


Featured Comment
I made it for lunch today and must say it was delicious: so flavourful and so tasty. Thank you for the very detailed recipe, the more I cook, the more I value technique, in this case, it was worth it!
– @lilibrik2 (from YouTube)
Every country has a dish that feels like home. Comfort food in Japan runs deep, miso soup, kinpira gobo, hambagu all qualify. But nikujaga stands apart.
This is the dish that teaches you what Japanese home cooking actually is. Not restaurant food, not fusion. Just a quiet pot of vegetables and meat that somehow says everything.

Nikujaga
Recipe Snapshot
- What is it? An iconic Japanese stew. A soy-glazed simmered dish of potato, thinly sliced meat, and onion braised in dashi-based broth. Originally believed to be rooted in yoshoku influence (Western-inspired ingredients, fully Japanese seasoning).
- Flavor profile: Sweet-savory shoyu backbone with dashi umami, mellow onion sweetness, rich meat fat, and a light glossy sauce that “soaks in” rather than thickens.
- Why you’ll love this recipe: No guesswork, no mushy potatoes, no mystery ingredients. This recipe walks you through exactly why everything happens.
- Must-haves: Dashi (a simple instant version also works great here), soy sauce, mirin.
- Skill Level: Confident beginner: success comes from controlled simmer (no hard boil), minimal stirring.
Summarize & Save this content on:
What is Nikujaga?
Nikujaga (肉じゃが) is a Japanese simmered dish (nimono/煮物) made by gently cooking sliced meat, potatoes, onions, and carrots in a sweet-savory broth of soy sauce, sugar, and mirin. The name literally means “meat and potatoes” (niku = meat, jaga = short for jagaimo, potato).
Nikujaga is served as a one-pot main alongside steamed rice, or as a hearty side with miso soup and grilled fish.
Often called the quintessential ofukuro no aji (mother’s home cooking), nikujaga is one of the most recognized comfort dishes in everyday Japanese cuisine. There is no single correct version: recipes vary from household to household, and even the choice of meat shifts by region, with pork more common in eastern Japan and beef favored in the west.
Nikujaga Ingredients
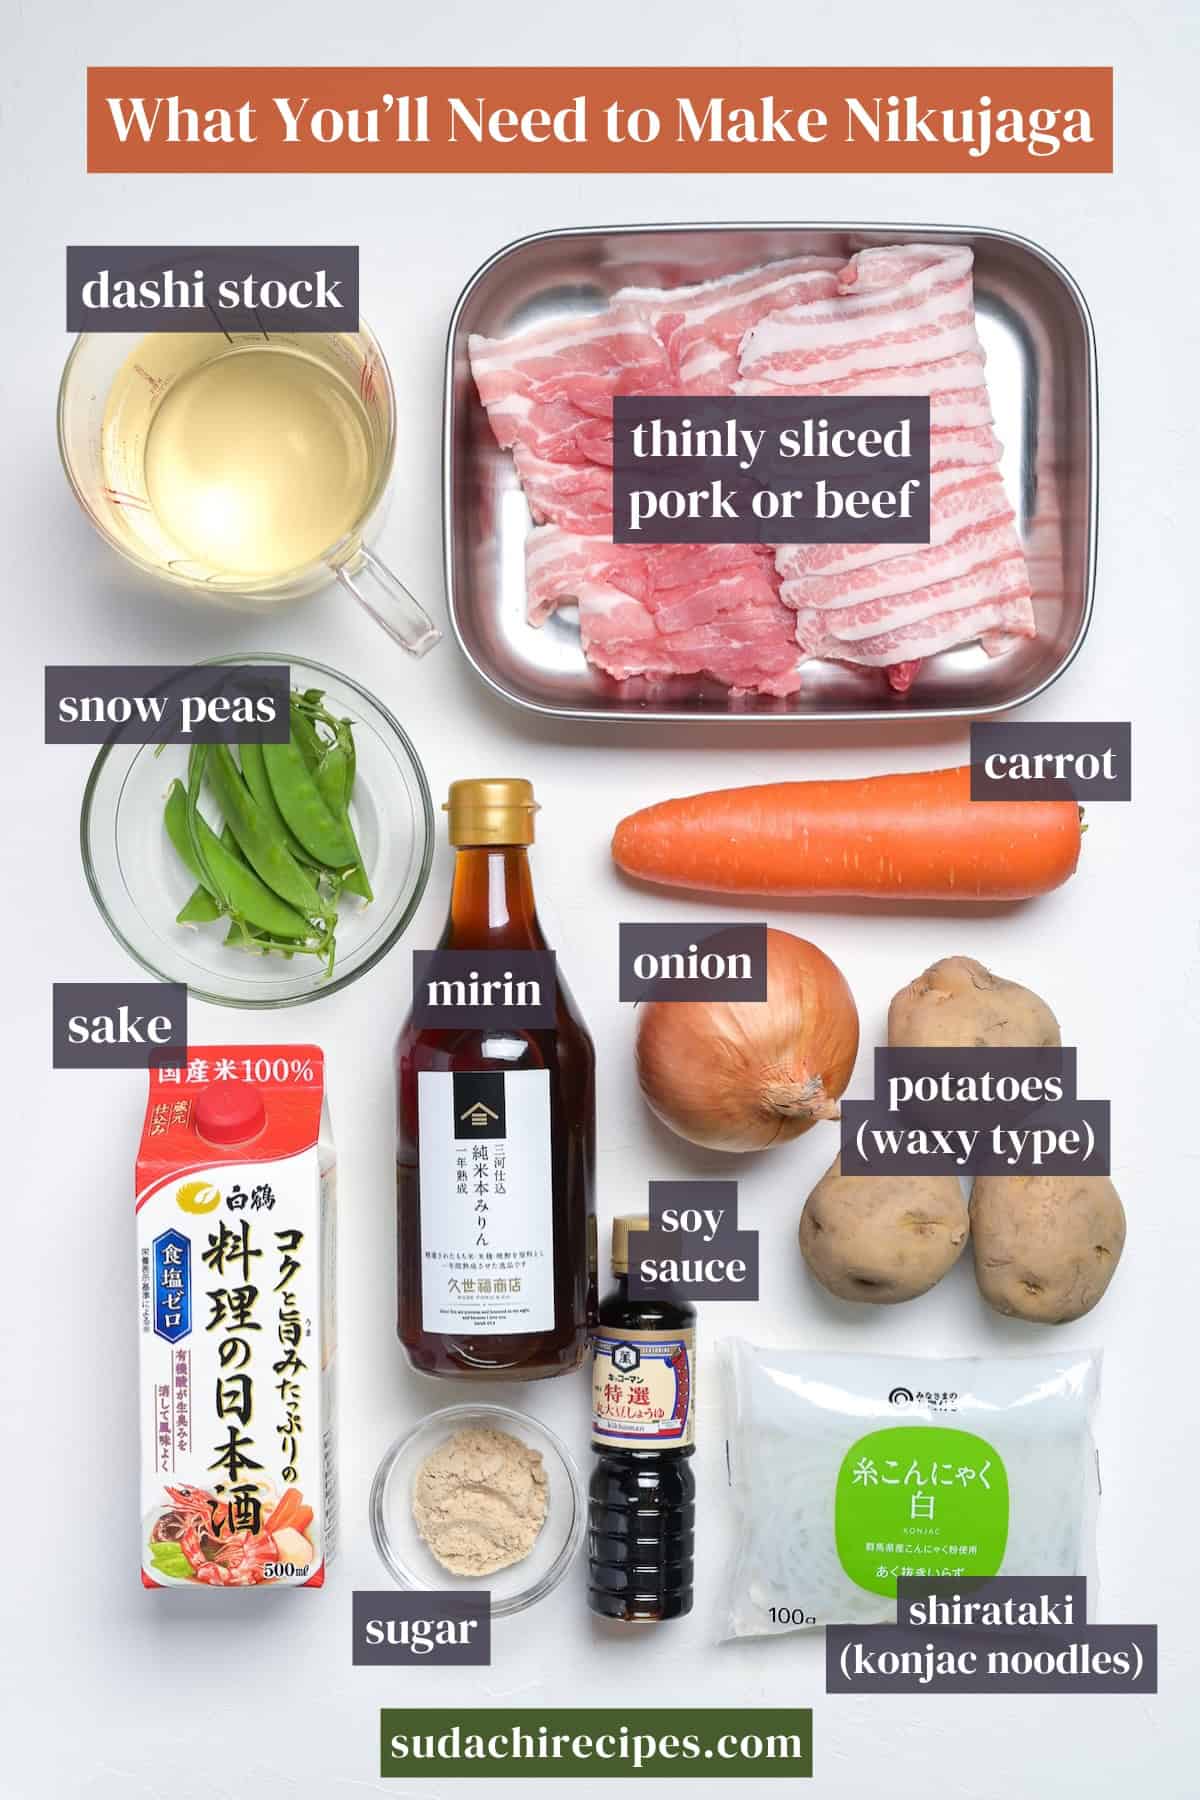
- Dashi Stock: It’s what makes the broth taste clean and deeply satisfying rather than just salty-sweet. Homemade dashi (made with bonito flakes and kombu) is great, but your next best option is a teabag-style dashi packets. Instant granulated dashi (like Hondashi) works too, but it contains added salt and other stuff, so you may want to ease up on the soy sauce later.
- Sugar: I prefer light brown sugar here because its hint of molasses adds a subtle warmth that rounds out the savory-sweet balance beautifully. That said, regular white sugar or even raw sugar will work.
- Thinly Sliced Pork (or Beef): Thin-sliced pork belly is my top pick. The extra fat keeps the meat tender and forgiving, and it melts into the broth with a gentle sweetness that ties everything together. Pork shoulder slices are a leaner alternative that still work well. If your store doesn’t carry pre-sliced meat, ask the butcher to slice it thin (about 2mm), or pop it in the freezer for 30 minutes and slice it yourself. You can also go Kansai-style with thinly sliced beef, though beef tends to dry out a bit faster, so it needs more attention.
- Shirataki (Konjac Noodles/Optional): These translucent, springy noodles are a traditional addition that gives each bite a fun chewy contrast against the soft potatoes. They’re completely optional, but if you can get them, they’re worth tossing in.
Substitutions & Variations
- Potatoes → Yukon Gold or any waxy, golden-skinned potato is your best stand-in for potatoes in Japan.
- Onion → Yellow onion is the closest match and keeps the balance classic. Sweet onion is fine too, but it nudges the broth sweeter.
- Thinly sliced meat (pork belly or beef) → Shaved steak (sold for cheesesteaks) is the easiest “no-fuss” substitute and still tastes great in nikujaga.
- Hon mirin → Aji-mirin (mirin-style seasoning) is the easiest swap and still gives sweetness and shine, though the aroma is simpler.
- Sake → Dry sherry is the most reliable substitute and keeps the simmered aroma close to Japanese cooking.
- Snow peas → Snap peas are the closest swap with similar crunch and bright color. Green beans work too, just a bit firmer and more “green” tasting.
Have trouble finding Japanese ingredients? Check out my ultimate guide to Japanese ingredient substitutes!
How to Make My Nikujaga
If you prefer to watch the process in action, check out my video of this nikujaga recipe!
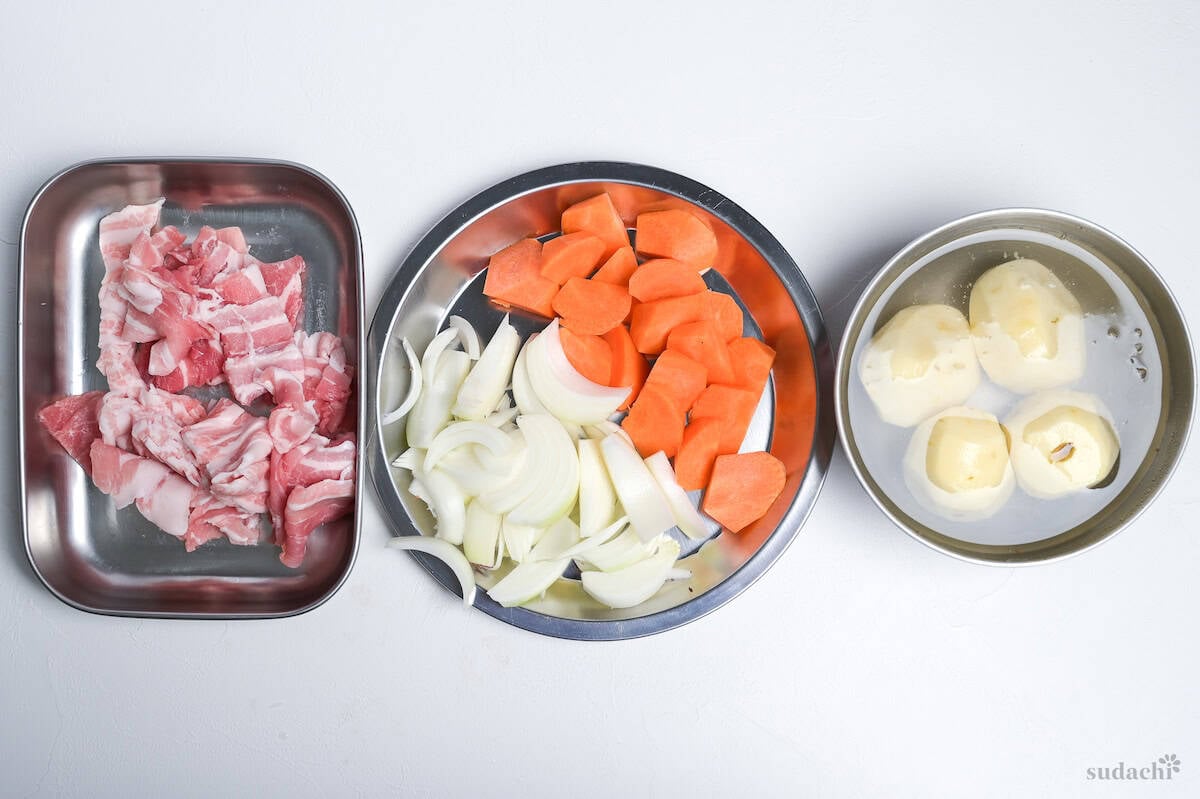
Before you start (Mise en place):
- Peel your potatoes and soak in water whole. I cut cut into 3cm chunks right before cooking to prevent too much of the starch from leaching out, but if you prefer, you can cut them now and soak.
- Cut carrots into ≤2cm-thick pieces and onions into 1.5-2cm wedges
- Cut pork belly or beef into bite-size pieces (about 5cm width).
To develop this nikujaga recipe, I used a 30cm carbon steel wok. A non-traditional choice, but the curved base and tall walls did the job. And it just makes sense for a lot of my steps for this recipe (I will explain each below).
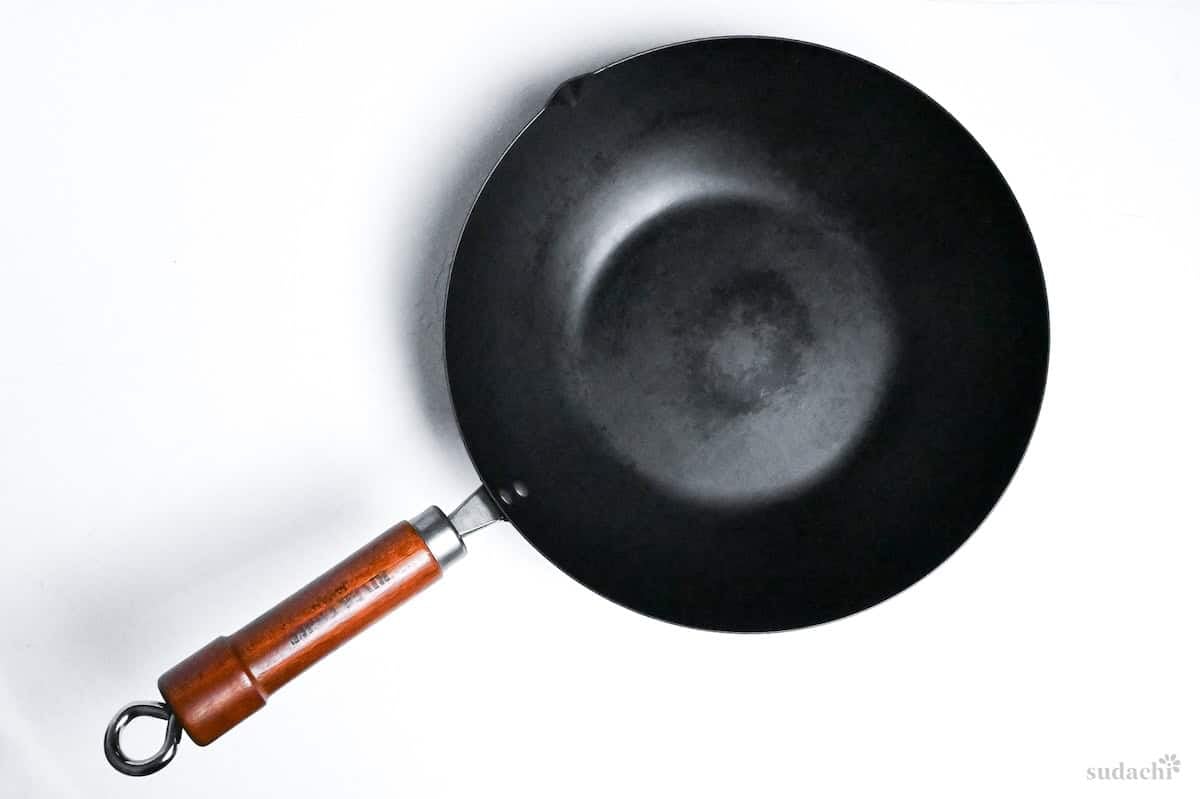
An enameled Dutch oven or a heavy-bottomed sauté pan with tall sides works fine. Just avoid anything too narrow and deep, which traps steam, slows reduction, and can leave you with unevenly flavored pieces.
i. Set your pot over medium heat and add neutral oil. When the oil shimmers, lay the pork (or beef) slices in a single layer without crowding. You want direct contact with hot metal, not steaming in a pile.
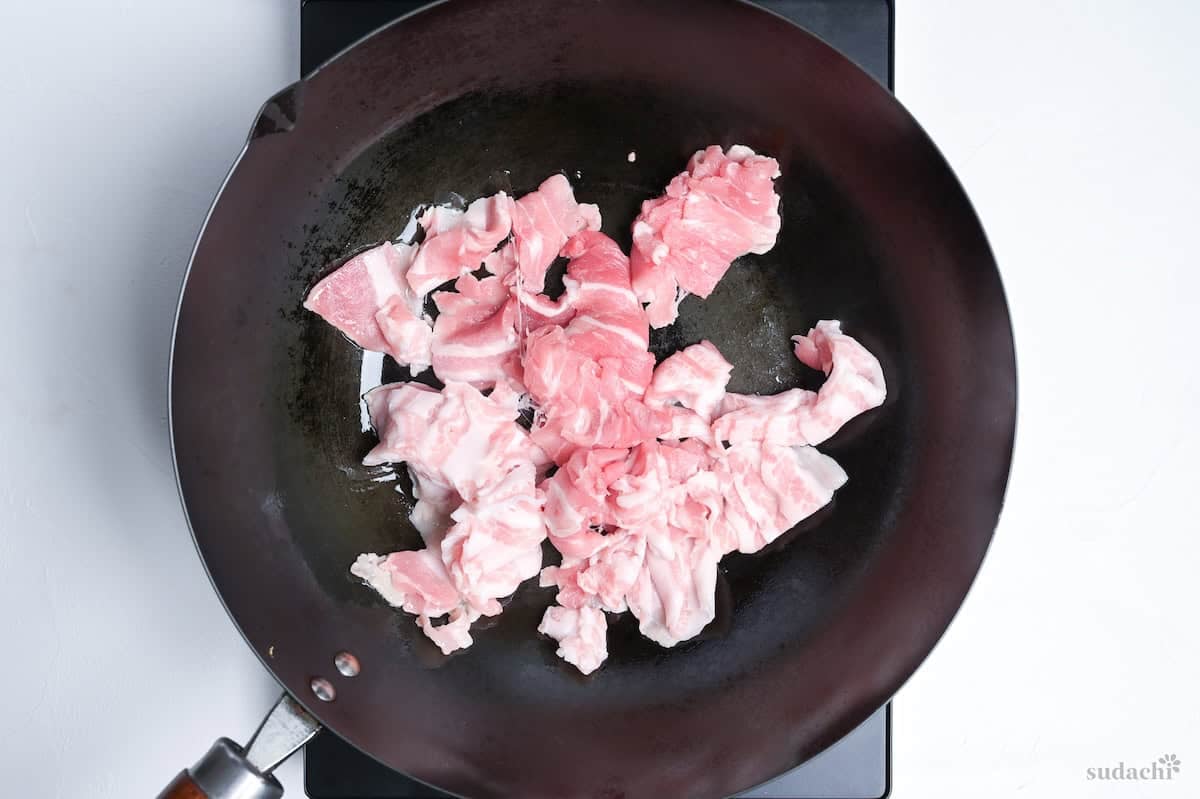
ii. Let the meat sit undisturbed for about a minute per side until you see golden-brown edges and smell something toasty and savory. This is one reason why I chose a wok.

iii. Set the meat aside on a plate for now, it will come back into the pot later.
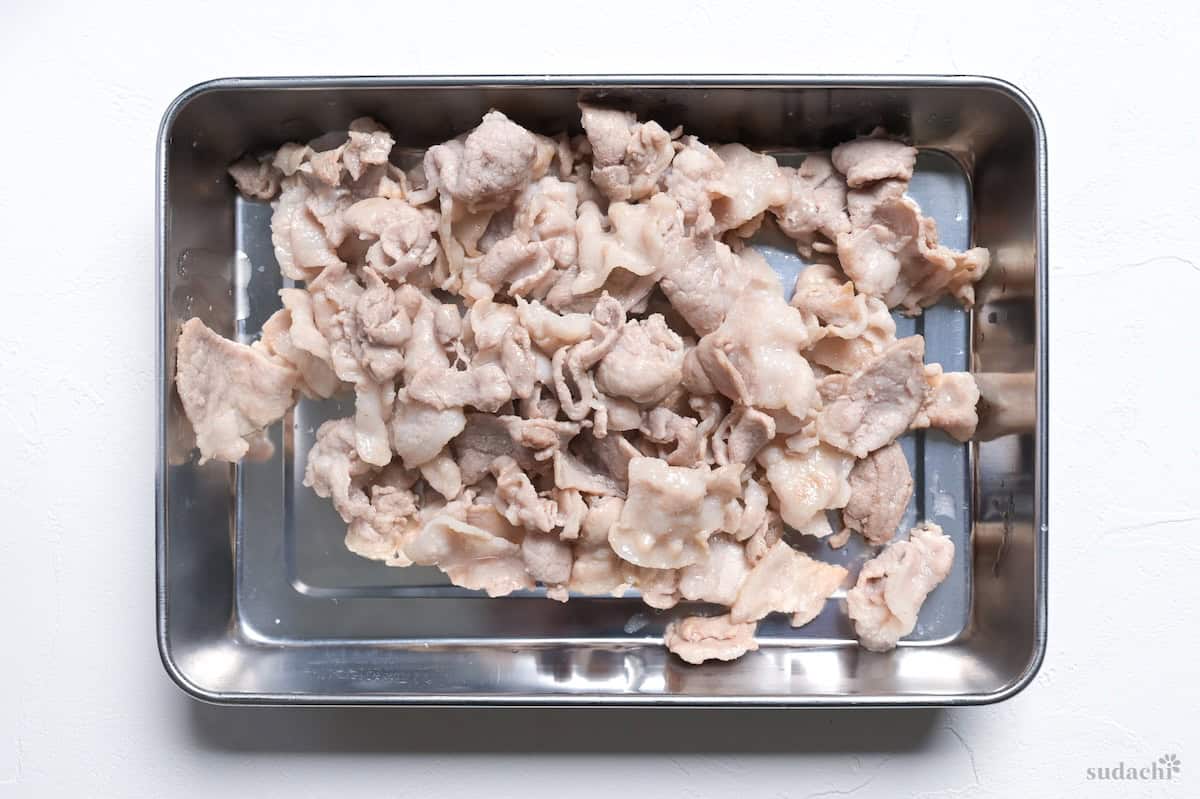
This step is optional in some Japanese households, but it earns its place. The Maillard reaction generates dozens of new flavor compounds at the meat’s surface, building a savory depth that dashi alone doesn’t deliver. Searing also renders some of the pork belly’s fat, which becomes your cooking medium for the vegetables.
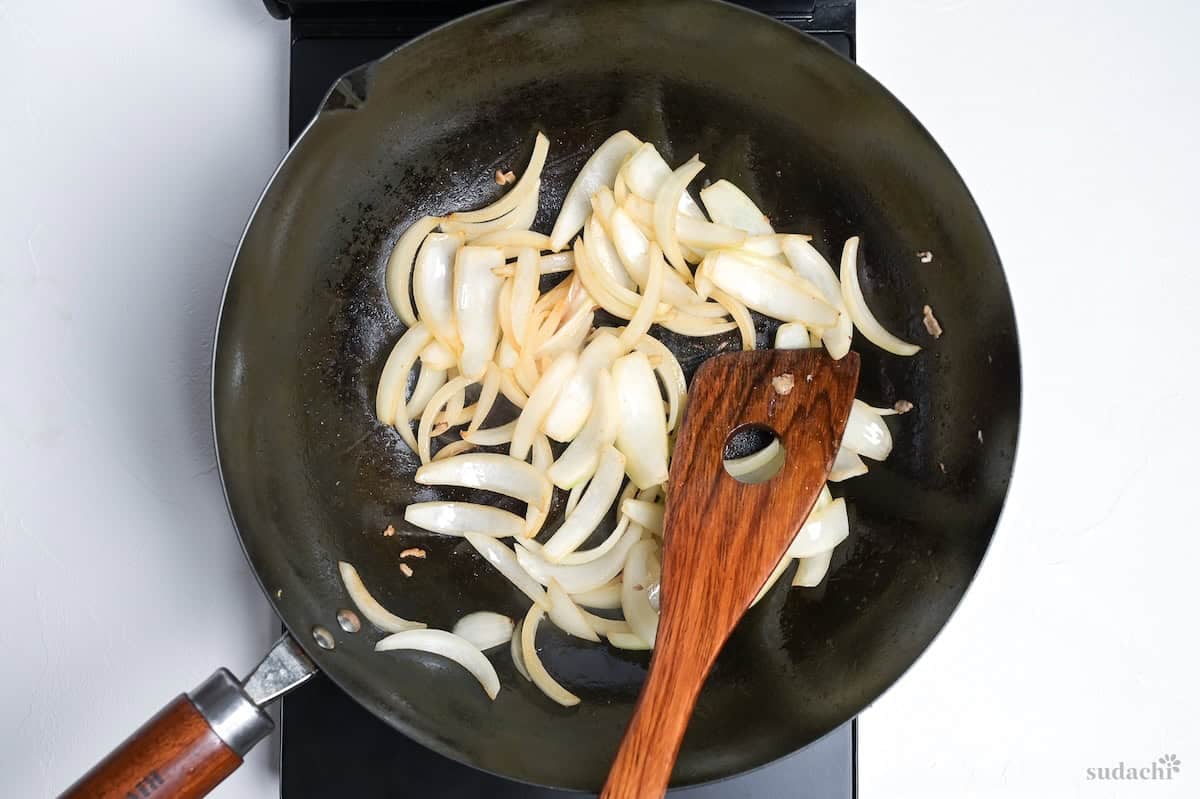
i. In the same pot, using the rendered fat left behind, add the onion wedges. Stir them gently over medium heat until the edges soften and begin to turn a light golden color, about 2-3 minutes.
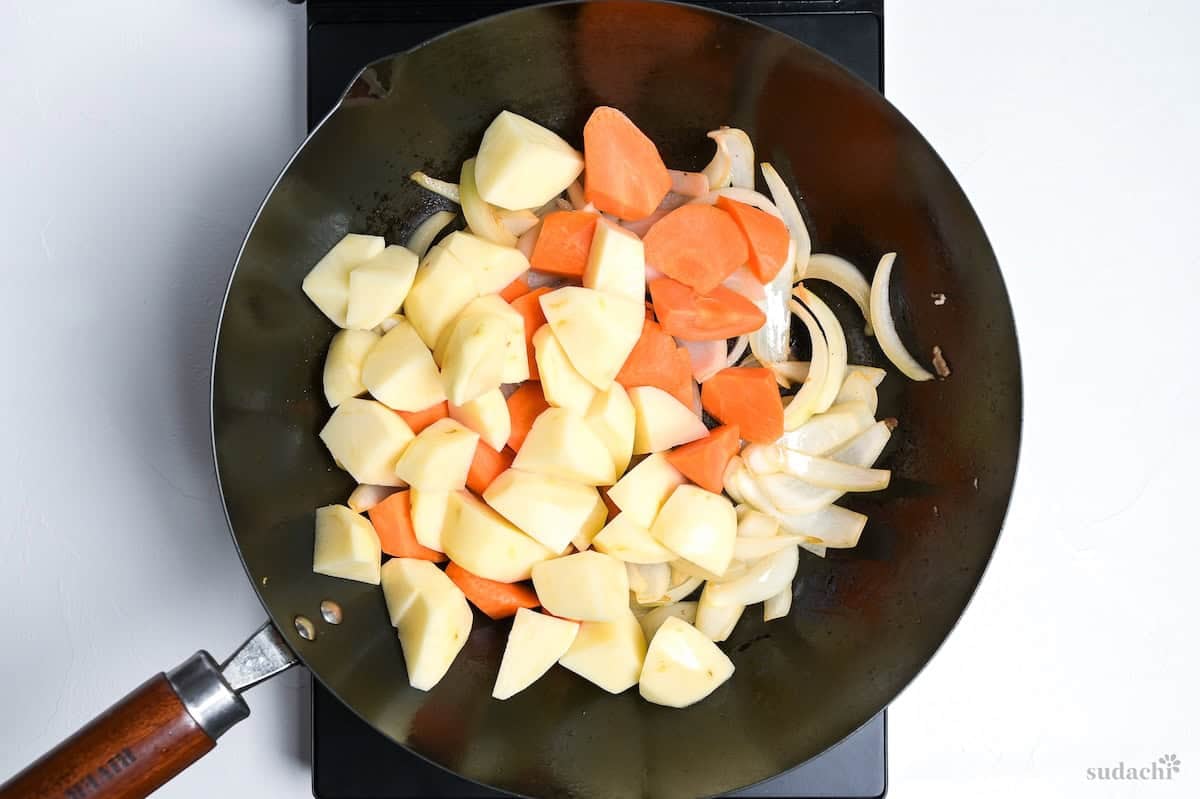
ii. Once the onions are starting to turn translucent with gold-tinged edges, add the potatoes and carrots. Give the pot a few gentle shakes just enough to coat the vegetables in a thin film of fat. This is the second reason why I chose a wok, easy tossing!
When you cut the potatoes, there is a traditional technique to consider called mentori (面取り), where you basically use your knife or peeler to gently round off the sharp edges of each potato chunk because those corners are the first to crumble during simmering, releasing starch that clouds your broth and turns your pot into mashed-potato territory.
If you want go proper, you can do so of course, but I personally don’t bother too much for nikujaga as I actually like some bits of potatoes soaked into the broth and create the textural difference.
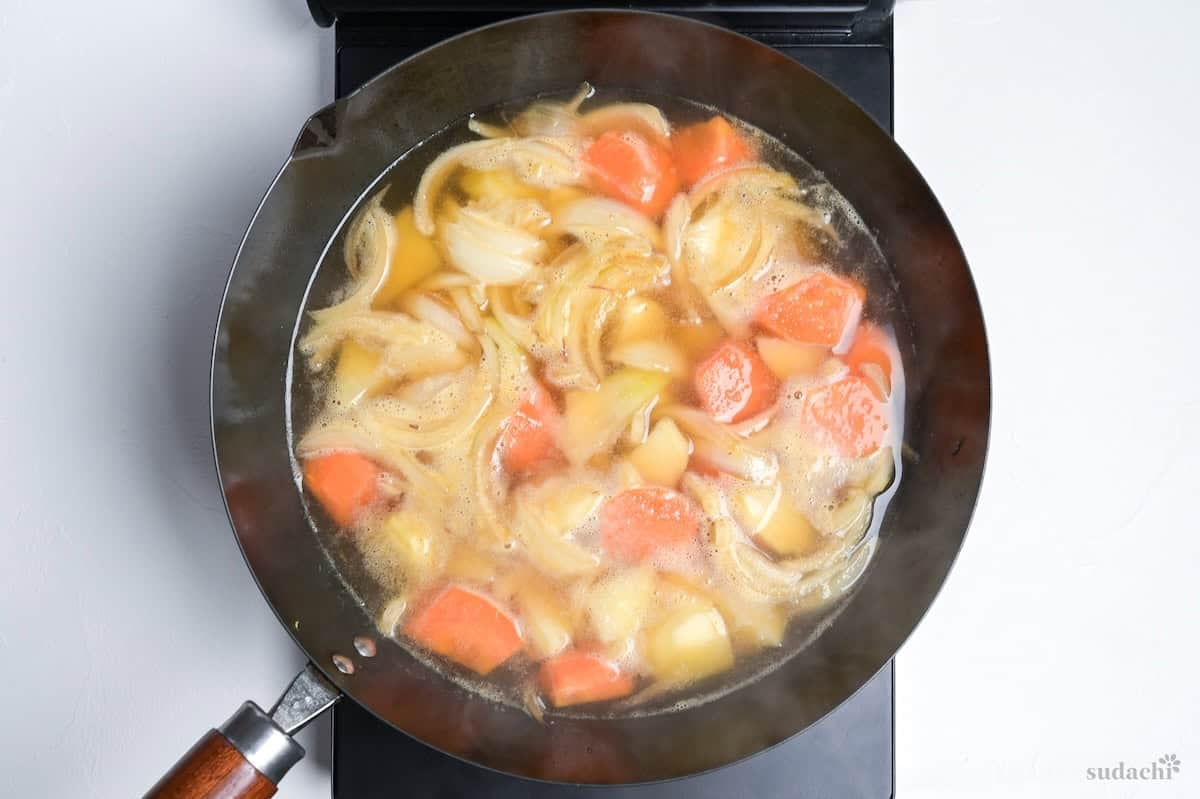
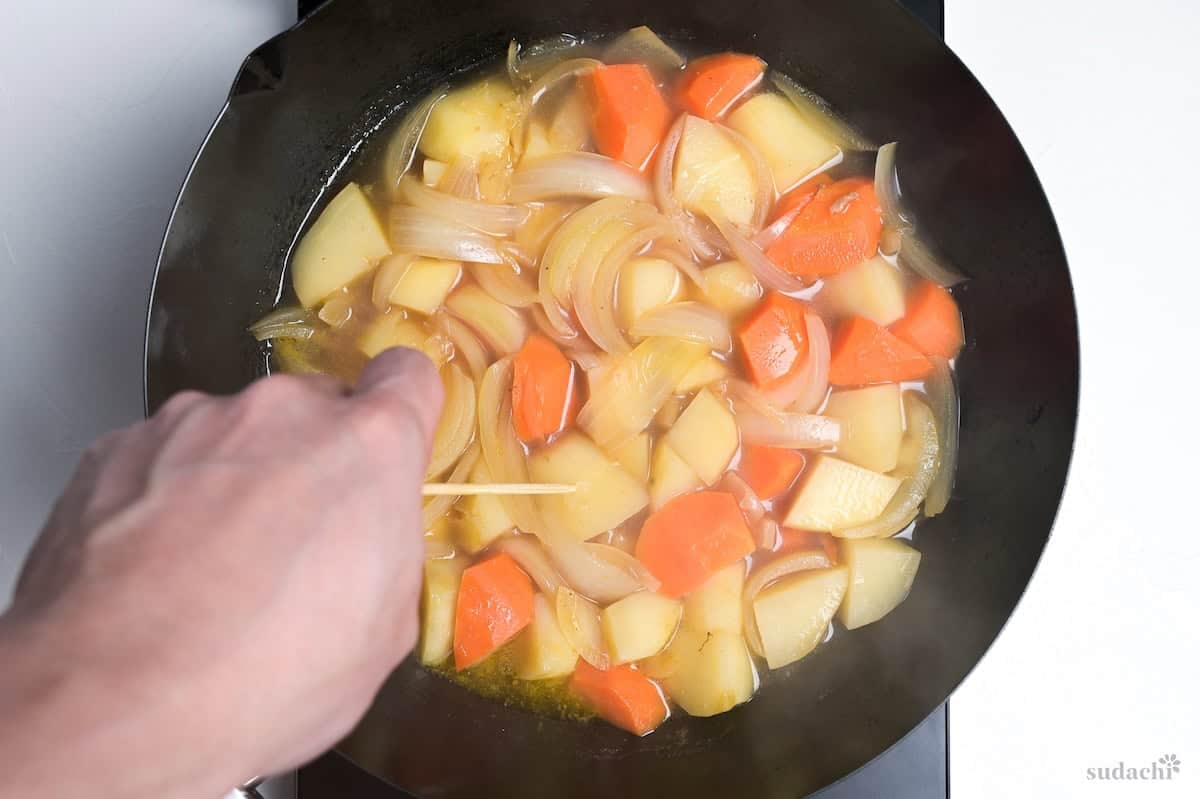
i. Pour in dashi stock and raise the heat to bring it toward a gentle boil. Watch the surface. You want a soft, rolling movement where small bubbles rise lazily around the edges, roughly 90 to 95°C.
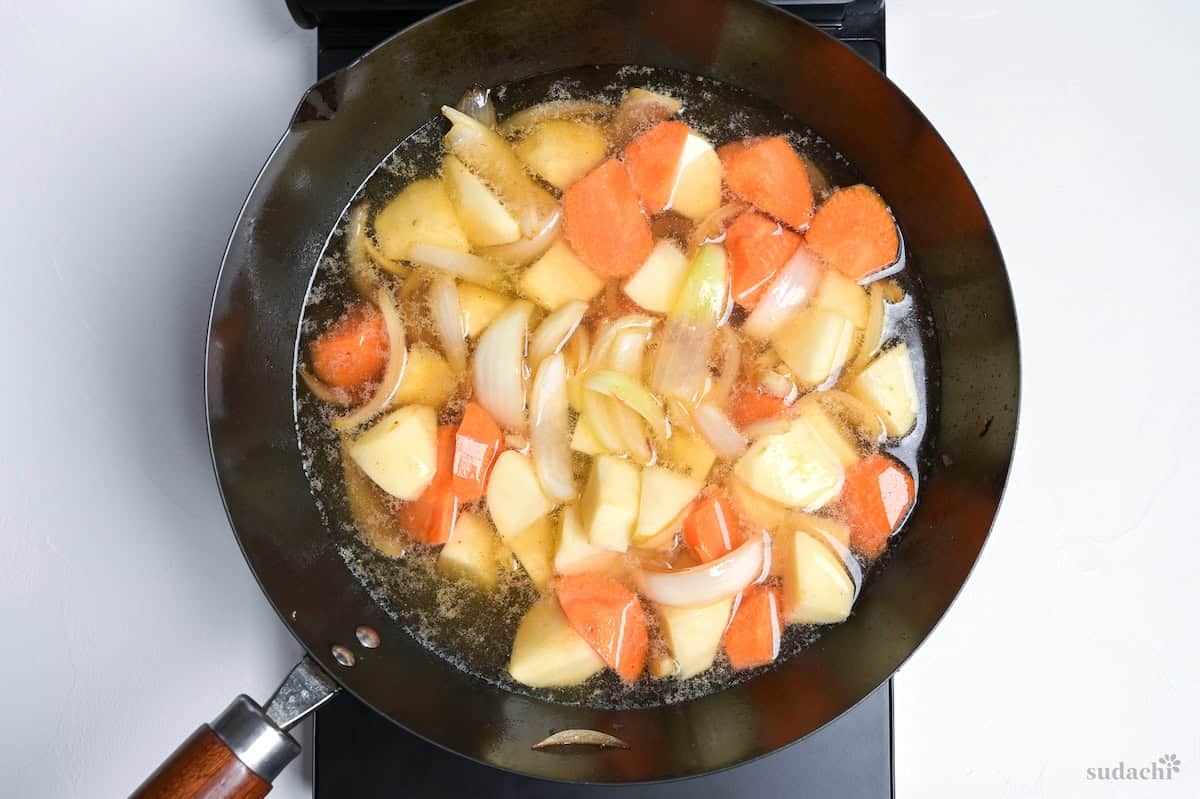
ii. The moment you see large, aggressive bubbles, back the heat down. A vigorous boil crashes your ingredients together, shattering potato edges and churning starch into the broth. If any foam or scum floats to the surface, skim it off with a spoon.
iii. Add the light brown sugar and sake.
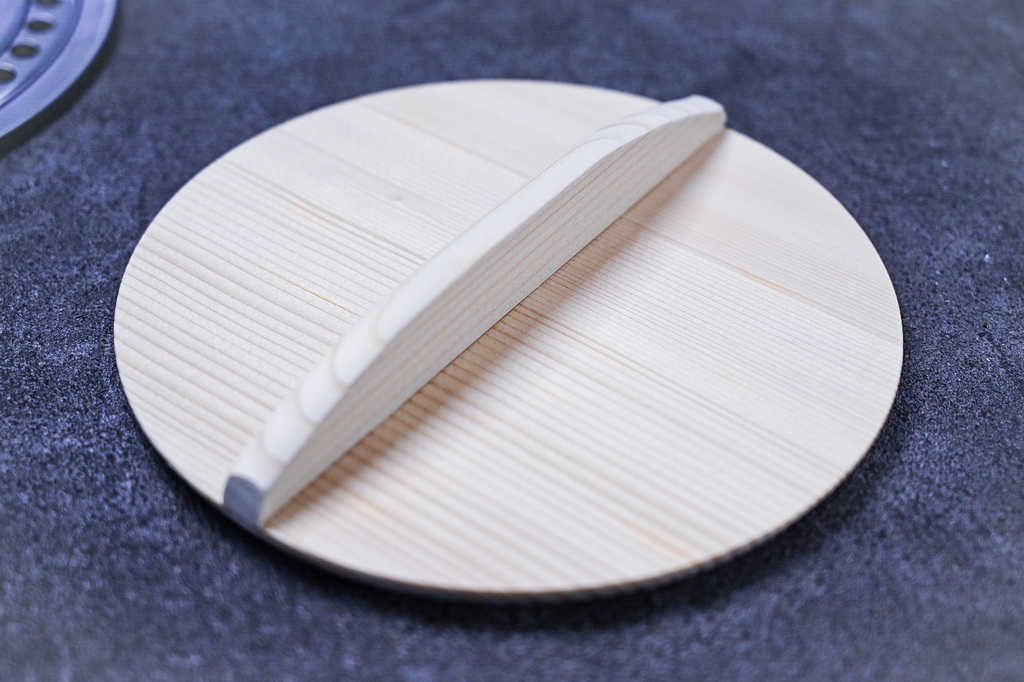
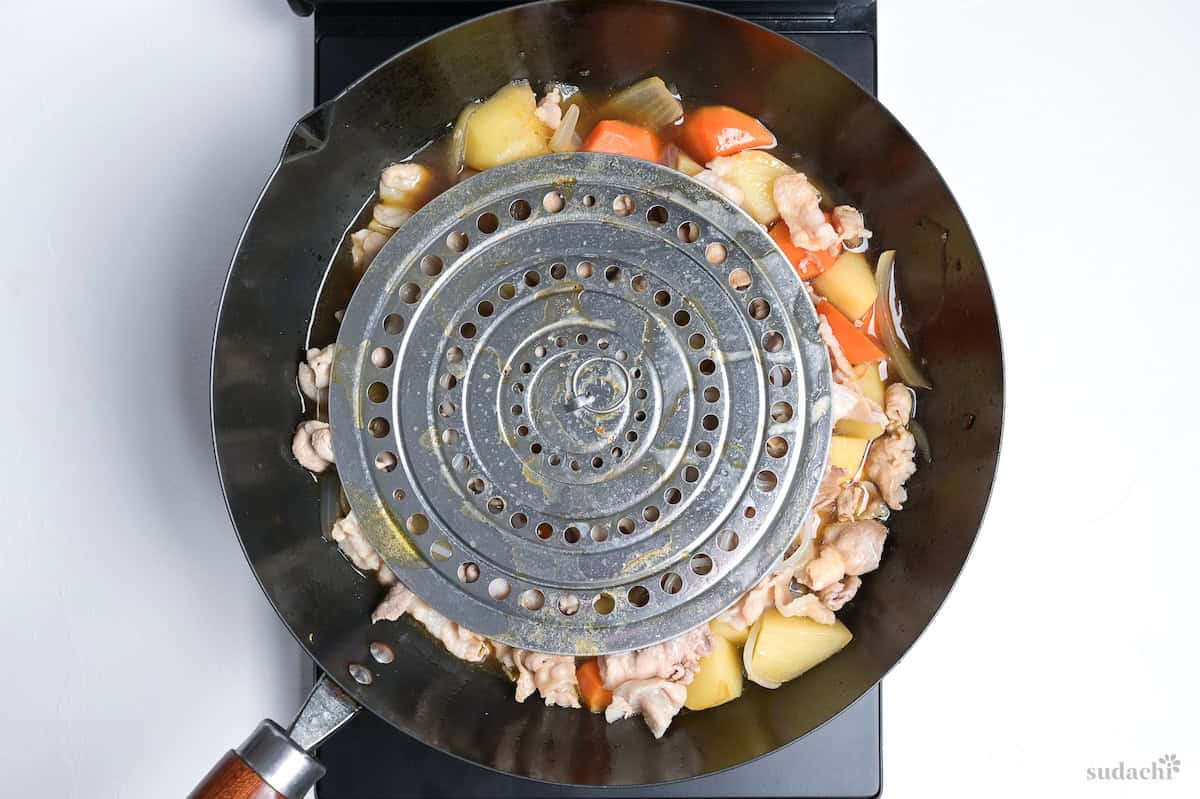
iv: Place an otoshibuta (drop lid) directly on the surface of the simmering liquid (preferably covering the whole surface, my wok was slightly too big for my drop lid).
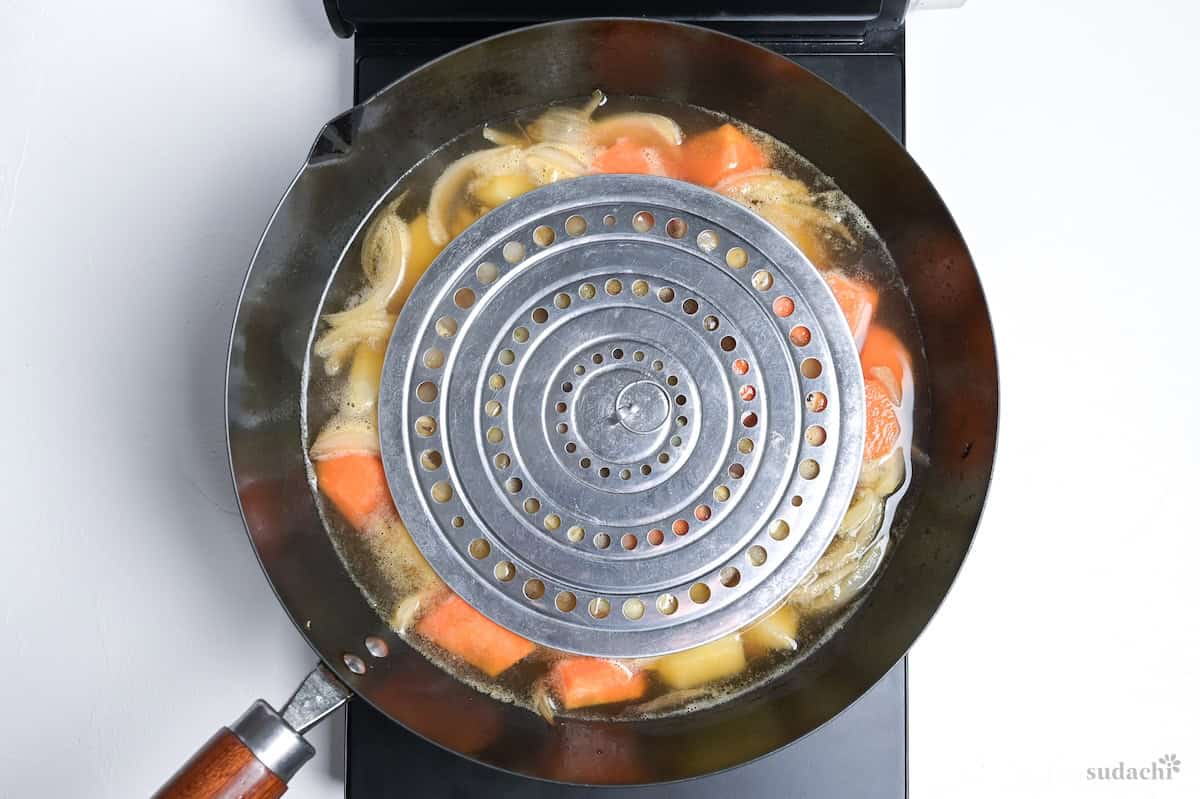
The drop lid does four things at once:
- Keeps the ingredients gently submerged so they season evenly.
- Reduces the violence of convection currents.
- Controls evaporation rate.
- Helps trap aromas in the broth.
According to Shibata et al. (2017), who compared several types of otoshibuta specifically in nikujaga (parchment paper, a wooden drop lid, aluminum foil, and no drop lid) the choice of material made a measurable difference in the finished dish. Without any drop lid, the carrots came out noticeably harder and the potatoes showed uneven seasoning between the top and bottom portions.
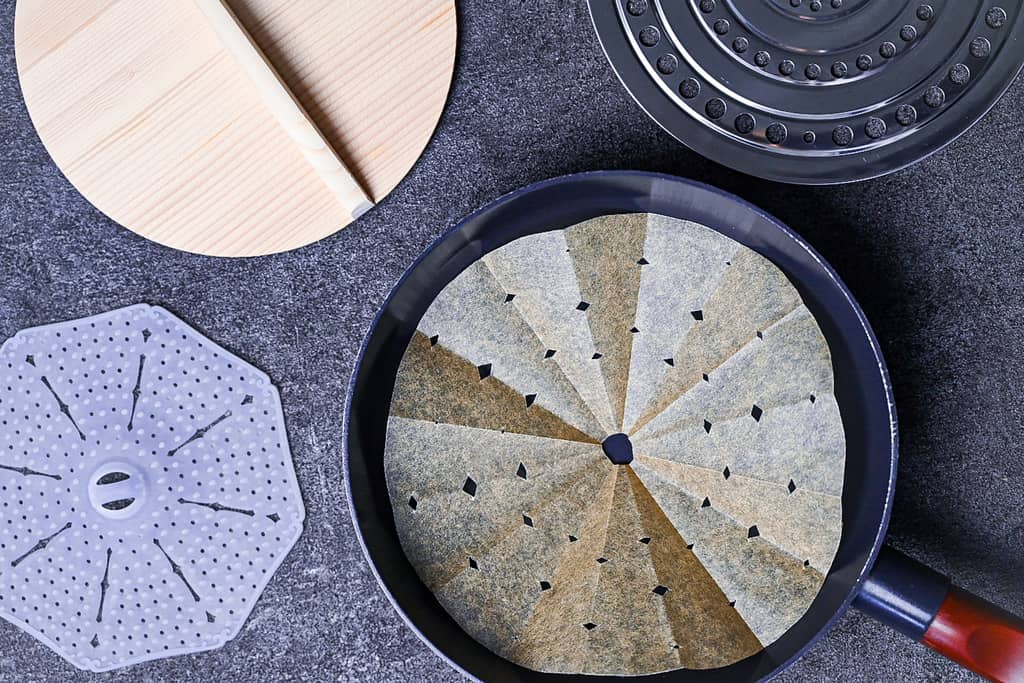
For most home cooks, the easiest and most practical option is parchment paper. It’s quick to use and easy to “fit” to your pot: check out how to make DIY otoshibuta. In the study, parchment paper struck the best balance: it kept ingredients intact while allowing umami and salt to penetrate the potatoes more uniformly than any other method tested.
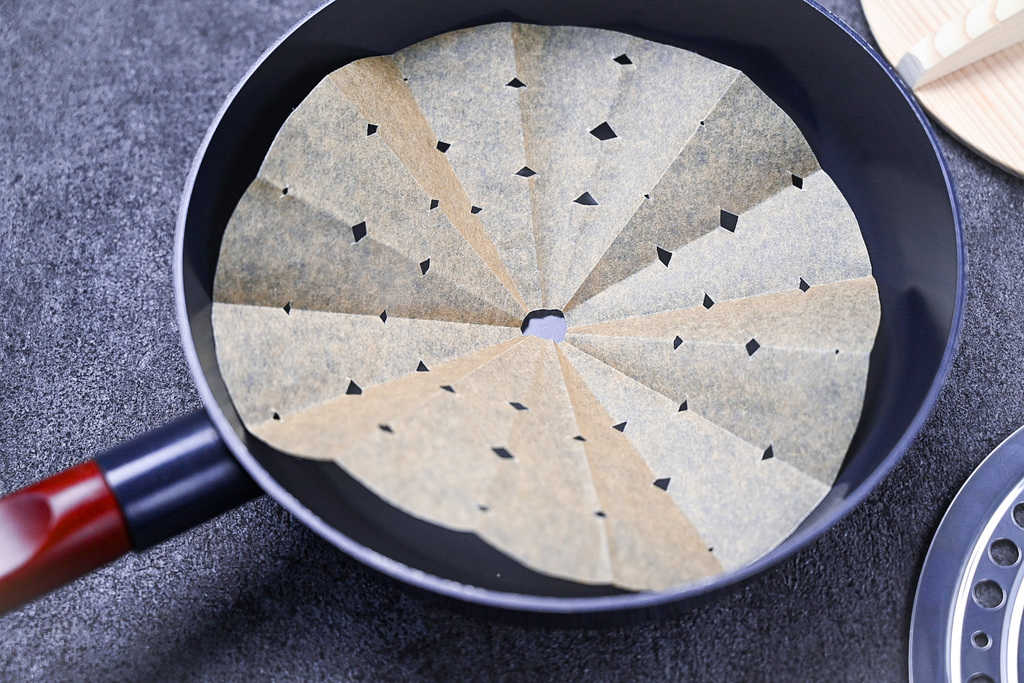
A wooden otoshibuta is the traditional reusable choice and excellent for tenderness, but it produced the most tender carrots but also the most severe breakage.
Aluminum foil also works in a pinch (cut to size and poke a few vent holes), and stainless steel or silicone drop lids are available as well.

Whatever material you choose, timing is key. Add the otoshibuta once everything is submerged and you’ve brought the pot to a gentle simmer, then keep the heat low enough that the surface stays calm.
v. Simmer 15 minutes, until a skewer slides in and edges hold.
The ideal simmering time depends almost entirely on how large you cut your potatoes. According to Kasai and Shimada (1985), who developed a mathematical model predicting optimal cooking times for potatoes based on softening rate, the relationship between size and time is roughly quadratic. Their formula, validated by sensory panels, gives us these practical benchmarks at a steady simmer:
- ~2 cm pieces: about 11 minutes
- ~3 cm pieces (this recipe): about 17 minutes
- ~4 cm pieces (large chunks): about 24 minutes
In other words, every extra centimeter adds around 5-7 minutes. That is why my recipe is set for 15 minutes + a few minutes afterwards.
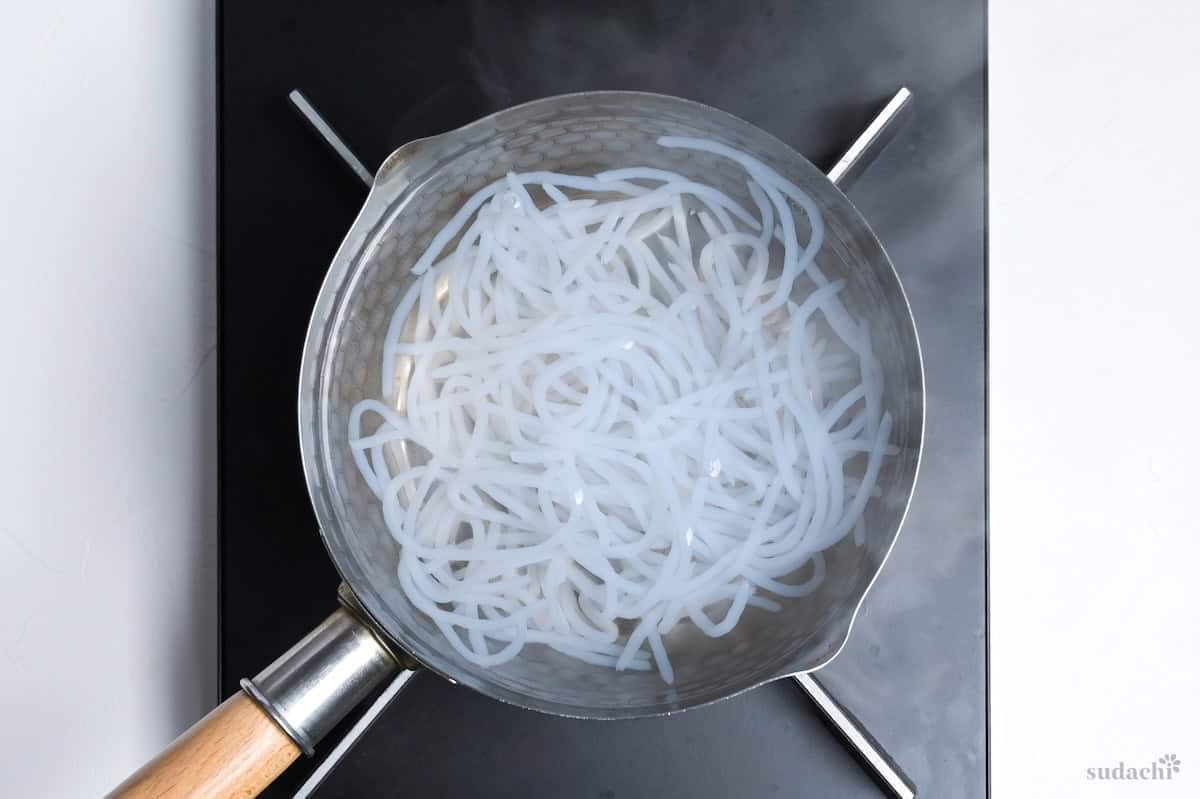
i. While the potatoes simmer, blanch shirataki 2-3 minutes and drain to remove odor (if using).
ii. After 15 minutes of simmering, remove the drop lid. Add Japanese soy sauce, mirin, seared meat and the blanched shirataki.
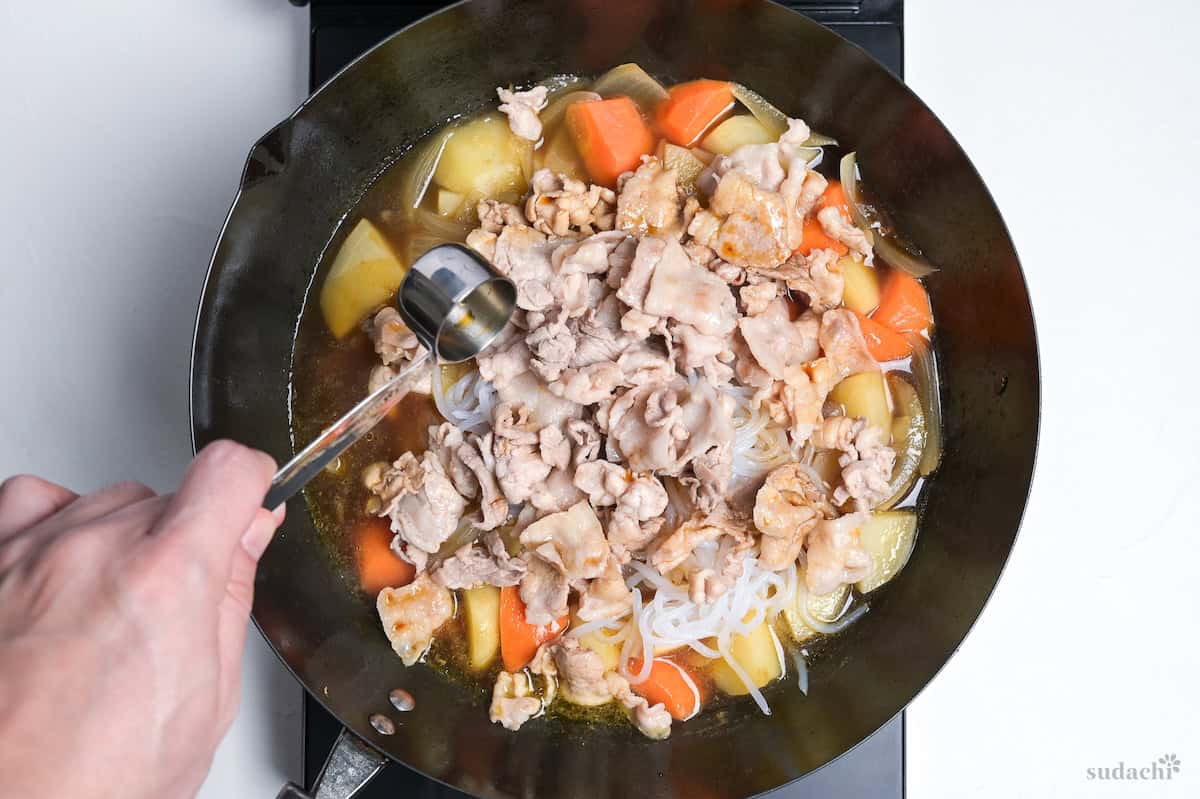
iii. Resist the urge to stir. Instead, tilt the pot gently forward and back a few times, rocking the liquid so the soy sauce disperses across the surface and trickles down around the ingredients. This protects your now-tender potatoes from the spatula’s force while still distributing seasoning throughout.
Soy sauce’s salt component penetrates food faster than sugar does, so if it goes in too early, the potato surfaces tighten up before sweetness has fully diffused inward. You end up with potatoes that taste salty on the outside and bland in the center. By staging the soy sauce after the sugar has had fifteen minutes of simmering to work its way in, you get pieces that are sweet and savory all the way through.
iv. Place the drop lid back on the surface and simmer for another 2-3 minutes.
i. If time allows, turn off the heat and let the pot sit, covered, until it comes to room temperature.
The common belief is that “flavor soaks in as it cools,” but what’s actually happening is simpler. Diffusion continues as long as a concentration difference exists, and the extra time is what lets seasoning reach deeper into each piece. Resting also lets the potatoes firm up slightly as their starch sets, giving a better bite when reheated. But don’t leave the pot at room temperature for more than about 2 hours.
ii. When you’re ready to serve, bring the pot back to a gentle simmer over medium heat.
iii. Remove the drop lid for the last time. Using a ladle, scoop up the simmering broth and gently pour it over the exposed tops of the vegetables. Basting them to build an even, glossy coating.
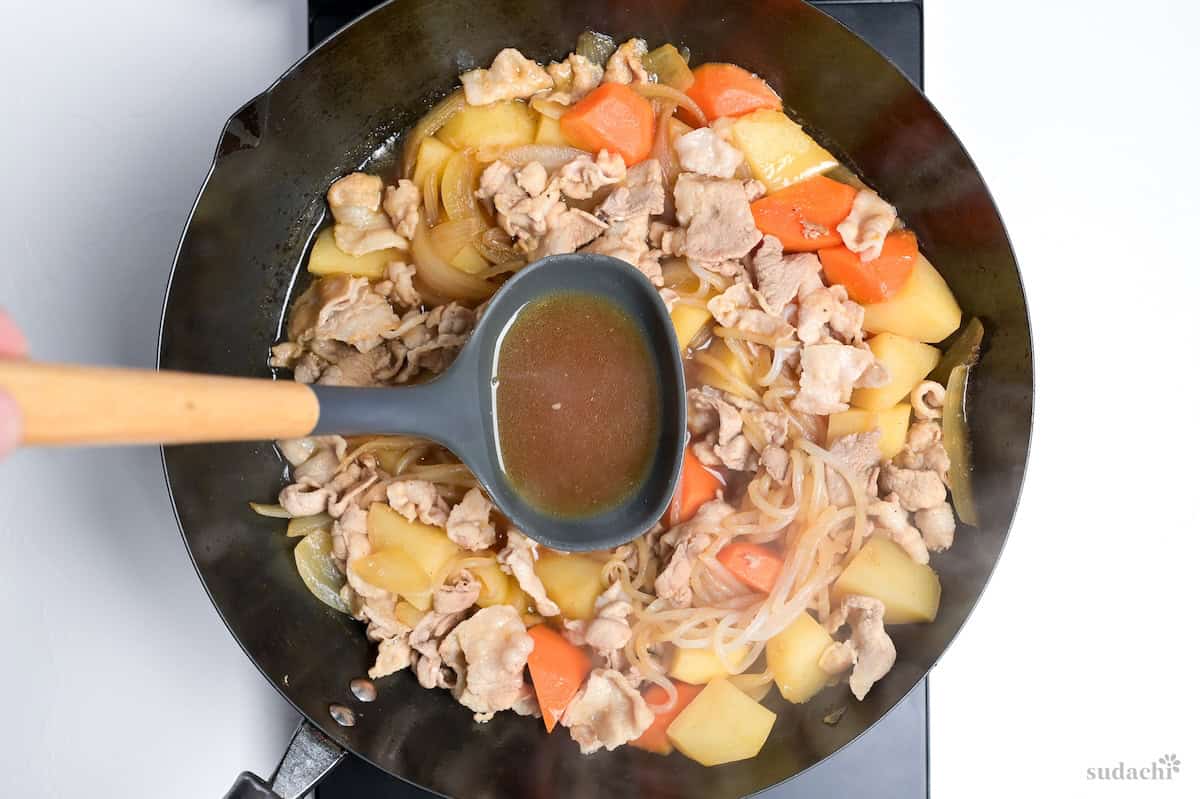
iv. Add another touch of soy sauce as a finishing seasoning and rock the pot to distribute. Let it simmer for another two to three minutes uncovered, watching the liquid reduce and thicken slightly.
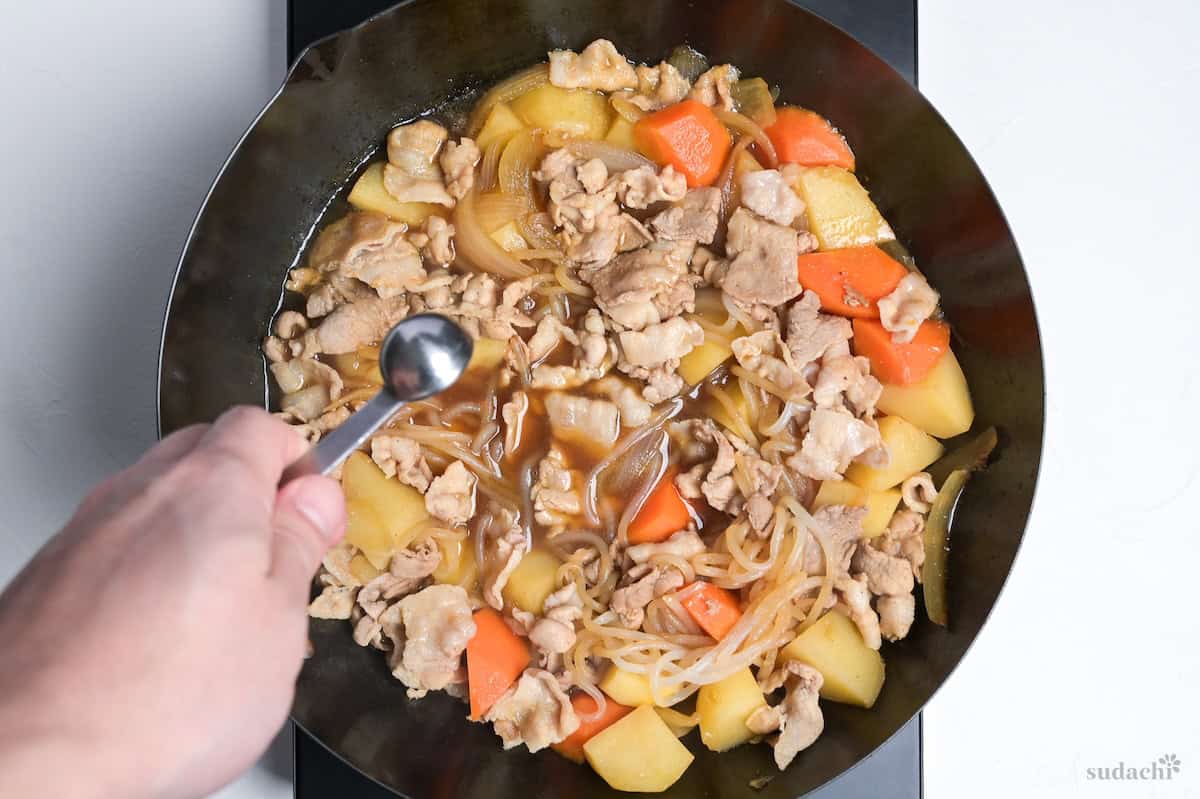
v. Taste the broth now and trust your palate. If it’s a touch flat, a small splash more soy sauce will sharpen everything. If it feels too salty, a tiny pinch of sugar can soften the edge.
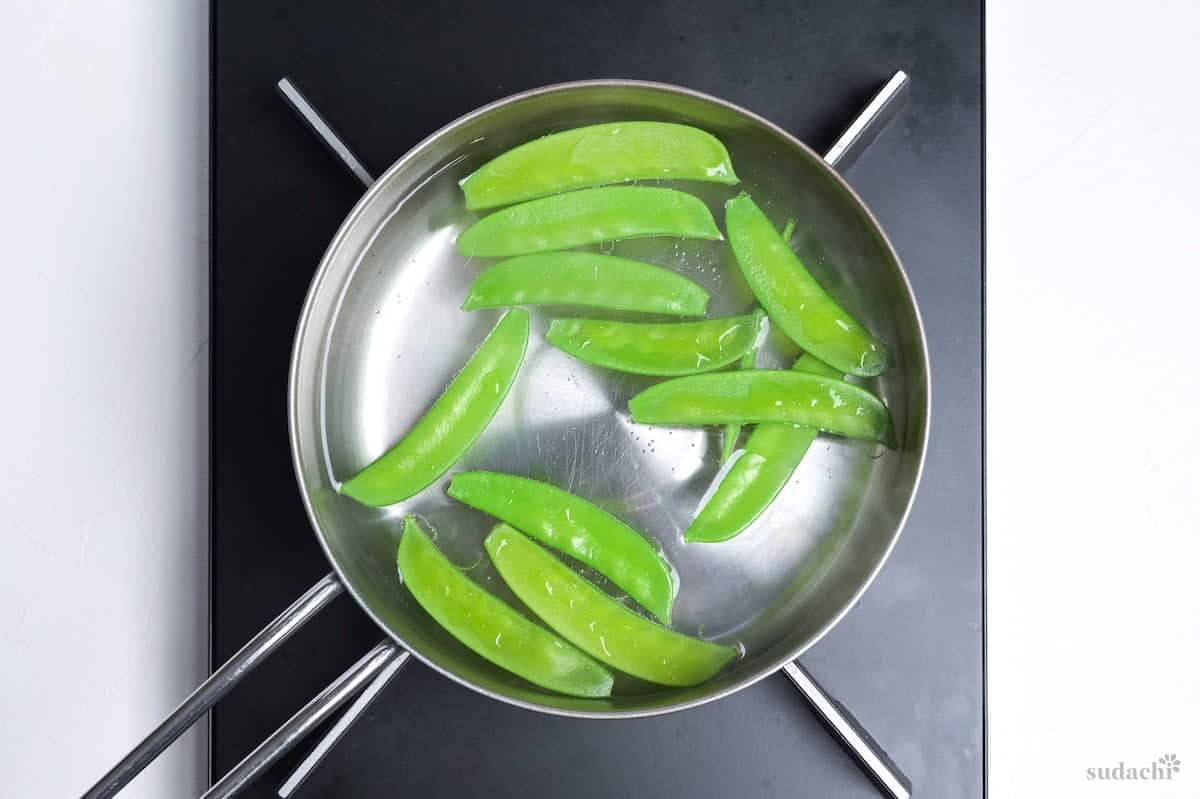
i. Blanch snow peas (if using) 1 minute to keep them bright green, chill in water, slice.
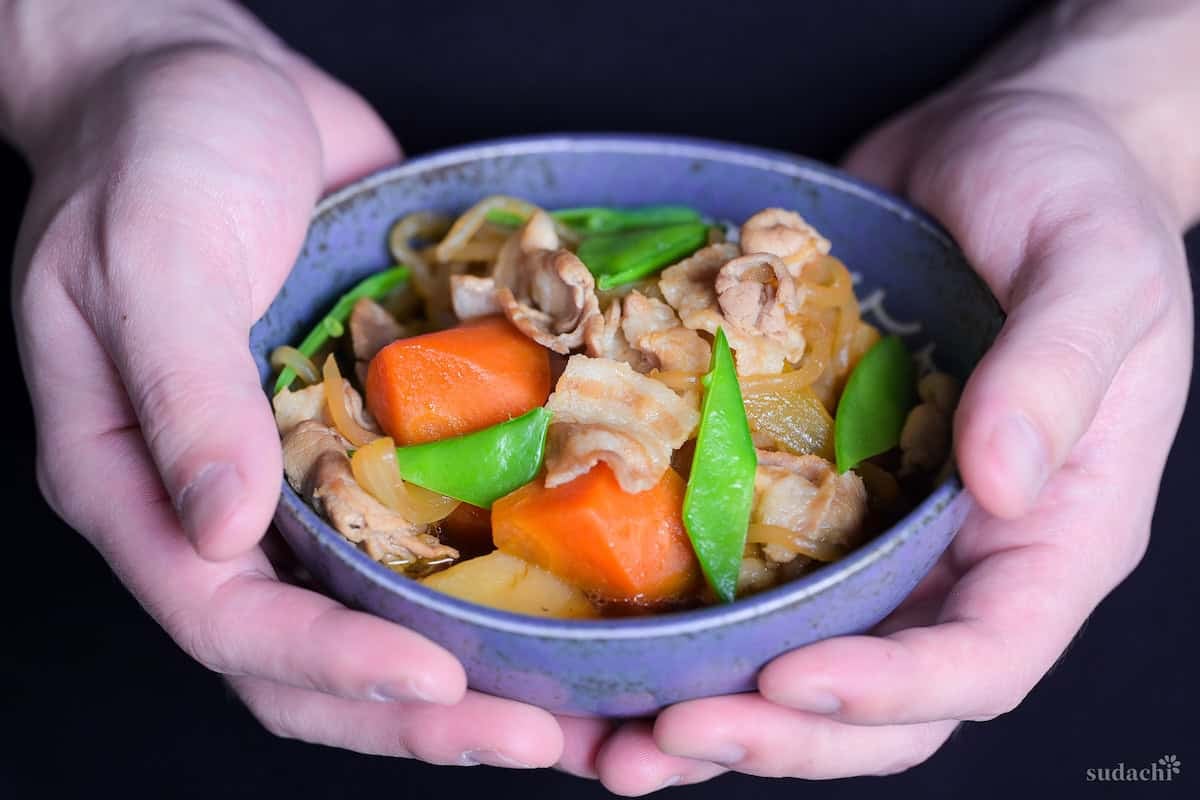
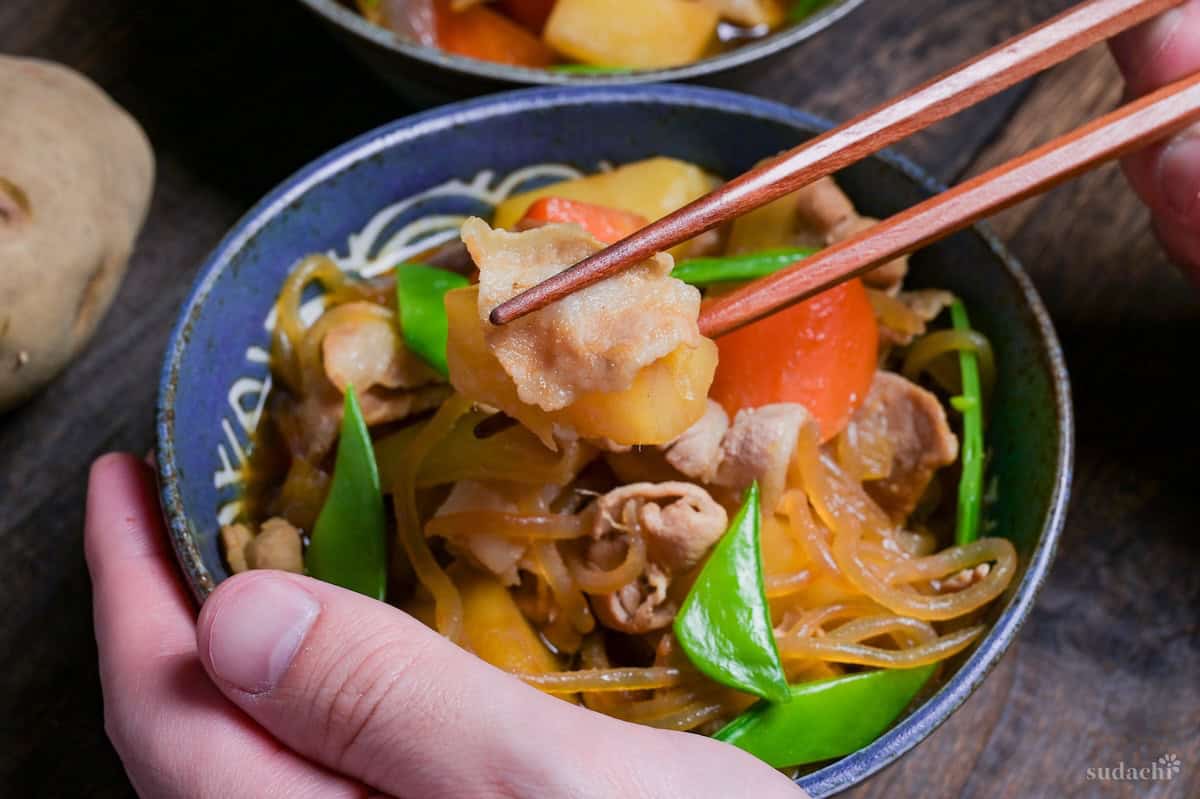
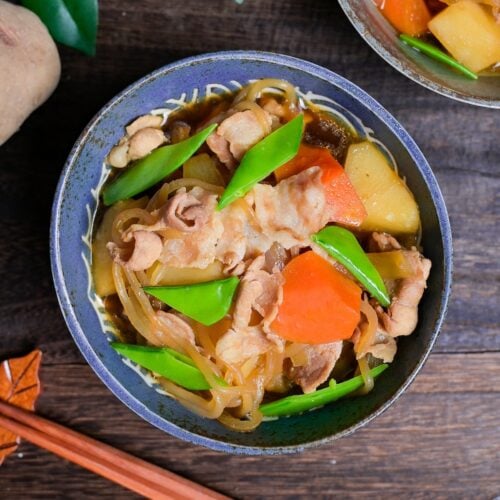
ii. Ladle the nikujaga into deep bowls, arranging the meat and vegetables so you can see the variety of shapes and colors. Scatter the bright green snow pea slices over the top.

iii. Serve immediately while the broth is still shimmering.
If you follow the default recipe, it will yield 2-3 main servings, or 5-6 side servings.

Essential Tips & Tricks
- Keep the simmer gentle, never an aggressive boil. A steady, quiet simmer (small bubbles along the edges, surface barely trembling) is the single most important control for tender potatoes and clean broth.
- Don’t stir, rock the pot or baste with a ladle instead. Stirring drags a spatula across softened potatoes and breaks them.
- Add soy sauce after the sugar has had a head start, not at the same time. Sugar molecules are larger and diffuse more slowly than salt, so they need time alone in the broth to reach the center of your potatoes.
- Return the seared meat late and simmer it briefly. Don’t let it boil for the full cook time. Thinly sliced pork or beef dries out and turns stringy fast because prolonged heat squeezes moisture from muscle fibers.
- Use a drop lid (otoshibuta) sitting directly on the liquid surface for the entire simmer to ensure even flavoring and prevent vegetable breakage.
With these simple tips in mind, you’re set for success every time you make nikujaga.
Storage & Meal Prep
Fridge: Transfer nikujaga to a shallow airtight container and refrigerate once steam stops rising, aim to get it chilled within about 2 hours. It keeps well for up to three days, and the flavor actually improves overnight as seasoning continues to diffuse.
Freezer: Freezing is not recommended. Ice crystals rupture potato cells during freezing, leaving you with mealy, waterlogged chunks that fall apart on reheating.
Meal Prep: You can cut all vegetables, blanch shirataki, and prepare your dashi up to a day ahead. Store each component separately in the fridge so the potatoes don’t discolor or absorb off-flavors.
Reheating: Warm nikujaga gently over medium-low heat in a pot, ladling broth over the top rather than stirring, to avoid breaking the now-tender potatoes.
What to Serve With This Recipe
Nikujaga FAQ
A popular origin story traces the dish to the Meiji-era navy, where cooks are said to have adapted a Western-style beef stew using soy sauce and sugar in place of wine and butter, which helps explain why nikujaga feels familiar to Western palates yet tastes distinctly Japanese. Sekimoto (2019), who analyzed roughly 5,000 oral-history accounts from across Japan documenting late Taishō through early Shōwa eating habits (1920s-1930s), found that potatoes were already one of the most common simmered-dish ingredients nationwide. The idea of simmering potatoes with protein in a savory broth wasn’t invented by any single cook. It was already happening in home kitchens across the country. That widespread practice, combined with growing access to meat in urban areas and the influence of Western cuisine, created the exact conditions for a dish like nikujaga to become a household standard.
The most common cause is too much heat combined with too much movement. A hard, rolling boil slams potatoes together and accelerates the breakdown of pectin (the glue holding potato cells together). Keep the simmer gentle (small bubbles at the edges, surface barely trembling), use a drop lid instead of stirring, and add your soy sauce in the second half rather than the beginning.
Both are traditional! The choice is regional and personal, not a matter of right or wrong. Pork belly brings richer rendered fat and a silkier mouthfeel to the broth (and forgiving!), while thinly sliced beef offers a leaner, more savory aroma. Either way, protect tenderness by giving the slices a quick sear and not over-boiling them in the simmer.
More Japanese Dinner Ideas
- Crispy Teriyaki Chicken (Authentic Japanese Method)
- Japanese Curry Using Roux Cubes
- Authentic Tonkatsu
- Shogayaki (Ginger Pork)
Hungry for more? Explore my Japanese dinner ideas to find your next favorite dishes!
Did You Try This Recipe?
I would love to hear your thoughts!
💬 Leave a review and ⭐️ rating in the comments below. 📷 I also love to see your photos – submit them here!
Authentic Nikujaga (Japanese Meat and Potato Stew)

Ingredients
- 300 g potato waxy type such as May Queen or Yukon Gold, cut into 3 cm chunks
- 150 g carrot roll-cut, pieces no thicker than 2 cm
- 150 g onion cut into 1.5-2 cm wedges
- 200 g thinly sliced pork belly (or thinly sliced beef), cut into 5 cm pieces
- 1 tsp cooking oil neutral
- 450 ml dashi stock homemade or teabag-style dashi packets
- 1 tbsp light brown sugar or white sugar
- 3 tbsp mirin
- 3 tbsp sake or dry sherry
- 100 g konjac noodles (shirataki) optional
- 2 tbsp Japanese soy sauce (koikuchi shoyu)
- 8-10 snow peas strings removed, for garnish
- 1 tbsp Japanese soy sauce (koikuchi shoyu) for final seasoning
My recommended brands of ingredients and seasonings can be found in my Japanese pantry guide.
Can’t find certain Japanese ingredients? See my substitution guide here.
Instructions
- Peel 300 g potato and place them in a bowl of cold water. Roughly cut 150 g carrot into 2cm (¾") pieces and 150 g onion into 1.5-2cm wedges. Cut 200 g thinly sliced pork belly into 5cm (2") pieces.

- Heat a large pot over medium and add 1 tsp cooking oil. Add the pork belly pieces in a single layer, fry undisturbed for 1 minute, then flip and repeat on the other side. Transfer to a plate for later.
- In the same pot, add the onion wedges and fry until they start to turn slightly translucent and golden around the edges, about 2-3 minutes.
- Drain the potatoes and cut them into thirds or quarters. Add them to the pot along with the carrots, and gently shake the pot just enough to give everything a thin film of pork fat.
- Pour 450 ml dashi stock into the pot and bring to an almost boil (about 90 °C (194 °F)). Add 1 tbsp light brown sugar and 3 tbsp sake, then cover with a drop lid and simmer for 15 minutes, or until the potatoes and carrots are fork tender.
- While you wait, bring a small separate pot of water to a vigorous boil and blanch 100 g konjac noodles (shirataki) for 2-3 minutes, then drain and rinse.
- Once the carrots and potatoes are softened, remove the drop lid and add 3 tbsp mirin, 2 tbsp Japanese soy sauce (koikuchi shoyu), the blanched shirataki noodles and the seared meat from earlier.
- Tilt the pot back and forth a few times to distribute the condiments, then cover with a drop lid once more and simmer for 2-3 minutes.
- Turn off the heat. If time permits, cool to room temperature and then reheat. Add 1 tbsp Japanese soy sauce (koikuchi shoyu). If reheating, avoid mixing and instead, baste the cooking liquid over the top of the simmering ingredients. Taste test, add a touch more soy sauce or sugar to taste.
- Boil a small pot of water and blanch 8-10 snow peas for 1 minute.
- Ladle the nikujaga into serving bowls and scatter the blanched snow peas over the top. Enjoy!
The recipe says green beans, but the pictures show snow peas. I think peas make more sense than green beans.
You’re right, my mistake!
I’ve corrected it now, thank you. 🙂
Delicious! thank you for your help!
Hi Helena,
Thank you for making this recipe! I’m glad you liked it! 🙂
Yuto
An other tasty recipe from this wonderful website!
Thank you so much, Andrea! Looking great as usual! I’m so happy that you enjoyed this one too! 🙂
So as not to overcook when using beef, would you suggest removing the beef after browning and adding it back in at the end? Thank you so much!
Hi Danielle,
Thank you for your question!
If you’re using thinly sliced beef instead of pork, I usually don’t remove it. Just give it a quick sear, then let it simmer gently so it stays tender. The bigger risk of overcooking comes from boiling hard, so keep it at a low simmer and avoid stirring too much. If you’re using thicker beef or you prefer it very soft, you can take it out after browning and add it back for the last 2-3 minutes to warm through though!
I hope this helps!
Yuto