


Featured Comment
Just used this recipe to make fish, shrimp and veggie tempura. It turned out so crispy and yummy! The best recipe I’ve tried so far, and it was easy to make! My husband said it tastes better than some tempura we’ve tried at sushi restaurants. Thank you!
★★★★★
– Michelle
Home tempura does not fail at the fryer. It fails at the batter, and the batter is more delicate than it seems: the wrong flour or an eyeballed pour does not just make it heavy, it makes it completely fail. So why does home tempura go wrong when the recipe looks so simple?
Because the batter is a short set of specific choices, not luck. Read the part before the recipe once, and the choices become yours. After that first time, you will not need to look anything up again.

Tempura Batter
Recipe Snapshot
- What is it? The thin coating that turns seafood and vegetables into Japanese tempura, traditionally a simple batter of low-protein flour, egg, and ice-cold water that is barely mixed and fried fast. It carries no seasoning of its own. It exists so the ingredient inside stays the star.
- Flavor profile: Almost flavorless by design, clean and neutral, with a light crispness rather than a heavy crunch. The shell is what you hear and feel, never what you taste over the shrimp or the sweet potato underneath.
- Why you will love this recipe: Home tempura usually fails at the batter, not the fryer, so this version locks down the exact choices that decide light-and-crisp versus stodgy. The real work is a 20 to 30 minute chill for both the water and the flour, after which cornstarch and carbonated water do what years of practice do for a specialty cook, cutting the failure points down significantly.
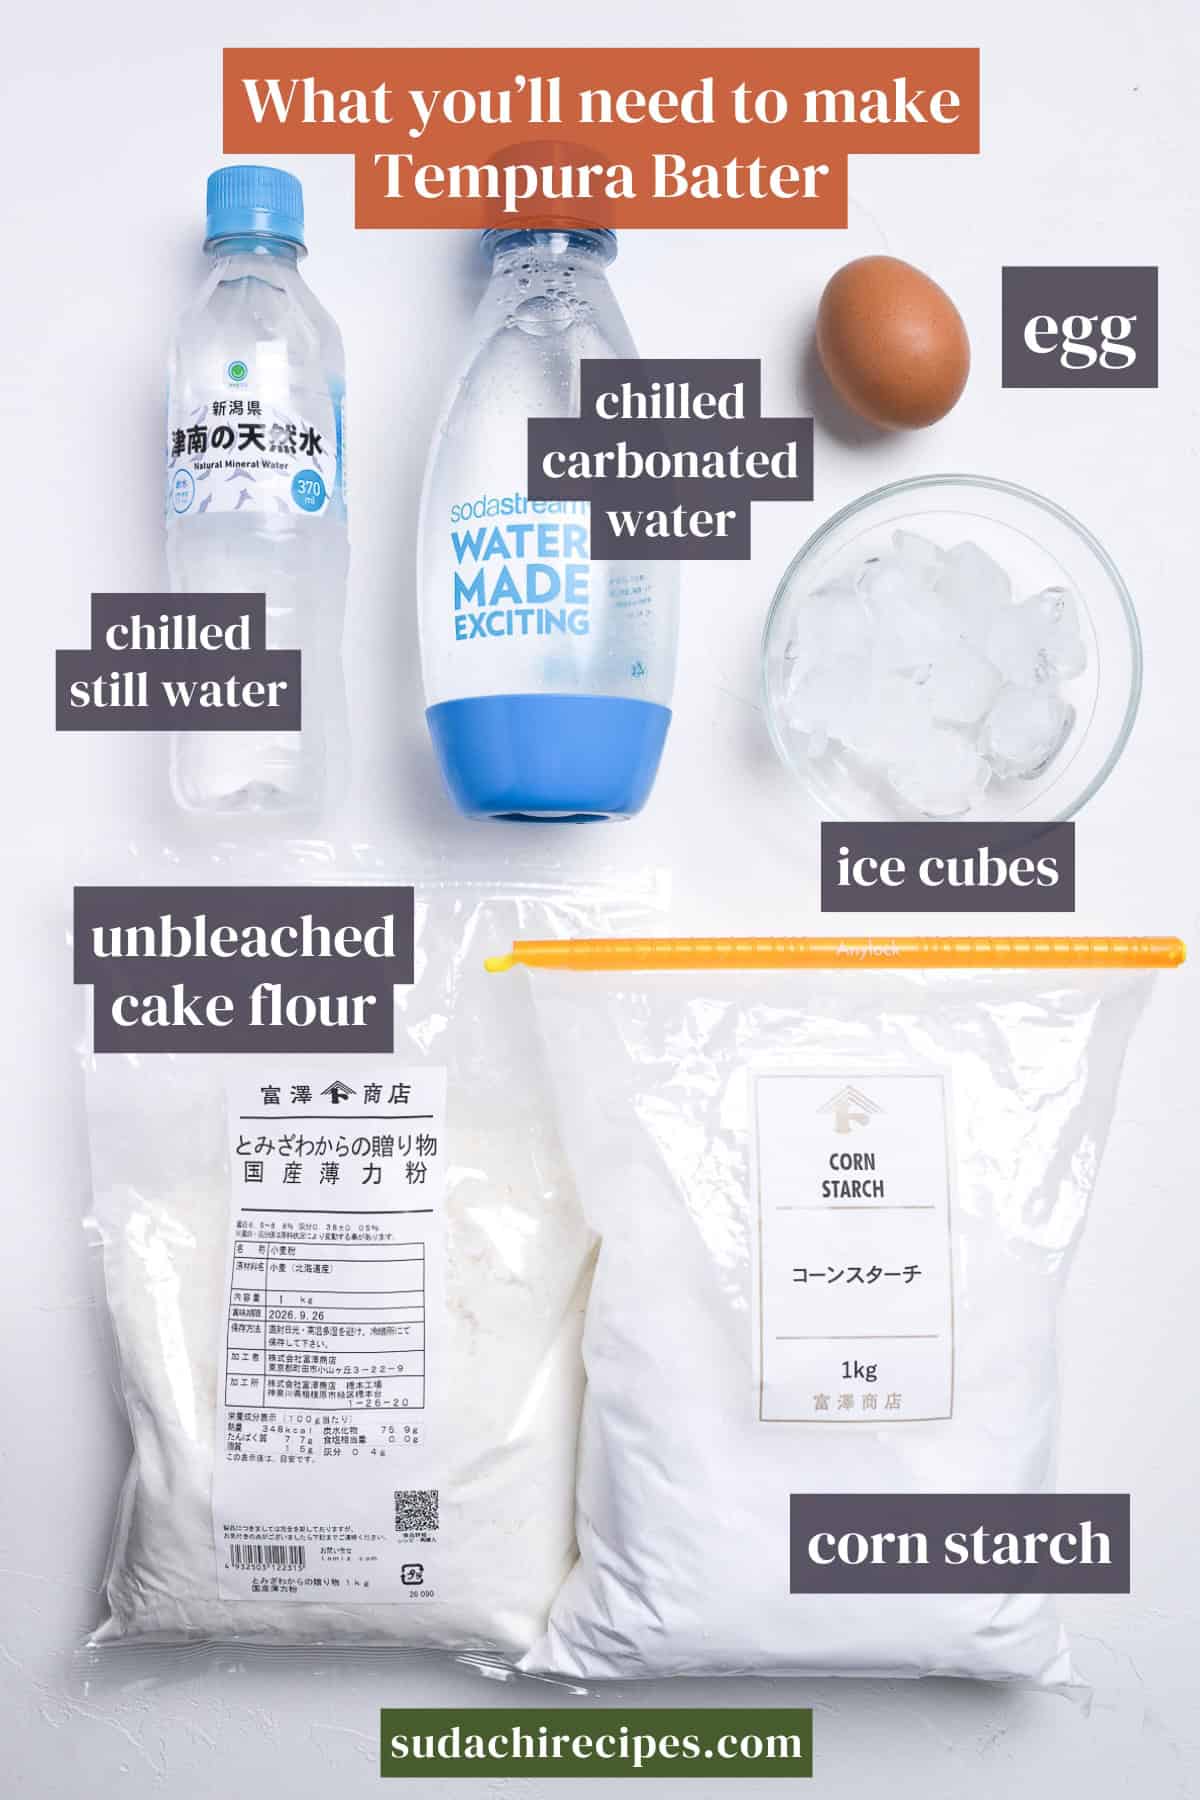
- Must-haves: Unbleached cake flour for the lowest gluten, cornstarch to drop the gluten ceiling further, then ice-cold water and ice cubes to keep the batter from turning sticky before it hits the oil.
- Skill level: Medium-to-Advanced. The frying itself is straightforward, but the batter rewards a cook who chills everything, measures the water instead of eyeballing it, and stirs just enough to bring it together. It’s less forgiving than karaage.
Summarize & Save this content on:
What is Japanese Tempura Batter?
Authentic tempura batter is the light coating that goes around seafood or vegetables before they are deep-fried into Japanese tempura. The classic mix is just 3 things: a low-gluten flour, egg, and water taken straight from the ice. It is stirred barely at all and used within minutes, before the gluten has a chance to develop. The batter holds no seasoning itself. Its only purpose is to fry up into a crisp, pale shell and then let the inside be the star of the show.
Here is the part most people might not have heard: tempura did not start in Japan. It came from Portugal in the 16th century, landed in Nagasaki, traveled east, and became one of the iconic flavors of old Edo. The word “tempura” traces back to “tempero,” meaning seasoning, a small, funny irony, because the batter is the one thing on the plate with no seasoning at all. There is no single correct way to make it, and outside Japan it often shows up thick and fritter-like, a different batter entirely.
In my version, I went after the batter you get at a high-end tempura restaurant in Japan: thin, crisp, no added flavor, no salt, the kind you finish with a little salt or a dipping sauce. The first time I ate at a proper tempura specialty restaurant, I was caught off guard, and I was born and raised in Japan. I sat there thinking, what was all the tempura I had eaten until now? That bite reset the standard for me, and it took multiple rounds of testing before I got close to it at home.
Tempura Batter Ingredients: Extremely Important!
Honestly, you might feel this part is tedious to read. But with tempura, ingredient selection is everything, and I would rather over-explain than let you guess. Below I go through each one in detail, the best way to choose it, and why I do things the way I do.
Once you have made this batter once, you can skip this section on every attempt after that. But if you are making my recipe for the first time, my honest wish is that you read it through carefully. This is the part that decides whether your tempura comes out light and crisp or heavy and disappointing.
Flour
This is the keystone of the whole thing. Get this one choice wrong, and your tempura will not come out light and crisp no matter what else you do. That is how much it matters. Japanese culinary science research has confirmed that low-protein flour produces better-fried tempura coatings, and that the lower the protein, the less sensitive the batter is to water temperature.
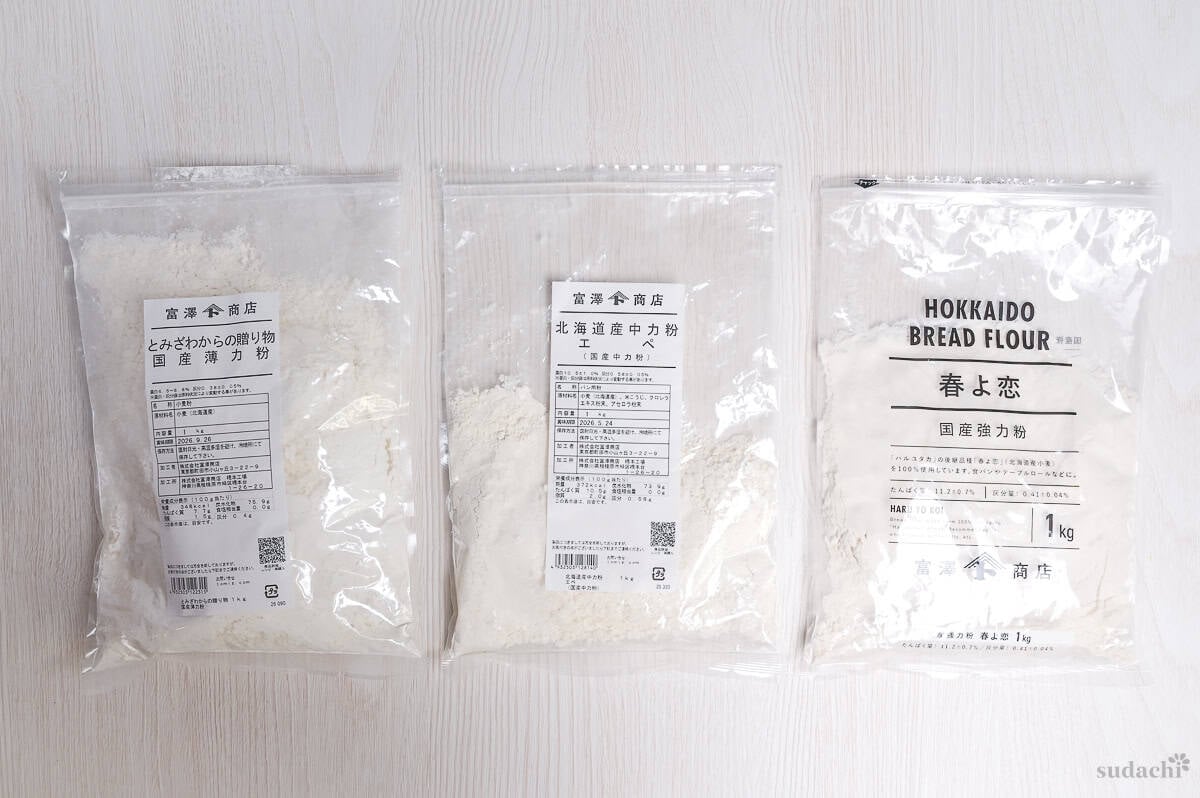
The best flour for tempura is what Japan calls hakurikiko, or low-protein flour. Japanese flour is sorted mostly by protein content, and the differences are bigger than they sound:
- Low-protein “hakurikiko” sits around 6.5 to 8.5% protein, made from soft wheat, with an extremely fine particle size.
- Medium-protein “churikiko” flour runs 8 to 10% and is what udon noodles are made from.
- High-protein “bread”kyorikiko” flour is 11.5 to 13.5%.
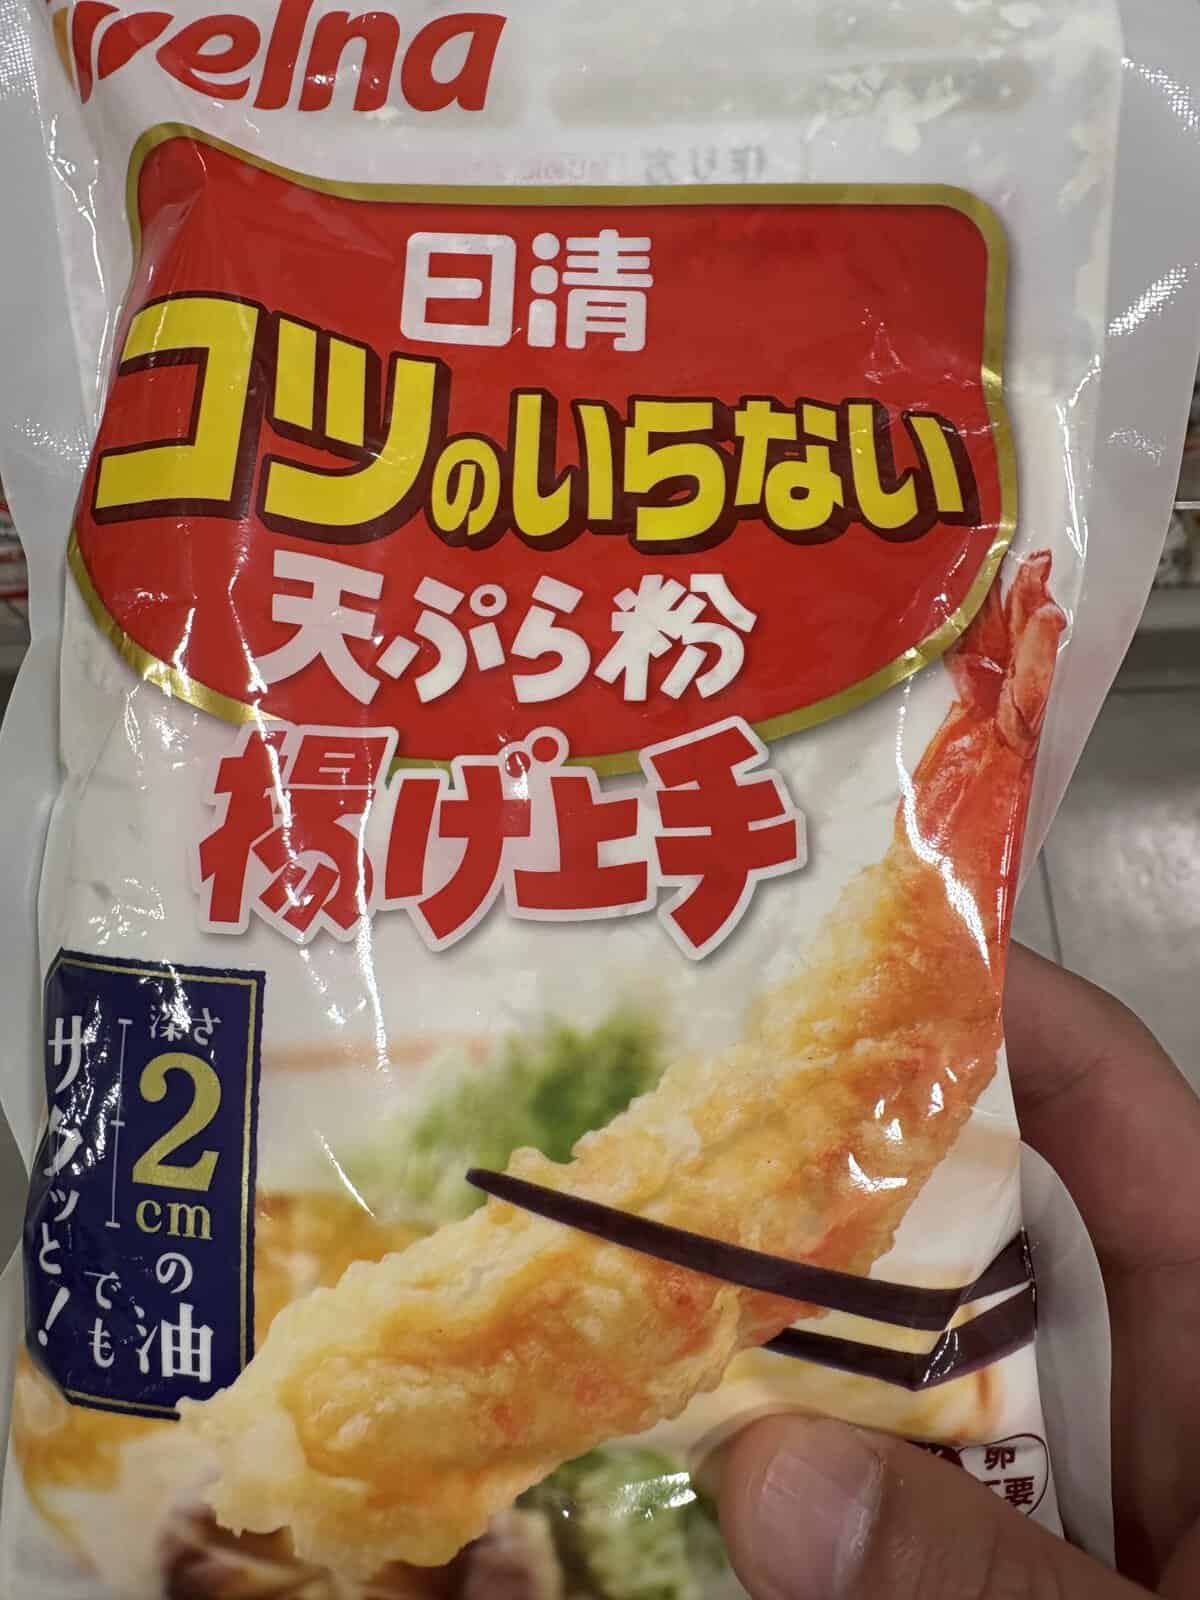
- There is also a ready-made tempura flour premix (天ぷら粉), which is a hakurikiko base with starch and a leavening agent and an emulsifier already blended in.
2 numbers decide how a flour behaves in this batter. The first is protein. The lower it is, the less room there is for gluten to form, and around 6% is the ideal target (restaurants). The second is particle size. The finer the flour, the more surface area touches the water, so the batter comes together fast and you can start frying before gluten has a chance to develop.

When there is too much gluten in tempura batter, the paths that moisture needs to escape through during frying get blocked, and you end up with a stodgy, heavy coating instead of a crisp one.
One thing to keep in mind if you are shopping in the US. Cake flour and pastry flour are the easy low-gluten options to find, but a lot of those products are bleached or chlorinated. In the UK and Australia, chlorination is banned by law, so that is not something you need to think about there.
Chlorination of soft wheat flour increases its water-holding capacity, raises the hydrophobicity of starch granule surface protein, and reduces the gluten network-forming ability. Those traits are what high-ratio cakes are built around, but they run counter to what tempura batter is trying to do. For all the detail on Japanese flour types, read my Japanese flour guide.
If cake flour is genuinely hard to get, AP flour can work. Its protein content is a little higher than cake flour, so it tends to develop stickiness, which means you have to be very restrained when you mix it. In that case it helps to bump up the proportion of cornstarch slightly.
Bottom Line: the best flour for the best tempura is low in protein, extremely fine in particle size, and unbleached. Lining up perfect protein and particle numbers can get expensive or difficult, so treat those 2 as a reasonable-effort goal, not something to stress over.
Egg
The egg does quiet, important work here. When egg and water are whisked together and meet the flour, the egg yolk lipoproteins and the oil disperse finely through the water and form a water-and-oil emulsion. That emulsion reduces how much direct contact the wheat protein has with the water, which delays and suppresses gluten formation.
Then during frying, the egg proteins set with the heat and hold the structure of the coating while the trapped moisture evaporates slowly, and that slow release is what gives you the fluffy feel.

Fresher eggs have more yolk lecithin, which means stronger emulsifying power. Old eggs emulsify weakly and the coating loses its richness, so reach for fresh ones. And use eggs from the fridge, cold eggs matter for tempura.
There are approaches that use whole egg, yolk only, or white only. I use whole egg. If you want to make a half batch, you can use just the yolk or just the white instead. Here is how they differ:
- Yolk only gives the coating viscosity and water retention from the strong lecithin emulsification, and the result fries up deeper in color, richer, crisp and fluffy, but it is a race against time once fried and goes limp quickly.
- White only sets into a firm coating from the protein coagulation, and it holds its crispness even as time passes.
- Whole egg is the middle ground, the balanced one.
Bottom Line: More yolk means a plumper coating, less means a crisper one, and whole egg sits right between, which is why I use it. If you can, cold and fresh.
Water and Carbonated Water
You can make this batter with any water, but soft water is ideal. In bread making, moderately hard water is considered great, because there you want to strengthen gluten. Tempura is the opposite, a batter where you want to suppress gluten, so soft water that is low in minerals, which most Japanese tap water is, suits it better.
The calcium and magnesium ions in hard water act like bridges between gluten proteins and strengthen the stickiness, which is exactly what you do not want. That said, you absolutely can make tempura with hard water, so please do not give up on the recipe just because you cannot get soft water.

I also mix carbonated water into my batter, and the mechanism is worth understanding.
- CO2 gas gets trapped as fine bubbles inside the coating, expands in the heat of the oil, and forms a void structure that lowers the density and creates lightness.
- Those same bubbles double as escape routes for water vapor, so the inside of the coating dries out faster, which is what locks in the crisp texture.
- And carbonated water sits at a pH of 4 to 5, lower than neutral water, which shifts the charge state of the gluten proteins and weakens their bonding.
- Specialty restaurants do not use it much, but it is an excellent way to get that light crispness easily at home, so it goes into my recipe.
I use it half and half rather than all carbonated water, and there is a reason. Strong carbonation gives the maximum effect, but it raises the risk of oil splatter when the batter hits the oil. Light carbonation, or a bottle that has gone slightly flat, is the home-friendly choice, a balance between a safety margin and the effect. So here too, you strike a balance.
Both the water and the carbonated water need to be chilled in the fridge, and this is not optional. For the carbonated water, CO2 dissolves better at low temperatures, so cold water holds onto the bubbles. For the batter overall, the reactions you are trying to slow down depend on temperature, so cold liquid keeps gluten quiet.
In specialty tempura restaurants, the mainstream is a batter made with ice water and egg, and there are no famous restaurants that routinely use carbonated water. The reason is that egg yolk lecithin emulsification already does an equivalent job, the lightness and the water retention, so carbonated water becomes redundant.
But that only holds with serious skill. At home, it is better to prioritize ease. Do not mistake the means for the end. In fact, the leavening agent blended into the ready-made tempura flour sold in Japan works on the same principle as carbonated water, generating CO2 during frying.
Starch
When you swap part of the flour for cornstarch, the absolute amount of wheat protein in the batter drops, which physically lowers the ceiling for how much gluten can form. In peer-reviewed work to date, blending in cornstarch has been linked to a crisper result.
In my recipe I use 20%. Here is what you need to know:
- If you are working with a flour that is extremely low in protein (like under 7%), 10% or less is fine too.
- And if you want to use AP flour, which carries a bit more protein, nudging it slightly above 20% is also worth doing.
- Pushing it all the way to a 50:50 split will definitely make it crisper, but the flavor and richness of the coating fall off, so I do not recommend going that far.
Here is the mechanism. The starch granules go through gelatinization with water and heat and form structure, but unlike gluten they do not weave a network. So the coating becomes a light structure, loose bonding between starch granules plus the coagulation of the wheat protein.
A peer-reviewed comparison of starches in tempura batter ranked cornstarch first for crispness and frying performance, with potato and wheat starch in the middle and tapioca and waxy corn starch performing worst. The starches that scored well were the ones whose granules kept their shape inside the fried coating.
This is also where my own experience pushed me. After making this batter again and again, the clearest thing I found was that adding starch measurably cut down the number of ways the batter could fail on me. It is not a refinement you add once you are already good. It is a failure-prevention move, and for anyone cooking this at home, I think you should definitely do it.
You will wonder whether other starches are okay, and the conclusion is that cornstarch is the most suitable. Here is how the common options compare.
| Type | Granule size | Texture characteristics |
|---|---|---|
| Cornstarch | Very small | Smooth, thin coating, drains oil well |
| Katakuriko (potato starch) | Large | Crunchy, high viscosity, oil surfaces when cooled |
| Rice flour | Medium | Lightly crisp, no wheat flavor |
| Joshinko | Large | Firm and hard |
Unlike carbonated water, there are in fact some professionals who do blend cornstarch into their batter.
Frying Oil
With oil, you do not need to agonize over finding the single best one. Even specialty restaurants use different oils. The sesame oil you often hear about, in its various unrefined, semi-refined, and refined forms, is expensive, and its smoke point shifts depending on which type it is, so I do not want you taking on cost and risk casually.
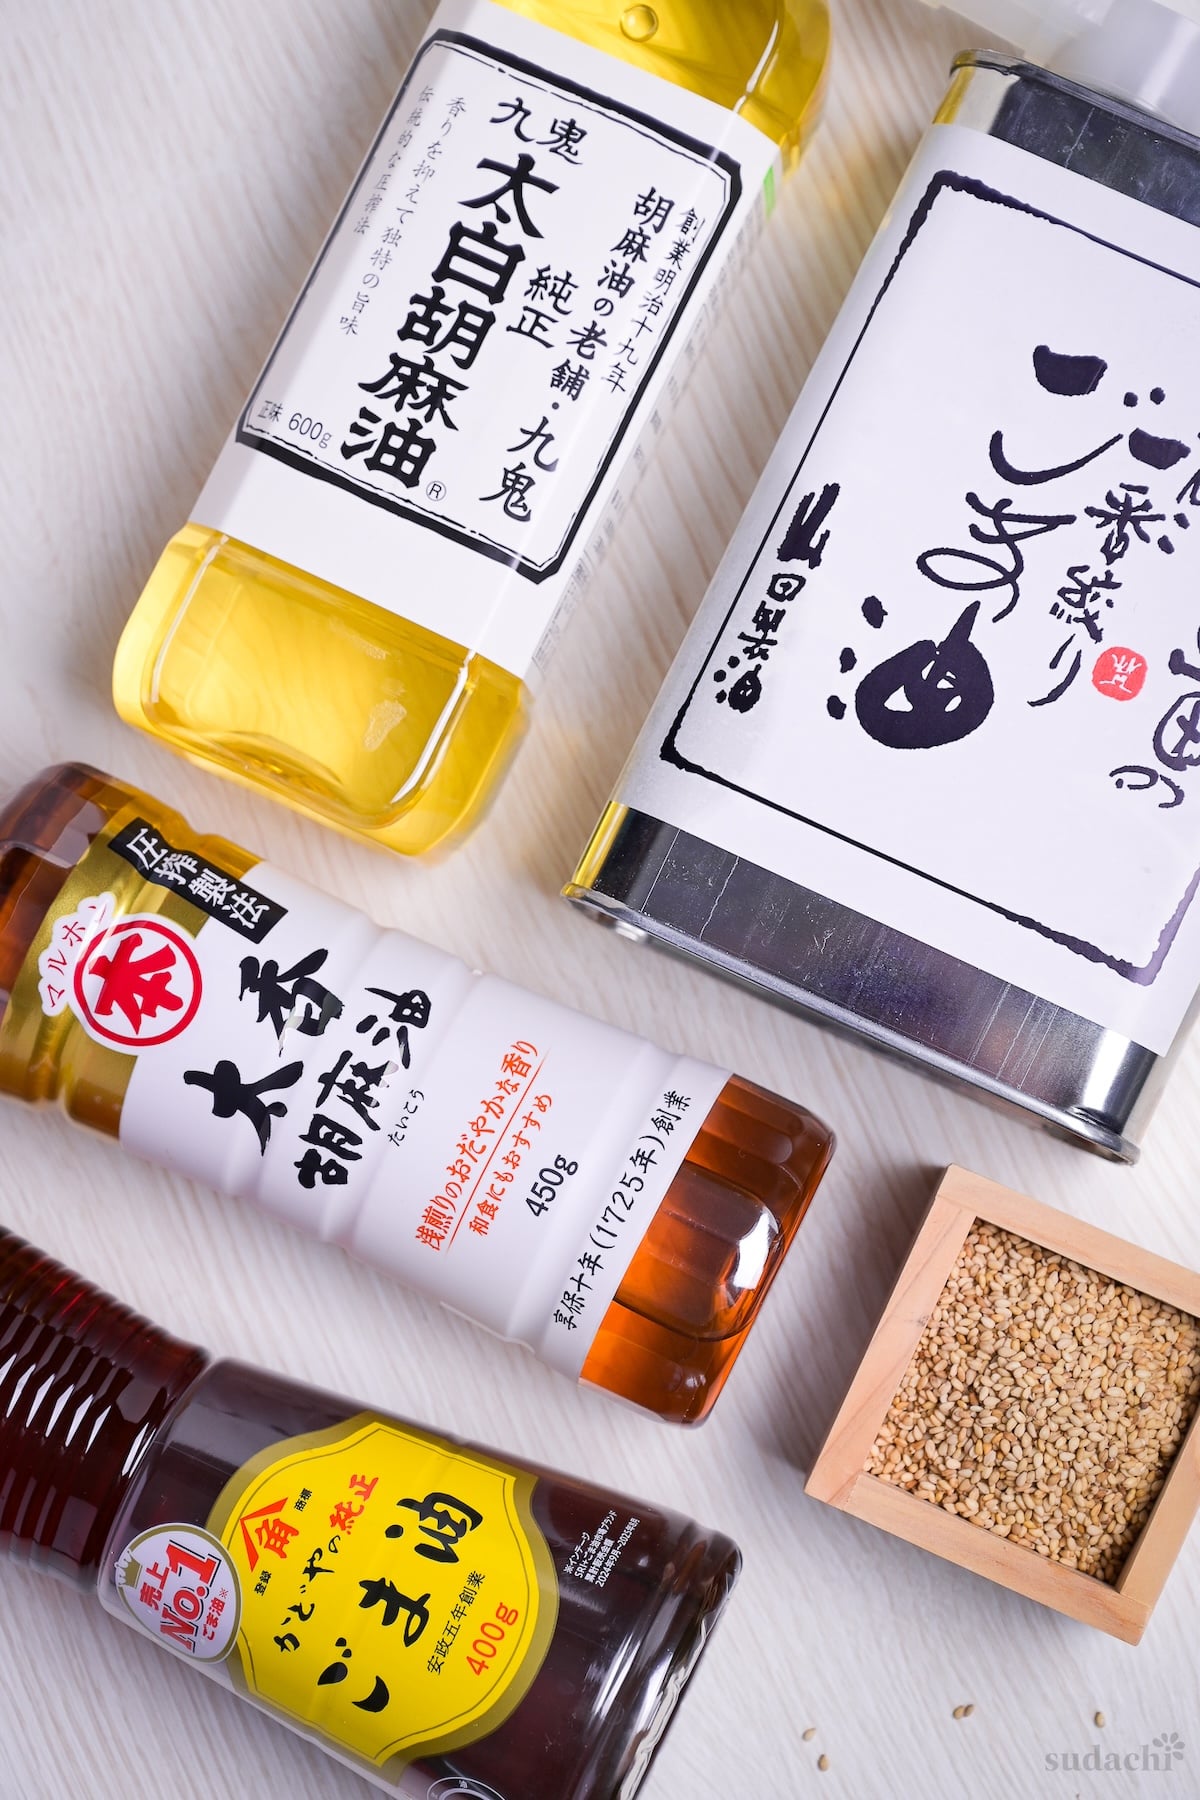
The restaurants can do it because they have the skill and the equipment to hold the oil temperature precisely and the deep knowledge of the exact product they are using. You can make tempura plenty delicious without white sesame oil, so I do not recommend it for home cooks. For the full picture, read my sesame oil guide.

What does matter is knowing which oils are simply not suited to tempura. Stay away from oils with a low smoke point, the ones that are a poor fit for deep frying in the first place.
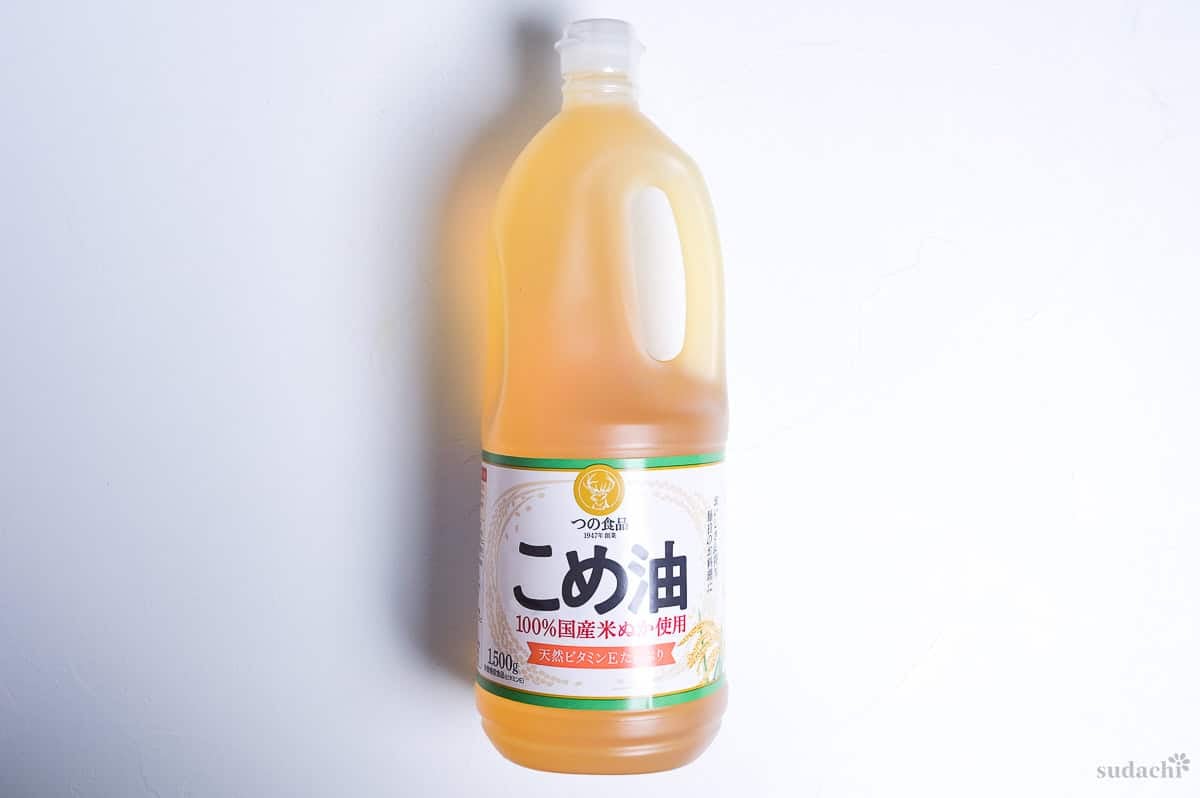
Personally, for deep frying I only use rice bran oil, which strikes a good balance of quality and price, but rapeseed oil or any other types work fine too. Choose something neutral with a high smoke point and you are set.
Substitutions & Variations
Here is the honest truth about this batter. Almost every part of it has a swap, and most of them get you most of the way there. Low-protein cake flour is what gives the best result, since that is the choice that decides whether your tempura comes out light or heavy, but if you genuinely cannot get it, all-purpose flour still works with a small adjustment.
Everything below is yours to adjust based on what is in your kitchen tonight.
Substitutions:
- Unbleached cake flour → All-purpose flour: AP is higher in protein, so it develops stickiness more easily, which means you have to mix it even more sparingly than usual. Bumping up the cornstarch proportion slightly helps too. The great thing about AP is, it’s almost always not chlorinated.
- Carbonated water → Ice-cold fresh water: The carbonated water is optional. You can make this batter without it. If you skip it, just replace it with the same amount of ice-cold fresh water straight from the fridge. You lose a little of that easy, airy crispness, but the batter still works.
- Carbonated water → Baking powder: A very small amount of baking powder mixed into the flour does the similar job, releasing CO2 into the coating as it fries. This is the same principle behind the ready-made tempura flour sold in Japan.
- Carbonated water → Lager beer: Beer brings carbonation plus a little alcohol, which evaporates fast and helps dry the coating. The catch is that a hop flavor stays behind, so the batter is no longer truly flavorless.
- Egg → Mayonnaise: While I prefer using eggs for tempura batter, mayonnaise is a convenient swap. Use 1 tablespoon of mayonnaise per egg. The catch: this only works with mayonnaise that actually contains egg, like Kewpie mayo.
Have trouble finding Japanese ingredients? Check out my ultimate guide to Japanese ingredient substitutes!
Variations:
- Half batch with yolk only: To make this recipe at half size, use just the egg yolk instead of a whole egg and halve everything else. Yolk-only batter is sometimes called “kinpura”, golden tempura, because the coating fries up rich and a little more yellow, crisp and light. One weakness is that it is a race against the clock once fried, it goes limp quickly.
- Half batch with egg white only: The other half-batch route is egg white only, sometimes referred as “ginpura (silver tempura)”. The protein sets into a firm coating, and unlike the yolk version, it holds its crispness as time passes. A good pick if you are not eating everything the second it leaves the oil.
- No-egg batter: I do not recommend going fully egg-free. If you really need an eggless version, do not improvise it here, follow my eggless vegan tempura batter recipe instead, which I built for it.
How to Make My Tempura Batter
If you prefer to watch the process in action, check out my YouTube video of this tempura batter recipe!

Before you start (Mise en place):
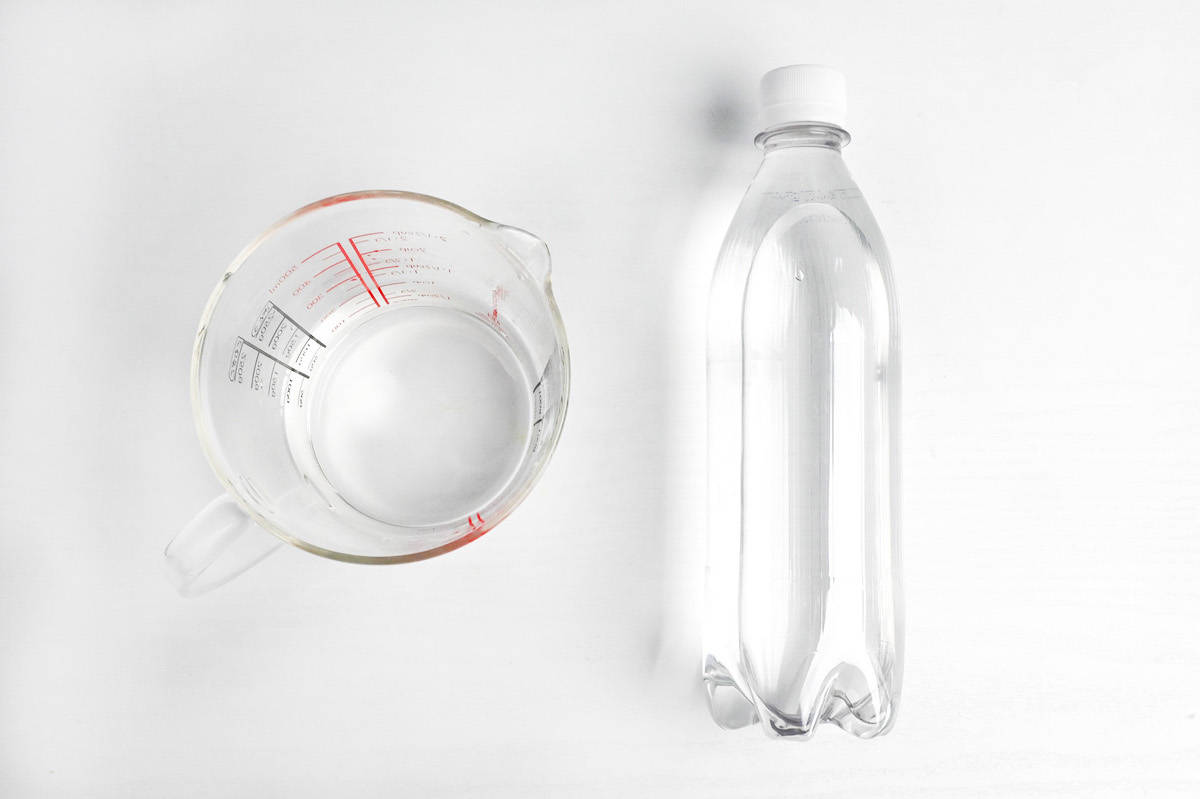
- Measure cold water into a jug and put it in the fridge for about 20 to 30 minutes.
- For the carbonated water, keep a chilled, unopened bottle in the fridge and measure it out right before you make the batter, so it keeps its fizz.
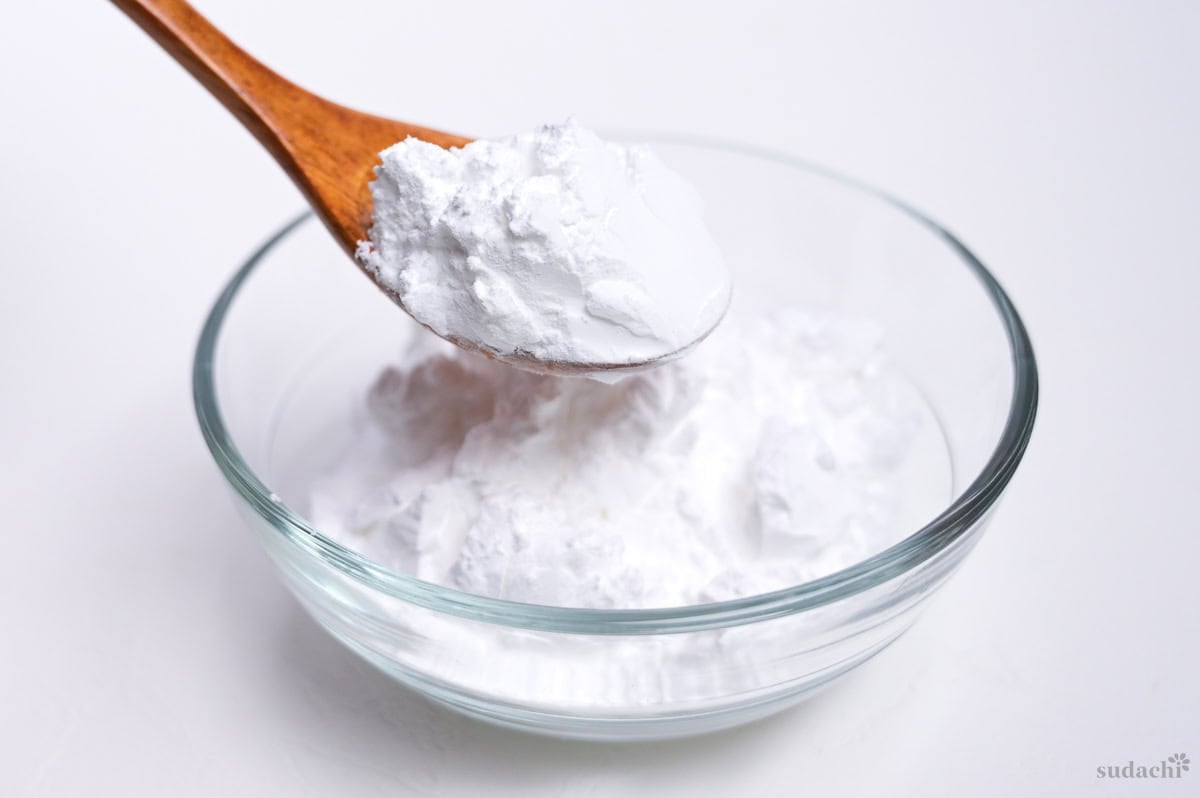
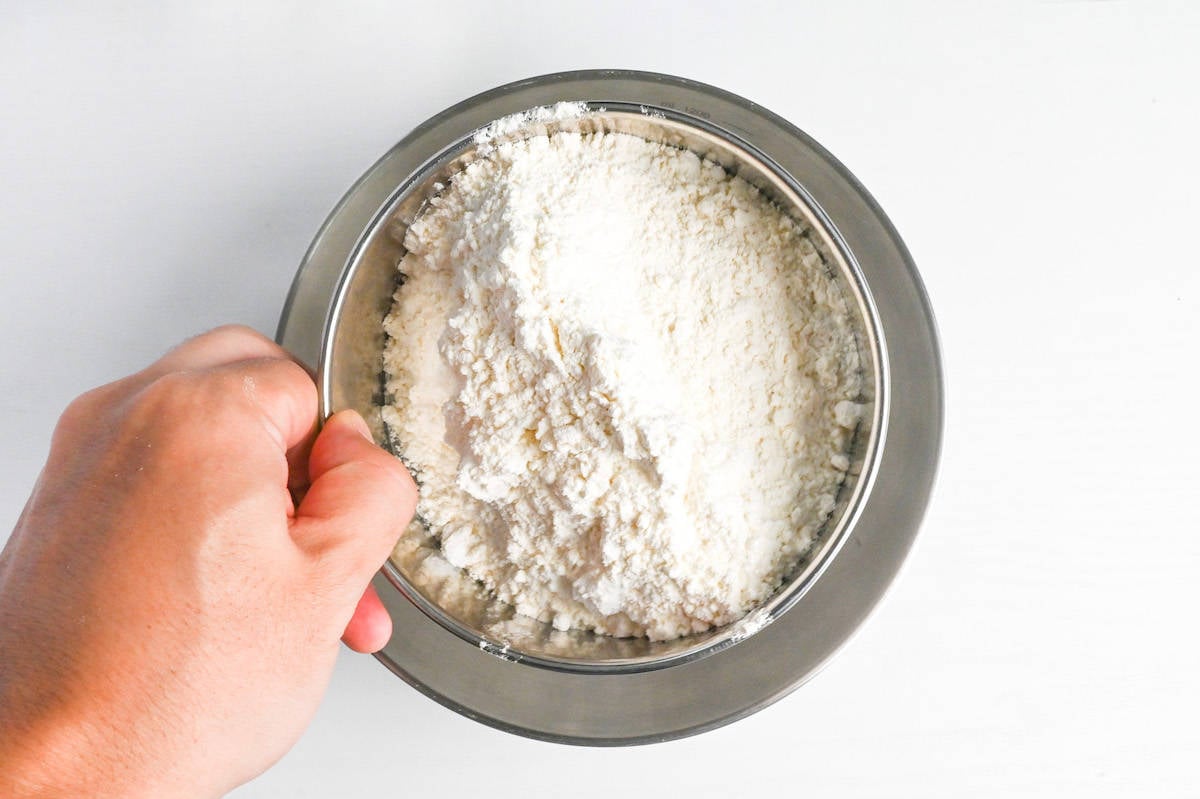
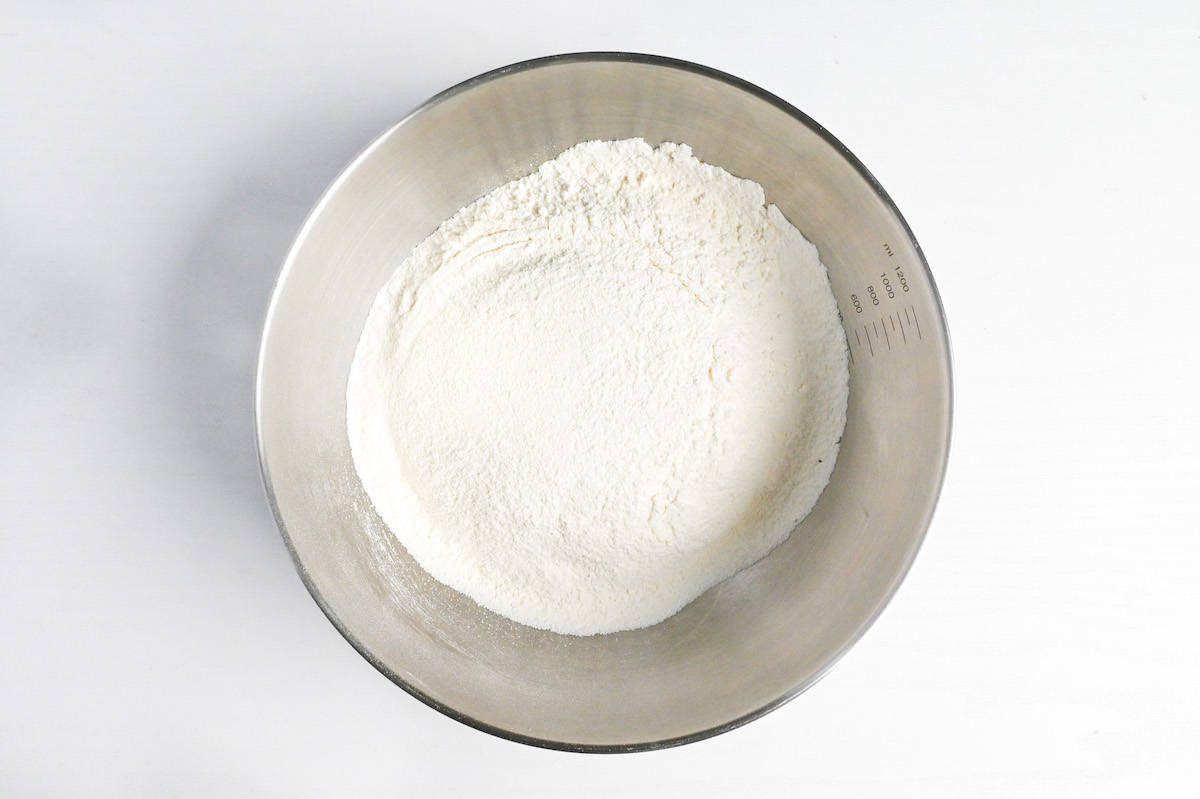
- Sift the cornstarch and unbleached cake flour together into a bowl and give it a good mix. Put the bowl of dry mix into the freezer for 20 to 30 minutes.
It’s very important, so I say this again: for tempura you want a low-protein (soft/weak) wheat flour like unbleached cake flour. The less protein in the flour, the less room there is for gluten to grab hold, and gluten is exactly what turns a light coating into a stodgy one.
Strong flours like bread flour pull the batter in the wrong direction, sticky and heavy, before you have even started frying. Avoid bleached or chlorinated cake flour as it changes the texture. Also avoid self-rising flour, whole wheat pastry flour, and gluten-free cake flour blends. These are different products. For UK and Australia readers, plain flour works, the protein is a touch higher but the result is close.
i. While the dry mix and water are chilling, wash and cut whatever you are frying.
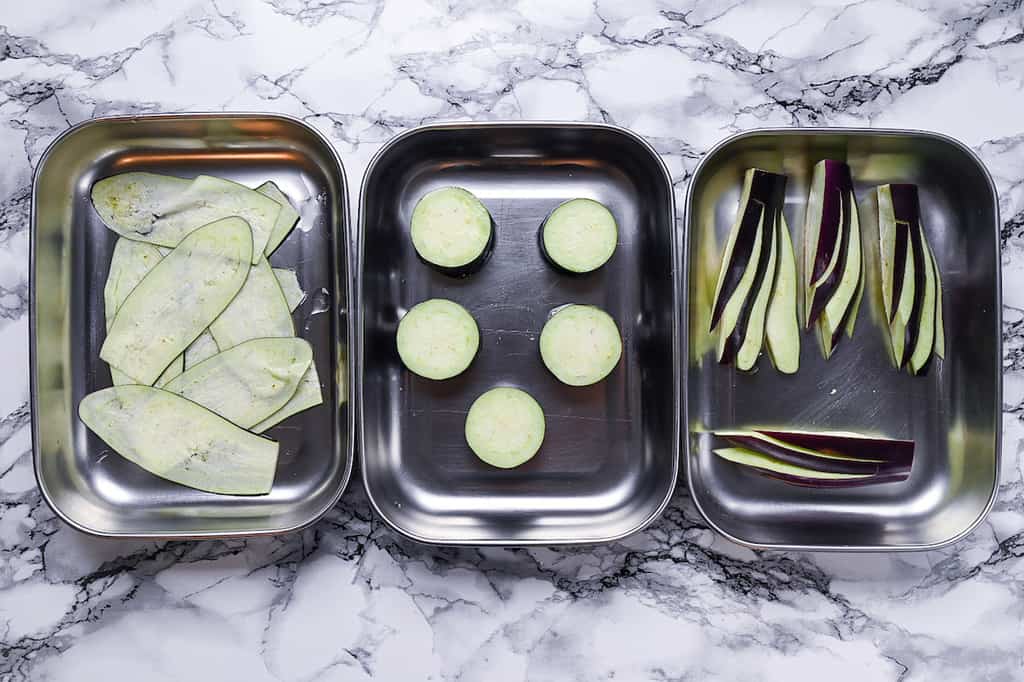
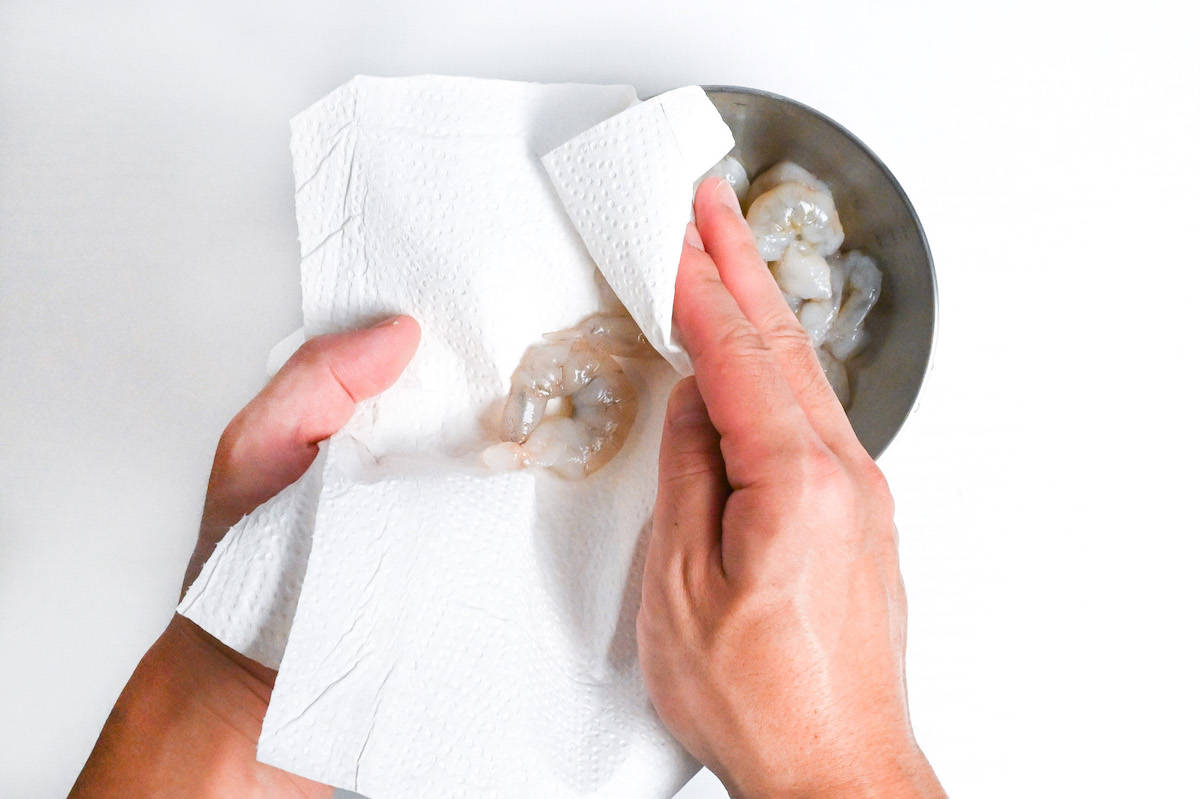
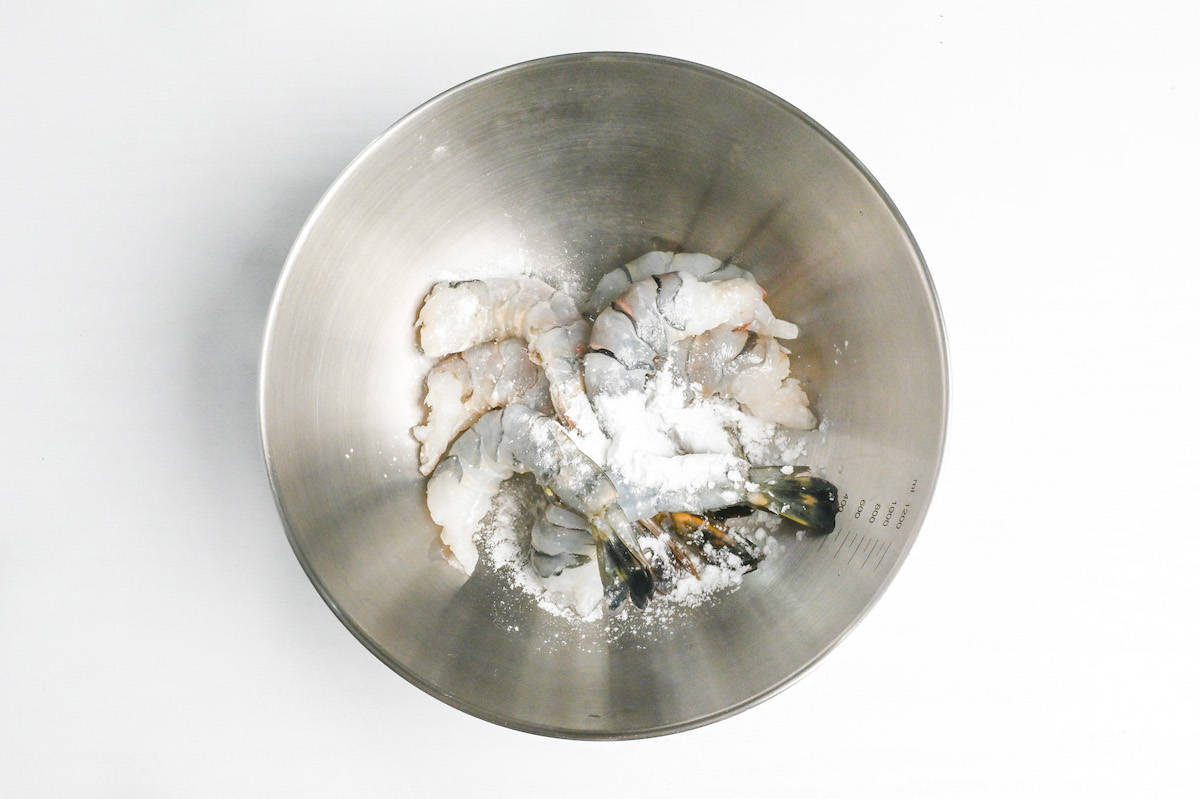
ii. Pat each piece dry with a paper towel, then dust it with a thin layer of flour so the batter has something to grip.
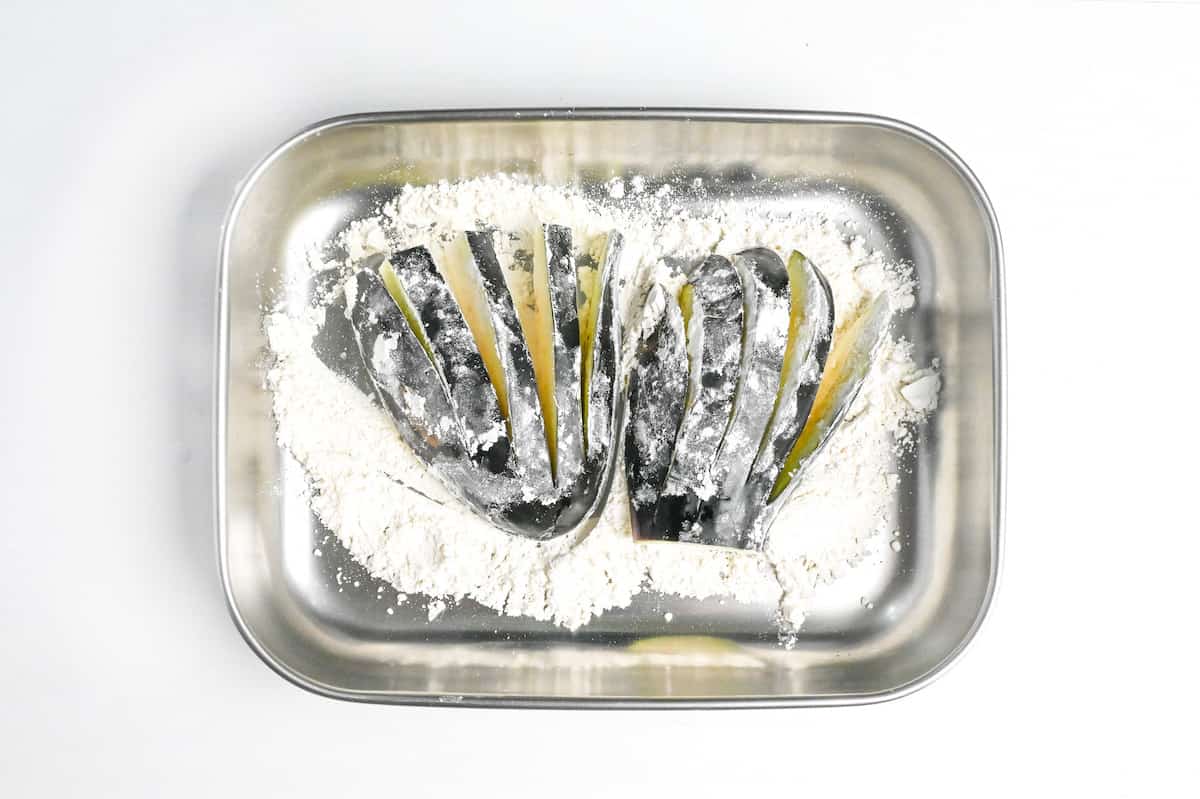
Surface water is the enemy here. A wet piece of shrimp or sweet potato sheds the batter and spits in the oil, so the paper towel is not a fussy extra step, it is the difference between batter that clings and batter that slides off. The light dusting of flour right after gives the coating a key to hold onto, which matters most for smooth, slippery things like shrimp and fish.
Japanese culinary science research on salting fish before cooking confirms the standard preparation: roughly 2% salt by fish weight, left for 20 to 30 minutes, which uses osmotic pressure to firm the flesh and draw out off-flavors along with surface moisture.
.
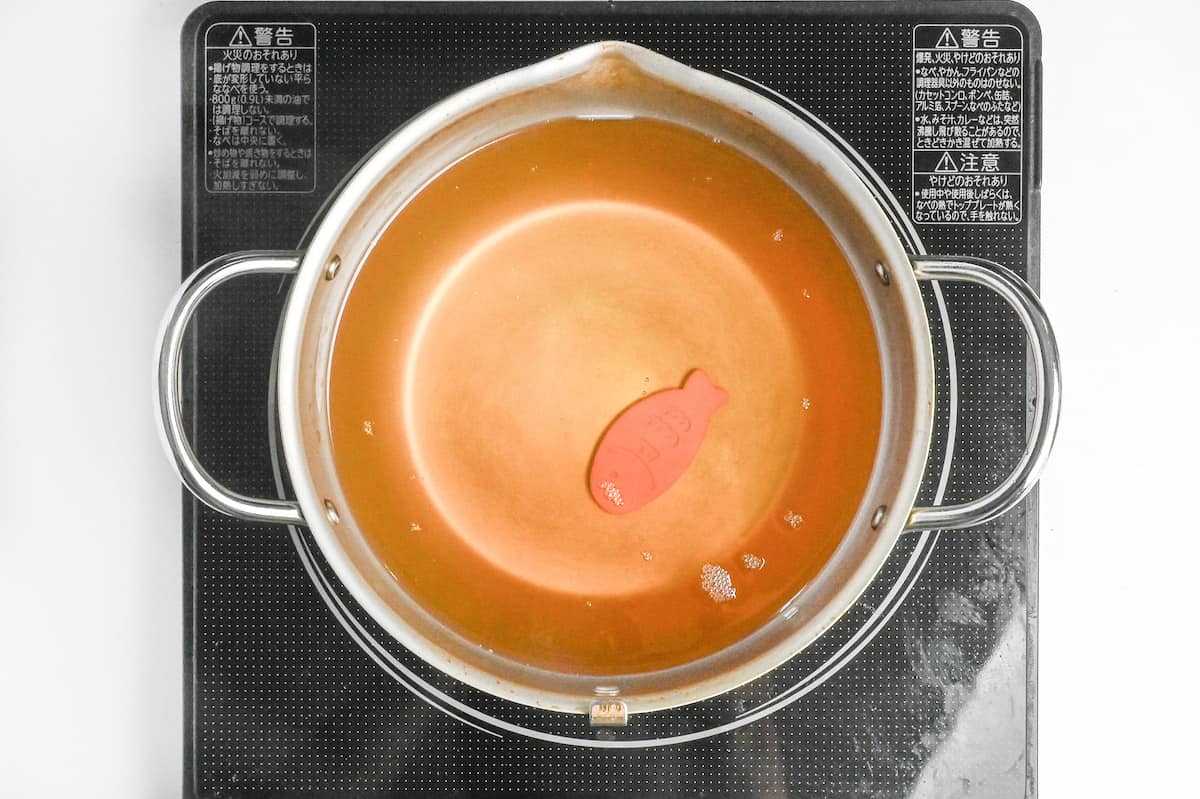
i. Once everything is thoroughly chilled, heat your oil to 180°C (356°F).
ii. Some ingredients want a slightly different temperature, so adjust if you are frying something specific.
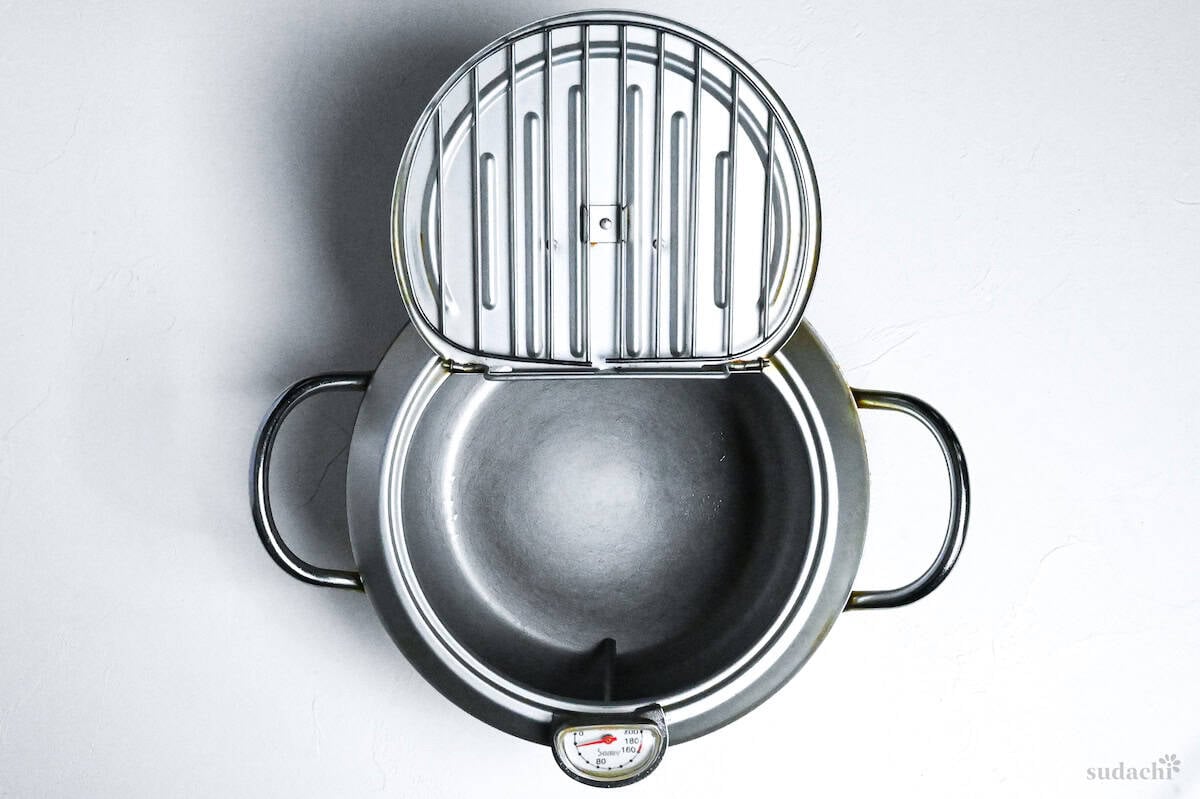
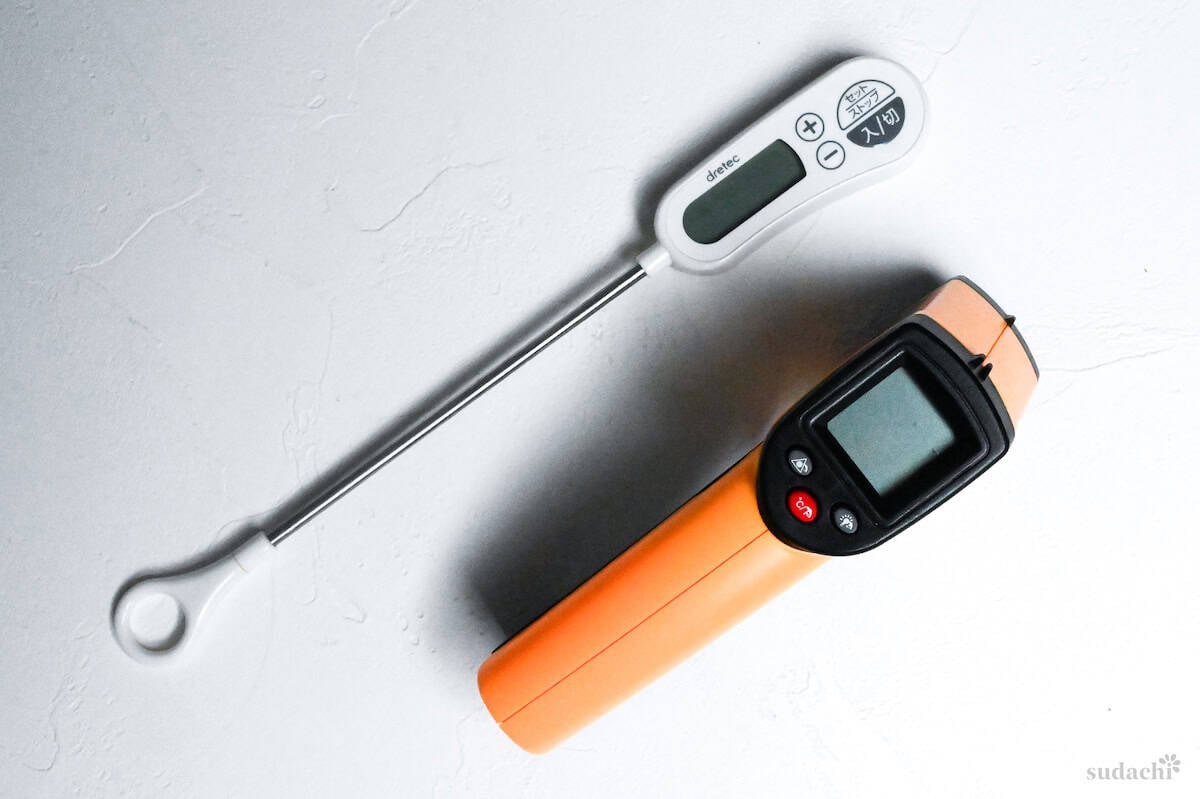
Tempura lives or dies on oil temperature, and your eyes are not a reliable gauge. Too cool and the coating drinks oil before it sets, too hot and the outside colors before the inside is done. I use tempura pot with built in thermometer.
A contactless cooking thermometer also take the guessing out of it, and once the guessing is gone, the rest of the fry is calm.
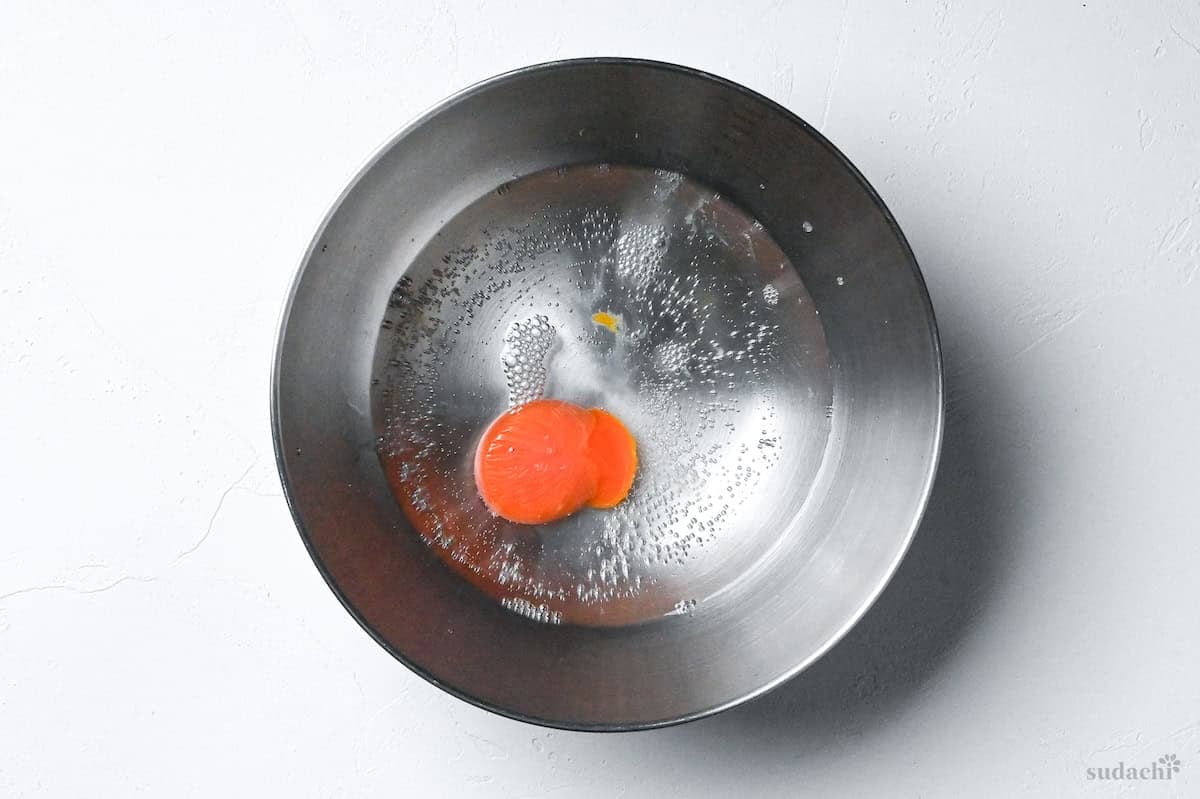
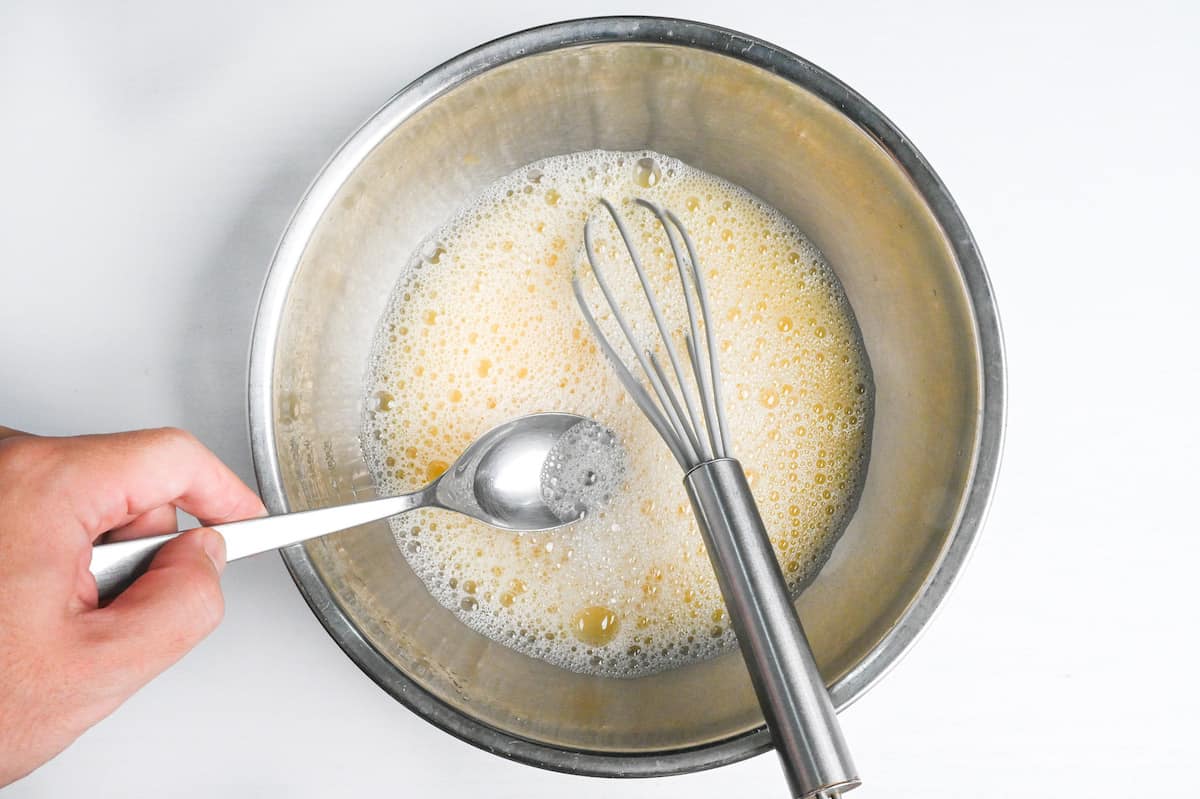
i. Pour the chilled water and carbonated water into a bowl.
ii. Crack in an egg, and give it a whisk.
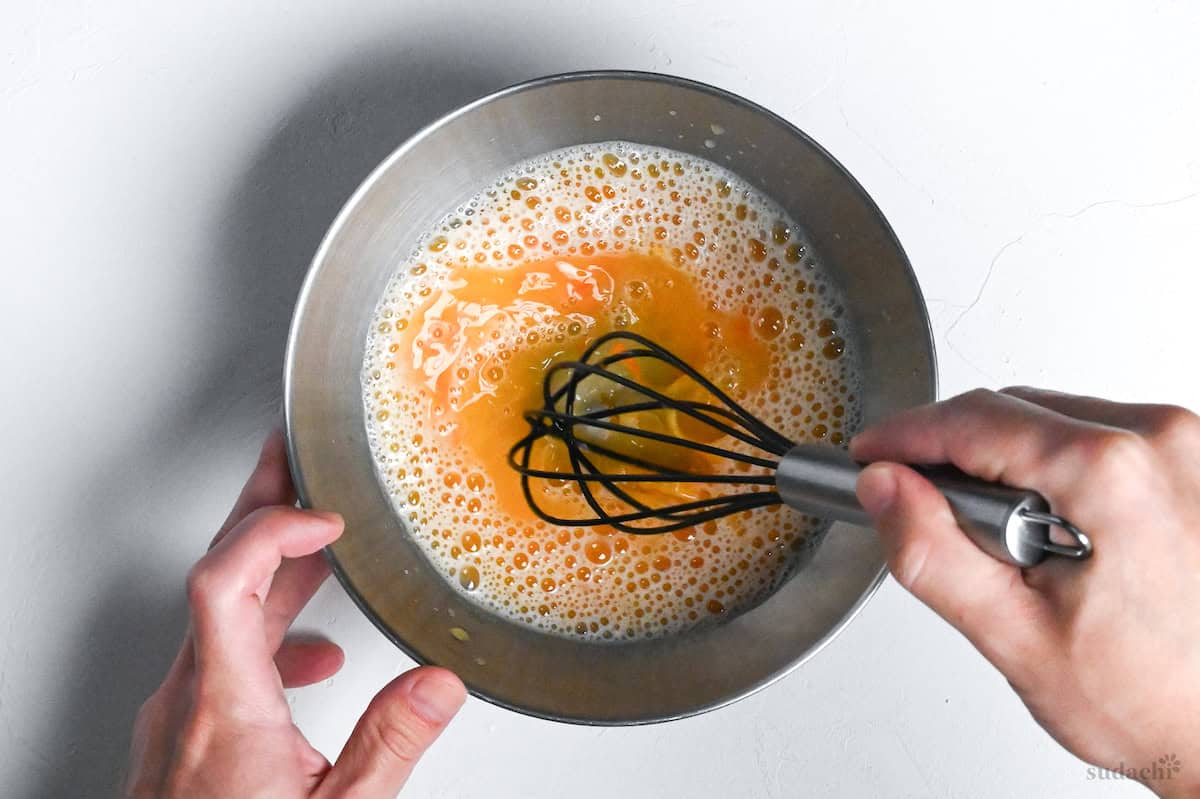
iii. If you see bubbles or foam on the egg, lift them off with a spoon.
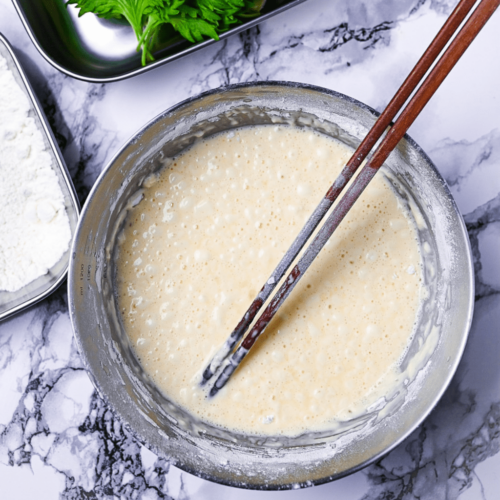
iv. Add the sifted flour and starch in thirds, mixing gently with chopsticks, not a whisk.
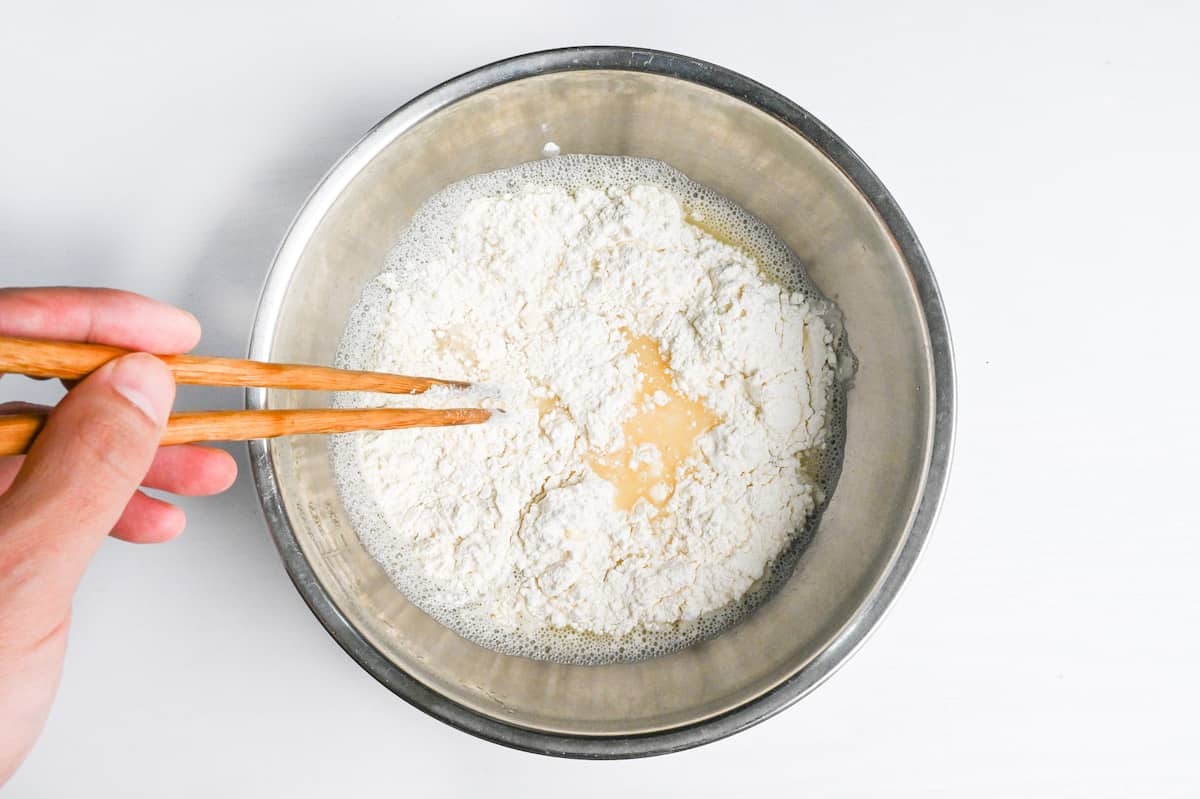
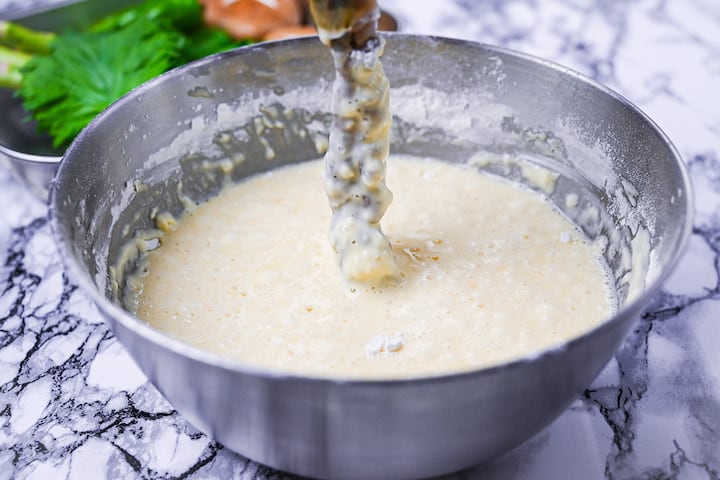
v. Make sure to leave the batter lumpy.
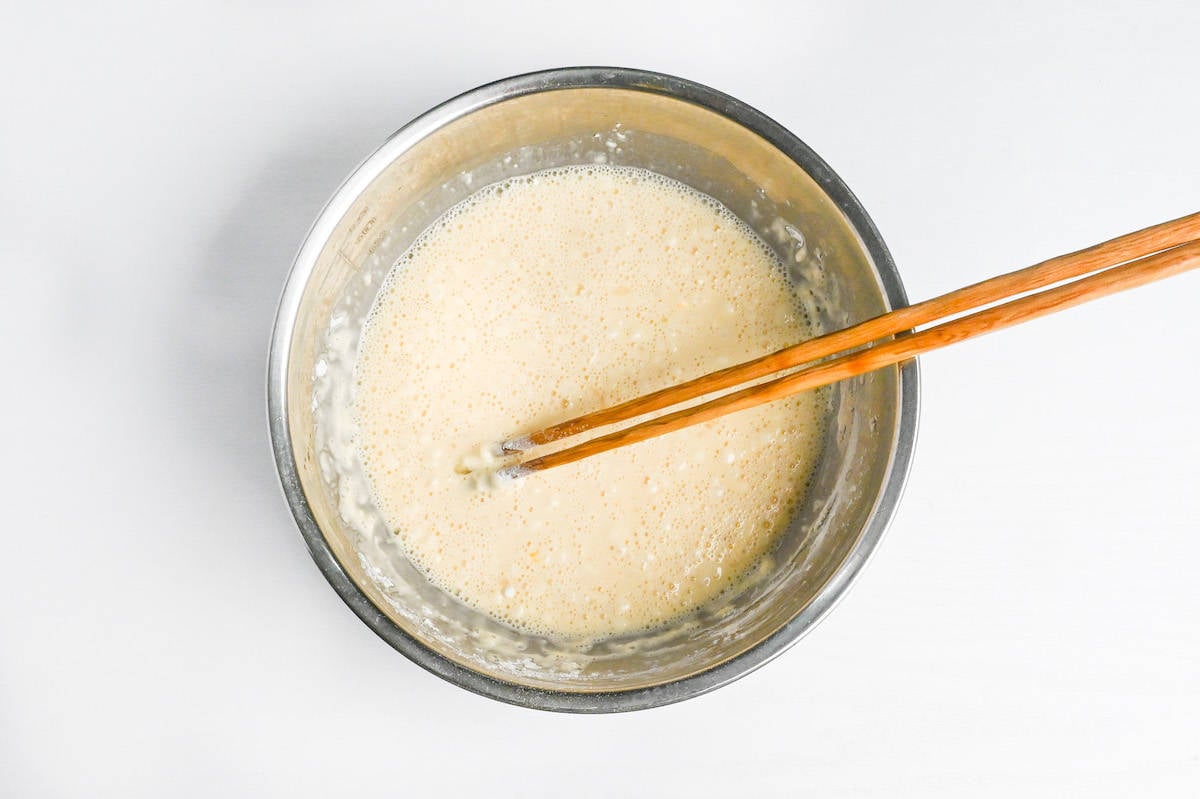
vi. Drop in a few ice cubes in the bowl to keep the batter cold while you work.
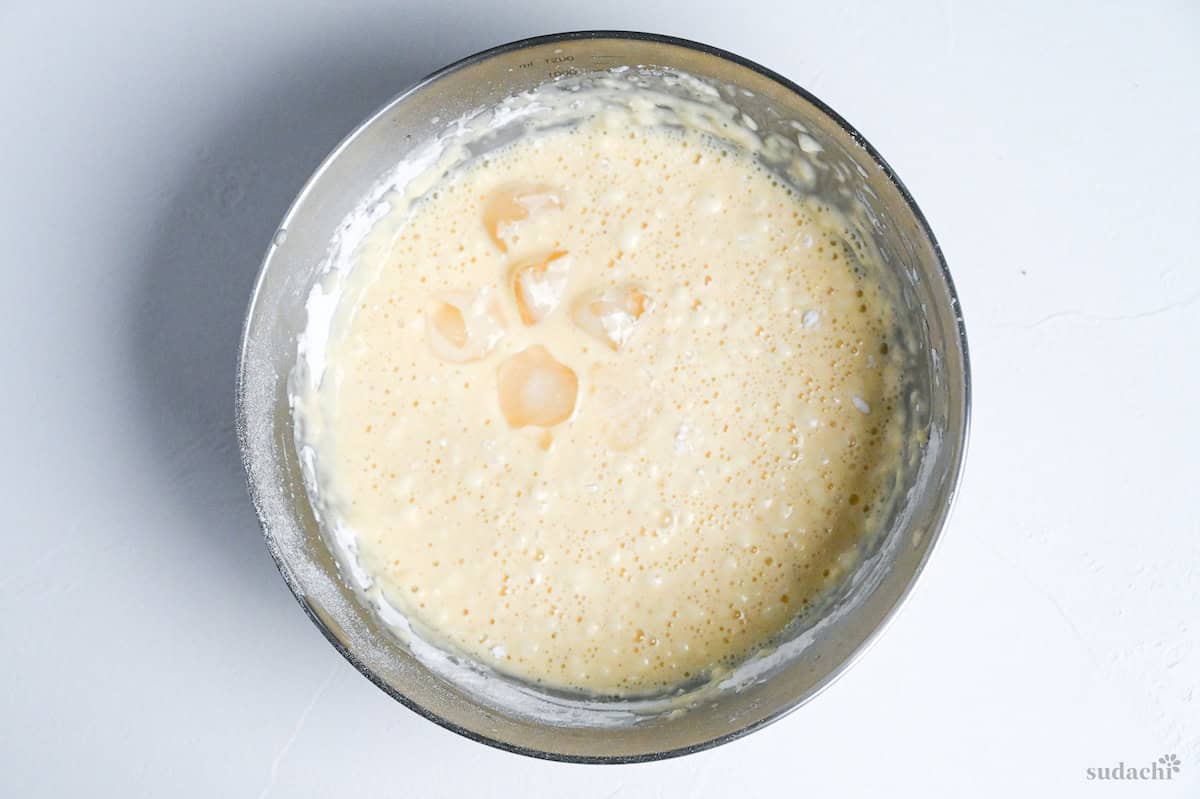
This is the step that feels wrong if you have ever made a cake batter, where smooth is the target. Tempura wants the opposite. Every extra stir builds gluten, and gluten blocks the tiny paths that steam needs to escape through during frying, which is what leaves you with a chewy, thick coating instead of a crisp one. Mix roughly with chopsticks, stop while you can still see flour streaks and lumps, and walk it straight to the oil.
A note on the ice cubes: this batter is thin enough that they will not cling to your ingredients while dipping, but make sure no ice cube ever goes into the hot oil.
i. Test the oil with a single drop of batter. If it sizzles and floats, you are ready.
ii. Lightly coat an ingredient in flour, dip it in the batter, and lower it carefully into the oil.
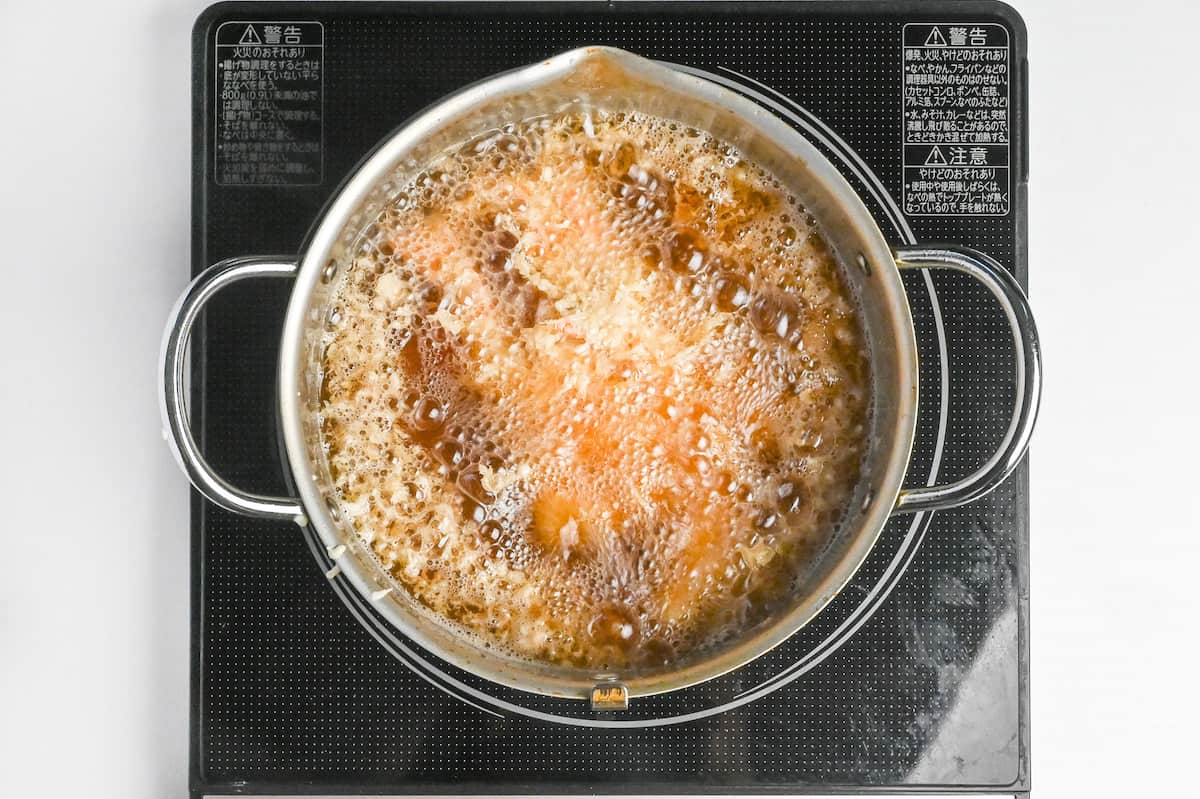
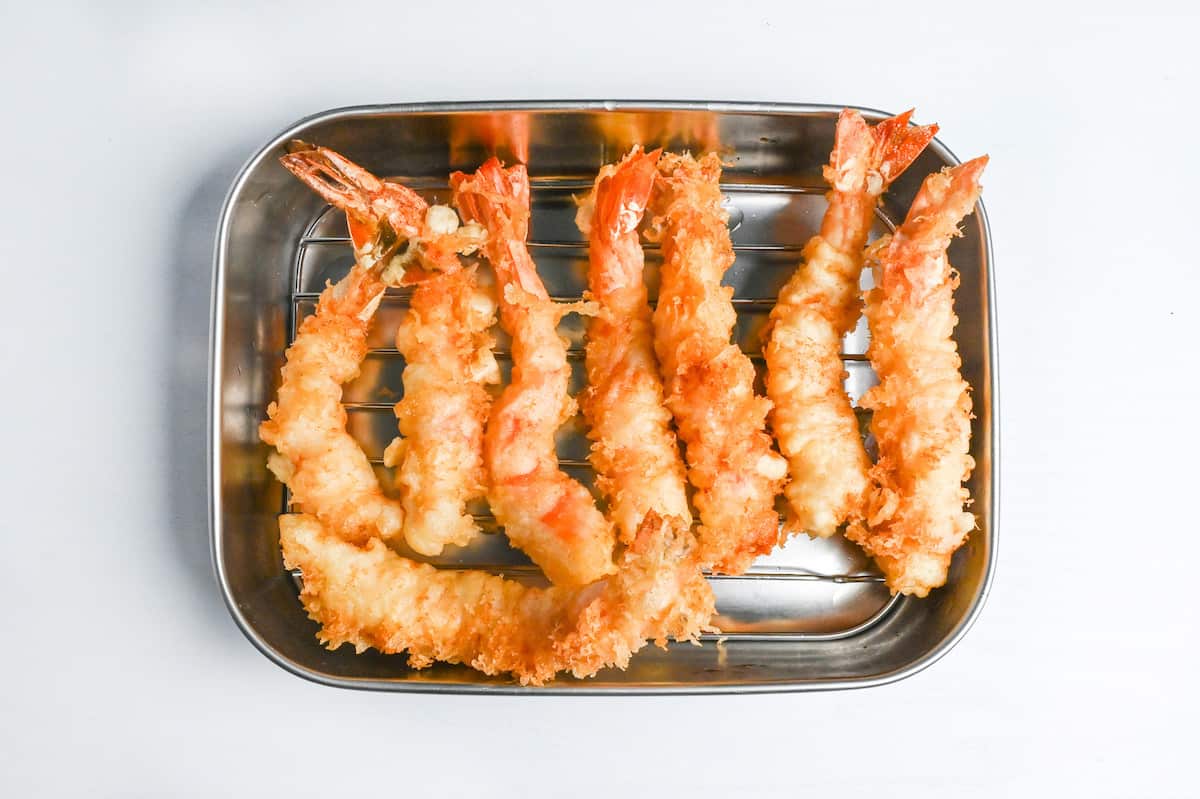
iii. Fry until the coating is crisp but not deeply golden, working with 1 type of ingredient at a time.
Different ingredients cook at different speeds, and a crowded pot of mixed pieces means some come out raw and some come out overdone. Frying 1 type at a time keeps the timing honest. The color cue matters here as well, pull the tempura while it is pale and crisp, because a deep golden coating has gone past light and into heavy.
i. Transfer the fried tempura to a wire rack so the extra oil drips away cleanly and use a mesh spoon to scoop any crumbs of batter floating in the oil between batches.
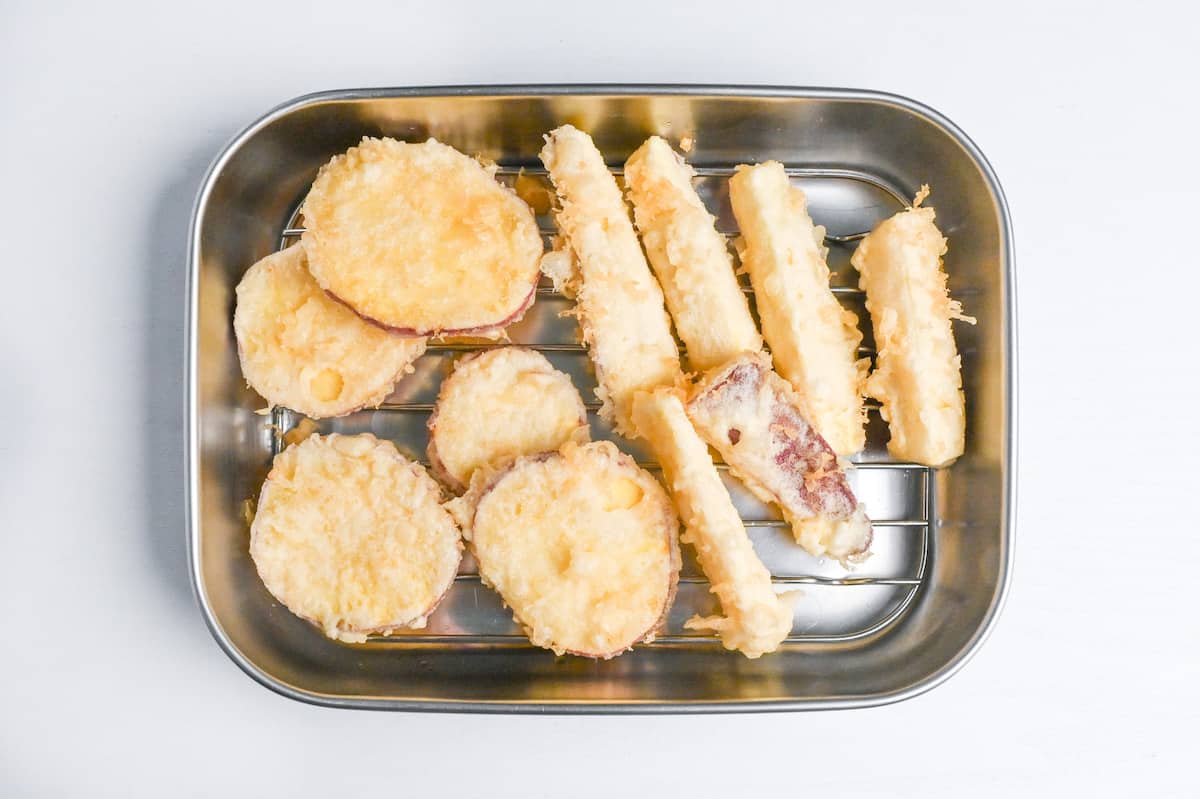
ii. Serve right away, with salt or a tempura dipping sauce.
A wire rack lets air move under the tempura so the bottom stays crisp. Set it on a plate lined with paper and the underside sits in its own steam and oil, and the crispness you just worked for softens within minutes. Tempura is at its best the moment it leaves the oil, so have your salt or dipping sauce ready before you start frying.
If you follow the default recipe, it will yield 4-5 side servings worth of batter.
iii. If there is any leftover batter, make sure to make tempura flakes (tenkasu) to use it all up! Homemade tenkasu is another level compared to store-bought ones.


Essential Tips & Tricks
The reason I am this exact about flour type and water amount is that I once was not. When I lived in England, I made tempura batter the careless way, any flour I had, water poured by eye, and it did not just come out heavy, it failed outright. So measure, do not eyeball. The precision is the recipe.
- Use unbleached cake flour, not bread flour. Low-protein flour is what keeps the coating light, and bread flour pulls the batter in the sticky, heavy direction before you even start frying. If cake flour is hard to find, plain or all-purpose works, just nudge the cornstarch up slightly to compensate.
- Mix with chopsticks and leave it lumpy. Every extra stir builds gluten, and gluten blocks the steam paths that make the coating crisp. Stop while you can still see streaks of dry flour, and walk the bowl straight to the oil. If you have only ever made cake batter, this will feel wrong. It is not.
- Make the batter right before you fry. Tempura batter does not hold. Mixed batter sitting on the counter warms up, the gluten keeps developing, and the carbonation goes flat. Mix it when the oil is at temperature and the ingredients are dried and dusted.
- Pat dry and dust with flour before dipping. Surface moisture is what makes batter slide off and spit in the oil. A paper towel pat plus a thin coat of flour gives the batter something to grip, and it matters most with shrimp and fish.
- Skim the oil between batches and save the tenkasu. Batter flakes break off as you fry, and if you leave them in the oil they scorch and turn the whole pot bitter and dark. Scoop them out with a fine mesh spoon. Those flakes are tenkasu (天かす), and they top udon noodle soups or go into devil’s onigiri. To make more on purpose, drizzle leftover batter into the oil, drain the flakes on kitchen paper, and freeze them in a sealable bag.
With these simple tips in mind, you’re set for success every time you make the best tempura batter.
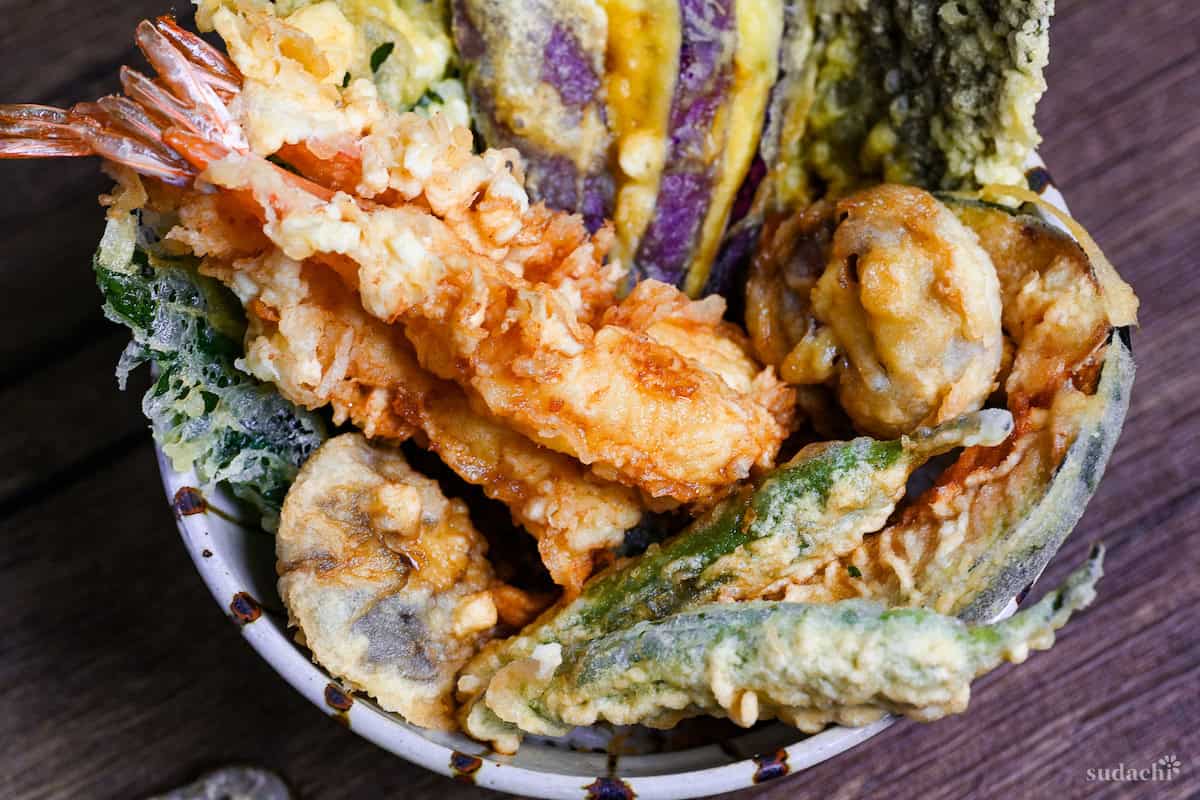
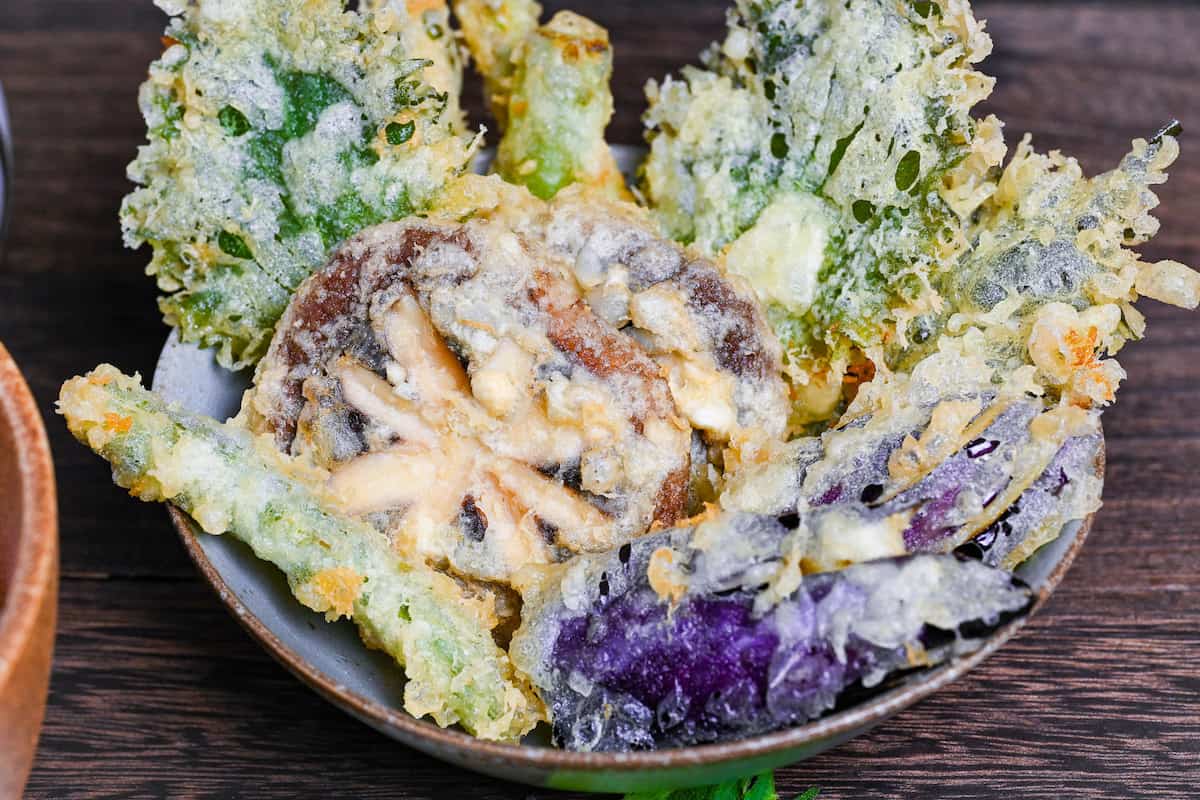
Tempura Ingredients and How to Fry Each One
The ingredients you fry in tempura have a name. They are called tane (タネ), almost always seafood or vegetables, and each one wants slightly different handling. The batter is the constant. The tane is the variable. Below is the working list, the ones I have a dedicated recipe for, with the oil temperature, the cook time, and the single most useful note for each.
| Ingredient | Cook (oil and time) | Notes |
Shrimp Tempura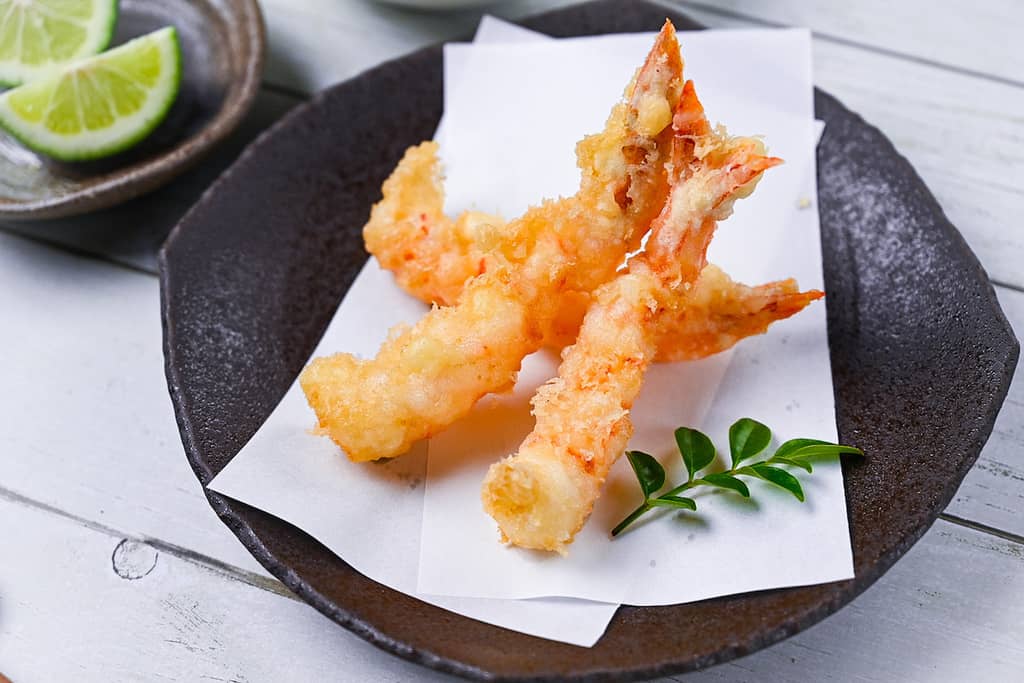 | 180-190°C (355-375°F), 2 min | Straighten so it fries flat, not curled, and pat dry before flouring so the batter grips. |
Kakiage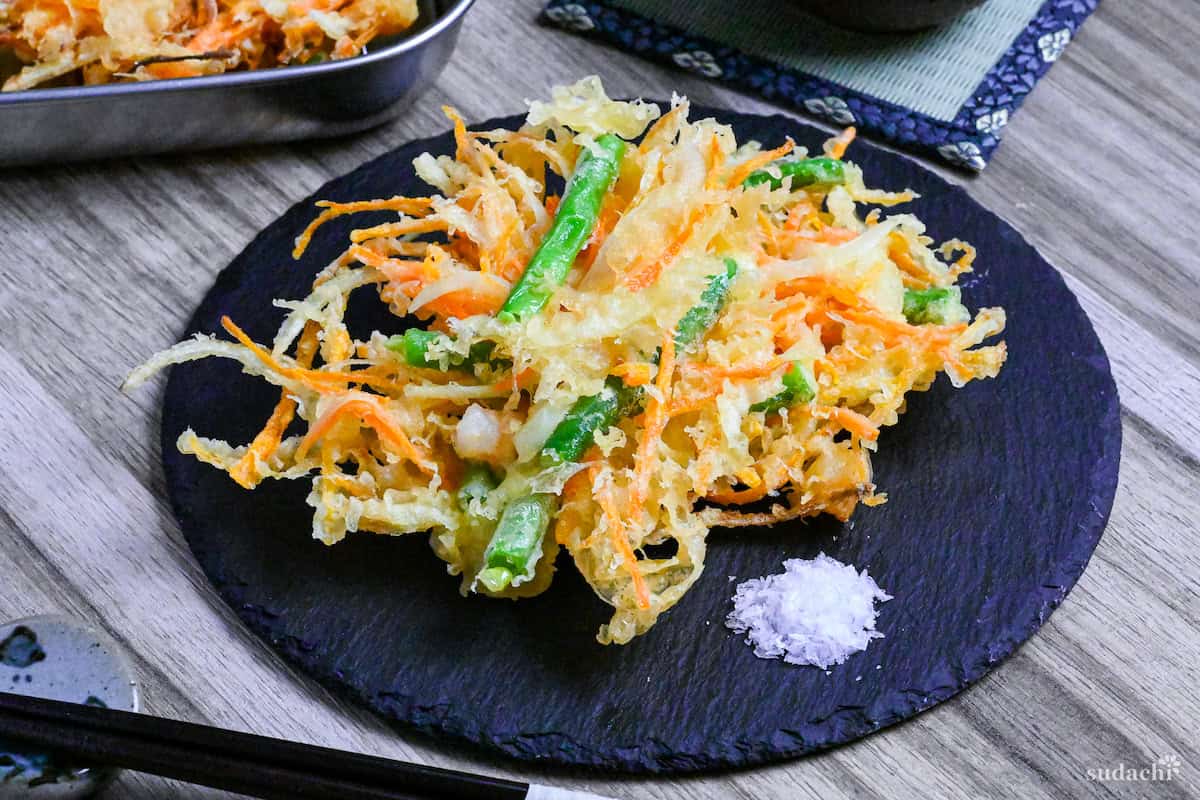 | 180°C (356°F), 1 min 30 sec each side | The dipping and the lowering are the whole game, the raft has to hold together as it hits the oil. |
Sweet Potato Tempura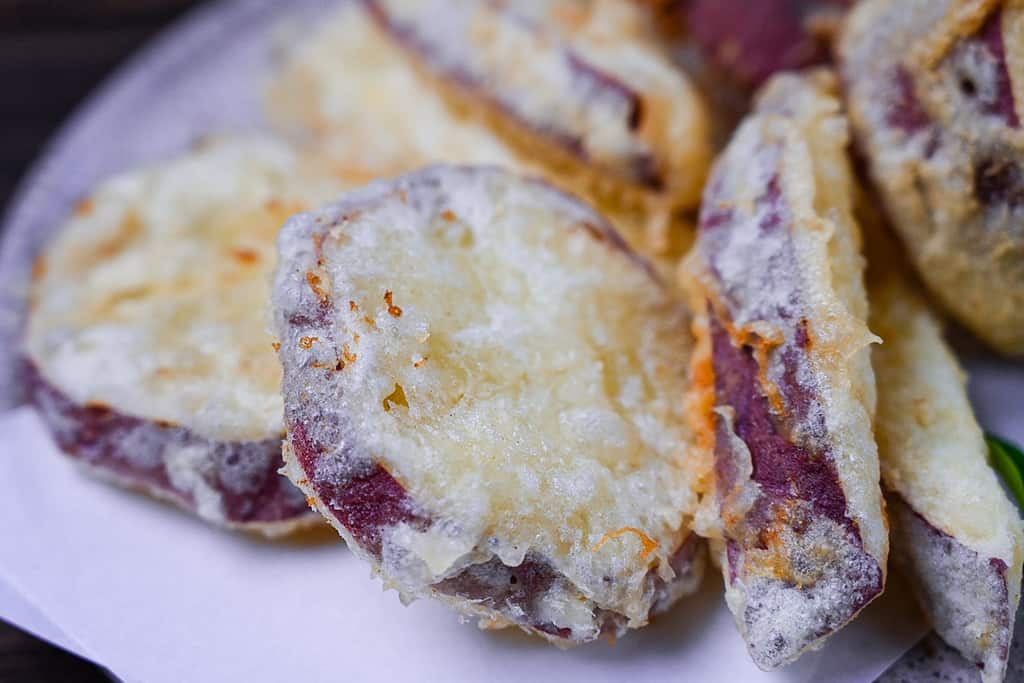 | 160°C (320°F), 4-7 min | Cut even, then fry lower and longer than other tane so the inside cooks through to creamy. |
Eggplant Tempura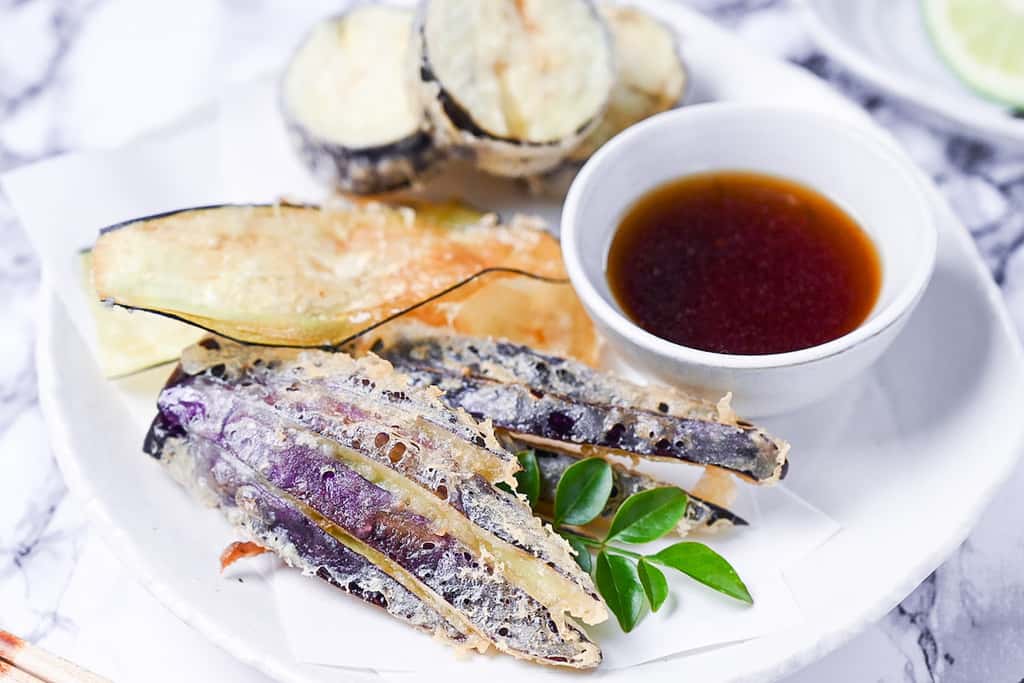 | 175°C (347°F), 30 sec to 1 min each side | Flesh is wet and soft, so go in fresh and fry fast, before it can steam itself limp. |
Conger Eel Tempura | 180-190°C (356-374°F), 3-5 min | Skin side fries longer than feels right, almost to the edge, to drive moisture off. |
Renkon Tempura | 175°C (347°F), 3-4 min | Cut into even rounds so it fries at one rate, into the batter before the cut edges brown. |
Shiso Leaf Tempura | 170°C (338°F), 45-60 sec then 15 sec on the second side | Dip one side only, a single light coat, and pull it before the leaf darkens. |
Asparagus Tempura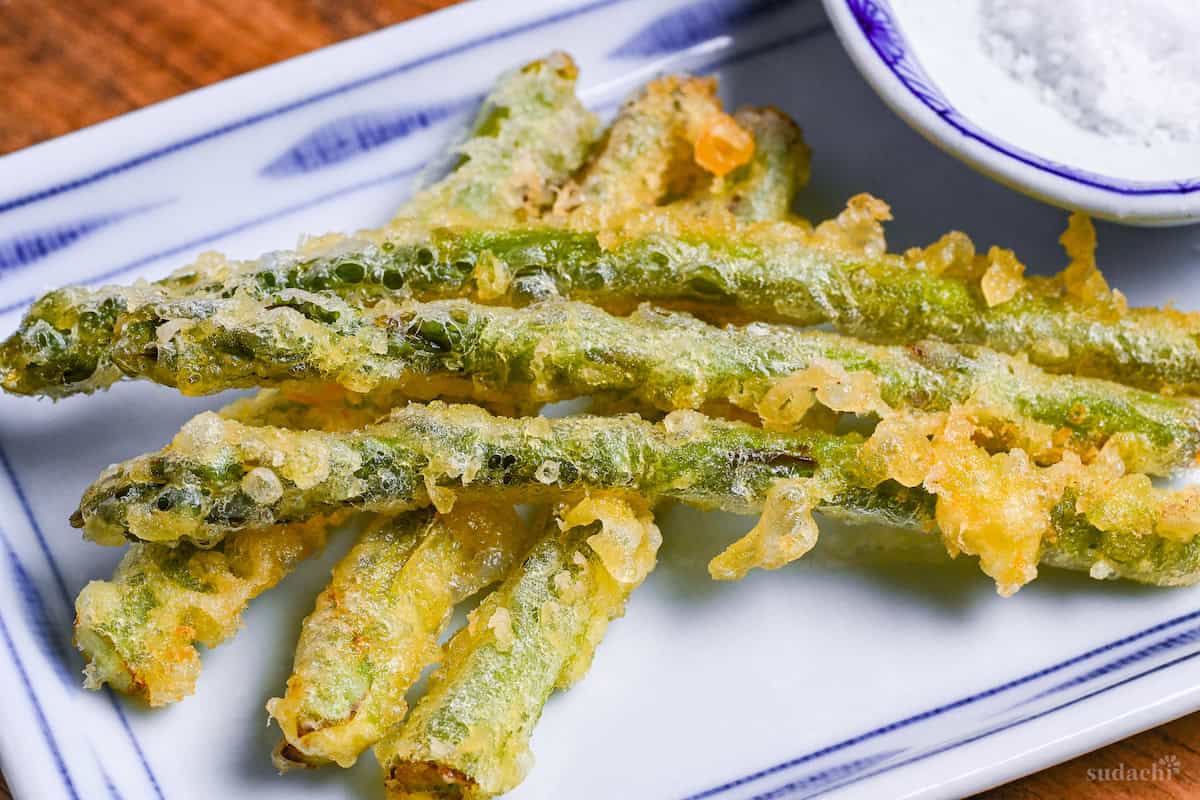 | 170°C (338°F), 90 sec | A forgiving tane, fries hot and quick and keeps a bit of bite at the core. |
Chicken Tempura (Toriten) | 170°C (340°F), 4 min, turning halfway | Use my toriten batter instead, this thin batter is too light to hold on chicken and will slide right off. |
Kabocha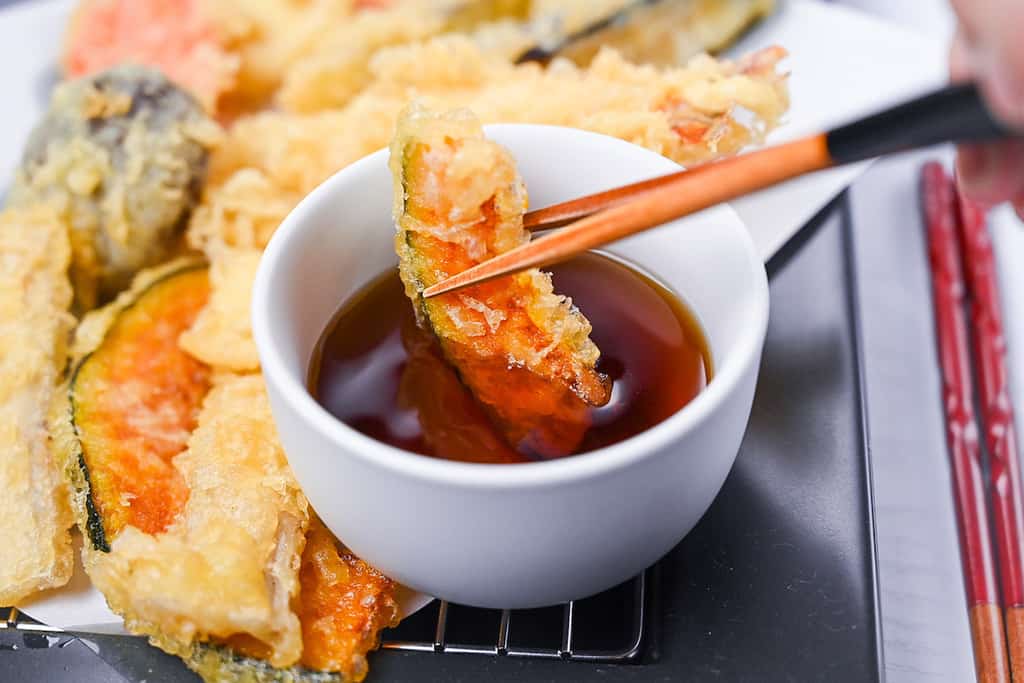 | 180-190°C (356-374°F), 2-4 min | Slice thin and even so it cooks through, the skin stays on and fries up sweet. |
This is the working set, not a closed list. For everything else in the rotation, you can browse my Japanese tempura recipe collection.
How Tempura Lands on the Table in Japan
At home in Japan, almost nobody eats tempura on its own. Eating it plain, piece after piece, straight off the rack, that is a specialist restaurant thing. In a home kitchen the tempura is a part, not the whole meal, and the first thing it meets is a way to be seasoned.
That is by design. The batter you just made carries no salt and no flavor, because the seasoning is meant to happen at the table, not in the batter.
- The everyday move is to dip each piece in tentsuyu, a thin savory sauce that soaks just into the coating.
- At a high-end counter you will often be handed salt (sometimes matcha salt) instead, a small pinch that lets the shrimp or the vegetable speak with nothing in the way.
- And when tempura goes over rice as tendon (tempura rice bowl), it gets a thick, sweet tendon sauce poured across the top. 3 different finishes, one quiet batter underneath, each ingredient still tasting like itself.

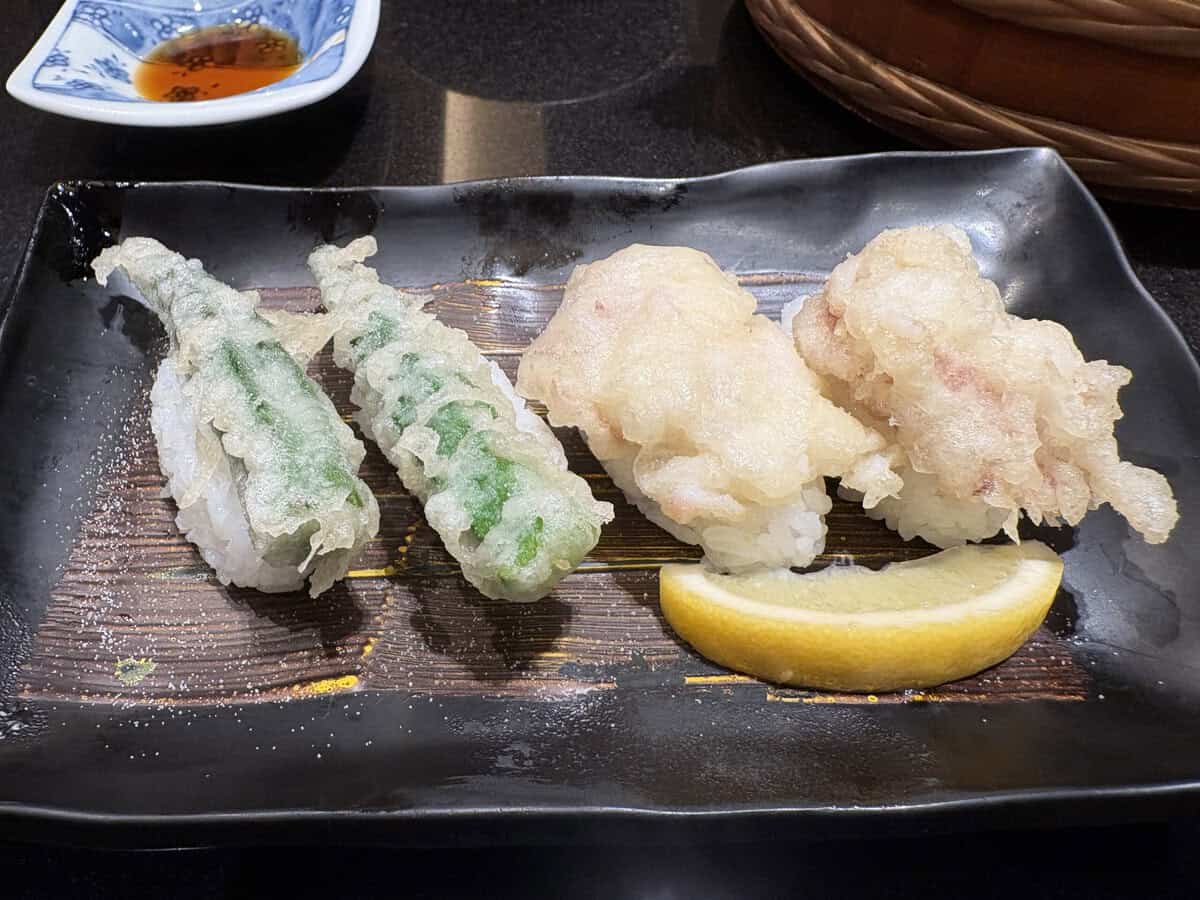
A quick honest note on range. This thin, authentic coating is built to be light, so it is not the batter for rolled sushi or tenmusu, where you want something sturdier wrapped inside the rice. Tempura sushi in Japan is usually nigiri style like the picture below anyway, a piece set on top of the rice with that sweet sauce brushed over it.
Past the seasoning, tempura is the center of a whole set of dishes, and this is where it really earns its keep on a weeknight. There is tendon, the rice bowl. There is tempura udon and tempura soba, where the pieces go into a hot noodle soup.
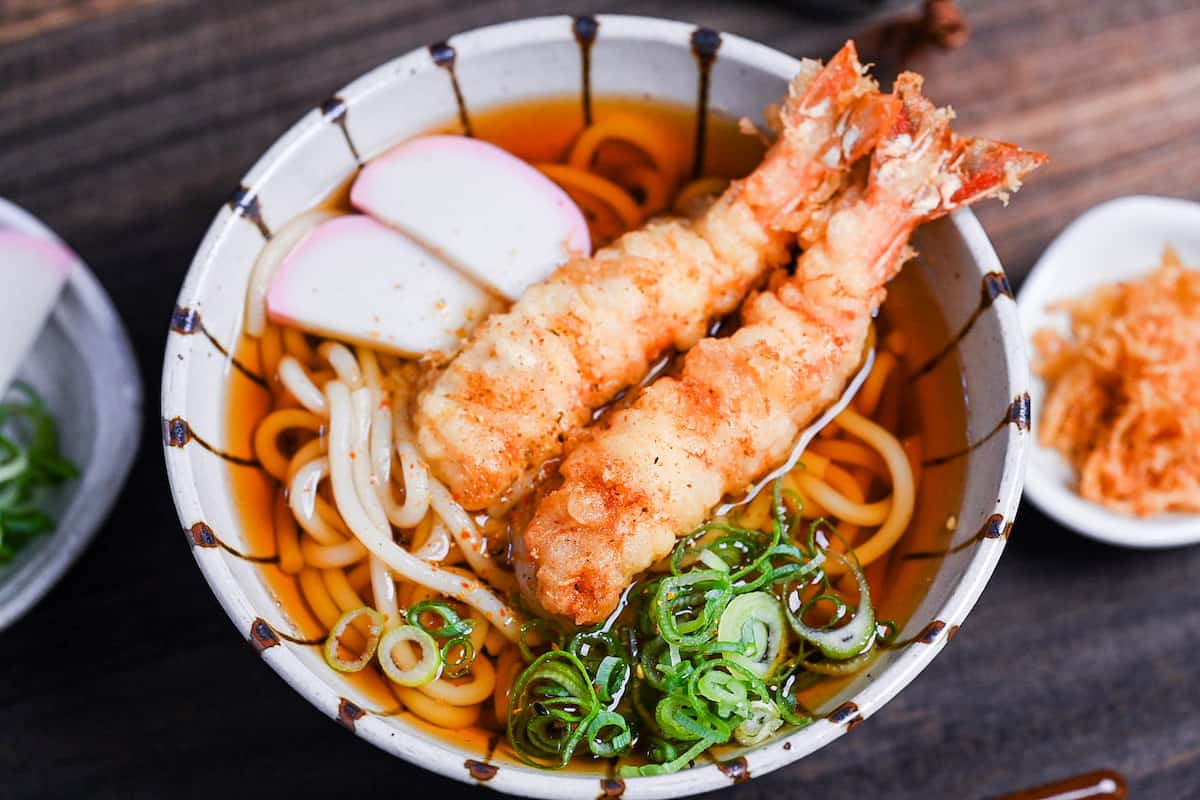
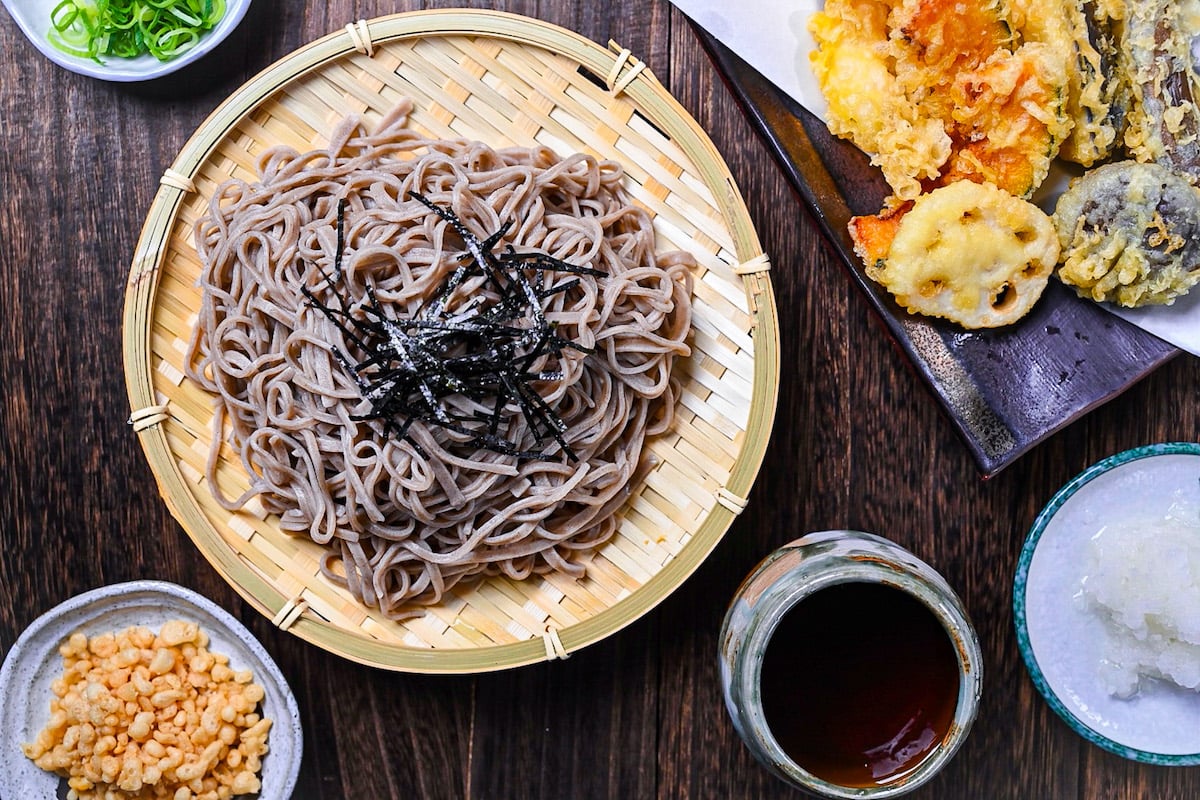
There is zaru udon and zaru soba, the cold versions you dip. There is tenjyu, tempura over rice in a lacquered box, and tentoji, tempura over rice bound with egg. My personal favorite is zaru udon with tempura in summer. Cold noodles, hot crisp tempura, the best.
If you want to build a fuller bowl, here is where the tempura you fried can go next.
Tempura Batter FAQ
These are real questions readers have sent me over the years. If you have one of your own, send it my way anytime. It helps everyone in this community.
You can use it with chicken thigh, but I do not recommend it with chicken breast. This tempura batter is very thin, and the surface of chicken breast is too smooth for it to hold. For best results with any type of chicken, use my toriten batter instead, which is built for regional chicken tempura.
Yes and no. It would not work well in a rolled sushi, and in fact we rarely put tempura in rolled sushi in Japan. For rolled sushi you would want a thicker and sturdier batter like ebi furai. But if you set the tempura on top of rice nigiri style, it works, and that is how we usually combine tempura and sushi in Japan.
Yes, that is normal. In Japan, tempura batter is intentionally plain, for 2 reasons. First, the batter is meant to be subtle so the flavor of each ingredient comes through. Second, tempura is typically eaten with dipping sauce or salt, and sometimes a sweet sauce, as on a tempura rice bowl. So a plain-tasting batter is exactly right for authentic tempura.
Unfortunately not. Because this batter is thin, it is not suited to air fryer cooking. You would need a tempura recipe created specifically for the air fryer. Tempura is actually one deep-fried dish that cannot be recreated with an air fryer.
The best range for deep frying tempura is 160°C (320°F) to 190°C (375°F). The exact temperature depends on the ingredient, its size, its texture, and how it is cut. I have a guide for popular ingredients above, and I will keep adding individual tempura recipes for more guidance. Feel free to leave a comment if you want advice on a specific one.
I recommend either extra virgin (white/taihaku) sesame oil or rice bran oil.
I use cornstarch rather than rice flour, based on my research into batter quality. I came across an interesting Japanese research paper that compared 5 different starches, looking at moisture evaporation, oil absorption, breaking strength, and overall texture through sensory evaluation. Cornstarch produced the best batter quality, particularly on texture. After reading it, I ran my own experiments with different starches, including rice flour, and found myself agreeing with that conclusion. That said, if rice flour is easier for you to get, feel free to substitute it for the cornstarch in equal amounts.
Look for any unbleached flour meant for cakes and pastries, since those typically have lower gluten content. I am not familiar with what is on every country’s shelves, so I cannot point to specific brands, but any flour you would normally use for baking cakes should work well as long as it’s not bleached. Another option is raise the cornstarch amount a bit and use AP flour.
I do not recommend it. The quality drops quickly, and raw ingredients have already been dipped in it which can lead to bacterial growth if it’s hanging around for too long. Use any excess to make tenkasu (tempura crumbs) instead.
I don’t recommend it, but if you have leftovers that you don’t want to waste then it is possible depending on the ingredient (shrimp or seafood works, vegetables not so much). To reheat, either deep fry it again until piping hot, or cook in the oven or air fryer. Do not thaw it, as this can make it soggy.
More Japanese Deep-fried Recipes
Once you are comfortable at the oil, the rest of the genre opens up fast, so take a look through my Japanese deep-fried classics collection and pick your next fry.
Did You Try This Recipe?
I would love to hear your thoughts!
💬 Leave a review and ⭐️ rating in the comments below. 📷 I also love to see your photos – submit them here!
Authentic Japanese Tempura Batter (with Secret Tips!)

Ingredients
- 150 ml cold water soft water preferred, chilled
- 100 ml carbonated water chilled in the fridge, or soft water
- 30 g cornstarch
- 150 g unbleached cake flour or pastry flour, low-protein, around 7-8%
- 1 egg relatively small sized, chilled
- 3 ice cubes
- cooking oil neutral, high smoke-point like rice bran or rapeseed preferred
The ingredient brands and tools I trust are in my Japanese pantry guide and my cooking tools guide.
Can’t find certain Japanese ingredients? See my substitution guide here.
Instructions
- Measure out 150 ml cold water into a jug and place it in the fridge for 20-30 minutes. Place 100 ml carbonated water in the fridge too, preferably an unopened bottle.

- Sift 30 g cornstarch and 150 g unbleached cake flour into a bowl. Mix them and place the bowl in the freezer for 20-30 minutes.
- While you wait for the water and flour to chill, prepare your tempura ingredients by washing, cutting, and drying them with kitchen paper to remove any excess moisture.
- Once 30 minutes have passed, start preheating your cooking oil to 180 °C (356 °F).
- Pour the chilled water and sparkling water into a bowl.
- Crack 1 egg into the bowl and whisk. If bubbles or foam forms on top, skim it off with a spoon.
- Take the chilled flour and starch mixture from the freezer. Add it to the egg mixture one third at a time, gently drawing crosses through with chopsticks to incorporate it. Do not whisk or over mix, preventing gluten formation is key.
- Add 3 ice cubes to the batter.
- Test your oil by adding a drop of batter, if it sizzles and floats you're ready to fry.Coat your ingredients in a thin layer of flour, brush off the excess and then dip them in the batter.
- Carefully place the battered ingredients straight into the oil and fry until crispy but before they turn golden.
- Once crispy, light, and cooked through to the middle, transfer on a wire rack to drain the excess oil.
- Serve with tentsuyu or salt for dipping, and enjoy!

Kasutera and pan also borrowed Portuguese.
That’s right!
Can I use rice flour (1:1) for this batter?
Hi Brian,
Thanks for your question. Yes you can! Rice flour is a popular choice for tempura 🙂
It was good, but I noticed that if I didn’t fry it to a light golden brown (not BEFORE) it lost its crispnese rather quickly (which wasn’t great because I was using tempura-fried items to add to a sushi roll) I fried them longer, and it definitely helped.
I also noted that it’s EXTREMELY bland. Maybe that’s why there needs to be a dipping sauce, but I’ve been to Japanese-run/owned restaurants in America and their batter isn’t this bland. I followed ALL the steps.
Hi Allison, thank you very much for your feedback!
Here are the answers to your comment:
1. We actually rarely add tempura to rolled sushi in Japan for this exact reason. But when we do, such as tenmusu (rice ball with shrimp tempura), a different type of batter is used. Thicker, fritter-like batters, flavoured batters or even breadcrumb coated ingredients like ebifry) are used. Sushi with tempura in Japan is usually nigiri sushi with the tempura served on top of rice (rather than rolled) with special sweet sauce so that the tempura stays crispy.
2. At least in Japan, tempura batter is normally bland/plain. There are two reasons for this. Firstly, we don’t want the batter to be overpowering, the goal is to allow the unique flavour of each ingredient to shine through. Secondly, as you rightly mentioned, tempura is not expected to be eaten as it is but rather dipped in a dipping sauce or dipped in salt (the high-end Japanese tempura restaurant way). It can also be served with special sweet sauce (e.g. tempura rice bowl).
Overall, thank you very much for pointing these things out, I will add more content to the post to make these clear for future readers.
Best wishes,
Yuto
what will happen if i pour the water on the flour instead of add flour to water?
Since lumps are fine in this recipe, it’s okay to pour it onto the flour, but you need to whisk the egg into the water first.
Allison, Japanese run restaurants in the States aren’t pure Japanese restaurants. They are focused on American palates, not pure Japan tastes. Shocked that you don’t know that.
Have you tried this recipe using an air fryer? Would really appreciate the process required using an air fryer.
Hi Cliff, because this batter is thin, it is not suitable for air fryer cooking and you would need a tempura recipe specifically created for air fryer use. I don’t have an air fryer myself so it’s not something I can develop here at this time. Sorry I couldn’t be of more help and I hope you find what you’re looking for!
Yes! Finally a recipe that cools all the ingredients. I thought I was crazy to do that. Thanks for the weights. This is now my recipe! Cheers.
Hi Bobby,
Haha well if it’s crazy then I’m crazy too!
Thanks so much for the comment and 5 star review.
This did not work.. the temp of the oil was just too low – especially when adding cold items to the oil – which brought the oil temp down even more. Did I miss something – pre-cooking the veggies maybe?
Hi Ann, I’m sorry to hear it didn’t work for you. What went wrong exactly? The batter didn’t stick? The vegetables weren’t cooked?
The oil should be preheated to 180°C (355°F). Tempura fries best between 160-180°C so by heating it to the higher end, this should accommodate for the cold items bringing the temperature down slightly, then the temperature should go back up as it cooks.
I’m not too sure why it didn’t work for you (I’ve used this recipe many times and haven’t had that problem). My only advice for problems with oil temperature is to use a thermometer for accuracy and fry in small batches, frying too many things at once can bring the temperature down too much.
What vegetables did you use? You don’t need to pre-cook the vegetables, cutting them small or thin should be enough. Thank you for your feedback, I’ll update the post with more advice on how to perfectly cut and cook the most commonly used vegetables. Hope this helps!
Hi Yuto, thanks for the recipe! Was really just looking to confirm quantities cuz usually eyeball it, but your tips and additions are very helpful! Mom, who’s Japanese, only used iced water, flour, and egg, mixed gently with ohashi, and an electric wok. Don’t have sparkling water to try (will try next time), but will be trying the corn starch, using mayo instead of egg for our small batch, and coating with flour before battering. Also using a little bottle of dipping sauce that someone gave me – ran out of mirin so it’s a good excuse to be lazy and finally see how that sauce in a bottle is. Since it’s a small batch, will get to try out the deep fryer instead of the usual electric wok. We’re having a late snack of broccoli and onion tempura with rice tonight! BBL… Oishi! Love the corn starch addition, and the batter stuck perfectly to the onion slices as promised! Hubs wants more! Think the electric wok is better. Bottled sauce was ok, but will stick to Mom’s sauce. Thanks again!
Hi Miyuki.
Thank you for trying the recipe and sharing your experience. The mayo trick is great for small batches isn’t it?
Glad to hear you and your husband enjoyed the recipe, thanks again!
Awesome recipe! Used a flax egg instead of real egg (egg allergy in our house) and had low expectations— but it was great! Still super light and crisp. Highly recommend if you also need eggless recipes 🙂
Hi Kate,
Thank you for the comment! I’m glad this recipe still worked well with an egg alternative! 🙂
Yuto
Thanks for this delicious Tempura recipe.
It’s absolutely super!
Hi Thomas,
Thank you for your comment and feedback! I’m happy to hear that you enjoyed the recipe! 🙂
Yuto
Thank you! This was my first try at making tempura and it was a success! The first few things in the pan were under-cooked or over-cooked, but it was a fairly short learning curve. The batter worked well once I got the timing right. I look forward to trying this again. It wasn’t nearly as difficult as I had imagined it would be.
Hi Alice,
Thank you for your comment!
I’m glad to hear it turned out great. I’m looking forward to hearing about your next tempura fry-up too! 🙂
Yuto
thank you so much for sharing
Thank you!
Love your site – it’s easy to understand and so many answers for recipes we thought were impossible. Love this recipe and your notes on Tempura! Well done.
Just tried it! great result! Thanks
Thank you for trying this recipe, John!
This tempura recipe works perfectly. Light and crispy! I will use it from now on! Thank you very much!
Hi Jorge,
Thank you for your comment and feedback! I’m happy to hear that the tempura batter turned out great! 🙂
Yuto
I am keen to try this – thankyou but one suggestion; surely you should warn people about the danger of putting ice cubes into the batter. If they haven’t melted a fire could be started so easily by submerging it into oil.
Hi Lara,
Thank you for your thoughtful comment and interest in trying this recipe! I understand your concern about ice, but I want to reassure you that this batter is very thin, making it impossible for ice to stick to the ingredients when dipping them as instructed. There’s no risk of ice accidentally falling into the oil when following the steps.
I appreciate you bringing up considerations, though. I will add a brief note to the post about working with hot oil. Thank you for taking the time to share your thoughts.
Yuto
Thank you for your help.
Thank you, Péter!
Hi! I don’t have cake flour. Should I be adjusting the flour quantity (as in more cornflour?)
Thanks!
Hi Ananda,
Thank you for asking! If you can sub in all-purpose flour instead of cake flour, I’d recommend increasing the cornstarch ratio a bit!
Yuto
Just used this recipe to make fish, shrimp and veggie tempura. It turned out so crispy and yummy! The best recipe I’ve tried so far, and it was easy to make!
My husbans said it tastes better than some tempura we’ve tried at sushi restaurants. Thank you!
Hi Michelle,
Thank you for trying my tempura batter recipe! That makes my day! I’m happy the recipe worked well and that it was a hit at home! Thanks so much for sharing that!
Yuto
Looking forward to using my new fry pot.
I hope you’ll enjoy using your new pot, Judy! 🙂
Finally authentic recipes!
Easy to follow instructions.
Delicious flavors and texture.
Hi Sandra,
Thank you so much! I’m really glad you enjoyed it! 🙂
Yuto
This looks perfect for a tempura batter. Unfortunately I’m not able to eat wheat. I have tried various other combinations of corn starch and non-wheat flours, but they either come out powdery, too crispy or soggy. Have you had any success (or interest) in creating a gluten free version?
Hi David,
That’s a great question, and I appreciate you sharing your experience. I haven’t experimented with a wheat-free tempura batter yet, but it’s something I’ve been meaning to explore. Rice flour or rice starch feels like a promising direction (that’s just my guess for now), so I’ll definitely add it to my list! 🙂
Yuto
Yuto, you are a true gem! I love the in-depth treatment you give each recipe! Definitely not the “fluff” seen in so many online recipes, but fascinating background and detail that is actually useful and thoroughly enjoyable. The same applies to your video presentations.
This tempura recipe is no exception! You made it straightforward and also highly informative. Thank you! It turned out wonderfully!!
Hi John,
Thank you so much for your incredibly kind words. I truly appreciate you taking the time to share such thoughtful feedback.
I’m really glad to hear that you found the background information and details helpful and enjoyable. That means a lot! I’m also happy to know that the tempura turned out well for you! Thank you again for your support and encouragement! 🙂
Yuto
Is there a specific reason why you don’t recommend using this batter recipe for chicken?
Hi Mariell,
Great question! This batter is really thin, so it doesn’t cling well to chicken, especially smooth cuts like breast. Also, as you can probably tell from the recipe, traditional tempura batter is unseasoned. For chicken, I think it tastes so much better when the batter itself is flavored. That’s why I’d strongly recommend checking out my toriten (regional chicken tempura) recipe (https://sudachirecipes.com/chicken-tempura/) instead. It’s technically a style of tempura but the approach is a little different, and it works perfectly for chicken!
I hope this answers your question! 🙂
Yuto
please can you tell where you can buy the oil fryer with the drain lid
Hi Anny,
Of course! Here’s my equipment list where you’ll find it along with the rest of my kitchen setup: (https://sudachirecipes.com/japanese-cooking-tools/)
Yuto
fantastic results…..thank you
Thank you so much, Katie! 🙂
We need to make this recipe Gluten Free (Celiac). Is there a substitute flour we can use? The corn starch is ok to use.
Thank you, K.S. Ivan
Hi Kathy,
Thank you for your question. I have not tested a gluten-free version with this recipe myself, so I cannot promise the result, but rice flour is the direction I would try first in place of the cake flour, keeping the cornstarch as is. If you go that route, just double-check that every product is certified gluten-free!
Yuto
Really appreciate the detailed instructions together with the information about the science behind the method. Things like making the batter just before frying, and mixing it lightly with chopsticks made a huge difference compared to my first attempt at making tempura. I live in Korea and they have a pre-mixed flour specifically for tempura (called 튀김가루 in Korean), so I used that with pumpkin, eggplant and mushrooms. Turned out perfectly.
Hi Kevin,
Thank you for the kind comment. It makes me happy that the technique still helped even with a store-bought mix! Glad you enjoyed the writing too! 🙂
Yuto
wow what an amazing batter. it tastes amazing, not oily at all once it was cooked and it stayed on my fish.
this is definitely my go to batter from now on. My family was very impressed.
wow what an amazing batter. it tastes amazing, not oily at all once it was cooked and it stayed on my fish.
this is definitely my go to batter from now on. My family was very impressed. followed all the steps to a tea.
Hi Tania,
Thank you for giving the tempura batter a go! Really glad it fried up clean and held onto the fish! Even happier you enjoyed it with the whole family! 🙂
Yuto
I’ve been making tempura for several years now . both at home and in a professional kitchen setting . I love that you took the time to break down the science behind the recipe . I find it fascinating. my own recipe uses a combination of egg and Sapporo beer in the batter to elevate the texture and flavor for my local clients. thank you for sharing
Hi Marc,
That means a lot, thank you! The long science breakdown was a bit of a gamble, so I’m glad it landed for someone cooking tempura in a professional kitchen! Beer in the batter is a great twist too! Thanks for reading through all of it. 🙂
Yuto