Disclaimer: This post may contain Amazon affiliate links. Sudachi earns a small percentage from qualifying purchases at no extra cost to you. See disclaimer for more info.
Featured Comment:
“Soooo yummy, even when I cheated and used instant dashi stock!”
– danielle (from Pinterest)
What is Japanese Miso Soup?
Miso soup (味噌汁) is a traditional Japanese soup made with ingredients such as vegetables, tofu, seaweed, and shellfish which is then served in a thin dashi broth. The soup is flavored by dissolving miso paste (made with fermented soybeans) into the broth, creating a delicious soup rich in umami.
Miso soup has long been a part of the Japanese diet and is commonly served as a side rather than on its own. It is also a very convenient way to use vegetables and local ingredients.
The taste of the miso soup varies depending on the soup stock, the kind of miso paste you use, and the choice of vegetables and other ingredients you add, so it’s easy to drink miso soup every day without getting bored!
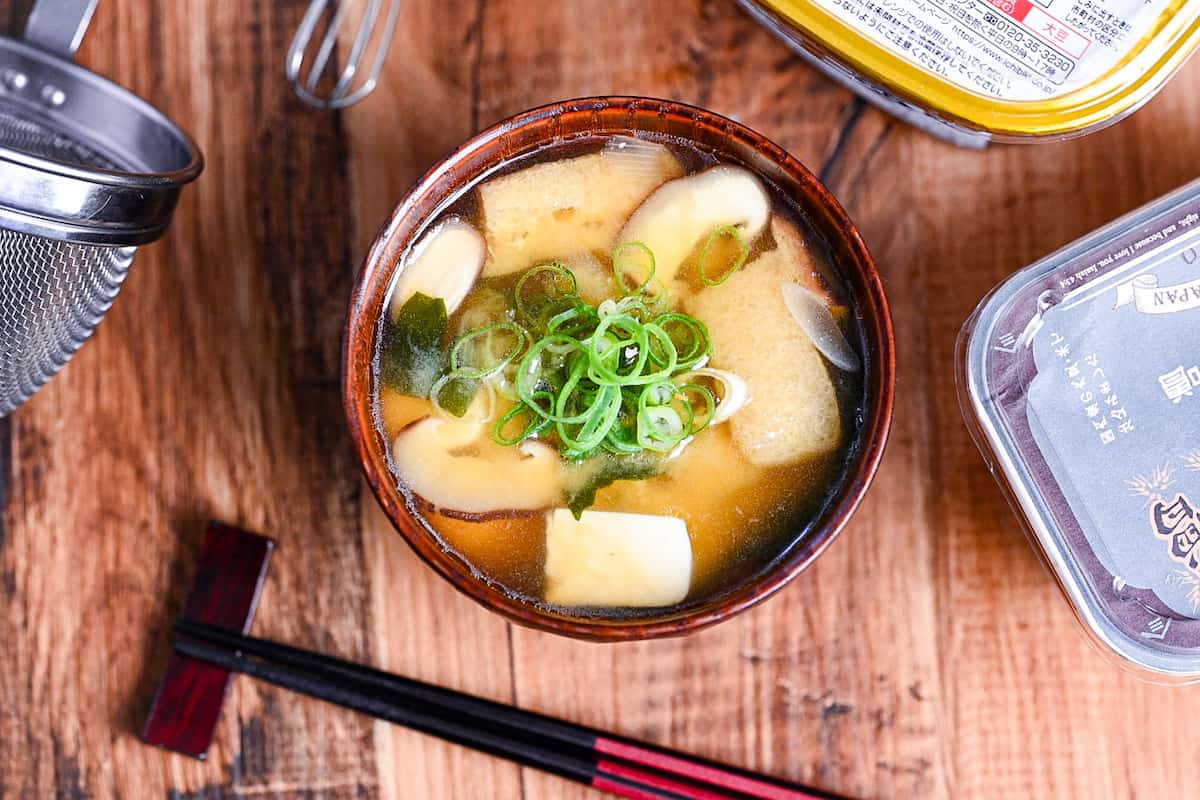

How I Developed This Recipe
When I set out to develop this miso soup recipe, my ambition was to create an authentic version that would resonate with the warmth and familiarity of a Japanese home kitchen. I wanted to craft a soup that I’d return to time and again.
To achieve this, I started with the typical ingredients that are the backbone of any classic miso soup and adhered to the traditional Japanese methods of preparation. However, I also introduced a slight twist, a subtle refinement to elevate the soup and make it the best possible version of itself.
This miso soup isn’t just a dish; it’s a comforting companion to any Japanese meal, meant to complement and enhance the flavors of your main dishes. I sincerely hope you enjoy the depth and authenticity it brings to your table.
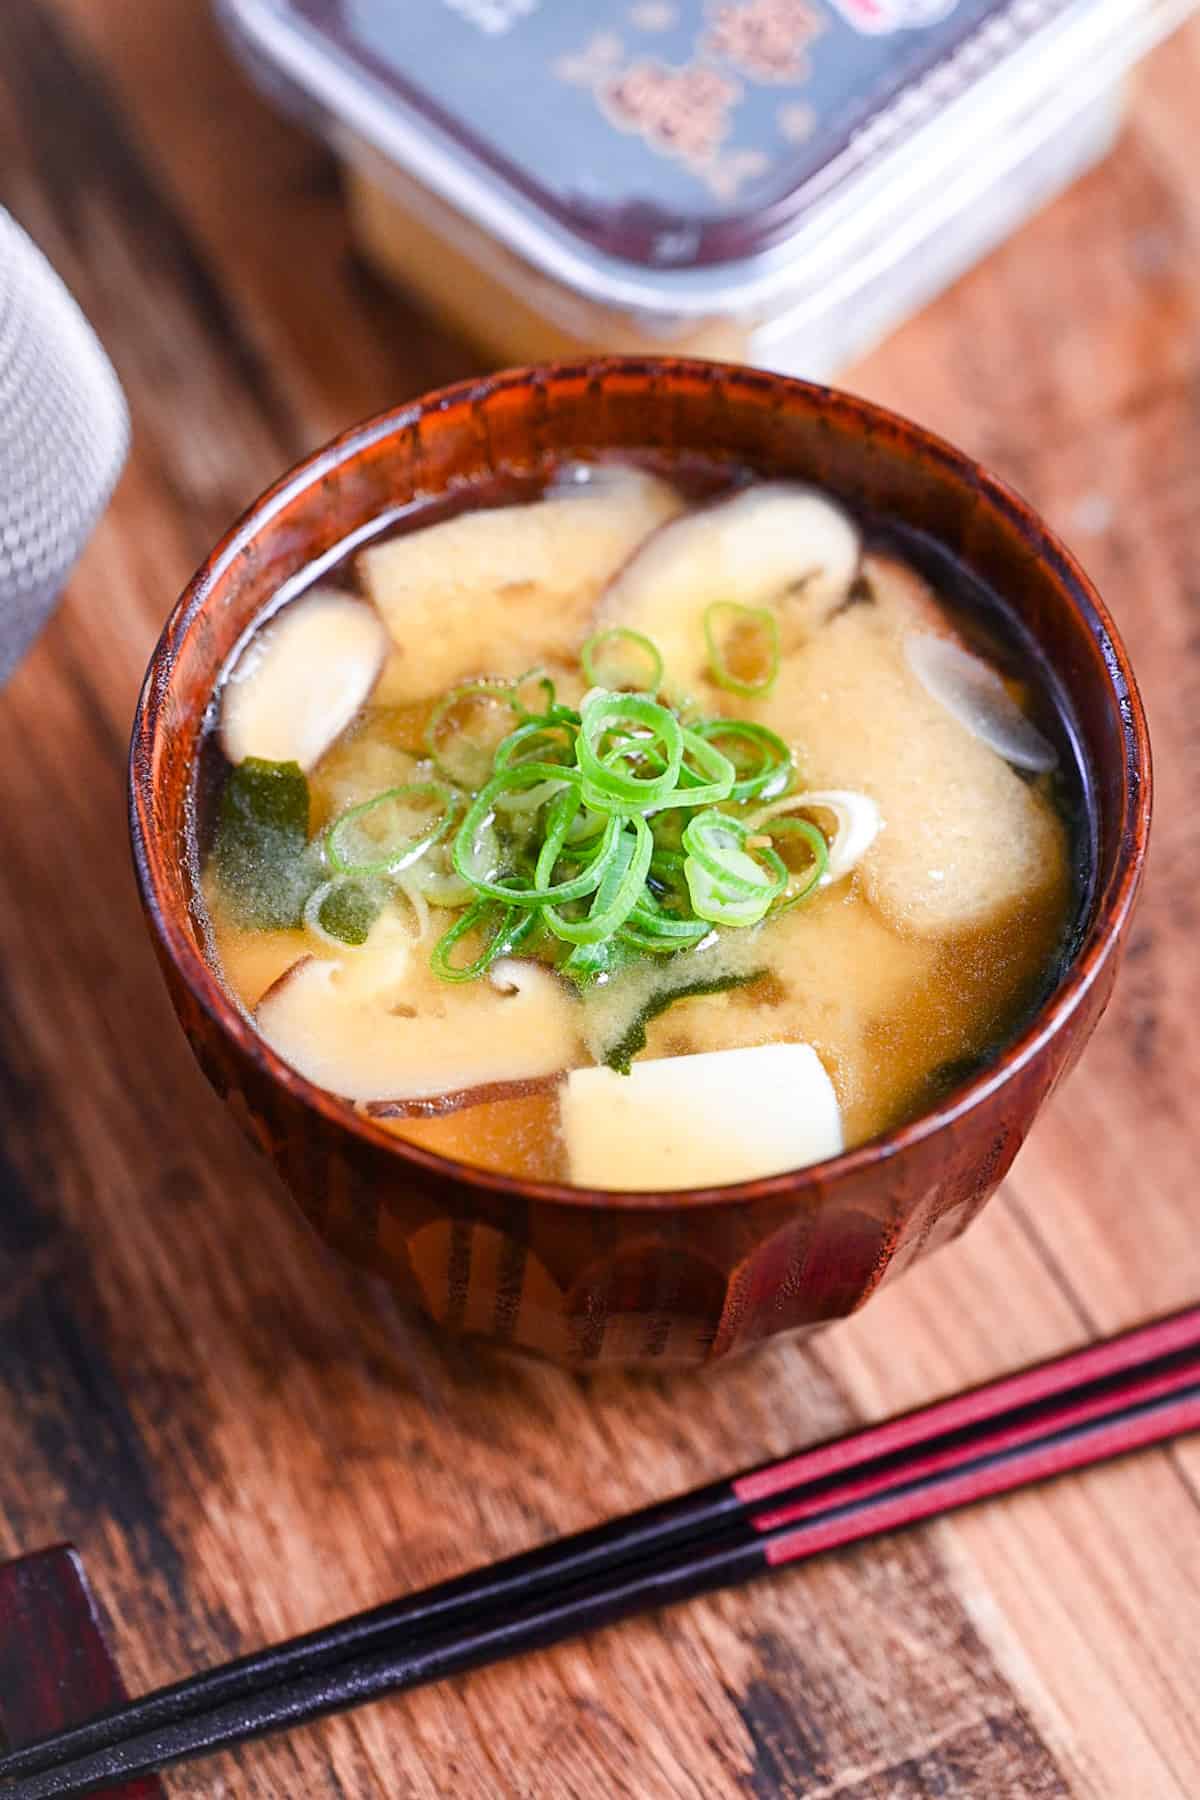
Types of Miso Paste You Can Use
There are many kinds of miso in Japan, and which one you use to make miso soup depends entirely on your preference! Here are a few examples of types of miso in Japan:
- Rice miso (米味噌): Made from rice, soybeans, and salt.
- Barley miso (麦味噌): Made from wheat, soybeans, and salt, often seen in Chugoku, Shikoku, and Kyushu regions.
- Soybean miso (豆味噌): Made from soybeans and salt, often seen in Chukyo region (which is where I’m from!).
- Mixed miso (調合味噌): A mixture of three or two types of rice miso, barley miso or soybean miso.
You can also categorize the type of miso by color too:
- White miso (白味噌) – light taste
- Red miso (赤味噌) – rich taste
- Mixed miso (合わせ味噌) – balanced taste
These are examples of the broad categories of miso in Japan. In reality, there are so many kinds from region to region. In the past, it was common for people to make their own miso at home too, so it even differed from family to family too.
I would recommend trying out lots of different types of miso paste to find your favorite type!
Awase Miso (Mixed Miso)
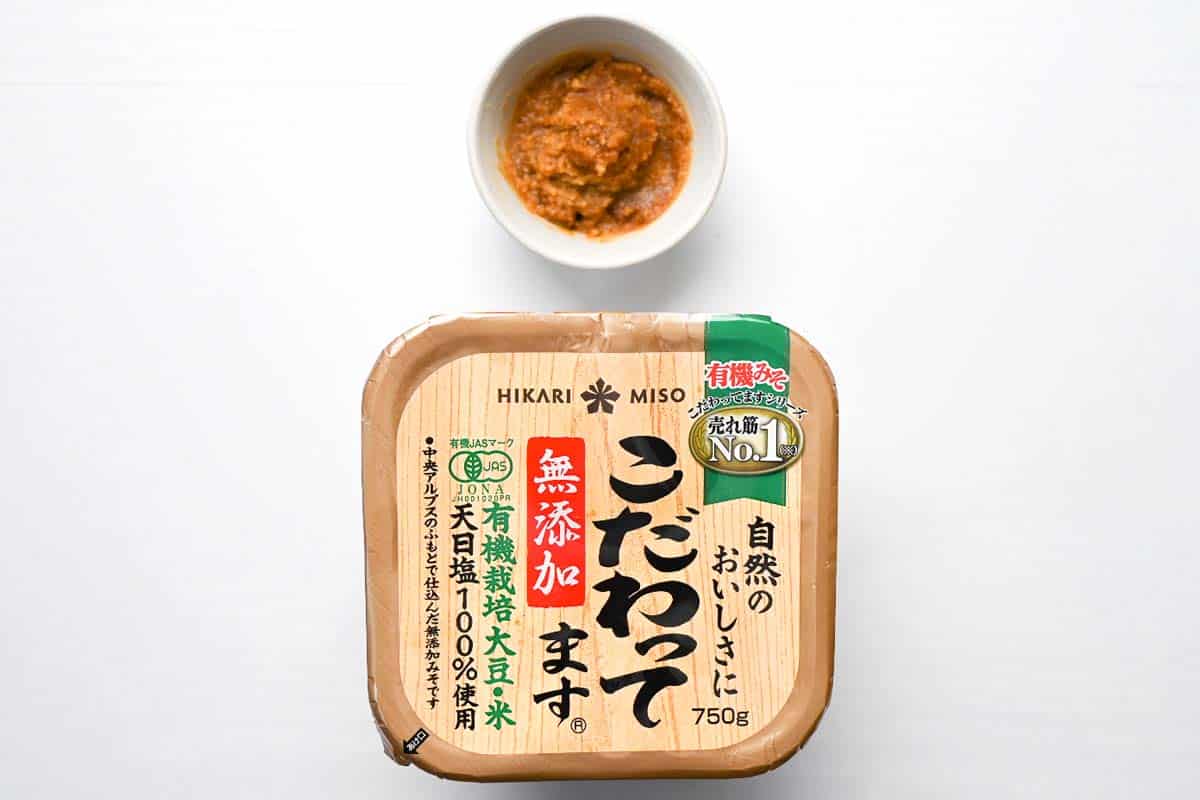
Awase miso is a mix of two or more types of miso. You can combine miso in many ways, like using different malts (rice, barley, or beans), colors (white, light, or red), regions, or saltiness, creating a new flavor by blending their unique characteristics.
Simply put, if you mix two or more miso pastes in your fridge, you’ve made your own unique awase miso. It has a mild taste without the strong features of just single type of miso, allowing you to enjoy the best of different origins, colors, and types, which makes awase miso a highly recommended choice for miso soup and cooking in general.
Red Miso
Red miso is another color-based classification of miso. Its darker color comes from the Maillard reaction that happens during production, where amino acids in soybeans react with sugar and turn brown. However, red miso is just a color term, and there are many types of red miso in Japan.
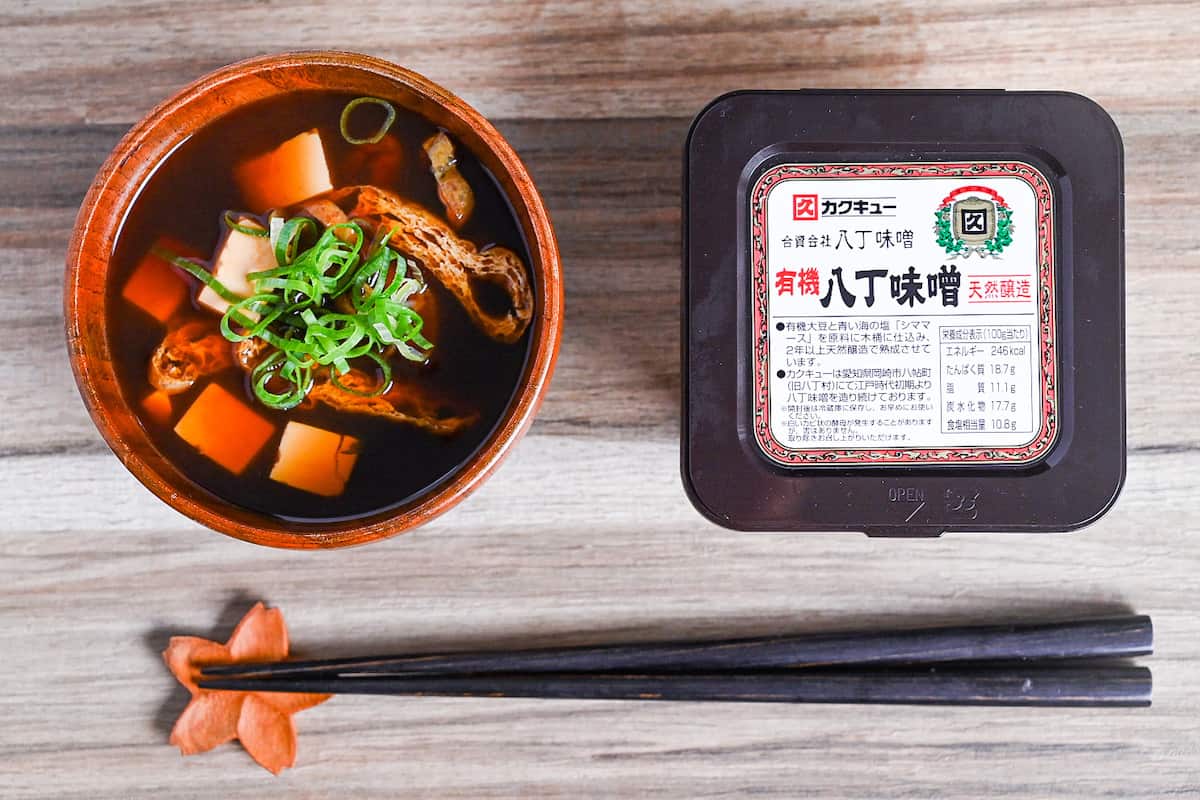
For example, hatcho miso, made from soybeans, is a traditional red miso from Okazaki City, Aichi Prefecture, where I am from. It has a dark reddish-brown color and a unique rich flavor, with moderate acidity, strong umami, and a bitter-sweet taste. For someone like me, who grew up in Okazaki, this miso is standard, but it might be too strange for others from different regions. In other words, people have very different tastes in miso, which makes miso a beautiful thing.
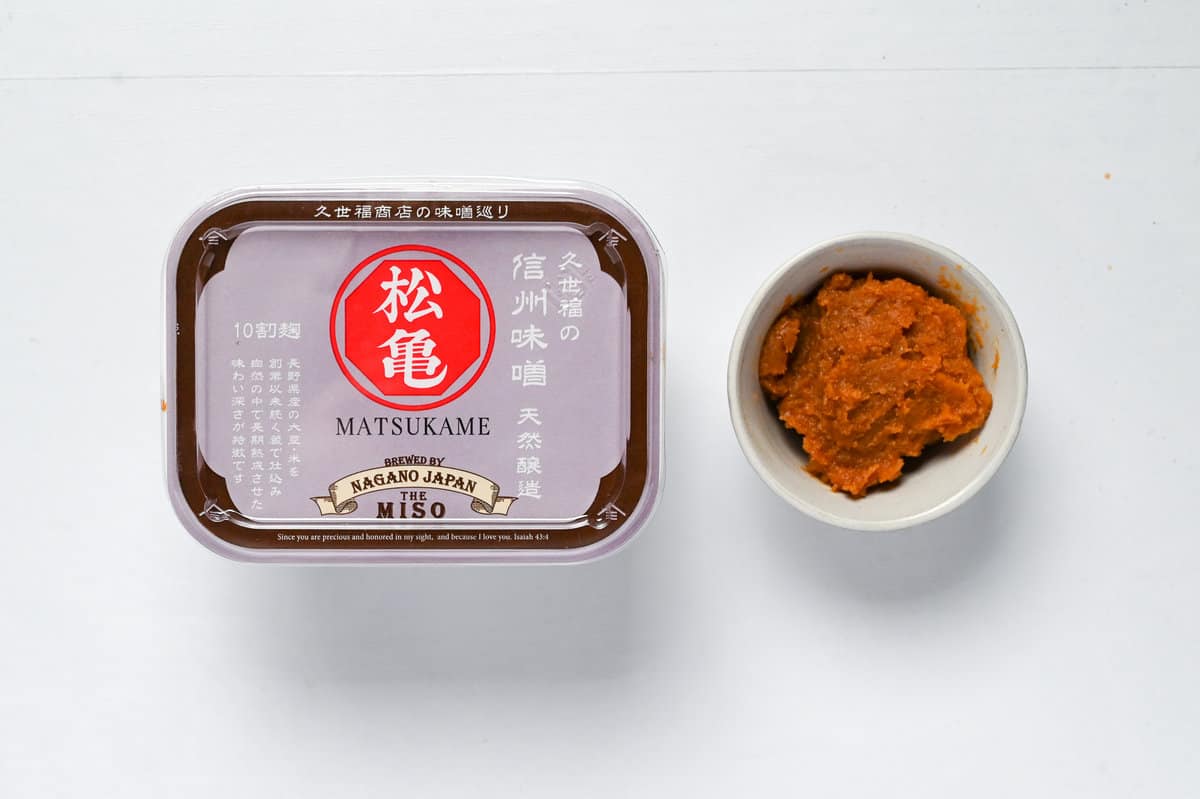
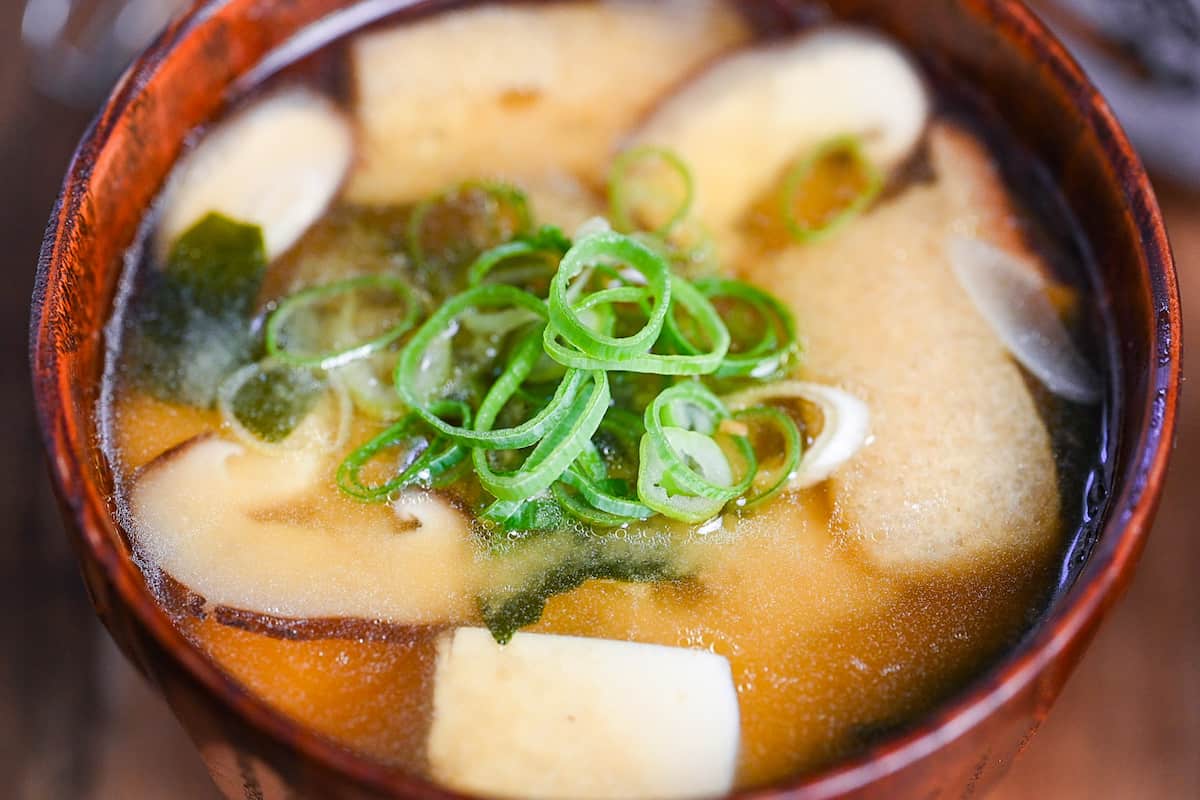
Another dark miso, called shinshu miso, is sometimes labeled as red miso. Despite the same color label, it tastes completely different from hatcho miso. If you want to experience some unique flavor, give them a try!
White Miso
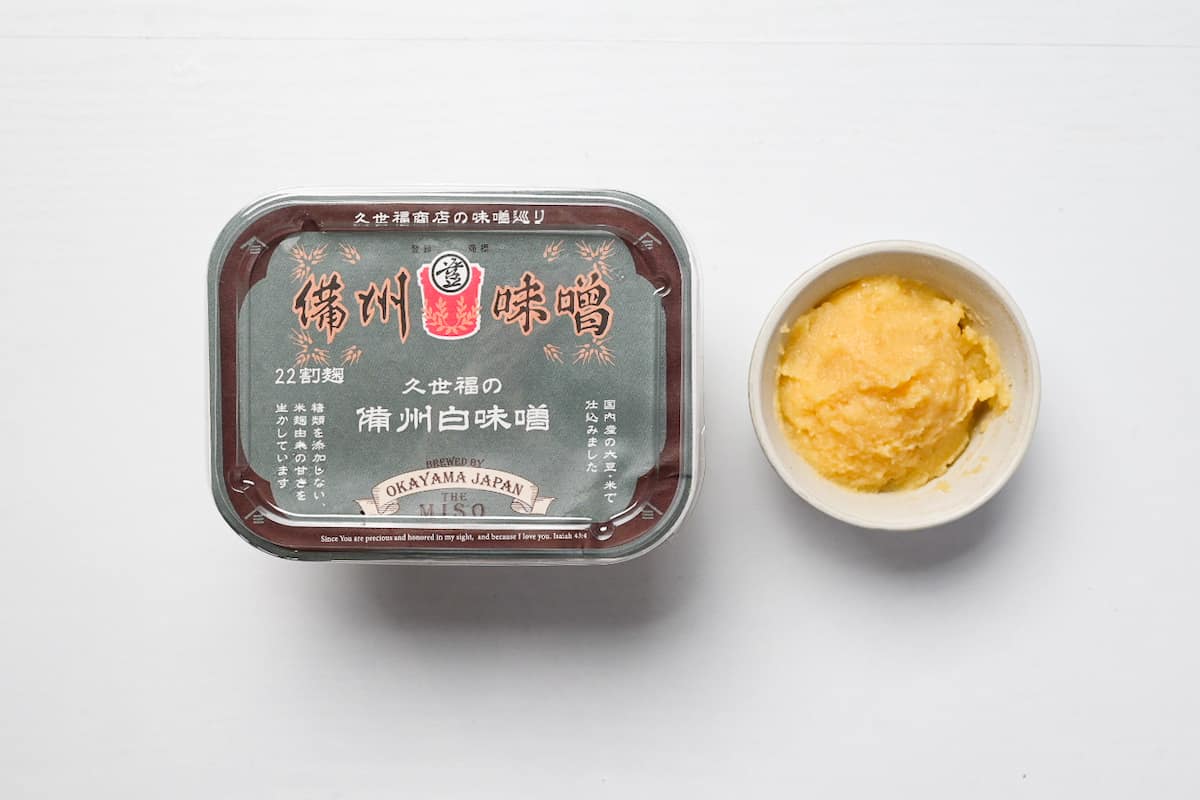
White miso has a creamy color, like a mix of bright yellow and white. It’s the sweetest miso compared to red miso, with more rice malt, a shorter aging period and less salt. In other words, it’s less salty, so you’ll need to add more when making miso soup compared to red or awase miso.
Famous white misos include Fuchu Miso from Hiroshima, Sanuki Miso from Kagawa, and Saikyo Miso from Kyoto. If you’re interested in sweeter and milder miso, give white miso a try!
Five Variation Ideas for the Perfect Bowl
Miso soup can be made with a wide variety of ingredients, and the combination varies from region to region, household to household, or even season to season in Japan. However, I highly recommend using local, in-season vegetables for your miso soup. No matter where you live in the world, using local vegetables is more “authentic” than trying to source Japanese ingredients, and it stays true to the soup’s spirit.
That said, here are five examples of ingredient combinations used in authentic miso soup.
Tofu, Aburaage and Wakame
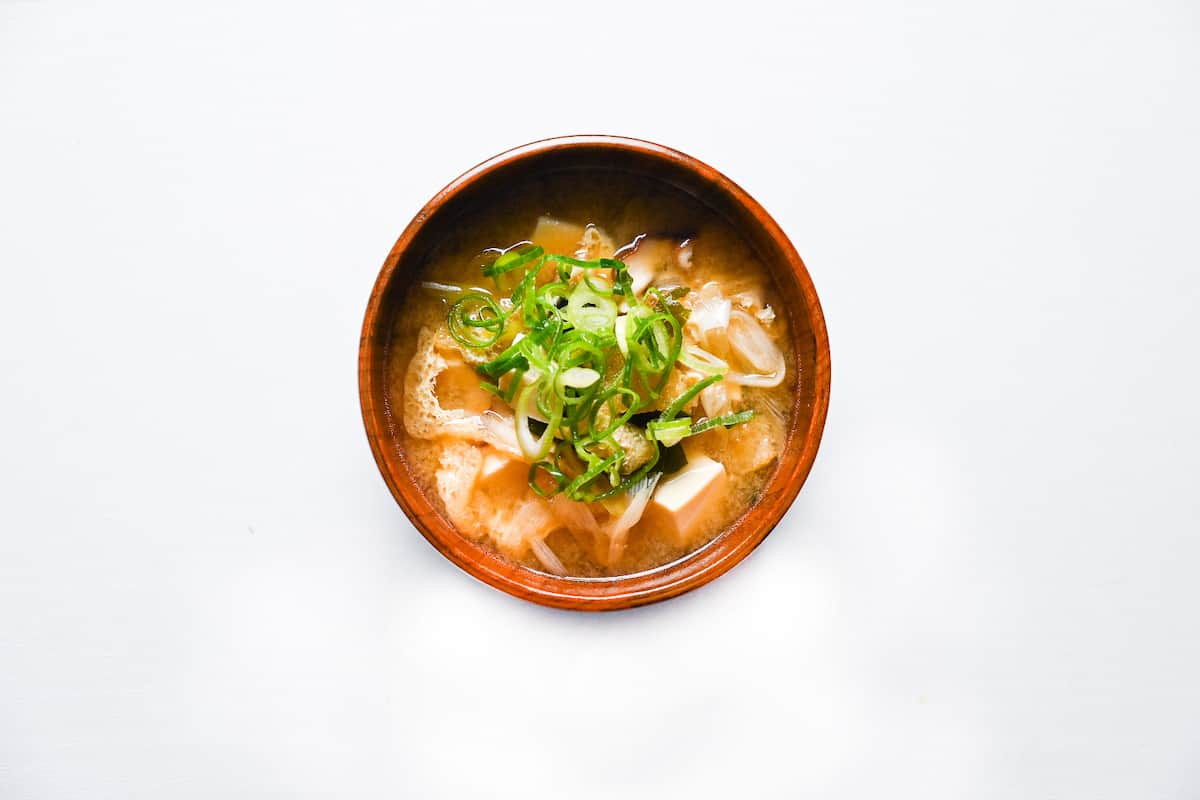
This combo is my go-to favorite! The recipe cards and videos in this article feature it too. As for the tofu, you can use either silken or firm tofu, but I tend to opt for firm tofu which is less likely to break.
As for the wakame (seaweed), fresh wakame is best if available, but for convenience, I often use dried wakame. It expands in the soup so a little goes a long way.
Eggplant and Okra
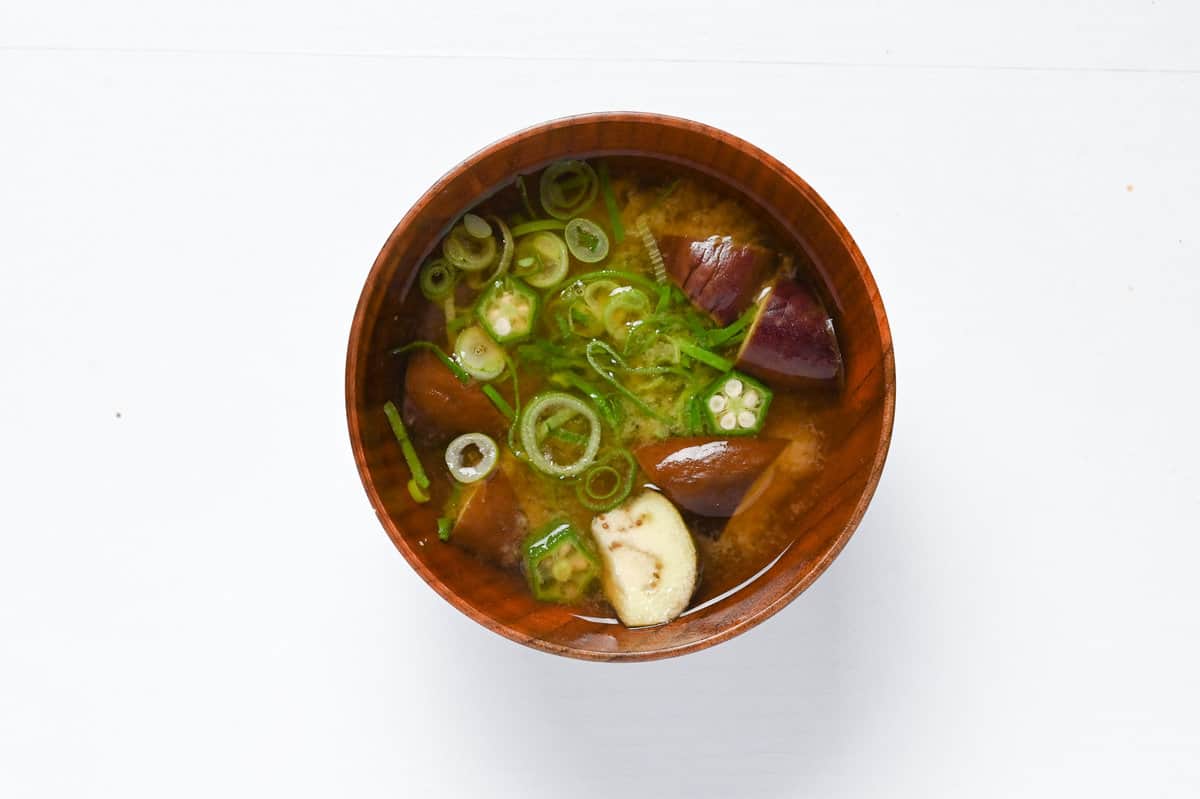
This combo features okra and eggplant, known as “summer vegetables” in Japan. The eggplant soaks up lots of tasty miso broth, making it extra flavorful.
Plus, adding okra gives the soup a slightly sticky texture, setting this delicious summer veggie miso soup apart from the rest!
- Zucchini (Courgette)
- Pumpkin
- Bell pepper
Hakusai (Napa Cabbage) and Aburaage

Now, let’s talk about winter vegetables in miso soup!
The flavor of Napa cabbage is amazing and pairs perfectly with the soup. If you can’t find Napa cabbage easily in your area, regular cabbage works too, or try adding some winter root vegetables too!
- Cabbage
- Pak choi
- Daikon
Kinoko (Mushrooms)
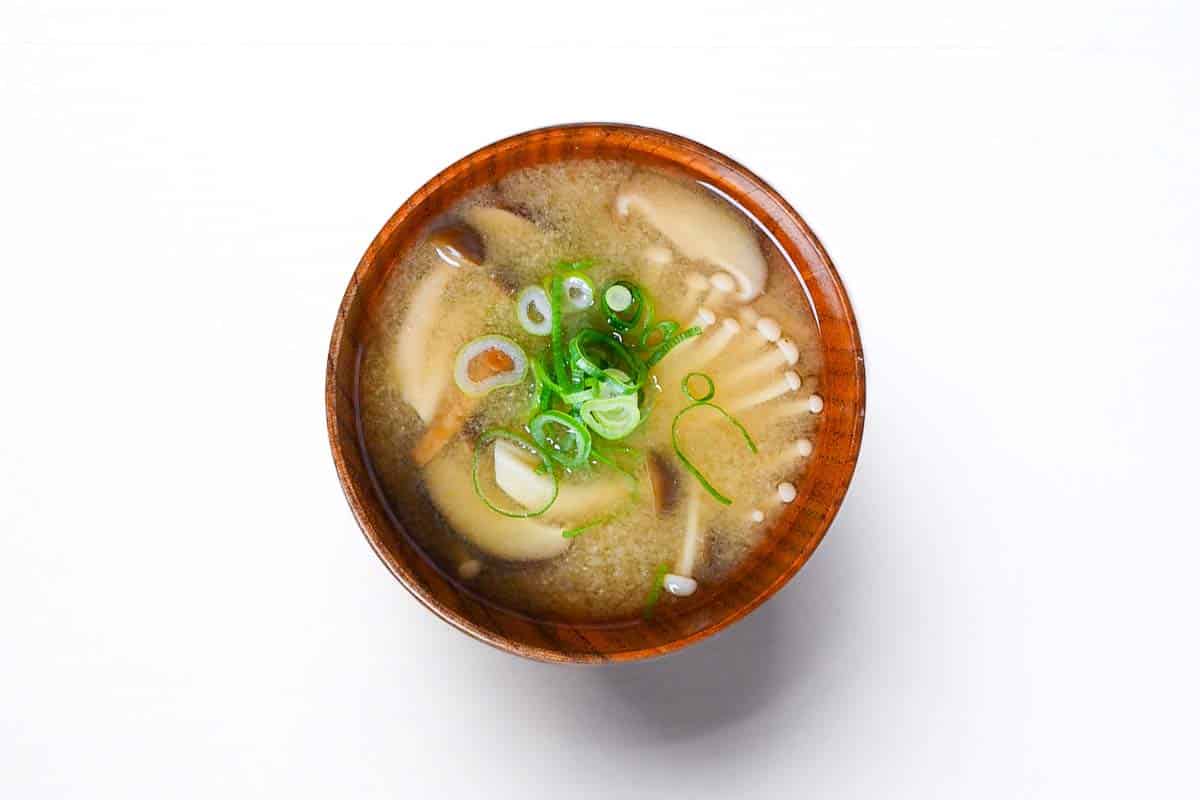
Mushroom fans, you’ve gotta try this! Miso soup and mushrooms are a match made in heaven, and you can use any kind you like!
I used classic shimeji, enoki, and shiitake mushrooms in Japan, but go ahead and experiment with local mushrooms from your area. I write more about all the mushrooms you can use in my mushroom miso soup recipe.
- Button mushroom
- Maitake mushroom
- Portobello mushroom
Potato, Onion and Snow Pea
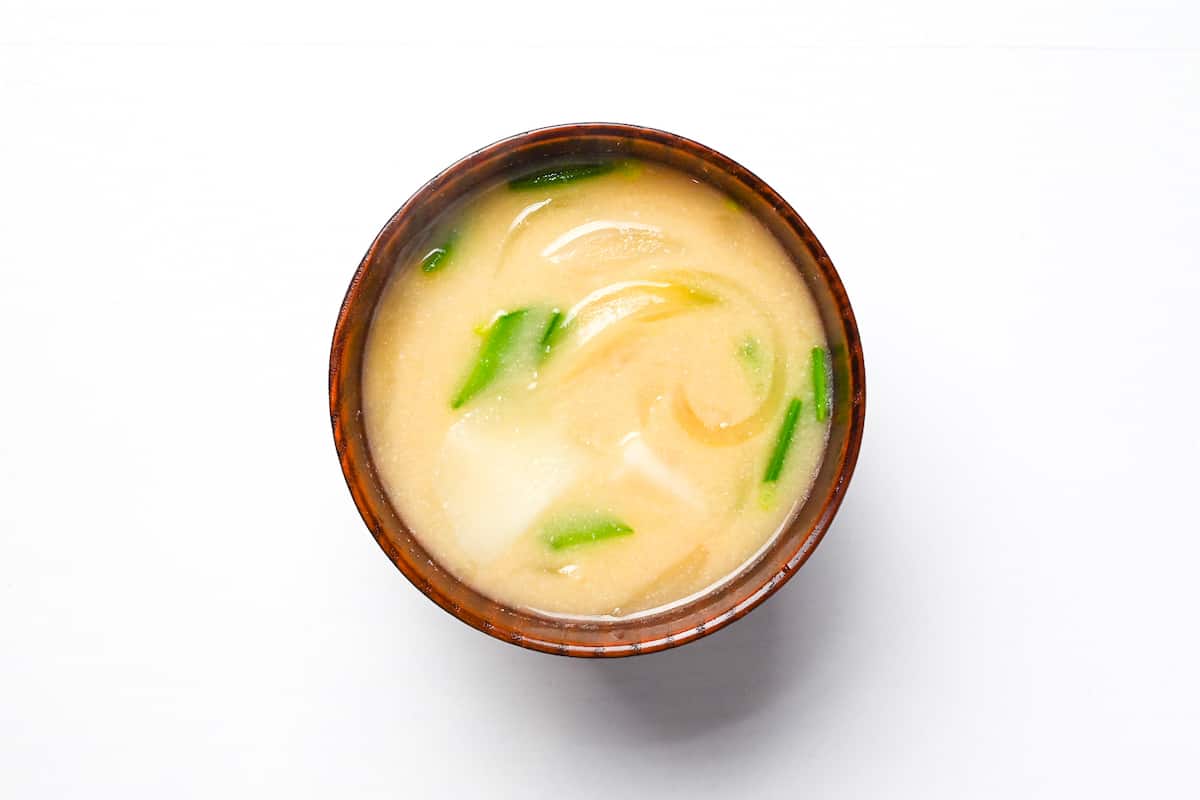
You might be surprised, but adding potatoes to miso soup is popular in Japan! They taste great together and make the soup more filling. Don’t forget to add onions when using potatoes too. Tossing in some snap peas for some added color is a bonus too!
I’d say this combination goes well with white miso. If you don’t like potatoes, sweet potatoes work just as well.
- Sweet potato
- Other kinds of onions
- Snap garden peas
Visual Walkthrough & Tips
Here are my step-by-step instructions for how to make Authentic Japanese Miso Soup at home. For ingredient quantities and simplified instructions, scroll down for the Printable Recipe Card below.
1. How to Make Homemade Dashi
Dashi is the base for all miso soups; without it, it would lack authentic flavor and depth. There are various options when it comes to making dashi for your miso soup:
- Instant dashi granules (mixed with hot water)
- Dashi packets (steeped in hot water)
- Use miso paste that contains dashi (mix into hot water)
- Make your own homemade dashi (recommended)
While instant dashi is quick and easy, homemade dashi brings your miso soup to another level and is a tip I always recommend. Although it might sound intimidating to make dashi from scratch, it can actually be pretty quick and easy to make. A basic awase dashi only requires 3 ingredients: water, kombu (dried kelp) and katsuobushi (bonito flakes).
Start by soaking the kombu in water for about 30 minutes (or until rehydrated). Since the wait is only 30 minutes, I do this in a cooking pot. Some people like to soak it for longer for a stronger taste (in this case, it’s better to use a container with a lid). It’s up to you how long you want to soak it, but 30 minutes is the minimum, and 24 hours is the maximum.
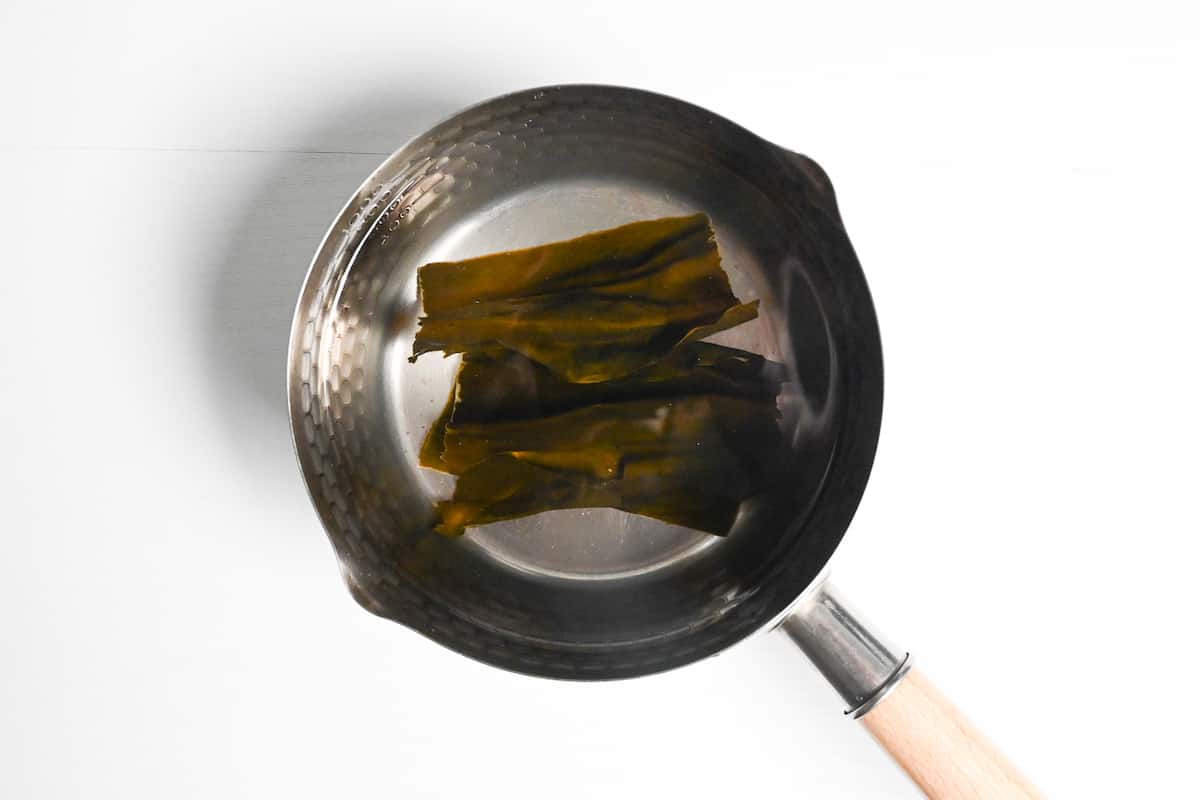
Once the kombu is rehydrated, transfer it to the stove and heat on medium until small bubbles start to appear around the edges. It should be almost boiling, but don’t let it fully boil at this point.
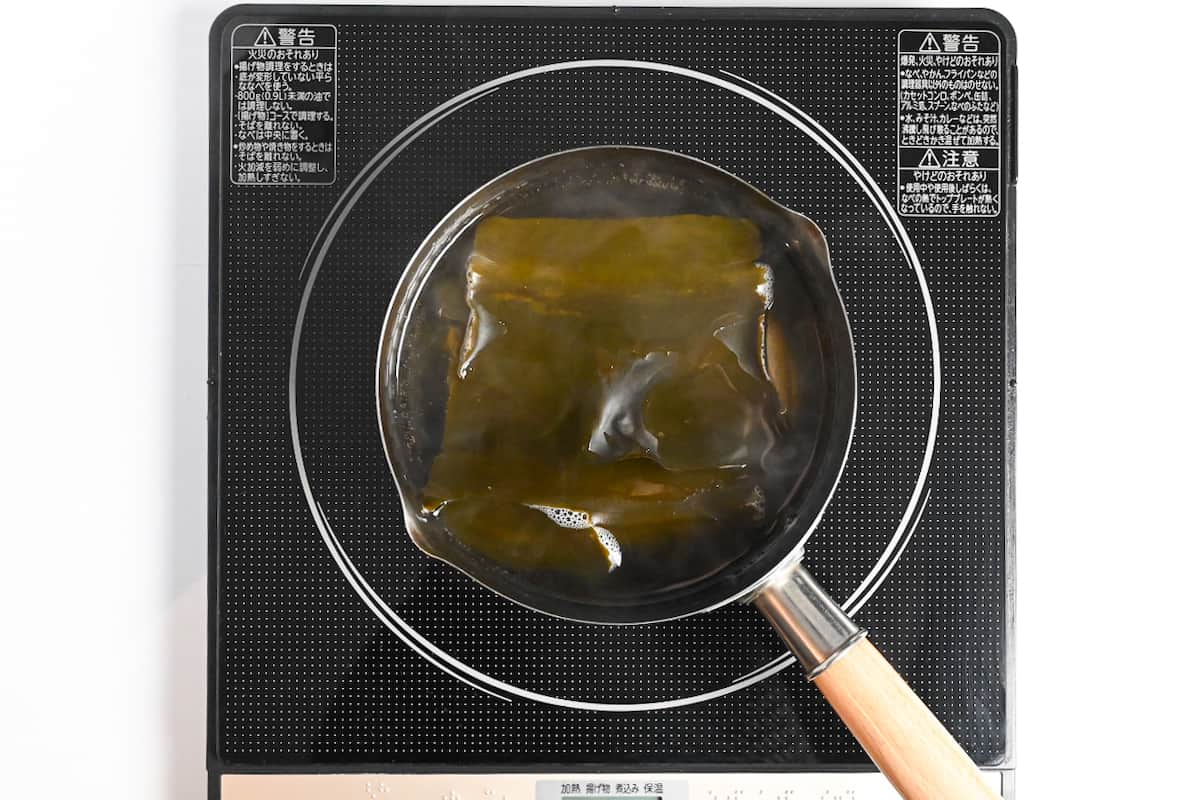
Remove the kombu (you can discard or reuse it to make kombu tsukudani) and then bring the water to a boil. Once boiling, turn off the heat and add the bonito flakes.
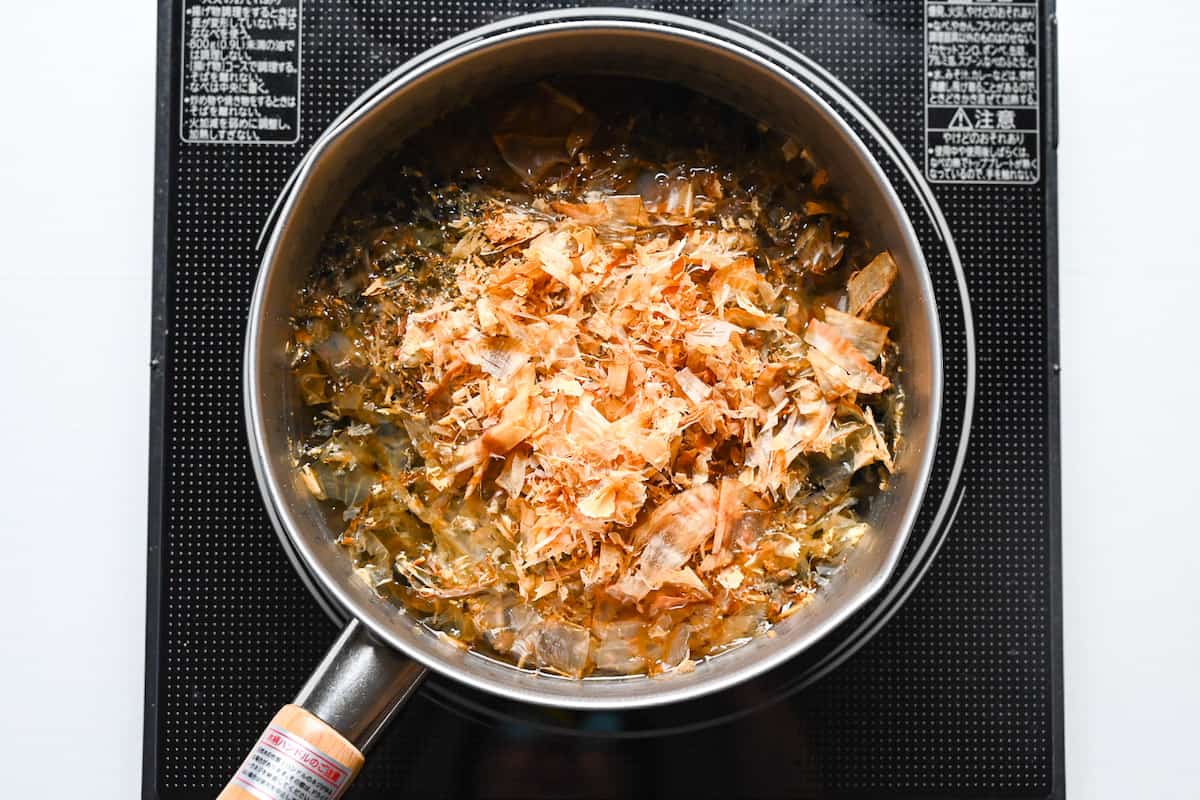
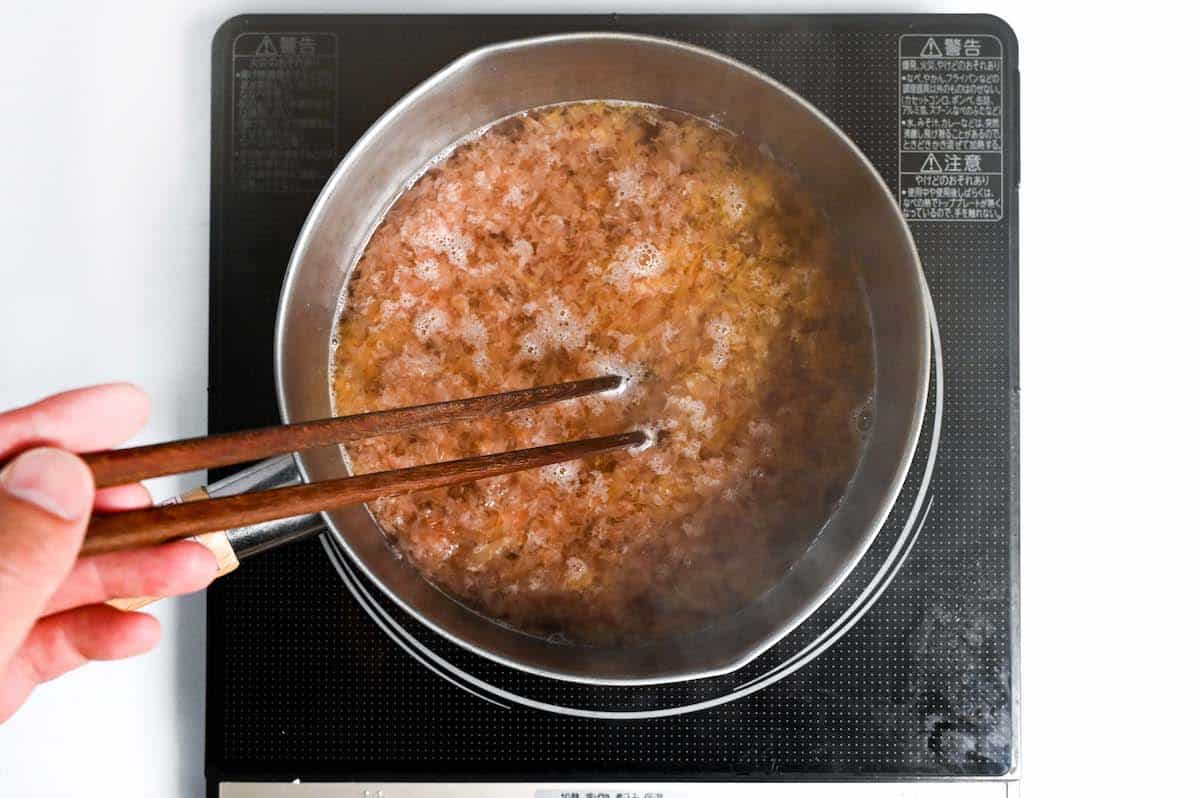
Leave the bonito flakes soaking in the hot water for about 5 minutes. It doesn’t need to be cooking, just keep the pan hot using the residual heat on the stove.
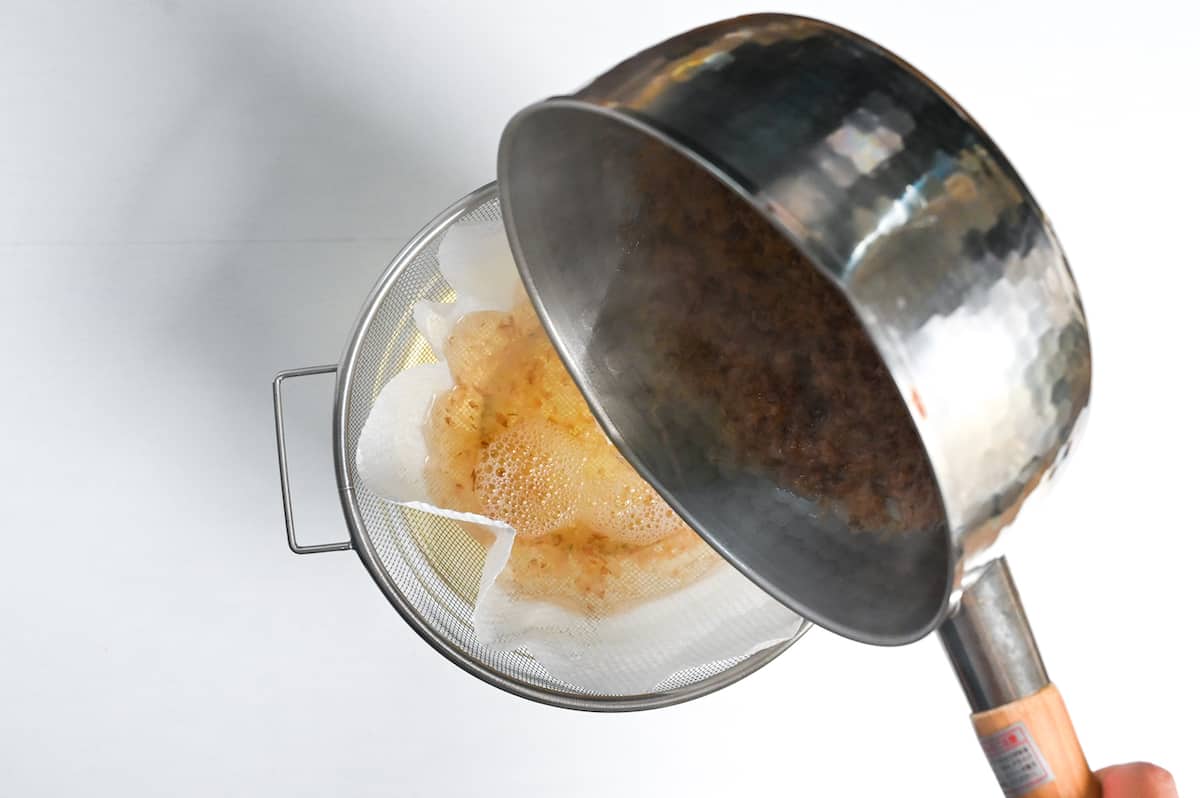
After 5 minutes, place a sieve lined with a sheet of kitchen paper over a heatproof bowl and pour the dashi through. This will catch all the tiny pieces of bonito flakes and leave you with a beautiful, clear and golden broth.

our final dashi should look something like this:
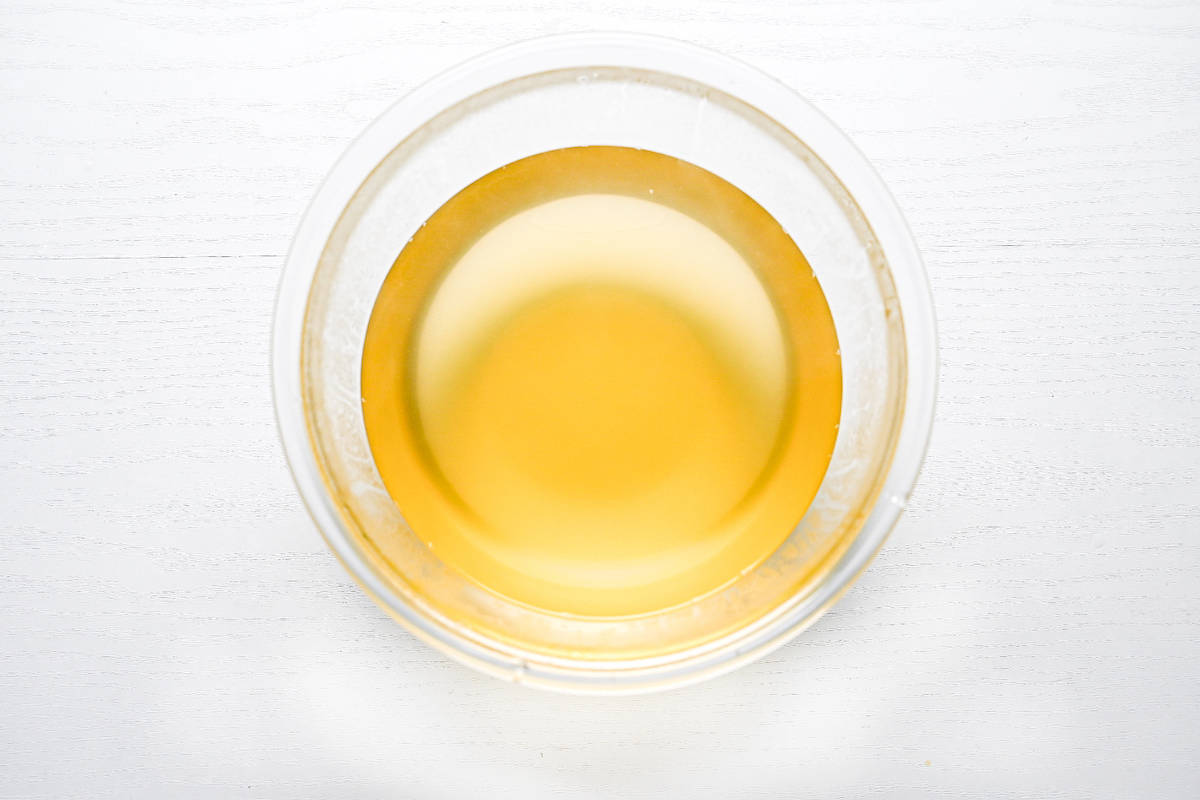
Once the dashi is complete, you can move on to making your miso soup!
2. How to Make Miso Soup
Cut your choice of ingredients into small bitesize pieces. Miso soup is usually eaten with chopsticks, so you can eat the tofu and vegetables and then slurp the soup straight from the bowl.
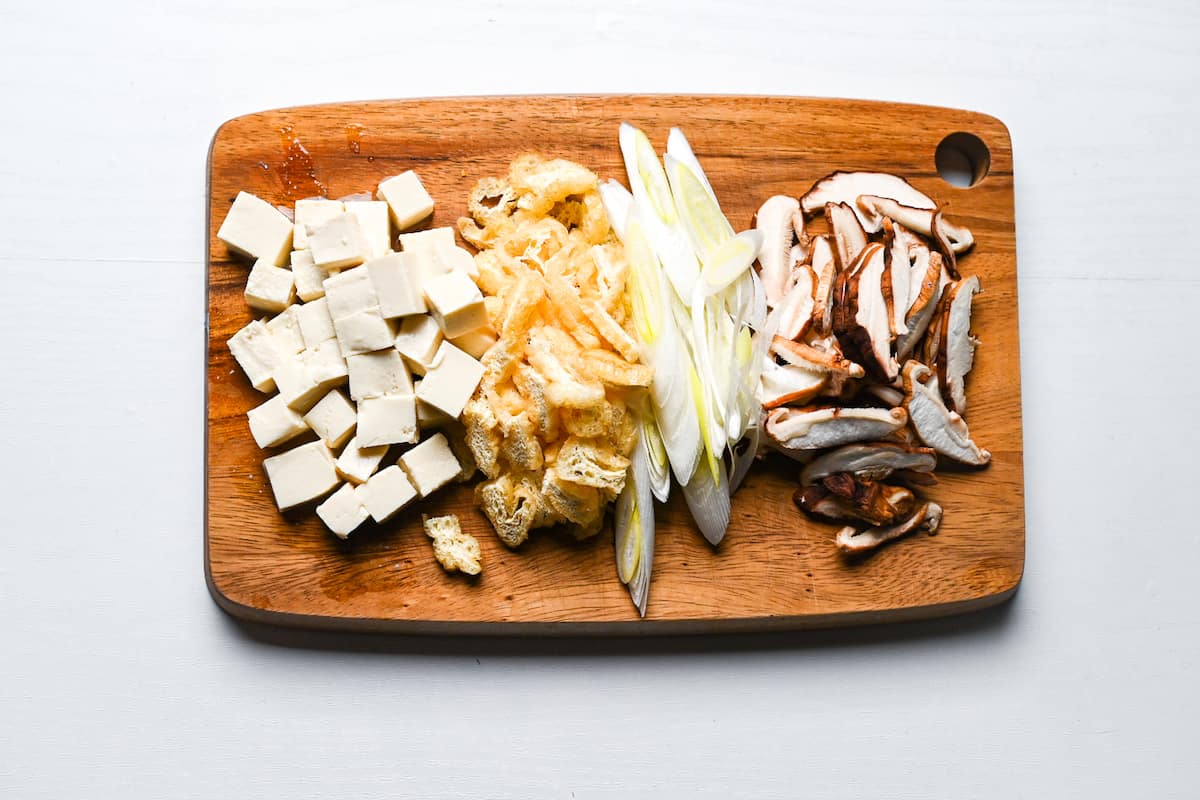
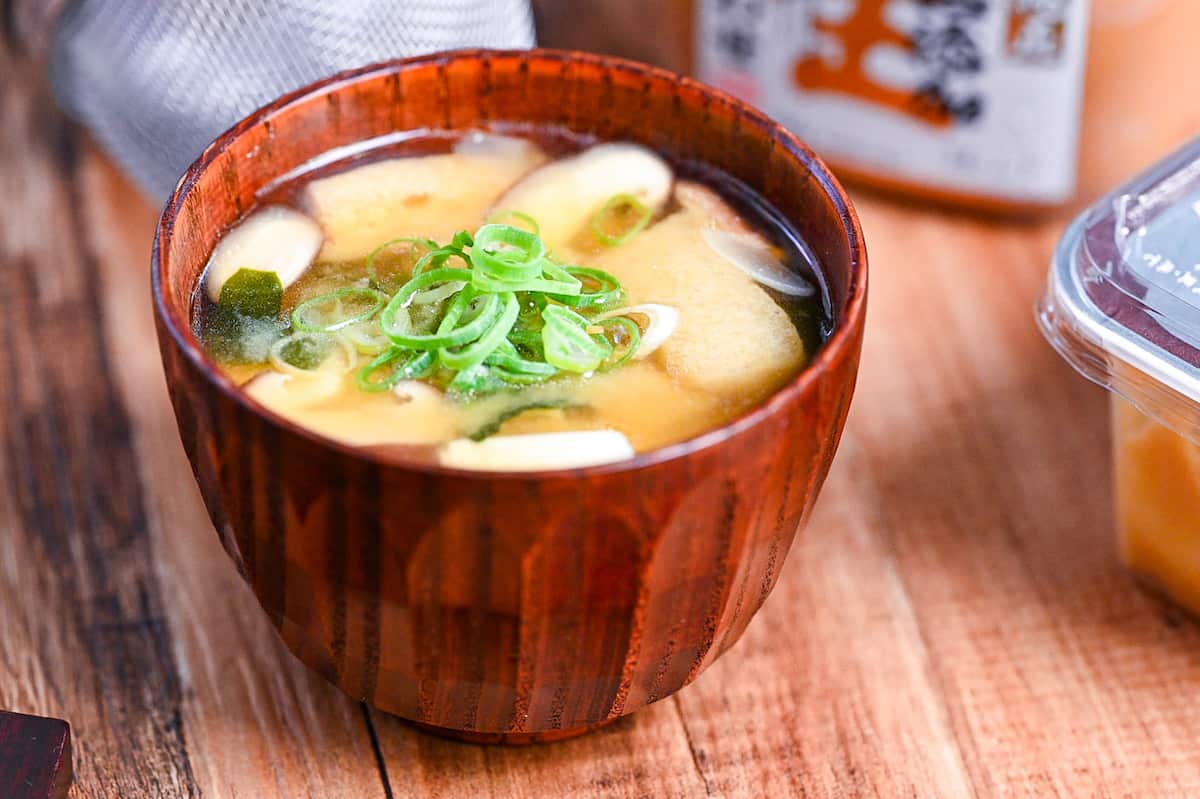
For my recipe, I use firm tofu, aburaage (twice-fried tofu pouch), thinly sliced spring onions, and shiitake mushrooms. Feel free to customize your soup to suit your tastes!
Transfer your dashi back into a pot and bring to a simmer over medium heat. Once small bubbles start to appear, add your vegetables and tofu to the pot.
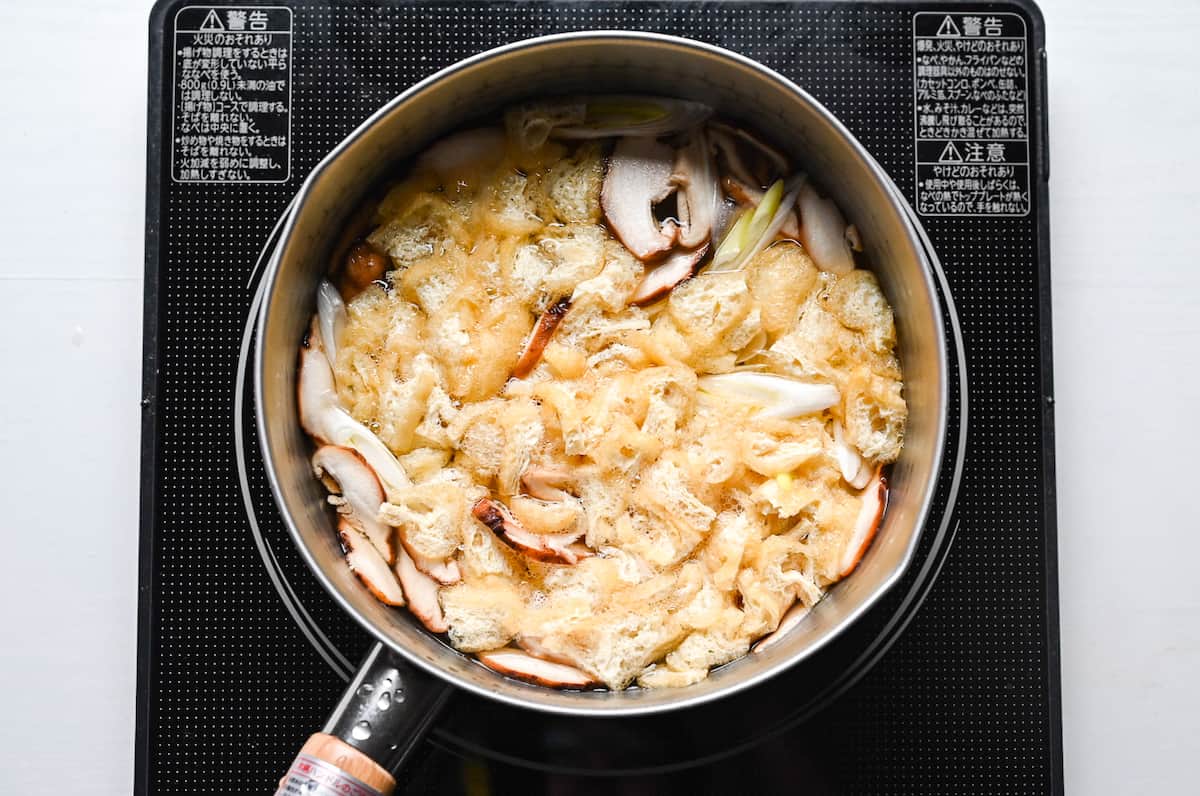
I purposely used ingredients with similar cooking times so that I could throw them all in at the same time. However, if you decide to add ingredients that need sufficient cooking time, like root vegetables such as carrots or potatoes or shellfish, be sure to add those first to give them time to cook all the way through.
On the other hand, soft ingredients like tofu only need to be warmed through and should be added just before the miso paste. Make sure to consider the timing when adding your ingredients to the soup.
This is also optional, but I like to add a small amount of soy sauce to my miso soup for some extra depth and umami.
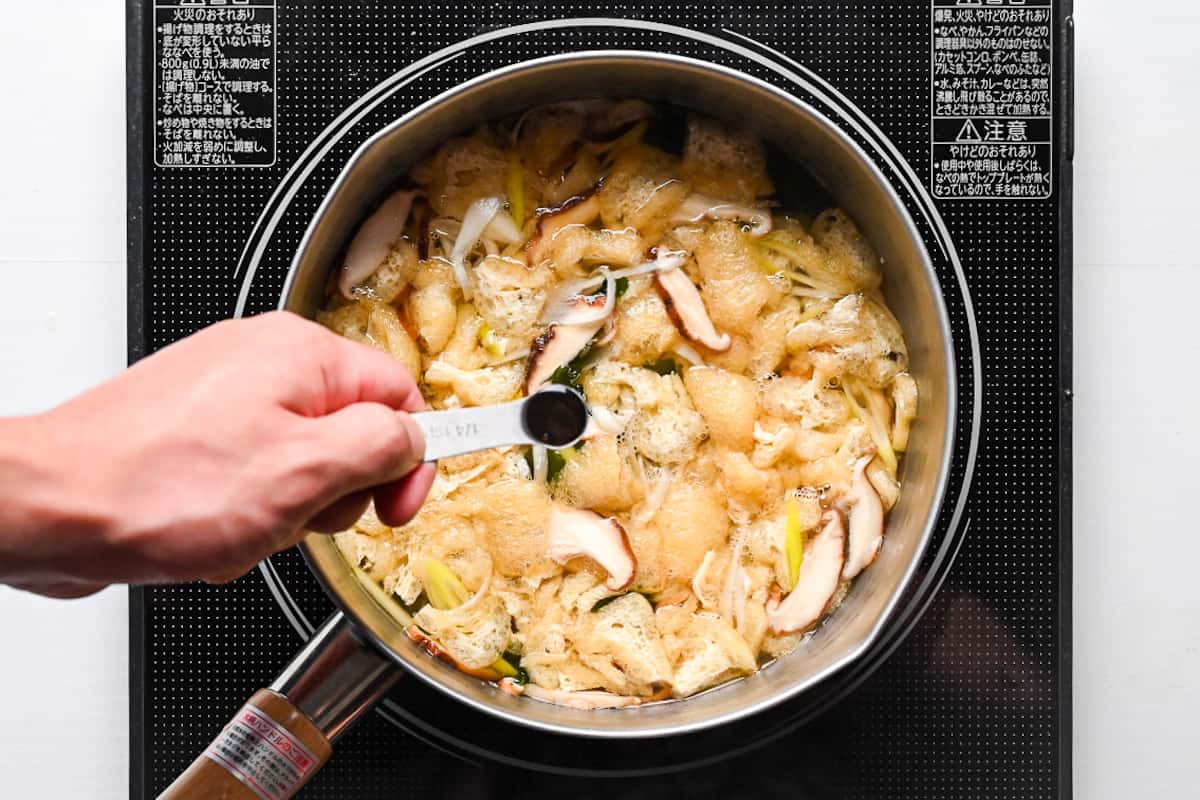
After ensuring that the pot’s ingredients are cooked, reduce the heat to the lowest setting and add the miso paste. Miso paste doesn’t actually dissolve; instead, it needs to be broken down to incorporate it into the soup.
If you add miso paste straight to the broth, it will be difficult to break up and there will be large lumps of miso in your soup. This can also make the overall taste of the soup weaker because the miso paste is not evenly distributed throughout the broth.
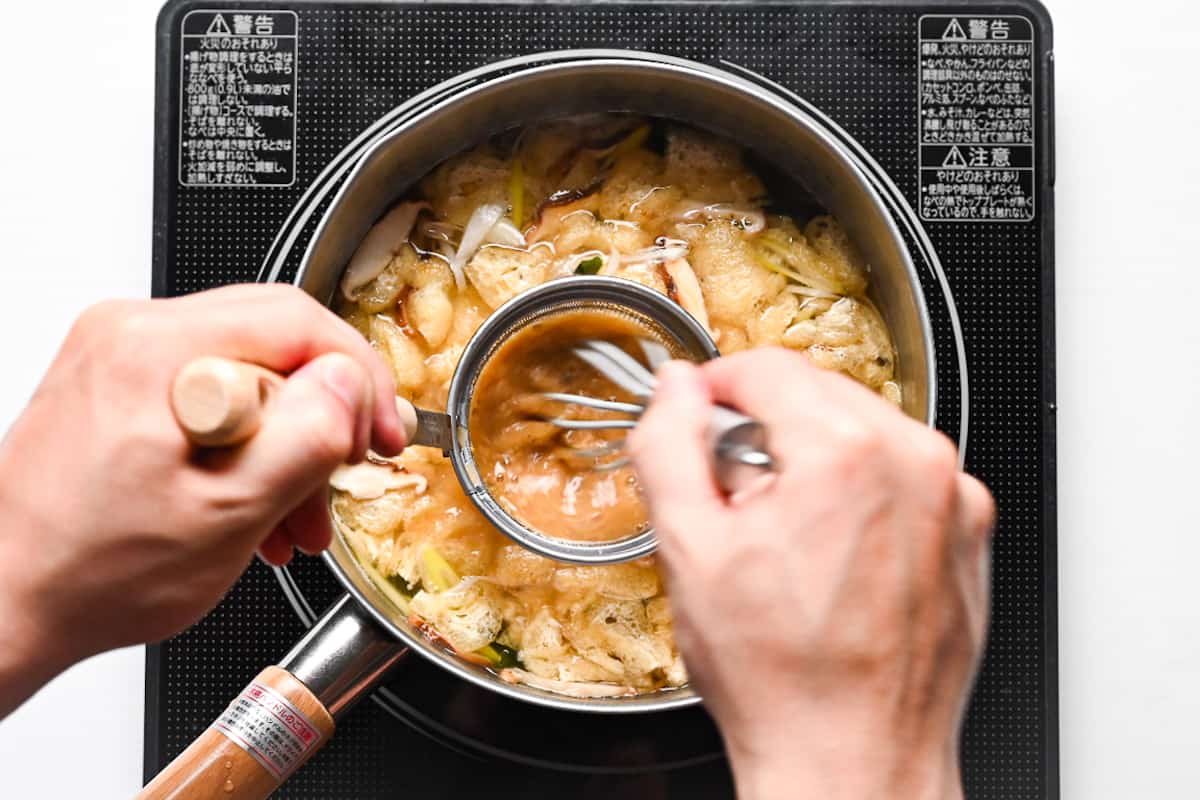
I recommend placing the miso paste on a fine mesh spoon and resting the spoon on the surface of the broth so that they come into contact with each other.
The hot broth will soften the paste, allowing you to whisk it while it’s still on the spoon, then it will seep into the broth through the mesh. This will thoroughly break up the paste and allow it evenly distributed throughout the broth.

If you don’t have a mesh spoon, you can also break up the miso paste by placing it in a small heatproof bowl or ladle and whisking it with a few tablespoons of broth. Once it’s smooth, simply pour it back into the pot.

After incorporating the miso, do not let it boil; try to avoid simmering for too long. If you boil the soup, the taste of the miso will begin to deteriorate, and the aroma will be lost.
It is said that miso soup is most fragrant when cooked slightly weaker than boiling; this is why I recommend setting the heat to the lowest before adding the miso paste. Miso soup tastes best at about 75°C (165°F).
If you need to reheat the soup, I recommend heating it over a medium setting and turning it off just before it boils.
Finally, add the ingredients that need to be warmed through (rather than properly cooked). In my case, this is tofu.
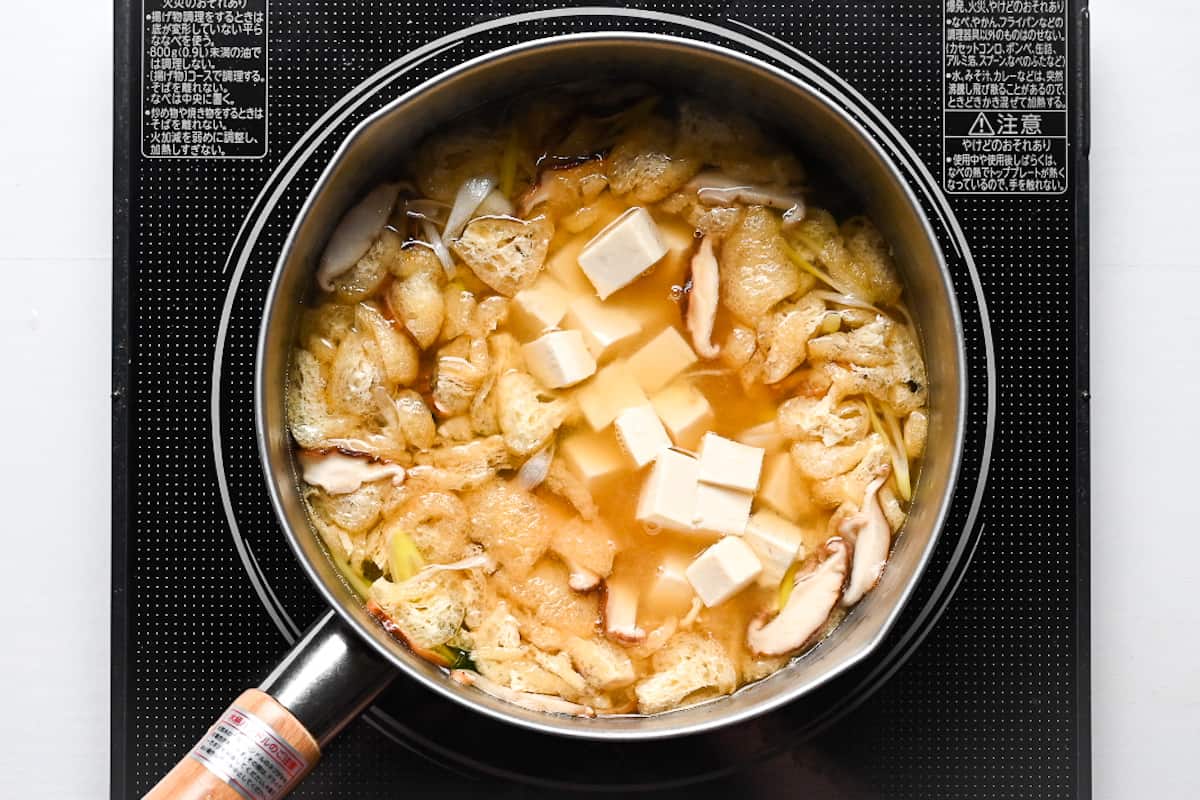
Simmer for a few minutes and then dish up!
Divide the soup into serving bowls and garnish with some fresh chopped green onion.

How to Store
While miso paste is a fermented product that can be preserved for a long time, it is very easy to spoil once it is made into soup and combined with other ingredients. If you must store leftover miso soup, avoid leaving it out too long. If you have no choice but to store it, cool it slightly and then transfer it to the refrigerator.
You should try to eat it as quickly as possible. I don’t recommend keeping it for more than 24 hours. Freezing is not recommended since the flavor will deteriorate.
Ideally, most Japanese families make miso soup in the morning and try to use it up before the end of the day. For example, make it for breakfast or lunch, then have it again with your evening meal.
On the other hand, dashi can be kept in the fridge for 5-7 days or up to 1 month in the freezer. If you have dashi, you can whip up miso soup in less than 10 minutes. If you want to make miso soup regularly throughout the week, I recommend making a batch of homemade dashi for convenience!
Storage summary
Room temperature – Not recommended.
Refrigerated – 24 hours.
Frozen – Not recommended.
FAQ
Miso has been part of Japanese life and culture for over 1300 years. It was first introduced to Japan by the Chinese in the 7th century. At that time, miso was a luxury item only used by the rich and elite. It was also not used as a seasoning but instead eaten directly.
Around the Kamakura period (1185-1333), Buddhist monks brought suribachi (pestle and mortar) from China, and it became easier to grind grains and beans, which could then be dissolved in water to make soup. With this development, miso soup was born.
Over time, farmers would grow more soybeans and make their own miso. From the late Muromachi period (1336-1573), miso became a popular ingredient amongst common people. It was also favored by Samurai warriors going into battle as it was a great source of easily preserved protein.
Going into the Edo period (1603-1868), miso began to spread into the lives of ordinary people, and miso soup appeared on every family’s dinner table. Since then, miso soup has always been a part of Japanese life.
Ever wondered about the difference between clear soup and miso soup?
They look different, but knowing what sets them apart might be confusing. Both soups are popular in Japanese cuisine, but clear soup is often reserved for special occasions like kaiseki or seasonal dishes. It’s known for its dashi broth flavor and seasonal ingredients, enjoyed simply without miso paste.
As the name suggests, clear soup is transparent. In short, if miso soup didn’t contain the miso paste, it would just be a simple unseasoned dashi broth, whereas clear soup is made with dashi broth seasoned with light soy sauce and salt.
The core of miso soup consists of dashi stock and miso paste. But what else do we add to the soup? Here are some examples of common miso soup ingredients.
Tofu (firm or silken, depending on preference)
Seaweed (usually wakame)
Mushrooms (commonly shimeji, enoki, nameko)
Daikon
Freshwater clam
Aburaage (twice-fried tofu)
Potatoes
Onions
Carrots
Gobo…etc
There is a variation of miso soup with pork called Tonjiru (豚汁) as well.
While the main ingredient for miso is soybeans, many miso pastes these days contain extra ingredients to add umami. These ingredients often contain fish products. Miso paste for vegetarians and vegans does exist, but you need to check the packaging to confirm this. Do not assume that all miso paste is suitable for vegans.
See my vegan miso soup recipe for more information!
Miso soup itself is not usually considered a gluten-free dish. Miso paste is primarily made from soybeans, but some miso may contain gluten because malt containing wheat or barley is sometimes used in fermentation. However, gluten-free miso paste is available on the market, and you can make gluten-free miso soup by choosing miso paste made with rice malt (koji), which does not contain gluten. Also, avoid ingredients made with wheat flour and choose gluten-free ingredients.
Soybeans, the main ingredient in most miso paste, are high in protein and carbs. Some miso paste may have too many carbs for a ketogenic diet. The carb content of miso soup varies with the miso and ingredients you use, so If you’re on a keto diet, choose your ingredients and miso soup amount according to your needs.
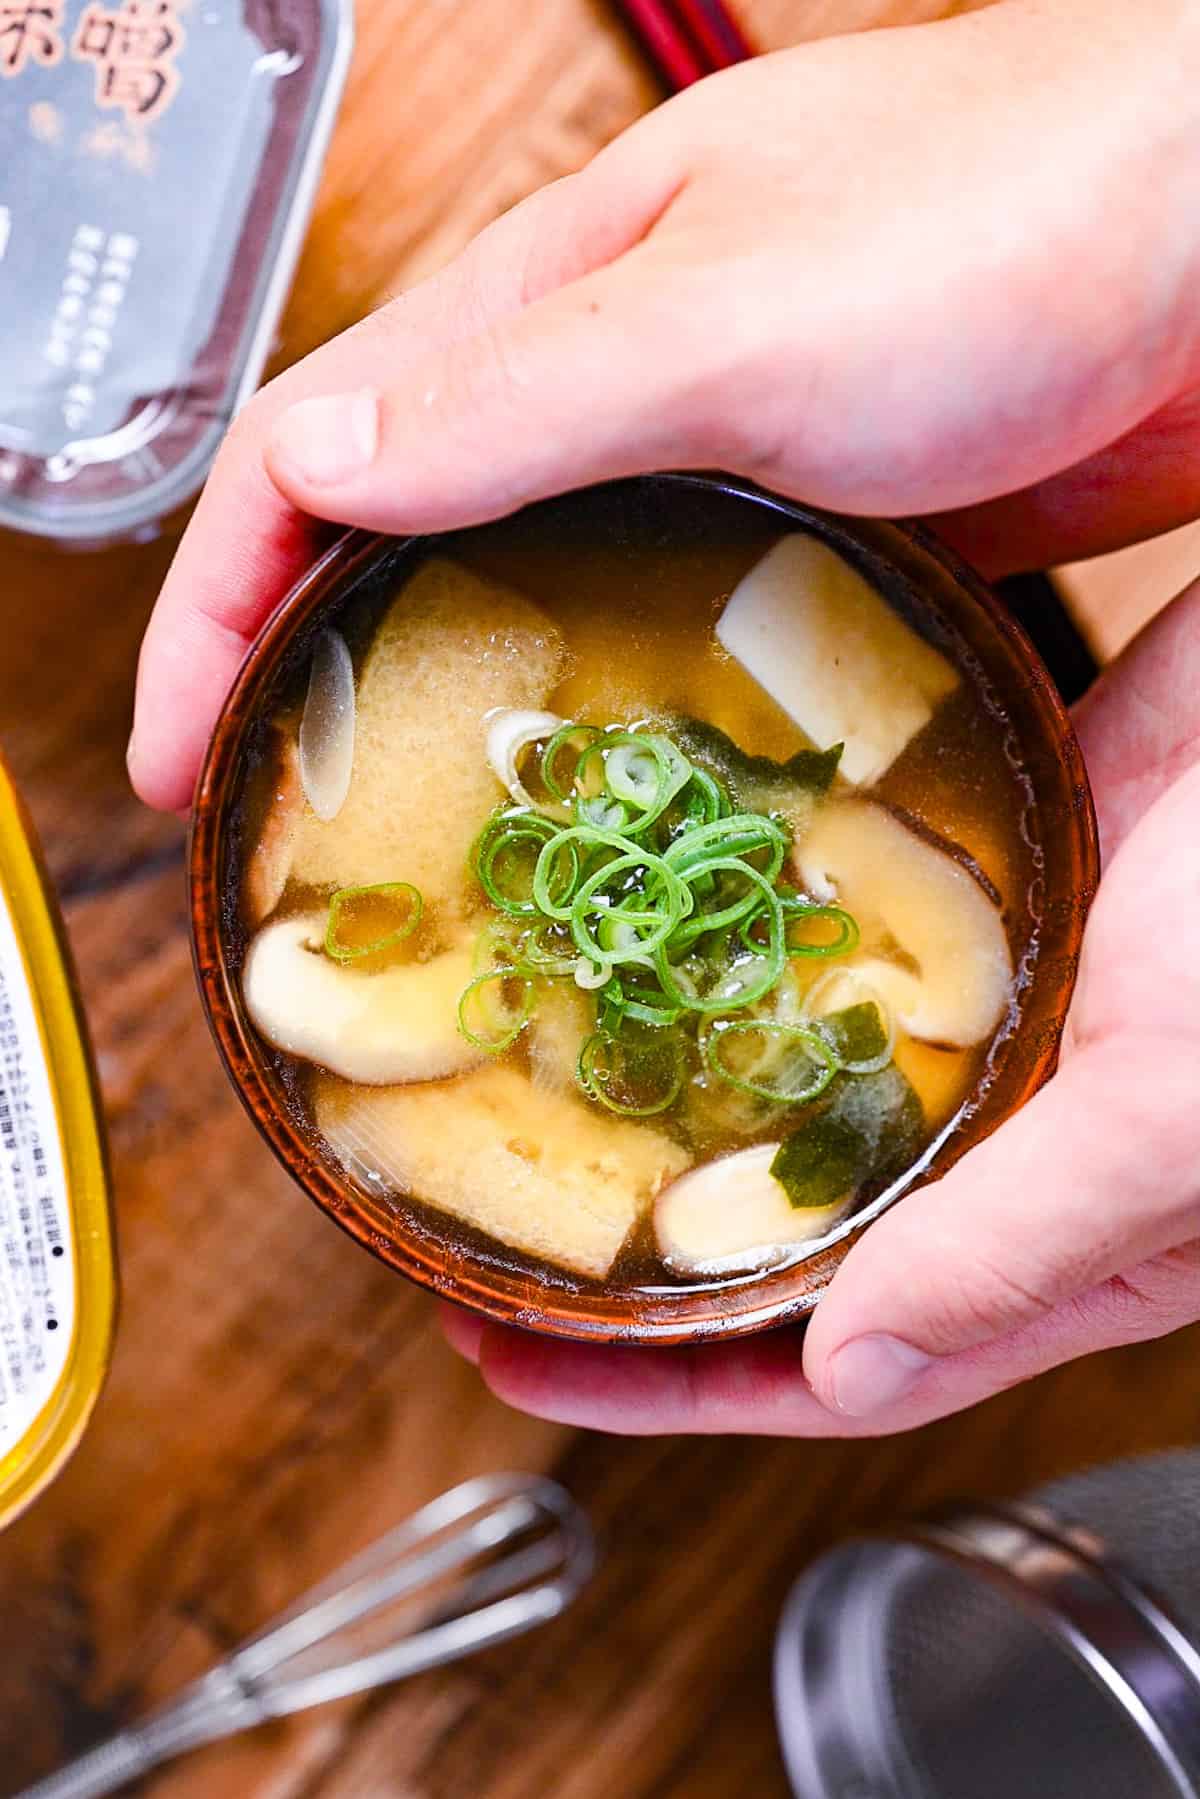
I hope you enjoy this Authentic Japanese Miso Soup recipe! If you try it out, I’d really appreciate it if you could spare a moment to let me know what you thought by giving a review and star rating in the comments below. It’s also helpful to share any adjustments you made to the recipe with our other readers. Thank you!
More Miso Soup Recipes
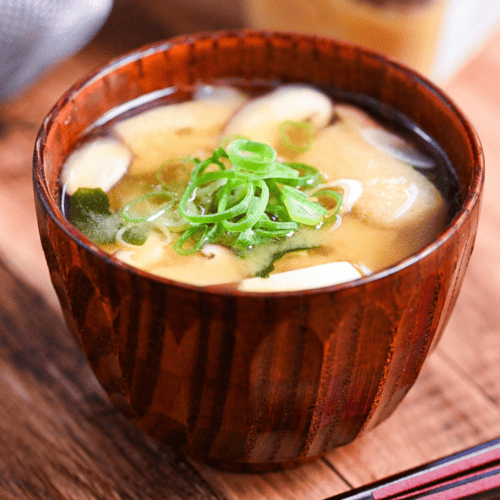
Authentic Homemade Japanese Miso Soup
Equipment
- Mini whisk
Ingredients
Homemade Dashi
- 10 g dried kelp (kombu) (kombu)
- 1 liter cold water
- 15 g bonito flakes (katsuobushi)
Miso Soup
- 150 g tofu firm or silken – cubed
- 30 g fried tofu pouch (aburaage) thinly sliced
- 30 g green onion thinly sliced
- 30 g fresh shiitake mushroom thinly sliced
- 1 tbsp dried wakame seaweed
- ¼ tsp soy sauce
- 4 tbsp yellow miso paste (awase miso)
- finely chopped green onions optional garnish
Instructions
Making Dashi
- Add 10 g dried kelp (kombu) and 1 liter cold water to a large pot and soak for 30 minutes.

- Once rehydrated, place the pot on the stove and bring to a simmer over a medium heat. (Don't let it boil.)

- Once small bubbles start to appear around the edges, remove the kombu, increase the heat to medium-high and bring it to a boil. Once boiling, turn off the heat and add the 15 g bonito flakes. Allow the katsuobushi to soak for 5 minutes.

- After 5 minutes, line a sieve with kitchen paper and place it over a large heatproof bowl.

- Pour the dashi through the sieve, the kitchen paper will catch the small pieces of katsuobushi, leaving you with a clear broth.

Making Miso Soup
- Thinly slice 30 g fried tofu pouch (aburaage), 30 g green onion and 30 g fresh shiitake mushroom. Cut 150 g tofu into cubes.

- Pour the dashi into a pot and heat on medium. Once it's almost boiling, add the ingredients (except the firm tofu) to the pot along with 1 tbsp dried wakame seaweed.

- Adding ingredients lowers the heat, so wait for the broth to bubble again. Once it's almost boiling, lower the heat to a simmer and add ¼ tsp soy sauce.

- Scoop 4 tbsp yellow miso paste (awase miso) onto a mesh spoon or ladle. Dip the miso paste into the dashi and whisk it in the spoon to loosen it up. Keep whisking, gradually allowing more dashi to seep into the mesh spoon/ladle each time until the miso paste has dissolved into the mixture.

- Add 150 g tofu (cubed) to the miso soup and stir gently. Allow to simmer on low for 2-3 minutes to heat the tofu through.

- Divide the miso soup into bowls and garnish with finely finely chopped green onions.

- Serve and enjoy!


This was wonderful, thank you.
Thank you Kiki, glad you enjoyed it!
Alot of your recipes are like my mother’s but she passed away. I didn’t get most of her recipes. I didn’t know she would leave me so soon. I’m glad you are here to show me some of your recipes. Thank you, Niomi
Hi Niomi,
I’m really sorry to hear about your mother. I’m glad I could help with my recipes. Let me know if there’s anything in particular you’d like recipes for anytime!
Yuto
Hi – thank you for this very helpful recipe. After Step 4 there is something green in the soup. What is that?
It’s my pleasure! 🙂
The green bits after step 4 are pieces of wakame, a type of seaweed commonly added to miso soup. It’s an optional ingredient though.
Hope that helps, thanks for stopping by!
Hii ,
which color of miso did you use and which Kombu did you use? Thank you 🙂
Hi mimi,
Thank you for the comment!
Typically, I opt for Awase (mixed) Miso, often referred to as “yellow miso” in English.
As for Kombu, my choice usually varies based on what I have in my pantry. However, Rishiri and Hidaka kombu are frequent picks for my miso soup.
If you’re curious about the various types of kombu and their unique characteristics, you can check out our ‘Kombu 101‘ post.
I hope this response is helpful to you!
Yuto
Dear Sir. Because of your accent I could follow the name of the ingredients. Many thanks
Hi Martha,
Thank you for the comment!
I’m glad to hear that my video was helpful!
Yuto