


Featured Comment
Ever since I watched your video and tried this recipe myself, kakuni has become our family’s favorite meal! We all absolutely love it. I’ve made it so many times now, and it’s all thanks to you.
– @UncleRa (from YouTube)
Ever crave pork belly so tender it trembles, glossy with sweet soy, even softer than chashu? You can simmer kakuni until it turns silky and comforting.
Even better, you can use the savory-sweet braising liquid to marinate eggs and save it for future ramen broths.
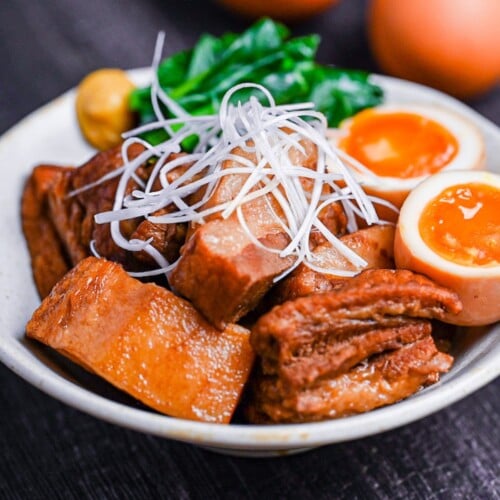
Buta no Kakuni
Recipe Snapshot
- What is it? Japanese braised pork belly simmered until fork-tender and finished with a glossy soy-sugar glaze.
- Flavor profile: Sweet-savory with ginger warmth, rich umami depth balanced by clean, degreased richness.
- Why you’ll love this recipe: A two-stage method (pre-simmer to render fat, then braise to build teri) delivers melt-apart texture without greasiness. Restaurant-level results, clear repeatable steps.
- Must-haves: Skinless pork belly slab, Japanese soy sauce (koikuchi shoyu), large heavy-bottomed pot.
- Skill Level: Medium
Summarize & Save this content on:

What is Buta no Kakuni?
Buta no Kakuni (豚の角煮) is a Japanese nimono (simmered dish) made by cutting pork belly into cubes and slowly simmering it in a sweet-salty soy-based sauce until the fat renders and the collagen softens into a melt-in-the-mouth texture. The name translates directly as “square-simmered pork,” buta (豚) meaning pig, kaku (角) meaning square or cube, and ni (煮) referring to simmering.
It sits among classic Japanese pork dishes like shogayaki and tonkatsu, but stands apart through its long, gentle braise rather than high-heat cooking. Kakuni traces its roots to the Chinese Dongpo pork (東坡肉), which arrived in Japan through Nagasaki’s trade ports during the Edo period (1603-1868), then Japanese cooks adapted the dish with a lighter hand.
Today it’s served in izakayas, home kitchens, and restaurants, often alongside soft-boiled eggs, blanched greens, and rice. Some transform the tender pork into donburi dishes or tuck it inside steamed buns.
Buta no Kakuni Ingredients

- Skinless pork belly slab: This layered cut (alternating fat and meat) is what makes kakuni impossibly tender. Look for a piece about 3-5 cm thick with visible streaks of both lean and fat. Too lean and it dries out, too fatty and it feels greasy. Skin-on belly works but adds significant cooking time, so go skinless for this. Look for a slab or “pork belly block” at your butcher counter.
- Japanese soy sauce: This is the flavor backbone! Umami, color, and that glossy mahogany finish all come from here. You’ll use a generous amount, so grab a larger, affordable bottle rather than using a premium one. But you can reuse the braising liquid later for eggs or other dishes.
- Lager beer: In this kakuni recipe, a splash of lager softens the porky aroma and adds a gentle bitterness that keeps the sauce from tasting one-note, helping you land that “extremely good” tenderness and finish. Any standard brand is fine.
Substitution Ideas
- Pork belly → Best option: don’t substitute! Pork belly is what gives kakuni that silky, layered “melt-in-your-mouth” bite. If you have to swap, pork shoulder is the closest, but it’ll taste meatier and less buttery, and it can turn a bit dry if you cook it like belly.
- Japanese leek (naganegi) → Use a regular onion or leek. This is mainly here to keep the pork smelling clean. The aroma will be slightly sweeter and less “negi-forward,” but it still works perfectly fine.
- Lager beer → Feel free to skip entirely and use water or sake instead. The beer adds a subtle depth, but your kakuni will still turn out beautifully without it.
- Light brown sugar → White sugar is the best substitute for light brown sugar, and dark brown sugar works if you want extra molasses depth. White keeps the flavor cleaner, while dark brown makes the sauce darker and a touch more caramel-like.
- Karashi mustard → Colman’s English mustard (powder or prepared) or Chinese hot mustard is the closest match to karashi’s sharp, sinus-clearing kick. Prepared versions are usually a bit milder and tangier. Skip Dijon, since the flavor profile is totally different.
Have trouble finding Japanese ingredients? Check out my ultimate guide to Japanese ingredient substitutes!
How to Make My Kakuni
If you prefer to watch the process in action, check out my YouTube video of this buta no kakuni recipe!

i. Fill a large, heavy-bottomed pot with enough water to submerge your pork belly completely, about 2 liters should do it. Set the pot over medium-high heat and let it come to a gentle boil, then dial back to a simmer.
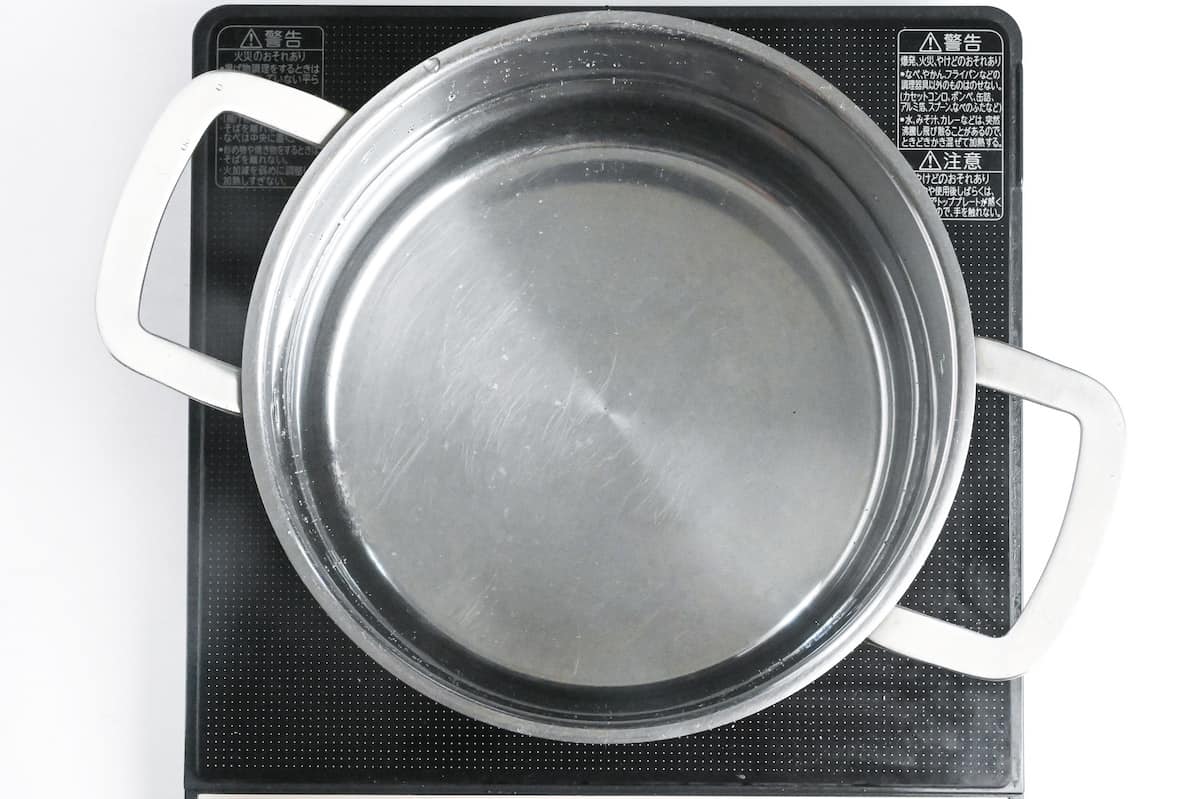
While the water heats, you’ve got just enough time to prep your pork.
ii. Place a dry frying pan over medium-high heat. Once the pan is hot, lay the pork belly block in the pan.
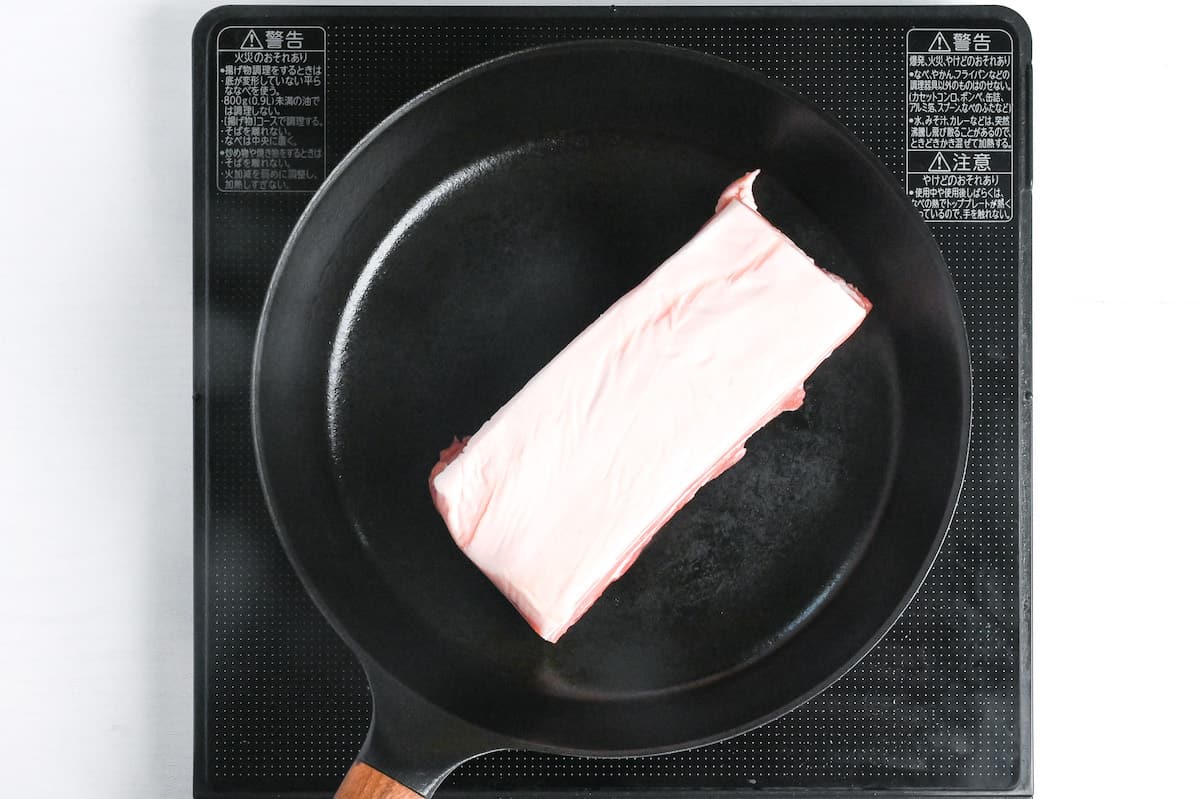
Sear each side until golden patches form and you hear a satisfying crackle, about 90 seconds per side. You’re not cooking through here, you’re kickstarting flavor.
Look for amber-gold patches on the fat cap and lightly browned edges on the lean sides. The kitchen should smell faintly nutty, not acrid. If you see smoke, reduce the heat as burnt proteins taste bitter, and you’ll carry that into your sauce.
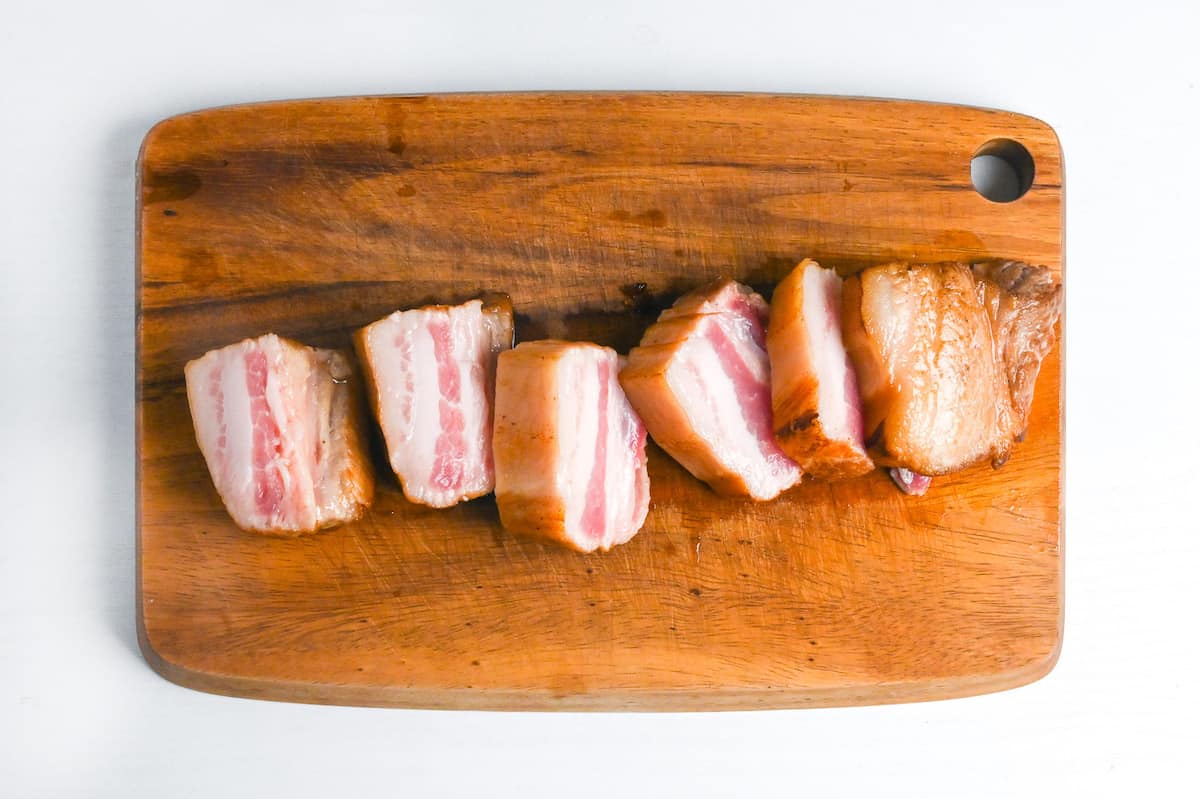
i. Transfer the seared pork block to a cutting board and let it rest for 2-3 minutes. Just long enough that you can handle it comfortably.
ii. Slice it into uniform cubes, roughly 4-5 cm (about 1½ inches) on each side. Even cubes mean synchronized collagen conversion, so every piece finishes tender at the same moment instead of leaving you with a mix of silky and chewy bites.
iii. Slip the cubes into your simmering water and cook for 10 minutes at a gentle bubble. You might see grayish foam and milky fat rise to the surface, this is the scum of coagulated proteins and impurities. Skim it off with a mesh spoon or ladle as it appears. In a way, this step is cleaning too.
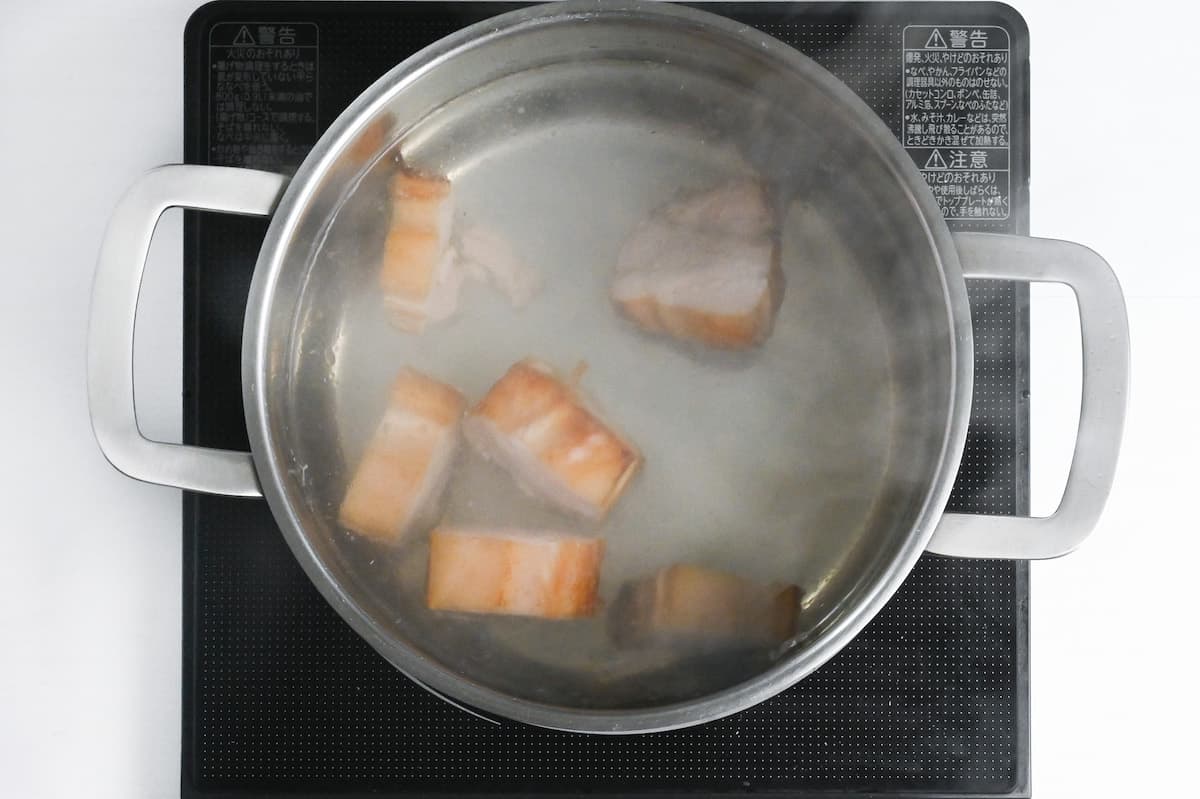
Don’t stress about catching every speck, but removing most of it now keeps your final sauce clear and your pork tasting refined.
i. Place a colander or mesh sieve in your sink and pour the pot’s contents through it, discarding the cloudy blanching liquid. Give the pork cubes a quick rinse under warm running water, turning them gently with your fingers to wash away any clinging scum or loose excess fat.
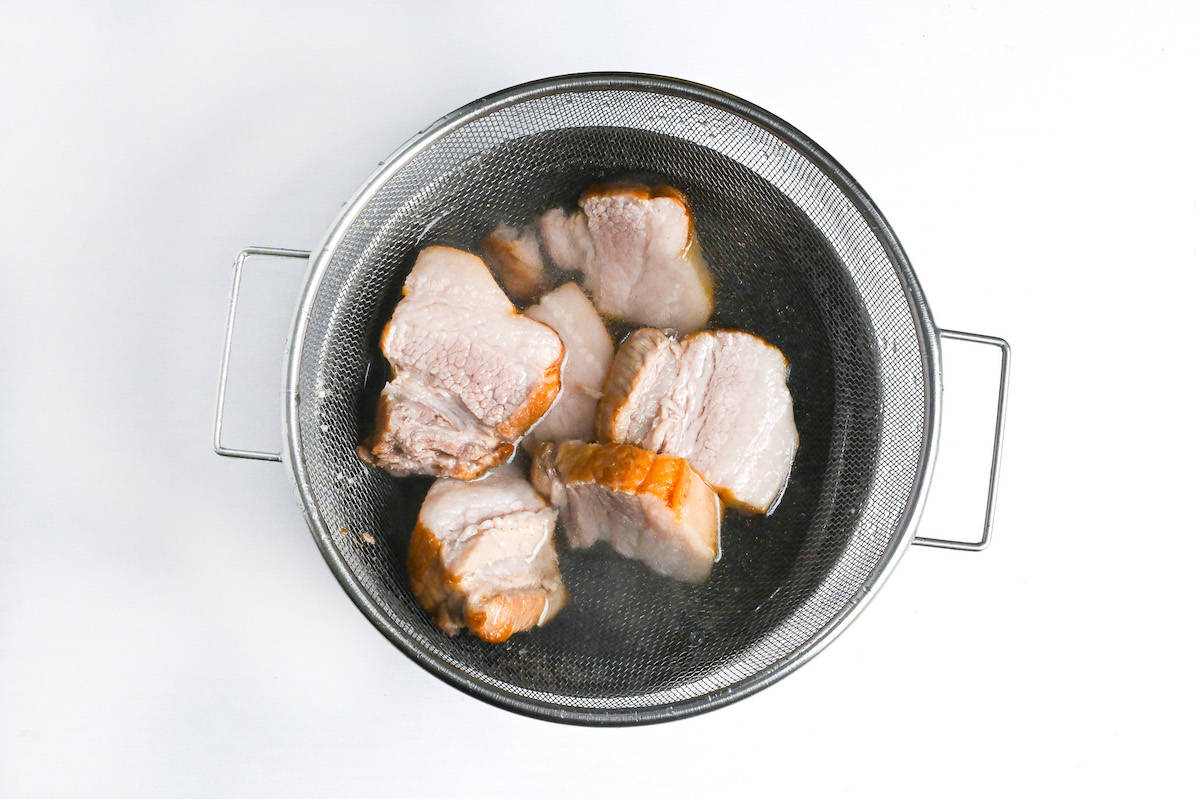
This might feel counterintuitive, but you’re resetting the surface for the braising liquid to come. A clean slate means your seasoning adheres directly to meat, not to a layer of greasy residue.
ii. Rinse out your pot to remove any lingering scum, then refill it with fresh water, enough to cover the pork. Bring it to a boil over high heat. While you wait, slice a Japanese leek (negi) into three sections and cut fresh ginger into thick coins. Reserve some of the leek’s white portion for garnishing later.
iii. Once the water boils, lower the heat to a bare simmer (tiny bubbles lazily breaking the surface, not a rolling boil) and add the pork, leek green, and ginger.
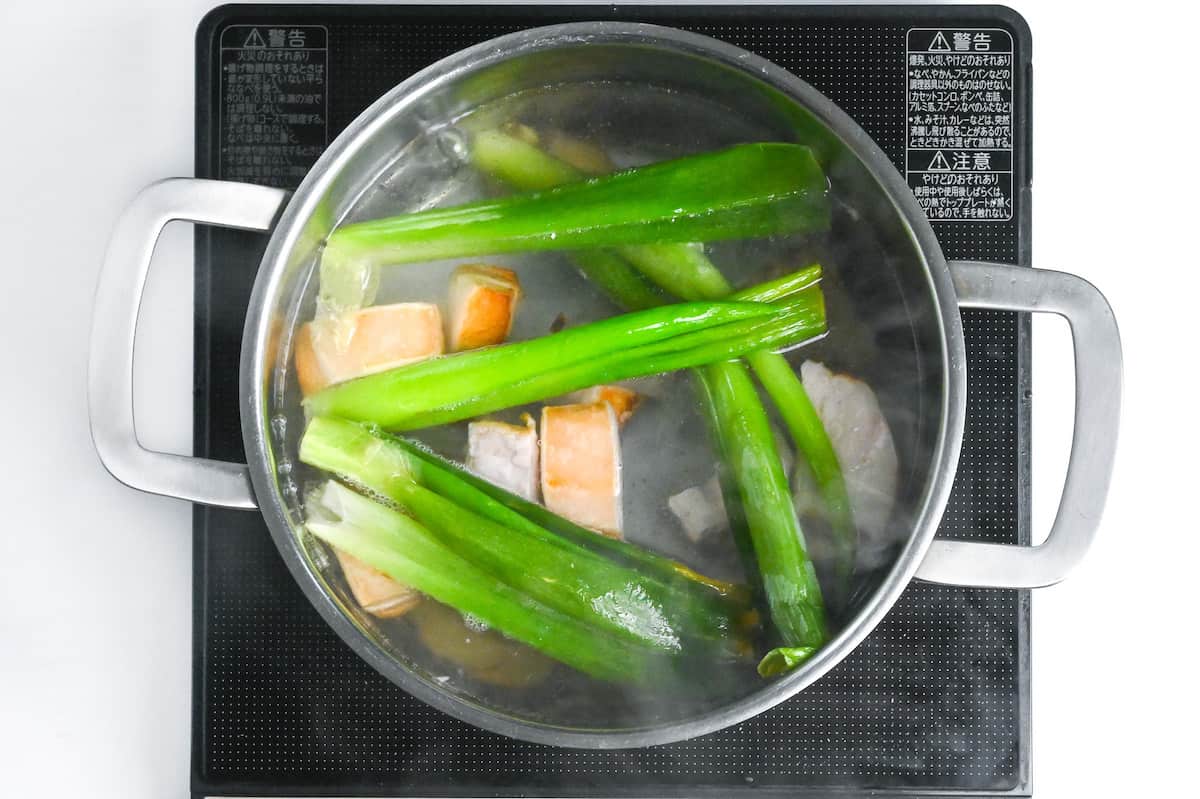
iv. Simmer for 1 hour, keeping the liquid just high enough to submerge the meat at all times. If the level drops, top it off with hot water. After an hour, turn off the heat entirely.
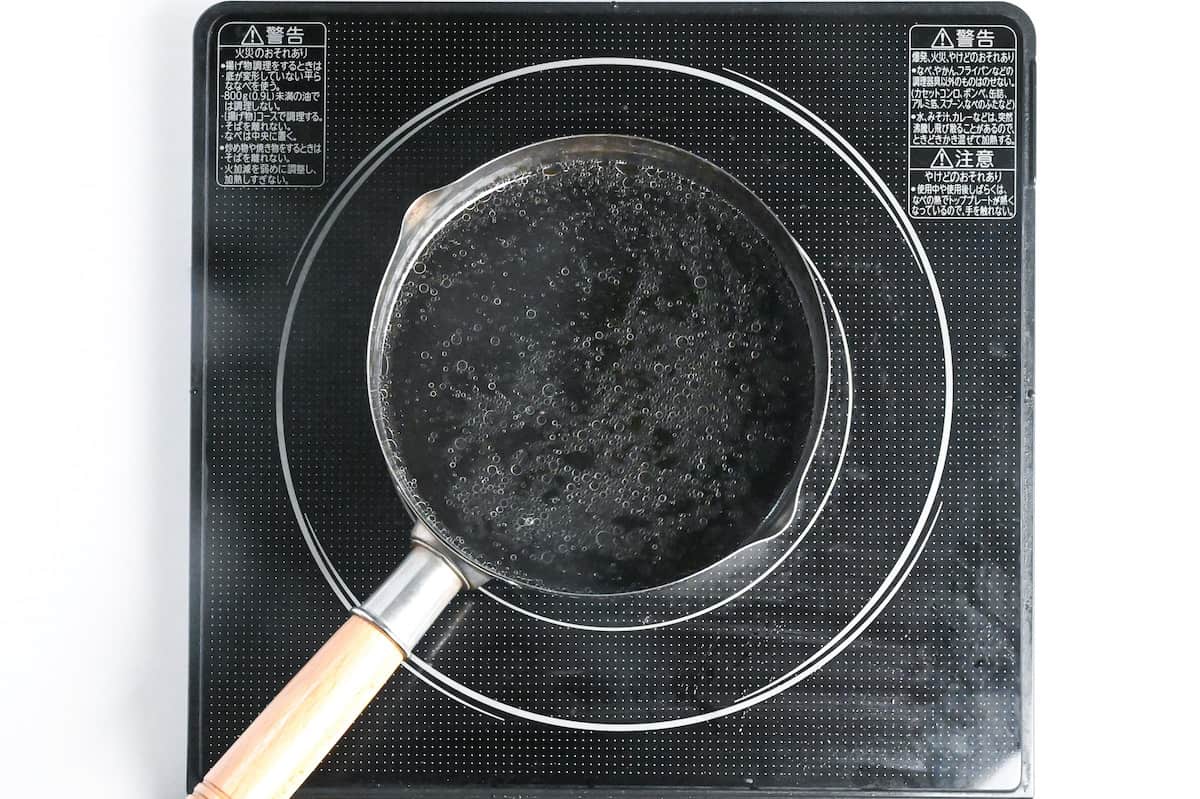
i. Measure out 500ml of cooking liquid from your pot. This is a light pork stock, subtly perfumed by ginger and leek, and it will become the backbone of your sauce.

ii. Pour it into a large saucepan and add lager beer, honey, light brown sugar, and soy sauce. Whisk gently until the sugar dissolves, then bring the mixture to a boil over medium-high heat.
If you’re wondering “Why beer?,” it’s not random. Alcoholic liquids can help meat turn out more tender, and a Japanese study suggests that it’s not just the alcohol itself: other components in drinks, like organic acids, may also play a role in tenderizing meat.
Beer may also change the way meat tastes and smells as it cooks. A 2020 paper in Food Chemistry looked at beer-based marinades and found they can affect aroma and flavor, as well as the kinds of compounds that form during cooking. In their grilled-meat tests, the beer-based marinades were linked to fewer “off” aromas from fat oxidation and fewer Maillard-related compounds, along with better overall sensory preference.
i. Lower the heat to a gentle simmer and carefully add your pork cubes to the saucepan. The liquid should mostly cover the meat, if not, add a splash of hot water.

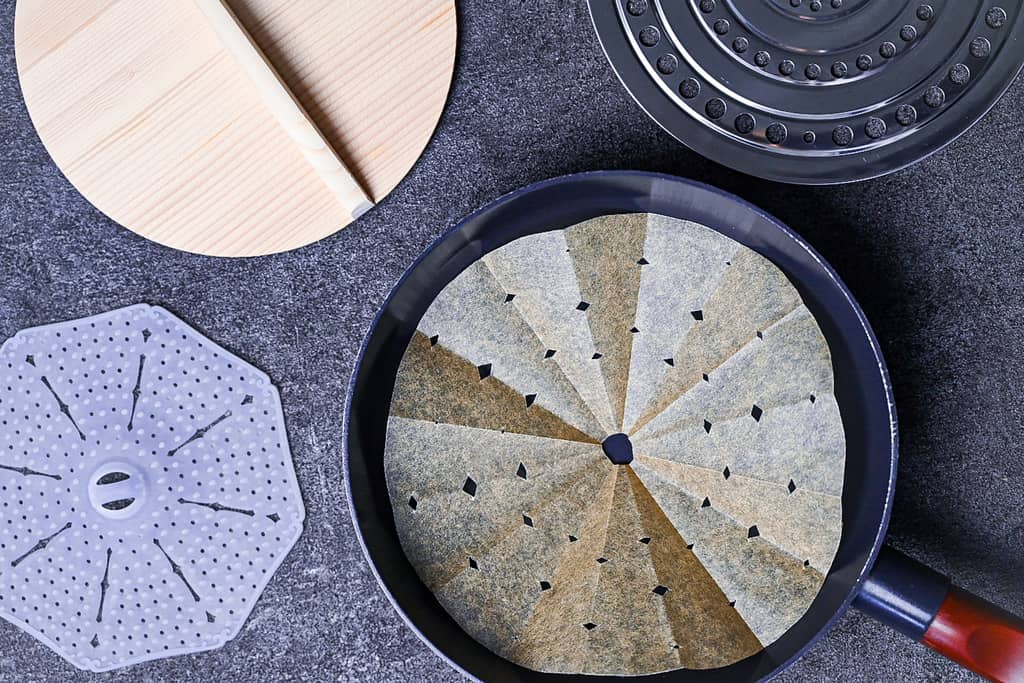
ii. Place a drop lid (otoshibuta) directly on the surface of the liquid. This keeps the pork submerged, promotes even cooking, and minimizes evaporation so your sauce concentrates steadily rather than spiking salty too soon.
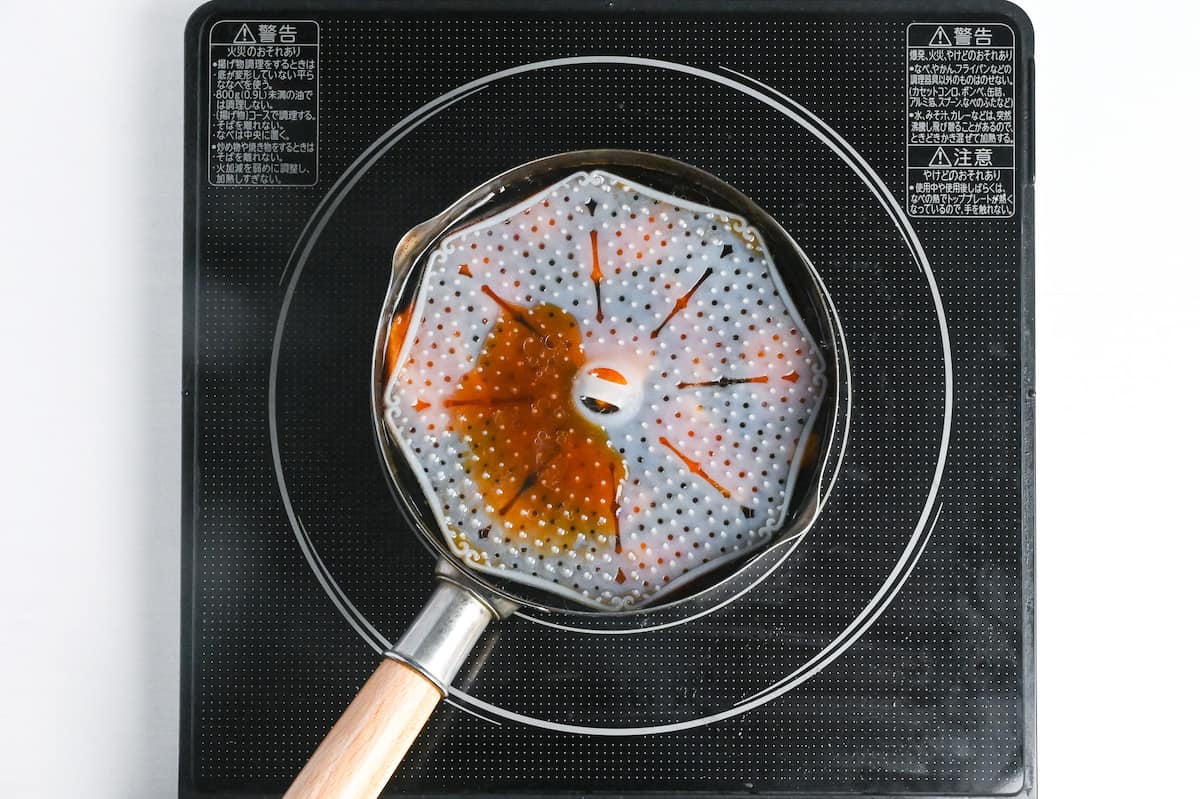
An otoshibuta is a flat lid that sits inside the pot, directly on the food, rather than on top of the pot itself. Traditional versions are made from wood or stainless steel, but silicone models are easy to find online.

In a pinch, you can even make shift otoshibuta out of baking parchment!
A standard pot lid traps steam and can raise the temperature past a gentle simmer, risking a rolling boil that toughens meat. It also allows ingredients to bob and float, so tops of cubes can dry out, a drop lid weighs it down while letting the steam escape.
iii. Simmer for 30 minutes, resisting the urge to stir or poke.
i. Turn off the heat and let the pot cool undisturbed. Once the pot is cool enough to handle comfortably, you can slip peeled soft-boiled eggs into the liquid for marinated eggs (ajitama). Let everything marinate together for at least 1 hour at room temperature; for deeper flavor, or transfer to the refrigerator and hold overnight.
ii. When you’re ready to serve, return the pot to the stove over medium heat and warm gently for about 15 minutes, or until the pork is heated through. Remove the eggs after 5-10 minutes to prevent overcooking.
I’d say yes! Flavor penetration happens fastest when the braise is hot, but equilibration continues as everything cools. Resting also firms the gelatin in both meat and sauce, making cubes easier to handle and giving you a clean opportunity to lift off any solidified fat from the surface.
iii. While the kakuni reheats, thinly slice the reserved white part of the leek into fine shreds and soak them in a bowl of lightly salted cold water. This technique produces shiraganegi, literally “white-hair onions”, a classic Japanese garnish that adds crunch, a mild oniony bite, and striking visual contrast atop the glossy brown pork.
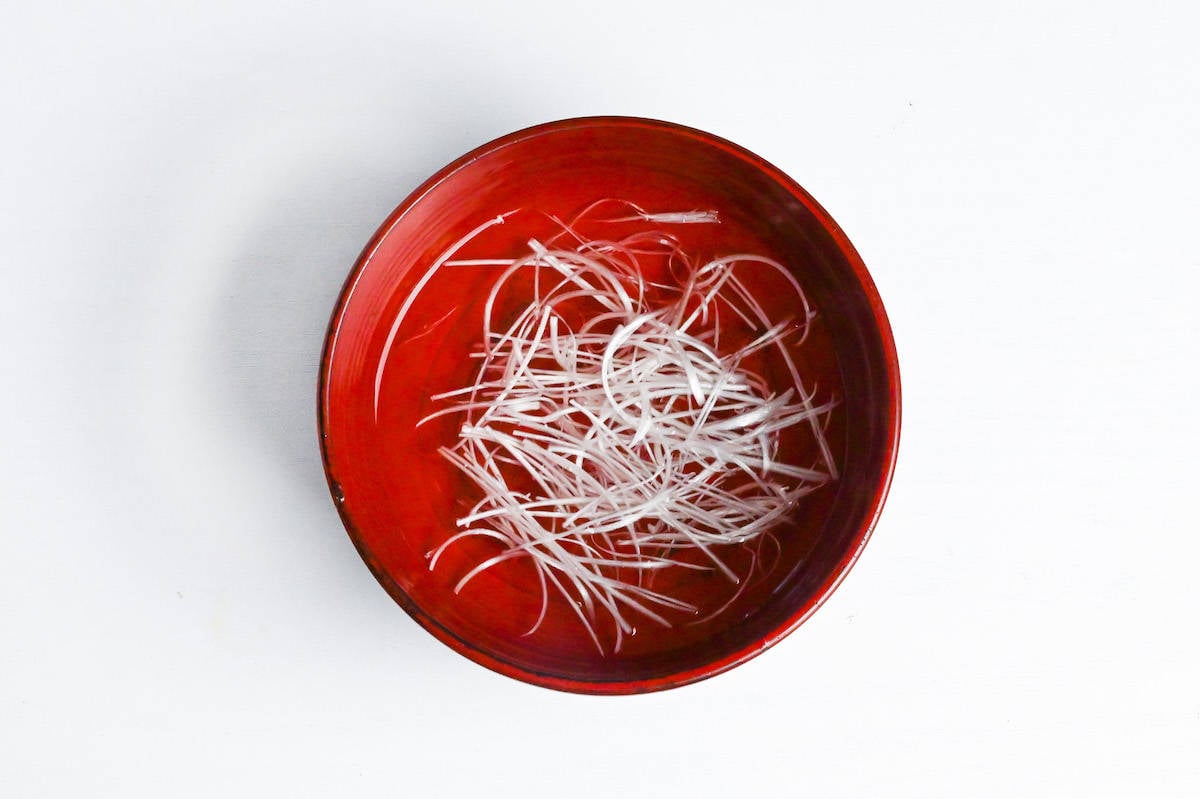
iv. After 5 minutes, drain and pat dry. The cold soak crisps the shreds and mellows any harsh bite.
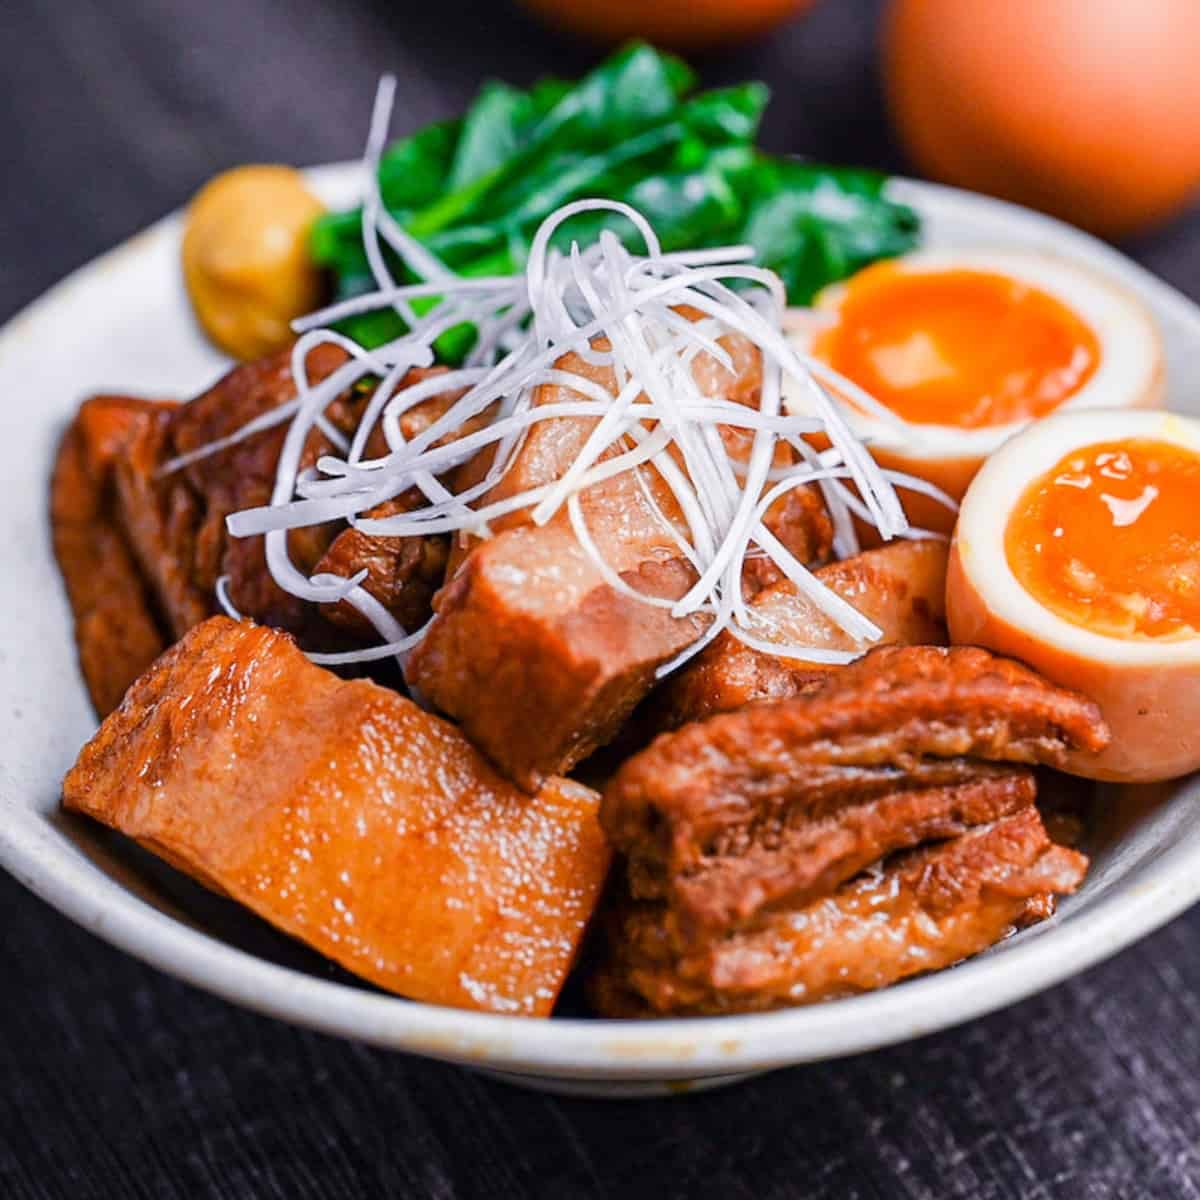
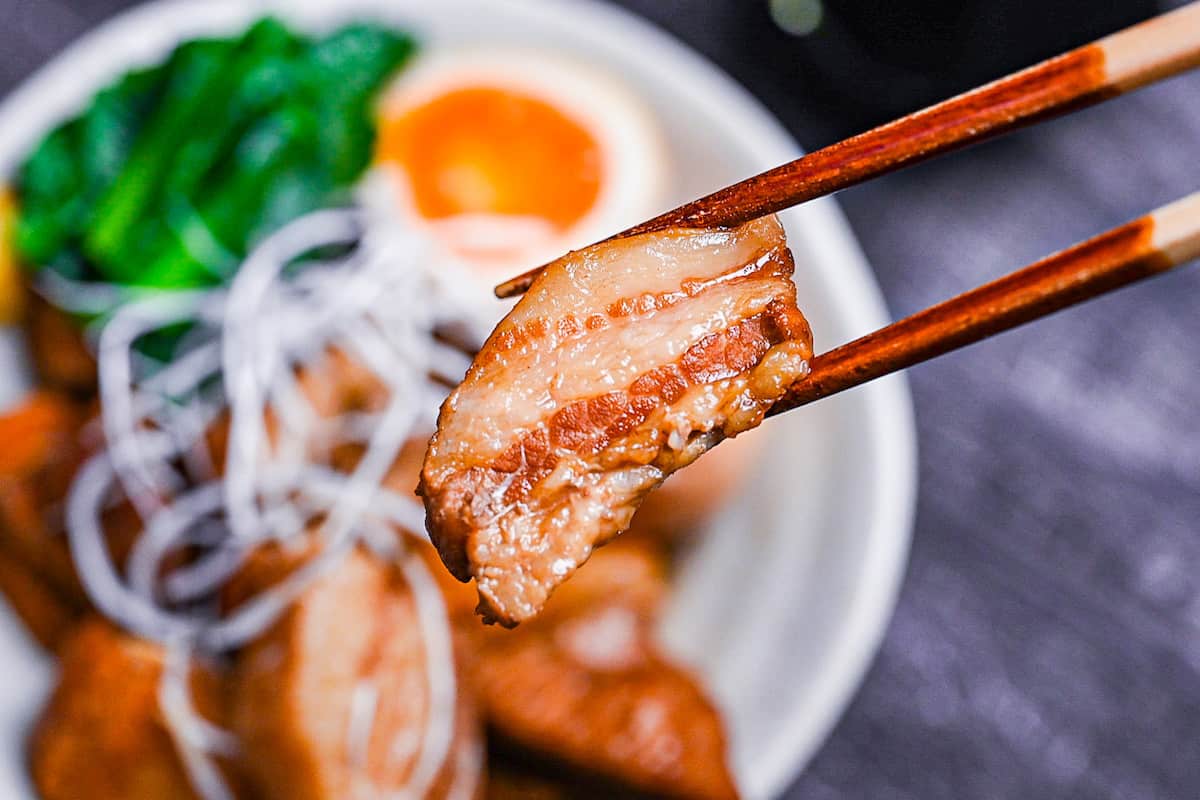
i. Arrange the warm kakuni cubes in shallow bowls, spooning the glossy sauce generously over each piece. Nestle halved marinated eggs alongside, cut-side up so the jammy yolk is on display. Add a small mound of blanched greens (baby bok choy, spinach, or chrysanthemum leaves work beautifully) for color and a fresh counterpoint to the richness.

ii. Crown the pork with a tangle of shiraganegi and place a dab of Japanese mustard (karashi) on the side. Serve over steaming short-grain rice, or present as a standalone side dish.

The braising liquid from kakuni is a flavorful concoction, rich with the essence of the pork and the depth of soy sauce. Discarding it would indeed be wasteful. Here are some creative ways to repurpose this umami-packed liquid:

- Noodle Soups: Transform it into a base for ramen or udon! If you have any remaining kakuni, they make an excellent topping, too. The braising liquid as it is is too sweet so I recommend mixing with water 1:1 and then build flavor little by little with soy sauce, salt, pepper, or chicken bouillon powder.
- Japanese Curry’s Secret Ingredient: Elevate Japanese-style curry with this flavorful broth. Gradually add to taste and witness the depth it brings to your curry.
- Fried Rice: Use the residual lard as your cooking oil and a dash of the marinade for seasoning to make a fantastic chahan!
- Marinated Eggs: Create ajitama eggs by reducing the marinade a little, then immerse soft-boiled eggs in it for a delightful flavor infusion.
On the other hand, the plain pork broth (from the initial simmering stage) is unseasoned and versatile. Use it as a soup base for my miso ramen, tantanmen, shio ramen, or shoyu ramen recipes! It adds body and subtle pork richness without locking you into a specific flavor profile, making it perfect for ramen!

Essential Tips & Tricks
- Simmer gently at around 90°C, never at a rolling boil. Low heat allows collagen to convert to gelatin while keeping muscle fibers relaxed and juicy. Boiling agitates the liquid and forces moisture out, leaving you with tough, dry pork even after hours of cooking.
- Searing the pork before blanching removes excess fat and helps the pork maintain its shape.
- Pre-boiling removes blood proteins and excess fat that cause off-odors and cloudy sauce.
- Keep the pork submerged using a drop lid (otoshibuta) or parchment round. The lid maintains even heat distribution and prevents exposed surfaces from drying out.
With these simple tips in mind, you’re set for success every time you make pork kakuni.
Storage & Meal Prep
Fridge: Store kakuni submerged in its sauce in an airtight container for up to 3-4 days. The sauce will gel firmly and the fat will solidify into a protective cap. Both are normal and help keep the meat moist.
Freezer: Recommended! Freeze portions fully coated/submerged in sauce in a freezer-safe airtight container or bag for 1-2 months best (up to 3 months) to limit freezer burn.
Meal Prep: Kakuni is ideal for batch cooking! Prepare a full recipe, cool, degrease, then portion and refrigerate or freeze for near-instant weeknight dinners. The dish improves with an overnight rest, so cooking a day ahead is not a compromise, it’s an upgrade.
Reheating: Reheat gently on the stovetop over low heat, adding a splash of water if the gelled sauce is very thick, until the pork is warmed through.
What to Serve With This Recipe
Kakuni FAQ
That usually means the heat was too high (a boil tightens muscle fibers) or the pork just needs more time for collagen to gelatinize. Drop to a tiny-bubble simmer and keep going until a skewer slides in with almost no resistance. If the liquid got low, add hot water so the pork stays submerged while it finishes tenderizing.
Yes, blanching removes blood proteins, impurities, and surface fat that would otherwise cloud your sauce and create a “porky” off-smell. Skipping it saves 10 minutes but often means you’ll spend the entire braise skimming scum and still end up with a heavy, murky glaze.
Look for a balanced piece (visible lean and fat layers) rather than all-fat, so you get tenderness without an overly oily braise. Even thickness matters more than perfect marbling-uniform pieces cook and render predictably.
More Classic Japanese Recipes
Ready to explore more flavors? Browse my collection of Japanese home cooking recipes easy enough for any weeknight dinner!
Did You Try This Recipe?
I would love to hear your thoughts!
💬 Leave a review and ⭐️ rating in the comments below. 📷 I also love to see your photos – submit them here!
Kakuni (Japanese Braised Pork Belly)

Ingredients
- 600 g slab skinless pork belly with visible fat-and-lean layers
- 30 g ginger root
- 1 Japanese leek (naganegi) green part, or regular leek/onion
Marinade
- 500 ml pork broth the liquid from cooking the pork
- 100 ml lager beer or water/sake
- 1 tbsp honey
- 2 tbsp light brown sugar or white sugar
- 100 ml Japanese soy sauce (koikuchi shoyu)
- 4 soft-boiled eggs peeled
To serve (optional)
- Japanese leek (naganegi) white part, to garnish
- Japanese mustard (karashi) or hot English mustard
My recommended brands of ingredients and seasonings can be found in my Japanese pantry guide.
Can’t find certain Japanese ingredients? See my substitution guide here.
Instructions
Part 1
- Start heating a large pot of water (enough to submerge the pork). When it reaches boiling, reduce the heat to a simmer.

- Heat a frying pan on medium/medium-high and sear 600 g slab skinless pork belly on all sides.
- Transfer the seared pork to a cutting board and let it cool for a few minutes. When it's cool enough to touch, cut it into chunks a little larger than bitesize.
- Place the pork chunks in the pot of water and simmer for 10 minutes.
- Drain the pork in a colander and wash it with fresh cold water. Rinse out the pot, refill it with enough water to submerge the pork, and bring to boil once more.
- Slice 30 g ginger root and break 1 Japanese leek (naganegi) into pieces small enough to fit in the pot. When the water starts to boil, add them to the pot along with the pork, and lower the heat. Simmer for one hour.Make sure the pork is always submerged and top up the water if necessary.
- After one hour, turn off the heat and reserve 500 ml pork broth from the pot.
Part 2
- Pour the reserved broth into a pot and add 100 ml lager beer, 1 tbsp honey, 2 tbsp light brown sugar and 100 ml Japanese soy sauce (koikuchi shoyu). Mix and bring to boil, then add the pork.
- Place a drop lid on top of the pork and simmer on low for 30 minutes.After 30 minutes, turn off the heat and leave to cool. Once cool, add 4 soft-boiled eggs (optional), cover and marinate in the fridge for 1 hour.
- If you want to garnish with "shiraganegi", cut the white part of a Japanese leek (naganegi) into thin strips and soak in lightly salted water for 5 minutes before serving.
- After marinating, return the pot to the stove and heat on medium until warmed through. Pull the eggs out early to prevent overcooking.
- Dish up and serve with Japanese mustard (karashi). Enjoy!
Mr Yuto!
I’ve been scouring for all the different Japanese across the internet. All your recipes are absolutely SMASH HITS.
I’ve cooked your gyudon, oyako-don, yakitori don, Japanese dry curry and today, This recipe right here.
You keep on producing hit after hit after hit of good quality recipes that are sure to tantalize the tastebuds!
Please keep up the good work!
Arigato gozaimasu!
Hi Joel,
Thank you for the comment and your kind words! It means a lot!
I’m so happy that you enjoyed every recipe so far!
I will try my best to keep adding more and more recipes, stay tuned! 🙂
Yuto
Can I substitute beer with something non alcoho?
Hi May,
Thank you for asking! If you’d like to skip the alcohol, using an additional 100 ml of the pork cooking liquid from step 1 is a great substitute! 🙂
Yuto
Delicious 😋
Hi May,
Thank you so much for making it and sharing your photo, it looks fantastic! I’m really glad the substitute worked well and that you enjoyed it 🙂
Yuto