


Featured Comment
I was surprised how good the result was.
★★★★★
– Ric
“Wow…” That is the kind of thing you mutter under your breath after one bite, when layered umami detonates all at once. With this recipe, you build the kind of ramen soup at home. And it is not the salt, we get there by layering the umami base instead.
We Japanese describe Tokyo-style shoyu ramen as assari (light and clean), against the richer tonkotsu ramen and miso ramen. Yeah. I went and built that ramen.

Shoyu Ramen
Recipe Snapshot
- What is it? The Tokyo soy-sauce style of Japanese ramen, the bowl Japanese cooks still call chuka-soba, built as a 4-component system rather than a single soup with soy sauce dumped in.
- Flavor profile: Light and clean (assari) on the surface, with layered umami detonating underneath from a dashi-and-chicken broth, a savor shoyu tare, and a chicken-skin aroma oil.
- Why you will love this recipe: This is the source-code Tokyo bowl, not a shortcut. Tare and broth stay apart until the bowl, the aroma oil is treated as structural rather than garnish, and the cross-cultural sourcing path makes a Saturday-afternoon project genuinely doable.
- Must-haves: Niboshi for the load-bearing dashi, Japanese dark soy sauce for the tare, and chicken skin or store-bought fat for the aroma oil.
- Skill level: Medium. Stovetop work with no special equipment, but the broth has to stay below a rolling boil and the aroma oil has to be there.
Summarize & Save this content on:
What Is Shoyu Ramen?
Shoyu ramen (醤油ラーメン) is the soy-sauce style of Japanese ramen, the bowl Japanese cooks still call chuka-soba (中華そば) on the signage. Tokyo is its home address, and it is the prototype that most other regional ramen style depart from.
The bowl was codified at an Asakusa shop in 1910, then rebuilt in postwar Ogikubo by ex-soba craftsmen who extended their kombu-and-katsuobushi dashi instinct into Chinese-style noodles. That move is what made it Japanese. Chicken bones for the body, niboshi, katsuobushi and kombu for the second layer, soy sauce kept out of the pot and built separately as a tare, a curl of chicken oil floating on top. 4 components, each on its own clock, only meeting in the bowl.
For this recipe, I am building chicken wings on top of a niboshi, kombu, and katsuobushi dashi, crafting a separate shoyu tare, and rendering chicken skin into an aroma oil.
Shoyu Ramen Ingredients
What You’ll Need for Shoyu Ramen Soup
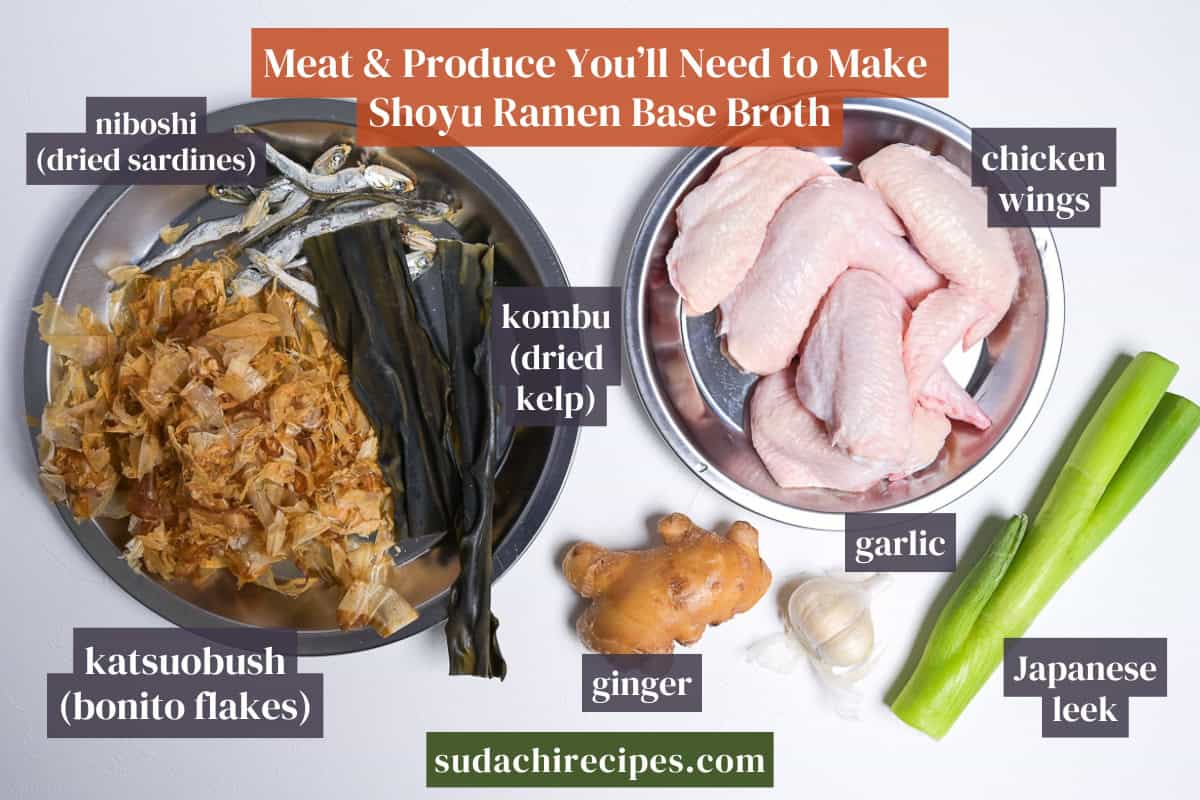
- Japanese dashi trio: This is the load-bearing trio, and for shoyu specifically, niboshi (dried sardines) is the one that decides whether you have Tokyo shoyu or just chicken soup with soy sauce in it. Kombu builds the glutamate floor and katsuobushi gets dropped in at the very end.
- Chicken wings: I went whole wings, but drumettes or wingettes work too. The point is to layer chicken stock on top of the dashi, not to lean on the dashi alone, the fish dashi gives you the clean part and the chicken gives you the body.
What You’ll Need for Tare & Aroma Oil
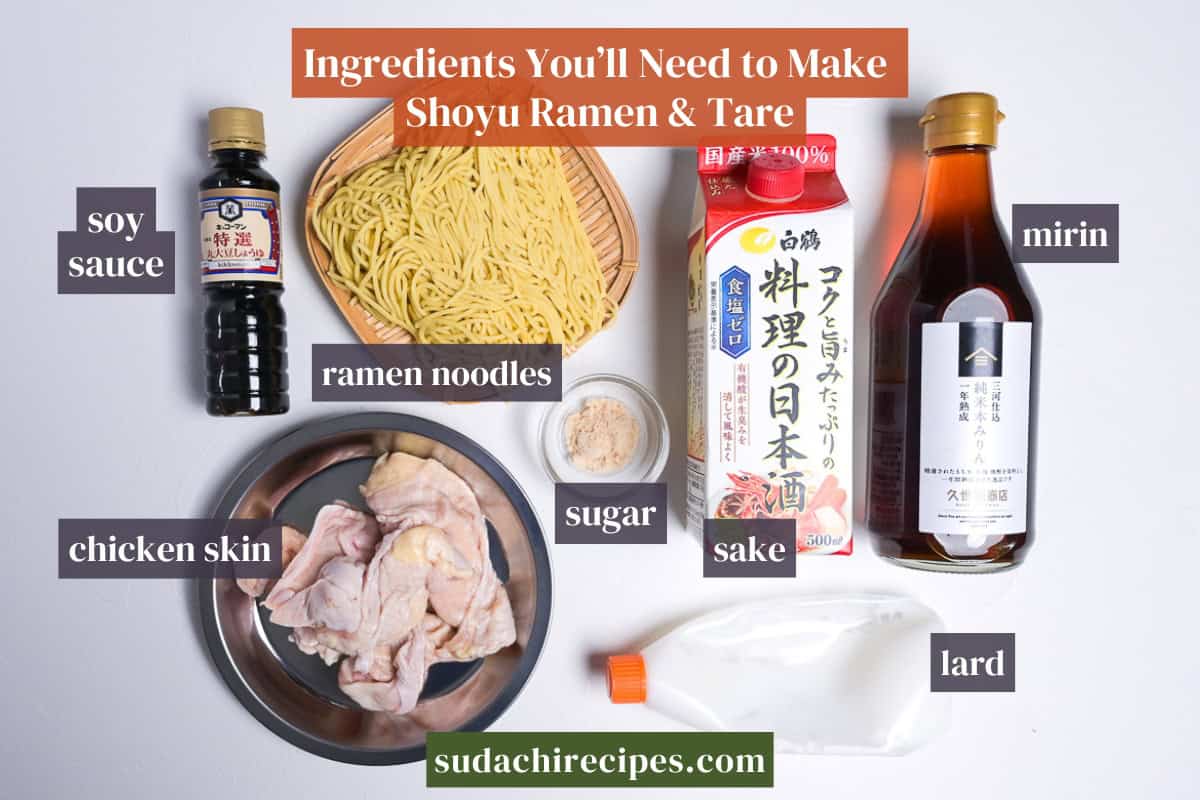
- Ramen noodles: Medium-thin to medium-thick is the sweet spot for shoyu. If you want to go all in, my homemade ramen noodles recipe walks you through the kansui-and-flour math from scratch.
Substitutions, Variations, and How to Customize
Here is the honest truth about a homemade shoyu bowl. 3 things are non-negotiable: Japanese dark soy sauce, a fish-and-kombu dashi layered with the chicken stock, and noodles made with kansui. Everything else has a swap that gets you most of the way there.
Substitutions:
- Chicken skin → Store-bought chicken oil (or schmaltz), duck fat, or goose fat: If you can find rendered chicken oil (chi-yu), melt 1 to 2 tablespoons of it down and drizzle it on at the end. That skips the whole rendering step. Duck fat or goose fat does the similar enough job with a slightly richer aroma. The aroma oil is structural, but the source of the fat is flexible.
- Niboshi, kombu, katsuobushi → Pre-made dashi packets: A real dashi packet is a clean swap and saves you a whole step. 1 warning. I personally don’t recommend substituting in dashi made from instant granules. The flavor stops being clean and tilts cloudy and a bit junky.
- Kombu → Korean dasima: Korean dasima at any Asian markets is the same kelp species.
- Chicken wings → Drumettes, wingettes, or chicken backs: Same purpose, similar yield. Drumettes have a touch more meat. Wingettes are pure gelatin and skin. Chicken backs for a couple of bucks a pound give you the cleanest stock-to-meat ratio if you can find them.
- Green parts of negi → Green parts of leek: Leek tops work cleanly. Thin scallions, on the other hand, will not cut it here.
Have trouble finding Japanese ingredients? Check out my ultimate guide to Japanese ingredient substitutes!
Variations:
- Make-ahead tare: Build the shoyu tare a full week ahead. Store it in a clean glass bottle in the fridge. The salt edge softens, the aroma compounds settle, and by day 3 to 7 the tare reads rounder and deeper. This is exactly the kaeshi tradition the Edo-era soba shops were running with their dipping sauces. Same chemistry, different bowl.
- Stretched dashi: If kombu and katsuobushi and niboshi are pricey where you live, halve the amounts in the recipe and you still get a credible bowl. Or keep the full amounts, bump the water from 1 liter to 2 liters, make a double batch, and store half for next weekend. Adjust this to fit your kitchen reality.
How to Customize:
- Wider dashi: Add dried scallop or dried shrimp like I did with my shio ramen. A small handful of dried shrimp at any Asian grocer adds another nucleotide channel without changing the bowl’s identity. Dried scallop is the luxury version of the same idea.
- Winter citrus lift: Lay a 5 cm sliver of yuzu peel on top of the bowl right before serving. Yuzu is at any Japanese grocer in winter. Lemon peel is a watery substitute, but Meyer lemon peel actually lands close.
- Old-school finishing dust: Add a pinch of white pepper as the last move. White pepper rides the aroma oil up to your nose and sharpens the first sip.
How to Make My Tokyo-Style Shoyu Ramen
If you prefer to watch the process in action, check out my video of this shoyu ramen recipe!
Before you start (Mise en place):
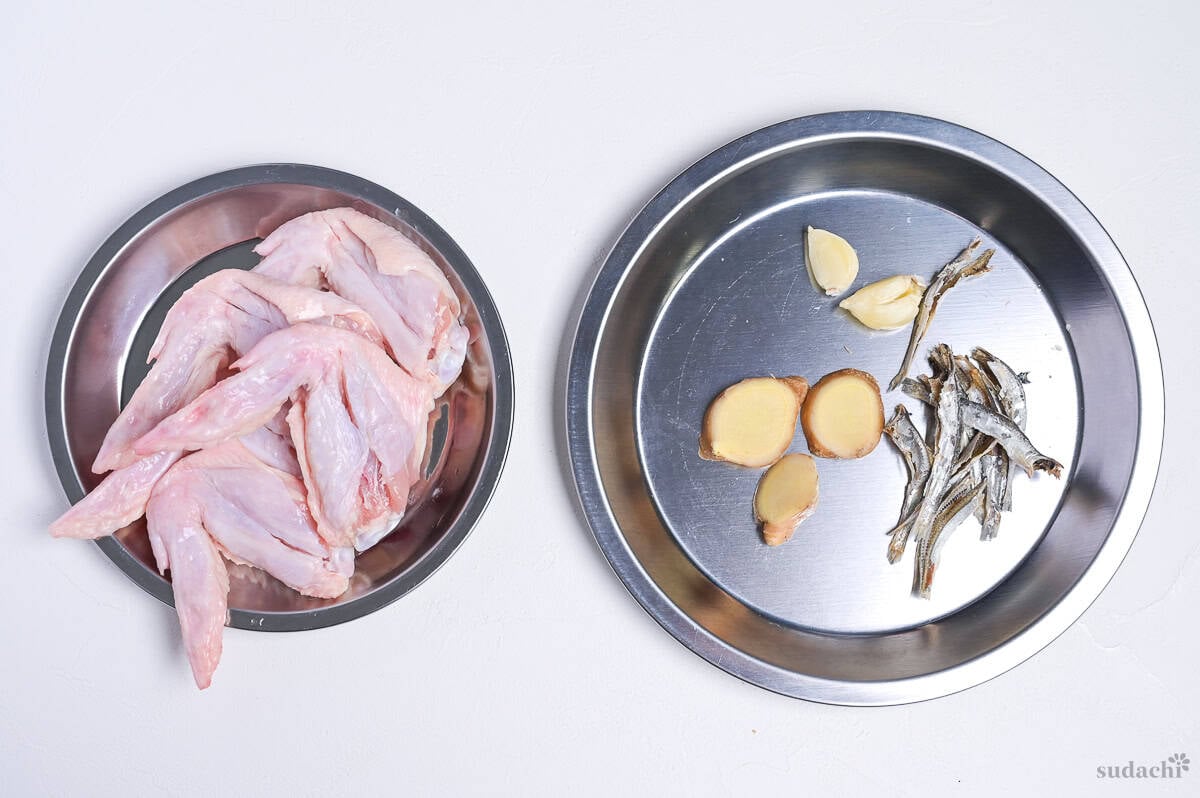
- Niboshi: pull the heads off and pinch out the dark gut sacs.
- Chicken wings: along the bone on the skinless side, run the tip of a knife or the point of kitchen shears straight through the meat to score it. This opens up a clean exit path for the gelatin and the inosinate as the wings simmer.
- Garlic: smash with the flat of your knife. No need to mince. Whole cloves slowly release their compounds into the stock without ever turning sharp.
- Ginger: slice into rounds, not too thin.
i. In a pot, combine 1000 ml of water with the kombu and the niboshi, and hold at 60°C (140°F) for 30 minutes.
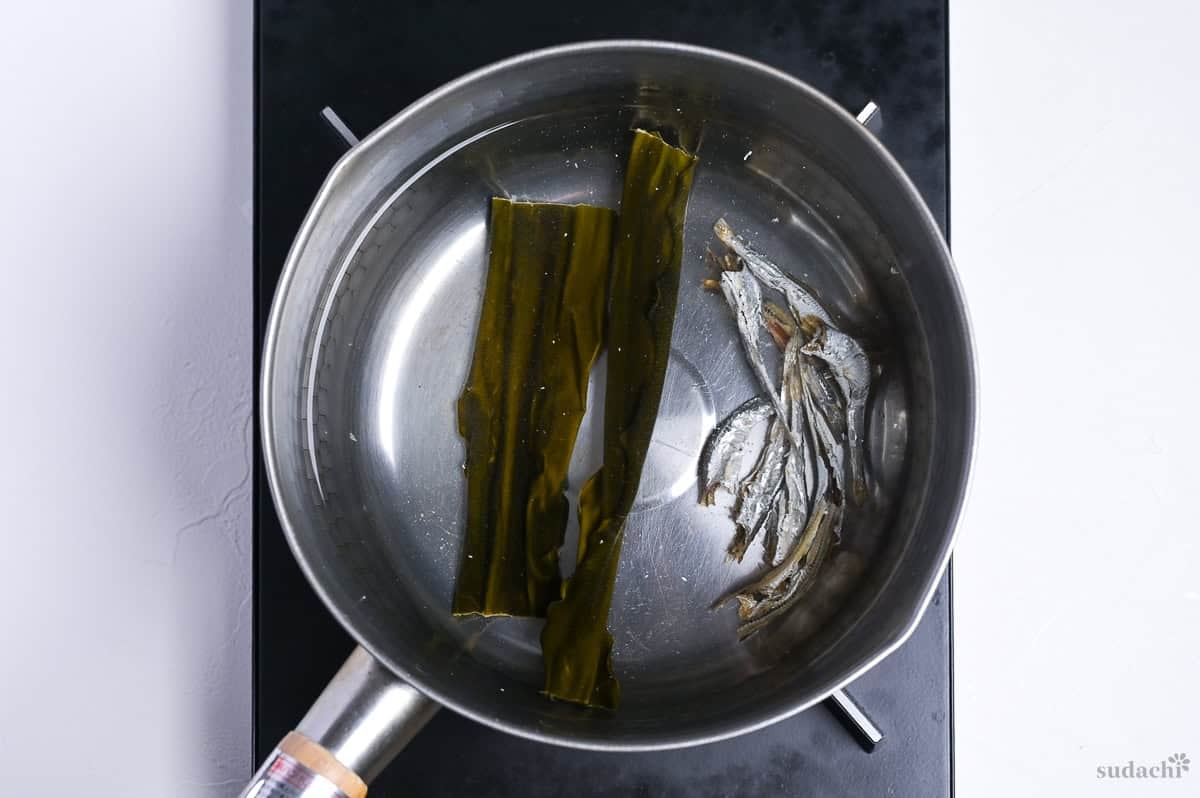
Kombu glutamate peaks at around 60°C. Push it any harder than 80°C and the kelp starts releasing slimy alginic-acid polysaccharides that cloud the broth and turn the texture viscous. A gentle warm pulls the umami out cleanly the way a tea bag steeps in hot but not boiling water. A hard boil pulls those plus a bunch of stuff you do not want in the bowl.
ii. Then pull the kombu and niboshi out before the temperature ever climbs higher.
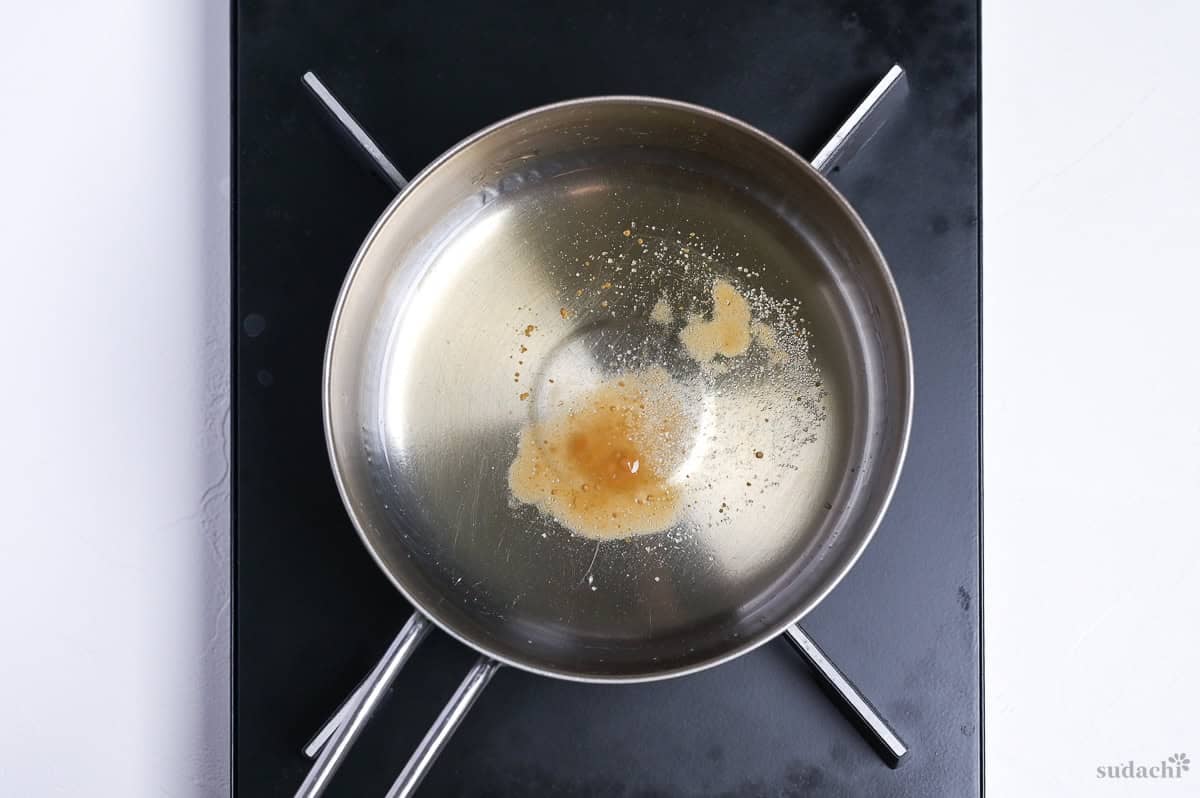
i. While the kombu and niboshi are doing their 30 minutes, knock out the tare. In a small pot, combine the sake, mirin, sugar, and a pinch of salt, and simmer until the sugar and salt dissolve and the alcohol smell from the sake and mirin has burned off. About 1 minute.
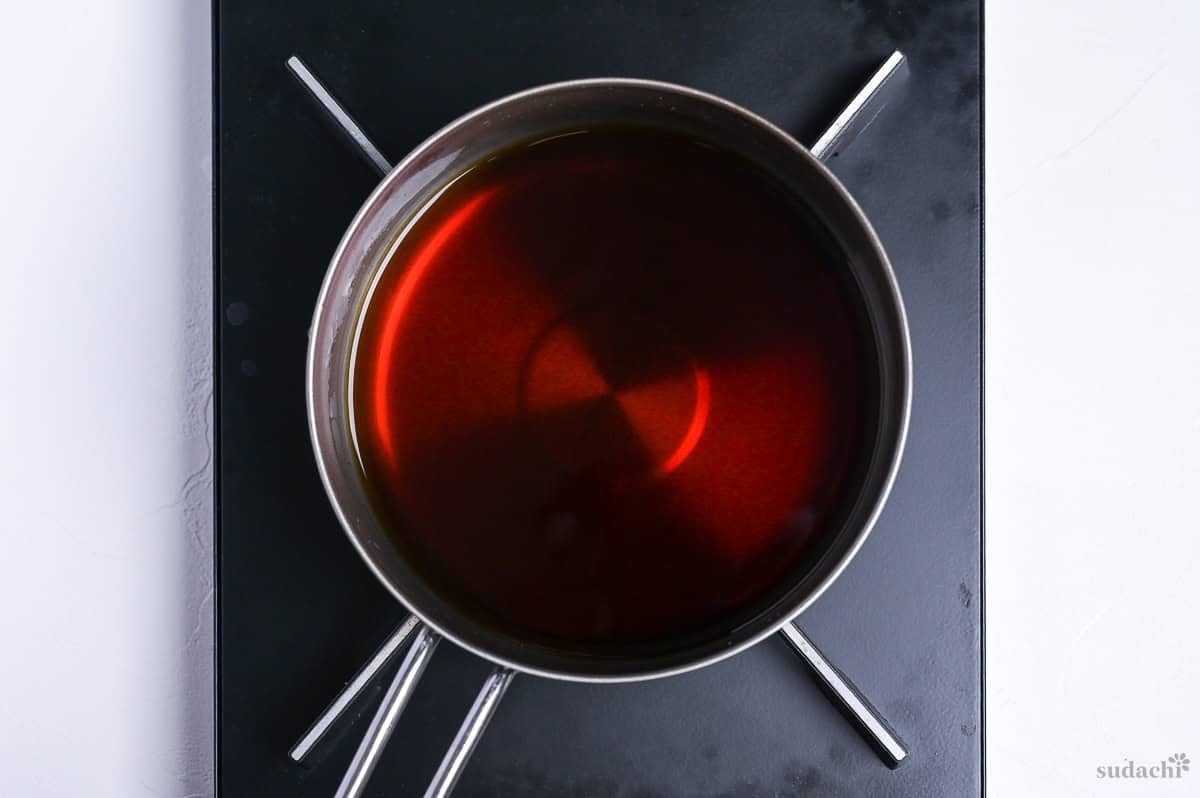
ii. Add the water and the Japanese soy sauce. Simmer another 5 to 10 minutes. Pull it the moment it has just barely started to thicken. That is the sweet spot.
iii. Transfer to a small jar or whatever container you have on hand. Let it cool to room temperature, then stash it in the fridge until you need it.
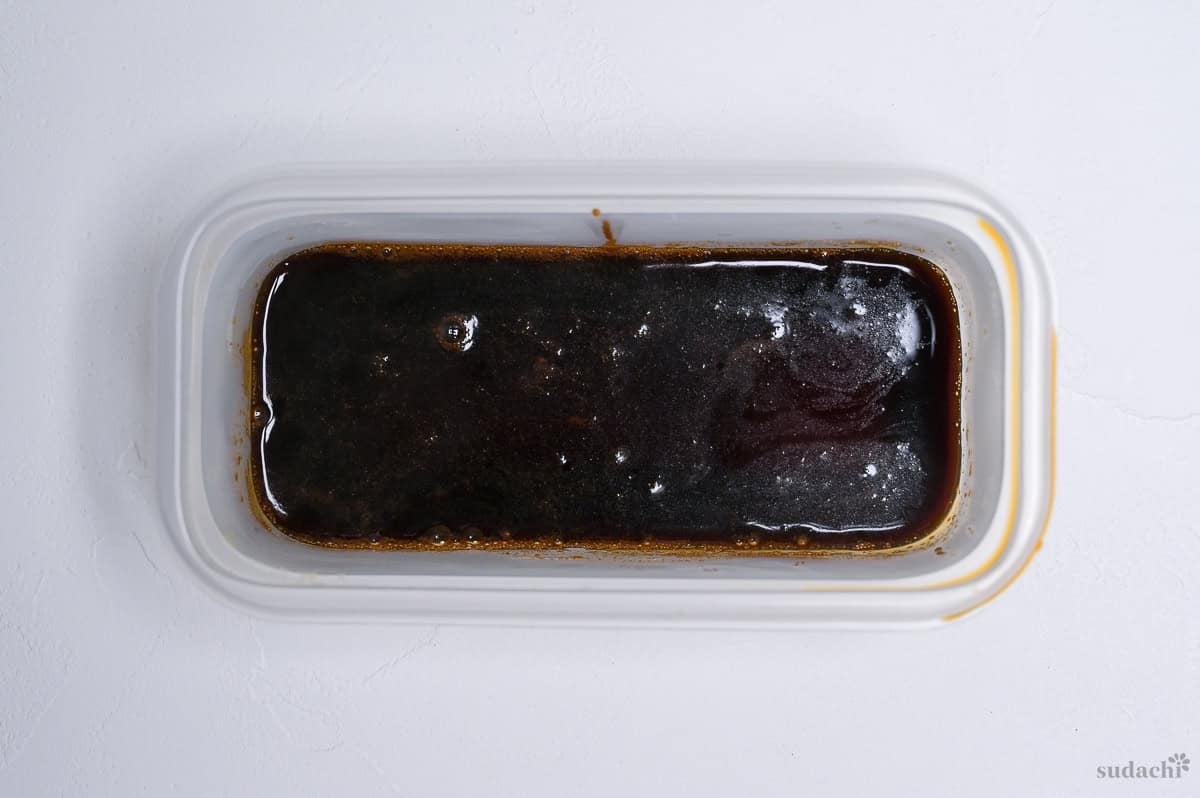
When shoyu tare rests in the fridge, the salt’s edge softens, the sake and mirin esters redistribute and round out, and the whole thing turns from sharp into deep. So honestly, the tare can be done the night before. Even better that way. If you build the bowl on a Saturday, build the tare Friday night.
i. After the kombu and niboshi are out, add the chicken wings, the smashed garlic, the sliced ginger, and the green tops of the negi to the pot.
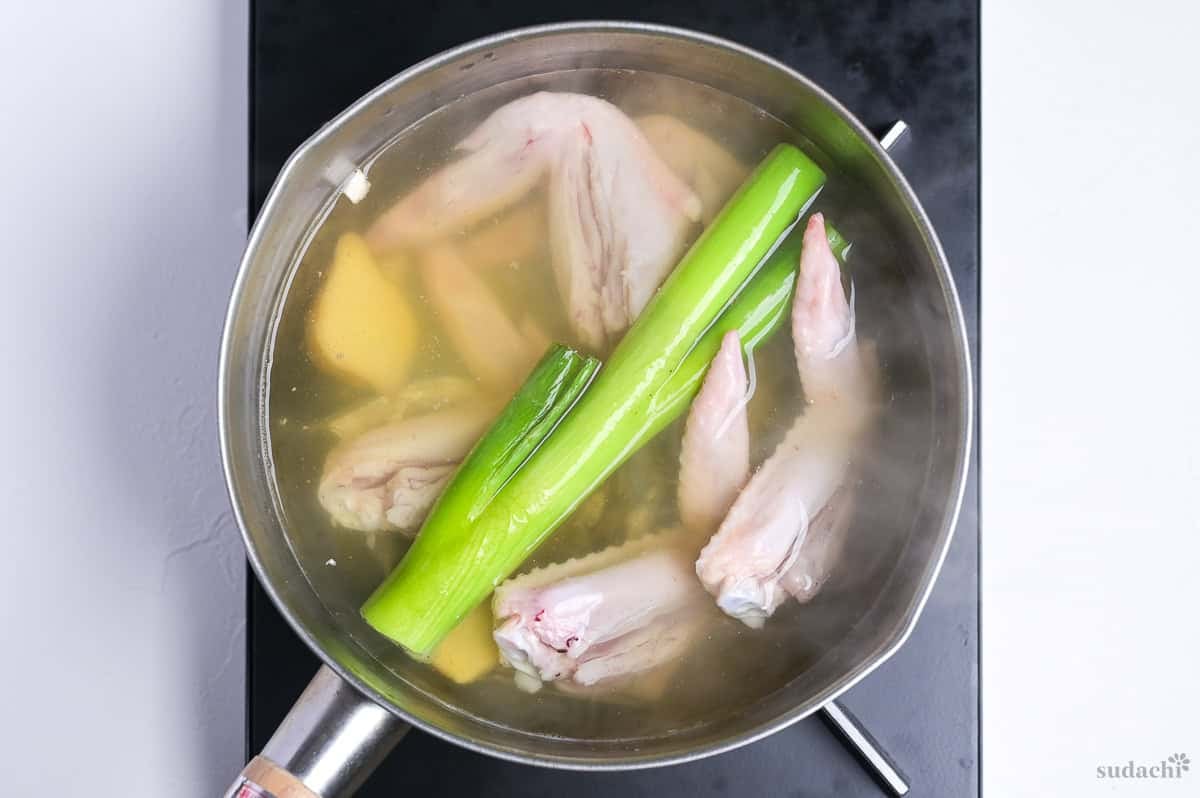
ii. Hold at 80 to 85°C (176 to 185°F) for 40 minutes. The surface should barely shimmer. No rolling bubbles, no aggressive churning, just an occasional small bubble breaking the top. Skim the foam off the surface (if any) every 10 minutes during the first half of the simmer.
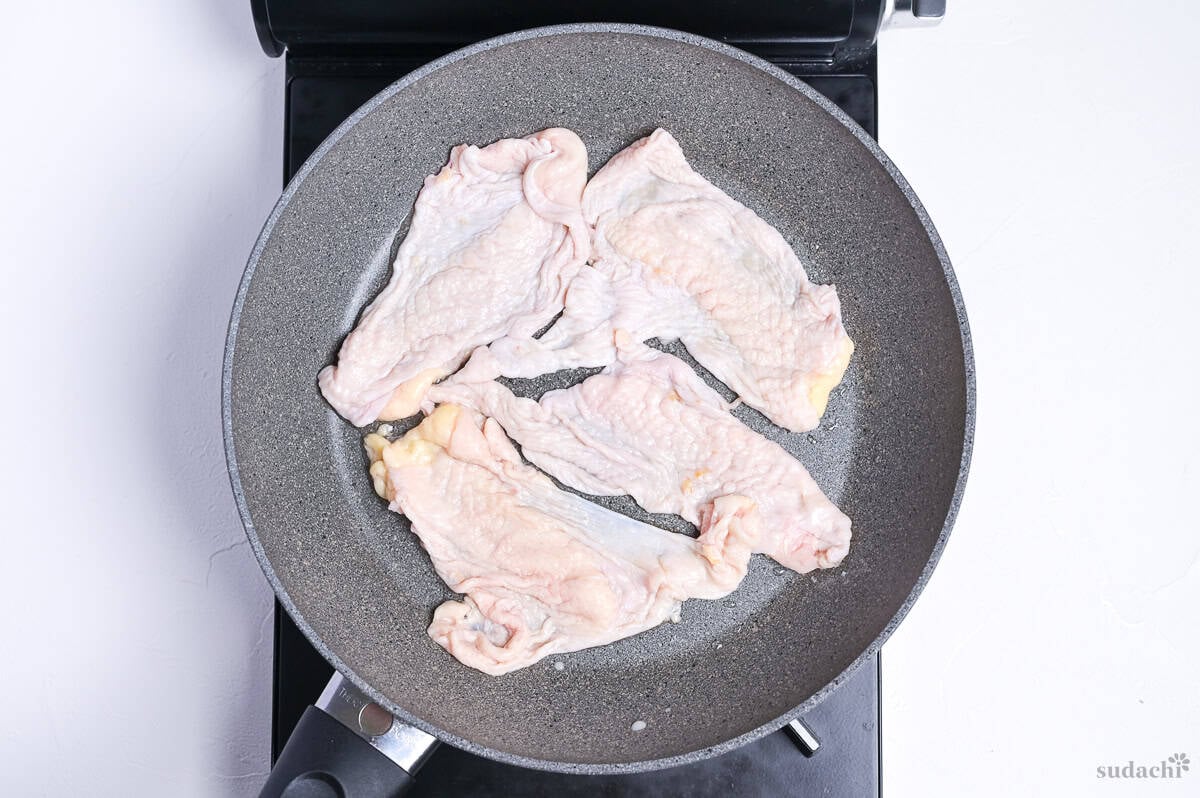
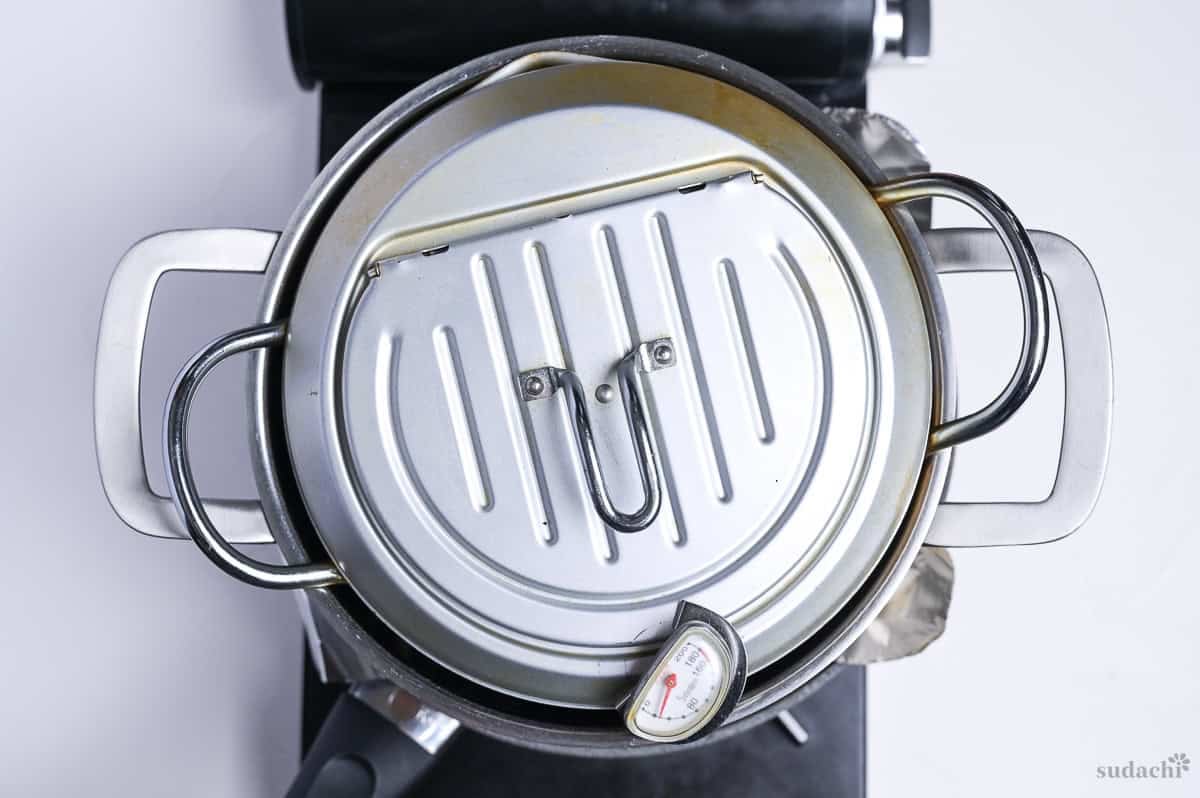
i. While the soup is simmering, heat a frying pan over low and melt the lard.
ii. Add the chicken skin and cook for about 10 minutes on each side, until both sides are deeply golden and the fat has rendered out into the pan.
Lay a sheet of aluminum foil on top of the skin and weight it down with a small plate or another pan.
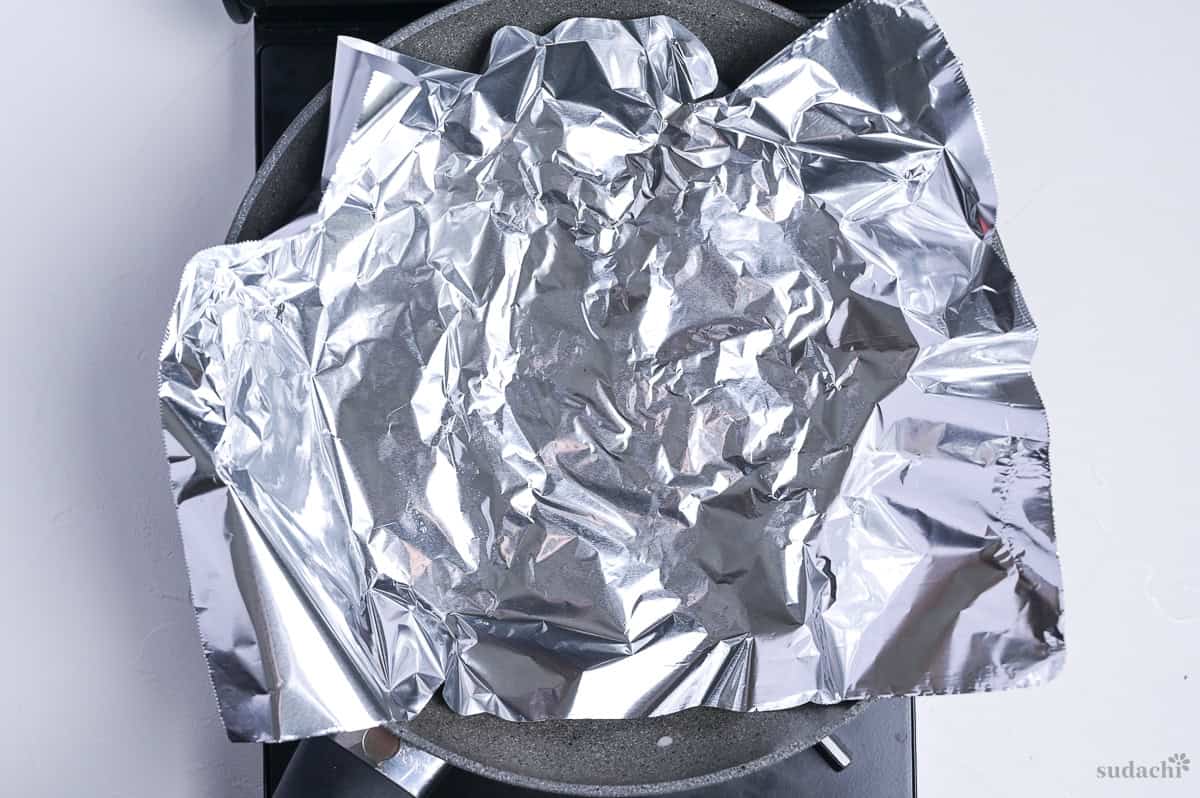
You get a much cleaner render that way, with both sides hitting golden at the same time. Highly recommended.
iii. Pull the chicken skin out of the pan with tongs. Reserve the rendered oil in the pan. If you can find rendered chicken oil, you can absolutely skip this whole step and use store-bought chicken oil, goose fat, or duck fat instead. Real time saver.
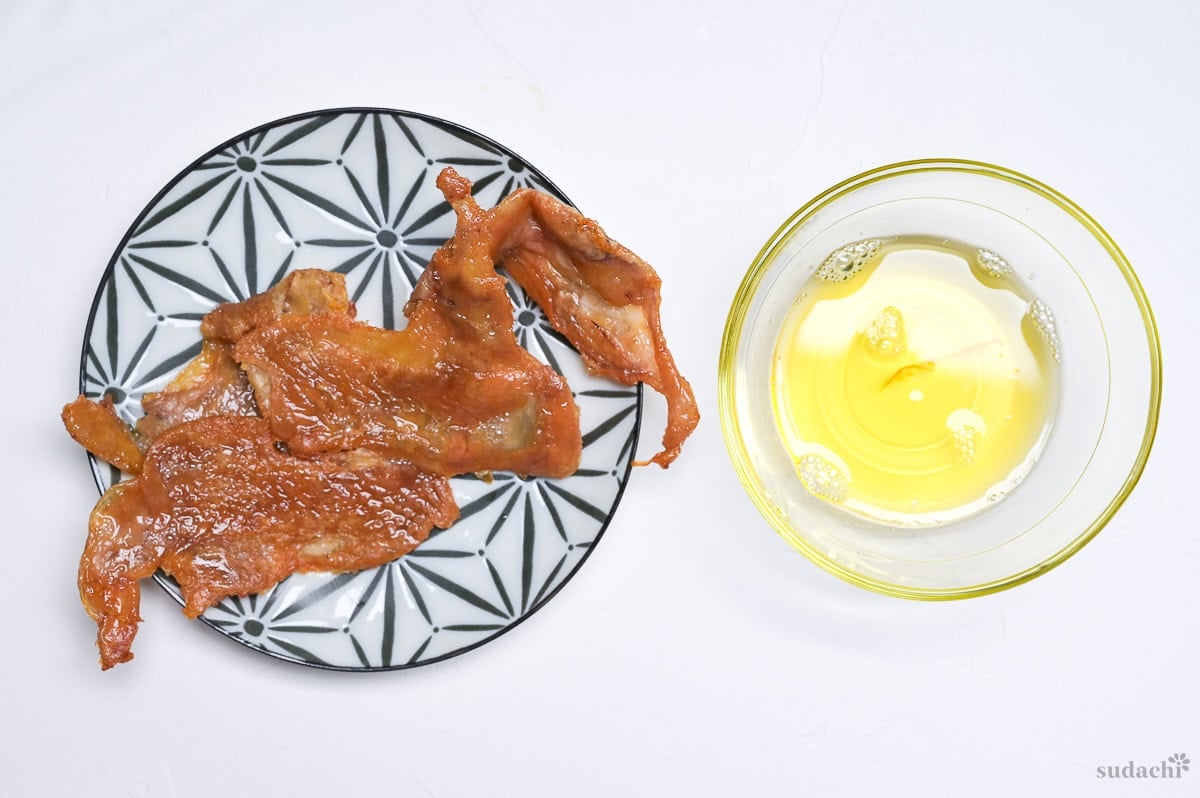
Listen, you get hungry when you cook, right? Hit the rendered chicken skin with salt and pepper and just eat it as a snack while you wait on the broth, or get a little creative and use it as a topping on the finished bowl. Especially handy when you cannot be bothered to make chashu.
i. When the 40 minutes are up, kill the heat under the soup pot.
ii. Drop in the katsuobushi and let it steep for 5 minutes off the heat.
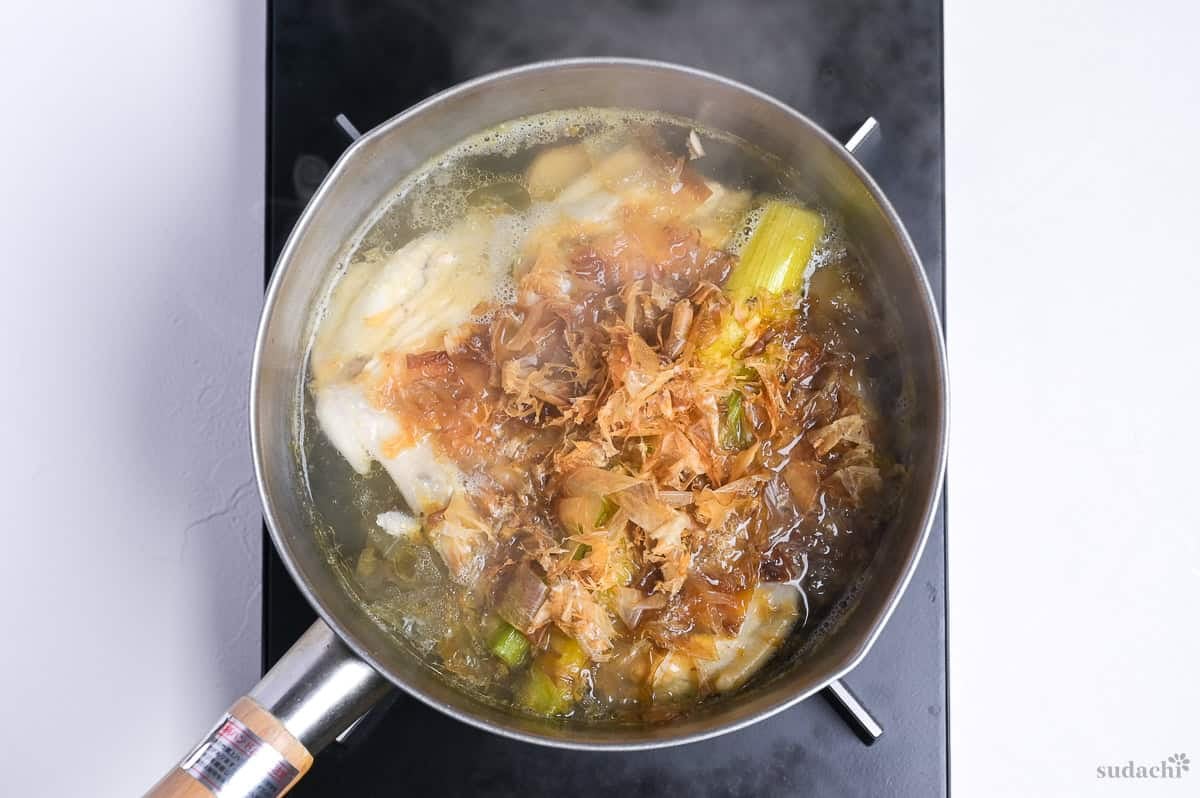
Take a sniff midway through that 5-minute steep. You will hit that “oh wow, this is the dangerous umami smell of a real ramen shop” moment. No joke.
These dashi quantities are based on how I make the soup in Japan. Obviously, kombu, katsuobushi, and niboshi are not that expensive when you buy them here, so I am using them pretty generously here.
But I am not about to say “this is the Japanese standard, you must use exactly this much.” If your dashi ingredients are pricey and you want to stretch them, half of these amounts is fine. Or keep the same amounts and bump the water up to 2 liters and make a double batch and store half. Adjust this to fit your kitchen reality.
i. Set up a fine-mesh strainer or a chinois with a sheet of paper towel laid inside it. Set it over a clean bowl or pot.
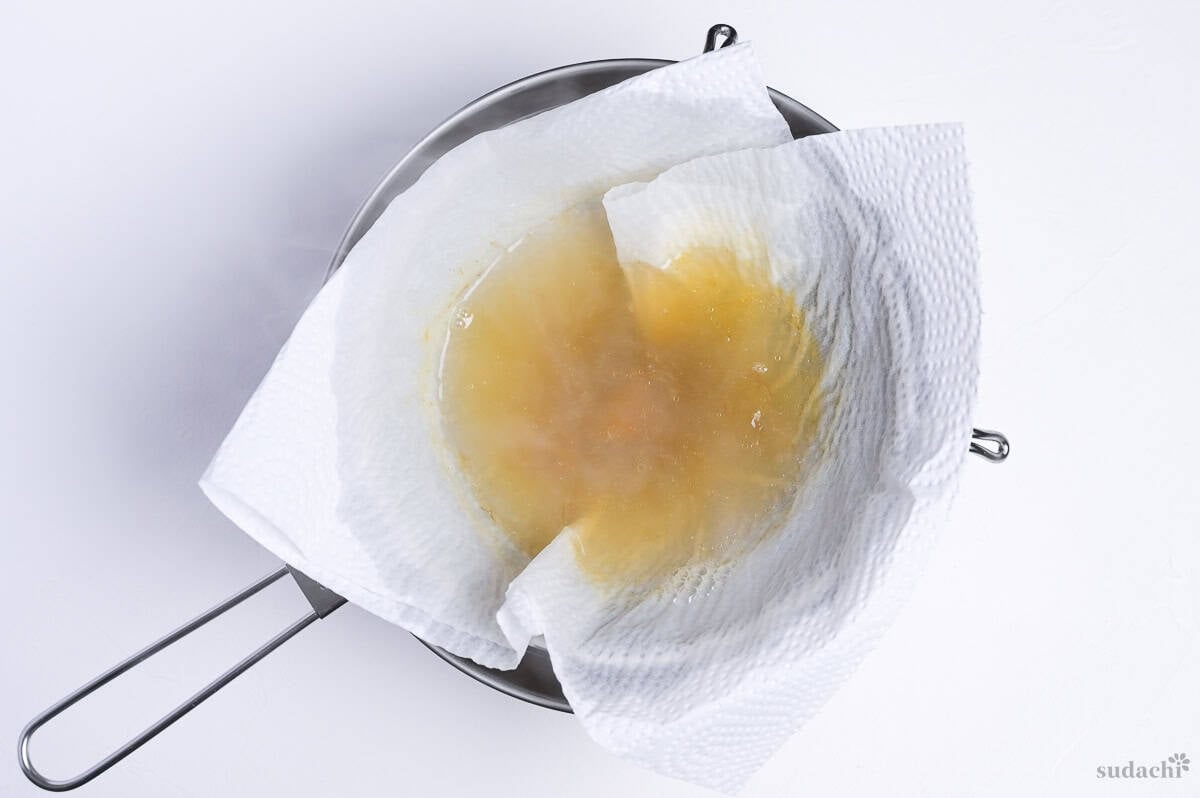
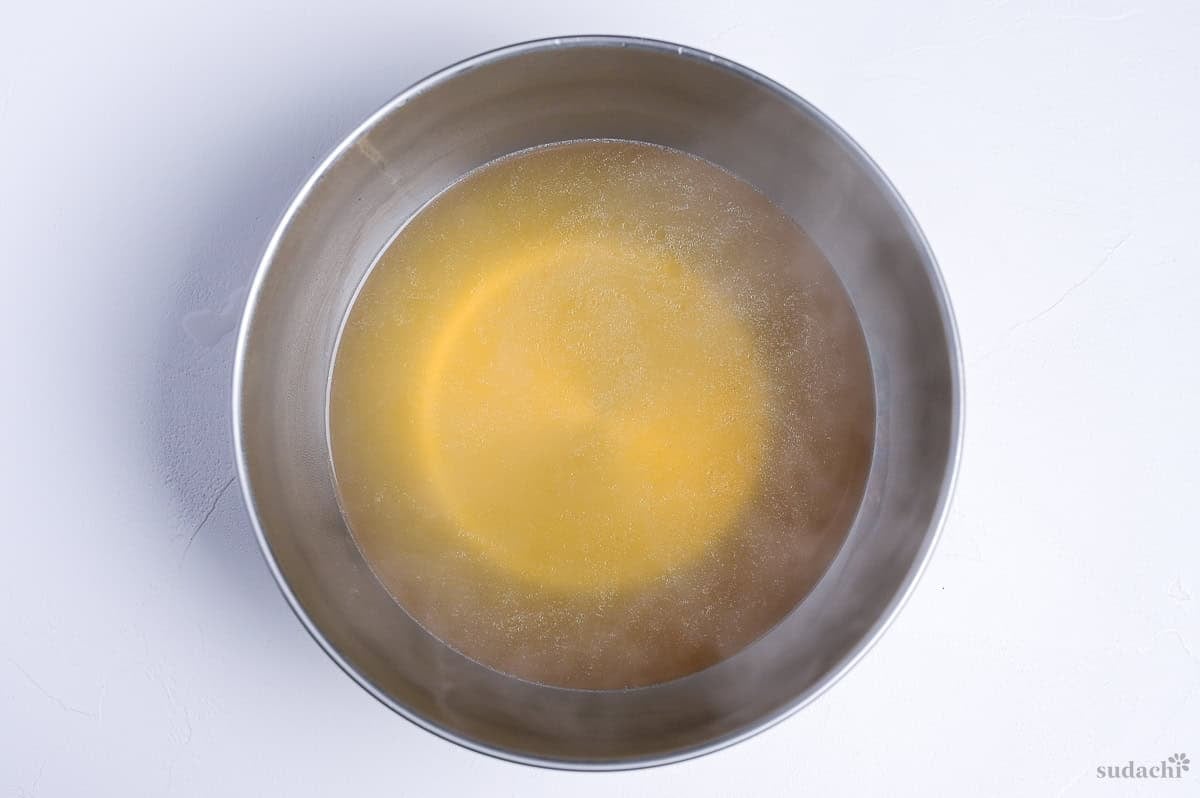
ii. Pour the soup through. You should end up with a clear, golden soup.
Do not press on the strainer or squeeze the chicken wings. Putting pressure on the solids forces fine fat particles through and clouds the broth. Take only what falls through naturally.
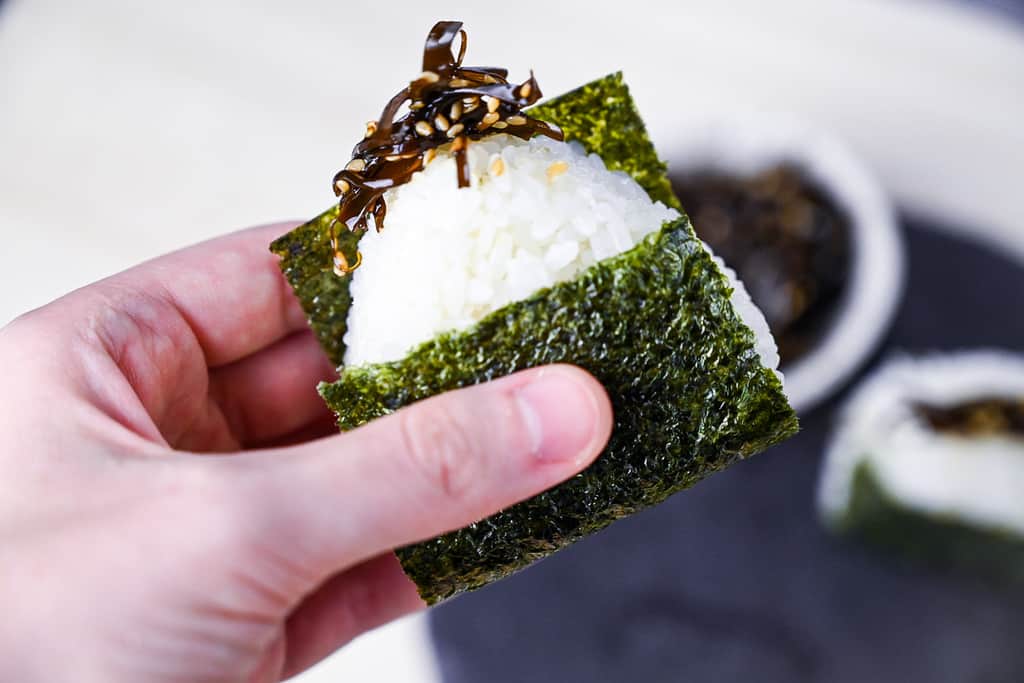
The used kombu can become tsukudani filling for kombu onigiri.
The wings, personally, I just toss into the air fryer, blast them for about 15 minutes, and eat them with salt or with some dips. The flavor has been pulled out of them and the meat is dry, yeah. But this isn’t a restaurant, it’s home. I am the one eating it, and so I want to enjoy every last bit of the ingredients I bought. Even fully extracted, the skin still gets crispy on the outside. Whether to use them or not, I will let you decide based on your own personal sustainability dial.
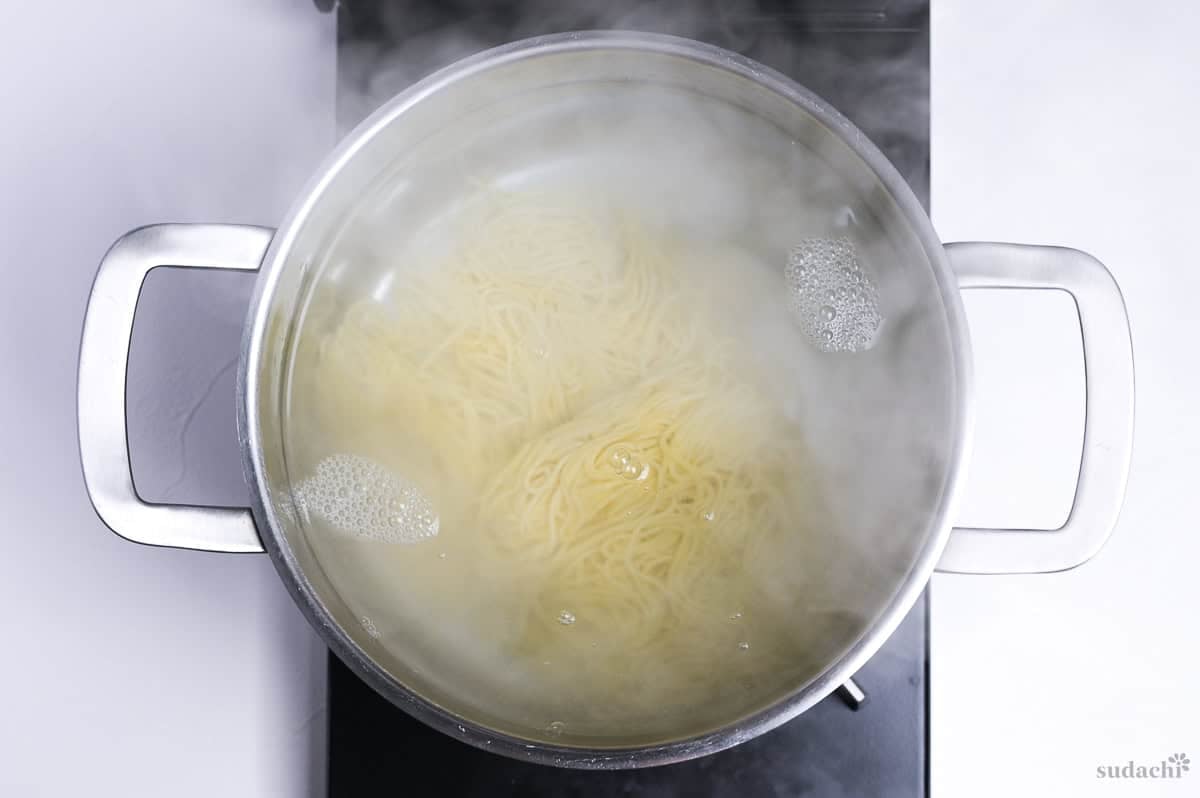
i. Cook the ramen noodles according to the package directions. A few rules: use at least 10 times the volume of water relative to the noodles, pull them 10 to 20 seconds before the package time so the carryover heat finishes them off, and drain them hard. No water clinging.
ii. While the noodles boil, warm the bowls. When you pour 90°C broth into a cold ceramic bowl, the soup temperature drops by 10 to 15°C (about 18 to 27°F) on the spot. Pour boiling water in, let it sit for 1 to 2 minutes, then pour it out. That little move gives you ramen-shop-style results.
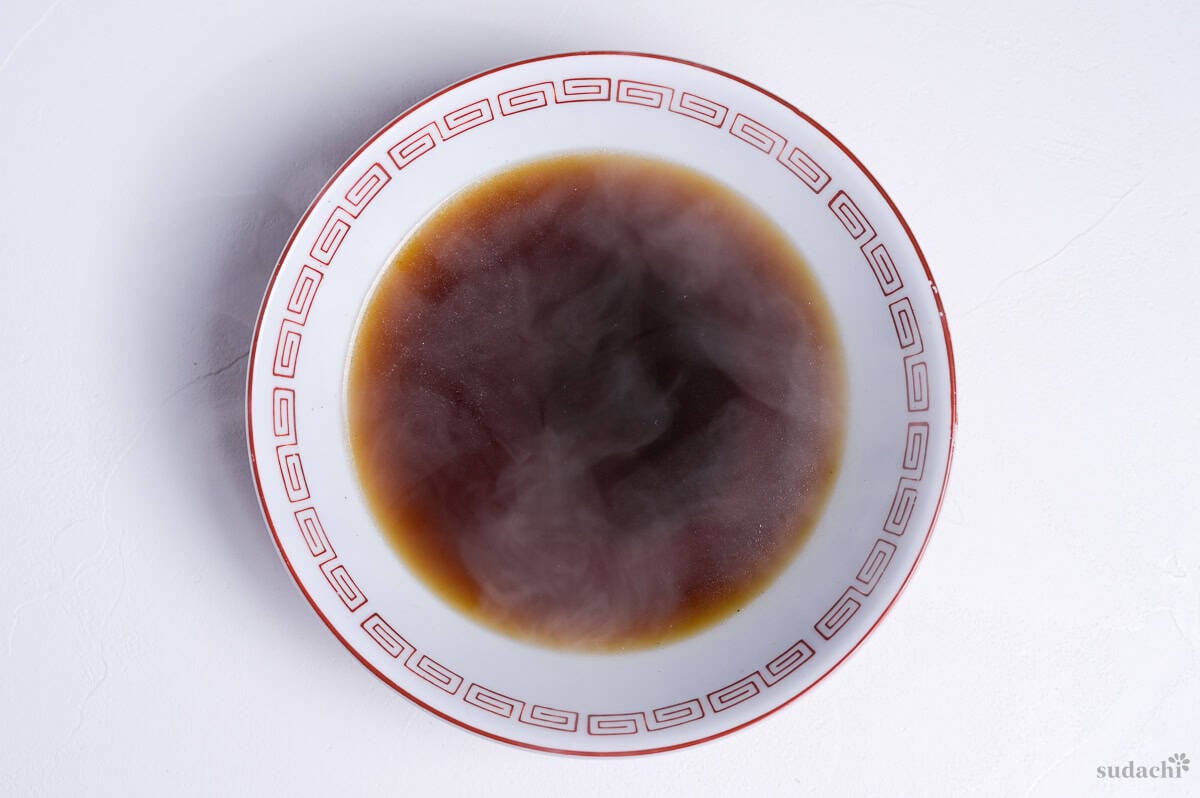
i. Pour half of the tare into each warmed bowl.

ii. Pour the hot soup into each bowl and stir once to disperse the tare.
Depending on your setup, the material of your pot, and how high your heat ran during the simmer, evaporation may have left you with less soup than expected (300ml per bowl). If that happens, just top it up with water to get back to where you need to be and reheat. Nothing dramatic.
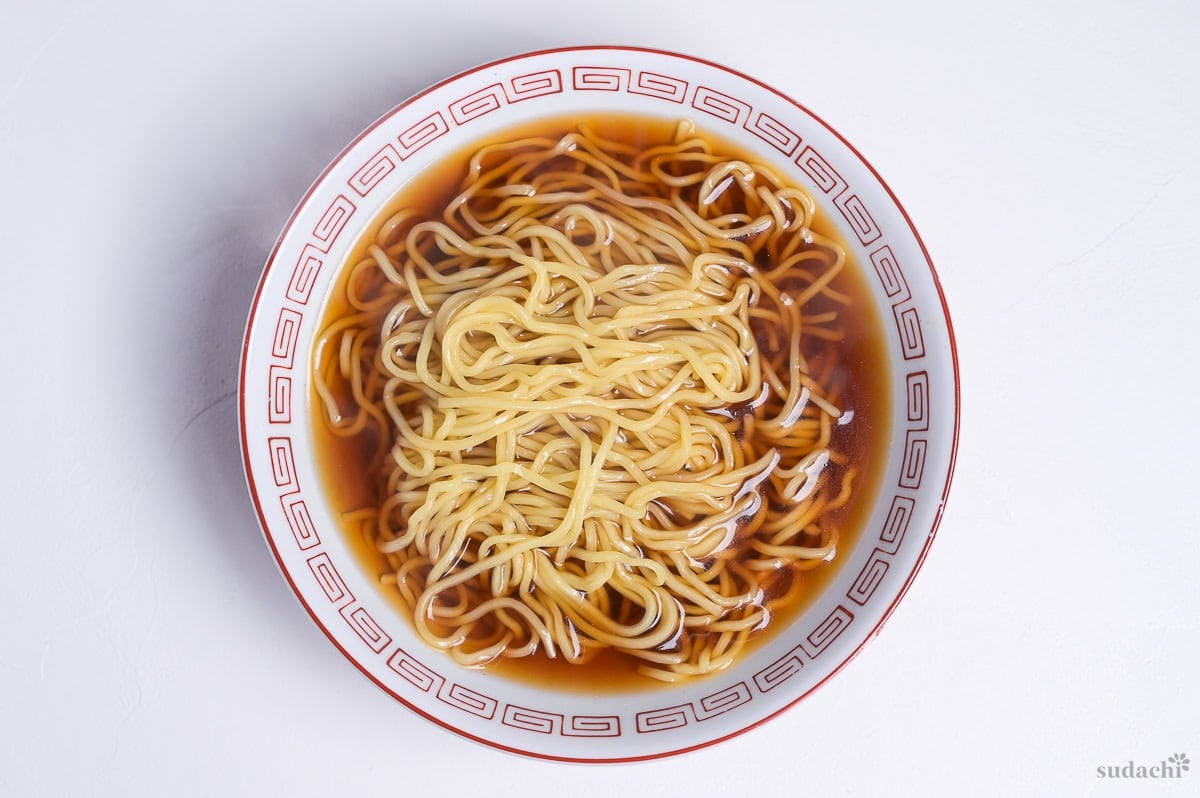
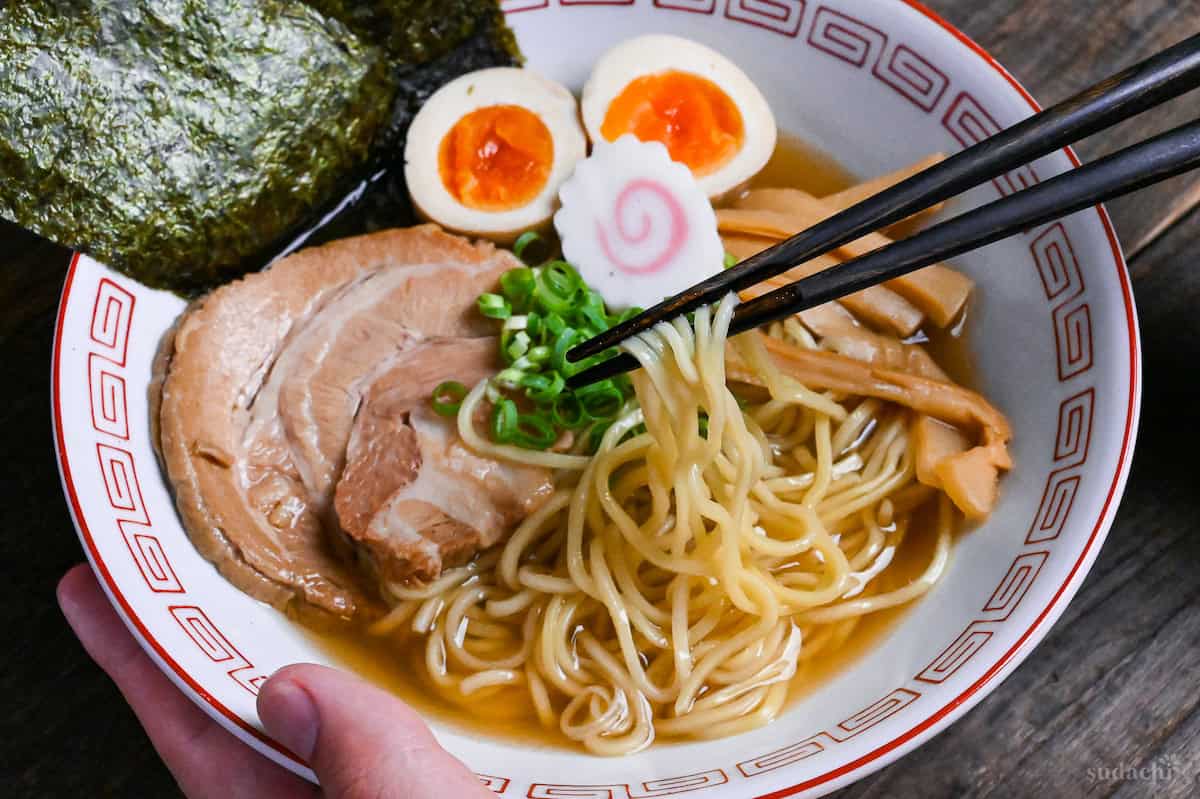
iii. Divide the drained noodles between the bowls, lifting them in with chopsticks or tongs so they sit on top in a neat pile rather than collapsing into the broth.
v. Drizzle the reserved aroma oil over each bowl.
Adding the aroma oil independently right at the end gives you an exceptional rush of aroma the moment it hits the bowl. The aroma oil floats on the surface and acts like a lid on the soup.
That lid does 3 jobs at once:
- It keeps the soup hot by insulating the surface.
- It carries the aroma (fat-soluble aroma compounds get delivered up to your nose as you bend toward the bowl).
- It gives that first sip its richness on the tongue.
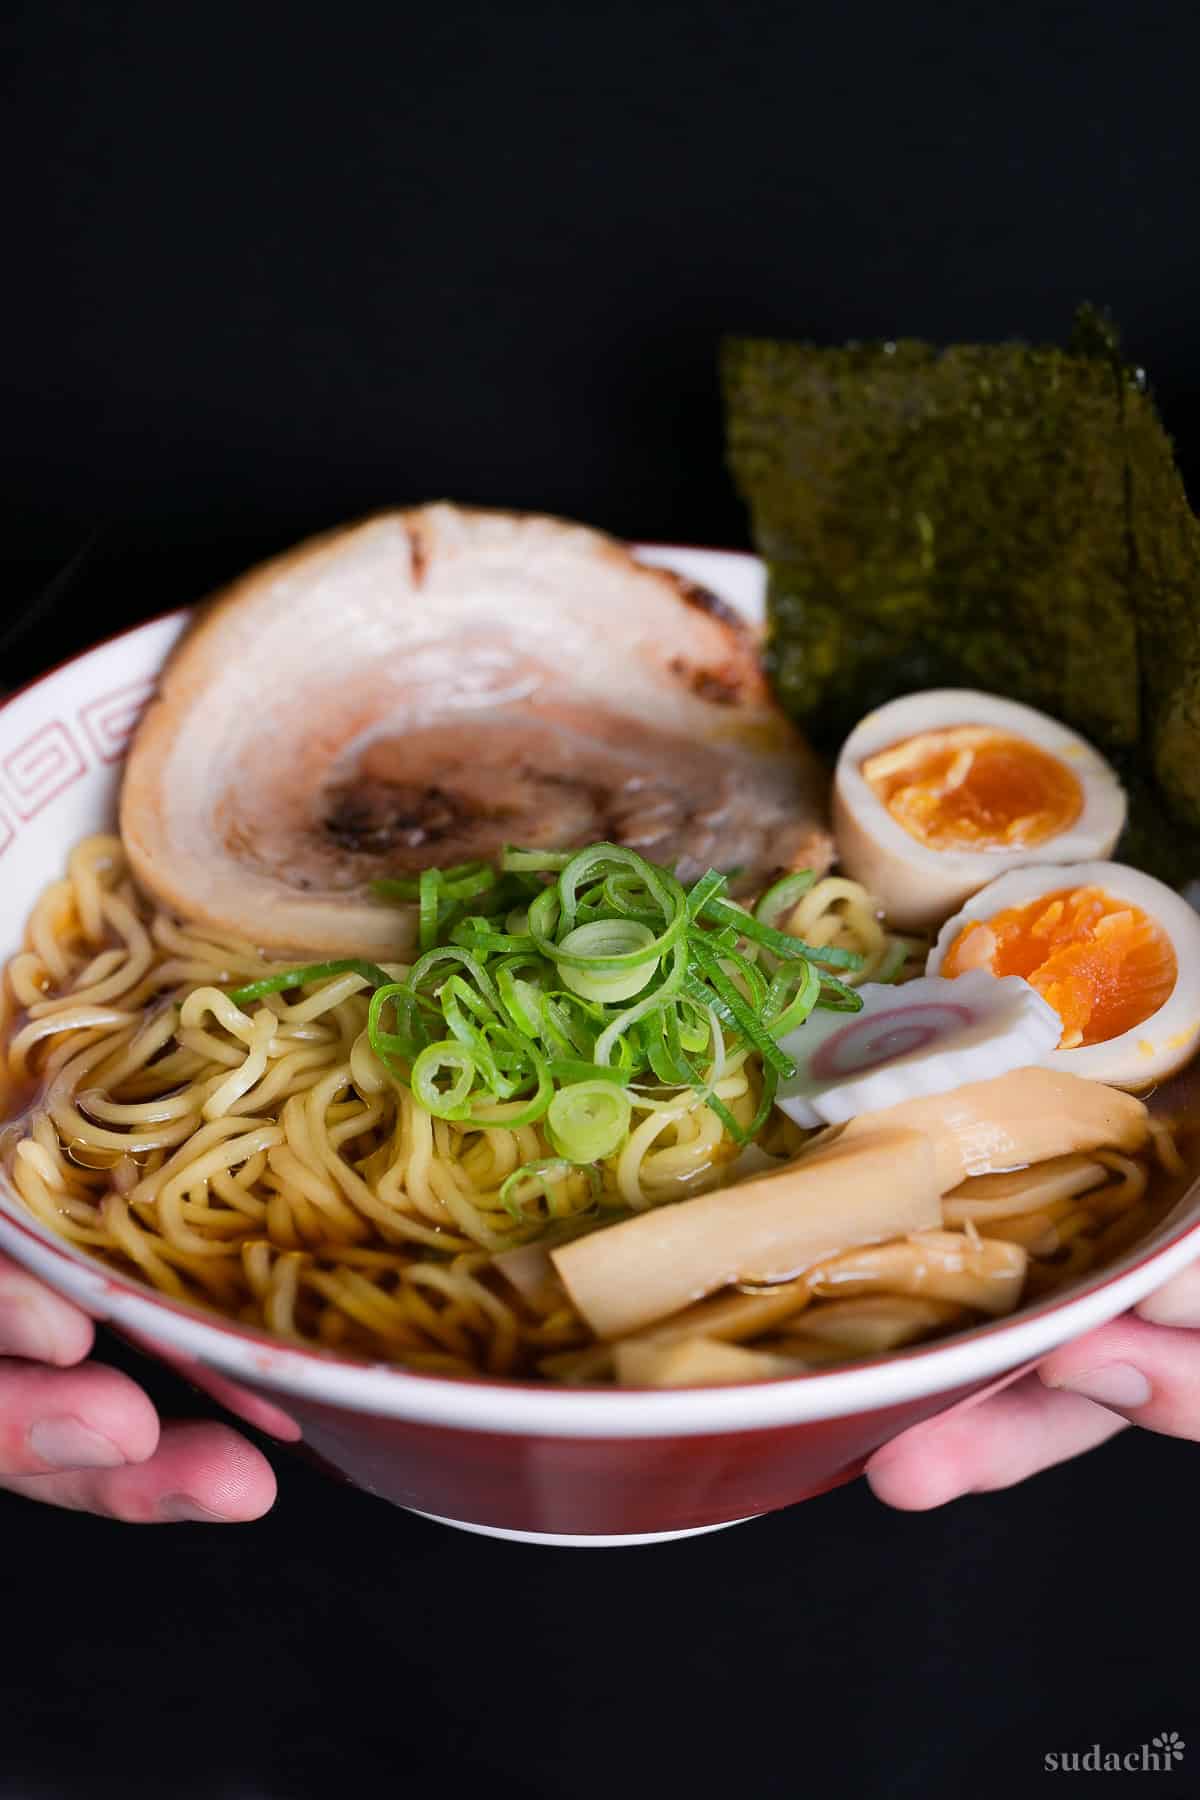
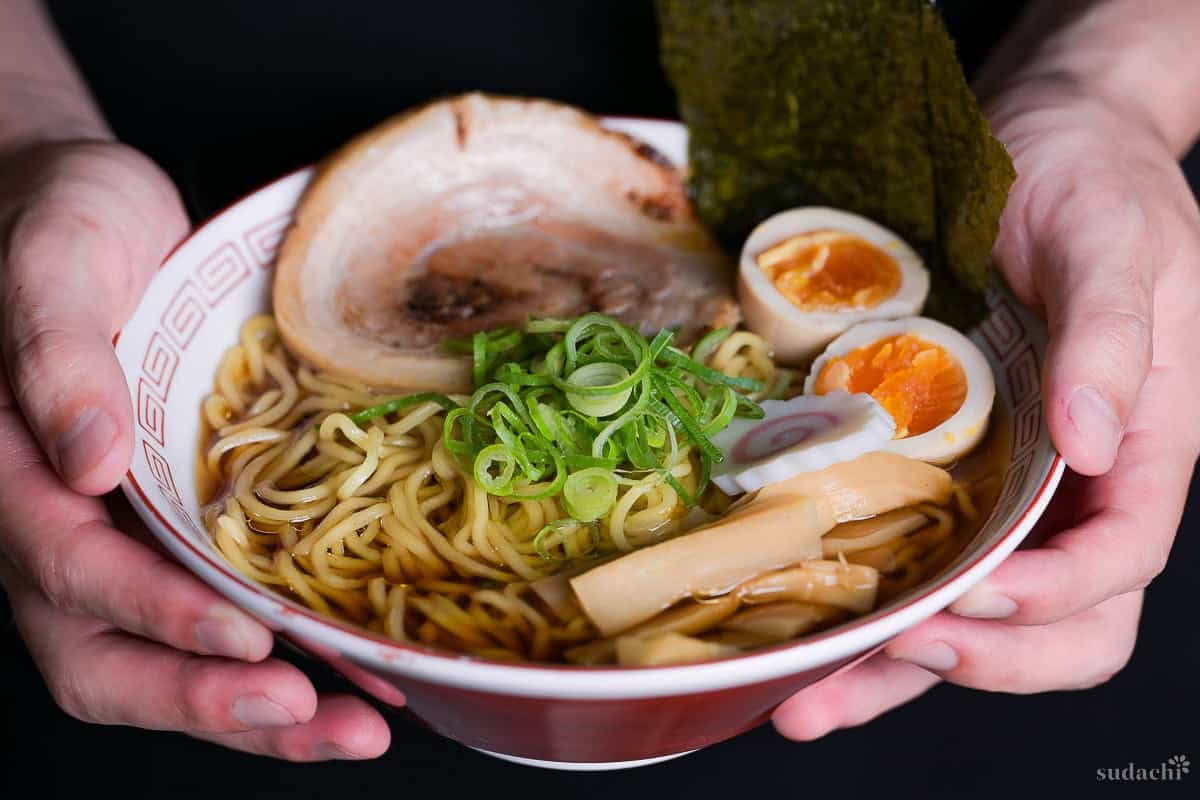
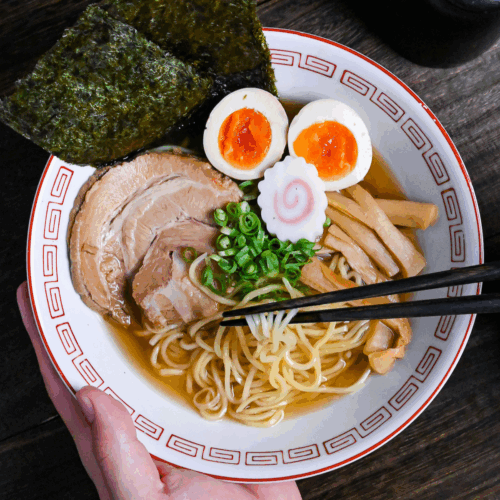
i. Top with whatever you like. What I used:
- Chashu
- Ajitama egg
- Menma
- Narutomaki (fish cake)
- Nori
- Thinly sliced green onions.
ii. Serve immediately.
First sip should be the sip where you mutter something under your breath. That is how you know.
If you follow the default recipe, it will yield 2 main servings with a bit of leftover aroma oil depending on the size of your chicken skin.

Tips for the Best Shoyu Ramen
- Build the tare early if you have time, like the night before. Salt and aroma compounds in shoyu, sake, and mirin need a few hours of cold rest to round off, the same chemistry the soba shops were running with their kaeshi.
- Hold the broth between 80-95°C (176-203°F), no rolling boil. Hard boiling shears fat into tiny droplets that the gelatin then stabilizes, and the broth turns cloudy on you for purely physical reasons. A gentle simmer keeps the fat in larger droplets that float to the top and skim off cleanly.
- Pull the noodles 10 to 20 seconds before the package time, and drain hard. Carryover heat finishes the cook in the first seconds the noodles hit the hot broth, and even a slight overcook at the boil turns the texture mushy in the bowl by the time you sit down.
With these simple tips in mind, you’re set for success every time you make the best homemade shoyu ramen.
Storage & Meal Prep
Fridge: Store the broth, tare, and aroma oil in separate sealed containers and refrigerate for 3 to 4 days. The tare actually rounds out and gets better over the first week, the broth is the weakest link and starts losing aroma, and the aroma oil holds for 2 to 3 weeks at peak quality. Cooked noodles do not go in the fridge in any usable form.
Freezer: Broth and aroma oil freeze well in portion-sized containers for 1 to 2 months. Tare freezes for up to 3 months but you lose a little of the rounded character that the cold rest builds.
Meal prep: Build the tare a full week ahead and stash it in a glass bottle in the fridge, that move alone gives you the biggest single quality jump in this recipe. Build the broth Saturday morning if you want a dinner the same day, or Friday night if you want to ladle in a clean cold pot Saturday and gain 30 minutes back. Slice the green onions and prep the toppings the day of.
Reheating: Warm the broth gently on medium-low and stop the moment the surface starts to shimmer, somewhere around 80-90°C (176-194°F).
What to Serve With This Recipe
Shoyu Ramen FAQ
9 times out of 10 the pot was at a rolling boil. Hard boiling shears fat into tiny droplets that stabilize into a permanent cloud, the same physics that turns tonkotsu broth white on purpose. Hold the simmer between 80-95°C (176-203°F), pull the foam off the surface during the first 20 minutes, and never press on the strainer when you finish, only take what falls through naturally.
Koikuchi shoyu, the standard Japanese soy sauce. Yamasa or Kikkoman from any well stocked supermarket work fine.
The era of naming. Chuka soba (中華そば/meaning Chinese-style soba) is the older term that the Tokyo-style heritage shops still put on their signage as a deliberate Showa-retro signal. Ramen is the postwar mass-market name. The dish in the bowl is the same.
Ramen Toppings to Upgrade Your Bowl
If you want to push this bowl further or build your own topping rotation, my full ramen toppings collection has the complete lineup with recipes for each.
Did You Try This Recipe?
I would love to hear your thoughts!
💬 Leave a review and ⭐️ rating in the comments below. 📷 I also love to see your photos – submit them here!
Homemade Shoyu Ramen Noodles (Soy Sauce Flavored Chuka Soba)

Ingredients
Noodles
- 2 portions ramen noodles medium-thin to medium-thick
Soup
- 1000 ml water soft water is preferred
- 10 g dried sardines (niboshi) heads and gut sacs removed
- 5 g dried kelp (kombu) or Korean dashima
- 4 chicken wings scored along the bone on the skinless side, drumettes or wingettes also work
- 2 garlic cloves lightly smashed with the flat of a knife
- 20 g ginger root sliced, not too thin
- 1 Japanese leek (naganegi) green tops only, or leek green tops
- 5 g bonito flakes (katsuobushi)
Aroma oil
- ½ tbsp lard or neutral oil
- 50 g chicken skin or store-bought chicken oil, duck fat, or goose fat (½ to 1 tbsp per bowl)
Tare
- 1 tbsp sake or dry sherry/white wine, same volume
- 1 tbsp mirin
- ½ tsp sugar
- 1 pinch salt
- 3 tbsp water
- 3 tbsp Japanese soy sauce (koikuchi shoyu)
Toppings Suggestions
- pork chashu sliced
- ramen egg halved, or plain soft-boiled egg
- seasoned bamboo shoots (menma)
- narutomaki fish cake sliced
- roasted seaweed for sushi (nori)
- finely chopped green onions
The ingredient brands and tools I trust are in my Japanese pantry guide and my cooking tools guide.
Can’t find certain Japanese ingredients? See my substitution guide here.
Instructions
- Take a pot and fill with 1000 ml water. Add 10 g dried sardines (niboshi) and 5 g dried kelp (kombu). Gently heat and hold at 60 °C (140 °F) for 30 minutes to make the dashi base. Make the tare while you wait.

Tare
- Grab a small saucepan and add 1 tbsp sake, 1 tbsp mirin, ½ tsp sugar, and 1 pinch salt. Stir and simmer until the salt and sugar have dissolved, the the alcohol smell has burned off.
- Pour 3 tbsp water and 3 tbsp Japanese soy sauce (koikuchi shoyu) into the pan and simmer on low for 5-10 minutes or until slightly thickened (be careful not to over reduce).
- Transfer to a sealable container, then cool and store in the fridge for later. This is your tare, the base flavor for your ramen.
Broth (part 1)
- After 30 minutes of gentle heat, remove the kombu and dried sardines from the pot of dashi. Add 4 chicken wings, 2 garlic cloves, 20 g ginger root, and 1 Japanese leek (naganegi). Heat on medium until small bubbles appear (avoid boiling). Skim any scum that appears at the top for the first 10 minutes, then hold at 80 °C (176 °F) to 85 °C (185 °F) for 40 minutes.
Render Chicken Fat
- Heat a large frying pan on low and melt ½ tbsp lard. Spread 50 g chicken skin in a single layer.
- Cover the top of the skin with foil and a heavy heat-resistant weight (like a smaller pot of water) to flatten it.
- Fry for about 10 minutes on each side, or until the skin is golden on both sides and the fat has rendered out. Pour the fat into a heatproof bowl, and enjoy the crispy chicken skin as a snack, or save as a topping for another dish.
Broth (part 2)
- After 40 minutes, turn off the heat and drop in 5 g bonito flakes (katsuobushi). Steep for 5 minutes.
- Set up a fine-mesh strainer or a chinois lined with a paper towel, and set it over a clean bowl or pot. Remove the bulky ingredients, then pour the broth through.
- You should be left with a clear golden broth.
Assembly
- Cook 2 portions ramen noodles about 20 seconds less than the package instructions say.
- Warm your serving bowls by filling them with hot water. Pour it out right before the noodles are ready, and divide the tare equally between the bowls.
- Pour the hot broth (approx 300ml) into each bowl and stir to evenly distribute the tare. Make sure not to overfill, as you will be adding noodles and toppings.
- Drain the noodles and gently lower them into the bowl.
- Drizzle the rendered chicken fat over the top and add your favorite toppings. I opt for pork chashu, ramen egg, seasoned bamboo shoots (menma), narutomaki fish cake, roasted seaweed for sushi (nori), and finely chopped green onions. Enjoy!

I was surprised how good the result was.
I didn’t curl the chashu and I used instant dashi. Also I cooked the chicken I used for the broth first got rid of the scum and then put it in the dashi to cook
Hi Ric,
Thank you for your comment and sharing your picture! Looking great! I’m glad you enjoyed the recipe. 🙂
I also appreciate you sharing your experience and modifications. It will be very helpful to other readers for inspiration!
Yuto
Hi Yuta,
thank you once again for the recipe, it has become a staple now and comfort food
Will definitely try out other recipes you posted.
Lots of appreciation from Austria,
Ric
I’m so happy that you keep making this recipe! I hope you will enjoy the other ones too! 🙂