



Featured Comment
I made it with salmon, because that’s my family’s favorite fish. It was excellent. Will be making it again soon.
★★★★★
– Sam
“This is the soul of Japan.” I’m Japanese, and I say it about sakana no nitsuke, the classic dish of simmered fish, without a second thought.
Picture white rice, miso soup, and pickles, with a single piece of fish at the center of the table, coated in a glossy, sweet and salty sauce. That’s all it takes to make everyone in Japan happy.
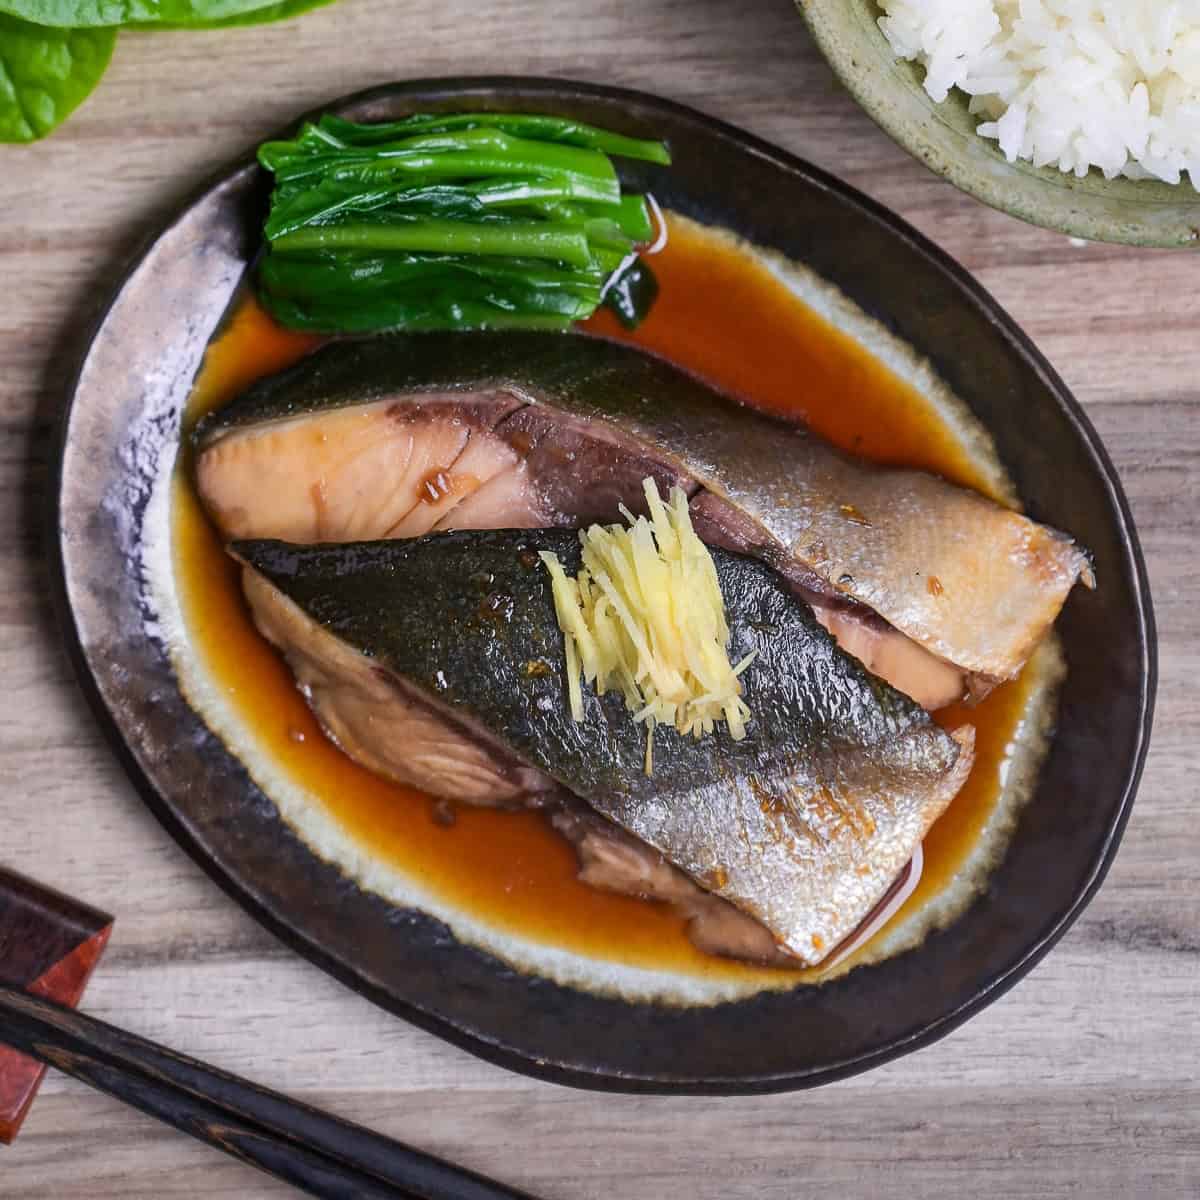
Sakana no nitsuke
Recipe Snapshot
- What is it? Sakana no nitsuke is Japanese simmered fish, eaten with rice and its sauce. Fillets cook briefly in sweetened equal parts sake and water with soy sauce. Most kinds of fish work.
- Flavor profile: The glossy sauce hits first, sugar and mirin over soy sauce. The moist, savory fish flakes with chopsticks. Last, slightly thick sauce soaks the rice as ginger and sake linger.
- Why this recipe works: Salting, drying, blanching, and an ice-water rinse keep fishy odors out of the sauce you eat. I used to skip a few. Now I do them all. It just tastes better.
- How to make it: Prep the fish with salt and hot water, then add it to fully boiling sauce. Simmer briefly under a drop lid, adding soy sauce in stages midway. Then reduce uncovered.
- What to expect: Allow about 45 minutes, 15 to prepare and 30 to cook. It is fairly straightforward. Knowing when to stop reducing the sauce is the part that can trip you up.
What Is Sakana no Nitsuke?
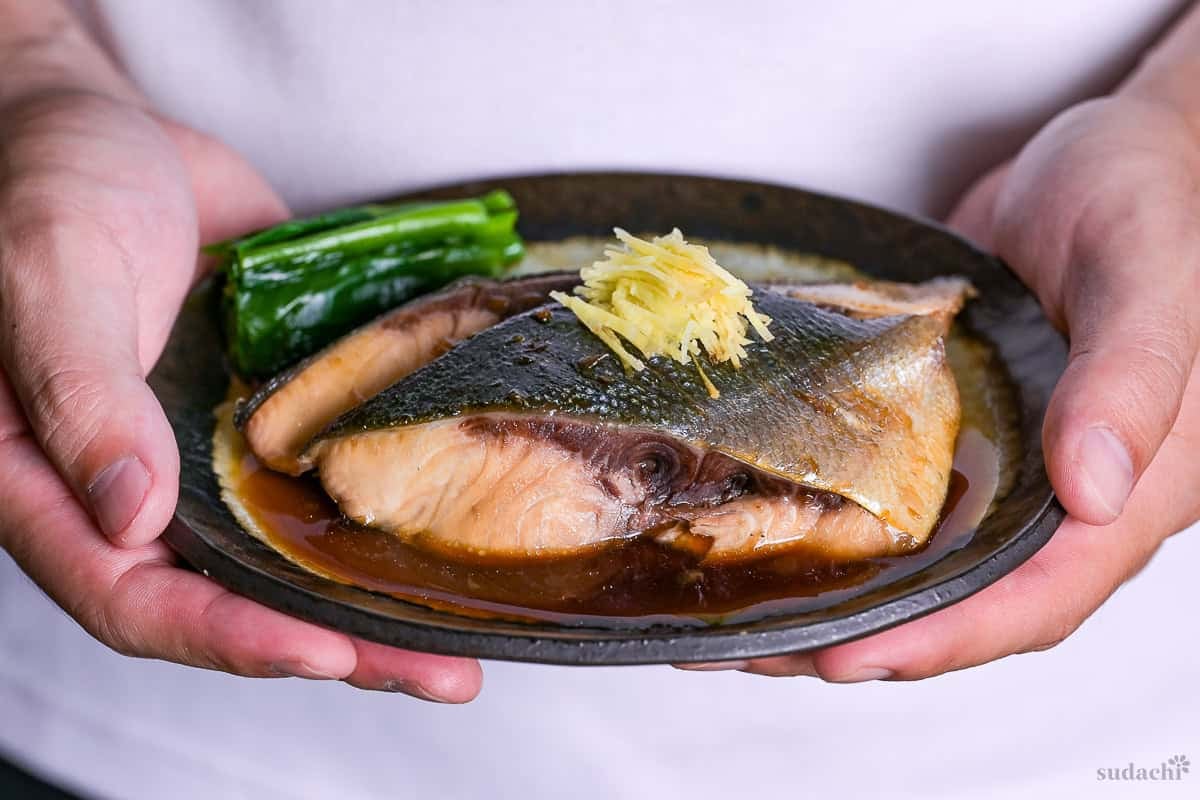
Sakana no nitsuke (魚の煮付け) is fish briefly simmered in soy sauce, sugar, mirin, and sake, with a little of the sweet and savory liquid left for serving with white rice. The fish is not simmered long enough to season it through, so you flake it with chopsticks and eat each bite with the sauce.
You will find it in homes, set-meal restaurants, and izakaya. It is about as Japanese as a dish gets, yet it works with most kinds of fish, so you can make it wherever you live.
The seasoning used for nimono evolved through the Edo period (1603 to 1868) and into the Meiji period (from 1868). Nitsuke, the sweet-savory style of simmered fish, takes those later seasonings into a brief simmer that leaves some liquid in the pan. A 1643 cookbook uses miso, tamari, irizake, and dashi for nimono. By 1730, a cookbook seasons more than half of its simmered dishes with soy sauce and sake. Sugar and mirin appear frequently in late Edo cookbooks, and one account describes sugar-free simmered dishes as almost unheard of in Meiji-era Tokyo. The idea that nitsuke originated as a way to preserve fish before refrigeration confuses it with other dishes. Tsukudani and nishime were made to keep. Tsukudani is reduced until its liquid is driven off, and nishime is cooked until no liquid remains.
Nizakana means simmered fish and covers any fish cooked in seasoned liquid. White-fleshed fish receives light seasoning and a brief simmer. Red-fleshed fish cooks longer to remove its stronger odor and bring seasoning into the center. Within that group, nitsuke has a short simmer in sweet-savory liquid, with some sauce left at the end. Ara-ni uses the same seasoning for the ara, or head, collar, and backbone. Cooked in homes and by fishermen, it makes use of every part of the fish. Miso-ni replaces the soy sauce in nitsuke with miso, which suits strongly flavored fish such as mackerel and sardines.
When I make nitsuke, 3 choices matter to me. First, I let the water for shimofuri cool to about 80°C (176°F) before pouring it over the fish. Water straight from the boil can easily tear the skin when it hits it directly. Second, I add the soy sauce in 3 stages, spooning the liquid over the fish and letting each addition settle in before the next. Third, I stop reducing when the sauce has thickened just a little. I want it neither watery nor reduced too far. That consistency goes best with white rice and, to my taste, makes a better dish.
Japanese Simmered Fish Ingredients
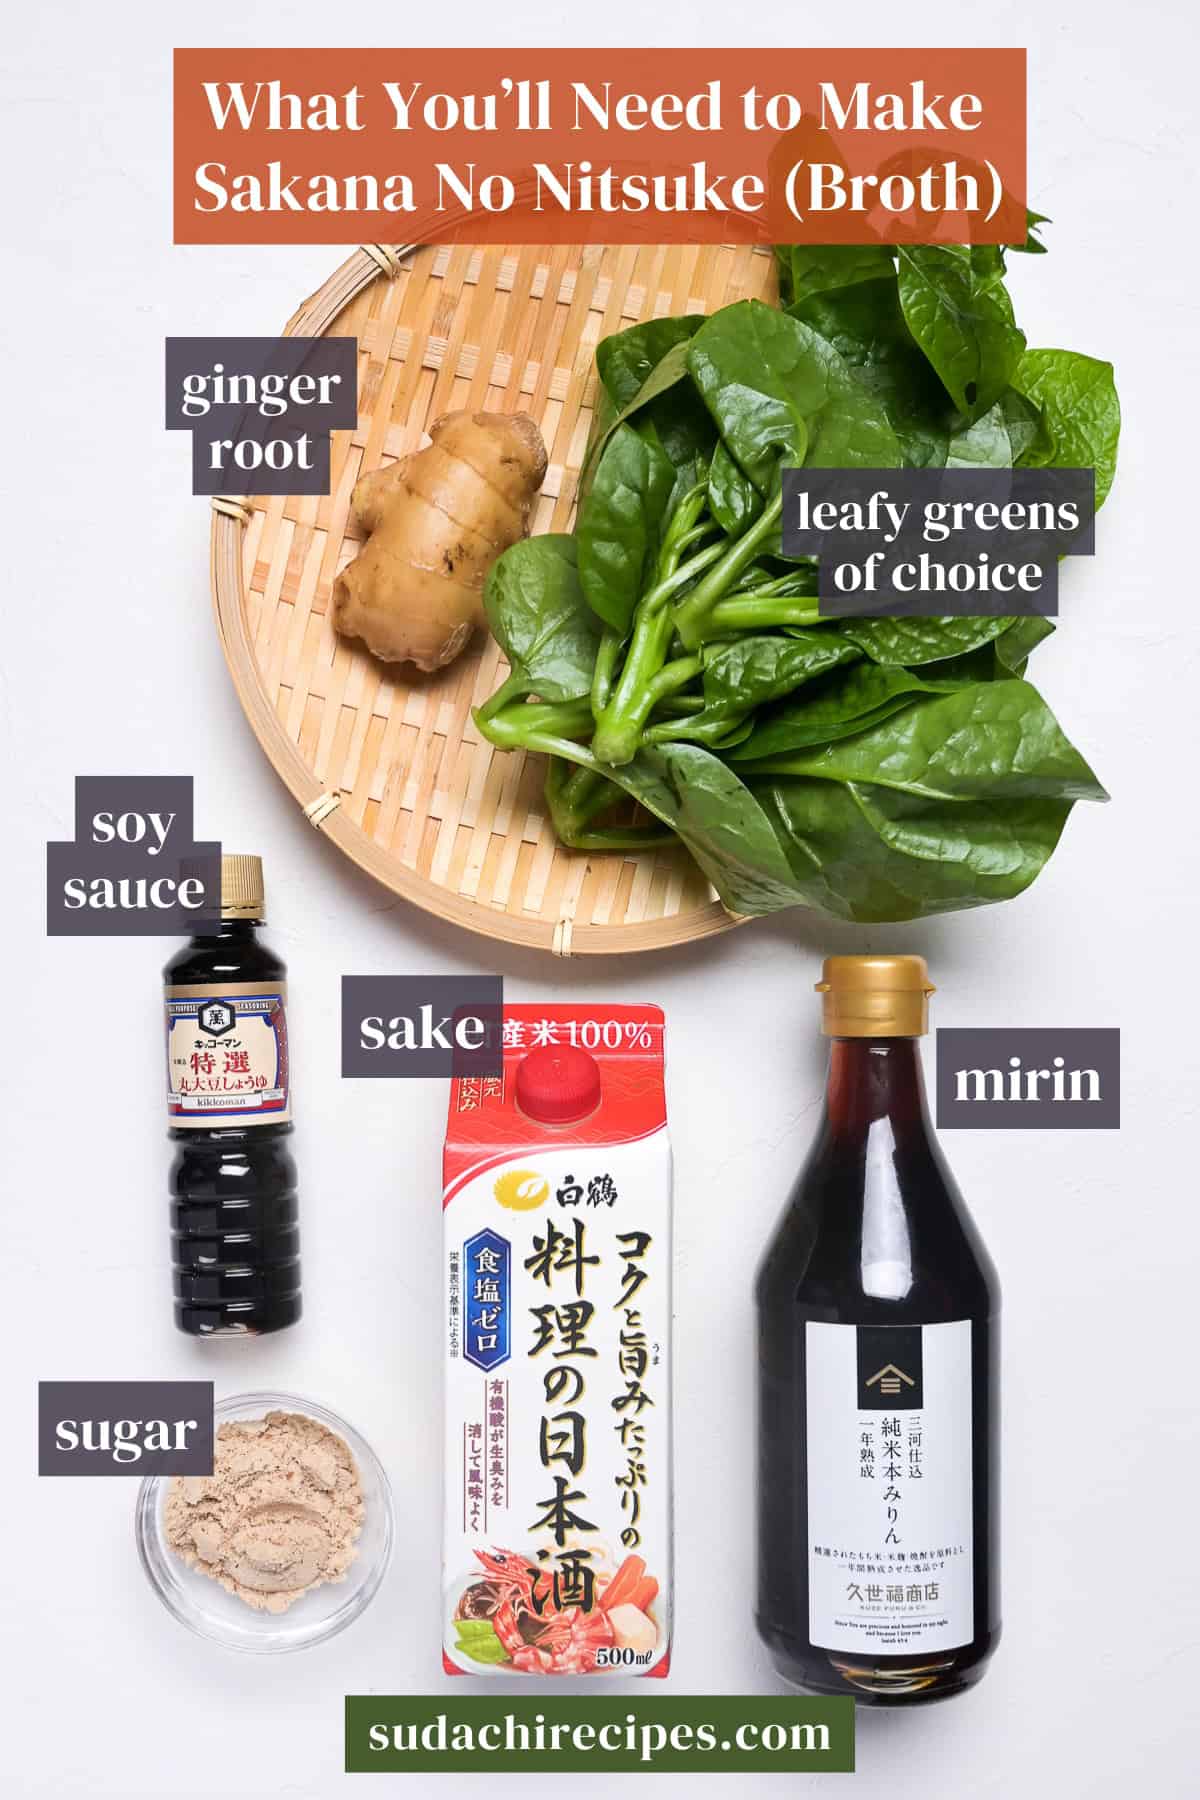
- Fish: Look for flesh that is firm enough to stay together, with enough fat to stay moist as it cooks. Choose thick, skin-on fillets, ideally with the bones still in if you can find them. Both the skin and bones help hold the fish together and add umami to the sauce.
- Ginger: Mature ginger root, called hine shoga, has the heat you want here. It is the ordinary ginger root sold in North American produce sections. Along with adding fragrance to the sauce, it helps reduce the fishy smell.
- Sake: My choice is an inexpensive drinking junmai sake with no added salt. It brings umami to the sauce. As the sauce boils, the alcohol evaporates, carrying away the fishy odor.
Fish Ideas for Nitsuke
I have cooked nitsuke with classic Japanese choices such as karei and hirame (flatfish), kinmedai (splendid alfonsino), tai (sea bream), and mebaru (rockfish), as well as salmon, mackerel, yellowtail, and fish sold in markets outside Japan. My usual advice is simple. Use whatever fish is local to you. Only be cautious with fish that has both unusually high fat content and soft, loose flesh, because it can break down and melt into the sauce. A fish called aburakarei taught me that lesson the hard way.
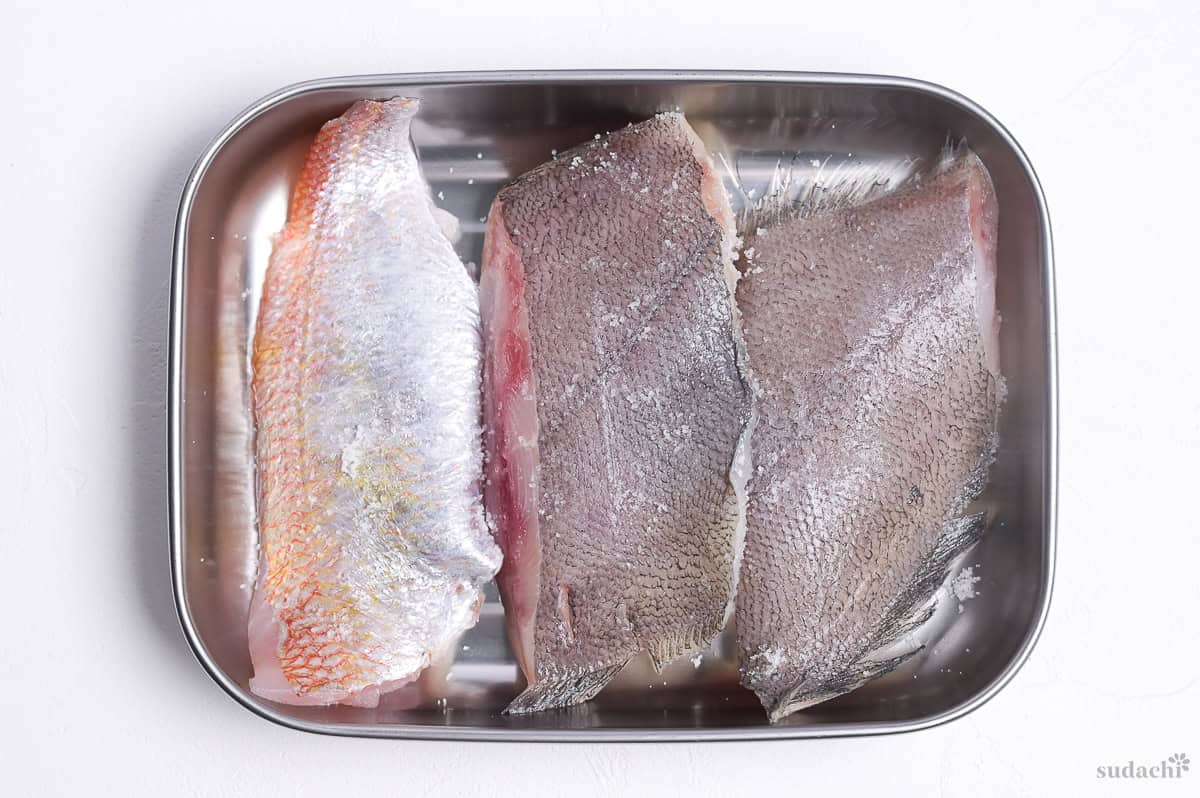
These are my general recommendations, followed by the fish I would be less inclined to use.
- Cod: This is the easiest option to find and fills the role of tara (Japanese cod). Choose thick fillets, since a thin tail piece will overcook before the sauce finishes reducing.
- Rockfish: Look for it under rock cod or Pacific snapper as well. It is similar to the Japanese rockfishes mebaru and kasago, with lean flesh that needs the short simmer given in the recipe.
- Flounder or sole: Either can take the place of karei or hirame, though their thin flesh cooks quickly. Keep the skin on, simmer briefly, and wait for the bubbling to subside before lifting them out. Finish reducing the sauce without the fish.
- Black cod (sablefish): Known in Japan as gindara, this fatty fish withstands a longer simmer than cod and adds richness to the sauce.
- Frozen akauo (Atlantic redfish): This frozen option is also a staple for nitsuke in Japan now. Let it thaw in the refrigerator, then blot away any released liquid before cooking.
- Mackerel (saba): Nitsuke made with mackerel is called saba no nitsuke. Wash the dark bloodline thoroughly and use bone-in pieces if available. Simmer it longer, 10 to 15 minutes.
- Yellowtail (buri): Choose thick fillets or use the head and collar. Its fat helps it stay intact during cooking, so simmer it longer, about 15 minutes.
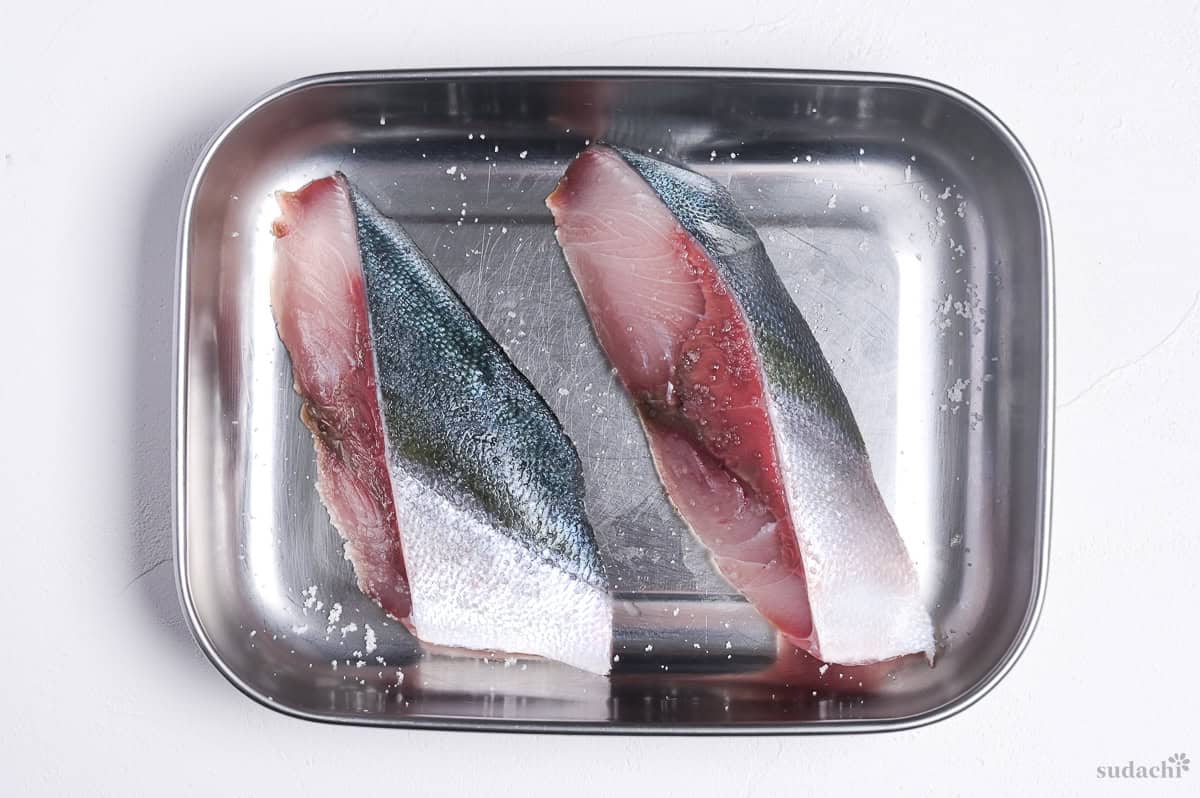
- Salmon: Expect flesh that flakes readily and a flavor different from karei. Sugar can make the fatty fish taste heavy, so use less sugar and compensate with a little extra mirin.
- Steelhead: Cook it as you would salmon, allowing for its fatty flesh.
- Rainbow trout: Smaller than salmon, trout is often available whole in ordinary supermarkets. Simmer it briefly, as you would other small whole fish. Trout smells different from sea bream, so do not skip the ginger.
- Haddock: This lean white fish is often displayed beside cod. Look for thick fillets, just as you would with cod, and stop cooking sooner if yours are thinner than 2 cm.
- Red snapper: True snapper, as opposed to rockfish, is a white fish similar to sea bream. A whole fish or thick, skin-on fillet makes a good substitute in a simple sea bream nitsuke. It cannot stand in for kabutoni (simmered fish head), though, unless you cook the head too.
- Branzino, porgy (scup), or black sea bass: Whole specimens can replace suzuki (Japanese sea bass) or a small sea bream. Their main advantage is that the skin and bones stay on during cooking.
- Tilapia: You can find whole tilapia at Asian grocers, and its moist, tender cooked flesh suits nitsuke. Keep the skin and bones on if you want a sauce like the one splendid alfonsino produces. The fish itself has a milder flavor than rockfish.
Fish I don’t really recommend:
- Arrowtooth flounder: North American shops may label this flounder or turbot. During simmering, the fish warms through a temperature range that activates an enzyme, causing the flesh to break down.
- Pacific whiting labeled hake: An enzyme active in that same temperature range makes the flesh fall apart before the sauce has reduced.
- Alaska pollock: Its soft flesh flakes readily and is prone to breaking when you spoon sauce over it during reduction.
- Kamchatka flounder (aburagarei): This very fatty fish has delicate, thin skin and flesh that remains soft after cooking. Treat it like ordinary karei and it can shred or melt away. It is better suited to frying.
- Skipjack tuna (katsuo): Cooking firms up this red-fleshed fish, and a lengthy simmer leaves it dry and stringy.
How to Make My Sakana no Nitsuke
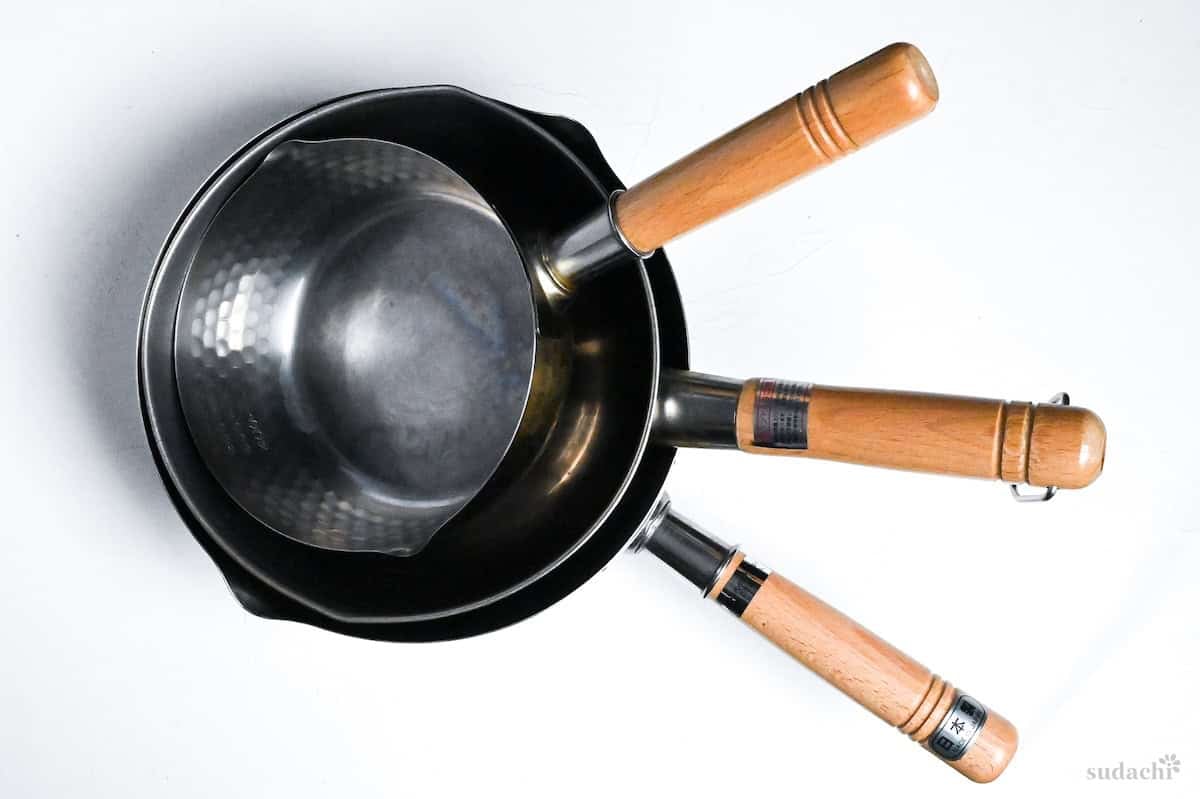
To develop this recipe, I used a 20 cm stainless steel saucepan.
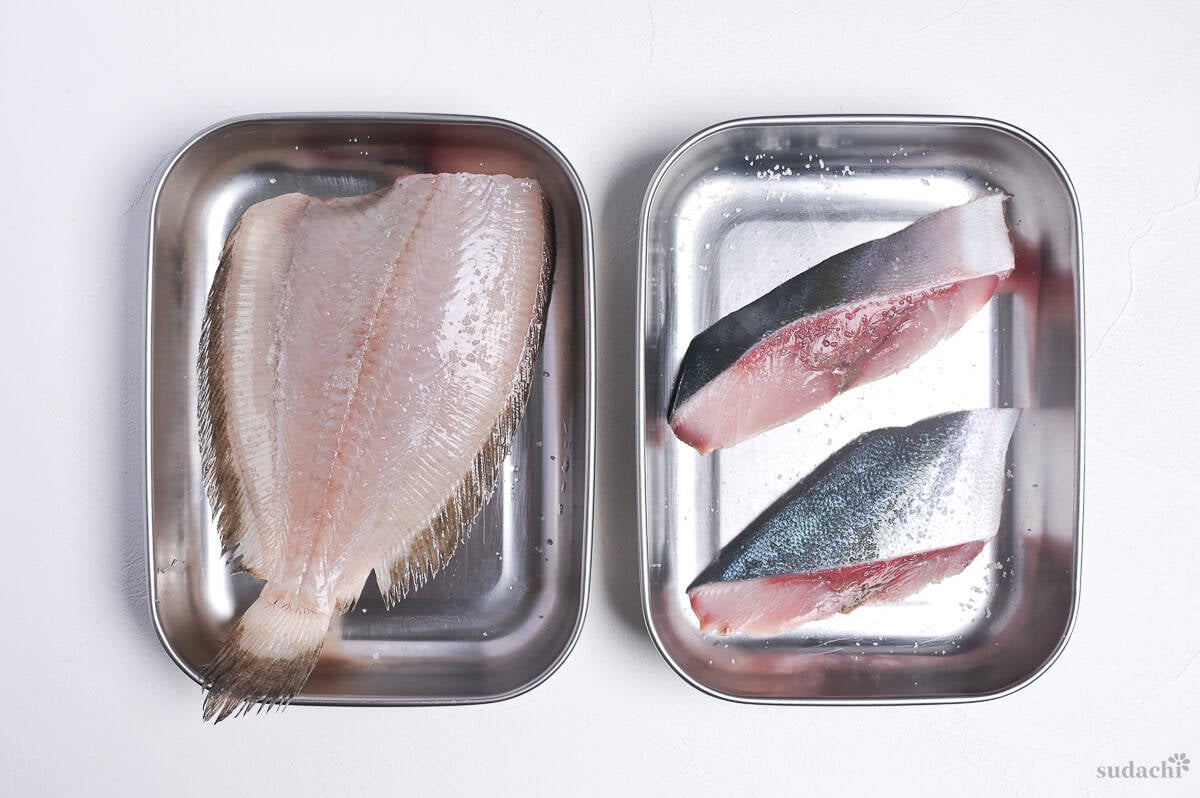
i. Salt the fish on both sides, then leave it for 10 minutes.
ii. Use that time to cut the ginger into 2 mm slices and prepare a bowl of ice water for the blanching step.
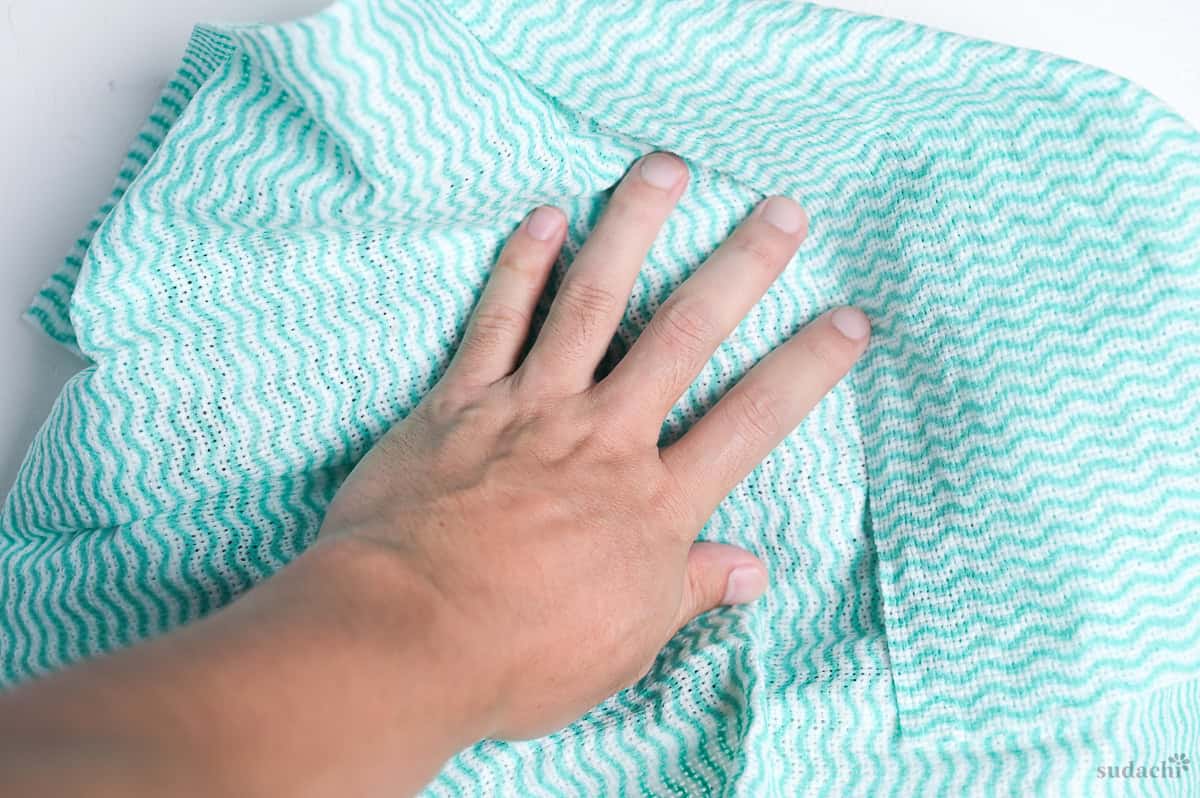
iii. After 10 minutes, use paper towels to blot off every bead of moisture on the fish.
iv. Make a shallow cut at the thickest point on the side you will display when serving. This is called kazari bocho. Add 1 cut underneath as well, this is called kakushi bocho. If you are using a whole fish, score both sides.
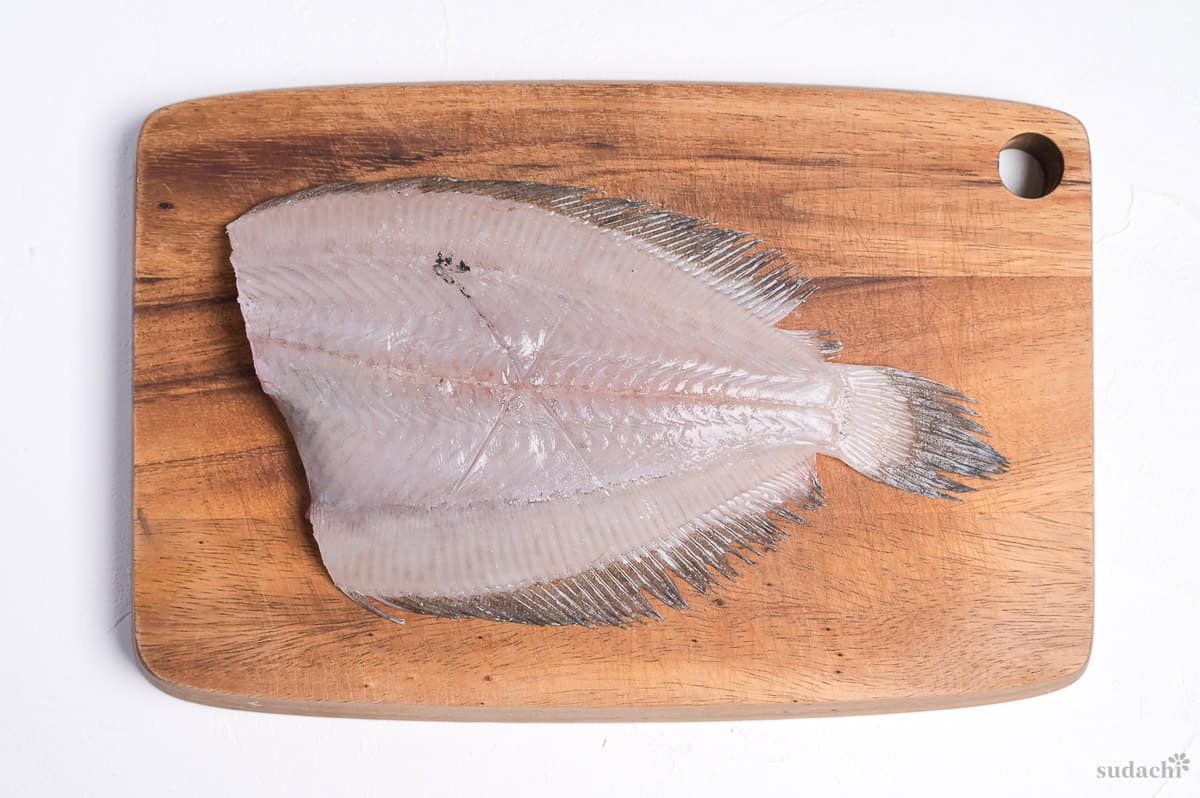
The underside cut helps heat and seasoning reach the flesh more quickly.
Salting draws out water along with substances that give fish its fishy smell. In nitsuke, the cooking liquid becomes the reduced sauce you eat. Leave that moisture on the fish and you carry the odor into the sauce, making it thin and watery too. Blotting removes both the water and the smell before cooking.
Kazari bocho refers to decorative cuts on the side of the fish that faces up when served, usually 2 or 3 diagonal slashes or cuts in a cross. They help prevent the skin from shrinking and tearing, give the fish a neat appearance, and help heat and seasoning reach the flesh. Kakushi bocho is a hidden cut, the same technique applied underneath, where it will not show on the plate. Keep either kind shallow, because a deep cut can cause the flesh to split as it simmers.
i. Boil some water, then add about a quarter as much cold tap water to lower the temperature to about 80°C (176°F). Pouring freshly boiled water directly onto the fish can tear its skin.
ii. Place the fish in a bowl and cover it with a drop lid or plate. Slowly pour in the hot water, then immediately stir gently with chopsticks to distribute the heat evenly. This is called shimofuri.
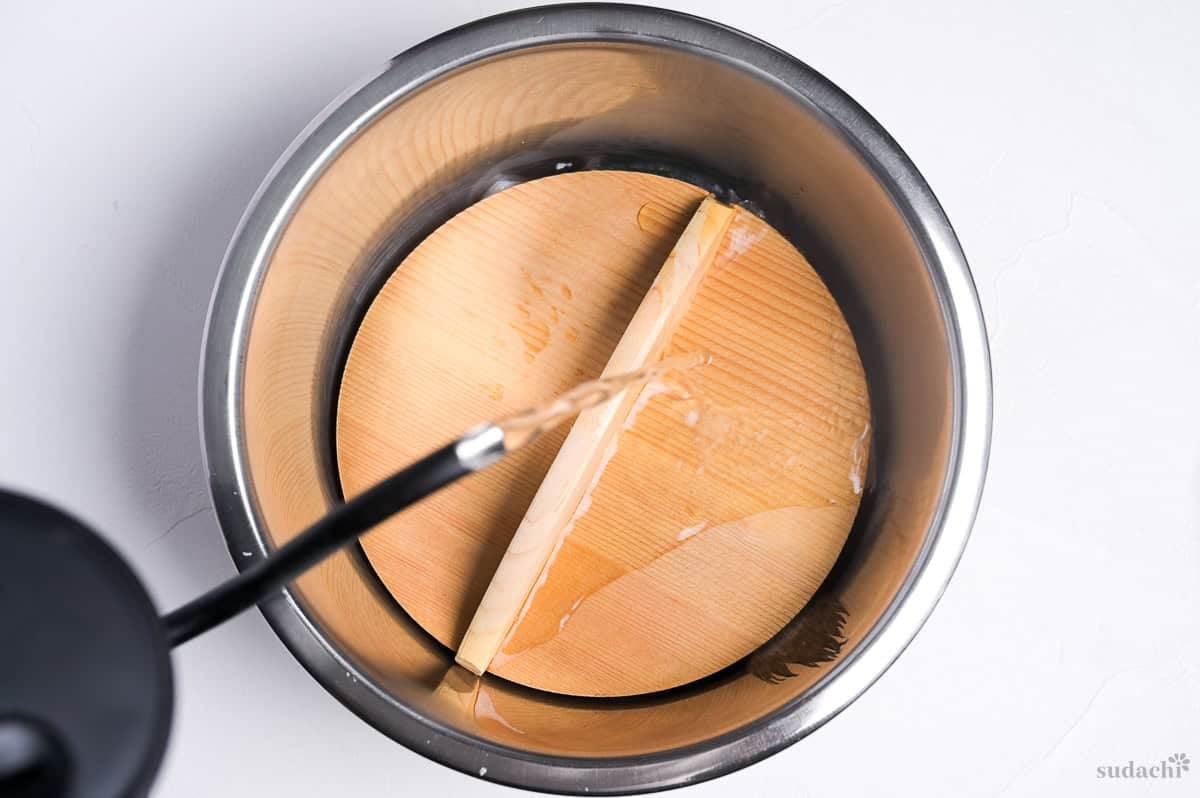
iii. Drain the hot water as soon as the skin contracts and the surface becomes whitish. Transfer the fish straight into the ice water, or put it under cold running water. Do not leave it in the hot water beyond that point.
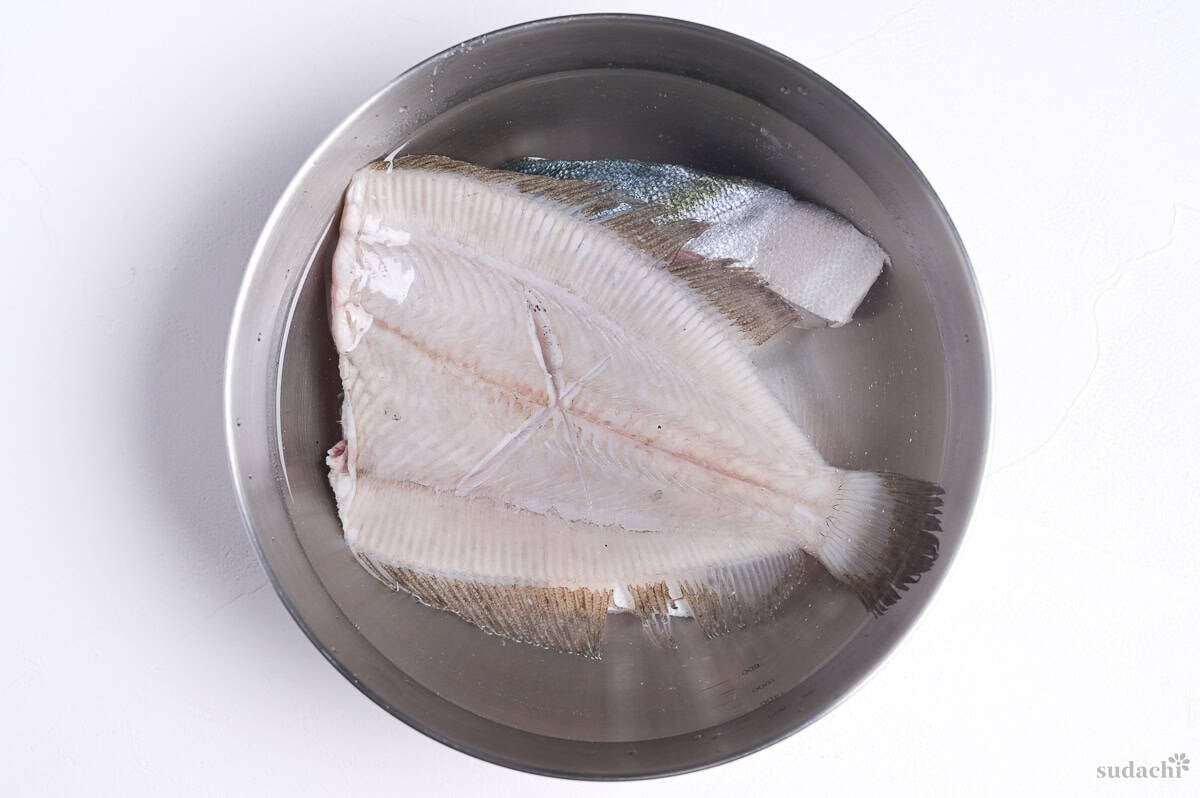
iv. Use a spoon to gently rinse off any remaining blood, slime, and white scum that has solidified on the surface.
v. Dry the fish thoroughly with paper towels.
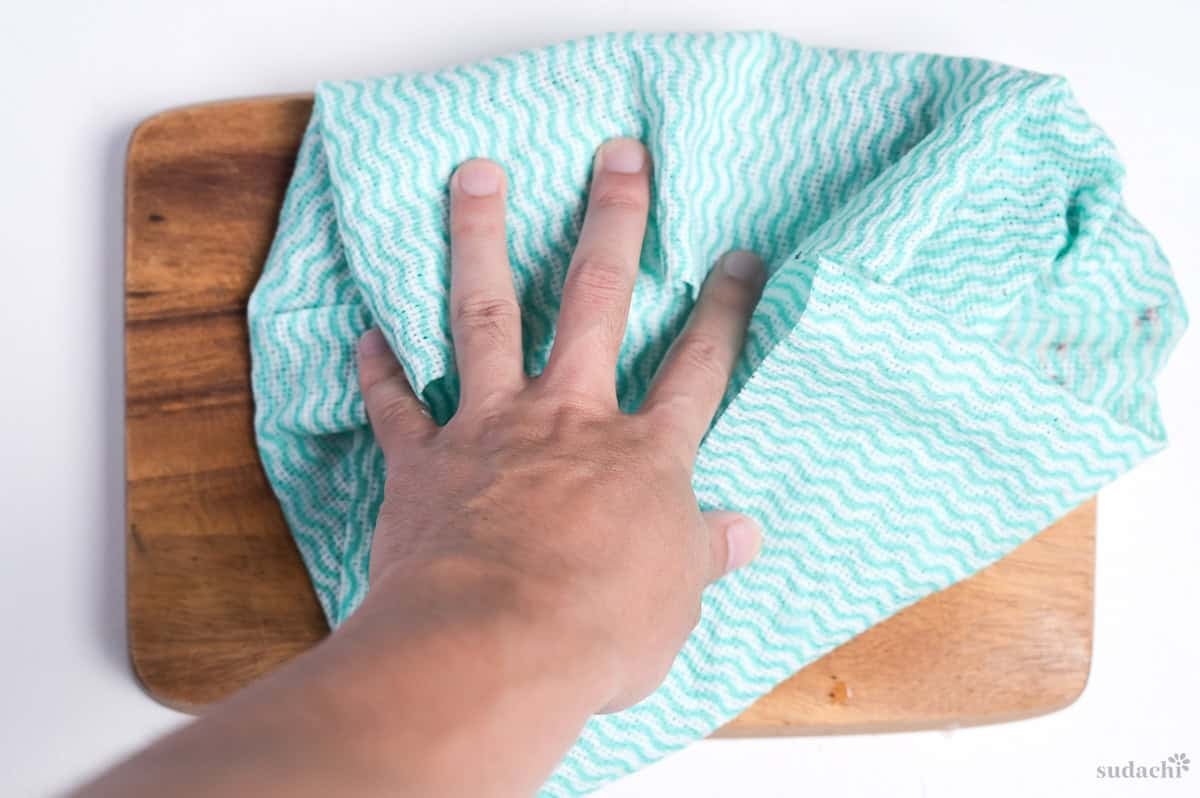
Clean the bowl and other utensils now so you can concentrate on simmering.
Salt removes only the odor carried out with the water. Blood, fat, and slime remain, and blotting cannot remove them all. The hot water firms up the surface and loosens those residues so they rinse off in the ice water. Together, salting and blanching remove the source of the smell before it enters the sauce.
Shimofuri is the preparation step of pouring hot water over fish, then transferring it to cold water as soon as the surface turns white, as though covered in frost. English searches for the word mostly bring up marbled beef. In fish cookery, however, it describes this surface-cleaning step before simmering.
i. Combine the water, sake, mirin, sugar, and ginger in a pot. Bring to a full boil over medium heat.
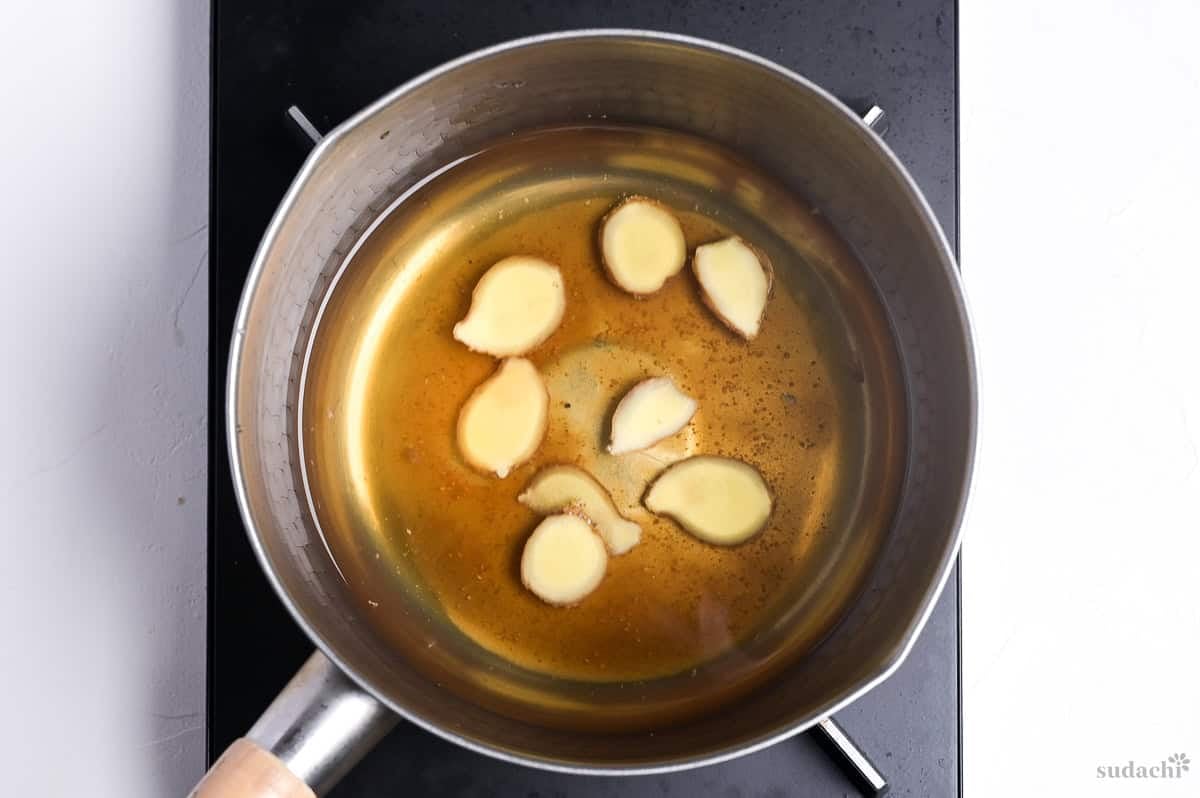
ii. Gently lower the fish into the boiling liquid with its skin facing up. Reduce the heat, place the drop lid (otoshibuta) on top, and simmer for 3 minutes.
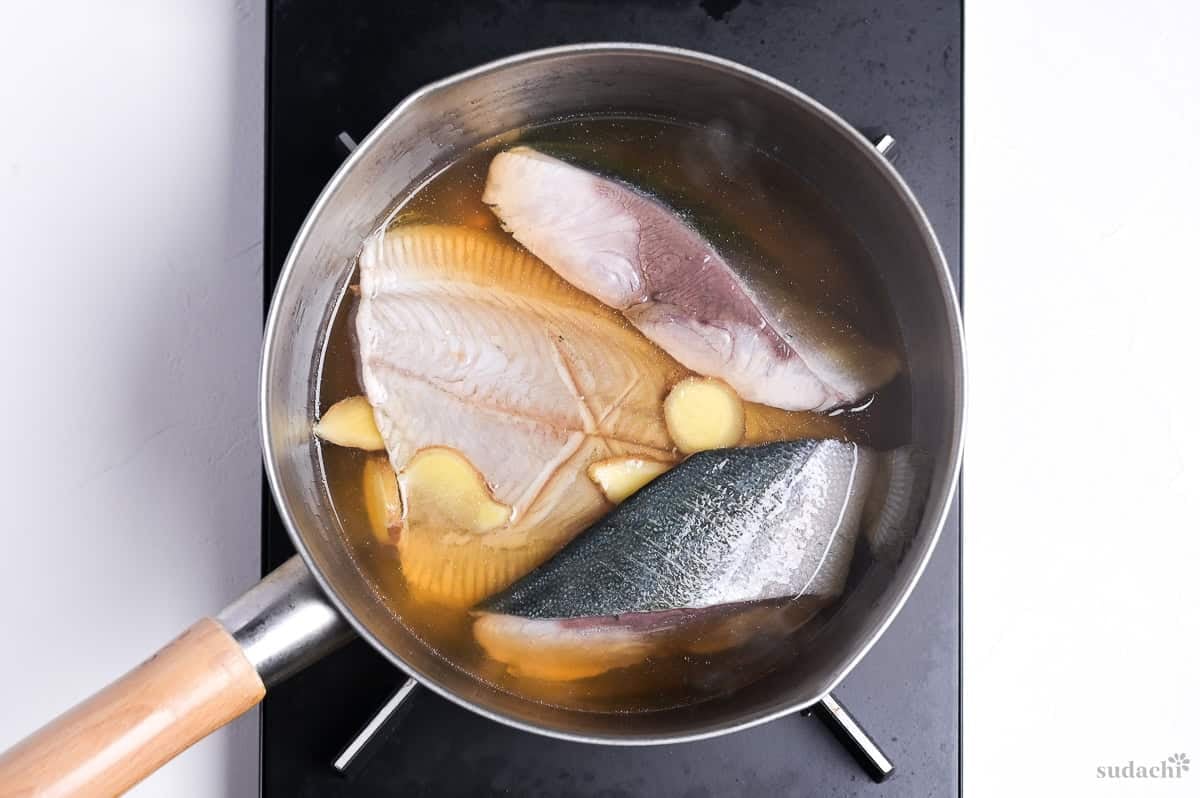
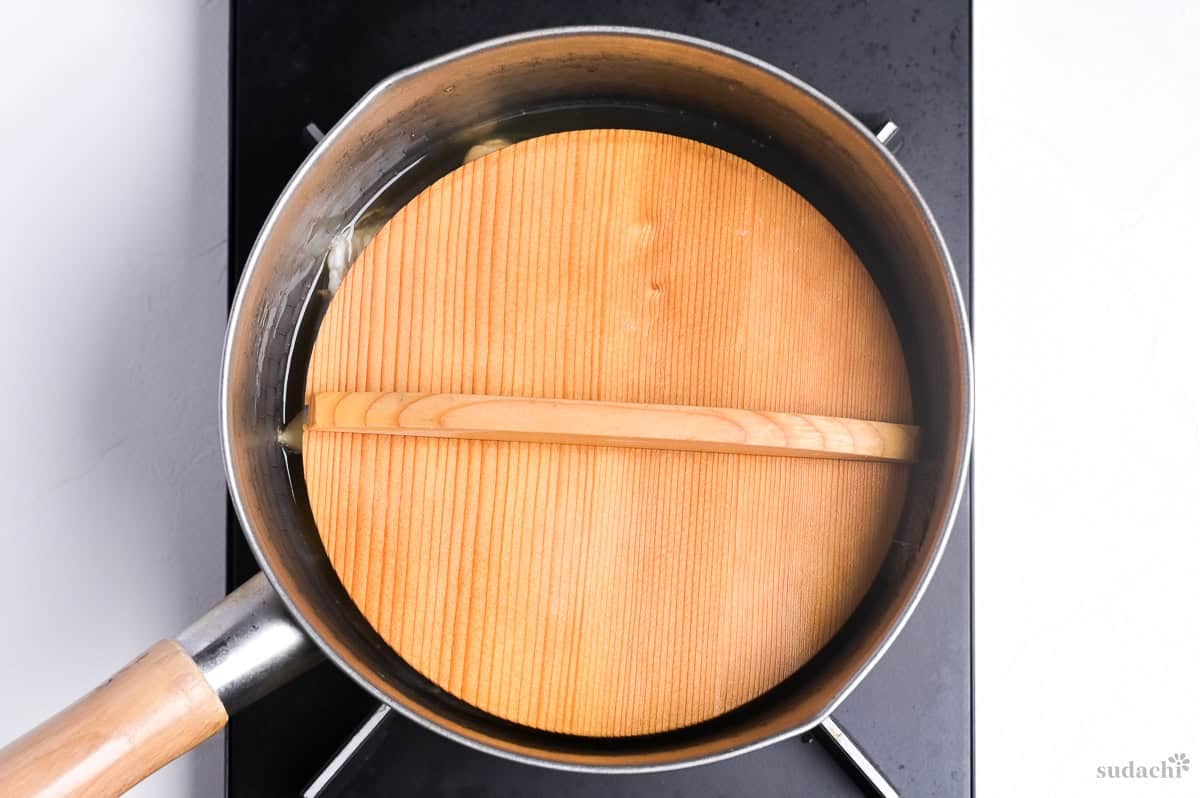
iii. Remove the lid and add the soy sauce in 3 stages. Spoon the sauce over the fish after each addition, waiting until it has mixed in before adding more.
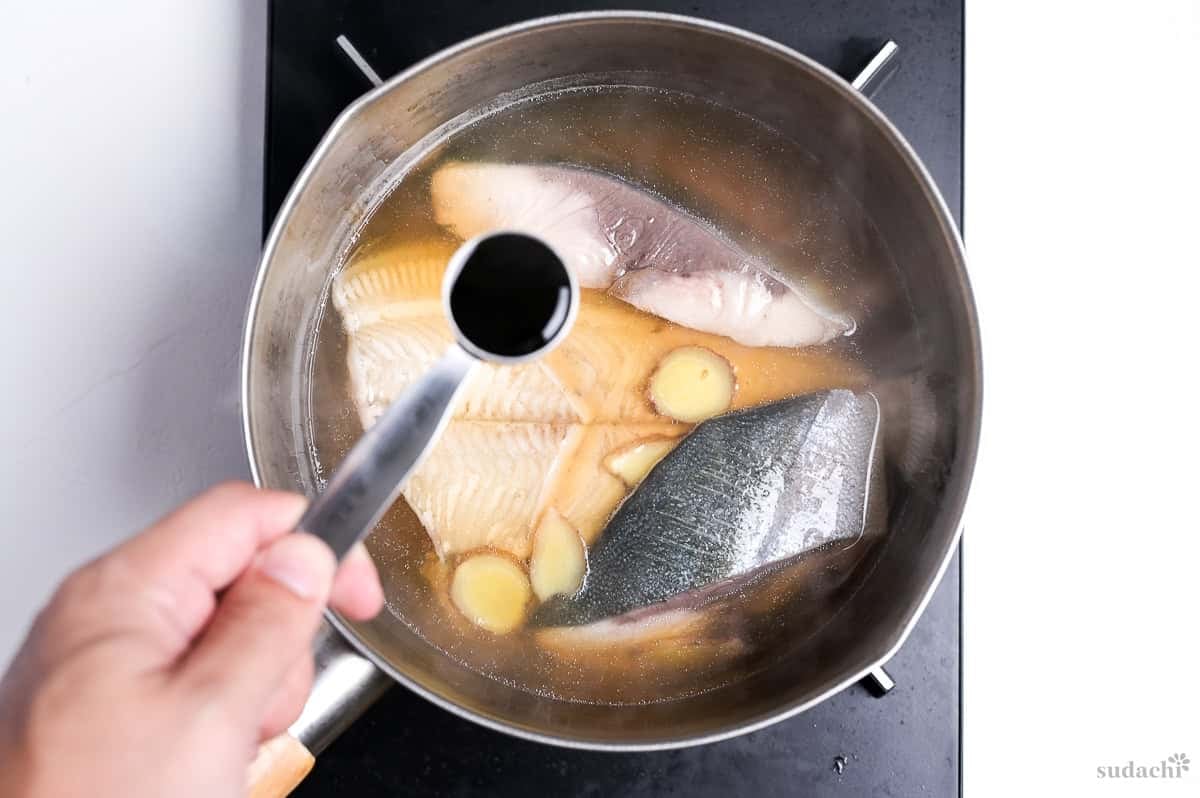
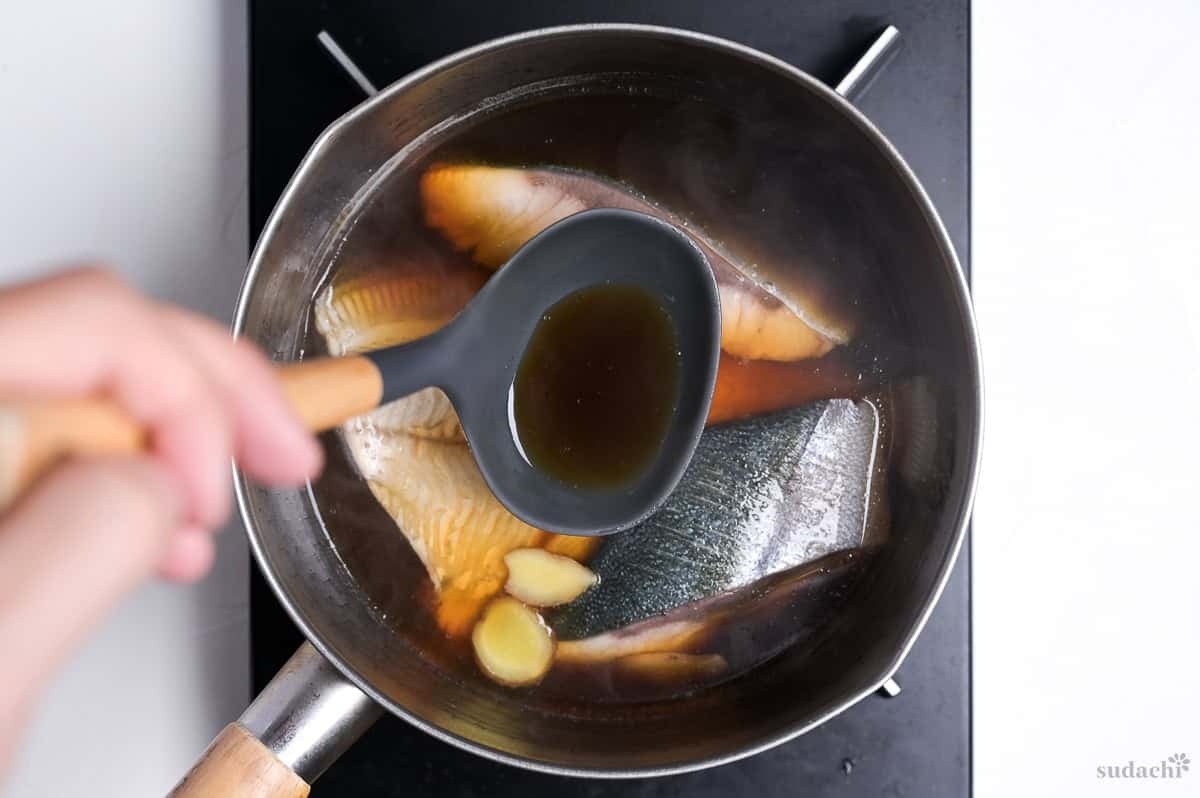
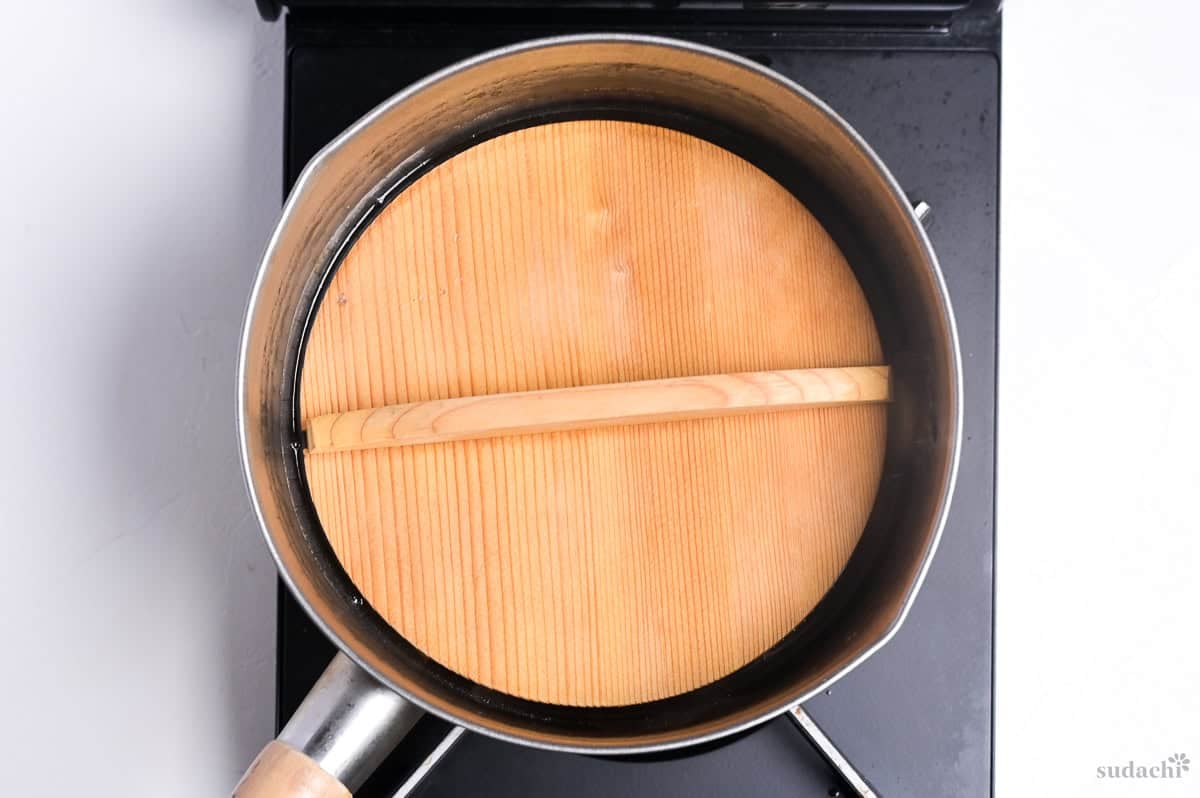
iv. Replace the drop lid and simmer over medium-low heat for another 4 to 5 minutes. Fillets should take about 7 to 8 minutes total from when you first added them.
v. During this simmer, bring another pot of water to a boil with a little salt. Cut your choice of green like spinach into 5 cm pieces.
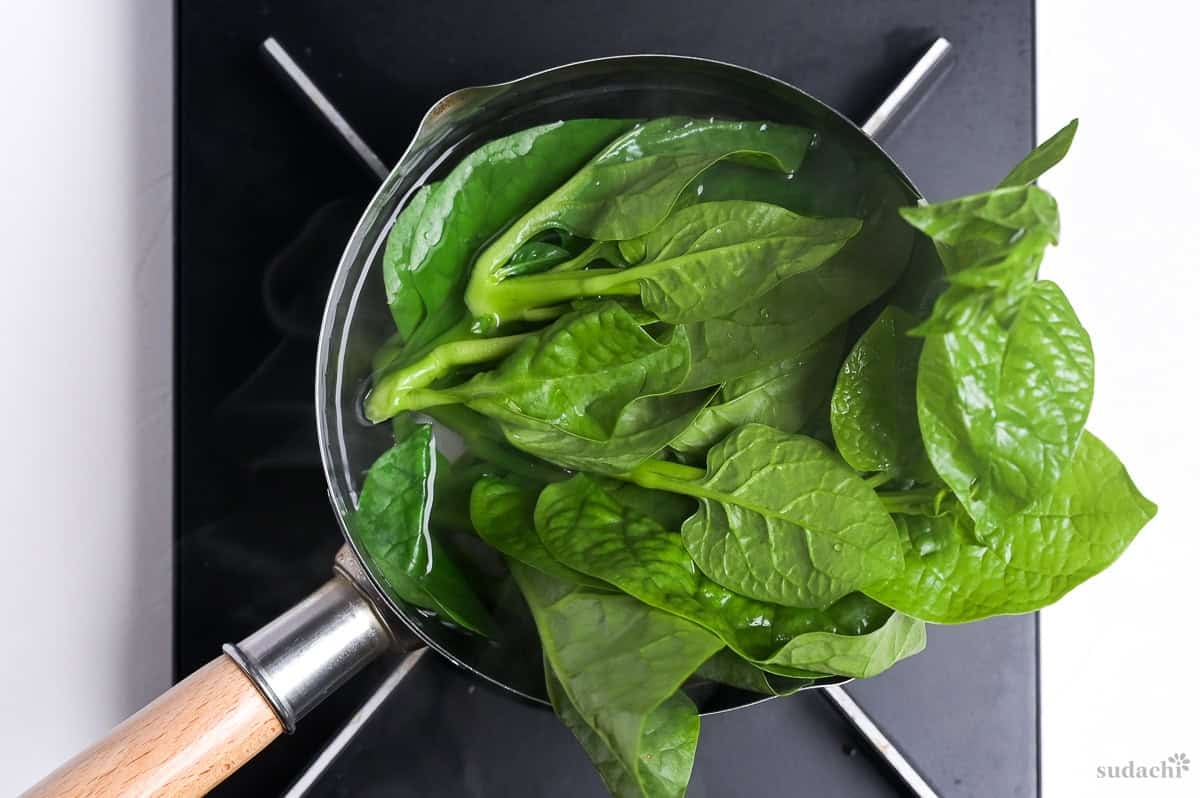
vi. Cook the greens in the boiling water for 1 minute, then transfer them to cold water.
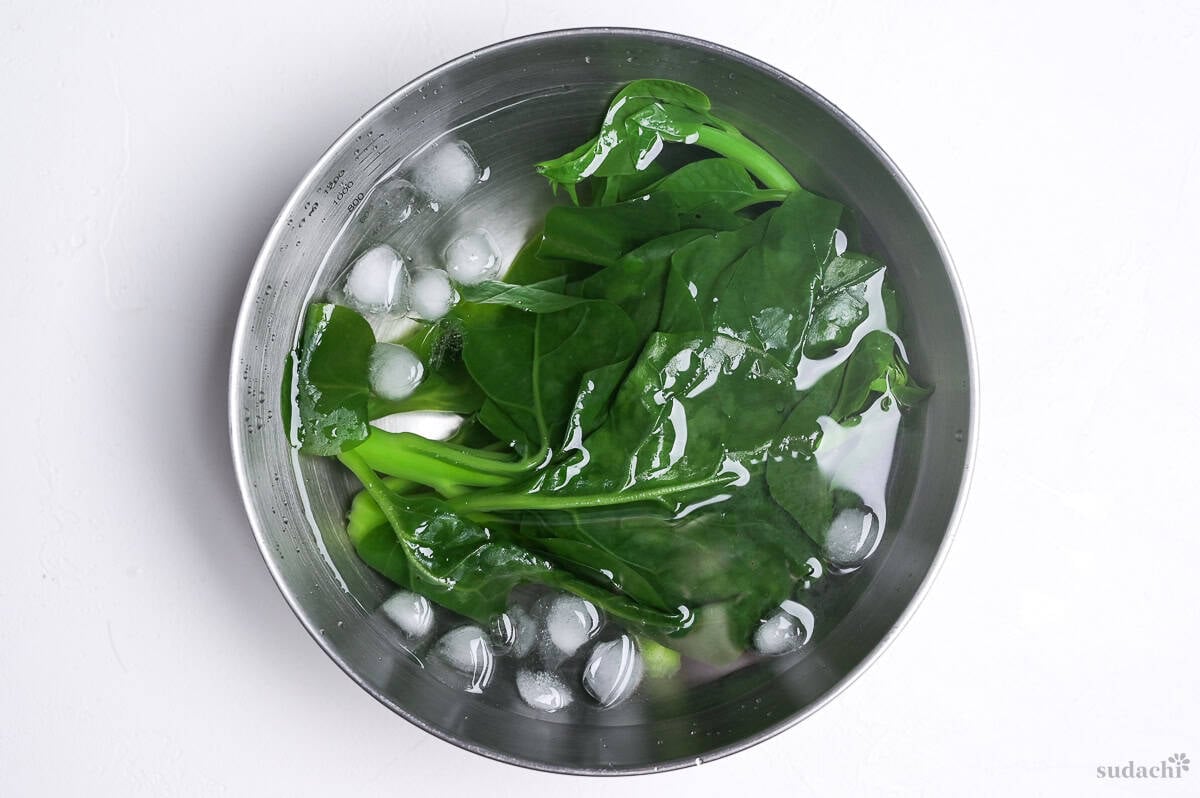
vii. Test the thickest part of the fish with a bamboo skewer. It is cooked when the skewer slips in easily. Also look at the skin and flesh to judge how far cooking has progressed.
A whole fish takes about 12 to 15 minutes. Look for upright pectoral fins, white flesh inside the cuts, and a skewer that enters the thickest part easily. Translucent flesh near the bone means it needs more time. If the flesh starts pulling away from the bone while still in the pot, it is overcooked.
Soy sauce added ahead of sugar and mirin makes it harder for sweetness to penetrate the fish, and its aroma dissipates during cooking. That is why the fish first spends 3 minutes in the sweet liquid. A hard boil with soy sauce from the beginning changes its aroma and leaves the smell of boiled-down soy sauce.
An otoshibuta, or drop lid, fits inside the pot and rests directly on the food. Bubbling sauce strikes its underside and drops back onto the fish, keeping the top moist even when the liquid is shallow. The lid also keeps pieces from moving around and breaking against one another. If you do not have one, use foil or parchment paper with holes poked through it.
i. Remove the drop lid and cook over medium-low heat for about 5 to 7 minutes to reduce the sauce. Keep spooning it over the fish.
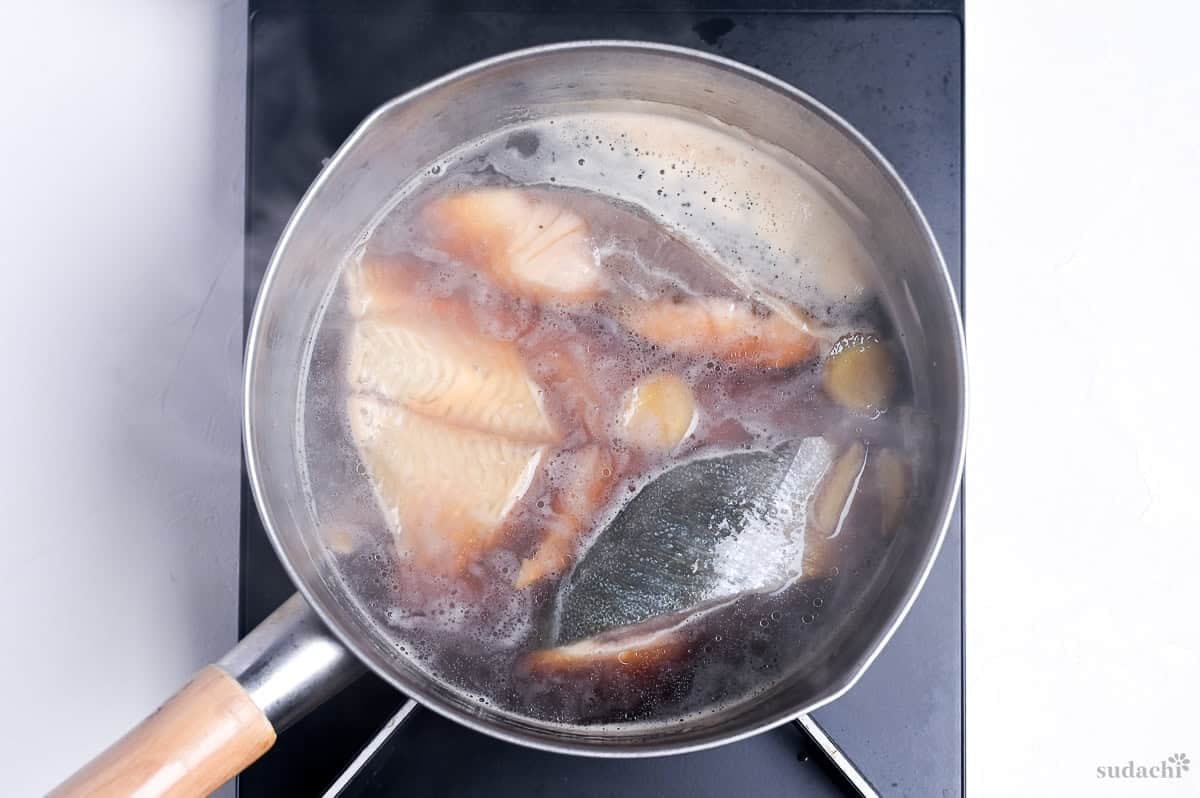
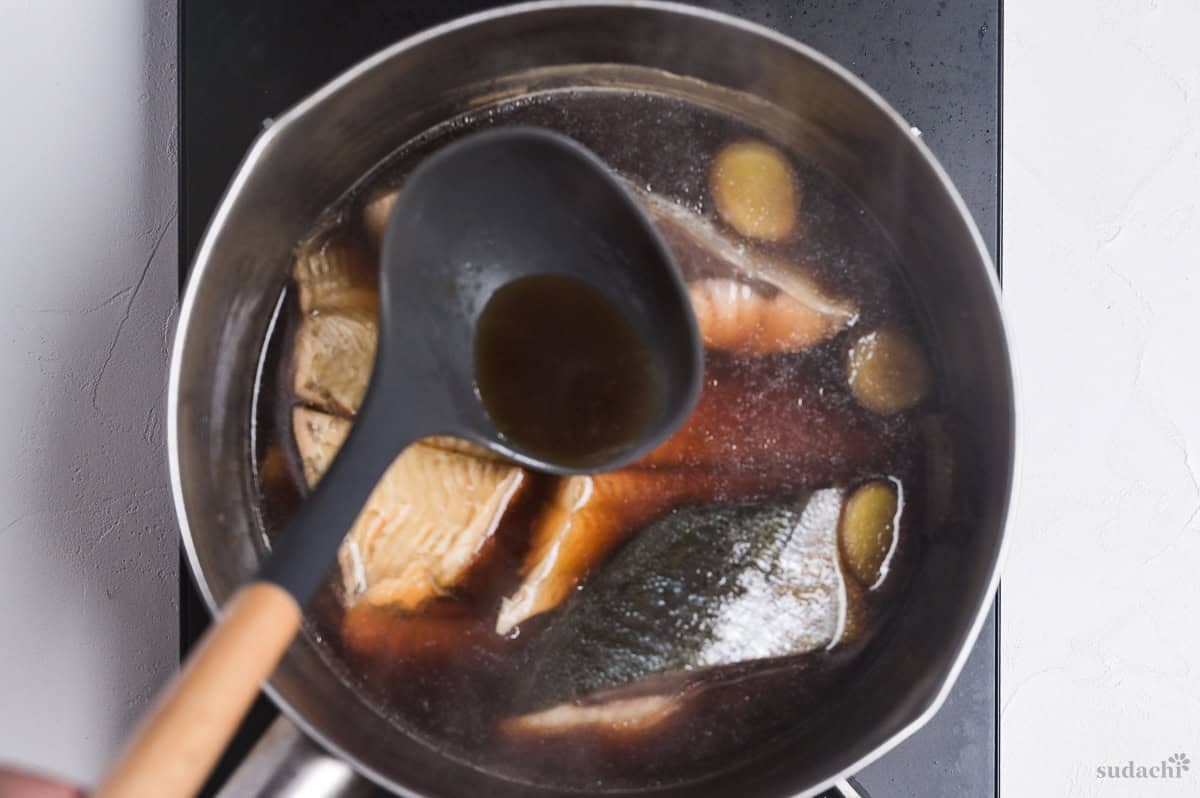
ii. Stop cooking when roughly one-third of the original sauce remains, the bubbles change, and the sauce looks glossy with a little body.
Lower the heat as the sauce thickens and its bubbles get larger, since it can scorch easily at this stage.
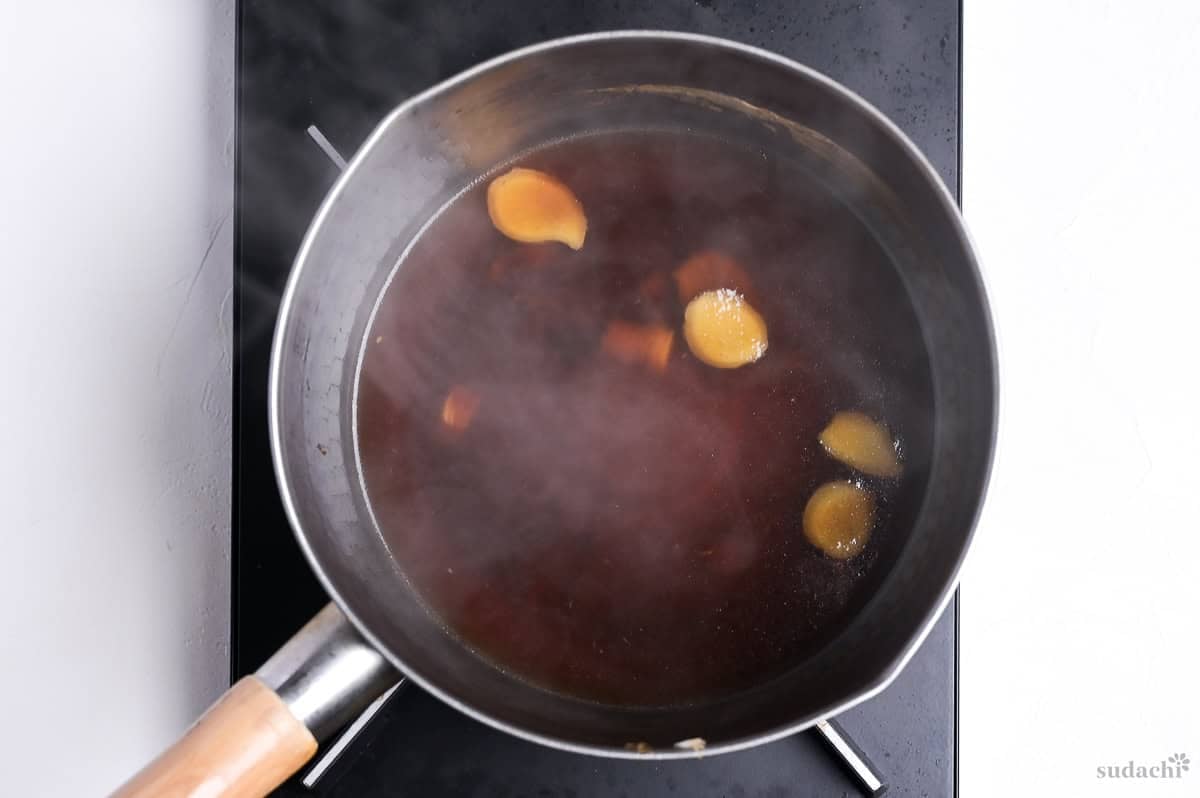
iii. Taste the sauce. If it needs more seasoning, stir in a little soy sauce at a time until you are happy with it.
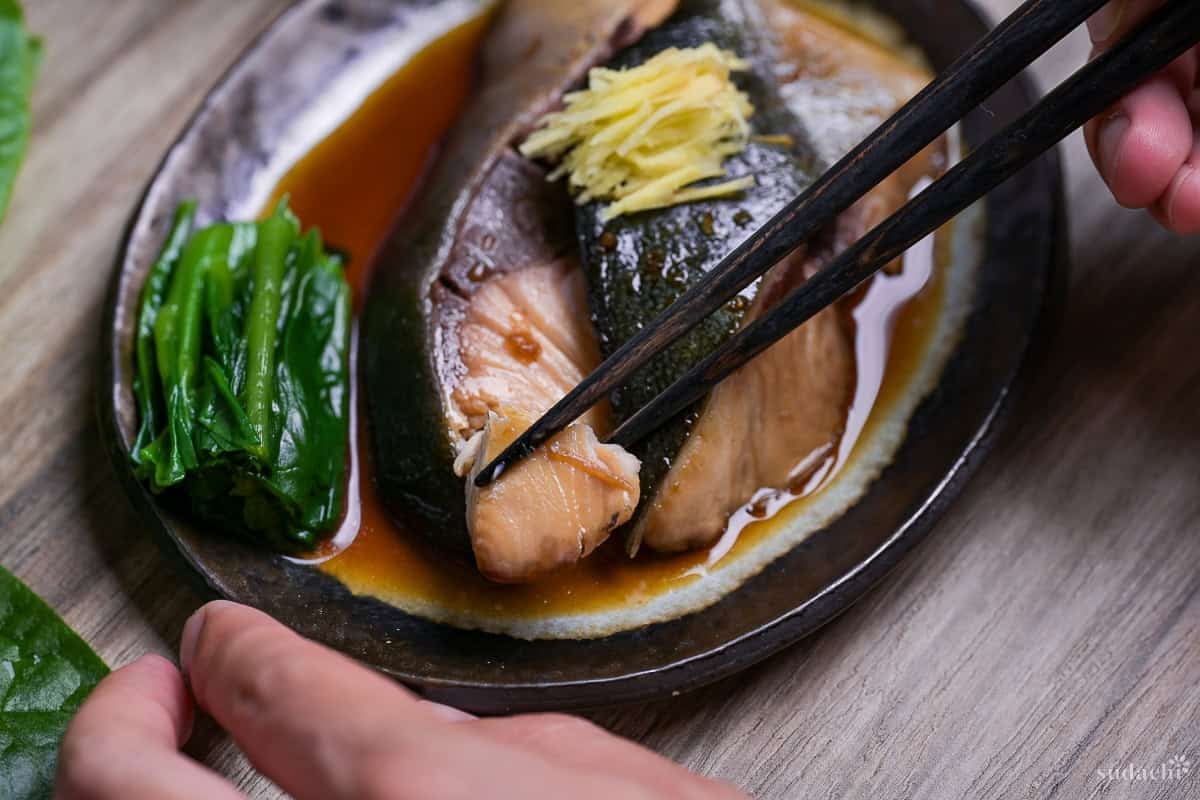
i. Transfer the fish to plates, top with the ginger, and pour a few spoonfuls of the remaining sauce over the fish.
ii. Squeeze the excess water from the green and arrange it beside the fish.
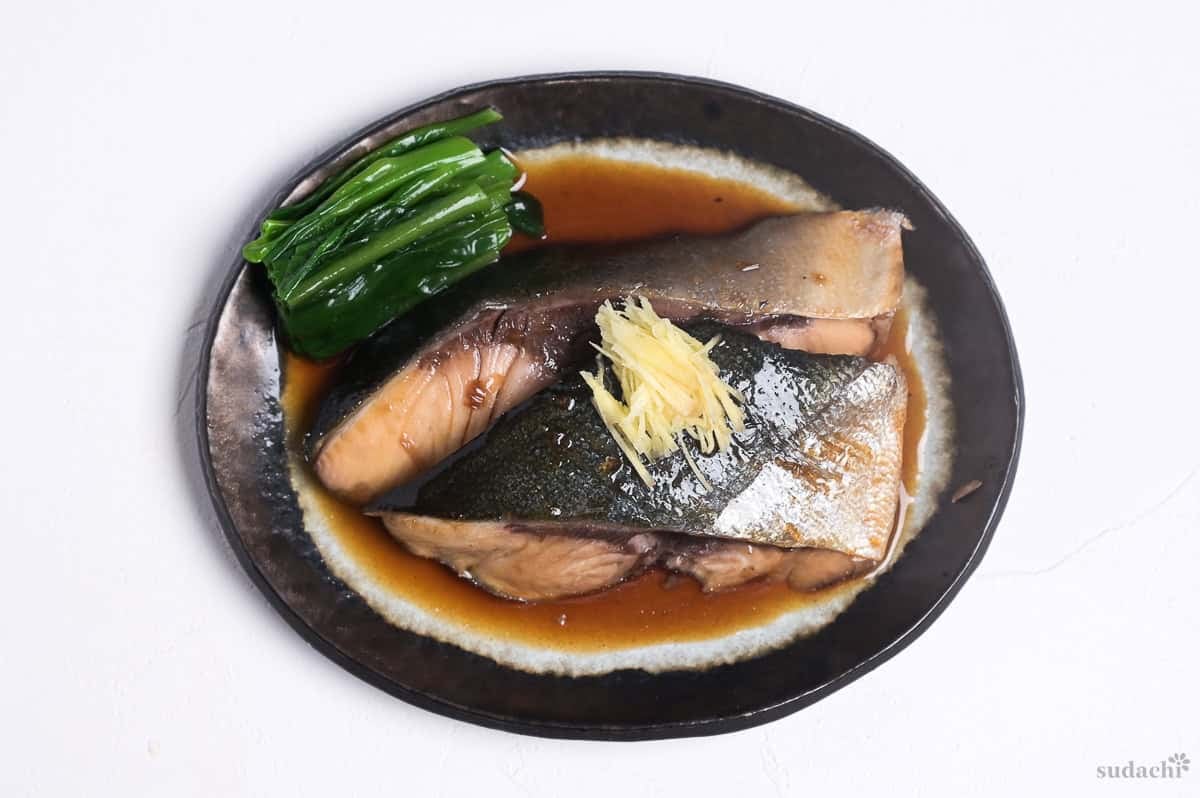
iii. Serve as soon as you finish plating.


Tips for the Best Japanese Simmered Fish
- Complete all the preparation steps. Simmering can do very little to remove a fishy smell once it is in the sauce. More ginger will not compensate for residues left on the fish.
- Choose a pan that the fish nearly fills. With so little sauce, an overly wide pan leaves the liquid too shallow to reach the top of the fish. Getting the pan size right matters just as much as using a drop lid.
- Put the fish in skin side up and leave it there. Flipping the fish can tear the side that has already cooked. Let the boil subside before transferring it to a plate. Even firm flesh can break on the spatula if you lift it while the sauce is boiling vigorously.
- Wait until the heat is off to taste and adjust the soy sauce. During simmering, stick to the amount in the recipe. Both saltiness and sweetness intensify as the sauce reduces, so adding extra soy sauce midway can leave the finished sauce too salty. Finish reducing, taste, and only then add more in small amounts if needed.
That last spoonful of sweet and salty sauce on your rice is the reward for taking care with the prep.
Storage & Meal Prep
Fridge: Seal the fish in sauce once steam stops. Keeps 2 days. Extra sauce seasons takikomi gohan, curry, or simmered roots like daikon.
Freezer: Bag each piece in sauce, air pressed out, 2 to 3 weeks. Thaw overnight in the fridge.
Meal prep: Best fresh, or cooled in sauce and eaten by the next day.
Reheating: Warm only your portion in sauce, covered on low, unflipped. Microwaving breaks the flesh.
What to Serve With Sakana no Nitsuke
- Japanese Multigrain Rice (Zakkoku Mai)
- Red Miso Soup (Akadashi)
- Easy Takuan (Pickled Daikon)
- Spinach Ohitashi (Spinach in Dashi)
Nitsuke Troubleshooting
Too much simmering draws moisture and fat out of the flesh. This often happens when the fish is already cooked but the sauce still needs reducing. As soon as the thickest part is white all the way through, turn down the heat and let the bubbling subside. Transfer the fish to a plate, reduce the sauce separately, and pour it over to serve. On your next attempt, begin checking fillets after 7 to 8 minutes in the pot.
You may have too much liquid for the pan, or the sauce may need more time to reduce. Adding sugar or soy sauce will not help it coat the fish. Once the fish is cooked, let the bubbling subside, then remove it and reduce the liquid on its own until glossy and slightly thickened, then spoon it over the fish.
The usual causes are leaving the fish in the blanching water too long or turning it while it simmers. Skin also tears more readily when it has not been scored, because there is no cut to allow for shrinkage. You cannot repair the tear, but the flesh can still cook properly, so keep the skin facing up and arrange the fish on the plate so the damage is less visible. Next time, pour the hot water over without leaving the fish to soak, then transfer it to ice water the instant the skin turns white.
More Japanese Fish Recipes
- Saikyo Yaki White Miso Grilled Fish
- Teriyaki Cod in Minutes
- Salt-Grilled Mackerel (Saba no Shioyaki)
- Buri no Teriyaki Glazed Yellowtail
Once you have the knack of finishing a piece of fish in its own sauce, pick your next fish dinner, grilled or glazed teriyaki-style, from my Japanese Fish Recipes.
Did You Try This Recipe?
I would love to hear your thoughts!
💬 Leave a review and ⭐️ rating in the comments below. 📷 I also love to see your photos – submit them here!
Sakana no Nitsuke (Japanese Simmered Fish Dish)

Ingredients
Fish Prep
- 200 g white fish fillets about 100 g each, thick and skin-on, such as cod, rockfish or sea bass
- ¼ tsp salt about 0.5 to 1% of the fish weight
- ice water as needed, for blanching the fish
- freshly boiled water as needed, for blanching the fish
Simmering Sauce
- 20 g ginger root
- 150 ml water
- 150 ml sake junmai, with no added salt preferred
- 3½ tbsp mirin
- 2 tbsp sugar
- 3 tbsp Japanese soy sauce (koikuchi shoyu)
To Serve
- 50 g green vegetable of your choice such as spinach, komatsuna or bok choy
The ingredient brands and tools I trust are in my Japanese pantry guide and my cooking tools guide.
Can’t find certain Japanese ingredients? See my substitution guide here.
Instructions
- Sprinkle ¼ tsp salt over both sides of 200 g white fish fillets and leave them for 10 minutes. While they sit, slice 20 g ginger root 2mm thick and set out a bowl of ice water.

- After 10 minutes, blot off the liquid on the surface with paper towels until the fish is dry. Make a shallow cut in the thickest part of the side that will face up on the plate, and 1 cut on the underside (for a whole fish, score both sides).
- Cool freshly boiled water to about 80°C (176°F) by adding about a quarter as much tap water. Put the fish in a bowl, cover it with a drop lid (or a plate), pour the hot water slowly over the lid and stir gently with chopsticks right away.
- When the skin contracts and the surface turns whitish, drain off the hot water at once and transfer the fish to the ice water. With a spoon, clean off leftover blood, slime and the white scum that has set on the surface, then dry the fish well with paper towels.
- Pour 150 ml water and 150 ml sake into a saucepan, add 3½ tbsp mirin, 2 tbsp sugar and the sliced ginger, and bring to a full boil over medium heat.
- Lower the fish gently into the boiling sauce, skin side up. Reduce the heat, cover with the drop lid and cook for 3 minutes.
- Lift off the drop lid. Add 3 tbsp Japanese soy sauce (koikuchi shoyu) in 3 stages, spooning the sauce over the fish after each one and waiting until it has mixed in before the next.
- Replace the drop lid and simmer over medium-low heat for 4 to 5 minutes (7 to 8 minutes in all for fillets, 12 to 15 for a whole fish). Meanwhile, bring water to a boil in a second pot with a little extra salt and cut 50 g green vegetable of your choice into 5 cm pieces.
- Cook the green in the boiling water for 1 minute, then transfer it to cold water.
- Test the fish with a bamboo skewer in the thickest part. Once it slips in easily, remove the drop lid and boil the sauce down over medium-low heat for 5 to 7 minutes, spooning it over the fish all the while. As the sauce thickens and the bubbles get larger, lower the heat.
- Turn off the heat when about ⅓ of the starting sauce is left, the bubbles change and the sauce turns glossy with a little body. Taste it, and if it needs more seasoning, add soy sauce a little at a time.
- Transfer the fish to plates, top it with the ginger and finish with a few spoonfuls of the remaining sauce. Squeeze the greens dry, arrange them beside the fish and serve at once. Enjoy!

I made it with salmon, because that’s my family’s favorite fish. It was excellent. Will be making it again soon.
Hi Sam,
Thank you for your comment and sharing your feedback! I’m happy to hear you enjoyed this recipe! 🙂
Yuto
It is an amazing dish. I made it for the second time using sea bream and it came out perfect. I appreciate your quick response to my question (how to keep while waiting for late guests). love this blog.
Hi Hadas,
Thank you for your kind words! I’m happy to hear it turned out great! 🙂
Yuto
I made this with branzino and it was delicious. It was an easy recipe to follow and well worth it.
Hi Lawrence,
Thank you so much for trying my recipe and for sharing which fish you used. I’m really glad to hear that you enjoyed it and found the recipe easy to follow! 🙂
Yuto