


Featured Comment:
“I halved the recipe as I’m only making 2 eggs, omitted the sugar and used my homemade tsuyu and it turned out very very good! I marinated for 36 hours so it was more salty than usual, but it made the eggs very flavourful. I also made your izakaya salted cabbage and I really enjoyed it!”
– Sarah
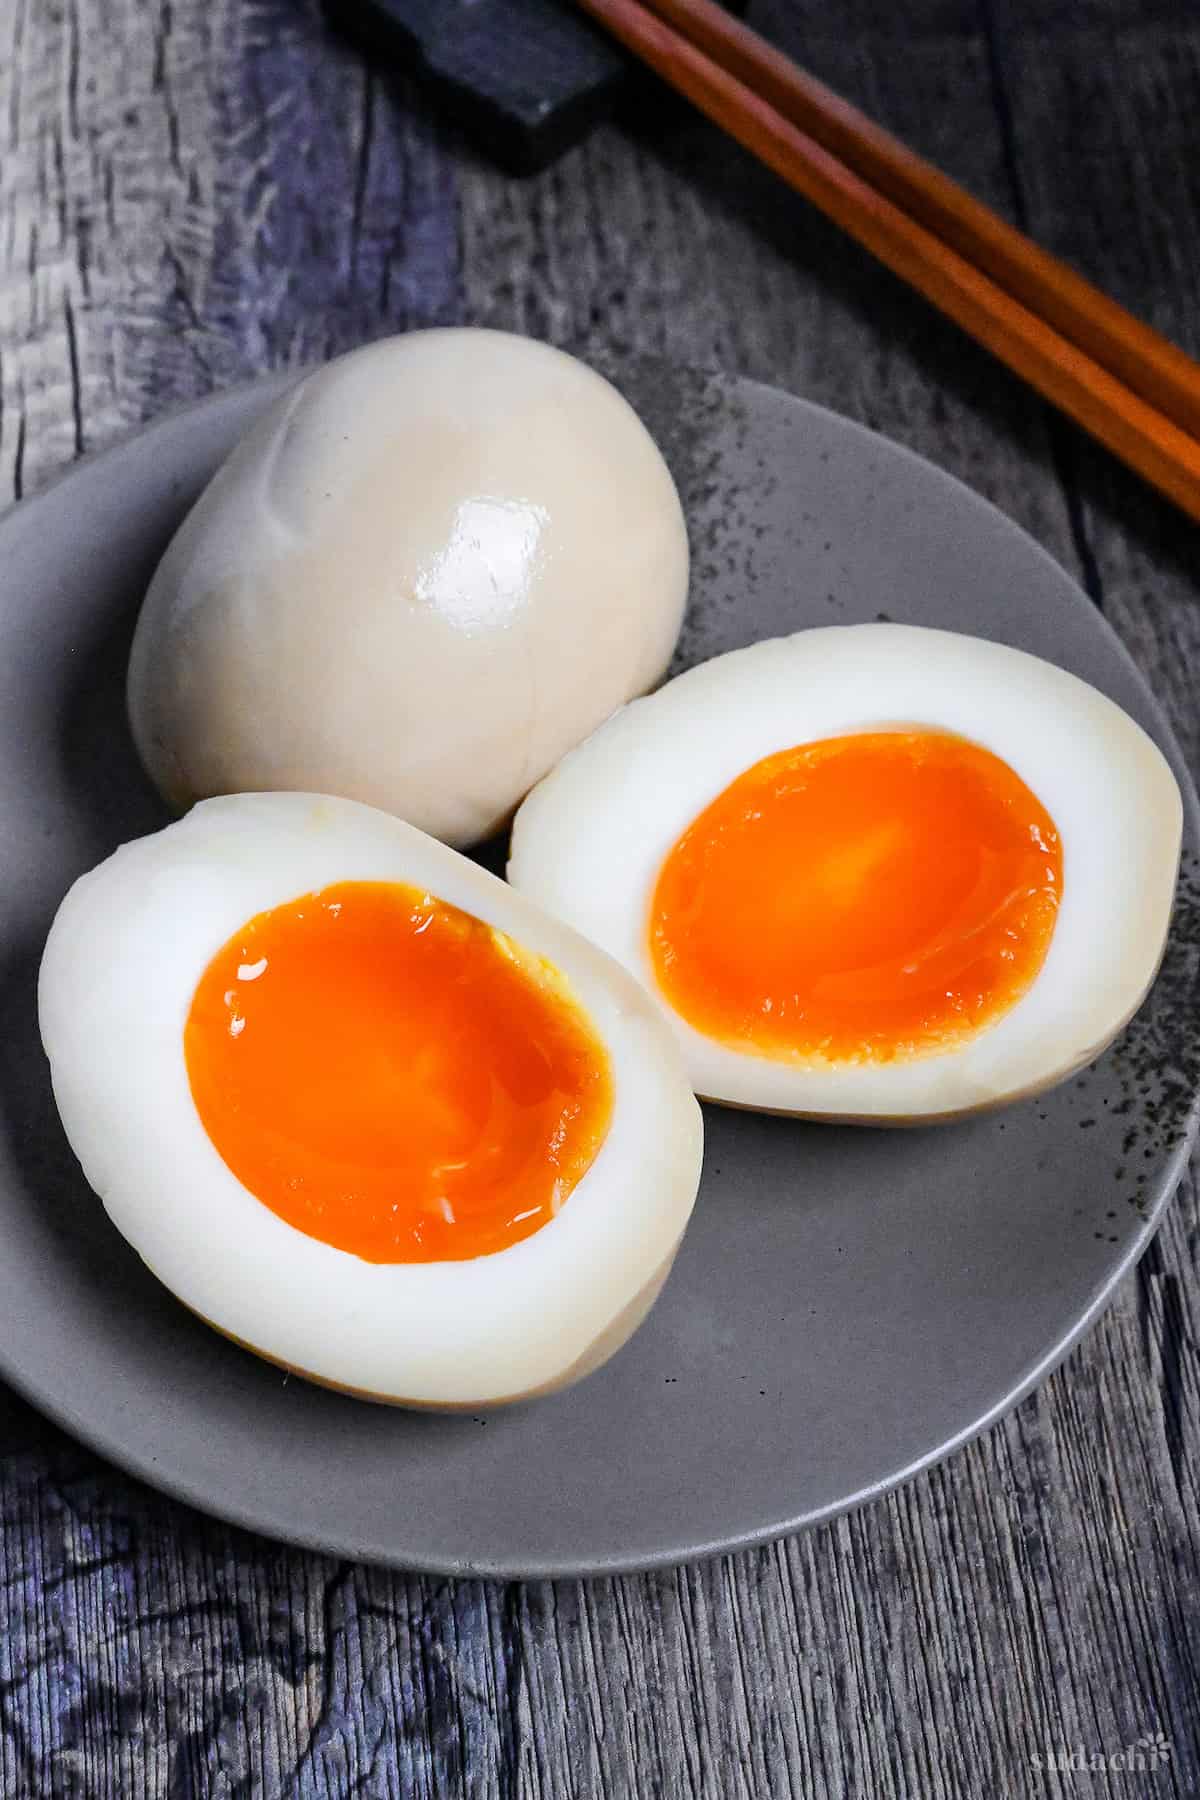
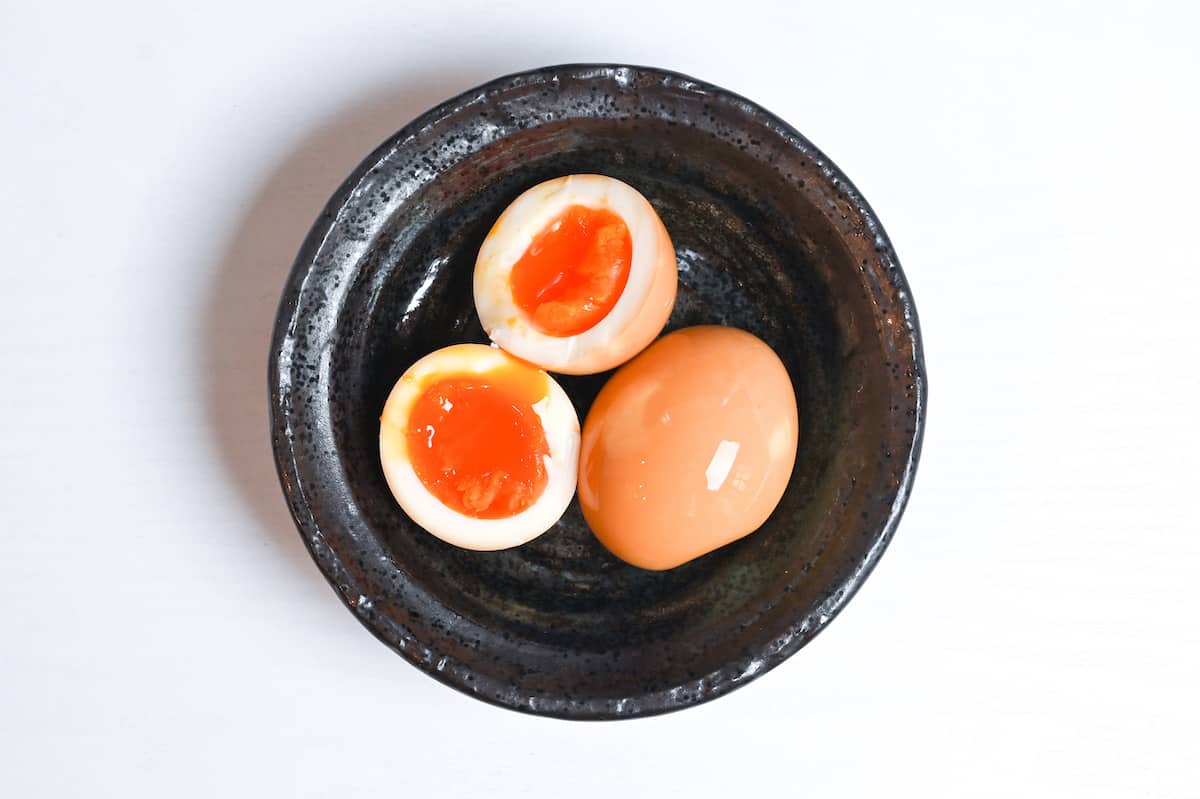
What is Ajitama Egg? (Nitamago/Ajitsuke Tamago)
Ajitama (味玉), also called “ajitsuke tamago” (味付け卵), “nitamago” (煮卵), or just “ramen egg” in English, is a must-have for the perfect bowl of ramen. These soft-boiled eggs marinated in a careful balance of soy sauce, mirin, and sake represent a relatively recent innovation in Japanese cuisine.
Before the late 1990s, ramen eggs were usually hard-boiled and simmered in just soy sauce.
What makes ajitama special is the precise marinade ratio and timing that transforms a simple egg into something one of the highlights of your ramen bowl. The modern version balances soy sauce, mirin, sake, and a touch of sugar to create layers of umami that complement rather than overpower the egg’s natural richness.
Cooking Methods & Techniques
If you want to make the perfect ajitama, you’ve got to understand how different cooking methods affect your eggs. The technique you choose will determine not just the texture, but also how easily the shells peel away.
Note: These cooking instructions are based on using room temperature eggs and may need a slight increase if using refrigerated eggs.
| Method | Time | Pros | Cons | Best For |
|---|---|---|---|---|
| Hot Start Boiling | 6-7 minutes | • Easy timing control • Shells peel cleanly • Most consistent results | • Risk of cracked shells • Need to stir initially • Whites may be slightly firmer | Most home cooks |
| Steam Method | 6-7 minutes | • No cracking risk • Easiest peeling • Energy efficient | • Requires steamer • Slight timing variation • Whites marginally firmer | Batch cooking |
| Cold Start | Variable | • Gentle heating • No shell shock • Softer whites | • Hard to time • Difficult peeling • Inconsistent results | Not recommended |
| Sous Vide | 20 min at 70°C | • Precise control • Set and forget • Perfect texture | • Equipment needed • Hard to peel • Time consuming | Perfectionists |
For most home cooks, getting the yolk consistency right is the main challenge. Professional ramen shops usually start with a 7-minute boil and adjust it by 30 seconds either way, depending on preference. Here’s how timing affects texture:
- 6 minutes: Runny center, barely set edges
- 7 minutes: Jammy consistency throughout (the standard)
- 7.5-8 minutes: Firmer but still creamy
Keep in mind that marinating time also affects texture – the salt in the marinade will continue to firm up the yolk slightly. My personal preference is 7 minutes of cooking and 1-2 days of marinating time.
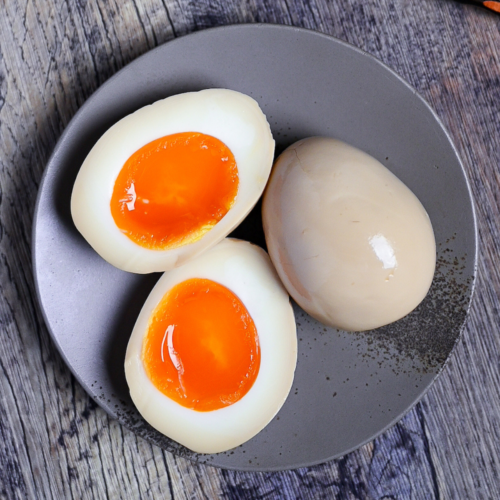
The time you let the ajitama marinate also affects how it looks. Fresh yolks keep their bright orange color if they’re only marinated for 8 to 12 hours, but if you let them marinate for more than 24 hours, they’ll turn an amber color from the edge to the center.
For most home cooks, the hot start boiling method offers the best balance of control and results. Use large eggs, lower them gently into boiling water, and time precisely from the moment the first egg enters the water.
Remember: ajitama is meant to complement, not overpower. Adjust your marinating time based on what you’re serving with – lighter for delicate shio ramen, longer for rich tonkotsu.
Visual Walkthrough & Tips
Here are my step-by-step instructions for how to make Ajitama Eggs at home. For ingredient quantities and simplified instructions, scroll down for the Printable Recipe Card below.
If you prefer to watch the process in action, check out my YouTube video of this Ramen Eggs recipe for a complete visual walkthrough!

Combine water, dashi granules, soy sauce, mirin, sake, honey, rice vinegar, toasted sesame oil, sliced ginger, and leek greens in a small saucepan and bring the mixture just to a gentle simmer.

Lower the heat and let it bubble for about a minute so the alcohol can slip away. Discard the ginger and leek greens, then set the marinade aside to cool.
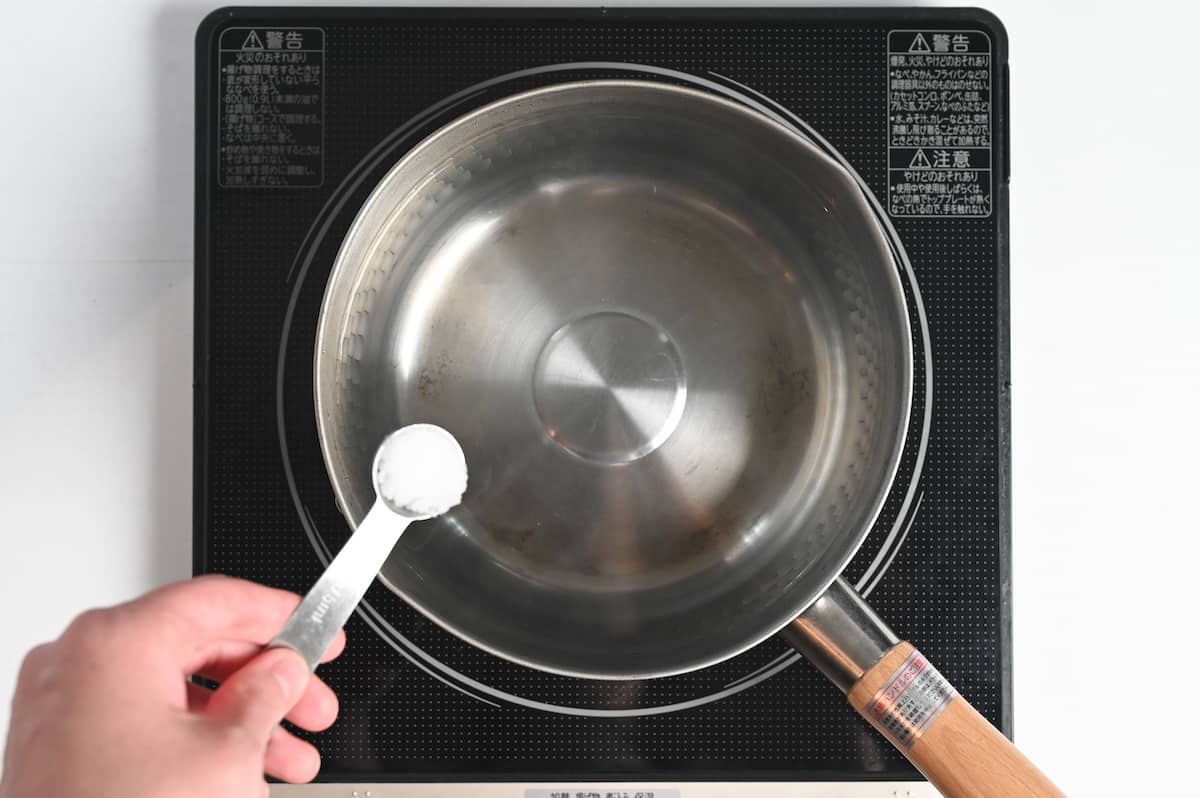
Fill a deep pot with enough water to cover the eggs by an inch and heat it to a steady 90 °C (about 190 °F). Add salt to cushion the shells.
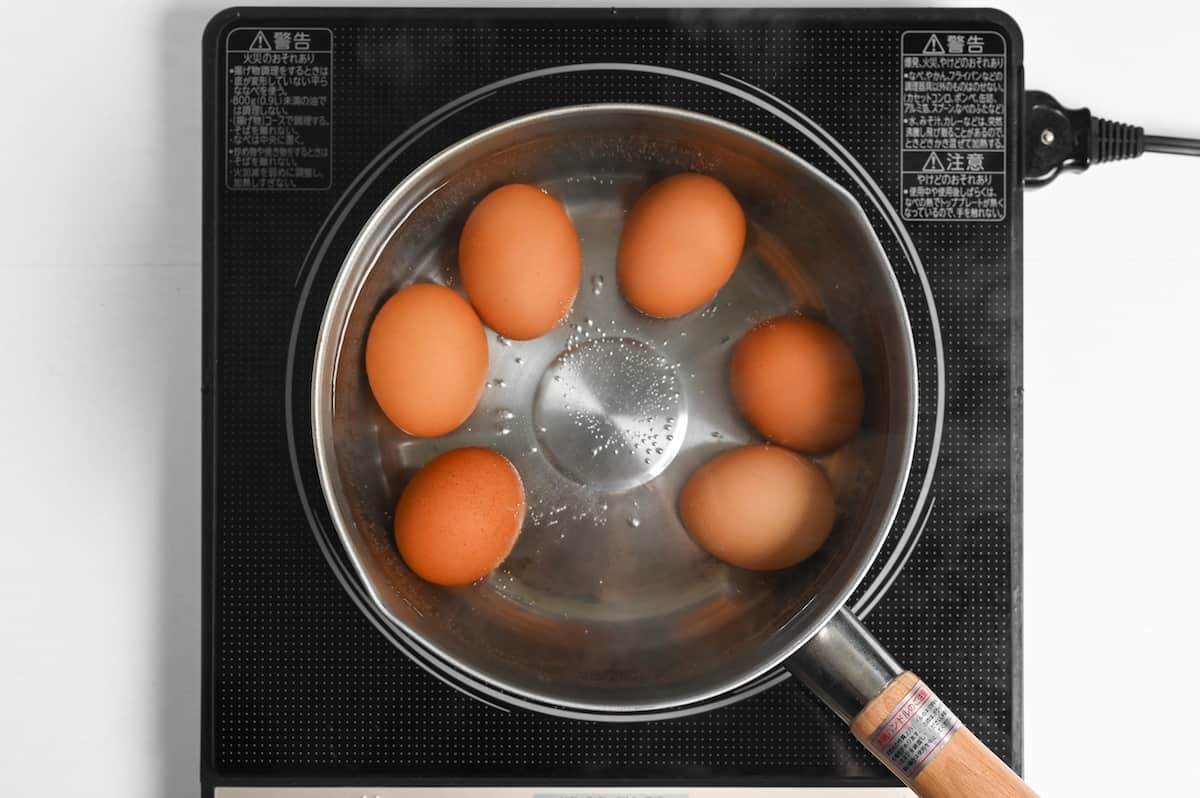
Then lower the room temperature eggs in.
If you use chilled eggs from the refrigerator, the sudden temperature change is likely to make the shells crack as soon as they hit the hot water. For best results, use room temperature eggs. If you forgot, you can place your cold eggs in a bowl of warm water while you wait for your pot of water to heat up.
Give each egg a lazy twirl for the first 30 seconds; that gentle spin keeps the yolk centered.

Keep the water at 90 °C (190°F). Do you prefer a fudgier center? Slide the timer back to 6 minutes. Prefer them on the firmer side? Let them boil for up to 8 minutes 30 seconds.
While you wait for the eggs to cook, prepare a bowl of ice water.
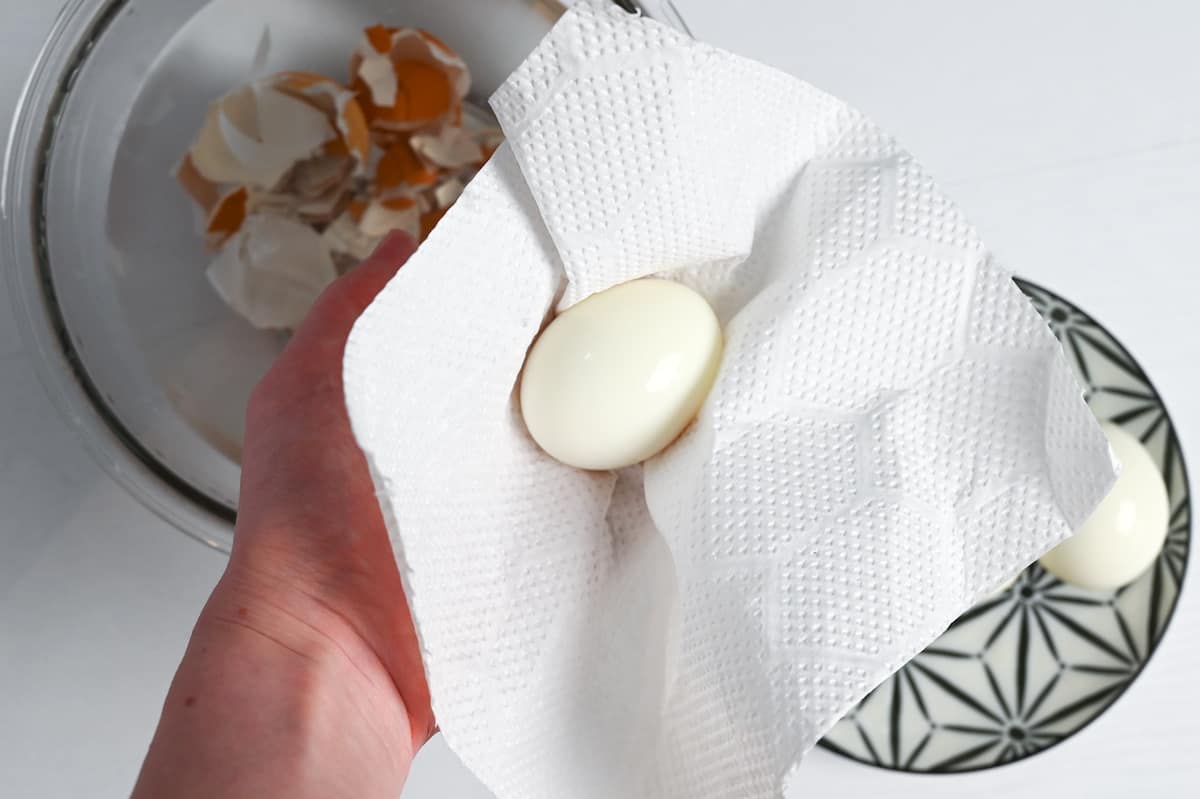
When the timer hollers, plunge the eggs straight into an ice bath. Leave them there until they feel fridge-cold, about 10 minutes. Then crack the shells all over and peel them under the water.
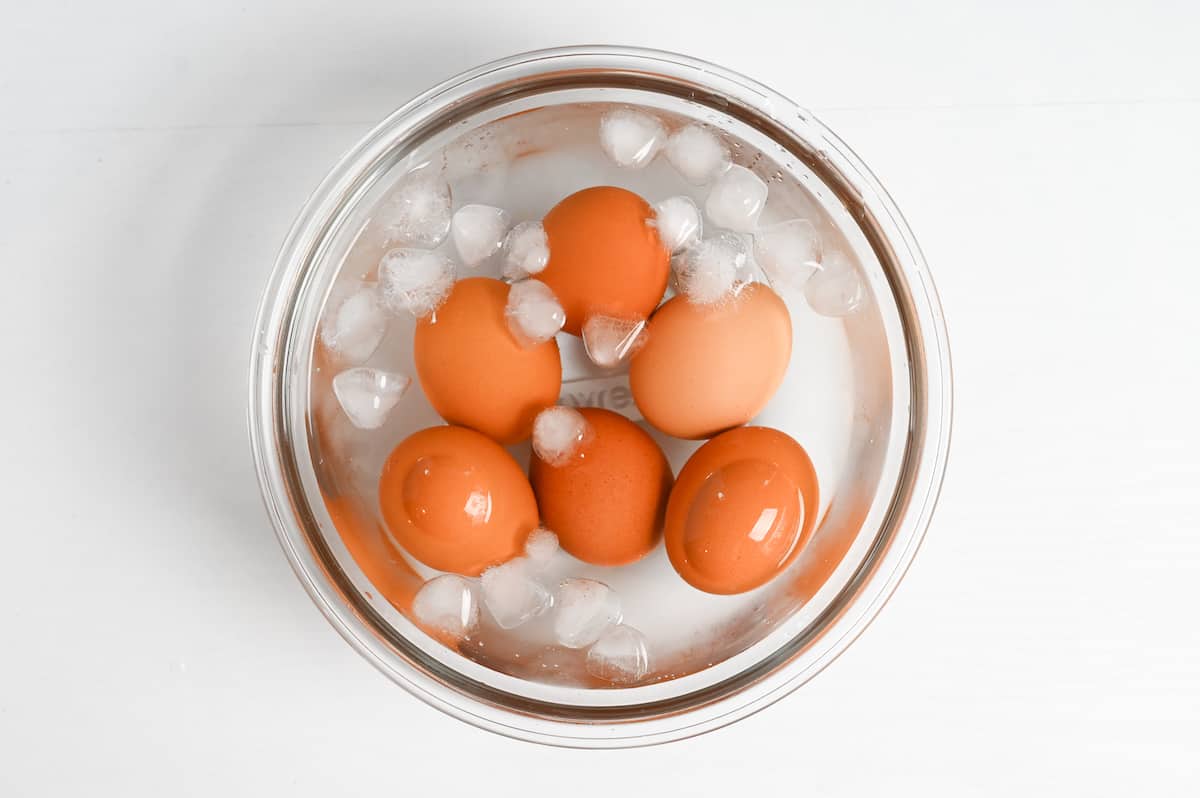
The water gets in there and helps the shell come off in big pieces. Give it a quick pat with a paper towel to get rid of any extra moisture that could water down your marinade.
Slip the peeled eggs into a zip-top bag, pour in the completely cooled marinade, and squeeze out as much air as possible.
It is important that the marinade is cool to the touch, since hot marinade could start cooking the eggs again and affect the texture.
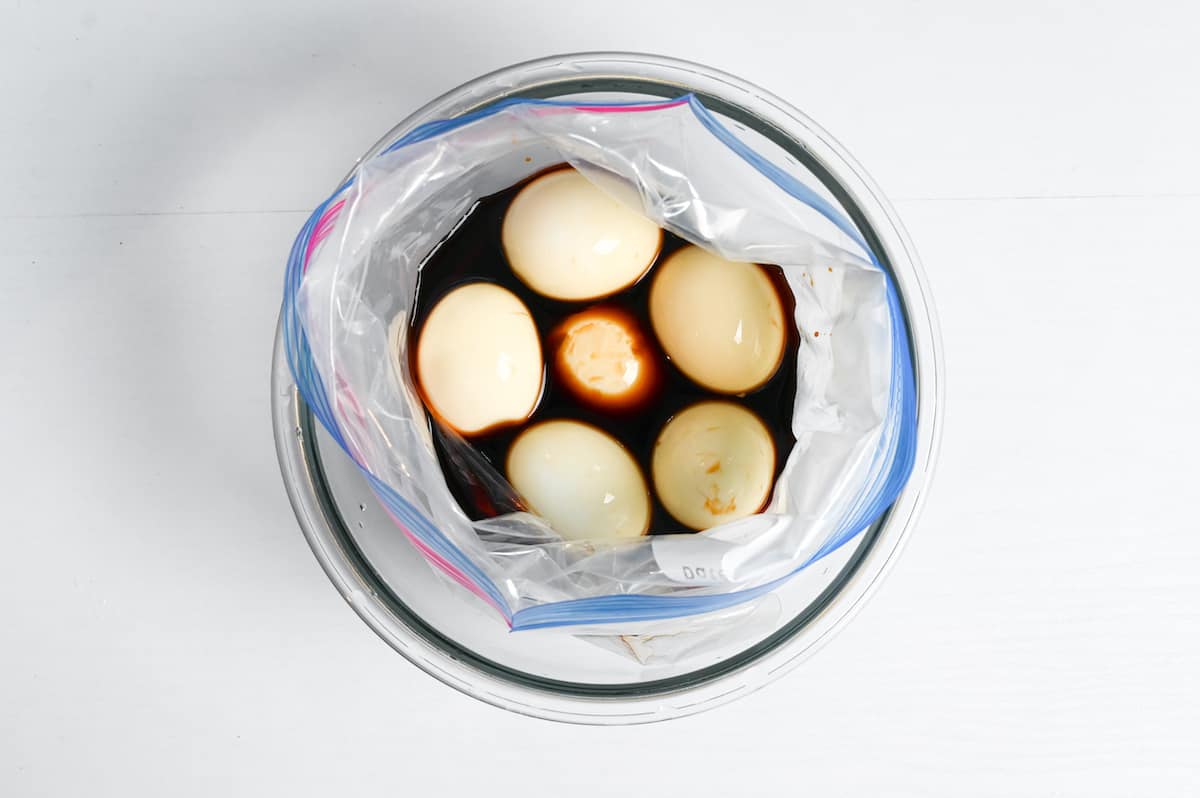
I use a Ziploc bag for two reasons. First, I only use a small amount of marinade, and the Ziploc bag makes it easy to make sure all of the eggs are covered.
If you use a square container, you’ll need more marinade, or you’ll have to turn the eggs occasionally to make sure they’re all evenly flavored.
Seal the bag and place it on a tray in the refrigerator. The tray helps prevent leaks (just in case!).
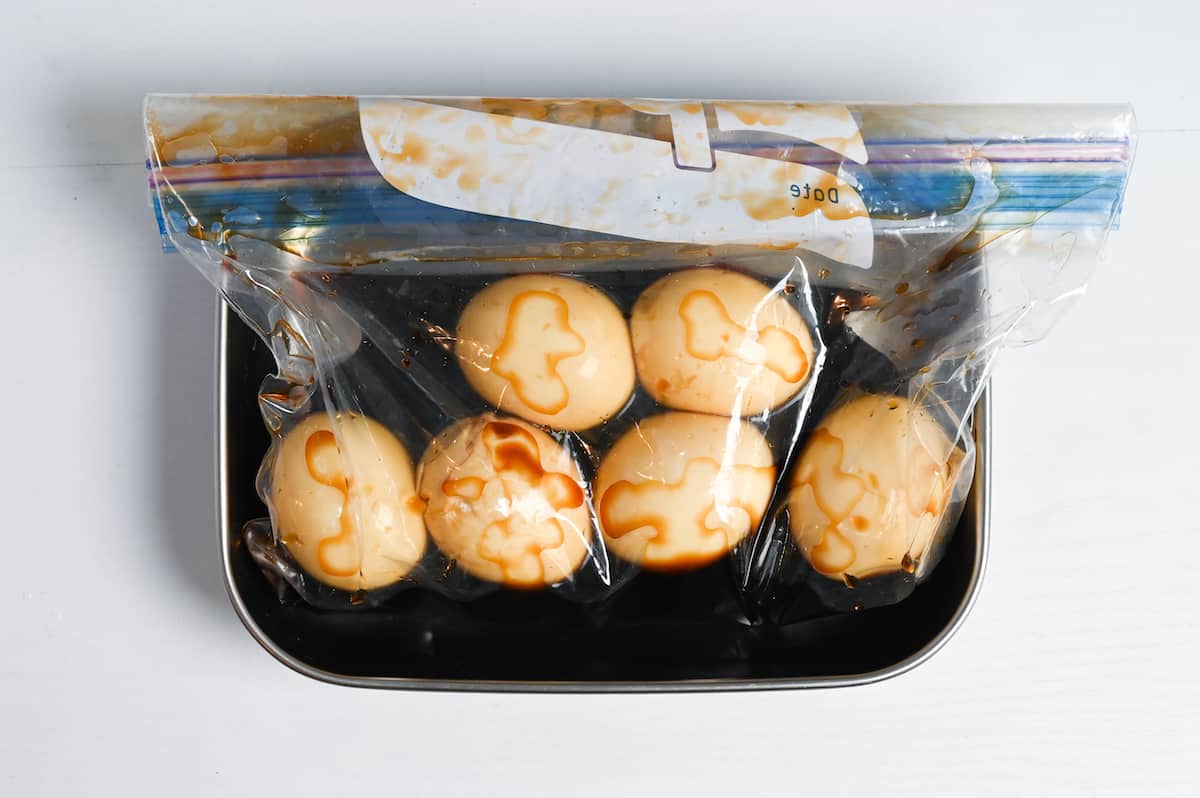
Marinate for at least 45 minutes (very light flavor), 1-2 days if you have time.
How long you let them marinate depends on what you like. The minimum is 45 minutes, and the maximum is usually 2-3 days. I like eggs that have been marinated overnight or longer, so I usually start eating them after one day and finish all six within three days.
While I personally don’t do this, for really photo-shoot-worthy halves, loop a length of unwaxed dental floss around the equator of each egg and pull tight. That way, no sticky yolk on your knife, no craggy edges.
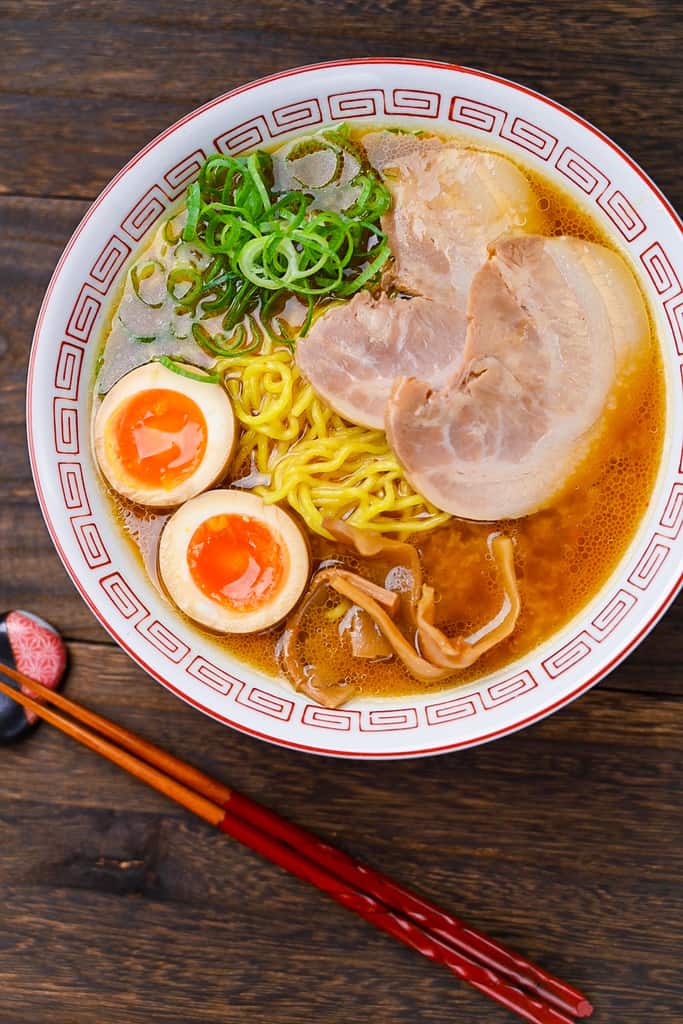
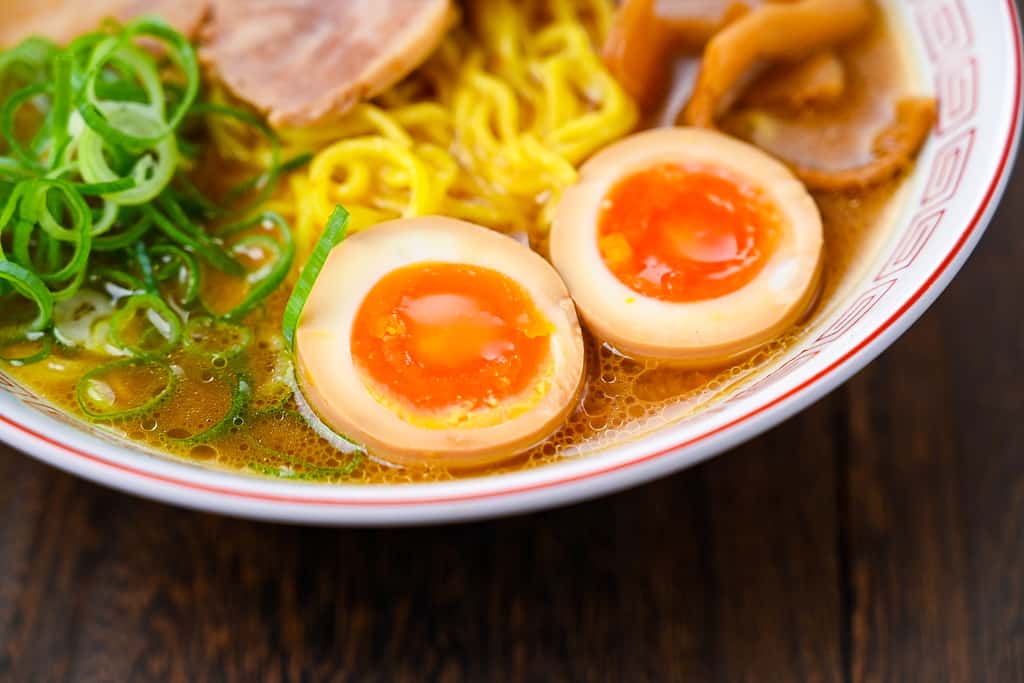
Enjoy your perfectly cooked and seasoned soft-boiled Ajitama Eggs on top of your favorite ramen or as a satisfying snack!
Jump to Full Recipe Measurements
Essential Tips & Tricks
- Use room temperature eggs to prevent cracking – and if you forgot to take them out in advance, place them in a bowl of warm (not hot) water while you’re waiting for the pot to water to boil.
- Start the eggs in 190 °F (90 °C) water and hit your timer the instant the last egg is submerged.
- Spin each egg gently for the first 30 seconds; this recenters the yolk and gives you picture-perfect halves.
- Chill the eggs in an ice bath until they feel fridge-cold.
- Make sure the marinade is completely cooled before you add the eggs.
- Press out excess air from the zip bag so every part of each egg is bathed in marinade.
With these simple tips in mind, you’re set for success every time you make Ajitama Eggs.
Meal Prep & Storage
This ajitama egg recipe is a solid short-term meal-prep option. The flavor actually deepens after a night in the fridge, so you’ll have ready-to-go protein for the next few days.
- Full Dish Prep: Cook, chill, peel, and marinate the eggs as directed. They’re at their peak between 12 and 48 hours, and best consumed within 3 days.
- Component Prep: Whisk together the marinade up to 5 days in advance, let it cool, and keep it sealed in the fridge. When you’re ready, all that’s left is to boil, chill, and peel fresh eggs, then pour the pre-made sauce over them.
- For Storage: Stash the finished eggs in an airtight glass or BPA-free plastic container and keep them in the fridge. Avoid freezing, half-set yolks and whites turn grainy after thawing.

10 Favorite Ramen Recipes
After you make a batch of ajitama eggs, the possibilities are endless. Here are some of my favorite ramen recipes that you can use them as toppings!
- Pork Miso Ramen in 15 Minutes
- Homemade Shoyu Ramen
- 10-Minute Cheat’s Tonkotsu Ramen
- Chicken Shio Ramen
- Tantanmen (Tan Tan Ramen) in 15 Minutes
- Hiyashi Tantanmen (Cold Spicy Ramen)
- Abura Soba (Soupless Ramen)
- 10 Minute Hiyashi Ramen (Cold Noodle Soup)
- 15 Minute Spicy Tsukemen (Dipping Ramen)
- Taiwan Ramen (Spicy Nagoya Style Ramen)
FAQ
Ajitama is just shorthand for ajitsuke tamago (flavored egg); both are typically soft-boiled and soaked cold in a marinade. Nitamago originally meant a hard-boiled egg simmered in seasoned broth, but modern usage in Japan often blurs the line. Many “nitamago” today are actually soft-boiled and marinated. In practice, restaurants use the terms interchangeably.
Yes, for cooking, not for a new batch of eggs. Bring the liquid to a rolling boil for at least one minute, cool it, and use within 24 hours in stir-fries or braises. Because the first batch of eggs dilutes the salt and introduces bacteria, it’s unsafe to soak fresh eggs in that same liquid.
Texture swings by the second. For room temperature large eggs:
• 6 min = molten center
• 7 min = jammy “sweet-spot”
• 8 min 30 s = fudgy and slightly firm
Adjust in 30-second increments and cool immediately in ice water to freeze the result in place. If using fridge-cold eggs, you might need to increase the time by 20-30 seconds and be aware that the shells might crack.
Give each egg a gentle twirl for the first 30 seconds of cooking; the spinning motion recenters the yolk before the white sets. If one still tilts, cut it so the prettier side faces up. Chefs do this all the time.
I hope you enjoy this Ajitama recipe! If you try it out, I’d really appreciate it if you could spare a moment to let me know what you thought by giving a review and star rating in the comments below. It’s also helpful to share any adjustments you made to the recipe with our other readers. Thank you!
Ajitama Egg (Nitamago/Ajitsuke Tamago)

Ingredients
- 125 ml water
- ¼ tsp dashi granules vegetarians can use kombu or shiitake dashi granules
- 2 tbsp Japanese soy sauce (koikuchi shoyu)
- 2 tbsp mirin
- 1 tbsp sake
- ½ tsp honey or the same amount of sugar
- ⅛ tsp unseasoned rice vinegar (komezu) unseasoned
- ⅛ tsp toasted sesame oil
- 1 slice ginger root thick cut
- 2 inch Japanese leek (naganegi) (green part) or regular leek/shallots
- 6 eggs US large at room temperature – if you forgot to take them out, put them in a bowl of warm water for 5-10 minutes
- 1 tsp salt for boiling
The ingredient brands and tools I trust are in my Japanese pantry guide and my cooking tools guide.
Can’t find certain Japanese ingredients? See my substitution guide here.
Instructions
- Take a pan and add 125 ml water, ¼ tsp dashi granules, 2 tbsp Japanese soy sauce (koikuchi shoyu), 2 tbsp mirin, 1 tbsp sake, ½ tsp honey, ⅛ tsp unseasoned rice vinegar (komezu), ⅛ tsp toasted sesame oil, 1 slice ginger root and 2 inch Japanese leek (naganegi). Heat on medium and let it gently bubble for about 1 minute. Leave to cool.

- Take a deep pot and fill it with enough water to cover the eggs by 1 inch. Heat the water to 90 °C (194 °F) (just before boiling) and add 1 tsp salt.

- Carefully lower 6 eggs into the water and set a timer for 6 minutes for runny yolks, 7 minutes for jammy yolks and 7.5-8 minutes for fudgy yolks.
- Gently spin each egg to re-center the yolk.
- While you wait for, prepare a bowl of ice cold water. Once the timer goes off, plunge the eggs straight into the ice water bath and leave for 10 minutes.
- Crack the shells and place them back in the water before peeling. Alternatively, peel them under cold running water. The water helps separate the egg from its shell. Dry each egg with kitchen paper.

- Once the marinade is cool enough to touch, place the eggs in a sealable freezer bag and pour in the cooled marinade.
- Squeeze out as much air as possible and seal the bag. Place it in a container to prevent leaks, then marinate in the fridge for at least 45 minutes (for a light marinade), preferably overnight.
- Cut, serve and enjoy!
Video
Notes
- Make sure the marinade has completely cooled before adding your eggs.
- Use room temperature eggs to prevent cracking shells, and if you forgot to take them out in advance, you can place them in a bowl of warm (not hot) water while you wait for your pot to boil.
- Keep the ramen eggs in the marinade stored in the fridge for up to 3 days (the flavor gets stronger each day).
- Use a ziplock bag rather than a Tupperware to make sure the eggs are fully covered. If using a box container, you will need to turn the eggs occasionally to make sure they’re evenly flavored/colored.
- Refrain from reusing the sauce (for both taste and hygiene reasons) for more eggs. It can be used in cooking for up to a week (stir fries etc) but make a fresh marinade for each batch of eggs.
- You don’t need to reheat the eggs, they will warm up in the ramen soup.
- If you want to heat them up, place them in warm water that is no hotter than 70 degrees C/ 158 degrees F for a few minutes.
- Add 30 seconds to the cook time if you live at high altitude (lower boiling point).
- Note: The nutritional information includes the mariande.
Thank you for this recipe! I halved the recipe as I’m only making 2 eggs, omitted the sugar and used my homemade tsuyu and it turned out very very good! I marinated for 36 hours so it was more salty than usual, but it made the eggs very flavourful.
I also made your izakaya salted cabbage and I really enjoyed it!
Hi Sarah,
Thank you so much for trying the recipe and sharing your results! Looking great!
I’m happy to hear you enjoyed them all!
Yuto