
Featured Comment
It wasn’t my first katsu, but definitely THE BEST katsu. I absolutely loved sesame seeds in the sauce. Your hint with adding oil to the egg was game changing (no more falling panko, yass!!). It’s a pity I haven’t discovered your blog earlier!
★★★★★
– Claudia
Still thinking about that tonkatsu set meal you had in Japan? You can make it at home. Actually, you can beat it. Homemade sauce and all.
As a Japanese who’s eaten tonkatsu my whole life, I’m not just giving you a recipe. I’m giving you the small details that transform decent into extraordinary. This is everything I know.

Tonkatsu
Recipe Snapshot
- What is it? Yoshoku-style Japanese pork cutlet (tonkatsu): thick pork loin/chop deep-fried in a flour→egg→panko breading, finished with from-scratch tonkatsu sauce.
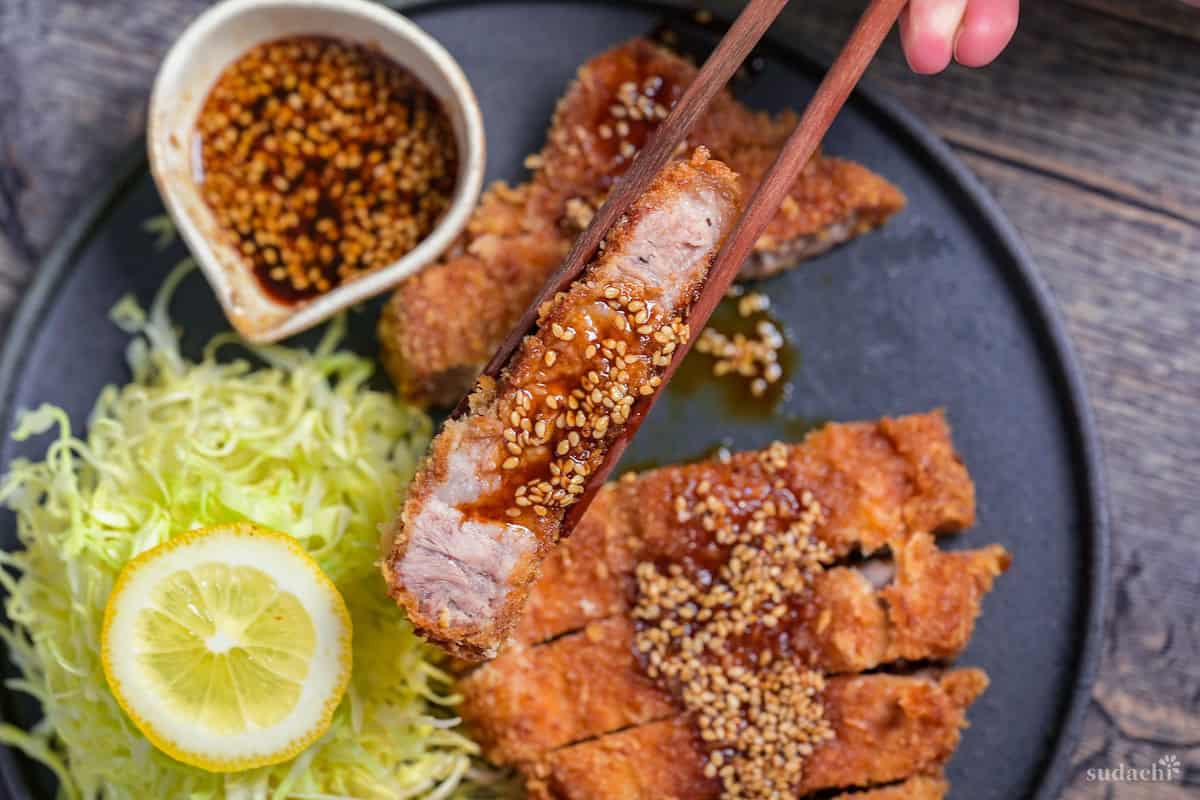
- Flavor profile: Toasty, crackly crunch gives way to succulent pork, then the sauce hits (tangy, a little sweet, with a savory Worcestershire-soy depth).
- Why you’ll love this recipe: No more soggy breading or tough, overcooked pork. This recipe walks you through the why behind every step, so you get restaurant-quality tonkatsu that’s actually repeatable.
- Must-haves: Japanese panko (the crunch difference is real), thick-cut boneless pork chops (2-2.5 cm), a wire rack for draining, and a neutral frying oil like rice bran.
- Skill Level: Medium (comfortable with a 3-step dredge station and managing oil temperature).
Summarize & Save this content on:
What is Tonkatsu?
Tonkatsu (とんかつ) is a Japanese breaded and deep-fried pork cutlet, one of the most well-known dishes in the yōshoku (Western-inspired Japanese) tradition. The name combines ton/豚 (pork) and katsu/カツ (cutlet, from the French côtelette). The panko coating is key: its large, jagged crumbs create an airy structure that fries up lighter and crunchier than the fine breadcrumbs used in European-style cutlets like schnitzel.
It’s most commonly served as a teishoku set meal with shredded cabbage, steamed rice, miso soup, and pickles, and finished with a savory-sweet tonkatsu sauce.
Today tonkatsu is considered a foundational Japanese comfort food, and the same crispy cutlet serves as the base for many popular spin-off dishes: katsudon, katsu curry, and even chicken katsu and gyukatsu (beef) variations. Alongside Japanese curry rice and korokke, tonkatsu holds an iconic place in Japan’s everyday food culture.
Pork Tonkatsu Ingredients
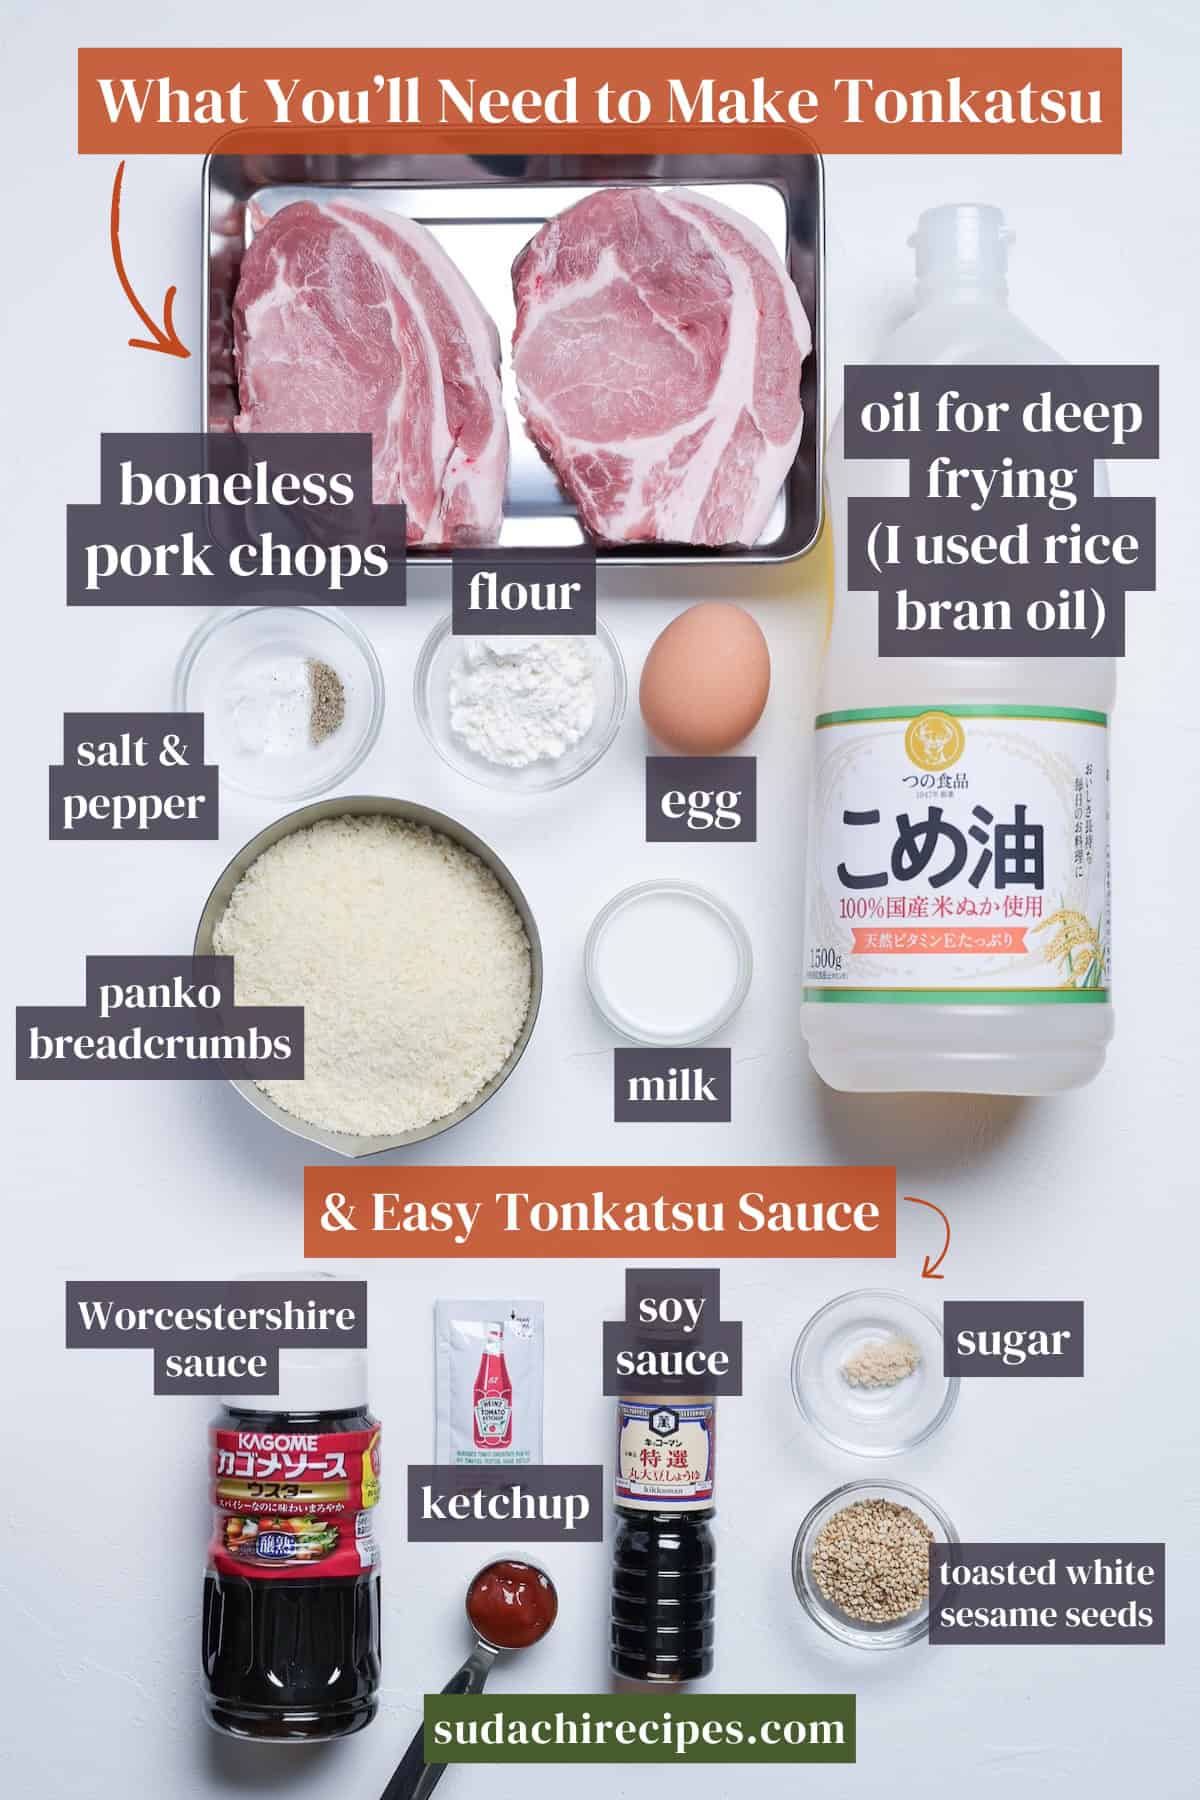
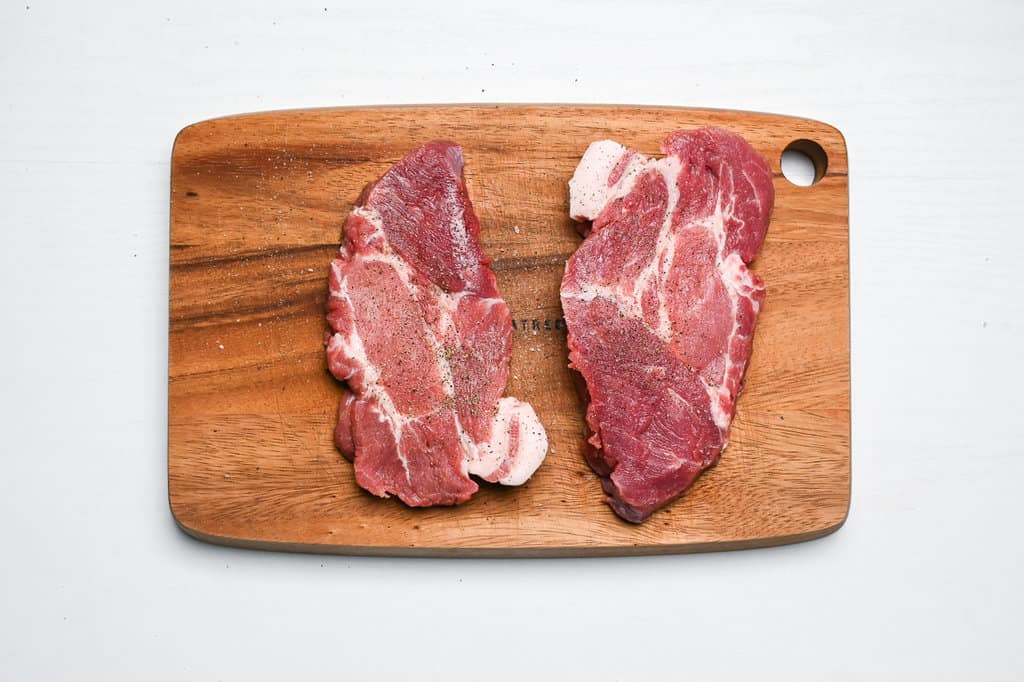
- Pork: For the best tonkatsu, look for boneless rib chops or relatively fatty pork loin chops about 2cm (¾ inch) thick. Whichever cut you choose, don’t trim the fat, It’s what makes the katsu taste rich and satisfying. We’ll break down all the best cuts in detail in the next section.
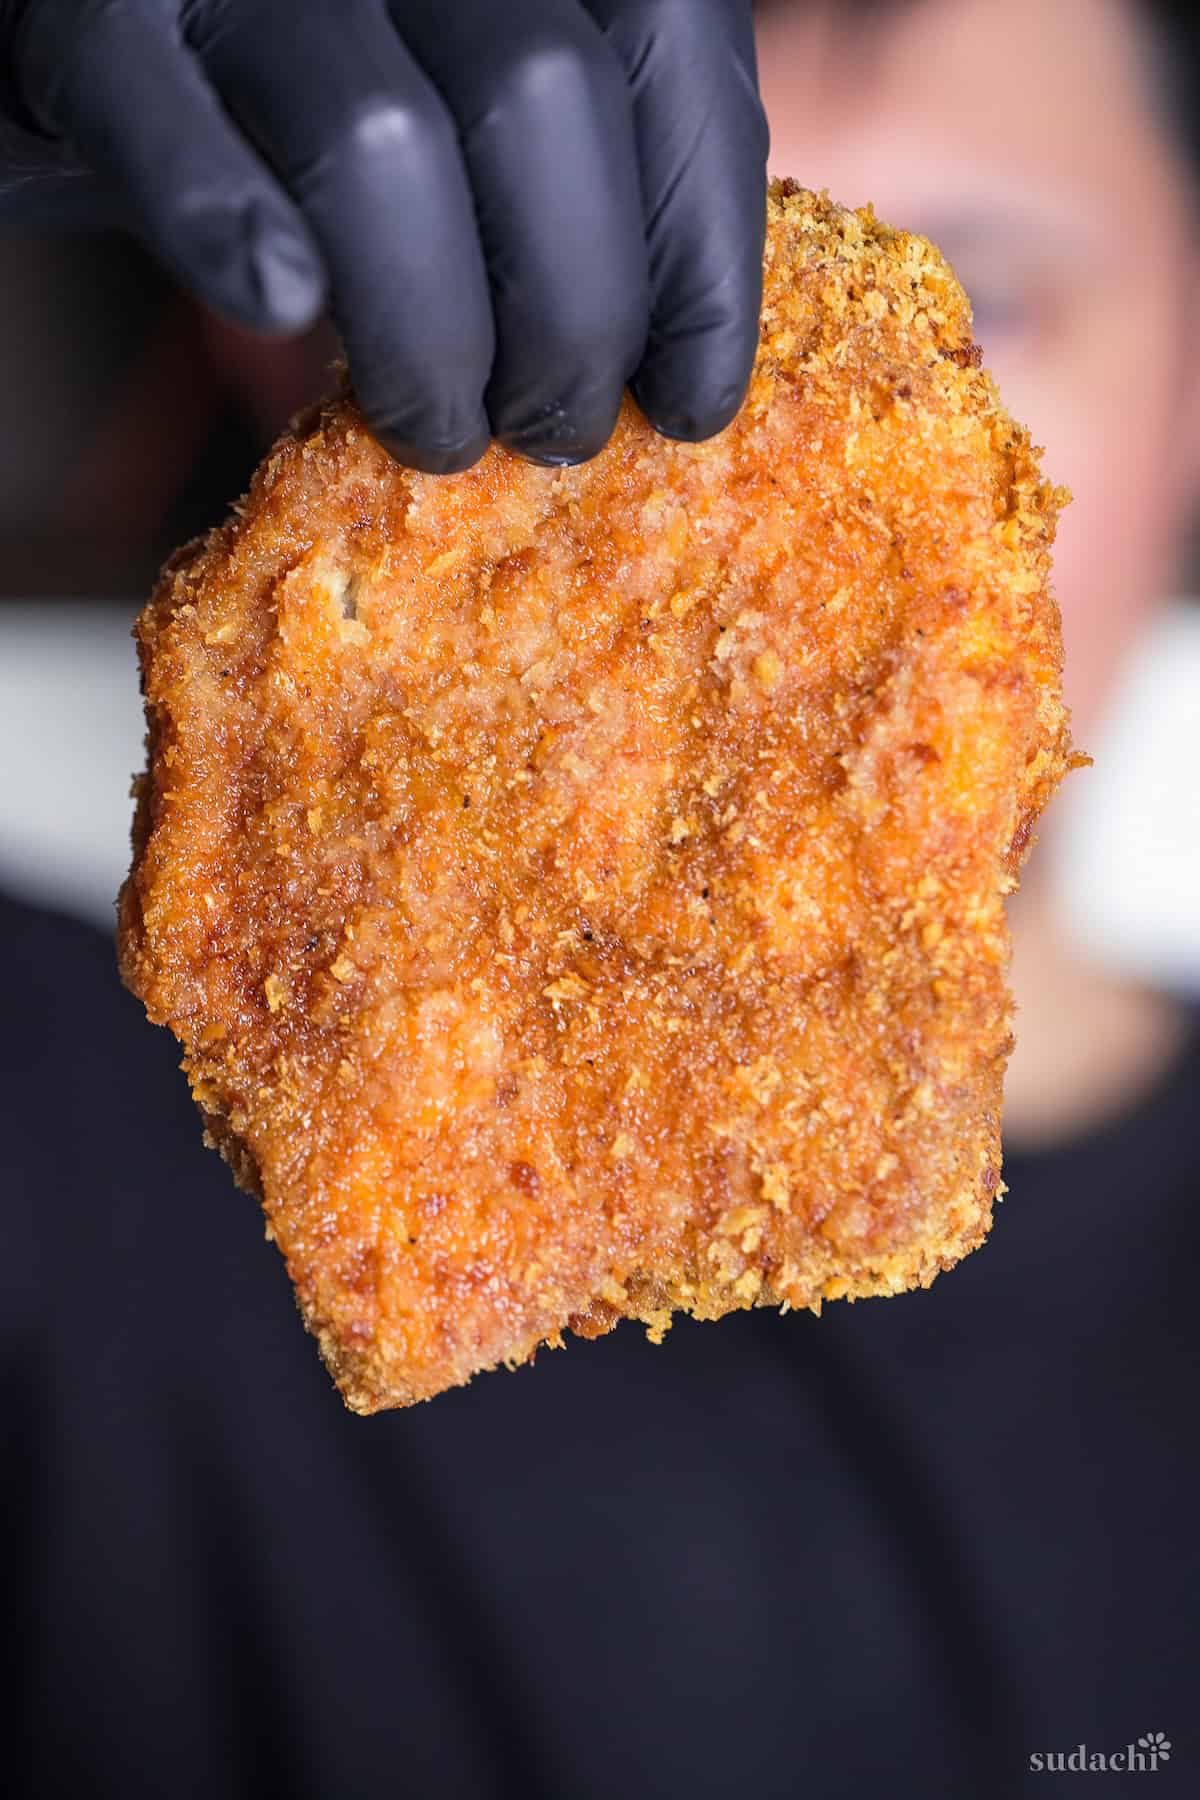
- Panko breadcrumbs: Panko is Japanese-style, extra-flaky breadcrumbs, bigger and lighter than the fine European crumbs you might be used to. They’re non-negotiable in this tonkatsu recipe because those large flakes cling to the egg layer and create airy gaps, giving you a lighter crunch that stays crisp even after slicing. You can also make your own by pulsing bread in a food processor until you get rough, uneven crumbs.
- Cooking Oil: Use a neutral oil with a high smoke point. Rice bran (my go-to), canola, or vegetable oil all work perfectly and won’t compete with the pork or sauce flavors. Some specialty restaurant use lard to make tonkatsu! If you want the similar feeling, you can infuse some lard into your oil, but this is totally optional.
Recommended Pork Cut Ideas
| Cut Name | Notes | Rating |
|---|---|---|
| Boneless Rib Chop (rib end of loin) | Best marbling on the loin. Juiciest, most flavorful, closest to Japanese premium tonkatsu. | ★★★★★ |
| Bone-In Rib Chop | Same great meat as above. Just remove the bone before breading. | ★★★★☆ |
| Center-Cut Loin Chop (boneless) | Widely available, easy to cook. Leaner than rib-end. Don’t trim the fat cap. | ★★★★★ |
| Sirloin-End Loin Chop (boneless) | Similar to center-cut but coarser grain. Lighter flavor, dries out a bit faster. | ★★★★☆ |
| Pork Loin Roast (sliced to 2cm) | Buy the whole roast and cut your own chops. Ask the butcher for cuts from the rib end. | ★★★★☆ |
| Pork Tenderloin (sliced into medallions) | Ultra-tender and lean. Quick to fry but dries out fast. Don’t overcook even by 30 seconds. If you use this cut, check out my hire katsu recipe. | ★★★★☆ |
| Pork Shoulder Steak (Boston Butt, sliced) | Incredibly rich and porky. Needs prep: pound, score connective tissue, and salt overnight. | ★★★☆☆ |
| Bone-In Sirloin Chop | Uneven texture, sinewy, hard to fry evenly with bone. Avoid for tonkatsu if possible. | ★★☆☆☆ |
| T-Bone Pork Chop | Has both loin and tenderloin, but bone makes deep-frying very difficult. Not recommended. | ★☆☆☆☆ |
TL;DR: Boneless rib chops (rib-end loin roast) sliced to 2cm (¾ inch) thick. Keep the fat on.
Substitution Ideas
- Panko breadcrumbs → If you can’t find Japanese-style panko, coarse unseasoned breadcrumbs are your backup. For an even better result, grate/blitz your regular bread and you’ll get that signature crunch right at home. I’ve tried with all sorts of breads including English muffins, baguettes, or loaf bread. All turned out so delicious, even better than store-bought Japanese panko.
- Japanese-style Worcestershire sauce → Any standard Worcestershire brand works here, so don’t worry about finding a specific one. It will just be a bit more vinegary and less sweet.
- Light brown sugar → Honey or regular white sugar both work in a pinch.
- Japanese short-grain rice → Calrose or any medium-grain rice is a great stand-in and easy to find at most supermarkets. Long-grain rice won’t pair as naturally.
Have trouble finding Japanese ingredients? Check out my ultimate guide to Japanese ingredient substitutes!
How to Make My Tonkatsu
i. Pour enough neutral oil into a heavy-bottomed pot so the cutlet will float freely without touching the bottom, and set the burner to medium-high, targeting 170 °C (340 °F). A deep pot with generous oil volume is your best defense against temperature swings.
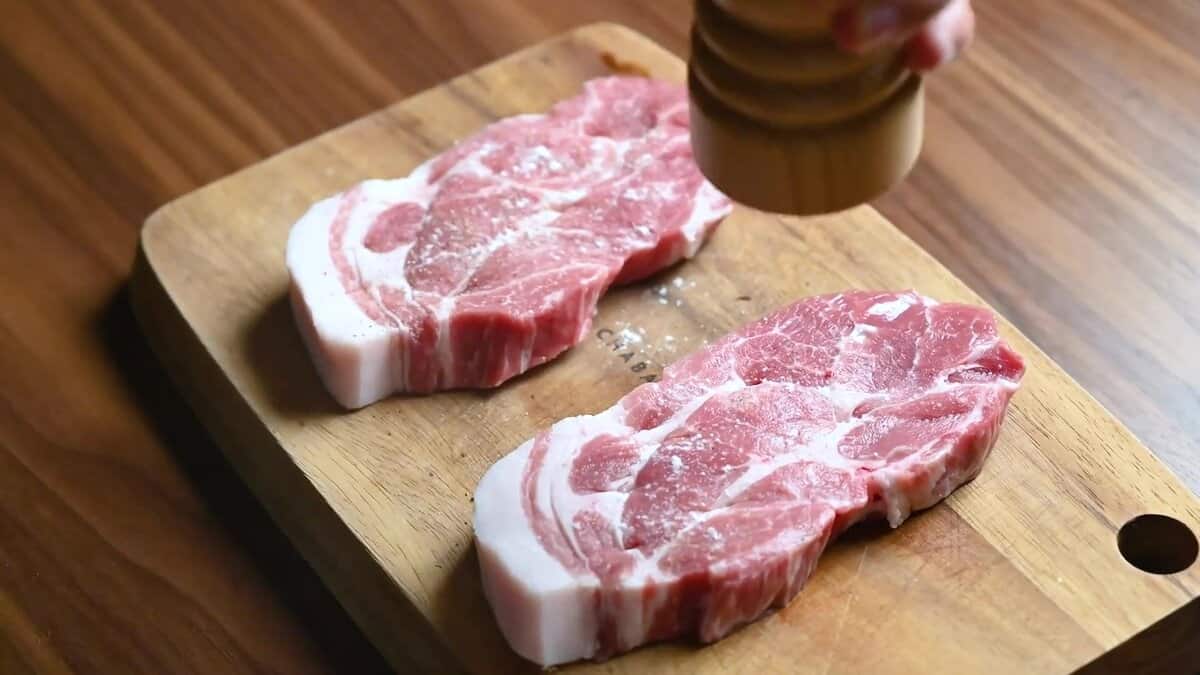
i. Grab the pork straight from the fridge (cold meat helps the coating grip because the temperature difference slows surface moisture from escaping too quickly). Lay the cutlet flat and use a sharp knife to make shallow cuts, roughly 1 cm apart, along the border where the white fat cap meets the pink meat.
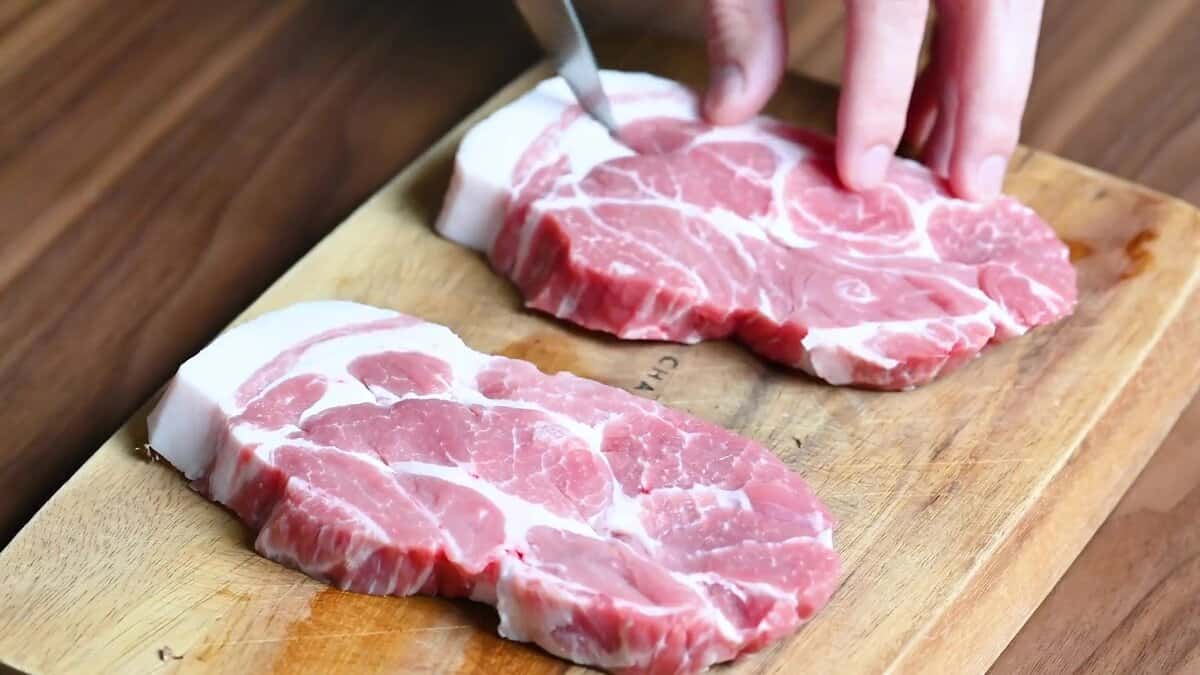
ii. Then make two or three short incisions into any visible muscle fibers running through the interior. These aren’t decorative. They’re structural release points.
Fat, connective tissue, and lean muscle all contract at different rates when they hit hot oil. Without scoring, that uneven shrinkage pulls the cutlet into a taco shape, lifting portions of the crust away from the oil entirely. The result is pale patches next to over-browned spots and a coating that peels away at the edges.
Scoring creates relief cuts that let each zone shrink independently, so the cutlet stays flat, fries evenly, and keeps its breading intact.
iii. Pat both sides of the pork thoroughly with paper towels until the surface feels dry to the touch. Any lingering moisture here turns into steam the moment it hits hot oil, which pushes the coating away from the meat and creates bald, soggy patches.
iv. Once dry, sprinkle a light, even layer of salt and pepper on both sides.
v. Pound the cutlet with the flat side of a meat mallet, starting from the center and working outward, until the thickness is uniform at about 2 cm (¾ inch).
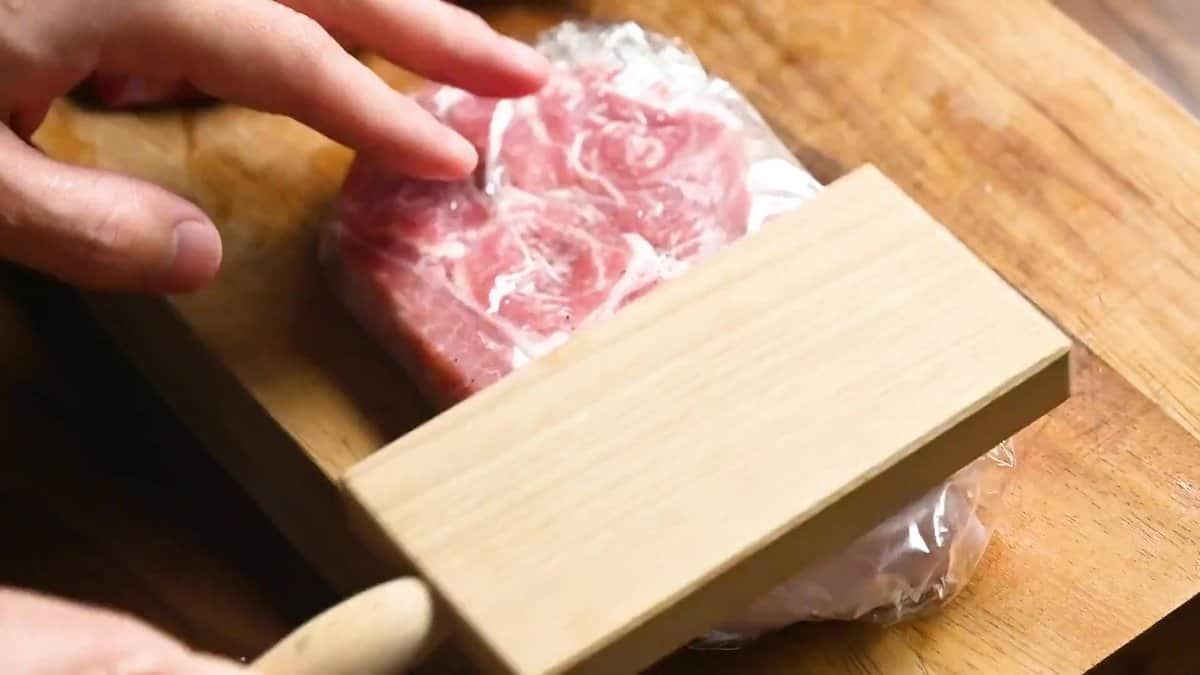
This serves two purposes! It evens out thick and thin zones so heat penetrates consistently, and it physically shortens the muscle fibers, making every bite noticeably more tender.
i. Arrange three wide, shallow containers in a row. Place flour in the first, panko breadcrumbs in the third, and crack an egg into the middle one along with a tablespoon of whole milk and a teaspoon of cooking oil.
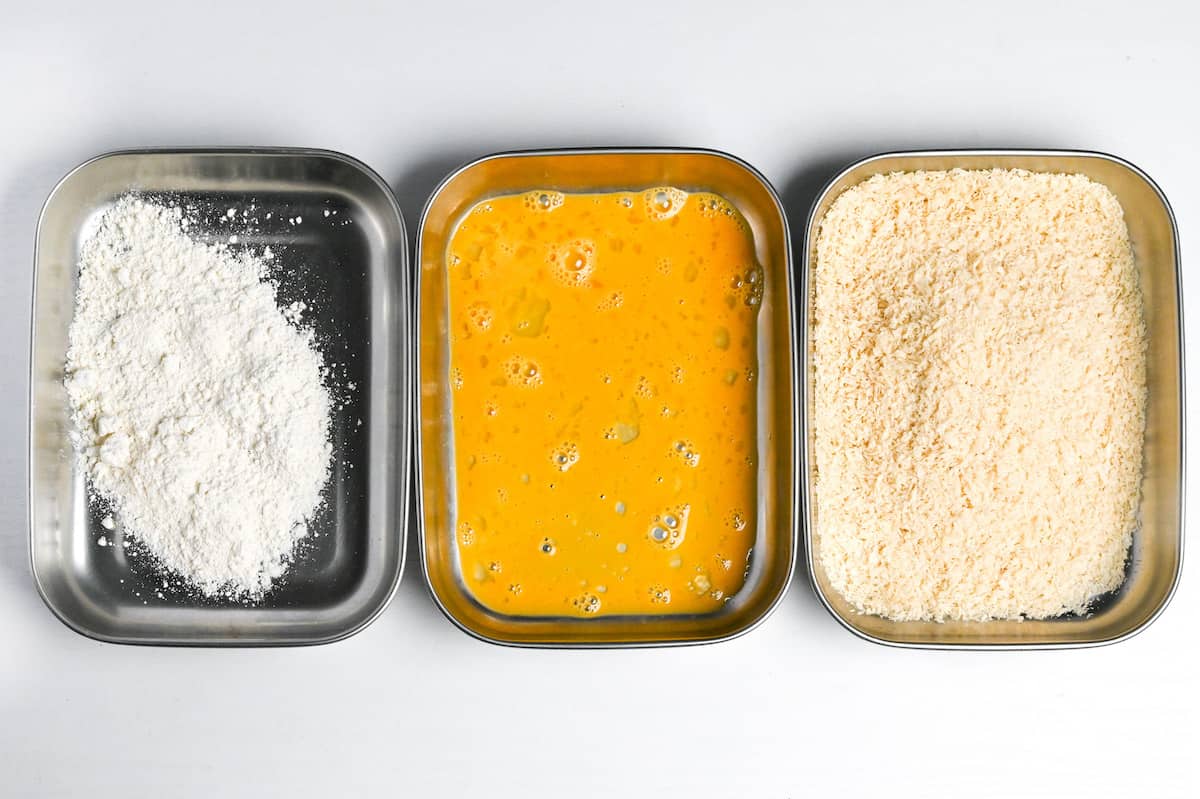
Whisk the egg mixture until it’s smooth and homogeneous, but stop before you create a froth as excess bubbles introduce air pockets that weaken the bond between egg and panko.
The oil in the egg wash creates a thin moisture barrier during frying that helps prevent the coating from separating and seals in the pork’s juices. Milk proteins contribute a secondary benefit: they promote browning through the Maillard reaction, which means richer color and a subtly deeper flavor in the finished crust.
ii. Lay the pork in the flour and dust both sides with a thin, even layer. This flour film is the dry primer that gives the egg something to cling to. Without it, egg slides right off raw meat.
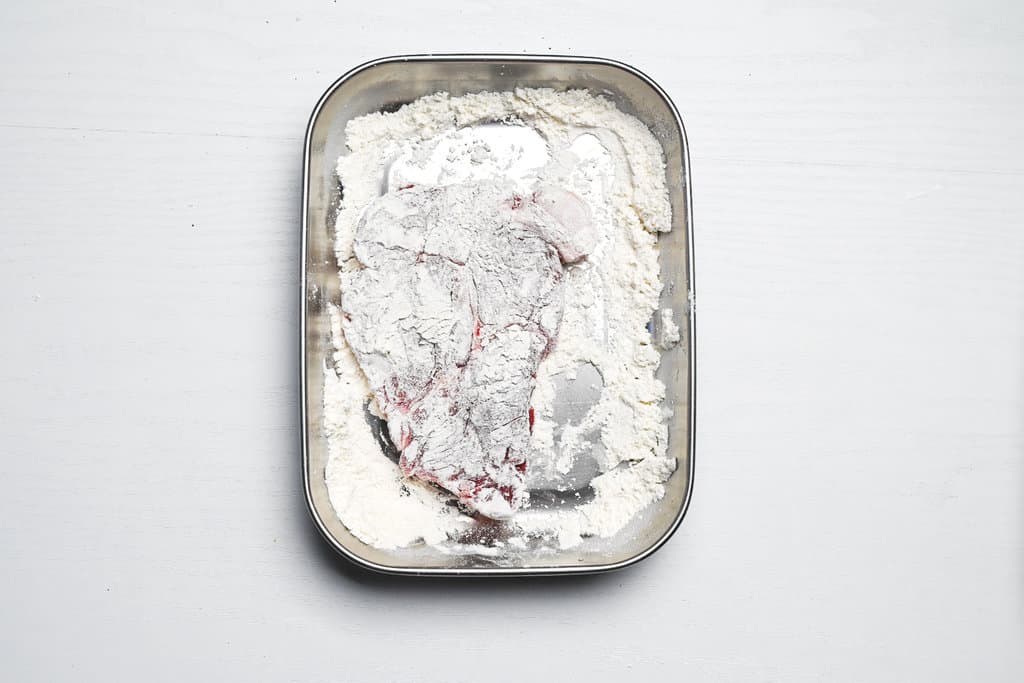
iii. Gently pat away any excess by lifting the cutlet and giving it a few light taps. Too much flour creates a thick, gummy intermediate layer that actually weakens adhesion and tastes pasty.
iv. Transfer the floured cutlet into the egg mixture, coating both sides evenly, then lift it and hold it above the bowl for a few seconds so the excess drips away.
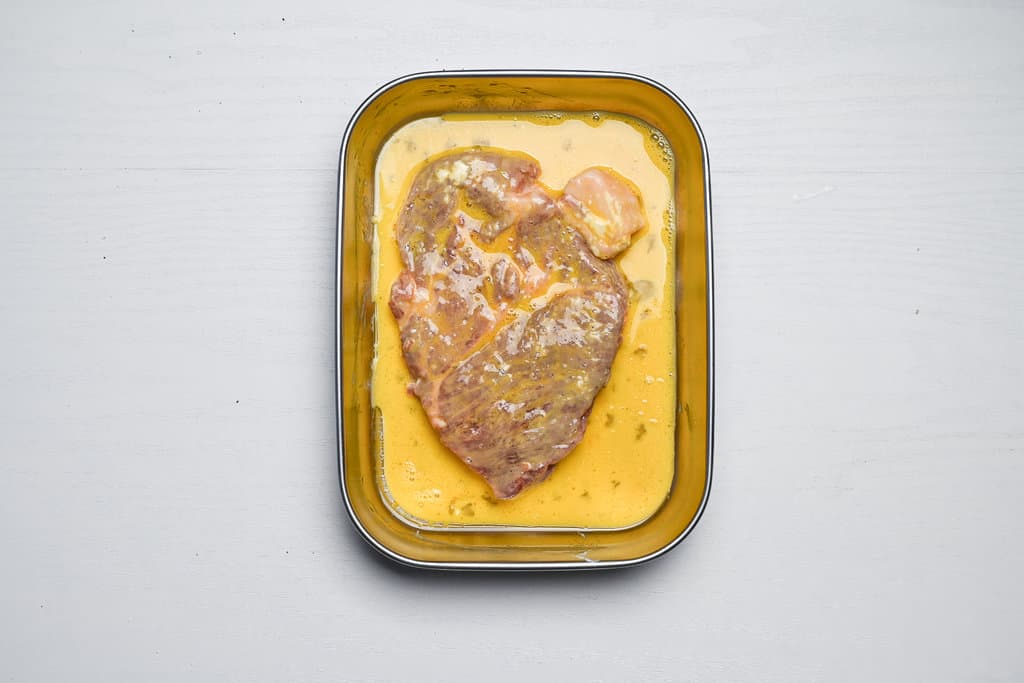
This egg layer is the structural glue of the entire coating. It coagulates rapidly once it hits hot oil, locking the panko shell firmly to the meat.
v. Lay the cutlet in the panko and heap breadcrumbs on top, pressing gently but firmly with your palms. The goal is full, even contact without crushing the flakes flat.
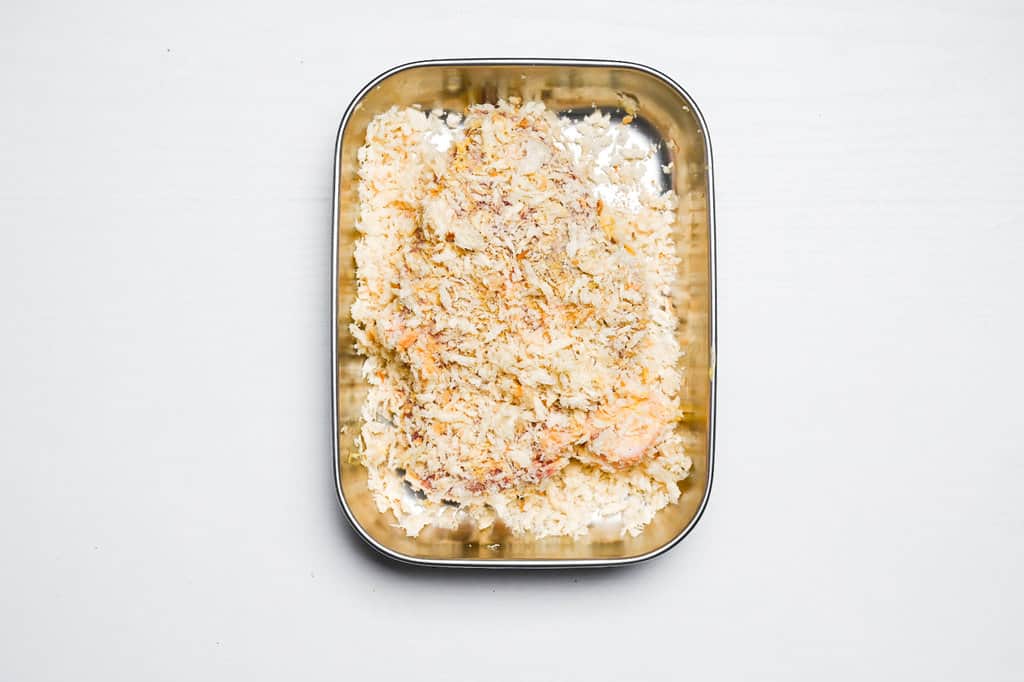
Panko flakes work because they’re full of tiny air chambers that dehydrate rapidly in hot oil, hardening into a rigid, crunchy lattice. Crushing those chambers increases density and oil absorption, producing a heavier, greasier crust.
vi. Set the coated pork on a clean plate or wire rack and leave it undisturbed for a few minutes before frying. This brief pause lets the flour and egg layers begin bonding into a cohesive film, dramatically reducing the chance of the coating sliding off.
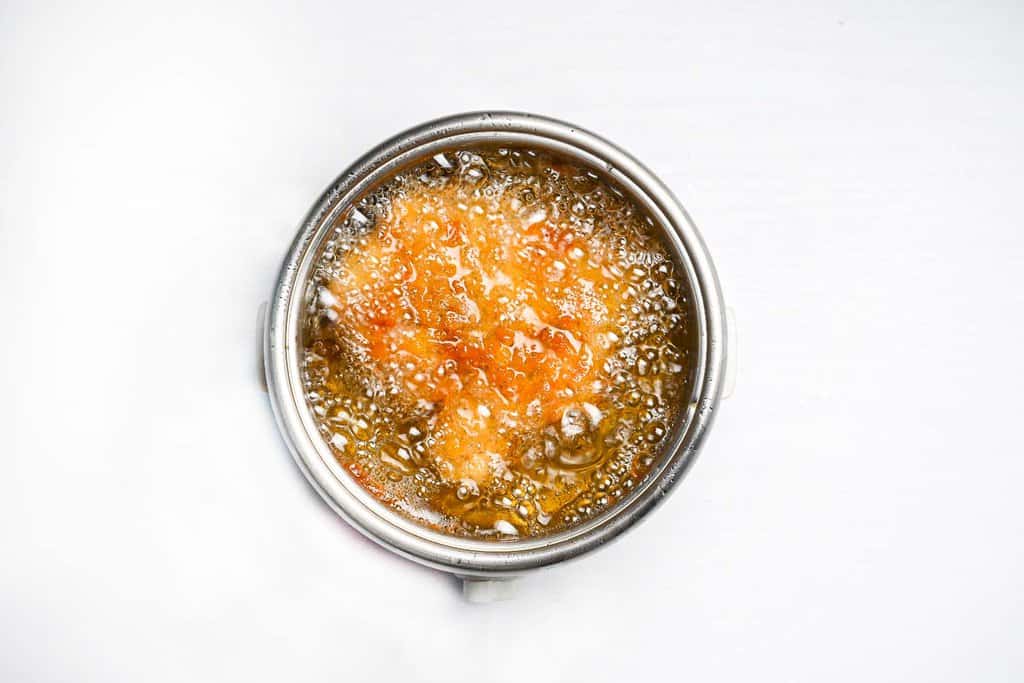
i. When the oil reaches 170 °C (340 °F), hold the breaded cutlet close to the oil’s surface and slide it in gently along the edge of the pot. Fry about 4 minutes per side (8 mins total), adjusting slightly if your cutlet is thicker or thinner than 2 cm.
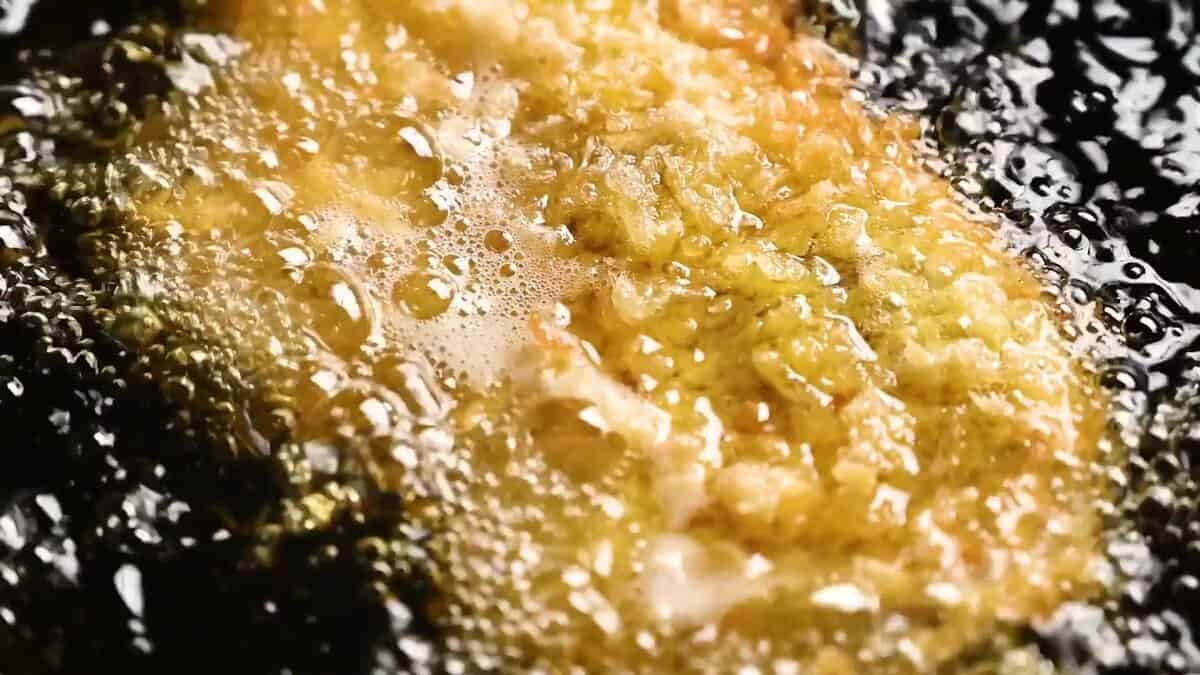
Do not touch the pork for at least thirty seconds. The coating needs this uninterrupted window to set and harden.
Dip a dry wooden chopstick or bamboo skewer into the oil and watch the tip. At roughly 170 °C, small bubbles will form steadily and rise at a moderate pace. If the bubbles are large, rapid, and aggressive, the oil is too hot. If you barely see any bubbles at all, give it more time.
ii. Move cutlet to a wire rack and rest 5 minutes. Bubbling fades as carryover heat finishes the pork and steam vents.
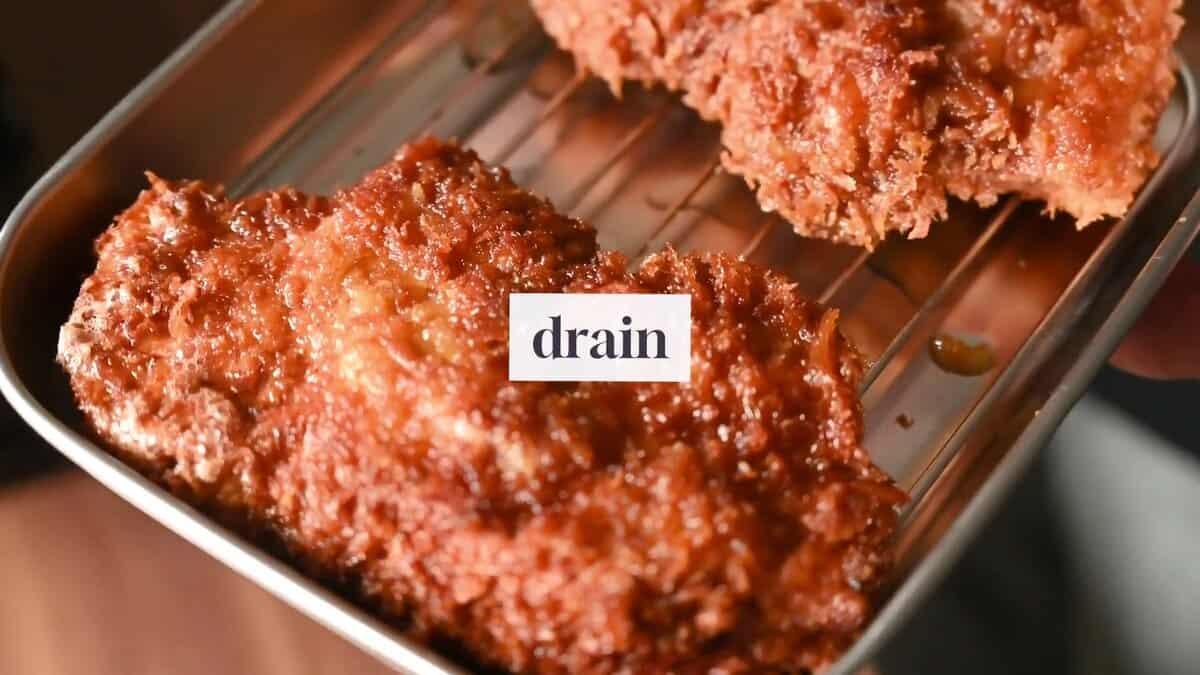
Allow the tonkatsu to sit on the rack for a full 5 minutes before you pick up a knife. During this time, carryover heat continues gently raising the internal temperature by several degrees. At the same time, the juices inside the meat redistribute evenly back through the muscle fibers. Cut too soon and those juices flood the cutting board instead of staying in your pork.
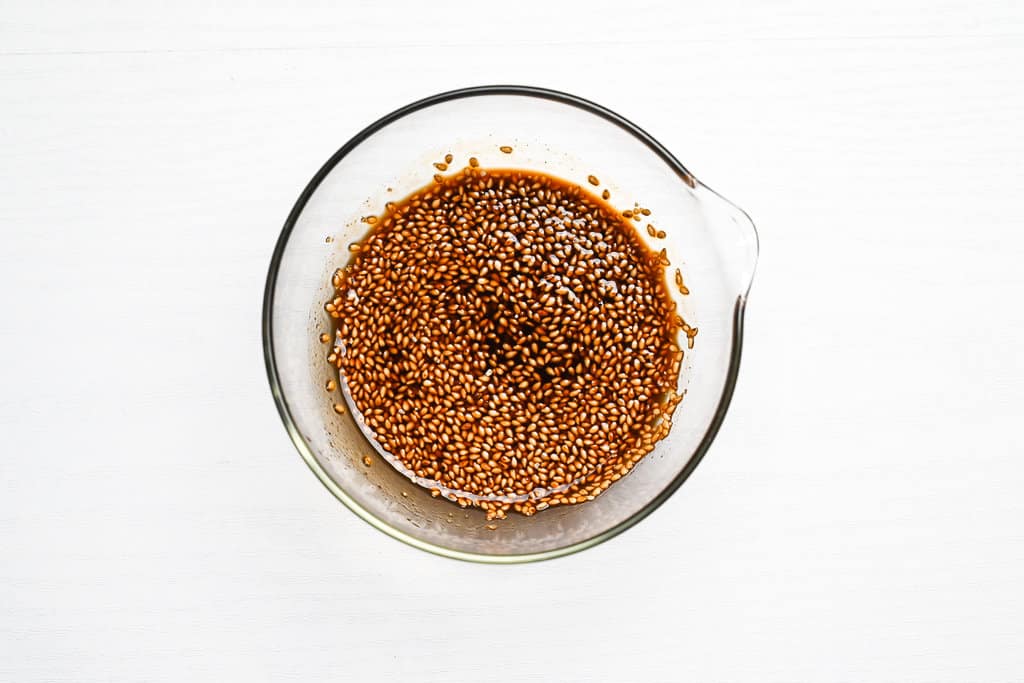
i. While you wait, grab a small bowl and whisk Worcestershire, ketchup, Japanese soy sauce, light brown sugar, and sesame seeds until the sugar dissolves and the sauce turns glossy and thick.
ii. If it’s too sharp or sweet, adjust with more ketchup or soy, then taste again.
If you’re looking for some different ideas for sauce, you should check out my three different tonkatsu sauces!

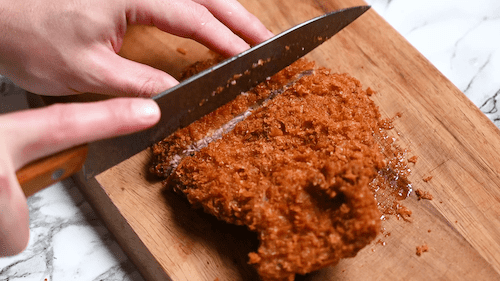
i. Place the rested tonkatsu on a stable cutting board and use your sharp knife. Position the blade and press downward in a single, clean stroke rather than sawing back and forth (a sawing motion drags the crust sideways, tearing it away from the meat and scattering crumbs everywhere).
ii. Slice into strips about 2 cm wide, cutting perpendicular to the grain of the muscle so each piece is easy to bite through.
A dull knife or a hesitant, back-and-forth approach compresses the crust before it separates, cracking the panko shell and pulling it away from the egg layer beneath. One firm downward press with a sharp knife lets the blade glide through both the crispy exterior and the tender meat in a single motion, preserving the clean layered look.
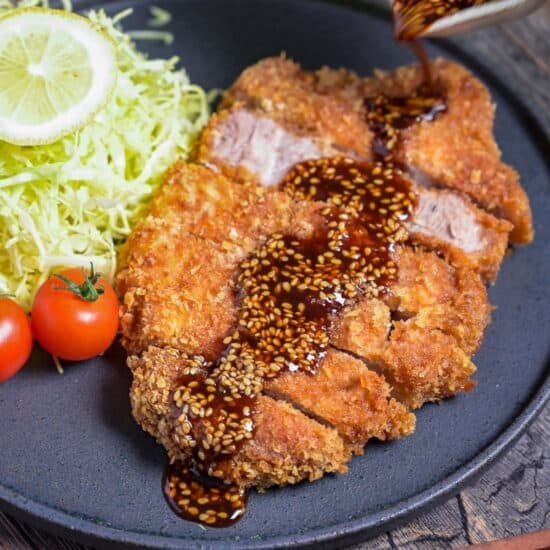
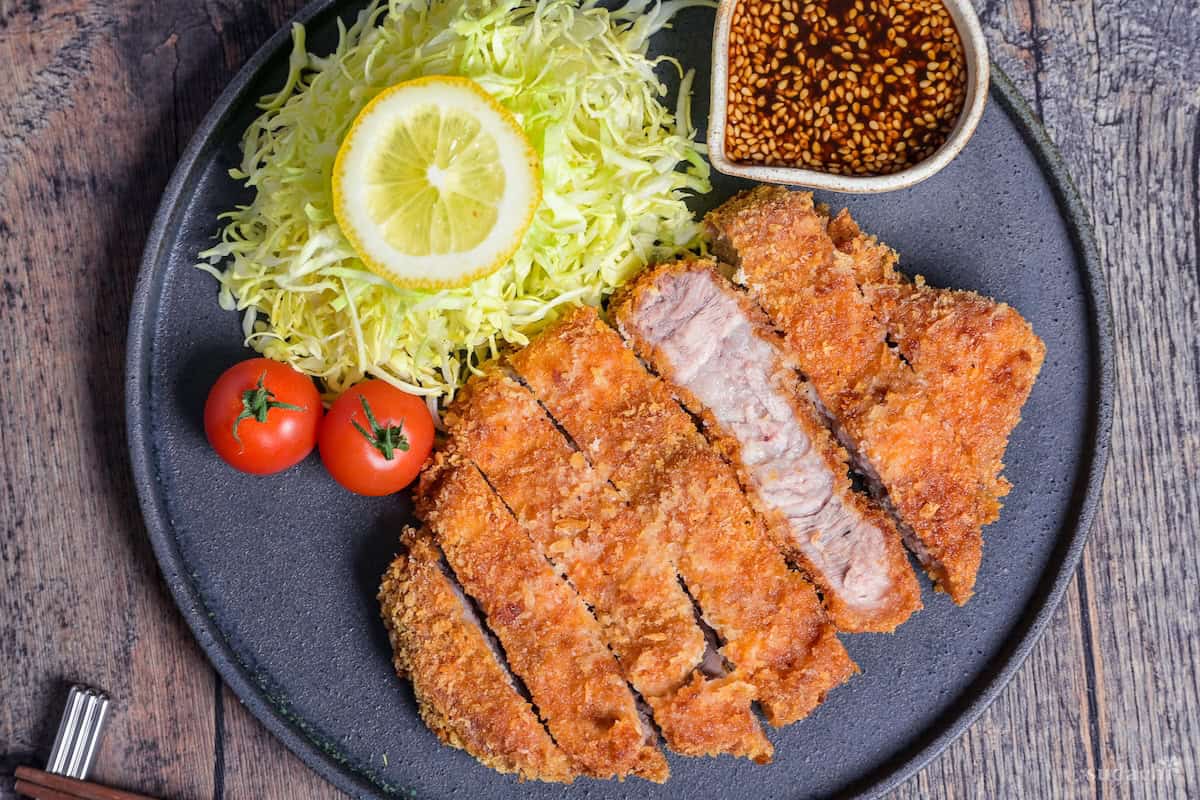
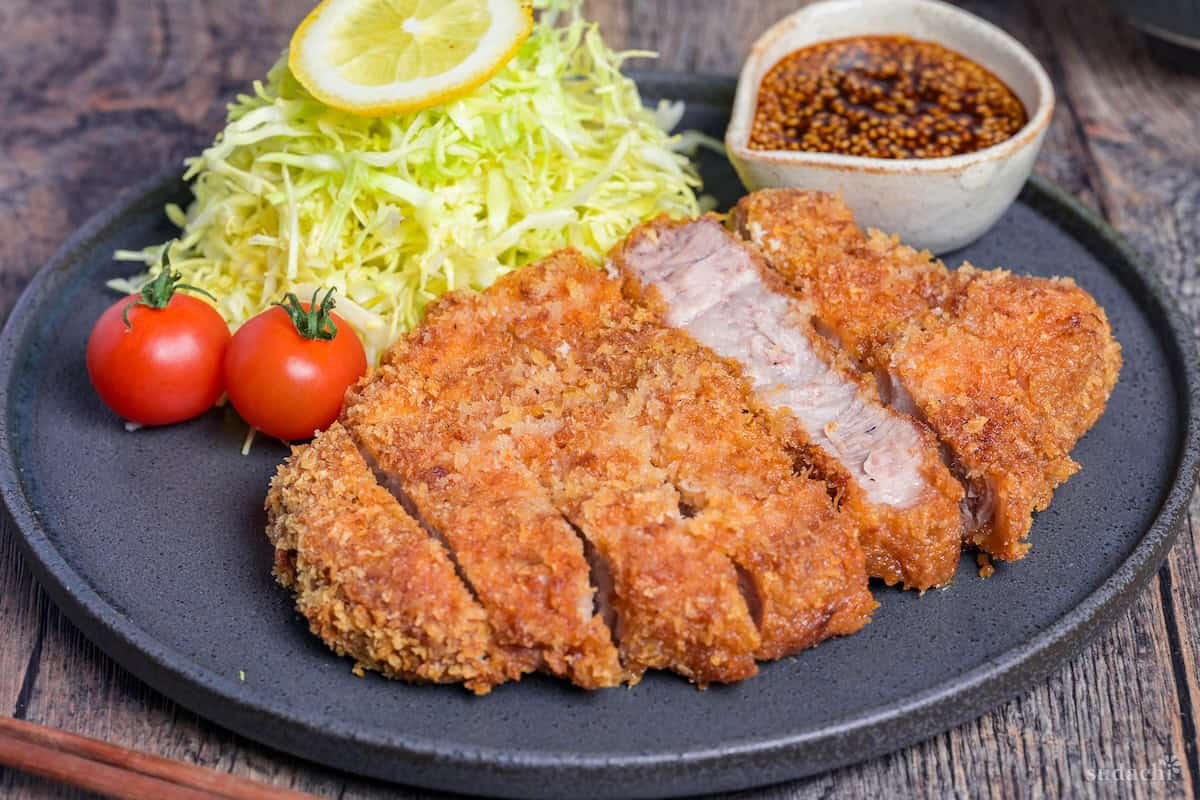
iii. Reassemble the sliced strips into their original cutlet shape and transfer them to a plate alongside a generous mound of cold, crisp shredded cabbage and a ramekin of your homemade sauce.

Essential Tips & Tricks
- Keep your oil locked at 170 °C (340 °F). Stable temperature drives rapid crust dehydration so the panko sets quickly and absorbs minimal oil. If the temperature dips below 160 °C the coating stays soft too long and soaks up grease, and if it climbs past 185 °C the crust scorches before the pork reaches a safe internal temperature.
- Fry no more than one or two cutlets at a time to protect oil heat. Each cold cutlet you add pulls the temperature down, and overcrowding can drop oil by 20-30 °C in seconds.
- Pat the pork bone-dry before flouring and let the breaded cutlet rest before frying. Surface moisture prevents flour from forming a uniform primer, which means the egg has nothing to grip and the panko shell will shear off the moment it hits turbulent oil.
- Skim loose crumbs from the oil between batches with a fine-mesh skimmer to keep the oil clean.
- Rest the fried cutlet on a wire rack for a few minutes before cutting.
With these simple tips in mind, you’re set for success every time you make ultimate tonkatsu.
Storage & Meal Prep
Fridge: Store leftover cutlets in an airtight container for up to two days-let them cool completely on a wire rack first, because sealing while warm traps steam that permanently softens the crust. Expect the coating to lose its crunch and the fat to solidify.
Freezer: Recommended: wrap each fully cooled cutlet tightly, then seal in a freezer bag with the air pressed out for up to 1 month (to limit freezer burn). The crust will lose some shatter from moisture migration but can be re-crisped with dry heat.
Meal Prep: Make the tonkatsu sauce and shred cabbage ahead, but store both separately from the cutlets so moisture doesn’t collapse the crust. Not recommended: breading the pork far in advance, panko absorbs moisture and the coating can fry up heavy or slip off.
Reheating: Place the cutlet on a wire rack or crumpled foil in a preheated 180 °C (350 °F) oven or air fryer for 5-8 minutes until the crust sounds crisp when tapped, then blast at 200 °C for 1-2 minutes to finish.
What to Serve With This Recipe
Japanese Pork Cutlet FAQ
Tonkatsu is widely placed in Japan’s Meiji-era (late 1800s) boom in Western-style cooking, often framed as an evolution of the French côtelette (a thin, breadcrumb-coated cutlet pan-fried in butter) that Japan first adopted as katsuretsu and then steadily adapted-thicker pork, coarse panko, and deep-frying rather than shallow pan-frying, supported by oil-handling techniques already familiar from tempura. Many stories also credit Ginza’s Rengatei (煉瓦亭) with popularizing a pork cutlet around 1899, with Tokyo restaurants serving a clearly “modern” thick, deep-fried version by 1929. Still, origin stories can be more complicated than a single birthplace: Masuko’s 2019 paper in International Information Studies points out that some earlier narratives may be repeated through secondhand citations without strong primary-source verification, and it raises the possibility that tonkatsu spread not just through restaurants but alongside the street-level popularization of yōshoku in the late Meiji-Taishō era.
The most common cause is oil temperature dropping too low, either because the oil wasn’t hot enough to begin with, or because too many cutlets went in at once, causing a sudden temperature plunge that stalls crust formation and increases oil absorption. Verify your oil is holding at 170 °C (340 °F) with a thermometer, fry no more than two cutlets per batch, and drain on a wire rack instead of paper towels. If the crust looks golden but feels limp, a one-minute blast at 200 °C in the oven can often rescue it.
That’s almost always an adhesion failure: a wet surface, too-thick flour, pooled egg, or moving the cutlet before the coating sets. Pat the pork dry, dust flour thinly, let excess egg drip off, press panko on firmly (don’t crush), then avoid touching for a few minutes so the coating can set. Also score the fat-meat seam-curling creates mechanical stress that can “peel” the crust.
More Japanese Dinner Recipes
- Hambagu (Japanese Hamburger Steak)
- Beef Hayashi Rice (Without Roux Packet)
- Japanese Style Mapo Tofu (Mabo Dofu)
- Crispy Teriyaki Chicken
Want more inspiration? Explore my Japanese dinner recipe ideas for a carefully selected collection of tasty recipe ideas to spark your next meal!
Did You Try This Recipe?
I would love to hear your thoughts!
💬 Leave a review and ⭐️ rating in the comments below. 📷 I also love to see your photos – submit them here!

Authentic Tonkatsu (Japanese Pork Cutlet) with Homemade Sauce

Ingredients
Tonkatsu
- 2 boneless pork chops rib-end/loin (2-2.5cm, 3/4-1 inch thick), fat-on
- 1 pinch salt and pepper
- cooking oil neutral, high smoke point
- all-purpose flour for dusting
- 1 egg
- 1 tbsp whole milk
- 1 tsp cooking oil for egg wash
- 100 g panko breadcrumbs coarse flakes or coarse homemade crumbs
Tonkatsu Sauce
- 1 tbsp Worcestershire sauce Japanese or regular brands
- ½ tbsp tomato ketchup
- ½ tbsp Japanese soy sauce (koikuchi shoyu)
- 1 pinch light brown sugar or white sugar/honey
- ½ tbsp toasted white sesame seeds
Serving Suggestions
- 2 portions cooked Japanese short-grain rice
- 200 g green cabbage shredded
- 2 slices lemon to garnish
My recommended brands of ingredients and seasonings can be found in my Japanese pantry guide.
Can’t find certain Japanese ingredients? See my substitution guide here.
Instructions
- Preheat cooking oil for deep frying to 170 °C (338 °F). While you wait, take 2 boneless pork chops and make incisions in the fat and muscle, then rub 1 pinch salt and pepper onto both sides and pound until about 2cm (approx 3/4 inch) thick.

- Set up a coating station with 3 containers or plates. Add all-purpose flour to one, and 100 g panko breadcrumbs to another. In the last one, crack in 1 egg, and add 1 tbsp whole milk and 1 tsp cooking oil, then whisk until combined.

- Coat the pork with flour on both sides and tap a few times to remove the excess.

- Place it in the egg mixture and coat on both sides, then lift and let the excess drip off.
- Generously coat in the panko breadcrumbs. Make sure it’s fully covered and gently press the panko down to secure them. Place on a wire rack and air dry for a few minutes for a more stable crust.
- Once the oil is ready, carefully place the coated pork chops into the pot and cook for about 4 minutes on each side (8 minutes total) or until golden brown. Once cooked, transfer to a wire rack to drain for 5 minutes.
- Mix 1 tbsp Worcestershire sauce, ½ tbsp tomato ketchup, ½ tbsp Japanese soy sauce (koikuchi shoyu), 1 pinch light brown sugar and ½ tbsp toasted white sesame seeds together in a small bowl.
- Cut the tonkatsu into strips using a sharp knife, pressing downwards in one quick motion (avoid sawing).

- Plate up next to the shredded cabbage, drizzle the sauce (or serve on the side) and garnish with lemon (optional). Serve with rice, miso soup, and pickles for a full teishoku set meal. Enjoy!

Hello and thank you for the recipe! I wonder what is the purpose to put milk and oil to the egg mixture? Thank you 🙂
Hi, thank you for the rating!
I add milk because it’s said to help make the meat softer and more tender. Adding oil is a trick that restaurants use to help make the egg smoother so it coats the katsu more evenly and stops the panko falling off. Apparently it also makes a thin layer around the meat which keeps the flavour inside too. Hope that helps, thanks for your question! 🙂
Thank you! Somehow I don’t receive email notification of your reply, sorry.
I love your recipe, they are simple and some even give a different approach compared to other recipe.
Hope you can continue to share.
Thank you and take care, ganbatte!
Thank you so much, it means a lot!
If you have any questions, feel free to contact me anytime 🙂
I’ll keep working hard to create good recipes, all the best!
Yuto
Here in Austria, we do the same when breadcrumbing ‚Wiener Schnitzel‘!
Interesting!
Sasuga!
Great recipe and wonderful instructions. I went with another sauce recipe that tasted closer and consistency I remember. The cutlets turned out perfect! You keep coming up as my favorite Japanese food recipe source. So delicious!
Hi Erin
Glad to hear you enjoyed the recipe! Thank you so much for your kind words, it means a lot!
It wasn’t my first katsu, but definitely THE BEST katsu. I used chicken as I’m not a big fan of pork (but definitely gonna try the recipe again with pork chops!).
I absolutely loved sesame seeds in the sauce. Your hint with adding oil to the egg was game changing (no more falling panko, yass!!).
It’s a pity I haven’t discovered your blog earlier!
Greatings from Poland!
Hi Claudia,
Thank you for your kind words and sharing your experience!
I’m so happy that you think this is the best katsu recipe! 🙂
Yuto
great presentation on making Tonkatsu. easy to follow recipe. thank you
Thank you so much, Carlos!
(I am sure this recipe is amazing, so leaving a pre-emptive 5star review, but I will come back and comment with more details once I do make it! But so far your recipes have been so delicious even my boomer parents will eat them, so please take that as the compliment it’s meant to be!!)
Hello! I’m currently using the tonkatsu recipe in your cookbook. I think I figured it out, but I wanted to ask about using pork tenderloin in this recipe! Can you provide more explanation on what it should look like before coating and frying, or how I should cut and tenderize it?
Where I’m at in the US, pork tenderloin is usually sold as two blocks/logs of meat. I recently watched a Youtube video where the Japanese chef sliced individual medallions from the meat, and then pounded them out into thin cutlets from the cut end. The tenderloins I bought didn’t seem like they’d work for that. They were about 1.5 pounds together, so I cut them into four pieces of about the same size/weight. Because my pieces were pretty long and skinny, I made the incisions right along the outside of the block and tenderized it by hitting directly onto the block until it was 3/4 inch thick.
Is this how I was supposed to prepare it? Just asking to make sure. I’m still learning a lot about cooking, so I apologize if any of this is unclear or doesn’t make sense.
Hi Sam,
Thank you so much for your kind words — it means a lot that you and even your parents have been enjoying my recipes!
For your question, I actually have a hire katsu (tenderloin katsu) recipe that uses the tenderloin block, complete with step-by-step photos: (https://sudachirecipes.com/miso-hire-katsu/). The tenderloin in that recipe should be (I hope) similar to what you can get, so I hope it helps guide you on cutting and tenderizing for the best results.
If you have any more questions, please don’t hesitate to ask. I’m always happy to help! And your comment actually gave me the idea to update this tonkatsu post with more details on the different cuts of pork.
Yuto
Hi Yuto,
Thanks for taking the time to read and respond!
I have tried the recipe from the cookbook since I last commented, and yes, it’s still 5 stars for me. The sauce is quite amazing. Easy to put together and definitely something that will make your palate happy.
Your explanation and the photos from the link definitely make sense and make things much easier for me to understand! What you have posted works perfectly with what is available where I’m at in the USA. I think I just made things more difficult for myself because I’ve only prepared katsu this way once before, and I didn’t know much at all about hire vs rosu katsu.
Thank you!
Hi Sam,
Thank you for the thoughtful follow-up! I’m so glad you enjoyed both the katsu and the sauce, and it makes me happy to hear the post and photos helped with the tenderloin prep! 🙂
Yuto
Love your recipe! It’s so easy to make – and soo delicious!
Thank you!
Thank you so much Claudia! I’m happy to hear you enjoy it! 🙂
Yuto