


Disclaimer: This post may contain Amazon affiliate links. Sudachi earns a small percentage from qualifying purchases at no extra cost to you. See disclaimer for more info.
Featured Comment:
“This worked great. A little water escaped out the top of the pan under the lid. I added a little drizzle from the sink to replace it and no ill effect.“
– Cynthia (from Pinterest)
What is Japanese-style Rice?
Did you know that there are over 1,000 different types of rice worldwide? These varieties can be categorized into Japonica rice, Indica rice, and Javanica rice. Japonica rice, also known as the Japanese type, is the most commonly produced rice in Japan with its unique rounded, oval shape. It’s often labeled “sushi rice” outside of Japan.
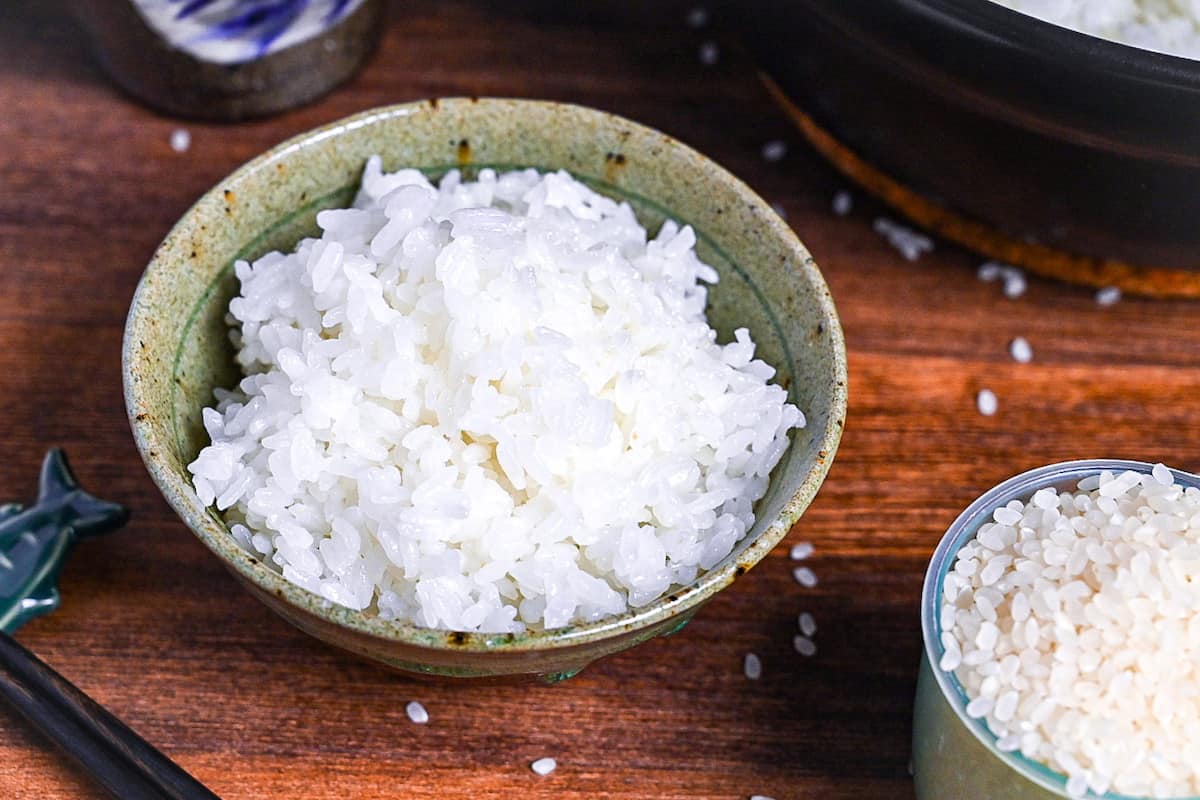
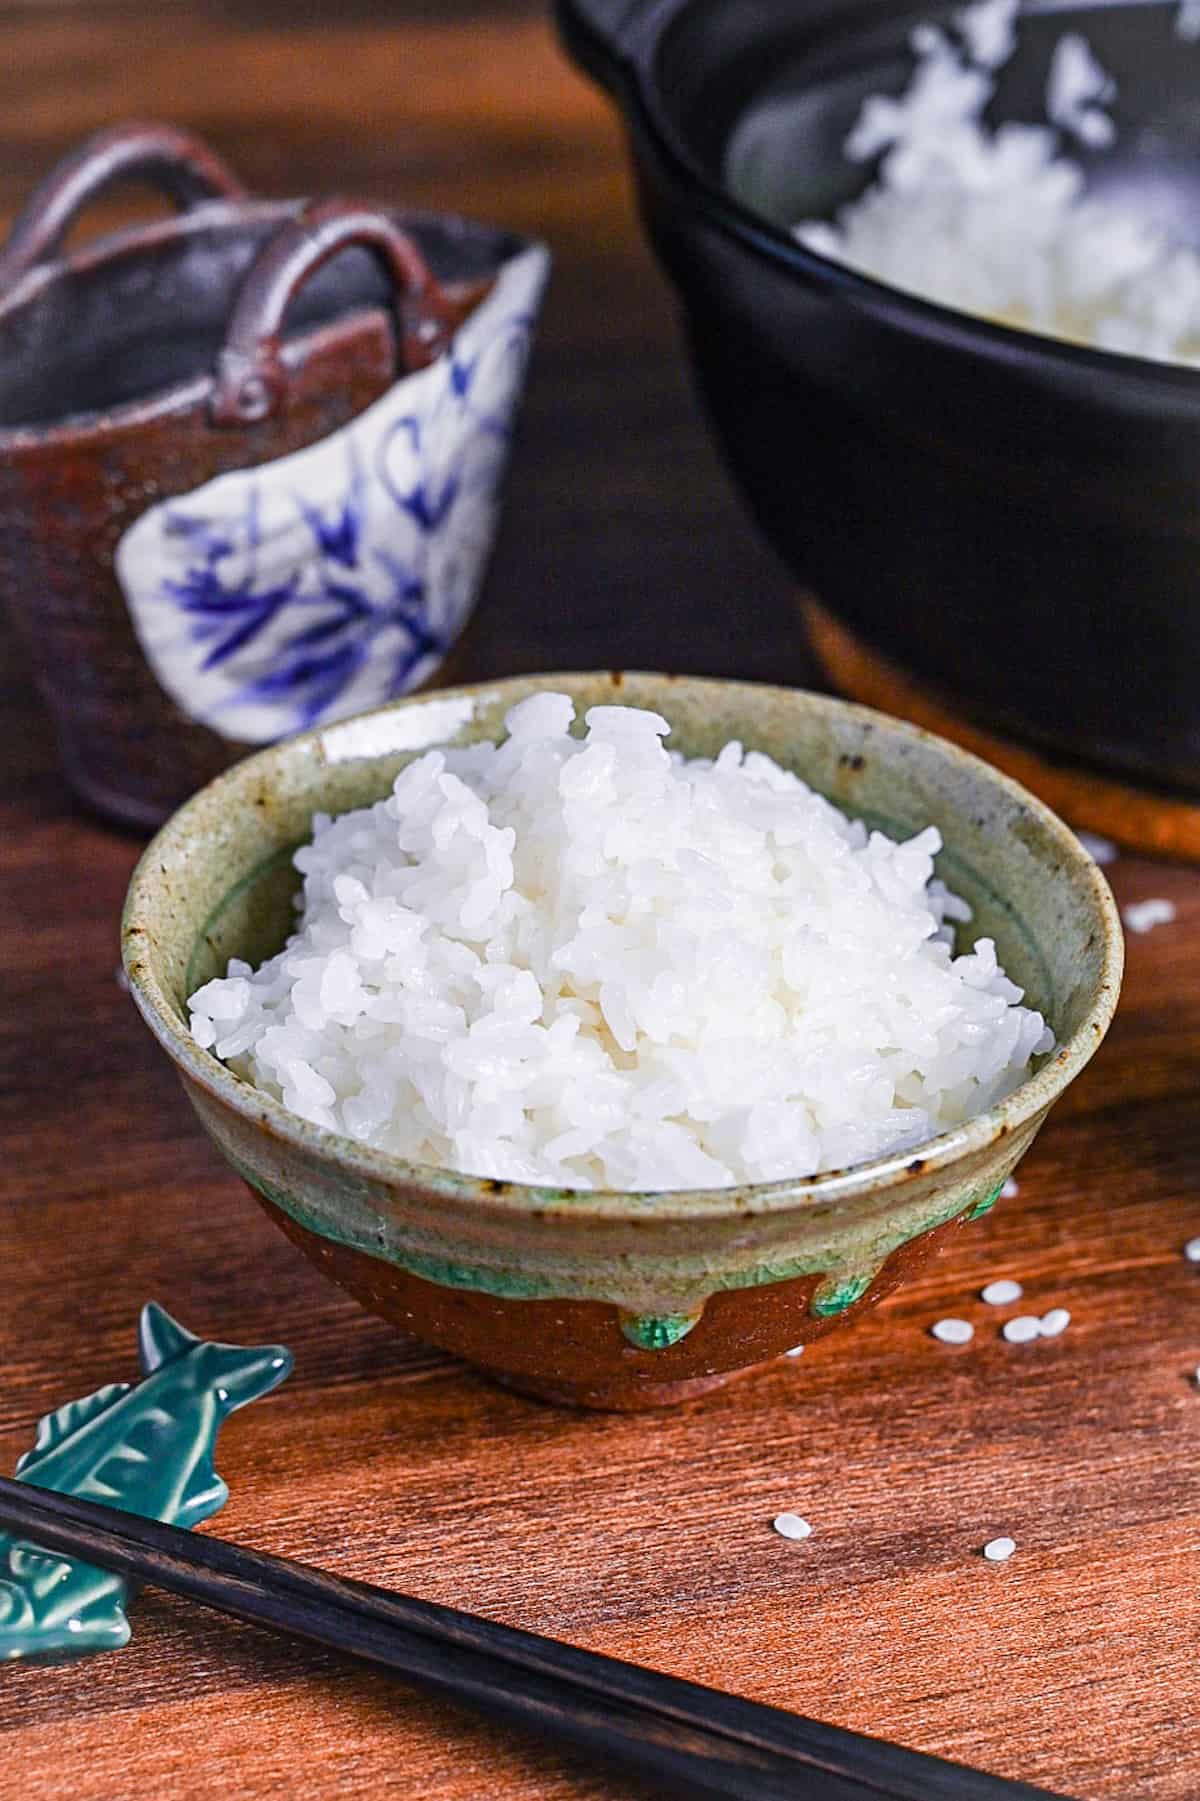
One unique characteristic of Japanese rice is its stickiness, which allows it to maintain its shape when molded, making it perfect for creating sushi and onigiri (rice balls). However, the texture of this rice is also firm and slightly sticky, making it a versatile option for pairing with a variety of Japanese dishes.
To clarify, this article does not discuss how to cook rice produced exclusively in Japan. Instead, it refers specifically to Japanese-style short-grain white rice. It’s important to note that this type of rice can also be grown in other countries, such as the United States.

The Reason Why You Need Japanese Rice for Your Japanese Cooking
There are many types of rice, and different cuisines use different kinds of rice.
- India – Long grain Basmati rice
- Italy – Short grain Arborio rice (for risotto)
- Thailand – Long grain Jasmine rice for savory, short grain sticky rice for sweets
- Mexico – Medium-long grain Sinaloa
- Japan – Short grain rice
These are just a few random examples, but the type of rice usually perfectly compliments the cuisine!
Is Japanese rice necessary when cooking Japanese food? This is a common question. While some dishes can be made with both Indica or Japonica rice (such as curry rice or chahan), most Japanese dishes require Japanese rice to maintain authenticity.
For example, sushi and onigiri (rice balls) need sticky Japanese rice to hold their shape. Dishes served on top of rice, like donburi, or as a side dish, may not work well with non-Japanese rice as they lack the needed stickiness or particular sweetness.
Japanese Rice Available In the US
Japanese rice refers to a style of rice grown in the Japanese tradition rather than rice specifically imported from Japan. Japanese-style rice is produced in places like California too.
Suppose you’re interested in purchasing the U.S.-grown Japanese rice, several online options are available. Here are a few examples.
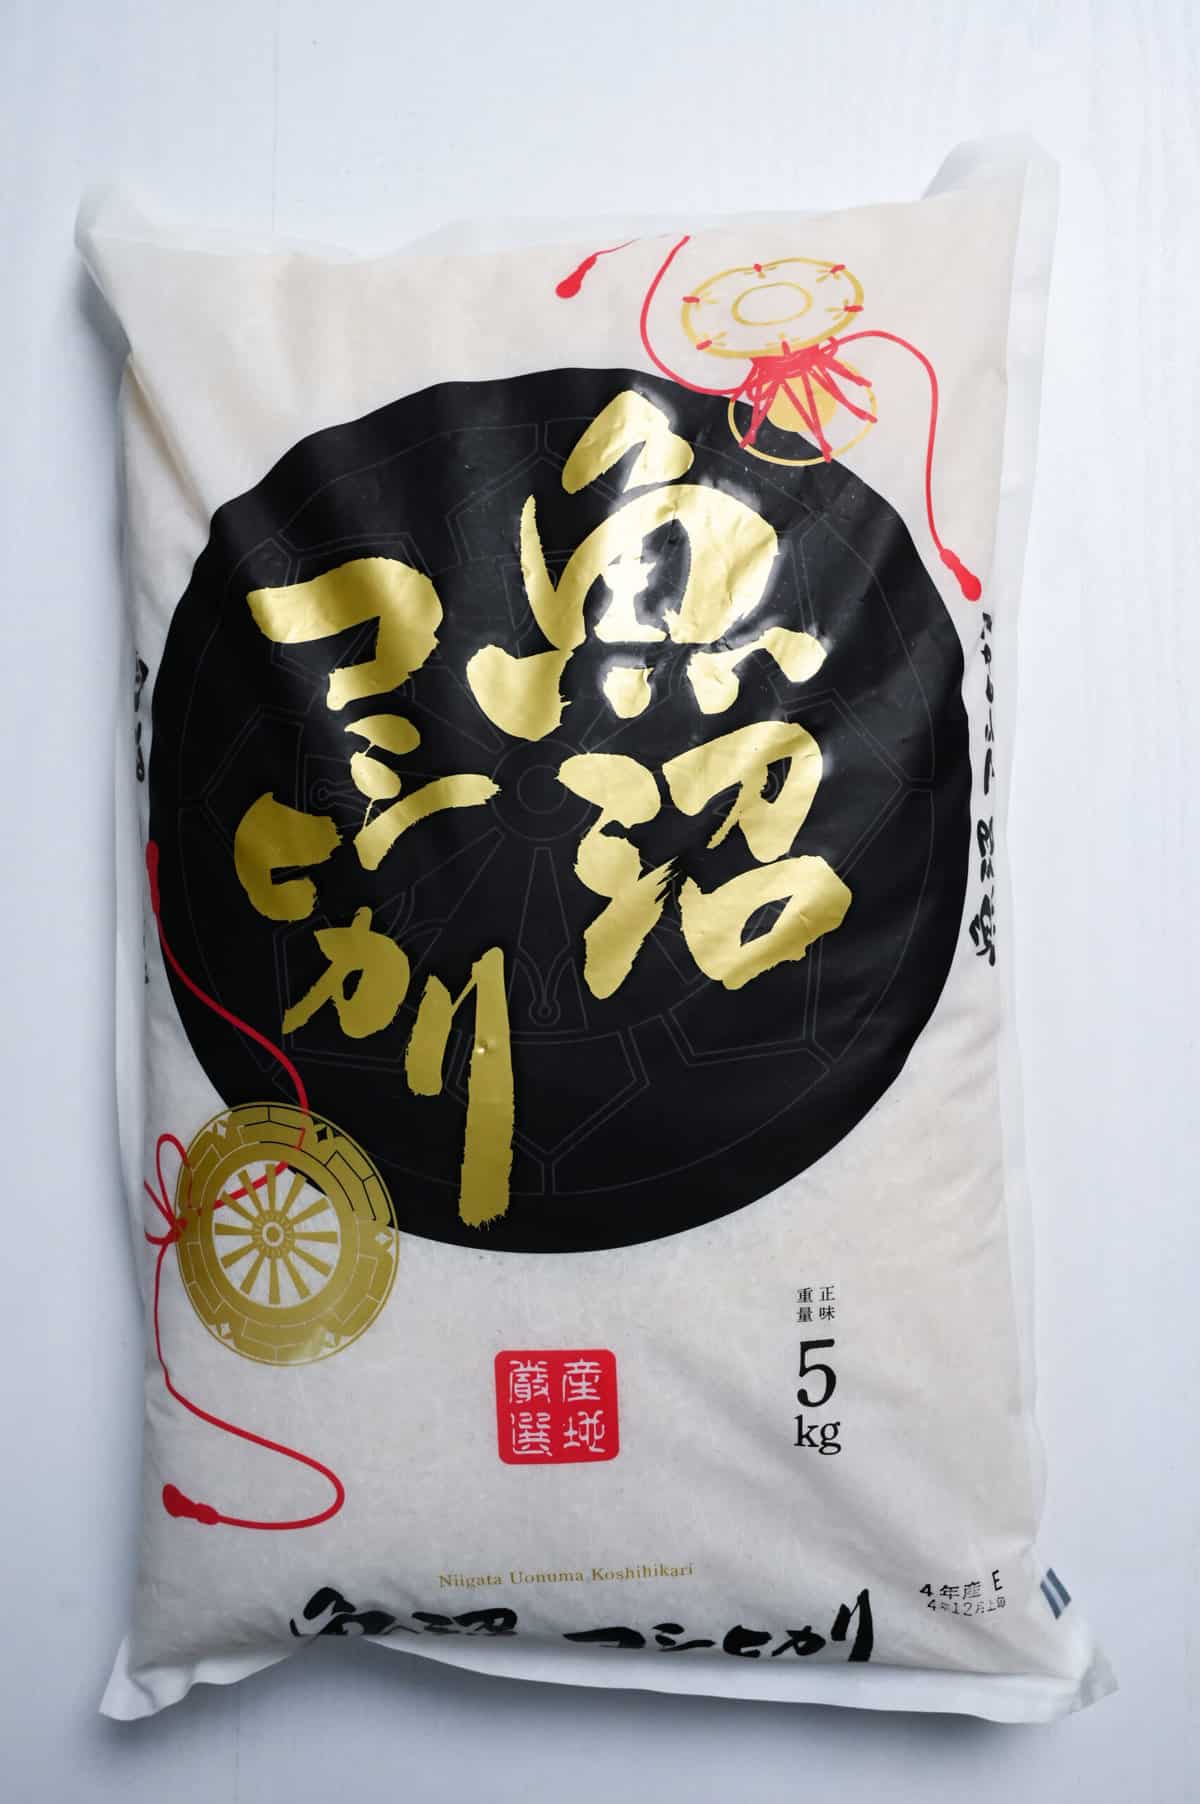
Koshihikari (コシヒカリ): A variety of Japanese rice that was created in 1956 and is sweet, sticky, and has an excellent luster and aroma. Since 1979, it has been produced throughout Japan, except Hokkaido and Okinawa, and continues to be the top rice variety produced, making it the most mainstream rice variety in Japan.
- Tamaki Gold (田牧米) – Tamaki is a Japanese rice brand developed by Ichiro Tamaki, a Japanese philanthropist and agricultural consultant, who moved to California in 1989 and started growing and milling rice. The rice is soft and tender with a glutinous texture, typical features of Japanese rice. The quality is comparable to many types of rice grown in Japan. It is well-loved by Japanese people living in the U.S. If you are looking for quality without regard to price, this is the rice to go!
- Kagayaki California Premium Short Grain Rice – Slightly more affordable California-grown Koshihikari rice. This type of rice has a soft texture, and as its name suggestions (kagayaki=shine) it develops a shiny appearance after being cooked. However, it may have a slightly lower level of sweetness comparably.
- Tamanishiki (玉錦) – A koshihikari rice produced in California. It has a glutinous texture and is cooked with more firmness than Tamaki rice. It is also more reasonably priced than Tamaki Rice!
- Yuki No Kakera “Snowflake” (雪のかけら) – This is a unique variety of rice known as California Milky Queen, which is a combination of koshihikari and glutinous rice. This type of rice has a higher level of stickiness than the other brands due to the inclusion of glutinous rice, making it an excellent choice for those who enjoy a chewy texture and sweet taste.
- Nishiki Premium Rice (錦) – When I lived in England, I used to eat Nishiki rice. It is readily available and affordable compared to other brands, but it is actually medium-grain rice, not short-grain rice.
Visual Walkthrough & Tips
In Japan, rice cookers are must-have household appliances with valuable features like timers and warming settings. Many people rely on them for perfectly cooked rice, but I know this is not the case outside Japan or Asia.
If you prefer to watch the process in action, check out my YouTube video of this recipe for a complete visual walkthrough!

Here is a step-by-step process that includes the scientific aspects and current best practices related to Japanese rice cooking. Once you get the gist, it is very easy!
Gelatinization (α化, 糊化): The process of gelatinization involves heating starch with water, causing the starch molecules to lose their regularity and become glue-like, also known as alpha. The soft and glutinous texture of freshly cooked Japanese rice is due to the starch being in a glutinous state.
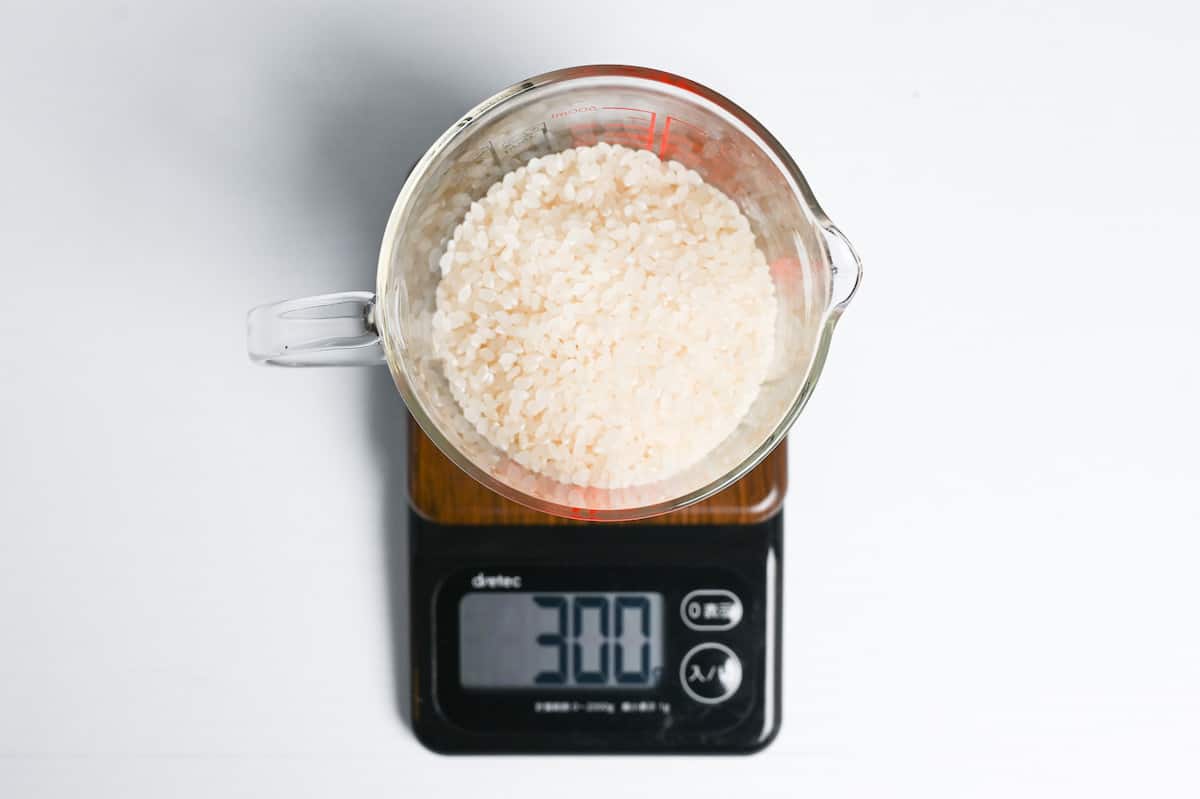
Measuring rice by weight instead of volume is important, with grams being the most accurate method. Weighing is directly related to the final firmness, making it a crucial step in preparation.
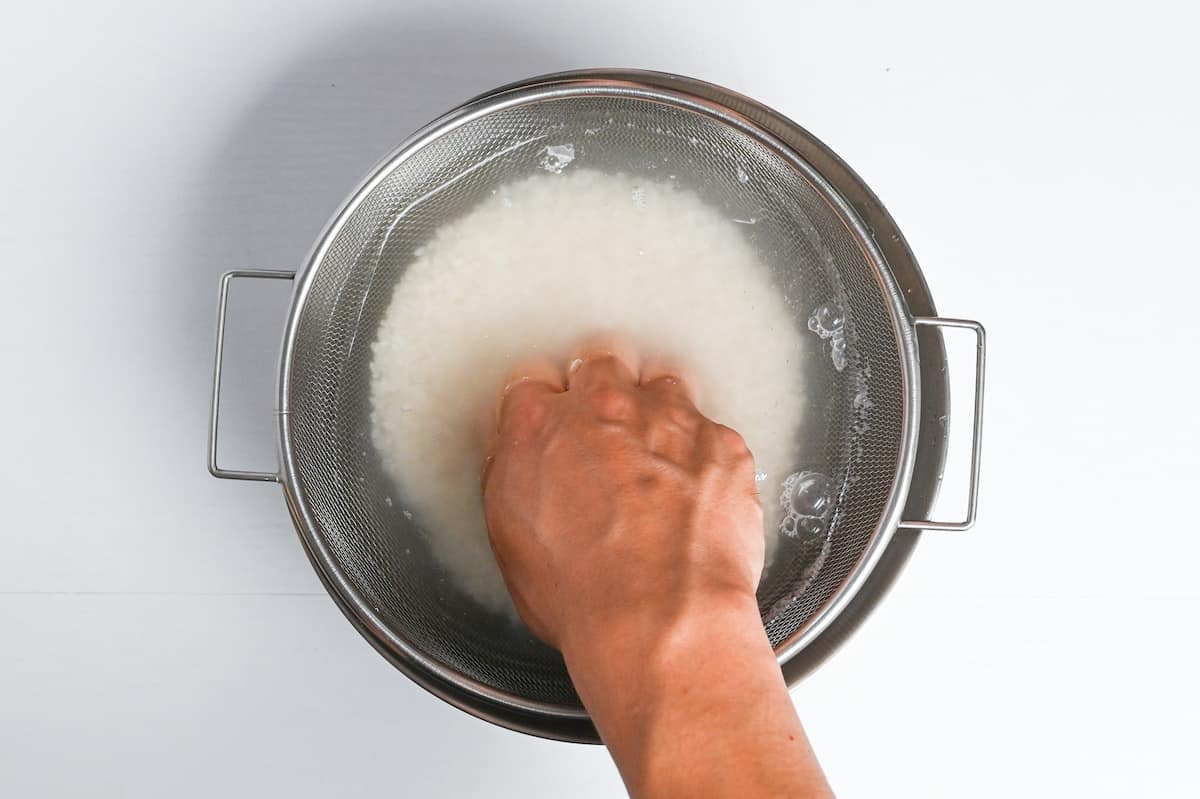
To prepare rice, it is essential to wash it first to remove dirt and excess bran. When rice is dry, it absorbs water quickly, which means that the first water it comes into contact with is the water it absorbs the most. Once water is added, the bran smell becomes more prominent.
To avoid this pungent bran smell, it is recommended to place the rice in a sieve, pour water over it and then drain immediately.
Additionally, using good-quality water is preferable for this process and some professionals even use bottled water for this.

To prevent cracks, it’s recommended to mix the rice gently using fingers bent like a cat’s paw.
It was believed that washing rice vigorously was the best practice in the past, but with advancements in rice milling technology, rice can break if rubbed too hard.
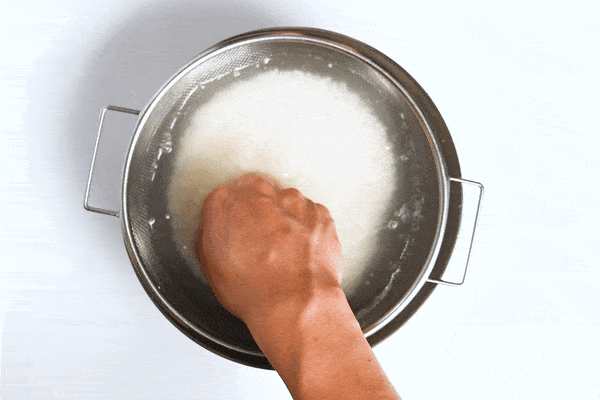
It’s important not to do this too strongly or for too long, as the rice is easily damaged. Drain and repeat five times each time the water becomes cloudy.
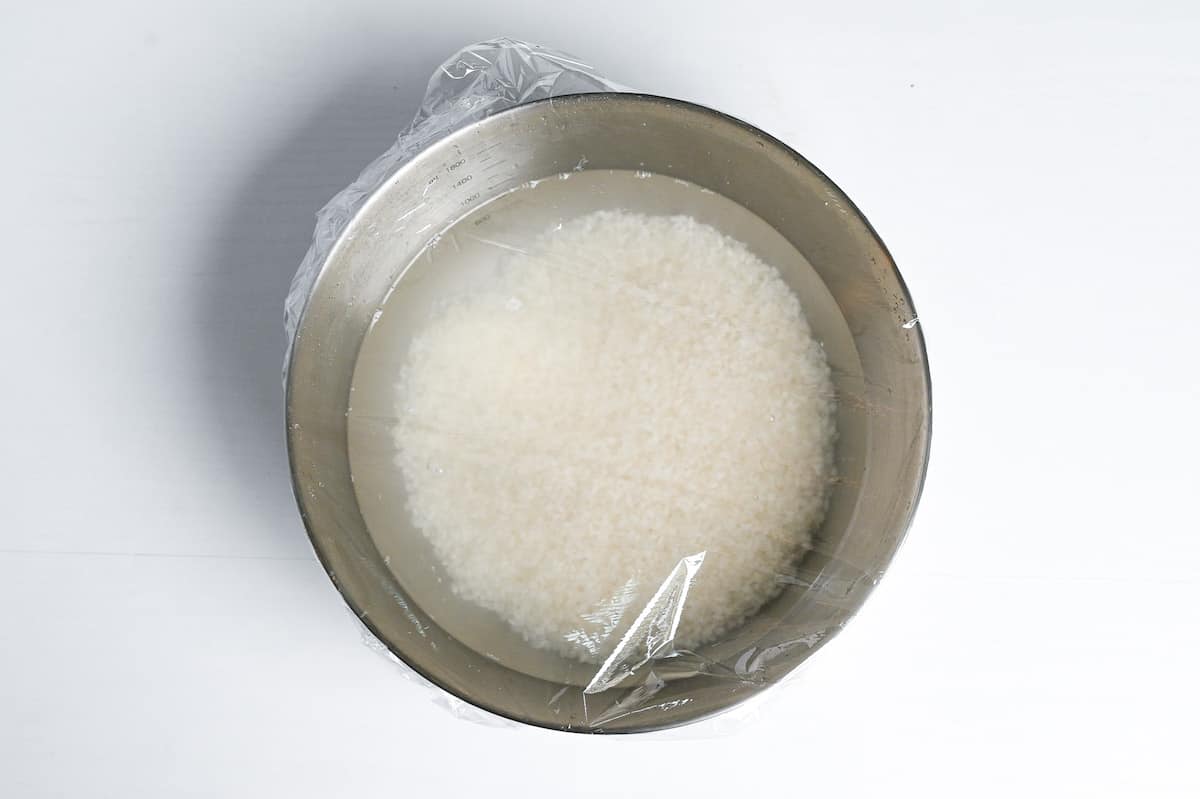
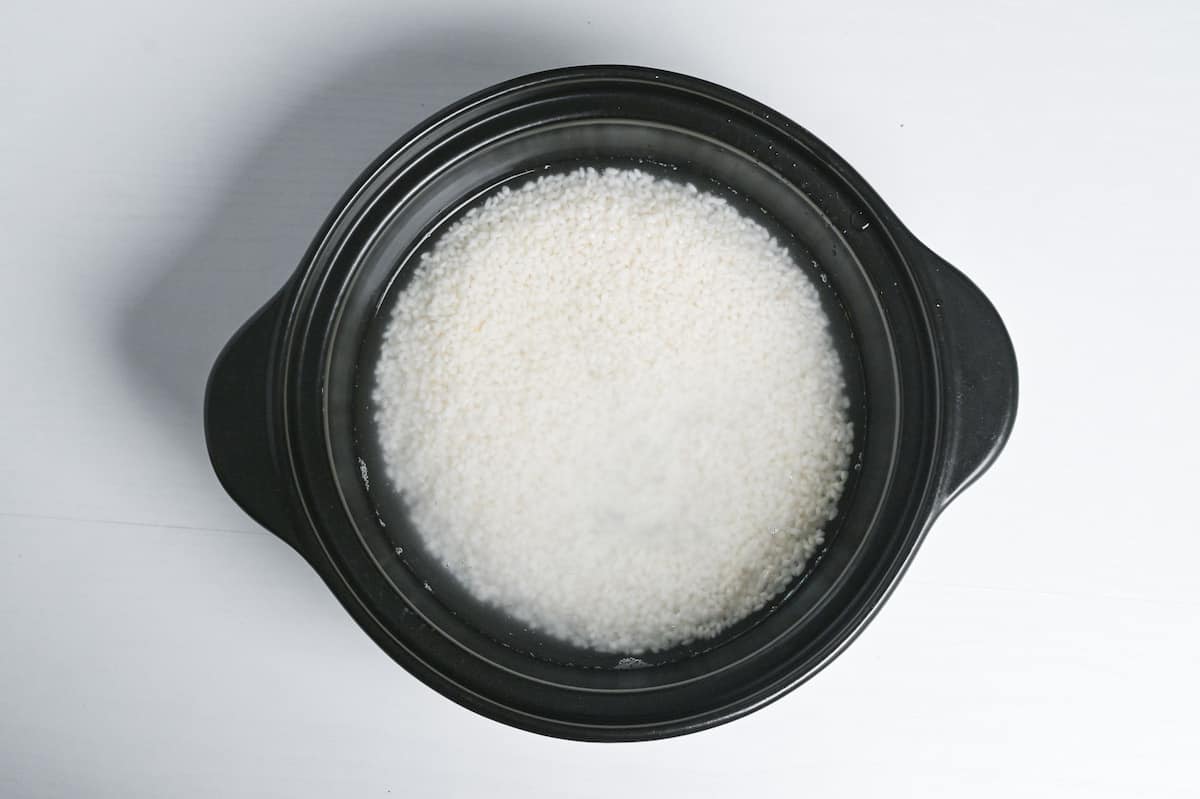
Transfer the rice to a bowl and add fresh water until all of the rice is submerged. Cover the bowl and leave it to soak for 30 minutes to 2 hours (more details below).
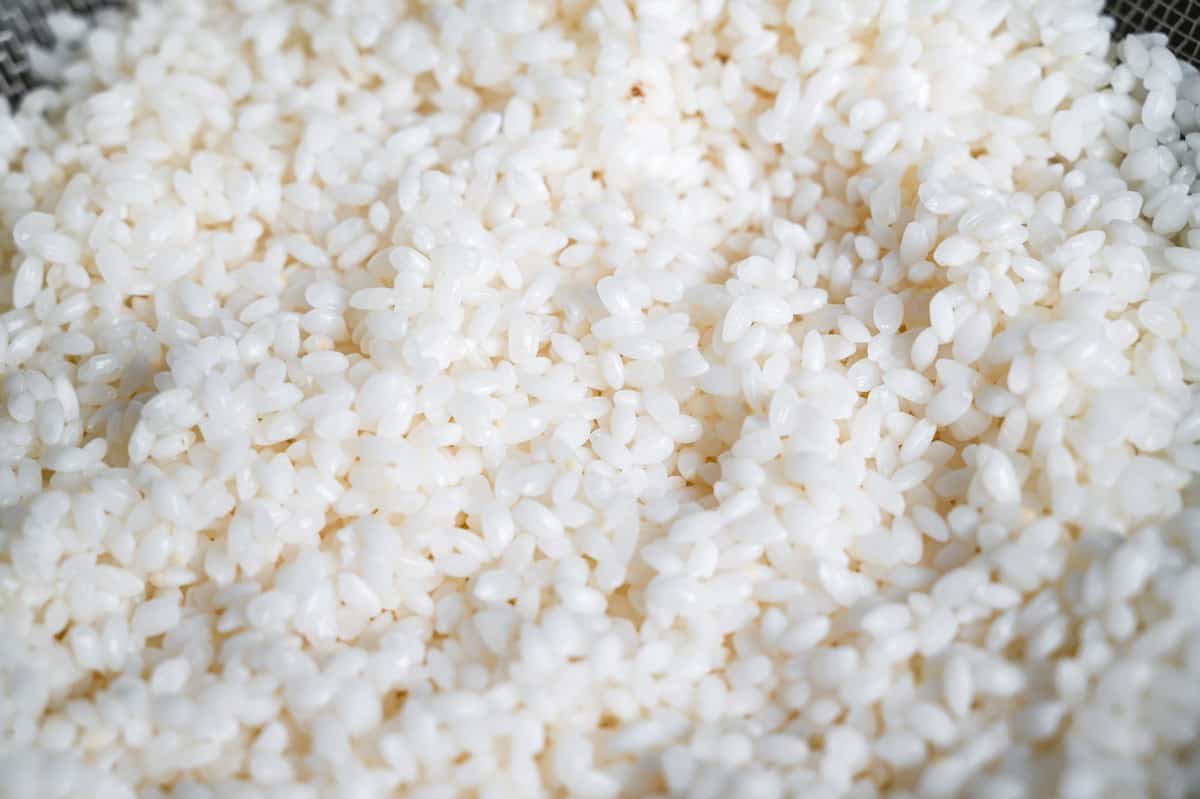
Japanese rice gets its fluffiness, stickiness, and delicious taste from its abundant starch content. Adding enough water and heat transforms this starch into a mouth-watering flavor. The water helps the starch to penetrate deep into the rice, causing it to gelatinize and become fluffy and glutinous.
The rice looks and feels completely different before and after soaking, and it’s essential to soak it before cooking to ensure that the beta-starch transforms evenly into alpha-starch.
Water absorption time increases with higher water temperatures, so adjusting the soaking time accordingly is important based on the season and your location. When I took this picture, the room temperature was 20-25 degrees Celsius.
If you live in a colder area during the winter, water absorption may take up to 2 hours. Also, if you live in a hot area, you can put the water in the refrigerator while the rice absorbs the water to maintain a low temperature.
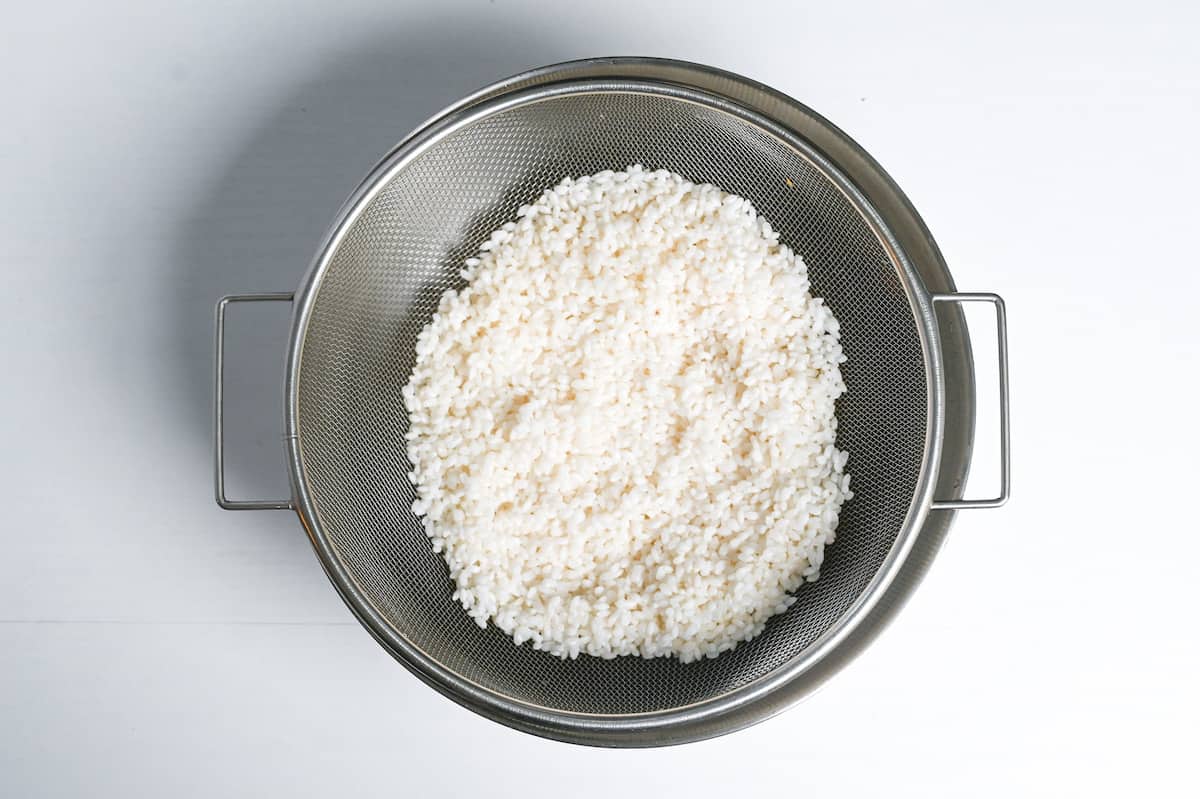
If you start cooking rice immediately after soaking, you cannot accurately measure the amount of water, so pour the rice into a sieve and place it over an empty bowl to dry for 5-10 minutes before cooking.
Add the rice to the pot and pour in 200ml (6.75 floz) of cold water for every 150g (5.3oz) of rice based on the weight before soaking (there’s no need to weigh the rice after it’s been soaked).
One Japanese rice cup holds 150g of uncooked rice and 175 ml of water, so the correct ratio is 1.15 cups of water for every 1 cup of rice.
For the best taste, it is recommended to use soft water when cooking rice. Hard water contains minerals that can stick to the surface of the rice and make it difficult to absorb water, resulting in dry rice.
It’s also important that the water is cold so that the temperature of the rice can rise gradually and cook evenly to its core. Starting with hot water will cook the outside too quickly, leaving you with rice that is mushy on the outside and hard in the middle.
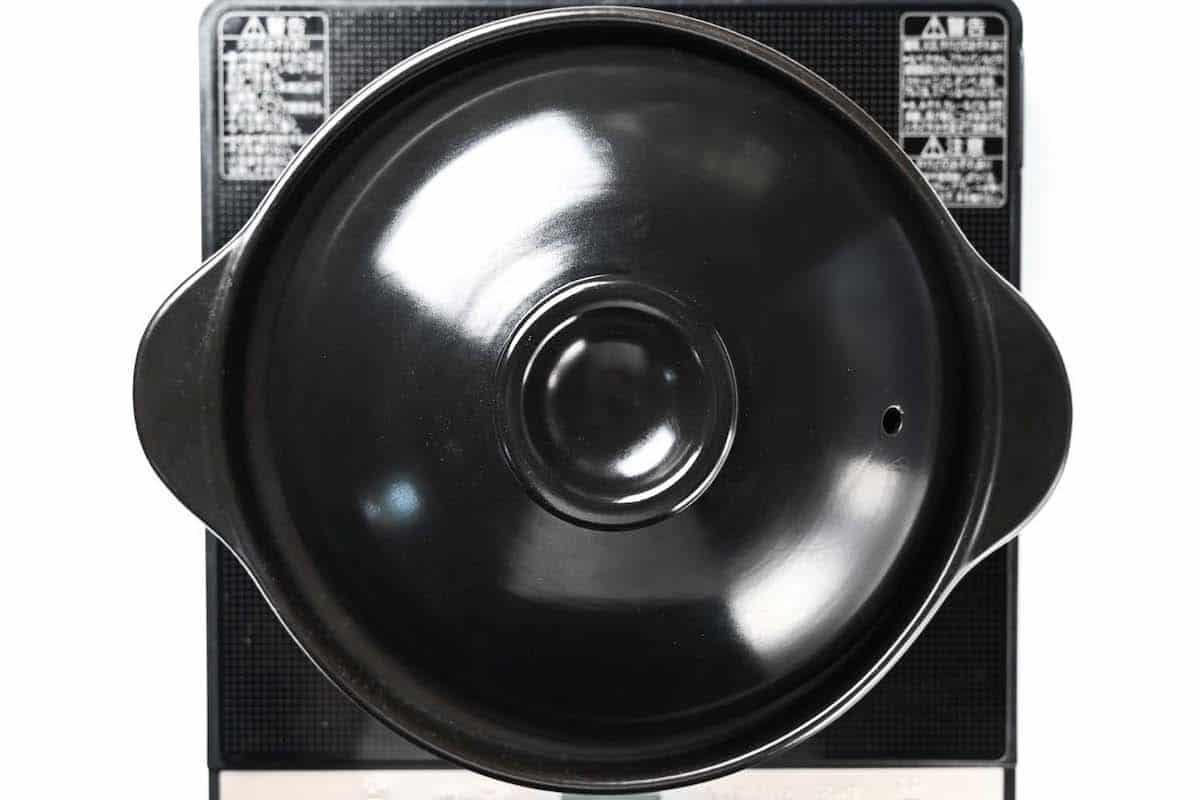
Shake the pot to flatten the rice into an even layer, place a lid on the pot and transfer it to the stove. Heat on medium and bring to a boil.
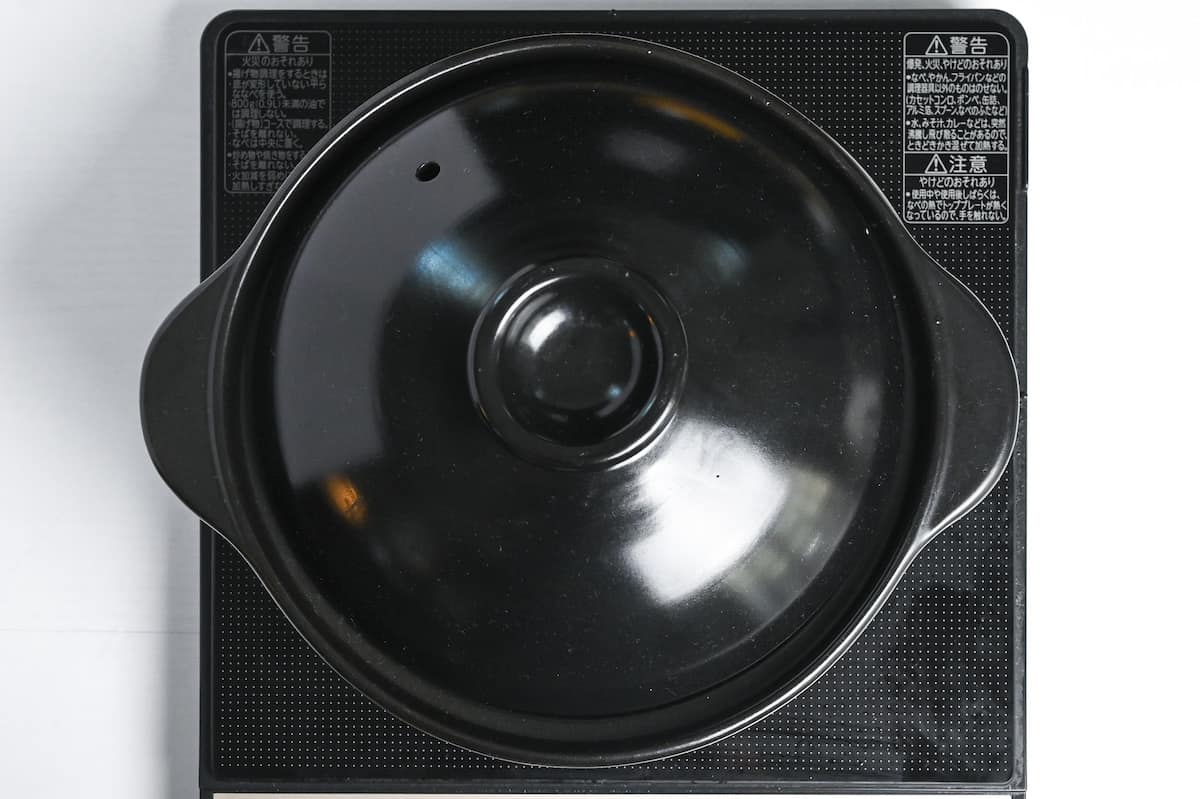
From this point, do not remove the lid as the steam will escape and mess up the ratio of water to rice.
Stay near the pot and listen out for the sound of bubbling. The water should be bubbling continuously before moving onto the next step.
Once bubbling, set a timer for 30 seconds.
After 30 seconds, reduce the heat to medium-low and set a timer for 2 minutes.
Reduce the heat setting to low and simmer for 5 minutes.
Blast the heat on high for 10 seconds and then turn off the heat.
Leave the pot on the stove to steam for 10 minutes.
Why is it important to steam rice? Steaming rice is a method that allows the starch in the rice grains, which have absorbed enough water, to be gelatinized.
When rice is cooked with the correct amount of water, the water is almost completely absorbed by the rice by the time the heating process is finished, leaving no water. If the cooking process is stopped at this point, the rice will not be fully gelatinized, and cores may remain.
In the past, rice was kept warm for 15 to 20 minutes over the remaining heat to complete pre-gelatinization. Many Japanese rice cookers have already considered this when designing cooking time.
It is also important never to open the lid during the 10 minutes of steaming. This is so significant that there is a Japanese saying, “Don’t take off the lid even if the baby cries.”
Once 10 minutes are up, remove the lid and mix the rice.
Use a rice paddle to scoop the rice from the bottom and fold it over the top, then use the side of the rice paddle to break it apart. This will prevent the grains from becoming crushed.
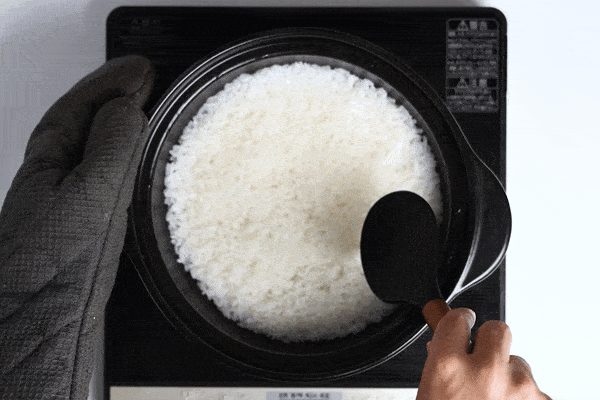
Mixing is especially important because excess moisture can accumulate around the rice, making it soggy if left untouched.
Mixing the rice immediately after steaming can distribute moisture evenly and promote evaporation.
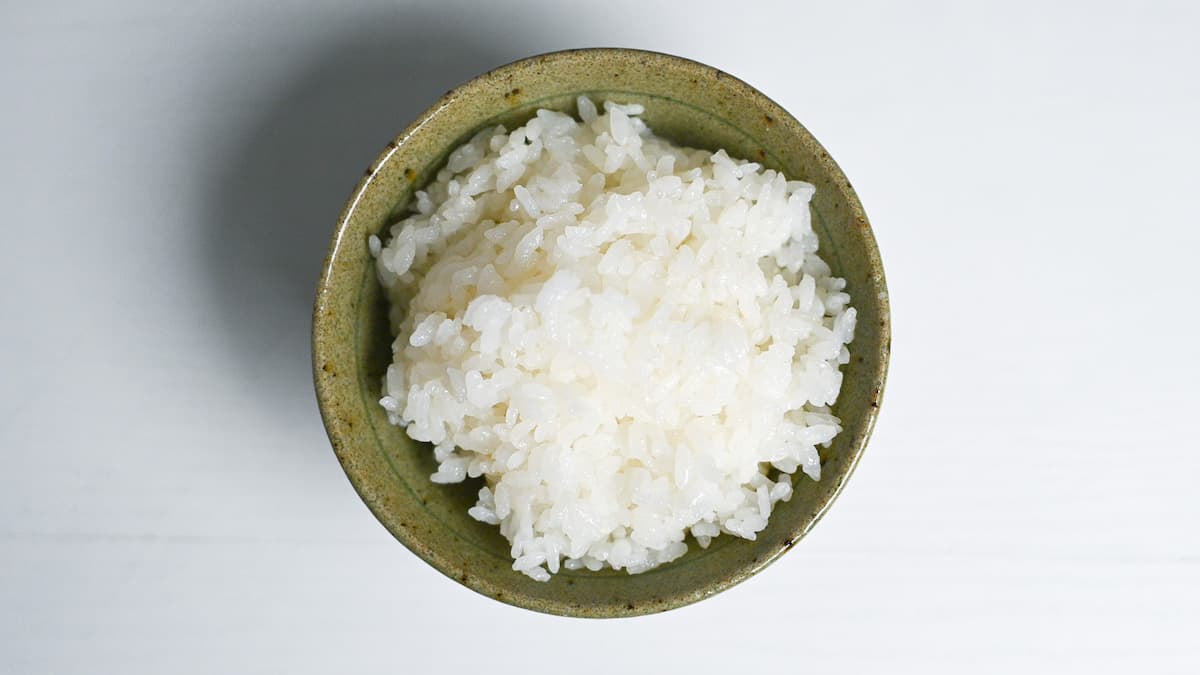
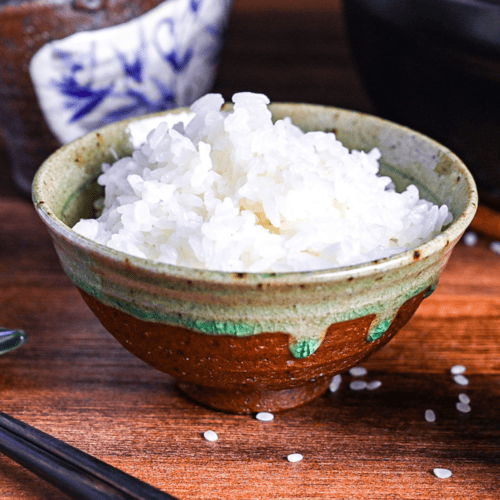
Use your fresh stove-cooked Japanese white rice with any Japanese meal, from teishoku and donburi, to onigiri and bentos! And if you made too much, see below for storage instructions!
Jump to Full Recipe MeasurementsFAQ
Here are answers to frequently asked questions I have received across all platforms, including here, YouTube, and Pinterest. If you have any questions, feel free to send them to me anytime! It will be a big help for everyone in this community!
If you use a Japanese rice cooker to cook Japanese rice, there is no problem. However, if you cook Japanese rice in a pot and do not allow it to absorb water before cooking, a glue layer will form on the surface of the rice grain. This glue layer prevents water and heat transfer, resulting in rice with uncooked core. Therefore, water absorption is a necessary step.
In a way, we do. But that does not mean you wash it literally with soap; it’s like rinsing and gently mixing to remove the bran by soaking the rice in water and rubbing it against each other. Recently, however, due to the development of rice milling technology, little bran remains in the rice, so it is sufficient to rinse lightly.
Japanese people rinse their rice to eliminate any bran or dirt that can cause unpleasant odors and affect the taste. However, modern polishing technology has progressed so much that there is barely any detectable dirt or bran left on the rice. So, it is now possible to cook rice without having to rinse it thoroughly for a long time. This means that you can simply rinse the rice once or twice, or even skip rinsing altogether if you are concerned about water usage. If you are using “Musenmai (無洗米)” rice, which has had the bran removed at the factory, you can cook it by adding water directly, without the need for any rinsing at all.
The causes of Japanese rice becoming dry can be attributed to the amount of water, not soaking enough, or rice being too old.
If the rice is broken when rinsing, the starch in the rice will dissolve into the water, resulting in mushy rice. Also, too much water will result in a porridge-like texture, so adjusting the amount of water is very important.
Rice dries and oxidizes in direct sunlight and at high temperatures; when it oxidizes, it loses its flavor. Many people store rice in the refrigerator because it is not exposed to sunlight, and the low temperature slows the oxidation process.
No, we do not add salt to rice unless there are special circumstances, such as making salted rice balls.
Yes, it will work in a rice cooker!
Yes, you can!
The speed at which rice absorbs water depends on temperature. Warmer water speeds up the soaking process, while cooler water slows it down. So, it’s common to soak rice for less time in summer and longer in winter!
How to Store and Reheat
While rice cookers have a keep-warm feature, it’s not the case if you cook rice in a pot. Firstly, it is not advisable to store rice at room temperature. This is because Bacillus cereus is present in uncooked rice, and cooking rice does not completely eliminate this bacteria. Hence, leaving rice at room temperature for an extended period may cause the remaining Bacillus cereus to breed, so it should not be stored at room temperature for more than an hour.
Storing cooked rice in the refrigerator is also not a good idea. As explained earlier, when rice is cooked with water, its starch absorbs water and becomes soft and sticky. But as it cools down, the starch gradually returns to its original beta state, becoming dry, bad-tasting, and hard to digest.
It is believed that rice is most likely to revert to its beta state at around 0 to 4 degrees Celsius, the same as the temperature inside a refrigerator. Therefore, refrigerated storage of cooked rice is not recommended.
So, to store cooked rice, freezing is the best option. It can last up to a month, but consuming it within a week is best to maintain its taste. After cooking, wrap the rice in plastic wrap and freeze it as soon as it’s cool enough to touch. For easy reheating, divide the rice into small servings and freeze them flat.
The microwave is the only method for defrosting. If you defrost the rice naturally, the moisture will be lost, and the rice will be sticky on the surface and dry on the inside. One serving can be heated for about 3 minutes at 600W or 3 minutes and 30 seconds a 500W, but adjust the time according to the amount of rice and the microwave oven you use. Avoid refreezing the rice, as it can become dry.
Storage summary
Room temperature – Not recommended.
Refrigerated – Not recommended.
Frozen – Up to a month, best within one week.
I hope you enjoy this recipe! If you try it out, I’d really appreciate it if you could spare a moment to let me know what you thought by giving a review and star rating in the comments below. It’s also helpful to share any adjustments you made to the recipe with our other readers. Thank you!
Recipes that Goes Perfectly with Cooked Rice
- Chicken Karaage
- Shogayaki (Japanese-style Ginger Pork)
- Mabo Dofu (Japanese-style Mapo Tofu)
- Miso Glazed Salmon
How to Cook Perfect Japanese Rice on the Stove

Ingredients
- 300 g uncooked Japanese rice sometimes labeled "sushi rice" outside of Japan
- 400 ml cold water preferably soft water
My recommended brands of ingredients and seasonings can be found in my Japanese pantry guide.
Can’t find certain Japanese ingredients? See my substitution guide here.
Instructions
- First, measure out 300 g uncooked Japanese rice. We recommend weighing it out using kitchen scales or a Japanese rice cup. (See note)

- Next, pour the rice into a sieve and place the sieve over a large bowl. Pour cold water onto the rice so that the bowl fills up and drain immediately.
- Fill up the bowl again but this time, swish the rice around gently to wash. When the water becomes cloudy, drain it out and repeat 5 times in total.
- Pour the rice into a mixing bowl and submerge in cold water. Cover and soak for 30 minutes in summer or up to 2 hours in winter.
- Once the rice has finished soaking, pour it back through the sieve and place over an empty bowl to dry for 5 minutes.
- Transfer the rice into a pot with a thick base. Pour in 400 ml cold water, place a lid on top and transfer to the stove. Bring to a boil over a medium heat and do not remove the lid at any point.
- Don't take off the lid, just listen out for the boiling water. Once you can hear it bubbling consistently, set a timer for 30 seconds.Once 30 seconds are up, reduce the heat to medium-low and set a timer for 2 minutes.

- After 2 minutes, reduce the heat to low and simmer for 5 minutes.Turn up the heat to max for 10 seconds and then turn off the heat completely, leave the rice to steam in the pot on the warm stove for 10 minutes. Don't be tempted to take off the lid or mix it before the 10 minutes are up.
- After 10 minutes remove the lid. Scoop and fold with the rice with a rice paddle, and use the edge of the rice paddle to break up the rice. (If you don't have a rice paddle, use a spoon or silicone spatula dipped in water to prevent the rice from sticking.)

- Serve up and enjoy!

Video
Notes
- One Japanese rice cup holds 150g of uncooked rice and 175 ml of water, so the correct ratio is 1.15 cups of water for every 1 cup of rice (200 ml water:150g rice).
- To store, cool and wrap with plastic wrap or transfer to airtight containers. Freeze for up to 1 month.
- Always use a microwave to defrost frozen rice (3 minutes at 600W or 3:30 minutes at 500W, adjusting for quantity).
- Never refreeze previously frozen rice.
- Never store cooked rice at room temperature for more than one hour.
- Avoid refrigerating cooked rice as the starch returns to its beta state, making rice dry, poor-tasting, and difficult to digest.
- When you’re using a rice cooker instead of a pot, just switch to the rice cooker method starting from step 6 in the instructions.
working through different kitchens, it seems like rice is the hardest to make. I have been in the business as a chef and yet I do mess it up sometimes. I always tell some of my cooks that cooking sometimes is science not just putting water on the stove and let it boil. eventually pot will burn if you leave to make a phone call or text someone. I don’t know what this have to do with anything but it’s true….you mess up a pot of rice it’s done.
“never stop learning”
-E..
Hi Edwin,
That’s true! In Japan, most people now opt for rice cookers as a fail-safe option, but there’s something special about cooking rice in a pot on the stove. Maybe it’s about knowing it can fail. But I’m always entertained when I open the pot lid to see the result!
Yuto
ok, so I defrosted my Ongiri in the fridge overnight… don’t have a microwave, so should I wrap them in foil and steam to defrost?
Super detailed…. bit OCD….. 1.15 cup to 1 cup ??? ( 7.2 tsp…btw) Recipe needs work
maybe weight thruout ?
Having a tight fitting lid seal seems key…. or maybe a rice cooker?
Great to learn about the rinse / repeat steps ! TY
Hi Yuto I have some short grain brown sticky rice that I have only used to mill into flour ..I’ve never actually cooked with it. Would I treat it the same way as white rice?
Hi Donna,
Thank you for your question! Brown rice does cook a bit differently from white, so it’ll need some adjustments. I’ll add it to my list and try to share a recipe for it soon!
Yuto
you refer to Japanese rice as ‘sweet’ rice. is it in fact the same as sweet rice sold in the grocery?
Hi Martha,
Thank you for your question! When I described Japanese rice as “sweet,” I was referring to its naturally subtle sweetness against long grains. It’s actually different from what’s labeled “sweet rice,” which is stickier and typically used for desserts in other Asian cuisines. If you’re preparing standard Japanese meals, I’d recommend either authentic Japanese short-grain rice imported from Japan or Calrose rice, a California-origin Japonica variety. Both are well-suited for typical Japanese cuisine.
Yuto
Thank you Yuto for the wonderfully clear instructions. My first experience with Japanese rice, a Koshihikari from Niigata. Quite a different rice from Spanish grains and cooking style.
First round with a thick steel pot, the result was just ok.
Second round with a non stick thick pot, with a clear lid that has a small ventilation hole which I forgot to obliterate. Result good but improvable.
Third round today, bingo! Excellent result, flavor, shine and stickiness. Lesson learned.
And, yes I agree that it is fun watching it bubble and cook.
Hi Carmen,
Love that you stuck with it through three rounds! I actually had the reverse experience back when I was obsessed with making paella years ago, took me a while to get used to those grains haha. So glad you cracked the code! 🙂
Yuto