


What is Katsu Curry?
First of all, although curry has roots in India, Japanese-style curry is a blend of roux and curry powder, first brought to Japan from the UK. Because of this unique history, Japanese curry shares some similarities with European-style gravy.
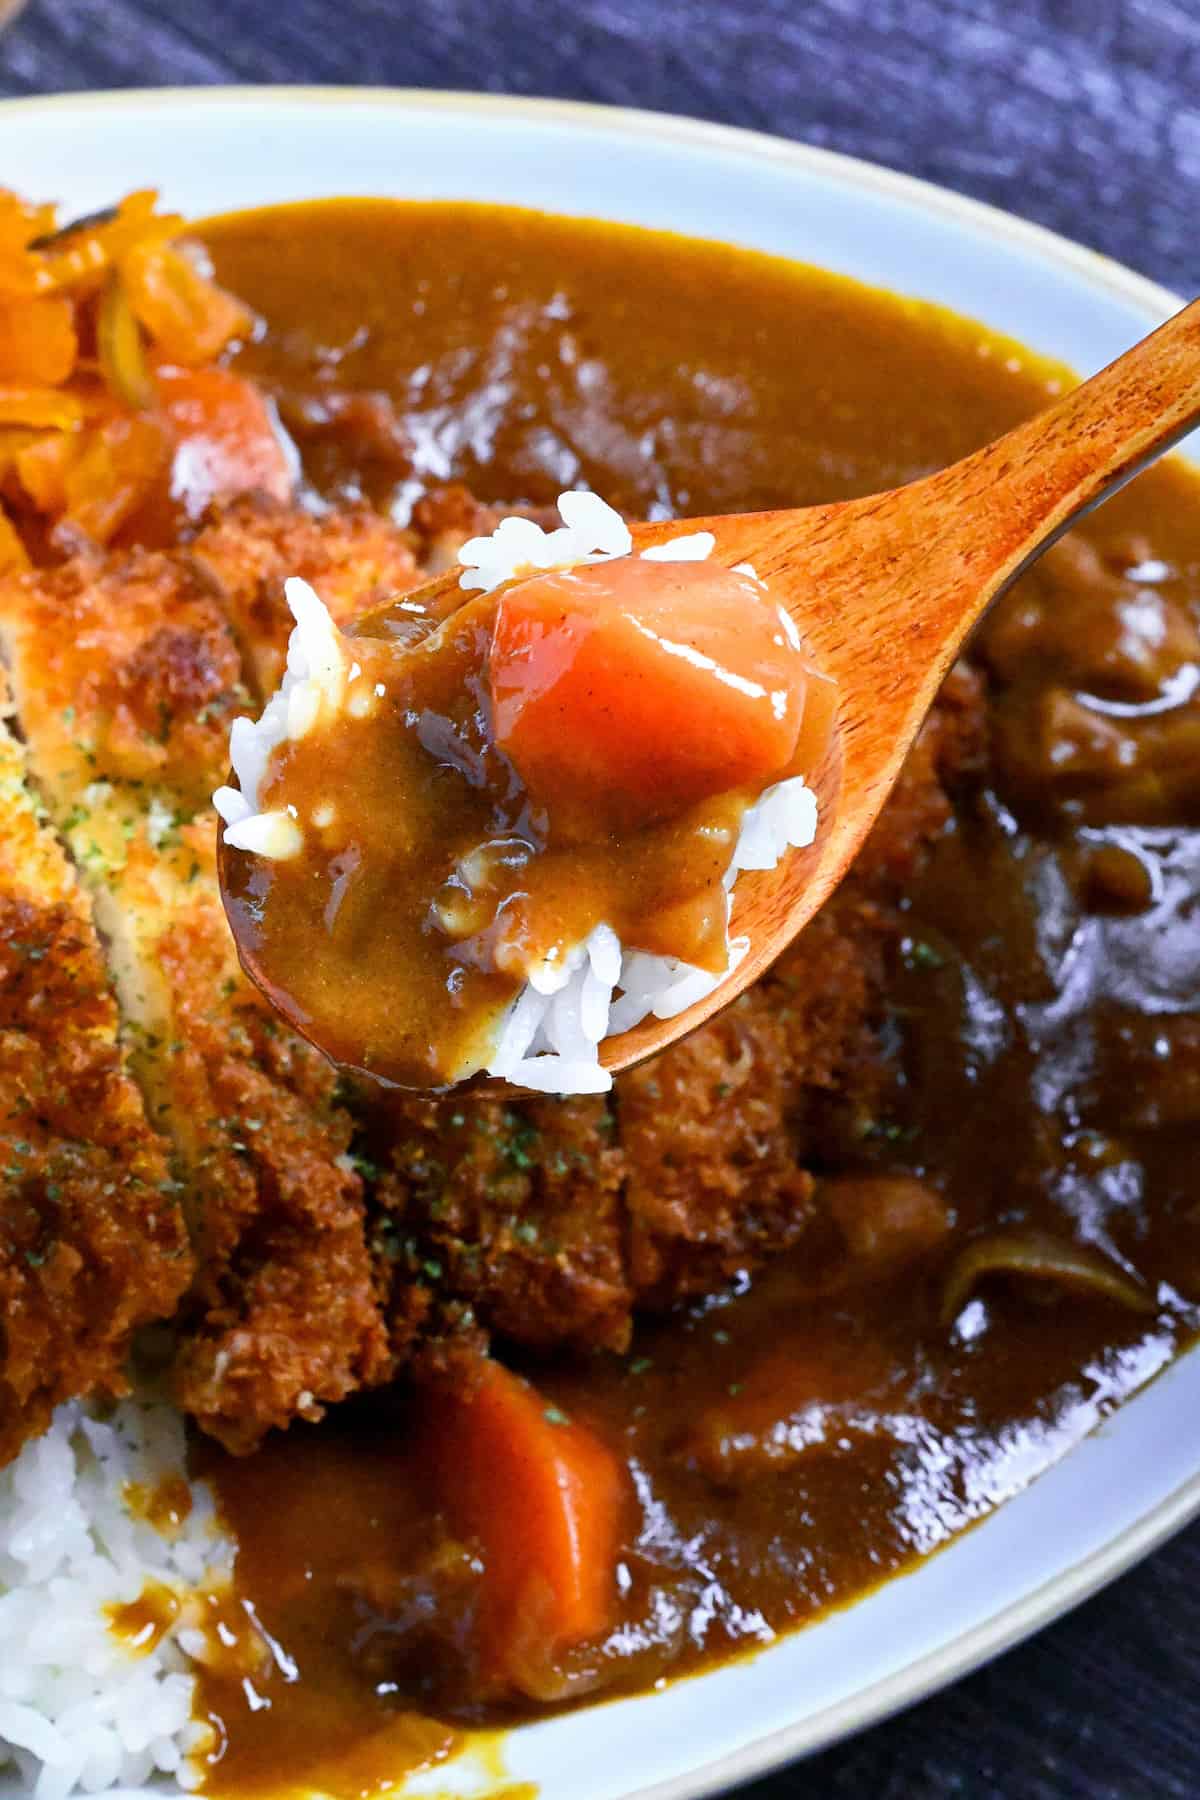
Japanese curry is kind of sweet, and its texture is thick and glossy, like gravy, served with freshly cooked short-grain rice. It’s not as spicy as Indian or Thai curries, so I think even people who don’t usually like curry would like Japanese curry! It’s probably one of the most popular home-cooked dishes in Japan and well-loved by kids and adults alike.
Then, Katsu Curry (カツカレー) is a popular variation of Japanese curry topped with a crispy breaded cutlet called “katsu”. Katsu is most commonly made with pork chops in Japan (similar to a pork schnitzel) but can also be made with chicken.

How I Developed This Recipe
As I mentioned, most Katsu Curry dishes in Japan are typically made with Tonkatsu, which is a Japanese-style pork cutlet. However, when I lived in England, I noticed that the most common type of Japanese-style curry served was chicken katsu curry.
Drawing inspiration from my experience, I came up with the idea of making a chicken katsu curry dish using the Japanese method.
In this article, I have adjusted the recipe so that it can be made using either my homemade roux or store-bought curry roux. I hope this recipe helps you enjoy the most delicious chicken katsu curry at home!
Ingredients & Substitution Ideas
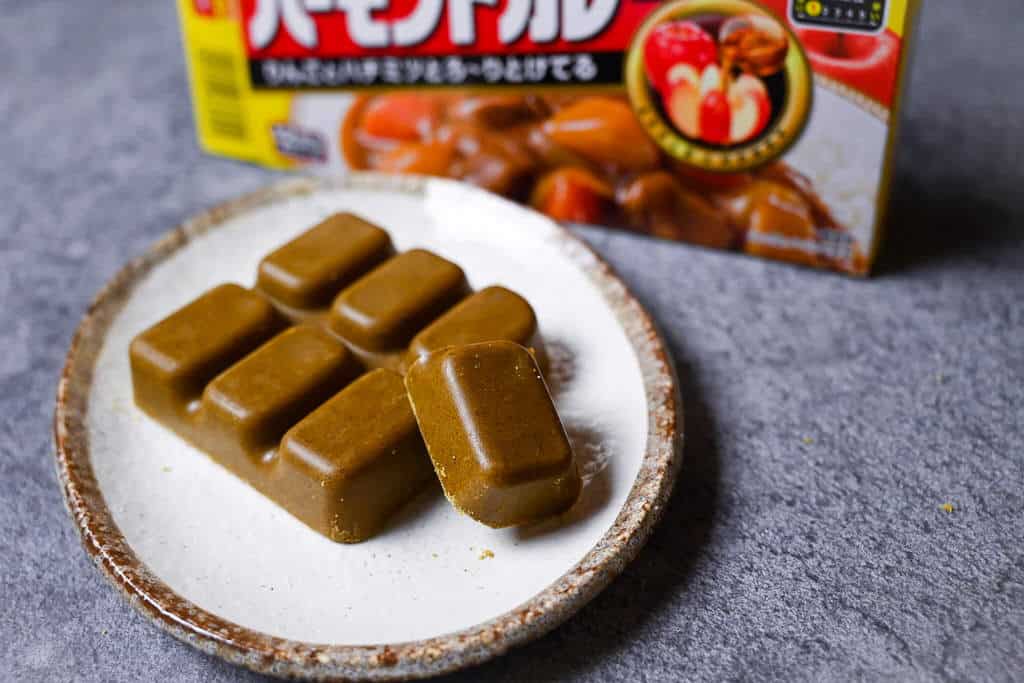
- Curry Roux: You can choose between homemade or store-bought curry roux. Note that homemade takes a lot longer to prepare. For store-bought options, refer to my Complete Guide to Japanese Curry Roux. If you prefer homemade, my Homemade Curry Roux Recipe can guide you.
- Boneless Chicken Thigh or Breast: This is used as an ingredient in the curry, not as a cutlet. You can also use drumsticks or wings instead here.
- Unsalted Butter: It’s best to use unsalted butter to control the saltiness of the dish. If using salted butter, reduce other salty ingredients accordingly.
- Vegetables: The recipe includes yellow onion, potatoes, and carrots. Feel free to add or swap in your favorite vegetables!
- Tsuyu Sauce: See my recipe for homemade tsuyu sauce or store-bought options. Alternatively, mix soy sauce with a bit of sugar.
- Honey: Any regular honey you have is suitable.
- Sake: White wine or dry sherry are good substitutes if you don’t have sake.
- Spices: Use chili powder and fenugreek powder for added flavor.
- Tomato Ketchup: Regular tomato ketchup works fine.
- Chicken Katsu Ingredients: For chicken katsu, use a large chicken breast (or thighs with my separate chicken katsu recipe), cake flour, medium eggs, panko breadcrumbs, and grated parmesan cheese.
- Cooking Oil: Choose neutral oils with high smoke points like canola, sunflower, or peanut oil. My personal choices are rice bran oil and extra virgin (white) sesame oil for both shallow and deep frying.
- Cooked Japanese Short-Grain Rice: Short-grain Japanese rice is most common in all Japanese cuisine. For recommendations on Japanese rice available in the U.S. and cooking instructions, refer to the How to Cook Japanese Rice Recipe.
- Toppings: Garnish with Fukujinzuke pickles and dried parsley for added flavor and texture.
This list contains the specific ingredients I use for this recipe, but the best part is that Japanese curry can be tailored to your own personal taste. If you want to know all the hidden flavors to make your own curry exclusively for you, be sure to read my Complete Guide to Japanese Curry first.
Jump to Full Recipe Measurements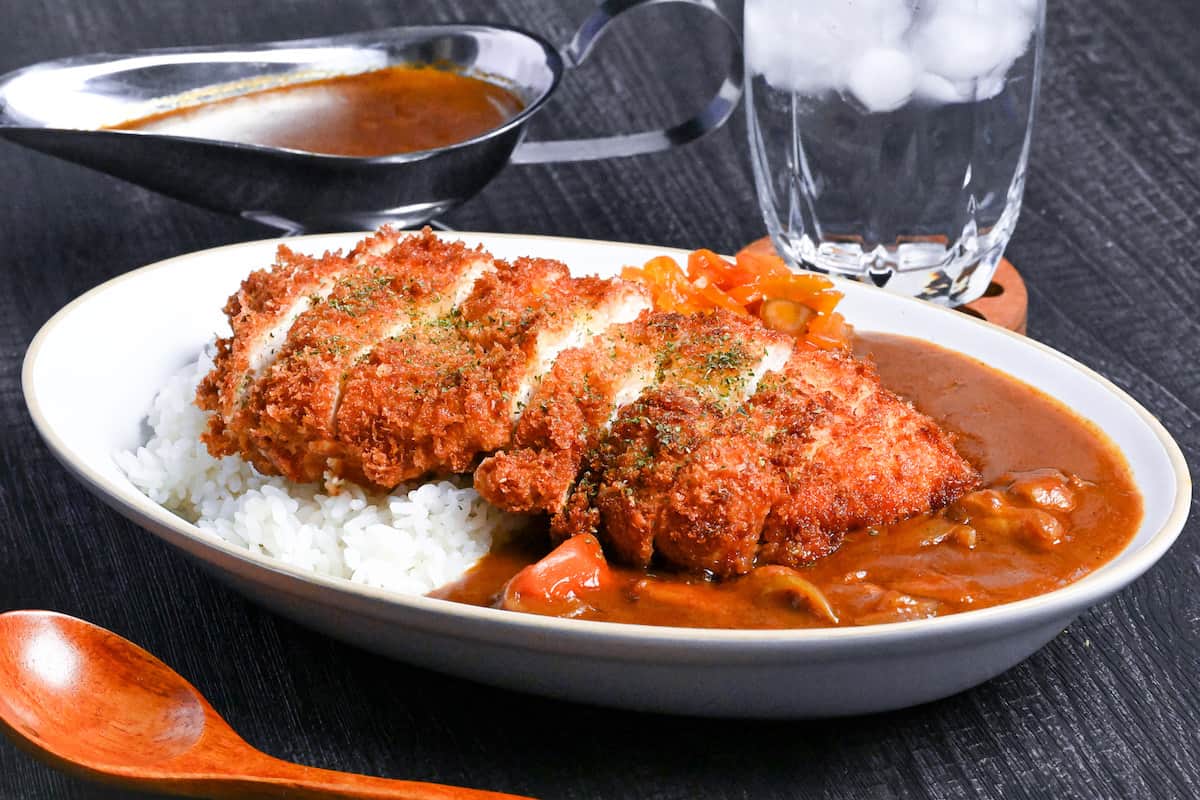
Visual Walkthrough & Tips
Here are my step-by-step instructions for how to make Ultimate Chicken Katsu Curry at home. For ingredient quantities and simplified instructions, scroll down for the Printable Recipe Card below.
If you prefer to watch the process in action, check out my YouTube video of this recipe for a complete visual walkthrough!

Before making curry, decide whether you want to use a homemade roux or a store-bought curry roux cubes. Making roux from scratch takes at least 12 hours, so it’s better to use a store-bought roux box if you’re in a hurry.
For more guidance on how to pick a store-bought roux, check out our Japanese Curry Roux Guide.
Meanwhile, if you would like to make your own homemade roux, please see my Homemade Curry Roux recipe.
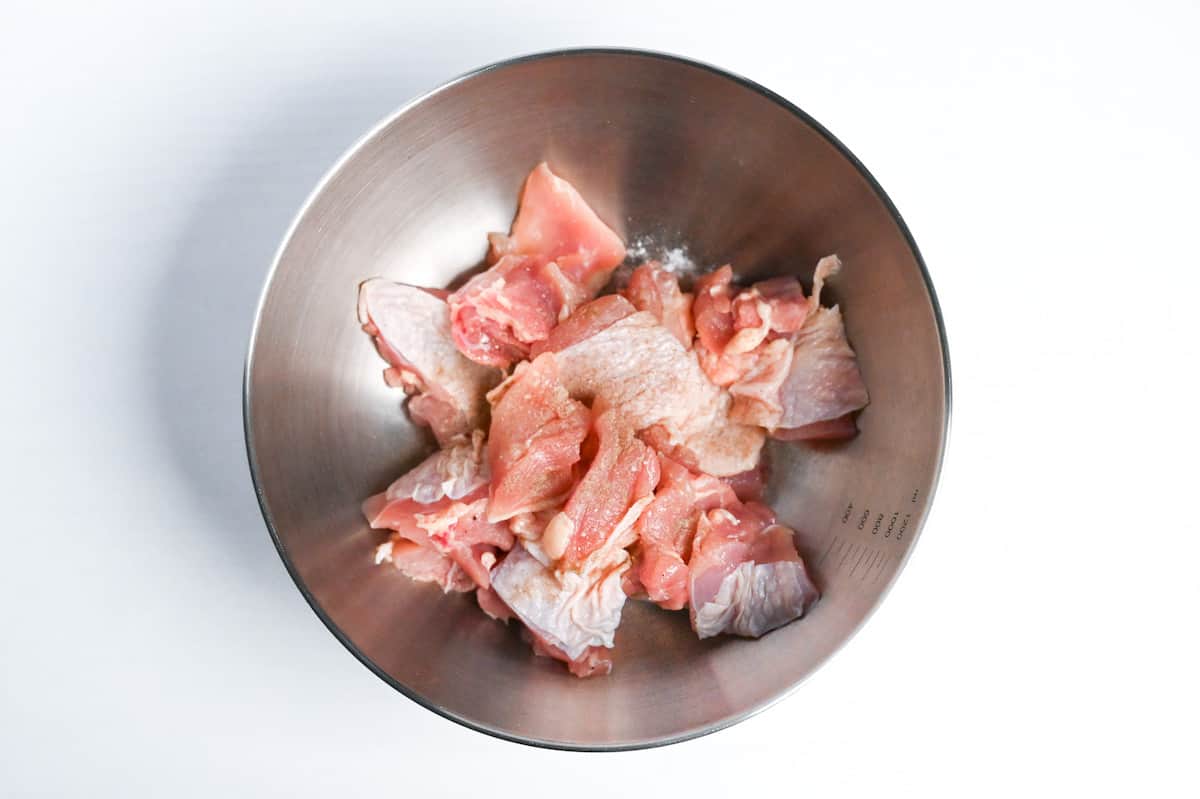
Cut boneless chicken thigh into bite-sized pieces and season with salt and pepper.
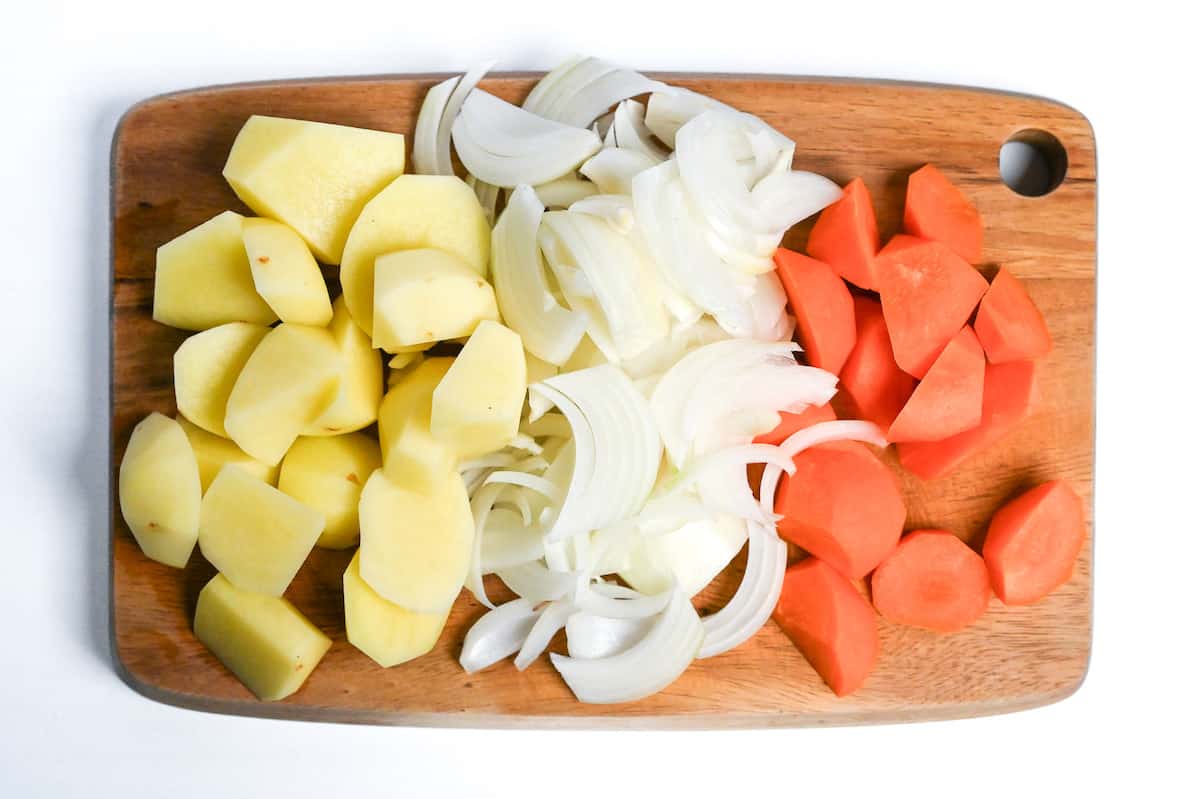
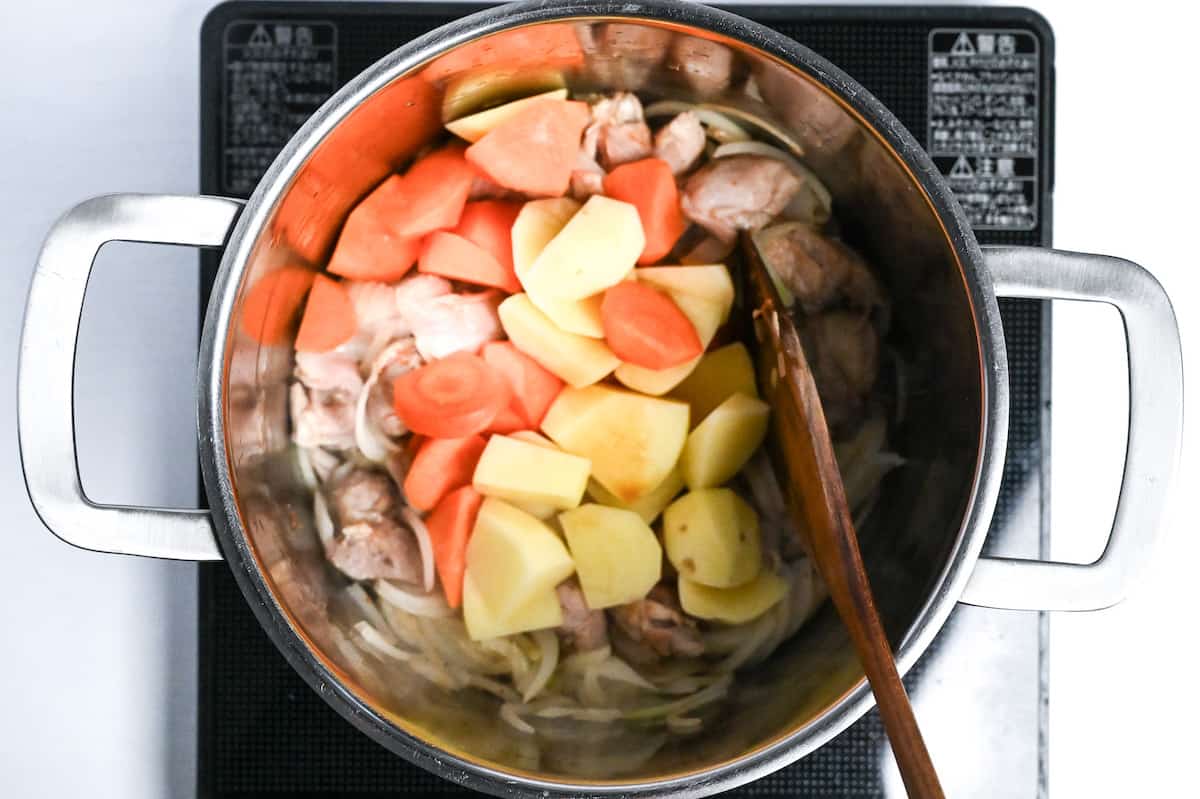
At this point, cut the carrots and potatoes into chunks and the onion into thin slices, too. Try to keep the potatoes and carrots similar in size so that they cook in the same timeframe.
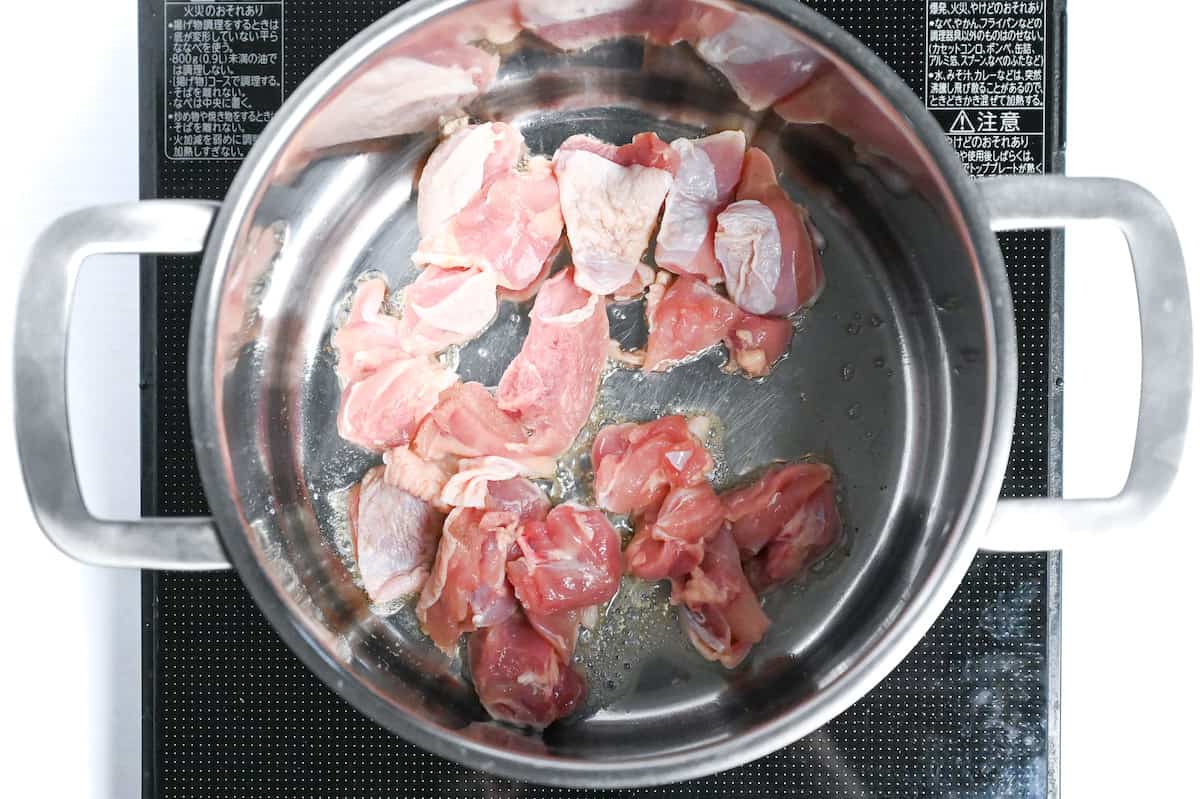
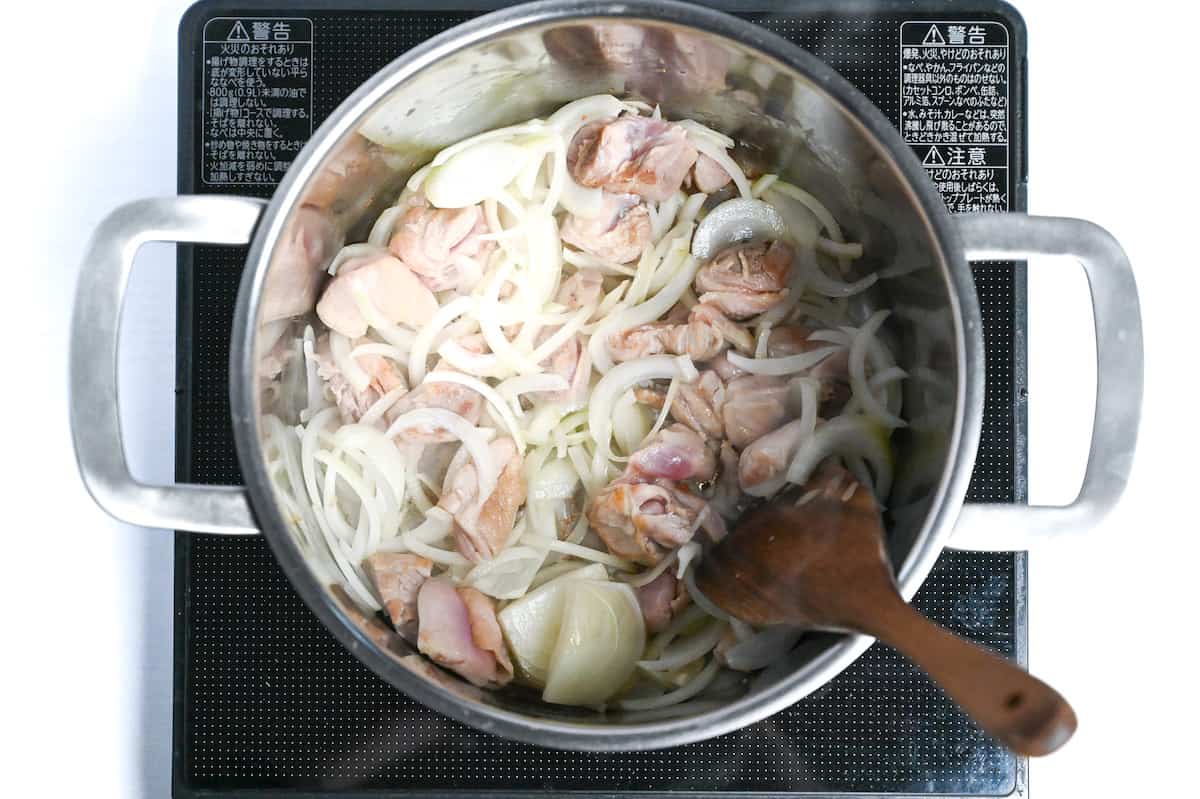
Melt unsalted butter in a large pot over medium heat. Fry the chicken pieces in the butter until they are browned on the surface.
Add the sliced onion to the pot and cook until slightly softened. Mix occasionally to prevent burning or sticking.
Next, add the potatoes, carrots, and tsuyu sauce. Stir and cook for about 1 minute.
Pour in the water.
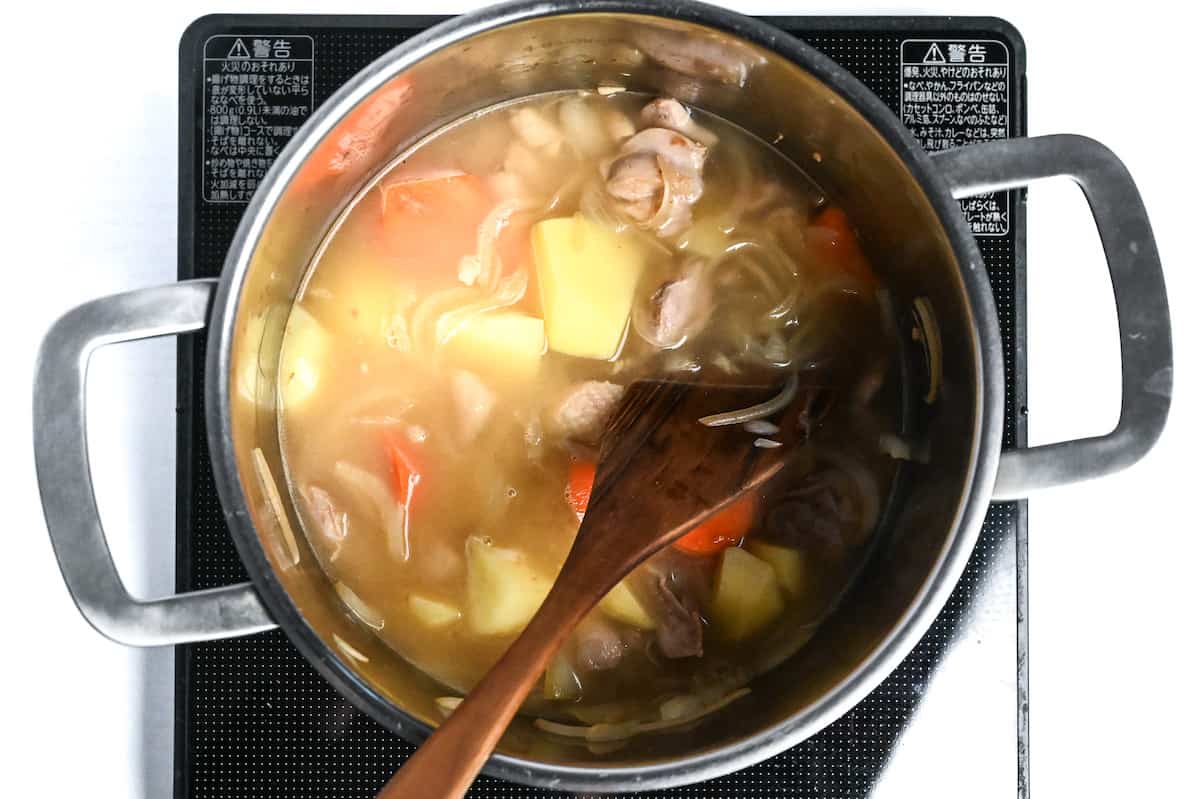
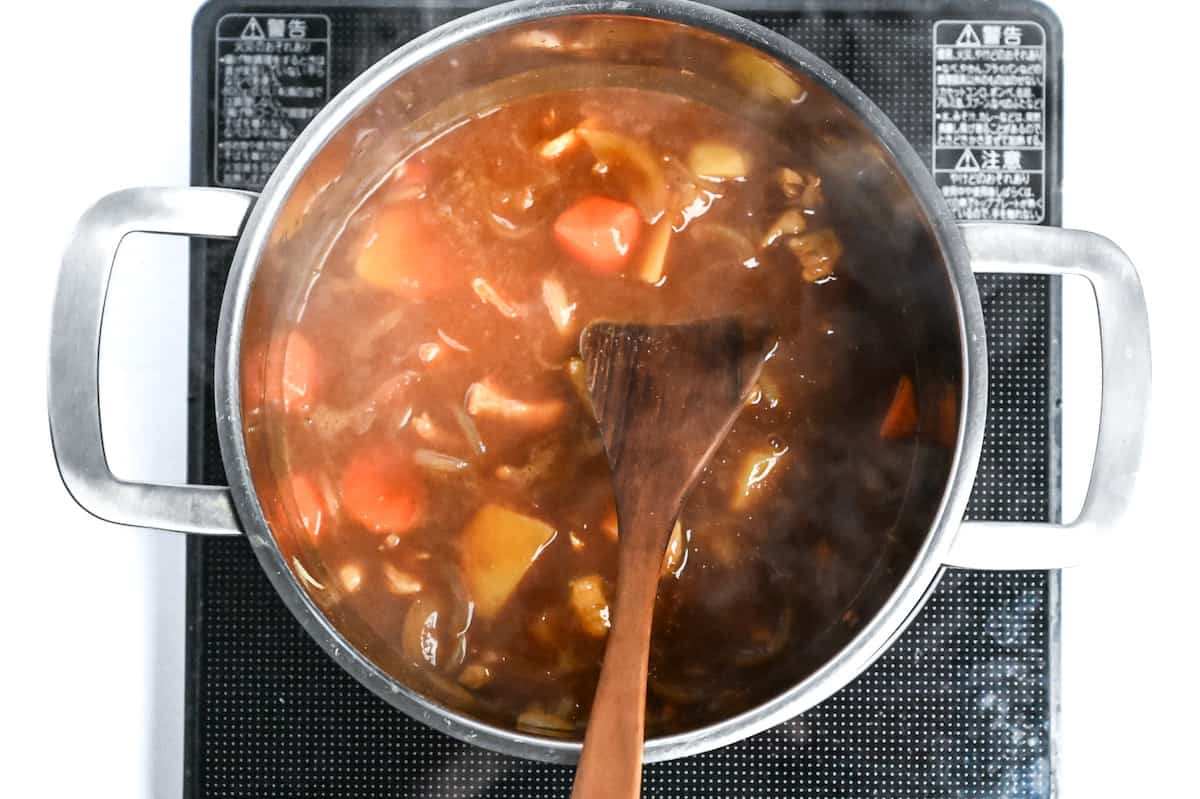
Stir in the curry roux until dissolved.
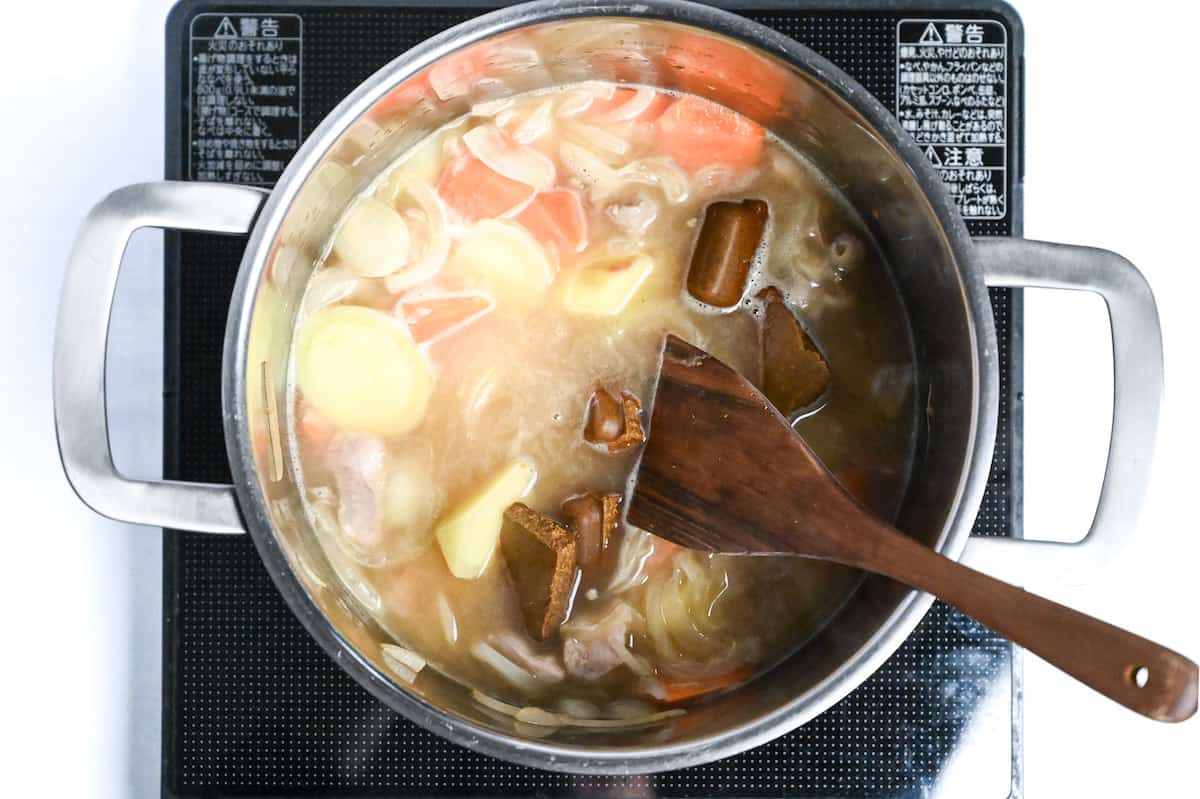
Add honey, sake, fenugreek powder, tomato ketchup, and chili powder. Mix well.
If you want to add other secret ingredients, please use them here. However, for salty ingredients, keep checking the overall saltiness as you add.
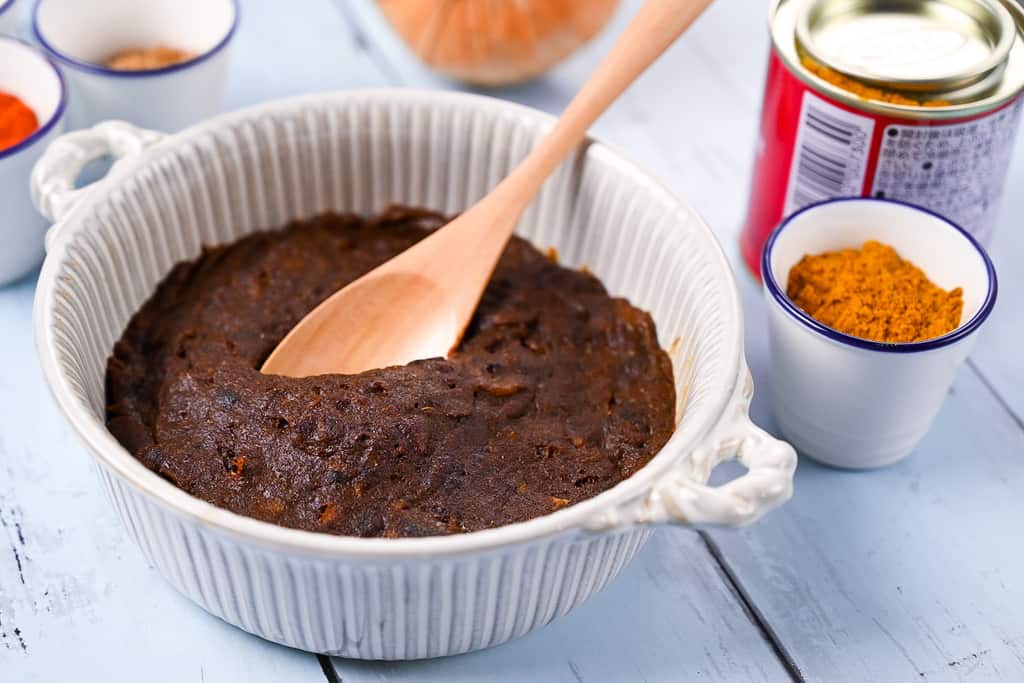
Let it simmer for 10-20 minutes or until it reaches your preferred thickness, stirring occasionally. Once it reaches your desired consistency, turn off the heat and place a lid on top to keep it warm.
While the curry simmers, start making the katsu.
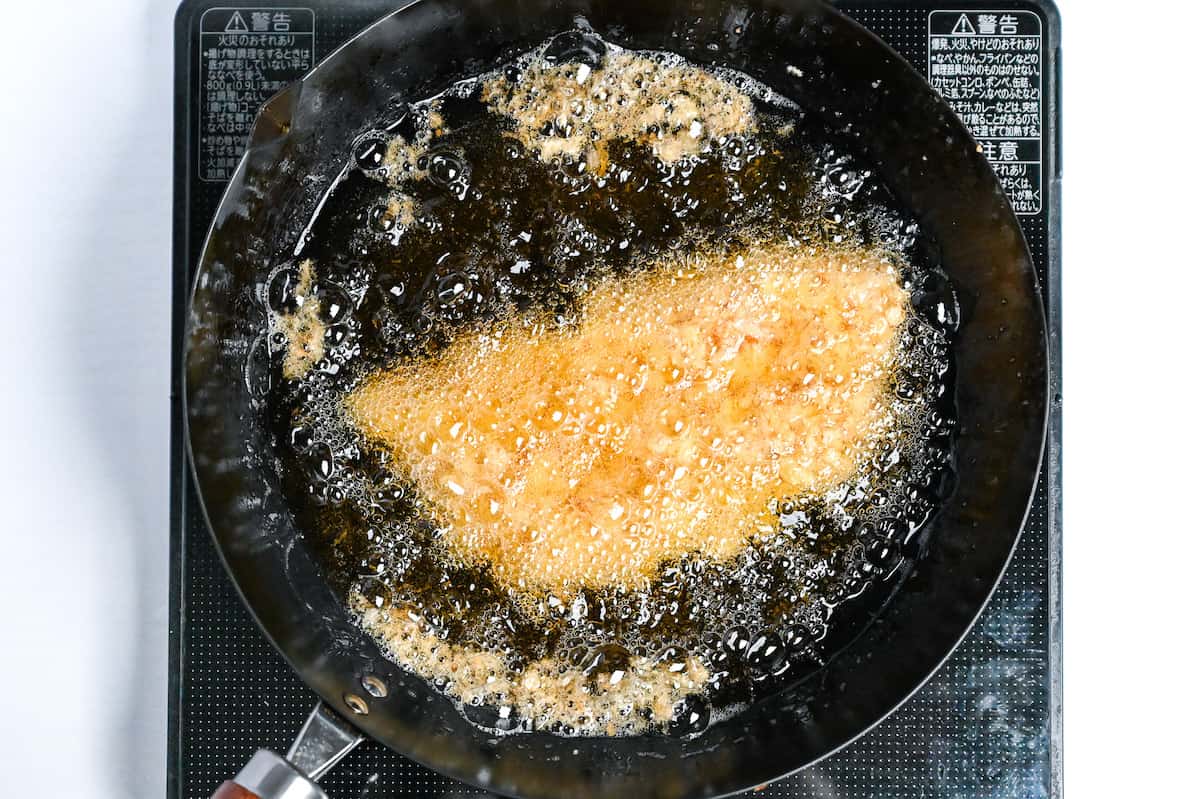
Heat your oil to 170 °C (338 °F).
Cut each large chicken breast in half horizontally, each breast will make two katsu (two servings). Season both sides with two pinches of salt and pepper.
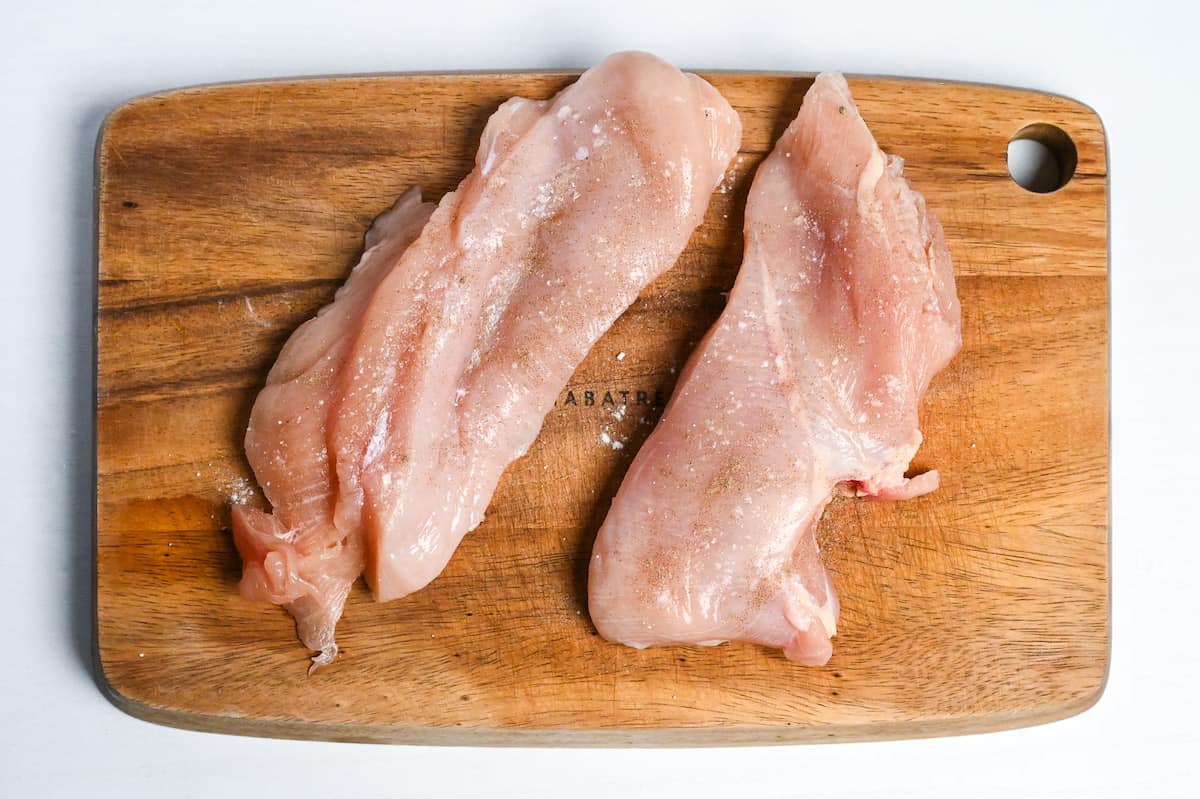
Wrap the chicken in plastic wrap and pound it until it’s about 1 cm thick using a meat tenderizer or rolling pin.

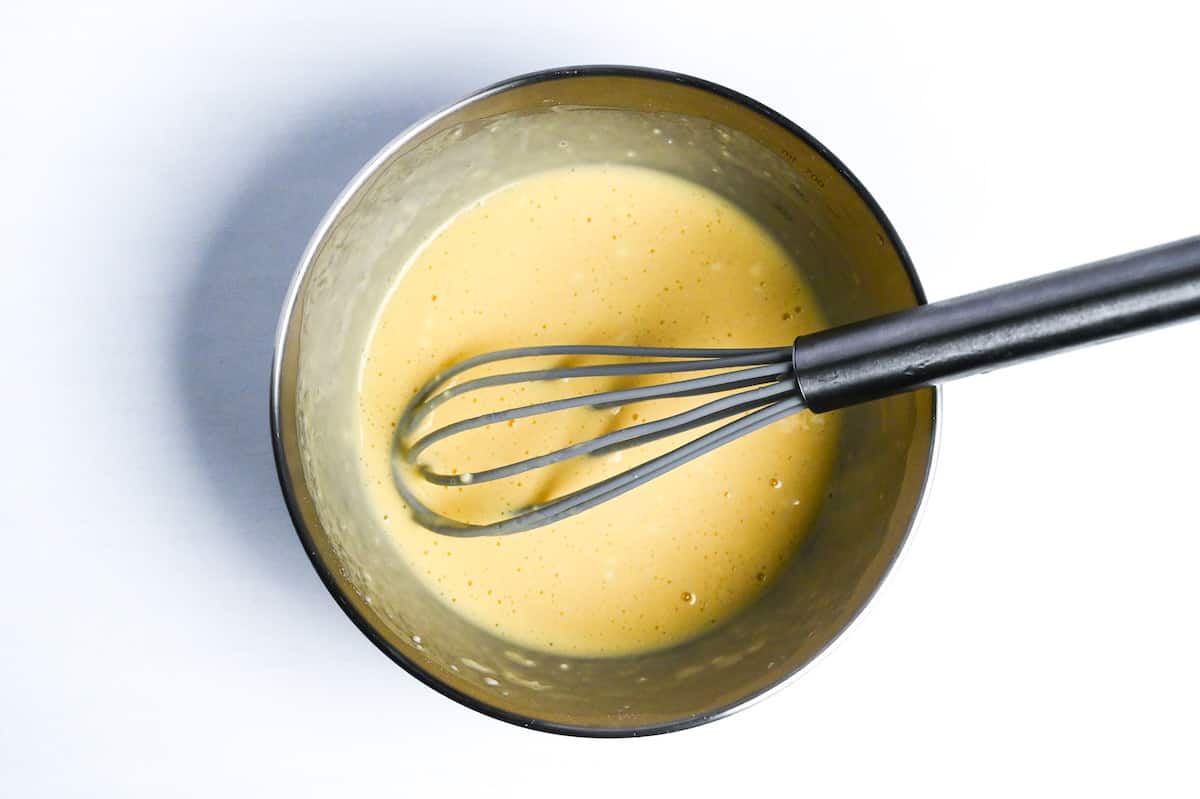
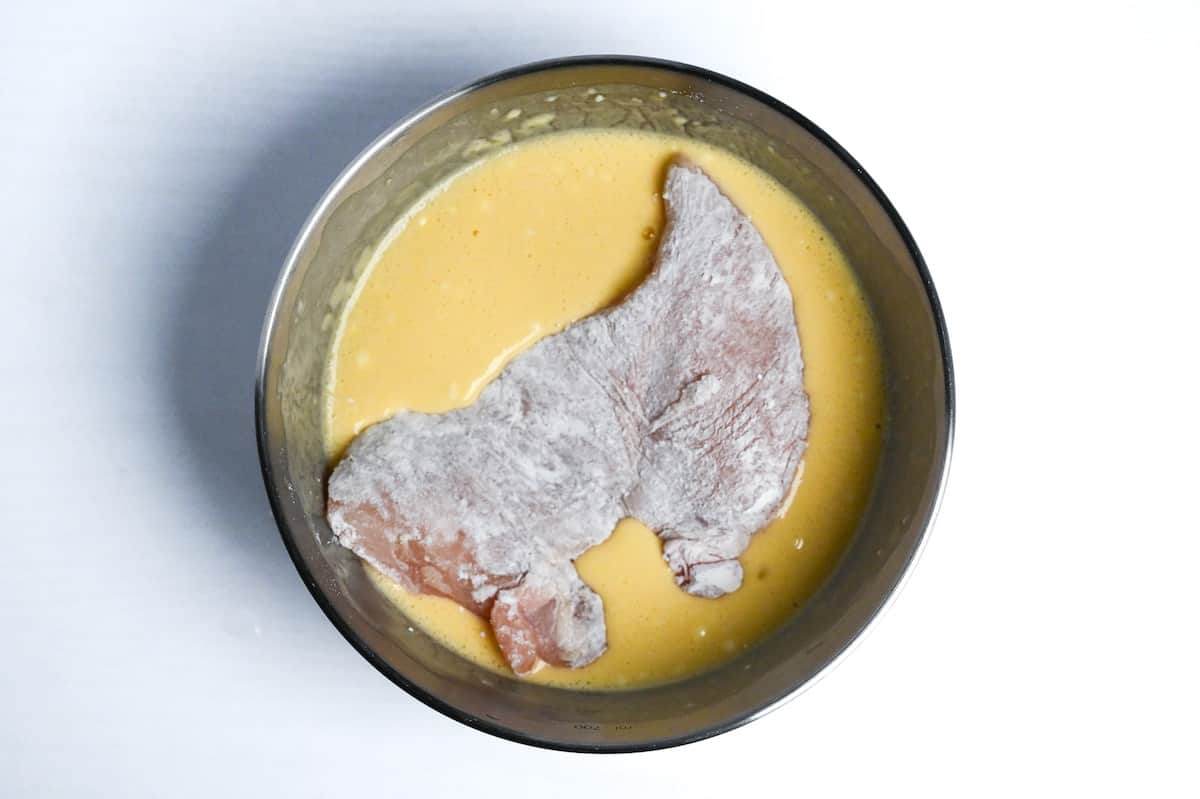
Mix water, eggs, and cake flour to form a thick batter.
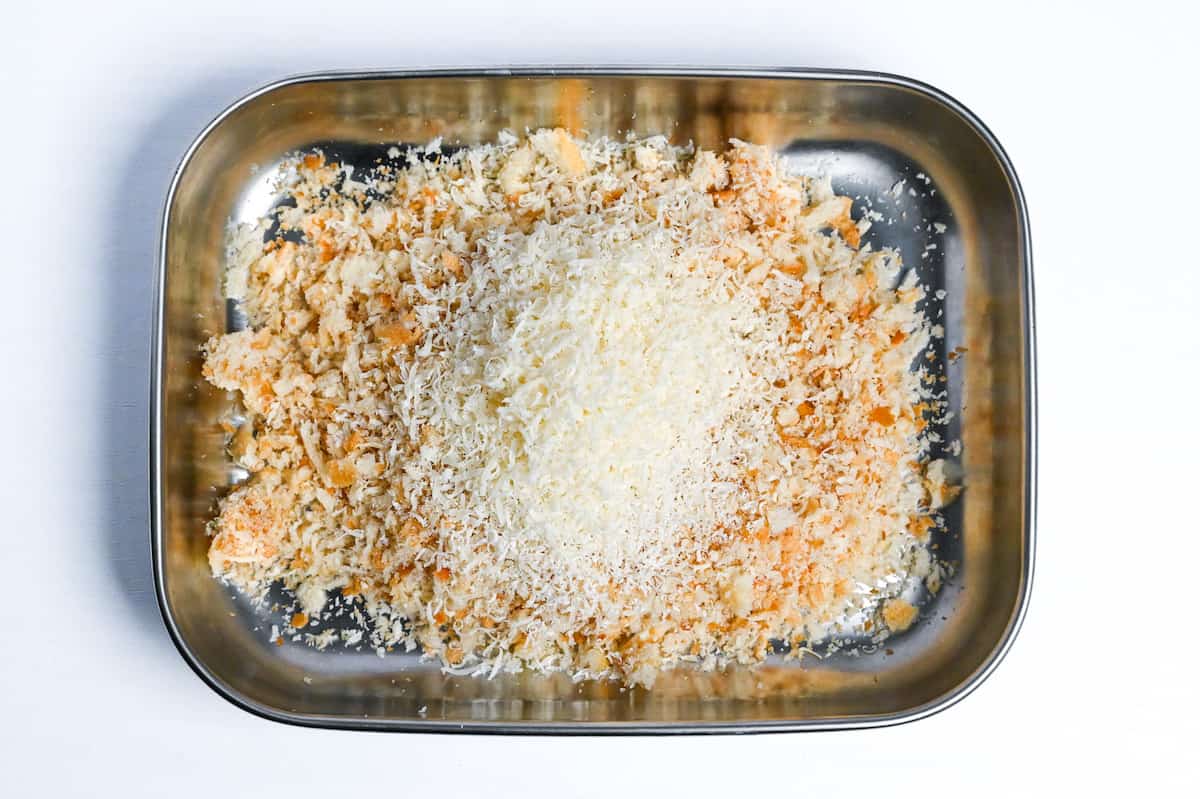
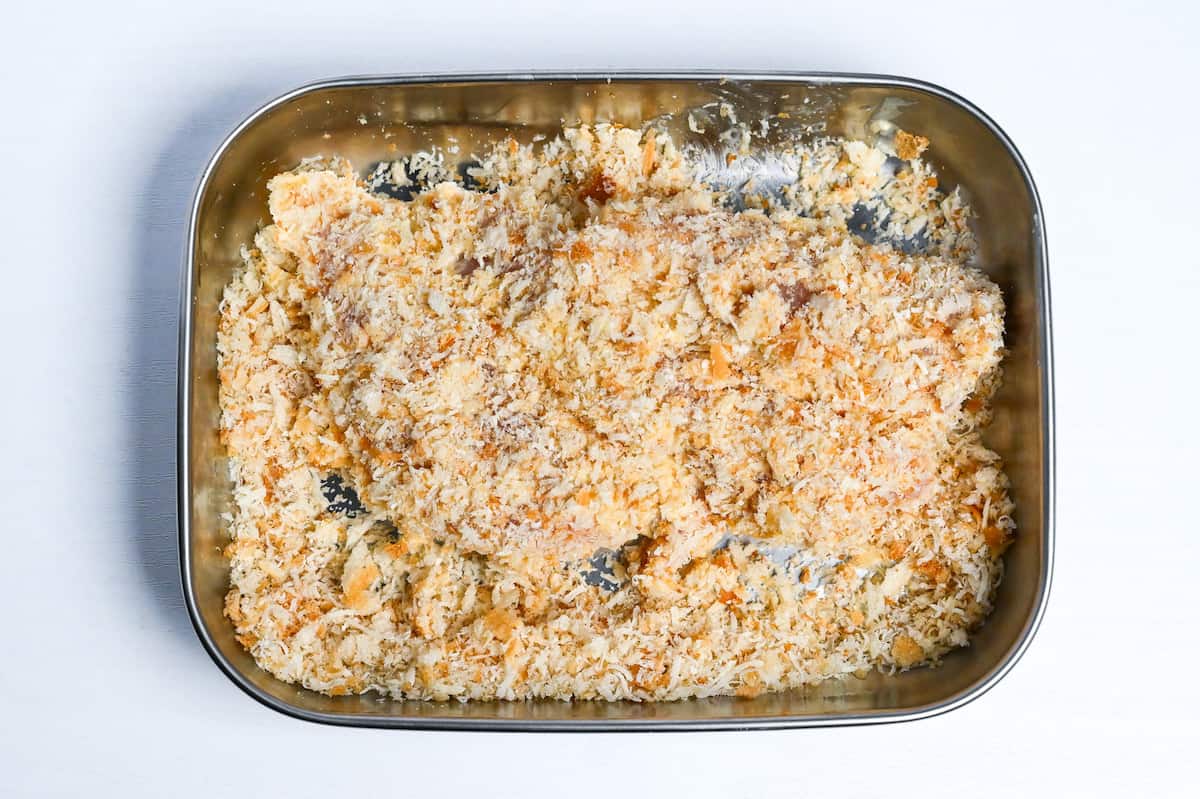
Combine panko breadcrumbs with parmesan cheese powder on a plate. I used my homemade panko breadcrumbs this time!
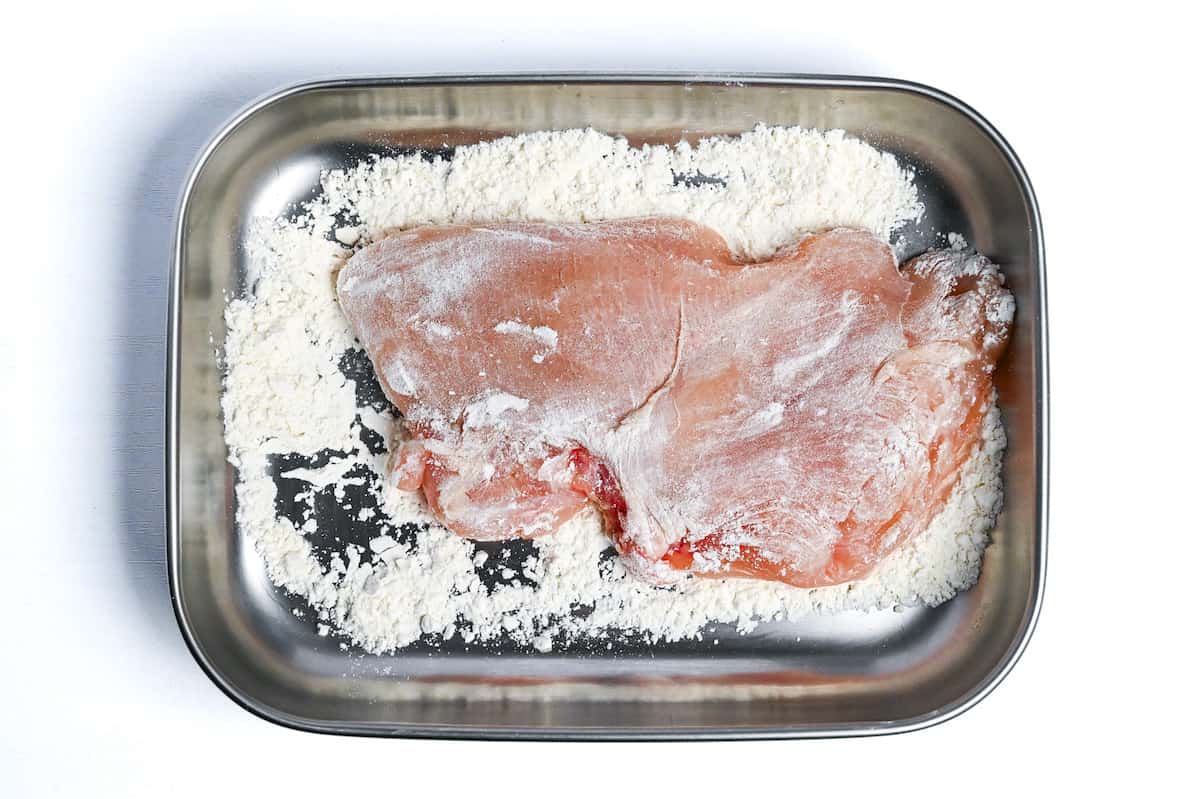
Coat the chicken evenly with cake flour, shaking off any excess.
Dip the chicken in the batter.
Then, cover it in the panko mixture, ensuring it’s fully coated.
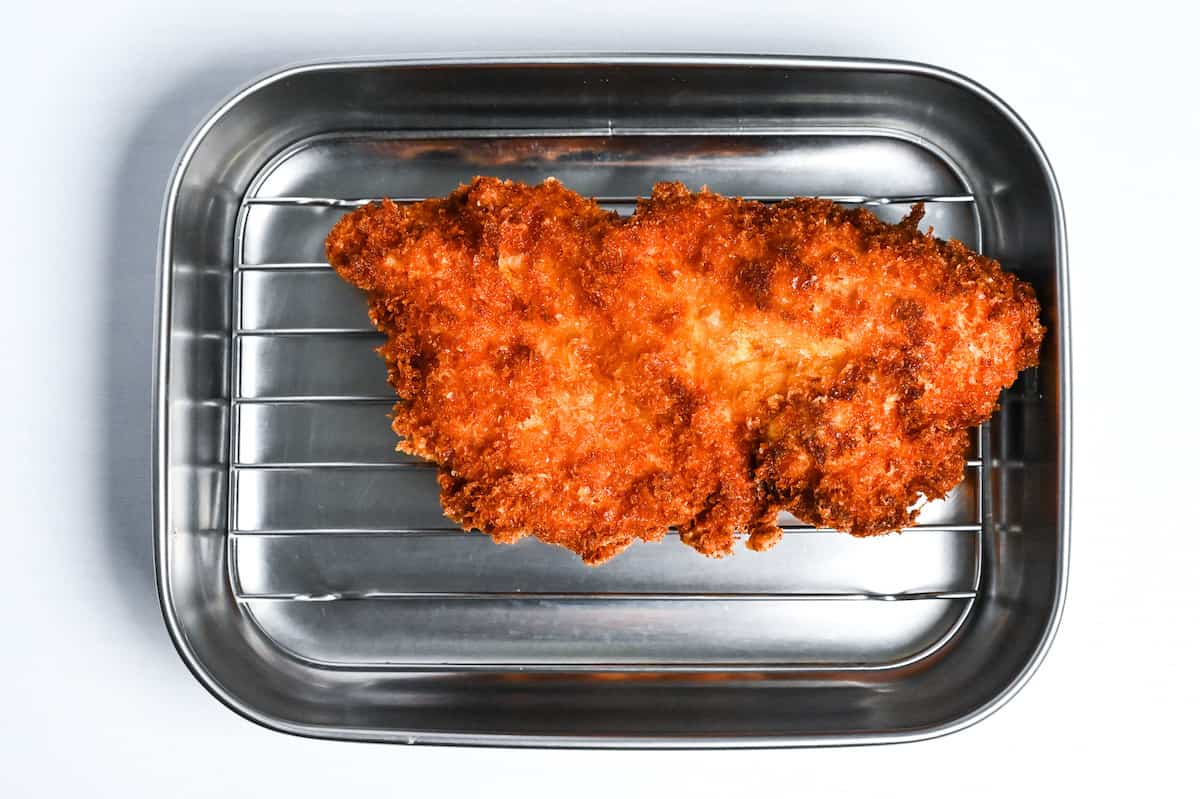
Fry the chicken for 6 minutes, turning halfway through until golden and cooked evenly.
Transfer to a wire rack to let the excess oil drip off. Allowing it to rest for a few minutes will improve the texture of the chicken and make it easier to cut later.
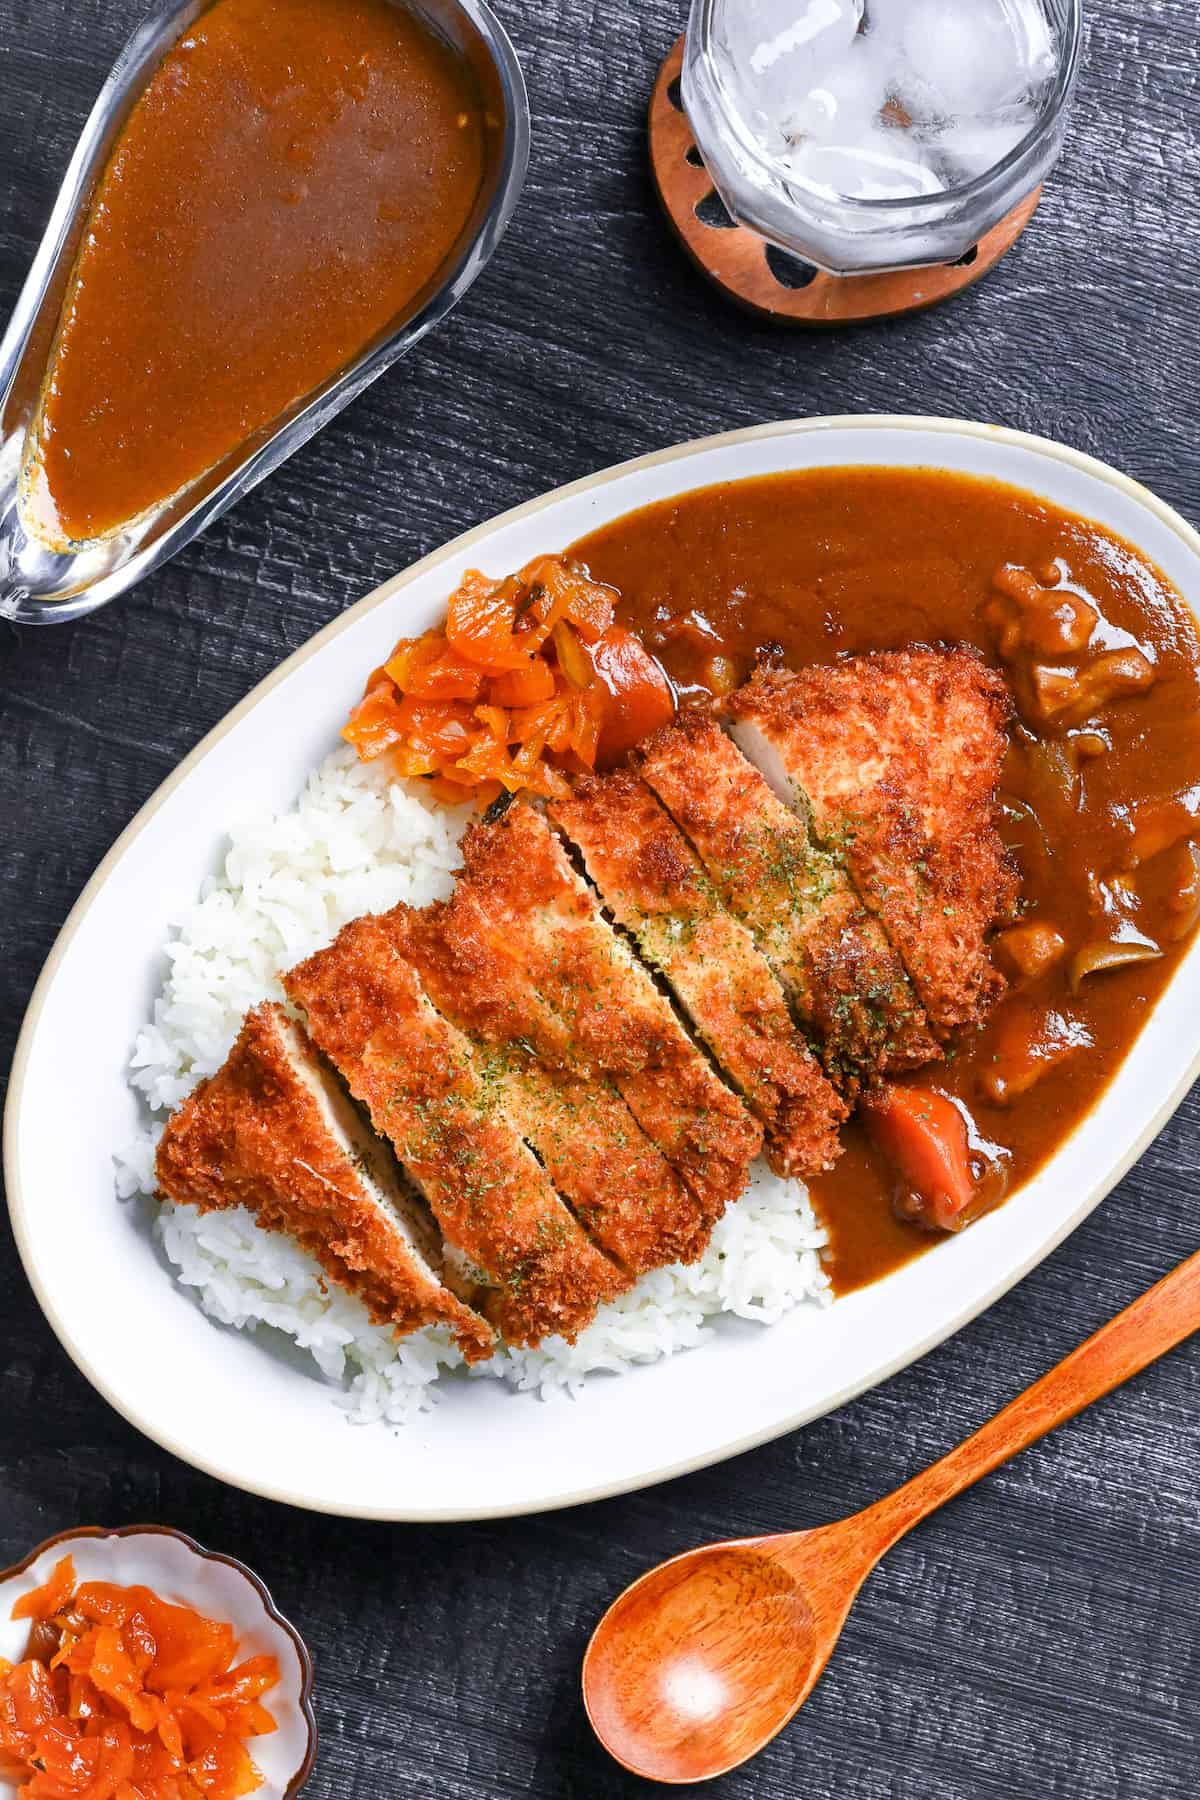
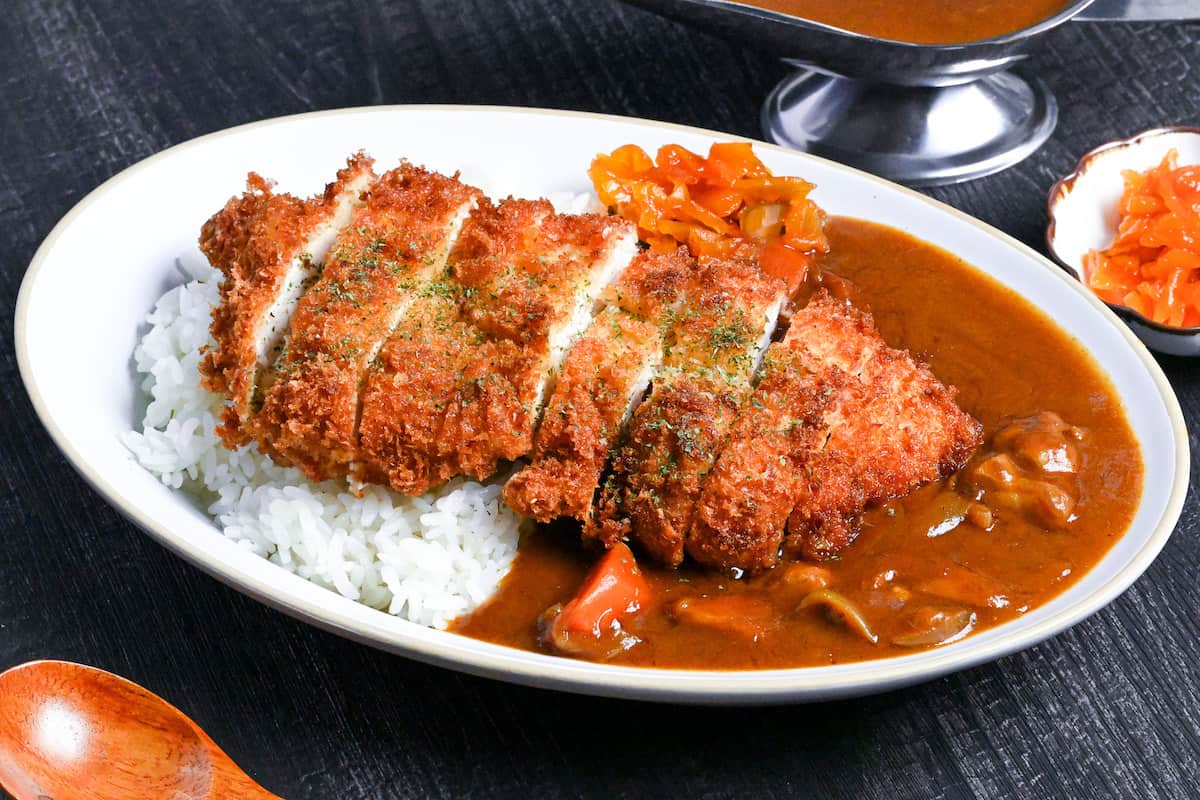
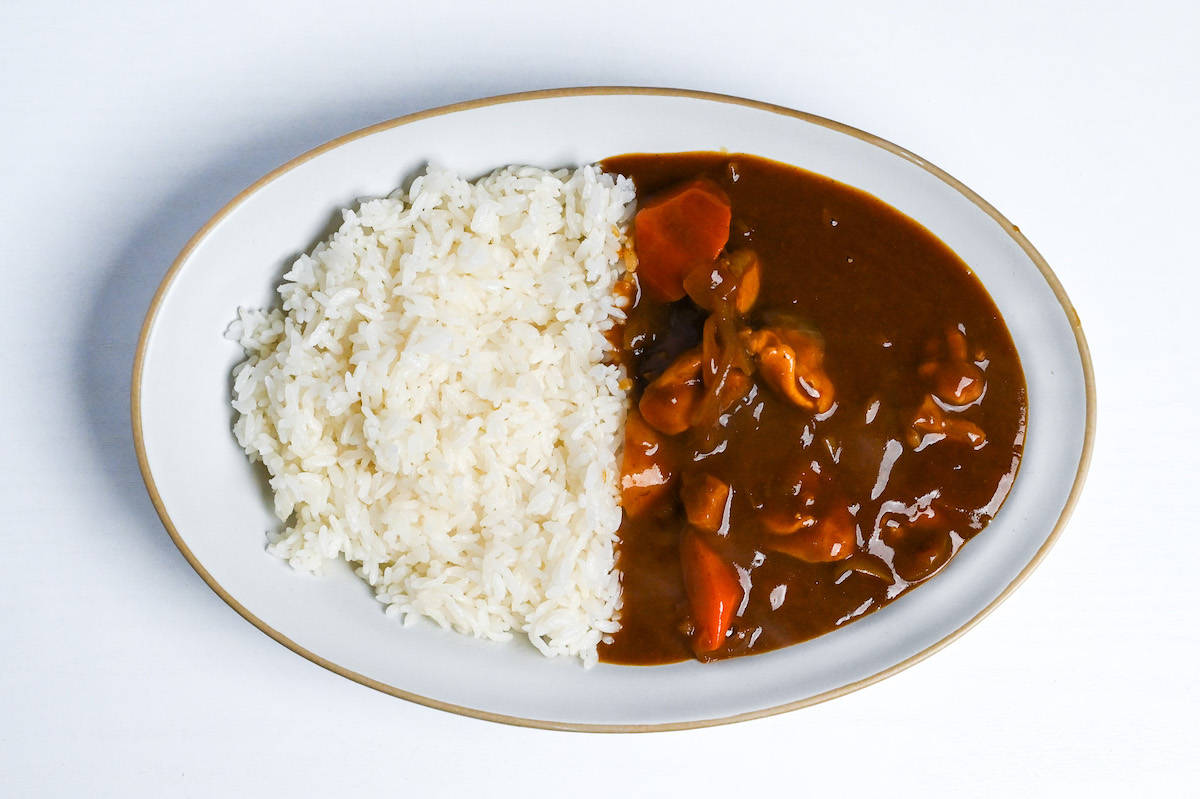
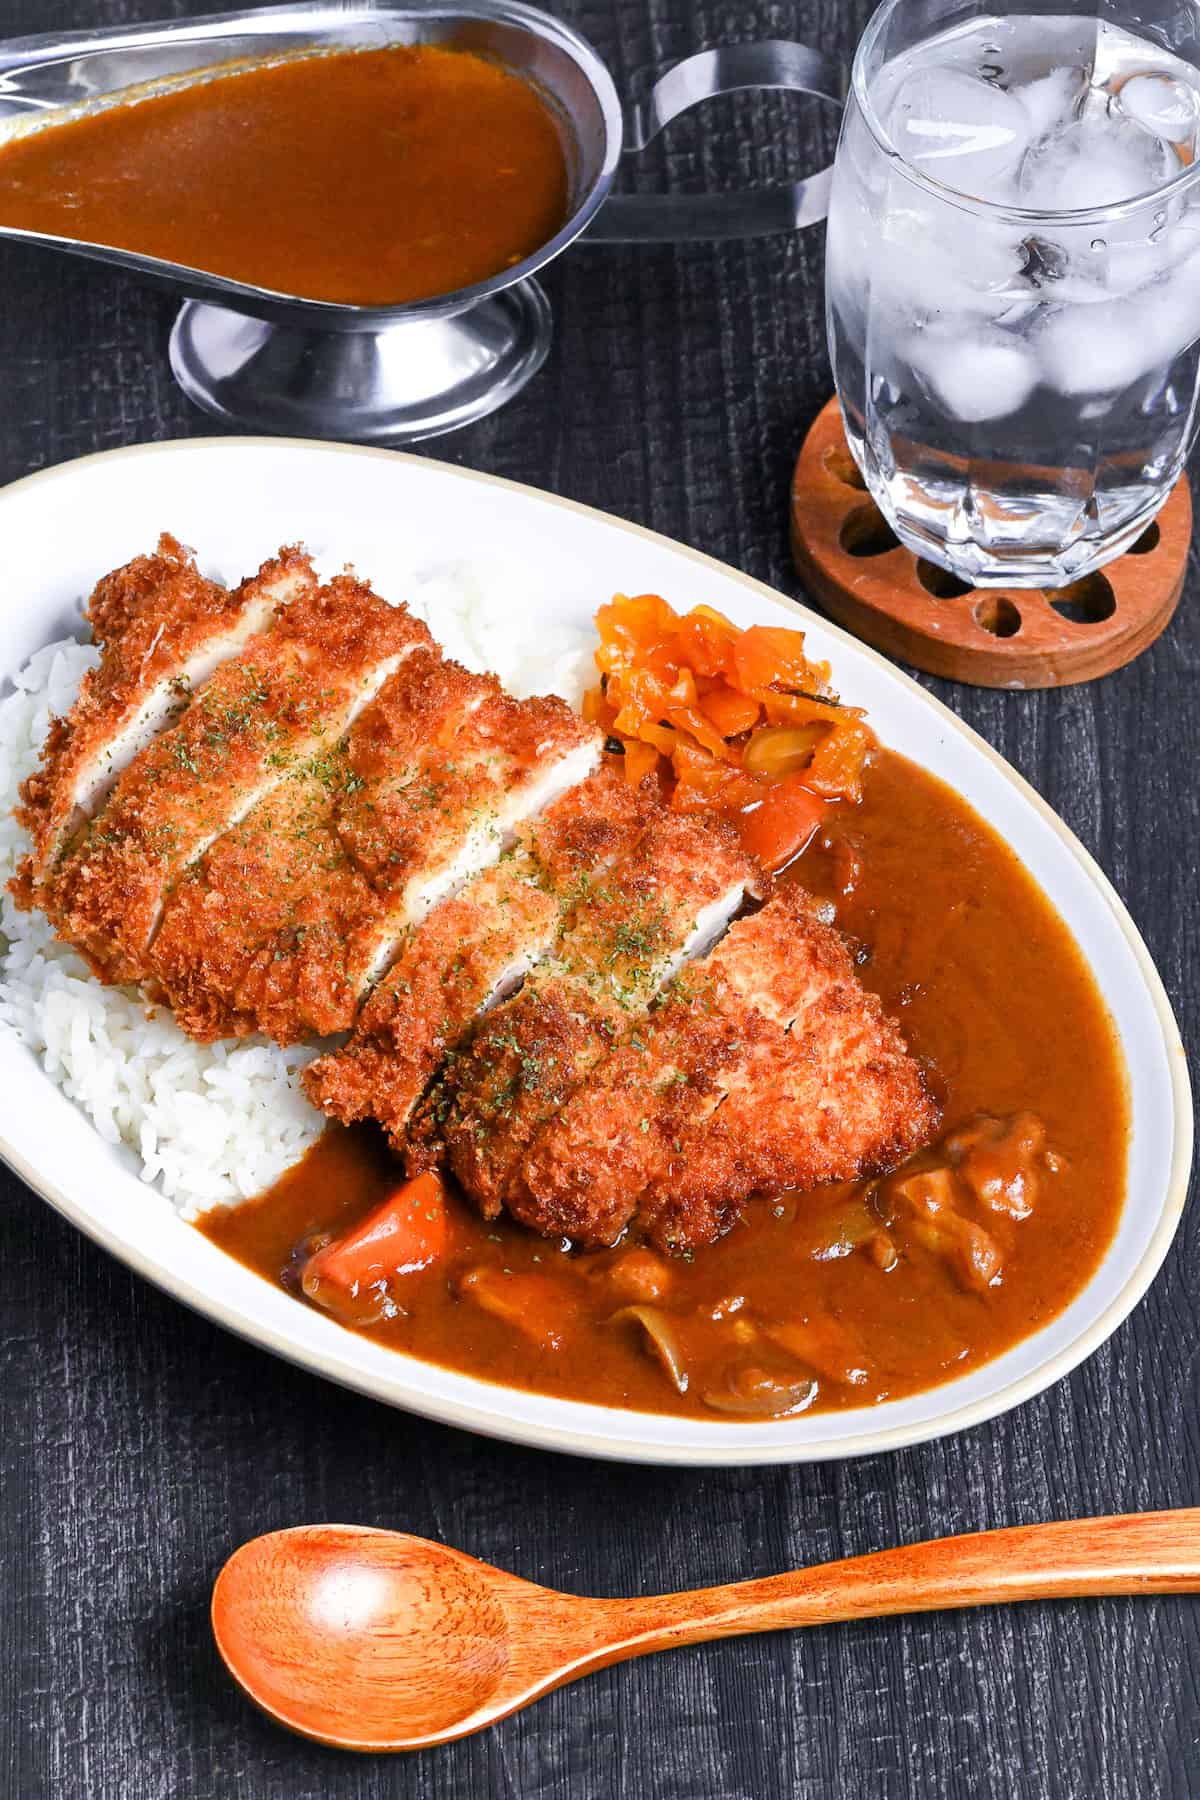
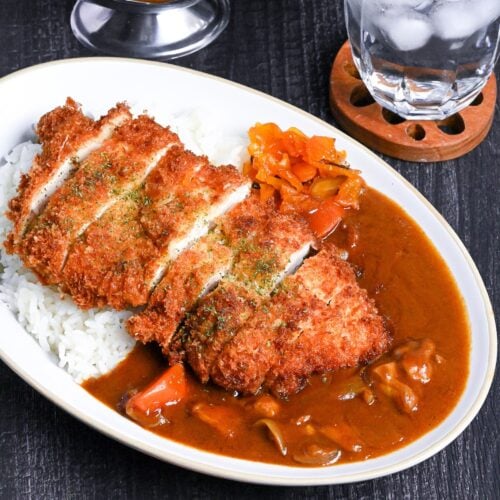
Serve rice on one side of the plate and spoon the curry onto the other.
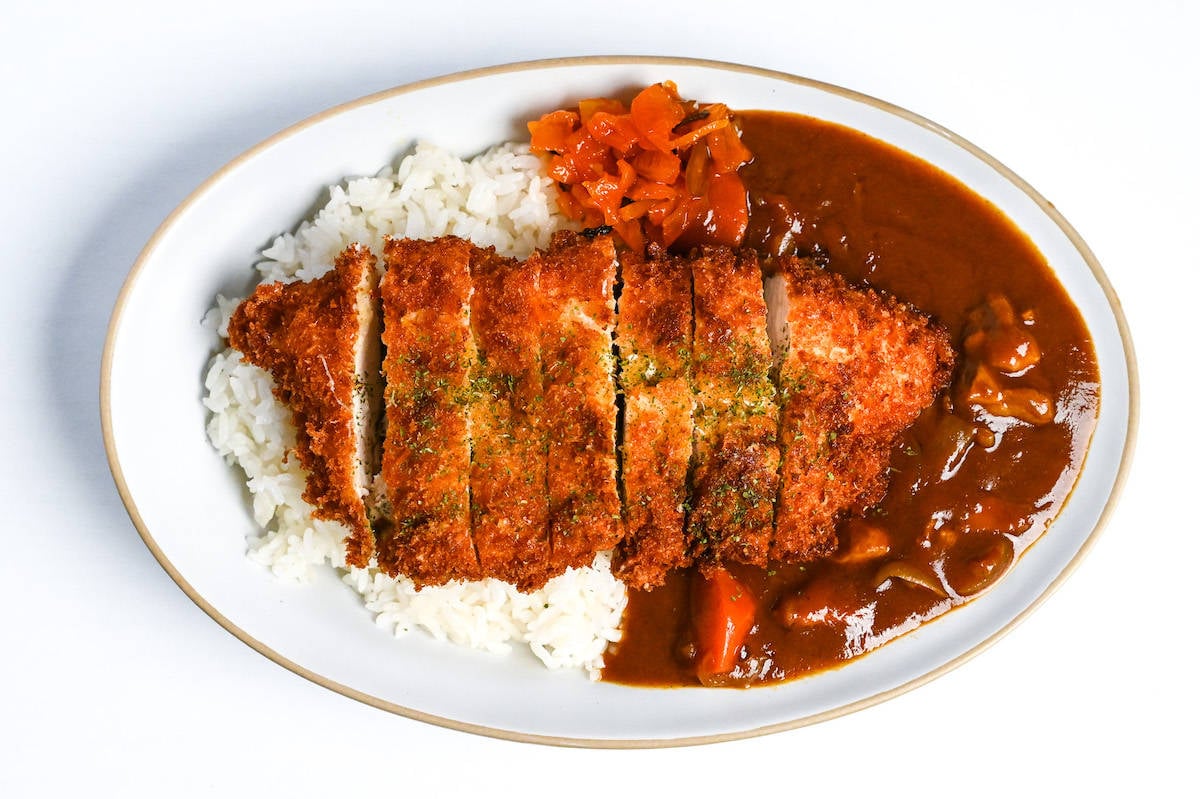
Cut the katsu into 1 cm strips and place them between the rice and curry.
Top each plate with fukujinzuke pickles. Optionally, sprinkle with parsley for a fresh garnish.
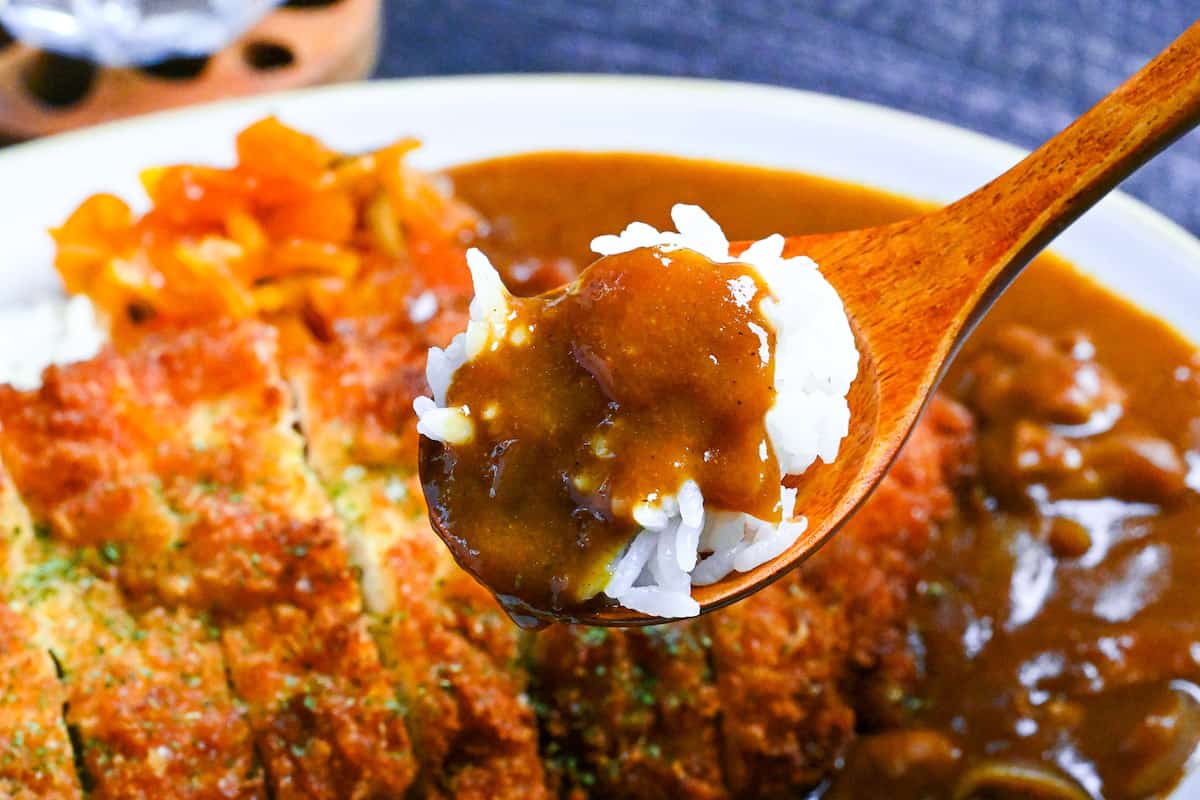
Enjoy your delicious chicken katsu curry!
How to Store
Japanese curry is the perfect dish for cooking in bulk and then eating later. It’s also perfectly safe to eat as long as you follow these storage and reheating instructions!
Storing
24-48 hours: If you plan on eating your curry leftovers within the next couple of days, you can simply let it cool and then keep it in the refrigerator in a sealed container or in the pot where you cooked it.
48 hours+: If you don’t plan to finish the curry within 2 days, it’s better to transfer the curry to a sealable glass container (plastic can be used, but it will get curry stains). Make sure to remove the potatoes; potatoes don’t freeze well in curry and tend to fall apart.
Japanese curry should be good in the freezer for about 1 month.
The katsu can also be frozen for up to 1 month in a sealable container.
Reheating
Refrigerated: If you’ve kept the curry in the same pot you cooked it in, simply reheat it on the stove. You can also bake in the oven if your dish is ovenproof; this will take about 15 minutes at 160°C or 320°F. (Keep the lid on to stop the meat from drying out).
If you put the chilled curry into containers, you can microwave it for approx 3-4 minutes, stirring every minute.
Frozen: Microwaving is the easiest way. You can defrost it first if you prefer, but it doesn’t really make any difference in the taste, only in the time. If you microwave from frozen, then it will take about 6-8 minutes. (Make sure to stir every minute after the first 3-4 minutes)
To reheat the katsu whilst maintaining the crispy texture, it is best to bake in the oven. Preheat the oven to 200°C or 400°F and bake. If it’s defrosted, it will take about 6-8 minutes, then a bit longer from frozen. Another option is to microwave it for a few minutes and then put it under the grill or toaster to crisp up the outside.
I hope you enjoy this Chicken Katsu Curry recipe! If you try it out, I’d really appreciate it if you could spare a moment to let me know what you thought by giving a review and star rating in the comments below. It’s also helpful to share any adjustments you made to the recipe with our other readers. Thank you!
More Japanese Curry Recipes
Japanese Chicken Katsu Curry and Rice

Equipment
- Japanese-style fryer
- Stainless steel cooking tray with wire rack
Ingredients
Japanese Style Curry (sweet)
- 300 g boneless chicken thigh or chicken breast
- 1 pinch salt and pepper
- 1 tbsp butter
- 1 onion
- 2 potato
- 1 carrot
- 4 servings worth Japanese curry roux homemade curry roux or boxed
- 600 ml water if using premade curry cubes, check box for water quantity
- 1 tbsp tsuyu sauce (noodle soup base)
- ½ tbsp honey
- 1 tbsp sake
- 1 pinch chili powder optional
- ½ tsp fenugreek powder
- 1 tsp tomato ketchup
Chicken Katsu
- cooking oil for deep frying
- 2 chicken breast
- 2 pinches salt and pepper
- 6 tbsp all-purpose flour
- 100 ml water
- 2 egg
- 100 g all-purpose flour
- 50 g panko breadcrumbs
- 4 tbsp grated parmesan cheese
To Serve
- 4 portions cooked Japanese short-grain rice see my post for how to cook Japanese rice on the stove
- fukujinzuke pickles optional
- fresh parsley optional
The ingredient brands and tools I trust are in my Japanese pantry guide and my cooking tools guide.
Can’t find certain Japanese ingredients? See my substitution guide here.
Instructions
Japanese Chicken Curry
- Cut 300 g boneless chicken thigh into bitesize pieces and sprinkle with 1 pinch salt and pepper

- Thinly slice 1 onion, and peel and cut 2 potato and 1 carrot into rough bite-size pieces.
- Heat a large pot on medium and melt 1 tbsp butter. Add the chicken pieces and fry until sealed on the outside.
- Once sealed, add the sliced onion and cook until slightly softened.
- Next, add the potato and carrot along with 1 tbsp tsuyu sauce (noodle soup base). Mix over the heat for about 1 minute.
- Add 600 ml water and bring to a boil. (If using boxed curry, check the instructions for the correct amount of water.)
- Lower the heat to simmer and add the 4 servings worth Japanese curry roux. Mix it until it's completely dissolved.
- Add ½ tbsp honey, 1 tbsp sake, ½ tsp fenugreek powder, 1 tsp tomato ketchup and 1 pinch chili powder. Mix well and simmer for 10-20 minutes or until it reaches your preferred thickness. Once thickened, turn off the heat and place a lid on top to keep it warm. You can make the katsu while it simmers, but keep an eye on it and stir it occasionally.
Making katsu
- Heat your cooking oil to 170 °C (338 °F). While it heats, cut 2 chicken breasts in half horizontally and sprinkle with 2 pinches salt and pepper on both sides.
- Wrap the chicken in plastic wrap and use a meat tenderizer or rolling pin to pound it until it’s 1cm thick. (about 1/2 inch)
- In a bowl, mix 100 ml water, 2 egg and 100 g all-purpose flour to make a thick batter.
- Add 50 g panko breadcrumbs and 4 tbsp grated parmesan cheese to a plate, and mix them together.
- Pour 6 tbsp all-purpose flour onto a plate and coat the surface of the chicken. Brush off any excess to ensure the coat is even.
- Once the oil is ready, dip your chicken into the batter.
- Cover the chicken in the panko mixture, making sure it's fully covered, before placing it straight in the oil.
- Fry for 6 minutes (or until golden) turning the katsu over halfway through to make sure it’s evenly cooked.
- Transfer to a wire rack and allow any excess oil to drip off.
Serving
- Dish up your rice on one side of the plate, and spoon the curry onto the other side.
- Cut the katsu into 1cm strips and place it in the middle of the rice and curry. Garnish with fukujinzuke pickles and a sprinkle of fresh parsley.
- Enjoy!
Leave a rating and a comment