

Disclaimer: This post may contain Amazon affiliate links. Sudachi earns a small percentage from qualifying purchases at no extra cost to you. See disclaimer for more info.
Featured Comment:
Thank you for this recipe. For me, this one is the most successful one I tried (and I tried many!). Very well-balanced. I used the vet-sin (MSG) which makes the taste very dynamic.
– Alex
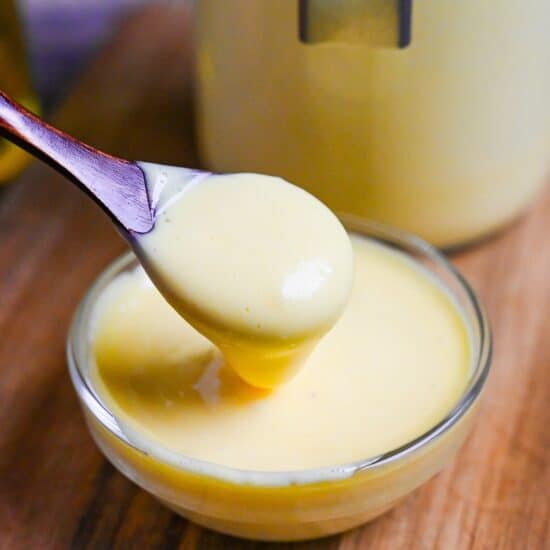
What is Japanese Style Mayonnaise?
If you’ve ever lived or visited Japan, you probably know there’s something special about Japanese mayonnaise. You can’t forget that rich, tangy creaminess, whether you’ve had it in Japan or at your favorite Japanese restaurant.
Mayonnaise came from Menorca, Spain, and then spread all over the world. But when it got to Japan in 1925, something amazing happened. The company that brought it there later became Kewpie. Now, it’s a cultural icon with its unique squeeze bottle and baby logo! It’s a symbol that represents more than just a condiment; it is a cornerstone of modern Japanese food identity.
The secret lies in its unique composition. Japanese mayonnaise distinguishes itself through three key characteristics:
- Often Egg Yolks Only: Unlike other versions that use whole eggs, many Japanese manufacturers make exclusively with egg yolks which gives it a richer, creamier flavor.
- Rice Vinegar Base: The use of rice vinegar, as opposed to distilled vinegar.
- Umami Boost: The addition of flavor enhancers, often MSG, amplifies the savory notes, creating a more pronounced umami taste.
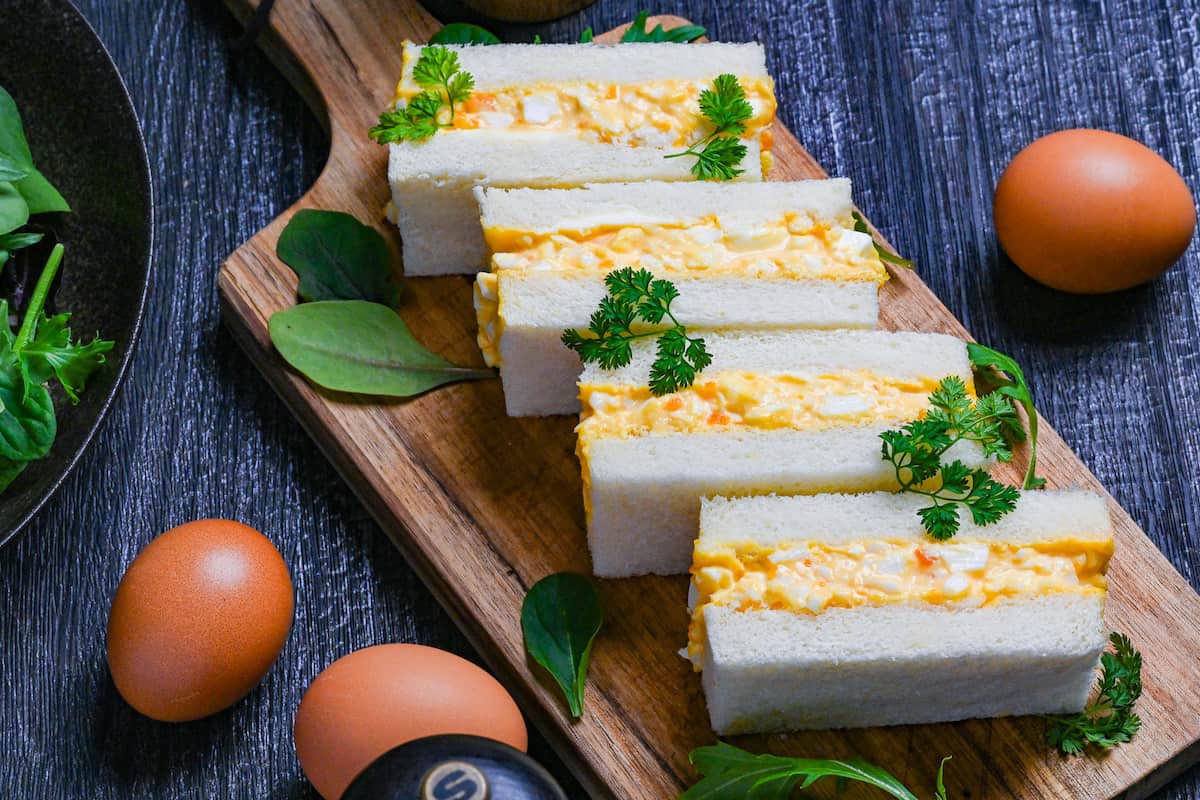
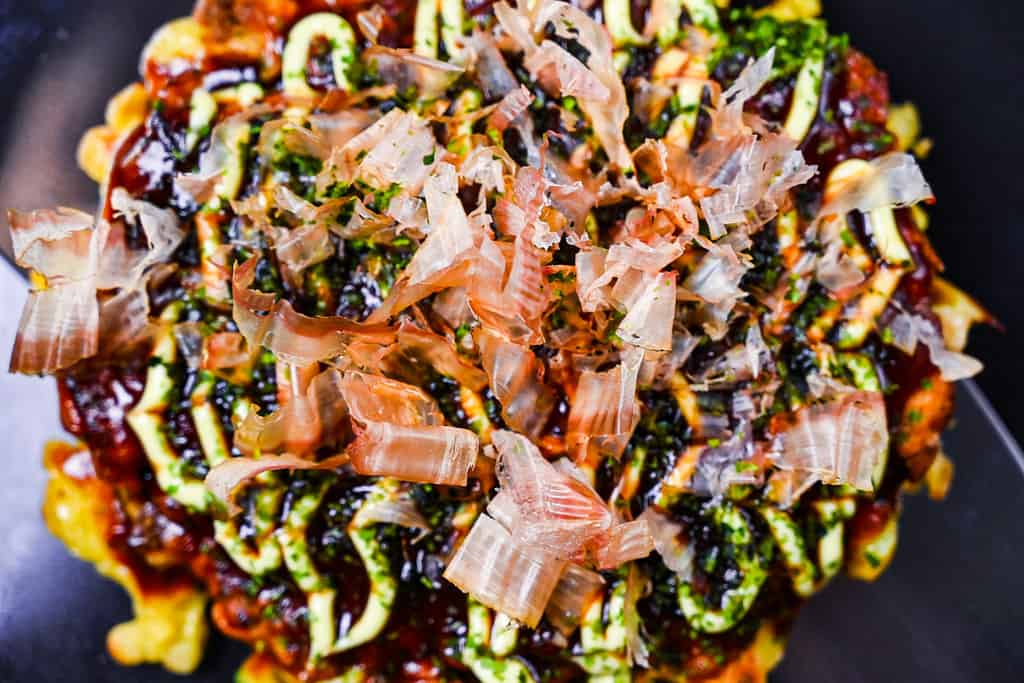
These elements combine to create a mayonnaise that’s tangy yet sweet, rich yet balanced-a condiment that elevates everything from egg sandwiches to potato salads, and even finds its way into uniquely Japanese dishes like okonomiyaki and takoyaki.
Truth: Relationship Between Japanese Mayonnaise and MSG
I’m not going to sugarcoat it, so let’s talk about a somewhat controversial ingredient: MSG (monosodium glutamate).
Before we get into the Japanese mayonnaise recipe, I want to clarify a few things. I’m neither a supporter nor an opponent of MSG. While I don’t use it in my cooking, I respect that it’s a personal choice for many home cooks. At the end of the day, isn’t the joy of cooking about creating flavors that you like?
Today, I’m recreating the much-loved Japanese mayonnaise, specifically the iconic Kewpie mayo. This recipe marks a first for me – I’ve included a small amount of MSG. Why? It’s just not possible to get the real Kewpie mayo taste without it.
Just so you know, the Kewpie mayo label lists “seasoning (amino acid)” as an ingredient, which is basically just another vague way to say MSG.
If you’re not comfortable using MSG, don’t worry. I’ve also made a version without it. While it doesn’t exactly mimic the Kewpie flavor profile, it’s delicious in its own right. This recipe is all about options and finding what works best for you.
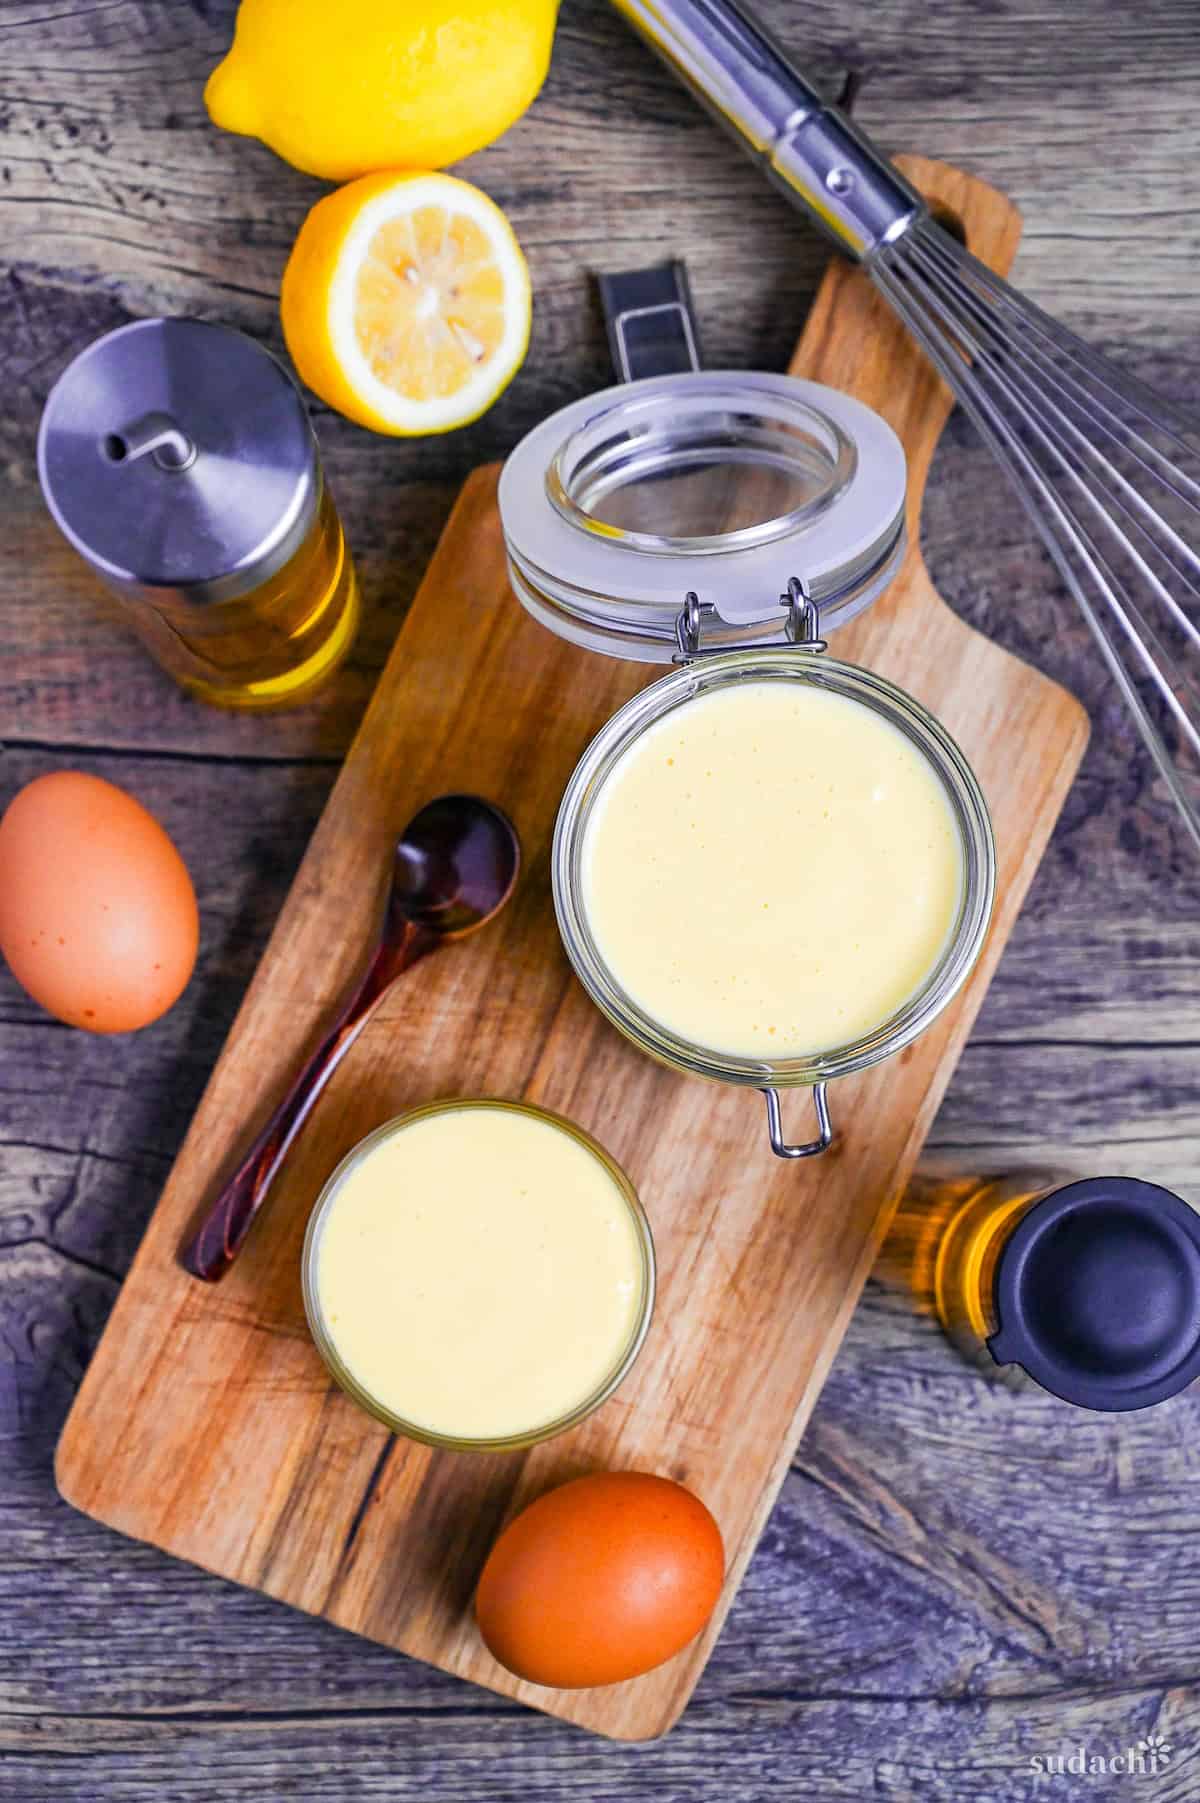
Key Ingredients & Substitution Ideas
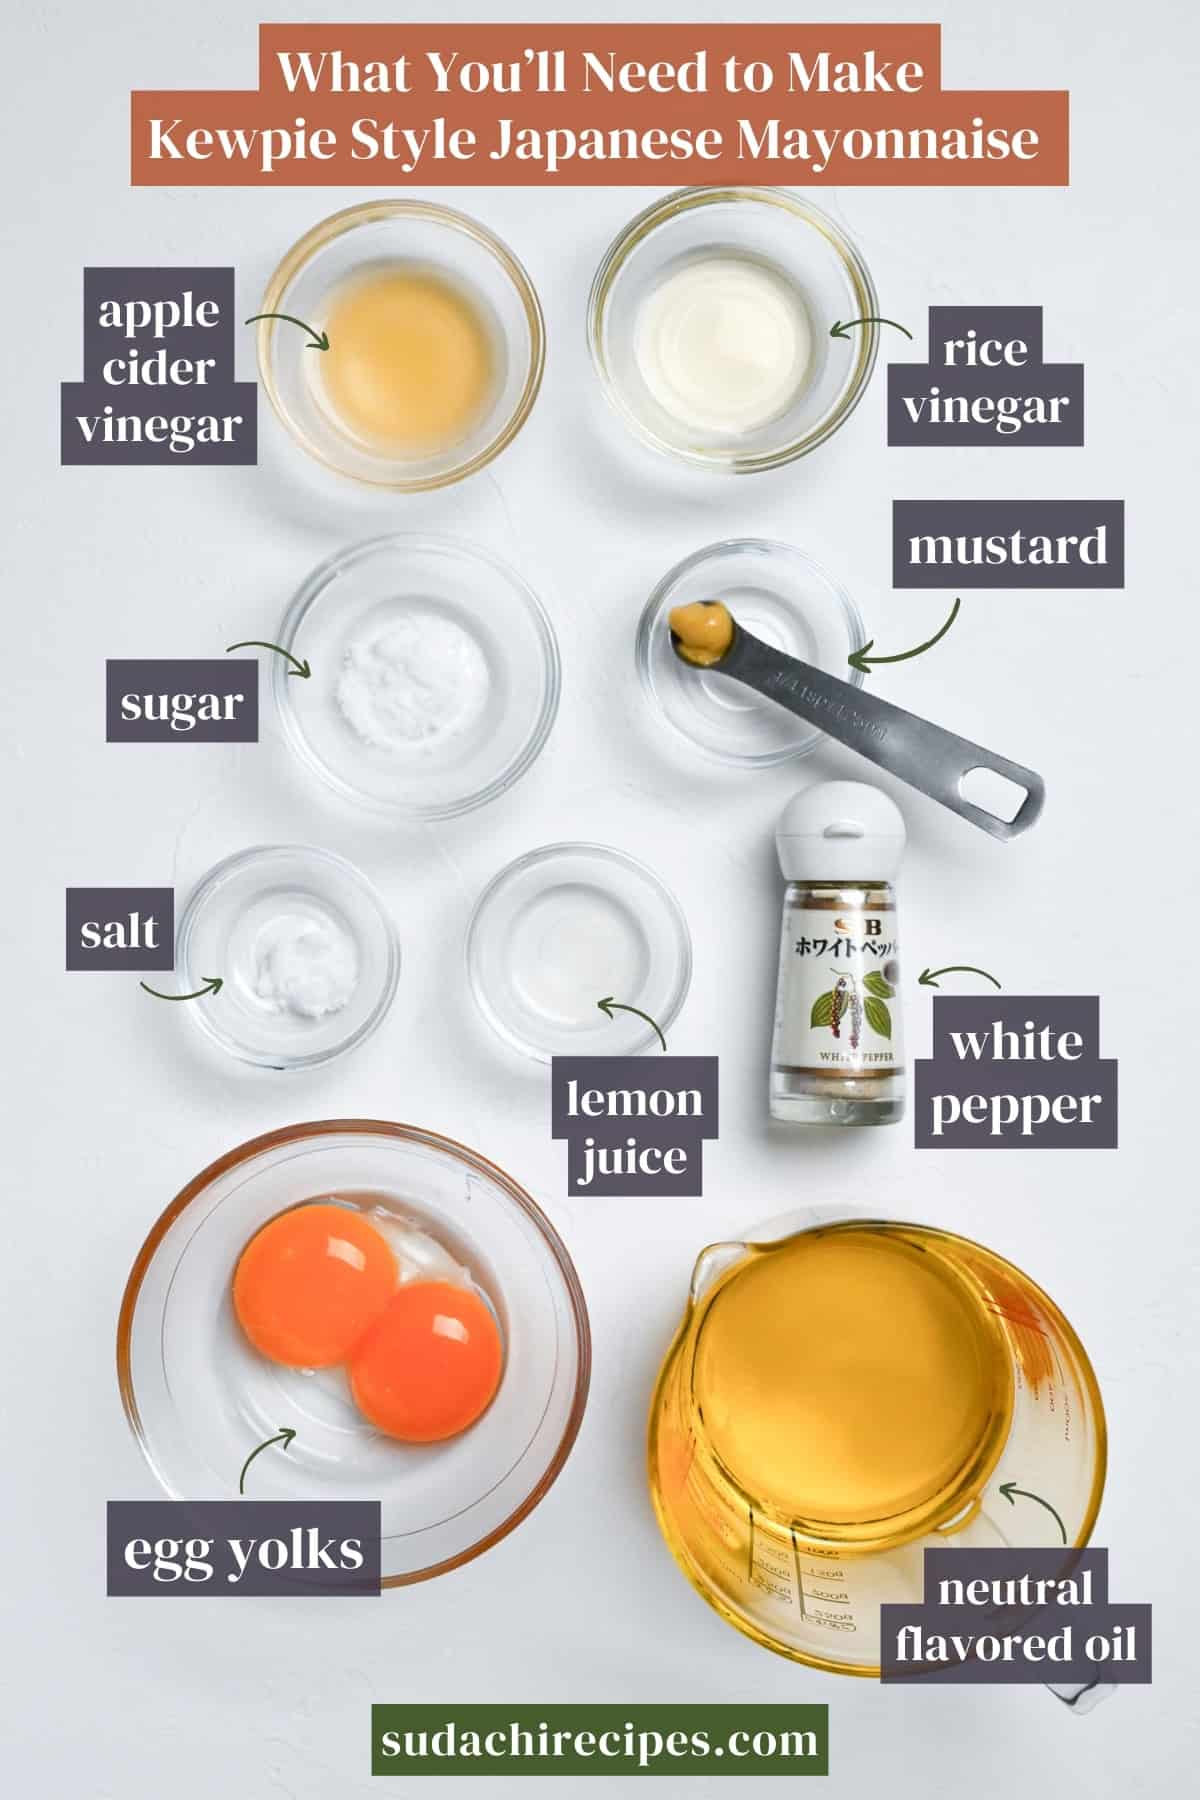
- Egg yolks: The foundation of authentic Japanese mayonnaise and the secret to its rich, custard-like texture. Use only pasteurized eggs since they won’t be heat-treated. Ideally, use a yolk separator rather than the shells to separate. This further prevents contamination.
- Japanese mustard & smooth Dijon mustard: The Japanese mustard delivers clean, sharp heat while Dijon provides subtle depth and helps stabilize the emulsion through its natural mucilage. This blend closely mimics the “spice extracts” mentioned in Kewpie’s ingredient list.
- Rapeseed oil: The choice of oil dramatically affects the final taste. While any neutral-flavored oil will work, rapeseed oil most accurately matches Kewpie’s proprietary blend of vegetable oils (rapeseed, soybean, and others).
- Rice vinegar & apple cider vinegar: Kewpie’s distinctive tang comes not from rice vinegar alone but from a special blend of vinegars. They use their own custom “mayonnaise vinegar” made from fermented apple juice and malt. Our recipe replicates this by combining rice vinegar’s gentle sweetness with apple cider vinegar’s complex, fruity acidity.
- Ajinomoto (MSG) (optional): As we discussed earlier, it is not possible to completely recreate the taste of Kewpie without some MSG. However, if you don’t want to use it, you can simply leave it out or even use dashi granules instead.
- Other ingredients: Salt (enhances flavor and acts as a natural preservative), lemon juice (adds brightness and helps stabilization), white pepper (provides subtle warmth without visible specks), and sugar (balances acidity- Kewpie itself doesn’t list sugar in its ingredients but has a natural sweetness from its vinegar blend).
Visual Walkthrough & Tips
Here are my step-by-step instructions for how to make Japanese-style mayonnaise at home. For ingredient quantities and simplified instructions, scroll down for the Printable Recipe Card below.
If you prefer to watch the process in action, check out my YouTube video of this mayo recipe for a complete visual walkthrough!

Before you get started, make sure your egg yolks are at room temperature. This is super important for getting those emulsions right. And when you’re doing this, try to use a glass or ceramic bowl instead of a metal one. Metal can mess with the flavor and can make things go bad faster.
When egg yolks are cold, their proteins don’t move around as much, which makes them less able to emulsify. But when ingredients are at room temperature, the lecithin in egg yolks (the natural emulsifier) can more effectively coat tiny oil droplets and prevent them from combining with each other.
Whisk the egg yolks, both mustards, and a pinch of sea salt until the mixture becomes slightly pale and thickened. This first mix creates a stable base for your mayonnaise by breaking down the proteins in the egg yolks, allowing them to better coat the oil droplets.

Start by adding just 3-4 drops of oil along the edge of the bowl while whisking continuously. Continue with very small amounts (about 1/4 teaspoon at a time) for the first minute. It’s important to be patient at the beginning because rushing this step is the most common cause of broken mayonnaise.

The emulsion forms when the lecithin in the egg yolks wraps around tiny oil droplets, keeping them suspended in the water-based components. This creates a stable mixture that would normally separate. By the time you’ve added about 2 tablespoons of oil, the mixture should look noticeably thicker and slightly lighter in color.
What’s happening here is interesting. The tiny oil droplets are getting spread out and suspended in the egg yolk mixture, and each one is covered by proteins and lecithin. Companies like Kewpie make oil droplets as small as 2-4 micrometers, but even at home, we can get a stable emulsion with a bit bigger droplets. Just remember, the smaller the droplets, the smoother and richer your mayo will be.
As the mixture starts to come together, you can gradually increase the amount of oil you add each time. Continue whisking energetically until you’ve incorporated half of the oil and the mixture has thickened considerably.
If you’re making this on a very hot day or whisking for a long time, occasionally place your mixing bowl over an ice bath for a few seconds. Excessive heat can destabilize your emulsion and affect the final texture.
Once you’ve added half the oil and achieved a thick, stable consistency, mix the apple cider vinegar and rice vinegar in a small bowl. Gradually add half of this vinegar mixture along the walls of the bowl, whisking in the same manner as you did with the oil. The vinegar adds tanginess and helps stabilize the emulsion.

Adding acid too early can destabilize the emulsion, but adding it at this stage helps maintain the perfect texture while incorporating that signature Japanese tanginess.
This is where my recipe takes a different route from the others. It’s because Kewpie doesn’t actually make mayo using just rice vinegar. Back in 1962, they created a “special vinegar blend for mayo” using ingredients like apple juice and malt in-house ironically to recreate Western mayonnaise. They actually didn’t want to use only Japanese vinegar like rice variation.
With this in mind, I’ve blended rice vinegar and apple vinegar.
Once you’ve added half the vinegar, keep going with the same careful approach. Slowly pour in the rest of the oil, right along the edge of the bowl, and whisk it all up at the same time. When all the oil is incorporated, add the remaining vinegar mixture in the same way and whisk until fully combined.

By alternating oil and vinegar additions, you’re allowing the emulsion to adjust gradually without shocking it.
Add salt, sugar, white pepper, MSG (if using), and lemon juice.
If you prefer to avoid MSG, a small pinch of dashi granules can provide added umami notes. You can even take it out, and you will still make a delicious mayonnaise!

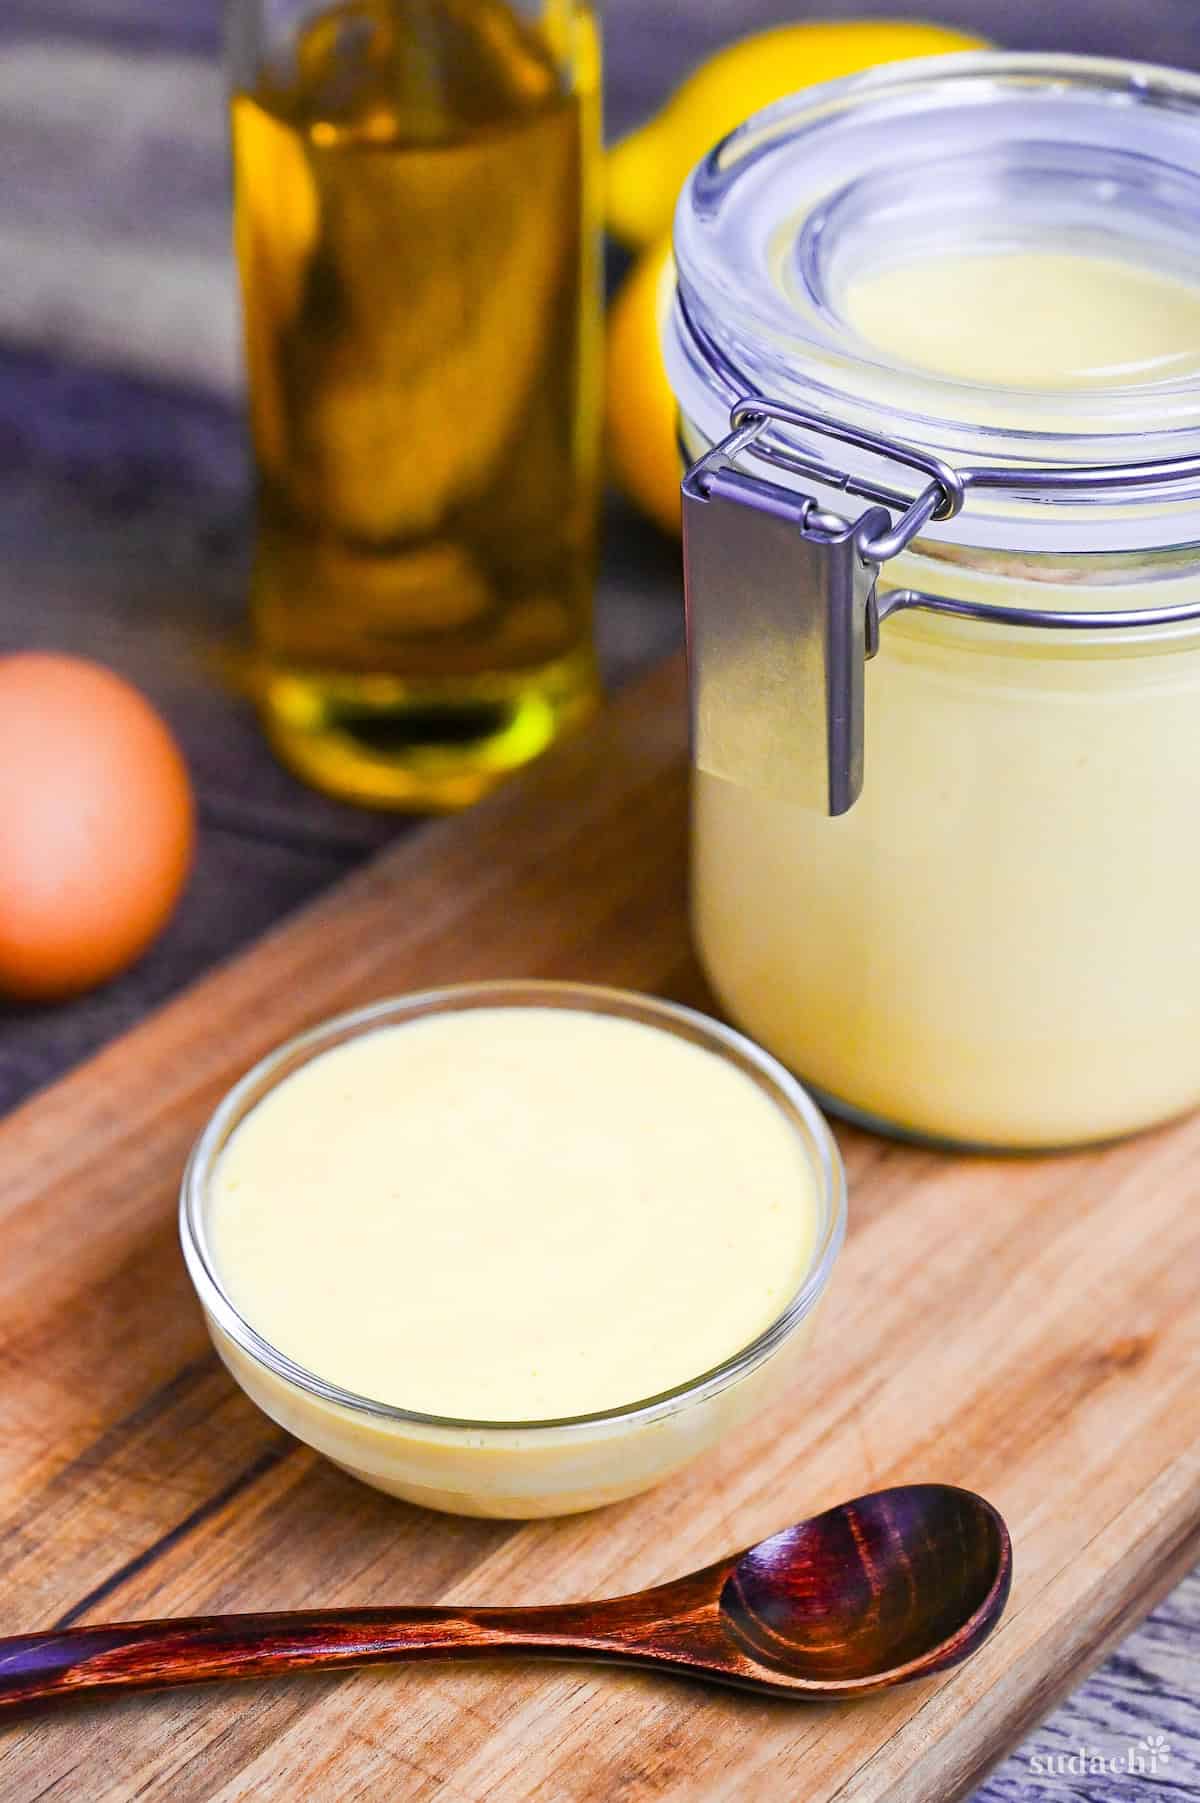
If available, finish with an electric whisk or immersion blender for 20-30 seconds – no longer, as over-blending can break your emulsion. Brief mechanical blending creates smaller oil droplets for a smoother texture, similar to commercial production. The mayonnaise should become smoother, fluffier, and slightly paler.

The blending process also incorporates the seasonings (especially salt and sugar) evenly. Store the mayonnaise in a sealed container in the refrigerator for 1 hour to allow it to thicken fully.
Here’s your chance to tweak your mayo to get it just how you like it. If it’s a bit flat, go ahead and add a bit more salt. Too acidic? A pinch of sugar will balance it out.
Essential Tips & Tricks
- Start with literally just a few drops of oil – the first 30 seconds are the most critical for creating a stable emulsion
- Use a glass or ceramic bowl – metal can react with acidic ingredients and affect flavor
- Watch for visual cues – your mixture should be thick and glossy; if it looks thin or grainy, slow down and whisk more vigorously
- Don’t rush the process – a properly made mayonnaise takes time; patience pays off
- Add vinegar after half the oil is incorporated – not at the beginning or end
- Limit electric mixing to 20-30 seconds – over-blending can break your emulsion
- Store in glass containers only – avoid metal which can cause oxidation
- MSG alternatives: If you don’t want to use it or buy it, you can replace it with dashi granules or simply omit it.
With these simple tips in mind, you’re set for success every time you make Japanese mayo.
Troubleshooting Guide
Separation usually happens when oil is added too quickly (especially at the beginning), ingredients are too cold, or too much oil was added for the amount of egg yolk. The key is to start with room temperature ingredients and add oil literally drop by drop at first, gradually increasing as the emulsion forms.
If your mayonnaise split in the early stages, you don’t need to waste it. Take a fresh bowl and try again with a new egg yolk and while whisking vigorously, very slowly add the failed mixture a few drops at a time. This should allow the broken mayonnaise to re-emulsify. You might need to tweak the seasonings to accomadate for the extra yolk.
This is called “over-emulsification.” It happens when you over-mix, add too much oil, or subject it to extreme temperature changes. The oil droplets become too concentrated and eventually regroup. Try making a new egg yolk base and slowly reincorporating the broken mayonnaise.
Yes, add a tiny pinch more sugar to balance acidity. Often, letting it rest overnight in the refrigerator helps mellow the flavors naturally.
You may not be whisking vigorously enough, or you might be adding oil too quickly. Make sure egg yolks are thoroughly whisked before adding oil, and add vinegar only after establishing a basic emulsion with half the oil. Try using an electric mixer briefly or continue adding oil very slowly while whisking energetically.
This commonly happens from exposure to cold air currents, temperature fluctuations, or an incomplete initial emulsion. Let it come to room temperature and gently re-whisk. Store in the refrigerator door or vegetable drawer, away from cold air vents.
How to Store
It can be fun to make your own mayonnaise, but it’s important to understand how to handle it. Since there are no preservatives or stabilizers in this stuff, you’ve got to handle it with care.
- Basic Storage Guidelines: Store your mayonnaise in a clean, sterilized, airtight glass container (metal containers can react with the acid and cause oxidation). Place your container in the refrigerator door or vegetable drawer rather than near cold air vents, which could cause the oil to solidify and separate. Never freeze homemade mayonnaise.
- Shelf Life: Consume homemade Japanese mayonnaise within 3-5 days. While the acid and salt do help inhibit bacterial growth, the lack of commercial preservatives limits its shelf life. Consider halving the recipe rather than large amounts that need extended storage.
- Handling Tips: Always use clean, dry utensils when scooping out mayonnaise to prevent contamination. You can store the container upside down once it’s partly used-this pushes the contents toward the lid and reduces air contact.
- Things to Watch: If you see a little bit of liquid on top, it’s no big deal. Just give it a stir. But if you spot any major separation, strange smells, significant color changes, or signs of mold, it’s best to toss that mayo right away.

Important: Is It Worth Making At Home?
After experimenting with a copycat recipe for Japanese-style mayonnaise, I’ve found myself pondering a crucial question: Is it really necessary to make mayonnaise at home?
First, if you’re looking to avoid MSG, this homemade recipe (excluding MSG) is an excellent option for creating Japanese-style mayonnaise. It allows you to control the ingredients and tailor the flavor to your preferences, not to mention avoiding excess chemicals and preservatives.
However, if MSG and preservatives aren’t a concern for you, I’ll be dead honest – commercially available Kewpie mayonnaise is a perfectly fine choice. You might wonder why I’m saying this after sharing a recipe, but I believe in transparency.
- Shelf Life: Homemade mayonnaise has a significantly shorter shelf life compared to commercial versions. If you don’t use Japanese-style mayonnaise frequently, making it at home may not be the most efficient option.
- Recipe Limitations: While this is a good copycat recipe, it’s important to remember that it’s still an imitation of the original.
- Convenience vs. Quality: Unlike other copycat recipes I’ve made (such as Saizeriya’s Milano Doria, Lawson’s Baschee, and Ootoya’s Vinegar Chicken), which can be almost impossible to find outside of Japan (and taste even better than the originals!), Kewpie Mayonnaise is relatively easy to find in well-stocked Asian supermarkets and online, and the flavor is consistently great which explains why it has such a solid fanbase.
If you can’t get Kewpie mayonnaise where you are or it’s too expensive, making it at home is a good option. It’s about finding the right balance between convenience, cost, and personal preferences. For example, if you’re in the US, you can get Kewpie mayonnaise on Amazon at pretty good prices, which makes the commercial option even more appealing.
Whether you try my recipe or buy Kewpie Mayo from the store, Japanese mayonnaise is an essential ingredient for any homecook with a love for Japanese food and perfect for toppings, sauces and general cooking!

I hope you enjoy this Japanese Mayonnaise recipe! If you try it out, I’d really appreciate it if you could spare a moment to let me know what you thought by giving a review and star rating in the comments below. It’s also helpful to share any adjustments you made to the recipe with our other readers. Thank you!
Use This Mayo For These Recipes

Japanese Kewpie-Style Mayonnaise

Ingredients
- 2 pasteurized egg yolks room temperature
- ½ tsp Japanese mustard (karashi)
- ½ tsp smooth Dijon mustard not grainy
- 175 ml cooking oil neutral flavored, I used rapeseed, avoid olive oil
- 1 tbsp apple cider vinegar
- 2 tsp rice vinegar unseasoned
- ½ tsp salt fine sea salt preferred
- ½ tsp lemon juice
- 1 pinch ground white pepper
- ¼ tsp sugar
- 1 pinch Ajinomoto or dashi granules, or omit completely
My recommended brands of ingredients and seasonings can be found in my Japanese pantry guide.
Can’t find certain Japanese ingredients? See my substitution guide here.
Instructions
- Whisk 2 pasteurized egg yolks, ½ tsp Japanese mustard (karashi) and ½ tsp smooth Dijon mustard together in a large bowl.

- Measure 175 ml cooking oil into a jug and pour a small drizzle down the side of the bowl into the egg yolks while whisking continuously and vigorously. Once incorporated, continue to slowly drizzle the oil into the eggs little by little while whisking until emulsified and half of the oil is used.
- In a small bowl, combine 1 tbsp apple cider vinegar and 2 tsp rice vinegar and pour half of it into the mayonnaise. Whisk well.
- Continue to whisk and add the rest of the oil, then the rest of the vinegars.
- Once the mixture is thick and stable, season with ½ tsp salt, ½ tsp lemon juice, 1 pinch ground white pepper and ¼ tsp sugar. Whisk until evenly incorporated.
- Optional: Add 1 pinch Ajinomoto (MSG) for that true Kewpie taste.
- Optional: Switch to an electric whisk or immersion blender and whip until thickened to your liking.
- Transfer to a sealable container, cover and refrigerate for 1 hour to thicken further before serving. Enjoy!

Video
Notes
- Bring all ingredients to room temperature 30 minutes before starting to ensure proper emulsification.
- Use a glass or ceramic bowl instead of metal to prevent unwanted reactions with acidic ingredients.
- Limit electric mixing to 20-30 seconds to avoid over-emulsification and breaking.
- Store in a glass container in the refrigerator door or vegetable drawer, away from cold air vents. Use within 3-5 days.
- Consider halving the recipe rather than making large amounts that need extended storage.
- Dip ideas for veg sticks or fries: Wasabi mayo, mentaiko mayo, soy sauce mayo, miso mayo, yuzu kosho mayo.
as someone who started very early on in life to make homemade mayonnaise I have to express my glee on how accurate the description and the troubleshooting is presented! will try the vinegar blend asap!
Hi Drothea,
Thank you! That truly means a lot coming from someone with so much homemade mayo experience! I hope this vinegar blend brings something fun and new to your mix! 🙂
Yuto
Thanks for the recipe. It tout great. On the subject of MSG, it’s been much maligned for decades. All because a doctor wrote a paper using an anecdotal case with a sample size of one. What’s worse, no one bothered to duplicate it.
Hi Jack,
Thank you! Really glad it turned out well. And yeah, the MSG debate has been a minefield, especially this online era. It’s one of those subjects where I choose my words carefully because it can get heated, but honestly the science speaks for itself at this point. 😄
Yuto
Dear Yuto,
Thank you for this recipe. For me, this one is the most successful one
I tried (and I tried many!). Very well-balanced. I used the vet-sin (MSG) which
makes the taste very dynamic.
Again, thank you.
Hi Alex,
Thank you so much for this! Honestly makes my day knowing it landed as the best one after all those attempts! 🙂
Yuto
Thank you Yuto!
This recipe is very accurate. Well-balanced and dynamic in taste.
It’s the best one I tried (and I tried many), so…. thank you!!!
The Japanese mayonnaise turned out perfectly. I wanted to make your recipe for Osaka style Okonomiyaki which required okonomiyaki sauce and mayonnaise and was glad to find a recipe for both as it meant less store bought jars in my fridge which never gets used up. Thank you so much for this website. Its has made Japanese cooking much easier and understandable.
Hi Tove,
Seriously made my day reading this! Knowing you went all in and made everything from scratch is exactly what I love to hear. Thank you so much for the kind words about my site too! 🙂
Yuto