

Featured Comment:
“I’ve never made a cheesecake with cheese slices so I was a bit skeptical… but it came out so good!”
– Esther
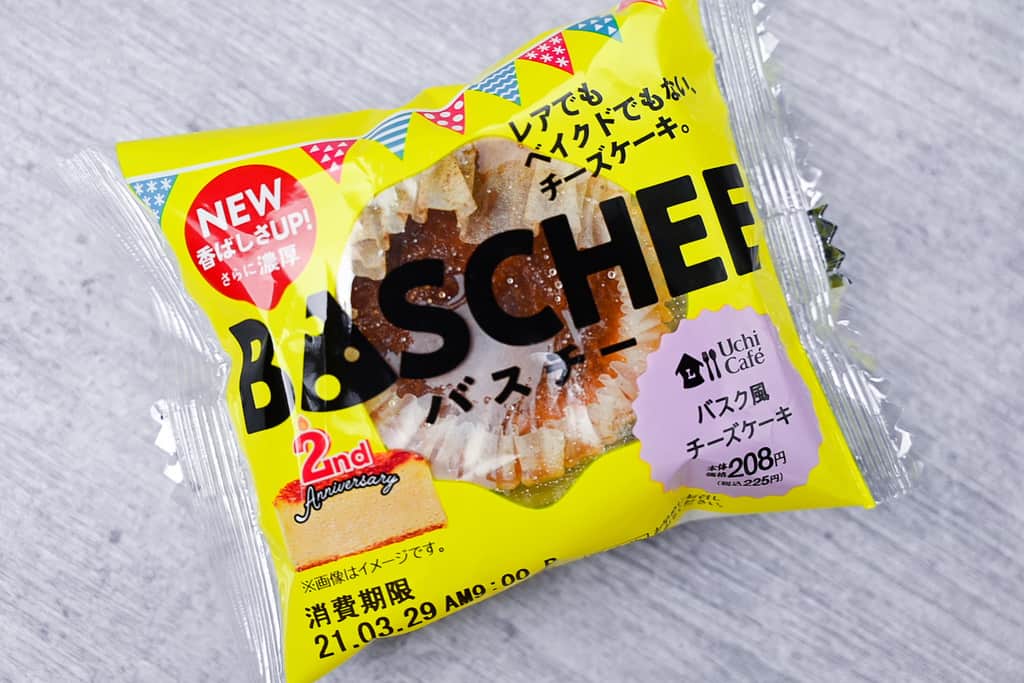
What is Lawson’s “Baschee”?
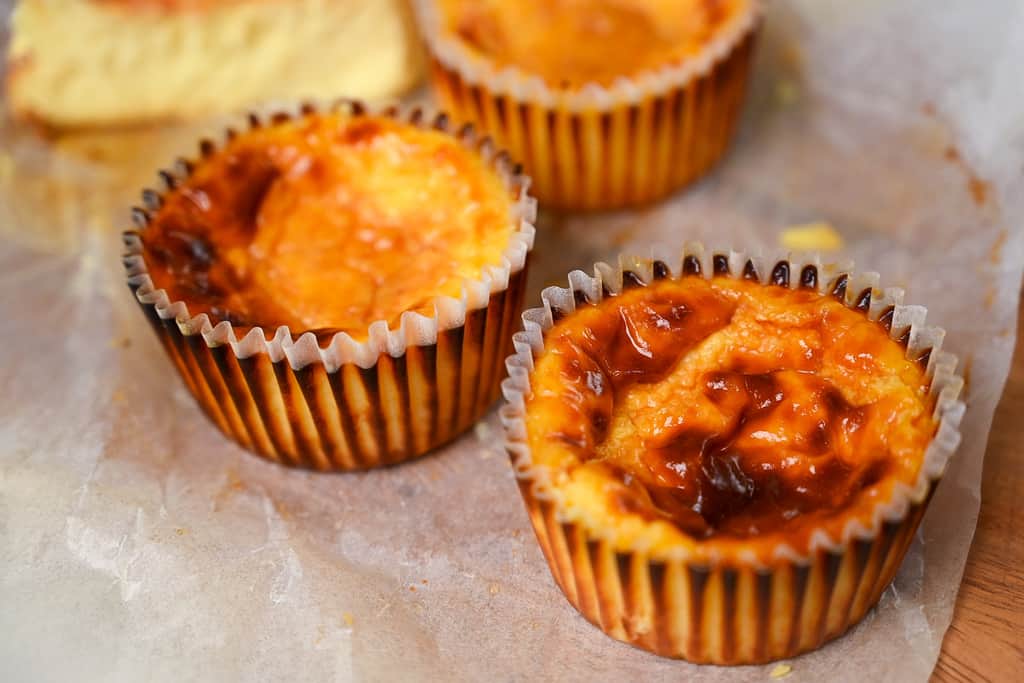
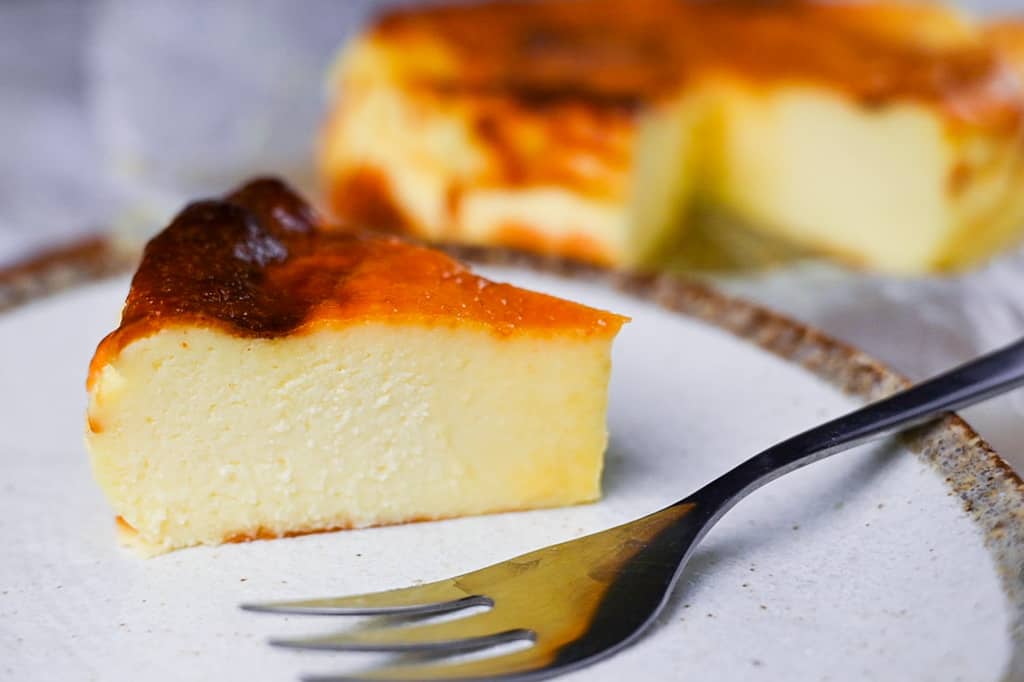
“Baschee” (バスチー) is a delicious dessert created by “Uchi Cafe,” a brand of original sweets launched by the Japanese chain convenience store “Lawson.” This creamy miniature cheesecake is inspired by the popular burnt “basque” cheesecake, which originated from Spain. Even the name “Baschee” is a Japanese abbreviation of basque cheesecake.
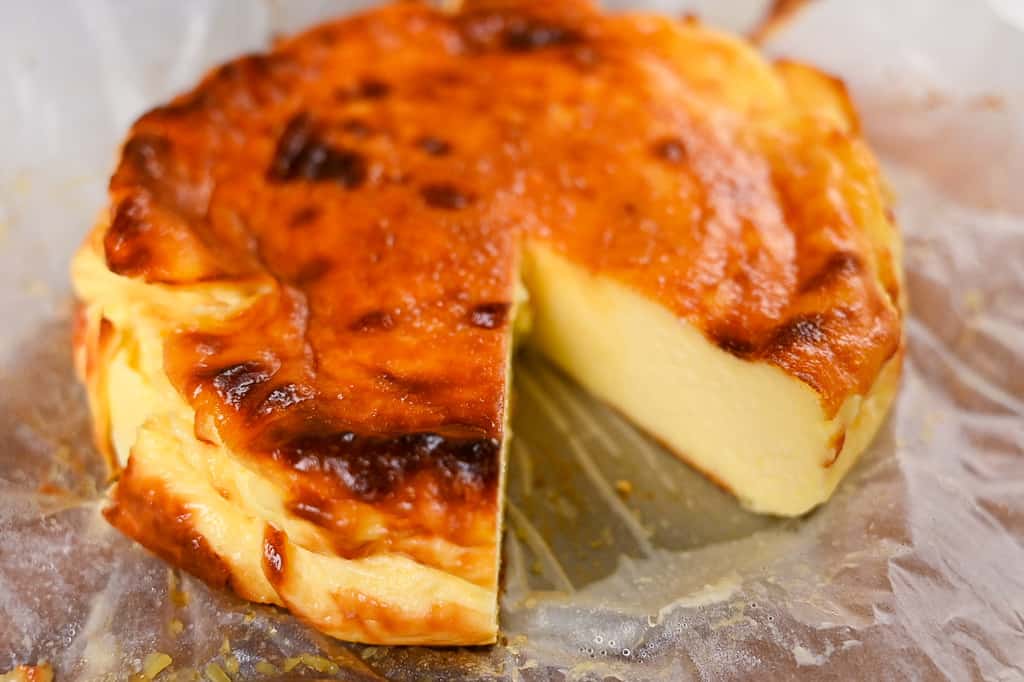
Basque cheesecake is a crustless baked cheesecake that was created in San Sebastian, Spain in 1990. This unusual dessert is unlike other baked cheesecakes that are cooked for a long time at lower temperatures. Instead, basque cheesecake is baked for a short time at a high temperature, creating a rustic look with a dark “burnt” surface, cracks around the edges, and a soft, melt-in-mouth center.
Basque Cheesecake is particularly popular in Japan and is considered a “high-end” dessert, with many specialist bakeries having long queues lining up out of the door.
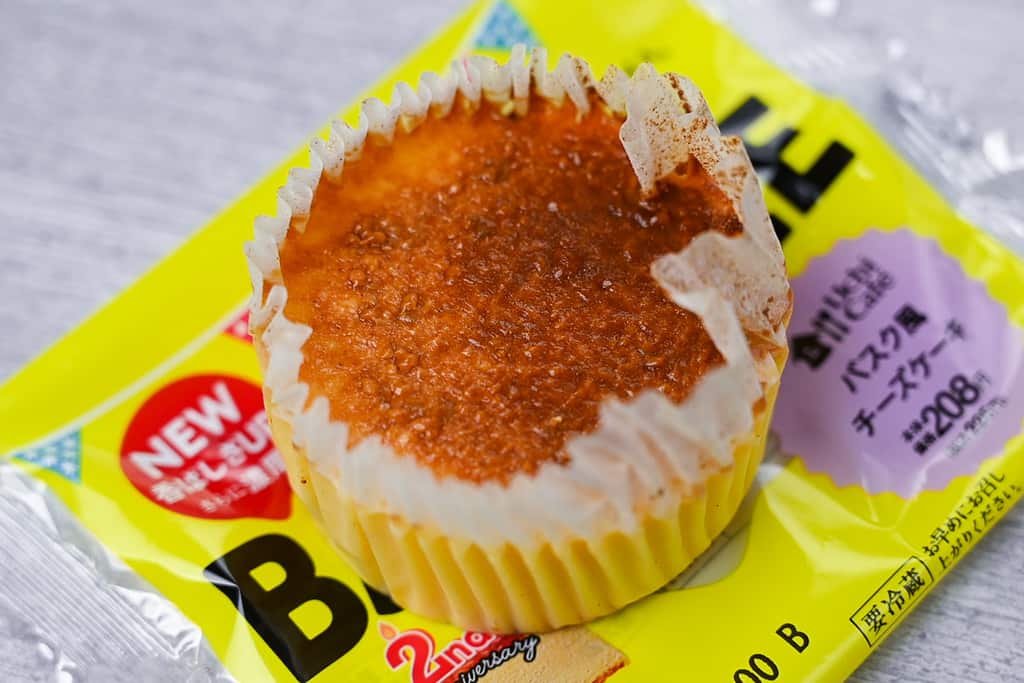
Lawson’s Baschee is made with Hokkaido cheddar cheese and contains a higher egg yolk ratio than regular basque cheesecake, making it smooth, rich, and cheesy. It is also brushed with caramel which sinks into the cheesecake, whilst adding a touch of burnt caramel flavour to the top.
Baschee was released in 2018 and sold 1 million over just three days. Following its success, other flavors were released, such as matcha, chocolate and hojicha (roasted green tea).
In Japan, it is common for products to be constantly changing, replacing older items with seasonal goods and new trends. Unfortunately, even successful combini desserts are not safe from the never-ending rotation of products and baschee was discontinued on September 23rd 2022 to make way for new items. I have to say that since learning this news, I’m so relieved I made this recipe so I can still enjoy making and eating baschee at home! (If you want to check out Lawson’s current dessert lineup, you can see the list here.)

How I Developed This Recipe
After jumping on the hype and trying one of Lawson’s Baschees for myself, I knew it was a dish I wanted to recreate. Compared to other basque cheesecakes I had tried, Lawson’s version was particularly rich and cheesy.
After checking the ingredients, I was surprised to learn that Lawson’s Baschee contained cheddar cheese. This discovery led to me experimenting with different cheeses to try and get both the perfect flavor and texture in my homemade Baschee, I think you’ll be surprised with the cheese I went with in the end!
This recipe is seriously delicious and one of my personal favorites. It’s also pretty easy, so why don’t you give it a try?
Ingredients & Substitution Ideas
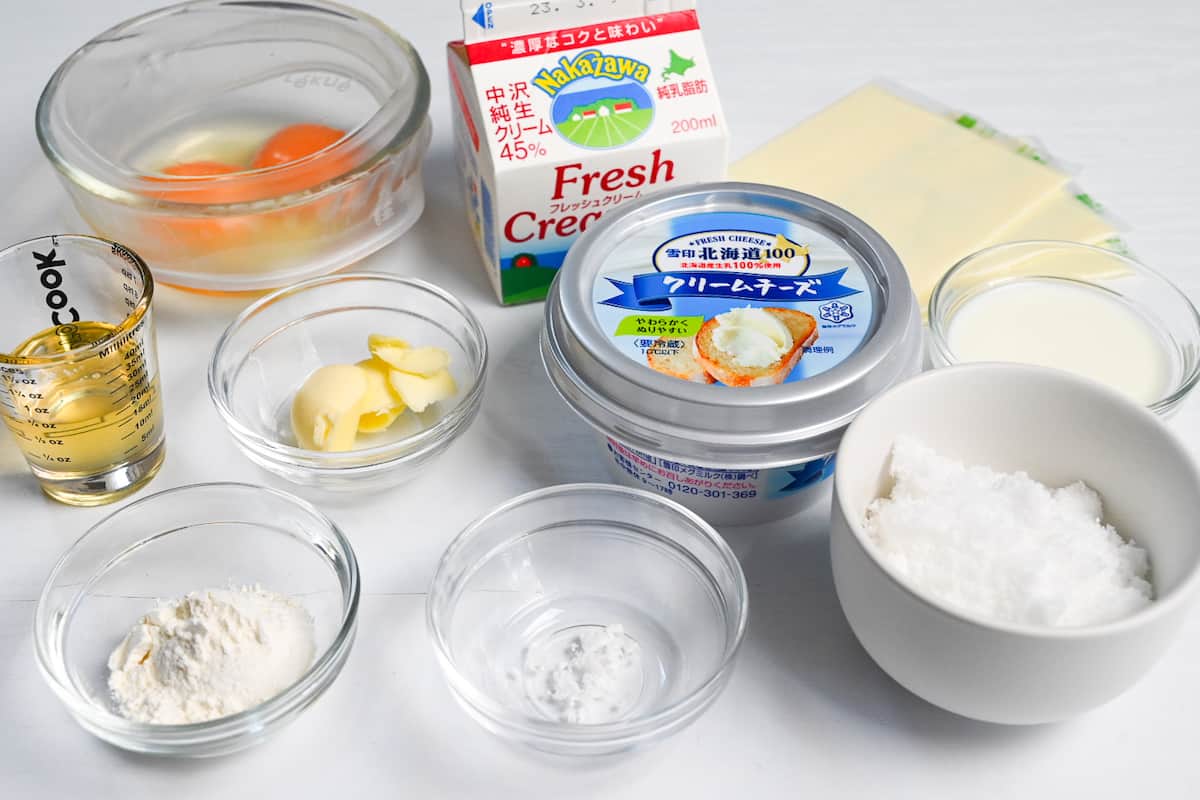
- Cream Cheese: An essential ingredient to make cheesecake, I usually use Philadelphia or Yukijirushi’s Hokkaido cream cheese.
- Processed Cheddar Cheese Slices: This surprise ingredient is used to add a subtle yet distinct cheesy flavor. I use Meiji or Kraft brand. If you prefer to use real cheddar, I recommend using an equal amount of grated mild cheddar.
- Whole milk: Used to mix with the processed cheese and create a soft paste that will incorporate easily into the mixture.
- Sugar: I use regular white caster or granulated sugar for sweetness.
- Unsalted butter: A small amount adds more richness to the overall taste.
- Honey – Adds additional sweetness and improves the texture.
- Eggs – For a rich cheesecake, I use 2 yolks for every egg white.
- Heavy cream: At least 36% fat to make it creamy and balance the cheese flavor.
- Cake flour: A small amount is added to help stabilize the cheesecake. Plain flour also works, but be sure to use flour with low gluten content to ensure the cheesecake doesn’t become heavy.
- Homemade Caramel: Made with a simple mixture of water and granulated sugar to create flavors similar to Lawson’s Baschee. You can also use store-bought caramel if you prefer.
Tip: Divide your eggs while they’re still cold, then measure all your ingredients and bring them to room temperature before you start. This will make them easier to combine when mixing.
Equipment you will need for this recipe:
- 15cm (6″) cake pan with removable base or 6 cup muffin pan (you could also use lined ramekins)
- A silicone spatula or wooden spoon for mixing
- A whisk (hand whisk is fine, no need for an electric whisk in this recipe)
- A microwavable mixing bowl
- Baking paper or 6 paper muffin cases
- Aluminum foil
If doubling or tripling the recipe, I recommend making the mini versions since larger cake pans require different baking times.
Jump to Full Recipe Measurements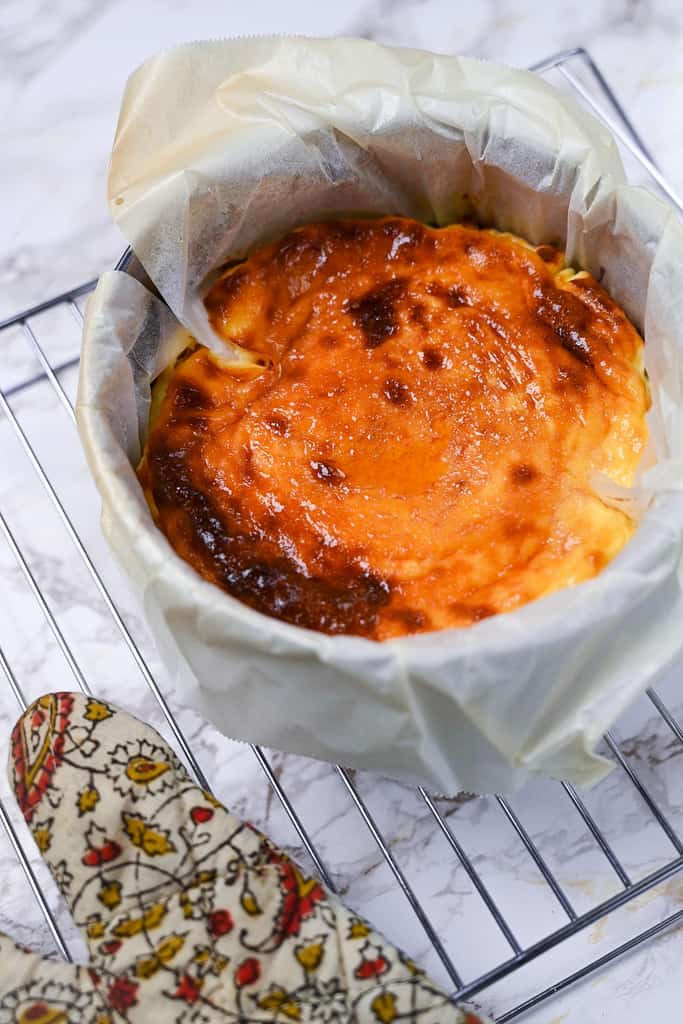
Visual Walkthrough & Tips
Here are my step-by-step instructions for how to make Lawson-style Basque-style Cheesecake at home. For ingredient quantities and simplified instructions, scroll down for the Printable Recipe Card below.
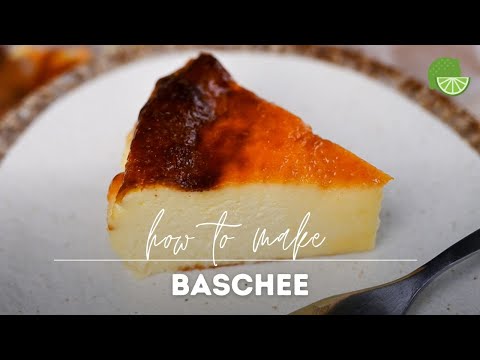
If you prefer to watch the process in action, check out my YouTube video of this recipe for a complete visual walkthrough!
Before you start, I recommend measuring out your ingredients and letting them come to room temperature, this will make it easier to blend them together and result in a smoother cheesecake. The eggs should be separated while they’re still cold since warm eggs are harder to separate.
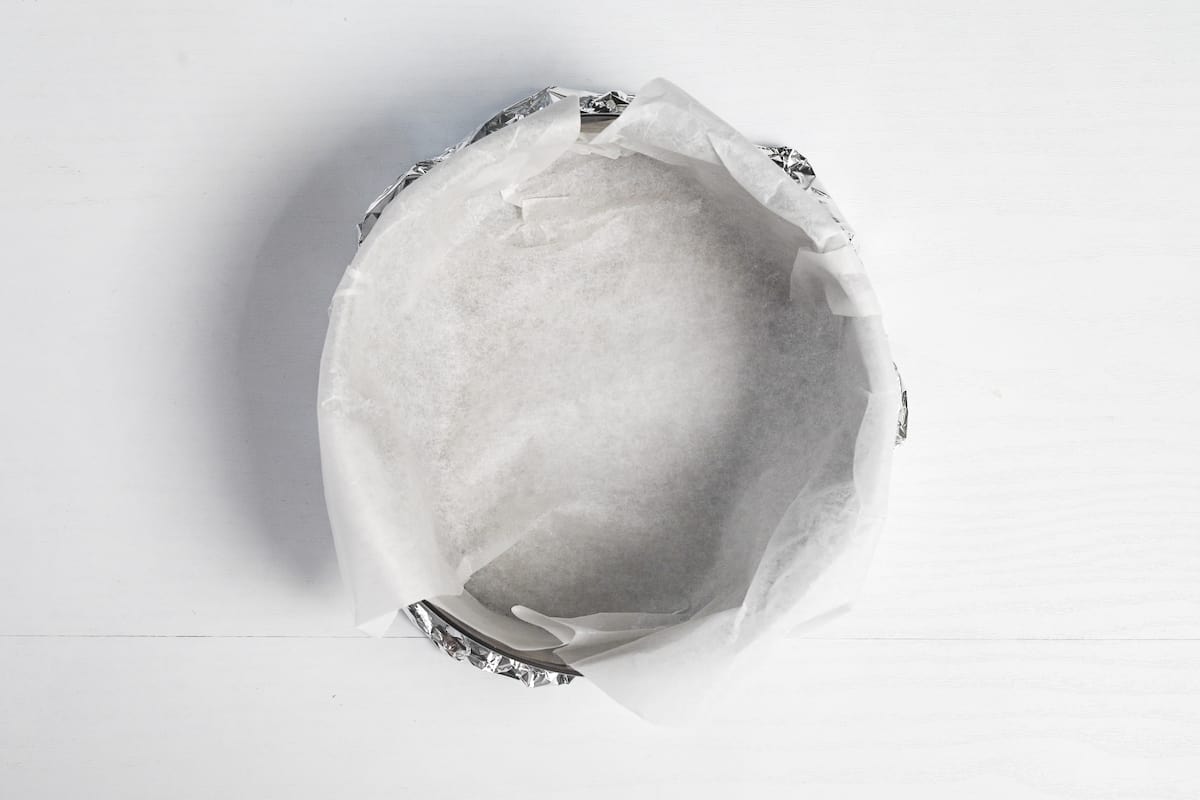
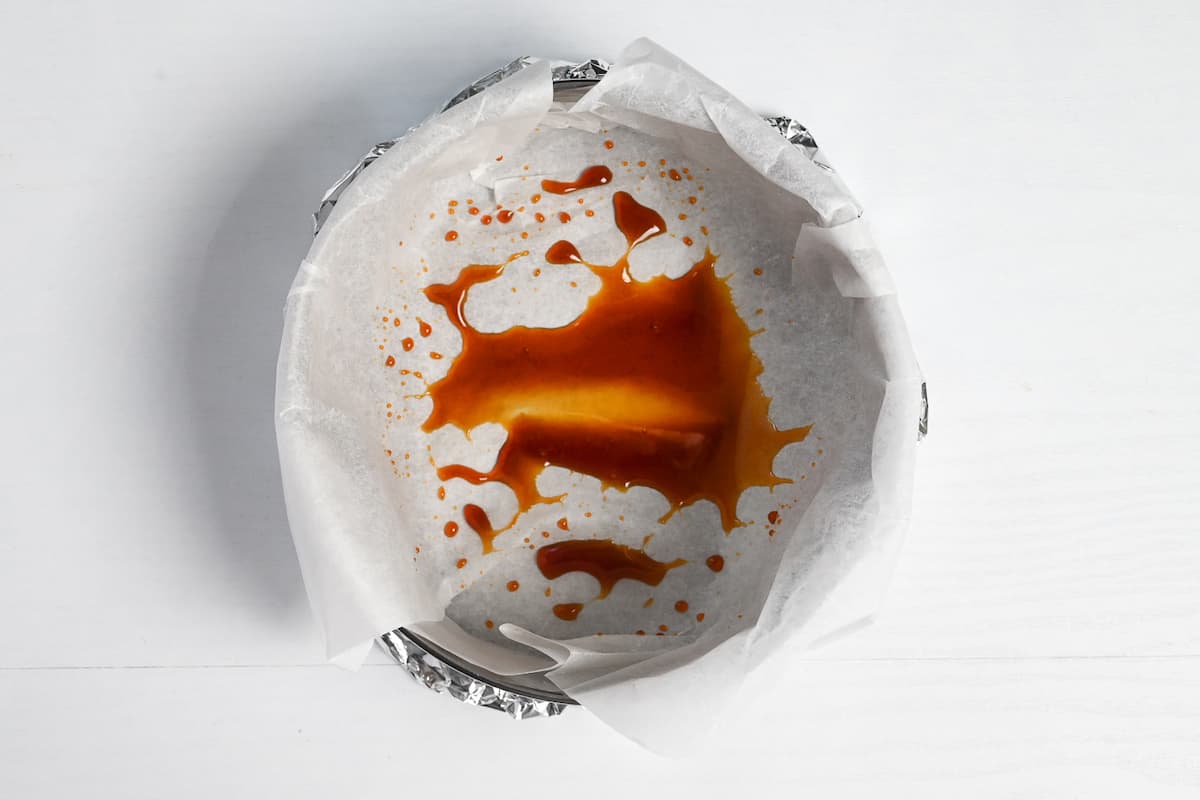
If you are making a full-size version, prepare your cake pan by lining it with a layer of foil and a layer of baking paper. The foil prevents leaks since the mixture is quite loose, and the baking paper prevents sticking. Scrunch the paper before placing it in the pan for that rustic look.
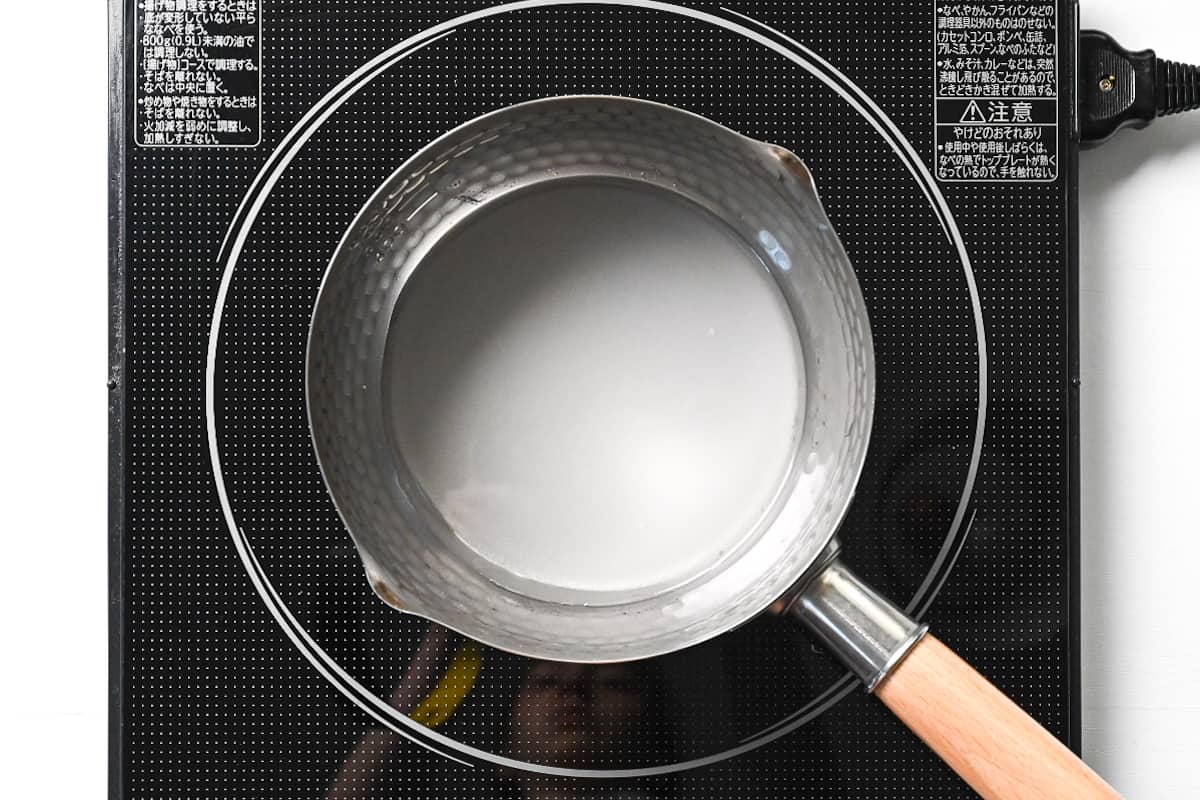
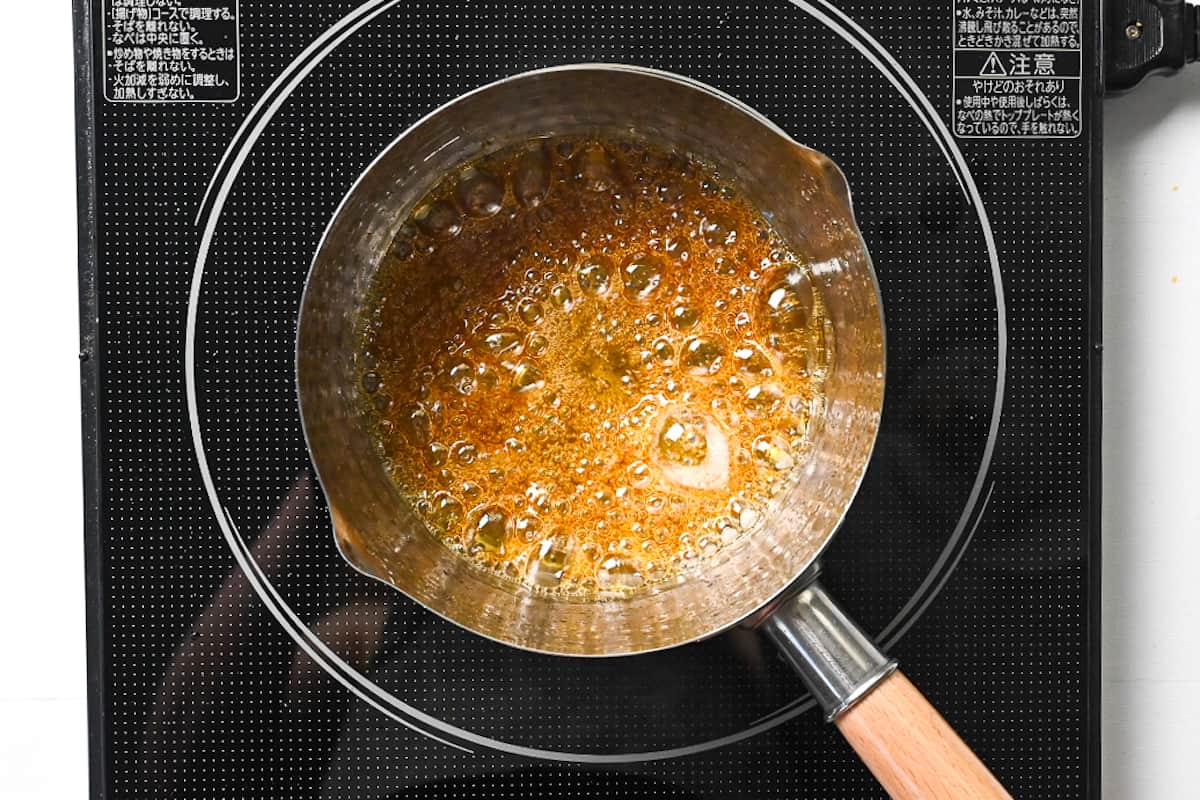
Start by mixing the sugar and water in a small saucepan and then place it on the stove over a medium heat. Mix occasionally to help dissolve the sugar evenly, but stop mixing once it starts to bubble.
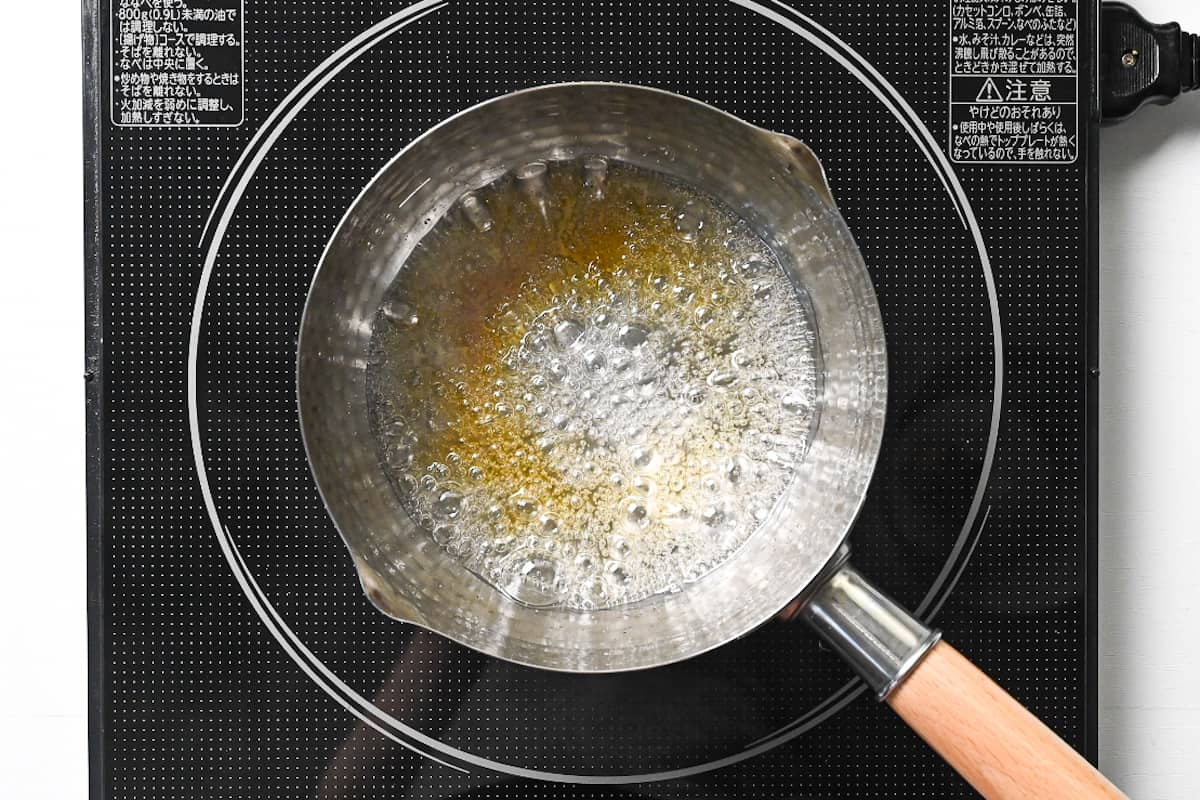
Once the sugar starts to turn golden, add a little more water, swirl the pan and lower the heat. Be sure not to mix or interfere with the caramel as this can cause it to crystallise.
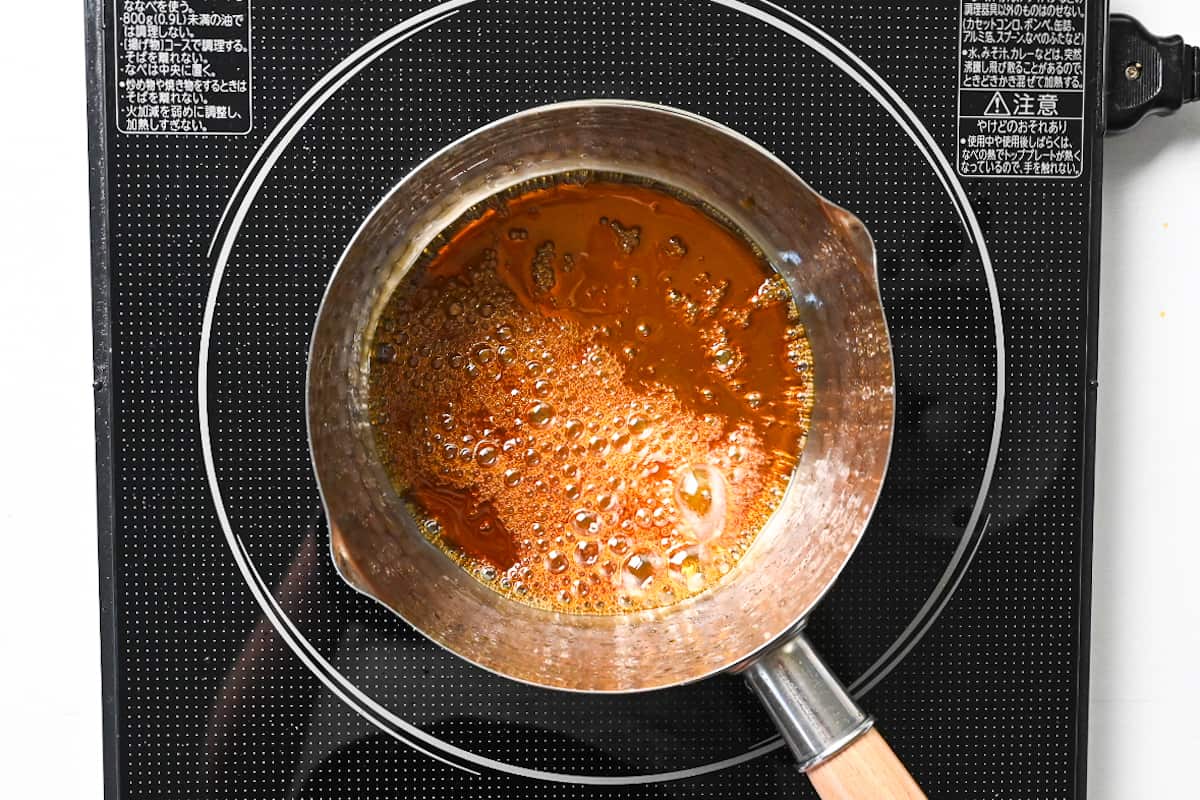
When it starts to turn amber, add a little more water, swirl the pan and turn off the heat. The caramel will thicken as it cools, so be careful not to overcook. Pour half into your lined cake pan and save half for later.
Once all of your ingredients have reached room temperature, start preheating your oven to 220°C (430°F) for one large cheesecake, or 210°C (410°F) for mini cheesecakes.
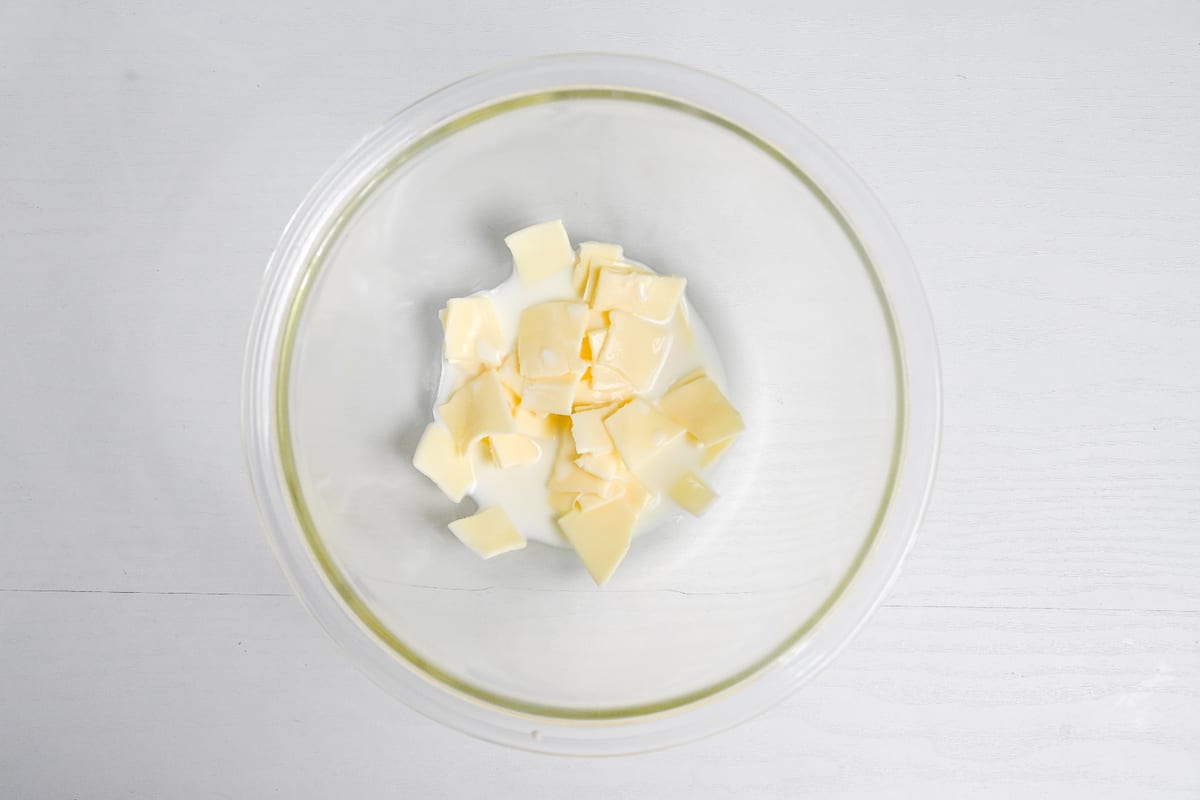
Rip the processed cheese into smaller pieces and place them in a microwavable bowl with the whole milk.
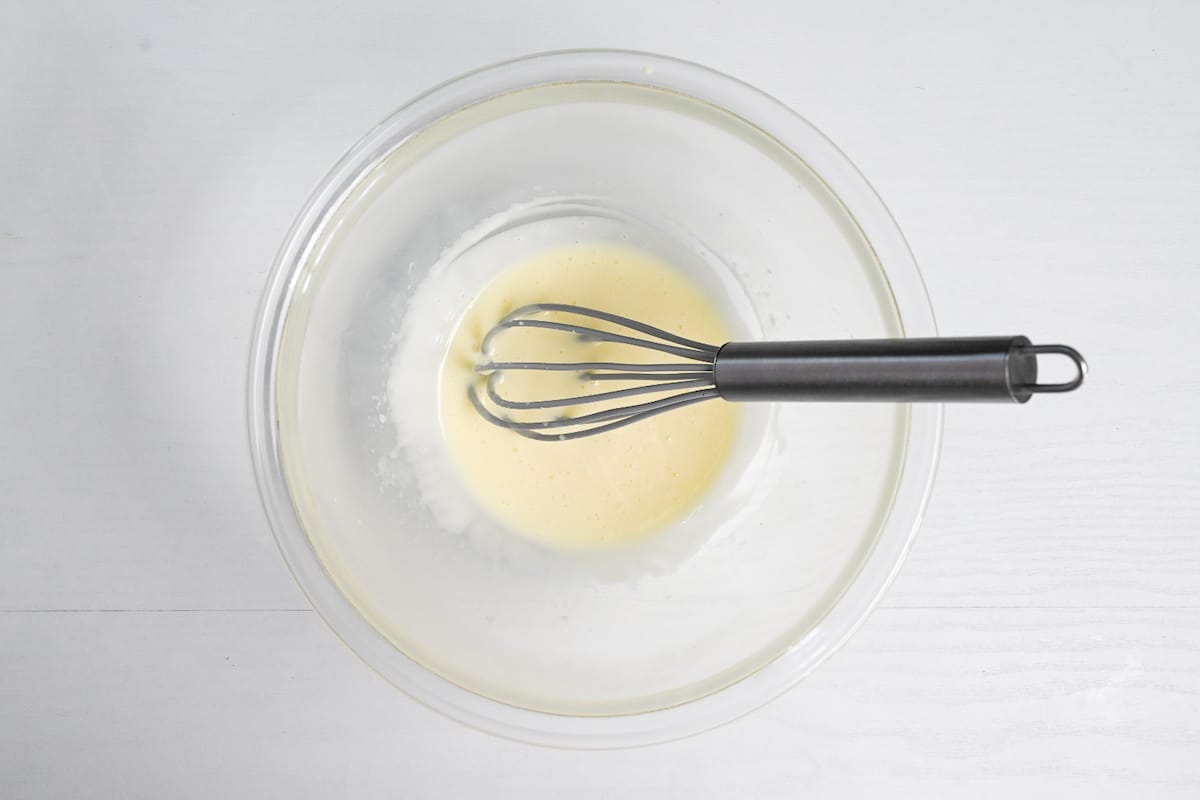
Microwave at 600W in 20-second intervals and mix well each time. Repeat until the cheese has fully melted and combined with the milk.
Add the cream cheese, butter, sugar and honey one at a time, whisking well between each addition.
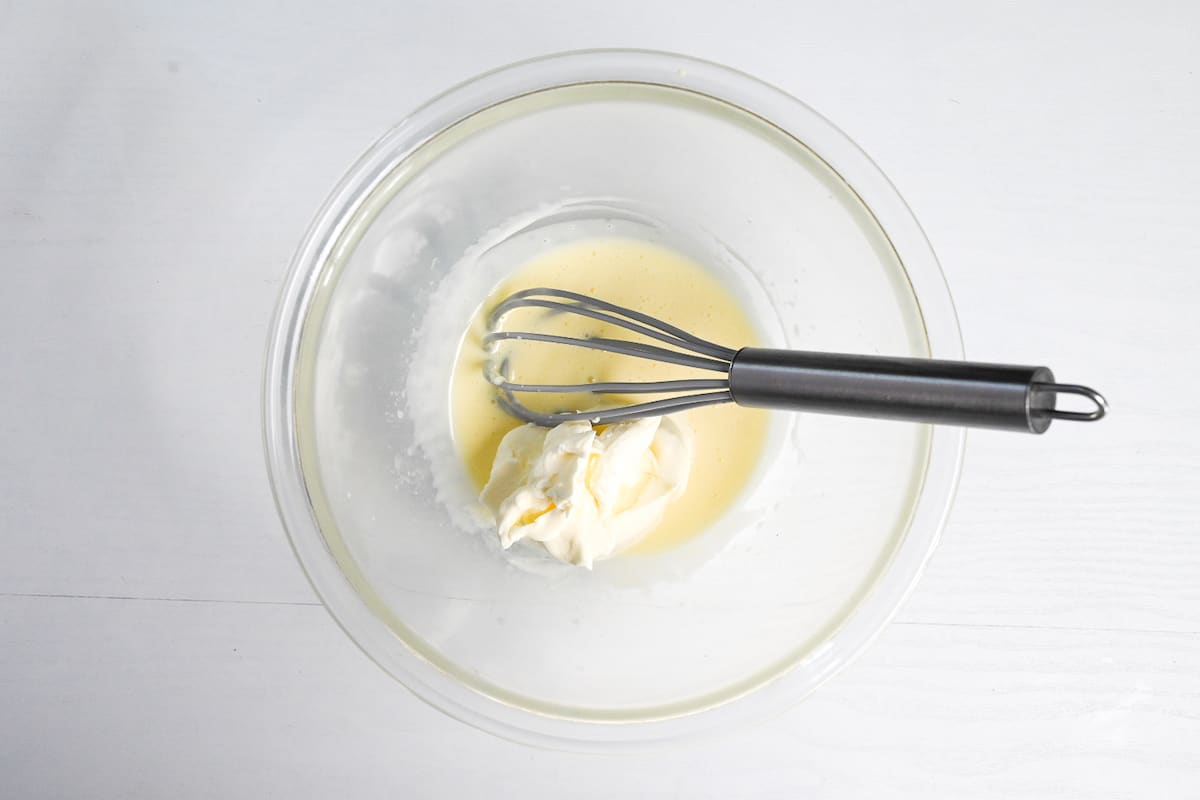
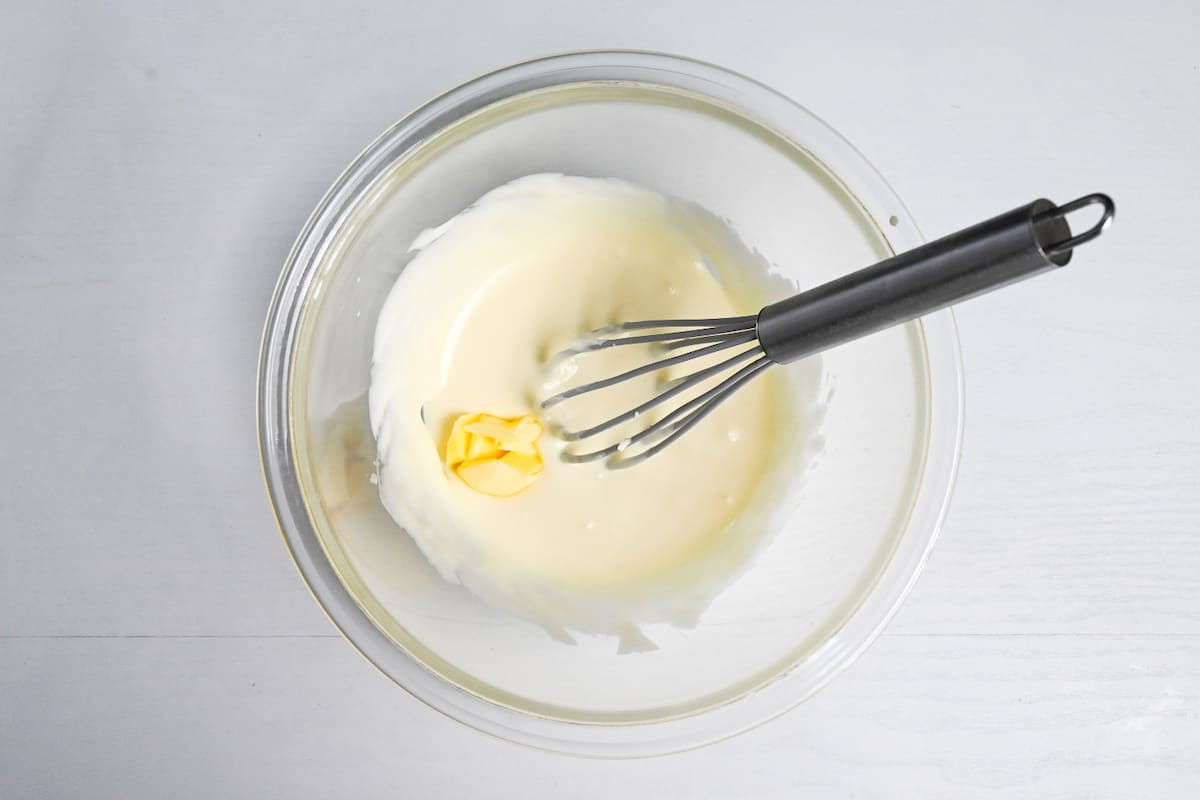
If the cream cheese is still firm and difficult to mix, add it to the bowl and microwave again for 20-40 seconds to soften it. (This will also help melt the butter and sugar if necessary.)
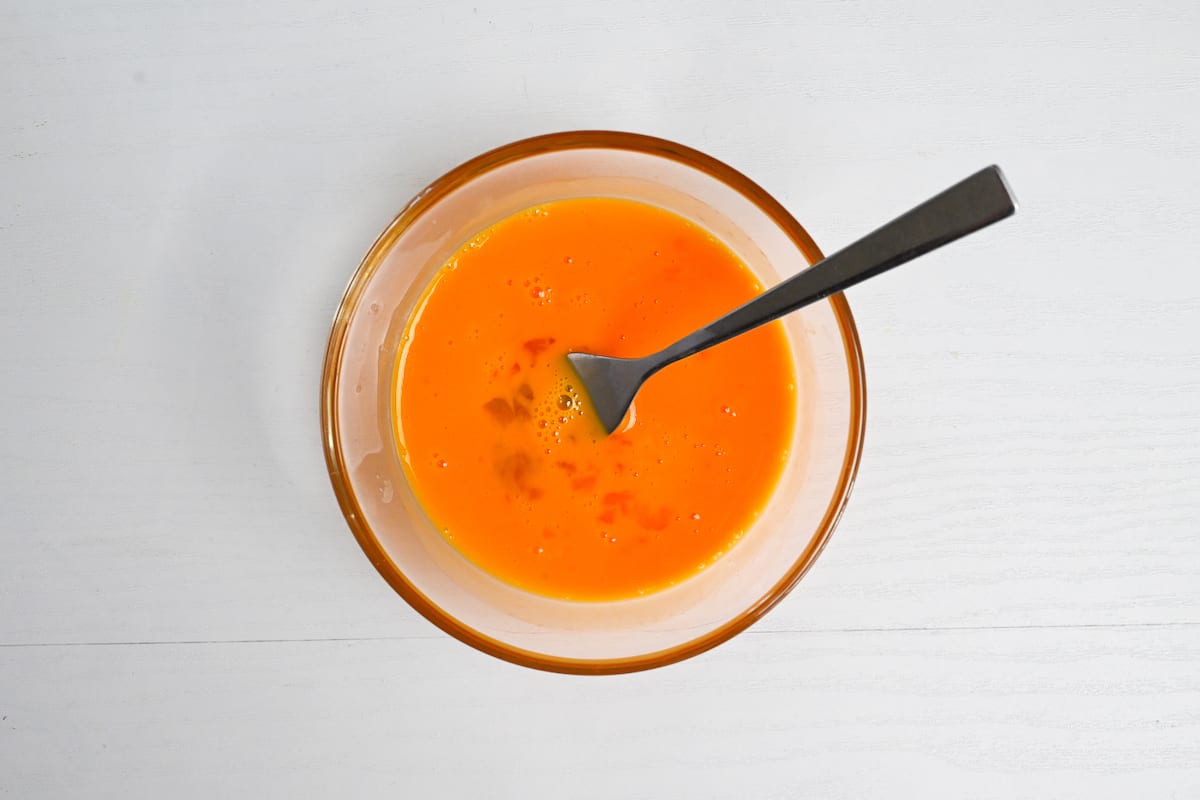
Gently whisk the egg yolks and whites in a separate bowl until combined. I recommend a fork rather than whisk to avoid creating too many air bubbles.
The key to making this cheesecake extra smooth and silky is to gently mix the cheesecake batter once the eggs are added. Eggs tend to become airy and create bubbles in the mixture if mixed too roughly.
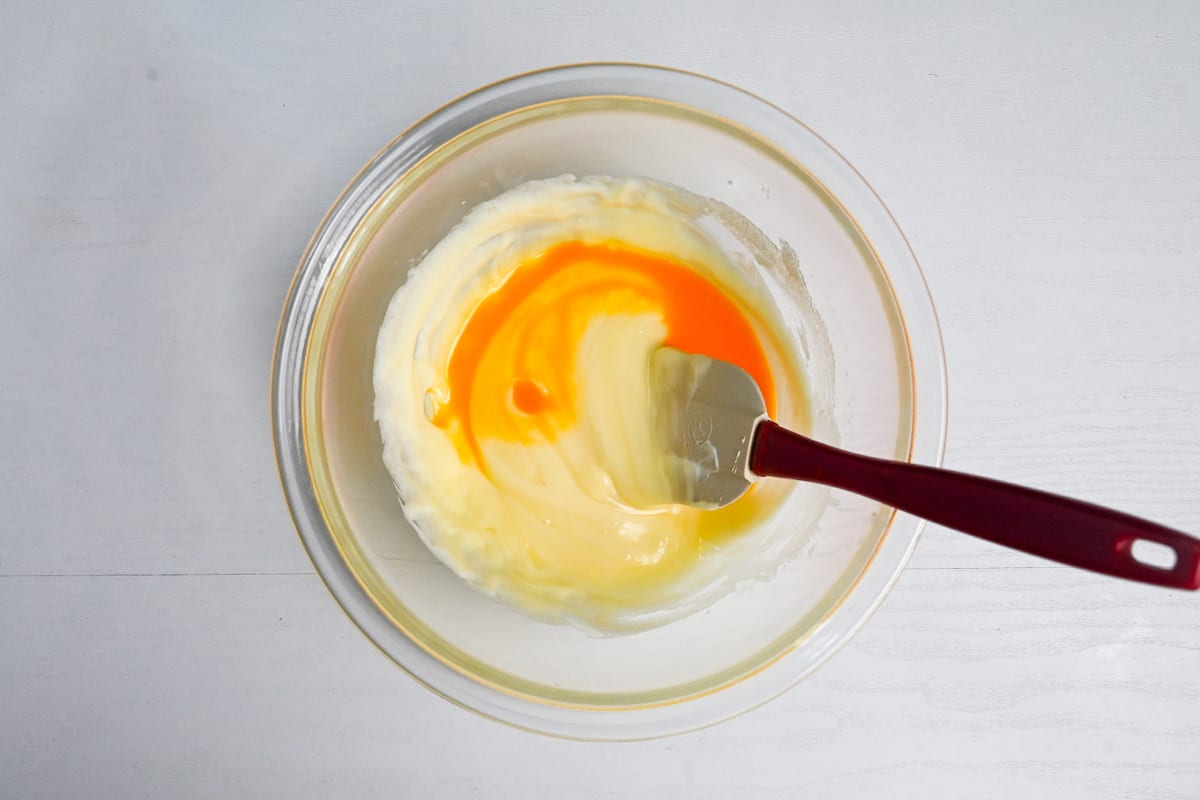
Add the egg to the cheesecake batter one third at a time and mix it gently with a silicone spatula or wooden spoon to avoid creating too many air bubbles.
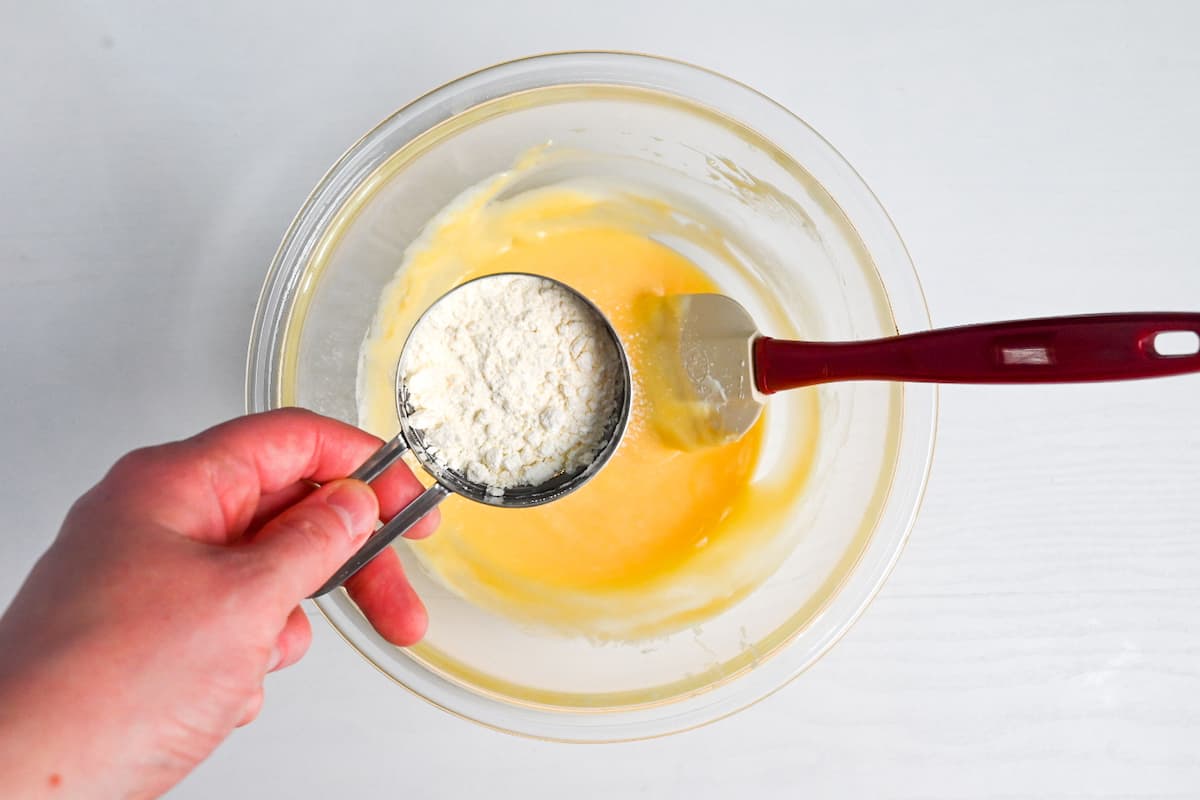
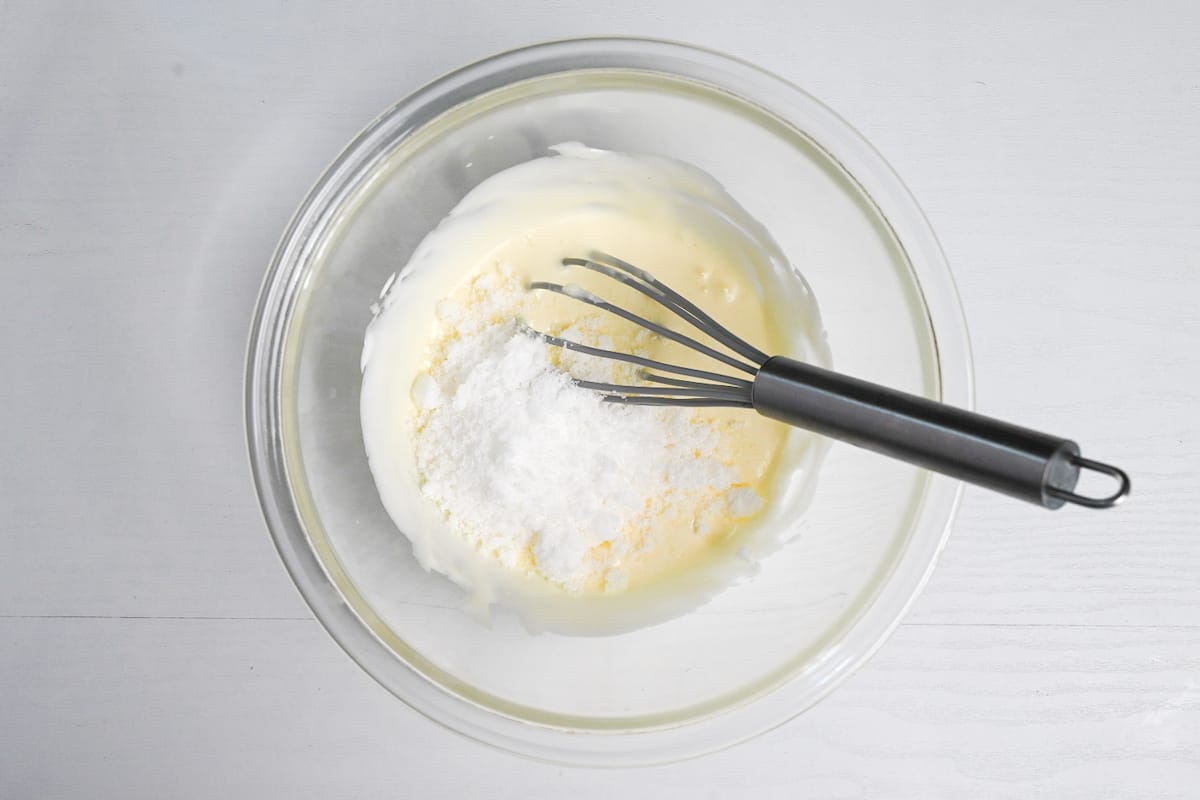
Sift in the flour. Flour helps make the cheesecake more stable and prevents too much cracking. It also makes the texture a little lighter.
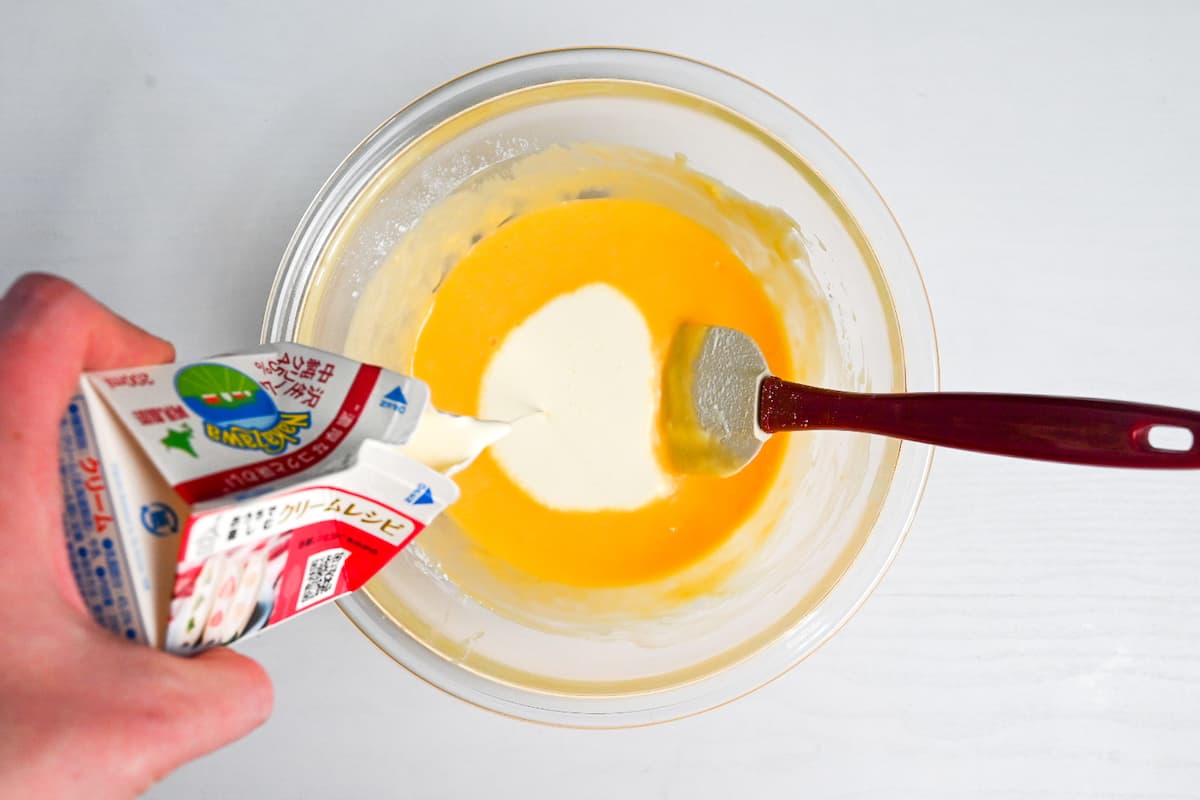
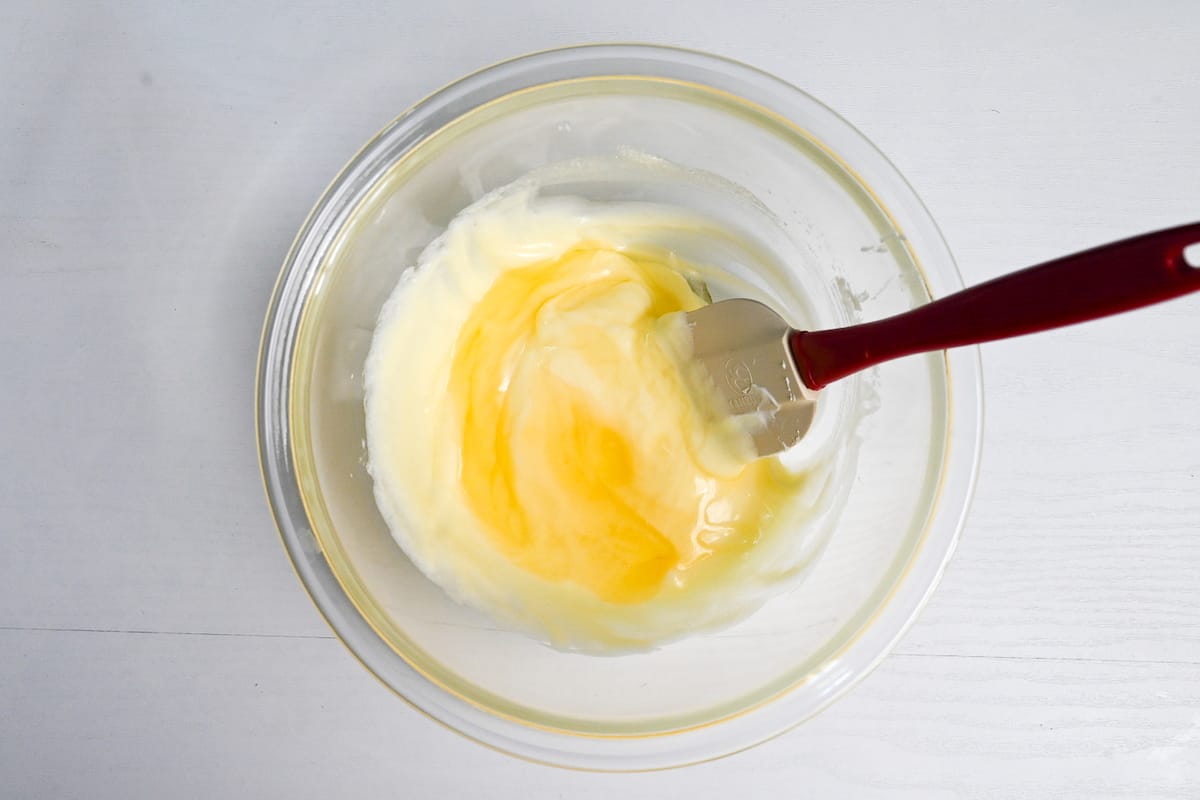
Finally, add the heavy cream. Cream is another ingredient that becomes airy when whisked, which is why I continue to stir with the spatula. Just like the eggs, add it one-third at a time and mix gently to avoid creating air bubbles as much as possible.
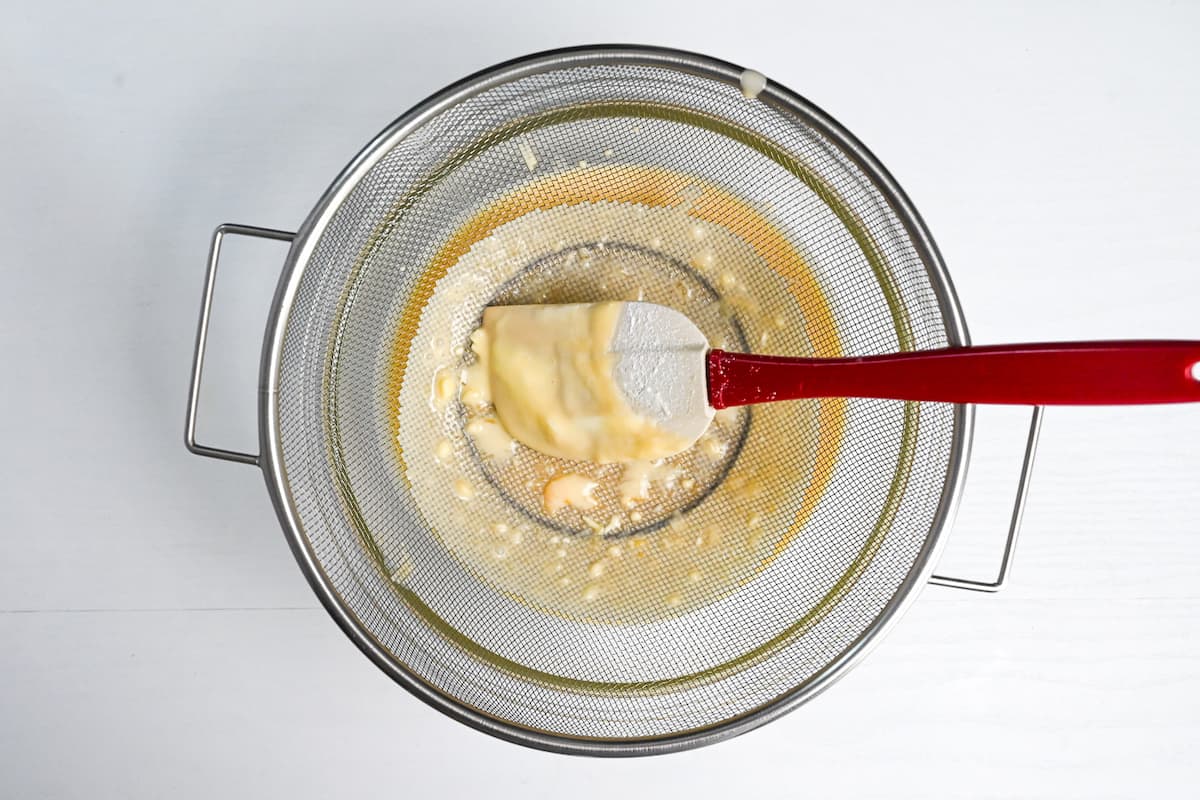
Pour your mixture through a fine mesh sieve into another bowl to ensure it is smooth. This will catch any bits of egg, flour or anything that didn’t mix in properly, especially during those steps with gentle mixing.
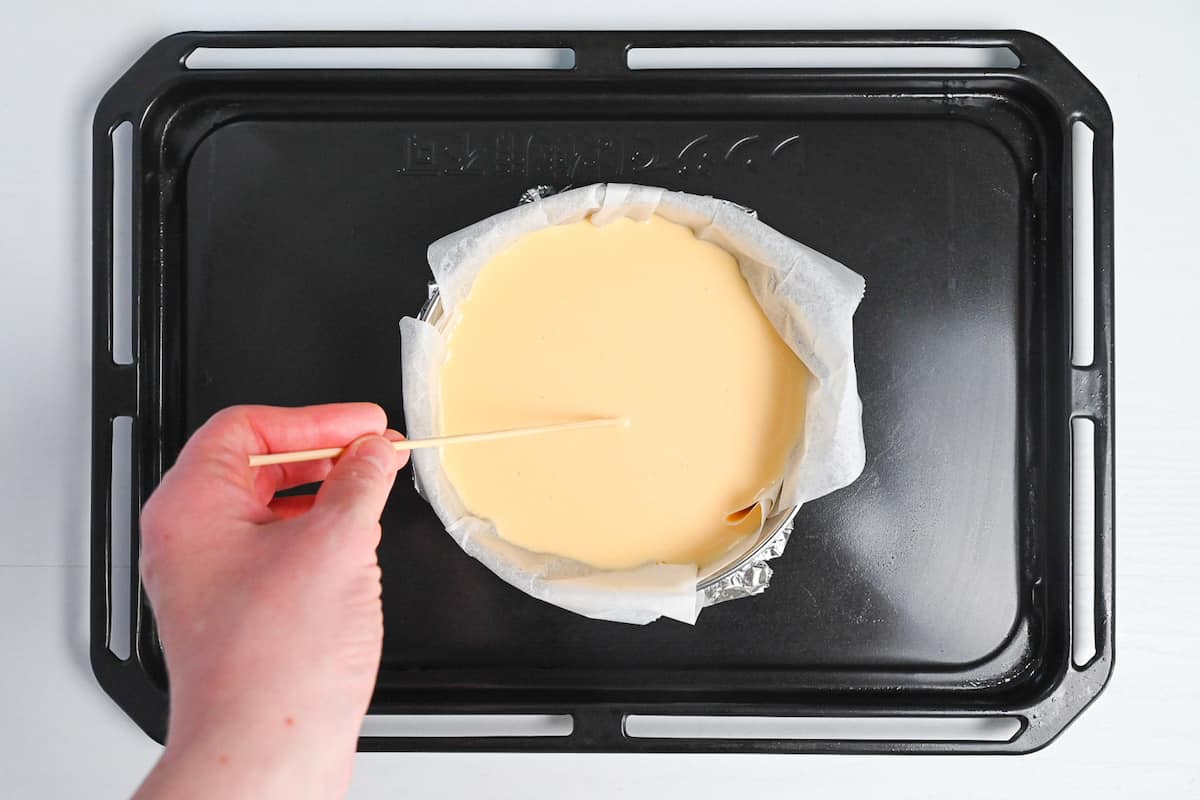
Pour the cheesecake mixture over the caramel. Tap the pan on the counter a few times and pop any stubborn air bubbles on the surface with a tooth pick.
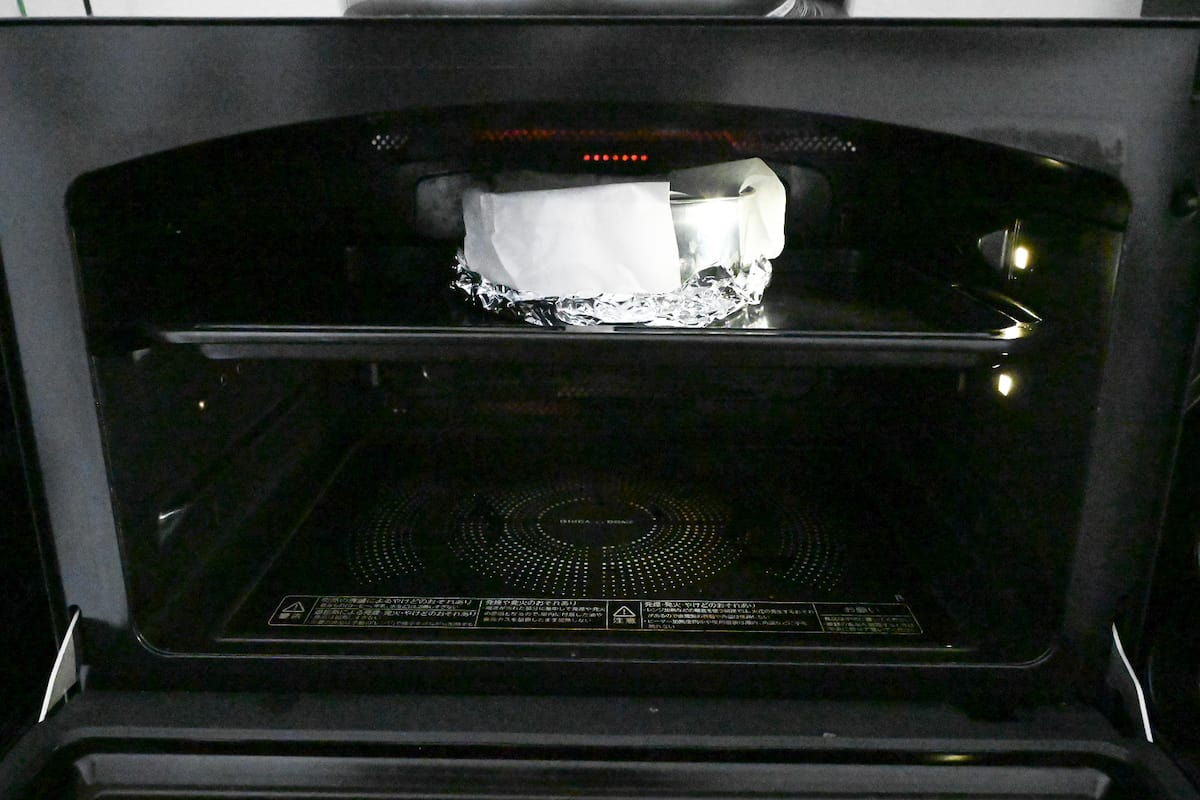
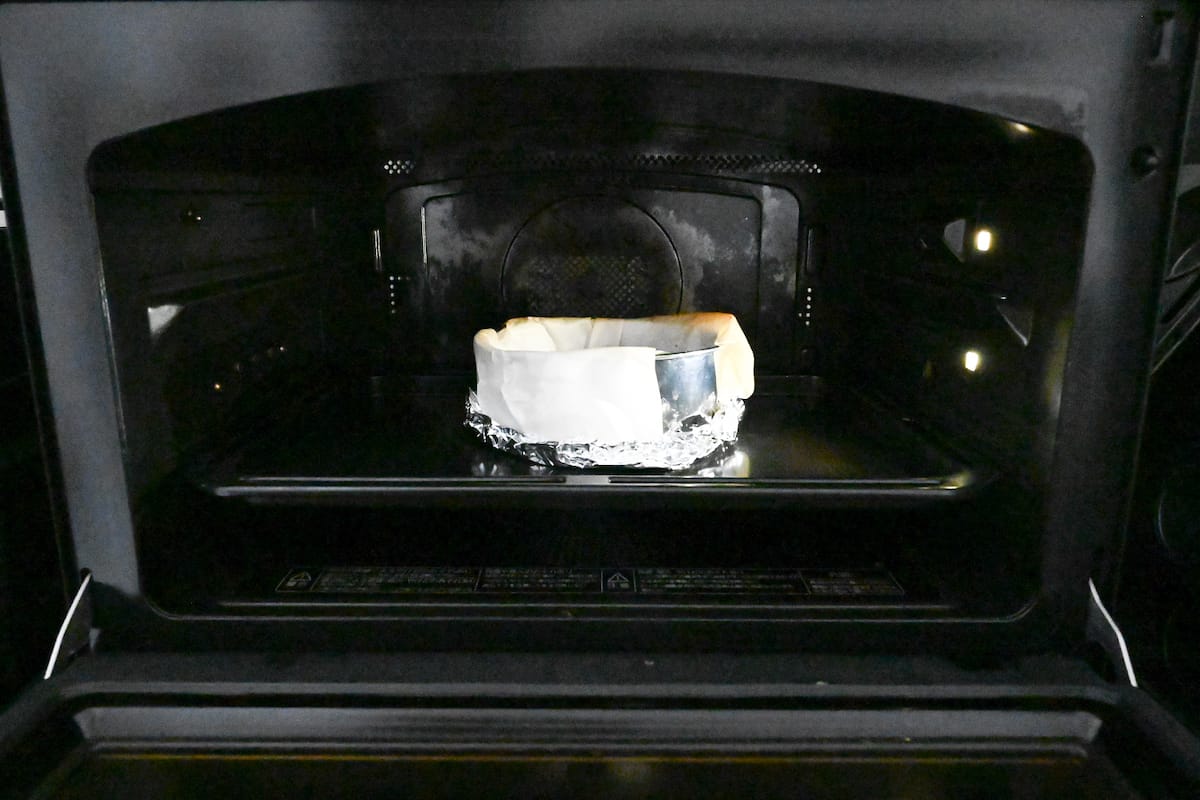
Place the cheesecake on the top shelf and bake for approximately 15-25 minutes or until the top starts to brown. (For miniature size, reduce this to 12-15 minutes.)
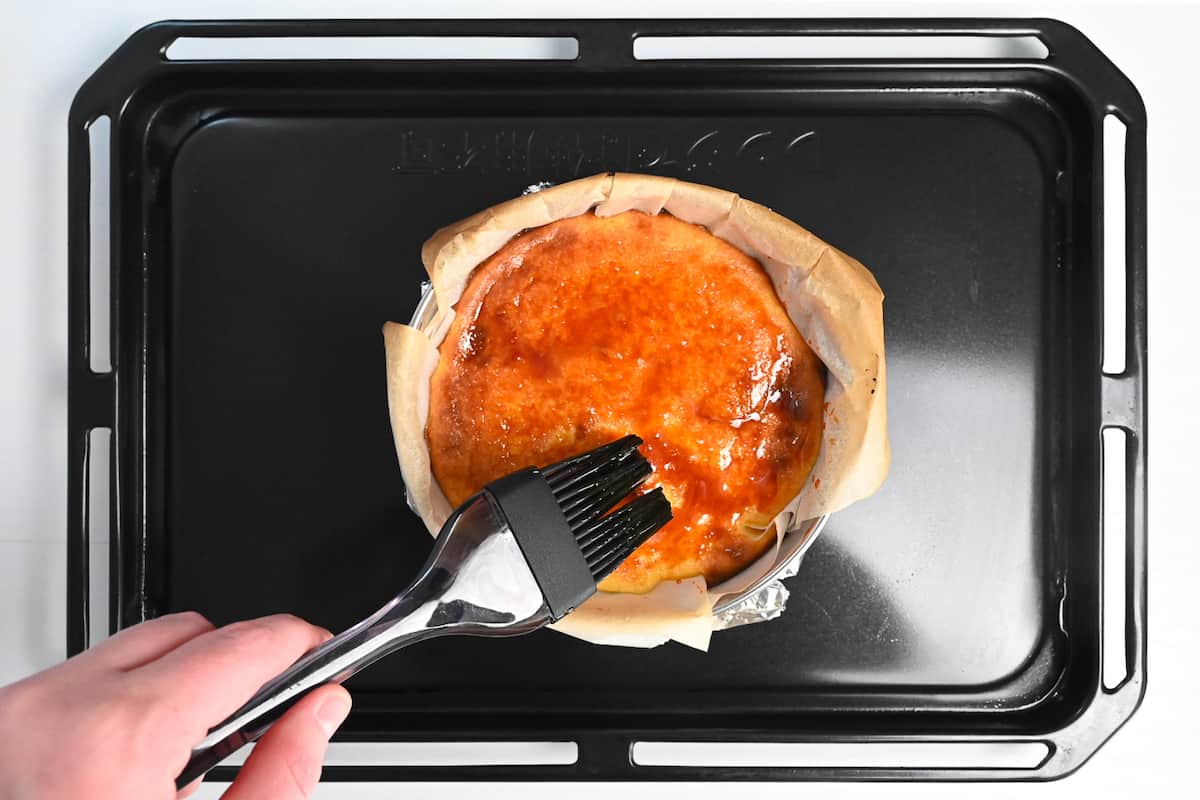
Once the cheesecake is slightly brown and firm on top, take it from the oven and gently brush the leftover caramel on top. If the caramel has become thick, heat it on the stove for a 30 seconds to soften it up again. (This will make it easier to spread on the cheesecake without breaking the surface.)
Reduce the heat of the oven by 20°C (approx 70°F) and place the cheesecake back into the oven, this time on the middle or lower shelf. Continue to bake for 5-10 minutes to create the burnt caramel effect.
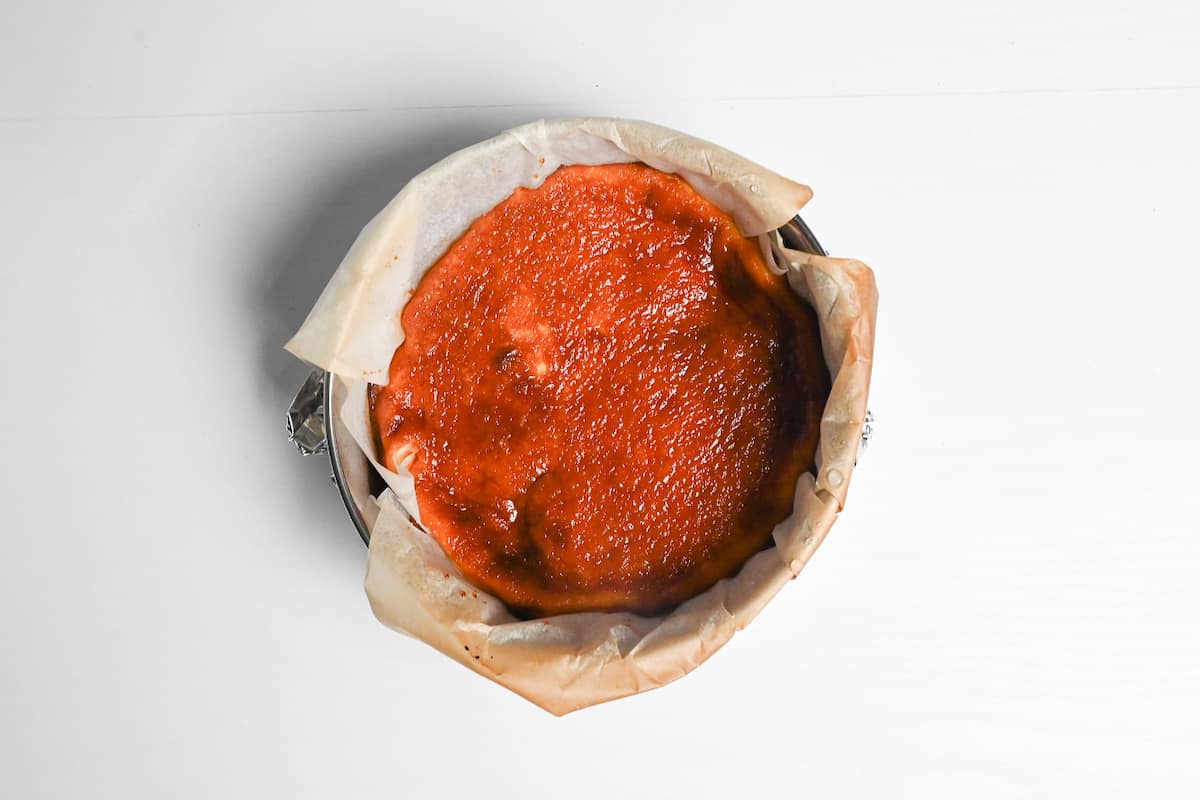
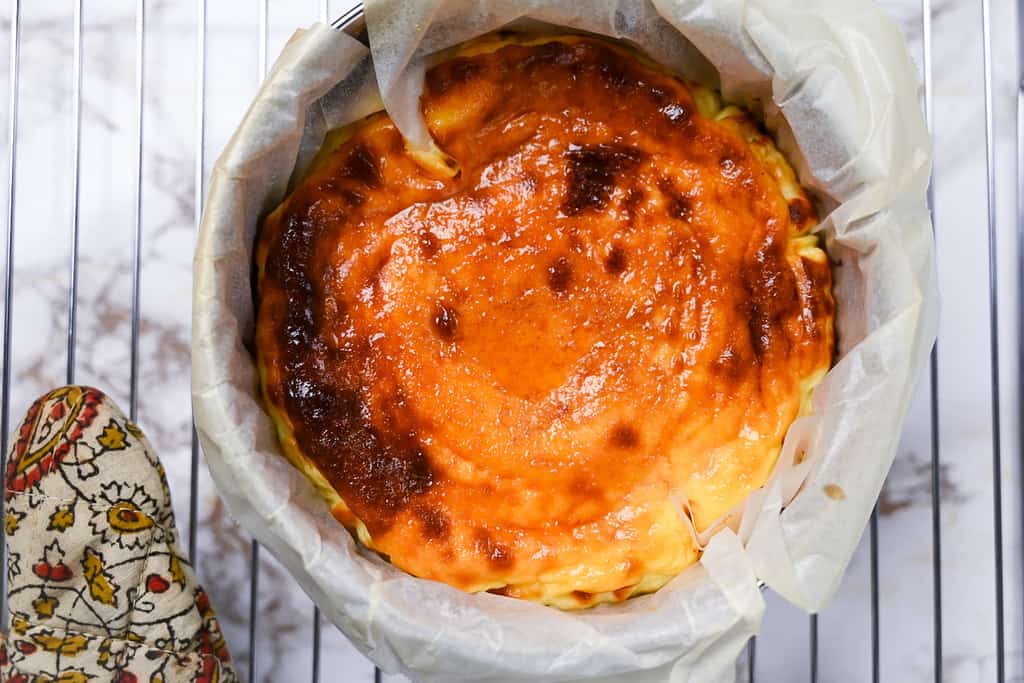
Once the time is up, remove the cheesecake from the oven and place the pan on a wire rack. It should still have a wobble when it comes out, but the cheesecake will continue to cook in the residual heat. Don’t be tempted to cook it for longer or try to remove it from the pan before it’s chilled. It will firm up once chilled.
When it’s cool to touch, wrap or place it in an airtight container and refrigerate for at least 3-4 hours before eating. For best results, chill overnight if you have time.
Enjoy!
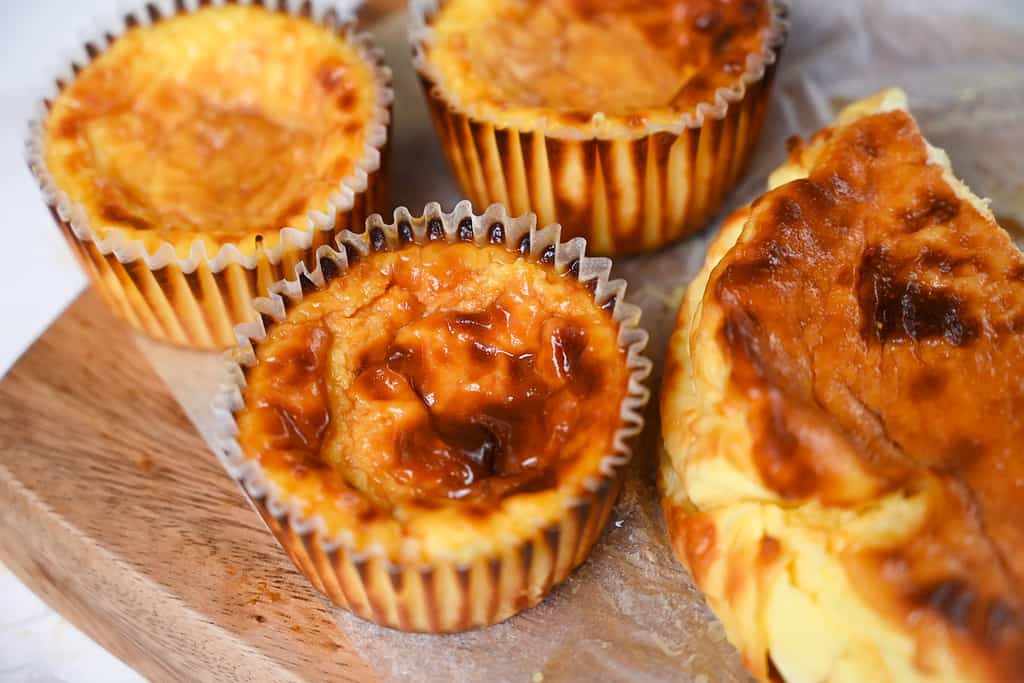
How to Make Mini Basque Cheesecake (Lawson Style)
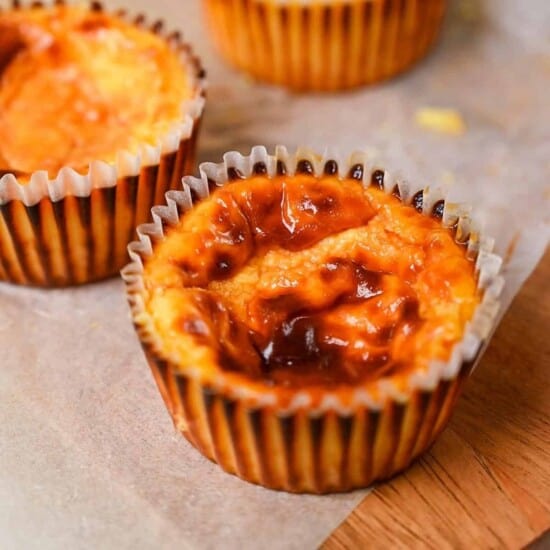
Basque Cheesecake is usually made as one large cheesecake that you can cut into slices, whereas Lawson’s Baschee is mini and probably about the size of a cupcake. The great thing about my recipe, is that you can use it for either size, you just need to adjust the cooking times.
Temperature and timings can vary from oven to oven, so the instructions here are guides based on my own oven (fan oven) and might need to be adjusted. Whether you’re making a large basque cheesecake or mini ones, you will need to start with a high oven temperature and then lower it slightly towards the end of baking.
Always make sure the oven is fully preheated, and then place the cheesecakes on the top shelf first to help them brown thoroughly on top.
Once the tops are browned, take them out and brush them with caramel. Before I put them back in, I lower the oven temperature by about 20-30°C (70-80°F) and turn the muffin pan around so that they cook more evenly. I also move the pan to a lower shelf to avoid burning the caramel too much.
Here are the approximate oven times and temperatures based on size. If doubling or tripling the recipe, I recommend making muffin size. I haven’t had a chance to test the recipe in larger cake pans yet, so I cannot advise times and temperatures for other sizes.
15cm (6inch) Cake Tin (approx total time 30 mins)
First 15-25 mins: 220-230°C (430-450°F)
Last 10 mins: 190-200°C (375-390°F)
6 x Muffin cases (approx total time 17 mins)
First 12-15 mins: 210-220°C (410-430°F)
Last 5 mins: 180-190°C (350-375°F)
This is just an approximate time based on my own oven and texture preference.

How to Chill & Store
This Basque-style cheesecake needs about 30 minutes (possibly longer if you make large size) to cool down and at least 3 hours in the fridge before it is stable enough to remove from the pan. Extra chilling will make it more stable and allow the flavors to develop.
Whenever I make this recipe, I try to make it in the evening. That way, I can let it cool, put it in the fridge and go to sleep… that’s how I remove the temptation of eating it sooner! If you’re making this for guests or an event, I recommend making it the night before.
To store, keep it in an airtight container or plastic wrap in the fridge for about 5 days or the freezer for 1-2 months. Thaw in the fridge overnight to defrost.
Storage summary
Room temperature – Not recommended.
Refrigerated – 5 days.
Frozen – Up to 1-2 months.
FAQ & Troubleshooting
Basque cheesecake is a crustless baked cheesecake that was created in San Sebastian, Spain in 1990. The name means “burnt” cheesecake and refers to the darkened surface created from baking it at a high temperature.
Basque cheesecake is baked at a high temperature and is expected to have a rustic look with cracks and a burnt top. If you bake it for too long, it could cause extra cracks so be careful of overbaking.
If your cheesecake didn’t set after it had been chilling in the fridge for 3-4 hours then it’s possible it needed more time in the oven. However, when you first remove it from the oven it should have a definite wobble and should stabilize in the fridge. I recommend chilling overnight for best results.
You can use an equal amount of grated mild cheddar, or swap the processed cheese and milk for double the amount of cream cheese.
I hope you enjoy this Baschee recipe! If you try it out, I’d really appreciate it if you could spare a moment to let me know what you thought by giving a review and star rating in the comments below. It’s also helpful to share any adjustments you made to the recipe with our other readers. Thank you!
More Sweets Recipes
- Lemon Rare Cheesecake
- Silky Japanese Purin
- Matcha and Dark Chocolate Brownies
- Nama Chocolate (Japanese Valentine’s Day Chocolate)
Want more inspiration? Explore my Japanese Dessert Roundup Post for a carefully selected collection of tasty recipe ideas to spark your next tea party!

Japanese Basque Style Cheesecake (Lawson’s Baschee Copycat Recipe)

Equipment
- 15cm (6 inch) Cake Tin
- 6 Cup Muffin pan
Ingredients
Caramel sauce
- 25 g white sugar caster or granulated
- 30 ml water
Baschee
- 3 slices processed cheese
- 30 ml whole milk
- 100 g cream cheese I use Philadelphia or Yukijirushi
- 2 tsp unsalted butter
- 50 g white sugar caster or granulated
- 1 tbsp honey
- 1 egg white
- 2 egg yolks
- 1 tbsp unbleached cake flour or AP/plain flour
- 1 pinch salt
- 200 ml heavy cream
My recommended brands of ingredients and seasonings can be found in my Japanese pantry guide.
Can’t find certain Japanese ingredients? See my substitution guide here.
Instructions
- Measure out all of the cheesecake ingredients and bring them to room temperature (about 20 minutes).

- Line the cake pan with one large scrunched piece of baking parchment, big enough to come up the sides. If you're using a pan with a removable base, wrap the bottom with foil to prevent leaks. (For mini baschee, use a muffin pan and place 6 muffin cups inside.)
Caramel
- In the meantime, make the caramel. Measure out 30 ml water, add one third of it to a small saucepan along with 25 g white sugar and mix.
- Place the sauce pan on the stove and bring to a boil over a medium heat.
- When the sugar starts to turn golden, add another third of the water and swirl the pan around (do not mix). Be careful of splashing.
- Return the pan straight to the heat, and once it starts to turn amber, add the remaining water. Take it off the heat and swirl the caramel around in a circular motion. This will draw air into the caramel and cool it down slightly.
- Pour half of the caramel onto the base of the parchment paper and save the other half for later.
Basque Cheesecake
- Preheat your oven to 220 °C (428 °F) – 230 °C (446 °F). (If you're making mini baschee then preheat to a slightly lower heat of 210 °C (410 °F).) While you wait for the oven to heat up, rip 3 slices processed cheese into small pieces and place them in a microwave-safe bowl with 30 ml whole milk. Microwave at 600W in 20-second intervals, whisking between each time. Repeat until the cheese has melted and combined with the milk.
- Next, add 100 g cream cheese and whisk until smooth. (You can microwave for 20-40 seconds if it's still too firm to mix.)
- Add the 2 tsp unsalted butter, 50 g white sugar and 1 tbsp honey, whisking between each ingredient.
- In a small separate bowl, mix 1 egg white and 2 egg yolks together using a fork. Mix thoroughly enough to combine, but gently to avoid creating too many air bubbles.
- Add the egg mixture to the cheesecake batter one third at a time and stir gently with a wooden spoon or silicone spatula.
- Sift in 1 tbsp unbleached cake flour and add 1 pinch salt, mix until smooth.
- Pour in 200 ml heavy cream one third at a time and mix well. The batter should be a smooth and quite thin consistency.
- Pour the mixture through a mesh strainer to remove any stubborn lumps of egg or flour.
- Pour it into the lined cake pan. Tap the tin on the counter a couple of times and use a toothpick to pierce any air bubbles on the top.
- Place the cheesecake on the top shelf of the preheated over. For the large size, bake for 15-25 mins. For muffin size bake for 12-15 mins.
- Once the top starts to firm up and turn brown, take the cheesecake from the oven and gently brush the surface with the other half of the caramel sauce. (If the caramel sauce has become too thick, you can heat it on the stove for a minute to melt it.)
- Lower the oven heat by 20 °C (68 °F) – 30 °C (86 °F). For the large size, this will be 190 °C (374 °F). For the muffin size, lower to 180 °C (356 °F). Return the cheesecake to the oven on a lower shelf and bake for another 5-10 minutes.
- Once the cheesecake is beautifully browned on top, remove from the oven and leave to cool in the pan for 30 mins to 1 hour. (It will still be wobbly when you take it out, this is fine! It will continue to cook in the residual heat.)
- Transfer to an airtight container and chill in the fridge for at least 3-4 hours (preferably overnight). Enjoy!

I’ve never made a cheesecake with cheese slices so I was a bit skeptical… but it came out so good!
Hi Esther,
Thank you so much for trying this recipe! I’m glad you enjoyed the cheese slice twist! 🙂
Yuto
My cheesecake went flat.. any idea what I did wrong?
Thanks for trying it! Worth knowing first: this isn’t a cheesecake that’s meant to stay tall. Unlike a soufflé or cotton cheesecake, it has no whipped-egg-white structure to hold air, so the puff you see in the oven is just heat and steam, and it settles back into a dense, low, creamy cake as it cools. A flat, sunken top is often completely normal here.
That said, where flat is a genuine problem is when it comes out as a thin disc or with a wet, sunken middle. With this recipe that usually points to the pan being too big for the fairly small, loose batter, or to underbaking. So it would help to know: what size pan did you use, and was the center set or still wet when you cut in?