



Featured Comment
Just made it and it was sooo delicious! I swear i cried of happiness while eating it, thanks a lot for the recipe!!!
★★★★★
– @shadowy_ash (from YouTube)
In Japan, yakiniku don (Japanese BBQ beef bowl) is a quick weeknight staple, usually made with bottled sauce… Think you can’t make it outside Japan? You can, just as easily.
The catch is the bottle costs more abroad, and buying one for a single bowl is never worth it. Why not mix seasonings you probably already have in a small bowl, sear beef from your regular supermarket, and coat it in the sauce? Even with a homemade sauce, you will be spooning the beef over rice in no time.

Yakiniku don
Recipe Snapshot
- What is it? In Japan, yakiniku don means seared beef, pork, or even chicken in a sweet and salty glaze over rice. The sauce flavors the rice as well as the meat.
- Flavor profile: First comes the salty soy sauce, sweetened with honey and apple, followed by the savory browned beef. Sesame oil and pepper round it out, with cabbage to refresh your palate.
- Why this recipe works: Pantry seasonings replace the bottle and cook down onto the beef, so you set how salty and sweet it gets. Sauce added after one side browns keeps the beef tender.
- How to make it: Mix the sauce, sear the beef on high, and reduce the sauce onto it. Serve over rice with sesame oil, sesame seeds, and pepper. One pan, no marinating or simmering.
- What to expect: With cooked rice ready, allow about 5 minutes to prep and 5 minutes to cook, for a total of 10 minutes. It’s a super-easy weeknight warrior.
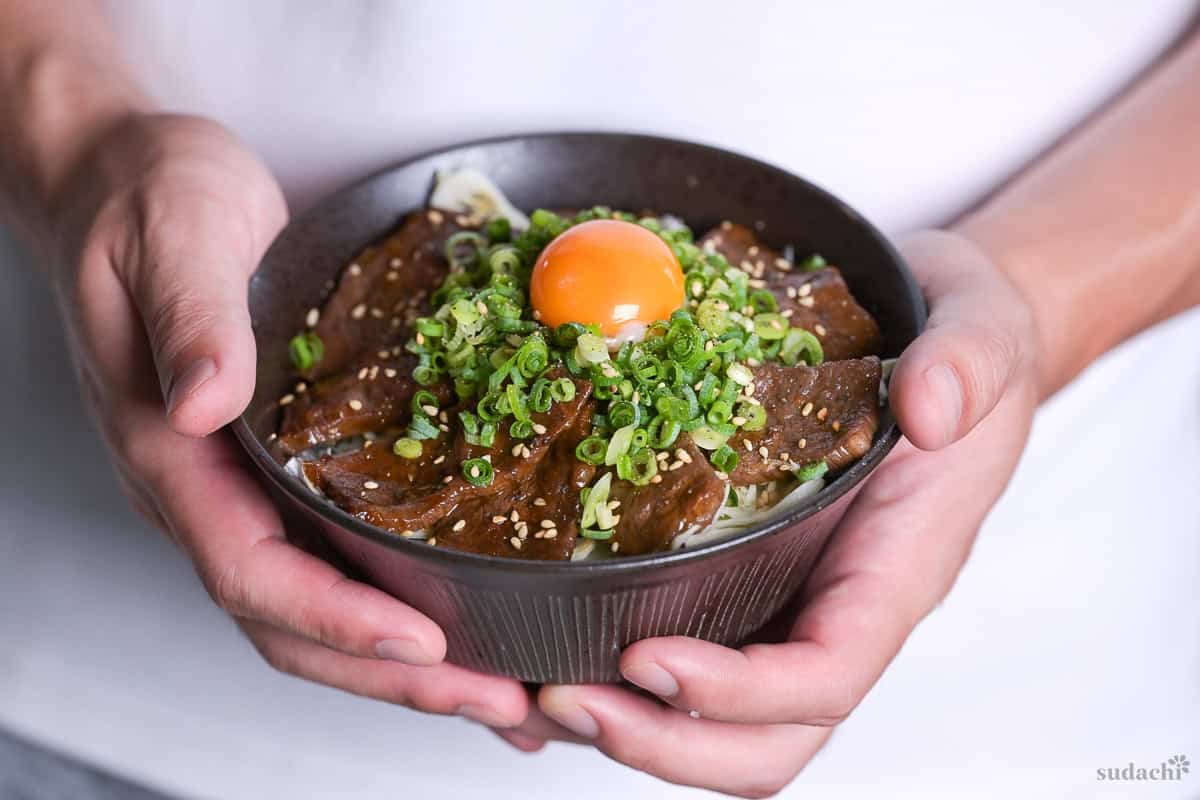
What Is Yakiniku Don?
Yakiniku don (焼肉丼) is a Japanese-style rice bowl topped with seared meat coated in a sweet, savory sauce. The sauce catches on the browned edges and seeps into the rice below. Gyudon cooks the beef in broth. For yakiniku don, you sear it first, then add sauce.
Yakiniku means grilled meat, a name home cooks use for both beef and pork. Here, I use beef. Think sliced steak over rice, except the sauce goes on in the pan before serving.
Gyudon chains helped make yakiniku don a familiar menu choice across Japan, served next to their beef bowls. Tokyo Chikara Meshi began serving seared beef over rice in June 2011, on the premise that grilling makes beef tastier than simmering. Major chains followed in 2012. Matsuya introduced its short rib bowl (gyu karubi don) in April, and Yoshinoya launched its grilled beef bowl (gyu yakiniku don) in September. Yoshinoya sold about 3 million bowls in roughly a month. Sukiya joined in with its own gyu karubi don in 2020, reportedly after 2 and a half years of testing the meat’s thickness and the sauce. The dish’s history at home is less clear. There is no record of who first made it or when.
Beef, soy sauce, and rice feature in several bowls, but the cooking method and timing of the seasoning set them apart. For gyudon, thinly sliced beef and onion simmer in a broth of dashi and soy sauce before going over rice. Korean bulgogi starts with thinly sliced beef seasoned with soy sauce, sugar, sesame oil, and garlic before cooking, and a bulgogi bowl serves that seasoned meat over rice. Stamina don usually uses pork, with garlic and garlic chives (nira) as its defining flavors. Yakiniku don generally uses beef cut for yakiniku, slightly thicker than the slices used for bulgogi or gyudon. The meat is seared first and coated in sauce afterward, saving you a long wait for it to marinate.
I use tomato ketchup and oyster sauce in my sauce, although neither is a typical yakiniku sauce ingredient. I’ve reworked this sauce twice. In 2024, I made it slightly sweeter and brought the tang forward. For this version, I started over again, using a little less ketchup to bring the flavor closer to a typical yakiniku sauce. I also added oyster sauce for umami. The shredded cabbage on the side is another new addition, because I wanted a more substantial bowl that could serve as a complete meal on its own.
Yakiniku Donburi Ingredients
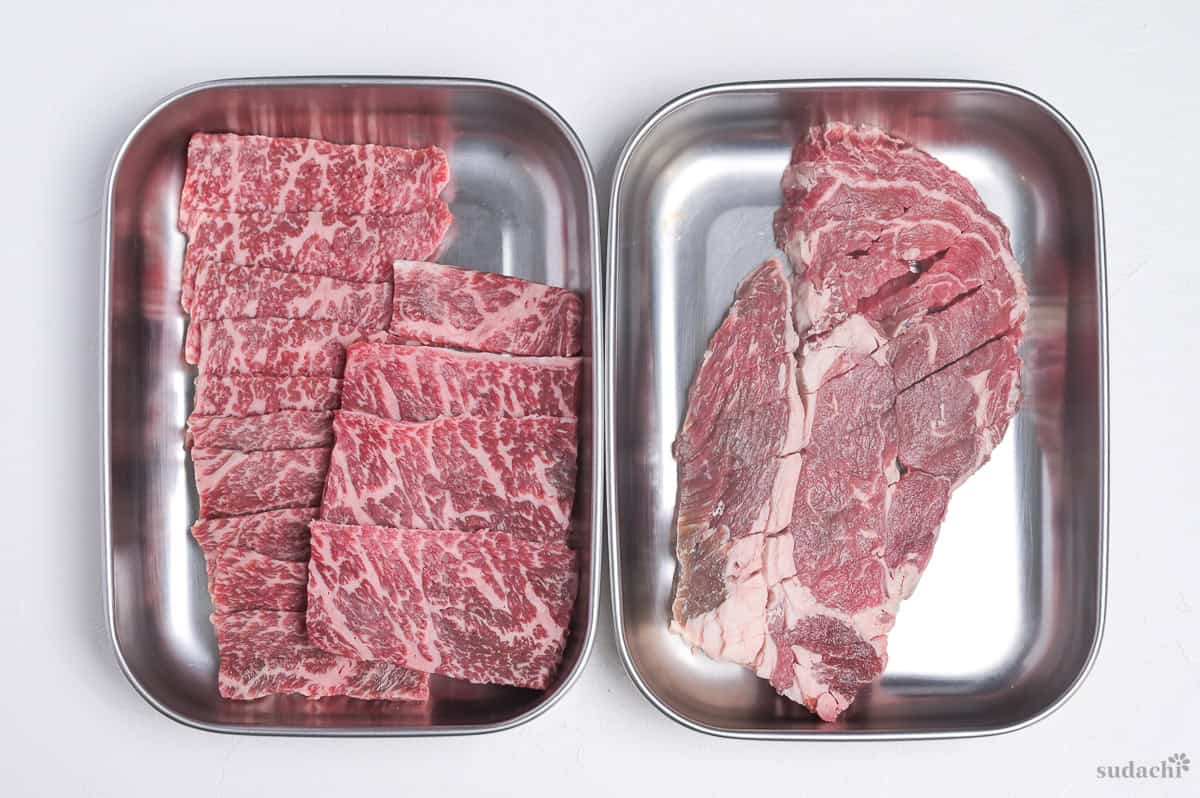
- Beef: Look in your usual supermarket for thinly sliced beef or shaved steak intended for cheesesteaks. If you have a Korean grocery store nearby, unseasoned bulgogi beef is another option. A reader reported excellent results with even thinner slices. When I surveyed Japanese home cooks living abroad, the respondent in Nevada / Arizona said they bought thinly sliced beef at Safeway and Smith’s. You don’t need a special trip to a Japanese market for premium yakiniku beef. Honestly, you can even use a tender steak like above cut into small, bite-size pieces instead of thin slices, and it still turns out great.
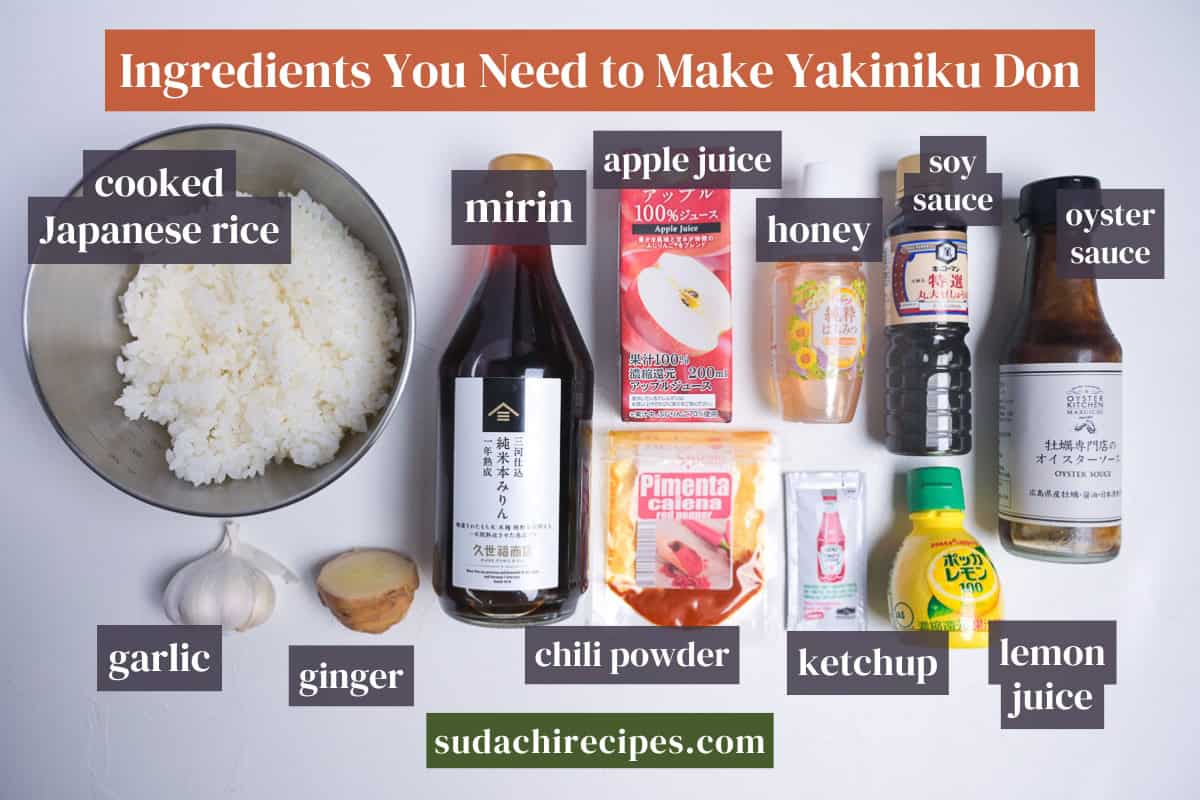
- Soy sauce: This supplies the sauce’s saltiness and savory base. Choose a standard Japanese soy sauce. Supermarket Kikkoman works well.
- Mirin: This adds sweetness and gives the sauce a glossy coating on the beef. Hon mirin (true mirin) is the best choice, but regular supermarket mirin works perfectly well for this bowl.
Substitutions, Variations, and How to Customize
Here are options for missing sauce ingredients, different meats, extra vegetables, and changes to the flavor.
Substitutions:
- Homemade sauce → Store-bought yakiniku sauce: Bottled sauce works too. Keep in mind that a bottle bought for one recipe often gets used a few times, then sits forgotten at the back of the fridge. Begin with roughly as much as you would use of the homemade sauce, then adjust to taste.
- Soy sauce → Chinese light soy sauce: Use an equal amount. It is lighter in color and slightly saltier than Japanese soy sauce, with a very similar flavor that tastes a little cleaner here. I used it every day when I was cooking on a budget in the UK.
- Mirin → Cola: To leave out the alcohol, replace the mirin with an equal amount of cola. Some of its sweetness and aroma will come through in the finished sauce.
- Cayenne pepper → Ichimi togarashi or crushed red pepper flakes: Ichimi togarashi is Japanese ground chili, which is also used in yakiniku don sauces in Japan.
- Lemon juice → Rice vinegar: Rice vinegar supplies the tang, though it won’t give you the lemon aroma.
- Honey → Sugar: Use the same amount of sugar for plenty of sweetness. Stir it in until completely dissolved, as it burns more readily.
Substitutions that I don’t recommend:
- Chinese dark soy sauce instead of soy sauce: Its thick texture and excessive sweetness make the sauce heavy and sugary.
- Sake alone instead of mirin: This leaves out the sweetness entirely.
- Rice vinegar and sugar instead of mirin: Replacing all the mirin with vinegar adds much more acidity than the small amount of lemon juice. The resulting sourness overwhelms the sauce’s balance of sweet and savory flavors.
Missing another Japanese seasoning? My guide to Japanese ingredient substitutes goes through the rest.
Variations:
- Pork or chicken: Either makes a great substitute for beef. For chicken, I strongly recommend thigh meat. Unlike the beef, pork and chicken need to be cooked all the way through. Naturally, chicken in particular takes longer in the pan.
- Add vegetables: Choose quick-cooking vegetables, such as onion, bell pepper, mushrooms, asparagus, or corn. Slice them thinly and stir-fry them in the same pan before cooking the meat. A reader reported cooking mushrooms and onions first, then adding them back to the beef just before pouring in the sauce.
- Go meatless: Sear tofu, then coat it with the same sauce.
How to Customize:
- Top with kimchi: Add it on top of the meat after assembling the bowl. Kimchi is a common topping in home recipes for yakiniku don.
- Make it spicy: Add a little doubanjiang (chili bean paste) when mixing the sauce.
How to Make My Beef Yakiniku Don
If you prefer to watch the process in action, check out my video of this beef yakiniku don recipe!
Before you start (Mise en place):
- Cook the rice before you start heating the pan. If cooking Japanese rice in a pot is new to you, you will find a video in the dish-up step below.
- Remove the beef from the fridge about 10 minutes before searing. While you wait, prepare the sauce and garnishes.
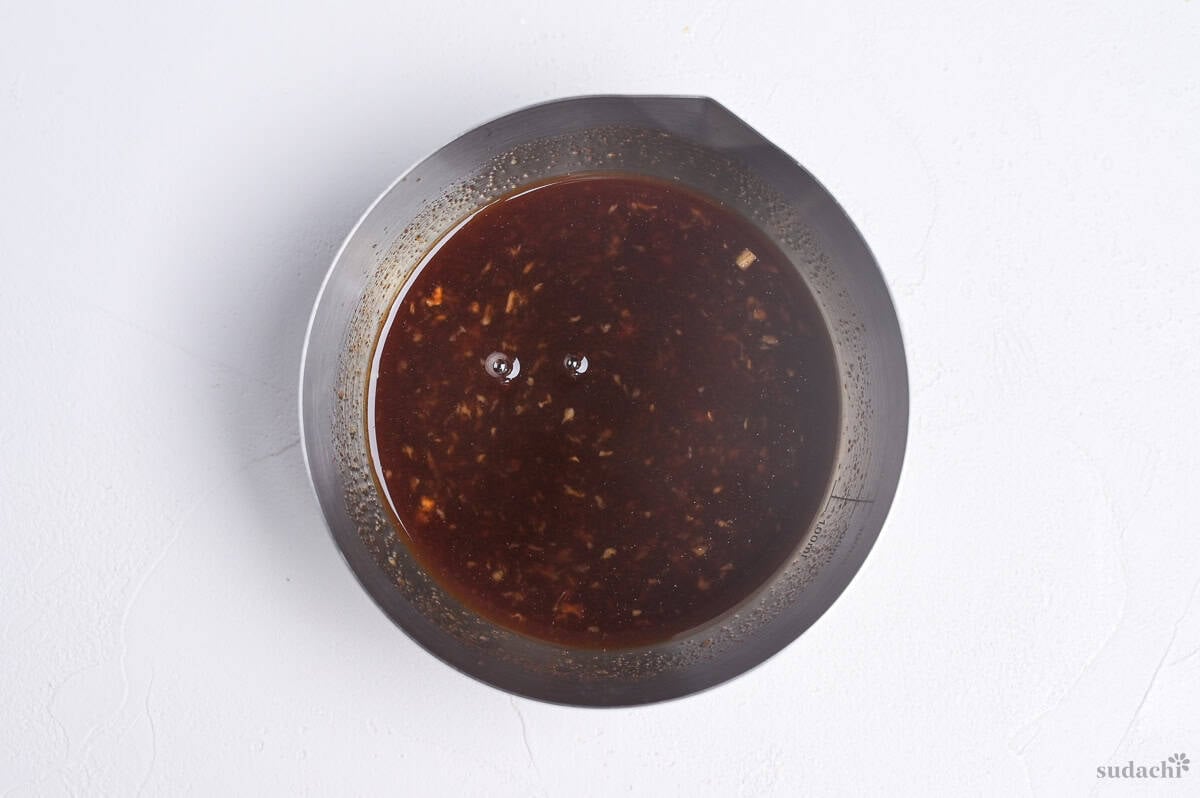
- Mix all the sauce ingredients thoroughly in a small bowl.
- If cutting a steak yourself, slice it thinly across the grain or cut it into bite-sized cubes.
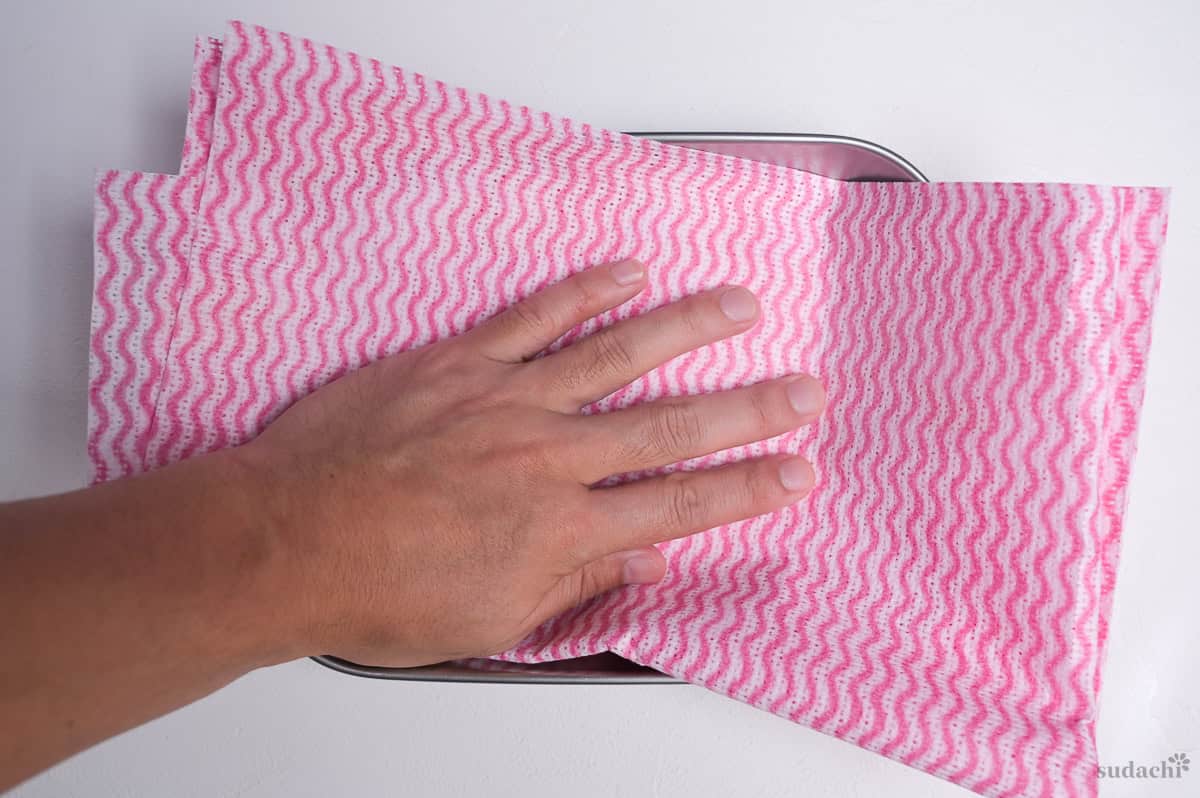
- Just before cooking, pat the beef dry with paper towels. Surface moisture makes it steam rather than sear.
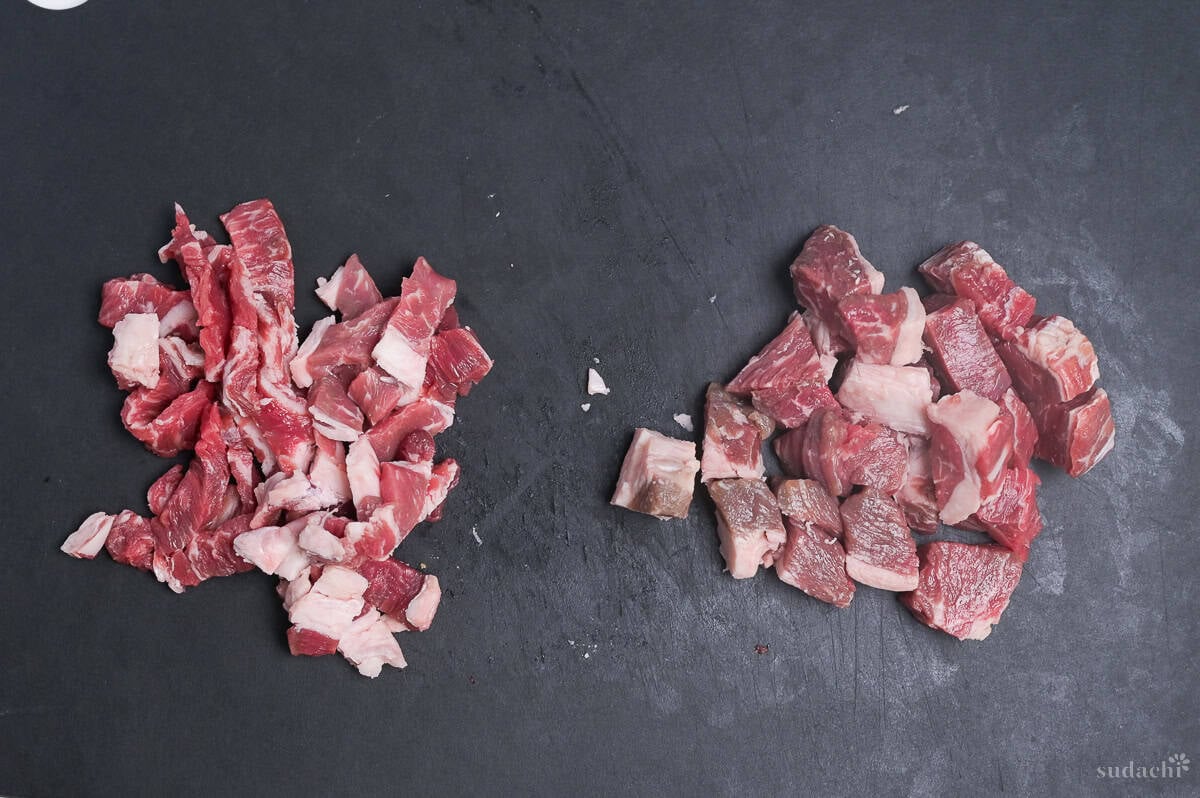

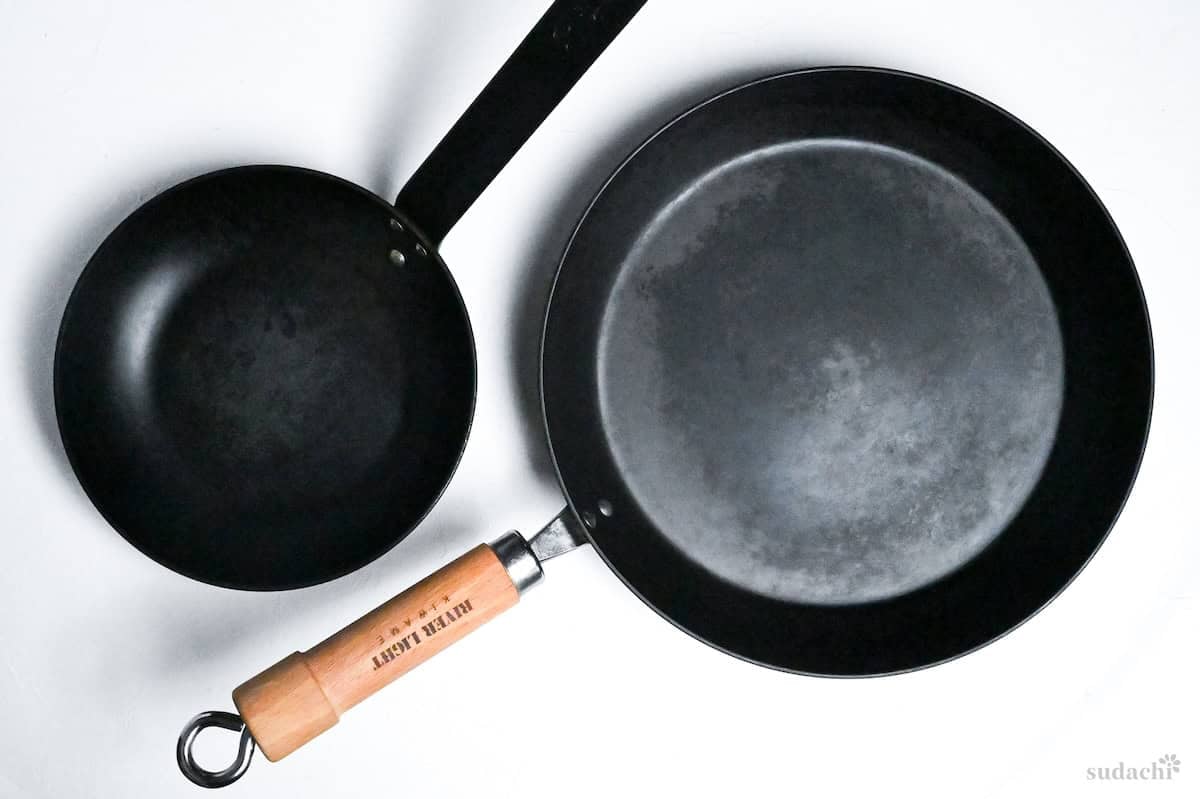
To develop this recipe, I used a 28 cm carbon steel skillet.
i. Set a frying pan over high heat. Swirl a little oil around the pan, then add the beef in a single layer, separating any clumped slices.
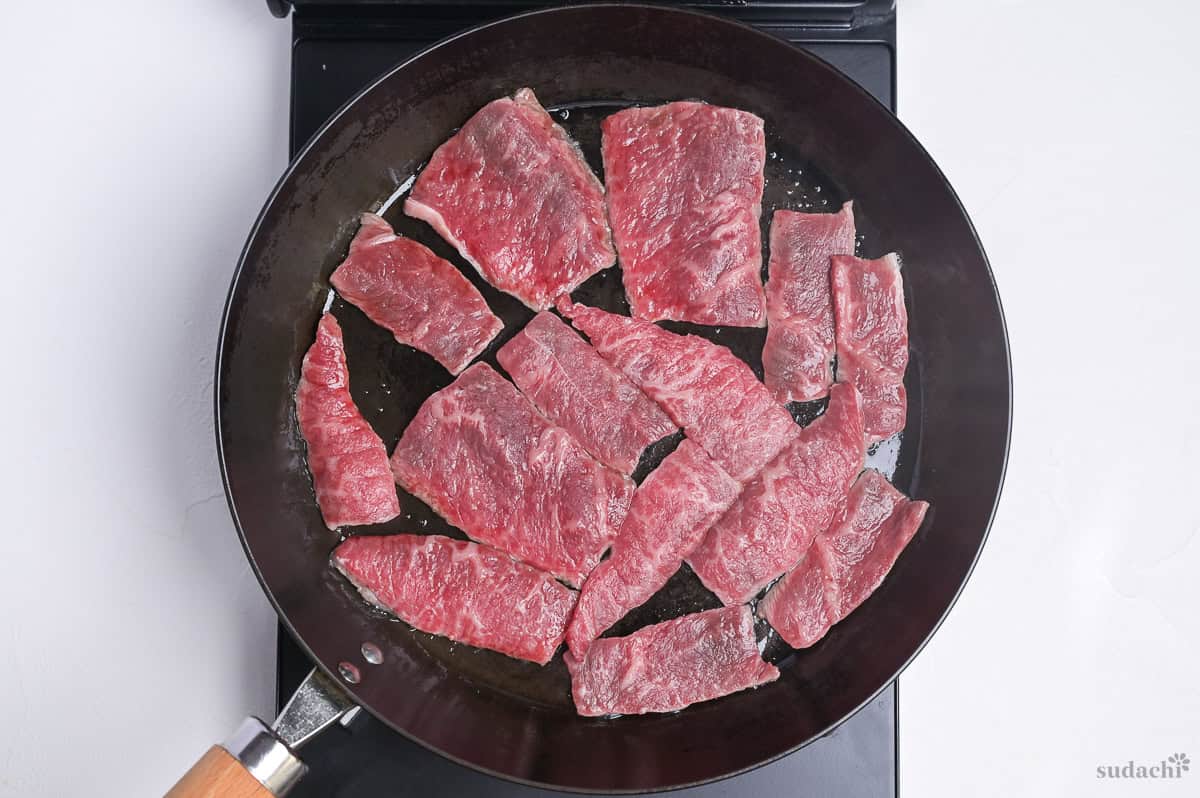
Note: Make in 2 batches if you have a small pan. Crowding the pan lowers its temperature, causing the beef to steam rather than sear.
ii. Flip the slices as soon as the underside is browned. Browning both sides at this stage takes them too far. For steak cubes, do the reverse and sear all sides over high heat before adding the sauce.
Thin slices will finish cooking in the sauce, so they only need to brown on one side first. You can add the sauce as soon as you turn them over. It’s fine for the meat to be underdone after this first sear. The following minute in the sauce cooks it all the way through.
i. Pour in the prepared sauce immediately after flipping the beef. Leave the heat on high and stir constantly so the sauce doesn’t burn.
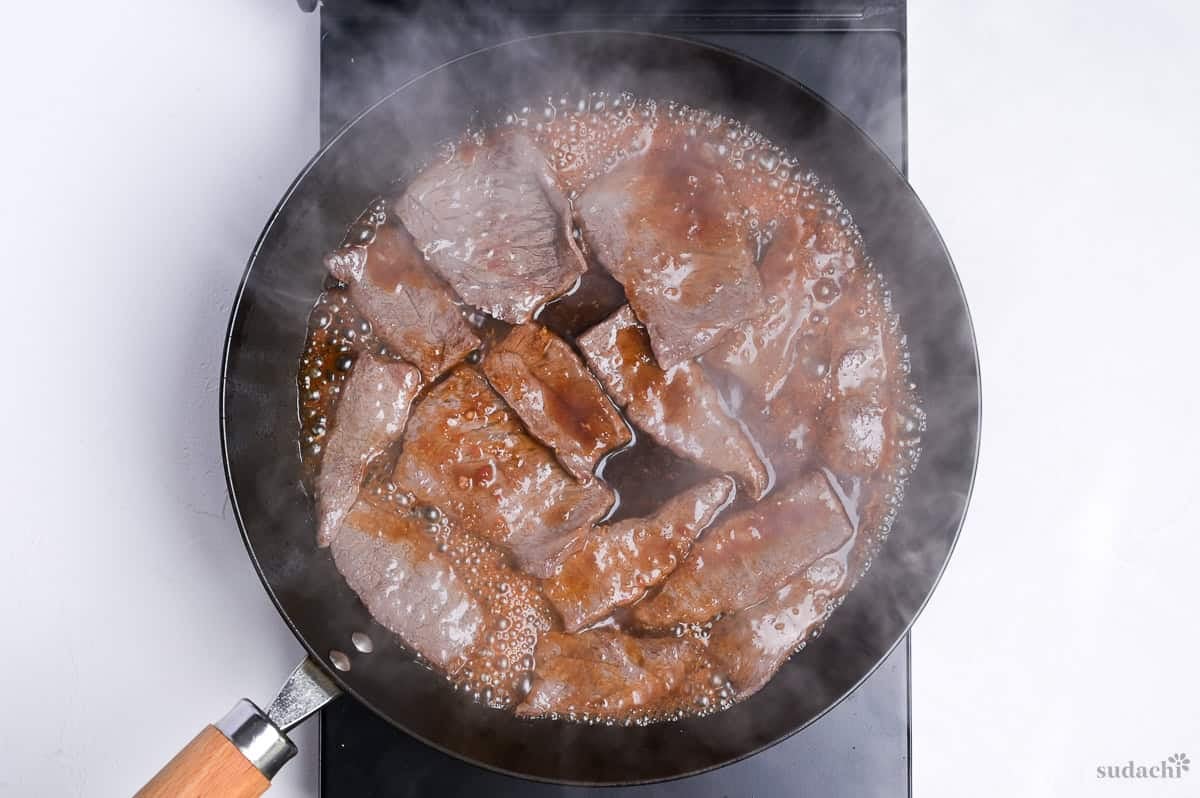
ii. This takes about 45 seconds to 1 minute, but watch the sauce rather than relying on the time. Switch off the heat when it has cooked down to a coating on the beef and there is no watery liquid left in the pan.
The beef will shrink and dry out the longer it cooks, so let your eyes decide when to stop.
i. With the heat off, fill your bowls with freshly cooked rice, then shredded cabbage.
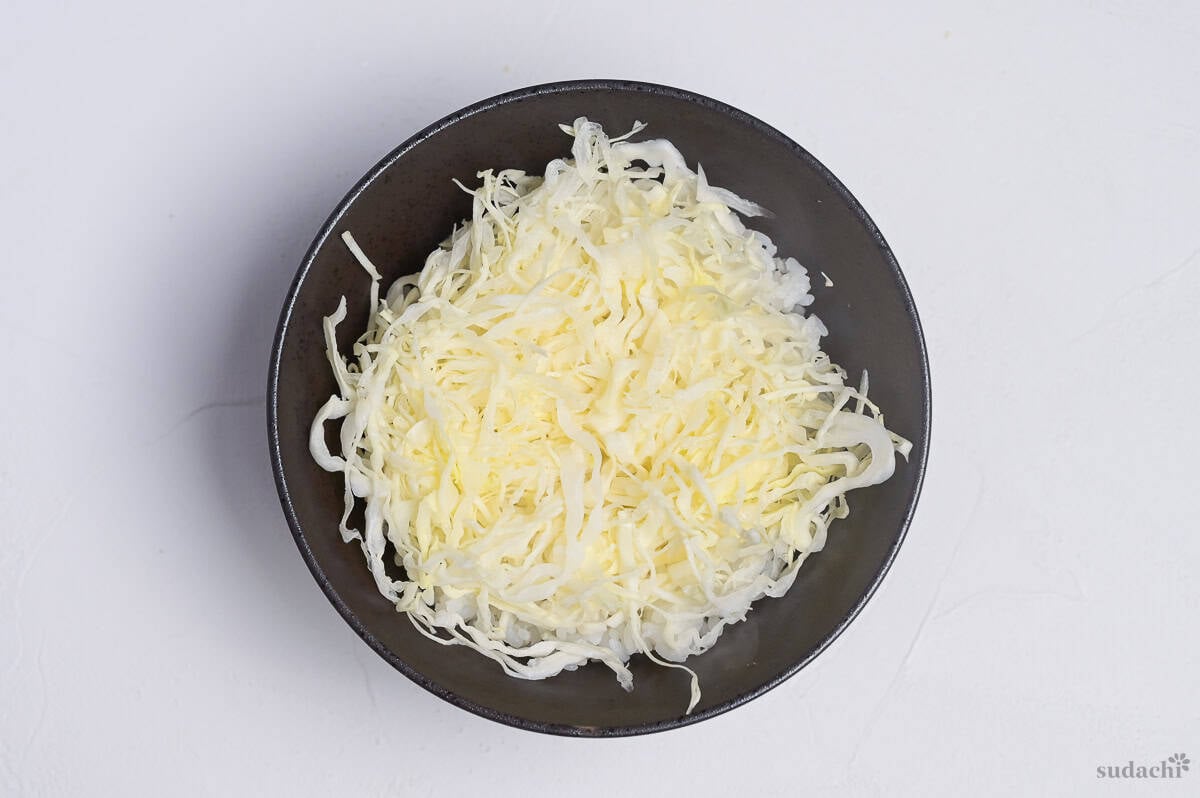
ii. Arrange the beef over the rice.
iii. Pour the remaining pan sauce over the rice as well. If you leave the sauce behind, the meat will be salty while the rice underneath stays plain.
i. Drizzle the toasted sesame oil over the bowl and sprinkle with white sesame seeds and black pepper.

ii. Sprinkle on the green onions. If you’d like, add a pasteurized egg yolk or a soft-boiled egg on top. You can also replace the yolk with an onsen tamago (Japanese slow-cooked egg).

The crisp cabbage contrasts with the rich beef fat and refreshes your palate.


Tips for the Best Yakiniku Bowl
- Add the sauce as soon as one side is browned. Thinly sliced beef continues cooking in the sauce, so if it already looks perfectly cooked before the sauce goes in, it will be overdone by the time you serve it. Once a slice dries out, extra sauce won’t make it juicy again.
- Sear the beef before adding any sauce. You might expect to marinate meat for yakiniku, but that makes this bowl harder to cook well. Soy sauce and sugar leave the surface wet, and the sugar burns before the beef can brown. Cook the unseasoned beef first, then coat it in sauce.
- Cook larger quantities of beef in batches. Make all the sauce at once, then sear the meat in batches small enough to fit in a single layer. Either return all the seared beef to the pan and sauce it together, or coat each batch as it comes off the heat.
Brown just one side and let the sauce finish cooking the beef for its final minute, so it is still tender when it lands on the rice.
Storage & Meal Prep
Fridge: Store sauced beef airtight, separate from the rice, for up to 3 days. Add cabbage and egg when serving.
Freezer: Freeze sauced beef for about 1 month. Thaw it in the fridge.
Meal prep: Slice the beef ahead. Mix the sauce per meal, as it isn’t cooked until it goes into the pan.
Reheating: Sprinkle with a little water, cover, and heat briefly. Prolonged reheating toughens it, like overcooking.
What to Serve With Yakiniku Don
- Classic Miso Soup with Dashi
- Spinach Salad with Sesame Sauce (Goma-ae)
- Ginger Cucumber Pickles (Kyuri no Tsukemono)
- Izakaya Daikon Salad
Beef Yakiniku Bowl Troubleshooting
The liquid is juice from the meat, collecting because the pan isn’t hot enough to evaporate it. This happens if the beef is wet, the pan is overcrowded, or you add the meat before the pan is hot enough. Moving the slices before they brown prolongs the steaming. Remove about half the beef, bring the pan back up to temperature over high heat, and arrange the remaining slices in one layer without overlapping.
The sauce needs to cook down further before it can coat the beef. Apple juice, lemon juice, mirin, and the meat’s juices all contribute liquid at the start. If you serve it while it’s watery, it drains off the beef into the rice, leaving the meat bland and the rice soggy. When the beef is already cooked, take it out, let the sauce reduce on its own for a few more seconds until thickened, then return the beef and stir to coat.
The sauce has cooked down beyond a coating into a dark, concentrated glaze. As more water evaporates, its saltiness increases. Stir in a little water to loosen it, then gently toss the beef in it again. Next time, stop cooking sooner, as soon as the sauce coats the meat.

More Quick Japanese Recipes
- Tonteki Pork Steak with Garlic Chips
- Yakitori Chicken Donburi
- Miso Glazed Salmon Fillets
- Okinawa Taco Rice
Once that 1-minute finish in a hot pan feels like second nature, pick your next fast weeknight dinner from my Quick Japanese Recipes.
Did You Try This Recipe?
I would love to hear your thoughts!
💬 Leave a review and ⭐️ rating in the comments below. 📷 I also love to see your photos – submit them here!

Beef Yakiniku Don (Japanese BBQ Beef Bowl)

Ingredients
Yakiniku Don
- 300 g thinly sliced beef shaved steak works best as a substitute
- 2 portions cooked Japanese short-grain rice about 200 g per bowl
Sauce
- 2 tbsp Japanese soy sauce (koikuchi shoyu)
- 2 tbsp mirin
- ½ tbsp tomato ketchup
- ½ tbsp honey
- 1 clove grated garlic or 1 tsp garlic paste
- 1 tsp grated ginger root or ginger paste
- ½ tsp oyster sauce
- ½ tsp cayenne pepper
- ¼ tsp lemon juice
- 1 tbsp apple juice
To Finish
- ½ tbsp toasted sesame oil
- ½ tbsp toasted white sesame seeds
- ¼ tsp ground black pepper
- shredded cabbage as needed
- 2 tsp finely chopped green onions
- 2 pasteurized egg yolks or soft-boiled eggs, or onsen tamago, optional
The ingredient brands and tools I trust are in my Japanese pantry guide and my cooking tools guide.
Can’t find certain Japanese ingredients? See my substitution guide here.
Instructions
- Take 300 g thinly sliced beef out of the fridge about 10 minutes before it goes in the pan. (If you slice the beef yourself, cut across the grain.)

- While you wait, make the sauce. Stir 2 tbsp Japanese soy sauce (koikuchi shoyu), 2 tbsp mirin, ½ tbsp tomato ketchup, ½ tbsp honey, 1 clove grated garlic, 1 tsp grated ginger root, ½ tsp oyster sauce, ½ tsp cayenne pepper, ¼ tsp lemon juice and 1 tbsp apple juice together in a small bowl until well blended.
- Right before searing, press paper towels lightly over the beef to blot away the surface moisture.
- Heat a frying pan over high heat and swirl in a little oil. Spread the beef across the pan in one layer without overlapping, and pull apart any clumps. (If your pan is small, sear the beef in 2 batches.)
- Once one side has browned, turn the slices over and add the sauce at once.Stir nonstop over high heat for 45 seconds to 1 minute. When the sauce has reduced and clings to the beef, and no thin, watery sauce remains in the pan, turn off the heat.
- Divide 2 portions cooked Japanese short-grain rice among the bowls. Lay the shredded cabbage, then beef on the rice and spoon the sauce left in the pan over it.
- Drizzle ½ tbsp toasted sesame oil over everything, then sprinkle with ½ tbsp toasted white sesame seeds and ¼ tsp ground black pepper.

- Scatter 2 tsp finely chopped green onions on top. If you like, add 2 pasteurized egg yolks, one per bowl, and serve hot. Enjoy!

This was so tasty! I’m so happy that I came across this recipe. I used thinner beef slices and it was still excellent. Thank you!
Thank you! I’m happy that you liked the recipe!