


Featured Comment
This turned out delicious. It tasted healthy and comforting. It will definitely be added to our regular rotation for autumn.
★★★★★
– May
Takikomi gohan looks like plain rice with a few ingredients tossed in. It is not. It is a different dish that just happens to share a pot. Cook it the way you cook white rice and you will pull out a hard core, or a wet mush, or a bowl seasoned only at the bottom.
The good news is that none of those failures are random. There are only a handful of places this dish goes wrong, and I can teach you exactly where each one hides.

Takikomi Gohan
Recipe Snapshot
- What is it? A one-pot Japanese rice dish where the grains simmer right inside a soy sauce, mirin, and sake dashi with fresh ingredients, so flavor lives in every grain rather than on top. An all-rounder you can cook any week of the year. Not maze gohan. Not plain rice in disguise.
- Flavor profile: Deep savory umami carried by rich rendered chicken fat and rehydrated shiitake, rounded by dashi, with a thin amber crust of “okoge” at the bottom of the pot.
- Why you will love this recipe: It maps out every place this dish goes wrong, the hard core, the soggy bottom, the bottom-only seasoning, and closes each one with tested timing, so a rice that misbehaves for most cooks comes out right for you.
- Must-haves: Short-grain (or medium Calrose) rice, skin-on chicken thigh, and dried shiitake rehydrated in cold water with a piece of kombu.
- Skill level: Medium. The cooking is stovetop-simple or fully hands-off in a rice cooker, but the dish rewards a cook willing to soak the rice in plain water, layer the seasonings on last, and leave the pot unstirred.
Summarize & Save this content on:
What Is Takikomi Gohan?
Takikomi gohan (炊き込みご飯) is Japanese rice cooked together with its seasonings and ingredients in a single pot, so that every grain takes on the flavor instead of carrying a topping. The name itself says it. Takikomu means to cook things in, and that “in” is the whole idea. The rice does not sit next to the flavor. The rice becomes the flavor.
There is a close cousin called maze gohan (混ぜご飯), or mixed rice, and the difference is one of timing. Maze gohan folds already cooked ingredients into already cooked rice. Takikomi gohan cooks them together from raw, which is exactly why it behaves so differently from white rice. It also goes by other names depending on the region, gomoku gohan around Tokyo, kayaku gohan around Osaka, and it is coded as an autumn dish, the season of new-crop rice, chestnuts, and mushrooms.
One quiet detail tells the whole story: rice cookers in Japan typically carry a dedicated takikomi setting, and most sold elsewhere do not. The country is admitting this rice needs its own program.
Takikomi Gohan Ingredients
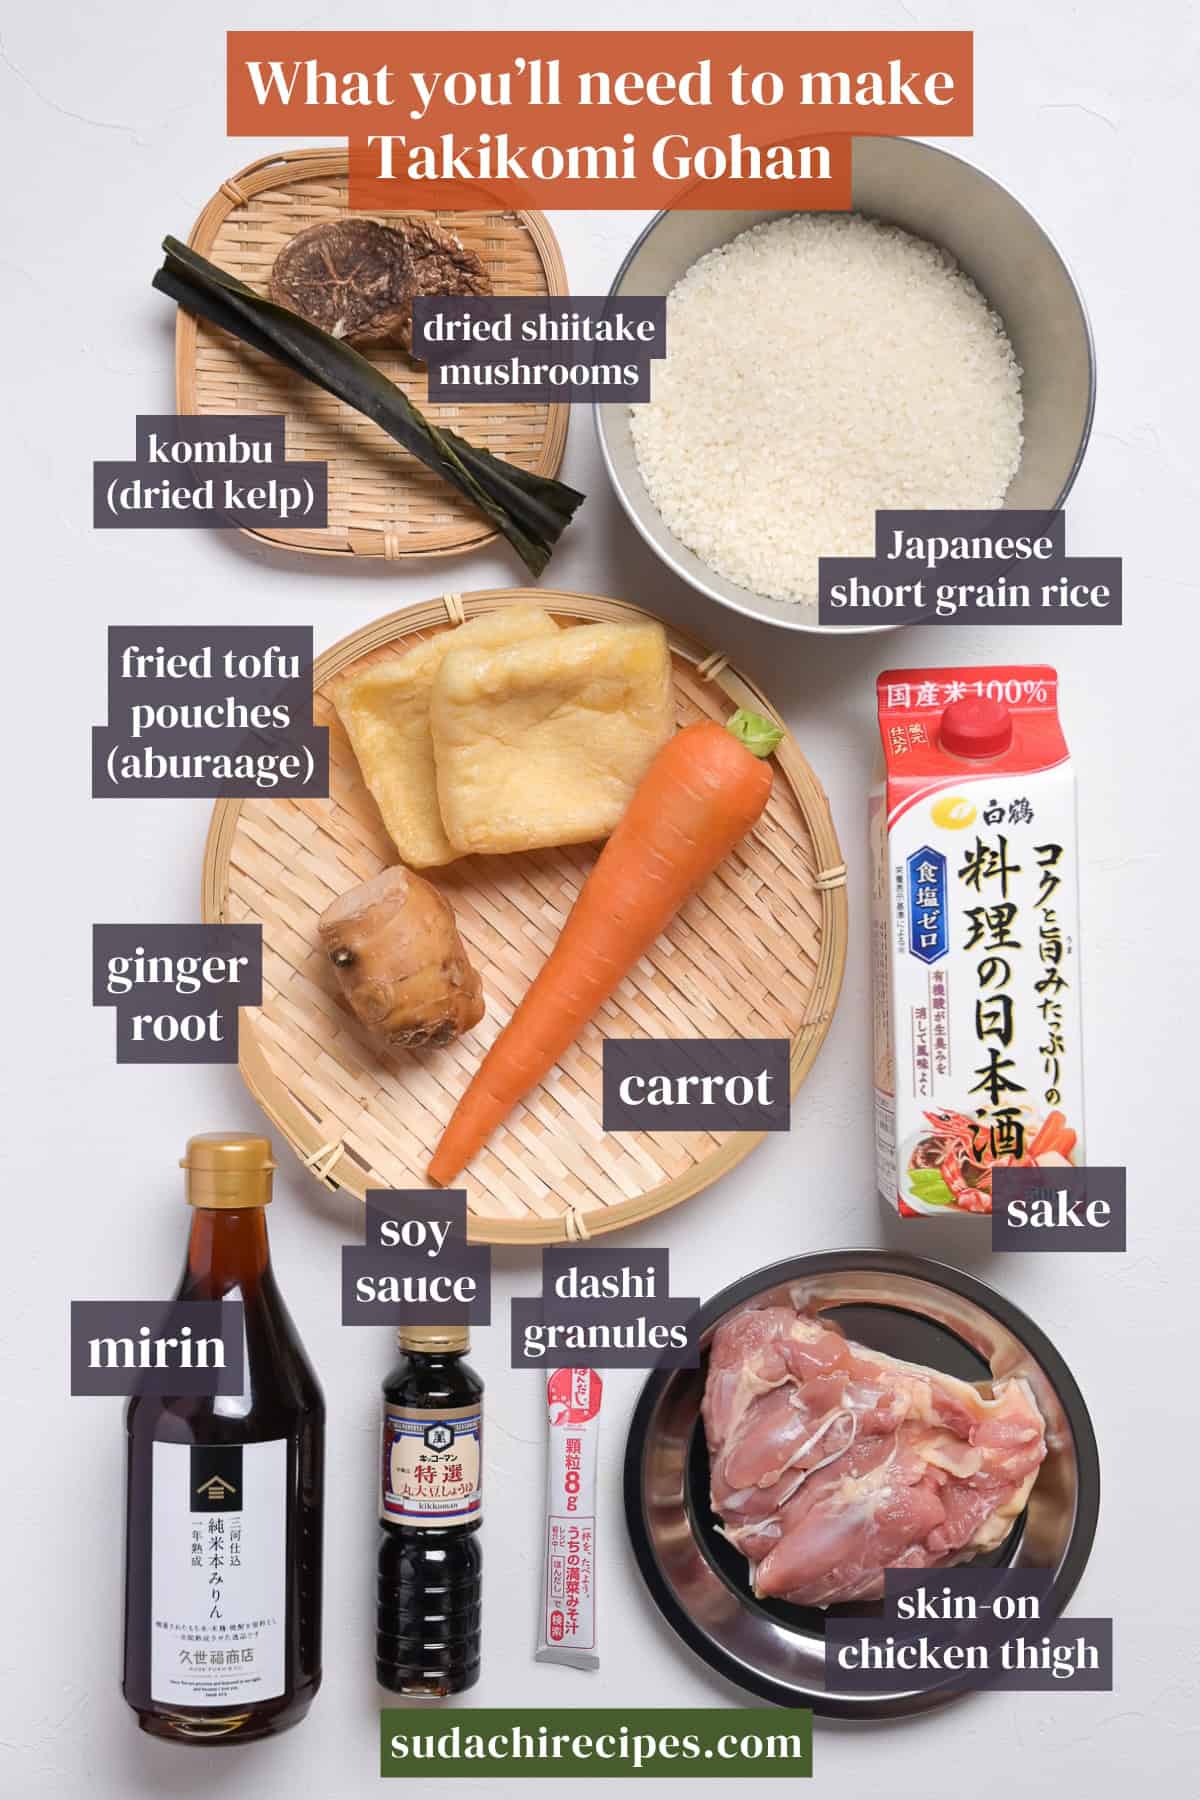
- Japanese short-grain rice: I made this recipe using Japanese short-grain, so this is the most fail-proof option. However, other short-grain like Korean or medium-grain Calrose would work too.
- Dashi stock: The cooking liquid that infuses every grain with umami, and in this recipe you are building it right inside the prep. If you want to skip the manual step, my go-to shortcut on other days is a batch of homemade dashi packets, one Sunday of work and the flavor is the real thing for weeks. If you would rather skip that, good store-bought dashi packets are an honest choice too.
- Skin-on chicken thigh: We use the skin for the skin for the depth, so I recommend getting boneless skin-on chicken thigh.
Substitutions & Variations
I will be honest with you here, more honest than most recipes are about swaps. This rice is calibrated, and the water in it is doing a careful job, counting the soy, the mirin, the sake, and the moisture the vegetables release, all as part of one balanced total. Every substitution you make is another variable you add back into a dish I tuned specifically to remove them. So treat this list as a short, tested set of changes that genuinely hold, not a license to rebuild the pot.
Substitutions:
- A pot on the stove → Rice cooker: This one is not really a substitution, it is a fork in the road, and both branches are good. A rice cooker, using its takikomi setting (or regular) if it has one, does the thinking for you. A pot on the stove hands you the controls, and the recipe walks you through the exact heat stages, so you lose nothing but you do need to carefully follow.
- Koikuchi soy sauce → Tamari: For a gluten-free version, a good tamari steps in cleanly and keeps the savory backbone intact. The color and salt run close enough that the rice still reads right.
- Skin-on chicken breast: As long as you use skin-on, you can get similar takikomi gohan. To be honest, if you get creative and render the fat without separating, chicken wings or drumsticks would work too.
- Short-grain Japanese rice → Do not reach for long-grain: I have to plant a flag here. Basmati and jasmine cook dry and separate, which is lovely for those dishes and wrong for this one. The whole texture of takikomi gohan depends on short-grain rice clinging and going glossy, so a long-grain swap does not adjust the dish, it changes it into a different dish.
- Swap the root vegetable: Carrot is the steady default here, but you can move within the same lane and use other firm root vegetables that hold their shape. Stay away from watery, high-moisture vegetables as the swap, because they seep liquid into a pot whose water is already counted, and that is the fast road to a soggy bottom.
Have trouble finding Japanese ingredients? Check out my ultimate guide to Japanese ingredient substitutes!
Variations:
- Salmon version: This is tested alternative. Use the salmon skin to render the fat and flesh in place of chicken thigh.
- Vegan version: Drop the chicken entirely and let the dried shiitake, the kombu, and the aburaage carry the savory load, which they are more than built to do. You lose the chicken-fat richness, so lean a touch harder on the shiitake and the soaking water for depth.
How to Make Takikomi Gohan
If you prefer to watch the process in action, check out my YouTube video of this takikomi gohan recipe!

i. Pour the rice into a bowl, fill it with water, swish, and drain. Repeat that swish-and-drain a few times. It is fine if the water never goes fully clear, you are rinsing off loose surface starch, not bleaching the grain.
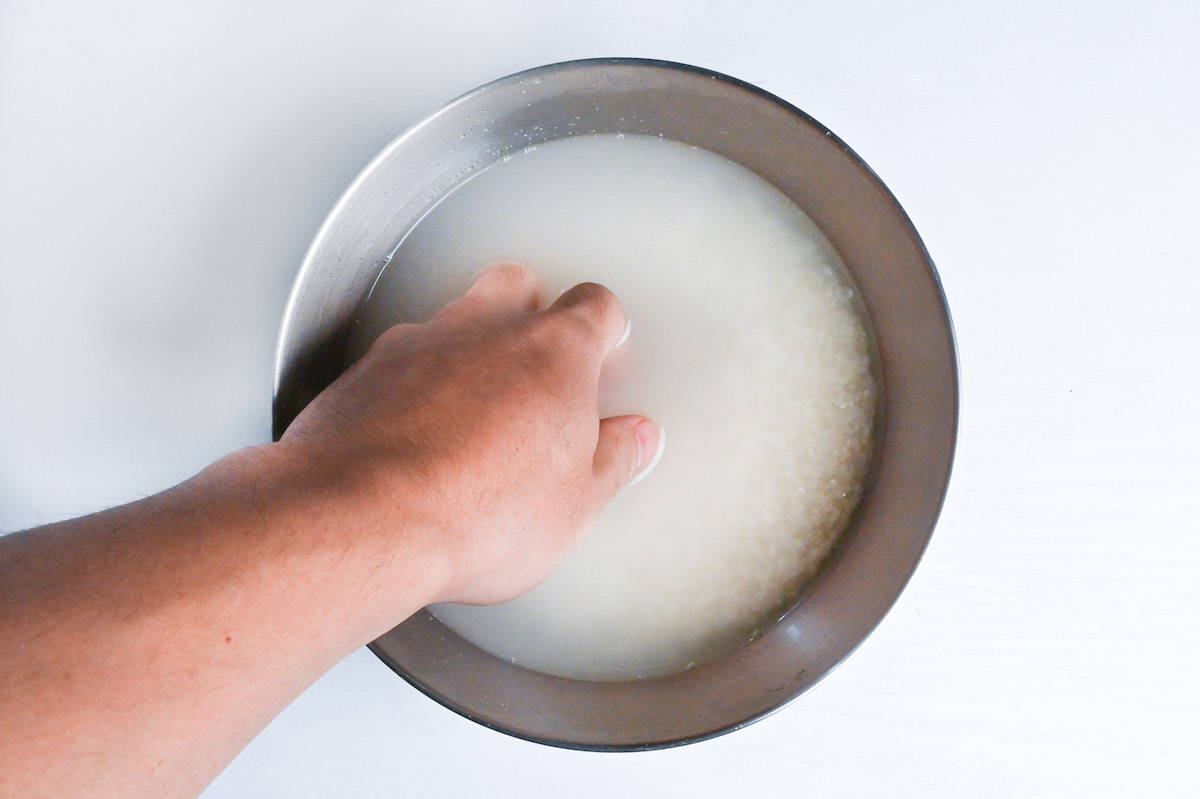
ii. Cover the rice with fresh water and leave it to soak for one hour. Plain water only here. No soy, no dashi, nothing seasoned.
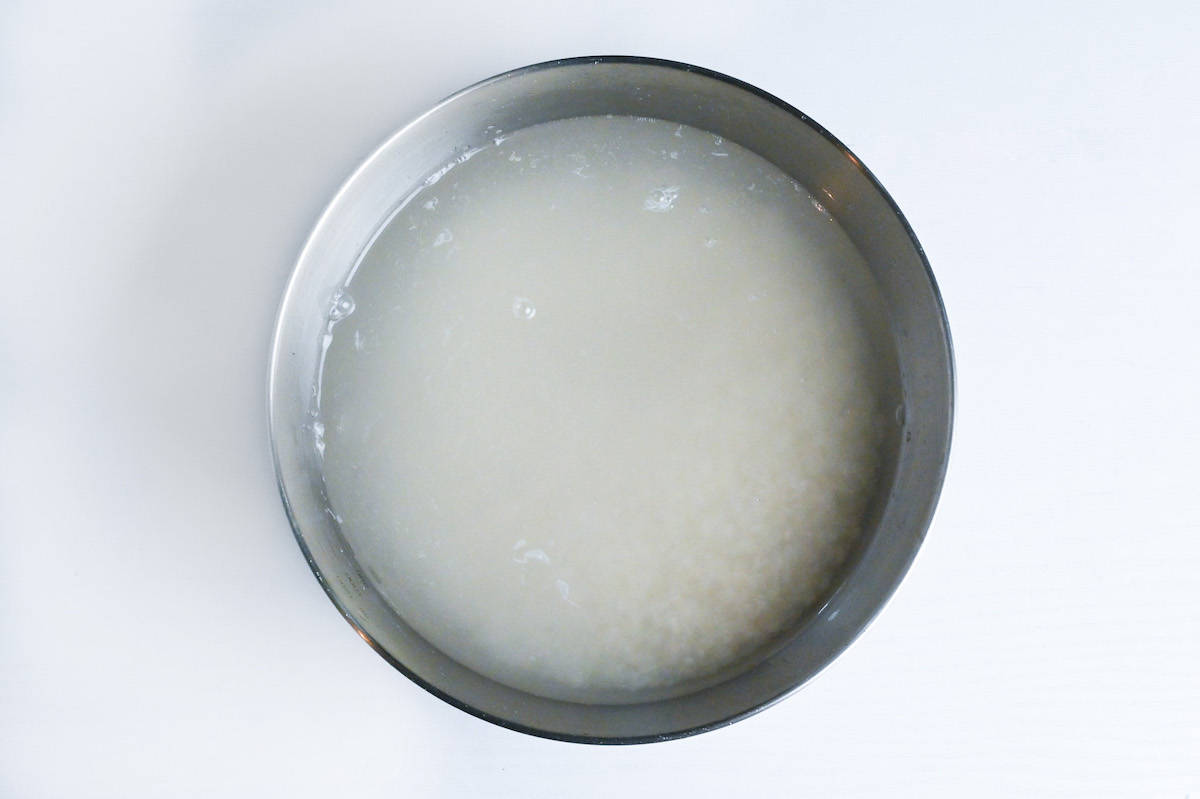
The grain needs to drink water all the way to its core before it cooks, or the center stays hard. Salt and soy raise the pressure outside the grain and slow that soaking down, the way a salted road pulls water out of ice. Season later. Soak plain.
i. While the rice soaks, drop the dried shiitake and the kombu into a bowl of cold water and leave them the same hour to rehydrate.
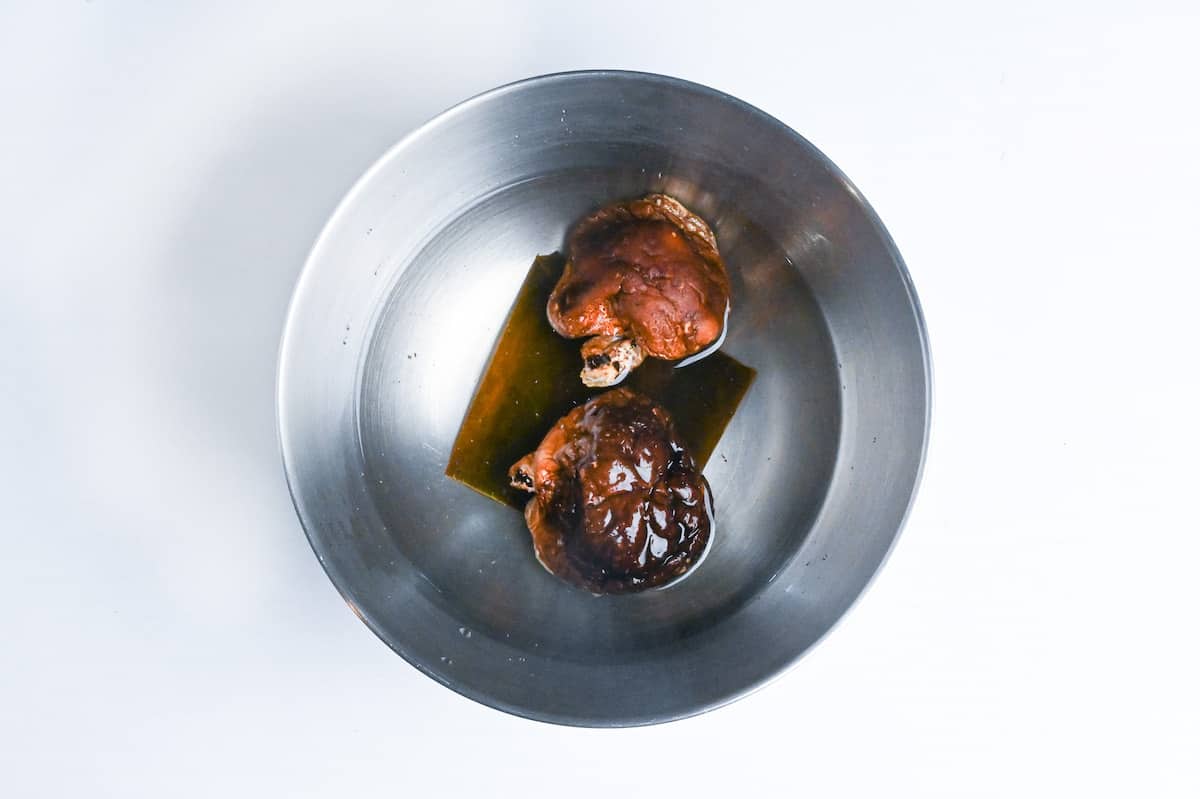
ii. This quiet bowl is doing real work. As the mushroom and kelp sit, they leak savory depth into the water, and that water becomes the dashi the rice will drink.
Cold and slow is not laziness, it is chemistry. The mushroom builds its deepest savory note while it soaks, and the part of it that does that job works best when the water stays cool. Rush it with hot water and you trade away the very depth you soaked it for.
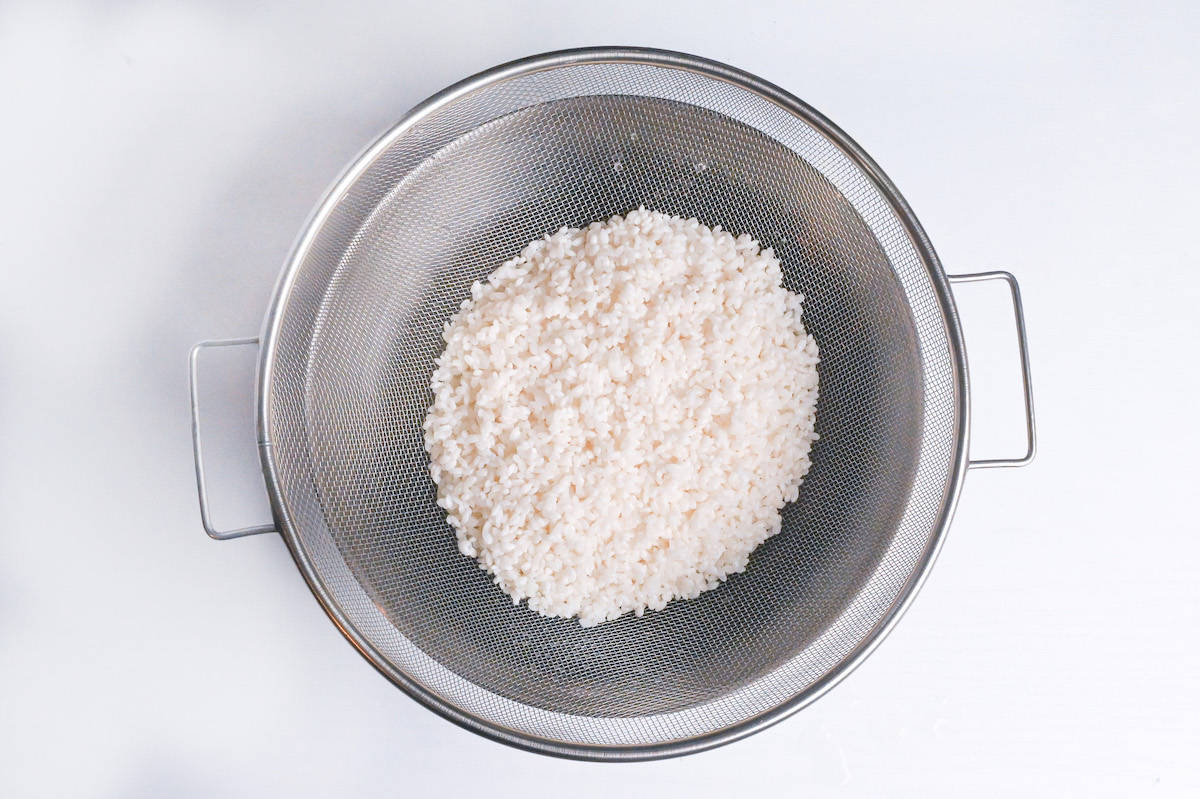
i. After the hour, pour the rice through a sieve to drain, then rest it over an empty bowl so it keeps drying until it’s time to cook.
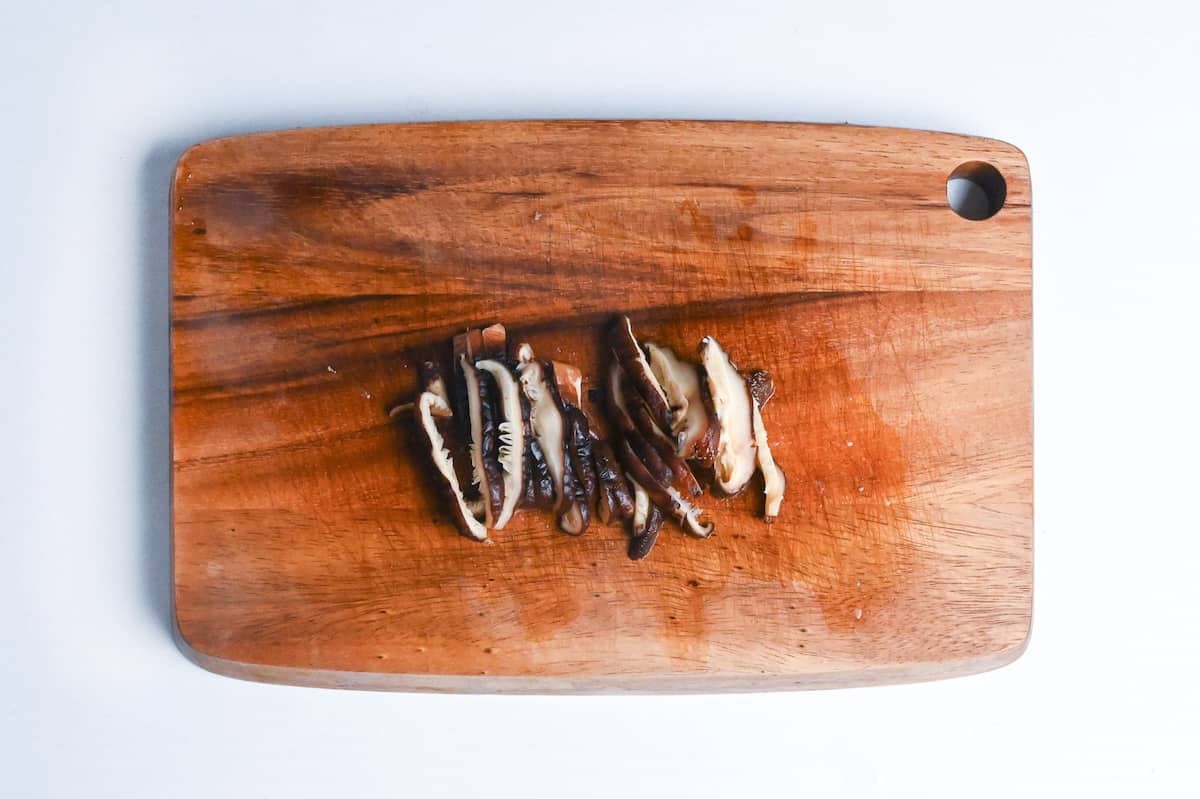
ii. Lift the shiitake and kombu out of their bowl. Keep that soaking liquid, it is your light dashi. Slice the softened shiitake thin, and set the kombu aside.
You can discard the kombu or use it to make kombu tsukudani rice ball filling.
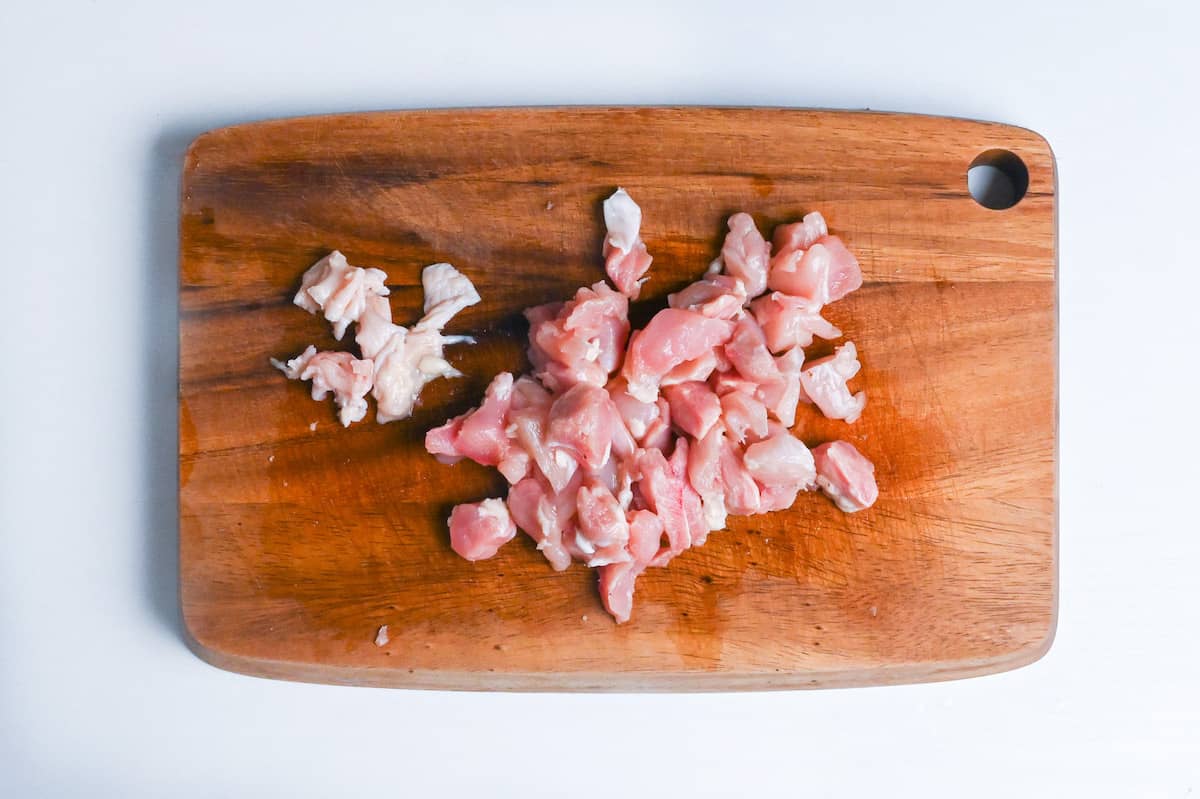
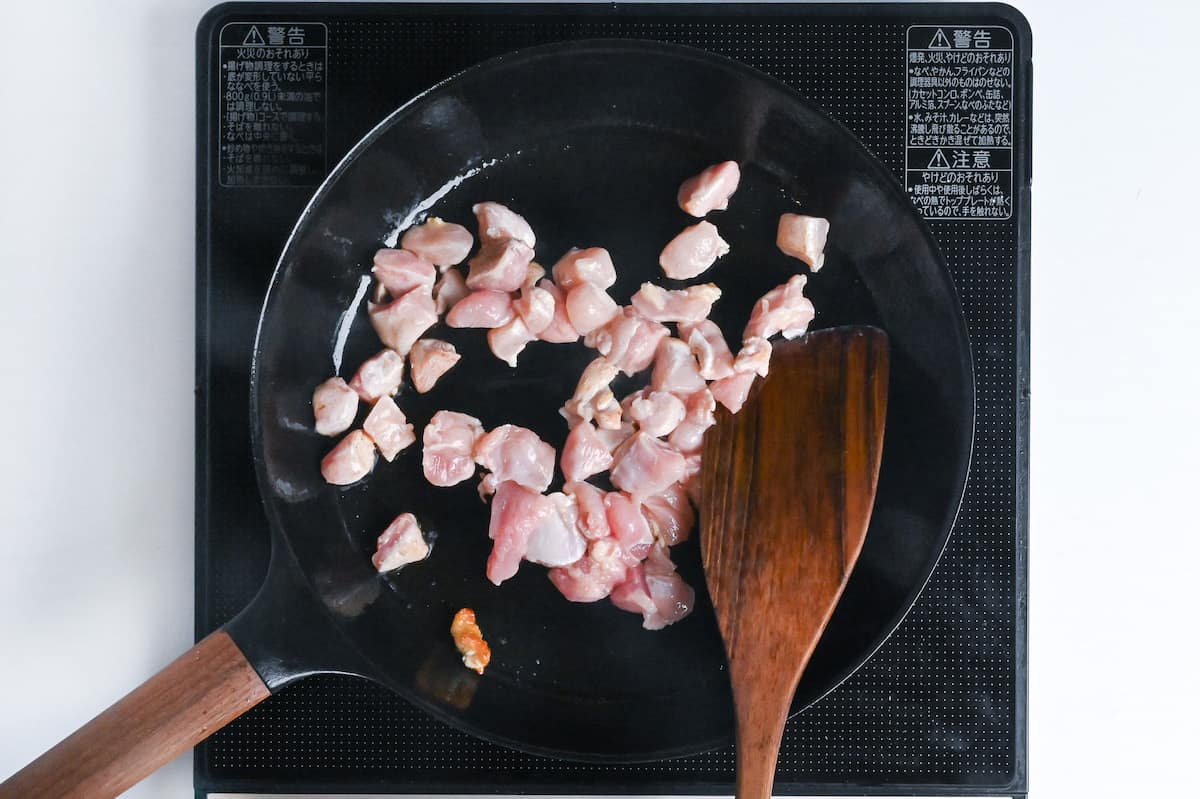
i. Peel the skin off the thigh and cut the meat into bite-size pieces. Set the meat aside for now.
ii. Heat a small pan, add a little oil, and lay the skin in flat. Put a lid on to keep the fat from spitting, and fry both sides until the skin is crisp and golden. Rest it on paper, this is your finishing crackle for later.
i. Wipe out the excess fat, then sear the chicken meat in the same pan until it loses its raw pink. You are not cooking it through, it will finish cooking with the rice later.
ii. Add the sliced shiitake, the carrot, the ginger, and the aburaage. Stir for a minute so they catch the chicken juices, then pull the pan off the heat. Listen for the sizzle to soften as they warm.

i. Transfer the drained rice to your pot or rice cooker, then pour in the shiitake and kombu dashi.
ii. Tip the contents of the pan on top of the rice. Do not stir. Just let everything sit in a layer.
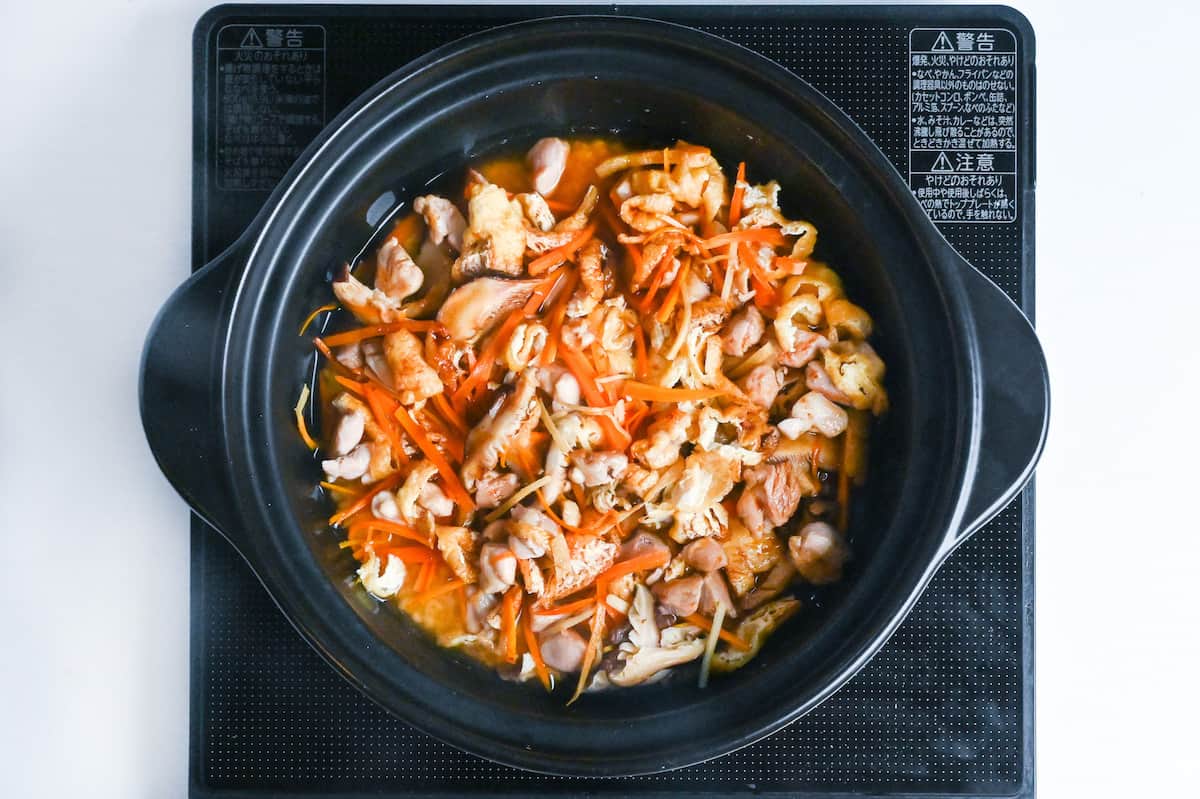
iii. Now, and only now, pour in the soy sauce, the mirin, the sake, and the dashi granules. This timing is the part I got wrong for years, so trust it. If you are using a rice cooker, use the takikomi setting if it has one, otherwise the regular setting, and close the lid. For a stovetop pot, the next block has your heat stages.
Two reasons stacked together. Add soy early and its salt blocks the rice from soaking up water, so the center cooks up hard. Stir the pot and you kill the gentle circulation that cooks the rice evenly, leaving you with hard pockets and patchy seasoning. Layer on top. Leave it be.
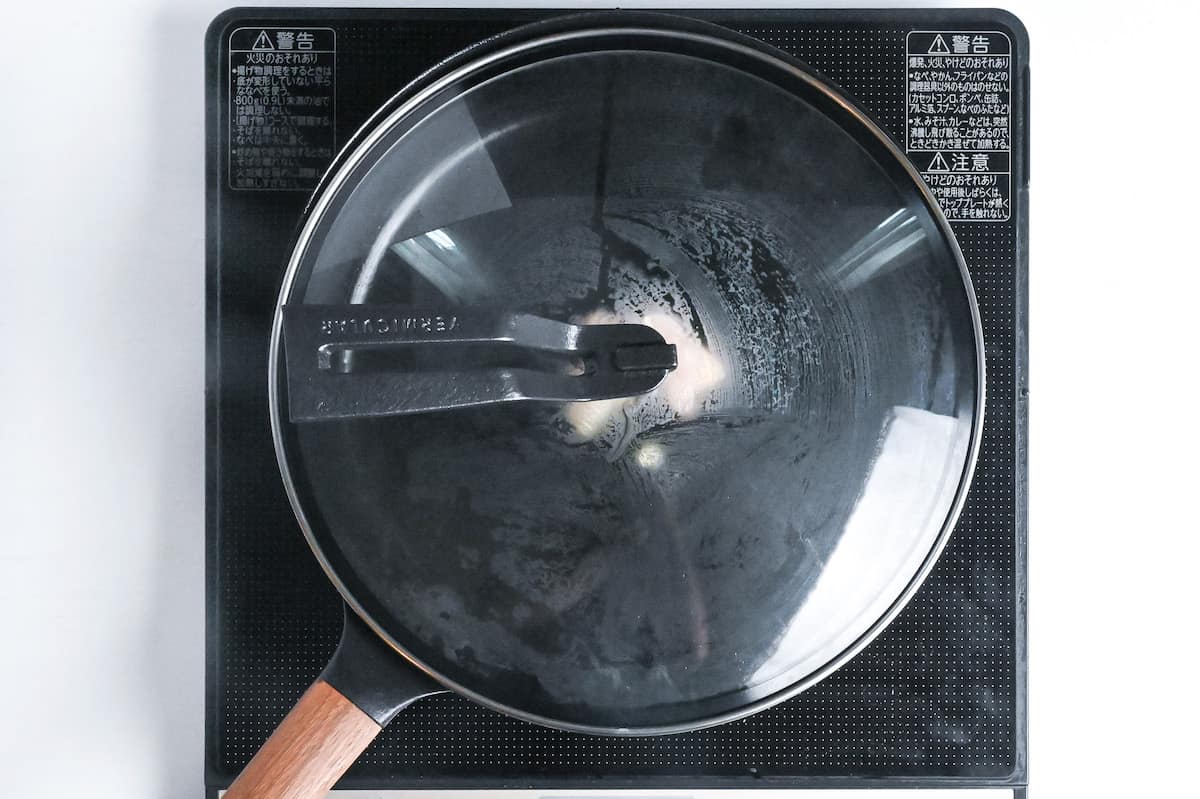
i. Set the lidded pot over medium heat and bring it up to a boil. Try not to lift the lid, listen for it instead.
ii. Once you hear it boiling, hold medium for 2 minutes, drop to medium-low for 3 minutes, then go to the lowest heat for 5 minutes. Finish with a hard blast of high heat for about 10 seconds, then cut the heat.
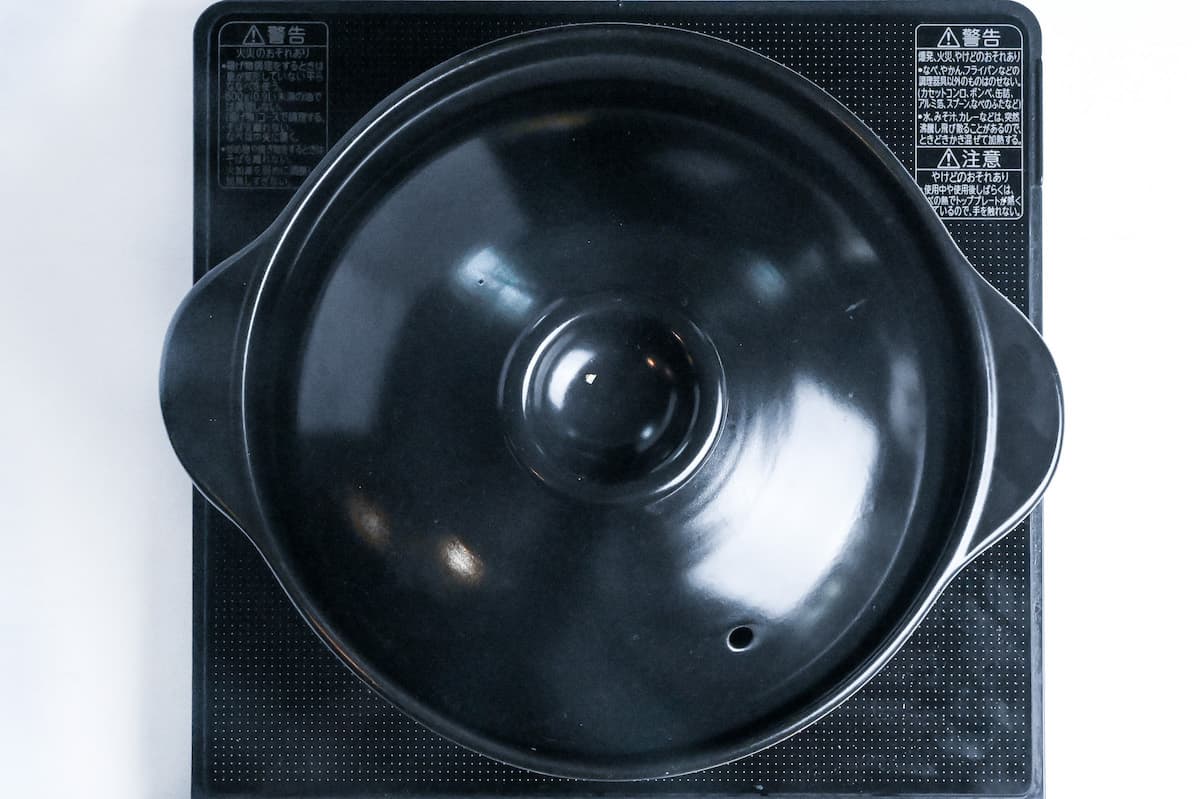
iii. Leave the covered pot on the warm burner to steam, untouched, for a full 20 minutes.
Your total liquid is not just the dashi. It is the dashi plus the soy, mirin, and sake, plus the water the vegetables and mushrooms release as they cook. Count all of it as one pour. That hidden vegetable moisture is why takikomi gohan misbehaves when you treat it like plain rice.
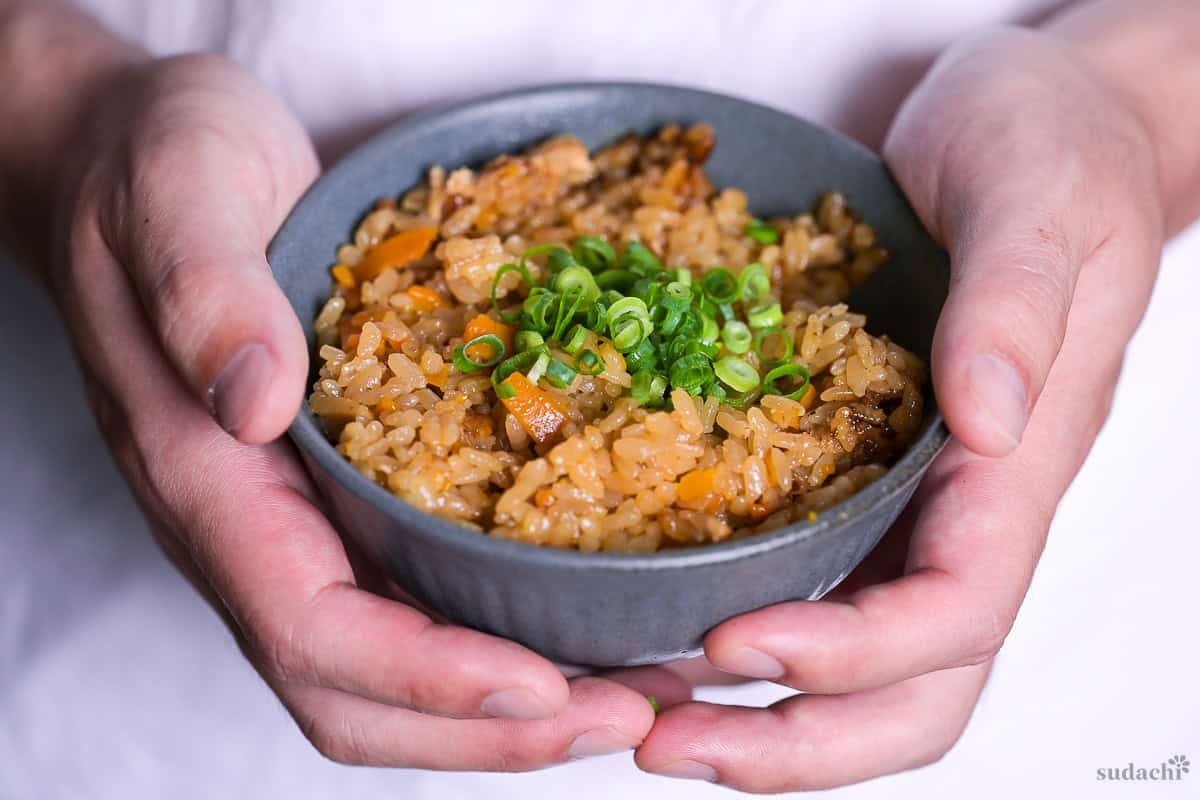
i. After the full 20 minutes of steaming, lift the lid. The grains underneath should look amber and glossy, with a thin crust whispering at the bottom.
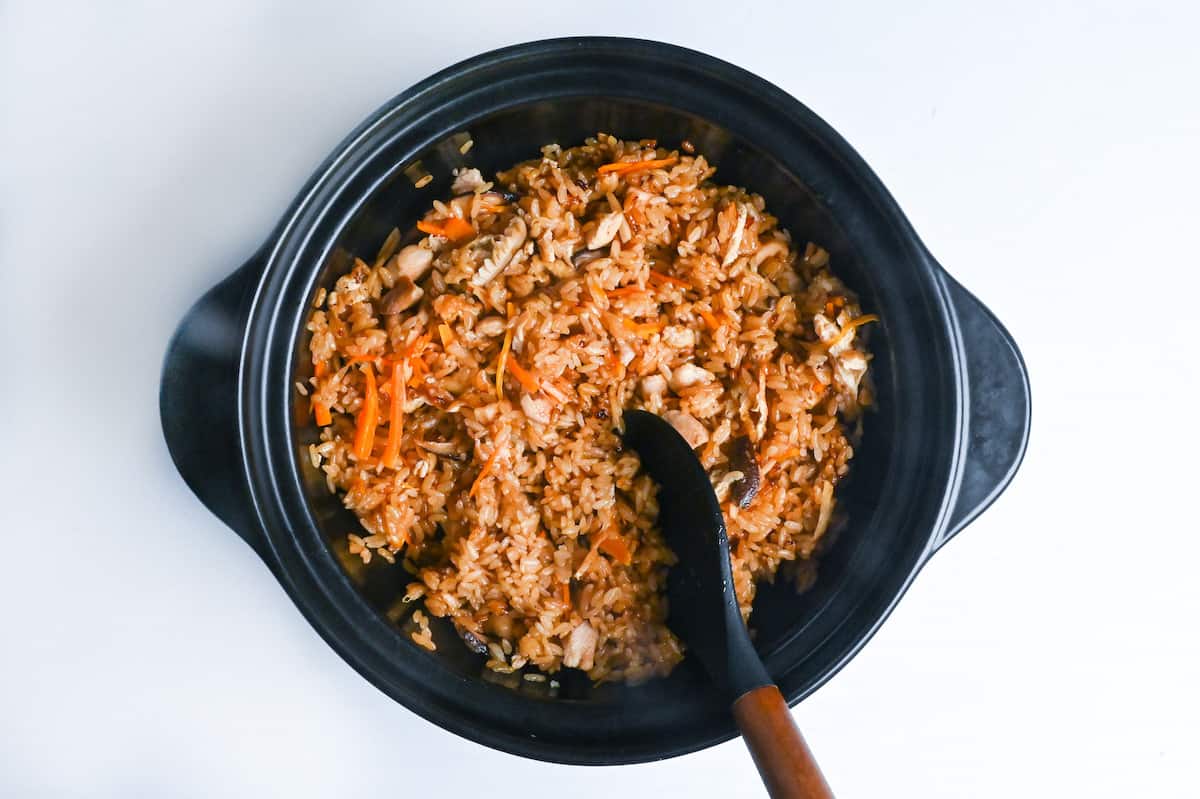
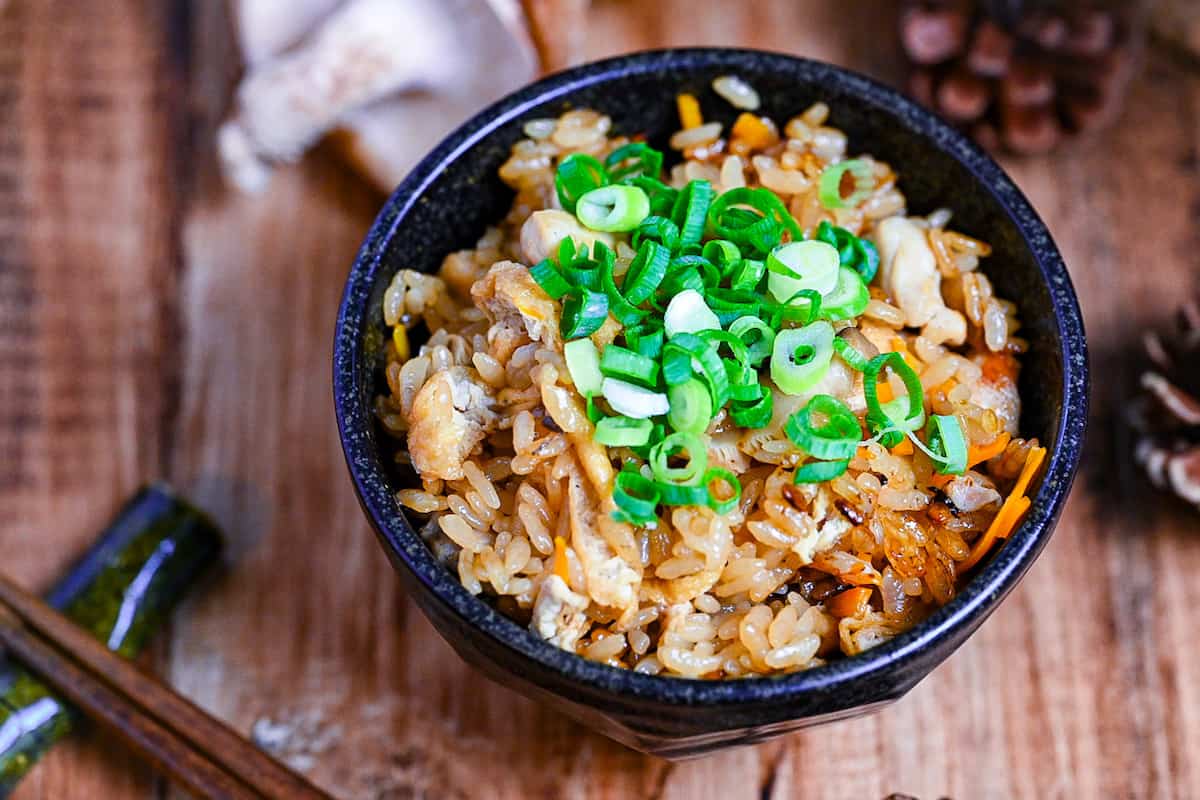
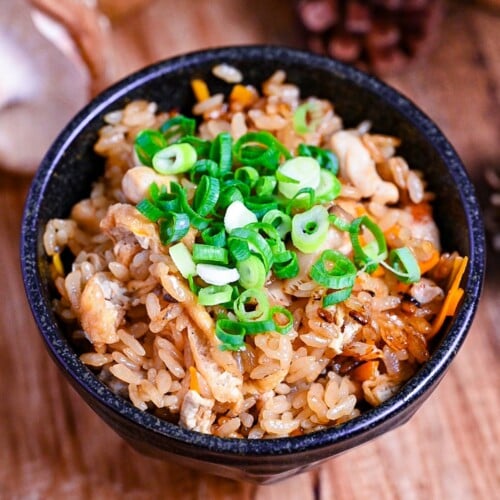
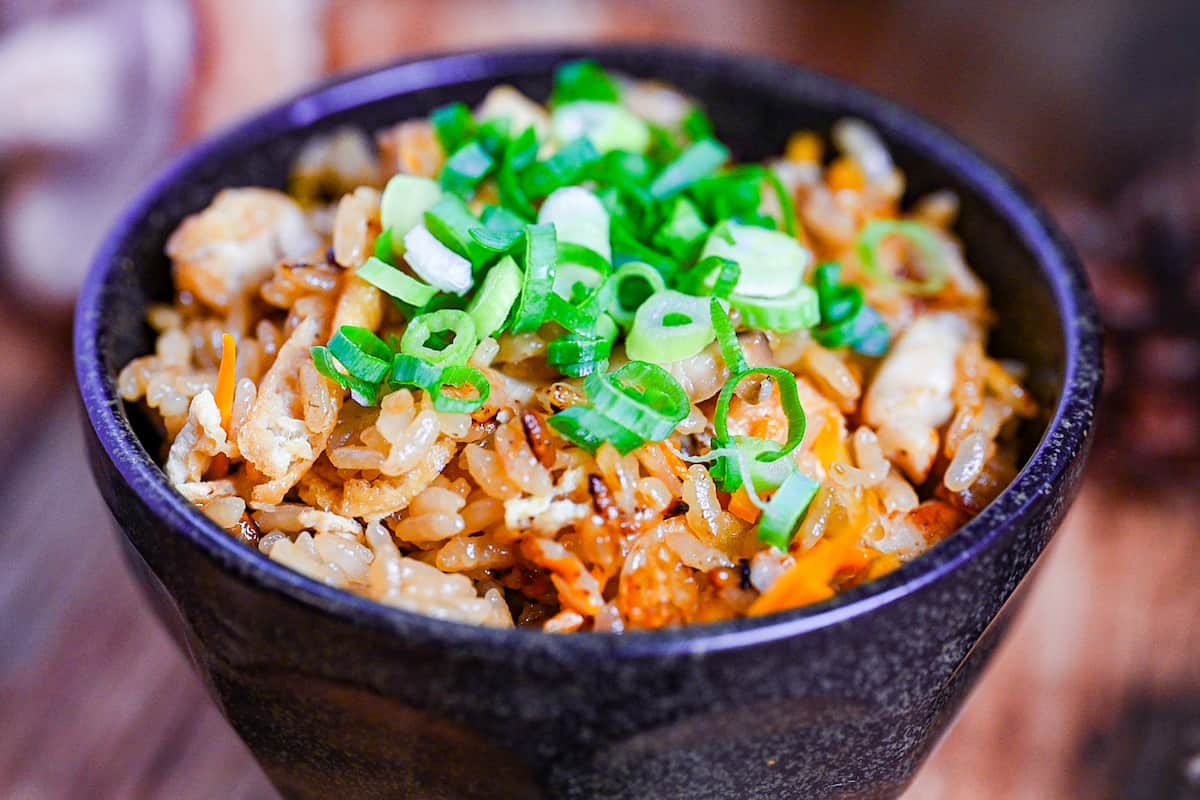
ii. Fold the rice thoroughly from the bottom up so the seasoning and ingredients spread through every grain. Scatter the crisp chicken skin from earlier and a handful of green onion over the top, and serve it warm.
If you follow the default recipe, it will yield 4 main servings, or 6-8 side servings.

Essential Tips & Tricks
- Never skip the soak and the drain, no matter how rushed you are. This is the one I will not let you cut, because skipping it is where most takikomi gohan goes wrong before the pot ever heats up. The rice has to drink water all the way to its center during that quiet hour, and then it has to drain so the clinging water does not throw off your liquid count.
- Save the soy, mirin, and sake for the very last moment before the lid goes on. Seasonings poured in early raise the pressure around each grain and quietly stop the rice from absorbing water, which is the exact opposite of what you want.
- Pile the ingredients on top and walk away. Do not stir the pot. It feels wrong to leave everything sitting in separate layers, but the even cook depends on liquid circulating gently through the rice as it heats. Stir it in and you kill that circulation, which leaves you with hard pockets and patchy seasoning.
- Reach for dried shiitake, not fresh, and keep every drop of the soaking water. Drying and rehydrating the mushroom is what switches on its deep savory note, a depth a fresh shiitake simply does not carry, and that note leaches straight into the soaking water.
- If you would rather take the easy road, a rice cooker runs this exact recipe with less to watch. Everything I wrote above holds whether you use a pot or a rice cooker, and the cooker simply handles the heat stages for you so there are no timers to chase. The trade is straightforward: the pot hands you control and gives you okoge, the toasty crust at the bottom that is the real reward of cooking this over a flame, while the rice cooker hands you ease.
Get the soak right and the seasoning timed last, and this rice does the deep, savory work all on its own.
Storage & Meal Prep
Fridge: The fridge is my second choice for this rice, not my first. Cooked takikomi gohan keeps for a day, maybe two, in a sealed airtight container.
Freezer: This is the way to store takikomi gohan. Pack it into single-portion servings while it is still hot, wrap each one tight or seal it in a container so no air gets in, and freeze. Don’t pack too tightly, to avoid crushing the rice. Store for up to 1 month.
Meal prep: Most of the prep travels well ahead of time. Wash and soak the rice, build the shiitake and kombu dashi, and slice the vegetables earlier in the day, then keep them covered in the fridge until you cook.
Reheating: Microwave a frozen portion straight from the freezer, covered, for around 1.5 to 3 minutes at 600W, until it is steaming all the way through.
What to Serve With This Recipe
Takikomi Gohan Troubleshooting
A hard core almost always traces back to the soak, not the cook. If the rice did not absorb water all the way through during its plain-water hour, the surface starch gelatinizes first and seals the grain shut, blocking heat and water from reaching the middle. Adding the seasonings too early makes it worse, since salt and soy slow that water absorption down even further. Next time, soak in plain water for a full hour, drain well, and hold the soy, mirin, and sake until the very last moment before the lid goes on.
Soggy rice is a water-counting problem. Your total liquid is not just the dashi, it is the dashi plus the soy sauce, mirin, and sake, plus the water the vegetables and mushrooms quietly release as they cook, and it is easy to overshoot all of it at once. Watery, high-moisture vegetables are the usual culprit, since they seep liquid into a pot whose water was already measured.
Filling past roughly two-thirds of the pot or rice cooker throws off both the heat and the circulation, and in a rice cooker it can confuse the sensor that decides when the rice is done. The result is a hard, unevenly cooked core no matter how careful you were with everything else. The fix is simple but firm: cook in smaller batches and keep each pot only about half to two-thirds full. Two clean batches beat one crowded pot of undercooked rice.
Yes, undercooked takikomi gohan is one of the easier saves. Spread the firm rice in a thin, even layer on a microwave-safe plate, sprinkle 1 to 2 tablespoons of water over it, and cover it with a loose lid or plastic wrap to trap the steam. Microwave at 500 to 600W for 2 to 3 minutes, then stir and check the texture. Repeat in short bursts until the grains soften through, adding a little more water only if it still looks dry.
More Japanese Rice Recipes
- Enoki Rice Bowl
- Yaki Onigiri
- Chirashizushi (Scattered Sushi Bowl)
- Easy Okayu with Egg
Hungry for more ways to put rice at the center of the table? Explore my full Japanese rice recipe collection to find your next favorite bowl.
Did You Try This Recipe?
I would love to hear your thoughts!
💬 Leave a review and ⭐️ rating in the comments below. 📷 I also love to see your photos – submit them here!
Takikomi Gohan (Japanese Seasoned Rice with Chicken)

Ingredients
- 300 g uncooked Japanese rice short or medium-grain only, basmati or jasmine cook dry and separate and turn this into a different dish
- 2 dried shiitake mushrooms
- 3 g dried kelp (kombu) 3-5g is approx one small sheet
- 300 ml cold water
- 150 g boneless chicken thigh skin on, or skin-on chicken breast
- ½ tsp cooking oil
- 3 small sheets fried tofu pouch (aburaage) approx 12g each, thinly sliced
- ½ carrot peeled and julienned
- ½ thumb ginger root peeled and julienned
- 3 tbsp Japanese soy sauce (koikuchi shoyu)
- 2 tbsp mirin
- 2 tbsp sake
- ¼ tsp dashi granules
- finely chopped green onions
The ingredient brands and tools I trust are in my Japanese pantry guide and my cooking tools guide.
Can’t find certain Japanese ingredients? See my substitution guide here.
Instructions
- Pour 300 g uncooked Japanese rice into a bowl and fill it with water. Swish, drain and repeat 3 times to wash it. (It's okay if the water is still cloudy.)

- After the final soak, fill the bowl with fresh water until the rice is covered and soak for 1 hour.
- At the same time, drop 2 dried shiitake mushrooms and 3 g dried kelp (kombu) into 300 ml cold water and soak them for one hour. This makes a shiitake and kombu dashi.
- After one hour, drain the rice with a sieve and place it over an empty bowl to dry until it's time to cook.
- Remove the shiitake mushroom and kombu from the bowl, the liquid inside is a light dashi that we will use to cook the rice later. Finely slice the rehydrated shiitake mushroom and discard the kombu. (Alternatively, you can use the kombu to make kombu tsukudani rice ball filling.)
- Peel the skin off of 150 g boneless chicken thigh and cut it into bite-size pieces. Cut the meat into small pieces and set aside.
- Heat a small frying pan on medium and once hot, add ½ tsp cooking oil and the chicken skin. Place a lid on to prevent the fat from splashing and fry on both sides until crispy and golden, then rest on kitchen paper and set aside for later.
- Reuse the pan, and wipe out the excess rendered fat if needed. Place the chicken pieces in a single layer and sear all over.
- When the chicken is no longer pink, add the sliced shiitake mushrooms along with ½ carrot, ½ thumb ginger root, and 3 small sheets fried tofu pouch (aburaage). Stir fry for about 1 minute so the ingredients are lightly coated in rendered chicken fat. You do not need to cook them completely as they will cook with the rice later.
- Transfer the dried rice to a pot (or rice cooker) and pour in the dashi. Empty the contents of the frying pan on top of the rice.Finally, pour 3 tbsp Japanese soy sauce (koikuchi shoyu), 2 tbsp mirin and 2 tbsp sake and ¼ tsp dashi granules into the pot. IMPORTANT: Do not mix! If using a rice cooker, close the lid and set it on a takikomi or regular setting. If using a pot on the stove, see next step.
- Place the pot onto the stove with the lid on and bring it to a boil over a medium heat. Listen carefully and try to refrain from removing the lid. Once you can hear it continuously bubbling, set a timer for 2 minutes.After two minutes, reduce the heat to medium low and set a timer for 3 minutes. Turn the heat right down to the lowest setting and set a timer for 5 minutes. Blast the heat for 10 seconds on the highest setting, and then turn it off. Leave the rice pot on the warm stove and allow to steam for 20 minutes.
- After 20 minutes of steaming, remove the lid and mix the rice thoroughly using a cut and fold motion with a rice paddle. Be careful not to crush the rice while mixing.
- Divide into serving bowls and sprinkle with the crispy chicken skin from earlier and finely chopped green onions. Enjoy!

This turned out delicious. I followed the recipe but added maitake mushrooms. I served it with a little red ginger and some white kimchi. It tasted healthy and comforting. It will definitely be added to our regular rotation for autumn. My rice did burn on the bottom of my donabe. I like crispy race at the bottom but this went a bitt farther to blackened. My stove tends to be a bit hot even on the low setting. Next time I might try skipping the 3min at medium low and going straight to low.
Hi Mei,
Thank you so much for trying this recipe! I’m really happy to hear that you enjoyed it and that it’s earned a spot in your autumn rotation. Adding maitake mushrooms sounds like a wonderful touch! The heating can indeed be tricky since both the stove and donabe can vary quite a bit. I hope you’ll find the perfect adjustment for your setup next time. 🙂
Yuto
Thank you for the recipe! I’m cooking right now and looking forward to it. Am I being dense? I can’t see what you recommend to do with the fried chicken skin after drying it on the paper. Is it to be sliced up and scattered after dishing up?
Hi SJF,
Yes you can slice or crush it and then sprinkle it over the top at the end.
It seems like I forgot to add it to the final step, thank you for spotting that! I’ve just updated it.
Hope you enjoy the recipe!
All the best,
Yuto