

Featured Comment
Great recipe. I never buy store sauces anymore. Much easier to make them. Thank you.
– Garry (from Facebook)
I lost count of how many times I remade this sauce. I wanted to make that sweet, fruity, slightly spicy complexity, then push past it with my own ideas. So I kept going, batch after batch, until I was 100% satisfied.
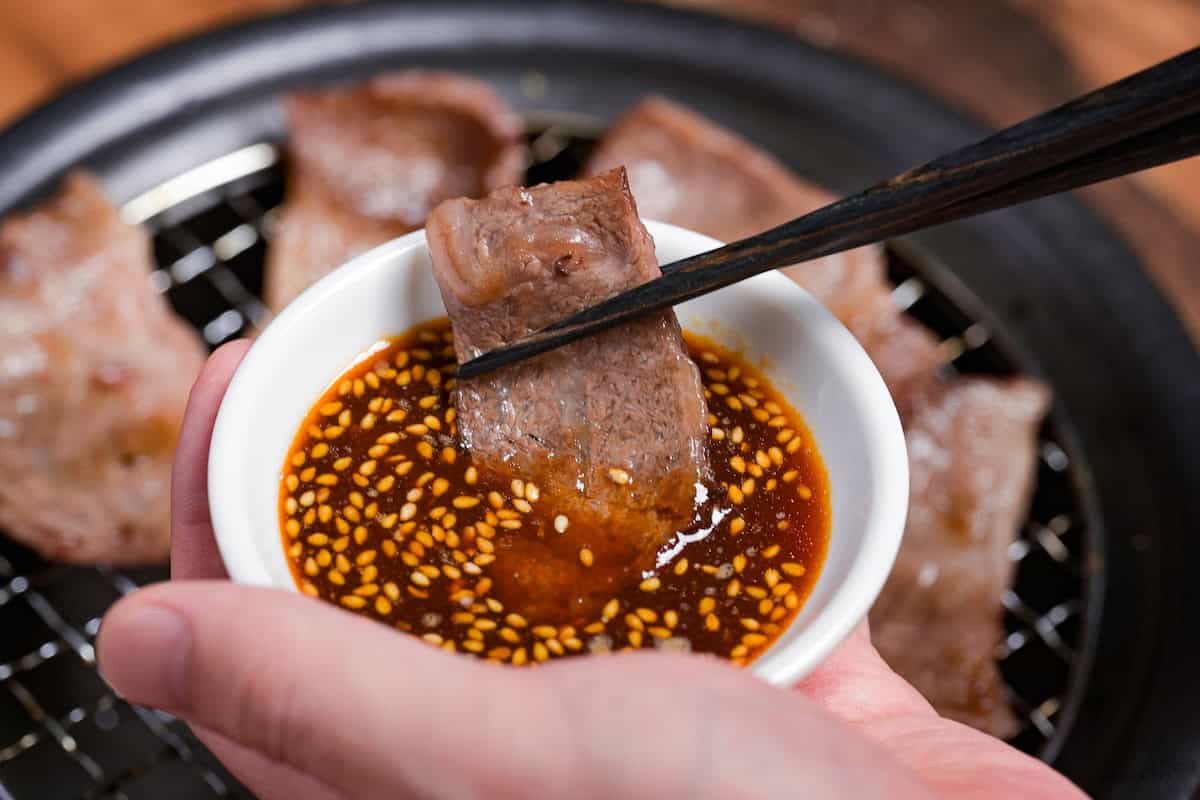
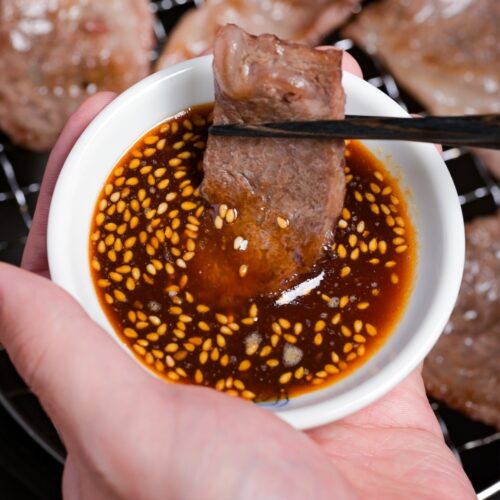
This is the recipe that survived all those rounds. It works beautifully as a dipping sauce for grilled beef, pork, and chicken, and it is just as good drizzled over yakiniku donburi or spooned alongside grilled vegetables. I will also show you how to adjust the sweetness, heat, and fruitiness to make it completely your own.

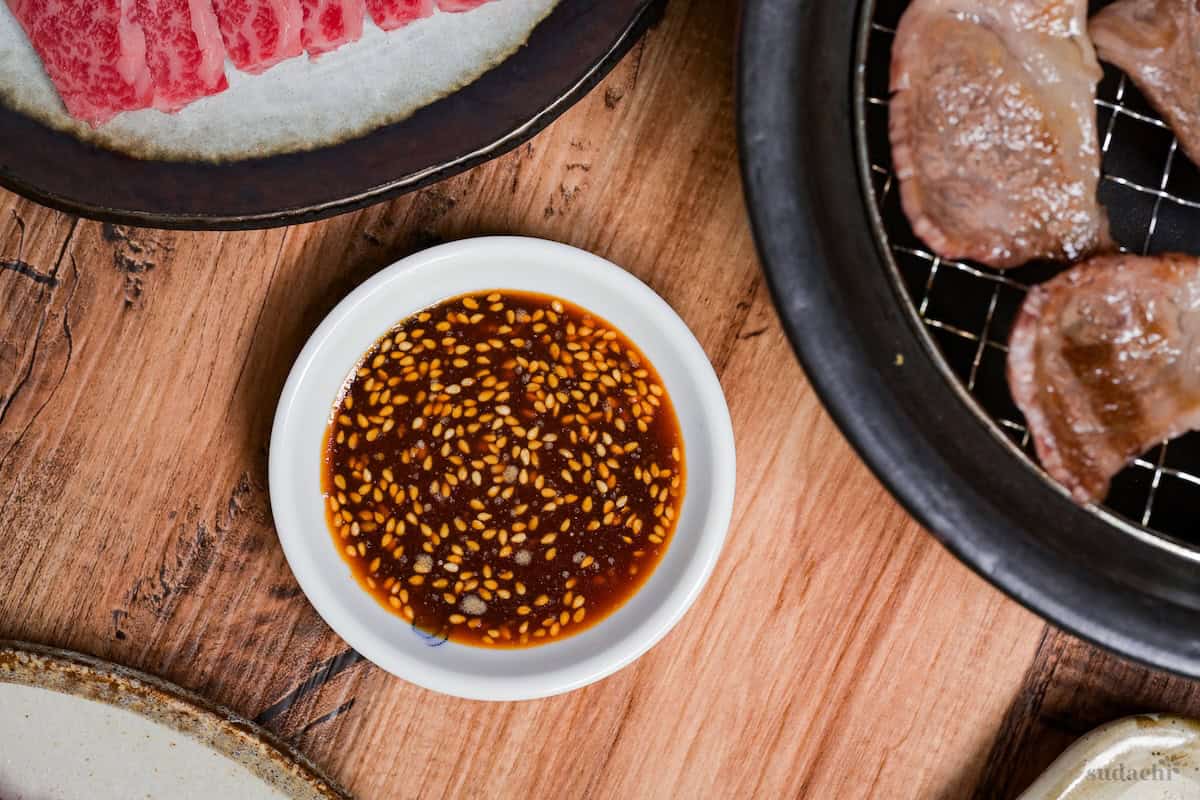
Homemade Yakiniku Sauce
Recipe Snapshot
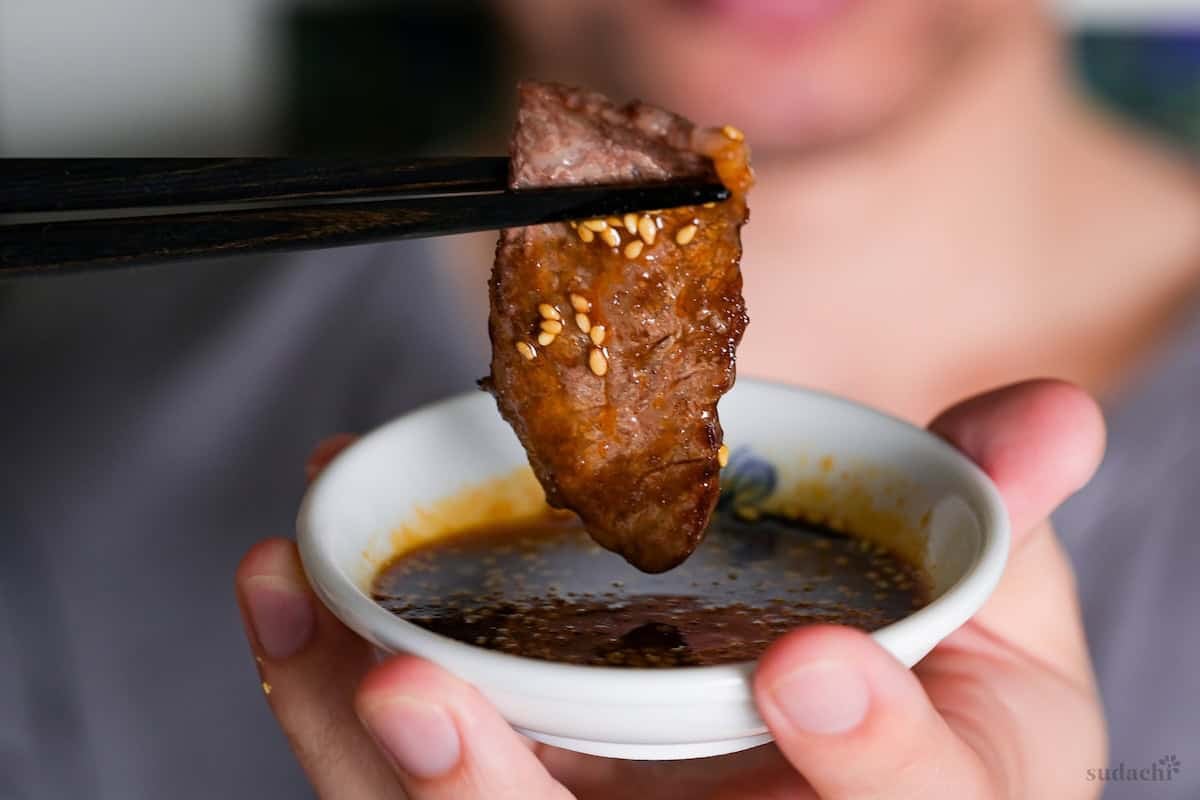
- What is it? Yakiniku sauce is a soy-based Japanese dipping tare designed for grilled meat, born from Korean-Japanese fusion. Unlike marinades, it is applied as a tsuke-dare after grilling, coating each bite without masking the char.
- Flavor profile: Soy sauce and miso build the umami base, caramelized sugar adds toffee-like depth, and apple juice with grated apple layers a fruity malic acid brightness over toasted sesame and warm ginger aromatics.
- Why you will love this recipe: Most homemade yakiniku sauces call for fresh garlic and ginger, leaving a fibrous, gritty texture. This recipe uses mostly powder-based aromatics for a completely smooth pour.
- Must-haves: Japanese soy sauce, mirin, and toasted sesame oil.
- Skill level: Easy. The only technique that may be new is a brief sugar caramelization, guided by visual cues (deep amber color, first wisps of smoke) before mirin stops the process.
Summarize & Save this content on:
What is Yakiniku Sauce?
Yakiniku sauce (焼き肉のタレ) is a soy-based Japanese dipping condiment built for grilled meat (yakiniku). It belongs to the tare family of Japanese sauces, but yakiniku sauce is thinner, punchier, and designed to be used as a a dip applied after grilling rather than a marinade rubbed in before.
The roots of yakiniku sauce trace back to postwar Japan, where Korean-Japanese communities adapted Korean grilling traditions for Japanese palates. Korean yangnyeom seasoning pastes are bold and chili-forward. Japanese yakiniku sauce pulled in the opposite direction: soy sauce replaced fermented bean paste as the base, mirin and sugar softened the heat, and fruit (especially apple) added a sweetness that became the defining signature.
In 1968, Ebara Foods launched its “Yakiniku no Tare,” bringing yakiniku sauce into home kitchens for the first time and pioneering what would become an entire product category. Today, the broader yakiniku sauce market in Japan is valued at around 93 billion yen, and Ebara’s flagship “Ougon no Aji” alone sells approximately 40 million bottles a year.
If you have used Yoshida’s sauce in the US or grabbed an Ebara bottle from the Asian grocery store, you already know the general flavor territory. Homemade gets you further. No pasteurization flattening the aromatics, no corn syrup standing in for real fruit, and full control over sweetness, heat, and depth. That is what my recipe is about.
Yakiniku no Tare Ingredients
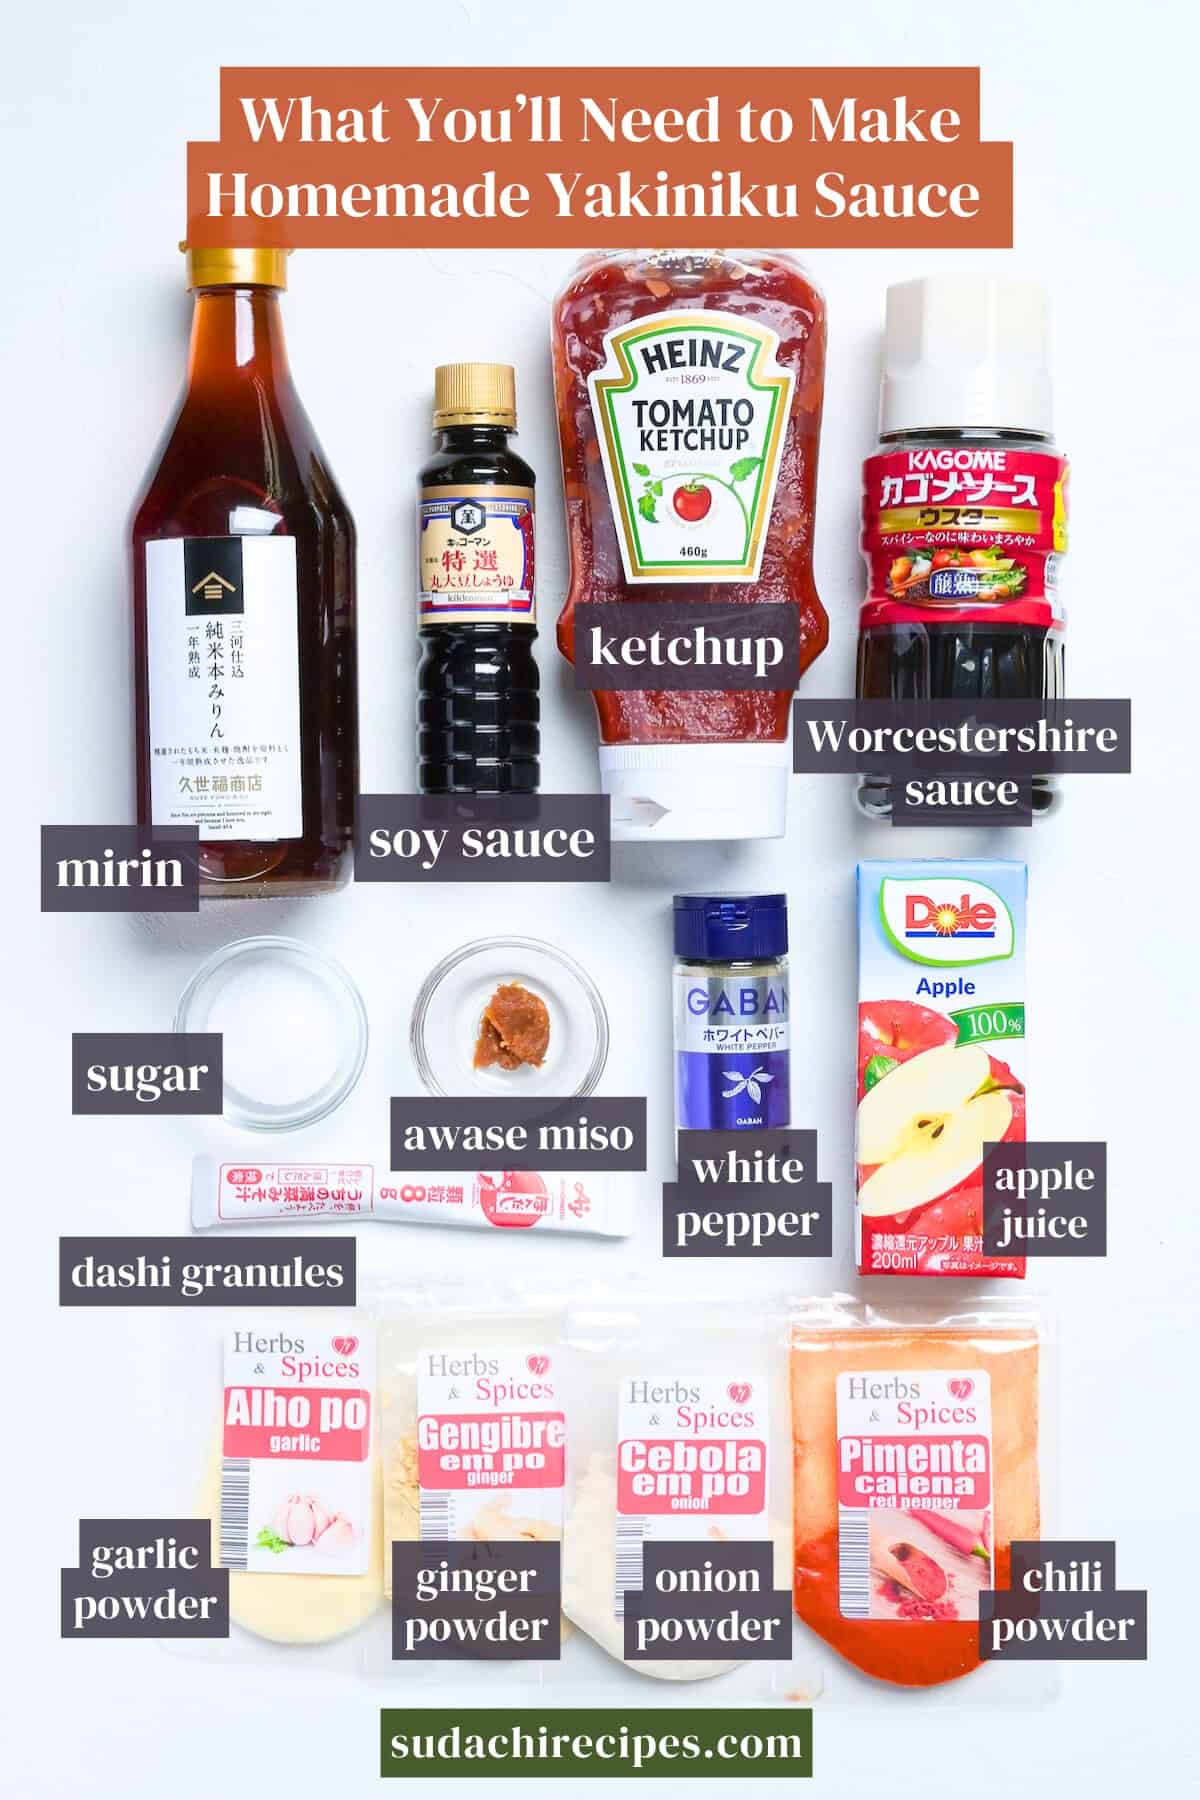
- Soy sauce: This is the backbone. The standard Japanese soy sauce gives you the right balance of salinity, umami, and color. If you are shopping at an Asian grocery store, any Japanese brand labeled “soy sauce” without qualifiers is almost certainly koikuchi.
- Miso paste: A small amount adds a fermented depth that soy sauce alone cannot reach. Think of it as a quiet umami amplifier working behind the scenes. Too much and the sauce becomes miso-forward, so restraint is key here.
- Dashi granules: A pinch is all you need. Dashi granules dissolve instantly and layer in a subtle umami beneath the soy sauce. It is a small addition that rounds out the overall savoriness without announcing itself.
Substitutions & How to Customize
- Koikuchi soy sauce → Tamari is the cleanest swap if you need gluten-free. Tamari is richer in umami and slightly thicker, so the sauce will taste a touch deeper and darker. Use the same amount.
- Mirin → Dry sherry/white wine + a pinch of sugar provides the same sweet-acidic function. Sake with a bit of sugar also works in a pinch.
- Sugar → Honey adds a floral sweetness, but you will need to skip the dry caramelization step. Add the honey directly to the mirin stage instead. The sauce loses some of that toffee depth but gains a rounder, more complex sweetness. Brown sugar or muscovado caramelize beautifully and push the sauce toward a deeper, more rustic character.
- Apple → Asian pear (nashi) gives a lighter, more delicate fruit sweetness. Pear is actually the traditional fruit in Korean BBQ marinades, so the swap is culturally right at home. Kiwi fruit also works, but use half the amount because its protease enzymes (actinidin) are significantly more powerful. Too much kiwi makes the sauce taste sharp and slightly bitter, especially after resting overnight.
- Cayenne → Gochugaru (Korean chili flakes) for a fruitier, more complex heat that nods to yakiniku sauce’s Korean roots. Ichimi togarashi gives a cleaner, sharper Japanese-style heat. Either way, start with half a teaspoon and adjust up from there.
How to Customize: This sauce is designed to be a starting point. Here are the levers you can pull to your linking after the initial try:
- Spicier: Add 1-2 teaspoons of gochujang or doubanjiang (fermented chili bean paste). Both bring fermented depth alongside the heat, which plain cayenne cannot do. Gochujang tilts the sauce toward Korean BBQ territory. Doubanjiang adds a Sichuan edge. Since both contain salt, reduce the soy sauce by about 1 teaspoon per teaspoon added to keep the overall salinity in check.
- Tangier: Stir in 1-2 teaspoons of rice vinegar after the sauce has cooled. The clean acidity cuts through richness and is especially good when you are dipping fatty cuts like short ribs or pork belly.
- More umami: Increase the miso to 1 full teaspoon and reduce the soy sauce by about 1 teaspoon to compensate for the added salt. A small splash of oyster sauce works too, with the same soy sauce reduction. For a dedicated miso-style yakiniku sauce (miso-dare), use 1 to 2 tablespoons of red miso and reduce the soy sauce by 1 to 1.5 tablespoons. Miso brings its own fermented salinity, so always taste and pull back on soy sauce proportionally.
- Sweeter/fruitier: Double the grated apple, or add a tablespoon of honey at the mirin stage (and reduce the caramelized sugar to 1 teaspoon to keep the sweetness balanced).
- Smokier: A few drops of liquid smoke or a pinch of smoked paprika give the sauce a charcoal grill undertone. This is not traditional, but it works well if you are cooking your meat indoors.
Have trouble finding Japanese ingredients? Check out my ultimate guide to Japanese ingredient substitutes!
How to Make My Homemade Yakiniku Sauce
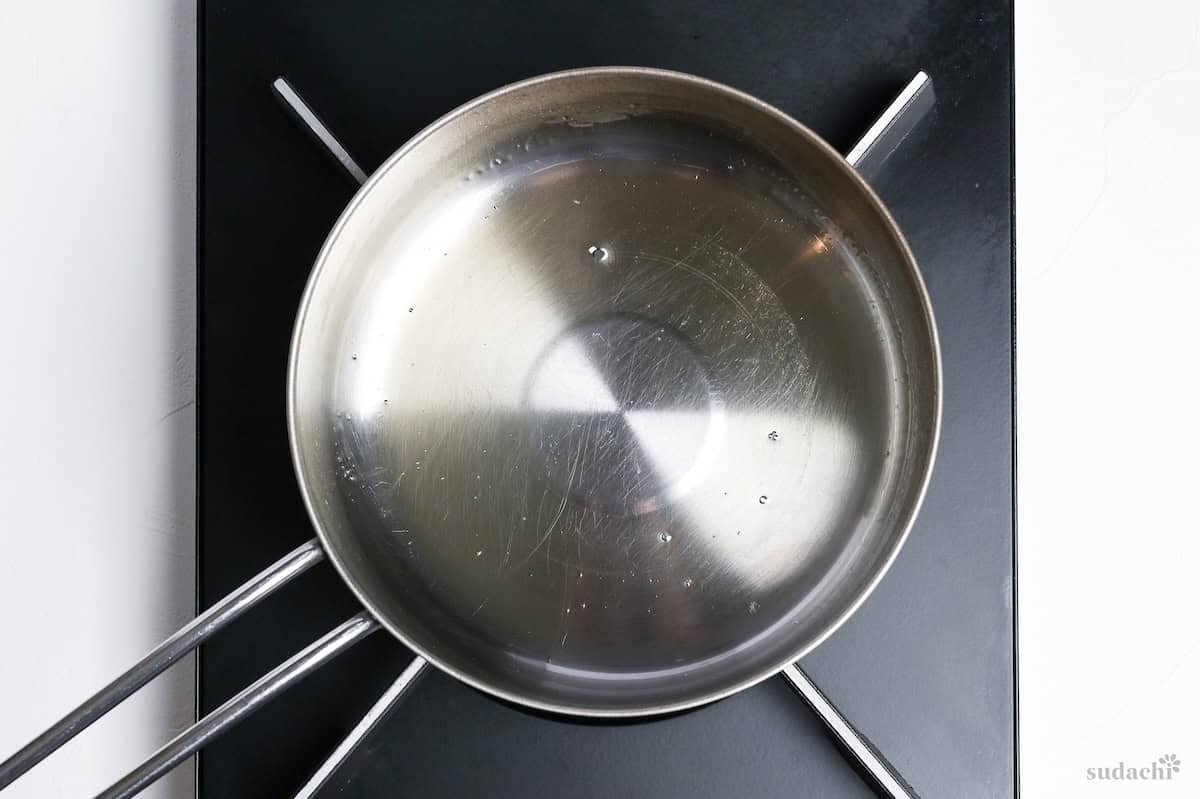
i. Add sugar and water (just enough to wet the sugar) to a small saucepan over medium heat. Stir gently with a heatproof spatula until the sugar dissolves, then stop stirring and let the heat do the work. Watch closely. The syrup will bubble, then begin to shift color: pale gold, honey amber, deep amber. You are aiming for that deep amber stage, the point where you smell strong toffee and see the first faint wisps of smoke rising from the surface.
ii. Gradually pour in the mirin, a little at a time. The mixture will sputter and bubble aggressively, that is normal. Keep stirring as you pour. The mirin immediately halts the caramelization and dissolves all those amber compounds back into liquid form.

Nothing gets wasted. What you have now is a caramel-mirin syrup with over 100 flavor compounds that plain dissolved sugar could never produce.
This is the step that separates my sauce from most homemade versions. Raw sugar adds sweetness. Caramelized sugar adds depth: toffee, butterscotch, a hint of bitterness that balances against the soy sauce later. It’s entirely optional, but it takes about 3 minutes and changes a lot.
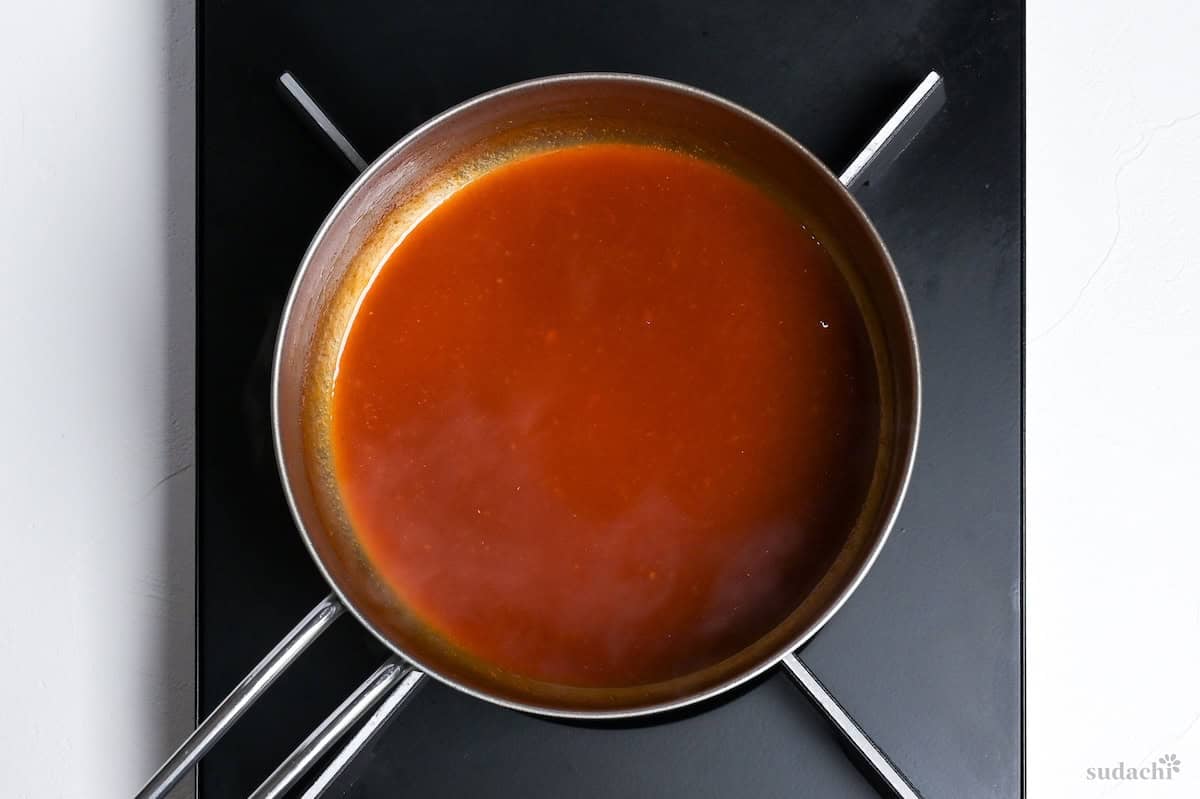
i. Add the apple juice, ketchup, Worcestershire sauce, miso, and dashi granules to the saucepan with the caramel-mirin syrup. Place over medium-low heat and stir until everything is combined and the miso is fully dissolved.
A Japanese brand like Bull-Dog is ideal, but a Western brand like Lea & Perrins works too. Just stir in a tiny bit of sugar, ketchup, or unsweetened applesauce to round off its edge and nudge it toward the Japanese style.
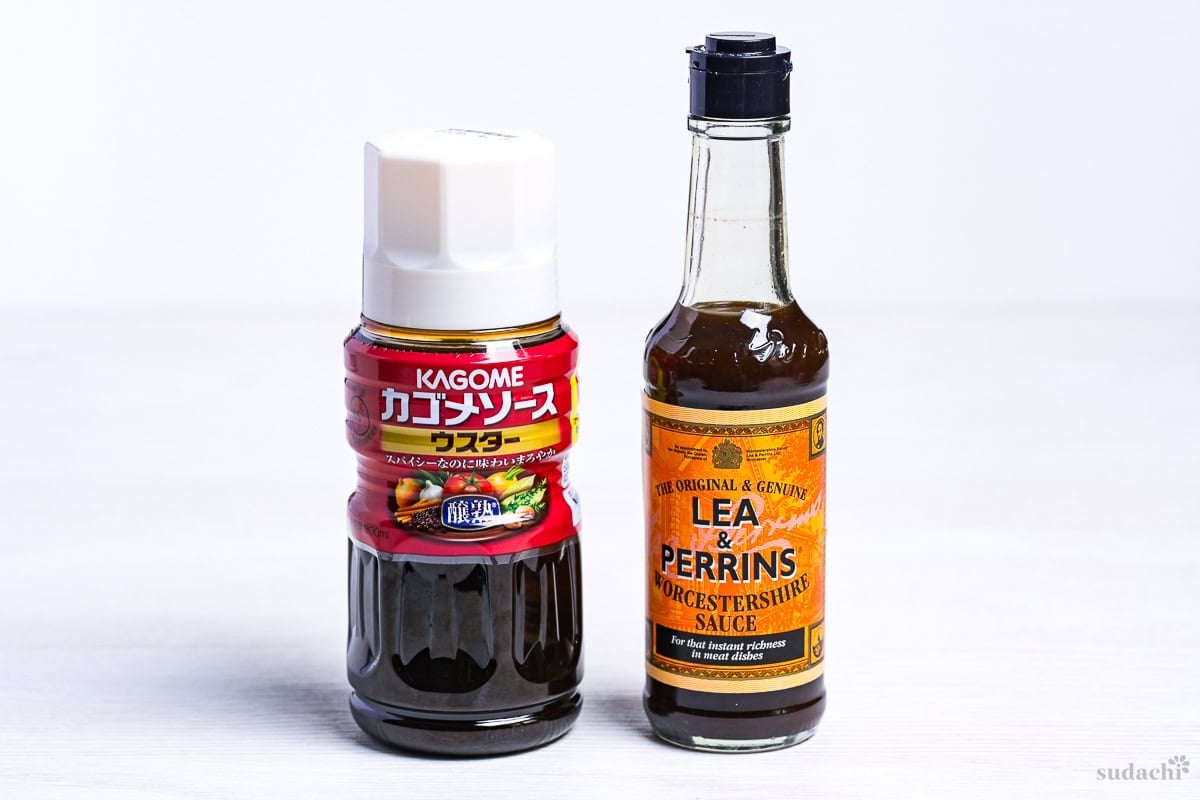
For the full breakdown and my side-by-side cooking tests, see my guide to Japanese Worcestershire sauce.
ii. Bring to a gentle simmer, stirring constantly, and let it cook for 2 to 3 minutes. The sauce should be lightly bubbling, not at a rolling boil. If it starts to boil hard, lower the heat.
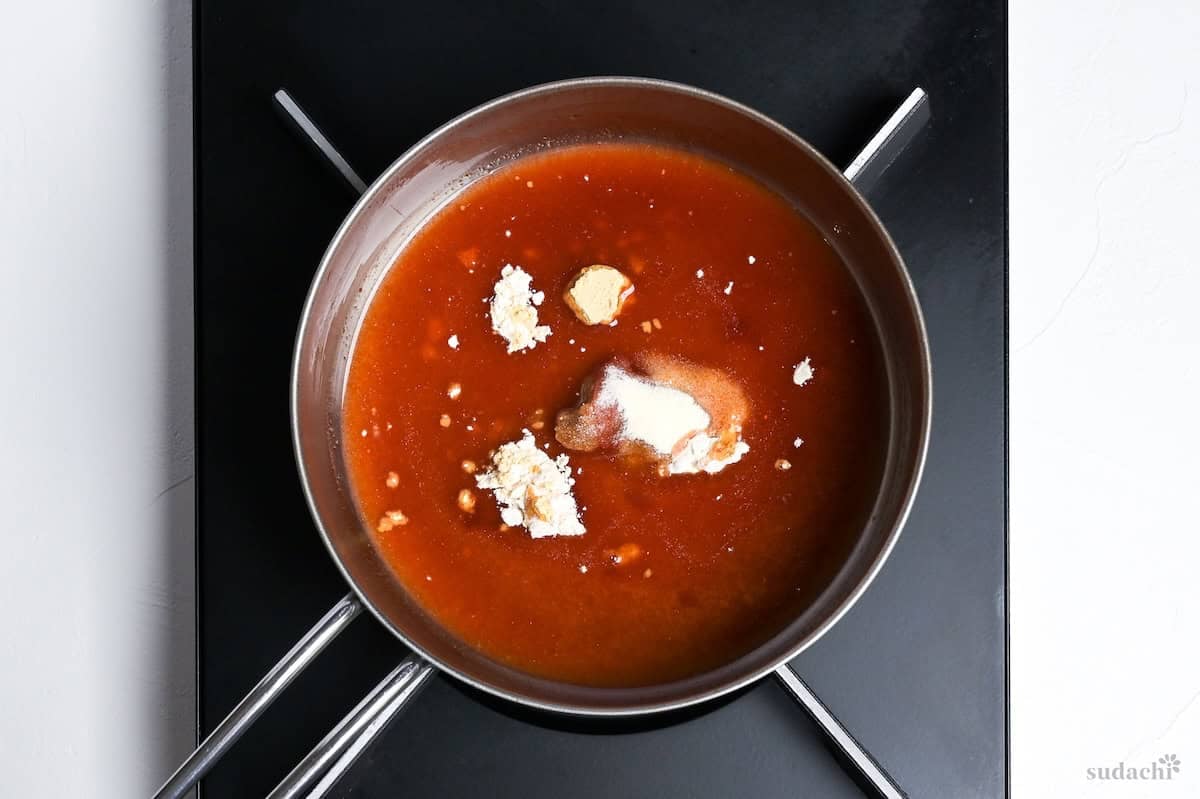
iii. Remove the saucepan from the heat and add all the powder spices: garlic powder, ginger powder, onion powder, cayenne, and white pepper. Stir well.
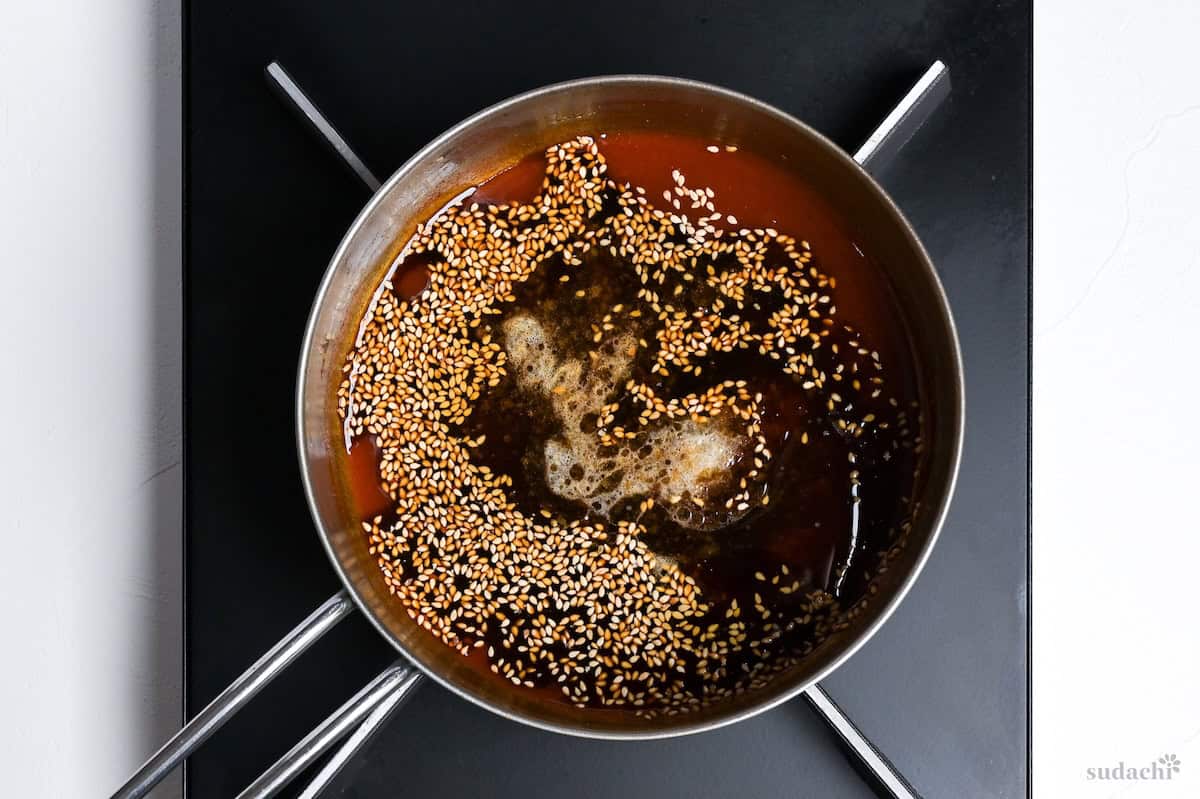
i. With the pan off the heat, pour in the soy sauce and stir thoroughly.
Soy sauce contains over 300 volatile aromatic compounds, the fermentation-derived esters, alcohols, and organic acids that give it its unmistakable complexity. Heat can destroy some of these compounds rapidly. Adding soy sauce off heat more or less preserves the full aromatic spectrum.
ii. Drizzle in the sesame oil and stir. This is the top note of the sauce, the first aroma that hits when you open the container. Add the sesame seeds, crushing them lightly between your fingers as they go in.
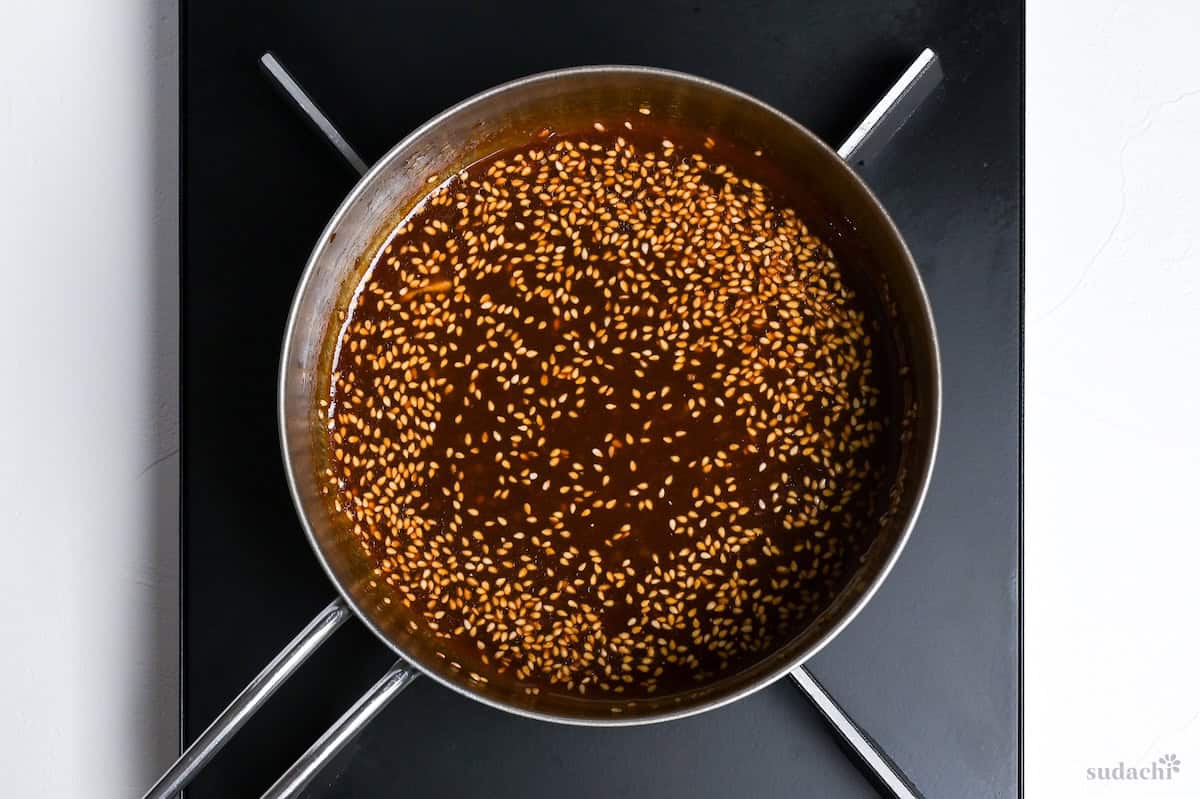
iii. Stir in the grated apple last. This is the heart note, the layer that hits right after the sesame.
Fresh apple sweetness, a little malic acid brightness, and a subtle enzymatic activity that helps the sauce develop more complexity as it rests. Commercial sauces lose this during pasteurization. The apple goes in last because I want its flavor to stay as fresh and immediate as possible.
My original recipe used freshly grated garlic, ginger, and onion. It tasted fine, but the texture bothered me. The sauce was too fibrous, too gritty for what I wanted in a yakiniku dipping tare. So I went back and rebuilt the entire aromatic layer with powders. The result was a sauce that pours smooth, distributes flavor evenly, and, frankly, is easier to make since you do not need to grate anything. Powders are available everywhere, which means you can make this sauce no matter where in the world you are. Smooth texture was the goal. Accessibility was the bonus.
i. Pour the finished sauce into a clean glass jar or airtight container. The sauce is ready to use immediately, but it improves with time. An overnight rest in the refrigerator lets all the flavors settle and merge. If you can wait 2 to 3 days, even better.

Essential Tips & Tricks
- If the caramel goes too dark, start over. Do not try to rescue it. Once the sugar passes deep amber into dark brown, the bitter compounds are already formed and cannot be reversed. They will throw off the entire sauce balance.
- Let the sauce rest overnight before judging the flavor. A freshly made batch tastes sharp and disjointed because the individual components have not had time to diffuse and merge. After 8 to 12 hours in the refrigerator, the flavors settle into a cohesive profile. If you can wait 2 to 3 days, the improvement is even more noticeable.
- Pour the mirin into the caramelized sugar gradually, not all at once. A sudden pour causes the mixture to sputter violently and can splash hot caramel.
With these simple tips in mind, you’re set for success every time you make yakiniku sauce.
Storage & Meal Prep
Fridge: Store in a clean, airtight glass jar for up to 1 week. The sauce thickens slightly as the sugars settle, and the flavors deepen over the first 2 to 3 days, so making it ahead actually produces a better result than using it same-day.
Freezer: Not recommended. Freezing is possible but the sauce will not solidify completely due to its high sugar and salt content.
Meal Prep: This sauce is ideal for batch cooking. Double or triple the recipe and portion it into small jars for the week.
Yakiniku Sauce FAQ
Absolutely. To increase heat, add gochujang (1 to 2 teaspoons) for a fermented, fruity warmth, or ichimi togarashi for a sharper, more direct chili hit. To make it milder, simply reduce or omit the cayenne pepper. The sauce still works without any chili at all, leaning into its sweet-savory character instead.
Absolutely! You can dissolve the sugar directly into the mirin, and the sauce will still taste good.
Fresh garlic and ginger add fibrous particles that make the sauce gritty, especially in a thin dipping tare where texture matters. Powders dissolve completely into the liquid, distributing flavor evenly throughout every spoonful. You trade some of the raw pungency of fresh aromatics for a perfectly smooth pour and consistent flavor in every bite. This is a deliberate design decision, not a shortcut.
More Japanese Sauce Recipes
Did You Try This Recipe?
I would love to hear your thoughts!
💬 Leave a review and ⭐️ rating in the comments below. 📷 I also love to see your photos – submit them here!
Homemade Yakiniku Sauce (Easy Japanese BBQ Sauce/Tare)

Ingredients
- 2 tsp sugar
- 3 tbsp mirin
- 2 tbsp apple juice 100%, no added sugar
- 1 tsp ketchup
- ½ tsp yellow miso paste (awase) or red miso
- ½ tsp Worcestershire sauce
- 1 pinch dashi granules
- 3 tbsp Japanese soy sauce (koikuchi shoyu) or tamari for gluten-free
- ½ tbsp toasted sesame oil
- ½ tbsp toasted white sesame seeds
- 1 tsp grated apple fresh, or Asian pear
Spices
- ½ tsp cayenne pepper powder
- ½ tsp garlic powder
- ⅛ tsp ground white pepper
- ½ tsp ginger powder
- ½ tsp onion powder
The ingredient brands and tools I trust are in my Japanese pantry guide and my cooking tools guide.
Can’t find certain Japanese ingredients? See my substitution guide here.
Instructions
- Add 2 tsp sugar and a splash of water to a small saucepan. Heat over medium, stirring until the sugar has dissolved. Stop stirring, and continue to heat the sugar until it turns amber. Avoid mixing, and swirl the pan occasionally for even coloring.

- Once the sugar has transformed into a deep amber syrup, pour in 3 tbsp mirin a little at a time and swirl the pan to distribute. The mixture will sputter aggressively as you add the mirin, so keep back and wear protective clothing when you do this.
- Reduce the heat to medium-low and add 2 tbsp apple juice, 1 tsp ketchup, ½ tsp yellow miso paste (awase), ½ tsp Worcestershire sauce, and 1 pinch dashi granules to the pan. Stir continuously for 2-3 minutes, or until the miso is completely dissolved. Let it bubble gently for 3 minutes while stirring, then take the pan off the heat.
- Add ½ tsp cayenne pepper powder, ½ tsp garlic powder, ⅛ tsp ground white pepper, ½ tsp ginger powder, ½ tsp onion powder, and mix.
- Add 3 tbsp Japanese soy sauce (koikuchi shoyu), and ½ tbsp toasted sesame oil. Pinch ½ tbsp toasted white sesame seeds between your fingers, then sprinkle them into the sauce and mix well. Finally, stir in 1 tsp grated apple and then transfer to a serving bowl or clean airtight container for storage.
- Serve with your favorite grilled meats and vegetables. Enjoy!

Thank you Yuto Omura for the recipe!
Thank you for reading it, Dan! I hope you will enjoy making this! 🙂
Yuto
It’s delicious. I love these well researched sauces.
I have a question; is it suppose to thicken to a specific consistency?
Hi Marian,
Thanks so much! Really glad you’re enjoying the sauces. To answer your question, you’re looking for a slightly syrupy texture, thick and clingy is the sweet spot. That said, I’ve actually been working on a big update to this recipe with some major improvements, so stay tuned for that soon! 🙂
Yuto