

Featured Comment
Pretty good! Cooked very well.
★★★★★
– Richard
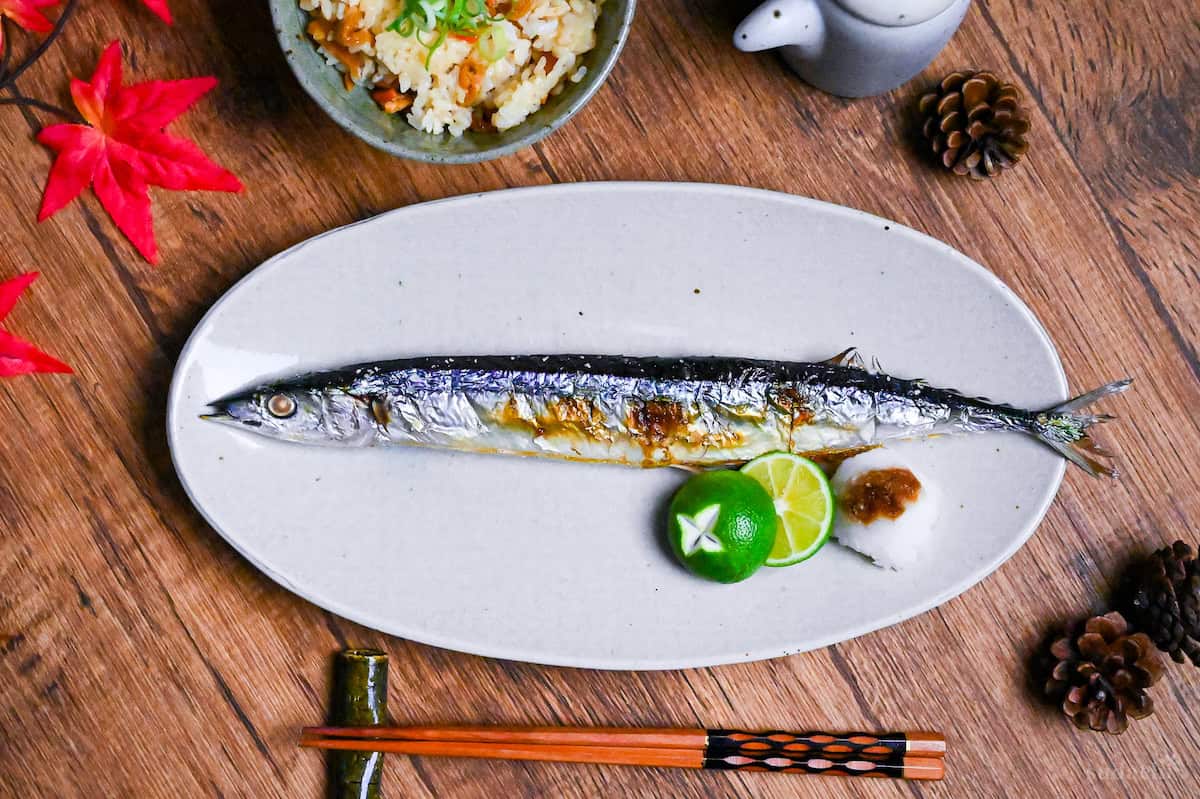
Ever wondered which dish truly defines Japanese autumn flavors? As cozy bowls of takikomi gohan, tender simmered pumpkin, kabocha squash soup, and golden sweet potato tempura fill the season, one humble fish quietly reigns supreme: salt-grilled Pacific saury.
Crisp skin, briny aroma rising like seaside air, each bite holds Japan’s autumn soul. The secret lies not in the salt, but in how you treat it. Ready to taste what makes this king of fall season?
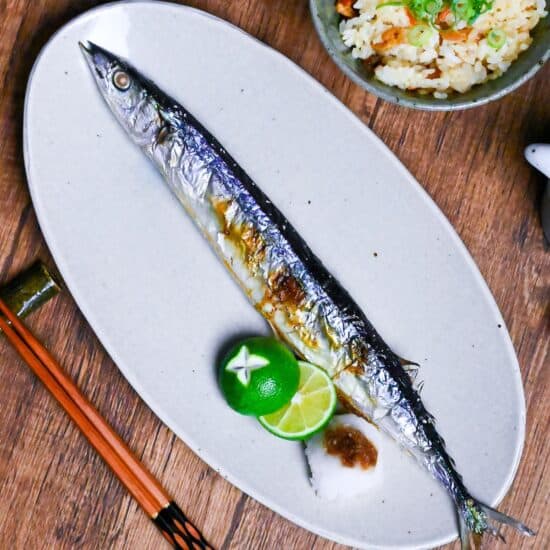
Sanma no shioyaki
Recipe Snapshot
- What is it? Classic Japanese salt-grilled Pacific saury (sanma), the taste of autumn in its purest form.
- Flavor profile: Savory, Smoky, Clean
- Why you’ll love this recipe: It offers a genuine way to honor Japanese tradition through simplicity and precision.
- Must-haves: Fresh Pacific saury (sanma), Sea salt, Fish grill or wire mesh grill.
- Skill Level: Easy
Summarize & Save this content on:
What is Sanma no Shioyaki?
Sanma no Shioyaki (秋刀魚の塩焼き), or salt-grilled Pacific saury, is one of Japan’s most iconic autumn dishes. The fish is simply salted and grilled whole, a minimalist technique that draws out its deep, savory flavor.
In Edo times (1603 – 1868), Sanma was a humble fish for the common people, celebrated for its rich flavor when grilled over charcoal. Dishes like shiozake, salt grilled mackerel, and ayu no shioyaki share that same elemental spirit, but I have to admit, no salt-grilled fish ever feels quite as right to me as Sanma in autumn.
Salt-Grilled Saury Ingredients
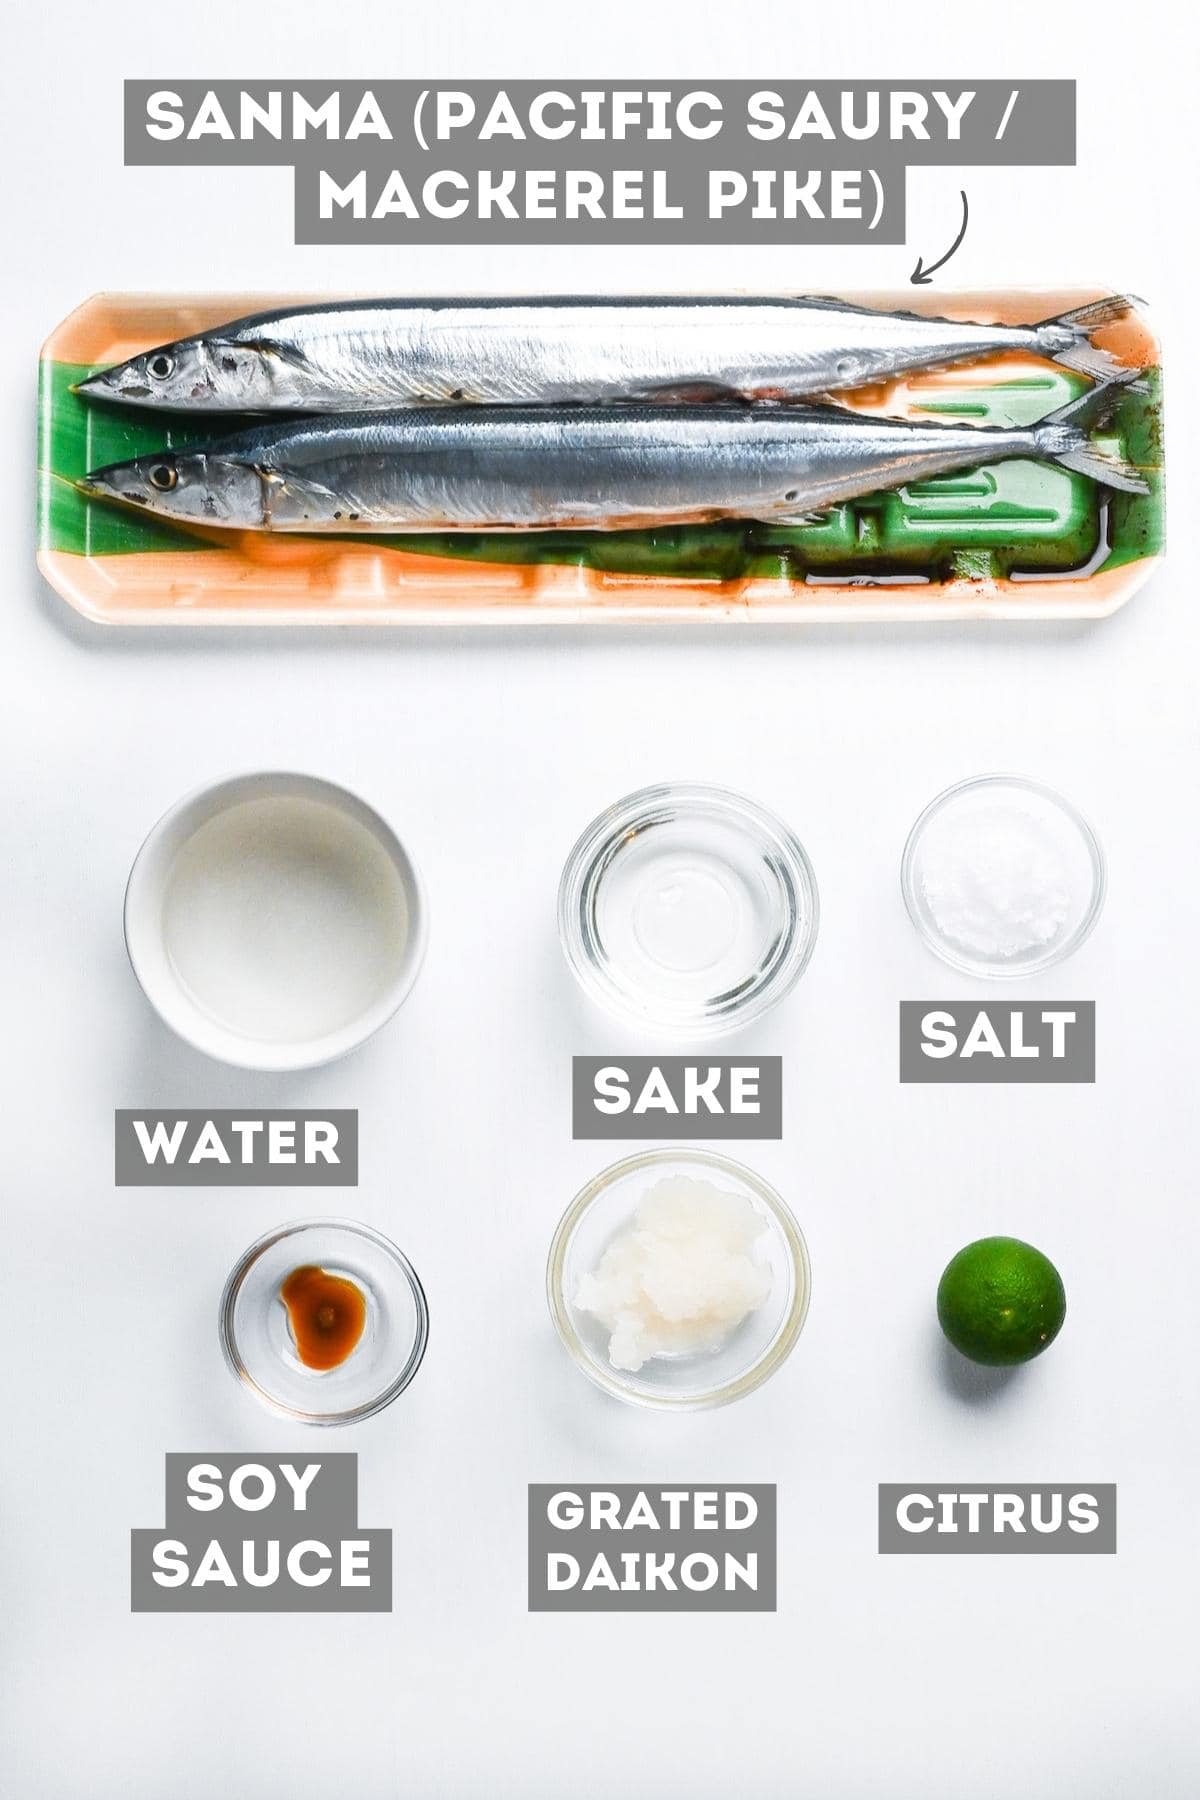
- Pacific saury (sanma, “mackerel pike”): A slender, oily autumn fish. You can find it frozen whole at large Asian groceries and Japanese markets. It’s everywhere in Japan between September and November.
- Sea salt: Preferably high-quality sea salt as it has big impact for the final dish.
Substitution Ideas
- Can’t find sanma? Fresh sardines or small mackerel give you that oily fish flavor. Japanese home cooks actually have been turning to iwashi (sardines) during sanma shortages for years.
- Citrus: No sudachi or kabosu? A simple lemon wedge does the job beautifully. Lime works too, though it’s slightly more assertive.
- Daikon radish: If your local stores don’t carry daikon, grated turnip offers a similar mild, slightly peppery bite. In a pinch, very finely grated horseradish (use sparingly as it’s much stronger) can provide that refreshing contrast to the fatty fish.
Have trouble finding Japanese ingredients? Check out my ultimate guide to Japanese ingredient substitutes!
How to Make My Sanma no Shioyaki
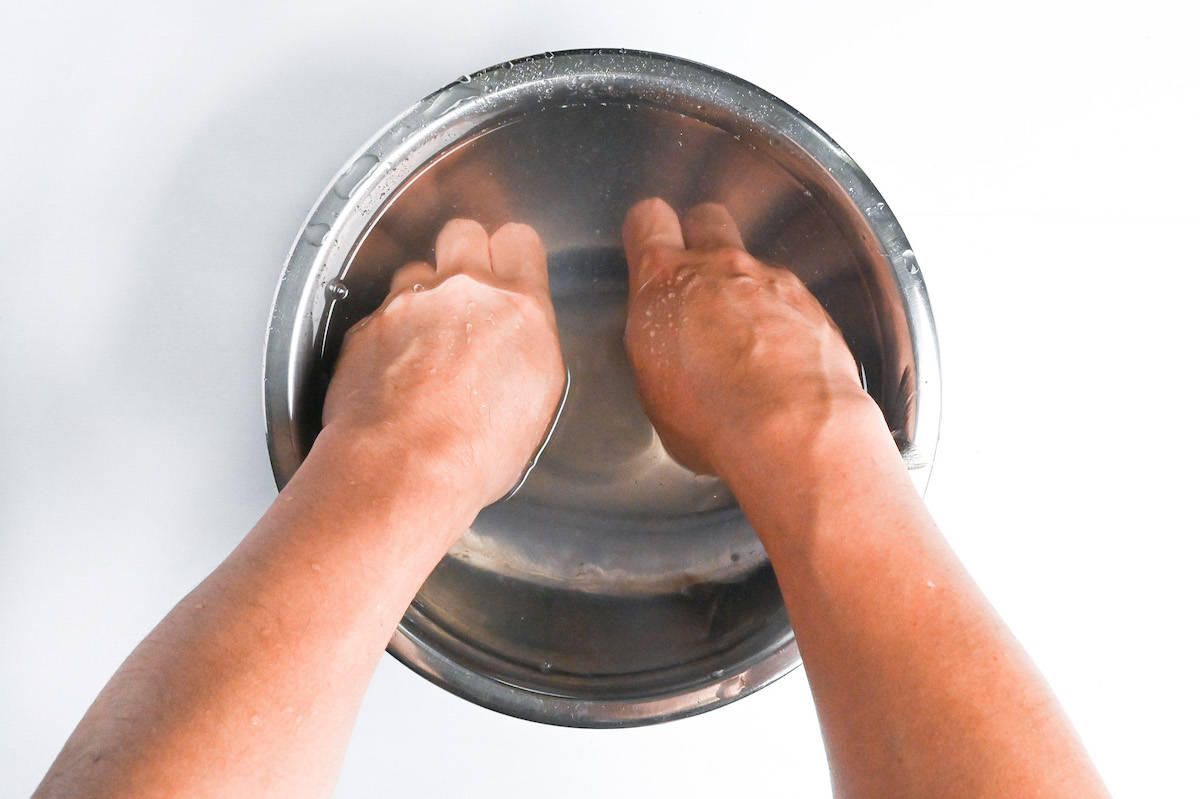
i. Rinse whole sanma in a bowl filled with cold water with a bit of sake, gently rubbing the skin, especially around the gills and belly to lift slime and blood.
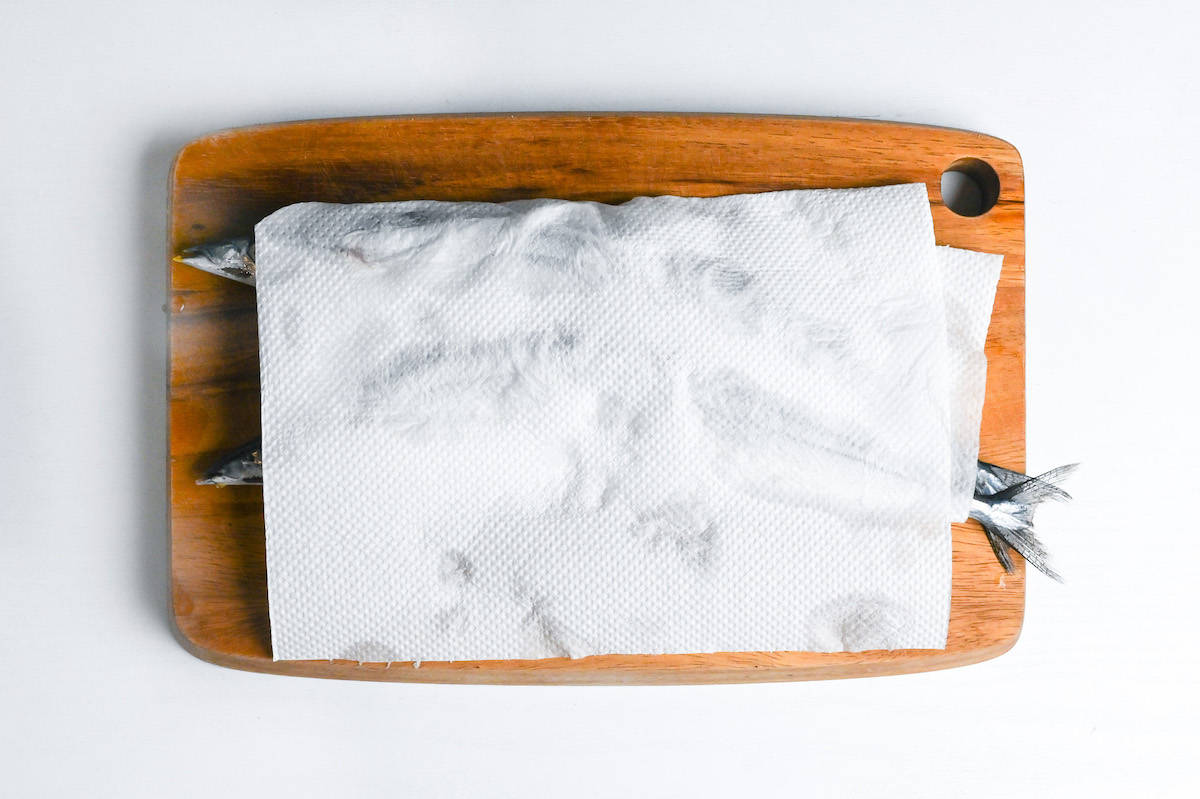
ii. Pat very dry with paper towels (a dry surface is key to crisp skin and clean flavor). The skin should feel “squeaky” and the towels should pick up any pinkish moisture rather than staying dry.
Leaving the innards gives that classic, faint bitterness some people love. Removing them lowers the risk of steaming and splitting on a stovetop or grill pan. If you remove them, make a short slit near the belly and scoop with a spoon or ask your fishmonger to do this if you prefer.
I personally leave it in anyway.
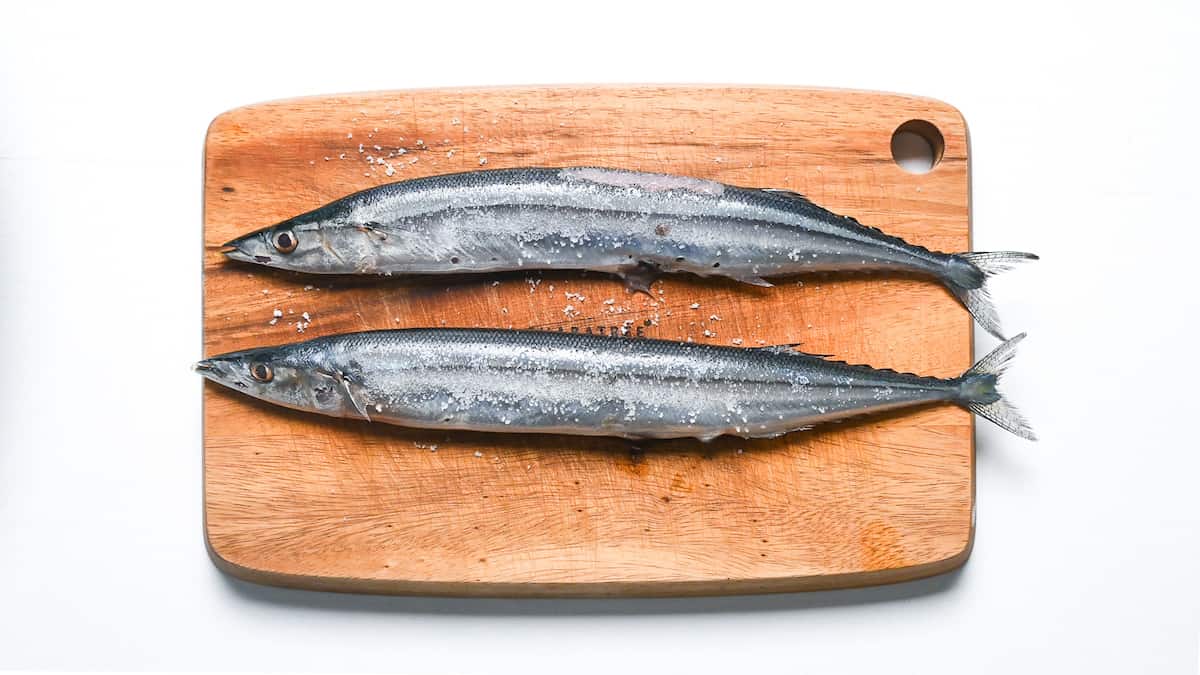
i. Season both sides lightly and evenly with salt (aim for a thin, uniform film, about “lightly salted” rather than crusted), then set the fish on a paper-towel-lined tray in the fridge for 15 minutes.
ii. This brief “pre-salt” draws out surface moisture and mild odors while seasoning the flesh throughout. After the rest, you should see fine beads of moisture on the skin. For super-fresh sanma with zero odor, you can skip the rest and cook right away for a snappier salt crust.
i. Blot both sides thoroughly with doubled paper towels. Press to absorb, don’t rub, which can tear the skin.

ii. Then lightly re-salt both sides. For a cleaner look, pack salt onto the fins (keshō-jio) by pinching them open and pressing in salt (highly optional).
Salting the fins guards them from burning and to leave a snowy accent after roasting. It’s one of those small details that improves presentation. Go gently to avoid oversalting, it’s decorative, not a crust. It’s highly optional for this fish, I don’t usually do this.
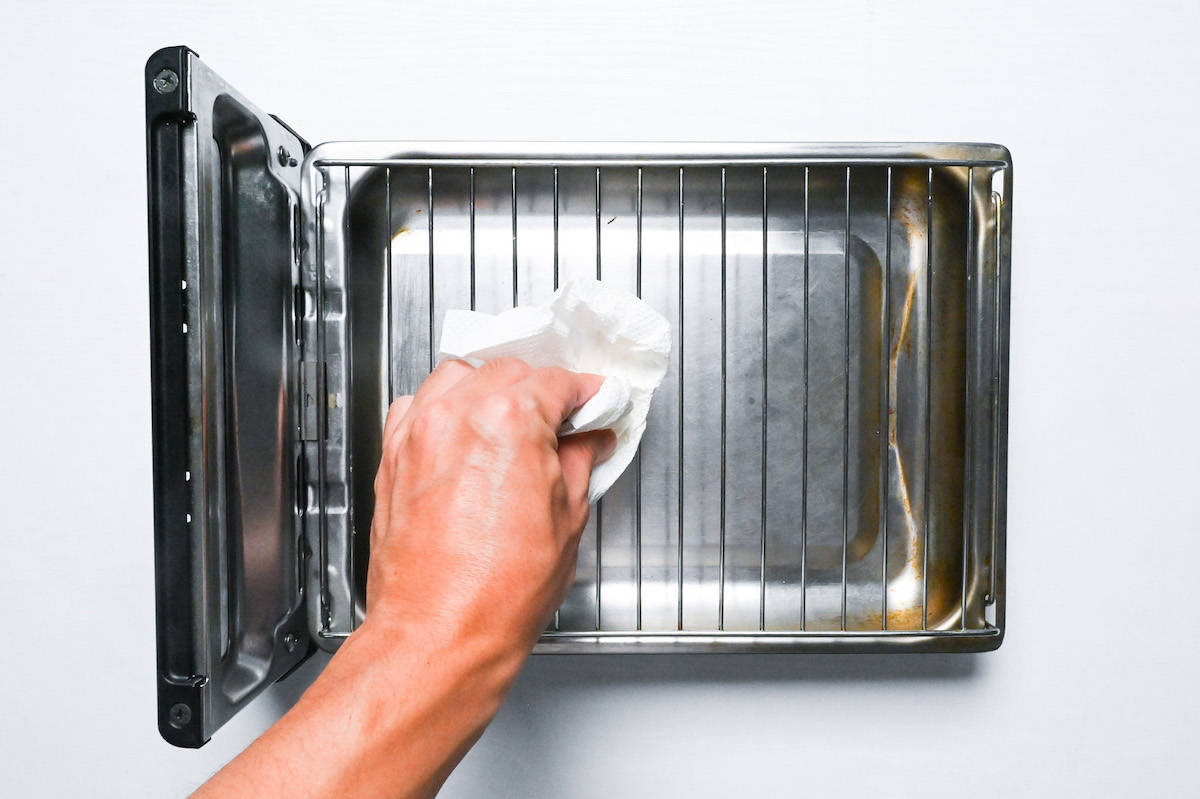
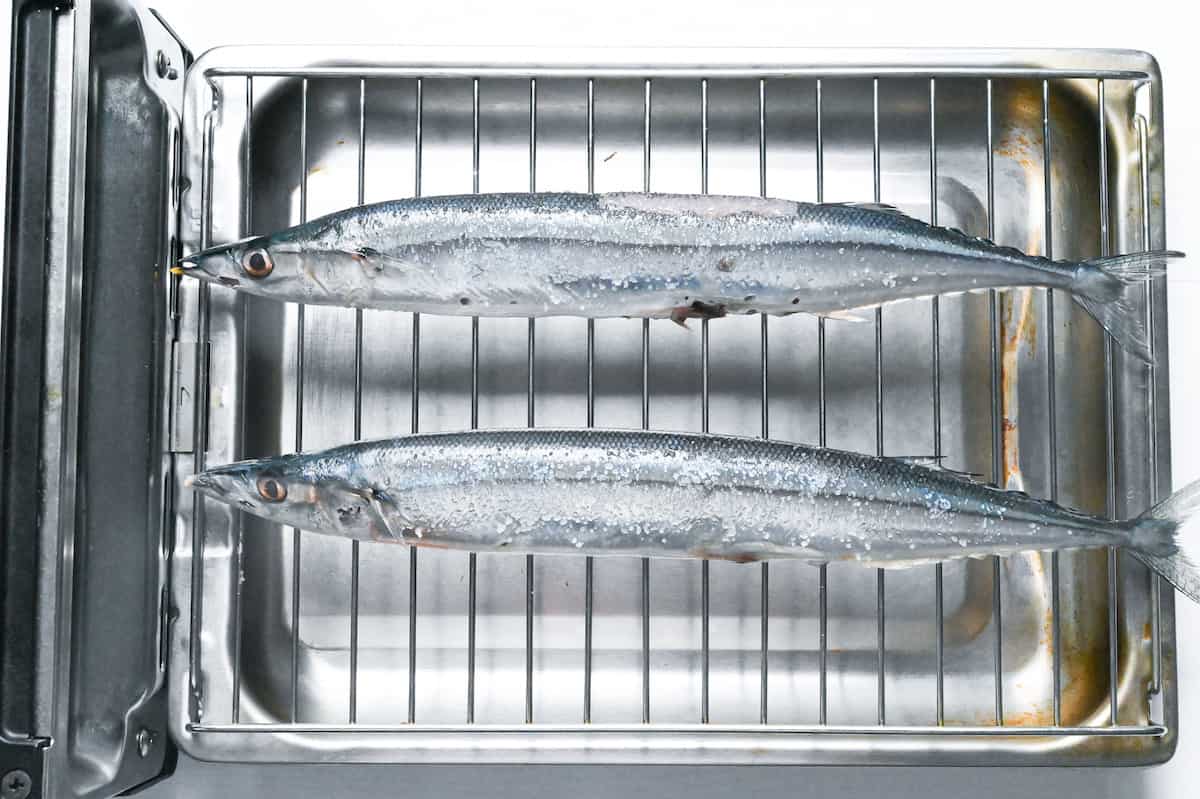
i. Preheat your oven broiler on High to about 260℃ (500°F) for 5 minutes with the rack or preheat an outdoor grill to 230-260℃ (450-500°F). Clean and oil the hot grate with a high-smoke-point oil so it lightly shimmers but doesn’t smoke.
A blazing-hot, clean, oiled grate is the single best insurance against sticking.
Shallow decorative slashes (diagonal, 2-3 cuts) help heat penetrate and can reduce skin bursting on very fresh fish. The trade-off: each cut lets a little fat drip, so skip scoring if your priority is maximum juiciness. I don’t personally do this.
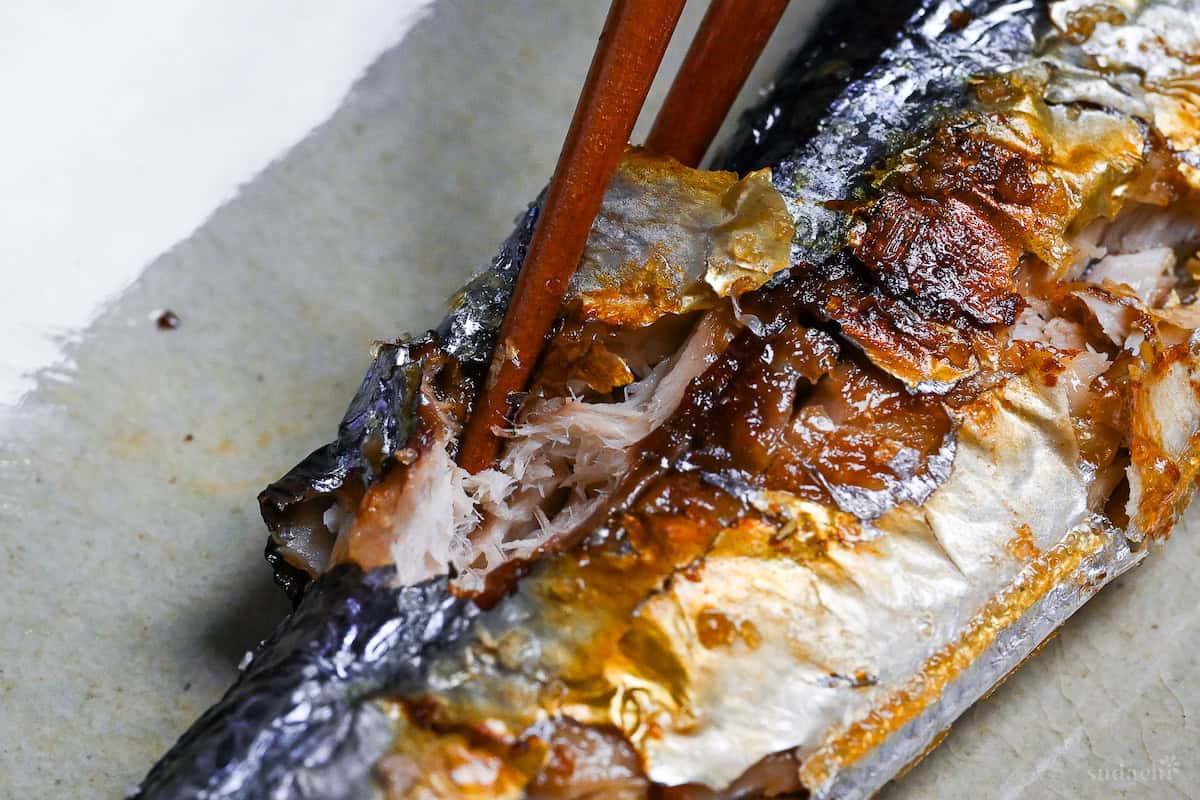
ii. Lay the fish on the oiled grate so the eventual “presentation side” (head facing left) begins down and sits directly under the heat; cook 5-7 minutes until the skin turns fox-brown and fat sizzles steadily.
iii. Flip once using a thin spatula or slide a carving fork’s tines under the fish from between the grate bars. Finish the second side 5-7 minutes. The sizzle will start high and bright, then soften to a gentle “hiss” as moisture drives off. That’s another sign you’re close. Every grill behaves differently, so trust your eyes and ears over clock for this.
iv. After the second side is done, flip back to the presentation side (head-left side up) and broil 10-20 seconds to re-crisp and add sheen. This quick “polish” makes the skin look lacquered without drying the flesh. Stop as soon as the skin glints and tightens.
Using Different Grills:
| Tool | Preheat & Distance | Typical Time* |
|---|---|---|
| Shichirin (Charcoal) | Coals fully ashed, keep fish several cm off intense embers | 7 min/side (size & fire strength vary) |
| Gas Fish Grill (Both-Sided) | Empty-chamber preheat 8 min | 5-7 min/side or auto-program |
| Gas Fish Grill (Single-Sided), this is what I used | Preheat 5 min | 5-7 min/side |
| Nonstick Frying Pan | Pan preheated to steady medium, optional parchment or fish-liner | 4-6 min/side, uncovered |
| Oven Broiler / Toaster Oven | Preheat broiler 5 min, rack ~15 cm (6 in) below element | 6-10 min/side (broiler), toaster needs closer watch |
| Air Fryer | 200-210℃ (392-410°F), basket preheated | 7-10 min (finish +1-2 min for skin) |
i. Grate raw daikon, lightly squeeze so it’s juicy but not watery, and spoon about 1 Tbsp per serving into a small bowl. Add a few drops of soy sauce and a squeeze of sudachi/yuzu/kabosu (or lemon).
Daikon contains active enzymes (e.g., amylase) and a myrosinase system that generates pungent isothiocyanates when grated, both contribute to that “clean finish.” Citrus acidity boosts salivation and refreshes the palate between bites.
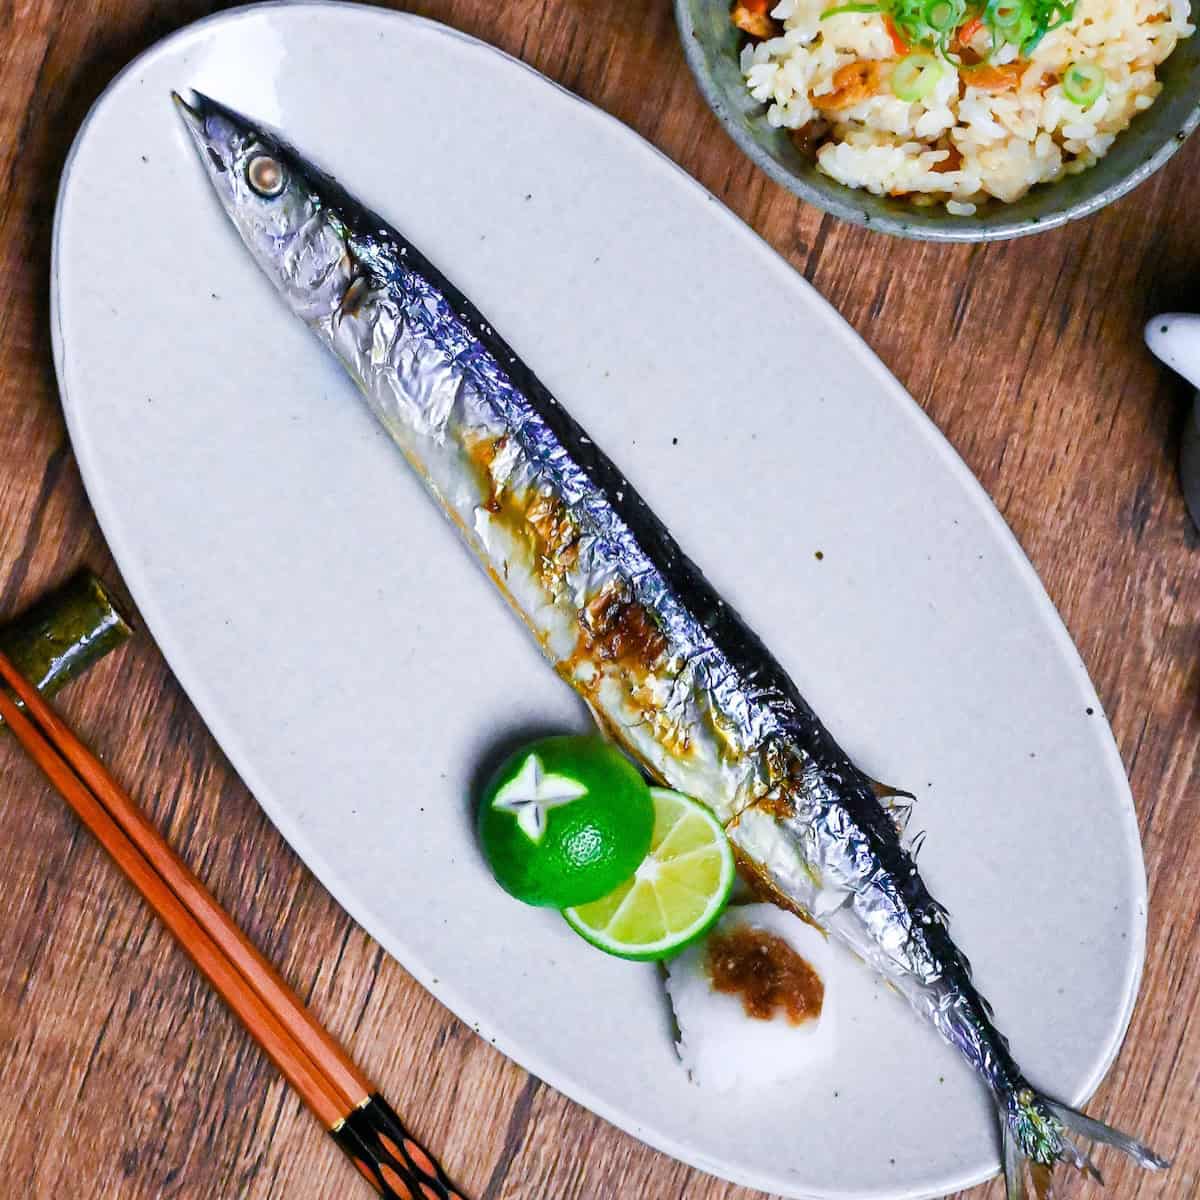
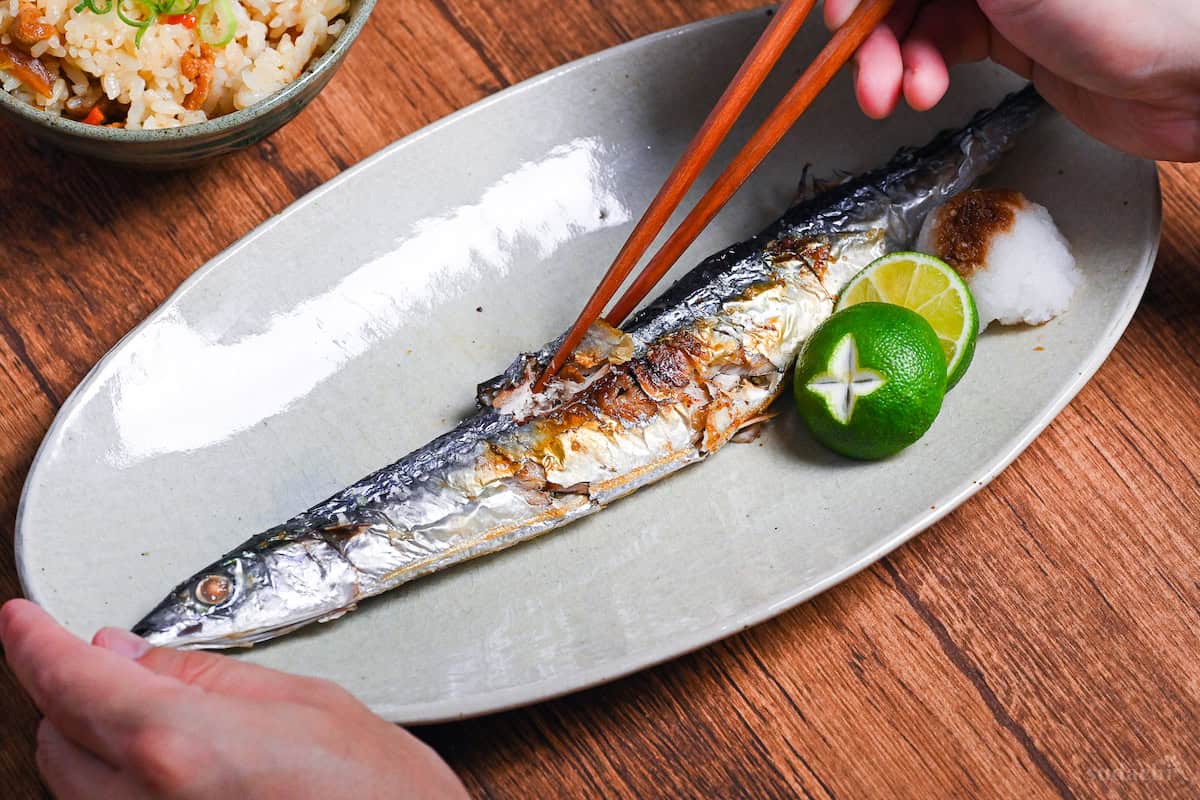
i. Plate each fish with the head to the left, belly toward you, a mound of daikon oroshi at the right front, and a citrus alongside.
ii. If the fish tastes slightly too salty, pair each bite with extra oroshi and citrus. If under-seasoned, finish with a tiny sprinkle of salt or a drop of soy at the table.

Essential Tips & Tricks
- Look for clear black eyes, yellowish mouth/tail tips, a shiny silver belly, thick body, dark glossy back, and a slight bulge at the neck. Larger sanma are usually richer and juicier.
- Rinse fast, dry thoroughly: a quick wash (cold water, optional splash of sake) and a meticulous pat-dry remove odors and prevent steaming skin.
- Light, even salt and a 15-minute rest draws out surface moisture and seasons within; blot, then finish with a light re-salt just before heat.
- Keep surfaces dry.
- Every grill behaves differently, so trust your eyes and ears over clock.
With these simple tips in mind, you’re set for success every time you make sanma no shioyaki.
Storage & Meal Prep
Fridge: Airtight container, 1-2 days max. Cool completely, wrap each piece tightly, and keep daikon oroshi/citrus separate to prevent sogginess and off-odors.
Freezer: Wrap each piece tightly in plastic, then a freezer bag with air pressed out; up to 1 month.
Meal Prep: Not ideal for “crisp-skin” make-ahead. You can, however, pre-salt raw fish up to 24 hours in the fridge (on paper towels, loosely covered).
What to Serve With This Recipe
- Steamed White Rice (Gohan)
- Mixed-Grain Rice (Zakkoku Gohan)
- Mushroom Miso Soup
- Spinach Ohitashi
Grilled Saury FAQ
Sanma is an extremely delicate fish, so sometimes you can’t avoid it. Always preheat the grate/pan so the skin sets instantly, and don’t move the fish until it releases naturally. Flip only once using a wide spatula or two chopsticks supporting the whole body.
Start with fresh fish and rinse away gill blood and belly traces. Presalt ~15 min to draw out odor.
The fish’s very name, sanma (秋刀魚), “autumn knife fish” reflects its peak season and sleek, silver, blade-like shape. In Edo times it settled as a commoners’ staple, and salting then charcoal-grilling spread because it both preserved and intensified flavor. Charcoal brought out sanma’s rich aroma and crisp skin, and evening Edo streets were said to fill with the smoke of households grilling fish. Though fatty fish were snubbed by the samurai class, townspeople embraced sanma as an affordable, nourishing taste of the season. By late Edo, the rakugo tale Meguro no Sanma, where a shogun falls for salt-grilled sanma, crystallized its status, embedding sanma shioyaki as an autumn icon.
More Japanese Fish Recipes
- Saba no Misoni (Miso Simmered Mackerel)
- Sakana no Nitsuke (Japanese Simmered Fish)
- Miso Glazed Salmon
- Unagi Donburi
Craving seafood with an authentic touch? Dive into my collection of Japanese fish dishes!
Did You Try This Recipe?
I would love to hear your thoughts!
💬 Leave a review and ⭐️ rating in the comments below. 📷 I also love to see your photos – submit them here!

Sanma no Shioyaki (Grilled Pacific Saury)
Ingredients
- 500 ml water for cleaning
- 3 tbsp sake for cleaning (optional)
- 2 pacific saury (sanma) whole, prefer large/fatty, clear eyes, shiny belly
- 1 tsp salt fine sea salt preferred, 0.8–1.2% by weight
- grated daikon radish (daikon oroshi) 1 tbsp per serving
- Japanese soy sauce (koikuchi shoyu) optional
- citrus of choice kabosu, sudachi or lemon/lime in a pinch
My recommended brands of ingredients and seasonings can be found in my Japanese pantry guide.
Can’t find certain Japanese ingredients? See my substitution guide here.
Instructions
- Take a large bowl and add 500 ml water and 3 tbsp sake. Submerge 2 pacific saury (sanma) in the water and rub the surface gently, paying extra attention to the area around the gills and belly.

- Dry thoroughly with kitchen paper.
- Sprinkle an thin even layer of salt over each side. Line a plate with kitchen paper and place the saury on top, then rest in the fridge for 15 minutes.

- Wipe a thin layer of oil over a wire rack, then place it under the heat source and preheat your grill or broiler on high (approx 260 °C (500 °F)) for about 5 minutes.
- Take the sanma from the fridge and gently blot the surface with kitchen paper to remove any drawn-out moisture. Lightly re-salt both sides, and pinch a thin layer of salt on the fins and tails for better presentation (optional).
- Lay the fish on the oiled grate so that the head is facing left and belly facing down. Place under the heat source and grill for 5-7 minutes or until the skin turns brown and crispy, then flip and repeat for 5-7 minutes on the other side.
- Flip once more and broil the first side once more for 10-20 seconds to revive the crispiness, then transfer to a serving plate. Serve each portion with 1 tbsp of grated daikon radish (daikon oroshi) topped with a dash of Japanese soy sauce (koikuchi shoyu) and a wedge of citrus of choice. Enjoy!
Pretty good! Cooked very well. Ate the whole fish, but the head was a little scaley in texture. Everyone saw I had eaten the head, and they gave me theirs to consume.
Haha!
I personally don’t eat the head either, but I hope you enjoyed it despite the scaley texture! Thank you for trying my recipe and giving a generous rating!