


What if the difference between burst spring rolls and perfectly crispy harumaki comes down to one overlooked detail? Unlike chuka restaurant staples like tan tan ramen or ebi chili, harumaki belong in home kitchens, where texture matters more than presentation.
This recipe loads each roll with crunchy vegetables that stay intact through frying. The secret to that shatteringly crisp shell without explosions? It’s simpler than you think.

Harumaki
Recipe Snapshot
- What is it? Crackly, golden harumaki: Japanese spring rolls stuffed with pork, glass noodles, and a colorful veg mix, fried until shatter-crisp.
- Flavor profile: Big savory umami, lightly sweet, and extremely fragrant.
- Why you’ll love this recipe: A reliable harumaki recipe that prioritizes texture, cook the filling, lightly thicken, cool, then fry for crisp rolls that don’t weep.
- Freezer Friendly? Yes!
- Suitable for Meal Prep? Yes!
Summarize & Save this content on:

What is Harumaki?
Harumaki (春巻き) are Japanese-style spring rolls served as a dim sum-influenced appetizer: a thin wheat wrapper is rolled around a savory filling, sealed, then deep fried until the surface blisters and turns crisp. What really defines harumaki is the contrast. Light, crackly wrapper outside and a warm, juicy filling inside, so most Japanese recipes cook the filling first and keep it thick enough that it won’t leak or soften the wrapper.
Harumaki come from the broader Chinese spring roll family, and the name literally means “spring roll.” It is well-loved chuka appetizers and party food in Japan like gyoza and shumai.
Compared with other “spring rolls,” harumaki are closer to Chinese chūn juǎn than Vietnamese gỏi cuốn (fresh rice paper rolls), and they’re generally crisper and more uniform than many American-style egg rolls because the filling is designed for moisture control.
Harumaki Ingredients
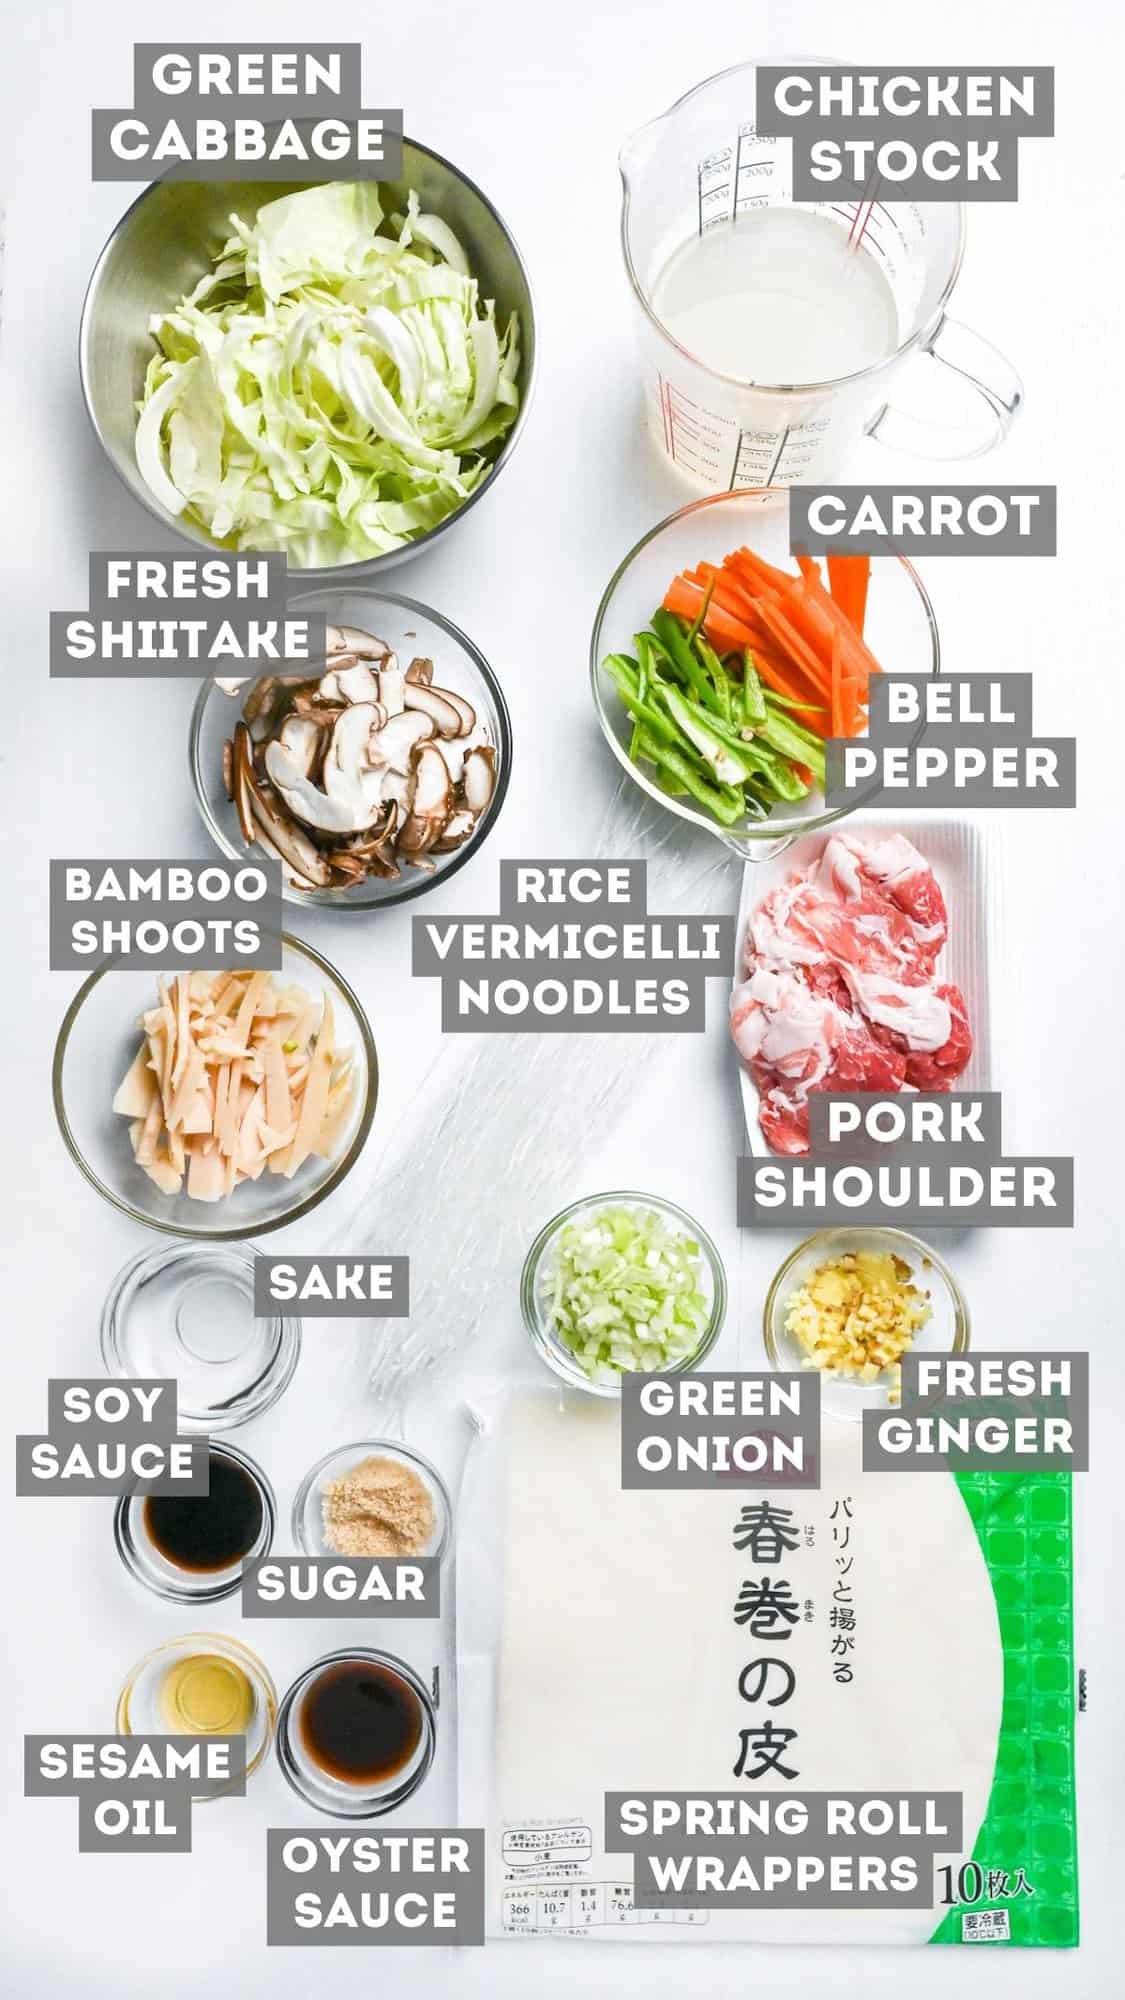
- Canned bamboo shoots: Pre-cooked young bamboo pieces with a clean, mild flavor. In this harumaki recipe, they stay snappy even after simmering in the filling. Look for them in cans or vacuum packs at Asian/international aisle of larger supermarkets.
- Glass noodles/cellophane noodles: Clear, starch-based noodles that turn slippery-chewy when cooked. In this recipe they quietly do the most important job: soaking up broth and seasoning so the filling stays cohesive (not watery), which is a huge reason your harumaki don’t burst and your wrappers stay crisp. You’ll usually find them dried in the noodle aisle.
- Shiitake mushrooms: Meaty, earthy mushrooms with a naturally savory taste. They’re the umami backbone that makes the pork-and-vegetable mix taste restaurant-deep, so you can keep the filling light and crunchy without piling on extra sauce.
Substitutions /Variations
- Gluten-free (GF): For a gluten-free Harumaki recipe, swap the wheat wrappers for rice paper or a rice/tapioca-based GF spring roll skin. Because these wrappers are more fragile and can blister quickly in oil, keep the filling on the drier side.
- Vegan / vegetarian: For a vegan or vegetarian filling, replace the pork with rehydrated soy mince plus extra mushrooms. The texture will be a bit lighter and less bouncy than meat but still deeply savory. Plant proteins release more moisture and contain less fat, so cook them down well. Also swap oyster sauce and chicken bouillon for vegan/vegetarian alternatives.
- Alternative proteins (chicken, turkey, seafood): If you don’t want to use pork, the closest match is juicy chicken thigh or ground dark chicken, which stays tender but tastes a little lighter, and you can also mix in shrimp or crab sticks for a seafood-style Harumaki.
- Vegetable swaps: For crunchy texture, you can trade canned bamboo shoots for celery or canned water chestnuts and use Napa cabbage instead of green cabbage. Just slice everything thinly and cook high-water vegetables like cabbage or celery down a bit longer so excess moisture. You can also substitute shiitake with your favorite local mushrooms.
- Baked or air-fried Harumaki: If you’d like a lighter version or want to avoid a pot of oil, you can brush or spray the rolled Harumaki lightly with neutral oil and bake or air-fry them until golden. They’ll be less shatteringly crisp but still pleasantly light and crunchy. Space them out so hot air can circulate and watch the tips near the end, as they brown faster than the sides.
Have trouble finding Japanese ingredients? Check out my ultimate guide to Japanese ingredient substitutes!
How to Make My Crispy Harumaki
If you prefer to watch the process in action, check out my YouTube video of this harumaki recipe!

Before you start (Mise en place): Julienne the vegetables to match (thin matchsticks), cut the cabbage into rough strips, mince ginger and leek, and measure your sauces so the stir-fry stays hot and dry.
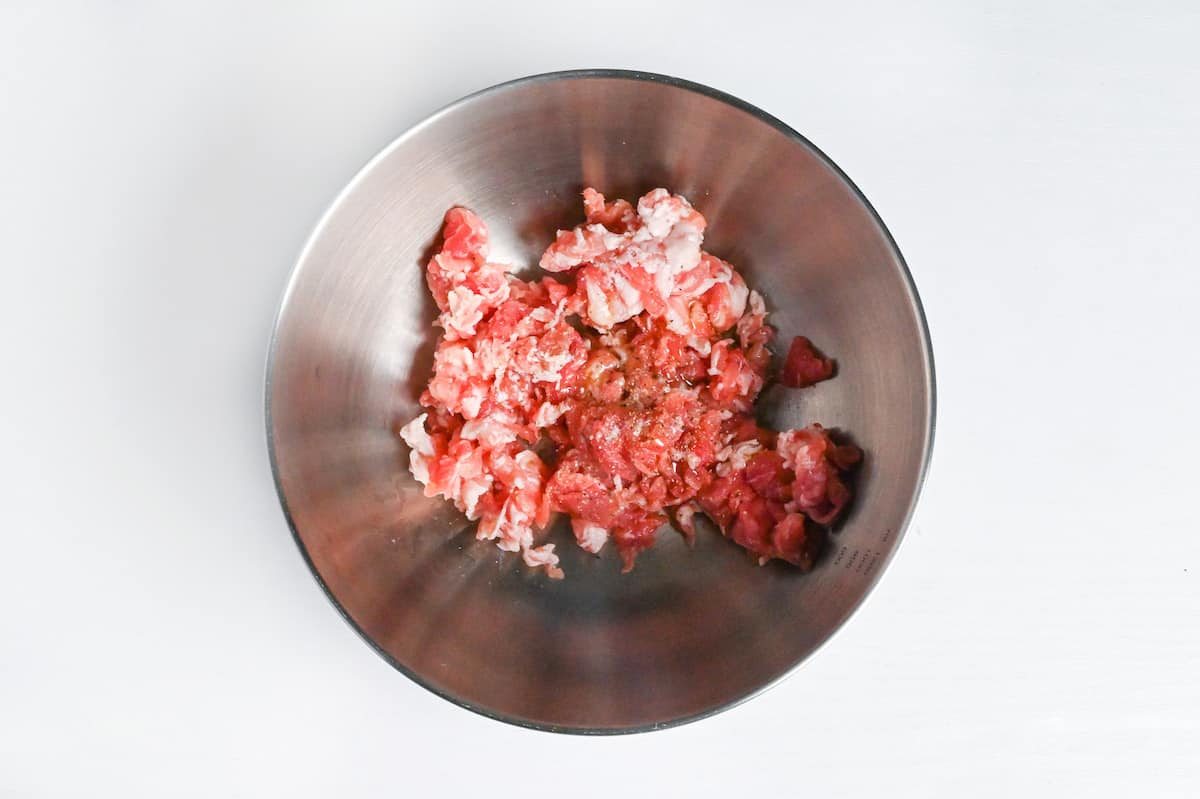
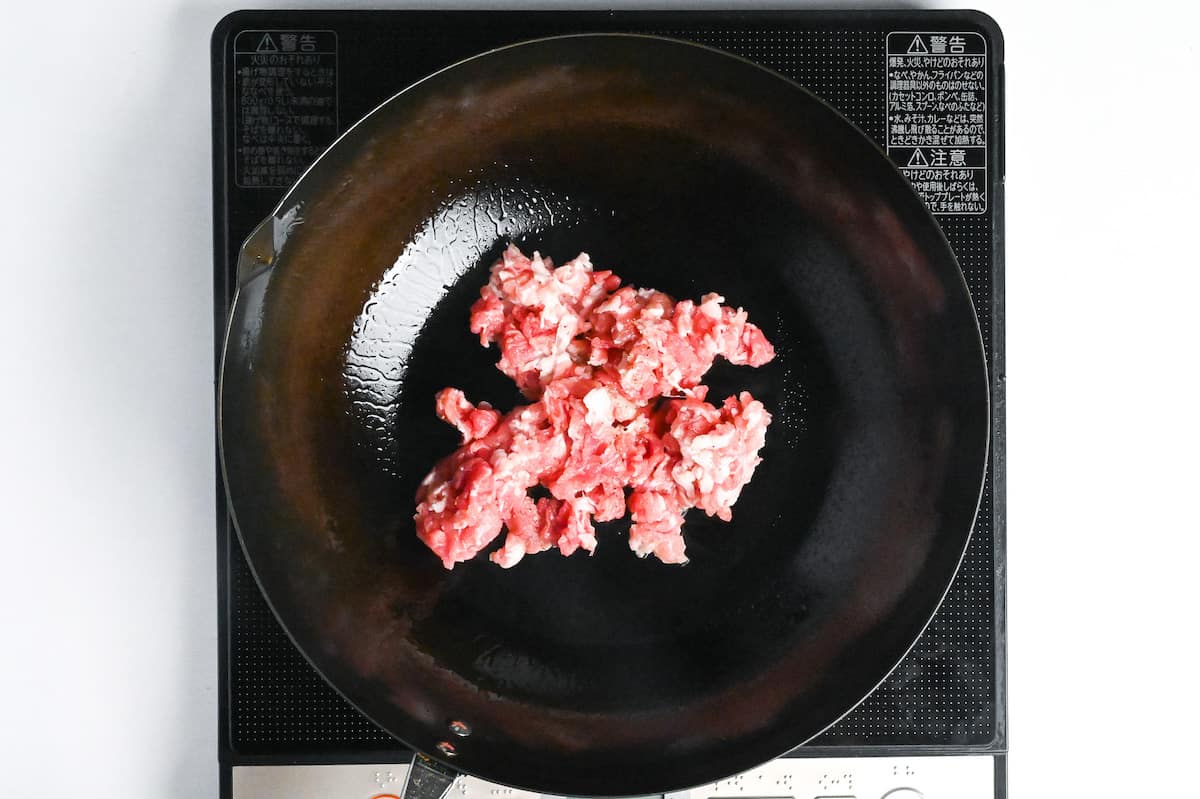
i. Roughly chop your pork belly or shoulder into small, bite-sized pieces. This creates a chunky, satisfying texture that ground meat can’t match.

ii. Toss the pork in a mixing bowl with salt, pepper, and a drizzle of toeasted sesame oil, working the seasonings in until each piece glistens.
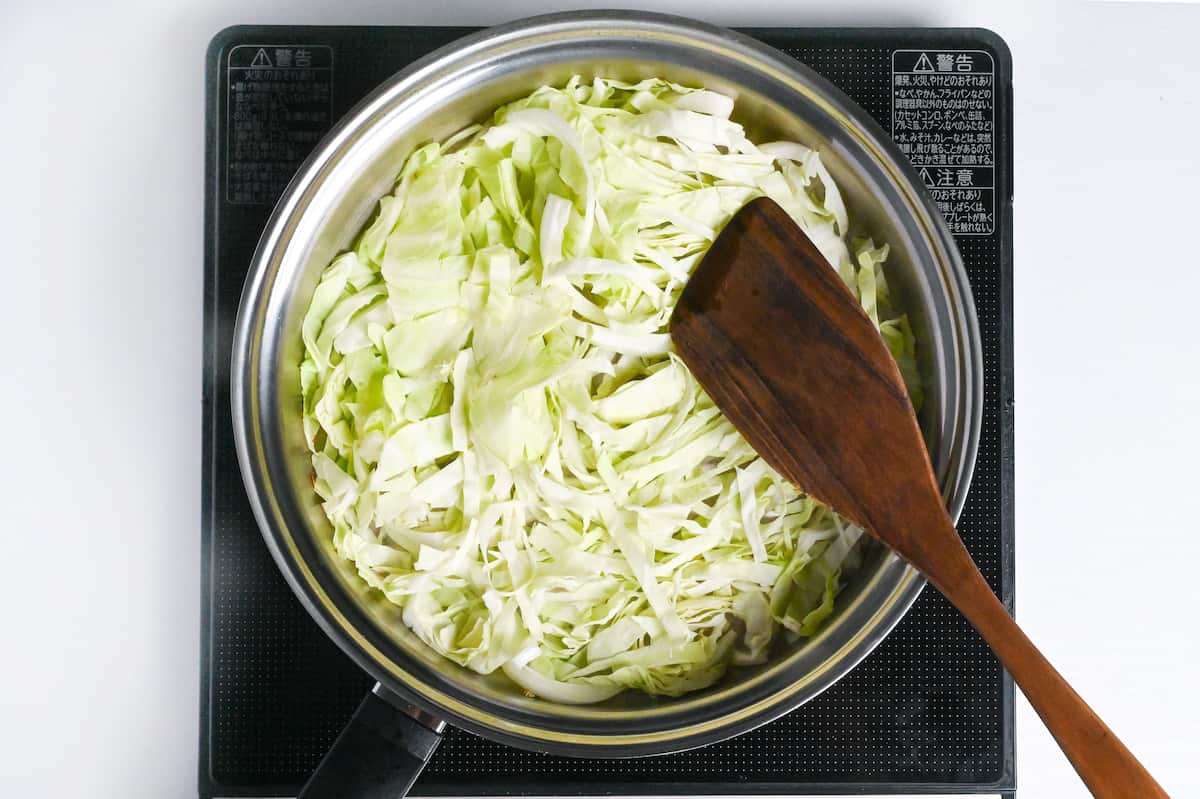
i. Heat a lidded pan over medium with a thin film of oil, then add shredded cabbage.
ii. When it starts to soften and smell sweet, add chicken bouillon and sake, cover, and simmer 3 minutes to steam and control moisture migration. If it sticks or browns, lower heat and splash in more stock or hot water.
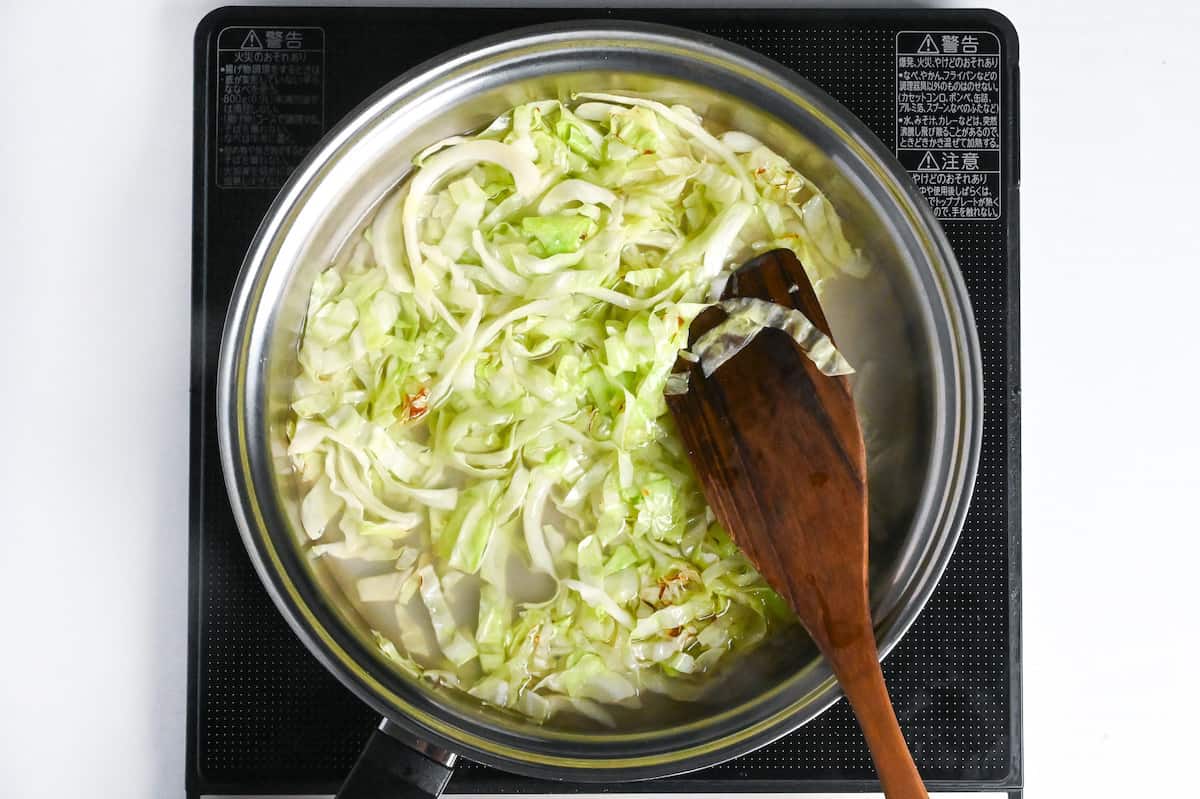
Cabbage releases a lot of water as it cooks. By steaming it separately with stock first, you control exactly how much liquid ends up in your final filling. I used to throw raw cabbage directly into the main pan, which created a watery mess that leaked through the wrappers during frying.
This two-pan method might seem fussy, but it’s the difference between juicy filling and soggy disasters.
i. Heat a large pan or wok over medium-low and add the seasoned pork. Stir-fry until the pieces are fully cooked and lightly browned.
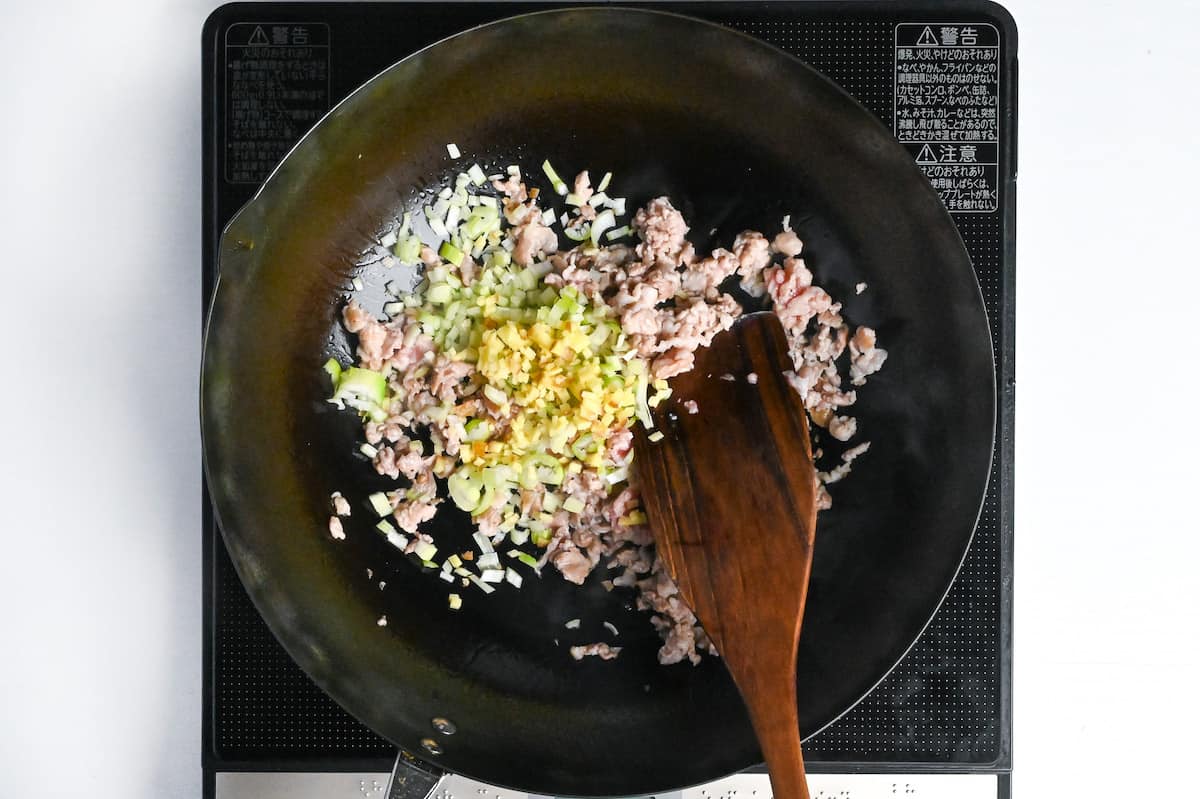
i. Add your finely chopped fresh ginger and green onion to the cooked pork, stirring until the ginger’s sharp, zingy aroma fills your kitchen. This usually takes about 30 seconds.
ii. Once fragrant, increase the heat to medium-high and toss in your julienned vegetables: carrots, shiitake mushrooms, bell peppers, and bamboo shoots, all cut into thin, uniform matchsticks.
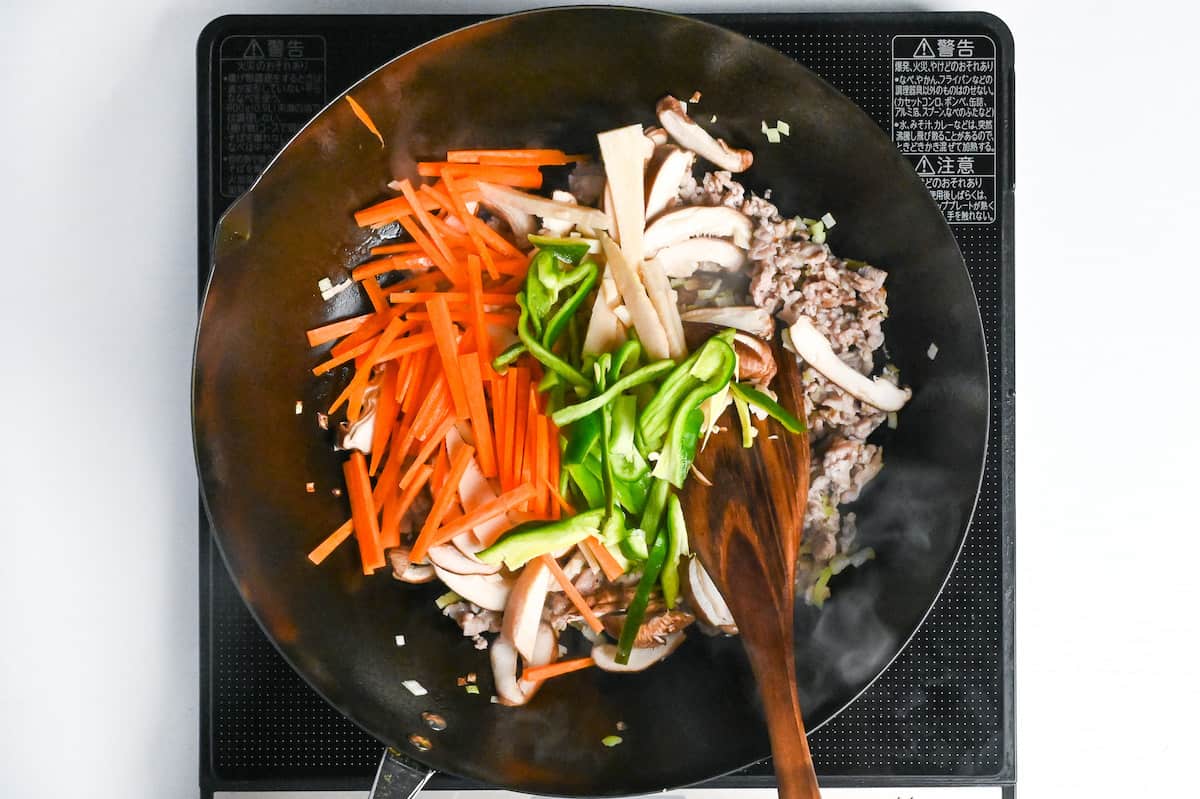
The julienne cut isn’t just for looks. Thin, even strips cook at the same rate, release moisture predictably, and most importantly, roll up neatly without creating lumpy, hard-to-wrap sections.
iii. Stir-fry the vegetables for about 3 minutes until they’ve softened slightly but still have a bit of snap. You’re not fully cooking them here, just getting them started.
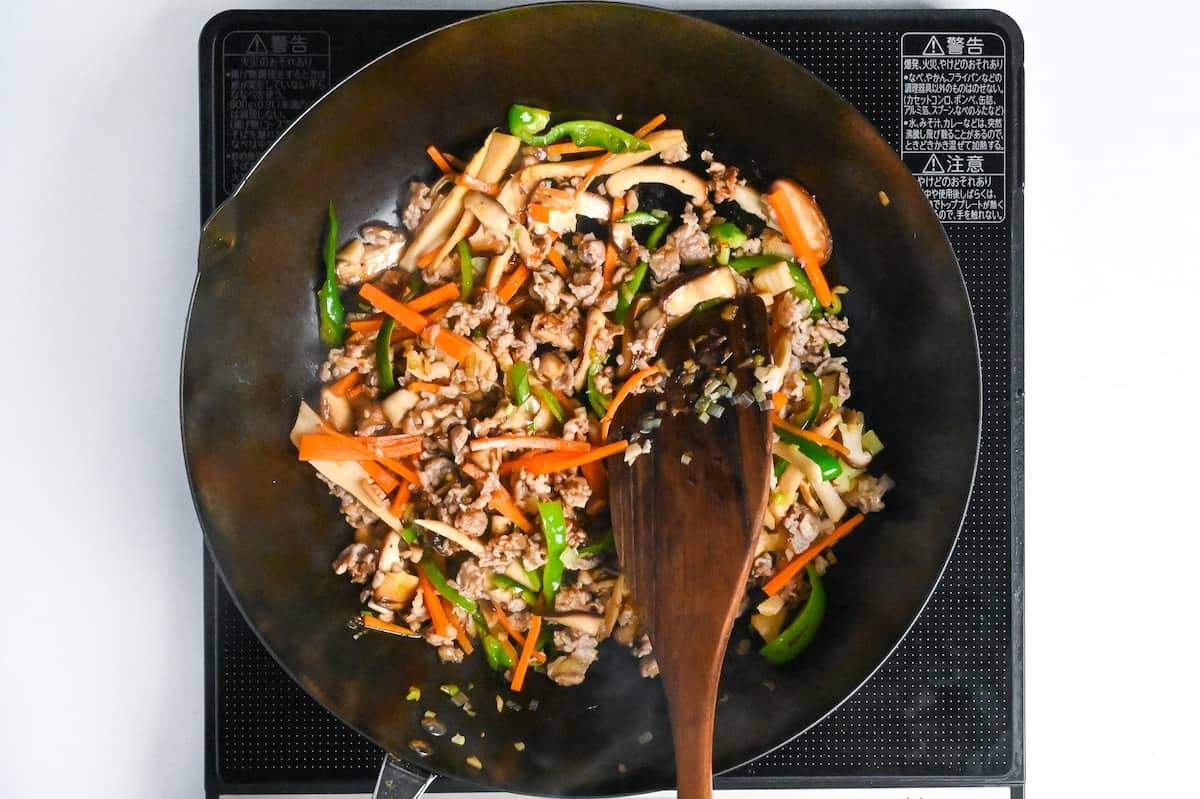
i. Now add soy sauce, oyster sauce, and a small pinch of sugar to the vegetables, stirring to coat everything evenly. The sugar might seem odd, but it balances the salty depth of the soy and oyster sauces while helping the Maillard reaction along, creating richer browning.
ii. Pour in the cabbage mixture you pre-cooked earlier (the softened cabbage and chicken bouillon), integrating it thoroughly with the vegetables and pork.
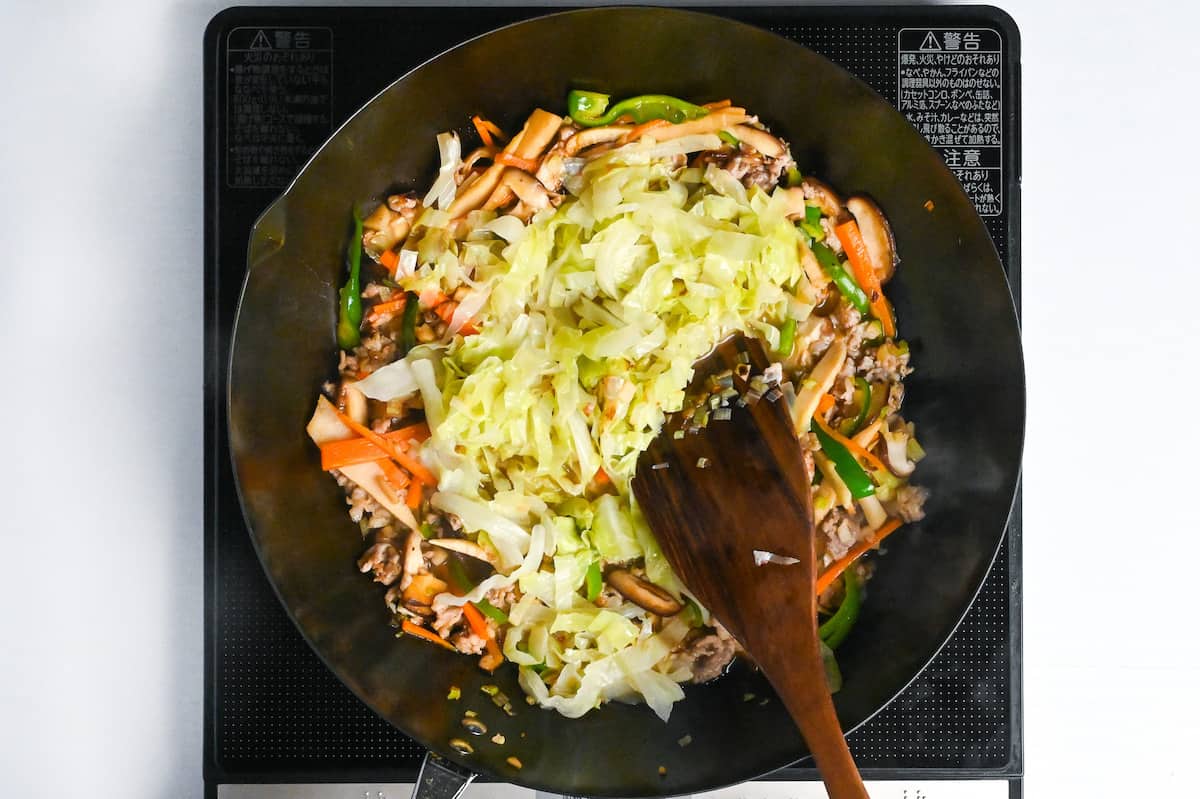
iii. Add your glass noodles directly into the pan, making sure they’re submerged in the cooking liquid. As they soften over the next 2-3 minutes, they’ll absorb the savory broth and carry that umami-rich flavor through every bite. Once the noodles have become pliable, you’re ready for the crucial thickening step.
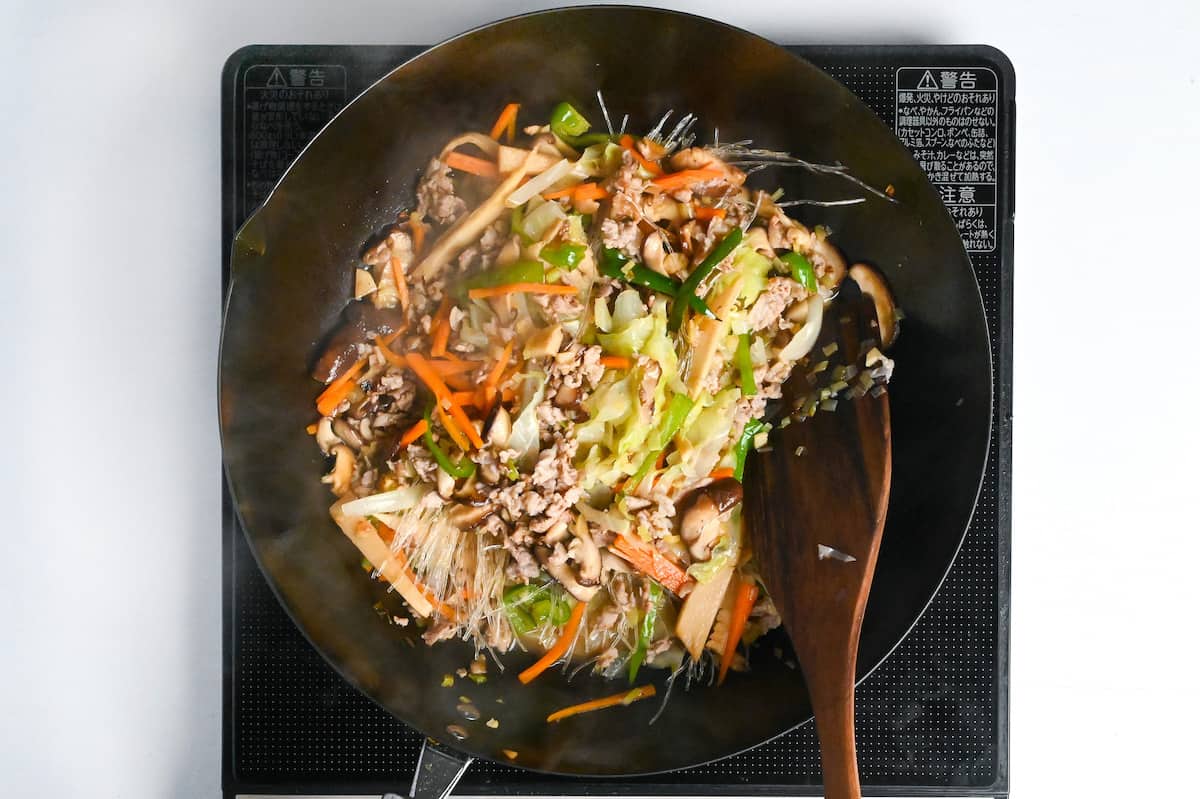
i. Mix cornstarch with cold water in a small bowl to create a smooth slurry. Pour this into the pan and stir immediately, watching as the mixture transforms from soupy to glossy and thick within 30 seconds.
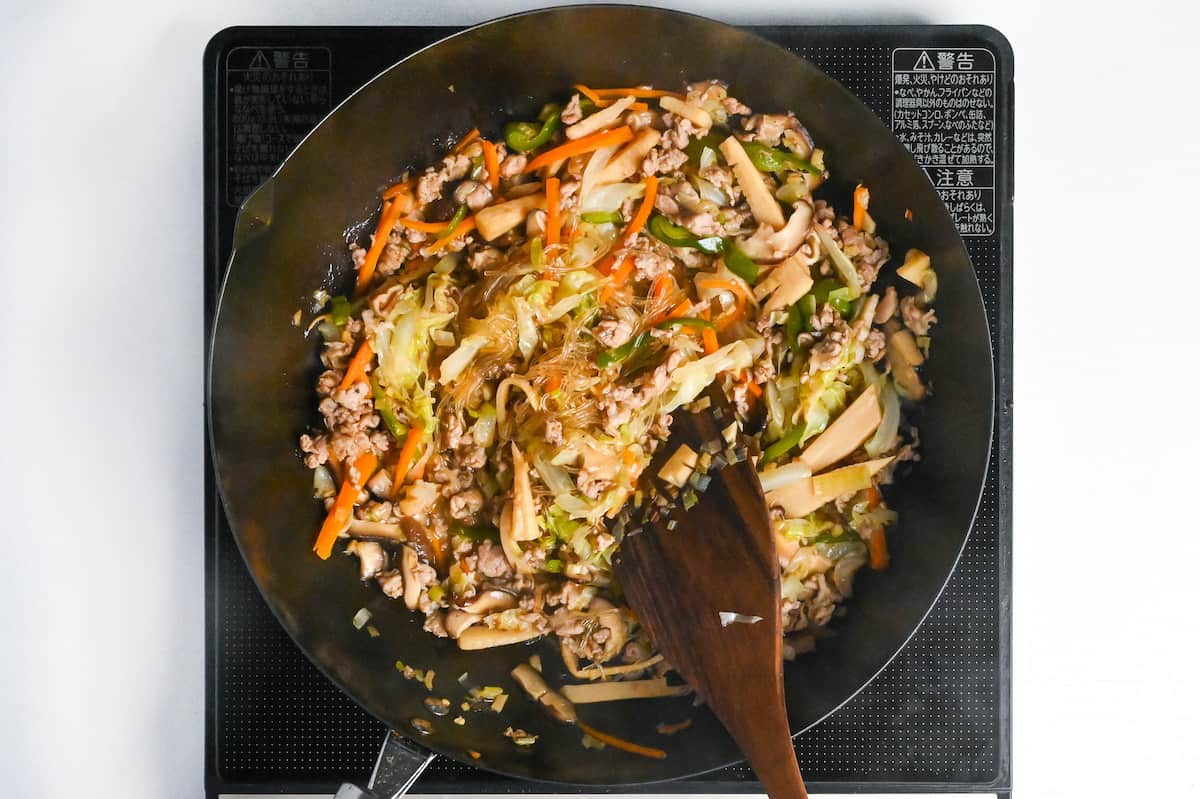
This isn’t just for texture! The cornstarch creates a stable matrix that traps moisture and prevents it from migrating into your wrappers, which is your primary defense against soggy, oil-logged spring rolls.
ii. Simmer for another minute until the raw starch taste cooks off and the filling develops that characteristic silky, gravy-like consistency.
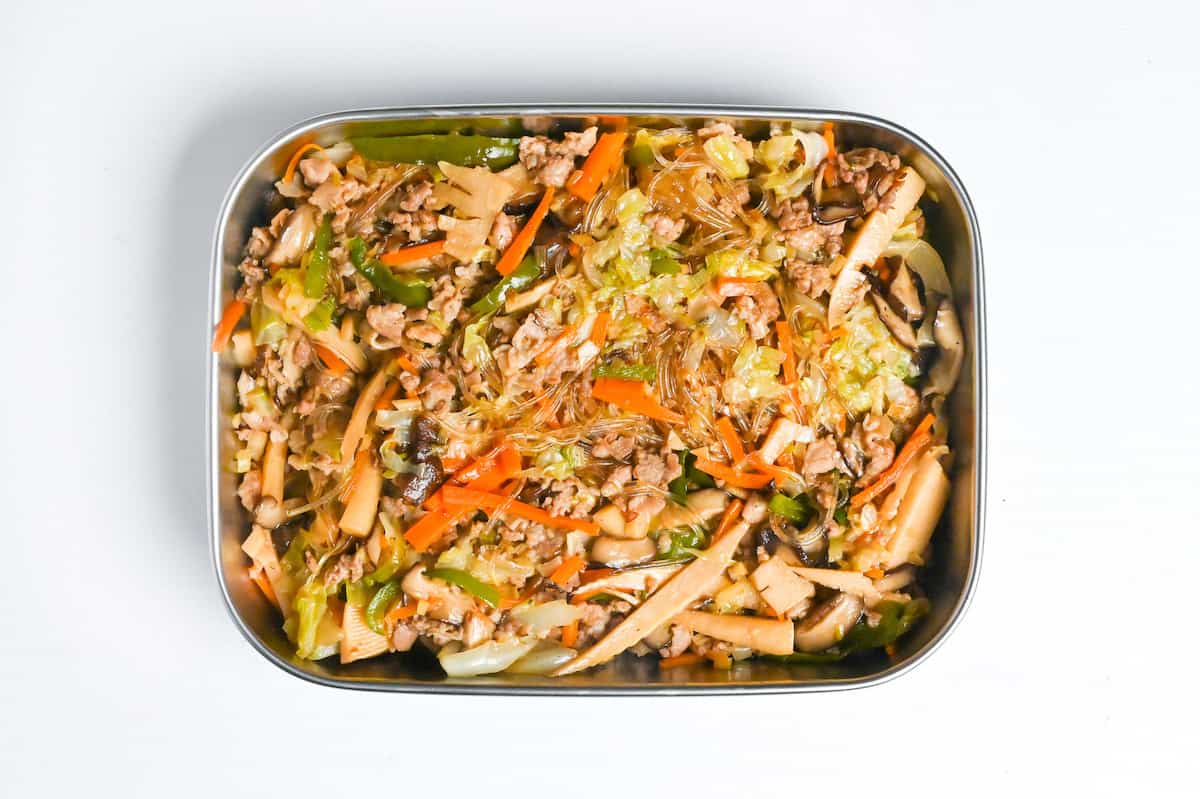
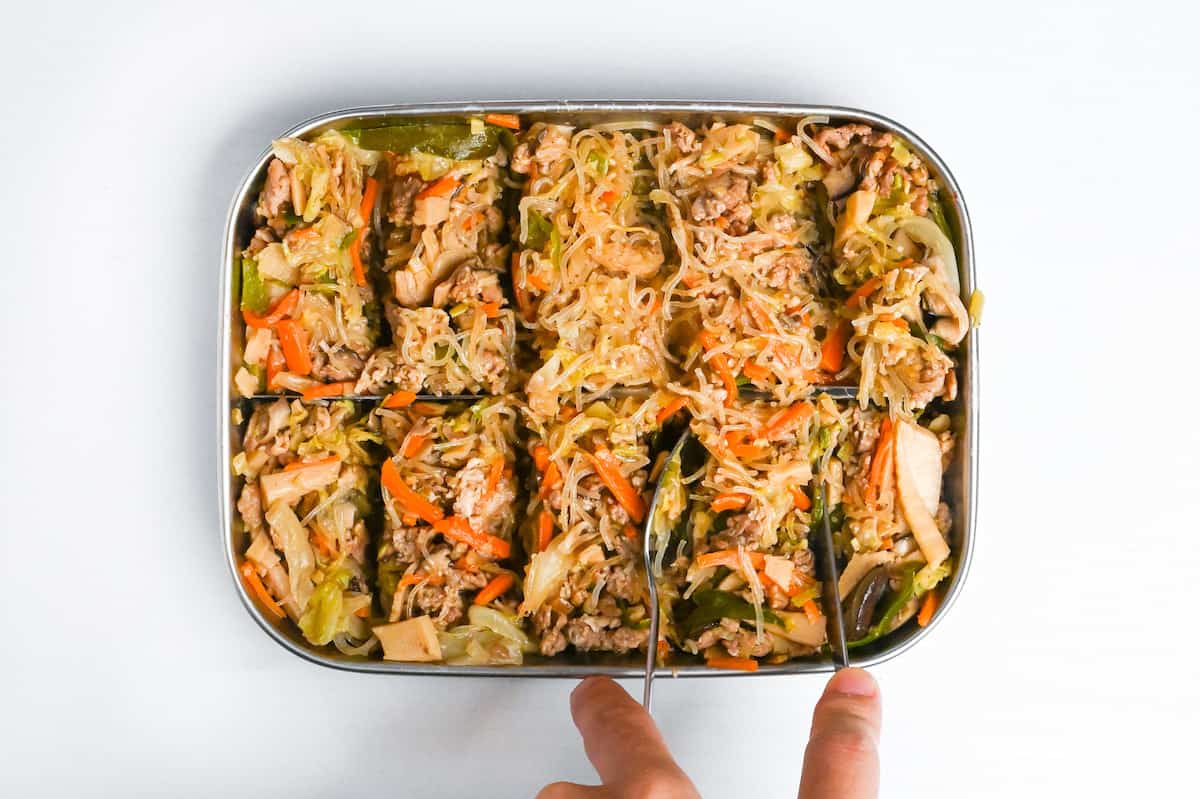
iii. Remove the pan from heat and transfer everything to a wide, shallow container. Spreading it out helps it cool faster and more evenly! Let it cool until it’s comfortable to touch, which usually takes 20-30 minutes at room temperature (THIS IS VITAL!).
iv. Once cool, use kitchen scissors to snip the noodles into shorter lengths, which makes portioning and rolling infinitely easier.

v. Divide the filling into equal portions matching your wrapper count. This pre-portioning ensures uniform rolls and prevents that frustrating moment when you’re down to your last wrapper with way too much filling left.
The cooled filling keeps in the refrigerator for up to 2 days, making this an ideal prepare-ahead recipe. Just bring it back to room temperature before rolling. Cold filling releases condensation that will soak into your wrappers.
i. Mix flour and water in a small bowl at a 1:2 ratio to create a paste. This acts as your edible glue for sealing each roll. Place one spring roll wrapper in front of you, positioned like a diamond (one corner pointing toward you).
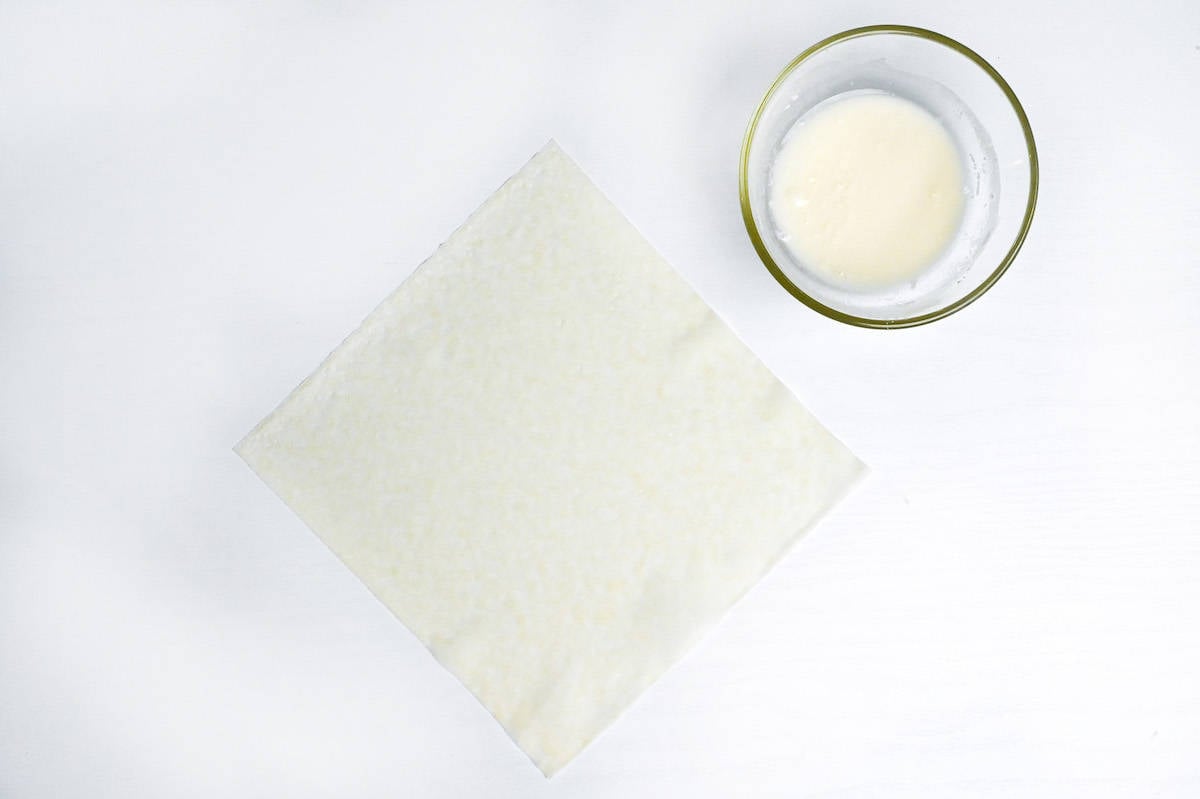
Harumaki wrappers have a smooth side and a rough side. The smooth side should face outward when rolled, so place the wrapper rough-side-up.

If you can’t tell visually, run your fingertip across both sides. The textured surface is subtle but noticeable.
i. Place one portion of filling horizontally across the wrapper, slightly below center, leaving about an inch of space on each side.
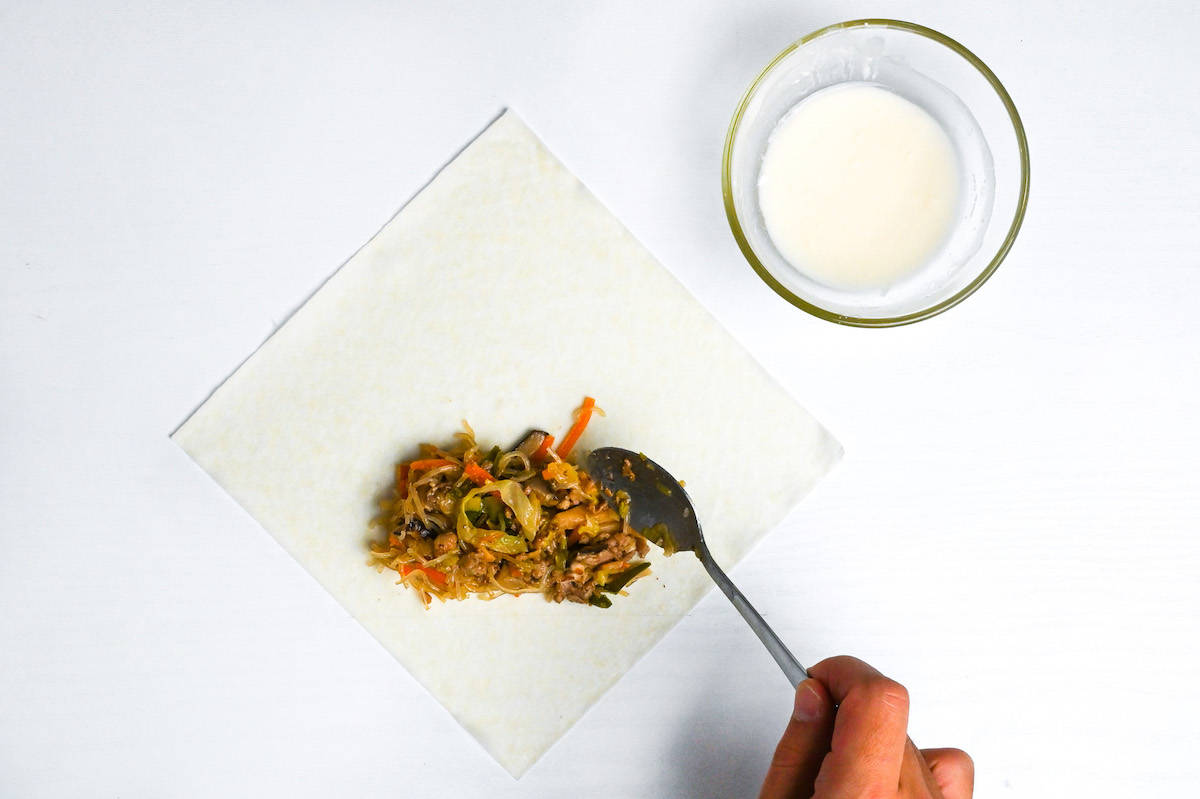
ii. Pull the bottom corner up and over the filling snugly. This first roll should be tight to eliminate air pockets.
iii. Now fold the left and right corners inward, pressing them down firmly to create an envelope shape with no gaps at the edges. Any trapped air will expand during frying and can blow out your carefully sealed seams.
This initial pull-and-tuck determines everything. I used to roll loosely, thinking I’d just “wrap it tighter” as I went, but loose rolls trap air and moisture. Now I pull that first corner taut, almost uncomfortably so and the difference is night and day. Tight rolls hold their shape, cook evenly, and never burst.
iv. Roll the wrapper upward once or twice (depending on wrapper size), stopping before you reach the top corner.

v. Brush the flour paste along the exposed edges of that final flap, then roll once more to seal completely. Press down gently but firmly along the entire seam. You’re creating a strong bond that needs to withstand hot oil and internal steam pressure.

The roll should feel compact and slightly flattened, which actually helps it fry more evenly by preventing it from rolling around in the oil.
Once you’ve rolled a few, you’ll develop a rhythm: fill, pull tight, fold sides, roll, paste, seal, press. The whole process takes about 20 seconds per roll once you’re comfortable. Don’t stress about making them look perfect! Rustic is fine here. What matters is that seal and the absence of air pockets.
i. Pour about 2 cm (roughly 3/4 inch) of neutral oil into a heavy pan or wok. Heat the oil over medium heat to 160°C (320°F), using a thermometer to verify.
ii. Once the oil reaches temperature, carefully place 3-4 harumaki in the pan with the sealed point facing down. This orientation uses the oil’s weight to press the seal closed as it sets, preventing any last-minute separations.
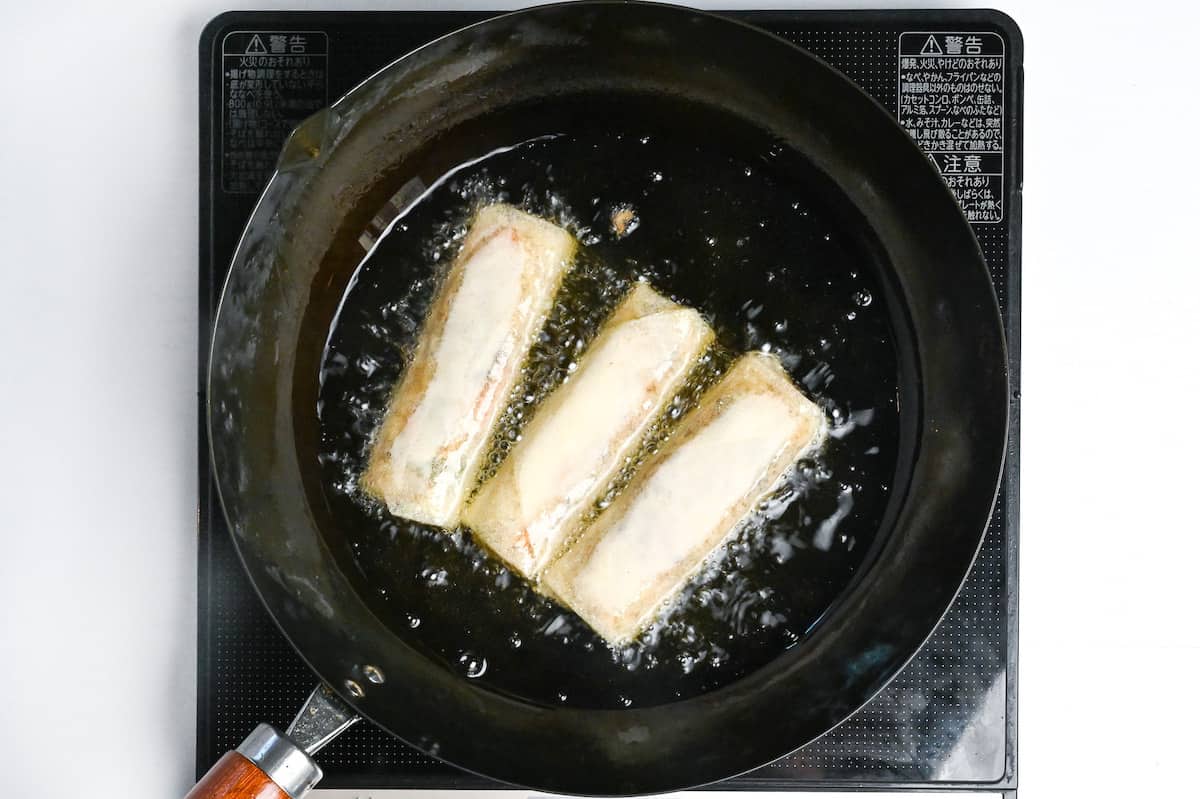
Don’t overcrowd! Adding too many rolls at once drops the temperature dramatically, leading to oil-soaked, limp wrappers instead of crispy ones.
iii. Fry the harumaki for 3-4 minutes on the first side, watching as the wrapper transforms from pale and matte to glossy and light golden.
iv. Once the underside has reached a warm honey color, carefully flip each roll using tongs or chopsticks. Fry the second side for another 3-4 minutes.
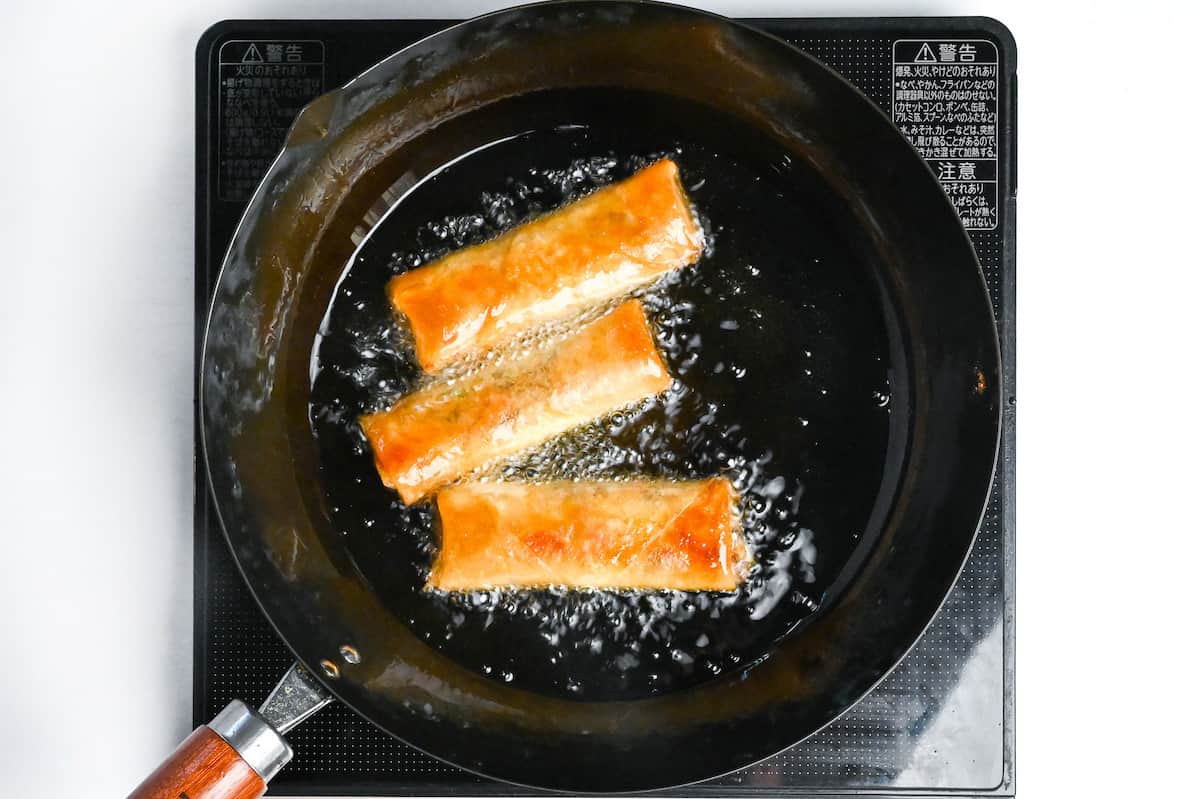
I pull my rolls when they’re a shade lighter than I think they should be. They continue cooking slightly from carryover heat, and what looks “almost done” in the oil often becomes “perfectly crisp” on the cooling rack.
Going too dark risks a bitter taste from over-browned starches.
The thing is, our filling is already cooked, so you’re just heating it through and achieving that all-over crunch. So ideally, trust your eyes over clock for this!
For maximum crispness, try a two-stage fry: cook at 160°C for 6 minutes total, rest for 2 minutes, then hit them with a second quick fry at 180°C for 1 minute. This drives off any remaining moisture and creates an extra-shattery crust.
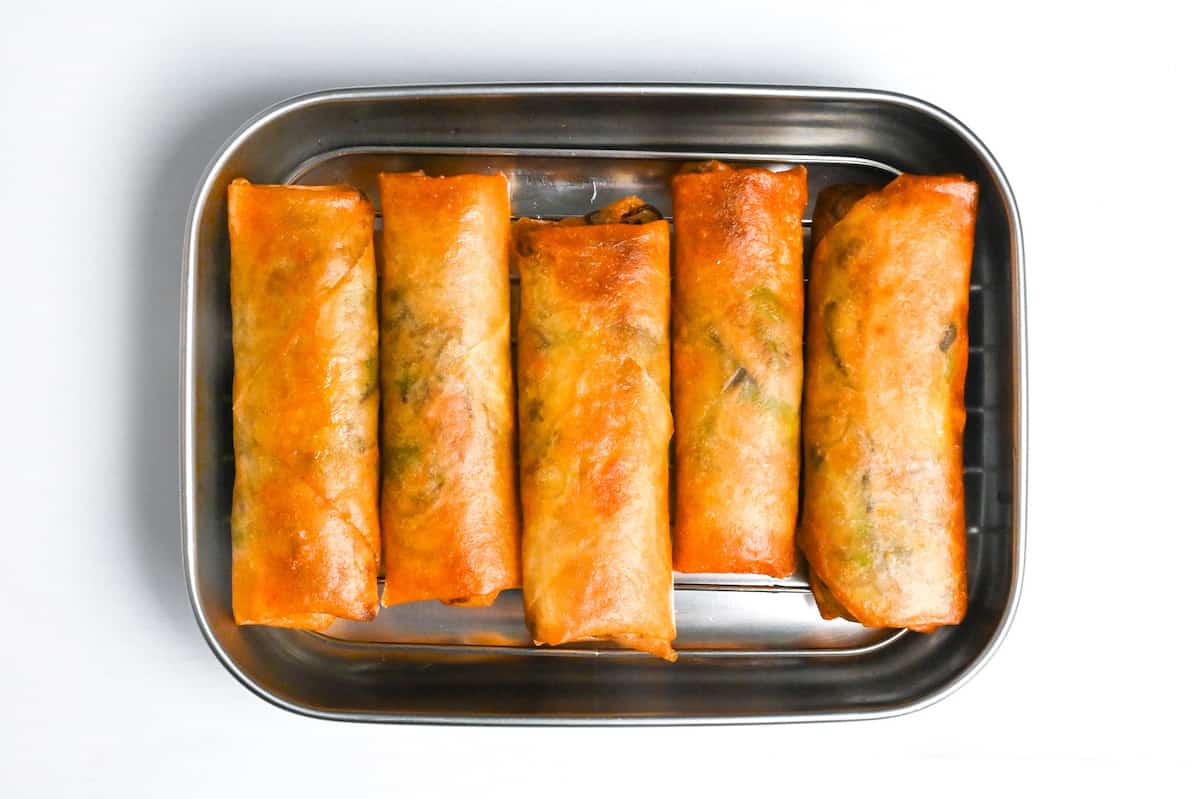
v. Transfer the finished harumaki to a wire rack, allowing excess oil to drip away while steam escapes from all sides. Resting them on paper towels can trap steam underneath, softening the bottom, so a rack is ideal if you have one.
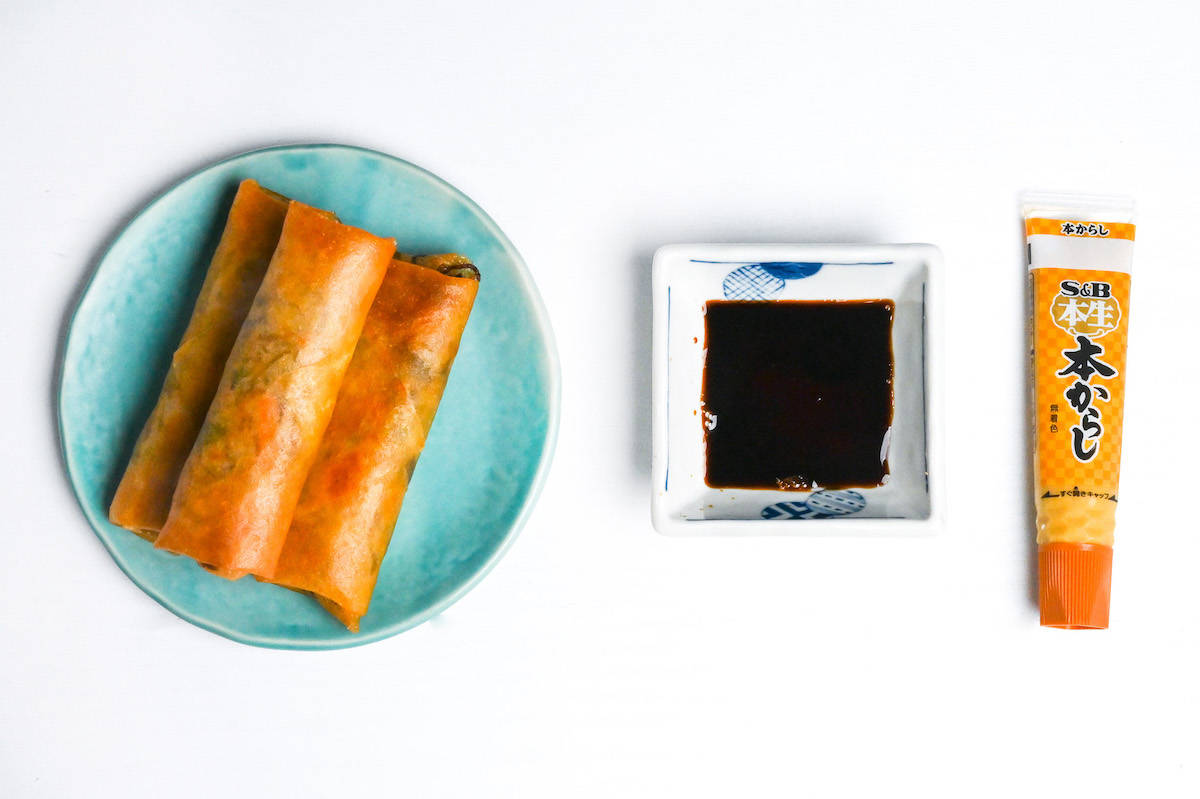
vi: For the classic Japanese presentation, serve the rolls whole or cut diagonally into halves with a small dish of soy sauce and a dab of karashi (Japanese hot mustard) on the side.

Essential Tips & Tricks
- Cool the filling completely to room temperature before rolling. This prevents temperature differential between hot filling and cool wrapper, which creates steam pressure during frying that bursts the wrapper.
- Thicken the filling with cornstarch slurry until it’s glossy and cohesive. The gelatinized starch creates a stable matrix that traps liquids and prevents moisture from migrating into the wrapper during frying.
- Pull the first roll extremely tight to eliminate all air pockets. Trapped air expands rapidly when heated, building internal pressure that exceeds the wrapper’s tensile strength and causes ruptures.
- Start frying at 160°C (320°F) and don’t overcrowd the pan. This lower initial temperature heats the filling through without scorching the wrapper, while adequate spacing maintains oil temperature.
- Drain on a wire rack, never on paper towels or stacked. A rack allows steam to escape from all sides and excess oil to drip away; paper towels trap steam underneath and softening the bottom crust.
With these simple tips in mind, you’re set for success every time you make harumaki.
Storage & Meal Prep
Fridge: Store cooked harumaki in an airtight container lined with paper towel for up to 1 day (2 days max), and refrigerate within 2 hours. The wrapper will lose its crunch and turn softer/leathery.
Freezer: Recommended: freeze assembled, unfried rolls up to 1 month, individually wrapped and sealed in an airtight freezer bag to prevent freezer burn/ Fry from frozen (no thawing) to avoid weeping and splatter.
Meal Prep: Best plan: make the filling 2 day ahead, cool fast, then store airtight. Keep wrappers sealed until you’re ready to roll so they don’t dry out or crack. Not recommended: rolling far ahead as moisture migration will soften the wrapper and raises leak/burst risk.
Reheating: Reheat leftover fried rolls with dry heat (toaster oven/air fryer or a dry skillet) until steaming hot in the center and the wrapper sounds crisp again. Microwave-only is not recommended because it traps steam and turns the wrapper rubbery.
What to Serve With This Recipe
Harumaki FAQ
This almost always comes from steam pressure. The filling was too warm, too wet, or there was trapped air. Cool the filling fully, reduce moisture until it’s glossy-thick, and roll the first turn snug to degas. If one opens mid-fry, lower the heat slightly and let it cook gently.
Vegetables release water quickly, so if the pan isn’t hot enough, they steam instead of stir-fry, and the filling won’t concentrate. Cook a bit longer on higher heat to evaporate moisture, then thicken at the end so the starch can actually trap juices. The goal is “saucy but not loose.” It should mound slightly on a spoon, not puddle or drip.
Wrappers tear when they dry out or when filling edges poke through. Keep the stack covered with a barely damp towel, and spread filling in a tidy log with a little margin so you’re not forcing the corners. If you find a small hole, patch it with a scrap of wrapper and sealing paste before frying.
You can, but the texture changes because you lose the oil-driven water-oil exchange that creates the classic shatter-crisp shell. Air-fry at 195-205℃ (380-400°F) with a light oil spray, flipping halfway. Bake similarly on a rack for airflow. Expect a slightly drier, firmer crunch. Still good, just not identical to fried harumaki.
More Japanese Appetizers
Hungry for more? Explore my Japanese appetizer recipes to find your next favorite dishes!
Did You Try This Recipe?
I would love to hear your thoughts!
💬 Leave a review and ⭐️ rating in the comments below. 📷 I also love to see your photos – submit them here!

Harumaki (Japanese Spring Roll)

Ingredients
- 150 g pork belly roughly chopped, or shoulder/ground pork
- 1 pinch salt and pepper
- 1 tsp toasted sesame oil
- 150 g green cabbage shredded about 1cm thick
- 2 tbsp sake
- 300 ml chicken bouillon
- 30 g Japanese leek (naganegi) finely diced, or regular leek/scallion
- 10 g ginger root finely diced
- 60 g fresh shiitake mushroom thinly sliced
- 30 g carrot julienned
- 30 g bell pepper julienned
- 50 g canned bamboo shoots julienned
- ½ tbsp Japanese soy sauce (koikuchi shoyu)
- ½ tbsp oyster sauce
- ½ tbsp sugar
- 30 g thin glass noodles (harusame) dry
- 1 tbsp cold water for slurry
- 1 tsp cornstarch for slurry, or potato starch
- 10 sheets square spring roll wrappers
- 2 tbsp cold water for paste
- 1 tbsp all-purpose flour for paste
- cooking oil for shallow frying
The ingredient brands and tools I trust are in my Japanese pantry guide and my cooking tools guide.
Can’t find certain Japanese ingredients? See my substitution guide here.
Instructions
Spring Roll Filling
- Roughly chop 150 g pork belly and place it in a bowl with 1 pinch salt and pepper and 1 tsp toasted sesame oil. Mix well and set aside.

- Heat up a pan (that has a lid) on medium with a drizzle of oil. Add 150 g green cabbage. When it starts to soften, add 2 tbsp sake and 300 ml chicken bouillon. Cover with a lid and steam for 3 minutes, then remove the pan from the heat.
- Heat a large pan or wok over medium-low with a thin layer of oil. Add the pork and fry until seared all over and lightly browned.
- Add 30 g Japanese leek (naganegi) and 10 g ginger root (finely diced), and fry until fragrant.
- Increase the heat to medium-high and add the julienned vegetables (60 g fresh shiitake mushroom, 30 g carrot, 30 g bell pepper and 50 g canned bamboo shoots). Stir fry for about 3 minutes or until tender crisp.
- Add ½ tbsp Japanese soy sauce (koikuchi shoyu), ½ tbsp oyster sauce and ½ tbsp sugar to the pan and mix well, then pour in the contents of the other pan (cabbage and chicken stock).
- Submerge 30 g thin glass noodles (harusame) into the chicken stock and simmer until softened. Make a slurry by mixing 1 tbsp cold water and 1 tsp cornstarch in a small bowl. Pour it into the pan and simmer until thickened and glossy.
- Remove from the heat and transfer to a wide container to cool (about 20-30 minutes).
- When it's cool enough to touch, cut the glass noodles with scissors so that they are 5-10cm in length. (This is only necessary if your glass noodles are long.) Chill in the refrigerator until you're ready to assemble.
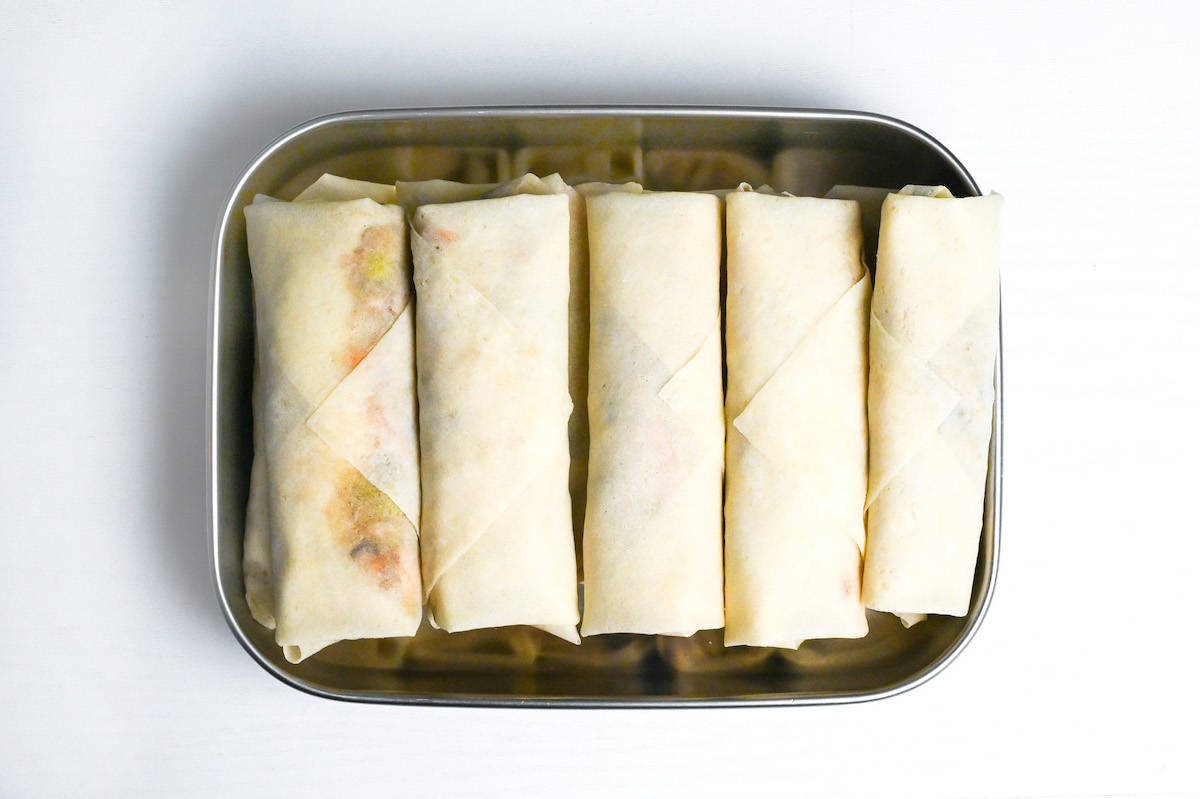
How to roll
- Divide the filling into portions equal to the number of wrappers (10 sheets square spring roll wrappers).
- Add 2 tbsp cold water and 1 tbsp all-purpose flour to a small bowl and mix until smooth to make a "glue". Position the wrapper on a flat surface in front of you at a 45-degree angle so it looks like a diamond.
- Spread a portion of filling horizontally just below the center, making sure not to let it get too close to the edges.
- Tightly pull the bottom corner over the filling and wrap it snugly over the top.

- Bring the left and right corners over the center and press the edges down to secure them.
- Roll it up, leaving the point at the top.
- Wet the top edges of the point with the water/flour mixture and finish the roll. Press down to secure.
- Repeat until all the wrappers and filling are used up.
Fry
- Take a pan and add 2cm (1 inch) of cooking oil. Heat to 160 °C (320 °F) and add the spring rolls with the sealed side facing down.
- Cook for a few minutes until golden and then flip and repeat on the other side. (The filling is already cooked, so the main purpose is to make it golden and crispy.)
- Rest on a wire wrack for a few minutes to drain the excess oil.
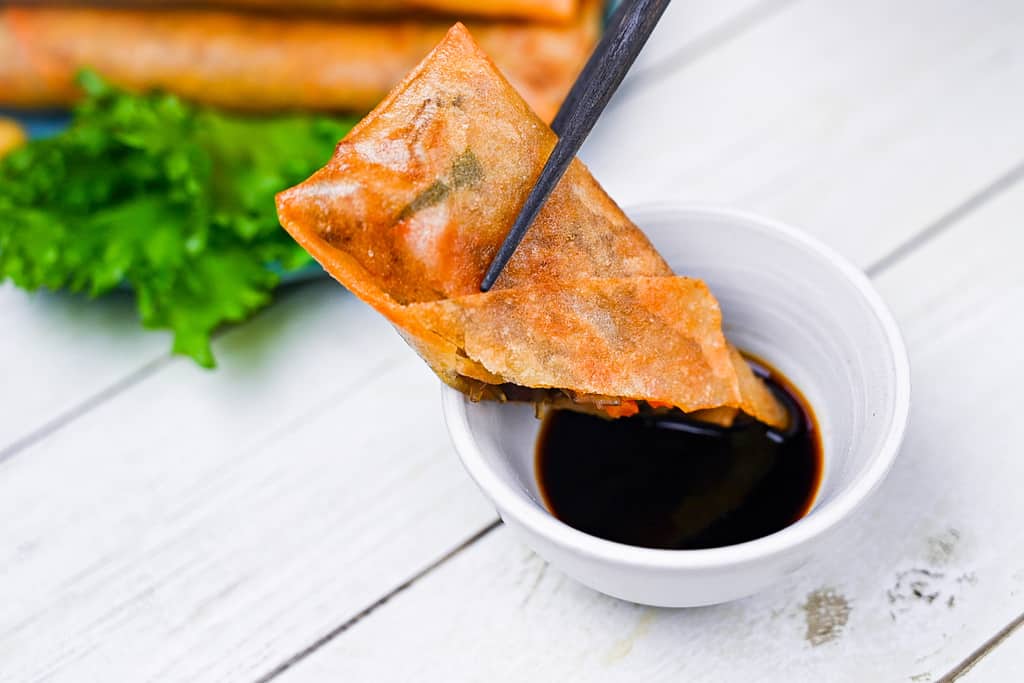
- Serve with soy sauce and Japanese mustard, and enjoy!
Video
Hi!
Can I cook Harumaki in the air fryer? If not, can I bake I bake the rolls? Give me tips, please.
Thank you, so much,
Manuela
Hi Manuela,
Thank you for your comment! Harumaki would definitely be one of the best things you can make in an air fryer. Unfortunately, I don’t own an air fryer at this time, so I cannot give you specific instructions, but I think the best option is to follow popular air fryer spring roll recipes (preferably with similar sized rolls to my recipe) for cooking instructions.
Sorry that I can’t be more of a help! I will make air-fryer version once I get an air fryer!
Yuto