
Disclaimer: This post may contain Amazon affiliate links. Sudachi earns a small percentage from qualifying purchases at no extra cost to you. See disclaimer for more info.
What is Temaki Sushi (Hand Roll Sushi)?
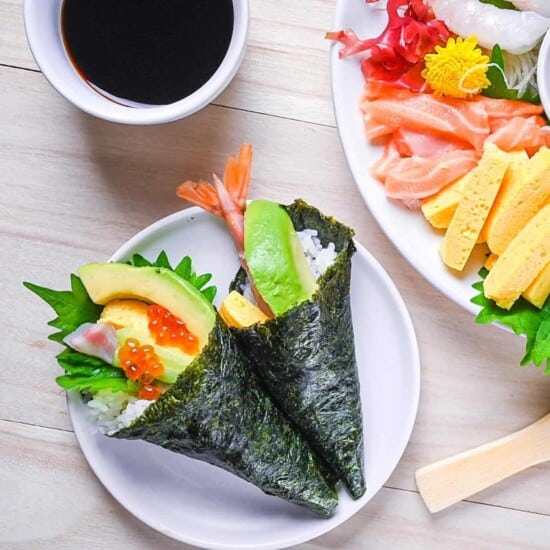
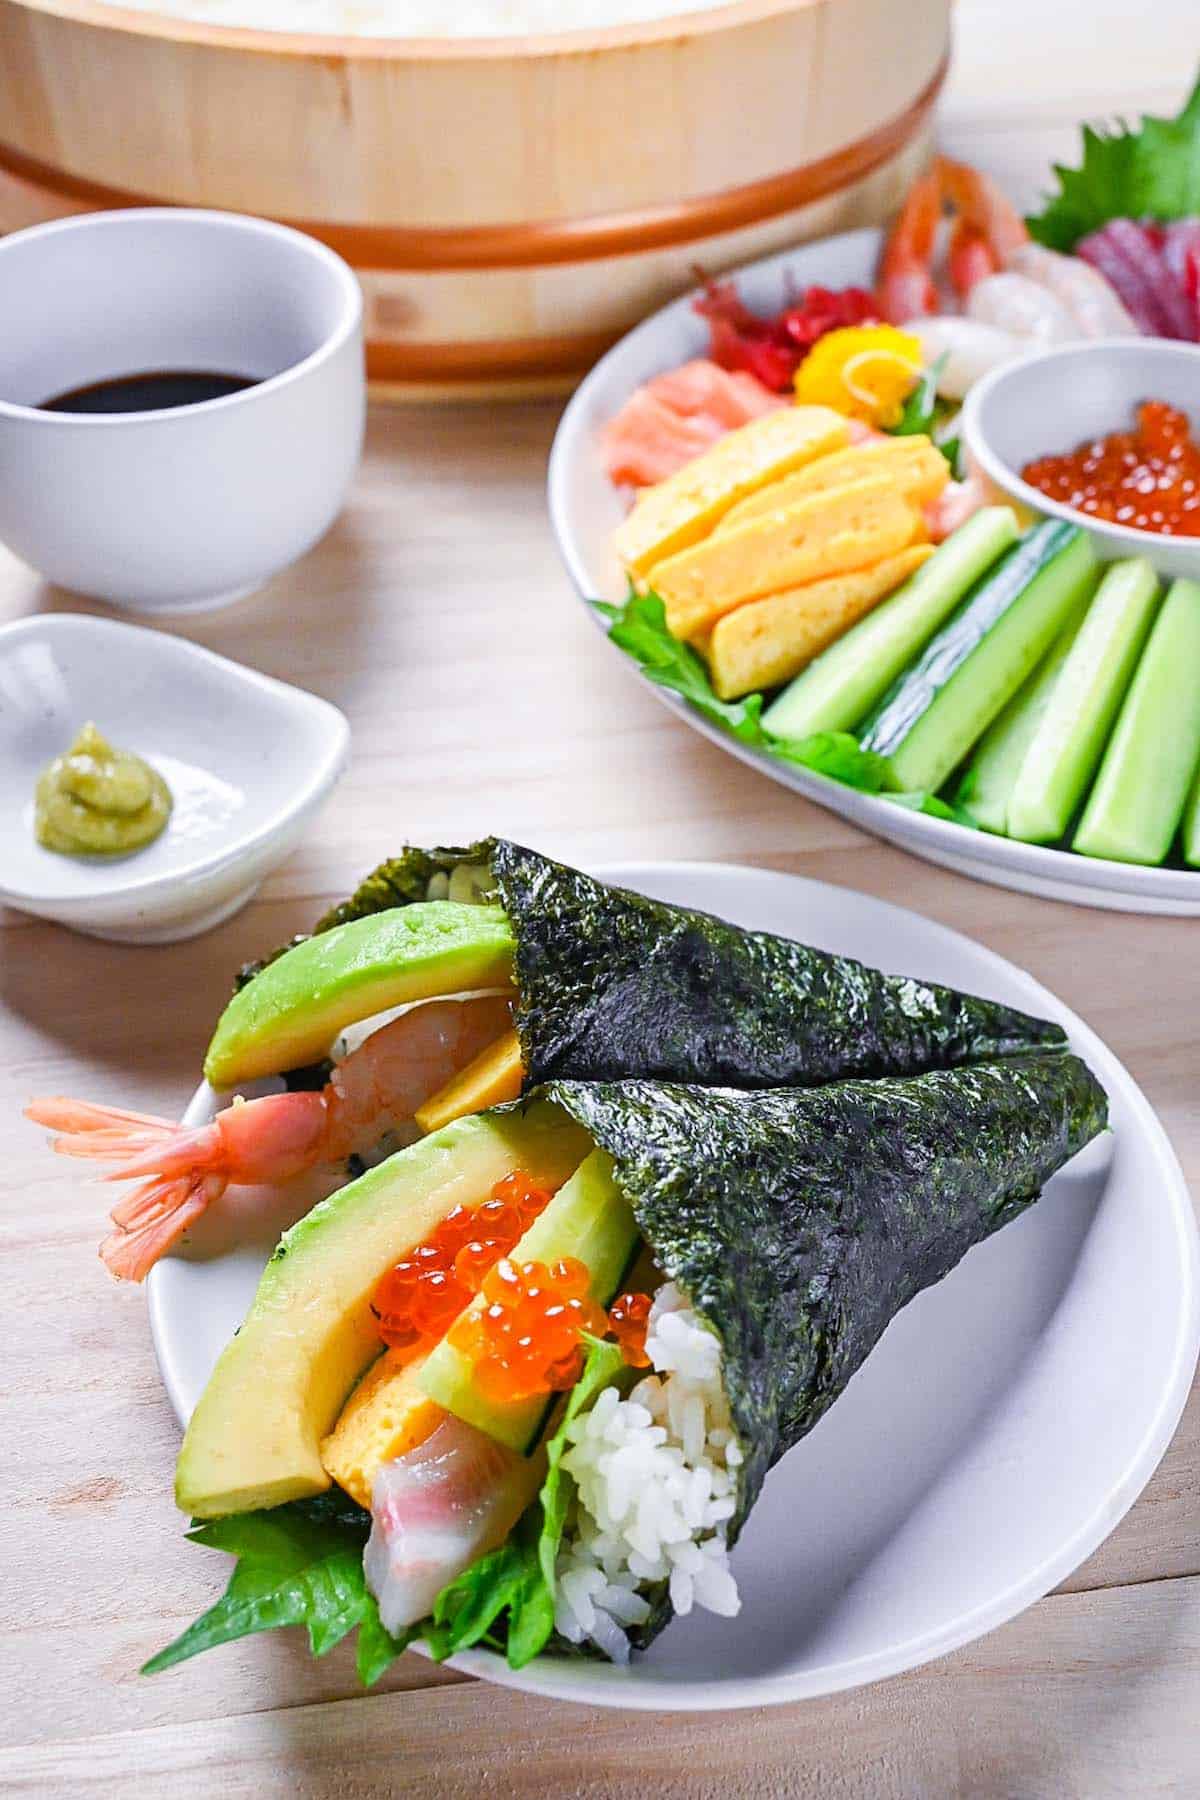
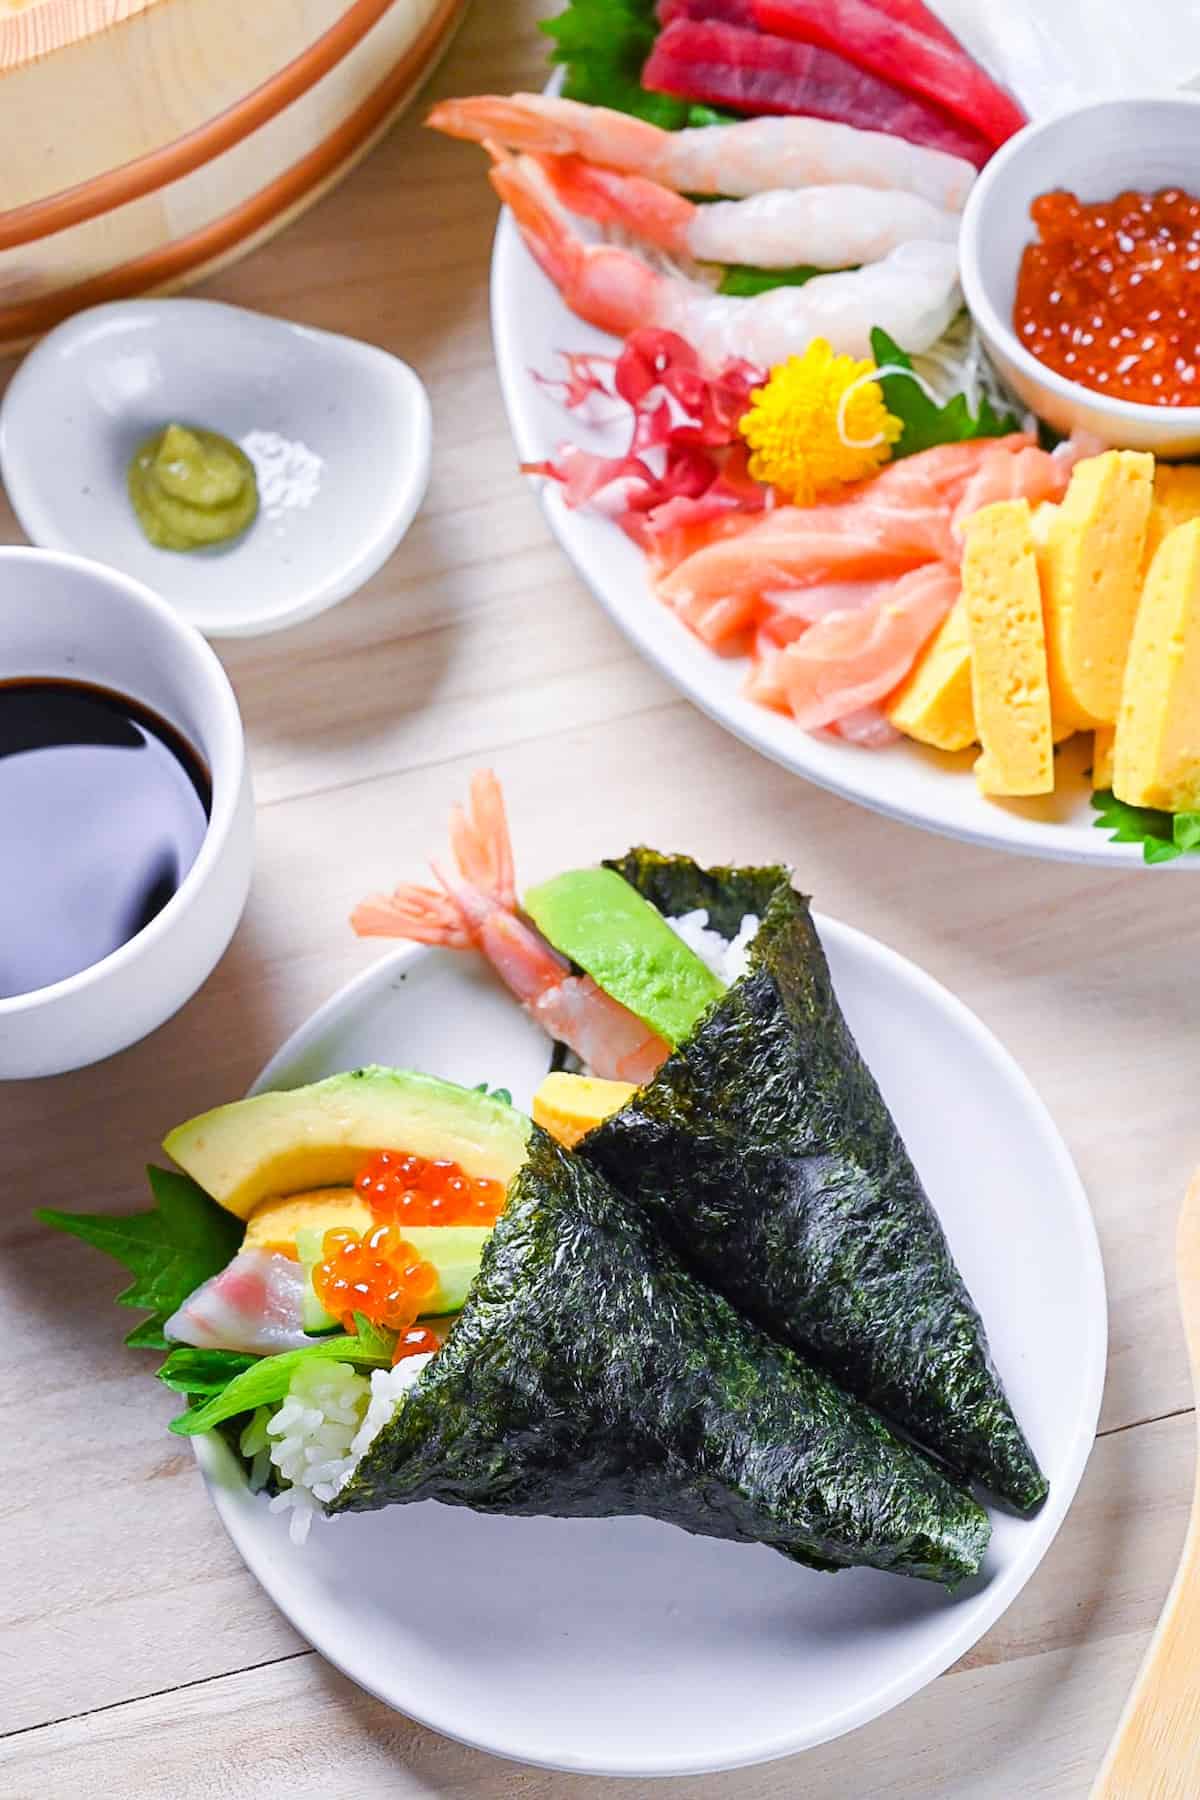
Temaki sushi (手巻き寿司) known as temakizushi in Japanese, is a type of rolled sushi (makizushi) that is shaped by hand rather than using a bamboo sushi mat. Nori seaweed is cut into smaller pieces (halves or quarters), then topped with vinegared sushi rice and a variety of fillings before being rolled into a cone shape.
Fillings are usually cut into strips and often include ingredients such as fresh seafood like salmon or tuna, vegetables like avocado or cucumber, and a Japanese rolled egg called “dashimaki tamago.”
Although these days, temaki sushi is a casual dish that is mainly made at home, it is said to have originated from a sushi restaurant called “Tsukiji Tamazushi (築地玉寿司).”
Visual Walkthrough & Tips
Here are my step-by-step instructions for how to make Temaki Sushi at home. For ingredient quantities and simplified instructions, scroll down for the Printable Recipe Card below.
1. Make vinegared sushi rice

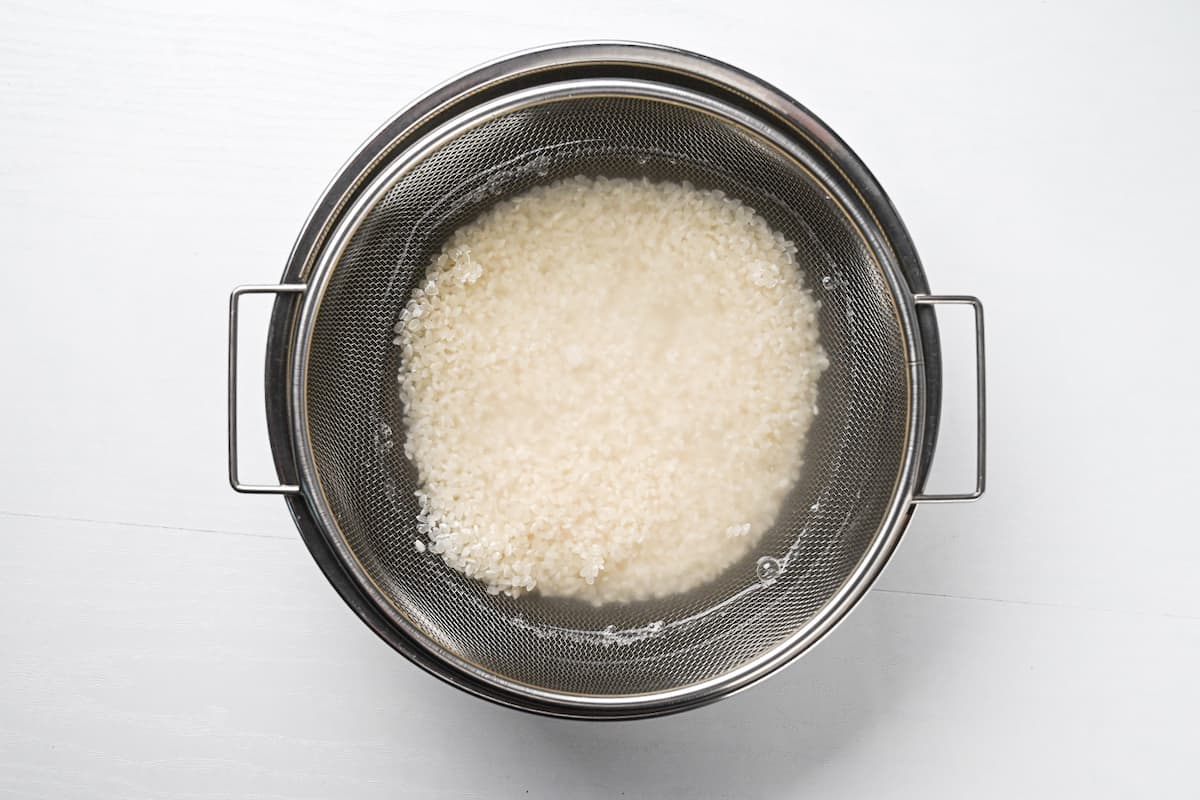
Generally, you should wash the rice to remove the excess starch. I pour the rice into a sieve and place it over a bowl. Fill it with cold water and swish it around until the water becomes cloudy.
Lift the sieve out and empty the bowl; repeat these steps 3 times. You will find that the water doesn’t become perfectly clear, but that’s okay. 3 times is enough!
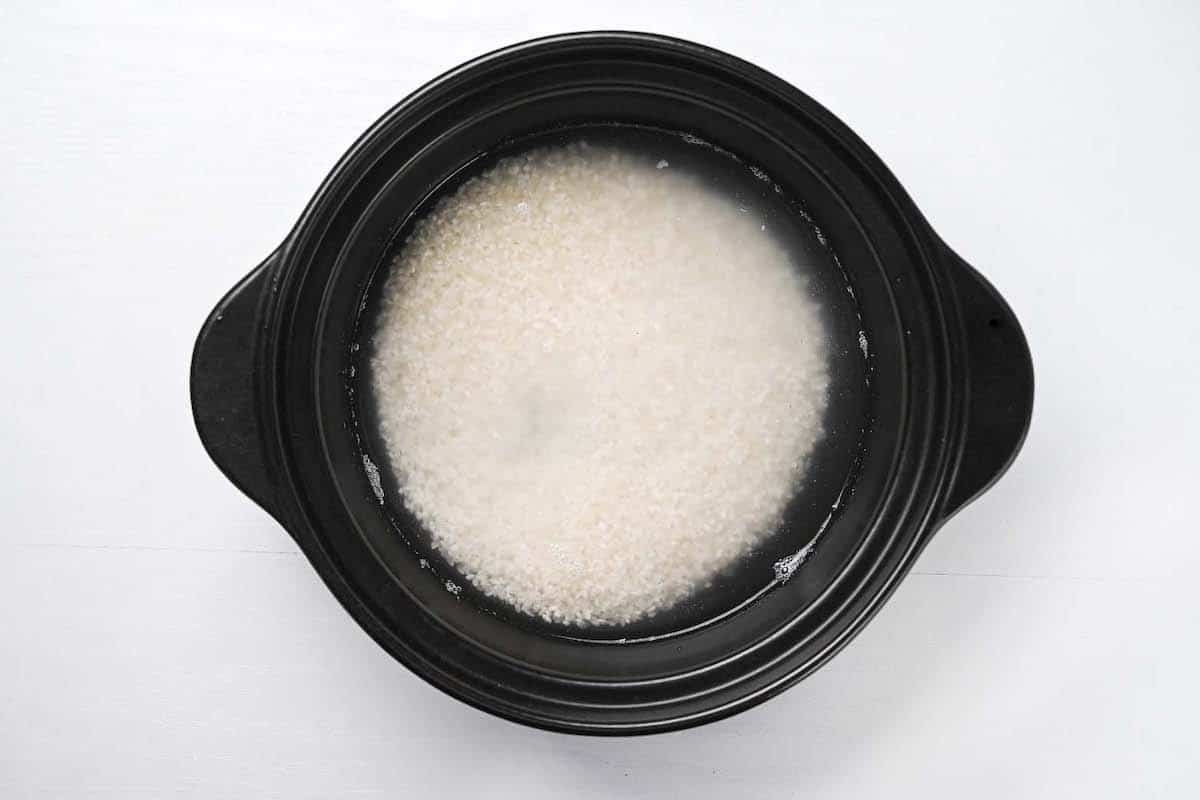
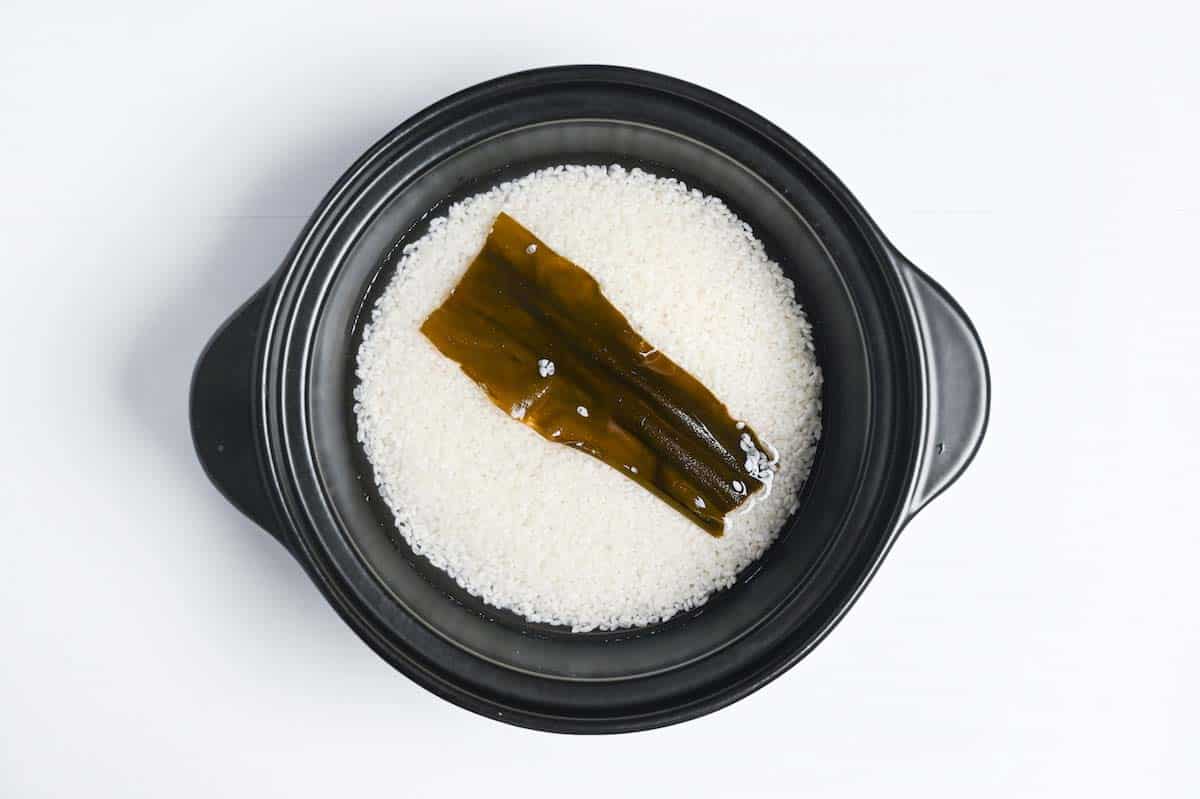
For best results, transfer the rice to your cooking pot (or rice cooker) and soak it in cold water for 30 minutes (1 hour in a cold environment). This allows the grains to slowly absorb the water to the core, helping it to cook more evenly.
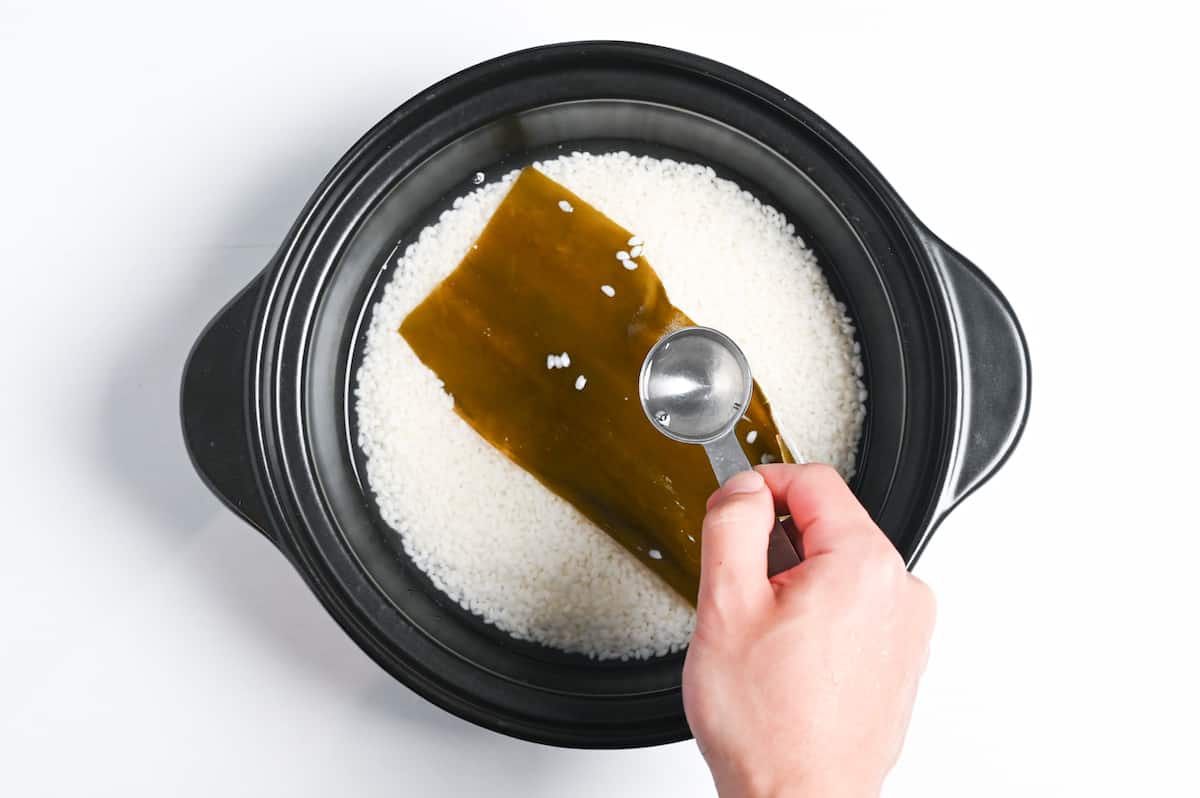
The general rule is for each Japanese rice cup (150g), add 200ml of cold water.
I recommend using a rice cooker, but if you don’t have one, follow these steps:
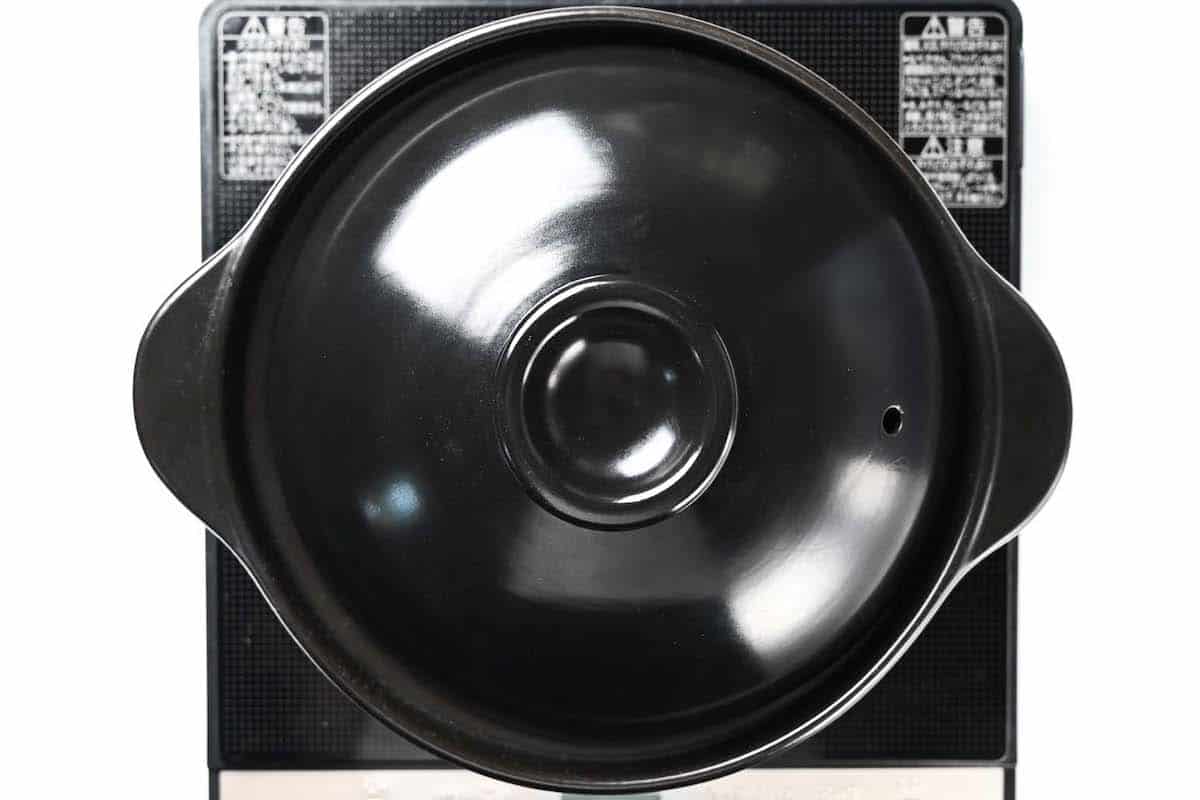
- Turn the heat on medium and bring the water to a boil with the lid on. (Do not remove the lid at any point.)
- Once you can hear it boiling, set a timer for 2 minutes.
- After 2 minutes, turn down the heat to medium-low and set a timer for 3 minutes.
- Once 3 minutes are up, lower the heat to a simmer and set a timer for 5 minutes.
- After 5 minutes, turn up to the highest heat for 10 seconds and then turn the stove off.
- Leave the pot on the stove with the lid on and allow the rice to cook in the residual steam for 10 minutes.
Steam is one of the most important aspects of cooking Japanese-style rice. If you remove the lid, then the steam will be released, and you could end up with hard, unevenly cooked rice. I know it’s tempting to check it but trust the process!
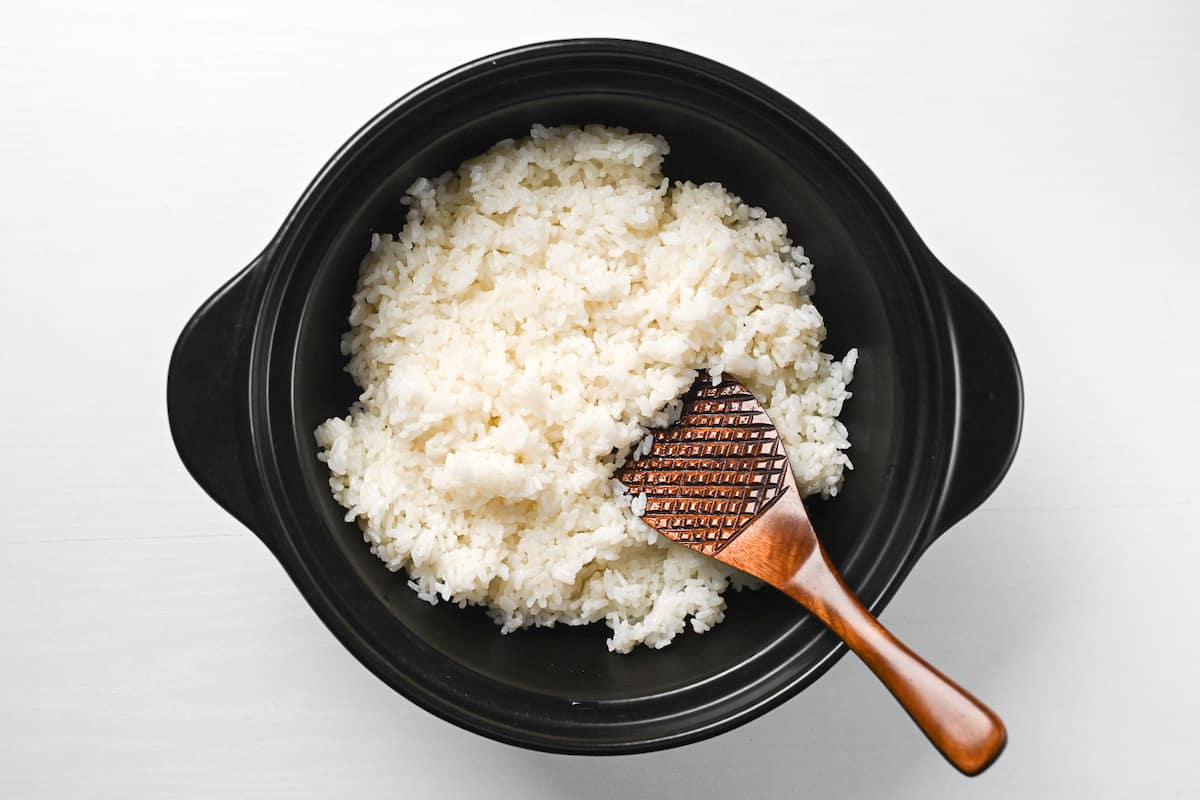
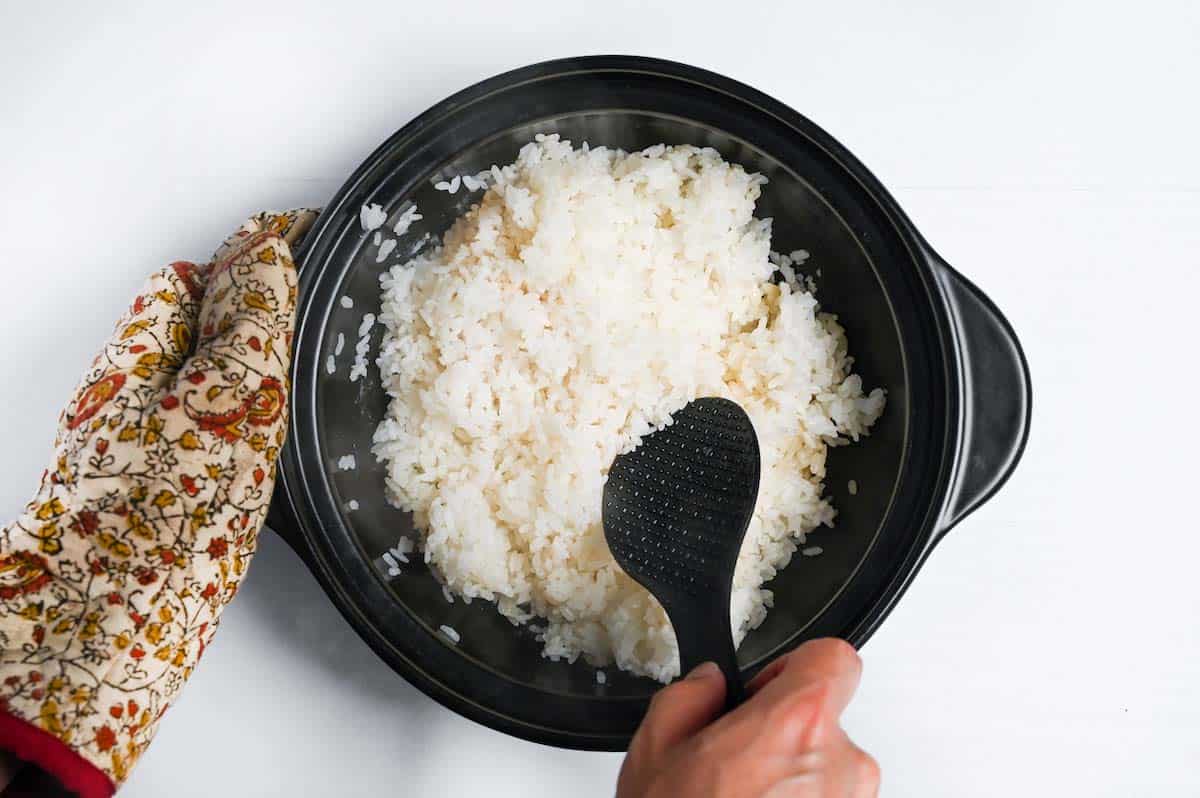
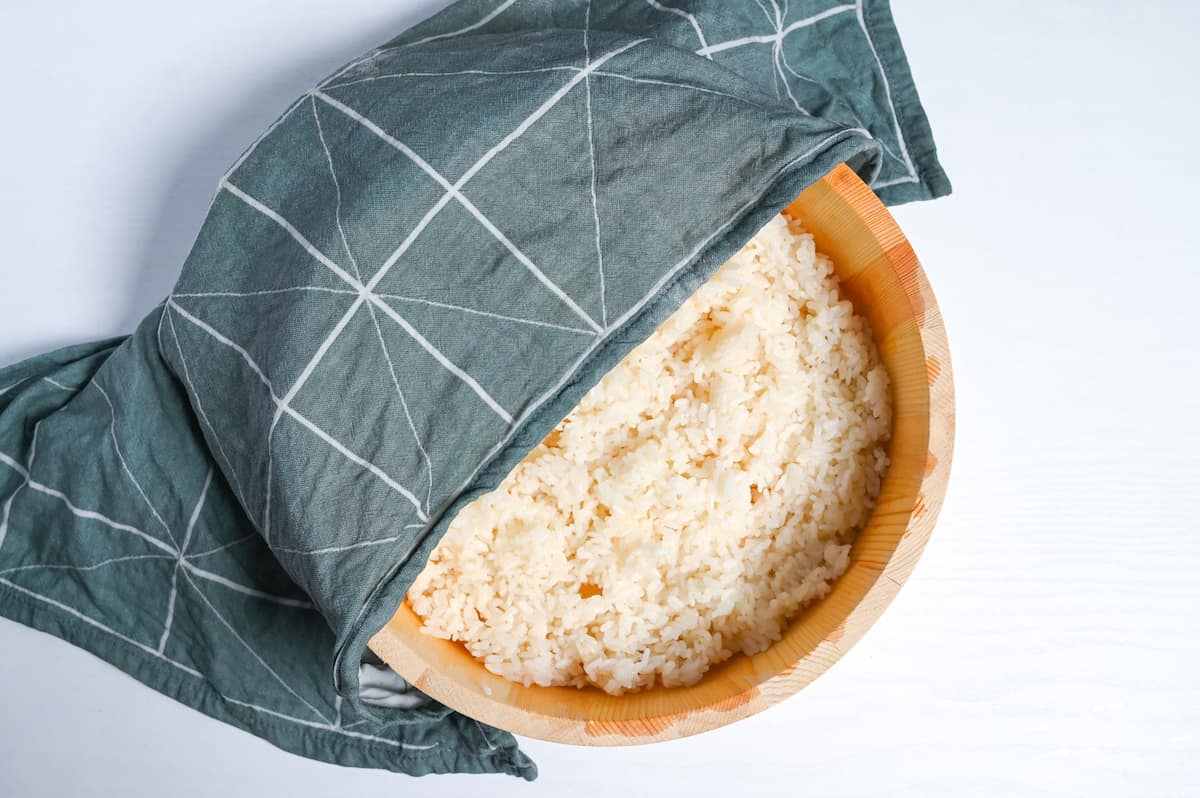
Once your rice is cooked, lightly mix it with a rice paddle to fluff it up.
For each Japanese rice cup (150g before cooking) I add:
- 1 tbsp rice vinegar
- 1/4 tsp sugar
- 1/2 tsp salt
You can change the ratio to suit your tastes (some people like it sweeter, for example), but this ratio is my personal favorite!
Be sure to check the bottle and determine whether you are using plain rice vinegar or seasoned sushi vinegar. Products labeled “sushi vinegar” often already have sugar and salt added for your convenience, so you simply add it to the rice on its own.
2. How to Hand-roll Temaki Sushi
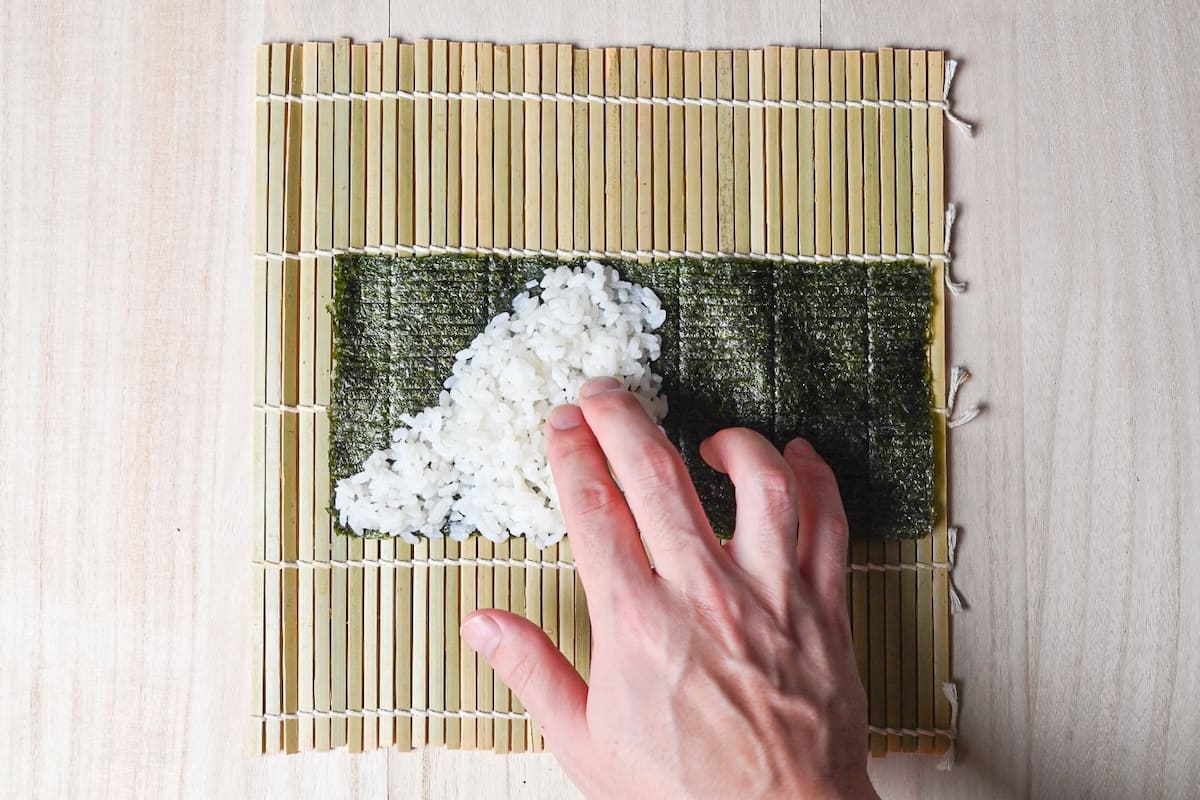
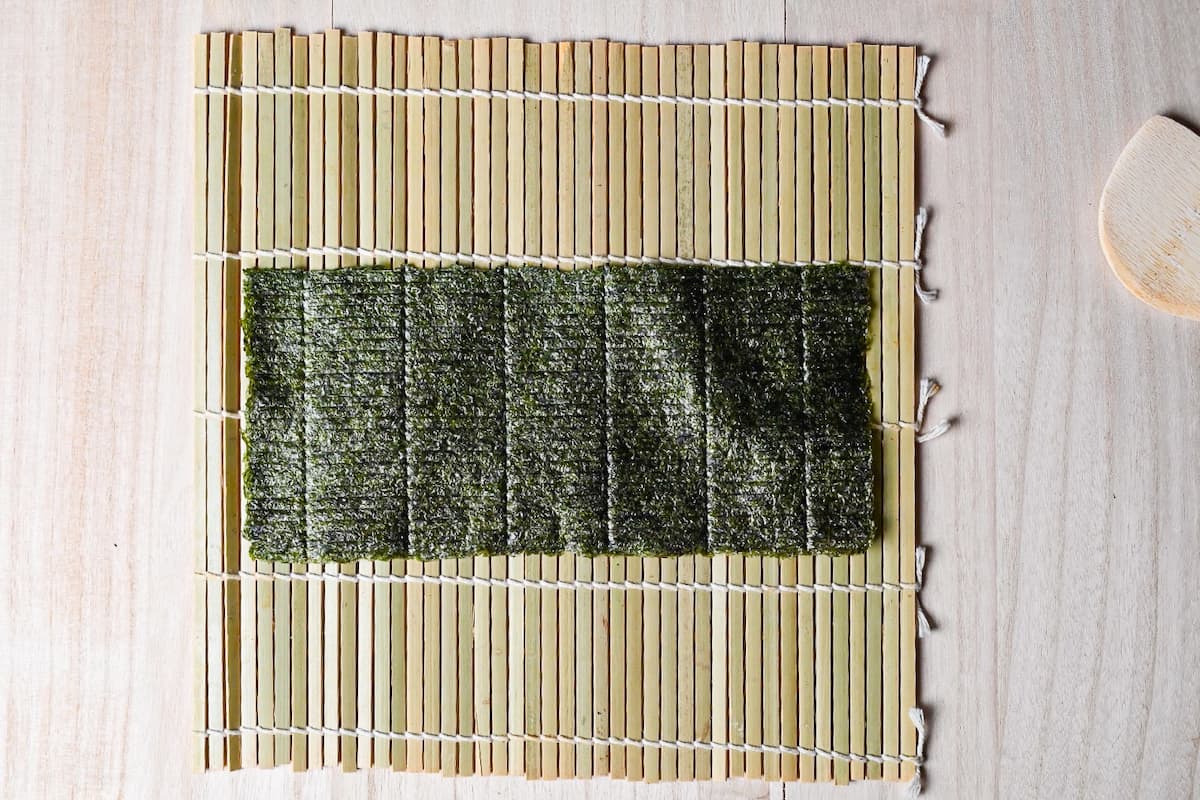
Probably one of the most important points to get the shape right is the placement of the rice! First, cut the nori in half and place it on a flat surface with the rough side facing upwards.
Place the rice just left in the middle of the nori. Spread it to make a right-angled triangle shape; the longest side of the triangle will travel from the bottom left corner to the top of the center of the nori.
If you’ve done it correctly, there will be an empty triangle on the top left, like in the picture above.
Be careful not to press the rice too hard, and wet your hands with cold water to stop it from sticking.
Use your finger to spread a thin layer of wasabi through the middle of the rice (optional).
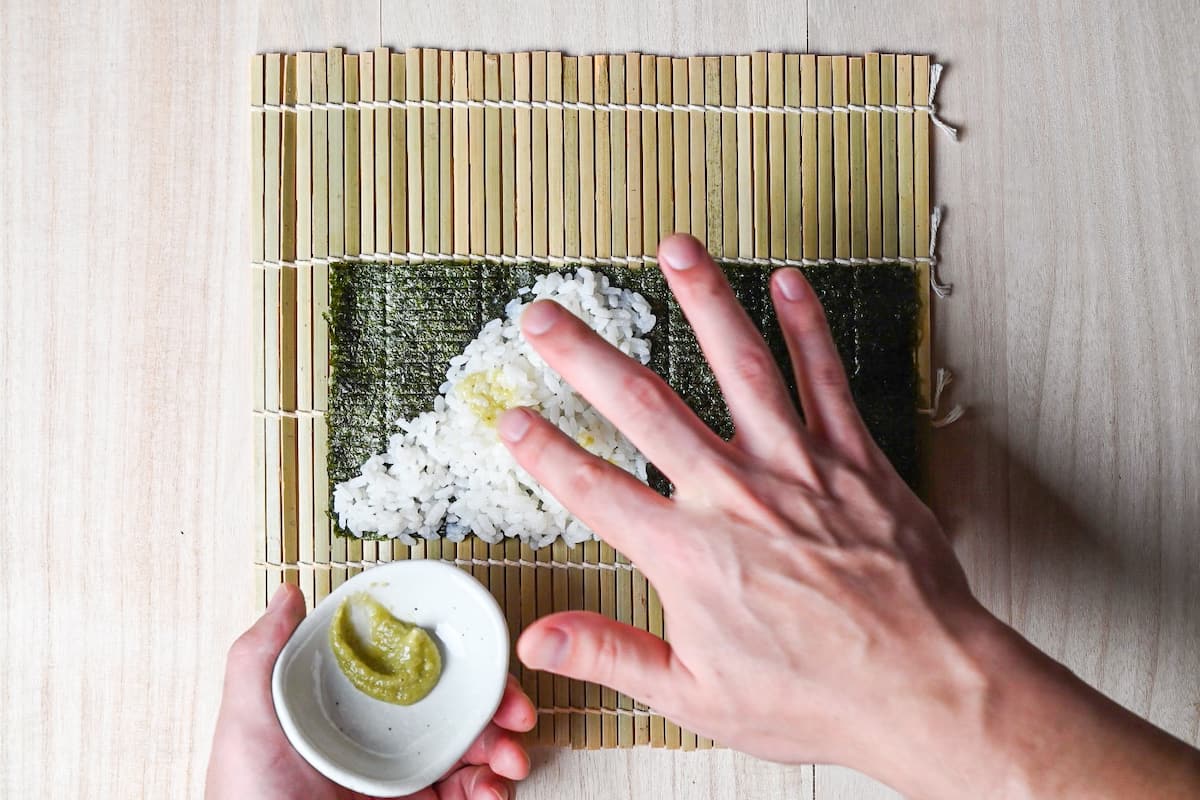
Next, lay your ingredients over the wasabi, diagonally from the top left corner of the nori to the bottom right corner of the rice.
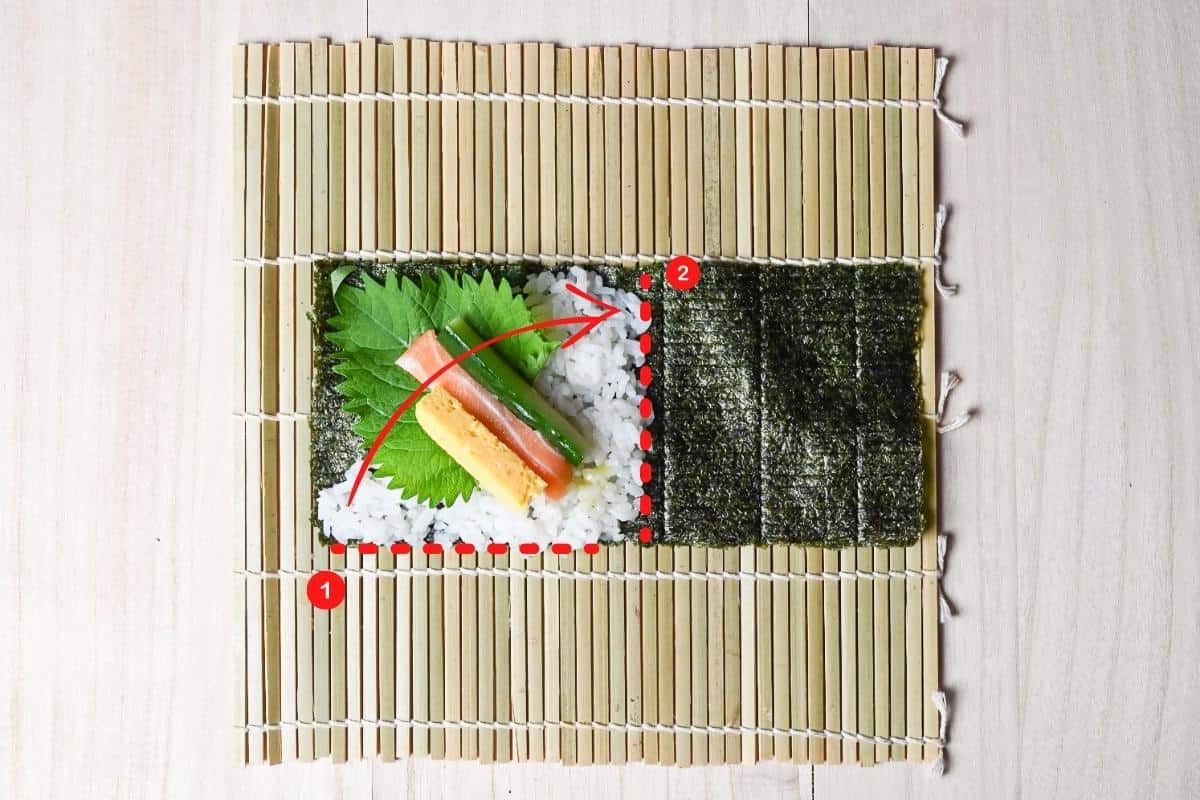
When you roll the temaki sushi, bring the bottom left corner of the rice (1) to the top right corner (2) so that the two shorter edges (red dotted lines) of the “rice triangle” meet. Make sure not to add fillings to these corners and edges; otherwise, it will become difficult to roll.
Bring the bottom left corner to the top center of the nori; essentially, you’re folding your triangle of rice in half diagonally.

Once you’ve folded the triangle, you will be able to roll the rest of the nori sheet around the back to make a cone shape.
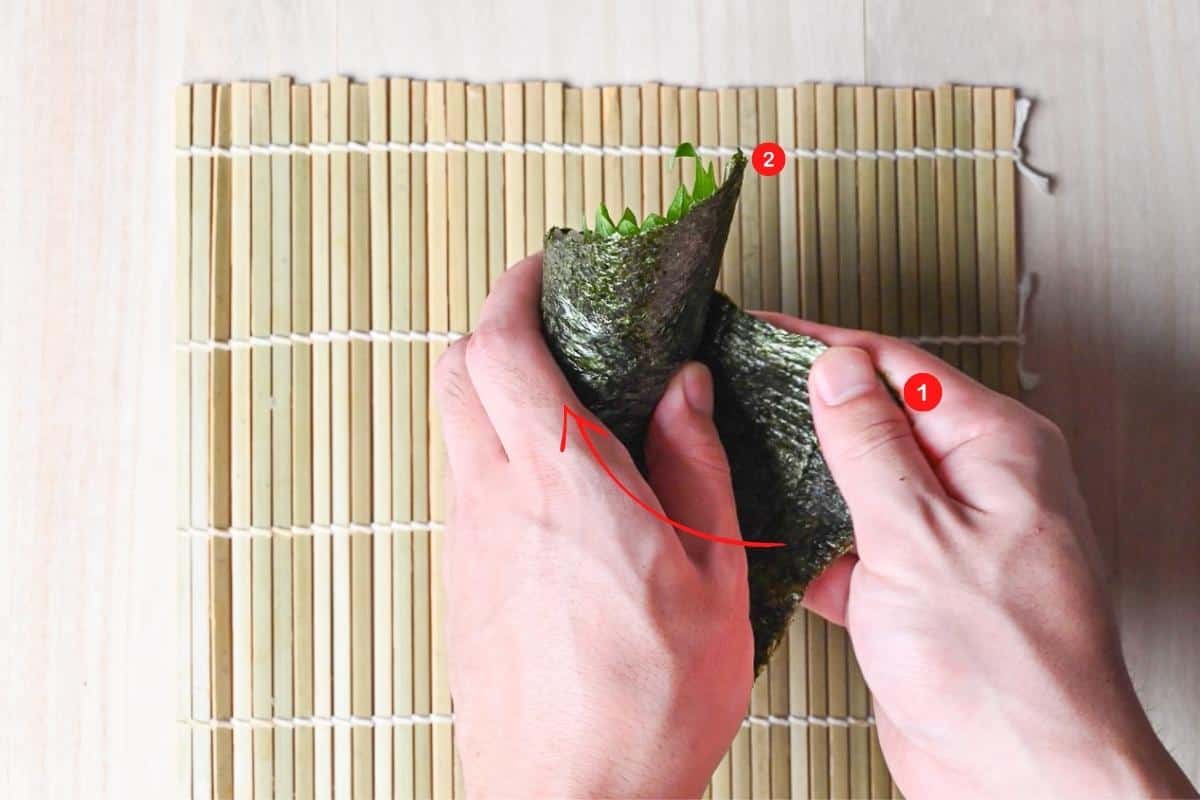
Make the corners match up (1 and 2) so that the final shape is beautiful and neat.
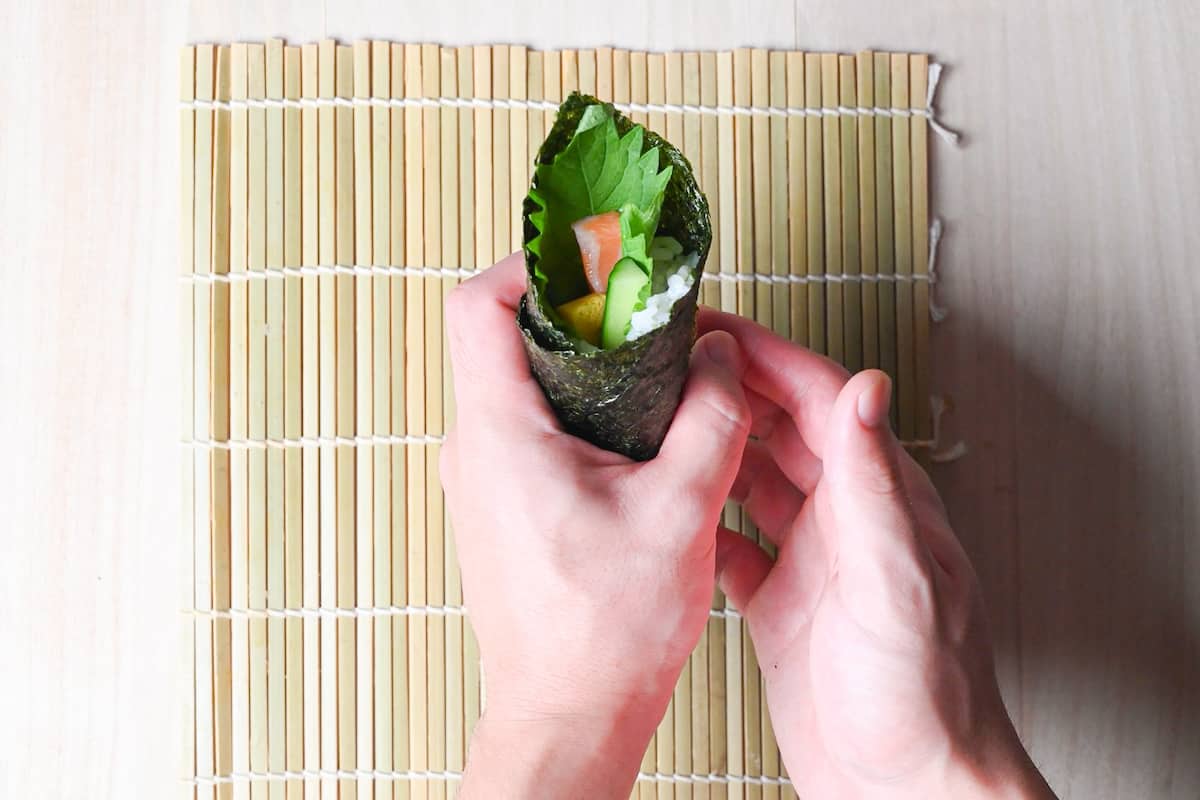
Once it’s rolled, dip it in soy sauce, eat and enjoy!
Jump to Full Recipe Measurements10 Variation Ideas
Here are 10 flavor combinations I created to give you some inspiration!
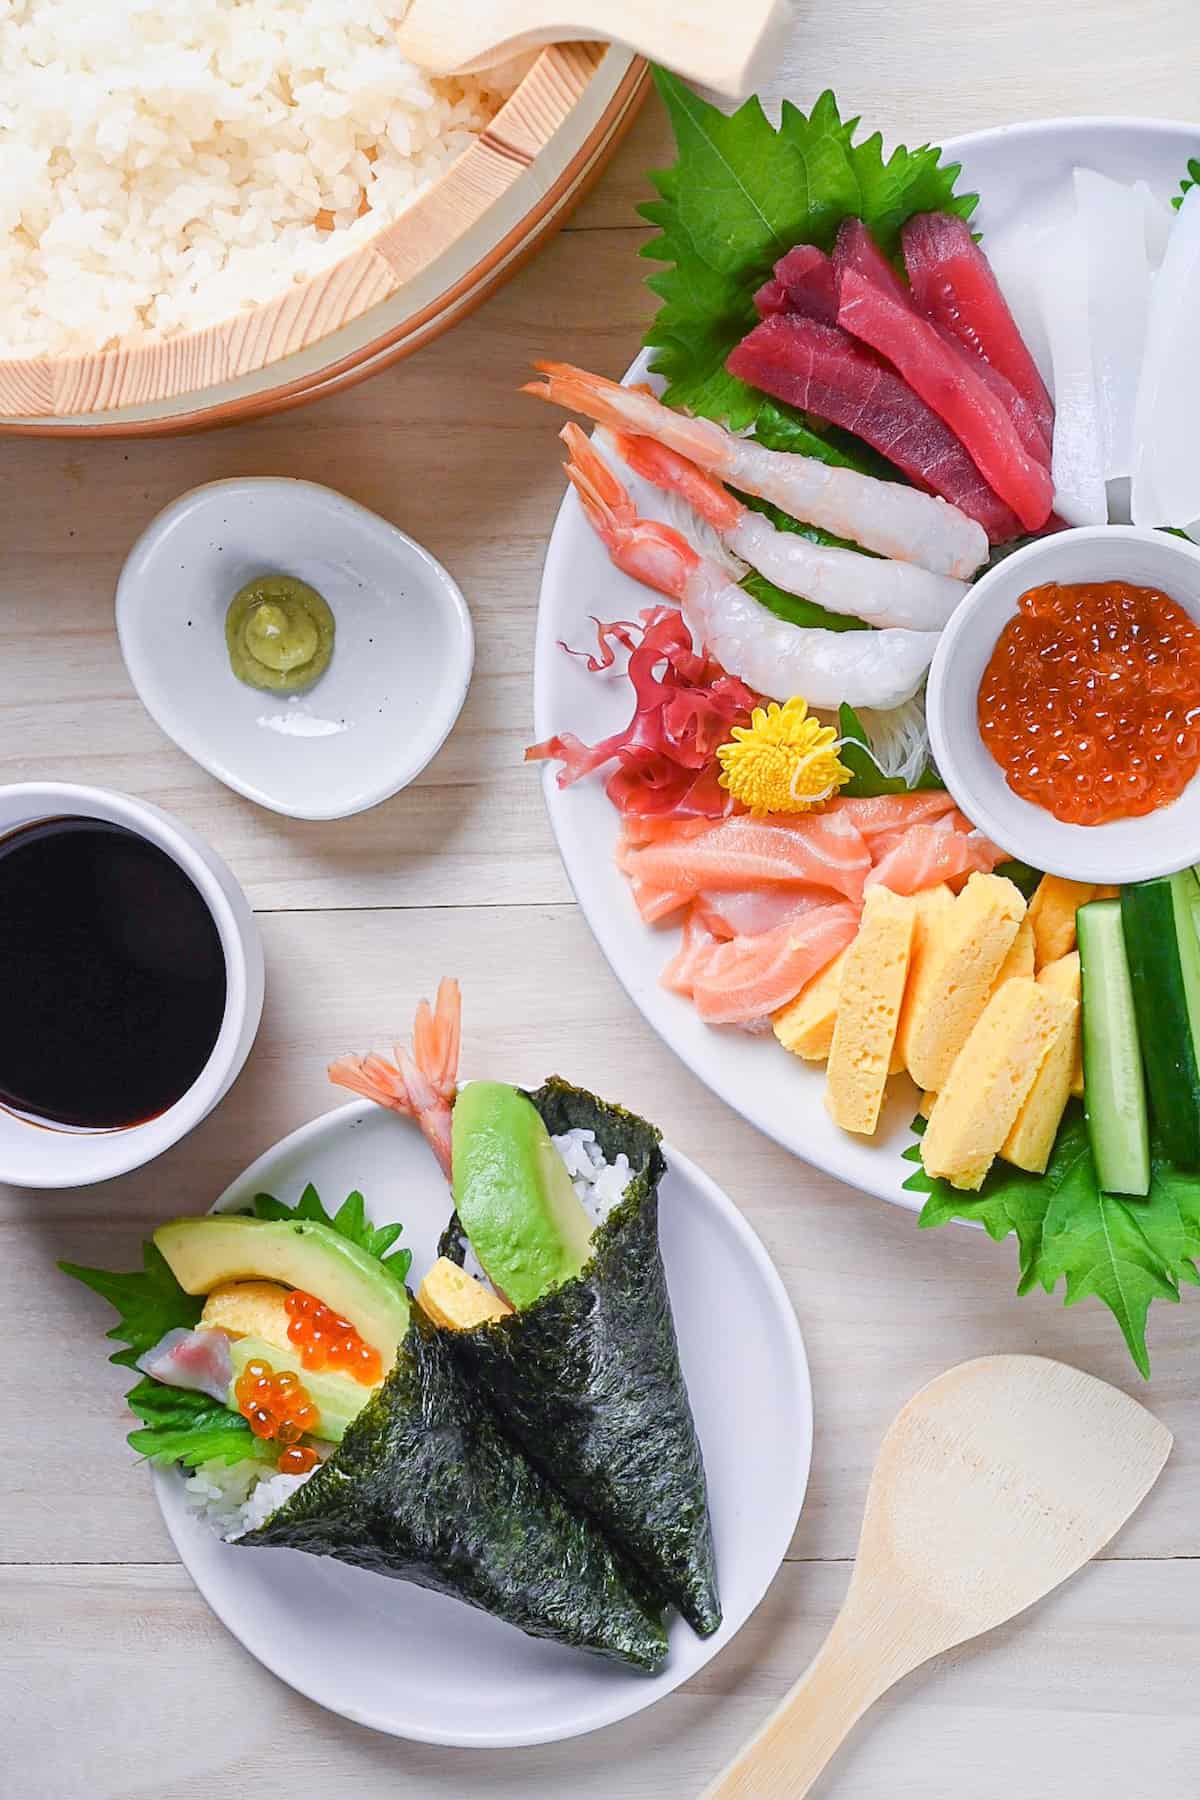
1. Salmon & Avocado
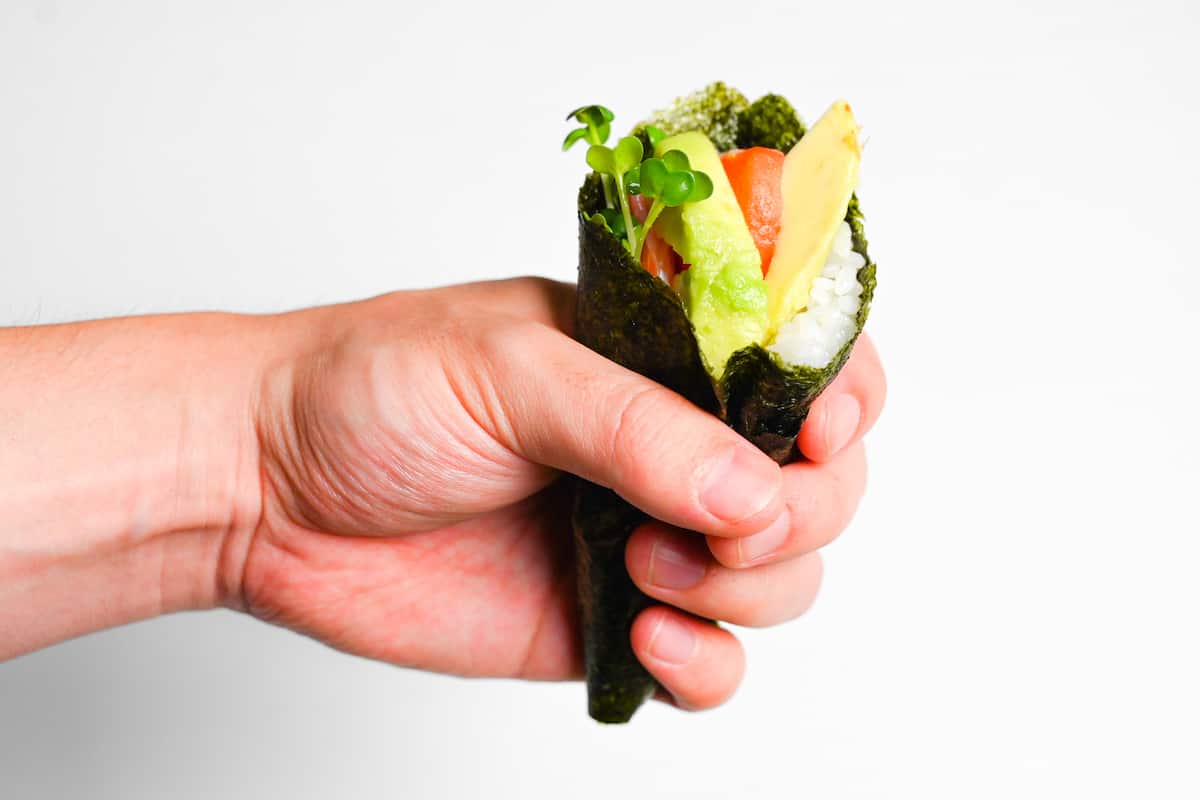
Avocado is not a traditional topping, but everyone loves a bit of avocado in temaki sushi these days! As I explained in the salmon and avocado donburi recipe, avocado especially goes well with salmon, in my opinion.
A small bunch of broccoli sprouts makes a nice presentation, too!
- Sashimi-grade salmon or smoked salmon
- Avocado
- Broccoli sprouts
2. Salmon & Ikura
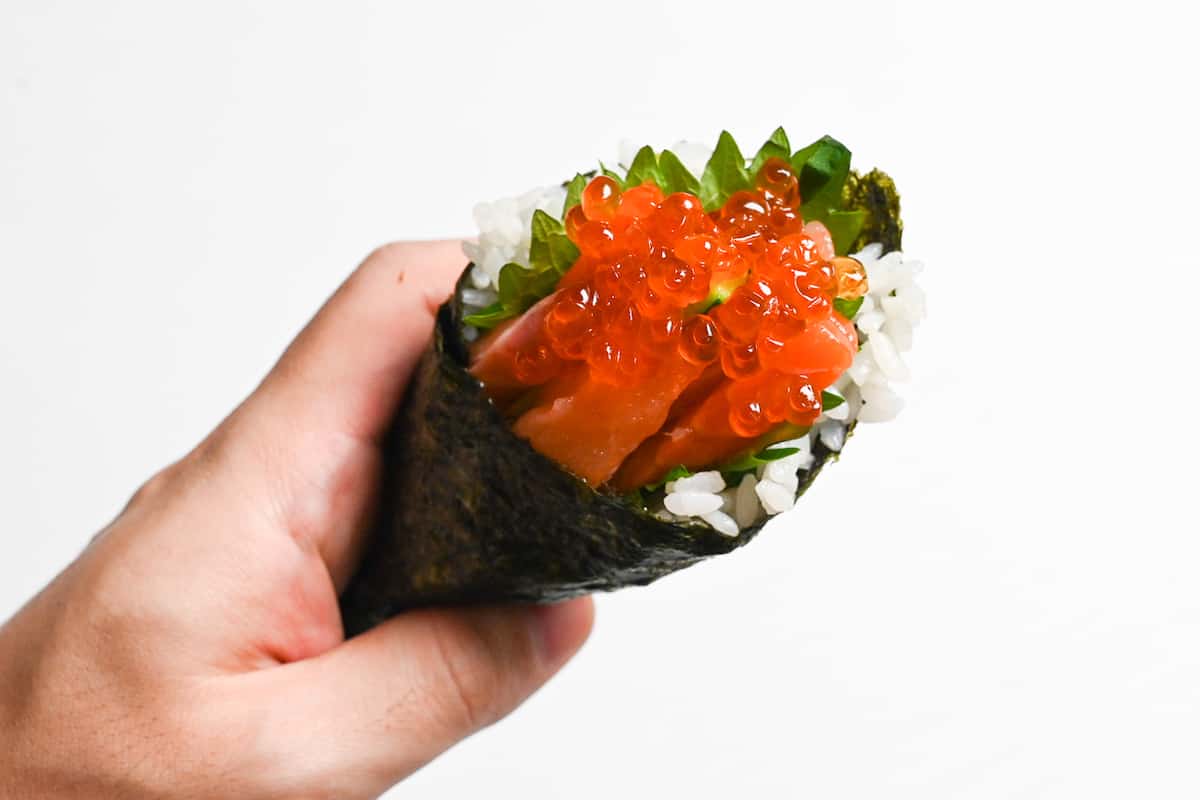
Another classic combo for Japanese sushi! Salmon and ikura with shiso leaves and cucumber! Some people might not be fond of the texture of ikura, but if you already like it, it’s definitely worth a try. This combination is full of interesting textures!
- Sashimi-grade salmon or smoked salmon
- Ikura (marinated salmon eggs)
- Shiso leaves / perilla leaves (ooba)
- Cucumber
3. Mixed Sashimi & Dashimaki Tamago
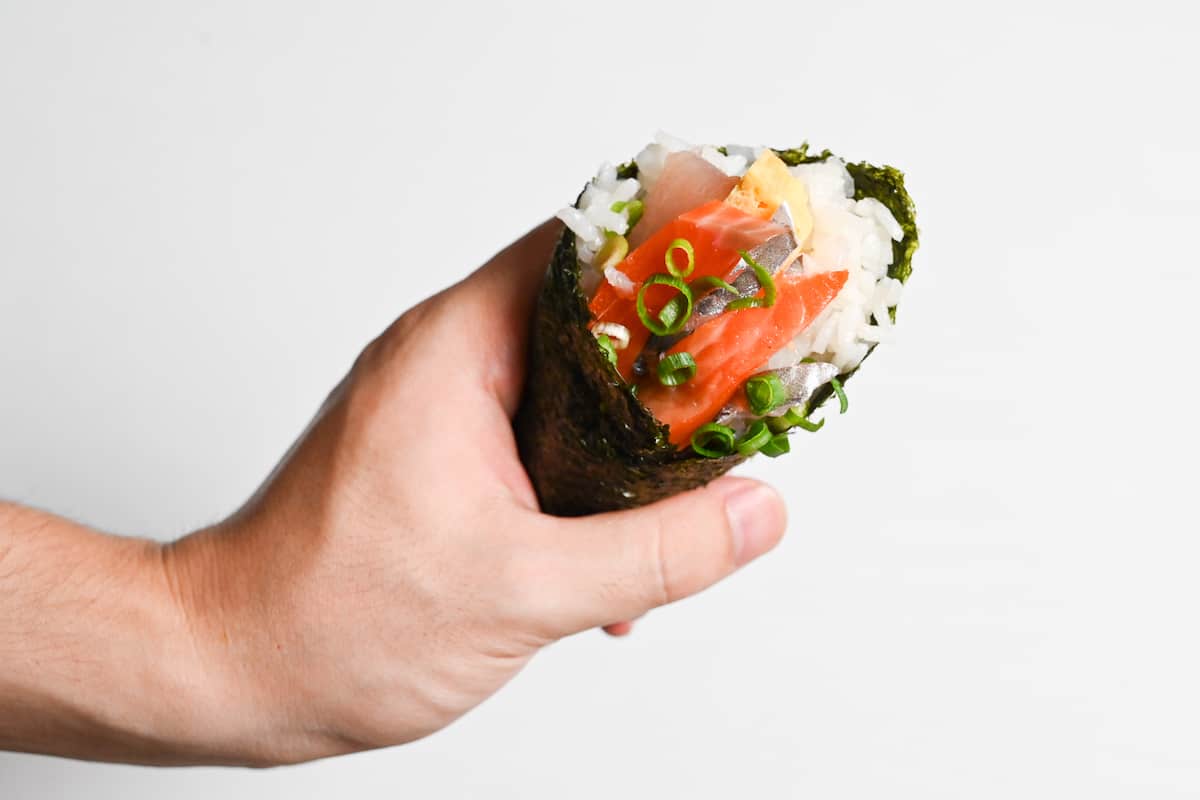
Dashimaki tamago is almost a must ingredient when we make hand-roll sushi in Japanese households. It adds different colors, textures, and tastes to the sushi!
If you want to know how to make it at home, check out my dashimaki tamago recipe.
- Sashimi of your choice (I used salmon and yellowtail in the picture above)
- Dashimaki tamago
- Chopped spring onions
4. Tuna & Cucumber
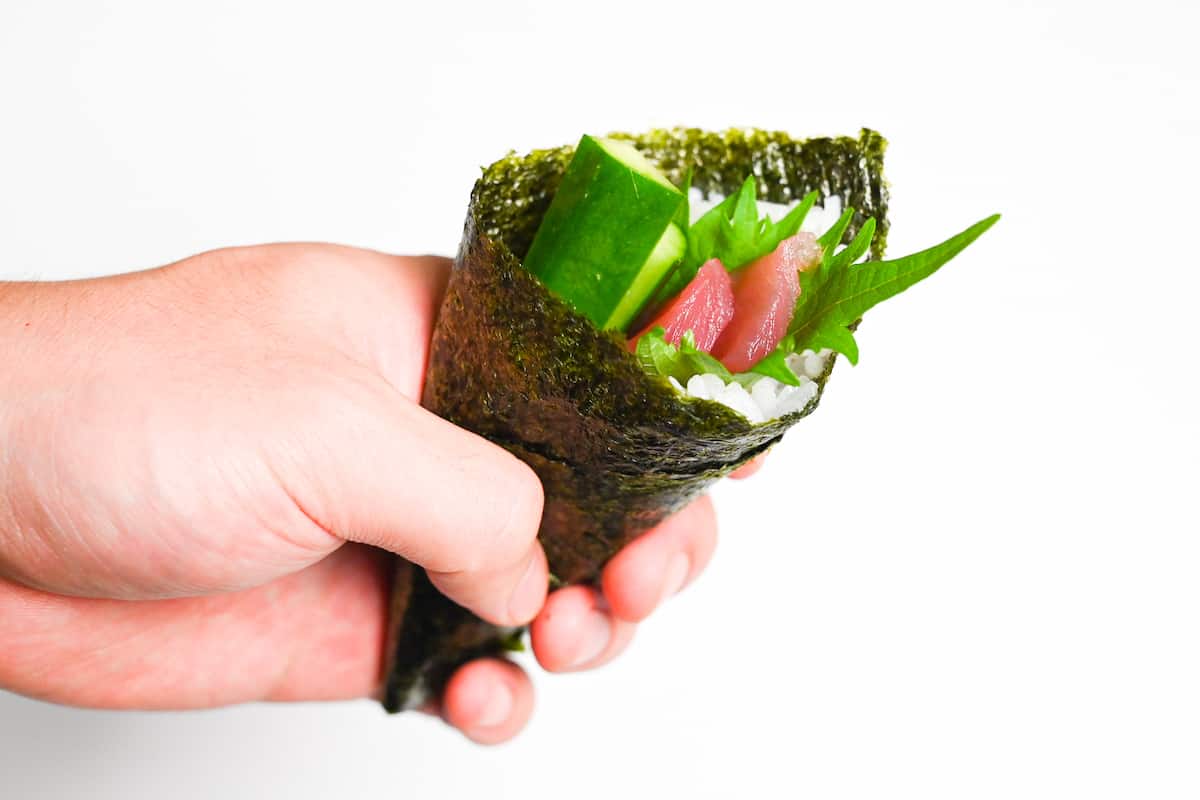
When we think of sashimi in Japan, we probably think of tuna first. Of course, it is a popular topping for hand-roll sushi, too! I simply used tuna sashimi and cucumber with a shiso leaf in this picture.
- Sashimi-grade tuna
- Shiso leaves / perilla leaves (ooba)
- Cucumber
5. Wasabi Tuna Mayo & Cucumber
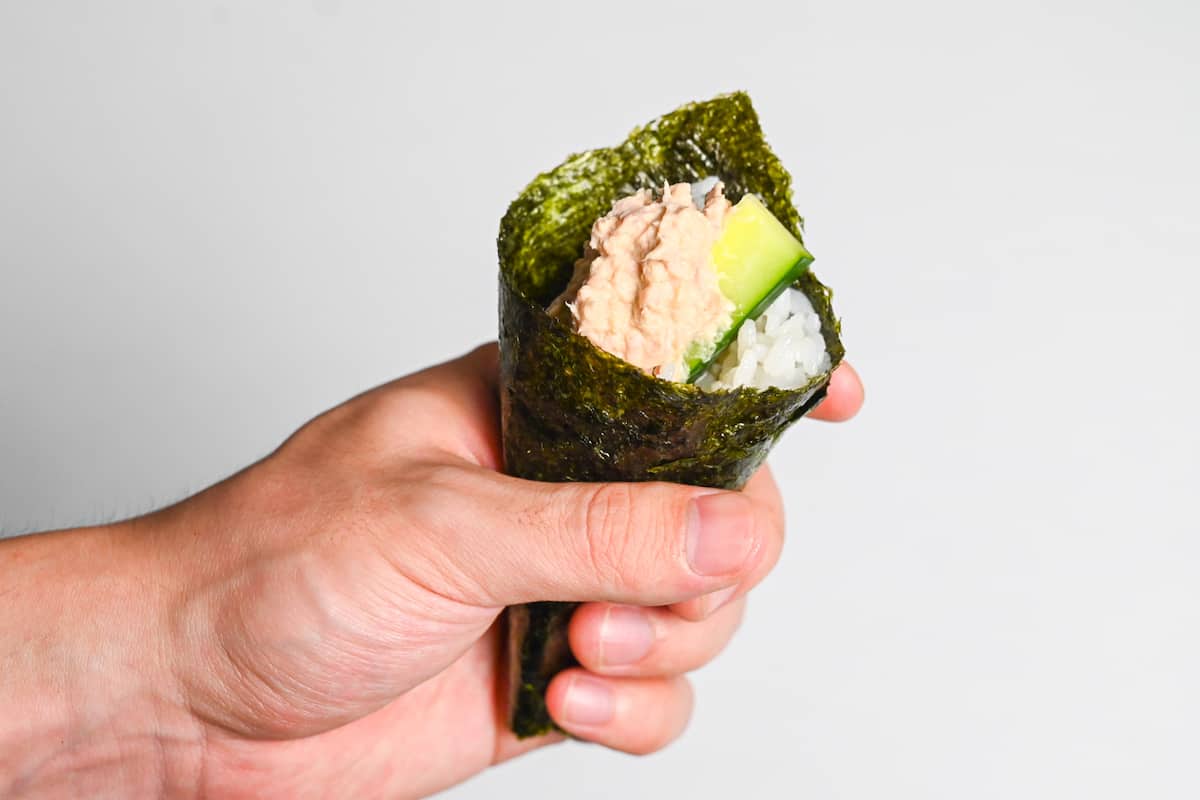
Can’t get fresh tuna? In that case, you can make tuna mayo using canned tuna! Here are the ingredients to make wasabi tuna mayo:
- 80g Canned tuna
- 1 tbsp Japanese Mayonnaise
- 1 tsp soy sauce
- 1/2 to 1 tsp wasabi
Just mix them up in a small bowl, and that’s it! Tuna mayo is not only a popular filling for temaki sushi but also for onigiri rice ball in Japan.
- Wasabi-flavored tuna mayo
- Cucumber
6. Negitoro
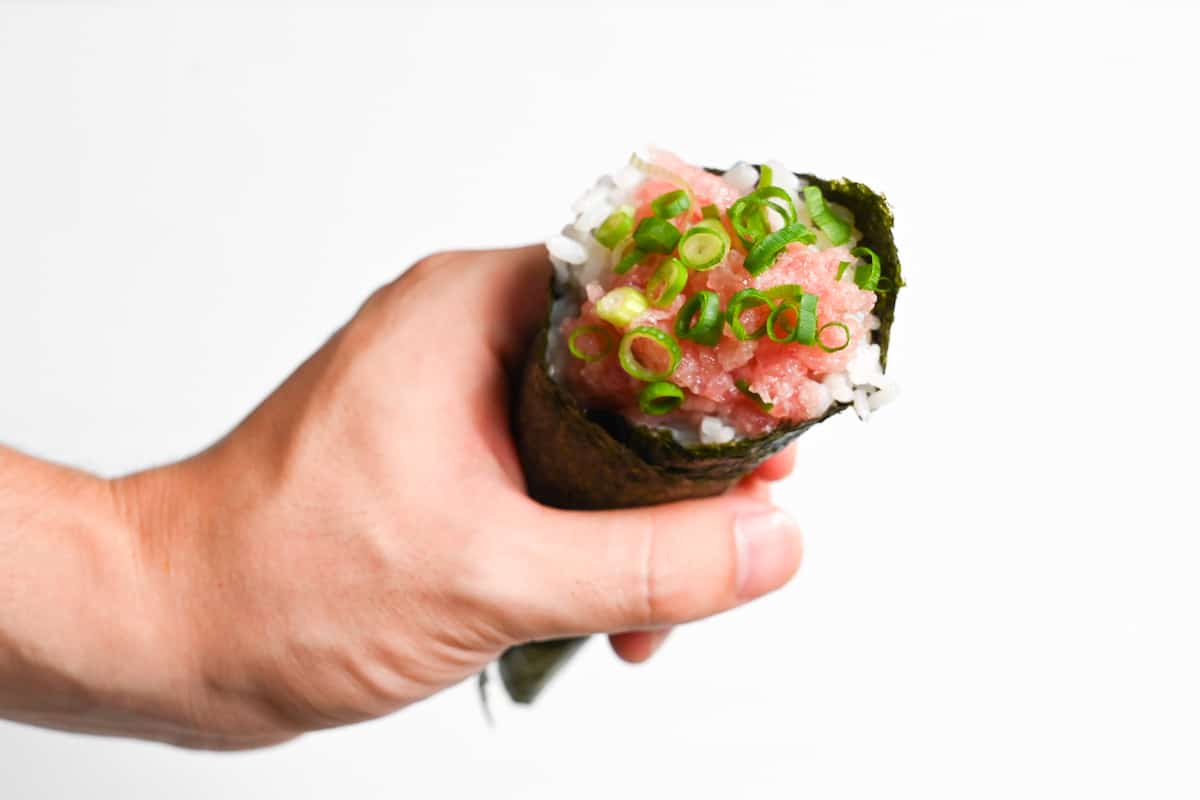
Negitoro is basically minced raw tuna (made with offcuts), and you can easily make it by mashing sashimi-grade tuna or simply buying it already made from your local Japanese food store.
- Negitoro (minced tuna sashimi)
- Chopped spring onions
7. Imitation Crab Salad
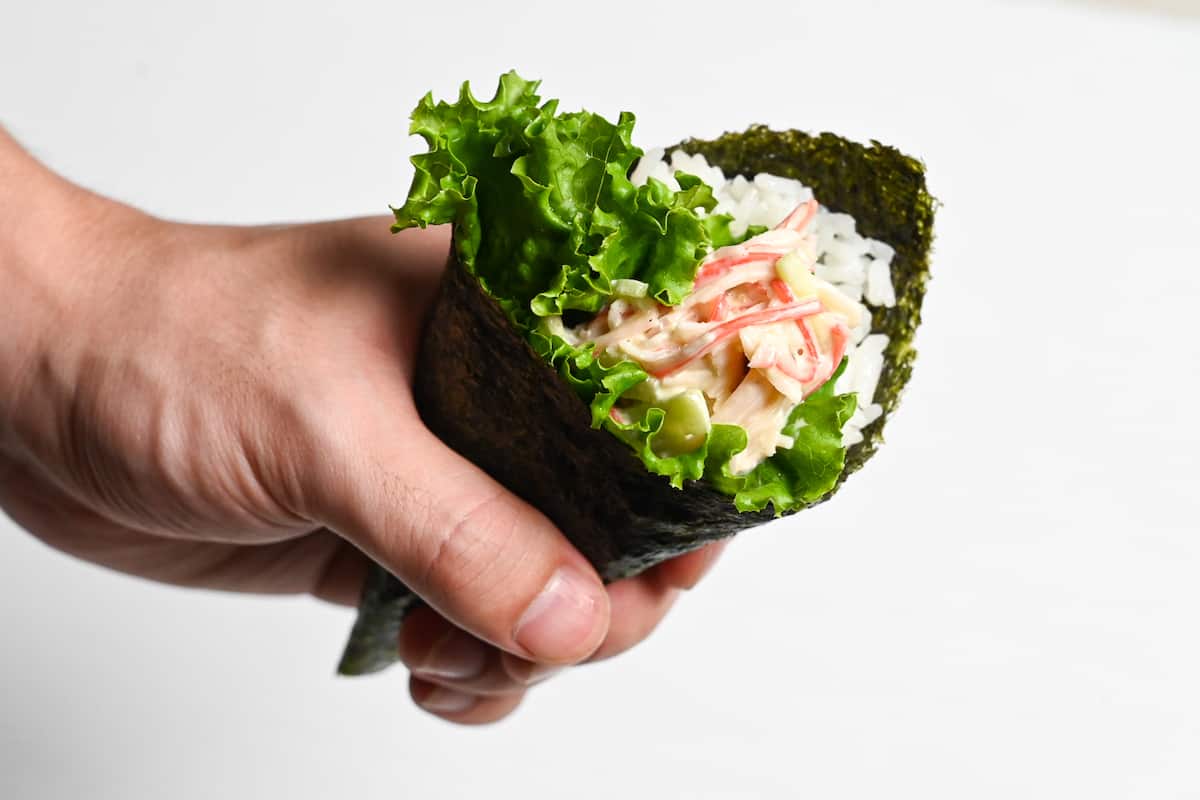
Imitation crab is also popular among Japanese households, especially with kids! Simply mix imitation crab with mayo and wrap it with lettuce!
- Imitation crab
- Japanese mayonnaise
- Lettuce
8. Spicy Mentaiko Mayo

If you already like mentaiko, you can also use it for hand-roll sushi! You can simply use it as it is or mix it with mayonnaise! If you want to know more about mentaiko, check out my mentaiko pasta recipe!
- Mentaiko (spicy cod roe)
- Japanese mayonnaise
- Shiso leaves (ooba)
- Cucumber
9. Soboro Chicken (Miso-flavored Ground Chicken)
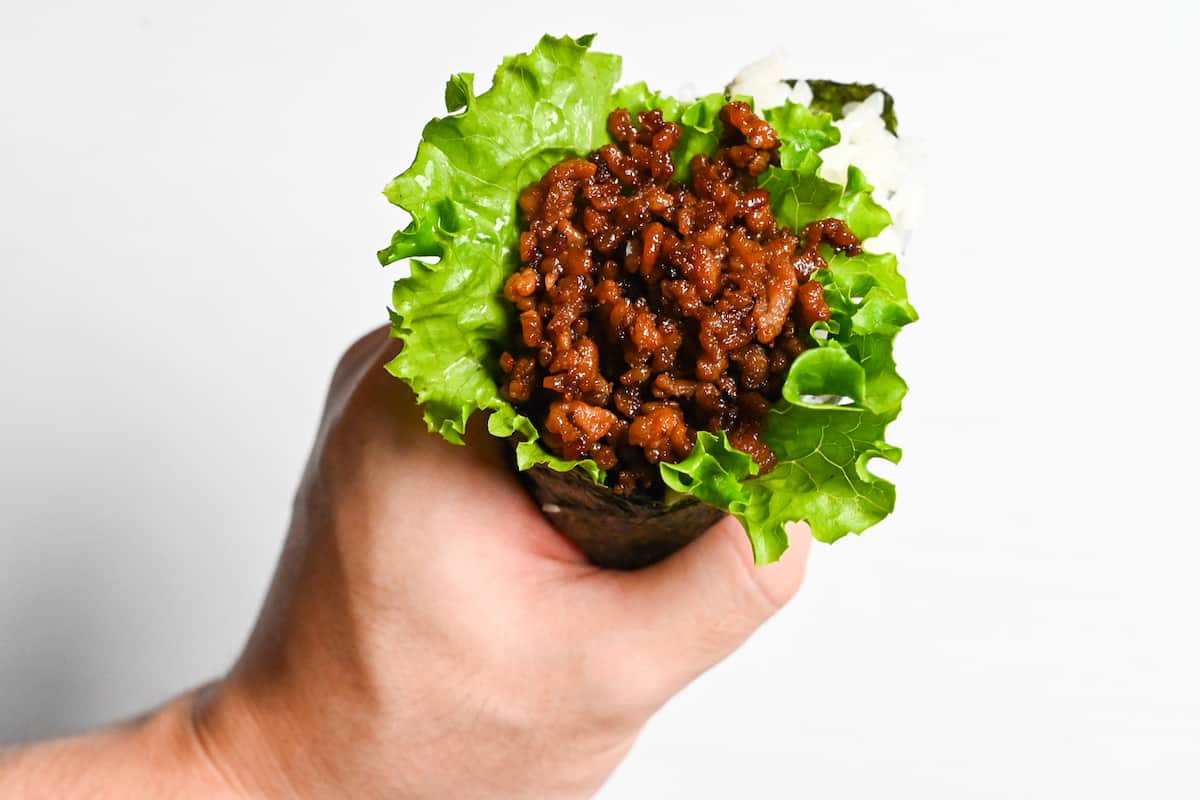
Who says you cannot use meat in hand-roll sushi? Sure you can! It is completely different from the other options, but it does go very well with sushi rice. This is a great option for people who aren’t a fan of fish.
If you want to know how to make this soboro mince, check out my soba salad recipe! You can use any kind of mince you like!
- Soboro mince (check out this recipe for detailed instructions)
- Lettuce
10. Natto
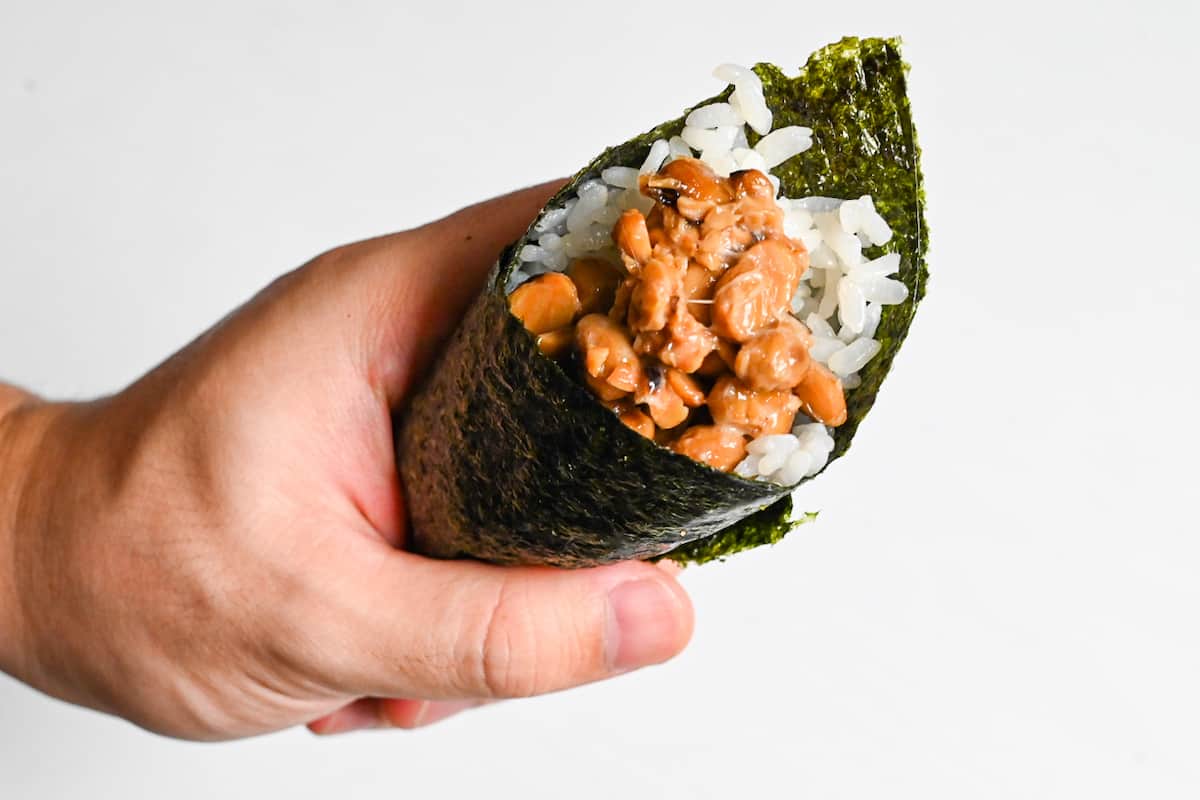
Okay, I know natto can be intimidating for some people, but if you have already tried and liked it, it’s a popular option for Japanese hand-roll sushi too!
If you want to know more about Japanese natto, please check out my natto 101 post.
What are your favorite ingredients to put in temaki sushi? Let us know, and comment below!
FAQ
The basic type of hand-rolled sushi is the trumpet-shaped “suehiro” hand-rolled sushi, and as I mentioned earlier, Tsukiji Tamazushi was the first restaurant in the world to invent this type of sushi. The “Suehiro Temaki” was invented over 50 years ago in 1971.
At the time, the owner wanted to create an unprecedented sushi dish in order to make sushi more accessible to young people. There is also an interesting story about the shape of the dish, which was inspired by the shape of an ice cream cone.
As a result, it attracted attention as a novel product, and temaki sushi quickly became a favorite in the restaurant. In other words, temaki sushi is not traditional sushi but rather a more modern and casual kind of sushi.
As you might have expected, sushi comes in many different forms. One of the biggest questions regarding hand roll sushi is the differences between sushi roll (maki sushi) and hand roll (temaki). I will explain the differences in detail.
First of all, maki sushi (巻き寿司) is a kind of generic term for rolled sushi. Those wrapped in nori seaweed are called “nori maki” and within “nori maki”, there are several variations such as “hosomaki” (thin with just 1-2 fillings) “futomaki” (thick with 3+ fillings), “ehomaki” (7 fillings) and “temaki sushi”.
Incidentally, gunkanmaki does not fall into the nori-maki category, since it is shaped with rice first and then rolled onto nori.
If you are making sushi at home, hand-roll sushi is quicker, easier, and more enjoyable for the family to make because you don’t need to worry about shaping it perfectly, and you can fill it with whatever you like!
You simply dip them in soy sauce and take a bite! We eat hand-roll sushi with our hands.
An average for one roll should be about 25g-30g for the best rolling experience, but it’s all down to how small you cut the nori seaweed and how much rice you want in one.
You actually don’t need any sushi mats to make hand-roll (temaki) sushi. In fact, if you use a mat, then it’s not really temaki sushi anymore.
I hope you enjoy this Temaki Sushi recipe! If you try it out, I’d really appreciate it if you could spare a moment to let me know what you thought by giving a review and star rating in the comments below. It’s also helpful to share any adjustments you made to the recipe with our other readers. Thank you!
More Japanese Sushi Recipes

Temaki Sushi (Hand Roll Sushi)

Ingredients
Sushi rice
- 300 g uncooked Japanese rice
- 350 ml water
- 5 g dried kelp (kombu) (kombu) optional
- 1 tbsp sake optional
- 2 tbsp unseasoned rice vinegar (komezu)
- 1 tbsp sugar
- ½ tbsp salt
Hand Roll Sushi
- 8 sheets roasted seaweed for sushi (nori)
- wasabi paste optional
- 250 g sushi grade fish of your choice tuna, salmon, etc.
- 200 g vegetables of your choice cucumber, avocado, etc.
- fillings of your choice
- Japanese soy sauce (koikuchi shoyu) for dipping
My recommended brands of ingredients and seasonings can be found in my Japanese pantry guide.
Can’t find certain Japanese ingredients? See my substitution guide here.
Instructions
- Pour 300 g uncooked Japanese rice into a sieve placed over an empty mixing bowl. Fill the bowl with cold water until the rice is submerged. Swish, drain and repeat 3 times to remove the excess starch and dirt/debris.

- Transfer the rice to a cooking pot and add 350 ml water and 5 g dried kelp (kombu) (optional). Leave to soak for 30 mins to 1 hour.

- Add 1 tbsp sake (optional) before placing the pot on the stove.

- Turn on the heat to medium and bring to a boil. Listen for bubbling and do not remove the lid. Once it's bubbling continuously, set a timer for 30 seconds. After 2 minutes, reduce the heat to medium-low and set a timer for 2 minutes.
- When 2 minutes are up, lower the heat to a simmer and set a timer for 5 minutes. After 5 minutes, turn up to the highest heat for 10 seconds and then turn the stove off. Leave the pot on the stove with the lid on and allow the rice to cook in the residual steam for 10 minutes.
- After 10 minutes, take off the lid, remove the kombu if you used it and lightly mix the rice without crushing the grains.
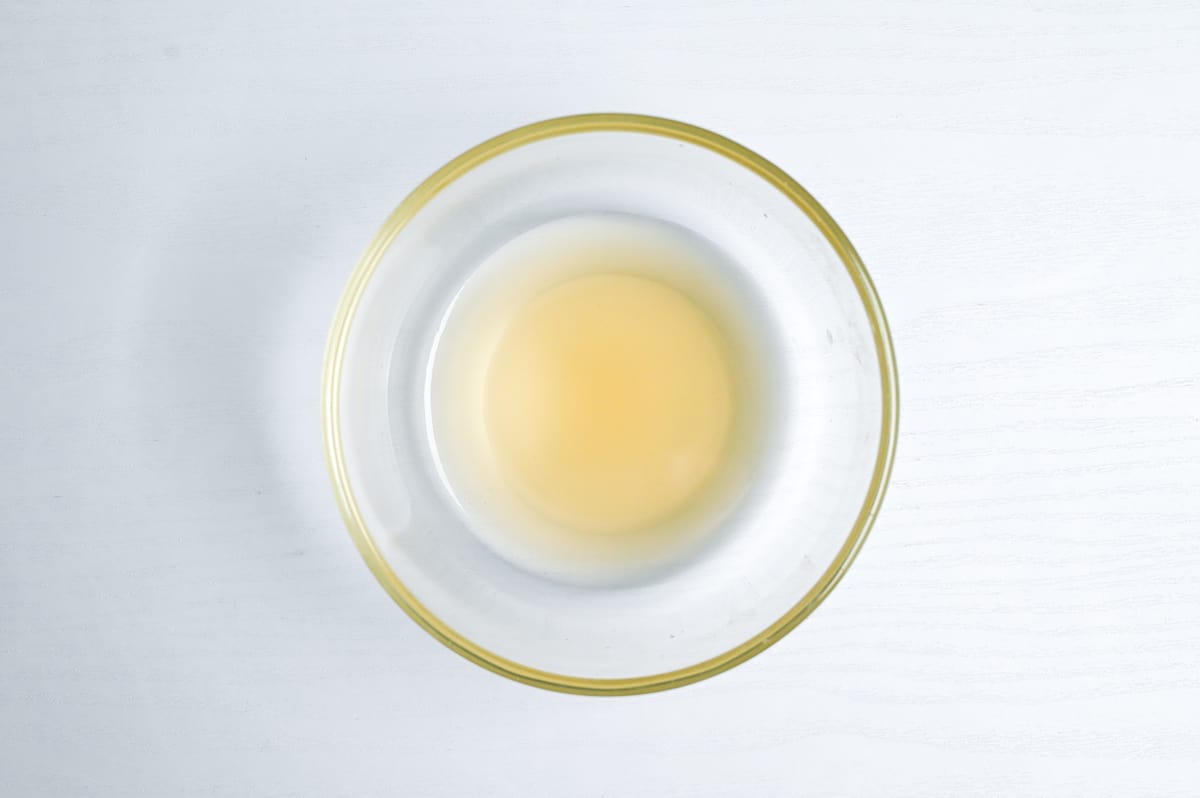
- Mix the 2 tbsp unseasoned rice vinegar (komezu), ½ tbsp salt and 1 tbsp sugar in a small bowl until fully dissolved.
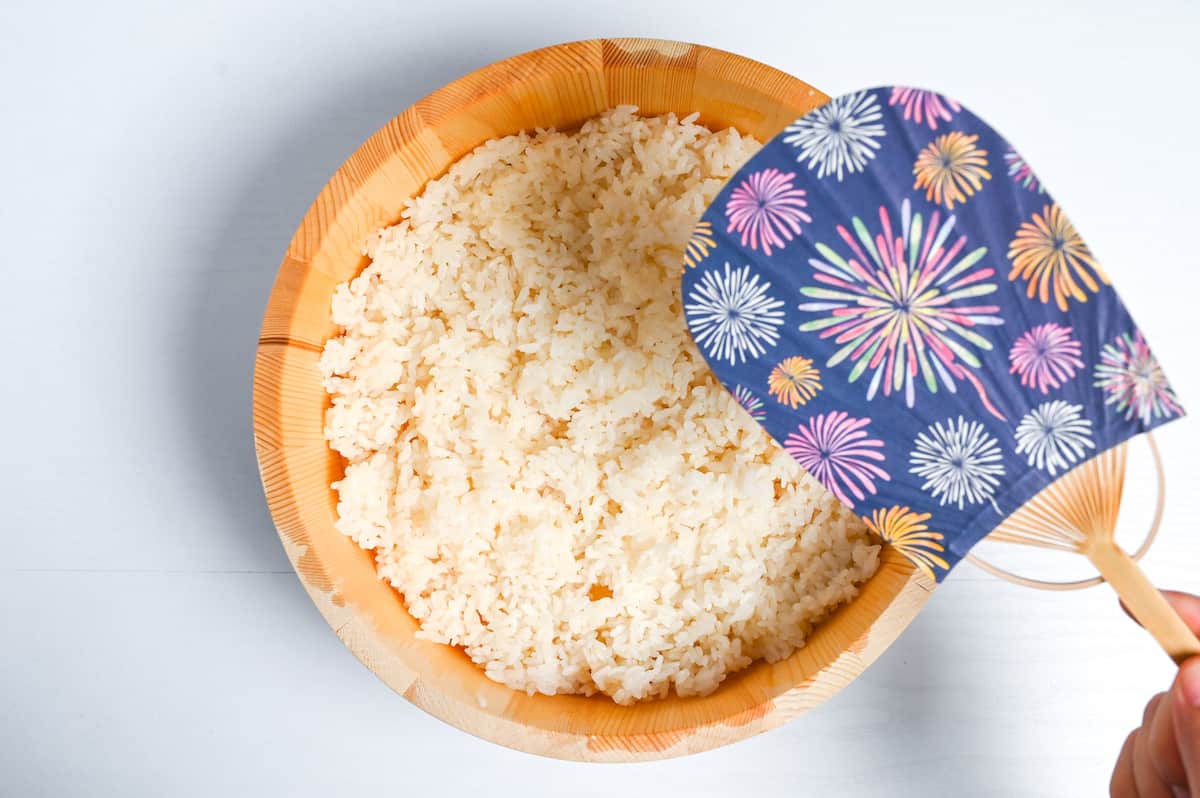
- Transfer the rice to a wide container (wider=fasted cooling) and pour the sushi vinegar mixture over the top while it's still hot. Mix and fan to cool the rice.
- Cover with a damp tea towel to stop it from drying out until it’s time to serve.

How to assemble temaki sushi
- Cut 8 sheets roasted seaweed for sushi (nori) into halves and set one down horizontally in front of you.
- Add about 30g of sushi rice and spread it out on one half of the nori, leaving the top corner empty. (Wet your hands to prevent the rice from sticking.) The rice should be shaped like a right-angled triangle.
- Spread a thin layer of wasabi paste diagonally through the middle of the rice triangle. (Optional)
- Place your choice of fillings over the top of the wasabi.
- Bring the bottom left corner of the nori up to the centre so that short edges of the rice triangle meet.
- Roll the remaining nori around the back of the cone, try and line up the points for a smoother and more beautiful shape.
- Dip in a personal bowl of Japanese soy sauce (koikuchi shoyu) (depending on the filling) and enjoy!
Perfect for a sushi night with the family! Everyone loved choosing their own fillings and rolling their own hand rolls. Thank you for sharing!
Thank you, Giuliana! I’m so happy to hear you all enjoyed it! 🙂