
Featured Comment:
“This is amazing! Have been making these for sushi and always felt that it never tastes quite the same- never knew a little dashi could bring this such a long way! Thank you! x”
– Kristin
What is Dashimaki Tamago?
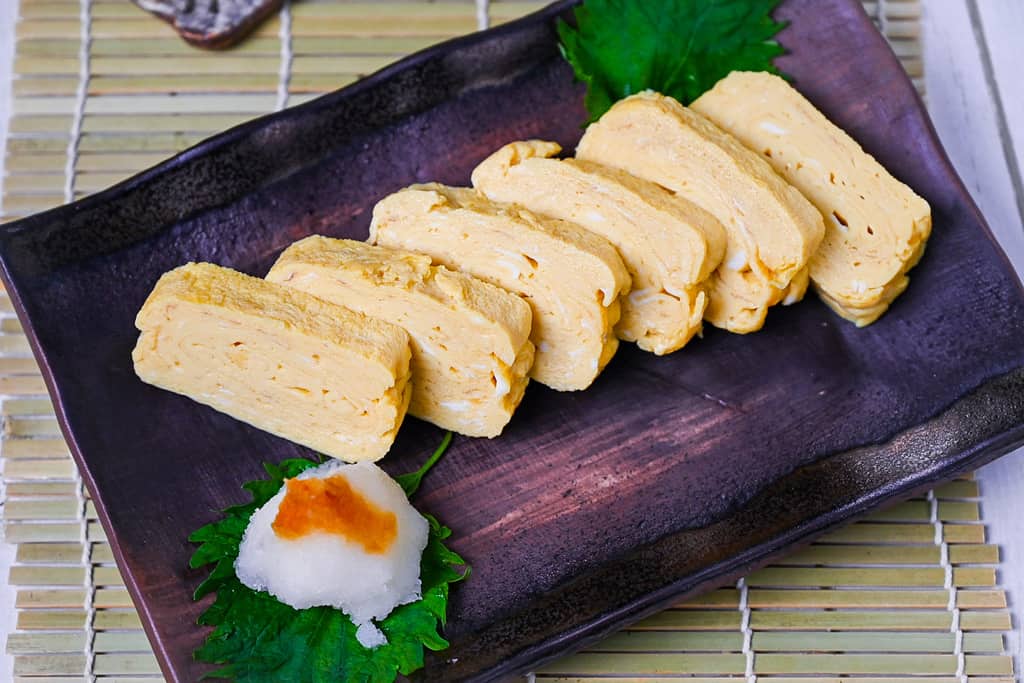
Dashimaki Tamago (だし巻き卵) is a popular Japanese rolled omelette dish made with beaten eggs seasoned with Japanese condiments and cooked in a unique square frying pan called a “tamagoyaki nabe.”
There are two types of Dashimaki Tamago – Eastern-style (Kanto) and Western-style (Kansai). The Eastern style uses sugar, dark soy sauce, and dashi, resulting in a sweet flavor and browned surface.
It is darker than the Western style, which omits sugar and instead uses dashi, light soy sauce, or mirin for a savory, dashi-rich taste. The Western-style has a yellowish hue.
If you’re wondering which type I follow, I’ll let you know that I’m from central Japan, so I don’t take sides. I try to incorporate the best of both worlds as someone who falls in between.
However, at the end of the day, it ultimately comes down to your personal preferences and the ingredients that you have available.

How I Developed This Recipe
From my experience, it takes more than a dozen attempts to truly master the Dashimaki Tamago. It would be incredible if you could make the perfect one on your first try.
Even many Japanese chefs start out trying to perfect this dashimaki tamago. As the saying goes, “Rome wasn’t built in a day.” The same goes for making dashimaki tamago. I also made dashimaki tamago during my work experience at a fancy Japanese restaurant in elementary school.
That said, I’ll include as many tips as I can in this post!
Differences Between Dashimaki Tamago and Tamagoyaki
Although Tamagoyaki and Dashimaki Tamago are similar in preparation and appearance, they are not the same dish.
| Tamagoyaki | Dashimaki Tamago | |
|---|---|---|
| Definition | General term for Japanese rolled egg omelette. | Specific name for rolled egg omelette with dashi stock. |
| Ingredients | Can have different ingredients such as spinach or cheese. | No added ingredients. (Only egg and seasonings) |
| Used in | Often seen in bento lunch box. | Often seen at izakaya or sushi restaurants, soba restaurants…etc |
Tamagoyaki (卵焼き)
Tamagoyaki is a rolled omelette made by seasoning lightly beaten eggs with sugar, salt, and soy sauce and then rolling into a cylindrical shape using a tamagoyaki nabe.
It is typically found in bento lunchboxes and can be seasoned with a variety of ingredients such as mirin, tsuyu, black pepper, Worcestershire sauce, mayonnaise, and more.
Tamagoyaki can also be mixed with other ingredients such as spring onions, spinach, cheese, etc.
Dashimaki Tamago (だし巻き卵)
Dashimaki Tamago is similar to tamagoyaki but made with dashi stock.
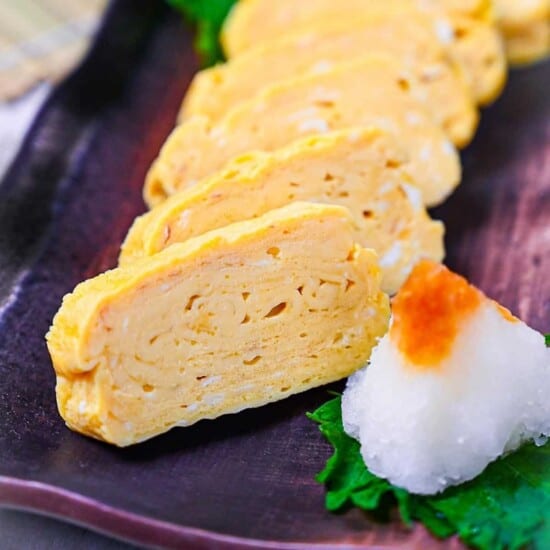
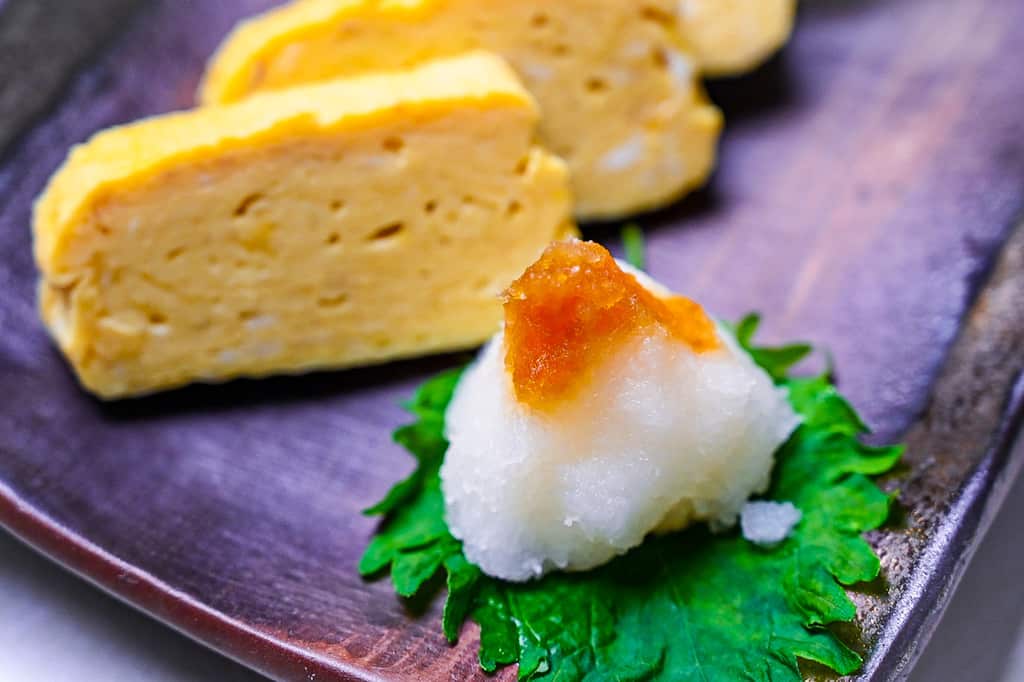
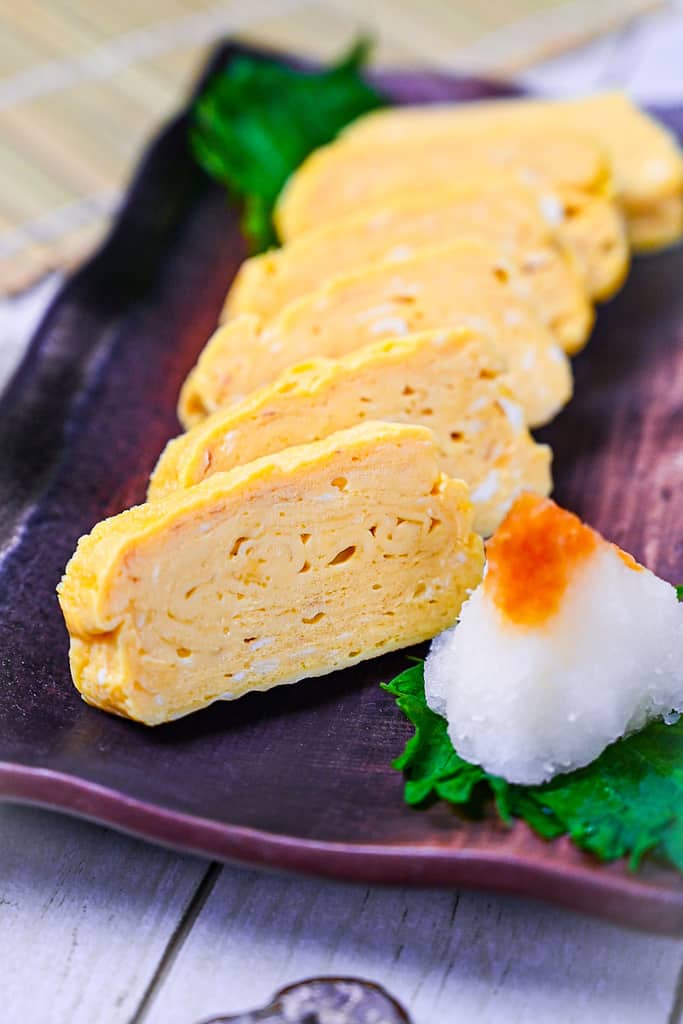
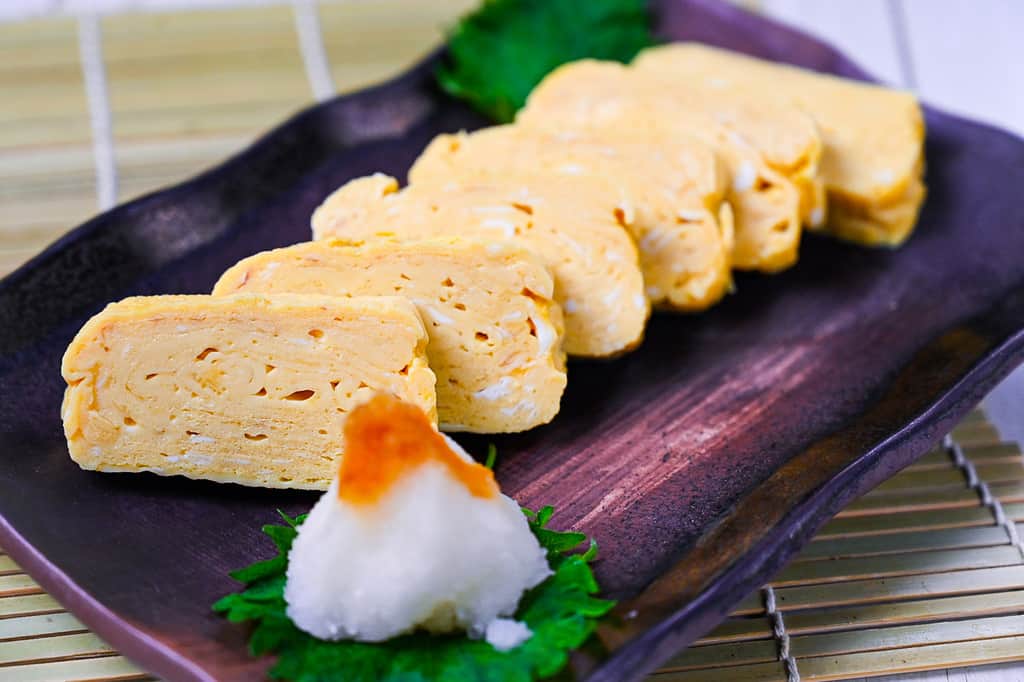
After cooking, the eggs are often pressed in a sushi mat to create a stripy pattern on the surface.
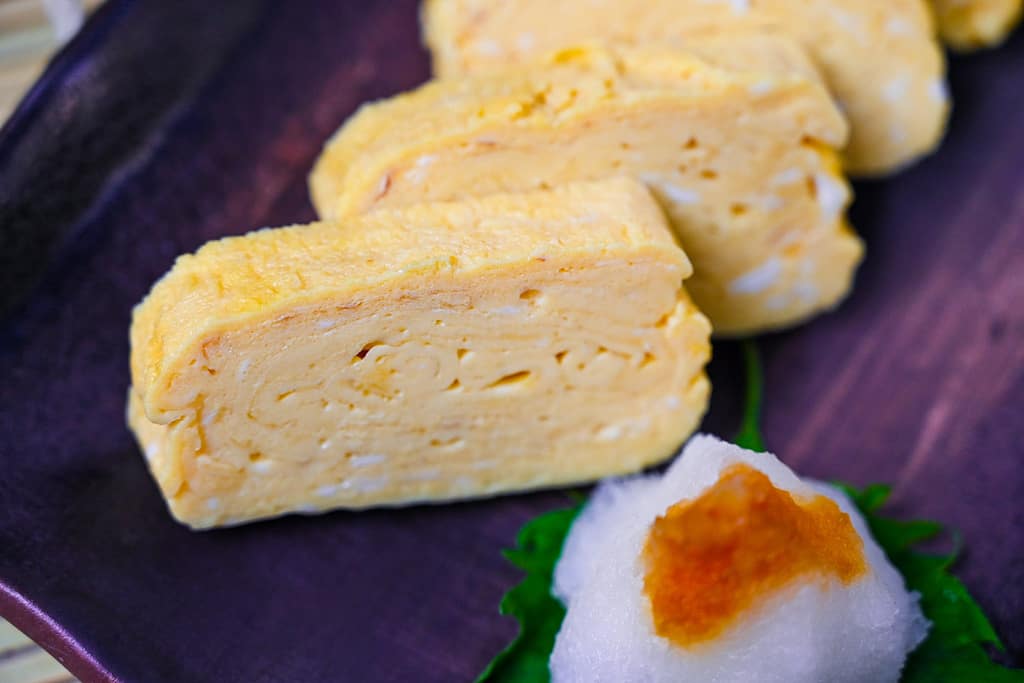
Dashimaki tamago is usually served with grated daikon radish and soy sauce, a popular dish at Japanese-style pubs called “izakaya.” It is often referred to as “dashimaki” for short.
Atsuyaki Tamago (厚焼き卵)
I have just explained the main differences between Tamagoyaki and Dashimaki Tamago. However, there is one more type called “Atsuyaki Tamago” (厚焼き卵).
The name “Atsu” means “thick” in Japanese, and as the name suggests, thickness is the defining characteristic of it. Each layer is thicker than the layers in the previous two.
They are usually seasoned with sugar and soy sauce but not with dashi stock. The added soy sauce gives it a characteristic slightly browned appearance.
Choosing a Tamagoyaki Pan
The easiest way to make any tamagoyaki is to use the special rectangular tamagoyaki pan we call “tamagoyaki nabe.” (玉子焼き鍋)
Using the tamagoyaki nabe will easily ensure straight edges and a rectangular shape. Tamagoyaki nabe can be purchased on Amazon and comes in various materials.
| Material | Pros | Cons |
|---|---|---|
| Aluminum (non-stick coating) | Cheap Lightweight Easy to use | Heat is not always even Easily scratched Not so durable |
| Cast Iron | Naturally non-stick Durable (can last a lifetime) Makes food taste better | Needs more care (seasoning) Expensive Takes longer to preheat |
| Copper | Very even cooking Used by professionals Easy to clean Lighter than cast iron | Needs more care (polishing) Expensive |
Ingredients & Substitution Ideas
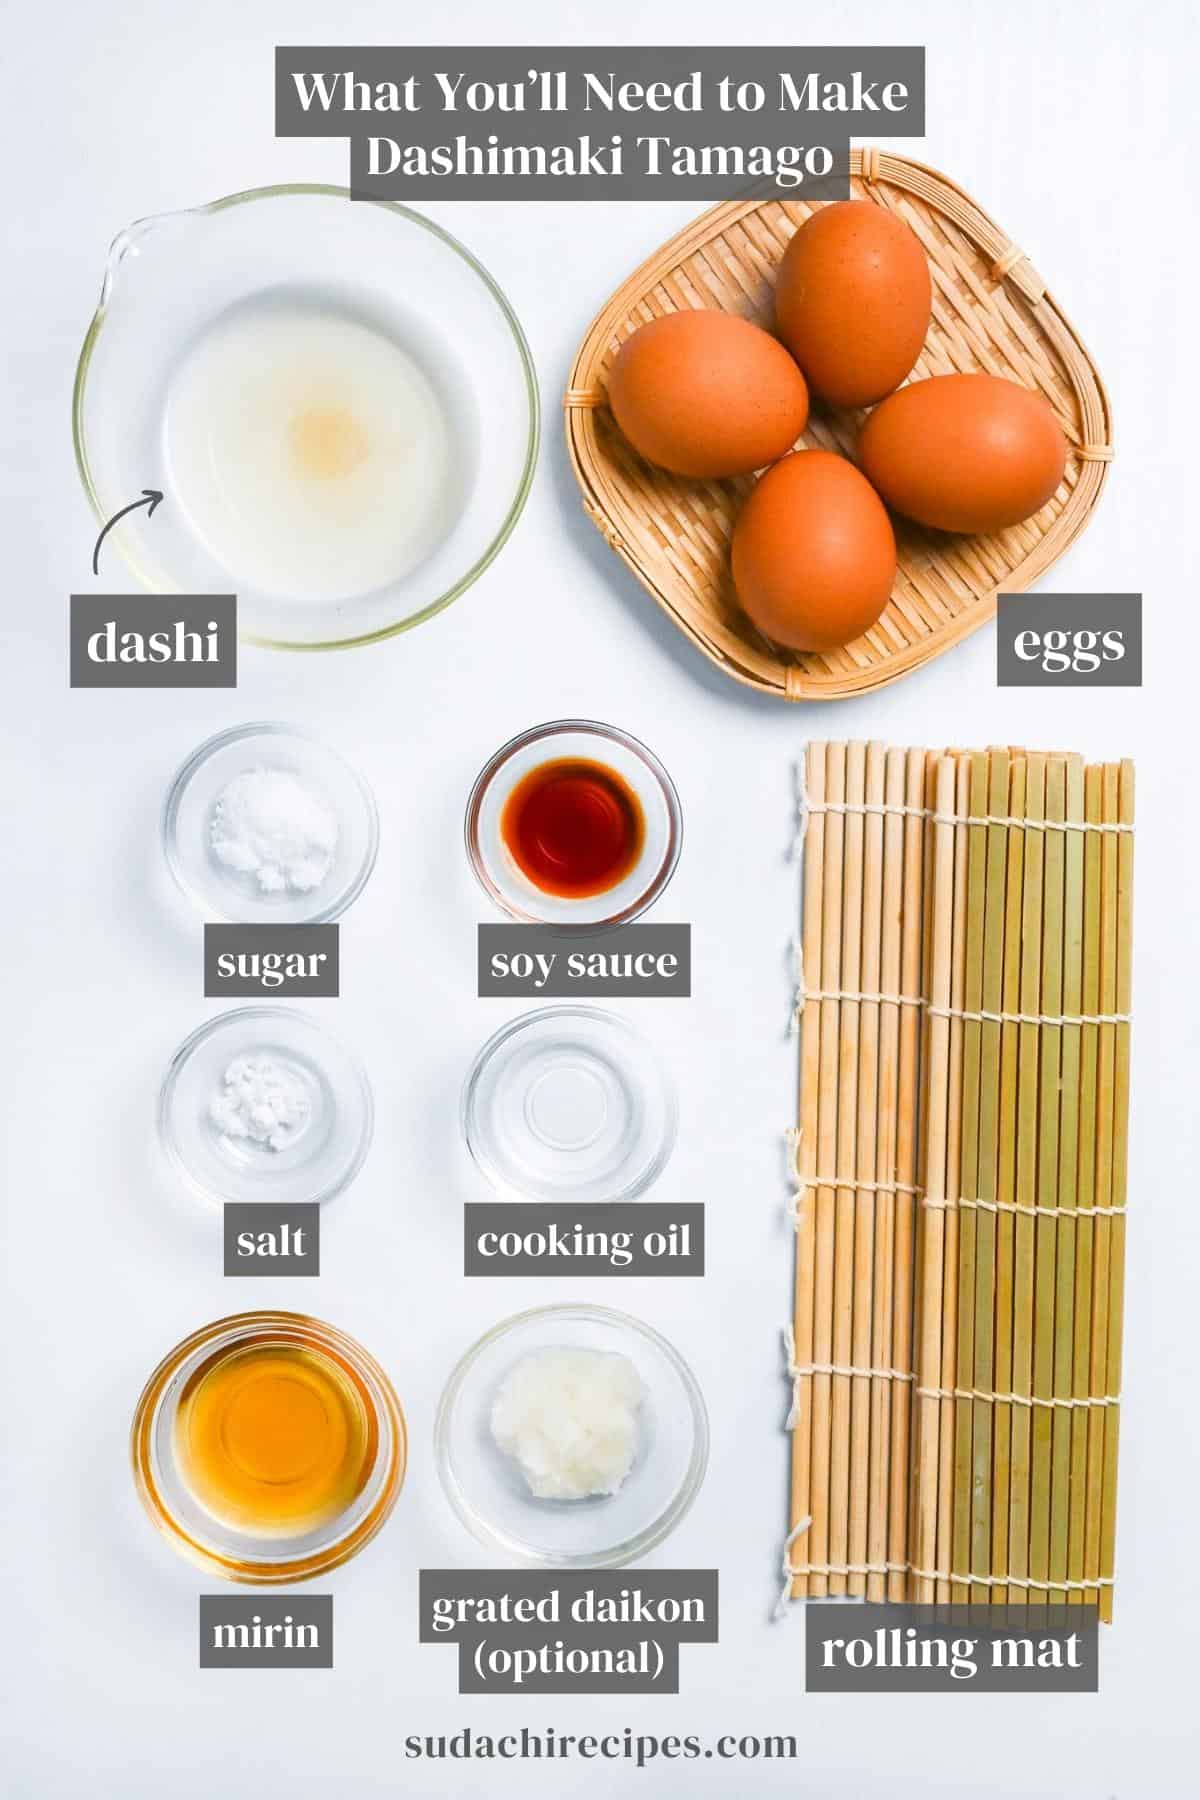
- Eggs: You can use M, L, or XL eggs, depending on where you live.
- Dashi Broth: Whether it’s my favorite dashi, simple awase dashi, or vegan dashi, the choice is yours. And if you’re pressed for time, instant dashi granules or dashi packets are lifesavers.
- Mirin: When on the hunt for mirin, keep an eye out for “hon mirin” (本みりん).
- Sugar: Your regular sugar is fine here.
- Salt: Opt for the fine-grained kind.
- Soy Sauce: For brand recommendations for Japanese dishes, check out my comprehensive soy sauce guide.
- Grated Daikon Radish: This is optional, but it’s a great addition that pairs beautifully with the dish, adding a refreshing touch.
Visual Walkthrough & Tips
Here are my step-by-step instructions for how to make Dashimaki Tamago at home. For ingredient quantities and simplified instructions, scroll down for the Printable Recipe Card below.
This delicate dish could go wrong any time (shape-wise, not the taste). Of course, it took me many tries to make a decent-shaped one myself.
So don’t get upset even if the first one went wrong! Every single one of us has gone through it and at least you can still enjoy the flavor!
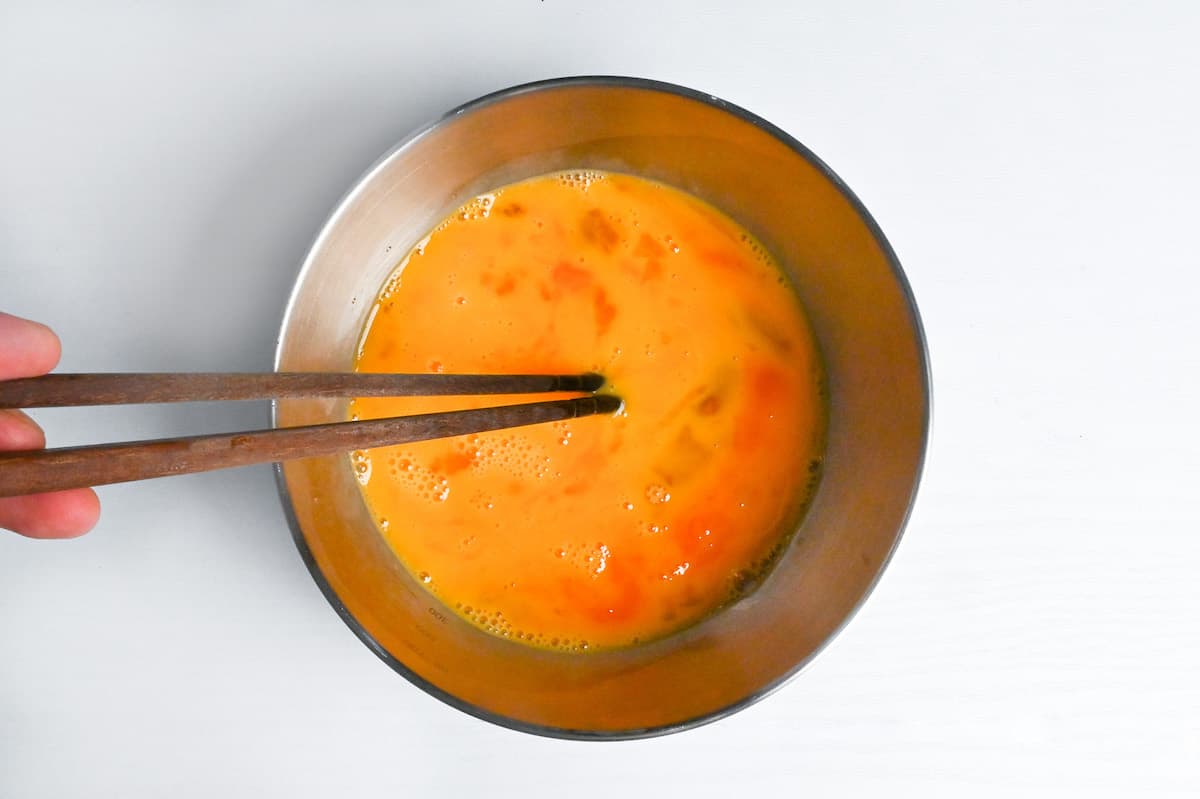
Crack medium eggs into a bowl. Using chopsticks, beat them back and forth, ensuring the yolks and whites blend well.
Whisking can cause the eggs to lose their firmness, and over-mixed eggs do not set well when cooked, resulting in a loss of their soft texture.
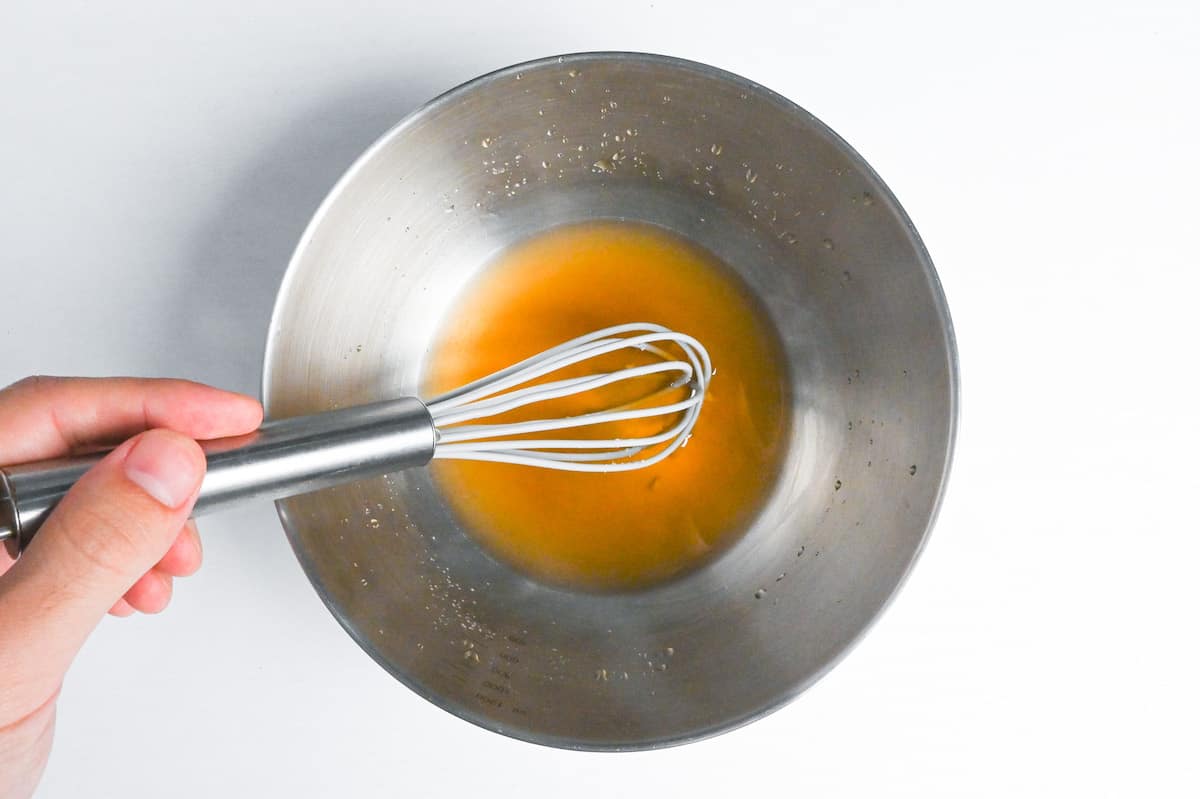
Combine dashi stock, mirin, sugar, salt, and soy sauce in another bowl. Stir until the sugar and salt are mixed well.
When adding condiments directly to the eggs, the sugar and salt may not dissolve very well, leading to an inconsistent taste and a grainy texture.
To prevent this, I recommended mixing the dashi and condiments in a separate bowl until they’re thoroughly combined, and then add the mixture to the eggs.
This will ensure a uniform flavor and a smoother texture.
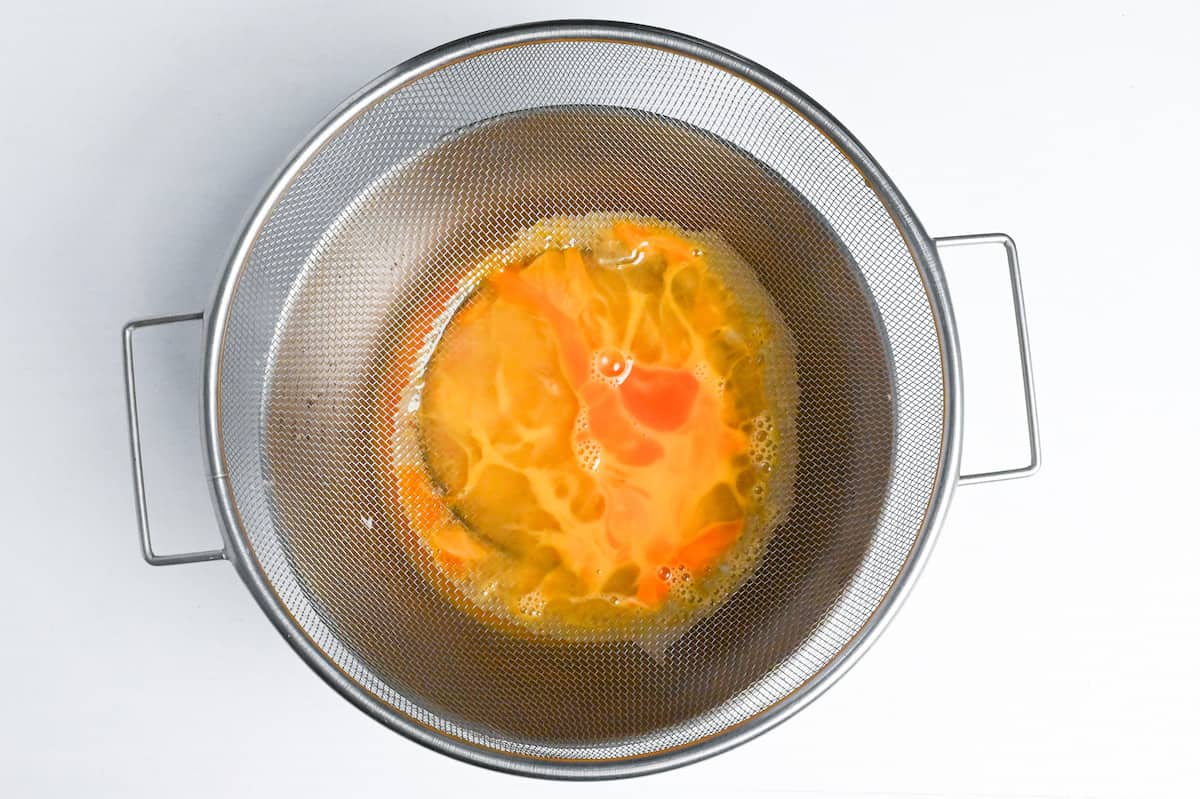
Then, pour the mixture through a strainer or colander to create a finer texture. This helps to ensure that the egg whites and yolks mix well together, resulting in a better overall flavor and texture.

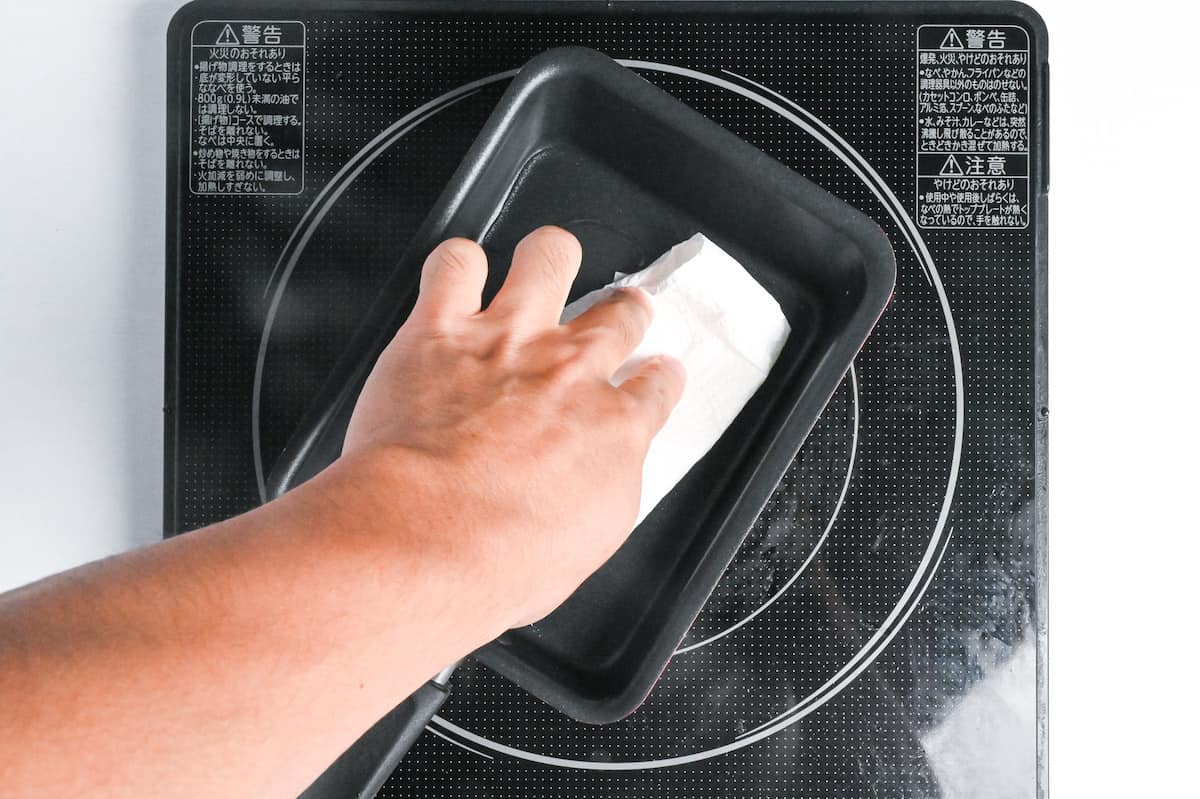
Drizzle a small amount of cooking oil into a tamagoyaki pan. Heat it over medium. Use kitchen paper to spread the oil evenly and wipe away any excess. Keep this paper handy; you’ll need it later.
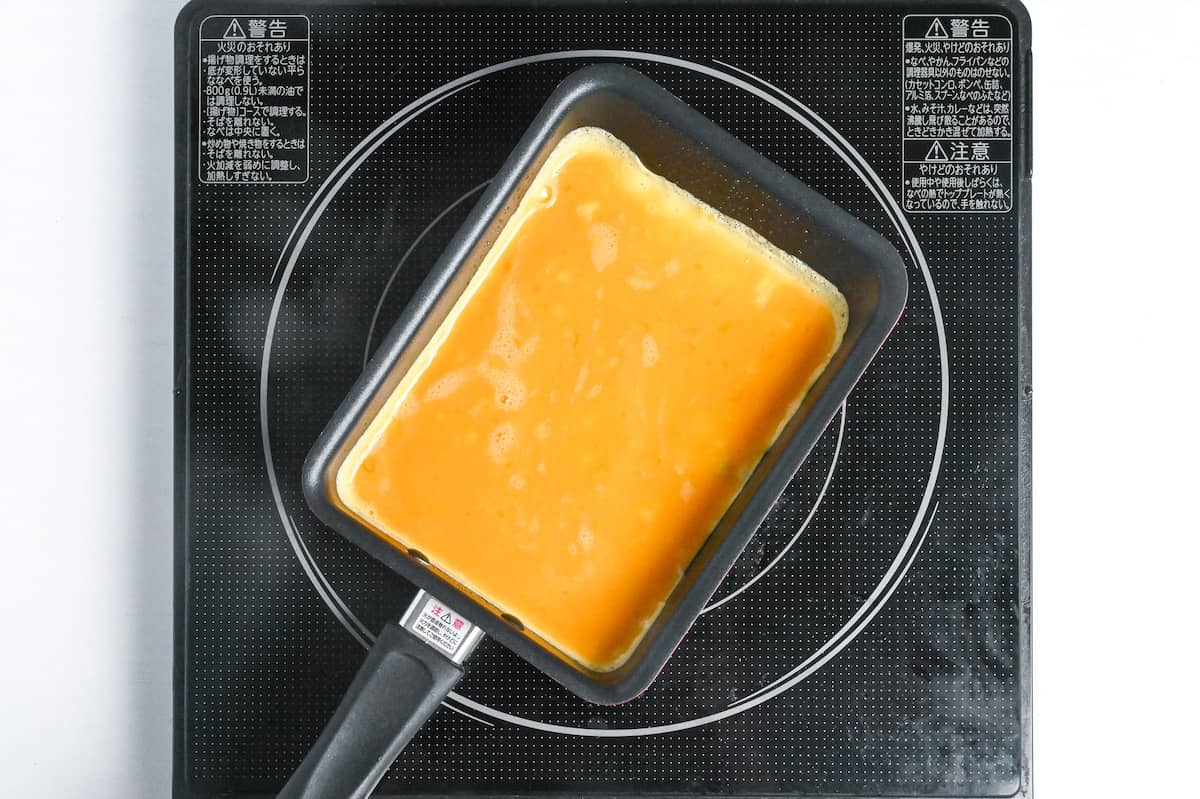
Once the pan’s hot, pour in a thin layer of the egg mixture. It should cook quickly but remain sturdy.
To achieve a well-shaped Dashimaki Tamago, I recommend chopsticks to puncture any air bubbles.
Rolling the omelet while it still has air bubbles will result in hollow spaces inside the egg, which is undesirable.
It’s crucial to maintain the right temperature when making Dashimaki Tamago. If the temperature of the egg mixture exceeds 100°C, the liquid will evaporate instantly, and the proteins will coagulate, resulting in a smoother texture. However, if you wait too long to roll it, the omelette will brown too quickly.
On the other hand, if you decrease the heat out of fear of burning the eggs, the omelette won’t be as fluffy. Therefore, striking a good balance between the temperature and timing is crucial.
When you add the egg mixture, a sizzling sound indicates that the temperature is just right.
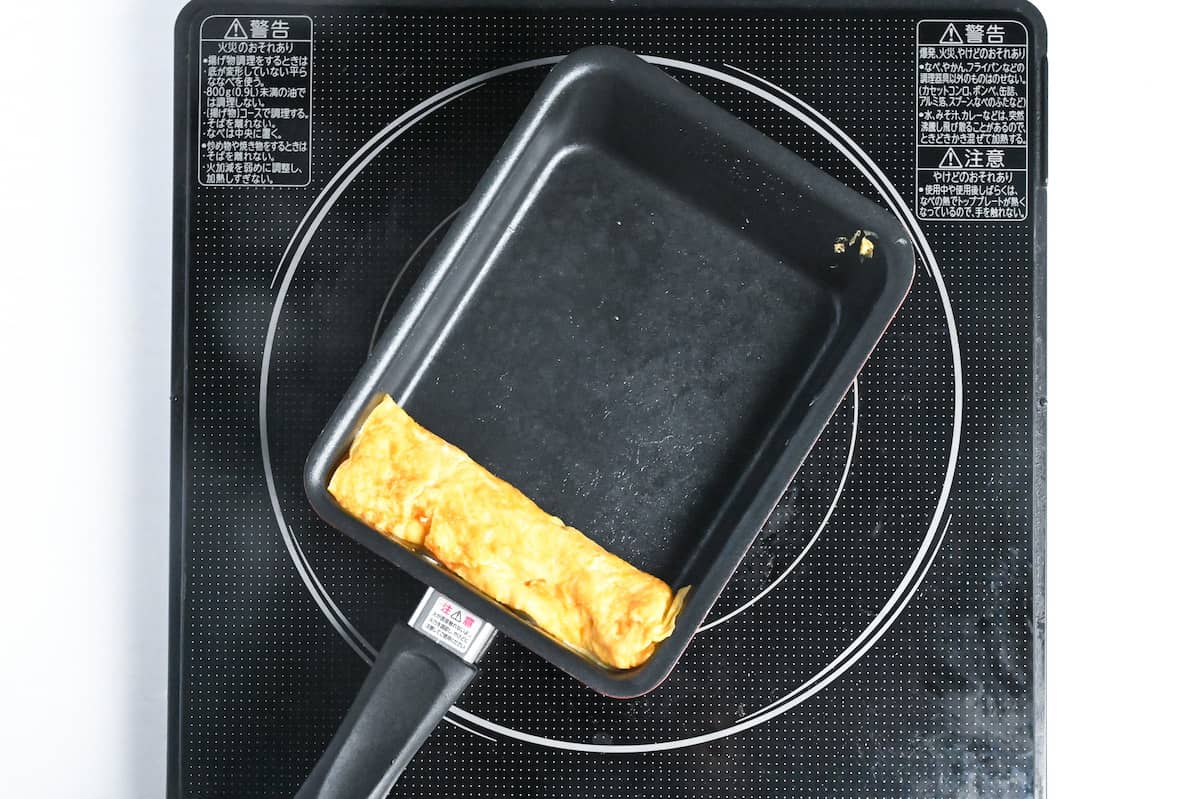
When the egg is half-cooked, start rolling it towards you from the back of the pan. Begin by lightly pinching the far edge.
As you hold the panhandle with your other hand, use a gentle scooping motion to initiate the roll. This technique ensures the egg doesn’t break.
You might think using a spatula is easier, but long chopsticks do the best job at rolling because they have precision.
Push the rolled egg to the pan’s far end. Use the kitchen paper to grease the space.
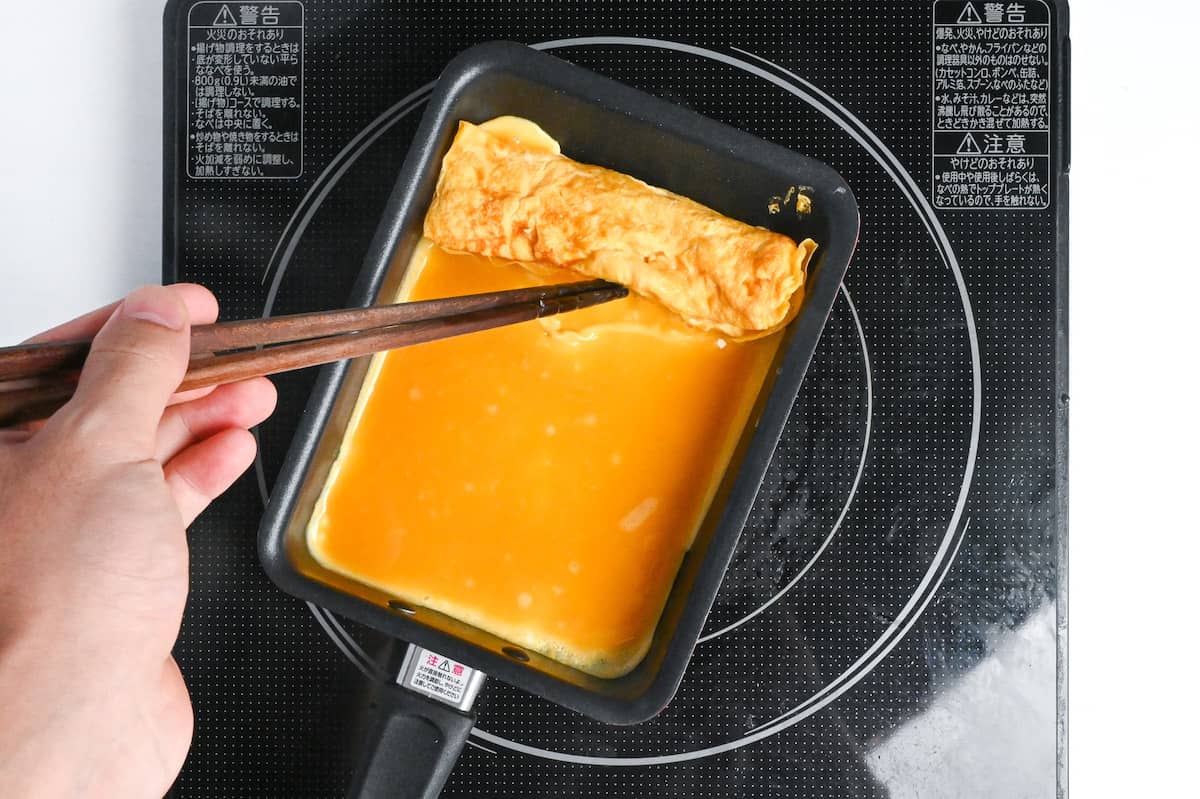
Pour another layer of the egg mixture. Lift the rolled egg slightly, allowing some mixture to flow underneath, ensuring a seamless roll.
If you notice the pan getting too hot, lowering the stove’s temperature might not be the best solution. Instead, try lifting the pan off the heat for a short while and then placing it back on the stove when you need more heat.
It’s important to focus on the pan’s temperature rather than the stove’s setting. Additionally, both your hands will be occupied – one holding the pan handle and the other holding chopsticks – so it may not be convenient to set something down to adjust the stove’s temperature.
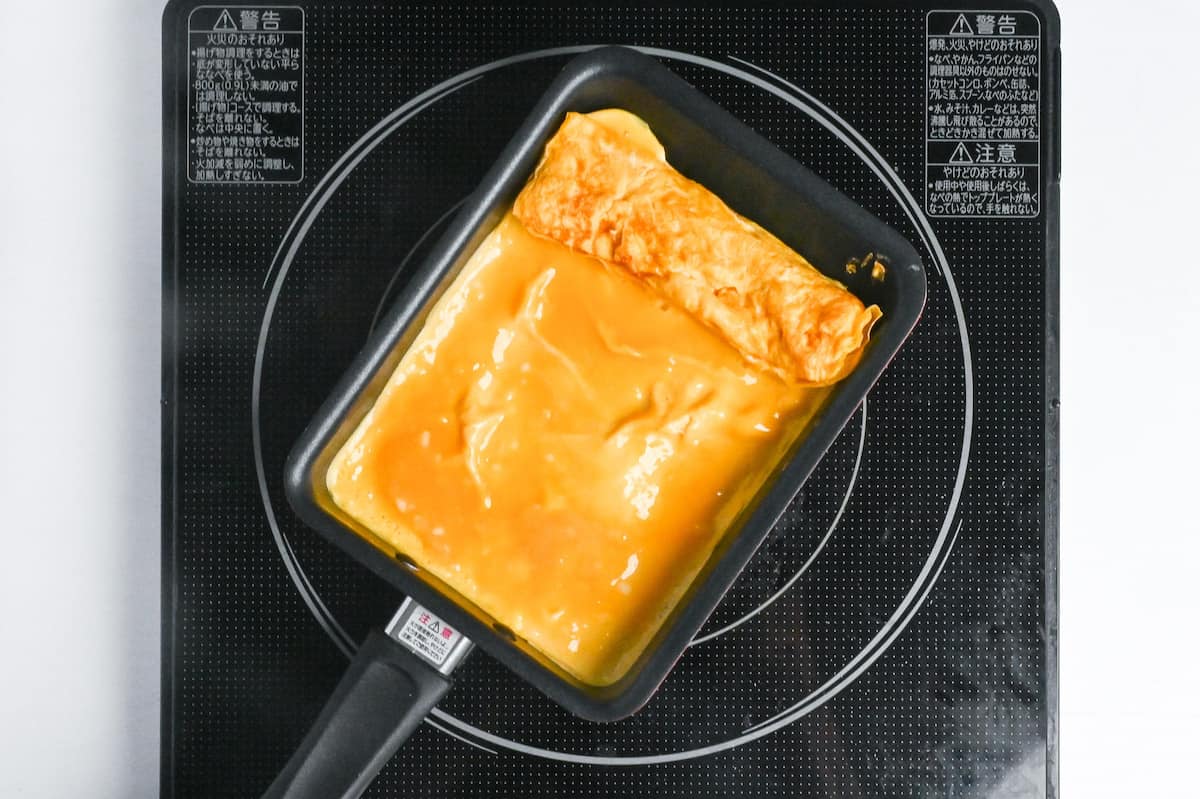
Wait for it to be half-cooked, then roll again. Continue this process until all the egg mixture is used.
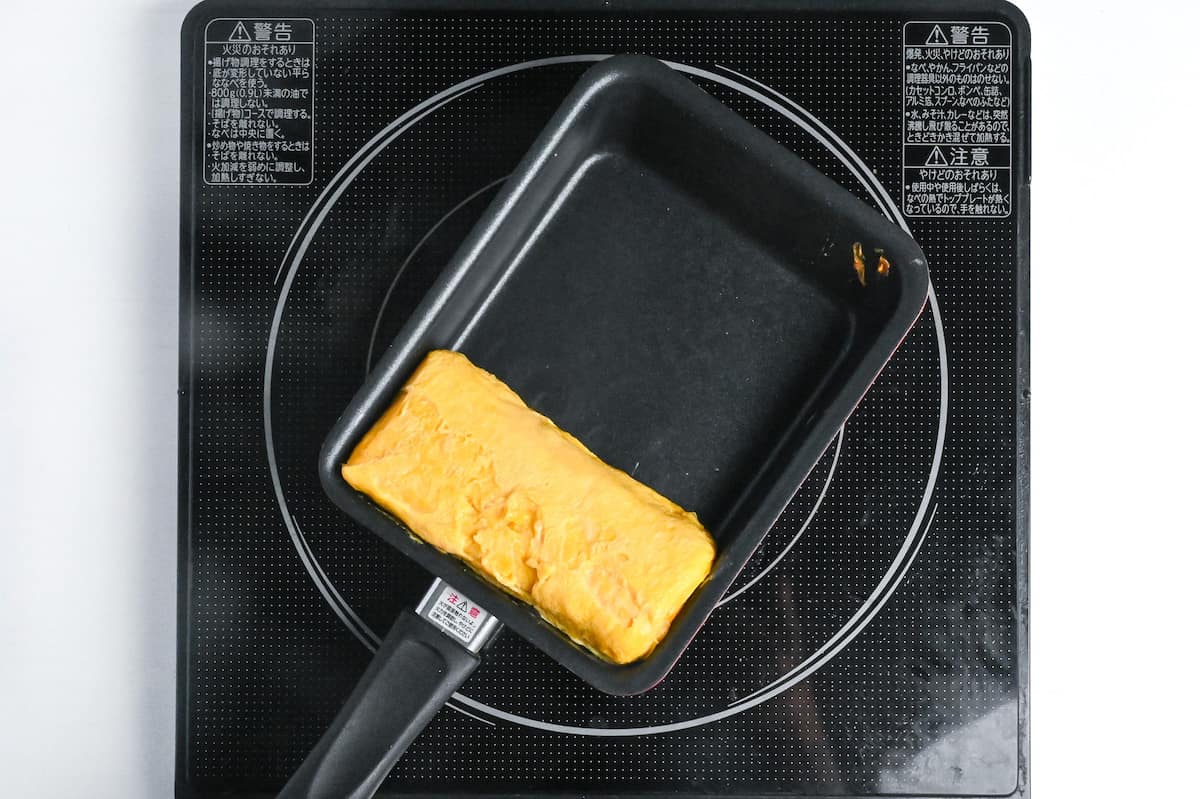
It’s important to note that the residual heat will continue cooking the egg, so you should start rolling when it is only half-cooked.
Overcooking the tamagoyaki will result in a dry and overly brown dish that is less flexible and more prone to breaking when rolled.
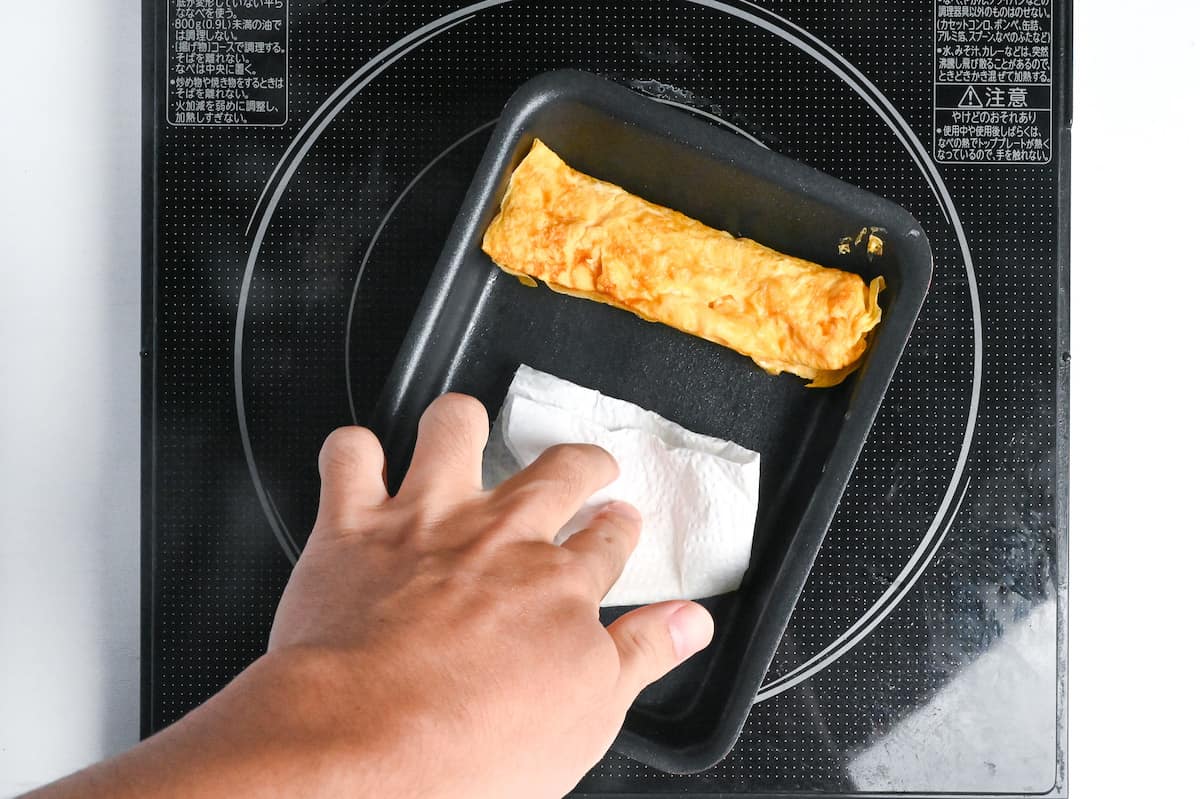
For the best results, it’s important to prevent the egg mixture from sticking or burning to the pan. To achieve this, I recommend applying a small amount of oil to the pan before adding the egg mixture each time.
To ensure the oil is evenly spread, you can use a paper towel to wipe the pan’s surface. This will also remove excess oil and give your Dashimaki a smooth and even appearance.
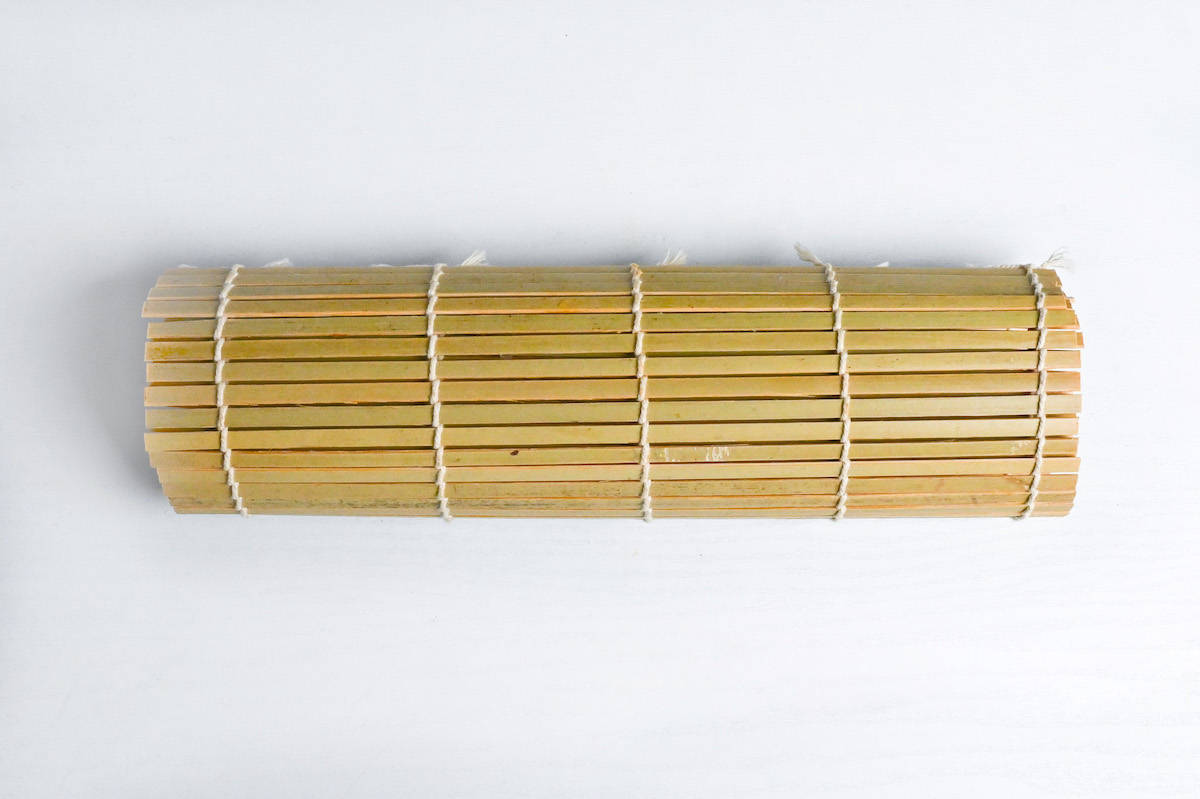
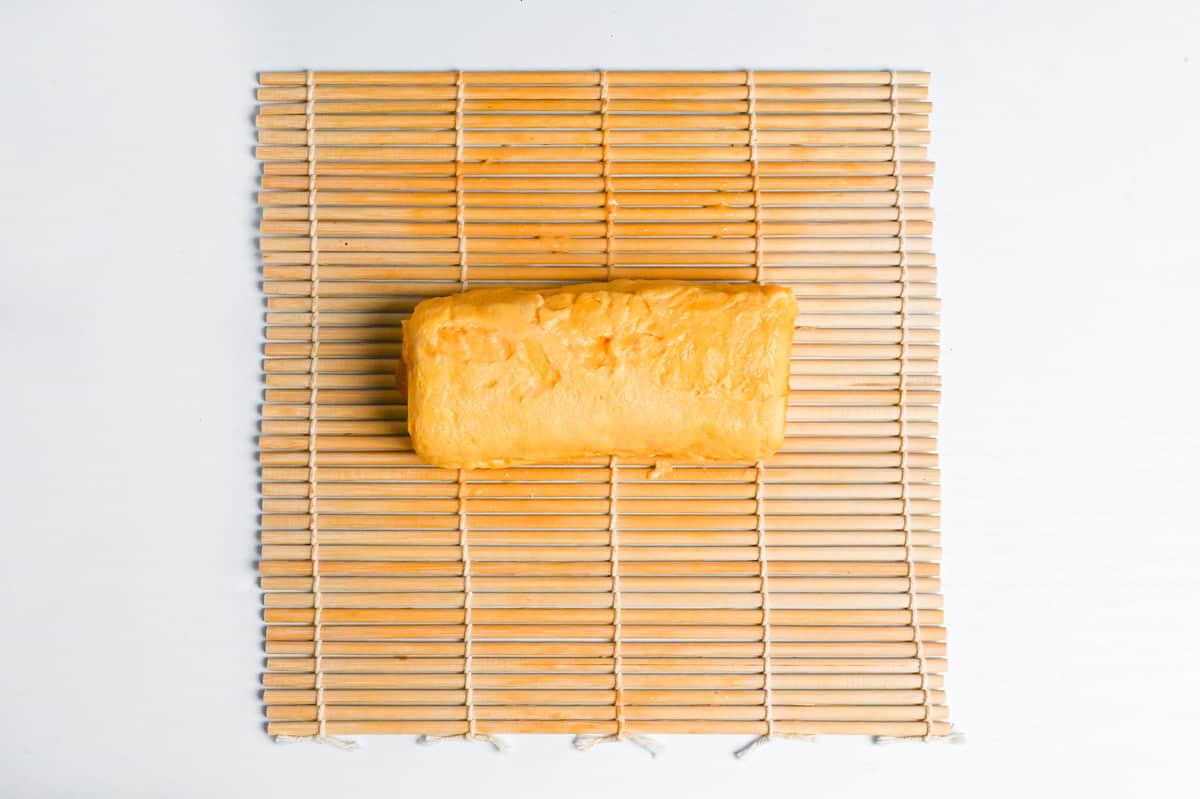
If you have a sushi mat, place the cooked egg rolls on it and let them settle until they form a good shape and pattern.
If you like, you can line the mat with a piece of plastic wrap to prevent any egg from getting in between the gaps.
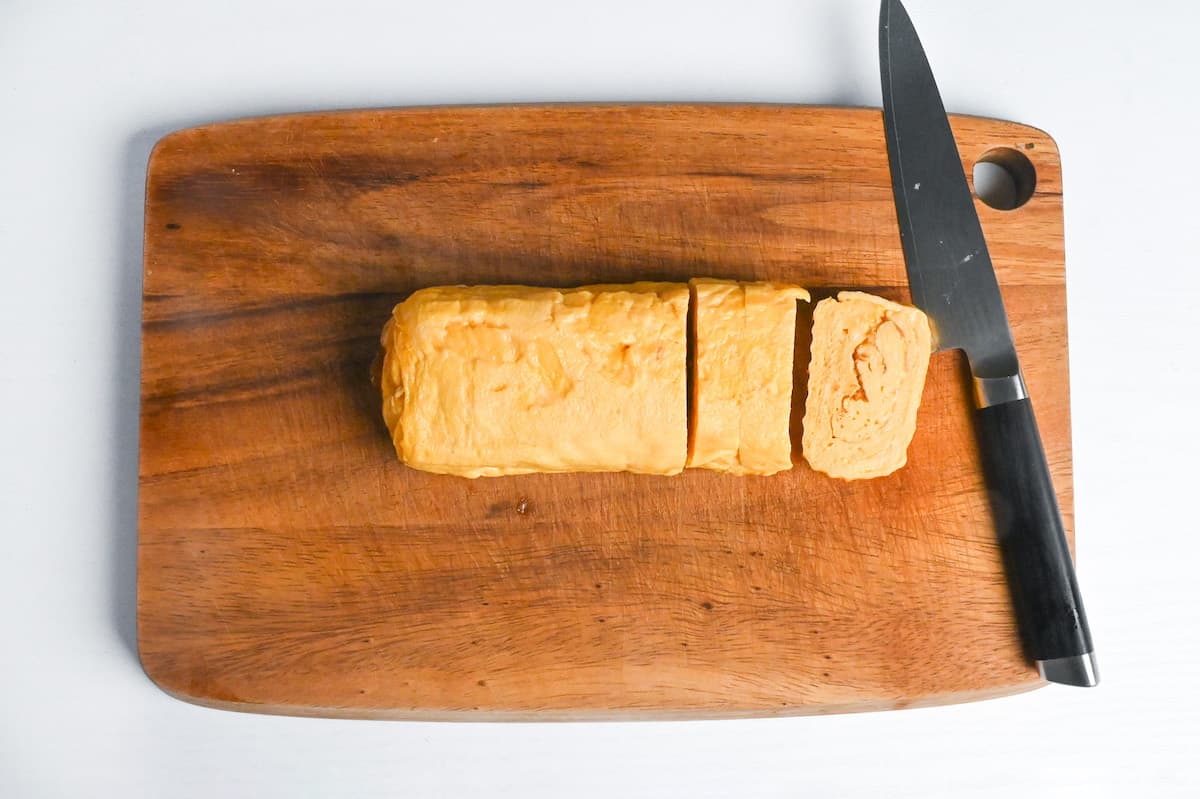
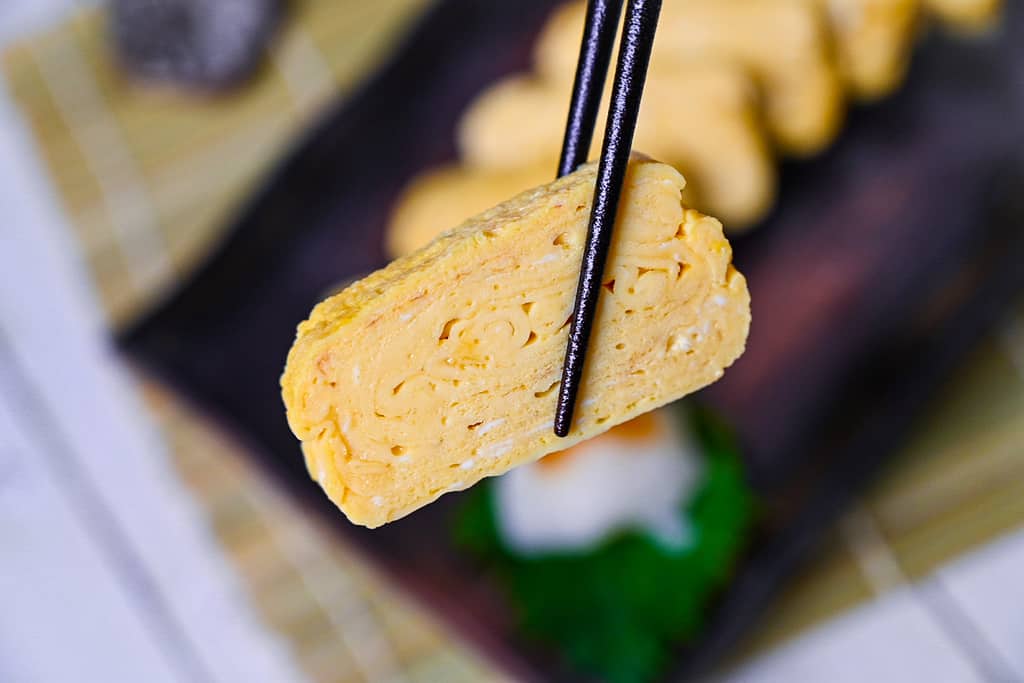
Move it to a chopping board. Cut it into approximately 1-inch thick slices.
How to Store
In my honest opinion, there’s nothing quite like savoring Dashimaki Tamago fresh off the stove. The rich aroma and the pronounced flavor of the broth are simply unmatched. Unfortunately, it’s not suitable for storage.
However, if you cannot consume it immediately or cannot finish it, remove it from the heat, wrap it in plastic wrap to prevent it from drying out, and place it in a clean storage container in the refrigerator.
It is best consumed within 24 hours.
I hope you enjoy this Dashimaki Tamago recipe! If you try it out, I’d really appreciate it if you could spare a moment to let me know what you thought by giving a review and star rating in the comments below. It’s also helpful to share any adjustments you made to the recipe with our other readers. Thank you!
More Japanese Side Recipes
- Beef Shigureni (Simmered Wagyu with Ginger and Gobo)
- Japanese Hijiki Seaweed Salad (Hijiki no Nimono)
- Simmered Kiriboshi Daikon Radish
- Japanese Simmered Pumpkin (Kabocha no Nimono)
Want more inspiration? Explore my Side Dish Roundup Post for a carefully selected collection of tasty recipe ideas to spark your next meal!

Dashimaki Tamago (Japanese Rolled Omelette with Dashi)

Ingredients
- 4 egg
- 3 tbsp dashi stock check out my homemade dashi recipe here. (Vegetarians can use plant-based dashi)
- 4 tsp mirin
- 1 tsp sugar
- ¼ tsp salt
- ½ tsp Japanese soy sauce (koikuchi shoyu)
- 1 tsp cooking oil
- 1 tbsp grated daikon radish (daikon oroshi) optional
The ingredient brands and tools I trust are in my Japanese pantry guide and my cooking tools guide.
Can’t find certain Japanese ingredients? See my substitution guide here.
Instructions
- Crack 4 egg into a bowl and beat lightly with chopsticks in a back and forth motion to break up the yolks and whites. Avoid whisking in a circular motion as this can form too many bubbles.

- In a separate medium-sized bowl, mix 3 tbsp dashi stock, 4 tsp mirin, 1 tsp sugar, ¼ tsp salt and ½ tsp Japanese soy sauce (koikuchi shoyu). Mix thoroughly until the salt and sugar are dissolved.
- Place a sieve on top of the bowl and pour the eggs into the dashi mixture. Mix gently to prevent too many air bubbles forming.
- Pour 1 tsp cooking oil into a tamagoyaki (rectangular) pan and place on the stove over a medium heat. Use a piece of kitchen paper to spread the oil around the pan and wipe away the excess. Keep the kitchen paper close-by, we will re-use it to lightly grease the pan later.
- Once the pan is heated, pour the egg mixture into the pan until the base is coated in a thin, even layer. It should be thin enough that it cooks quickly, but not so thin that it breaks. If you see air bubbles, pierce them with chopsticks.If you notice some parts cooking too quickly or you realize it's getting too hot, lift the pan off the heat temporarily and readjust as necessary. (Try and avoid changing the temperature unless absolutely necessary.)
- When it's half cooked, begin to roll the egg starting from the back of the pan first and rolling towards you. The first step is to lightly pinch the edge furthest from you. Then, with your other hand holding the panhandle, make a gentle scooping motion to help flip the far edge over and start your roll. (Don't rely purely on the chopsticks to fold it over, otherwise it will surely break.)
- Repeat this action to keep rolling the egg until it reaches the edge of the pan closest to you, and then use the kitchen paper from earlier to grease the empty space. Push the rolled tamagoyaki back to the far end of the pan and lightly grease the remaining side.
- Pour another layer of the egg mixture into the pan and gently lift the rolled piece while tilting the pan so that some of the mixture goes underneath. This will create a seamless roll.
- Tilt the pan again to make sure the rest of the mixture is flat and even. Once again wait for it to become half cooked, popping air bubbles and lifting the pan off the heat when you feel it's necessary.
- Roll and repeat until you've used all of the egg mixture.
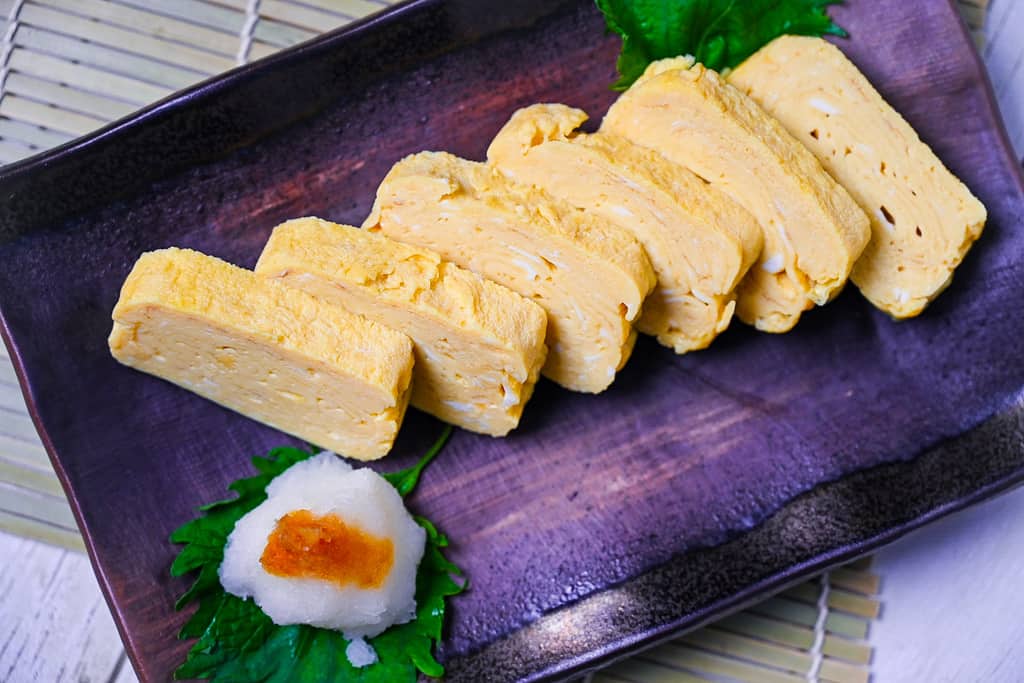
- Once it’s done, transfer the dashimaki tamago to a inverted bamboo sushi mat (this will make a striped pattern on the surface.) Press into shape and then transfer to a chopping board.
- Cut into slices approx 1 inch pieces and served with 1 tbsp grated daikon radish (daikon oroshi).
- Enjoy!
This is amazing!
Have been making these for sushi and always felt that it never tastes quite the same- never knew a little dashi could bring this such a long way!
Thank you! x
You’re welcome, I’m glad you enjoyed the recipe! Thank you for the kind words and generous rating 🙂
Delicious! Separate mixing of dashi/eggs, + getting rid of air bubbles make a big difference in finished egg texture! Only have a round pan so the shape came out like a football, but great taste! Thank you!
Hi Linda,
Thank you for such a thoughtful comment! I’m really glad the tips helped and that you enjoyed the taste. Really appreciate you making it and sharing your experience! 🙂
Yuto
I was craving tamago and had to click through so much AI and generic “pan-Asian” recipes to find this. Made it. Loved it. And immediately ordered your book 🙂 I made mine in a small non-stick pan so it looked more like a tightly rolled french omelette, but my partner took one (large) bite and he just said WOW. Thank you for this recipe!
Hi TJ,
Appreciate you sticking with the search and finding this one. The fact that your partner’s first response was WOW is honestly the best outcome I could hope for. Thank you so much for ordering the book too! 🙂
Yuto