


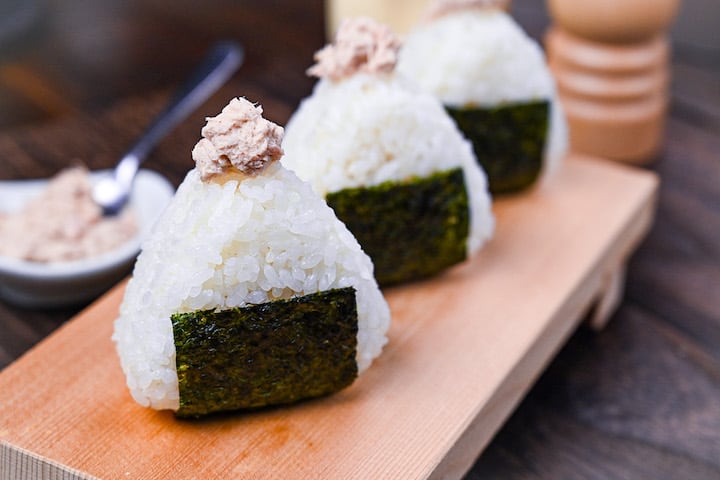
What is Tuna Mayo Onigiri?
This recipe brings that same simple pleasure home, minus any guesswork. I’ll keep the “slightly junky” charm that makes it so delicious, but we’ll also share just enough kitchen tricks to make it perfect every time.
For anyone who’s ever stood in a konbini, peeling back that clever packaging and thinking “I could eat these every day”. Here’s how to make that dream come true.
Visual Walkthrough & Tips
Here are my step-by-step instructions for how to make Tuna Mayo Onigiri at home. For ingredient quantities and simplified instructions, scroll down for the Printable Recipe Card below.
If you prefer to watch the process in action, check out my YouTube video of this Tuna Mayo Onigiri recipe for a complete visual walkthrough!

Start with properly cooked Japanese short-grain rice (uruchimai), which contains approximately 80% amylopectin that gives it the perfect stickiness for onigiri.
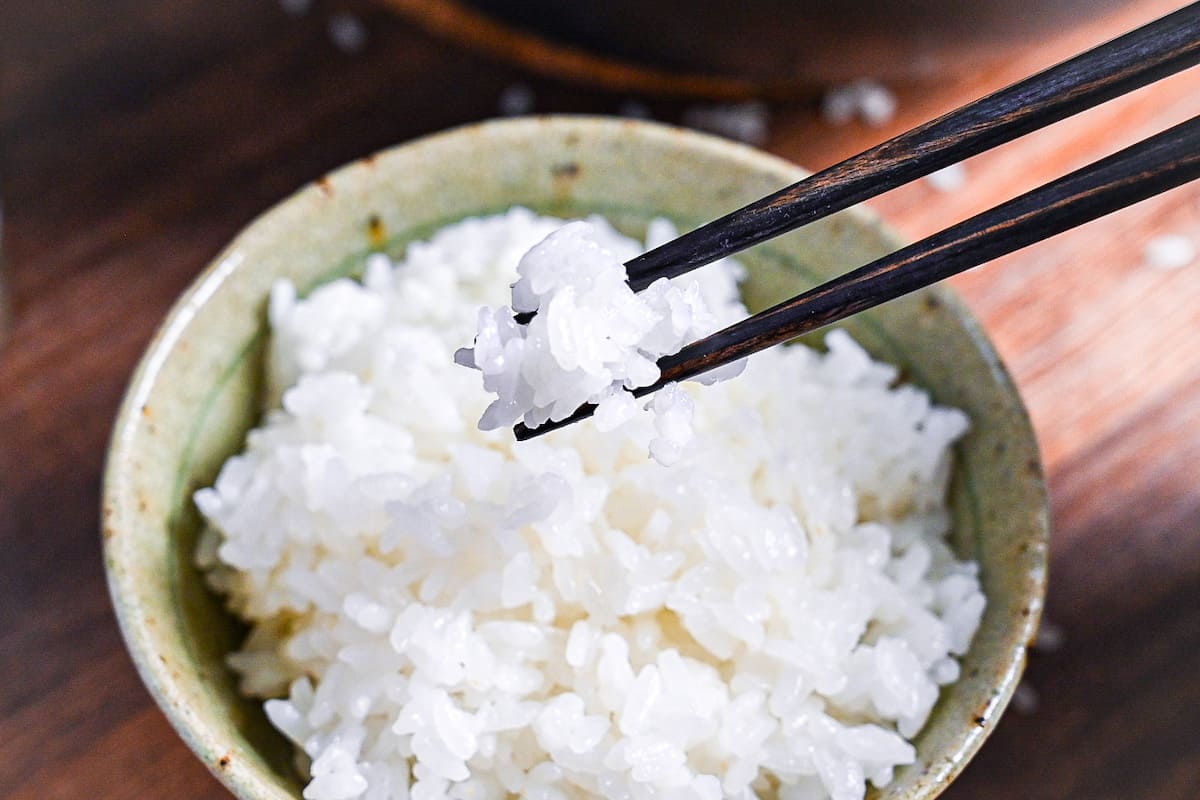
If you have a preferred method, stick with it! If you want to know how I cook rice, check out my Japanese rice-cooking guide. It works with rice cookers and stoves.

First, place a colander or sieve over a bowl. Take canned tuna and squeeze out the excess liquid. This step ensures that your filling isn’t too wet. This thorough moisture removal is absolutely critical; even slight excess moisture can cause your onigiri to fall apart.
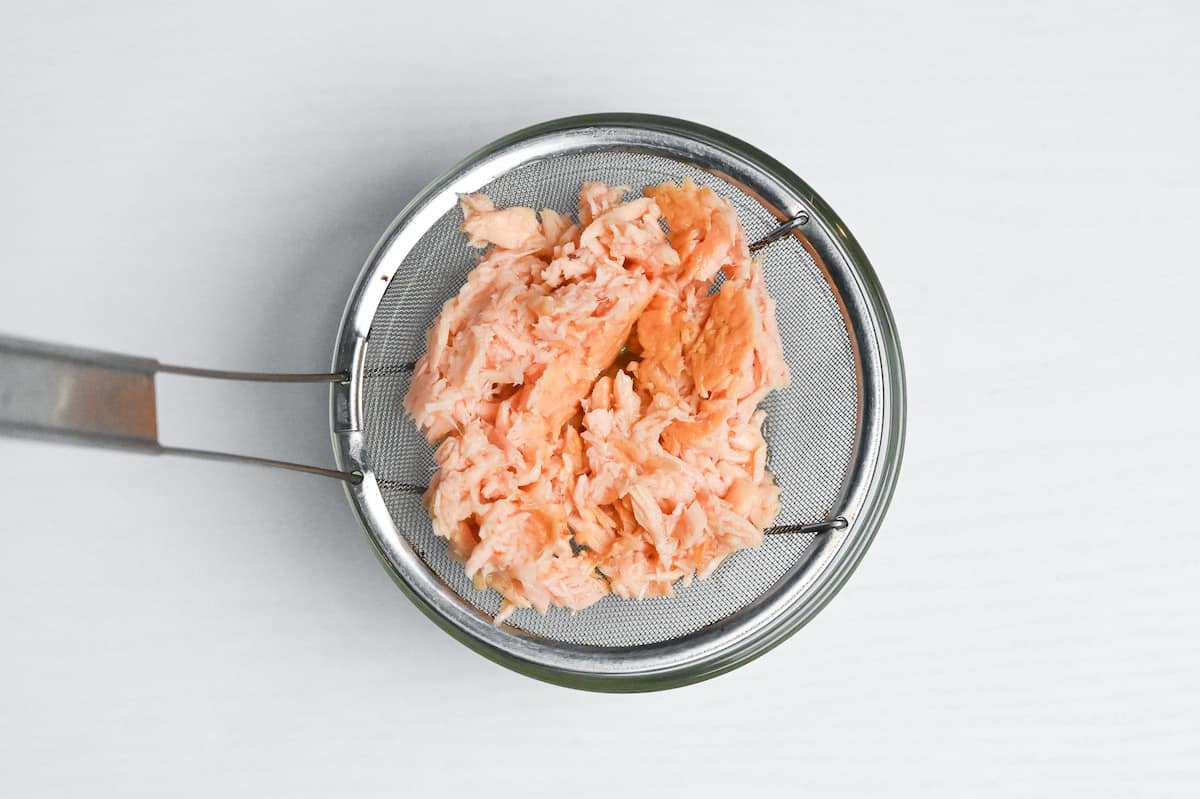
The first step to perfect tuna mayo onigiri is getting the water out right. First, put your canned tuna in a colander or sieve set over a bowl and drain the liquid. For really exceptional results, wrap the drained tuna in paper towels and press it firmly from above.
Thorough liquid removal isn’t just about preventing messiness. It’s about flavor concentration. When excess liquid remains in tuna, it eventually seeps into the rice, creating that dreaded mushy texture.
Although I don’t usually do this, if you want to take it to the next level, try sautéing your tuna with its oil in a frying pan over medium heat for about 5 minutes after draining. This extra step gets rid of any remaining moisture, makes the texture fluffier, and brings out the umami flavors.
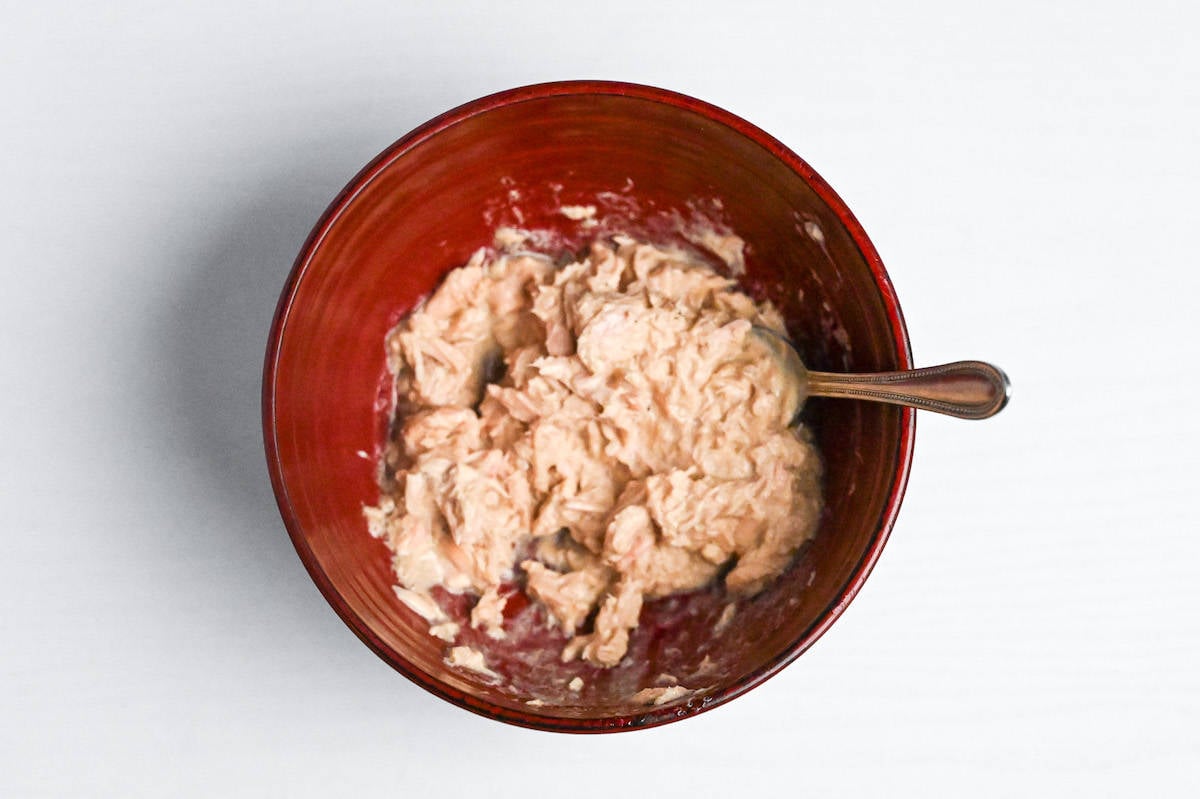
After draining, put the tuna in a bowl. Mix it with Japanese mayonnaise, soy sauce, and black pepper. This combination gives a deliciously creamy and flavorful filling.
If you want to mix things up and add some extra flavor, try adding small amounts of spices like shichimi togarashi (a seven-spice blend), ichimi togarashi (ground red pepper), wasabi paste, or even curry powder. These work great with tuna mayo!
You can also add a pinch of dashi granules for an added layer of umami!
Now, sprinkle your onigiri mold with a bit of salt. This adds a subtle flavor to the rice. Add about 50-60 grams of rice into the mold, which is half the amount of rice you will need for each portion, and make a small dent in the middle for the filling.
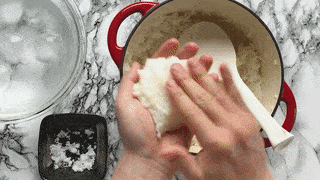
If you’re shaping by hand, wet your hands with cold water and sprinkle them with salt. This prevents sticking. Then take double the amount of rice (the full amount for a portion) and flatten it on your palm before adding the filling.
The most common mistake is pressing the rice too firmly. You want to shape the onigiri with just enough pressure to hold it together. Use a gentle, three-step motion: first loosely gather the rice, then use your palms to create three flat sides, and finally, just smooth the edges. The entire process should only take 3-4 gentle squeezes.
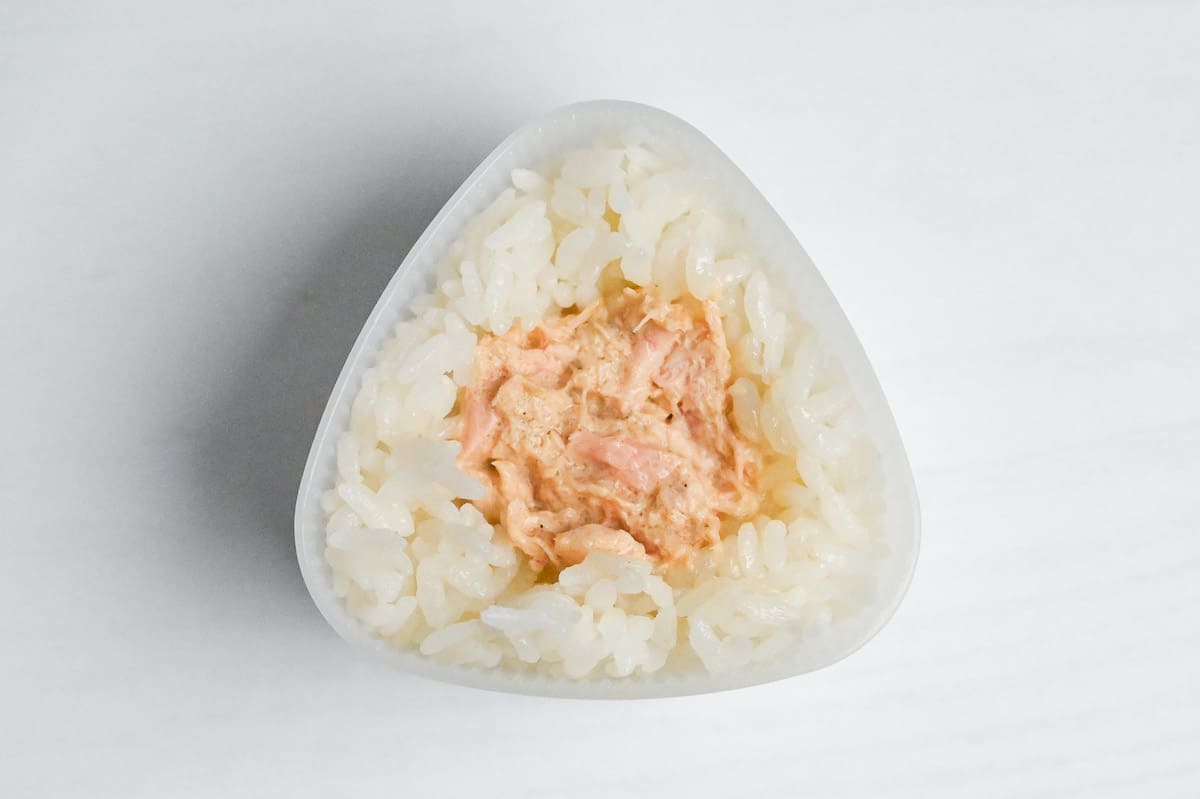
If using a mold, spoon the tuna mayo mixture into the dent you’ve made in the rice.
For structural integrity, the filling should make up no more than 1/5 to 1/6 of the total volume. This ensures enough rice-to-rice contact to keep everything together without overwhelming the delicate structure.
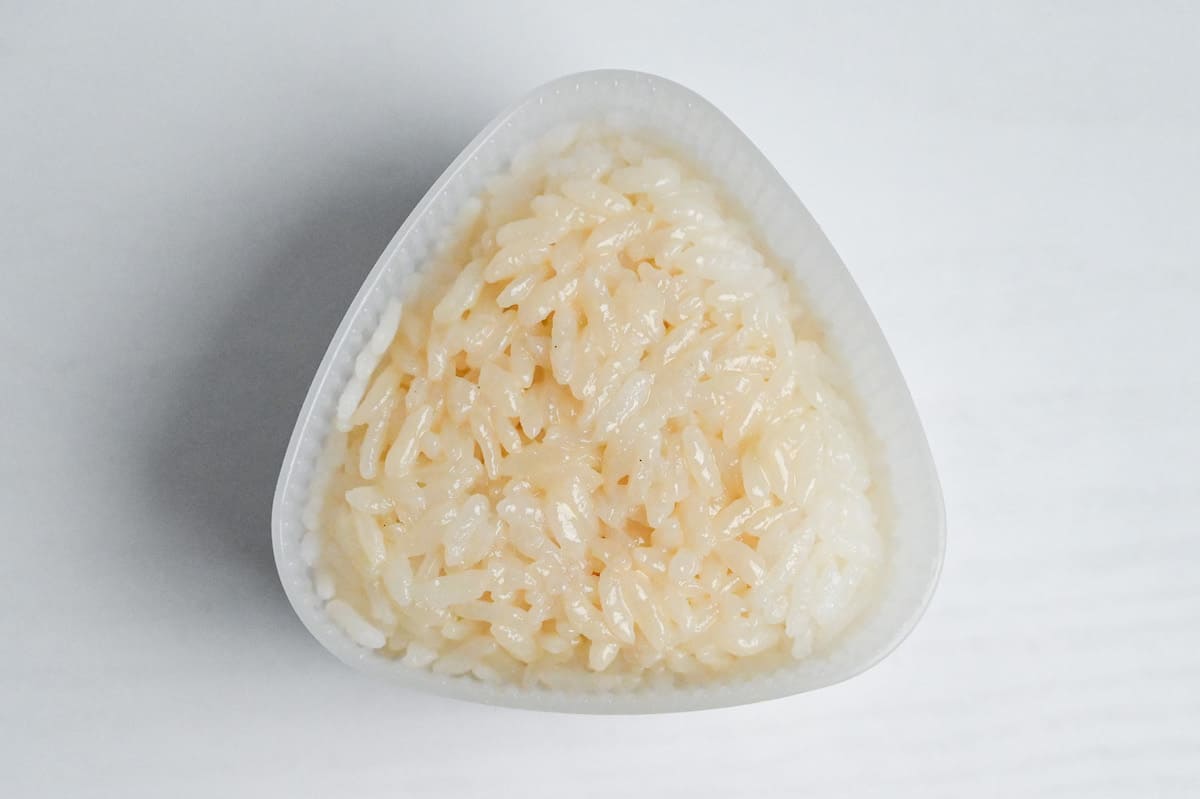
Top the filling with more rice. Use the lid of the onigiri mold to press it down firmly. If you’re shaping by hand, gently fold the rice over to encase the filling. Then, use your folded palm to shape the rice into a triangle. This method keeps the filling snugly inside.
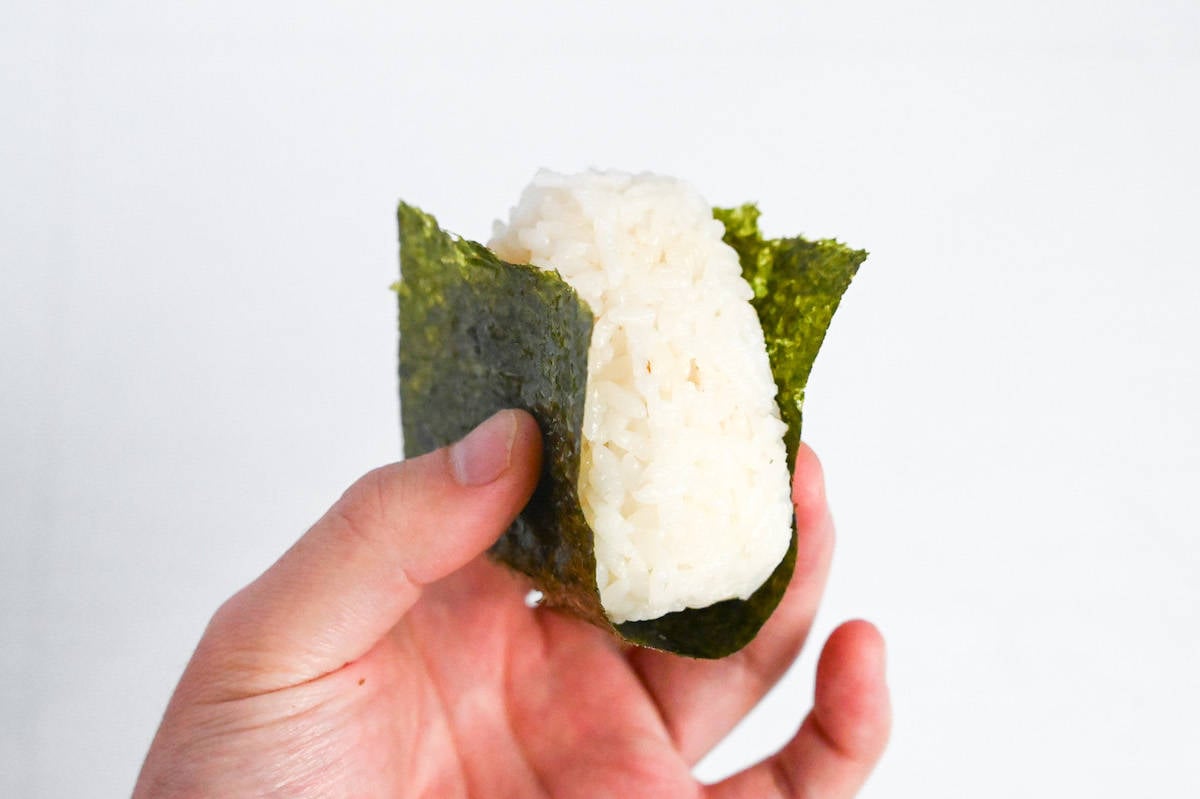
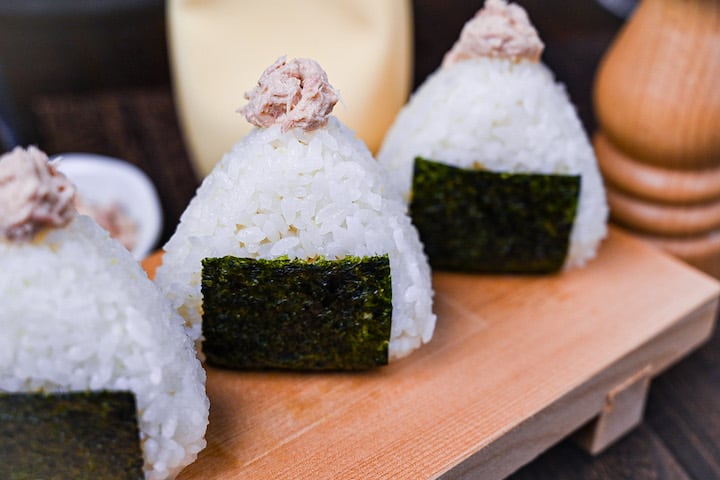
Finally, wrap each onigiri with a strip of nori. The nori adds a nice crunch and a savory sea flavor. Enjoy your onigiri fresh, as a quick snack or a delicious part of your meal!
Jump to Full Recipe MeasurementsEssential Tips & Tricks
- Ultimate water removal: Squeeze tuna firmly! This single step prevents soggy onigiri more than anything else.
- Perfect rice temperature: Work with rice at 50-60°C (122-140°F)! Warm enough to stick but cool enough to handle comfortably.
- Gentle pressure only: Shape with 3-4 light squeezes; pressing too hard creates dense, gummy rice that’s unpleasant to eat.
- The 80/20 rule: Keep filling to just 20% of total volume for structural integrity. Overfilling leads to breakage.
With these simple tips in mind, you’re set for success every time you make Tuna Mayo Onigiri.
Meal Prep & Storage
Tuna mayo onigiri can be prepared ahead with some important modifications:
- Component Prep: The most effective meal prep approach is to prepare the components separately. Make the tuna mayo filling ahead of time and store it refrigerated for up to 2 days. Cook the rice fresh when you’re ready to assemble, as freshly cooked rice creates the best texture for onigiri.
- Full Onigiri Prep (Freezer Method): If you need complete onigiri prepared ahead, the freezer is your best option. Shape the onigiri without nori, let them cool completely, then wrap each tightly in plastic wrap and freeze. They’ll maintain quality for 2-3 weeks. To eat, microwave from frozen for 1-2 minutes at 600W (time depends on size), then add fresh nori just before eating.
For storage, keep onigiri at room temperature for no more than 4 hours in cool weather and just 1-2 hours in summer. For food safety with tuna mayo fillings, use cold packs in lunch boxes.
Never store onigiri with nori already attached in the refrigerator; the nori will become soggy, and the rice will harden. Always add nori just before eating for the best texture experience.
Serving Suggestions
I hope you enjoy this Tuna Mayo Onigiri recipe! If you try it out, I’d really appreciate it if you could spare a moment to let me know what you thought by giving a review and star rating in the comments below. It’s also helpful to share any adjustments you made to the recipe with our other readers. Thank you!
More Onigiri Recipes
- Yaki Onigiri (Grilled Rice Balls)
- Japanese Salmon Rice Balls (Sake Onigiri)
- “Okaka Onigiri” Bonito Flakes Rice Ball
- Chicken Soboro Onigiri (Ground Chicken Rice Ball)
Hungry for more? Explore my onigiri recipe collection to find your next favorite dishes!
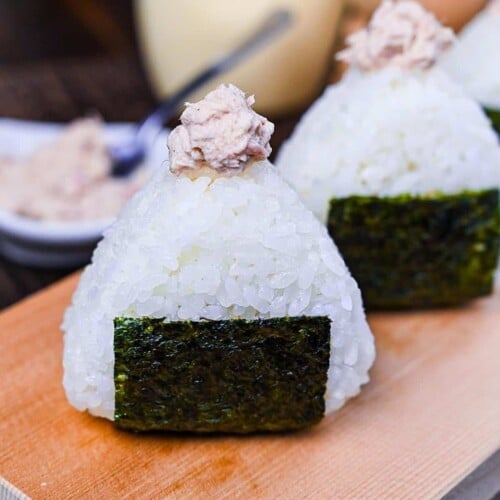
Tuna Mayo Onigiri (Japanese “Sea Chicken” Rice Balls)

Equipment
- Zojirushi Rice Cooker
Ingredients
- 700 g cooked Japanese short-grain rice preferably freshly cooked, still warm)
- 80 g canned tuna oil-packed for flavor or water-packed for lighter option, thoroughly drained
- 1 tbsp Japanese mayonnaise or regular mayonnaise
- 1 tsp Japanese soy sauce (koikuchi shoyu)
- 1 pinch ground black pepper freshly ground if possible
- 6 strips roasted seaweed for sushi (nori) wrap right before eating for crispiness
The ingredient brands and tools I trust are in my Japanese pantry guide and my cooking tools guide.
Can’t find certain Japanese ingredients? See my substitution guide here.
Instructions
- Place a colander or sieve over a bowl and squeeze the excess liquid out of 80 g canned tuna.

- Pour away the liquid and place the tuna into a bowl. Mix with 1 tbsp Japanese mayonnaise, 1 tsp Japanese soy sauce (koikuchi shoyu) and 1 pinch ground black pepper.
- Sprinkle the onigiri mold with salt and place about 50-60g of rice inside. Make a dent in the middle and add about 2 tsp of tuna mayo filling. (If shaping by hand, wet your hands with cold water and sprinkle with salt. Take 100-120g of rice and press it flat before placing the filling in the middle.)
- Top with an equal amount of rice and press it using the lid of the onigiri mold.
- If shaping by hand, fold the rice over to seal the filling and use your folded palm to press the rice into a triangle shape

- Wrap each onigiri with nori and enjoy!
Video
Notes
- Make standard triangle onigiri 100-120g in size; reduce to 60-80g for children’s portions or light snacks.
- Enhance the tuna mayo mixture with wasabi, shichimi, curry powder for spicy variations.
- Use a pinch of dashi granules (about 1/8 teaspoon) to enhance umami.
- Work with rice at ideal temperature (50-60°C/122-140°F).
- Store by wrapping completed onigiri (without nori) in plastic wrap and refrigerate for up to one day or freeze for 2-3 weeks; always add nori just before eating and use cold packs when packing for lunch.
- Serving ideas: Authentic miso soup, Mushroom miso soup, Pickled cucumber, Hiyayakko (cold tofu).
Leave a rating and a comment