Disclaimer: This post may contain Amazon affiliate links. Sudachi earns a small percentage from qualifying purchases at no extra cost to you. See disclaimer for more info.
Featured Comment:
“Made the recipe yesterday with 31% hydration. My first time making it, the dough turned out quite brittle as I expected at that low hydration but they still ended up great 👍 Also love the plastic bag stomping method, a creative way to work with such a stiff dough.”
– @Reversed82 (from YouTube)
This recipe is one I would love to send to myself 10 years ago when I lived in England when I had a craving for Japanese-style ramen but couldn’t.
The ingredients needed? Water, high gluten flour, salt, and alkaline agent!

Oh, and a sturdy manual pasta machine!
Yes, that’s it!
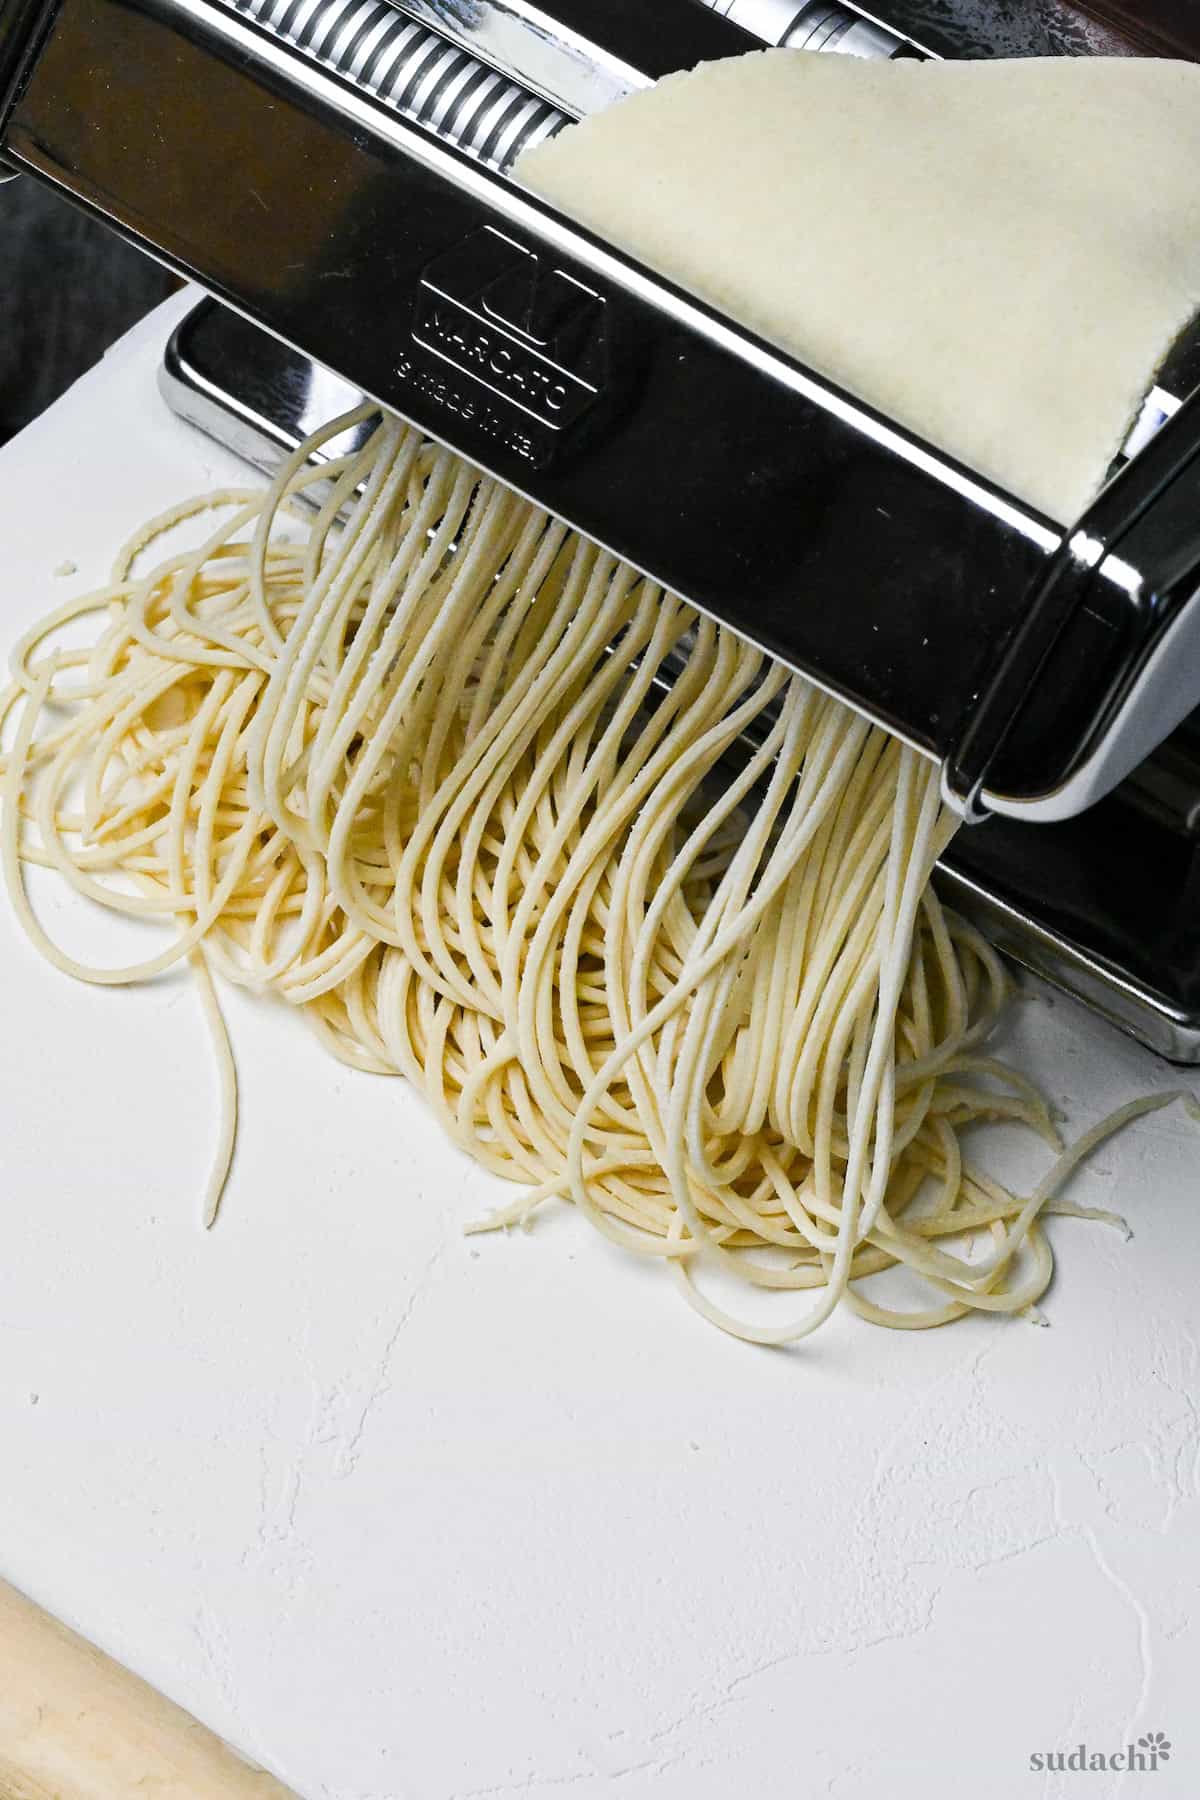
I’m currently living in Japan, so I have the pleasure of easy and cheap access to fresh ramen noodles from supermarkets. However, I’m going to keep making my own from now on.
Wanna know why? Keep reading this article!
What Are Ramen Noodles?
Ramen noodles, also known as “Chukamen (中華麺)” (which means “Chinese-style noodles” in Japanese), trace their roots back to China, as the name suggests.
What makes ramen noodles so special is the addition of lye water, which gives the noodles a unique texture and a yellowish hue. So, simply put, the noodles would simply not be the same without it!

Ramen has become a real staple in Japanese cuisine. It’s the foundation for so many delicious dishes, like ramen, yakisoba, tsukemen, and hiyashi chuka. Its versatility and unique taste have made it an integral part of modern Japanese cuisine.

How I Developed This Recipe
Fresh ramen noodles are a real treat if you live outside of Japan. Regular supermarkets simply don’t carry them.
In my personal opinion, while dried udon and soba noodles are tasty in their own way, ramen noodles are in a league of their own. There is a substantial difference in quality between fresh noodles and other types. When it comes to instant noodles, they are so different that it is even a wonder they even share the name “ramen” at all.
I’ve poured my heart into creating a ramen noodle recipe that captures the essence of those hard-to-find fresh noodles. I wish I could send this recipe back in time to my younger self, living far from home and craving a bowl of authentic ramen.
Through countless experiments and trials, I’ve discovered the secrets to making truly delicious homemade ramen noodles.
Key Ingredients & How to Choose Them
The beauty of making homemade ramen noodles lies in the simplicity of the ingredients. With just four essential components – flour, water, salt, and lye water powder – you can create noodles that rival those of your favorite ramen shop.
Let’s dive into each ingredient, exploring their roles and potential alternatives:
Flour
The flour used for ramen noodles is “high gluten flour (強力粉).” In other words, bread flour used for bread, pizza, etc.
- Cake Flour (Hakurikiko): Low gluten content and fine particle size. When used in cooking, it produces a “fluffy” and “crispy” texture. Major uses of light flour include cakes and tempura.
- All-Purpose Flour (Churikiko): Everything in the middle. It is commonly used for udon and somen noodles due to its moderate viscosity and elasticity, resulting in a slightly chewy texture.
- Bread Flour (Kyorikiko): High gluten content and coarse particle size. This is the one you need for ramen noodles.
However, some stores may blend all-purpose flour with bread flour, aiming for some specific texture. While this may work if you exactly know how you want your noodles to be, it’s best to stick with plain bread flour first.

Water
You might think that all water is the same, but there are two types: soft water and hard water. In Japan, most of the tap water and mineral water we drink is soft water.
Soft water has a low mineral content, which softens the texture of the noodles and allows them to stretch well. Hard water, on the other hand, has a high mineral content, which makes the noodles harder and more difficult to stretch. While this one isn’t super important, I’d recommend using soft water when making ramen noodles if you can!
Another key in producing consistent and high-quality noodles is maintaining the dough kneading temperature. The ideal temperature range for kneading ramen noodle dough is between 20-30℃ (approximately 70-85°F).

Salt
The initial step in creating the perfect ramen noodles is to prepare a brine by combining water, lye water powder, and salt. To ensure a smooth and successful process, it’s crucial to choose a salt that dissolves easily in water. Steer clear of flaky, coarse salts that are difficult to dissolve, as they may not integrate well with the other ingredients.
When selecting the type of salt for your ramen noodles, I highly recommend reaching for sea salt.

Lye Water (Powder)
In the world of ramen noodles, one ingredient reigns supreme: lye water, also known as Kansui. This alkaline salt solution is the key to unlocking the signature flavor, texture, and color that define authentic ramen noodles. Without Kansui, it’s nearly impossible to achieve the true essence of ramen noodles.
In my recipe, I used lye water powder, which is readily available on Amazon US. This convenient form of Kansui is easy to work with and store. However, you can also find lye water in liquid form, which is equally effective in creating perfect ramen noodles.
For those who may not have access to specialty ingredients, there is a more accessible alternative: baking soda. While baking soda doesn’t produce the same vibrant colors as Kansui and may result in a slightly different texture, it’s an excellent substitute that can be found in regular supermarkets.
Equipment That I Used
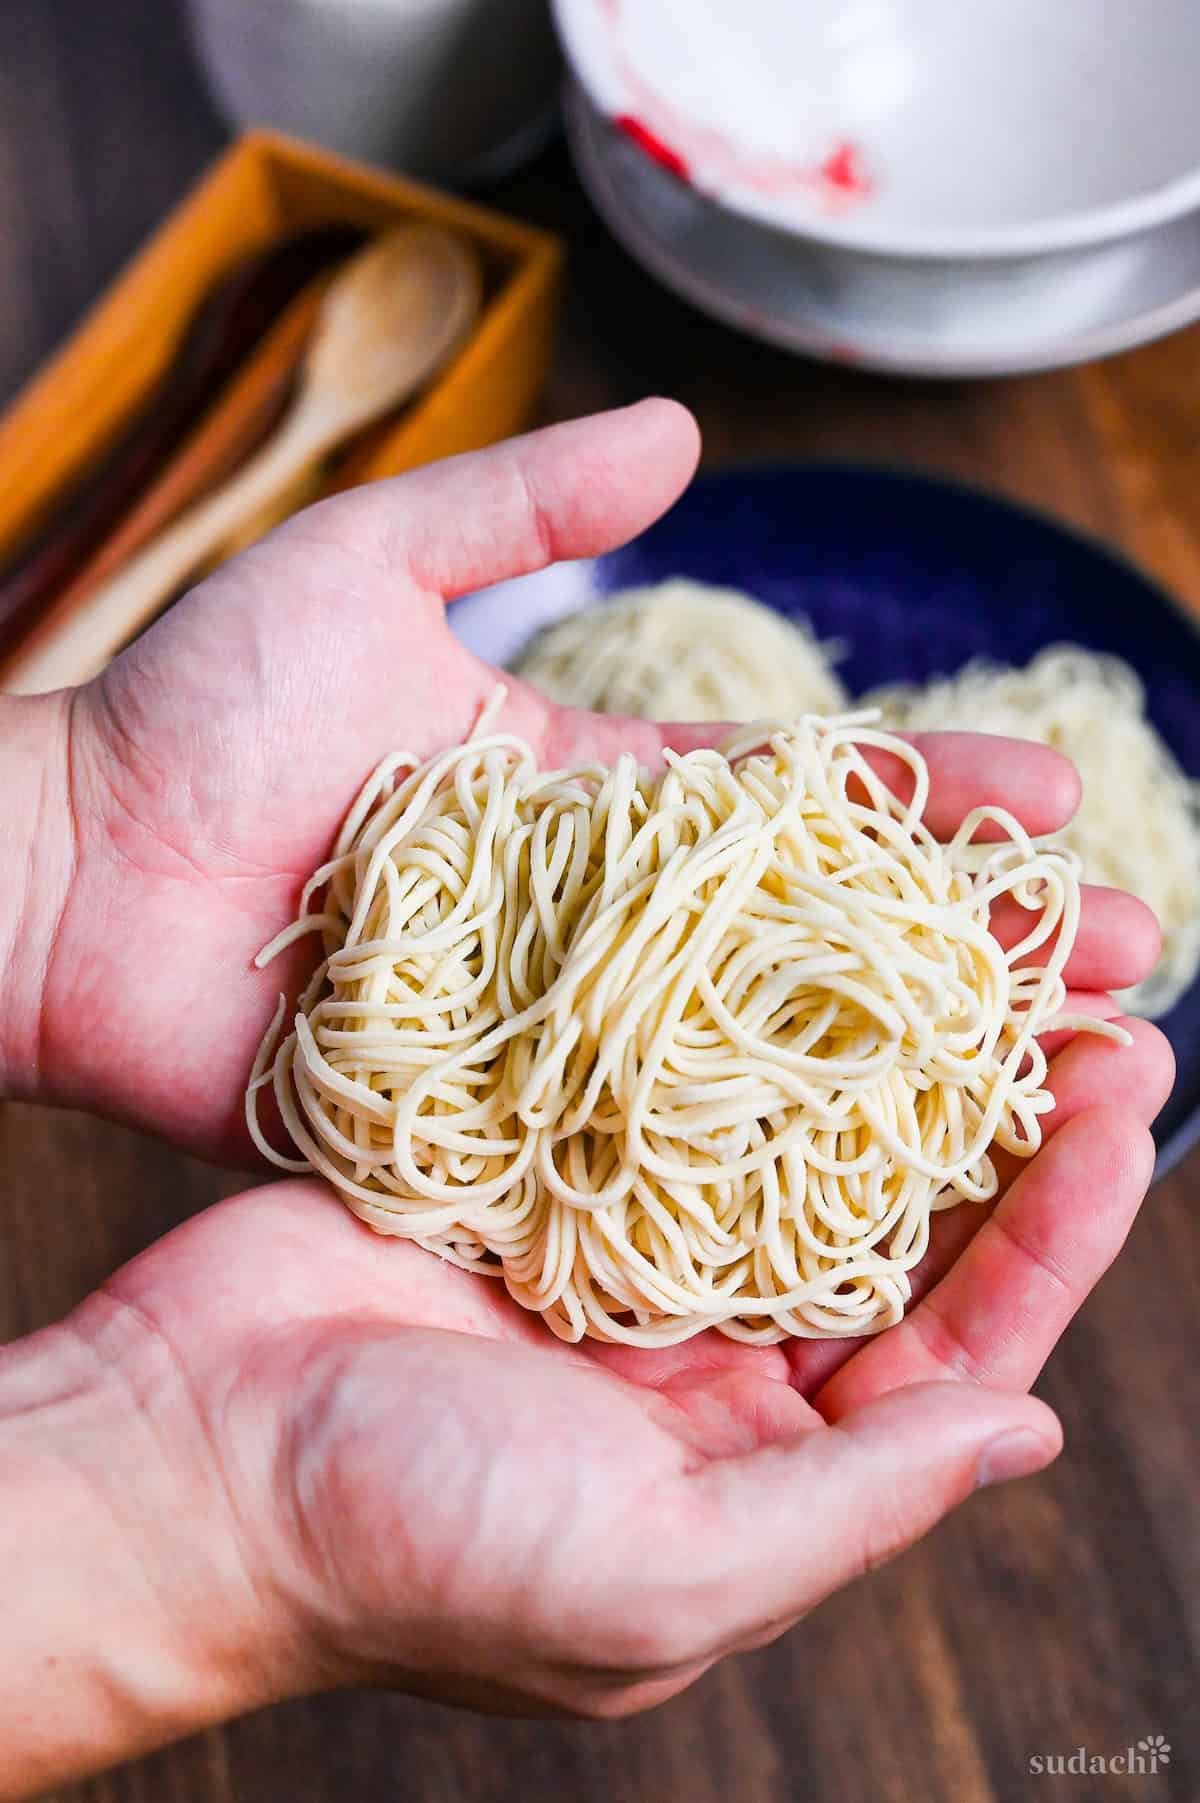
We’ve got some great news for you. You don’t need to spend a fortune on fancy equipment to make delicious homemade ramen noodles. All you really need is a simple manual pasta machine.
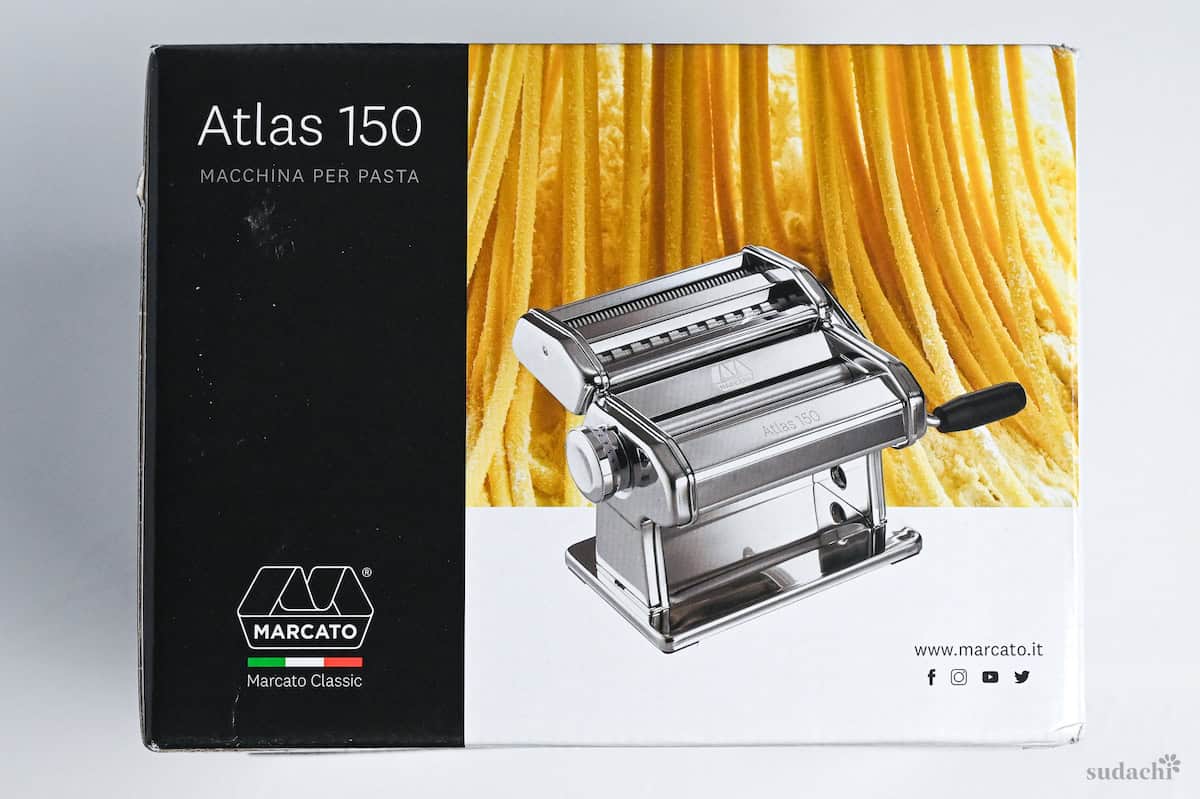
I personally swear by my trusty Atlas 150 pasta machine. This reliable tool has been my go-to for creating perfect ramen noodles time and time again. But don’t worry if you don’t have this specific model—any manual pasta machine will do the trick!
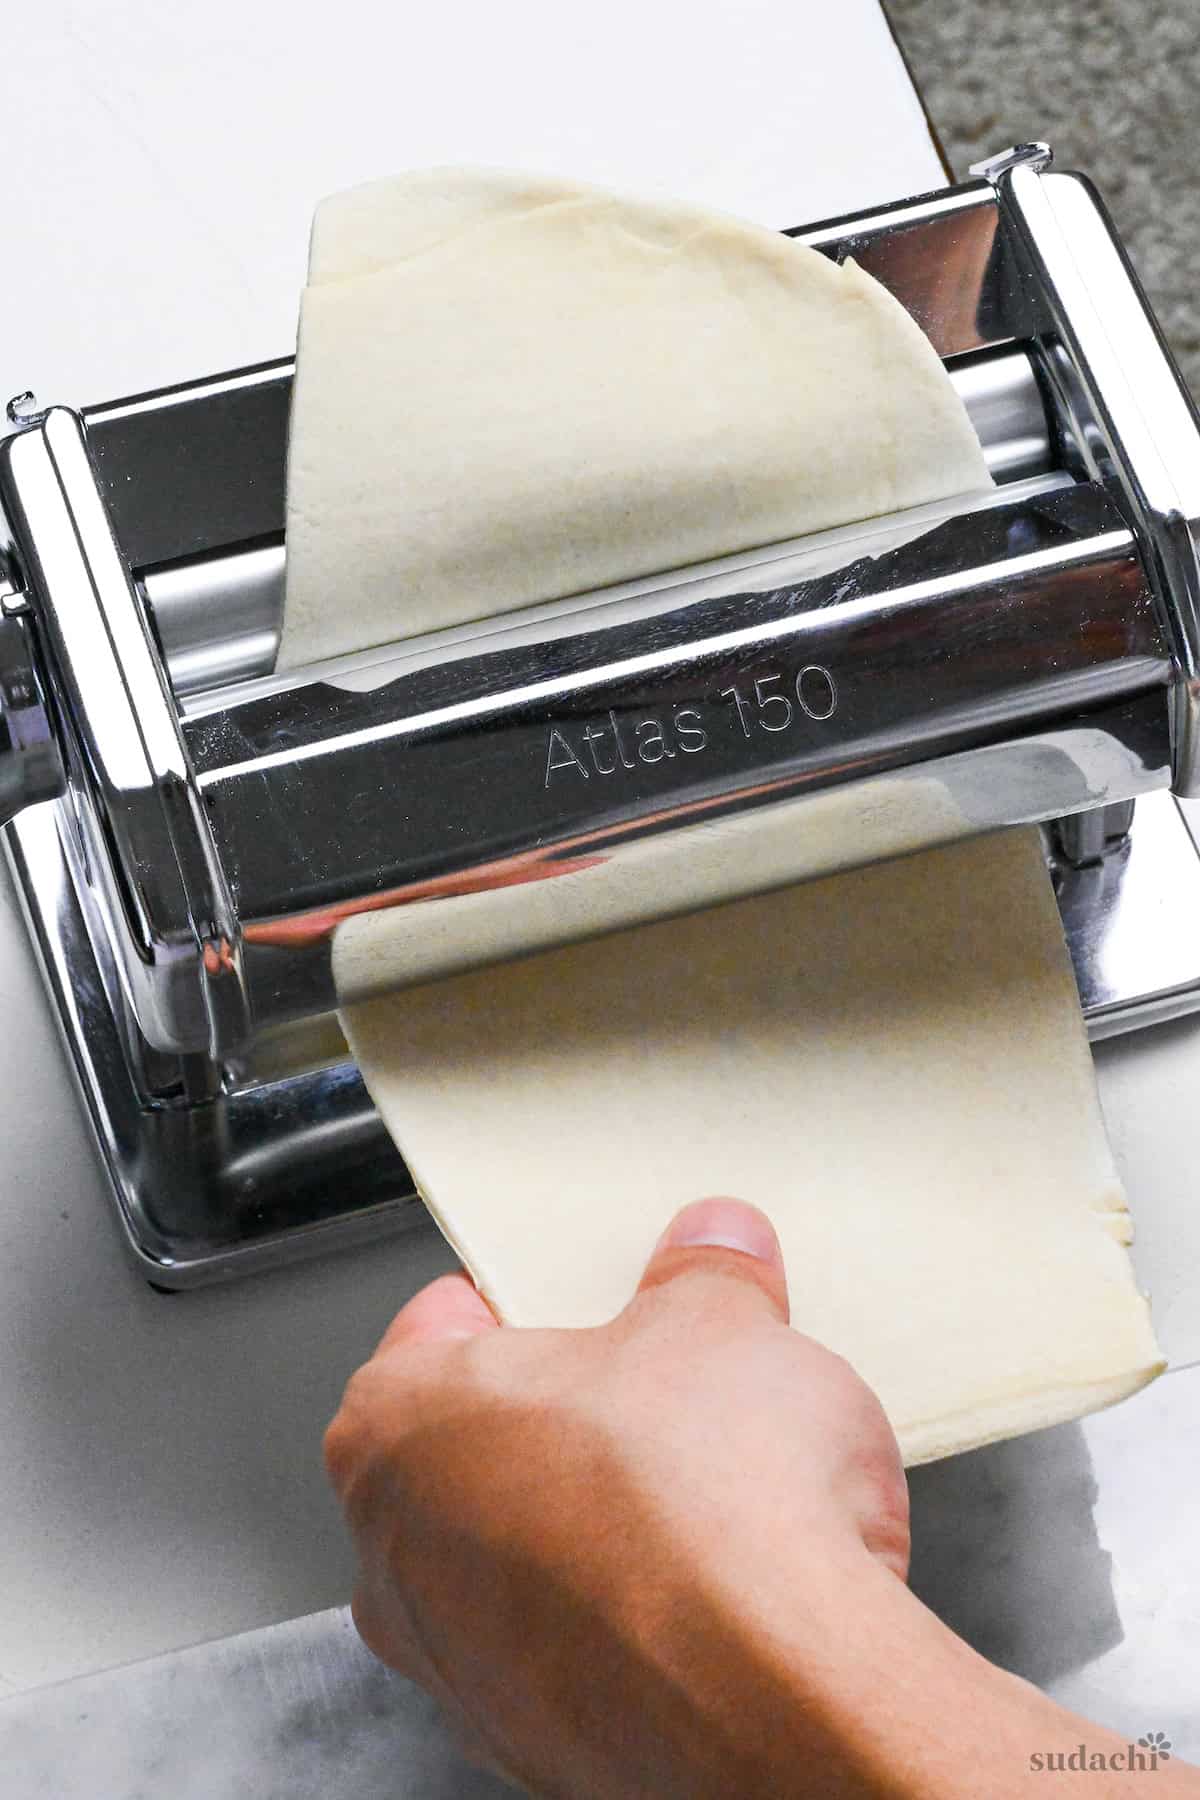
Using a manual pasta machine makes the process of rolling out and cutting your ramen noodle dough so much easier. It allows you to achieve the perfect thickness and ensures consistent results every time.
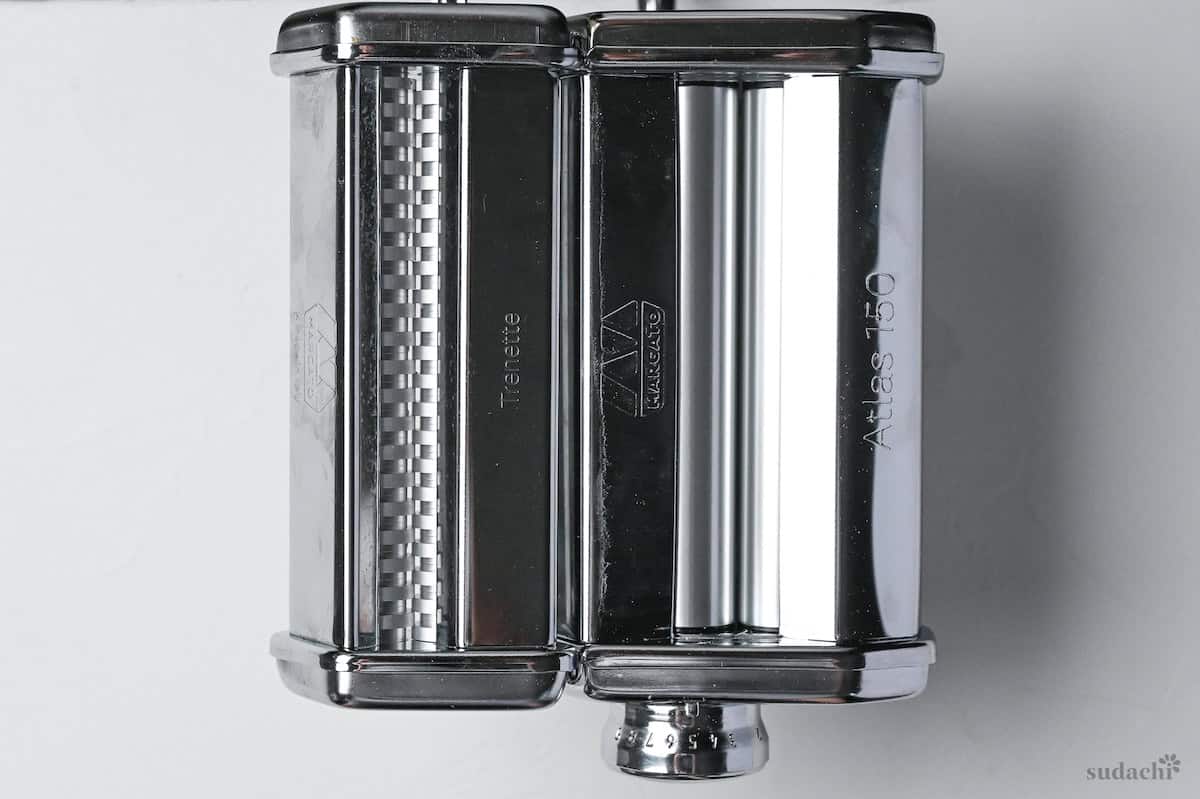
By simply changing attachments, you can enjoy various thicknesses of thin or thick noodles.

I currently own the Spaghetti, Trenette, Lasagnatte, and Cappelllini attachments, but I recommend starting with the spaghetti attachment if you want to make common ramen noodles.
Let’s Talk About Water Ratio
Before we dive into the step-by-step process of making ramen noodles, it’s important to discuss the water addition rate.
Ramen noodles come in all sorts of shapes and sizes! They can be thin, thick, or somewhere in between. And they can be pretty wet or dry, depending on the type. To help you understand these differences, I’ve put together a simple table:
| Ratio | Water Addition Rate | Example |
|---|---|---|
| Low | 30% and below | Hakata Tonkotsu, Shio Ramen, Jiro-Kei |
| Medium | 31-37% | Shoyu Ramen…etc |
| High | 38% and up | Sano Ramen, Kitakata Ramen, Tsukemen |
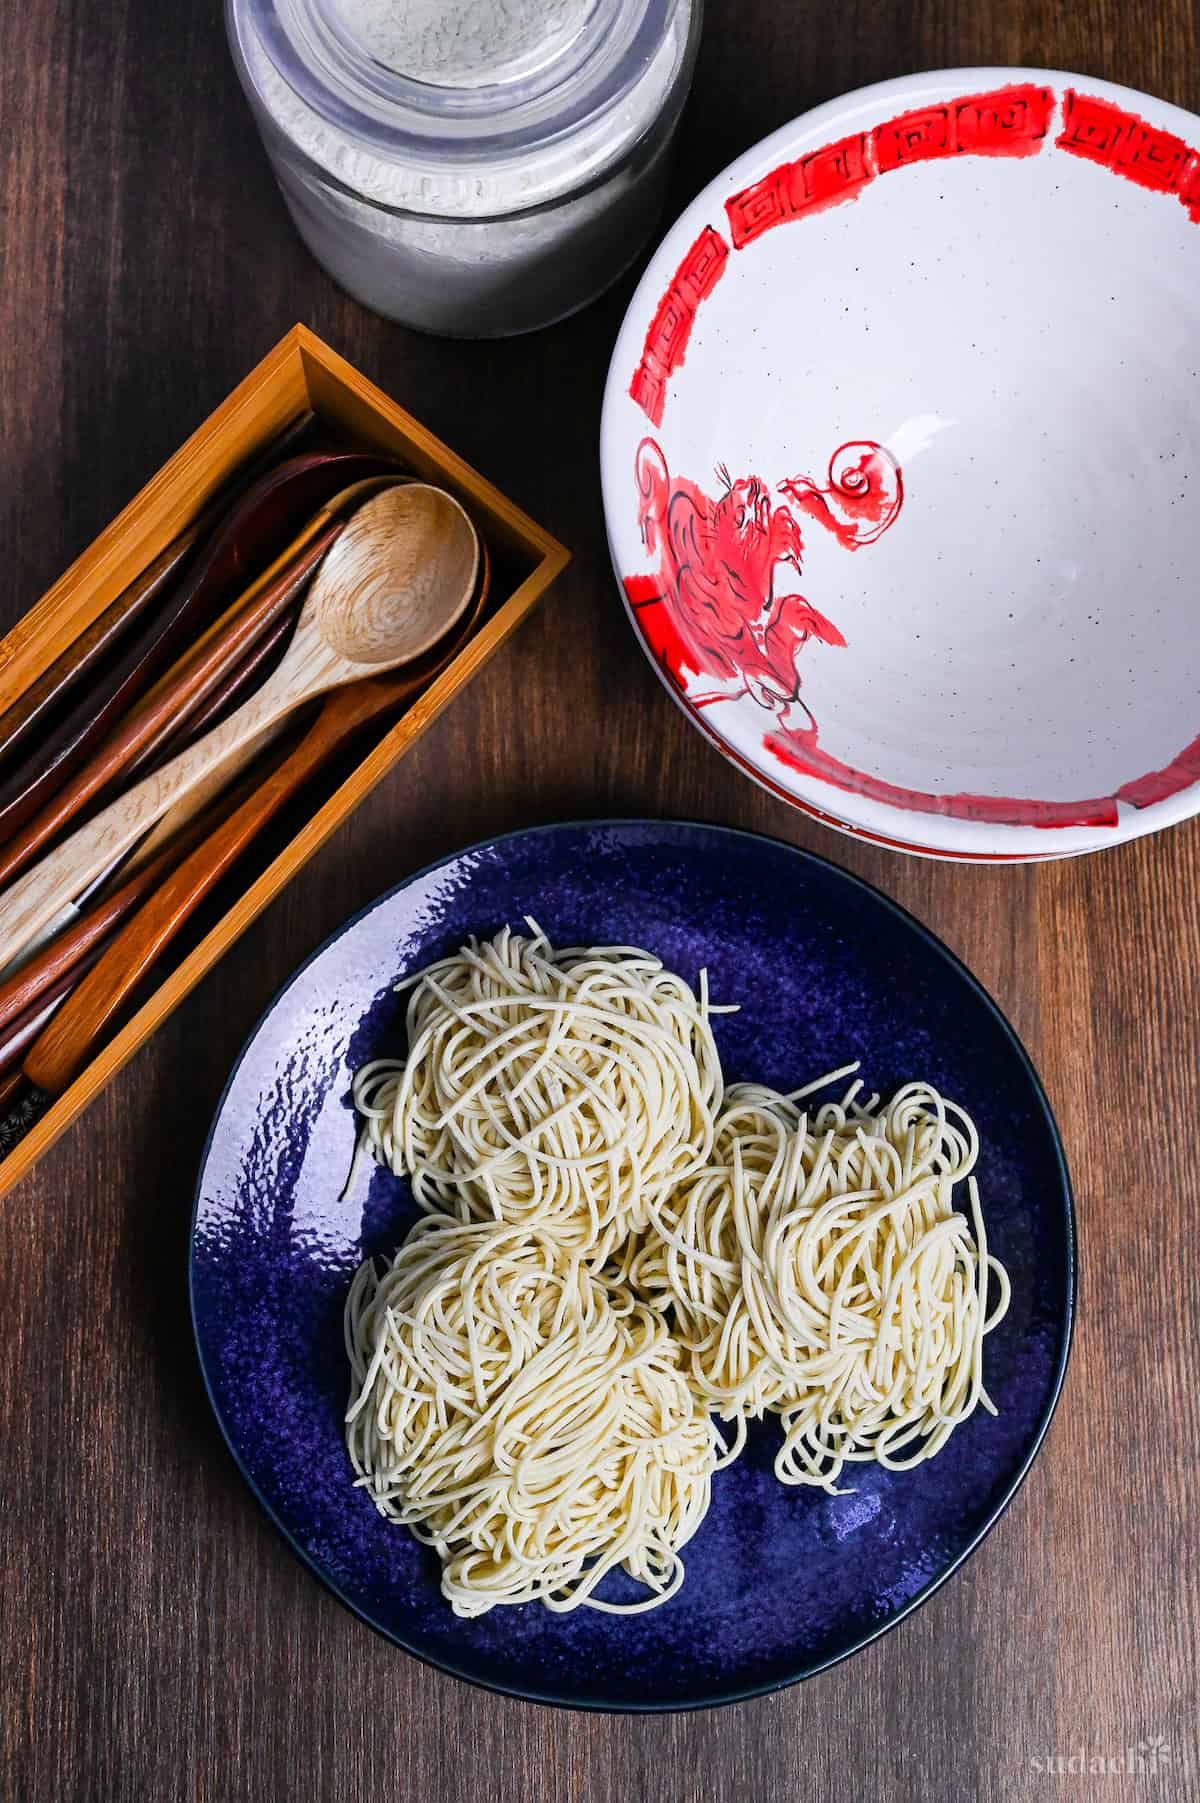
Noodles with a lower water content will have a firmer, chewier texture, while those with a higher water content will be softer and more pliable.
In this recipe, I’ve chosen a water content of 41% (125g/300g) to make the dough easier to work with, especially for beginners. This slightly higher water content will result in noodles that are more forgiving during the rolling and cutting process, as the dough will be more malleable and less likely to tear or break.
However, I encourage you to experiment with different water ratios to find your personal preference. You can check out my experiment logs in the later section!
Visual Walkthrough & Very Important Tips
Here are my step-by-step instructions for how to make Authentic Handmade Ramen Noodles at home. For ingredient quantities and simplified instructions, scroll down for the Printable Recipe Card below.
If you prefer to watch the process in action, check out my YouTube video of this recipe for a complete visual walkthrough!
First, combine the water, lye water powder, and salt in a bowl. I mix them together really well until the salt and lye water powder are fully dissolved and everything is evenly blended.
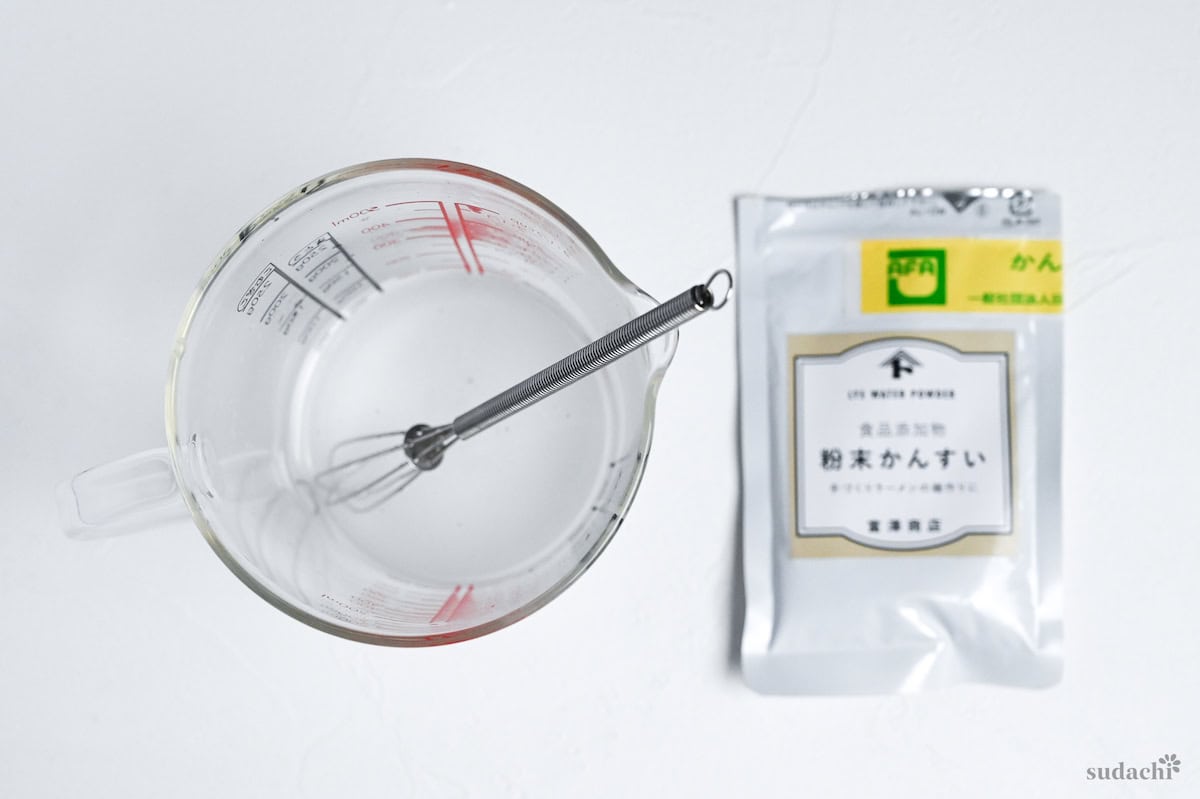
If you use liquid lye water, follow the dilution rates on your package.
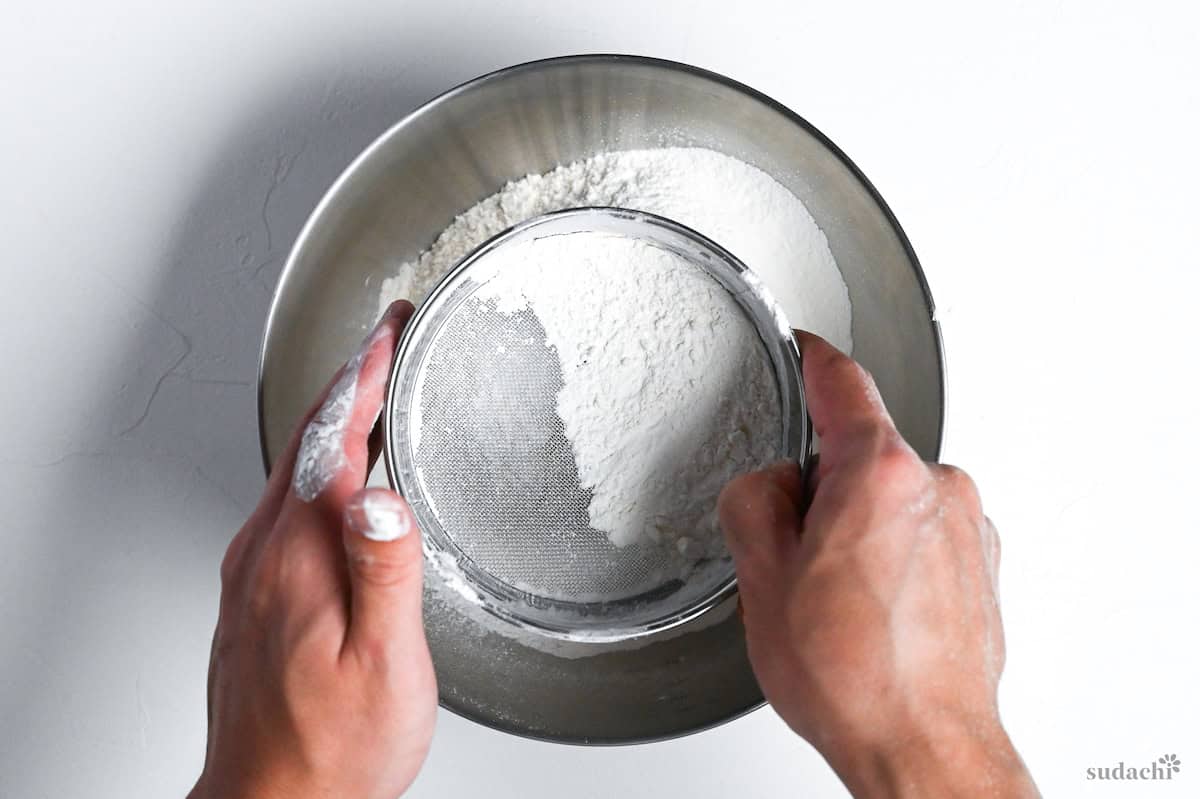
Next, sift the bread flour into a large bowl.
Gradually add the water mixture to the flour, mixing with hands or chopsticks after each addition.
Making homemade noodles is very sensitive. Be sure to weigh the flour carefully in order to track the water addition rate.

Keep adding the water mixture and mixing until the dough becomes crumbly with little to no dry flour left.
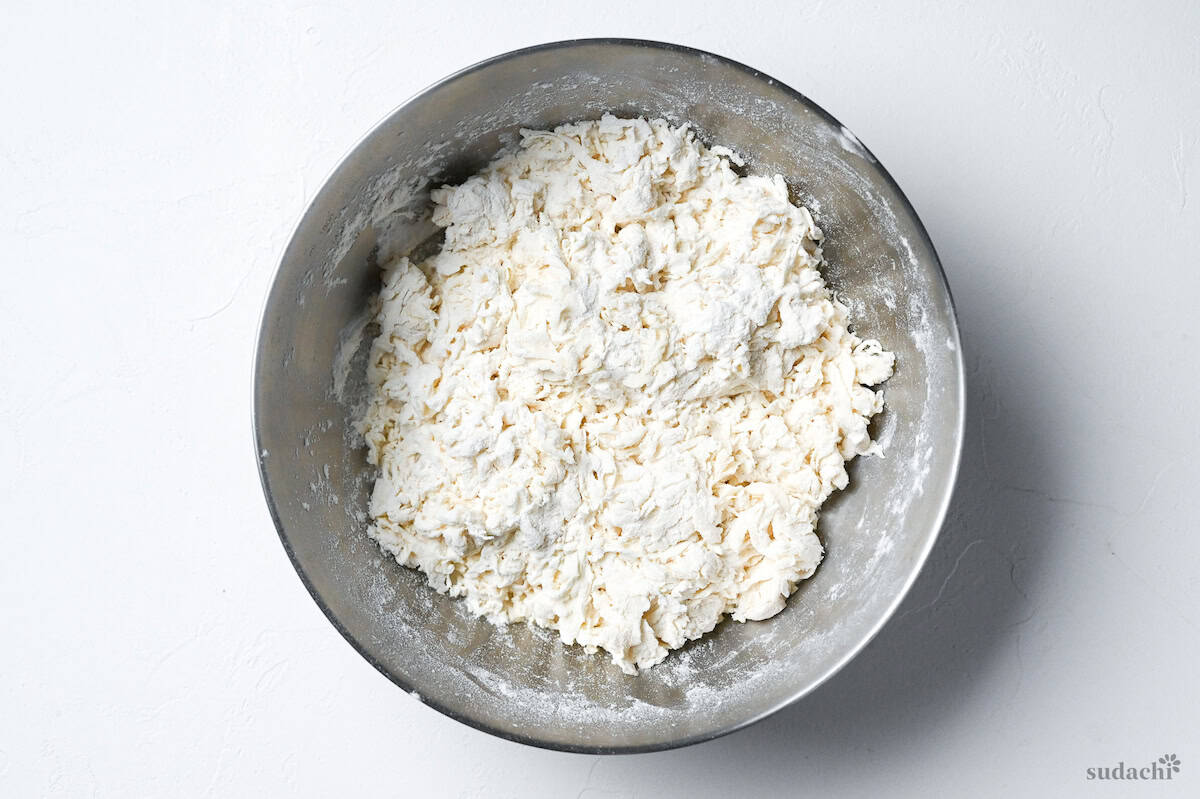
Then transfer this crumbly dough to a sealable bag, seal it up, and let it rest at room temperature for an hour.
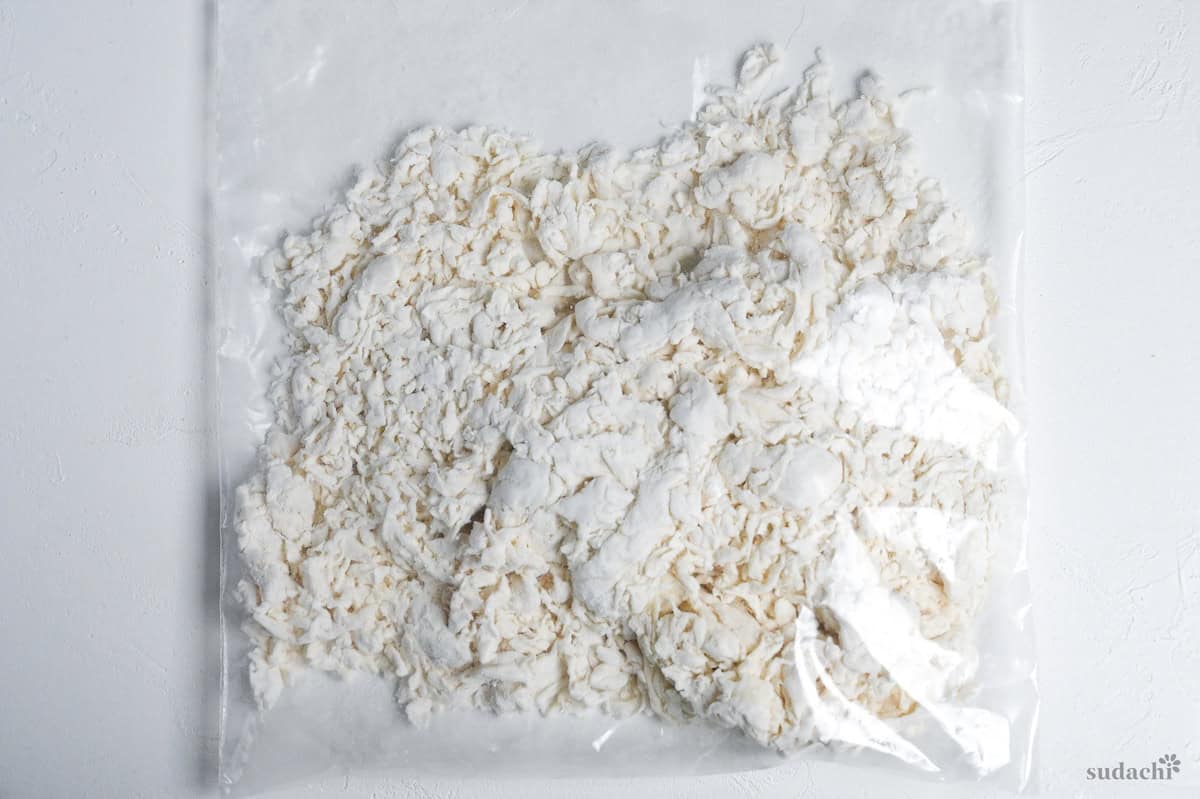
In the world of Japanese homemade noodle enthusiasts, the term “maturing” is often used, but it doesn’t actually refer to the aging process in the traditional sense. Instead, it describes a crucial step in the noodle-making process that involves allowing the dough to rest for a period of time. This resting phase is essential for achieving a perfectly hydrated and evenly distributed dough.
When water is first added to flour, there is usually an uneven distribution of moisture. The areas of the flour that come into direct contact with the water will absorb it more quickly, while the rest of the flour remains relatively dry. This can result in a crumbly, inconsistent texture that is difficult to work with.
The “maturing” process addresses this issue by giving the dough time to rest, allowing the water to slowly and evenly penetrate throughout the flour.
After the hour is up, place the bag with the dough on the floor and step on it with feet to spread the dough out evenly.
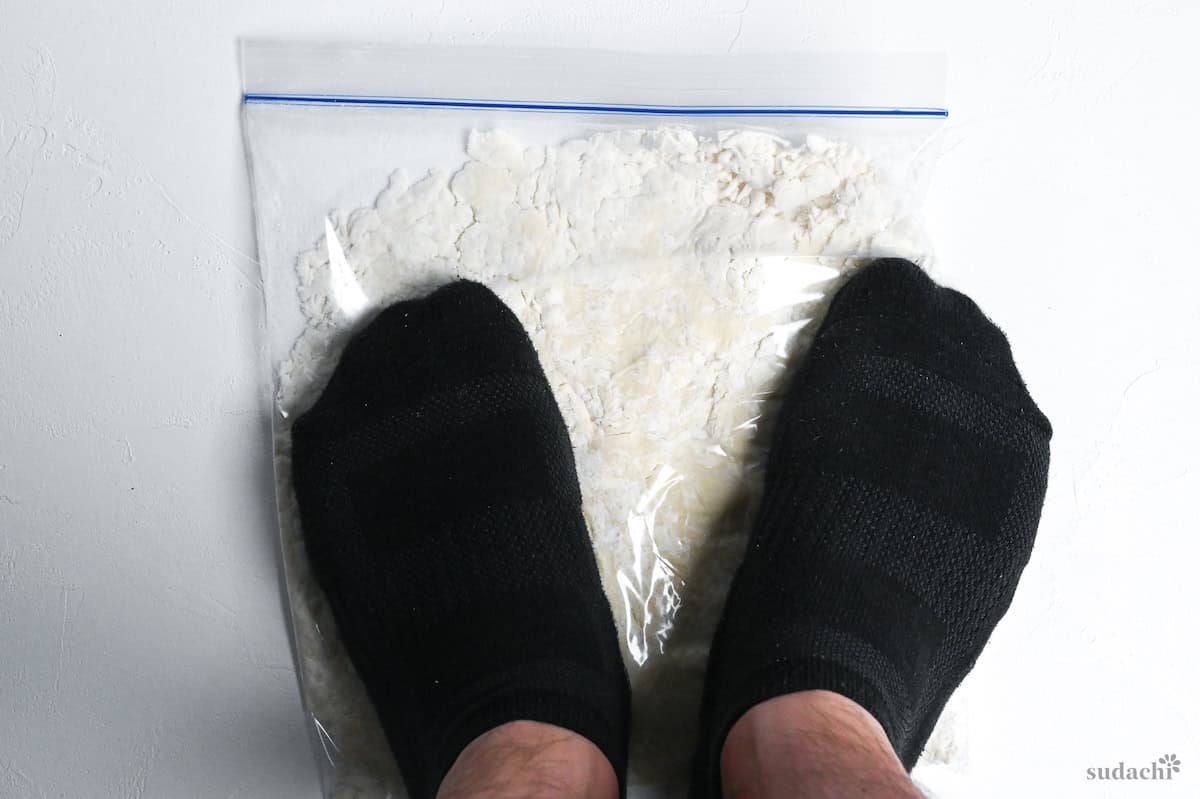
Keep stepping on it until the dough is fully stretched and filling the bag.
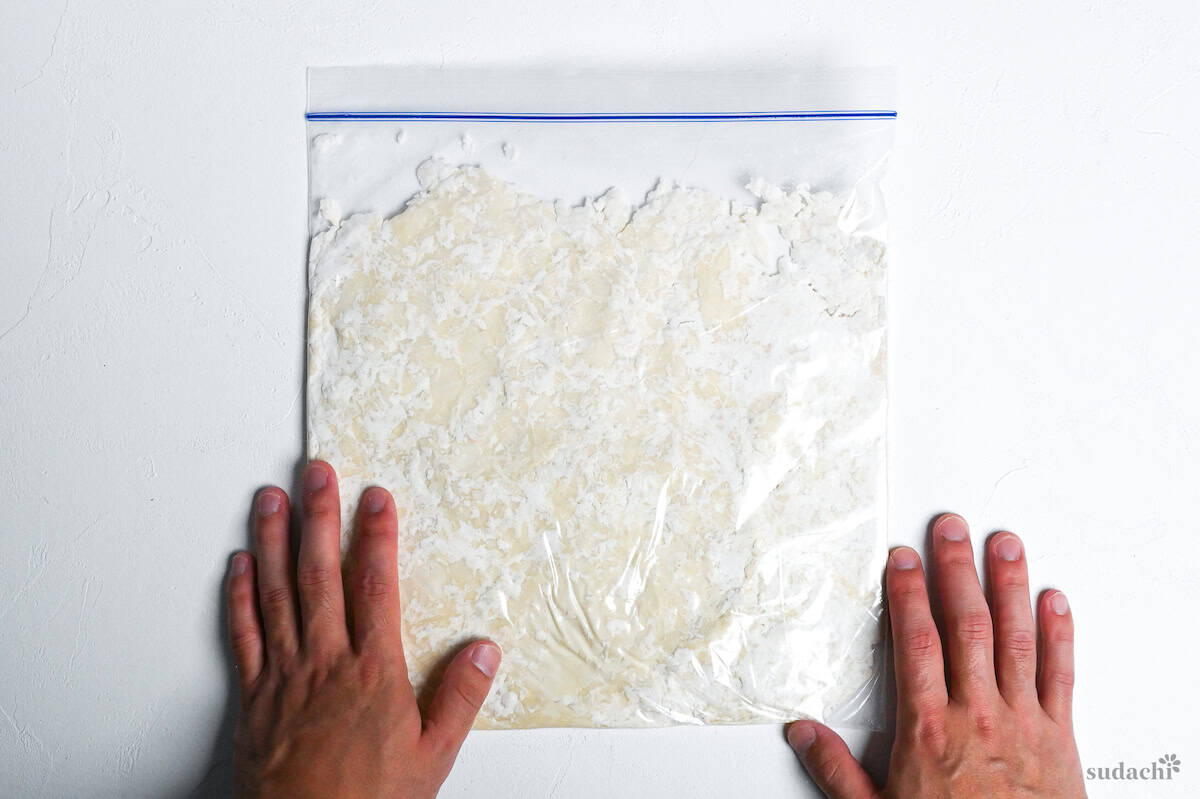
Then take the dough out of the bag, fold it into thirds, place it back in the bag, seal it, and step on it again.
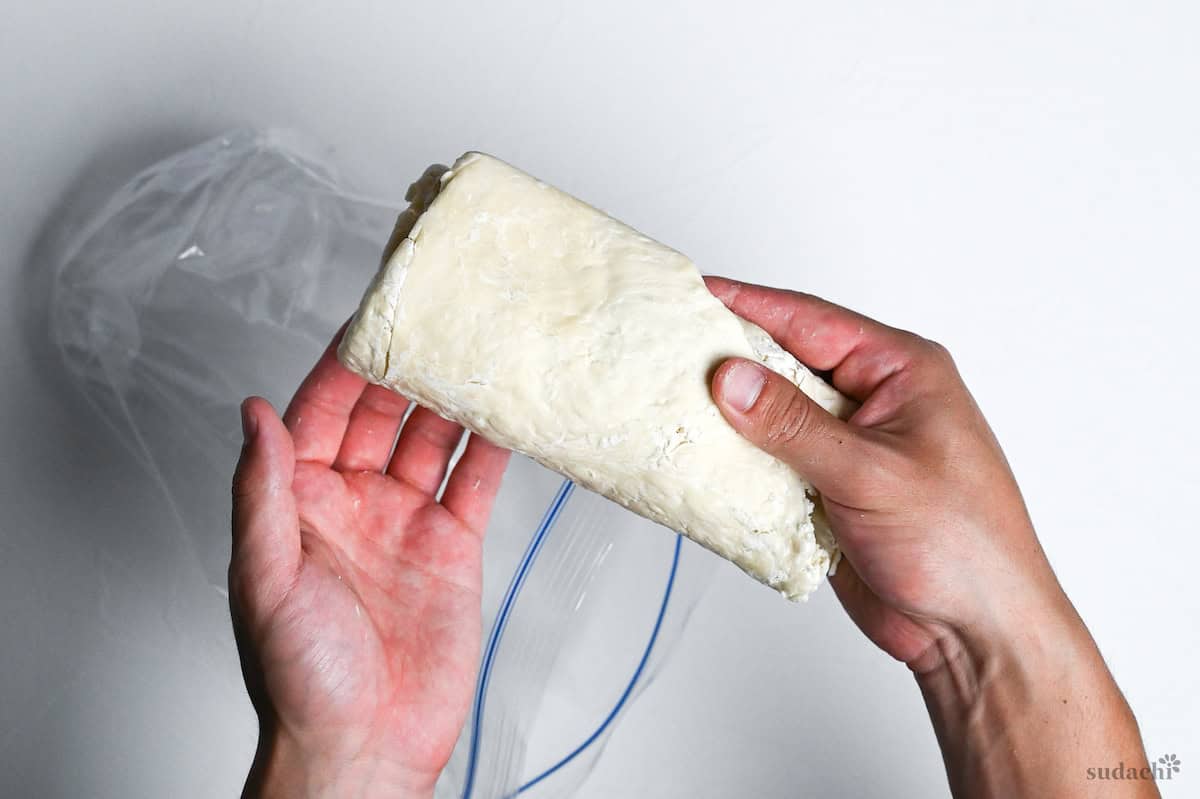
Repeat this process of folding the dough into thirds and kneading it with my feet for about 15 minutes. Then seal the bag with the kneaded dough and let it rest at room temperature or in the fridge (if your environment is hot and humid) for a full 24 hours.
For longer rests, store them in the refrigerator.
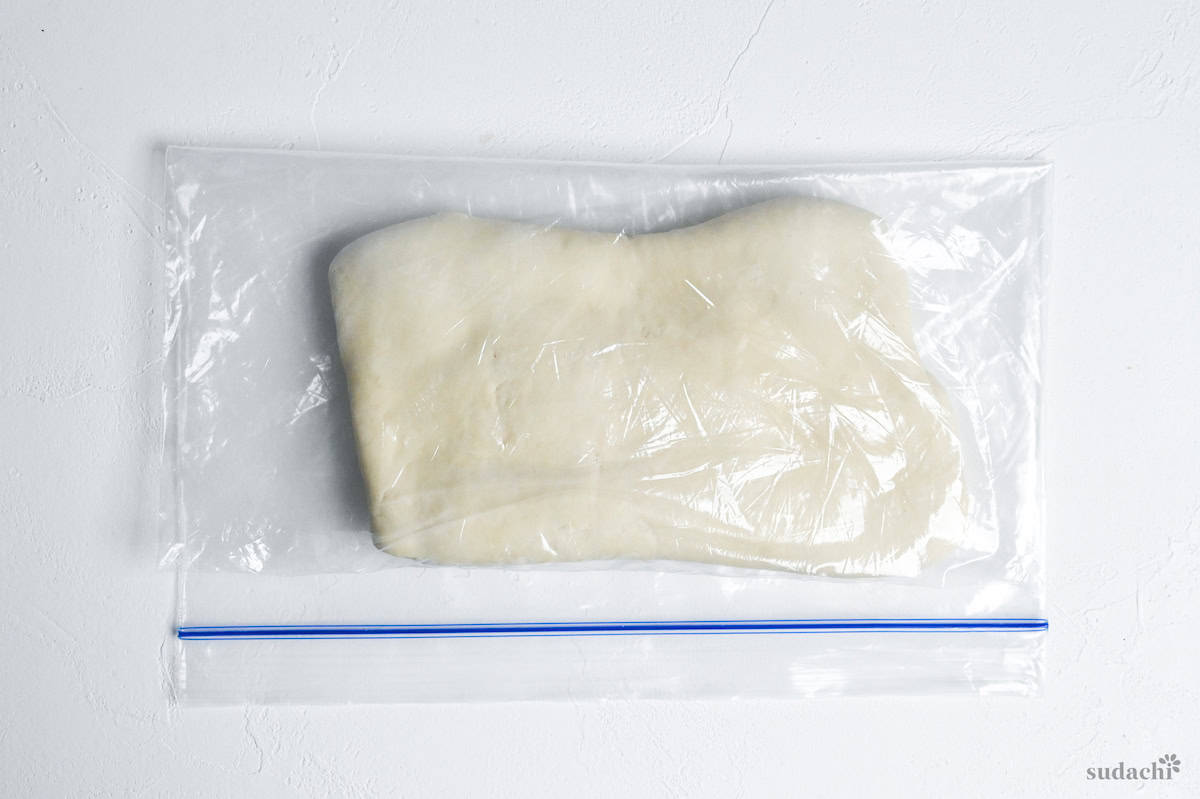
After the initial maturing process, giving the dough a second rest can take your noodles to the next level. This additional resting period allows the dough to become even more cohesive, making the noodle-making process much smoother and easier to manage later on.
At this point, you may notice that the dough has a speckled or mottled appearance. This is completely normal and simply indicates that the water hasn’t been fully incorporated into the flour. However, by allowing the dough to rest again, the color will even out, resulting in a beautiful, light yellow hue that is characteristic of perfect noodle dough.
While a few hours of additional resting time is sufficient, I personally prefer to let my dough rest for a full 24 hours, or overnight. This extended resting period allows the dough to develop an even greater level of cohesiveness and smoothness.
Flour is particularly sensitive to moisture. When stored in a hot and humid environment, flour can absorb excess moisture from the air. This can lead to several problems:
- Mold growth
- Hardening
- Quality deterioration
So, when making ramen noodles during the hot and humid summer months, an additional precaution is to let the dough rest in the refrigerator.
Flour also has a tendency to absorb odors from its surroundings. This is important to keep in mind when deciding where to store your flour, as strong odors can negatively impact the flavor and quality of your ramen noodles.
After the rest, remove the dough from the bag and place it on a lightly floured surface. Using a rolling pin, I roll the dough out nice and thin.
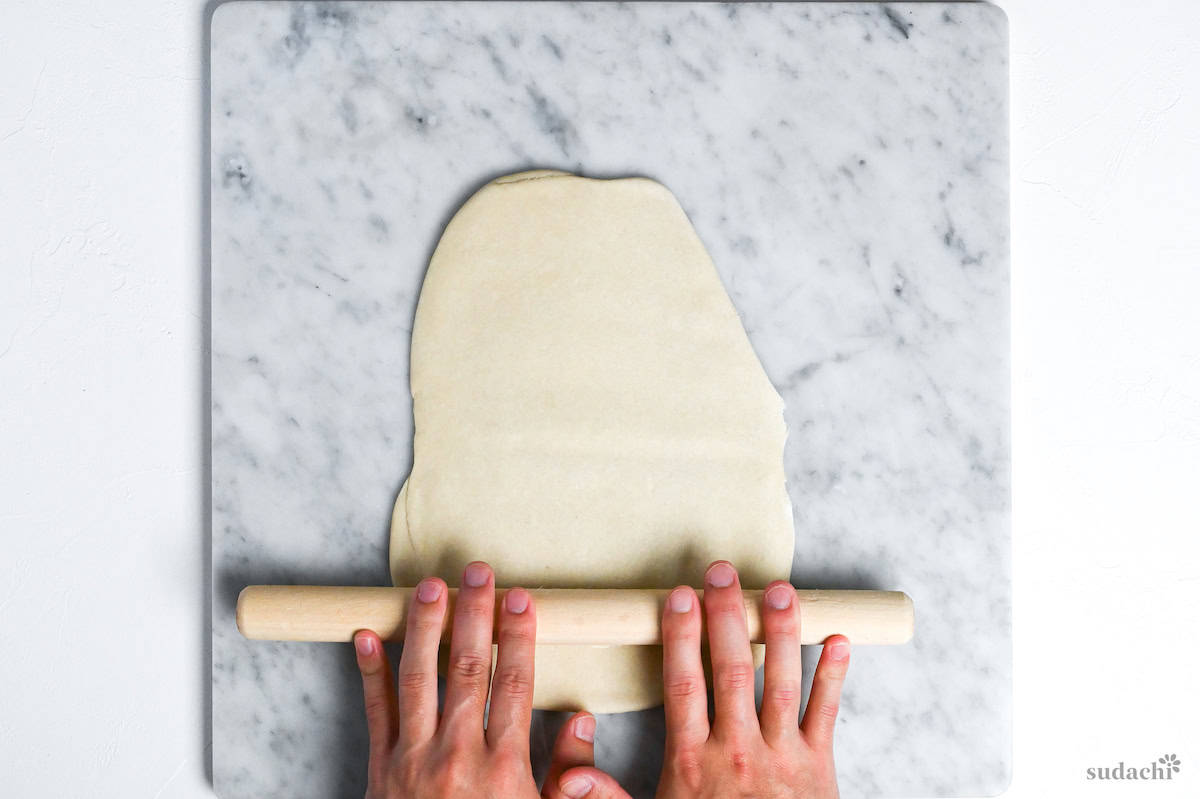
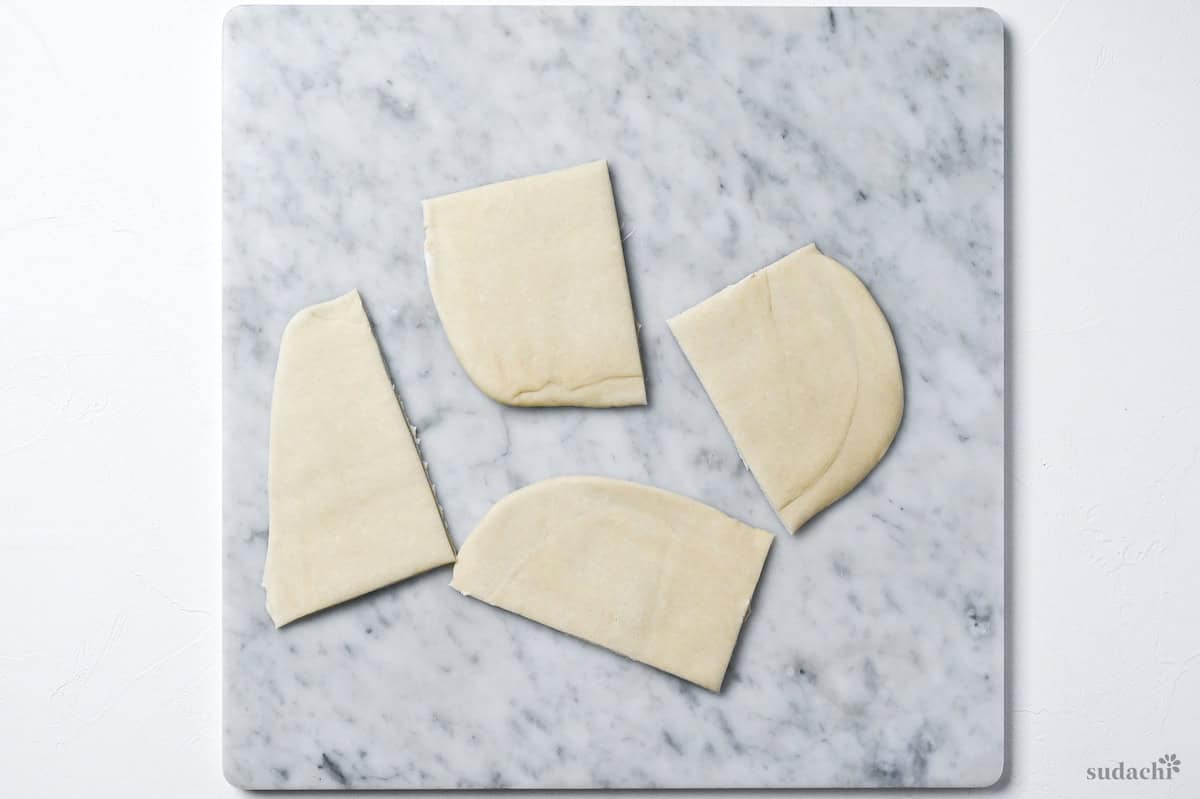
I also cut the rolled-out dough into quarters so each piece will fit through my pasta machine.
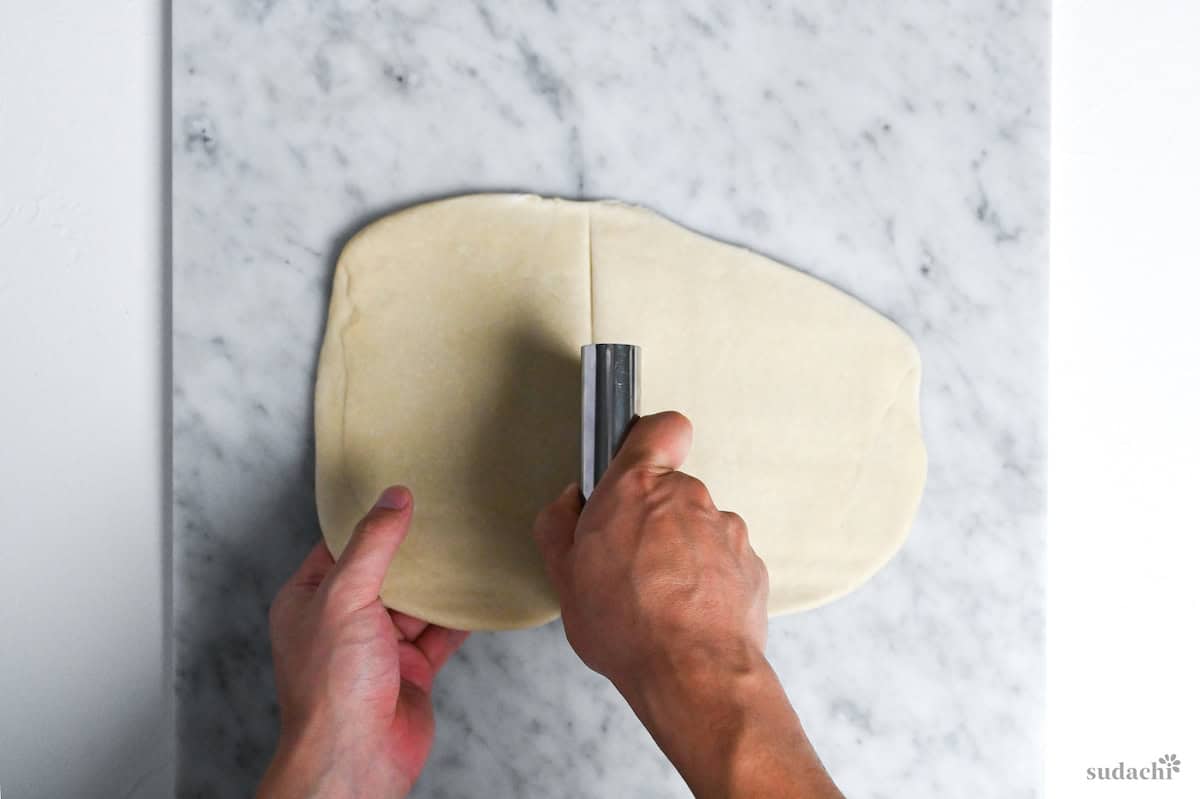
Set the pasta machine to its widest setting (usually dial 0) and run a piece of dough through once to flatten it. Then adjust to a narrower setting (dial 1) and run the dough through again.
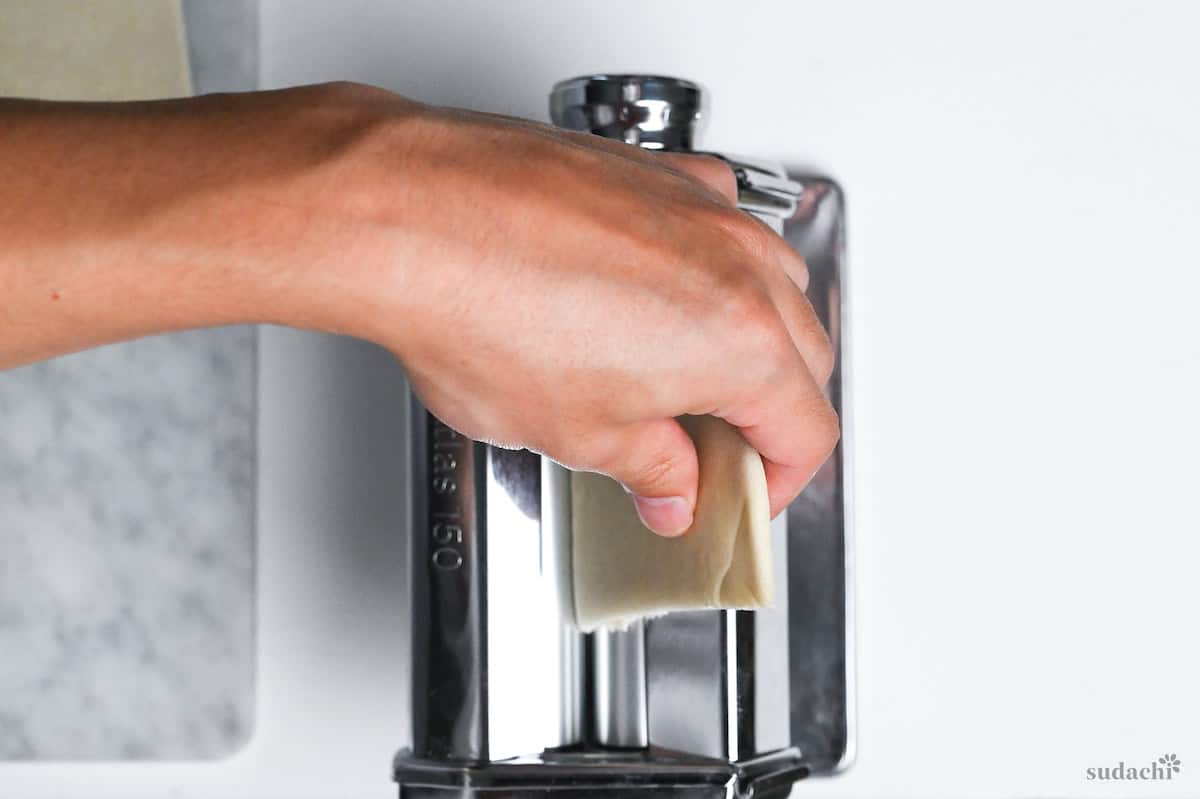
Keep adjusting to narrower settings (dial 2, 3, 4, 5) and running the dough through each time.

After the dial 5 setting, I cut each piece of dough in half to shorten the noodles, but this is optional. Lightly dust the noodles with some extra flour to keep them from sticking together.
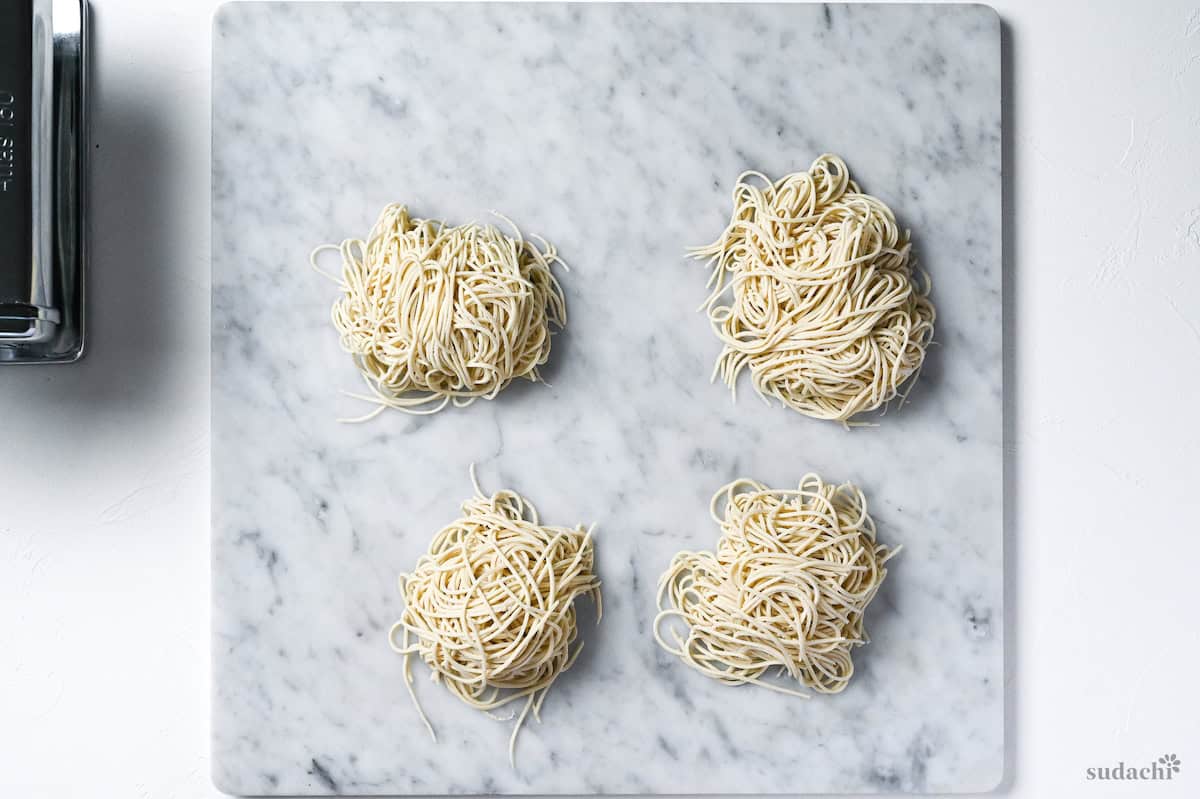
Finally, I attach the spaghetti cutting blade (1.5mm) to my pasta machine and run the thin sheets of dough through to create that classic ramen noodle shape.

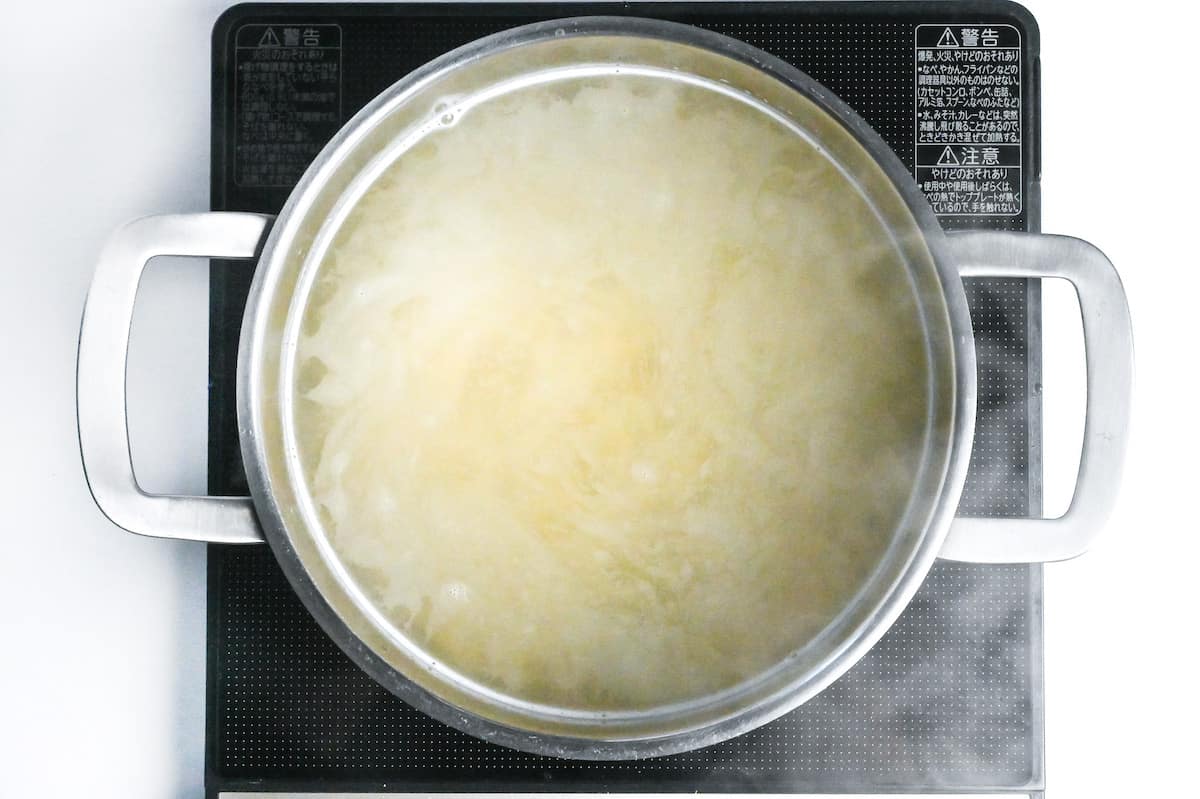
To cook the noodles, bring a pot of water to a rolling boil. Add the noodles and cook them for just 1 minute.
Then, pour the cooked noodles into a colander to drain, and rinse the noodles with cold water to remove any excess starch.
Right before serving, pour fresh hot water over the rinsed noodles to warm them back up.
And enjoy your authentic homemade ramen noodles!
Jump to Full Recipe MeasurementsHow to Store
When it comes to storing fresh ramen noodles, there are two great options: refrigeration and freezing.
If you plan to consume the noodles within 2 to 3 days, refrigeration is the best bet. While the noodles can technically last longer than 3 days in the refrigerator, keeping them for an extended period can lead to an excessive “maturing” process that affect the aroma of the wheat.
Based on personal experience, I recommend storing refrigerated noodles for a maximum of 3 days to ensure optimal balanced taste and texture. If you need to store the noodles for a longer period, freezing is the way to go. Frozen noodles can be kept for several weeks.
No matter if you’re going to refrigerate or freeze your noodles, it’s really important to divide them into individual portions before storing them.
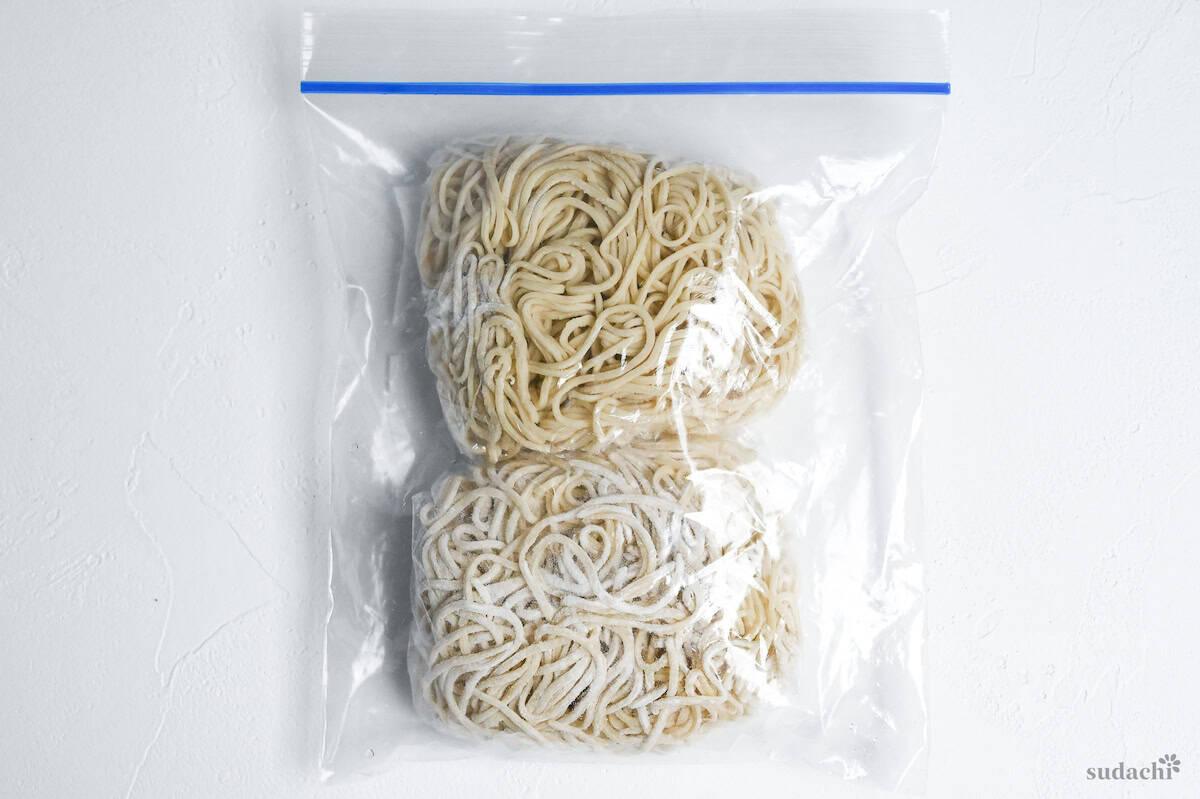
Just wrap each portion tightly in plastic wrap, making sure there are no air pockets. Then, place the wrapped portions inside a Ziploc bag, removing as much air as you can before sealing.
Our Experiment Logs: Success and Failure for Different Variations
As I said before, the world of ramen noodles is so diverse! There are so many variations and ways to make it.
Noodle enthusiasts are always trying new things, pushing boundaries, and seeing what else they can do. Some experiments are a big hit, while others don’t turn out quite as well. But it’s that chance of not getting it right that makes the joy of creating something truly delicious all the more special!

I find the process of experimentation absolutely fascinating because it takes us to the edge of failure. It’s this incredible dance between success and failure that fuels our passion for crafting the perfect noodles. Each attempt, whether it’s a triumph or not, teaches us something valuable.
In the spirit of positive community, I will add the results of my own experiments to this section. As I try different variations and techniques, I will document both my successful and unsuccessful attempts, providing detailed insights into the process and the outcomes.
But I’d love for this to be a two-way conversation! I invite you, my fellow ramen enthusiasts, to join me on this exciting adventure.
My website allows you to leave comments and share pictures, so please feel free to contribute your own variations, experiments, results, findings, and creations. Whether you’ve had a resounding success or a learning experience, feel free to share your story with this community. I will add each one to this section.
2024 June 12
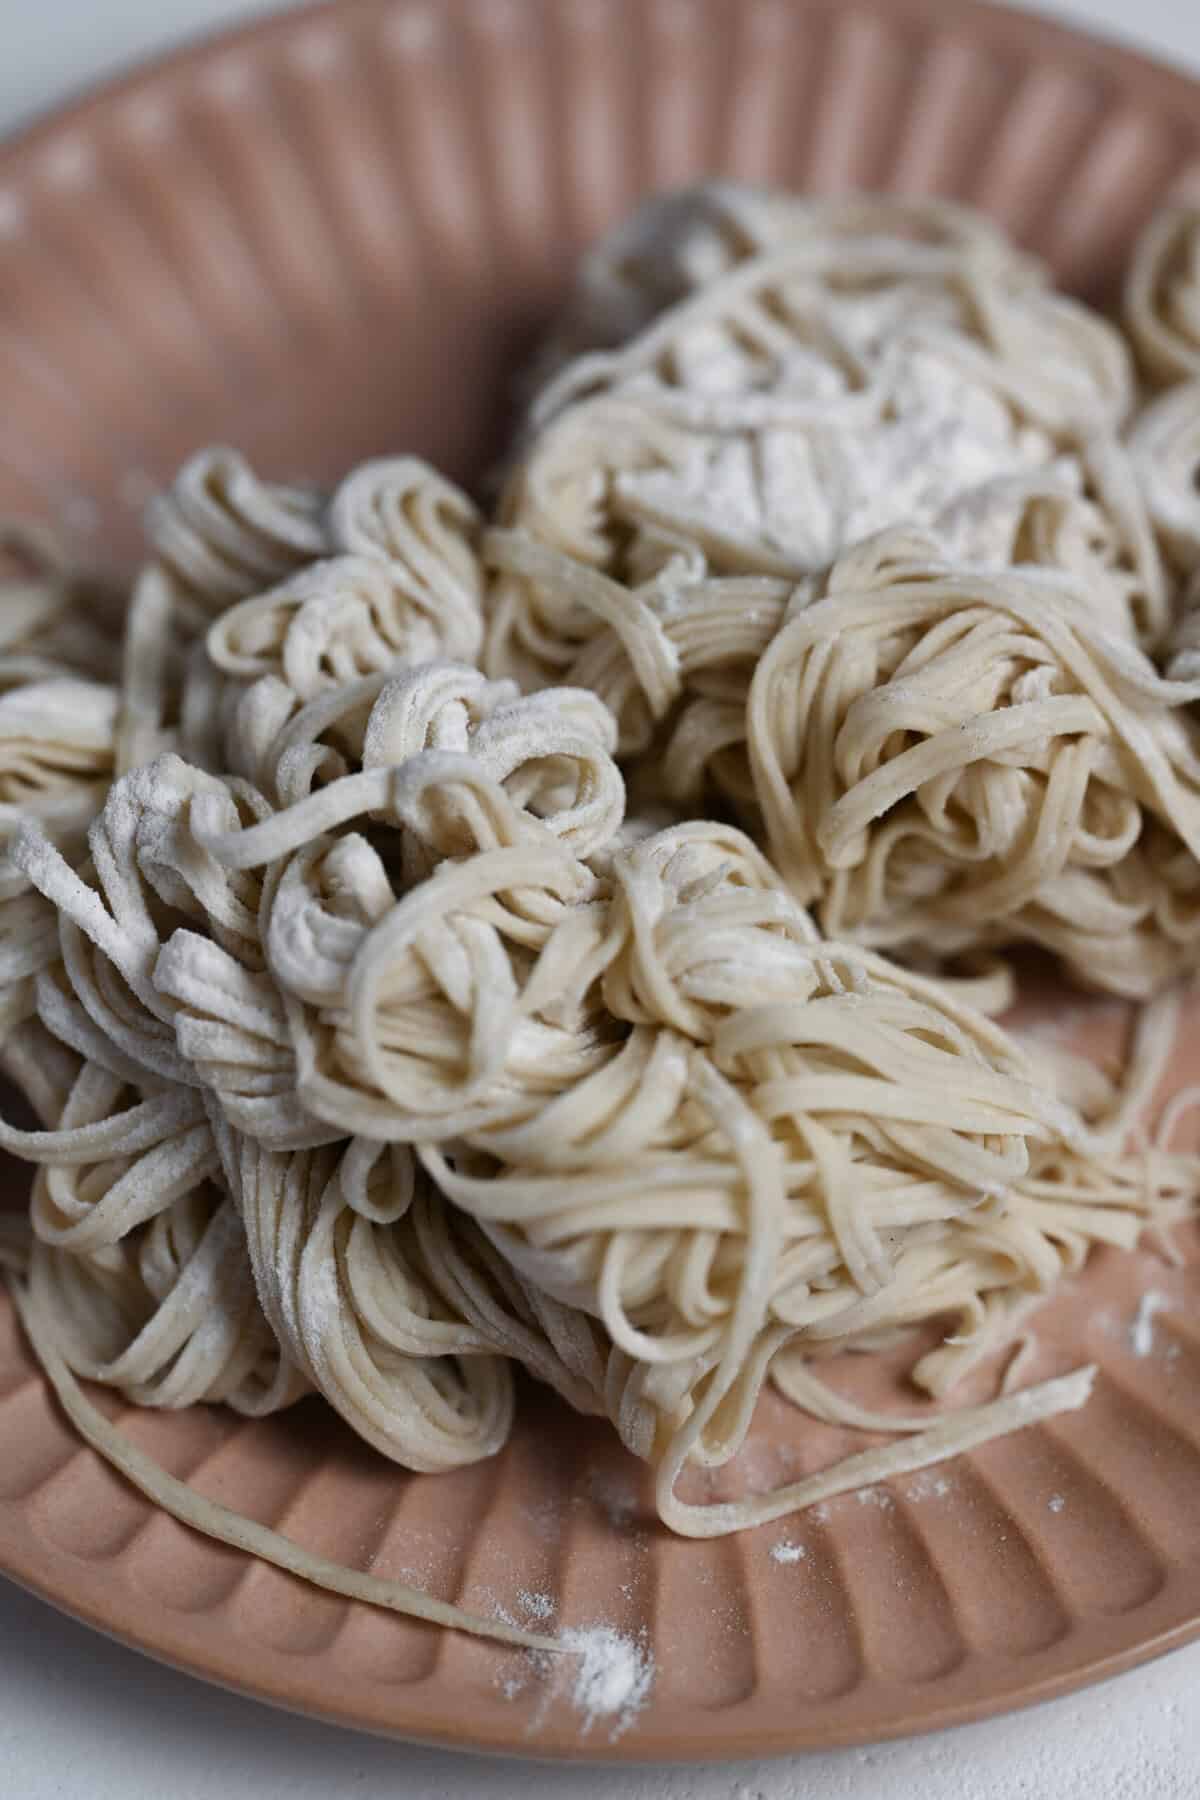
- Water content: 46%
- Alkaline agent: Baking soda
- Resting time: 1 Hour + Overnight
- Pasta machine dial: 0-8
- Pasta machine attachment: Capellini (1mm)
- Result: Fail
For my first experiment, I decided to use baking soda as a substitute for lye water. While the results were not bad, I’m afraid the color of the noodles didn’t turn out as beautifully as I had hoped.
I also tried something new with the pasta machine to make very thin noodles. I adjusted the dial up to 8 to achieve an extremely thin dough and tried to make thin noodles using the attachment for Cappellini.
As a result, the noodles that came out of the attachment were doubled up and looked strange. The texture of the noodles after boiling was also not good (too soft), leading me to conclude that high water content noodles and thin type are not a good match.
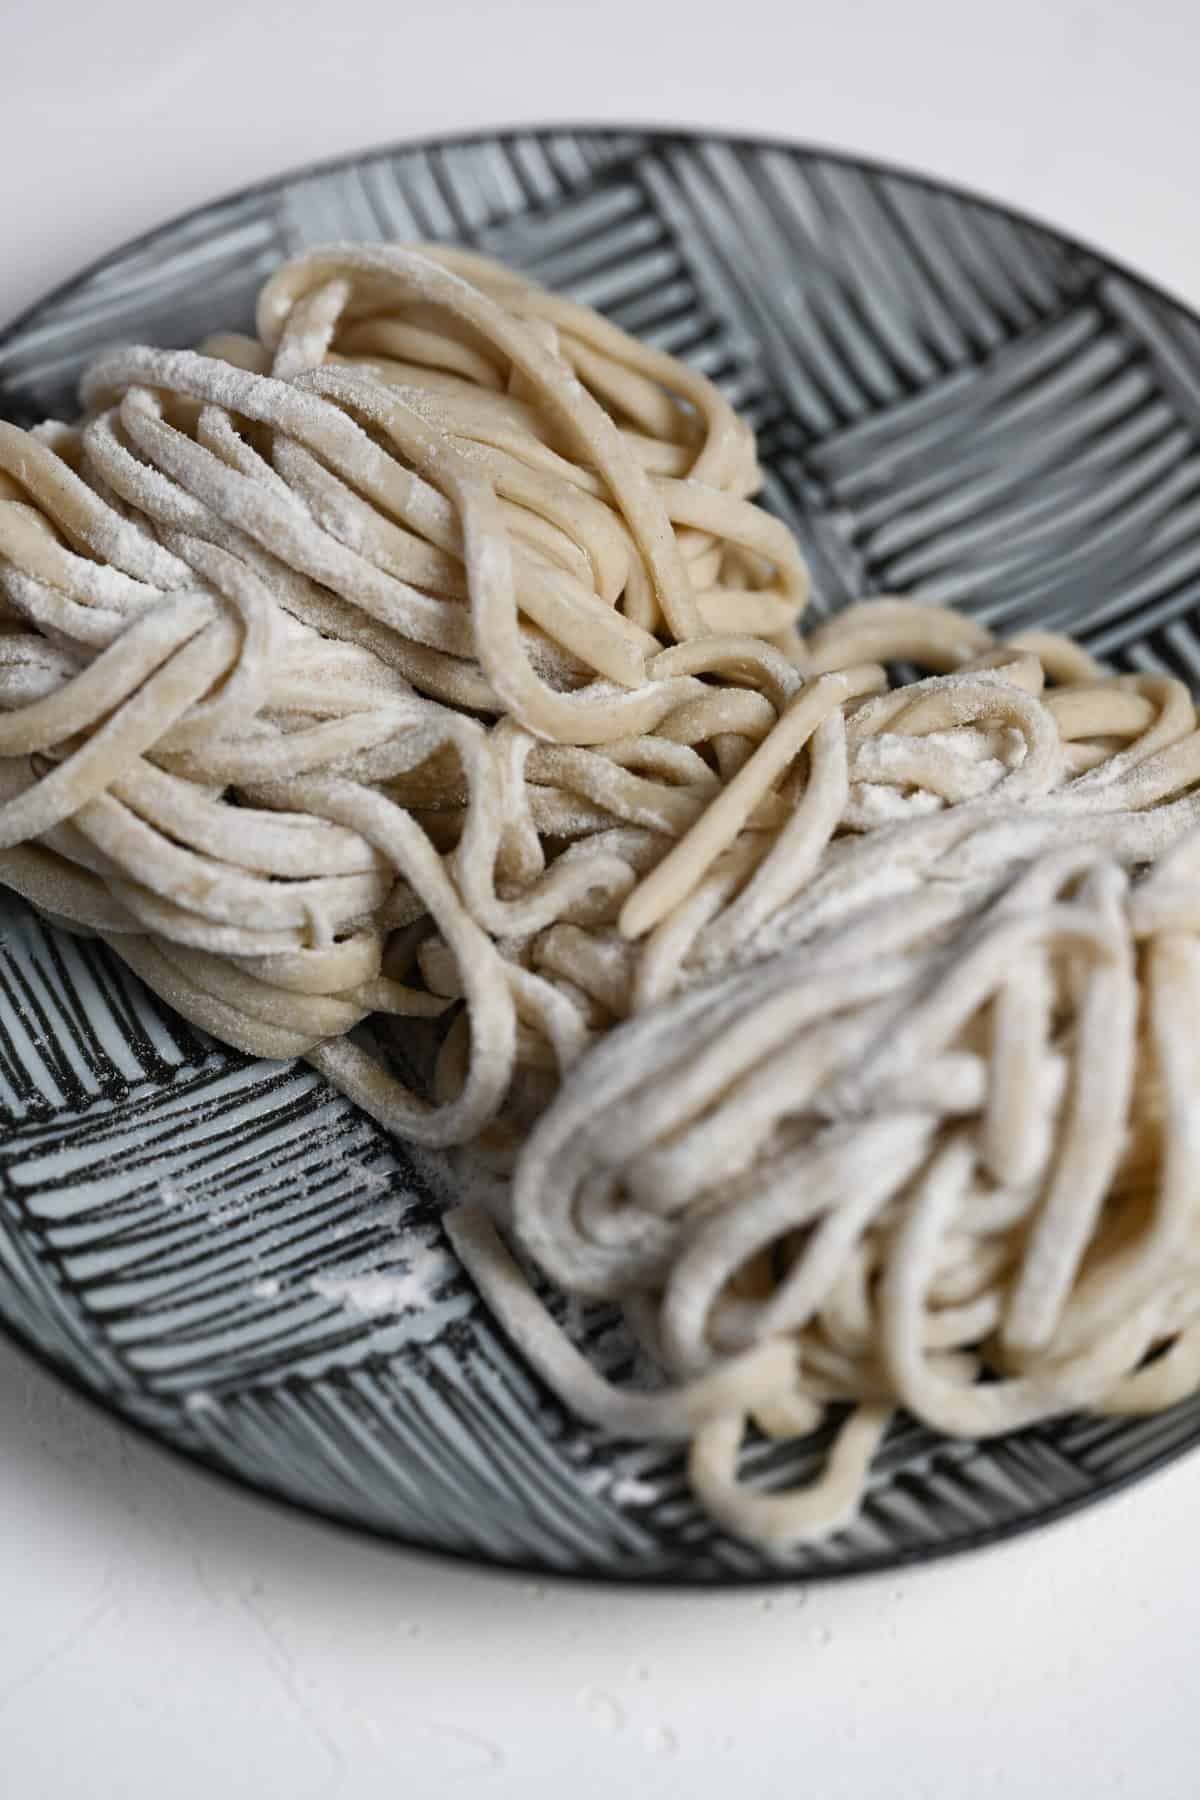
- Water content: 46%
- Alkaline agent: Baking soda
- Resting time: 1 Hour + Overnight
- Pasta machine dial: 0-3
- Pasta machine attachment: Trenette (3.5mm)
- Result: Success
On the same day, I decided to try making thick noodles using the same dough. This time, I adjusted the pasta machine to dial 3 and used the trenette attachment to create thick noodles for tsukemen.
I’m so happy to report that this experiment was a success! I found that high-water-content noodles go perfectly with thicker noodles. The chewy texture that’s unique to high-water-content dough goes so well with the thick noodles.
Isn’t it amazing how just changing the dials and attachments on the pasta machine can result in noodles of such different qualities?
It also gave me some valuable insight into my previous attempt.
It confirmed that the use of baking soda as a substitute for lye water was not the cause of the failed noodles I mentioned earlier.
Key Findings
Experiment 1:
- The combination of a high-water-content dough and a thin noodle type (Capellini, 1mm) resulted in noodles that were doubled up and had a strange appearance.
- The thin noodles made from high water content dough had a texture that was too soft after boiling, indicating that this combination is not suitable.
- Setting the machine dial to 8 for thin noodles was unnecessary and contributed to the poor noodle quality. Even for thin noodles, a dial setting of 5 is sufficient.
Experiment 2:
- Thick noodles (Trenette, 3.5mm) made from a high-water-content dough resulted in a nice chewy texture that is well-suited for tsukemen.
- The success of this experiment demonstrated that high water content dough is compatible with thicker noodle types.
- The success of Experiment 2 using the same dough as Experiment 1 confirmed that the use of baking soda as a substitute for lye water was not the cause of the failed noodles.
2024 August 2

- Water content: 33%
- Alkaline agent: Lye water powder
- Resting time: 1 Hour + 2 days (refrigerated)
- Pasta machine dial: 0-5
- Pasta machine attachment: Spaghetti (1.5mm)
- Result: Success
For this experiment, I focused on creating low-water-content thin ramen noodles. I used a 33% water content and the 1.5mm spaghetti attachment on the pasta machine. I heard that low-water noodles need to rest for a long time before handling, so I refrigerated the dough for two days.
The result was really tasty! I love hard, thin noodles, and these were just perfect. But I should mention that this texture might not be everyone’s cup of tea.
Also, the low water content made stretching the dough quite tricky, which is something to think about for future low-water content noodle preparations.
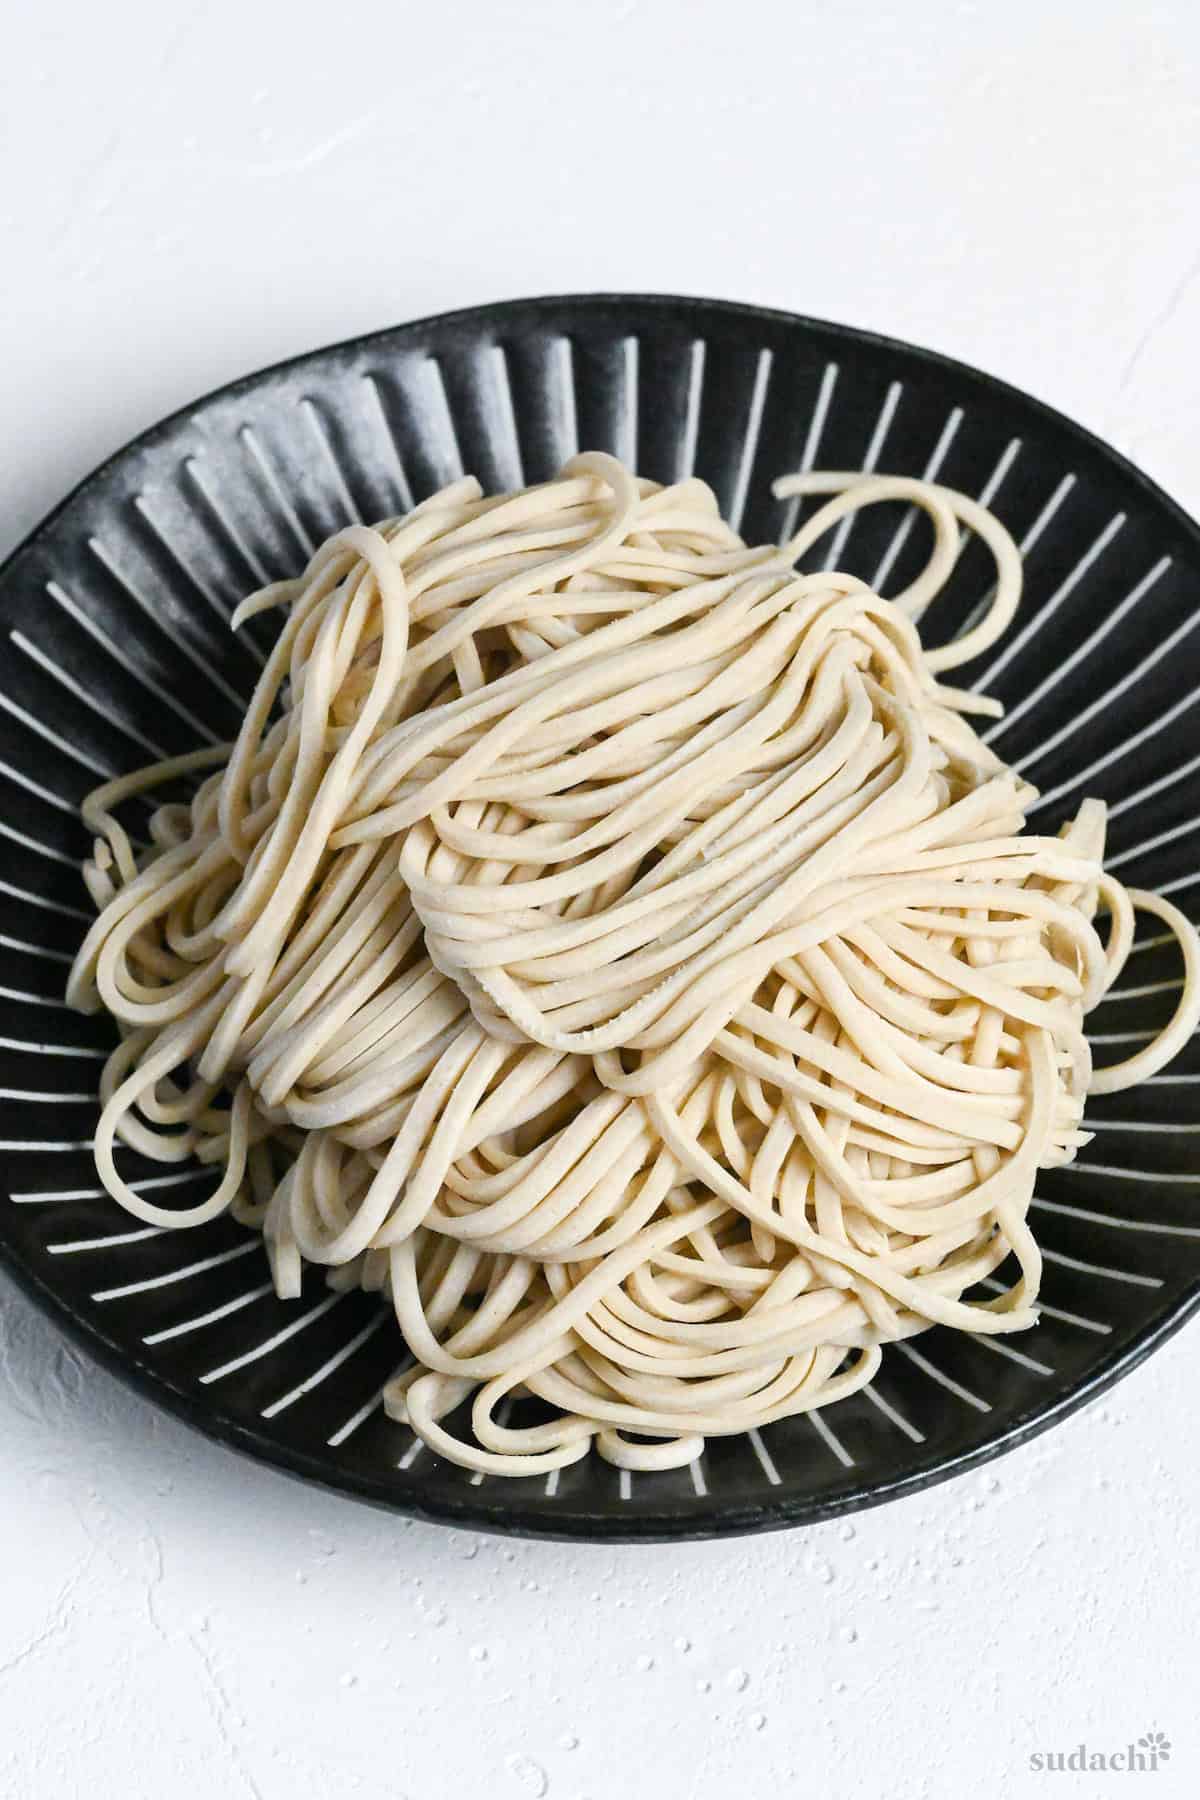
- Water content: 33%
- Alkaline agent: Lye water powder
- Resting time: 1 Hour + 4 days (refrigerated)
- Pasta machine dial: 0-5
- Pasta machine attachment: Capperini (1mm)
- Result: Success
Using the same dough, I made another batch of thin noodles with slight modifications. The result was excellent – I achieved the perfect thin noodles that would complement tonkotsu ramen beautifully.
I made a few changes this time around. Instead of adjusting the pasta machine dial, I kept it at 5 while cutting at 1mm. This resulted in noodles with a beautiful cross-section. I also extended the refrigeration period to four days for this batch, but I didn’t notice a big difference compared to the two-day rested noodles.

Key Findings of This Batch
- A low-water content (33%) dough makes excellent thin, hard noodles, which are ideal for specific preferences.
- Extended resting periods (2-4 days) are beneficial for low-water content dough, improving the texture.
- For thin noodles (1mm), keep the pasta machine dial up to 5 instead of going higher setting.
- There’s no real difference in quality between 2 and 4 days of resting.
- The low-water content dough takes more effort to stretch, so factor that into your noodle-making process.
2024 August 8
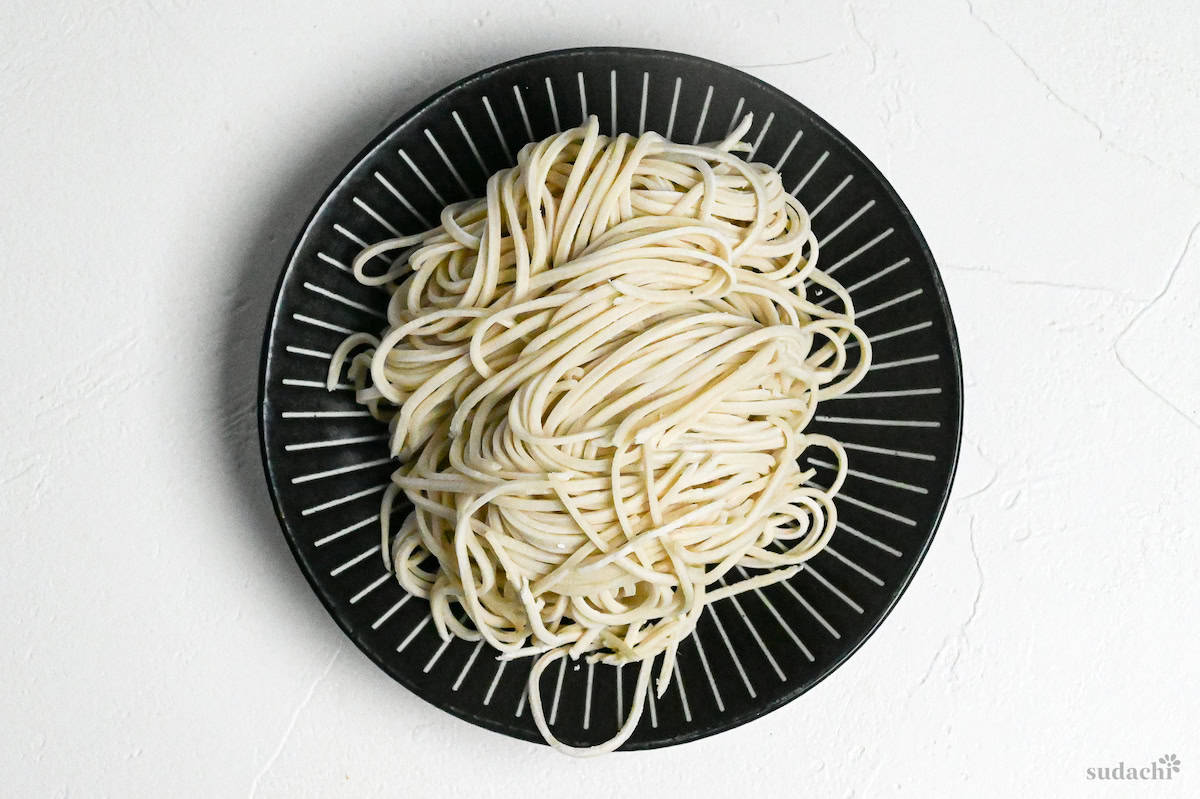
- Water content: 35%
- Alkaline agent: Lye water powder
- Resting time: 1 Hour + 1 day (refrigerated)
- Pasta machine dial: 0-5
- Pasta machine attachment: Capperini (1mm)
- Result: Success
This time, I focused on creating thin noodles with a slightly higher water content of 35%. This adjustment made the dough easier to handle compared to the previous 33% water content while still producing very tasty thin noodles.
The result was fantastic in terms of taste and texture! However, I noticed that when using the capellini cutter, the noodles had a slightly flat cross-section. This made me think that I might be able to increase the number of dials on the pasta machine for the next batch.

Key Findings of This Batch
- A 35% water content dough is easier to handle than 33% while still producing excellent thin, hard noodles.
- The capellini cutter (1mm) produced noodles with a slightly flat cross-section at the current dial setting. Further experimentation with higher dial settings on the pasta machine may be necessary to achieve a more rounded cross-section.
- The taste and texture of the noodles were excellent.
2025 June 26
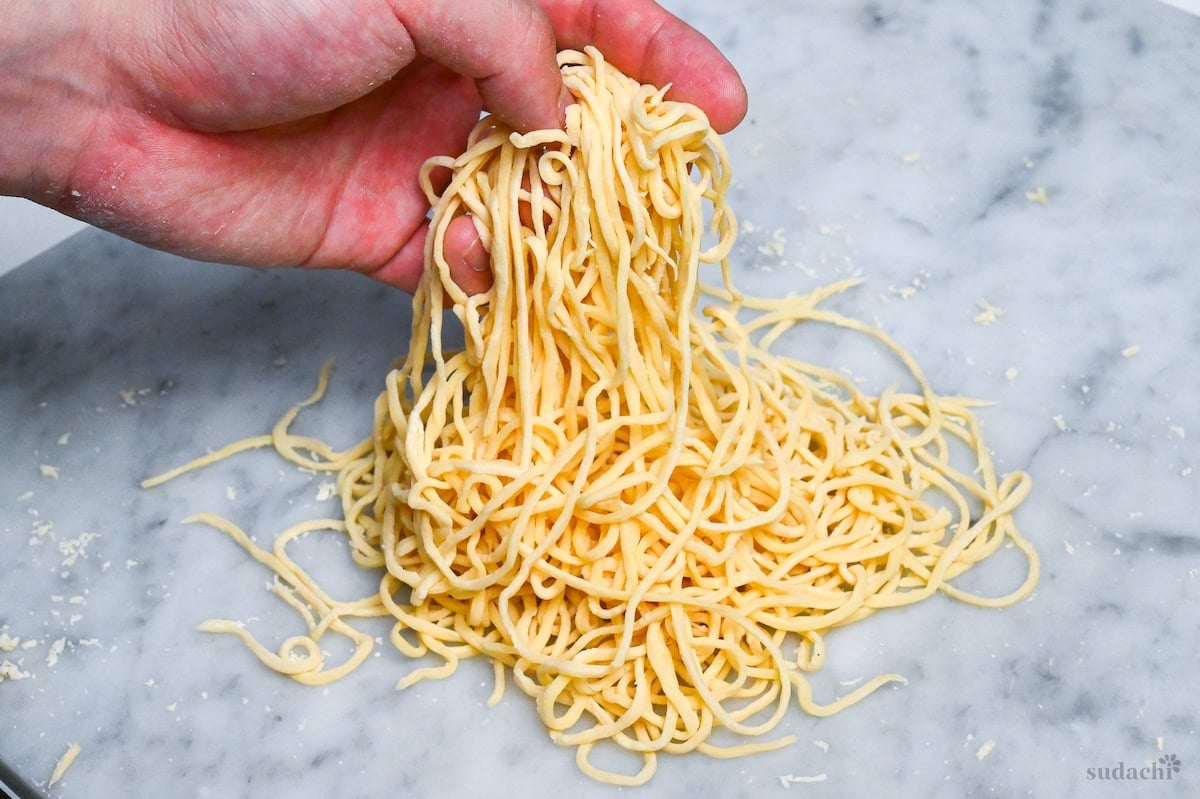
- Water content: 35%, 40%
- Alkaline agent: Egg (and lye water for some)
- Resting time: 1 Hour + 1 day (refrigerated)
- Pasta machine dial: 0-5
- Pasta machine attachment: Spaghetti (1.5mm), Trenette (3.5mm)
- Result: Success & Failure
This time, my objective was clear: to make egg noodles that would perfectly complement miso ramen. Since Sapporo-style egg noodles are usually 2-3 mm thick, I tested spaghetti and trenette cutters.
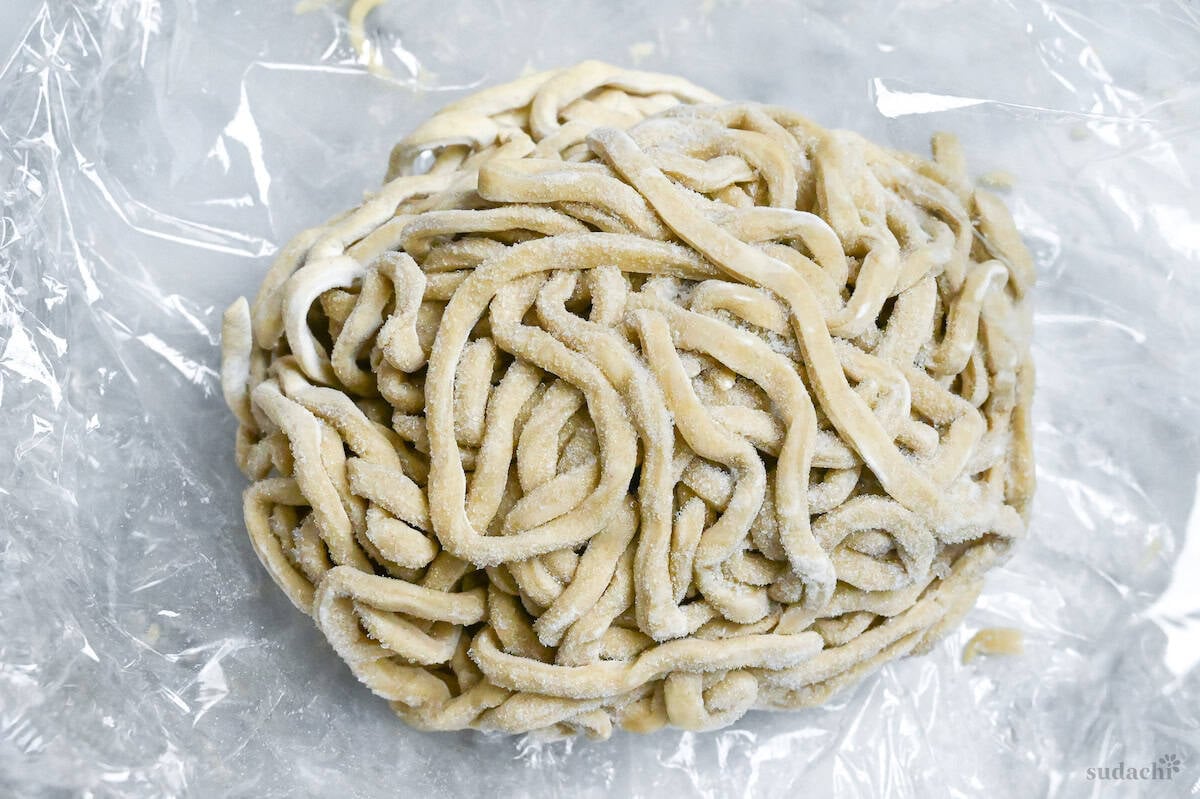
Then, I had to figure out whether to use lye water or not. Egg noodles used in ramen sometimes include it and sometimes don’t.
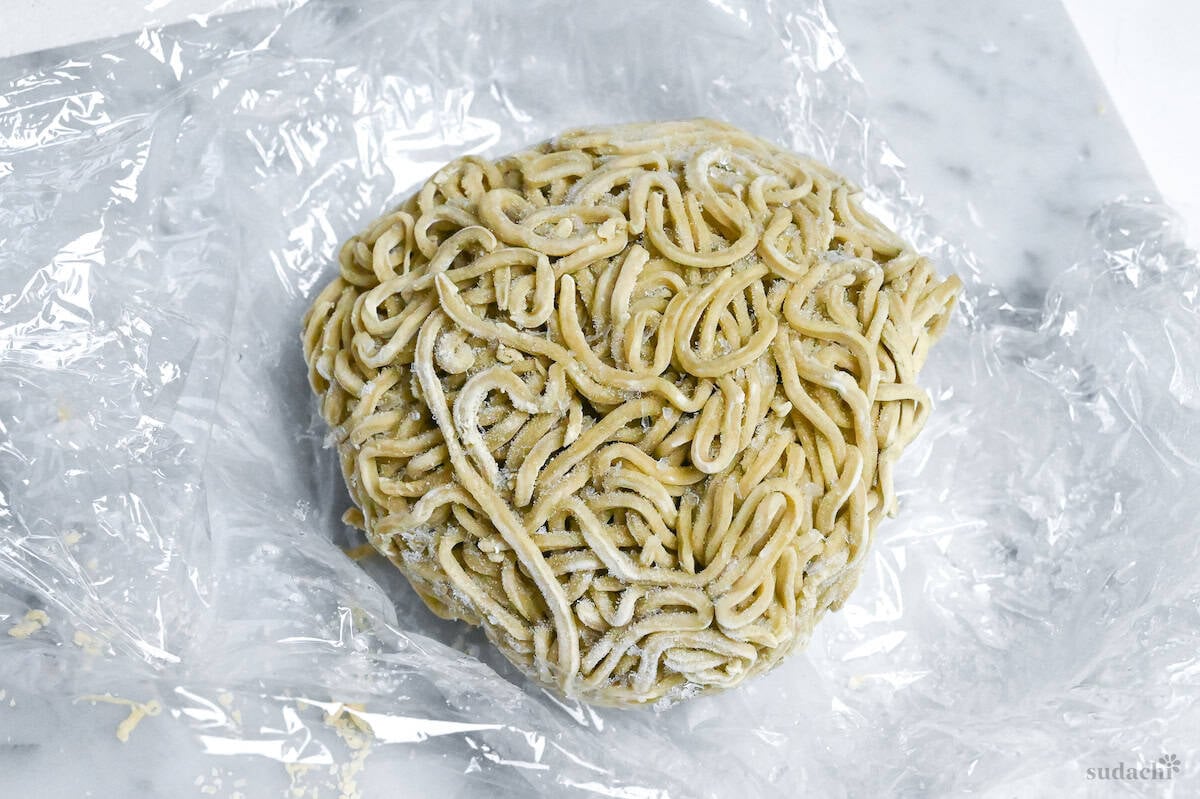
Finally, I tested hydration levels. Since Sapporo miso ramen noodles are typically high-hydration noodles, I tested both 35% and 40% water content.
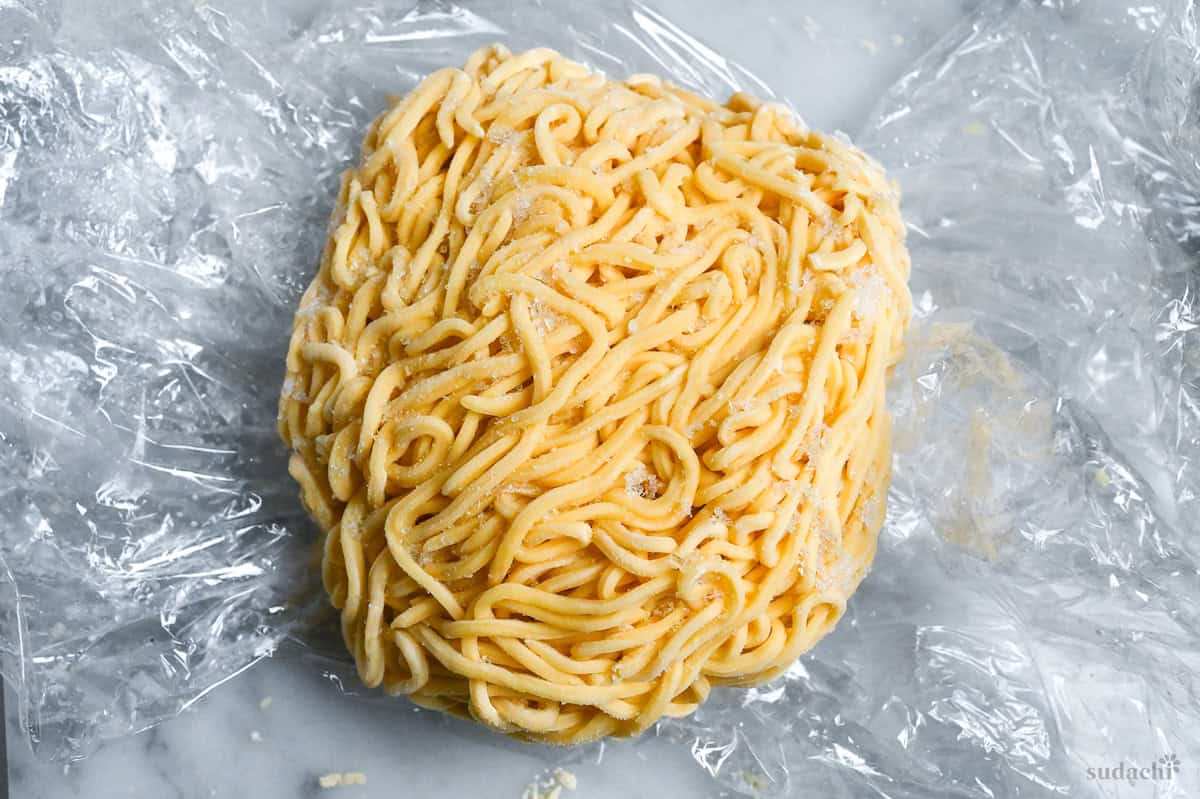
To sum it up, my preferred combination was the 1.5mm cutter with 35% hydration using only eggs.
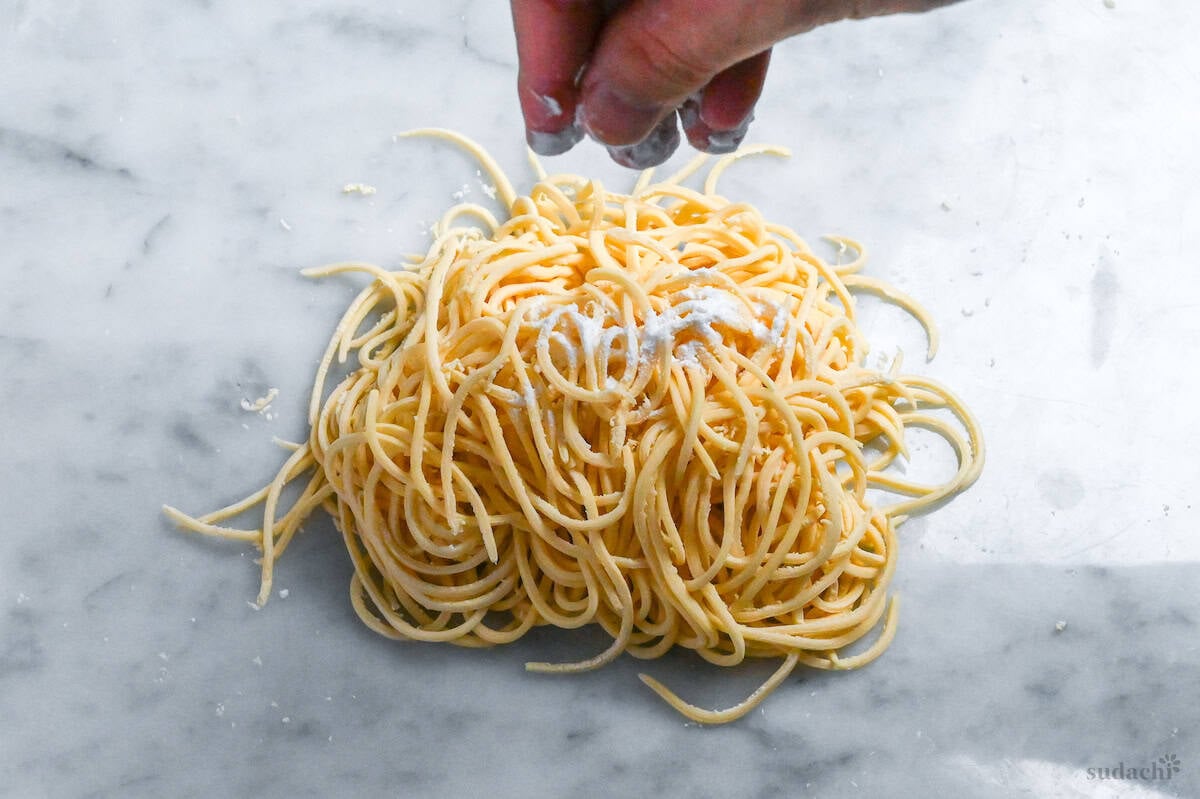
I also found out that starch is way better than flour as a dusting agent, so I’m updating this recipe.
Since they have a slightly different preparation method from regular noodles, I’ve created a separate egg noodle recipe post for those who want to try making them.
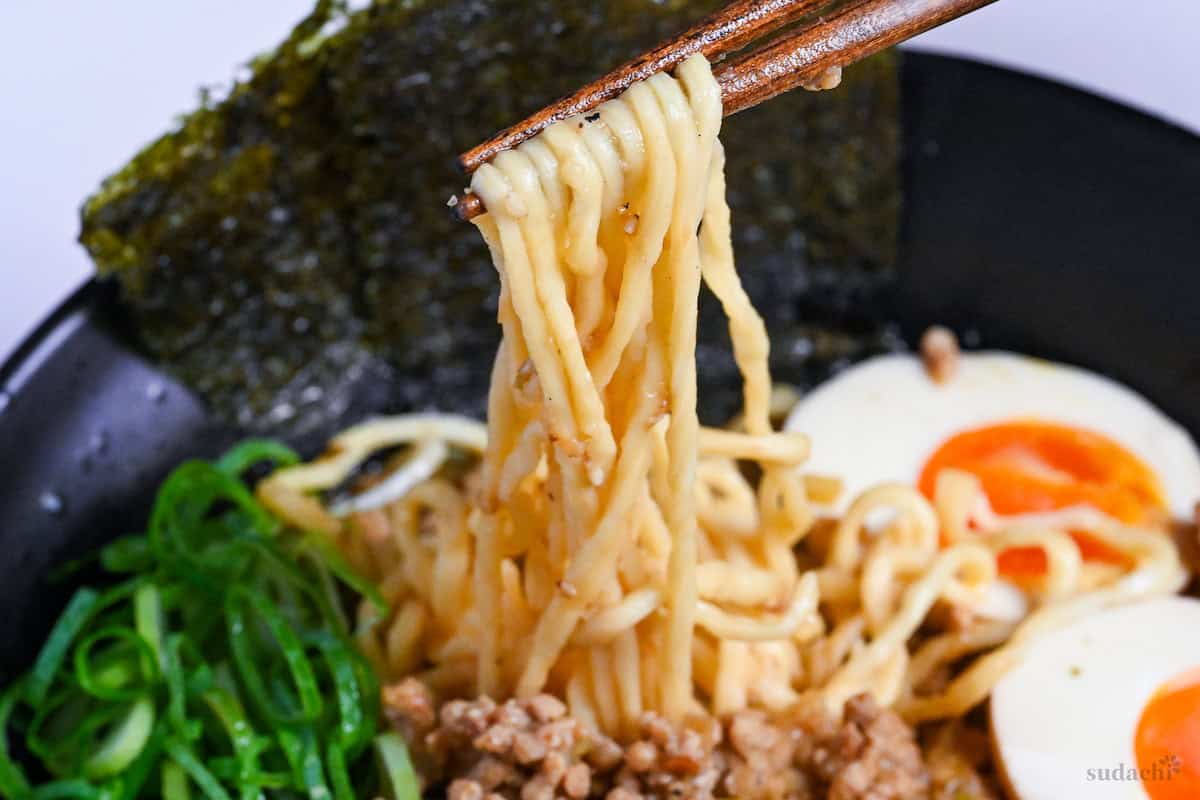
Key Findings of This Batch
- 3.5mm thickness is too thick for miso ramen.
- Egg-only noodles produce a better color than those with added lye water.
- Starch is significantly better than flour as a dusting powder.
Alternatives for Homemade Ramen
If you’ve made it this far, I hope you’re feeling inspired and excited to try your hand at making homemade ramen noodles!
But I totally get it. We all lead busy lives, and sometimes it’s just not feasible to make homemade noodles every time you crave a bowl of ramen. We all have those days when we’re short on time and need a quick fix.
In this last section, I’d love to share some of my favorite go-to options when you find yourself in a pinch. I’ll be sharing my thoughts on the different types that I think are good substitutes for homemade ones, as well as those that I wouldn’t recommend.
Store-Bought Fresh Noodles
If you live in Japan or certain other Asian countries, you may have access to fresh ramen noodles at your local supermarket. These noodles are often available at reasonable prices, making them an excellent alternative when you don’t have the time or resources to make noodles from scratch.
In countries where fresh ramen noodles are readily available, I highly recommend taking advantage of this option.
Dried Noodles
If you can’t find store-bought fresh ramen noodles in your area, the next easy option would be dry noodles. It’s important to note that we’re talking about dry ramen noodles here, not instant noodles.
When choosing dry ramen noodles, quality is really important. There can be a big difference in taste, texture, and overall quality from one product to another. Taking the time to find a high-quality dry noodle can make a world of difference in your finished dish.
If you’re living in the United States, I would highly, highly recommend trying Hakubaku Authentic Plain Ramen Noodles. Hakubaku is a reliable Japanese manufacturer established in 1941.
Spaghetti Hack
For those times when you want to make a quick and easy bowl of ramen using ingredients you likely already have at home, the spaghetti hack is your best bet. This clever trick allows you to transform ordinary dried spaghetti noodles into a convincing ramen noodle substitute with just a couple of additional ingredients.
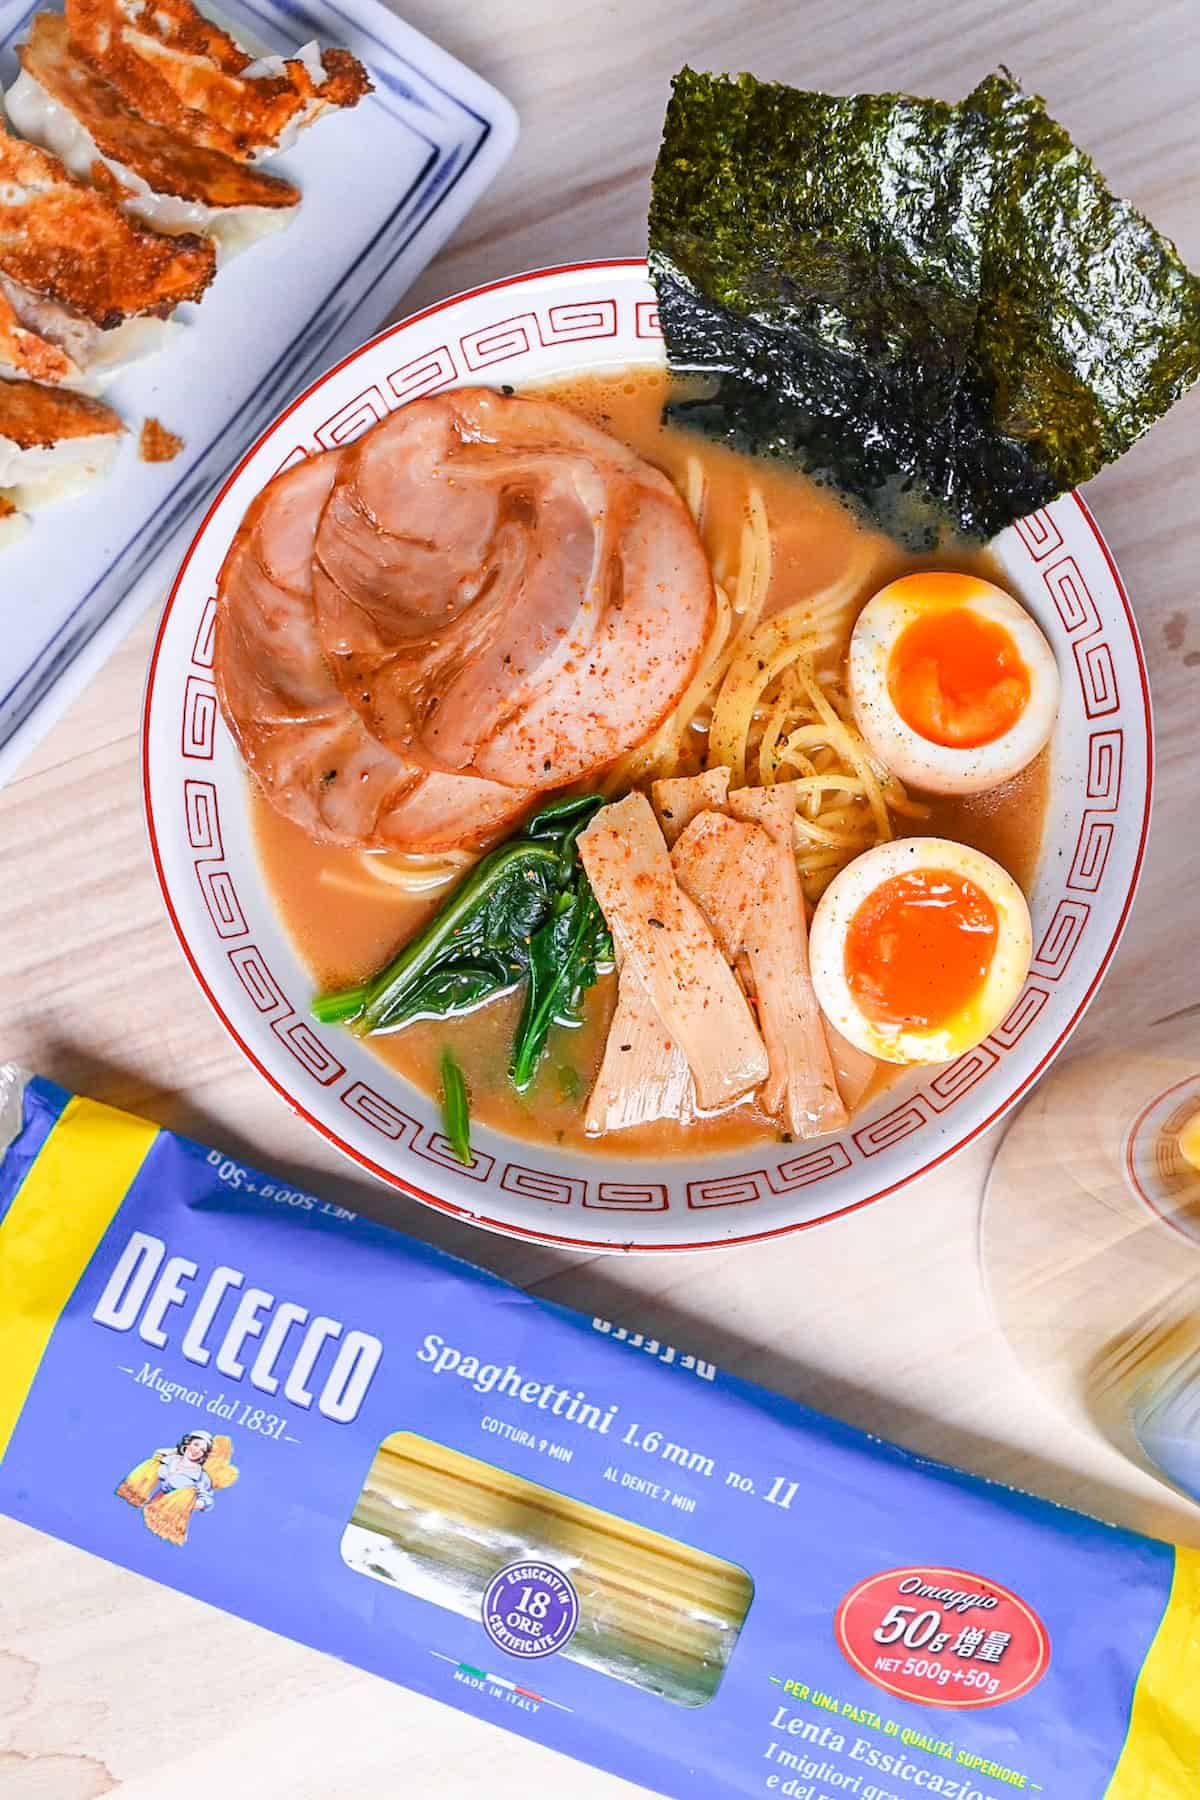
To make ramen-style noodles using the spaghetti hack, you’ll need three simple components: dried spaghetti noodles, salt, and baking soda.
If you’re interested in learning more about how to execute the spaghetti hack, I encourage you to check out my dedicated Spaghetti Ramen Hack recipe.
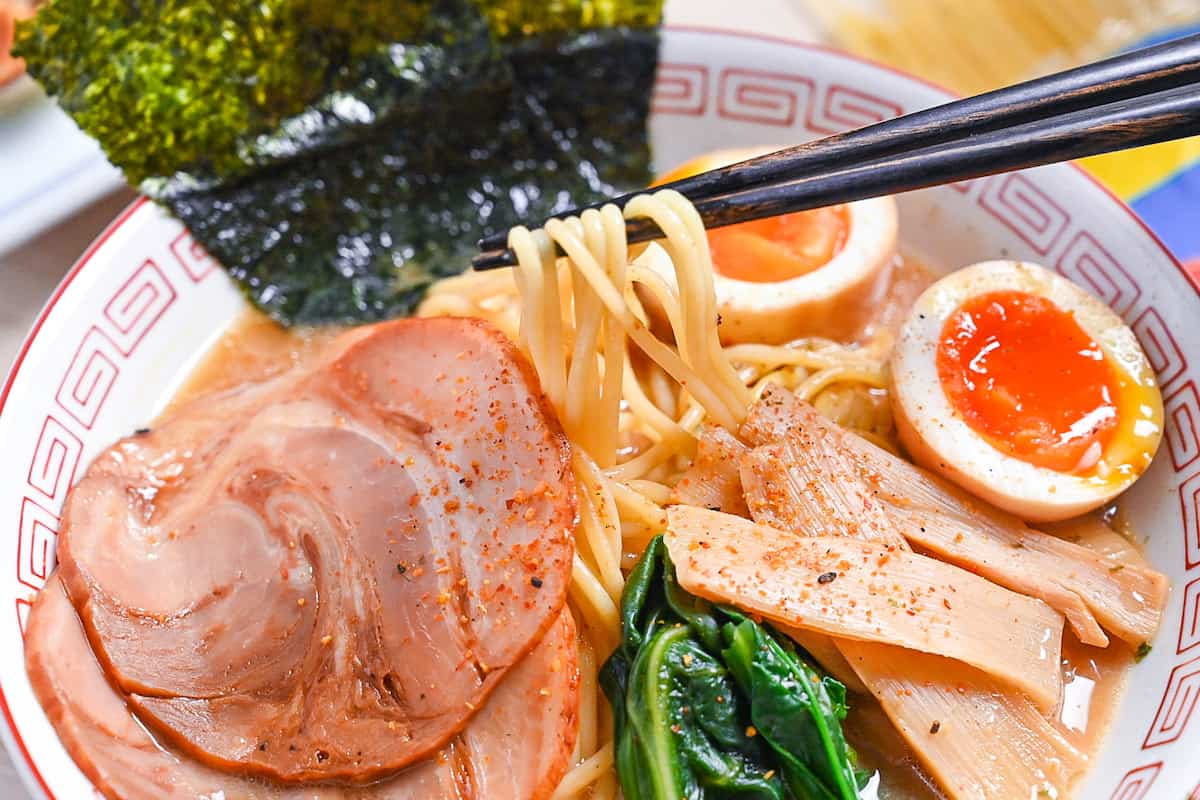
Instant Noodles (Not Recommended)
Finally, I want to chat about one type of noodle that I wouldn’t suggest using as a substitute: instant noodles. These are the crispy, pre-cooked noodles that come in popular products like Cup Noodles, Maruchan Noodles, or Shin Ramen. They are typically produced using an instant oil or hot air drying method, which gives them their distinct texture and quick cooking time.
Don’t get me wrong, I enjoy instant noodles for what they are. They serve a great convenient snack.
However, in my opinion, they are not a suitable replacement for authentic ramen noodles, especially when paired with a carefully crafted homemade broth and toppings.
Instant noodles are designed to be paired with their accompanying packet of flavoring, which often contains a powdered soup base. The noodles and the soup base are engineered to work together, creating a specific junky flavor profile. And I love it as it is!
When you take the time and effort to prepare a homemade ramen broth and thoughtfully selected toppings, using instant noodles as the base is just not matching.
If you find yourself in a situation where you want to enjoy a bowl of ramen with homemade soup and toppings but don’t have access to fresh or dry ramen noodles, I strongly recommend opting for the spaghetti hack instead.
FAQ & Troubleshooting
This is often a problem with the water addition rate. If your noodles are too soft, you may have added too much water. If they are too hard, you may have added too little water. Everyone has a different preference for noodle firmness, so you’ll find your perfect solution as you make them more often.
Also, overboiling will naturally soften the noodles. For thin noodles, you’ll want to boil them for less than a minute. For normal thickness noodles, about a minute should be enough.
This issue can be resolved by allowing the dough to rest properly. Don’t skip resting periods to ensure that moisture is evenly distributed throughout the dough.
Additionally, consider purchasing a pasta machine to make beautiful, uniform noodles.
This is often because you didn’t flour the noodles before cooking them. Just make sure to dust them with flour or cornstarch, especially when making noodles with high water ratio.
This can be caused by not having enough alkaline ingredients, like lye water (kansui). Be sure to add lye water (powder), or baking soda if you do not have access to lye water, to give your noodles the distinctive ramen flavor and texture.
Some restaurants use “Tamago men” (ramen noodles with egg), but it’s more common to make them without eggs.
Unfortunately, regular alkaline water isn’t a suitable substitute for the lye water & baking soda solution. The lye water (or traditional kansui) contains potassium carbonate (K₂CO₃) and sodium carbonate (Na₂CO₃), giving it a strong alkaline pH of 10-11. Regular alkaline drinking water typically has a much milder pH of 8-9, which isn’t strong enough to create the distinctive springy texture and flavor that makes ramen noodles. For best results, stick with baked baking soda water as your alkaline solution if you cannot get lye water.
I hope you enjoy this Homemade Ramen Noodles recipe! If you try it out, I’d really appreciate it if you could spare a moment to let me know what you thought by giving a review and star rating in the comments below. It’s also helpful to share any adjustments you made to the recipe with our other readers.
I’d also love for you to contribute to our experiment logs by sharing a comment with a picture about your unique experiences!
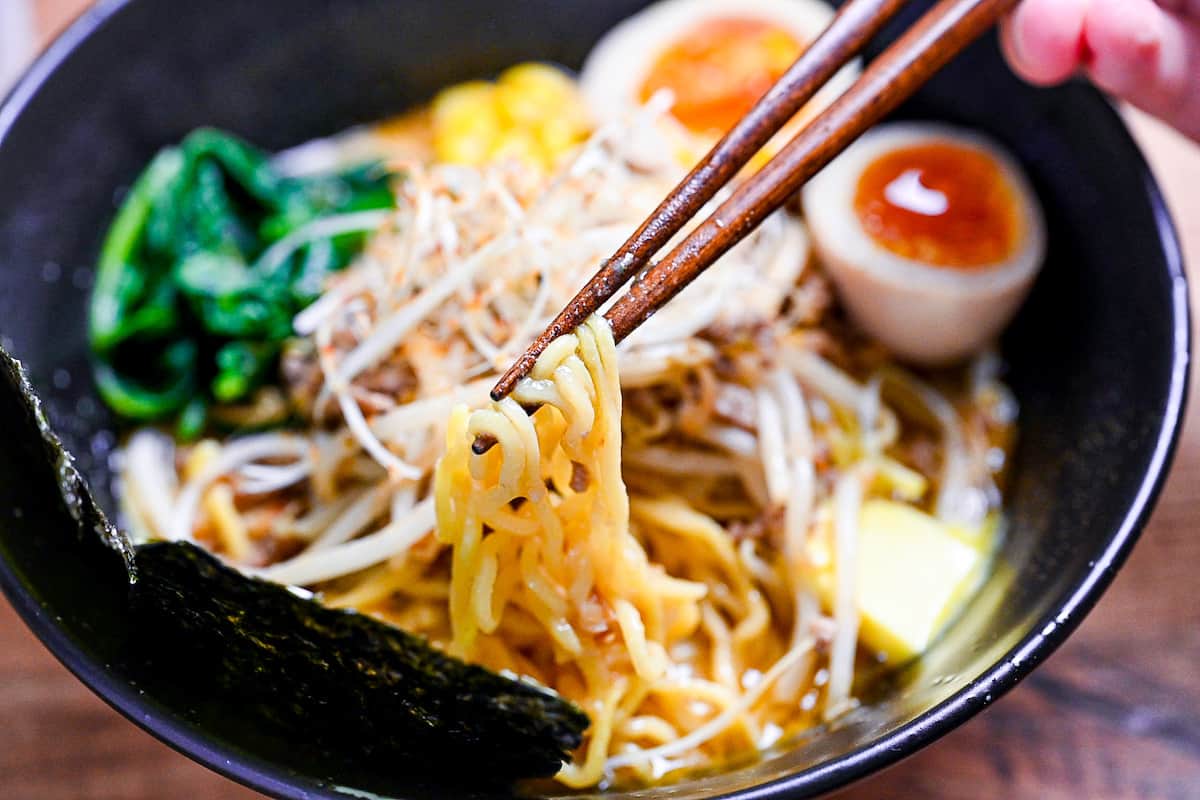
Make These Dishes with Homemade Ramen!
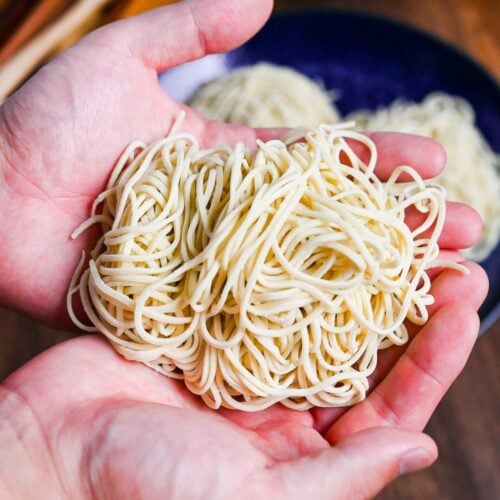
Handmade Ramen Noodles From Scratch
Ingredients
- 125 ml water
- ½ tsp lye water powder or an equal amount of baking soda
- ½ tsp salt
- 300 g bread flour plus extra for dusting
My recommended brands of ingredients and seasonings can be found in my Japanese pantry guide.
Can’t find certain Japanese ingredients? See my substitution guide here.
Instructions
- Measure 125 ml water into a container and add ½ tsp lye water powder and ½ tsp salt. Mix until fully dissolved and completely blended into the water.

- Sift 300 g bread flour into a large mixing bowl.

- Add the lye water little by little and mix with your hands (or chopsticks) after each addition until crumbs form.

- Stop adding water once all of the flour becomes dough-like crumbs (sprinkle a little more if there is still dry flour in the bowl). It's important not to add too much water.

- Transfer the crumbs to a large sealable freezer bag, push the air out and seal. Rest for 1 hour at room temperature.

- After 1 hour, place the bag on the floor and knead the dough by stepping on it with your foot. Step until the dough is flattened and fills the bag.

- Take it out and fold it into thirds, then return to the bag and repeat until you have a smooth dough (approximately 15 minutes of kneading).

- Once smooth, return to the bag and seal. Rest at room temperature for 24 hours.

- The next day, remove the dough from the bag and place it on a clean dry surface sprinkled with a small amount of flour.

- Roll the dough out thinly and then cut it into four manageable pieces narrow enough to fit through your pasta machine.

- Feed each piece through the pasta machine at the widest setting (usually 0) then reduce and repeat until you get to setting 5. If the surface of the dough feels tacky at any point, dust with flour to prevent sticking.

- Attach the spaghetti cutting attachment and roll each piece through.

How to Cook
- Start heating a large pot of water to a rolling boil. Once boiling, add the noodles and cook for 1 minute. Once cooked, pour through a colander to drain and wash with cold water. Rinse with hot water to warm through before serving.

How to Store
- Lightly dust the noodles with extra flour to prevent sticking.

- Wrap each bundle with plastic wrap, being careful not to press or crush them. Place the bundles in a sealable freezer bag. If using the same day, store in the refrigerator. If you don't plan to use them within 2-3 days, store in the freezer for up to 3 months and boil from frozen for 1 minute.


hi, by any chance do you have a recipe for Wonton Noodle? also what would be the ratio if the Lye used is already in liquid form? thank you
Hi Zabrina,
Thank you for your question!
While I don’t currently have a recipe for wonton noodles on my site, I appreciate your interest and will keep this in mind for future content. Regarding your question about liquid lye water, I recommend following the dilution rates specified on your package’s instructions, but make sure to adjust the plain water amount accordingly so that the total liquid volume (water + liquid lye water) remains the same as in this recipe.
I hope this helps! Feel free to let me know if you have any other questions.
Yuto