

Before beef sukiyaki existed, there was chicken sukiyaki. For centuries, it was the original. And this recipe doesn’t just swap the protein. The warishita is redesigned from the ground up for chicken’s lighter, cleaner flavor.
Less sugar, light soy sauce, rendered chicken fat instead of beef suet, and a double-dashi backbone that gives chicken the umami it actually needs. This is chicken sukiyaki built to be its own thing. Not a compromise. An upgrade.

Chicken Sukiyaki
Recipe Snapshot
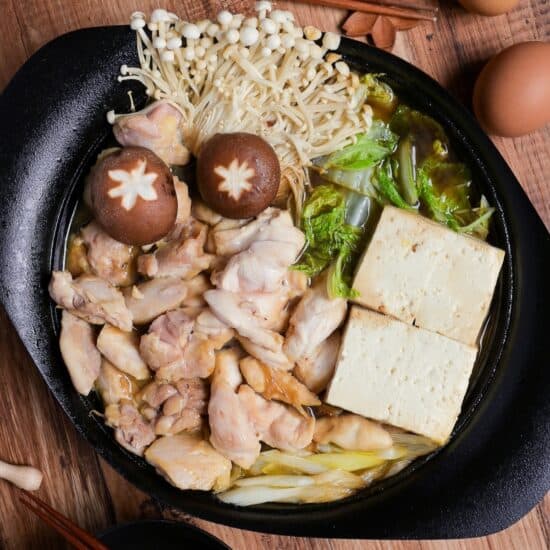
- What is it? A Japanese hot pot where chicken, tofu, and vegetables simmer in a sweet-savory warishita sauce, then get dipped in beaten egg at the table. Rooted in Kyushu home cooking, where chicken sukiyaki (tori-suki) predates the beef version.
- Flavor profile: Clean chicken umami layered with a double-dashi backbone (bonito flakes and kombu), sweet-salty warishita, and a hint of rendered chicken fat richness. Lighter and more delicate than beef sukiyaki.
- Why you’ll love this recipe: The warishita is built specifically for chicken, not borrowed from beef sukiyaki. Less sugar, light soy sauce to preserve the pale color, and a dashi-forward design that gives chicken the umami support it actually needs.
- Must-haves: Chicken thigh (with skin on for rendering), Japanese light soy sauce, and dashi stock plus dashi powder for the double-umami approach.
- Skill level: Easy to Medium
Summarize & Save this content on:
What is Chicken Sukiyaki?
Chicken sukiyaki (鶏すき焼き), also called tori-suki or kashiwa no sukiyaki, is a Japanese hot pot that simmers chicken, tofu, and vegetables in a sweet-savory warishita sauce. Like beef sukiyaki, the cooked ingredients are dipped in beaten raw egg before eating.
What most people don’t realize is that chicken sukiyaki is actually the older form. Before the Meiji era’s bunmei kaika (Western modernization) introduced widespread beef consumption, sukiyaki in Japan was made with chicken, seafood, or tofu. The name itself comes from grilling food on a farmer’s suki (spade). Beef sukiyaki, the version we think of today, only became mainstream in the late 1800s.
In Fukuoka and other parts of Kyushu, tori-suki remains a household staple.
Chicken Sukiyaki Ingredients
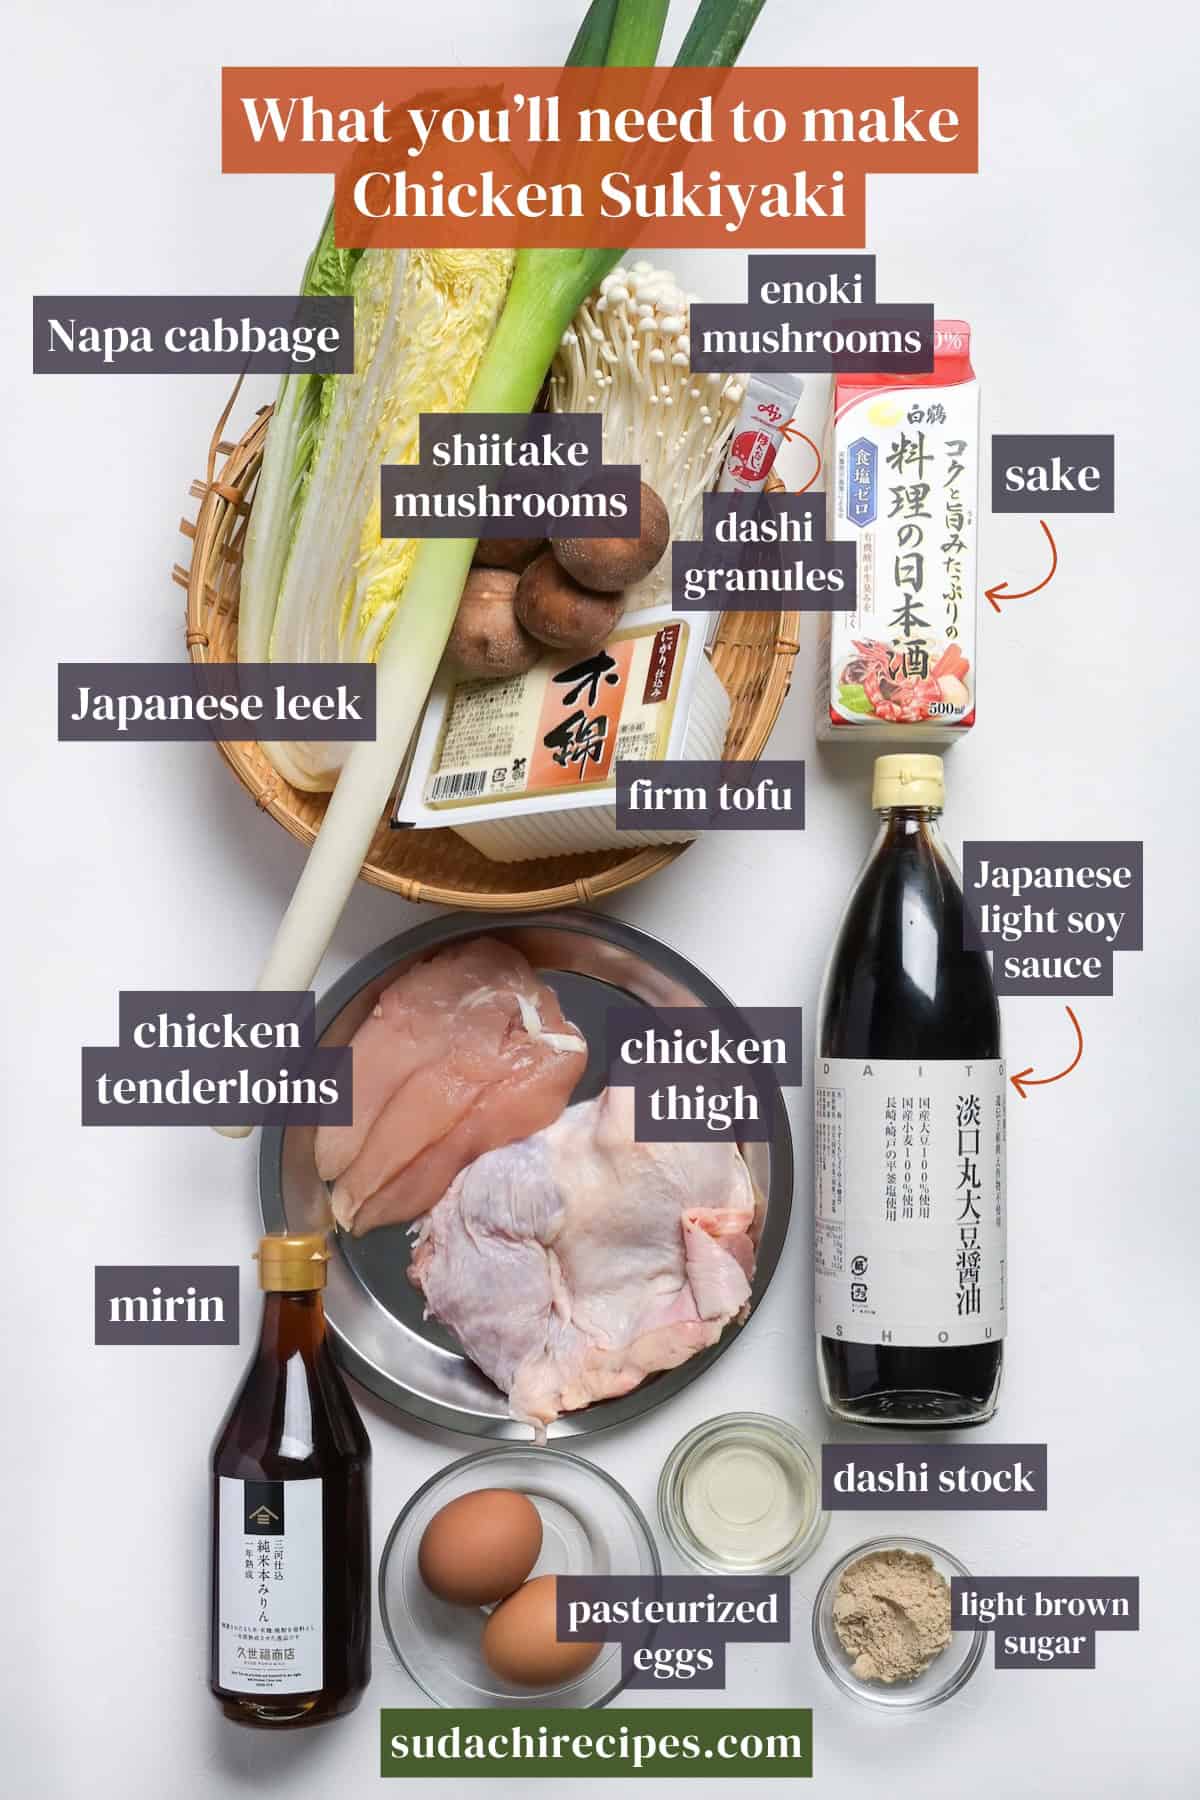
- Chicken (thigh and tenderloin): Use a combination of thigh meat and chicken tenderloin to create a contrast in texture within the chicken itself. You can get away with just one, but ideally you want both for that layered effect. Thigh stays juicy and rich from its intramuscular fat, while tenderloin is lean and delicate. Together, they make the eating experience far more interesting than a single cut.
- Light soy sauce (usukuchi): This is a deliberate choice, not a default. Usukuchi keeps the broth pale and clean, letting chicken’s natural color come through instead of turning everything dark. It’s saltier than regular soy sauce by volume, so you’ll notice the amounts are smaller than you might expect. If you only have standard Japanese soy sauce, that works too. Just increase the amount slightly or add a small pinch of salt to compensate.
- Napa cabbage: You can substitute regular cabbage here and it works just fine. Napa cabbage releases more water as it cooks, which naturally helps dilute the warishita and keep the concentration in check.
Substitutions, Variations, and Customization
Substitutions:
- Usukuchi (light) soy sauce → Regular Japanese soy sauce works. It’s less salty, so increase the amount a little or add a pinch of salt. The broth will be darker and the soy flavor more pronounced, but it still tastes good.
- Napa cabbage → Regular cabbage is a fine swap. It takes a bit longer to soften and releases less water, so the warishita may concentrate faster. Add a splash of water or sake if it gets too salty.
- Chicken tenderloin → Thinly sliced chicken breast. Slice it very thin (about 5 mm) against the grain and add it toward the end of cooking to keep it tender.
- Negi (Japanese long green onion) → Regular leek. Milder and thicker fibers, but it caramelizes nicely when seared. Use the white and light green parts.
- Fresh shiitake/enoki → Any local mushroom. King oyster, maitake, or button mushrooms all work.
- Homemade dashi → It’s a small amount so feel free to use the leftover dashi stock or prepare it with instant dashi granules or dashi packets.
- Regular soy sauce (for gluten-free) → Tamari is the closest match.
Variations:
- All-thigh version: Skip the tenderloin and use all thigh. You lose textural contrast but gain simplicity and a richer overall flavor.
- Udon shime (noodle finish): Add cooked noodles directly in the remaining warishita after eating the main ingredients. Somen is the traditional Fukuoka finish.
How to Customize:
- Spicier: Add shichimi togarashi or ichimi just before eating. The heat pairs well with the sweet-savory sauce and egg.
- Citrus accent: A squeeze of yuzu juice or a touch of yuzu kosho adds brightness that cuts through the richness.
- Miso finish: Stir 1-2 tsp of miso into the warishita toward the end. Reduce soy sauce slightly since miso adds salt.
Have trouble finding Japanese ingredients? Check out my ultimate guide to Japanese ingredient substitutes!
How to Make My Chicken Sukiyaki
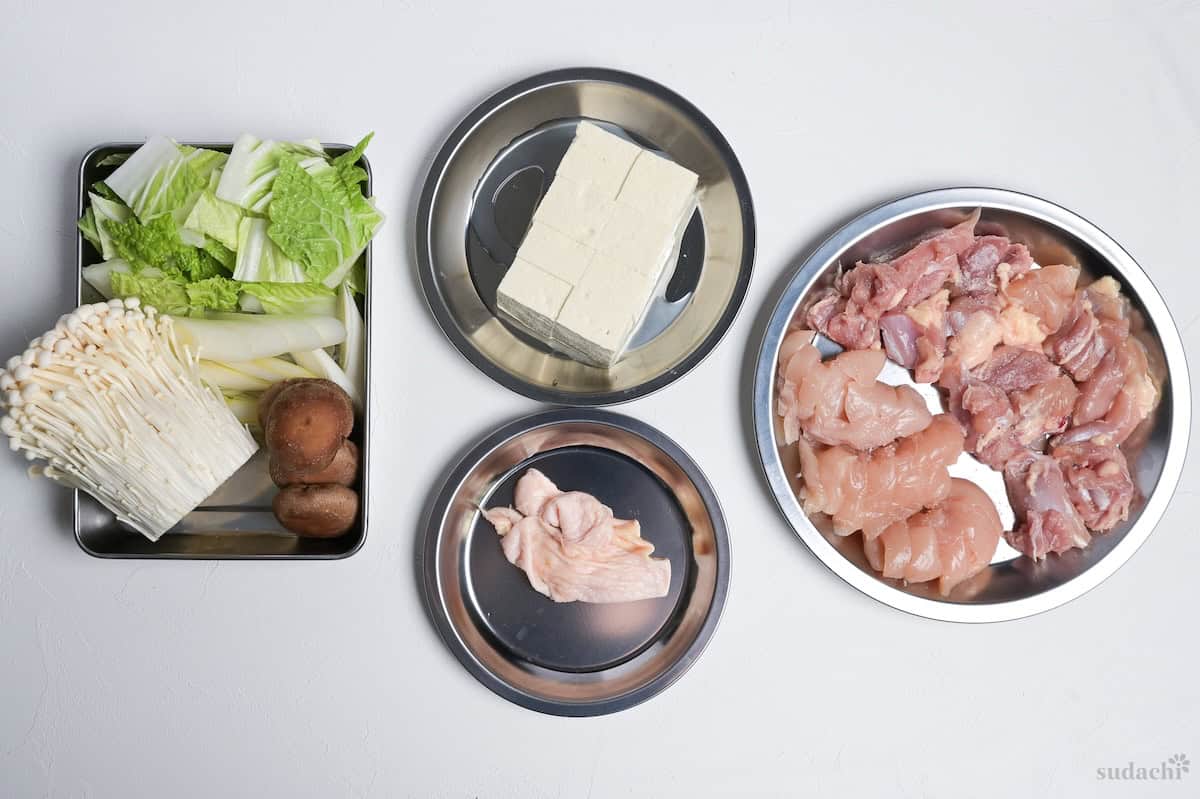
Before you start (Mise en place):
- Remove the chicken from the refrigerator. Slice the thigh and tenderloin against the grain, separate the skin from the meat, and season everything with a light pinch of salt.
- Cut firm tofu into large pieces.
- Roughly chop napa cabbage.
- Slice leek on the diagonal into 5-6 cm pieces.
- Trim the stems from fresh shiitake and enoki. Score the shiitake caps decoratively if you like, then salt all the mushrooms lightly and arrange everything on a tray.
Salting at the prep stage draws moisture to the surface through osmosis, concentrating their natural umami (guanylate). When they hit the hot warishita later, they’re already loaded with flavor.
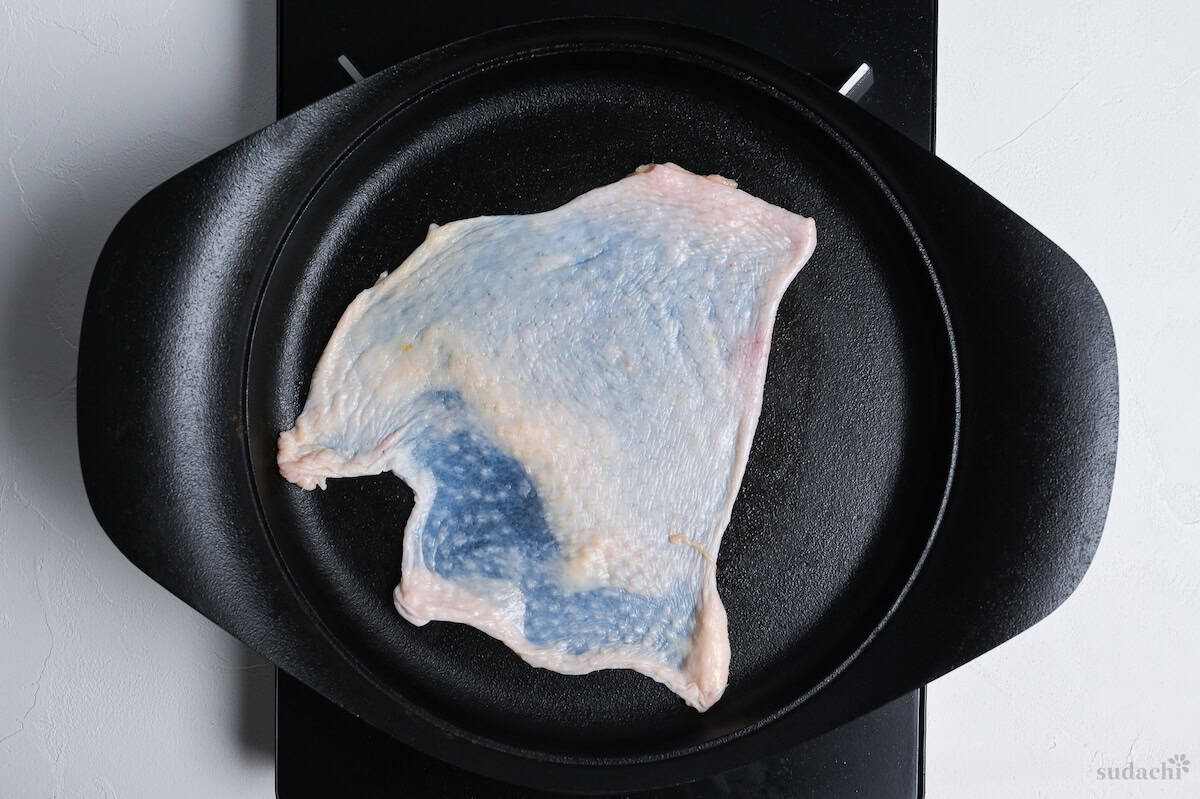
i. Spread the chicken skin across the bottom of a shallow iron skillet or heavy pan. Start from a cold pan and heat slowly over low to medium heat.
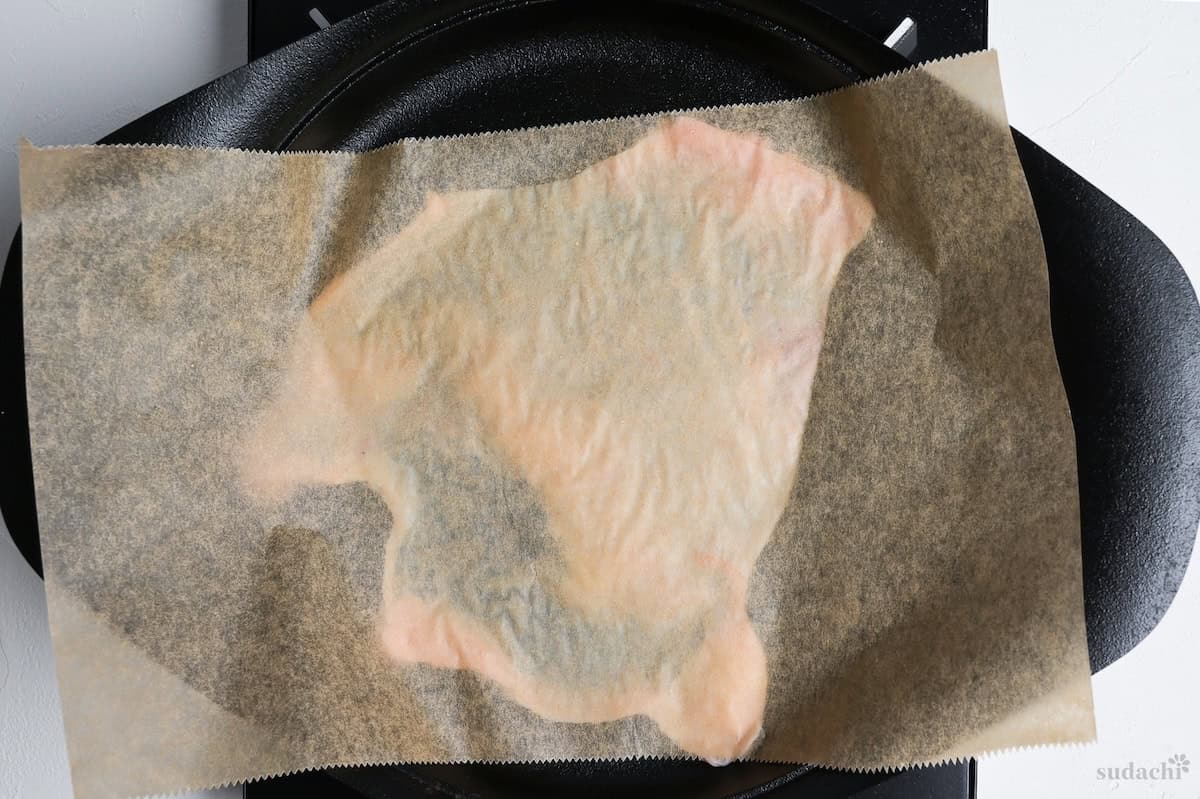
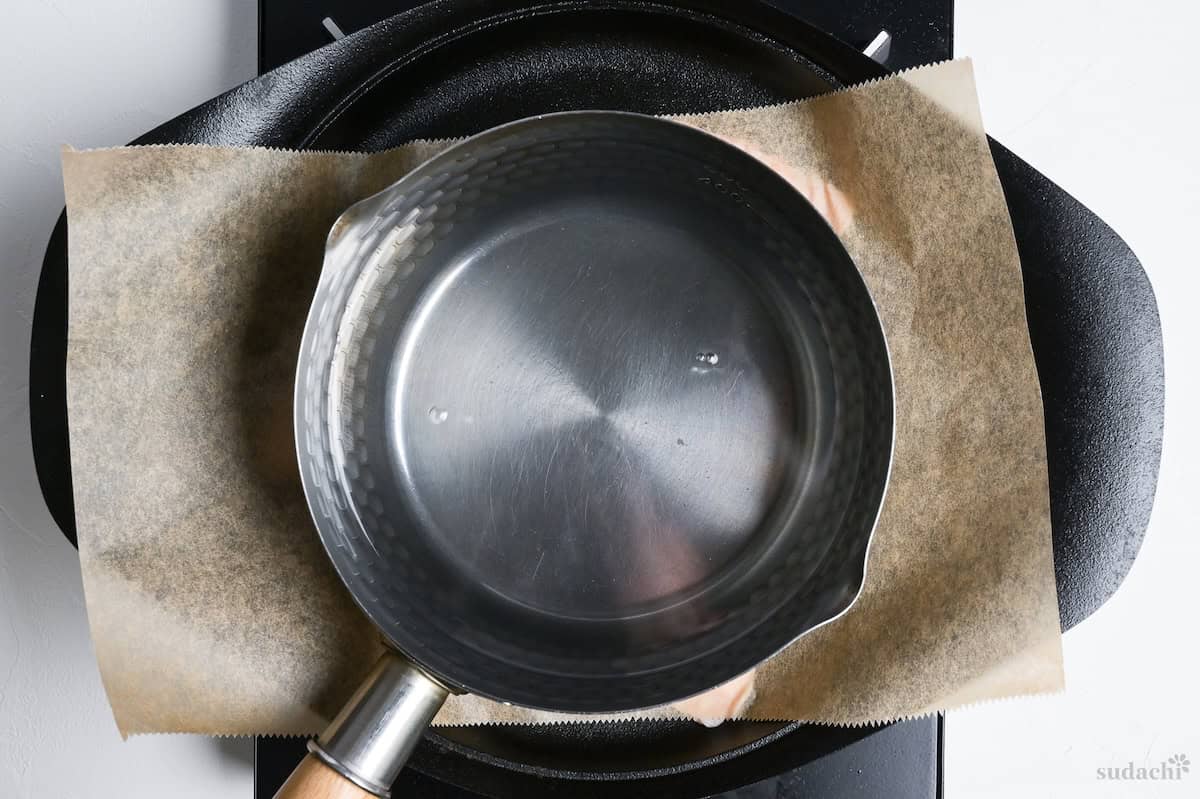
ii. Let the fat render gradually. For faster results, lay a sheet of parchment paper over the skin and press down with a weight.
iii. Once the skin is golden and crispy and the fat has pooled in the pan, remove the skin and set it aside.
In beef sukiyaki, beef suet greases the pan and adds richness. Here, chicken skin does the same job. Chicken fat has a melting point of just 30-32°C (86-90°F), much lower than beef tallow, creating a light, clean mouthfeel.
i. While the skin renders, combine the mirin and sake in a small saucepan. Bring to a boil over medium heat and cook briefly to burn off the harsh alcohol.
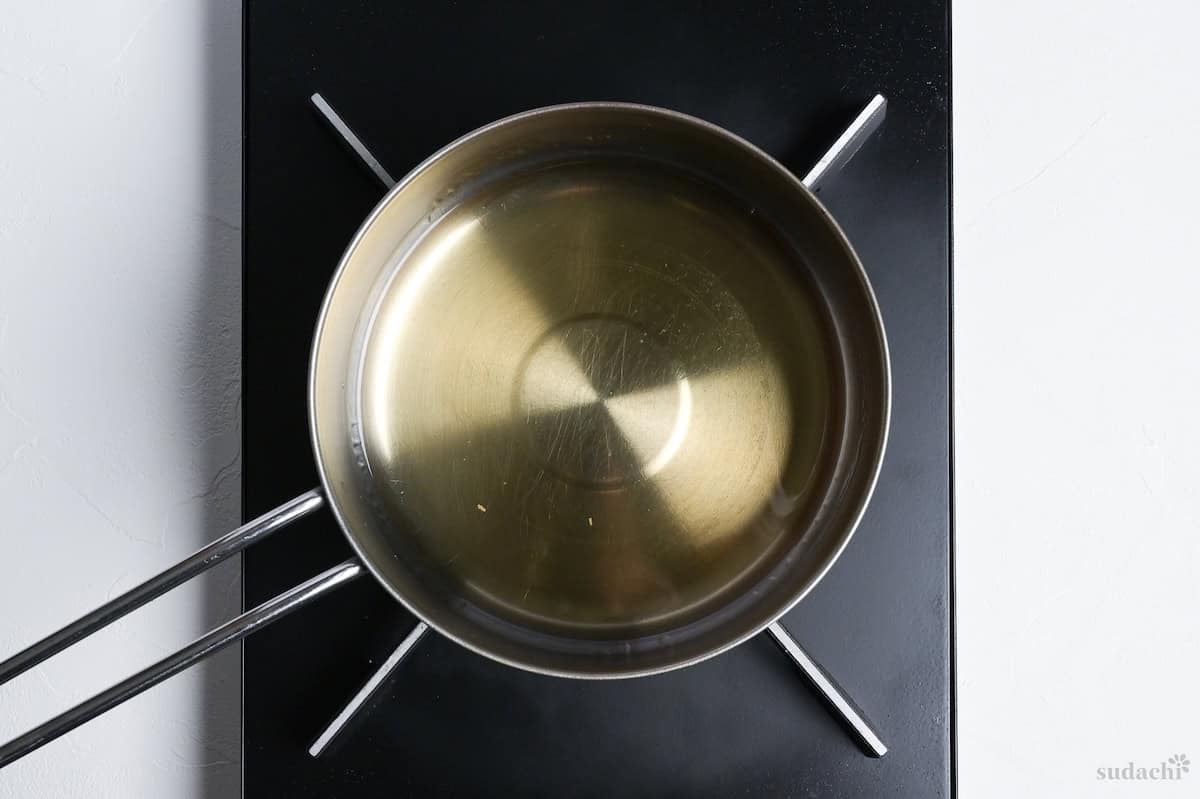
ii. Lower the heat to medium-low. Add the usukuchi (light) soy sauce, light brown sugar, dashi stock, and instant dashi granules. Stir until the sugar and dashi powder are fully dissolved.
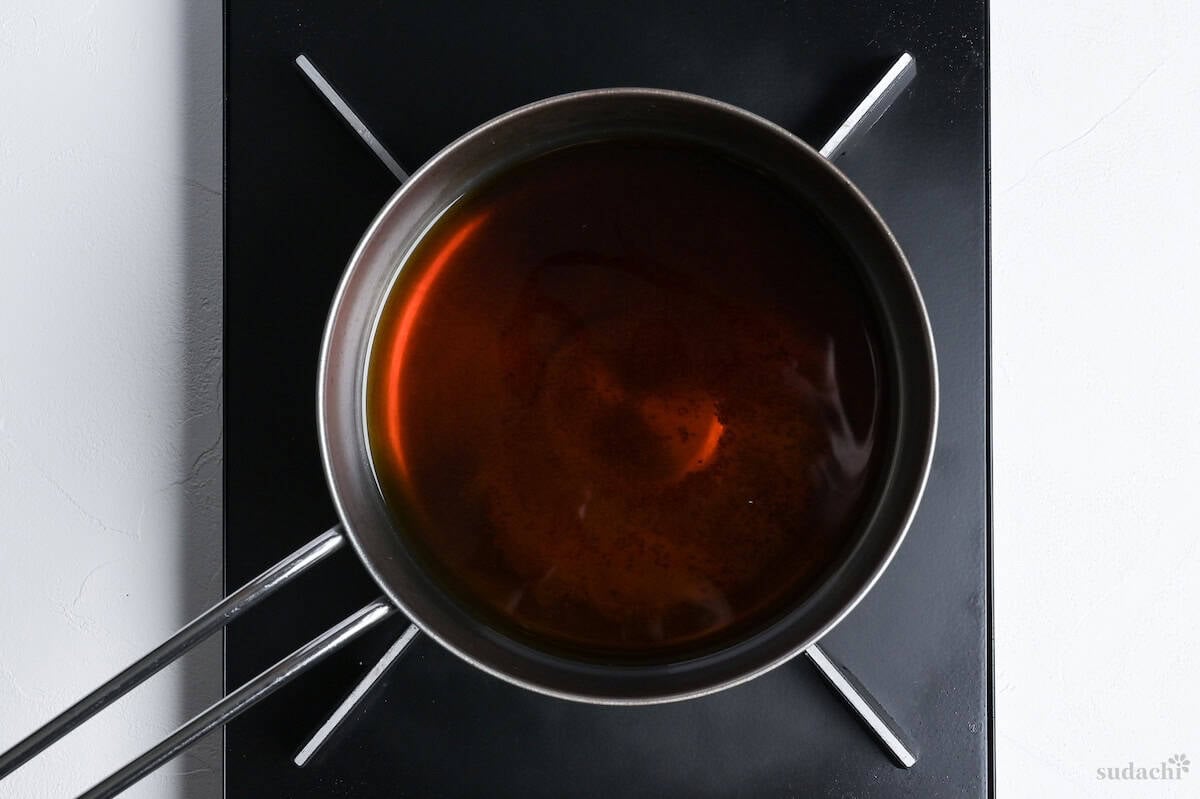
3 deliberate changes. First, light soy sauce instead of dark, because dark soy muddies chicken’s pale color. Second, less sugar, because chicken doesn’t need heavy sweetness as a counterbalance unlike rich beef fat. Third, a double-dashi approach (liquid stock plus granulated powder) to bring in both glutamic acid and inosinic acid. Beef sukiyaki can get by on fat alone. Chicken needs this umami backbone.
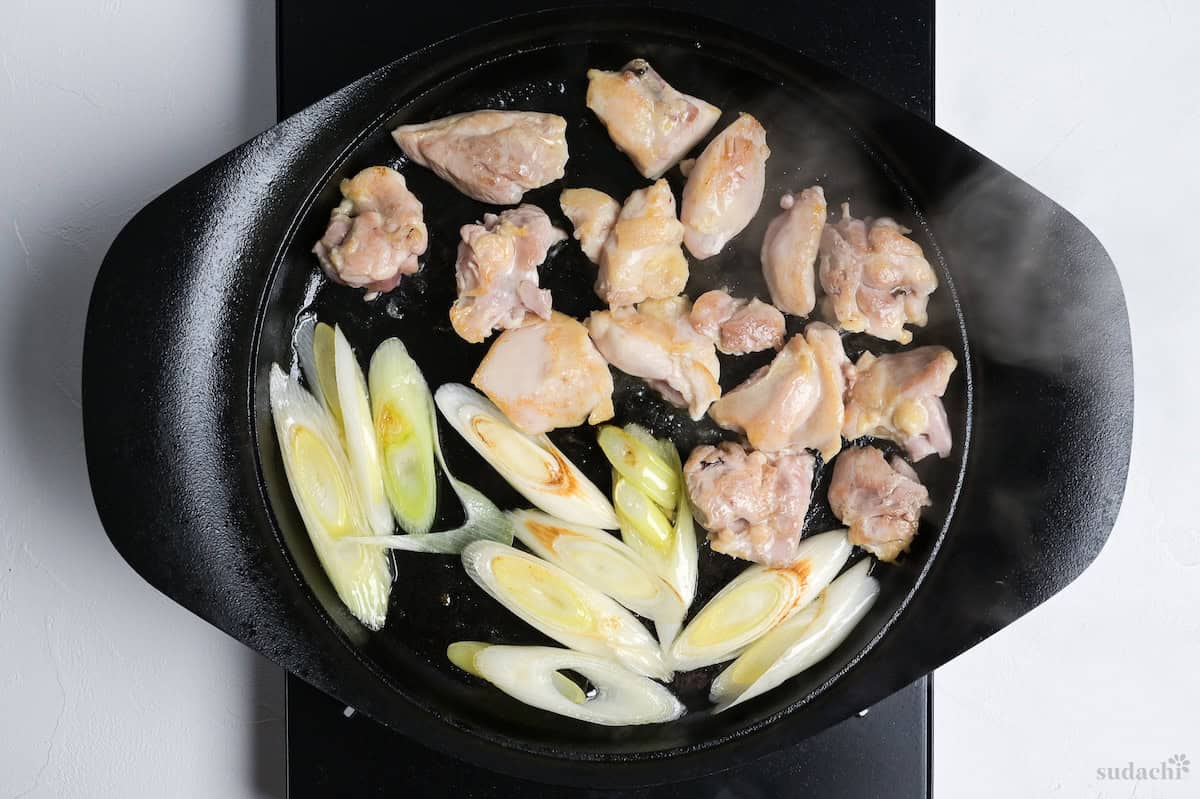
i. In the rendered chicken fat, add the full amount of negi and the chicken thigh (patted dry with paper towels).
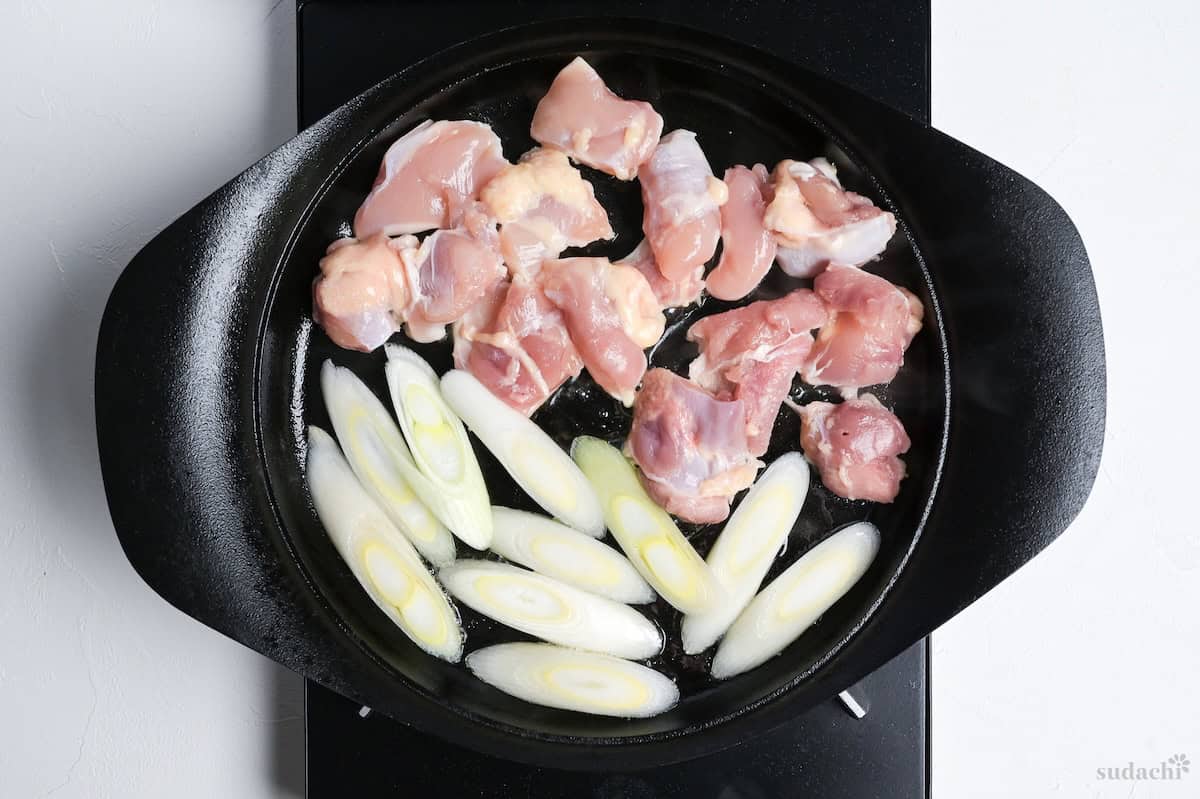
ii. Sear over medium heat until lightly browned on the surface. Once the negi has good color, push it to the side. Remove the chicken thigh temporarily.
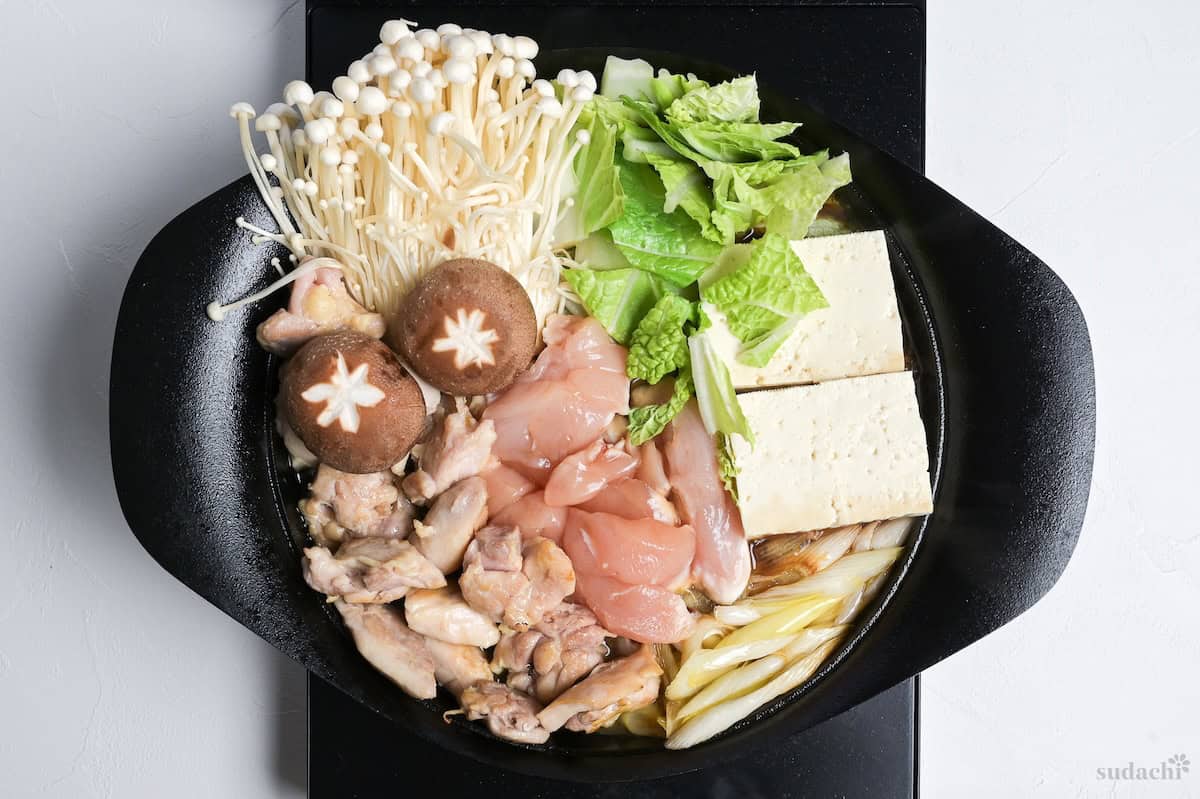
iii. Pour in the warishita. Add the tofu and the vegetables (napa cabbage, shiitake, enoki). Bring to a boil, then lower to a gentle simmer.
i. Make space between the ingredients and nestle the chicken (both the seared thigh and the raw tenderloin) into the liquid so it’s in contact with the warishita. Flip the tofu so it absorbs evenly on both sides.
ii. Simmer until the chicken is cooked through and the vegetables are tender, roughly 5-15 minutes.
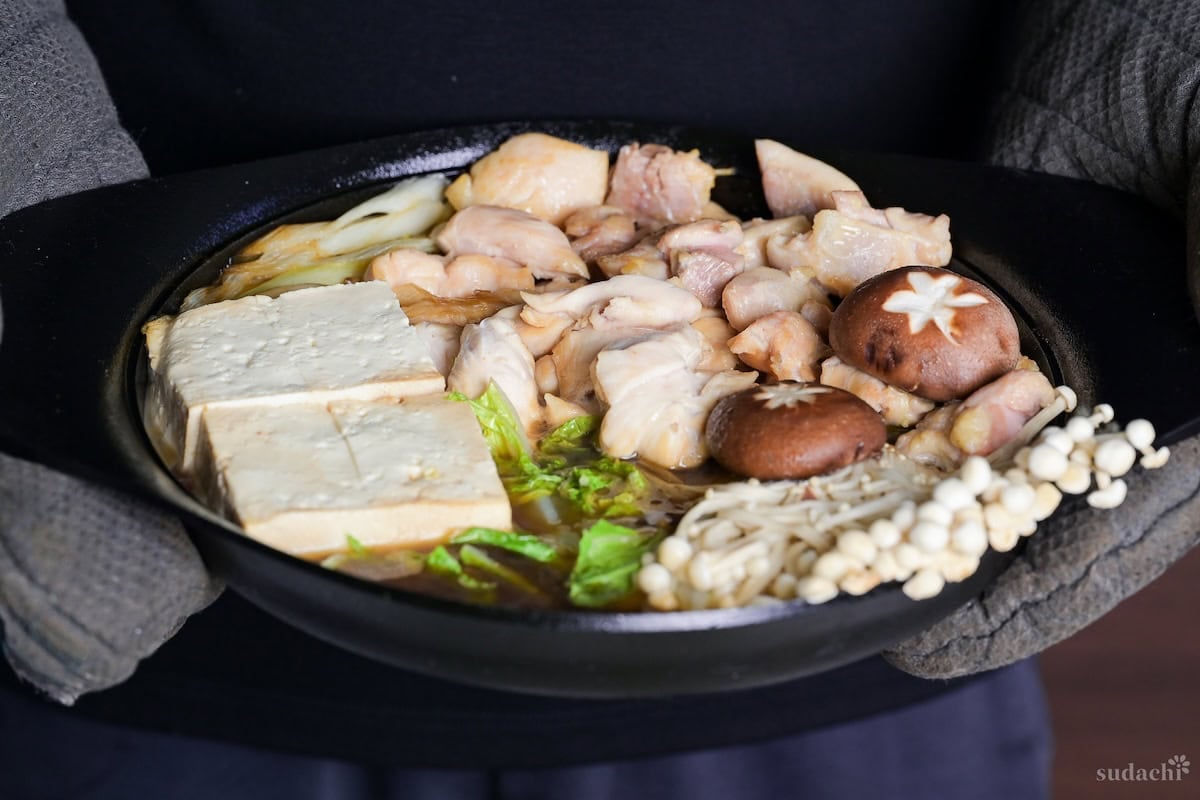
iii. As each ingredient reaches your preferred doneness, transfer it to a serving bowl. Add fresh ingredients into the open space in the pan. This is how sukiyaki is eaten: in rounds, at the table, while everything stays hot.
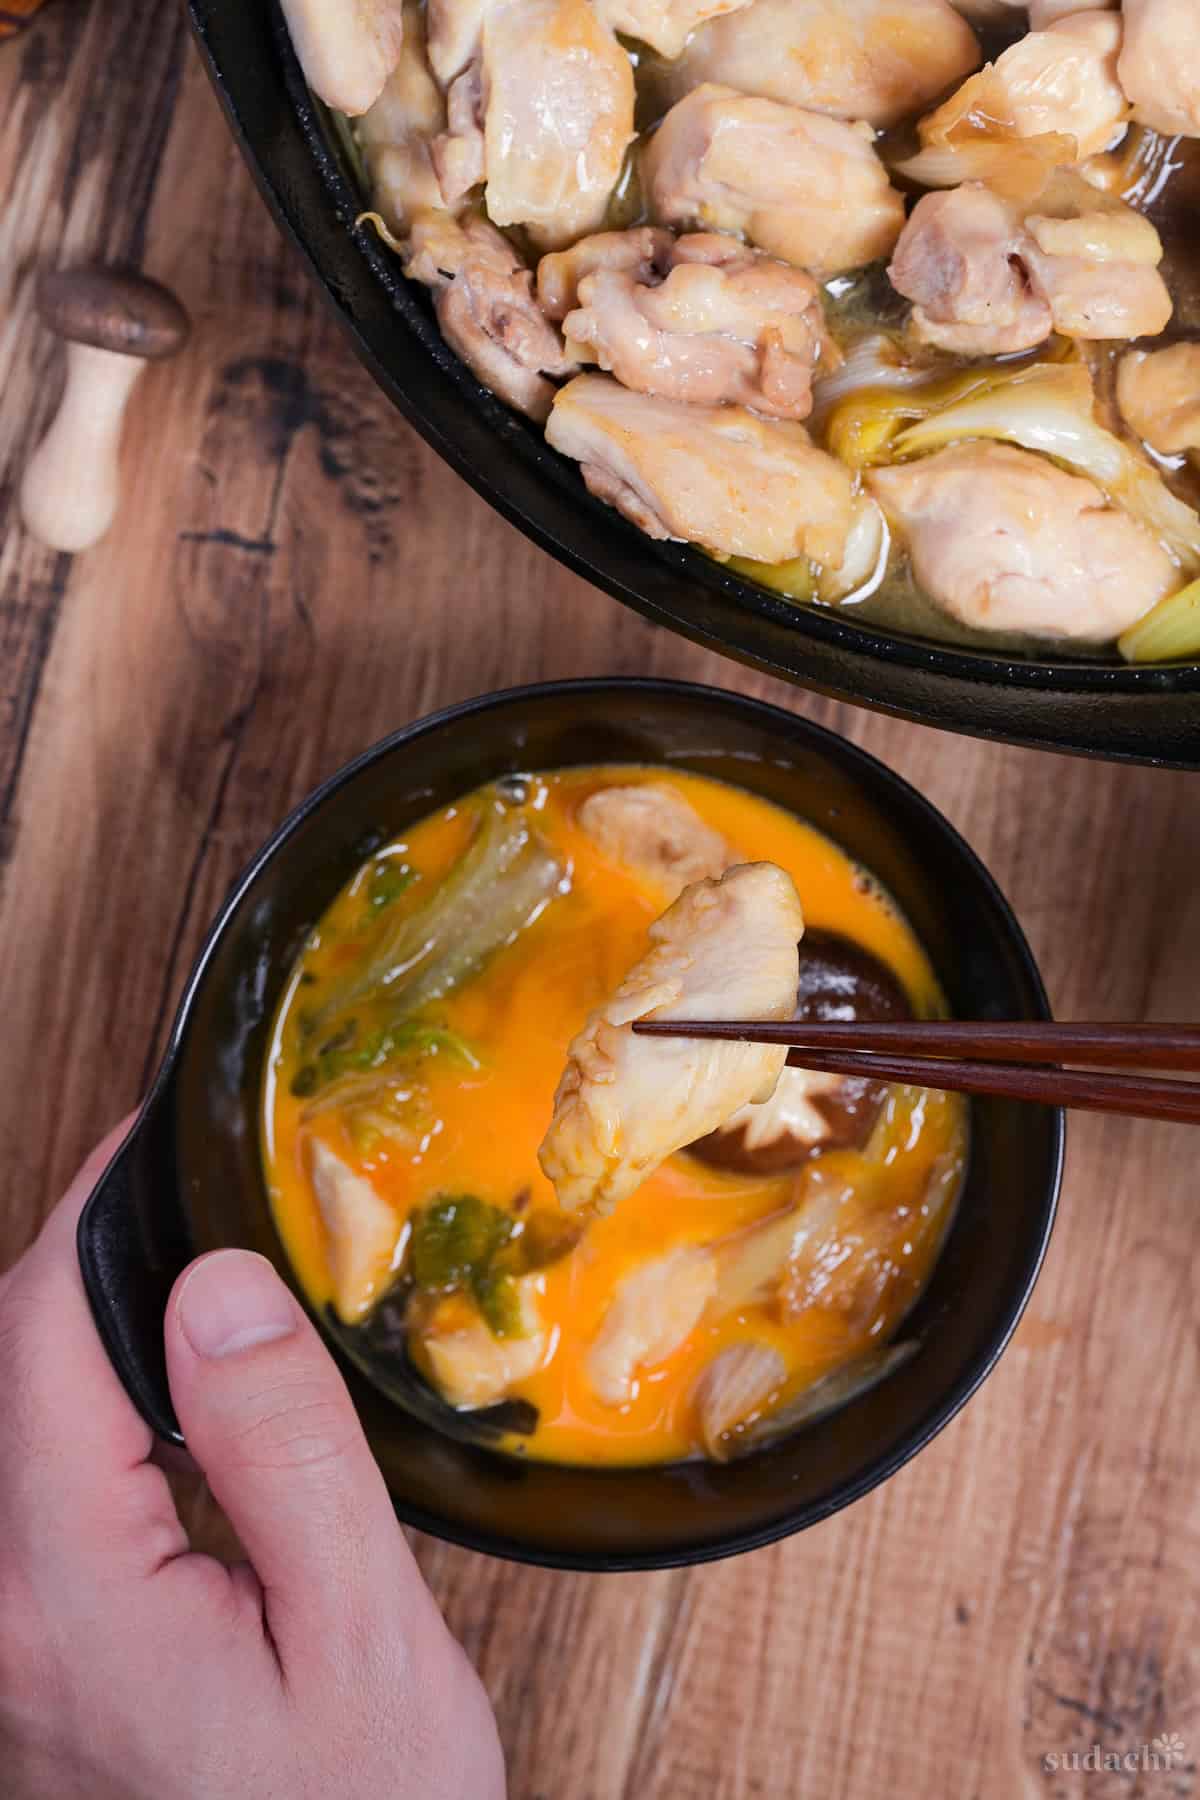
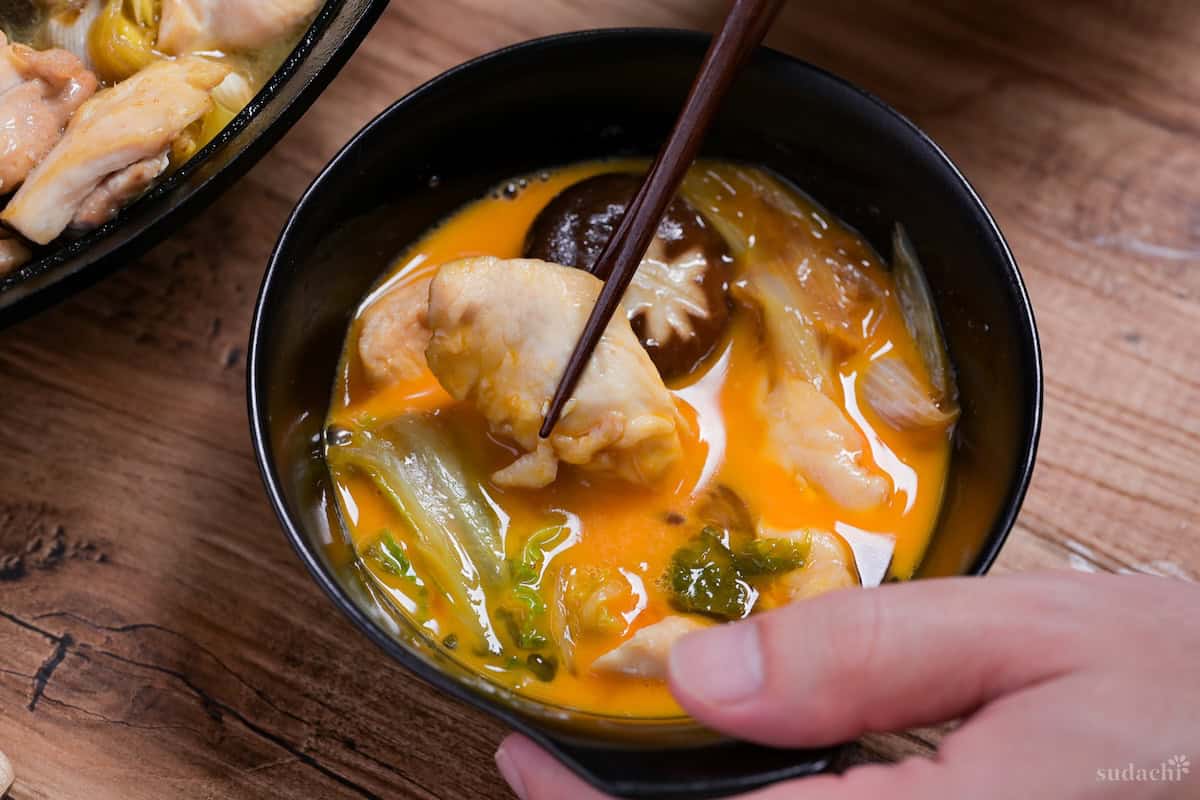
iv. Crack a pasteurized egg per person into individual dipping bowls and beat well. Dip the hot sukiyaki ingredients into the egg as you eat. The egg coats everything in a silky, rich layer and cools the surface just enough to eat comfortably. This step is optional but traditional.
v. Finish with a sprinkle of sansho pepper and the crispy rendered chicken skin from earlier as a topping. You can enjoy this with plain steamed rice too.

If you follow the default recipe, it will yield 2-3 main servings.

Essential Tips & Tricks
- Remove the chicken as soon as it’s done. The single biggest mistake with chicken sukiyaki is letting it sit in the simmering warishita too long. Extended heat causes continued moisture loss and makes the meat tough and dry.
- Start rendering the skin from a cold pan. Placing chicken skin in a hot pan sears the outside before the fat underneath can melt out. Starting cold gives the fat time to render slowly and evenly. Patience here pays off with more rendered fat and crispier skin.
- Watch the warishita concentration. Sukiyaki pans are shallow and wide, which means the sauce evaporates and concentrates quickly. If the broth gets too salty or thick, add a splash of water or sake to bring it back. The vegetables release water as they cook, which naturally dilutes the sauce over time, so the first few minutes tend to be the saltiest.
- Slice the tenderloin thin and add it late. Tenderloin is lean and cooks fast. If you add it at the same time as the thigh, it will overcook.
With these simple tips in mind, you’re set for success every time you make chicken sukiyaki.
Storage & Meal Prep
Storing Leftovers:
Chicken sukiyaki is best eaten fresh from the pot, but leftovers can be stored.
- Refrigerator: Cool the leftover sukiyaki quickly. Transfer to a shallow airtight container (not the pot) and refrigerate within 30 minutes. It keeps for 1-2 days. The chicken will absorb more salt from the warishita as it sits, so the flavor intensifies overnight.
- Freezing: Not ideal.
- Reheating: Reheat gently on the stovetop over medium-low heat until the chicken reaches a safe temperature throughout. Add a splash of dashi or water if the warishita has thickened too much.
Meal Prep Tips
- Make the warishita ahead: The sauce can be mixed and stored in the refrigerator for up to 3 days before cooking. Don’t heat it until you’re ready to cook.
- Prep all vegetables in advance: Cut the napa cabbage, negi, tofu, and mushrooms and store them on a covered tray in the fridge. Salt the mushrooms only on the day you cook.
- Don’t pre-cook the chicken: Chicken is best cooked fresh for sukiyaki. Pre-cooked chicken reheated in warishita loses moisture and becomes tough.
Chicken Sukiyaki FAQ
Yes, but slice it thin (about 5 mm) against the grain and add it later in the cooking process. Breast is leaner and dries out faster than thigh. It won’t have the same juicy richness.
You can, but the flavor will be noticeably lacking. Dashi provides the umami backbone that chicken needs. If you don’t have liquid dashi, increase the granulated dashi powder slightly and use water. It’s a simpler version, but it still works.
Yes. A shallow, heavy-bottomed pan (cast iron is ideal) works well. The wide, shallow shape matters more than the material because it allows you to sear, simmer, and serve from the same pan.
More Summer Recipes
- TipOne
Hungry for more? Explore my udon recipe collection to find your next favorite dishes!
Did You Try This Recipe?
I would love to hear your thoughts!
💬 Leave a review and ⭐️ rating in the comments below. 📷 I also love to see your photos – submit them here!

Chicken Sukiyaki (Kashiwa no Sukiyaki)
Ingredients
Warishita (Cooking Sauce)
- 3 tbsp sake drinking-grade recommended
- 3 tbsp mirin
- 1½ tbsp light brown sugar or white sugar
- 2½ tbsp Japanese light soy sauce usukuchi shoyu
- 3 tbsp dashi stock
- ¼ tsp dashi granules
Sukiyaki
- 200 g boneless chicken thigh skin-on, skin reserved for rendering
- 100 g chicken tenderloin thinly sliced against the grain, or chicken breast
- 200 g firm tofu or grilled tofu, drained and cut into large pieces
- 2 leaves Napa cabbage or green cabbage
- 4 fresh shiitake mushrooms or button mushrooms
- 60 g enoki mushrooms trimmed
- 1 Japanese leek (naganegi) or leek, white and light green parts only
- 2 pasteurized eggs optional, for dipping
- Japanese sansho pepper to taste
My recommended brands of ingredients and seasonings can be found in my Japanese pantry guide.
Can’t find certain Japanese ingredients? See my substitution guide here.
Instructions
- Separate the skin and meat of 200 g boneless chicken thigh. Cut the meat into bitesize pieces, and 100 g chicken tenderloin into thin slices against the grain. Season everything with a few pinches of salt. Drain 200 g firm tofu and cut it into large pieces. Roughly cut 2 leaves Napa cabbage and diagonally slice 1 Japanese leek (naganegi). Trim the stems/roots of 4 fresh shiitake mushrooms and 60 g enoki mushrooms, then sprinkle with salt.

- Spread the chicken skin out in a large cold skillet, then cover with a sheet of parchment paper and a heavy weight (like a pot filled with water). Heat on low/medium-low until golden and crispy.
- While you wait, make the warishita sauce. Pour 3 tbsp sake and 3 tbsp mirin into a small saucepan. Boil for a minute to burn off the harsh alcohol, then set the heat to medium low and add 1½ tbsp light brown sugar, 2½ tbsp Japanese light soy sauce, 3 tbsp dashi stock, and ¼ tsp dashi granules. Stir over the heat until the sugar and dashi granules have dissolved, then remove from the heat.
- Remove the crispy chicken skin from the skillet and set it on a wire rack to drain excess oil. Add the chicken thigh and Japanese leek to the skillet and fry over medium heat in the rendered chicken fat until lightly browned all over.
- Transfer the seared chicken thigh to a plate for now. Pour the prepared warishita sauce into the skillet, and arrange the tofu and vegetables in the sauce. Bring to a boil, then reduce the heat to a simmer. Make a space between the ingredients and add the seared chicken thigh back in, along with the uncooked tenderloin. Make sure everything is in contact with the sauce.
- Crack 1 pasteurized egg per person into individual dipping bowls. Whisk until the yolk and whites are combined. As each ingredient cooks to your preferred doneness, remove it from the skillet, then dip it into the egg and enjoy. Sprinkle with Japanese sansho pepper to taste.
Leave a rating and a comment