

Disclaimer: This post may contain Amazon affiliate links. Sudachi earns a small percentage from qualifying purchases at no extra cost to you. See disclaimer for more info.
What is Onigiri?
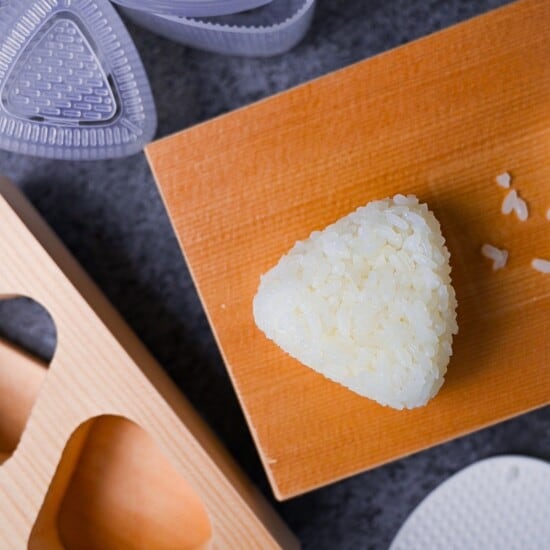
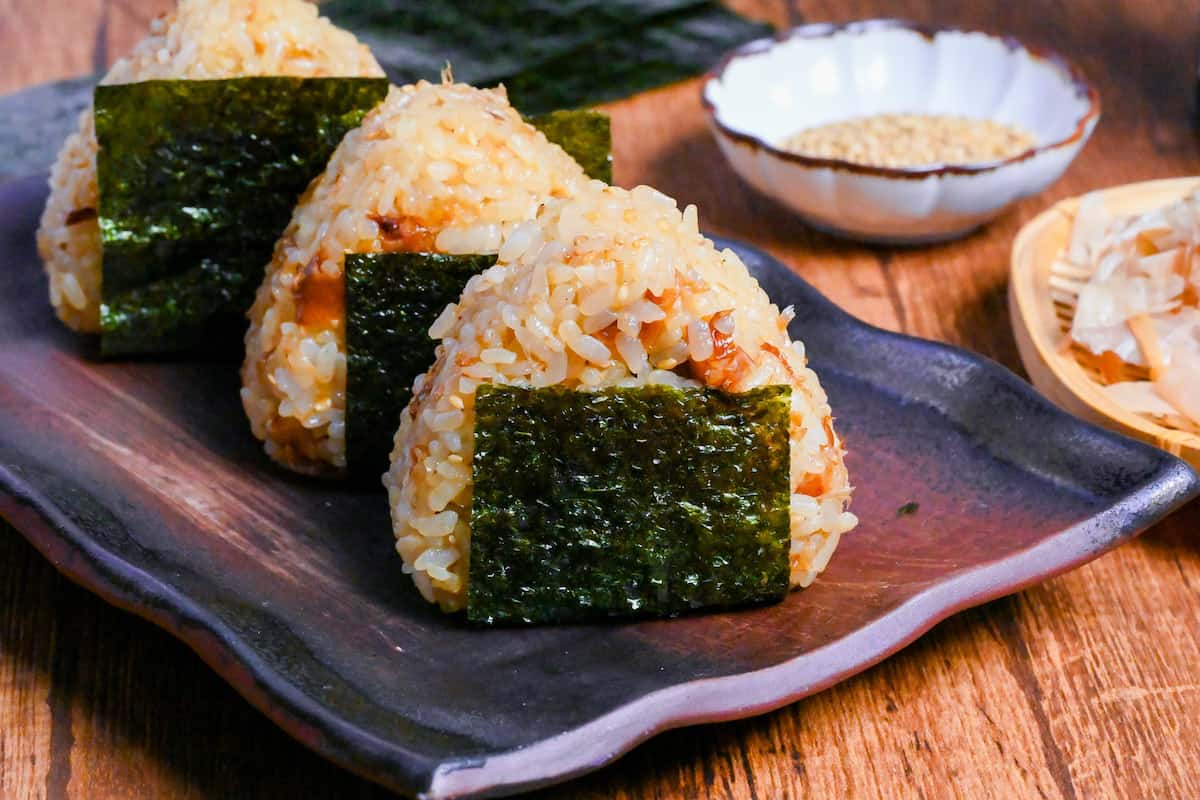
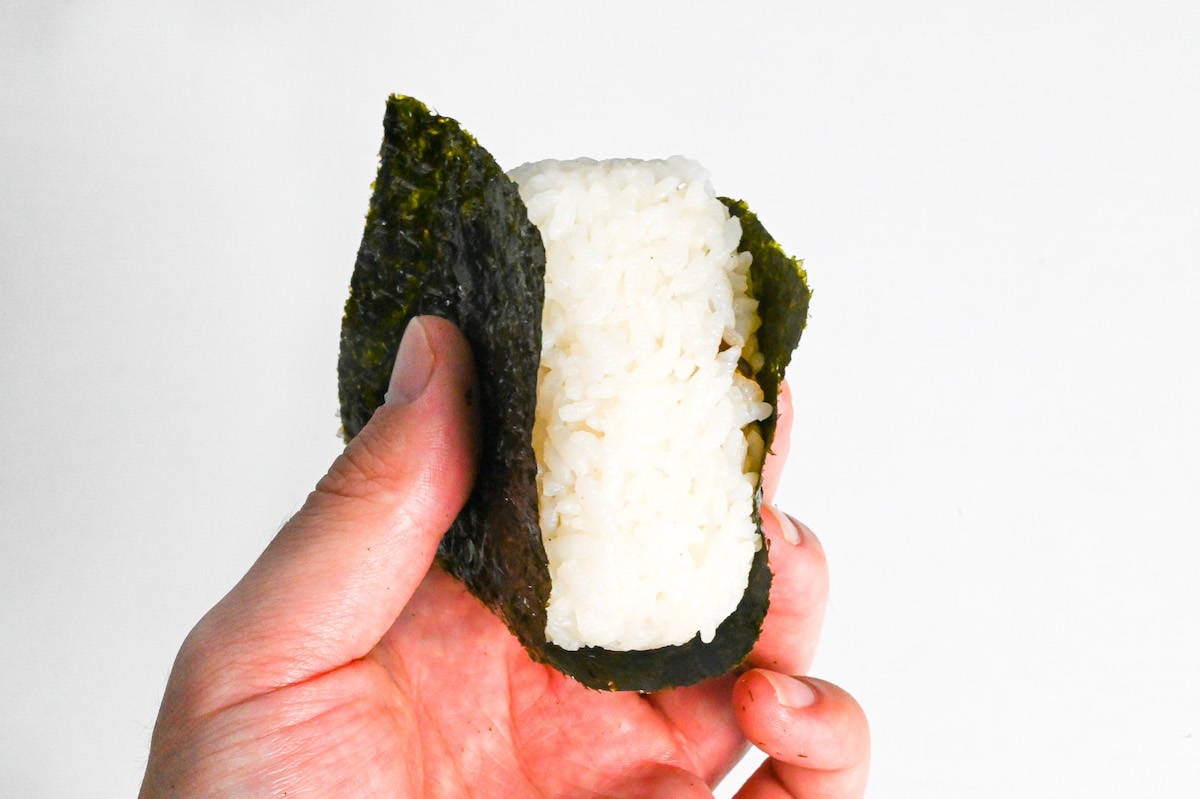
An onigiri is essentially a rice ball made from sticky Japanese short-grain white rice, which is the same type of rice used to make sushi. The most common shape for onigiri is a triangle with rounded corners, although they can also be made completely round.
It is believed to have originated during the Heian period (794-1185). Since then, it has been highly valued for its ease and convenience as it does not require a plate, making it a popular choice for portable food during the Sengoku (war states) period (1467-1615).
Just like a sandwich, onigiri is customizable and the variety of fillings and flavor options are endless! Here are the most common ways to add flavor to rice balls:
- Salt: The most basic onigiri of all – salt. And it’s one of the most popular types too! The salt helps preserve the rice and adds a simple yet great flavor.
- Mixing: Ingredients can be incorporated into the rice before shaping, such as salmon or soboro chicken. It might sound simple, but if the ingredients are too wet or greasy, the rice may lose its stickiness and the onigiri may not hold its shape so caution is needed.
- Filling: For a central flavor surprise, try fillings like tuna mayo or kombu tsukudani. Filling works best with ingredients with a lot of moisture.
- Cooking: Flavors can be intensified by cooking rice with ingredients like meats or using stock instead of water. I often make rice balls using leftover Takikomi Gohan for example!
- Frying: For a crispy twist, there’s yaki onigiri which is pan-fried after it’s been shaped.
With these methods, onigiri offers a taste experience for everyone.

Best Rice to Use for Onigiri
Onigiri is nearly always made with Japanese short-grain white rice. This type of rice has a sticky texture, making it easy to shape into rice balls that hold together without falling apart. It is also a popular staple in Japanese cuisine that is consumed almost daily.
If you want to know my recommended rice brands in the US and how to cook Japanese short-grain rice on the stove, check out my Japanese rice recipe.
If you prefer to use brown rice, you will need to find Japanese short-grain brown rice. It has the same sticky texture as the white variety, but it requires extra soaking time and can be difficult to find.
It’s important to note that regular long-grain brown rice cannot be used to make onigiri as the grains do not stick together, causing it to fall apart.
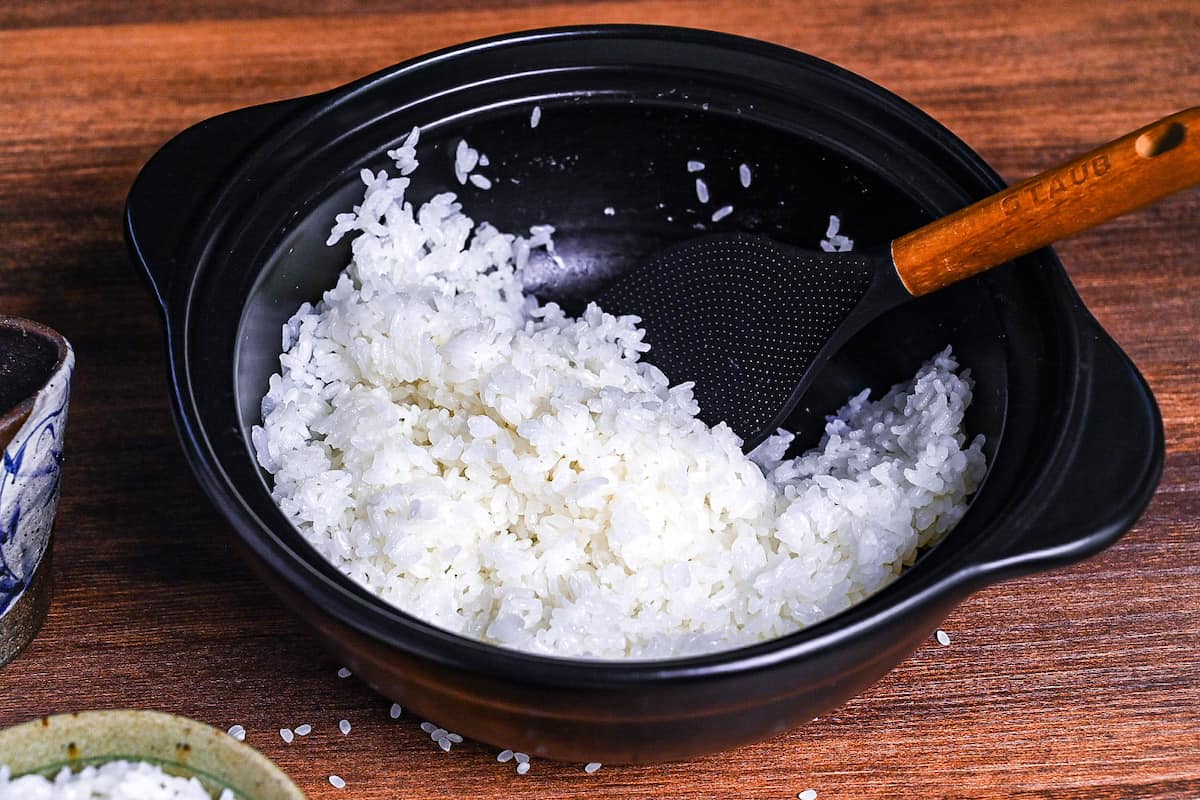
We usually cook the rice in a rice cooker, but if you don’t have one, check out my post on how to cook Japanese-style rice on the stove.
How to Shape by Hand
The simplest way to make onigiri is using your hands. Here are some pros to making onigiri by hand.
- No need for extra equipment
- No waste (good for the environment)
- Easy to make different sizes
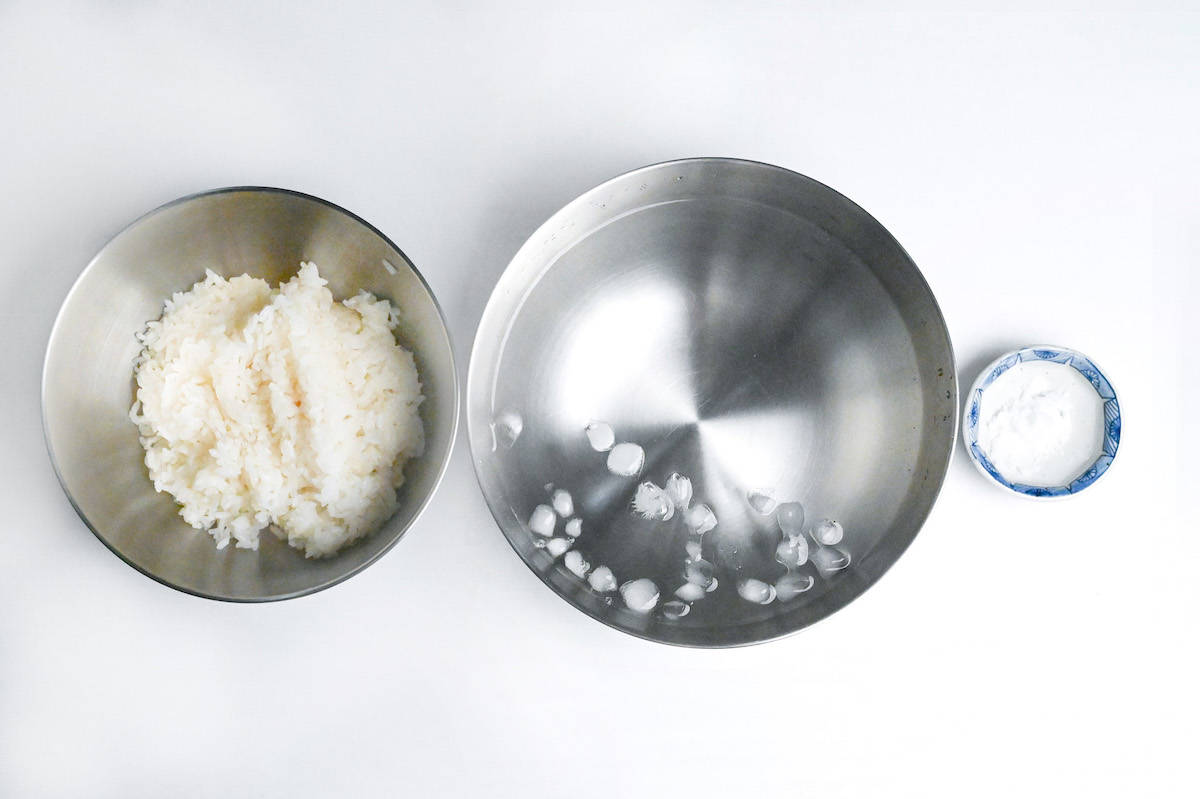
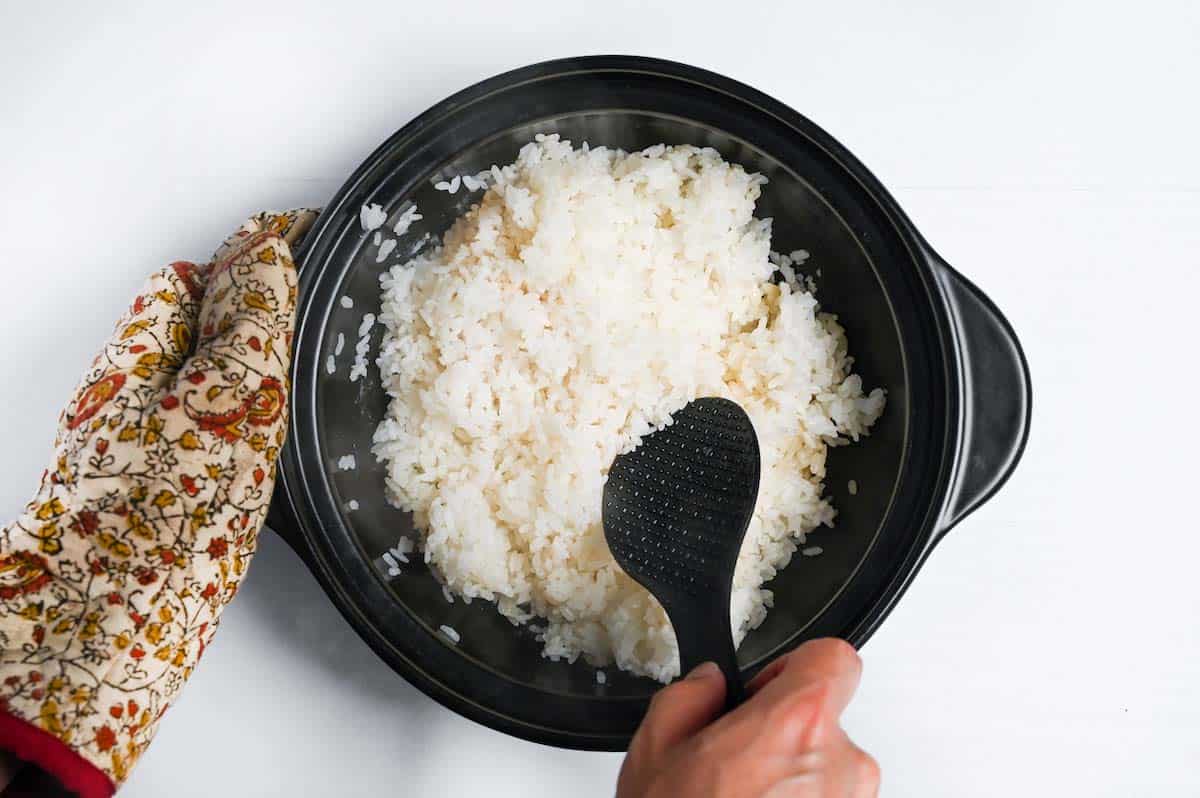
Begin by laying out all your essentials. You’ll need your freshly cooked rice, a bowl filled with ice-cold water, and a small dish of salt.
If you’re adding extra ingredients, they should be ready and nearby too. Having everything within arm’s reach makes the process smoother.
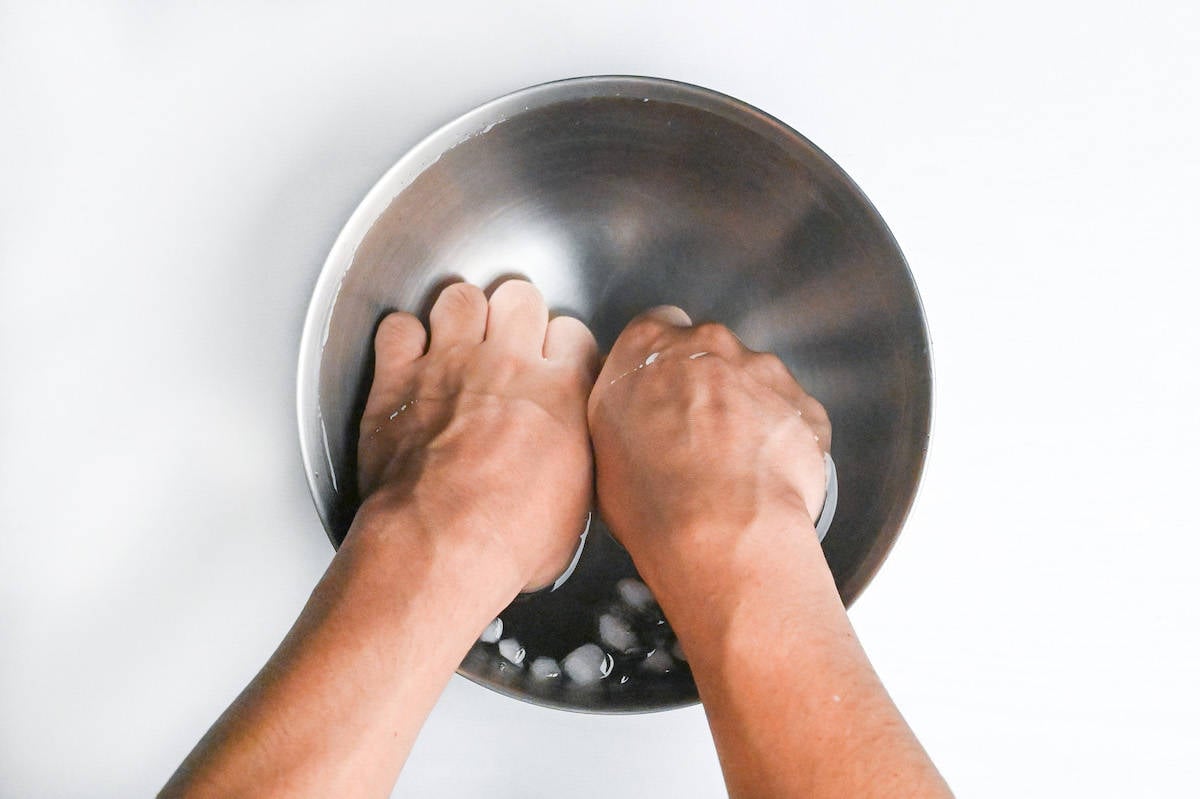
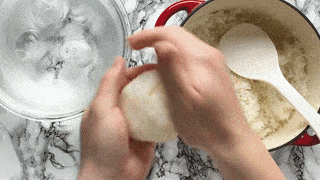
First, give your hands a thorough wash.
Once they’re clean, immerse them in the icy water for a good 15-20 seconds.
This not only chills your hands but also prevents the rice from sticking too much.
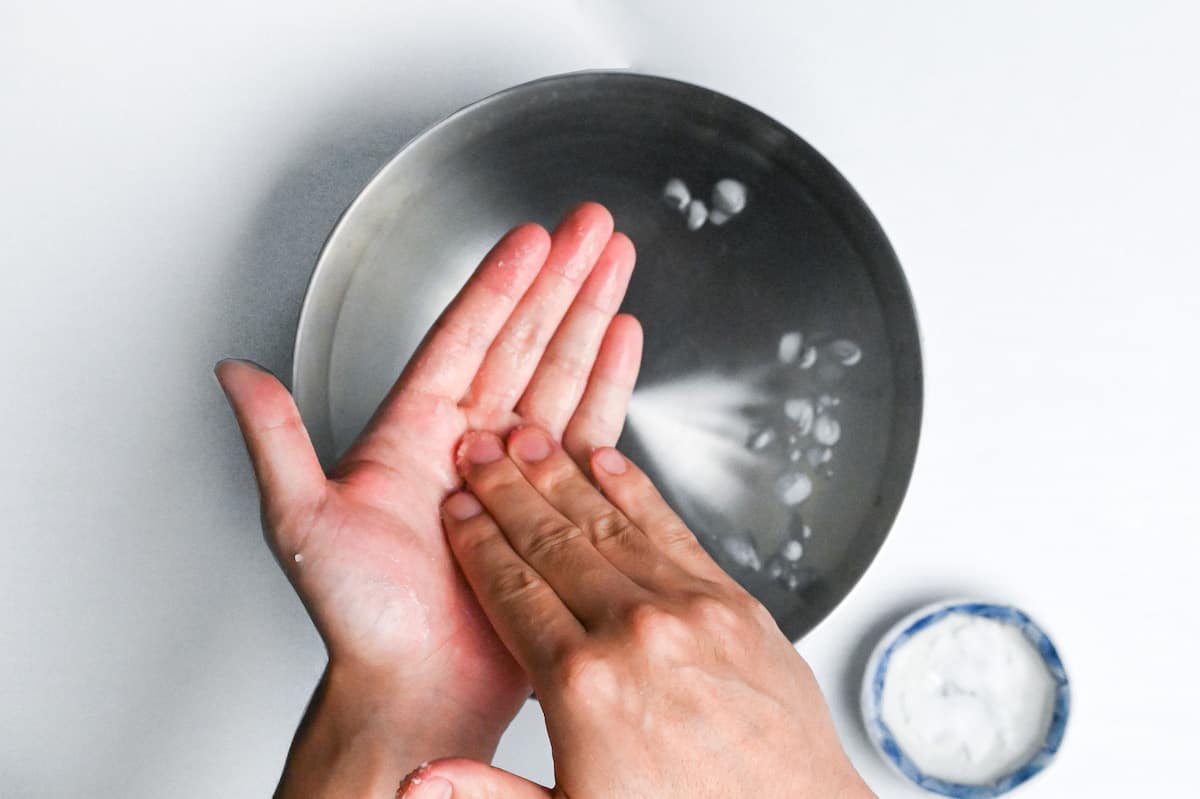
Sprinkle about 2 pinches of salt over your palms. This adds a subtle flavor to the onigiri and also acts as a preservative.
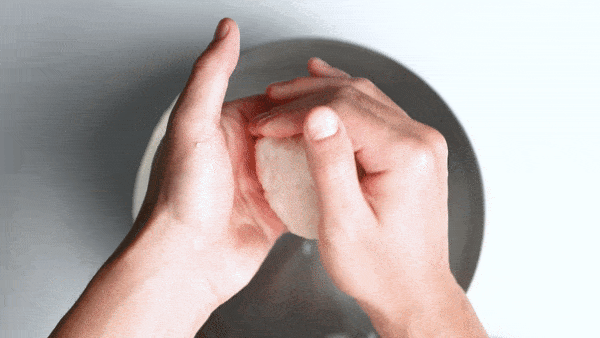
Pick up a handful of rice. If you want all of your rice balls to be the same size, I recommend dividing the rice equally first.
If you’re adding a filling, here’s a tip: flatten the rice on your palm, create a small well in the center using your fingers, and then add your chosen filling. Fold the rice over the filling, ensuring it’s snugly encased.
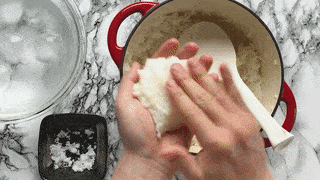
Cup your hand slightly and press the rice into your folded palm. Rotate the rice ball and press again to create three edges. Continue to press and turn until you have a firm rice ball that holds its shape beautifully.
If you want to learn in action, check out my video below!
How to Shape with Plastic Wrap
Shaping an onigiri using plastic wrap is a common method in Japan. You can also use the same plastic wrap to wrap it up and put it in a lunchbox and keep it intact.
Here are a few benefits of shaping with plastic wrap.
- Mess-free
- Hygienic
- You can re-use the plastic and wrap it for later
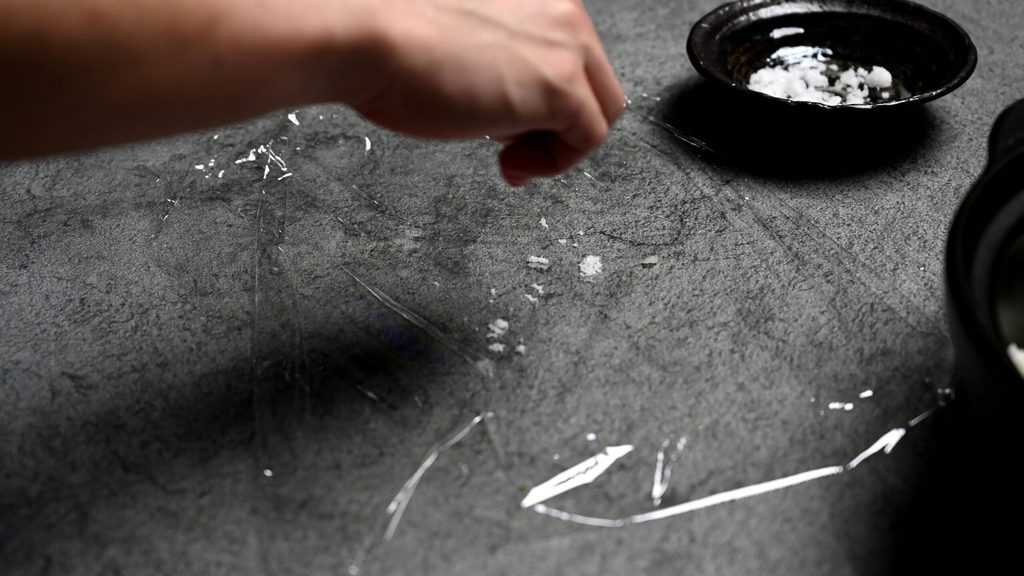
Start by tearing off a piece of plastic wrap and laying it flat on your countertop or table.
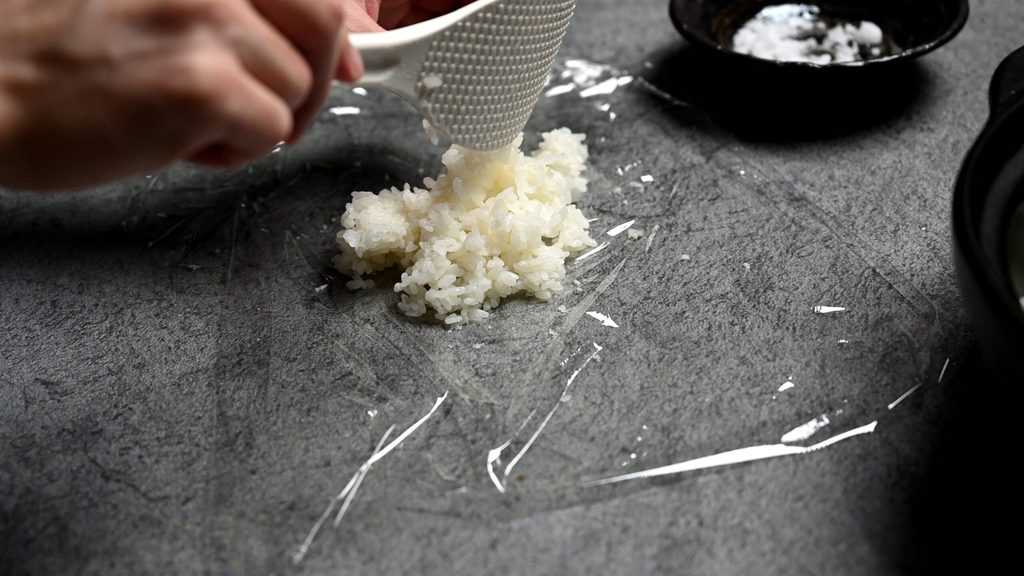
Lightly sprinkle 2 pinches of salt across the plastic wrap to season your rice as you shape. Then, place your rice right in the center.
Place the rice in the center of the plastic wrap. If you are adding filling, spread the rice out flat, make a dent in the middle and place the filling in the dent. Fold the rice over to encase the filling before you begin to shape the onigiri.
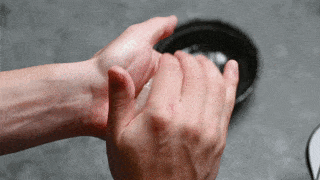
Lift the edges of the plastic wrap to envelop the rice. With the rice securely wrapped, cup your hand and gently press the rice into your folded palm.
Rotate the wrapped rice ball and give it another gentle press. After forming three edges, continue pressing and turning until you have a firm, beautifully shaped onigiri.
How to Use Onigiri Molds
If you’re not confident in your onigiri shaping skills, I have some options here for you! Here I will explain how to use onigiri molds.
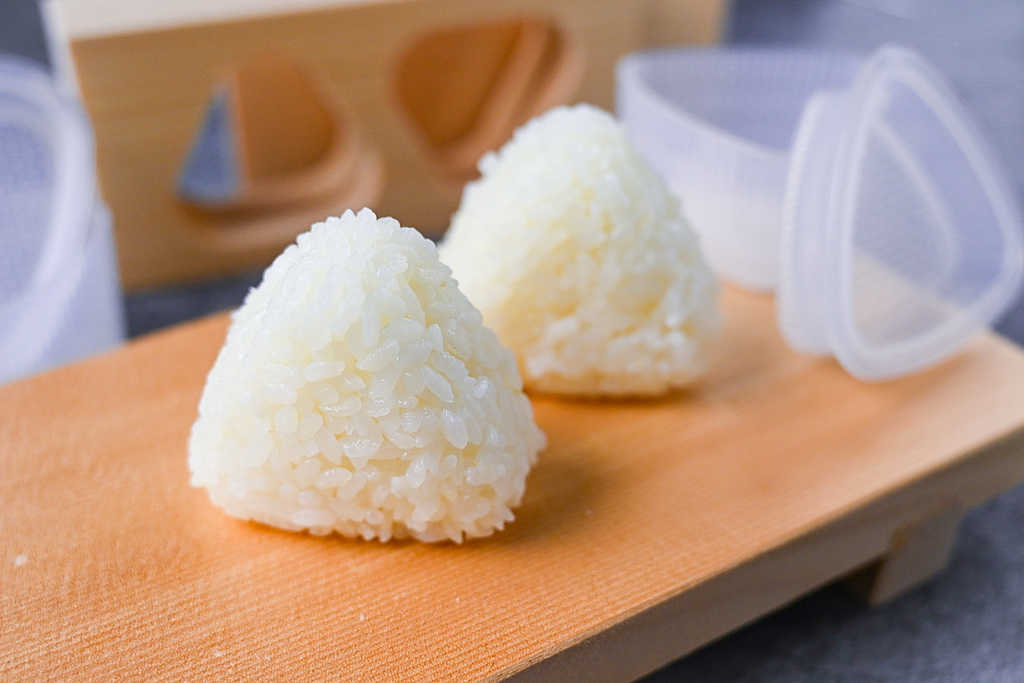
Plastic Molds
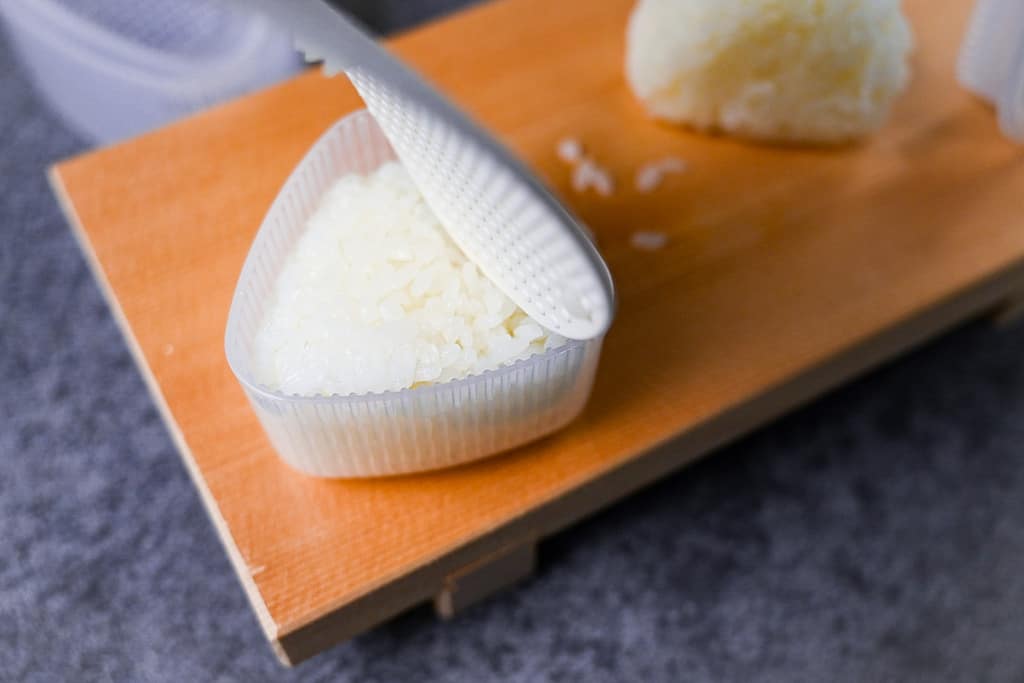
Plastic onigiri molds usually come in two or three sizes and are especially great for when you’re adding fillings. I bought mine at Daiso (Japanese dollar store) but you can find them on Amazon here.

Here are a few pros for using plastic molds.
- Fast
- Hygienic
- More consistent shape and size
- Different shapes for fun bentos
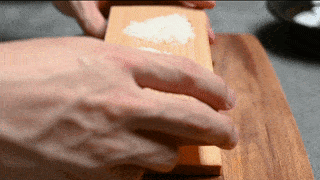
Begin by mixing a few pinches of salt into the rice. This ensures every bite of your onigiri is lightly seasoned.
Gently press the rice into your mold. Make sure to fill it up right to the top. If you don’t add enough rice, the end result will easily fall apart.
At the same time, don’t pack too much, as this will make the rice ball too dense.
For those who love a surprise in the middle, add half the rice and press it down lightly. Make a dent and nestle your chosen filling in the center, then top off with the remaining rice.
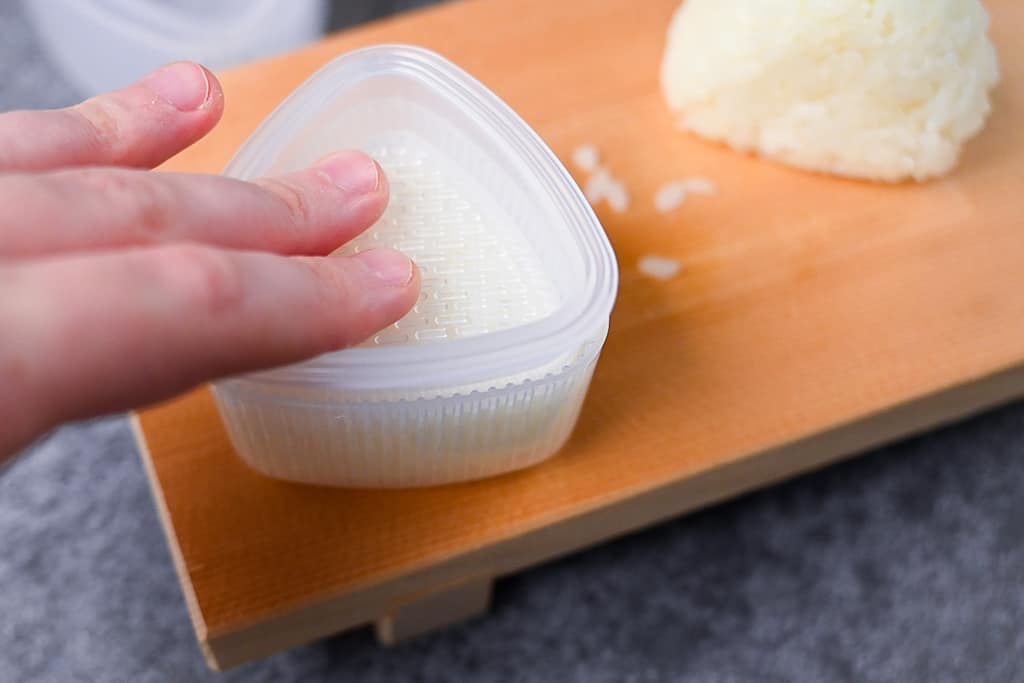
Place the lid over the mold and press down firmly. This will ensure the onigiri is stable and less likely to fall apart.
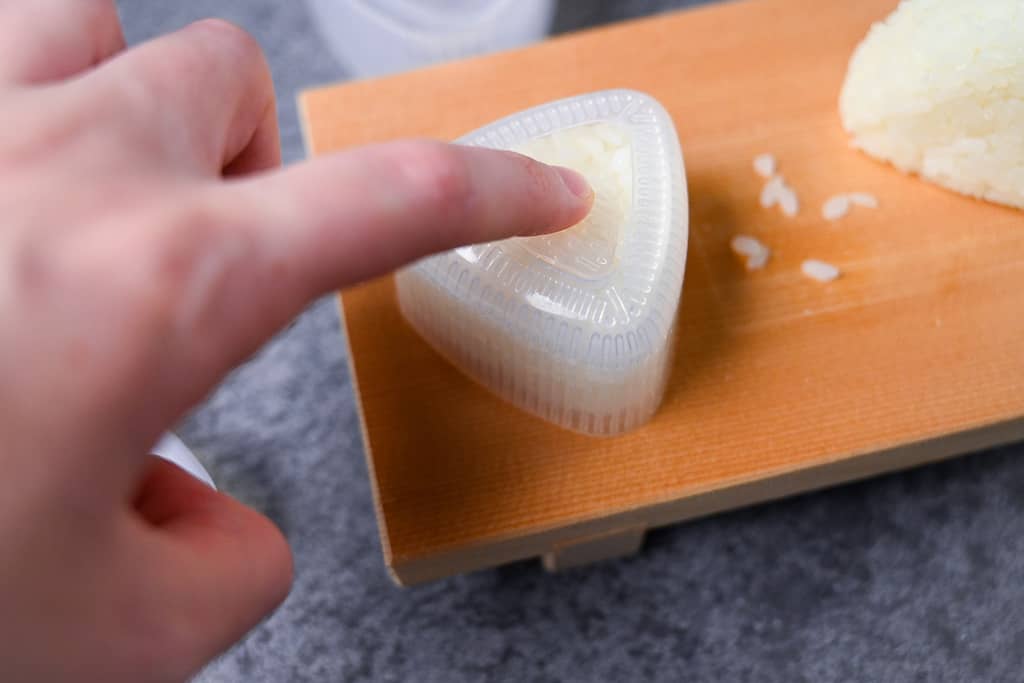
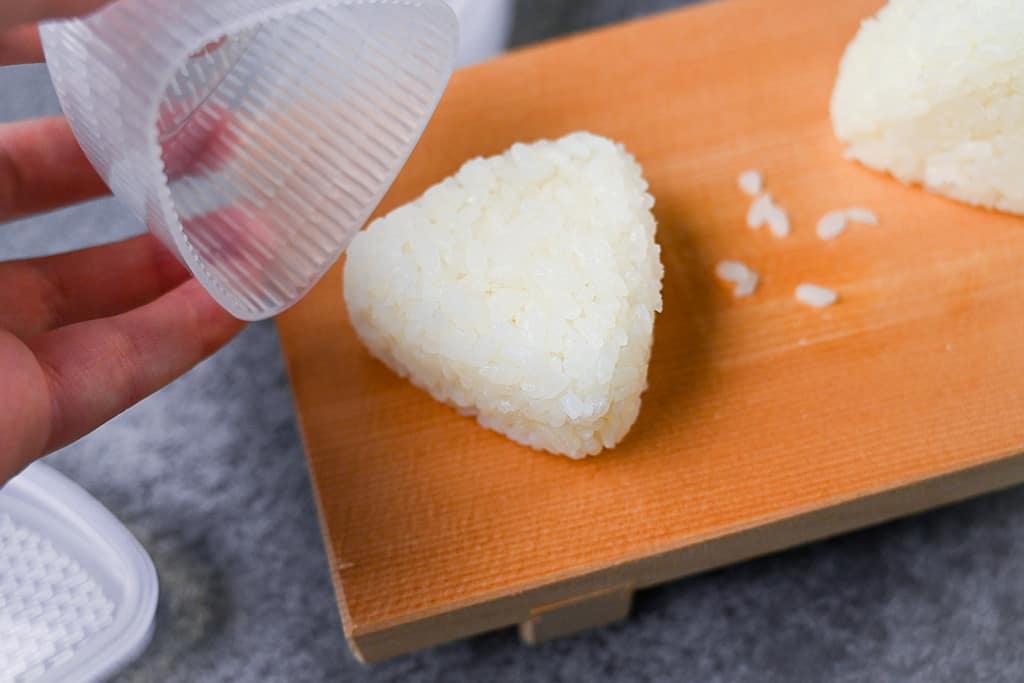
Remove the rice ball from the mold by pushing down the tab at the back. Pull the mold away and the perfectly shaped onigiri will pop right out!
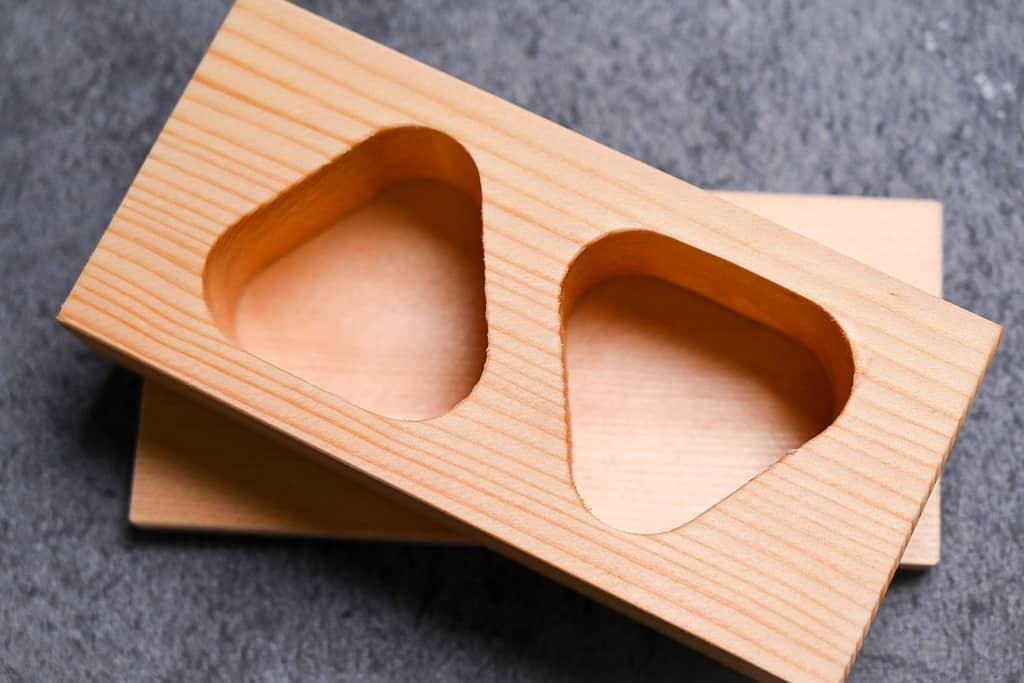
Wooden Mold
A bit more old-fashioned but a lot sturdier is the traditional Japanese wooden onigiri mold.
I bought the one in the picture below in a hardware store in Japan, and you can find them on Amazon.
The pros to using a wooden mold are:
- Fast
- Consistent shape
- Wooden molds are sturdy and long-lasting
There are usually multiple slots so that you can make more than one onigiri at a time too!
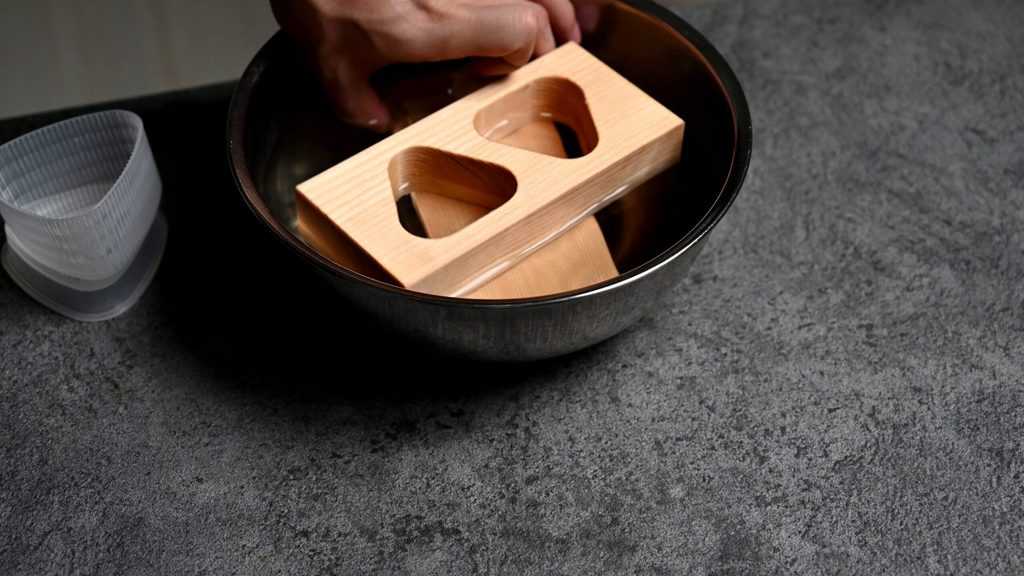
Begin by soaking the wooden mold in warm water for about 5-10 minutes. This simple step ensures the rice won’t stick, making the process smoother.
Before shaping, mix salt into the rice. This not only seasons your onigiri but also enhances its overall flavor.
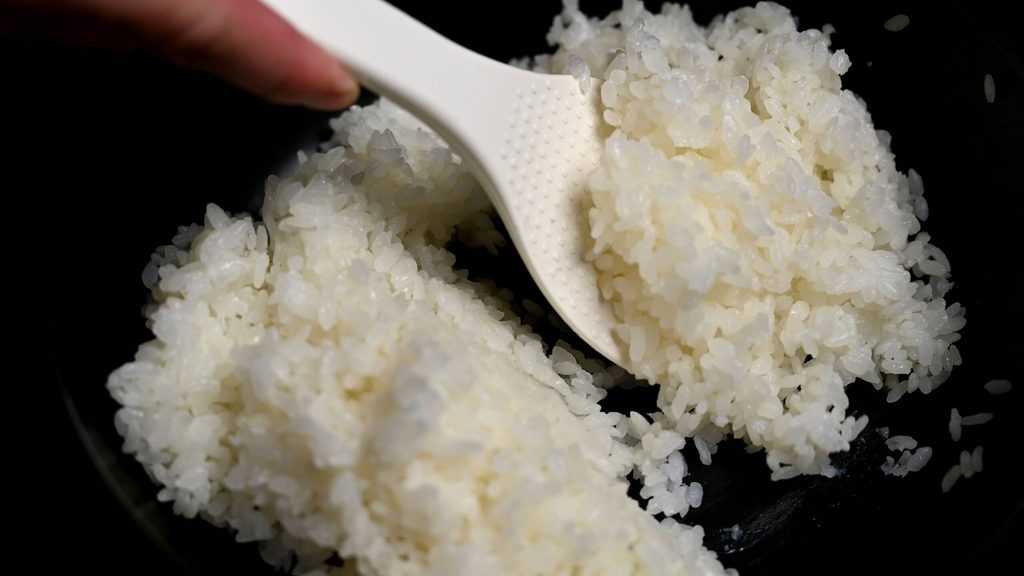
Gently press the rice into the mold’s slots, ensuring you push it well into the corners for a perfect shape.
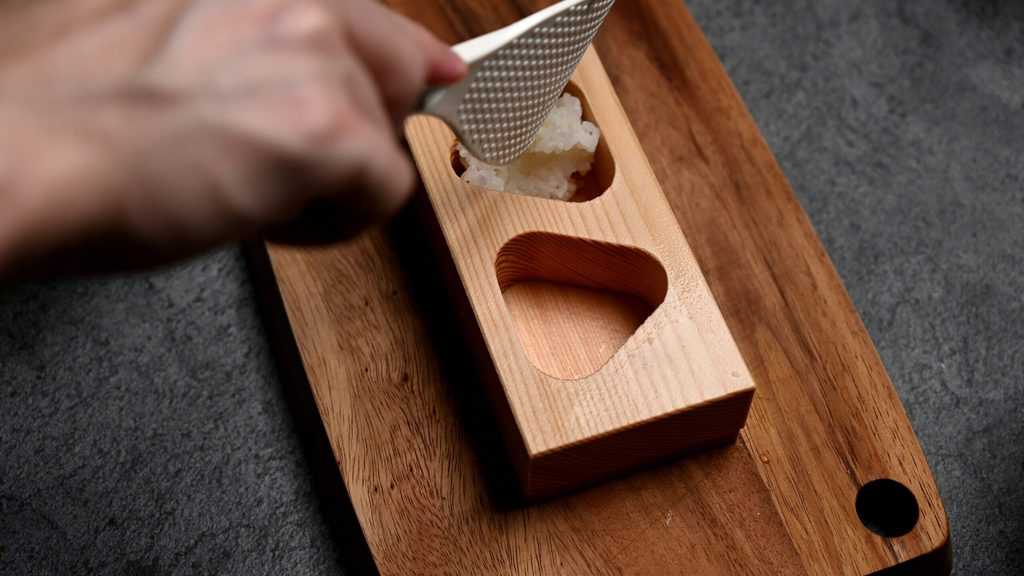
If you’re adding fillings, fill the mold halfway and make an indent in the middle with your fingers. Place the filling in the dent and then top with the other half of the rice to cover the filling.
Flip the mold over, press the onigiri firmly down and pull the mold up and away. Make sure to wet your thumbs with a little water before pressing, this will stop the rice from sticking.
How to Store
Once the onigiri is formed, it is best to eat it as soon as possible to prevent it from drying out. If you plan to eat it within a few hours, wrap with plastic wrap and keep it in a lunchbox with an ice pack.
Refrigerating onigiri is not recommended since it will cause the rice to become dry and hard. If you wish to prepare onigiri in advance, the best method is freezing (depending on the filling).
To freeze, wrap each onigiri individually without nori, then store them in a freezable container or freezer bag to protect them from frost. Frozen onigiri can be stored for 2-3 weeks (depending on the filling). To defrost, microwaving until warmed through is the best method.
Storage Summary
Room temperature – A few hours with an ice pack.
Refrigerated – Not recommended.
Frozen – 2-3 weeks, depending on filling.
I hope you enjoy making rice balls using these tips! If you try it out, I’d really appreciate it if you could spare a moment to let me know what you thought by giving a review and star rating in the comments below. Thank you!
Check Out My Onigiri Recipes

3 Ways to Shape Onigiri (Japanese Rice Balls)

Equipment
- Zojirushi Rice Cooker
Ingredients
- 300 g cooked Japanese short-grain rice
- salt
- ice cold water
- fillings of your choice
- roasted seaweed for sushi (nori) (seaweed) optional
The ingredient brands and tools I trust are in my Japanese pantry guide and my cooking tools guide.
Can’t find certain Japanese ingredients? See my substitution guide here.
Instructions
How to Shape Onigiri by Hand
- Prepare your shaping station with 300 g cooked Japanese short-grain rice (warm), a small bowl of salt and a large bowl of ice cold water.

- Wash your hands and hold them in the ice cold water for 15-20 seconds. Remove them from the water but do not dry them.
- Sprinkle a few pinches of salt over your palms and rub your hands together to spread it evenly.
- Pick up a handful of cooked rice. If you're making onigiri with a filling, flatten the rice, make a dent in the middle and add the fillings of your choice. Then fold the rice over to encase the filling.

- Shape by pressing and turning to form three edges. Repeat until the onigiri feels stable.

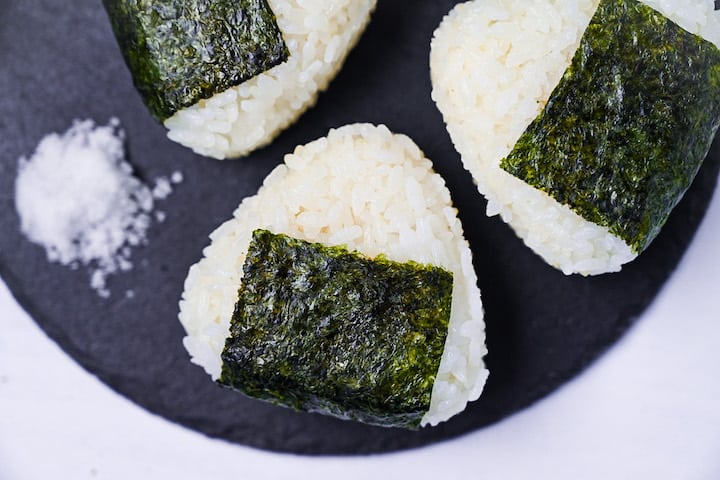
- Wrap with roasted seaweed for sushi (nori) and enjoy!

How to Shape Onigiri with Plastic Wrap
- Break off a piece of plastic wrap and place it on a flat surface. Lightly sprinkle with salt.

- Place the rice in the center of the plastic wrap. If adding a filling, fold the plastic wrap over the rice and flatten it with your palm, then make a dent in the middle. Peel back the plastic wrap, and use it to fold the rice over before shaping.
- Wrap the rice and shape by pressing and turning to form a triangle.
How to Shape Onigiri with a Plastic Mold
- Mix 300 g cooked Japanese short-grain rice with a few pinches of salt.
- Add the rice to the mold. If adding a filling, fill the mold half way and make a dent. Add the filling and then add the other half of the rice on top. Fill the mold to the top but don't pack too much.

- Press the lid on top and push the rice down.
- Remove the lid and turn the mold over. Push the tab and lift the mold up to release the onigiri.
- Wrap with roasted seaweed for sushi (nori) and enjoy!
Nilai 9,terima kasih tulisan memberikan banyak pengetahuan tentang cara membuat Onigiri
Thank you! 🙂
Used this page for extra info on making these, thanks so much for the tips and filling ideas.
Really glad that I got a mould in the sushi making kit that I bought, made them so simple to do.
Used a tuna mayo filling and they were loved by my daughter, mother-in-law, and hair dresser, and enjoyed by my wife, minus the nori.
Thanks for your website, I’m going to be learning to make a lot from here.
Hi Doug,
This genuinely made my day! I’m really glad the article helped! And I love that they were enjoyed by your family and even your hair dresser! Thanks so much for sharing your experience. I’m excited for all the recipes you’ll try next! 🙂
Yuto