


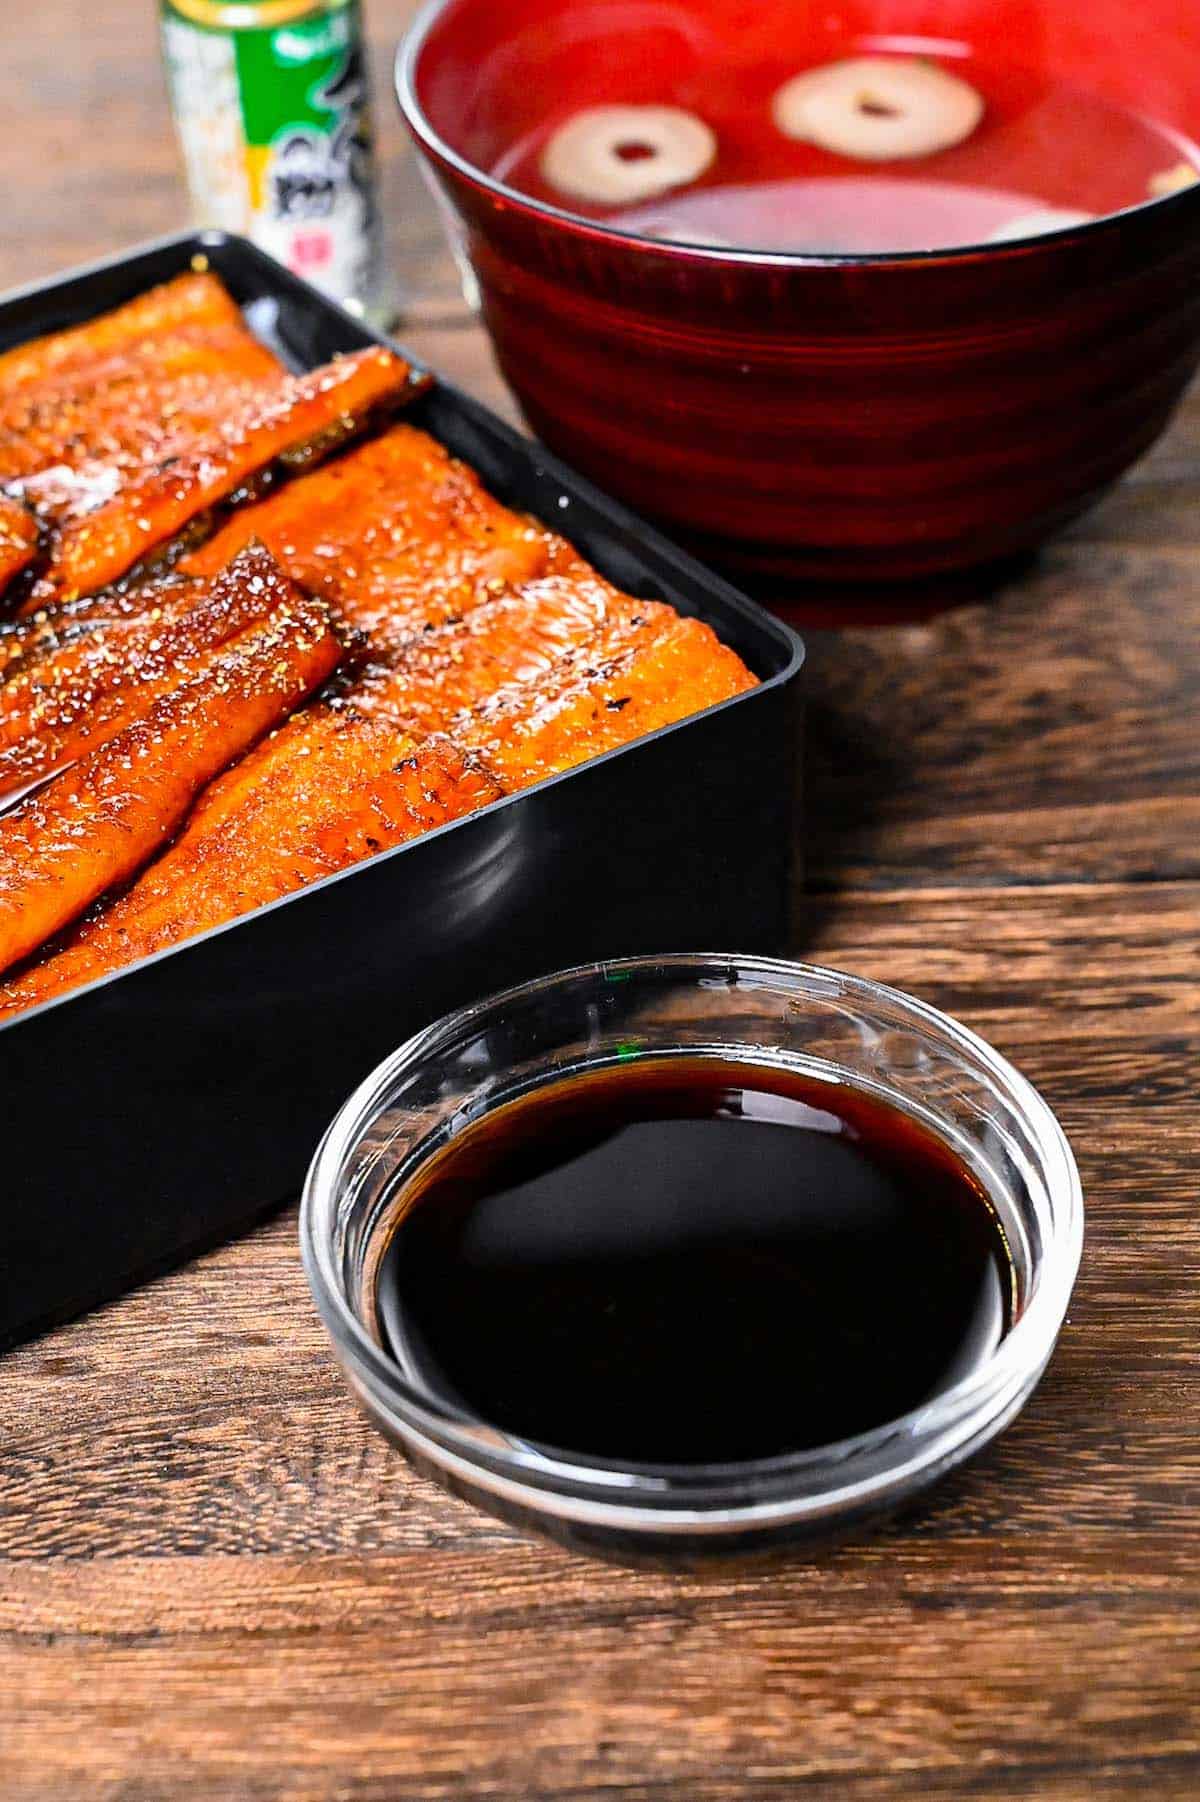
You probably assume the bottled eel sauce is the one to beat, and that a homemade pour could never match it. Taste them side by side on plain rice and the assumption flips.
The store version leans sweet and carries a faint additive edge, while a home reduction can win on depth, as long as you use sugar for roundness instead of for sweetness.

Unagi Sauce
Recipe Snapshot
- What is it? A Japanese pantry glaze for kabayaki-style grilled eel, made by reducing sugar with sake, mirin, and dark soy until it turns thick and lacquered.
- Flavor profile: Deep sweet-savory and lacquer-glossy, with a rounded backbone from coarse zarame and dark muscovado rather than the flat, front-loaded sweetness of plain white sugar.
- Why you will love this recipe: It gives you an all-purpose rice sauce that works far past eel, on grilled chicken, salmon, tofu, or a plain bowl, and it wins on depth instead of being merely sweet, so a home reduction beats the supermarket bottle on your own counter.
- Must-haves: Coarse raw cane sugar with a touch of dark muscovado, real hon-mirin, and a good Japanese soy sauce.
- Skill level: Easy, and it comes together in about 15 minutes of active cooking plus cooling time.
Summarize & Save this content on:
What Is Unagi Sauce?
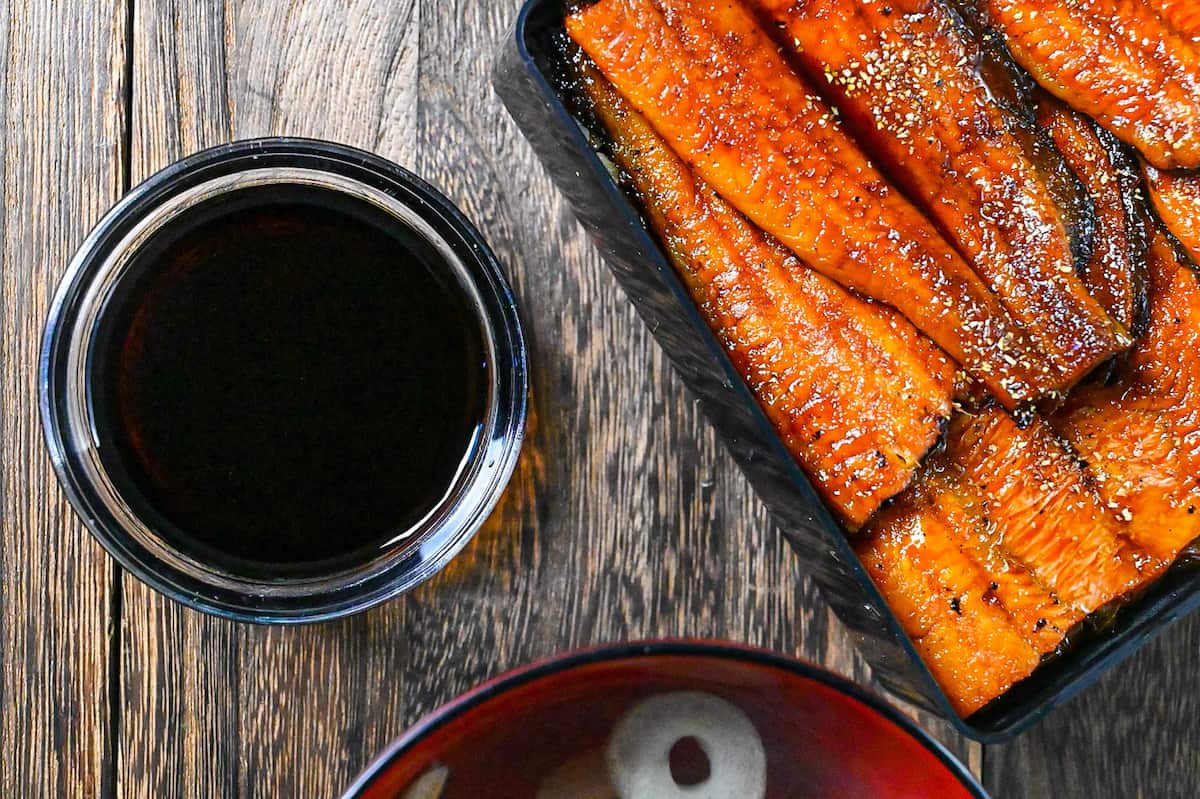
Unagi sauce (うなぎのタレ, or unagi no tare) is the dark, glossy, sweet-savory glaze brushed onto grilled eel. It is built from 4 pantry items, soy sauce, mirin, sake, and sugar, simmered down until it coats a spoon. Plenty of people in Japan also pour it straight over plain white rice with no eel anywhere in sight.
You have probably heard the legend of the famous eel shops running the same pot of tare for 100 years, never starting over, carrying the flavor. But it is not simply a pot of century-old sauce. The pot is topped up with fresh ingredients every day and within a month or so, basically every molecule has been replaced. What time actually buys is not an old liquid but a never-empty state, a pot that has never once been allowed to run dry, with hundreds of grilled eel being dipped and leaving behind added flavor and depth every single day.
The daily accumulation of eel umami is the real thing. None of which matters at your stove, by the way, but it tells you the kind of depth you are chasing, the kind a specialty shop gets. A supermarket bottle will never come close.
Eel Sauce Ingredients
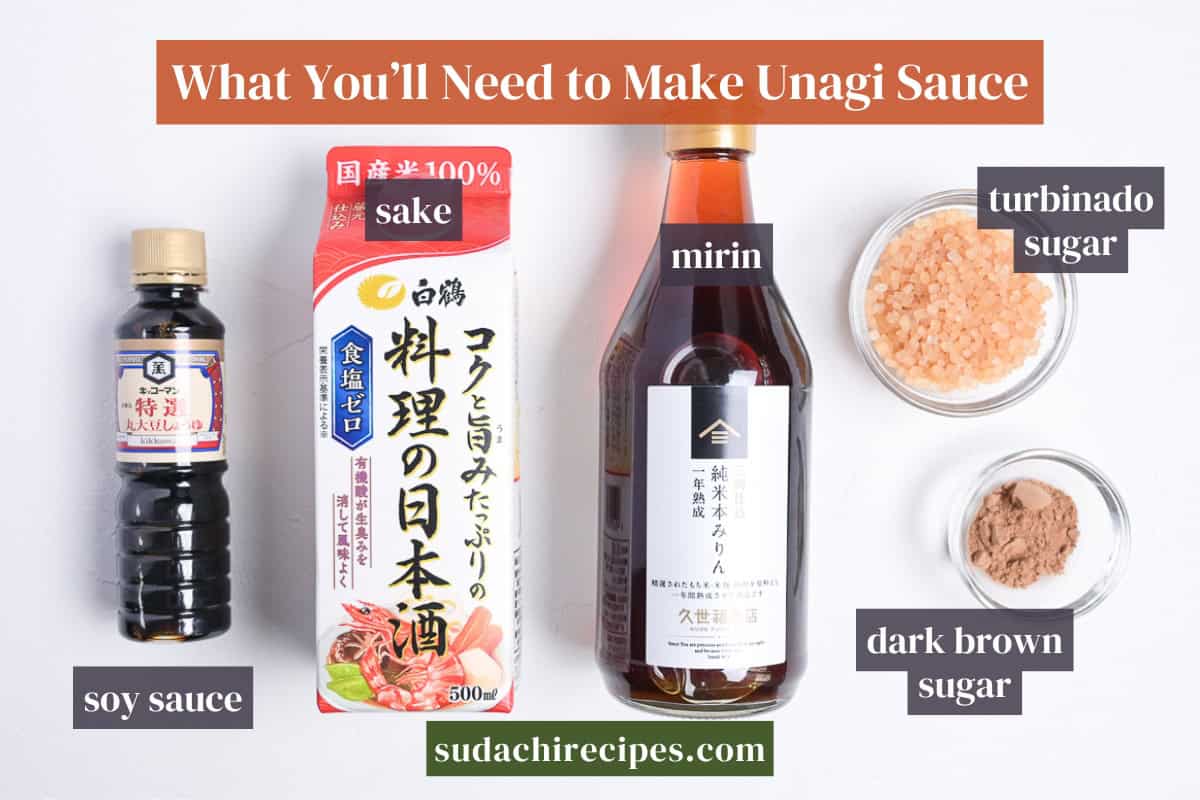
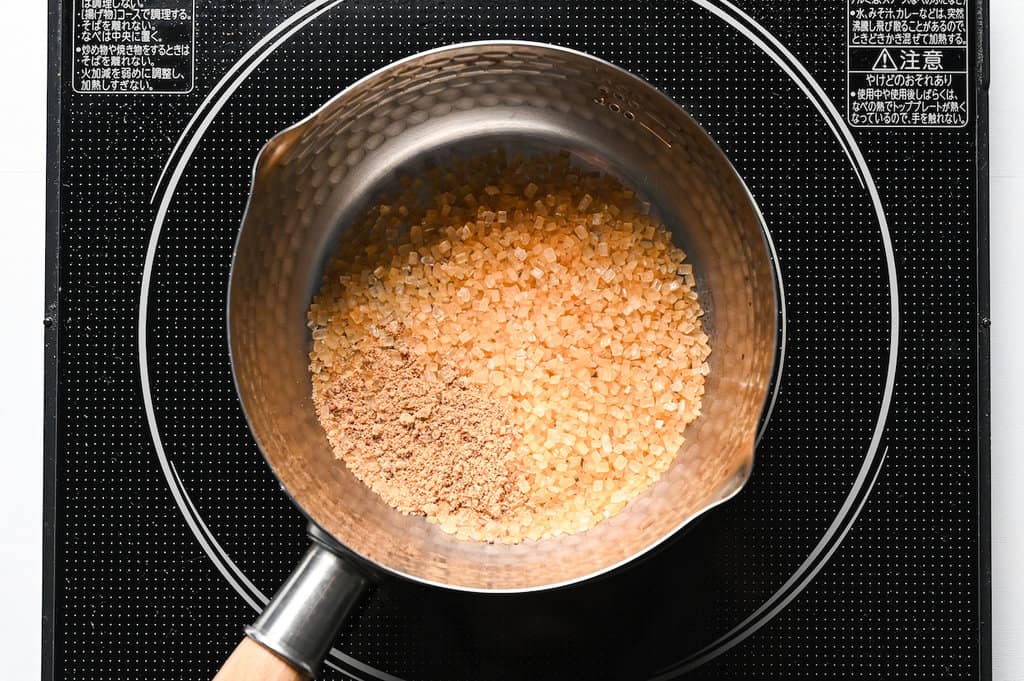
- Turbinado sugar (zarame): This is my signature move, so I am putting it first. Zarame is a coarse, light-brown crystal sugar, and you can find it as turbinado or raw cane sugar at most supermarkets. White sugar gives you sweet and nothing else, a single flat note that sits right at the front of your mouth.
- Dark brown sugar (muscovado): A small amount of dark muscovado or a similar dark brown sugar is the second half of the sugar story. Where zarame builds the body, the muscovado drops a low, almost molasses-like note underneath it. Together they keep the sauce from ever reading as one-dimensionally sweet.
- Japanese soy sauce (koikuchi shoyu): Standard Japanese dark soy sauce is the spine of the whole thing. It is the salt, the savory backbone, and the source of all that dark color and toasty aroma.
Substitutions & Variations
- Japanese soy sauce → Tamari: This is the only true swap, and honestly some prefer it. Tamari gives you a richer color and a deeper, rounder savoriness, and it is your gluten-free path since it is brewed with little or no wheat. It is the only ingredient in this sauce I would tell you to feel free to change.
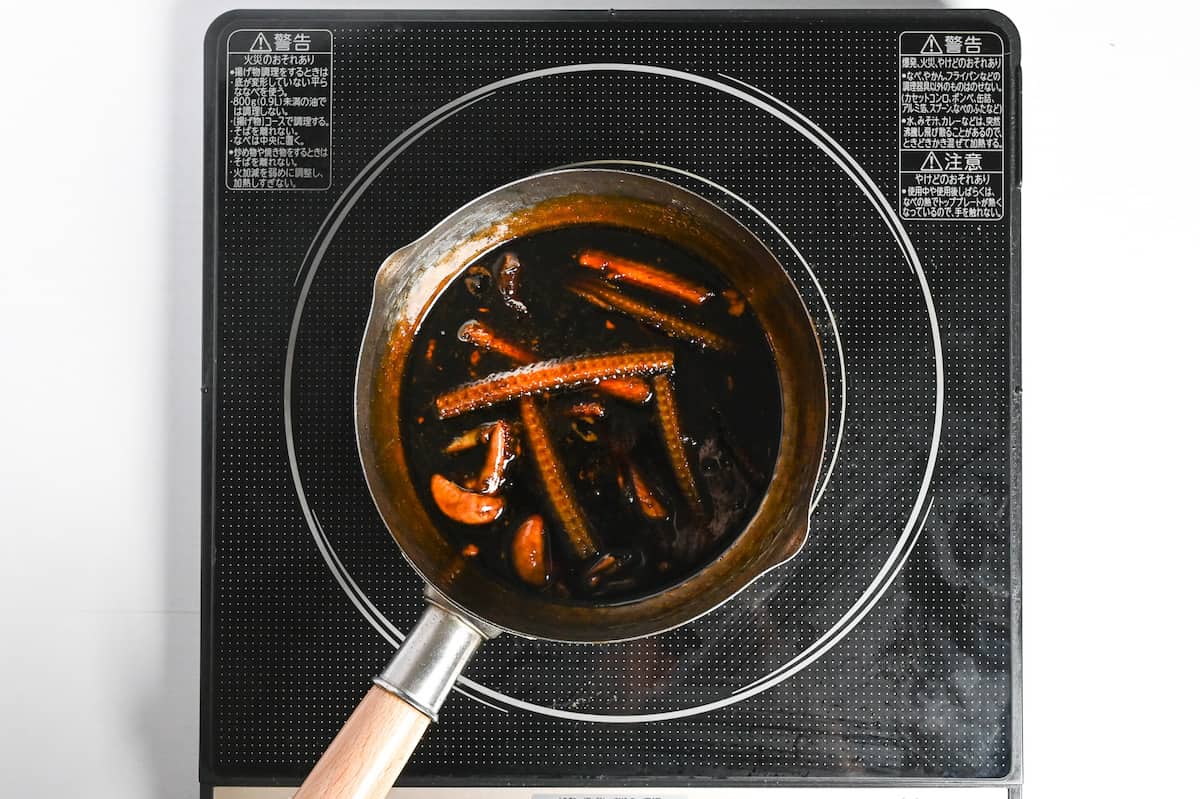
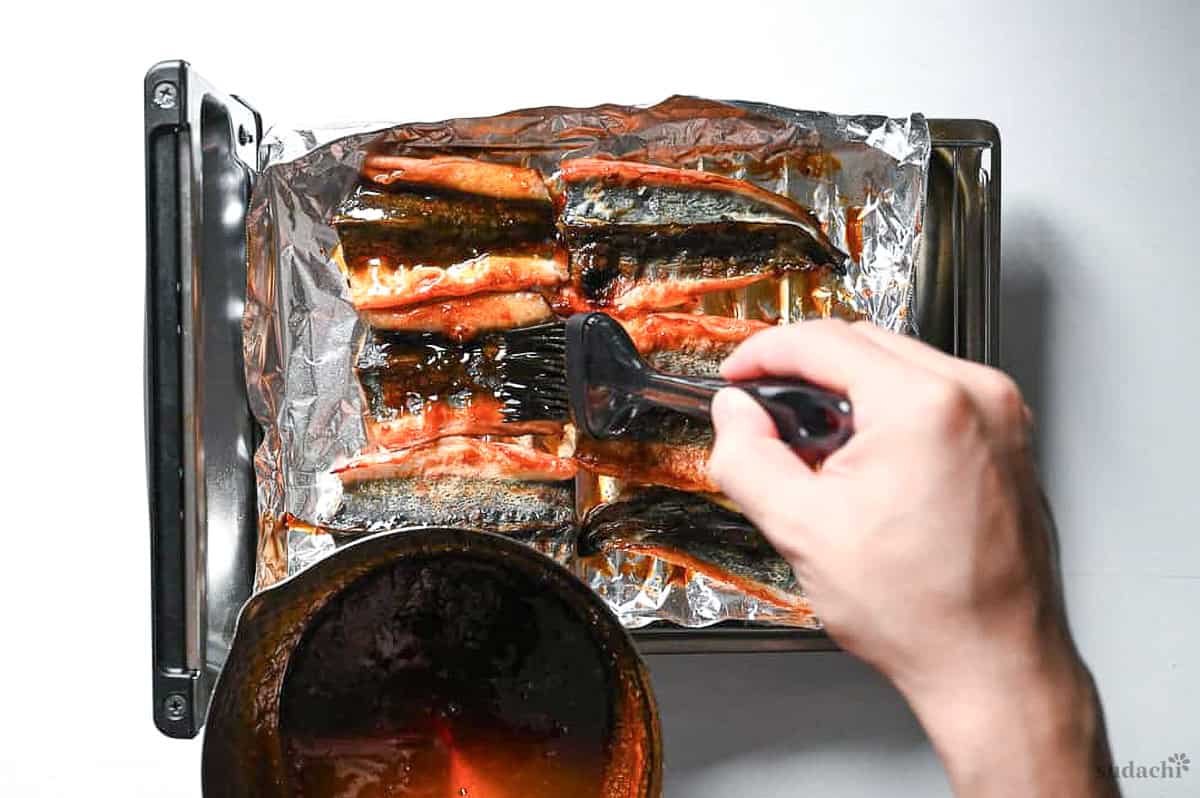
- Add charred eel bones or head for restaurant depth: If you ever have eel bones or a head on hand, grill them dry until there is no raw moisture left, then simmer them in the sauce and strain. This is the single biggest jump toward the depth a specialty shop gets. It is optional and it is a project, but it is the real thing.
- Pour it past the eel: Once you have a jar of this, it stops being only an eel sauce. Brush it on grilled chicken or salmon, glaze tofu, or just spoon it over hot rice. That last one is how a lot of us eat it anyway.
Have trouble finding Japanese ingredients? Check out my ultimate guide to Japanese ingredient substitutes!
How to Make My Unagi Sauce
If you prefer to watch the process in action, check out my YouTube video of this unagi sauce recipe!

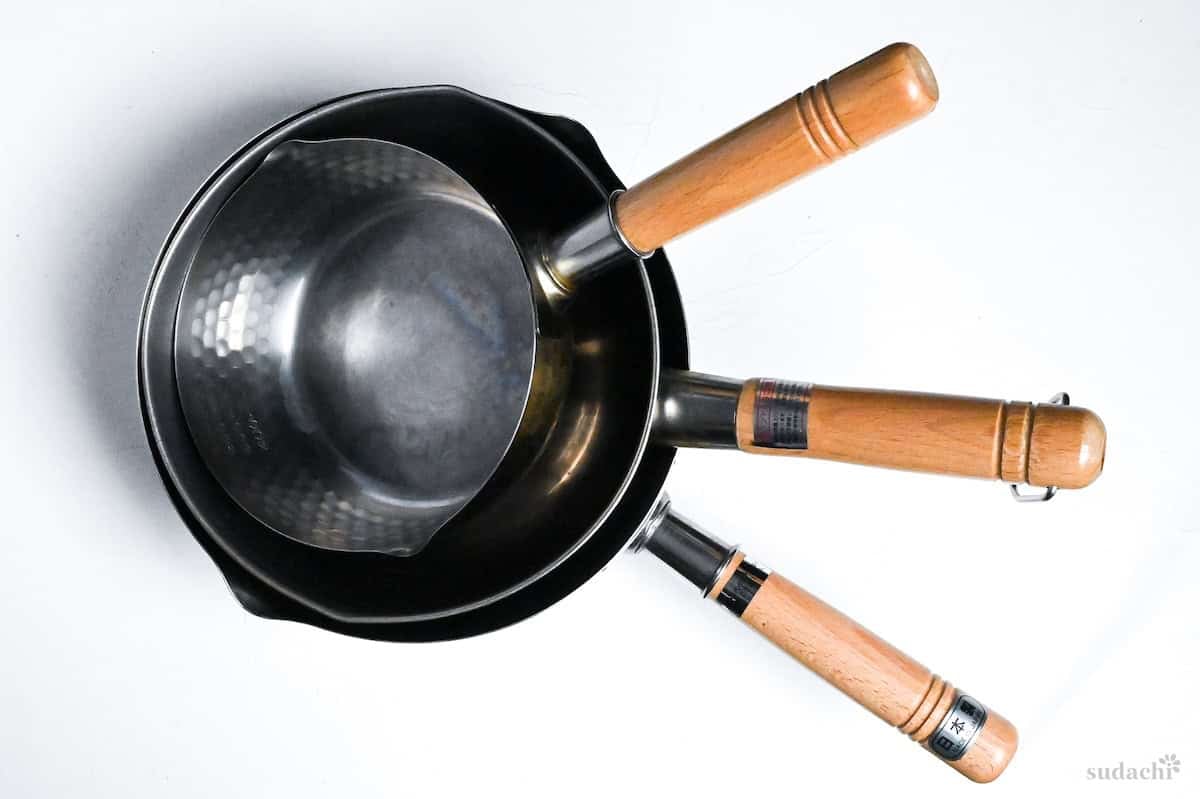
To develop this eel sauce recipe, I used a 16cm Japanese saucepan called yukihira nabe.
i. Add both sugars to a small saucepan and set it over medium heat.
ii. Let them begin to melt and go slightly syrupy. You are starting a loose caramel, not finishing one, so the moment they are melting and moving you are ready for the next pour.
i. Add the sake and the mirin to the melting sugar and stir.
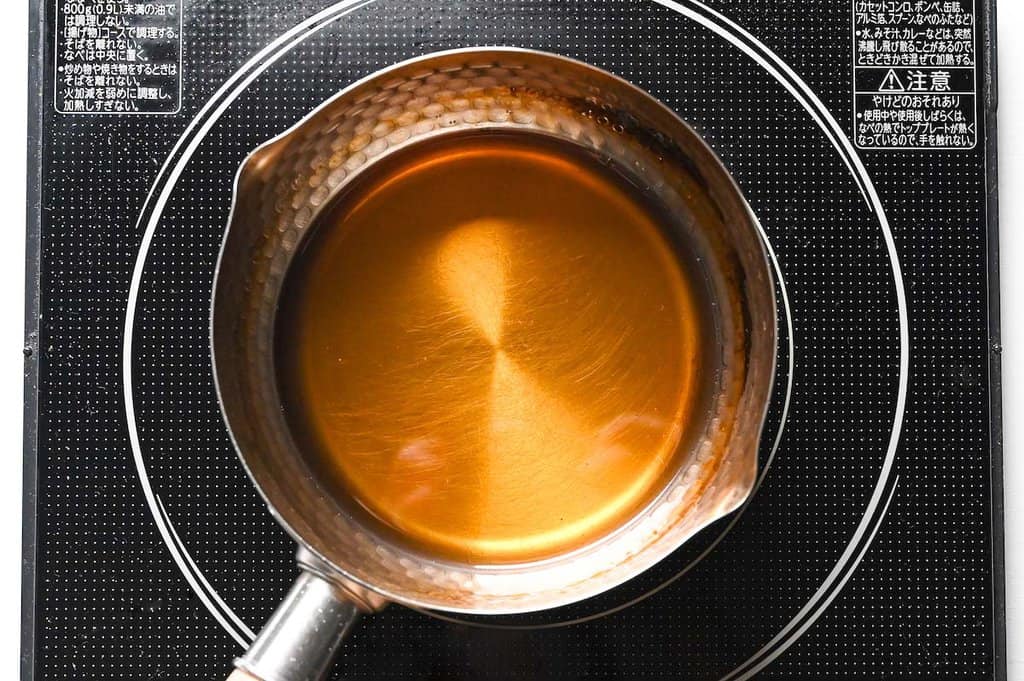
ii. Bring it up to a boil and let it bubble for a minute or so. You will smell the sharp alcohol edge lift off and soften. That is the sound and smell of the burn cooking away and the rounder aroma staying behind.
i. Drop the heat to low, then stir in the soy sauce.
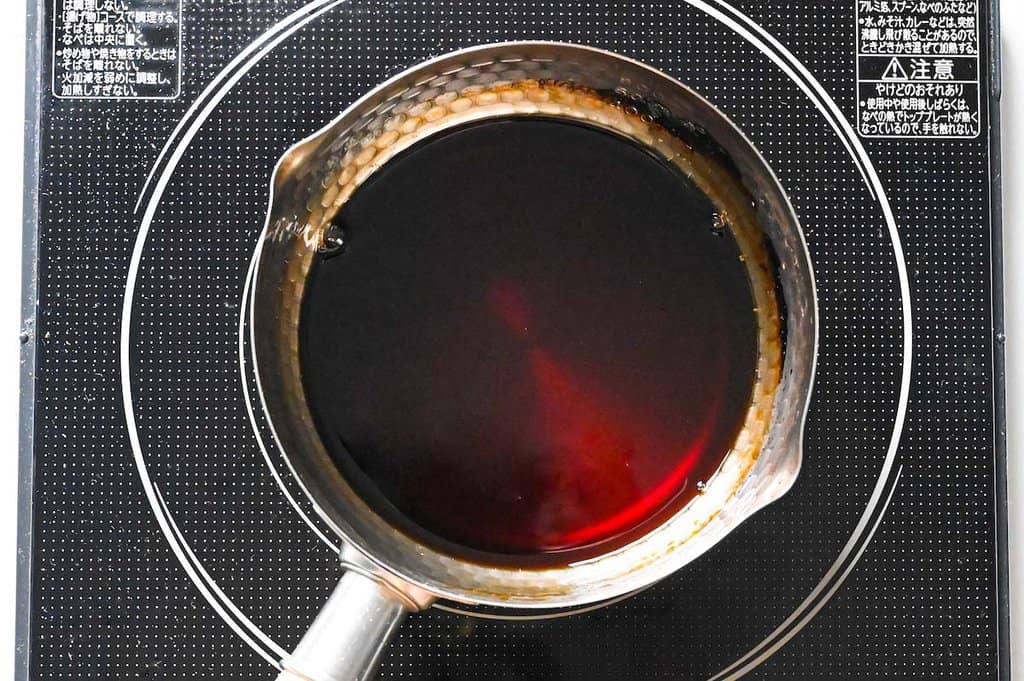
ii. Let everything come back together at a gentle simmer. Hold a low, lazy simmer for around 10 minutes, stirring now and then.
iii. Skim off the foam that gathers on top so the sauce stays clear and glossy. Skim for clarity, but do not chase every last bubble, over-skimming strips out body and leaves you with a thin, only-sweet sauce.
i. Watch how the sauce drips off your spoon or spatula. When it falls in slow, heavy drops instead of running off like water, you are close.
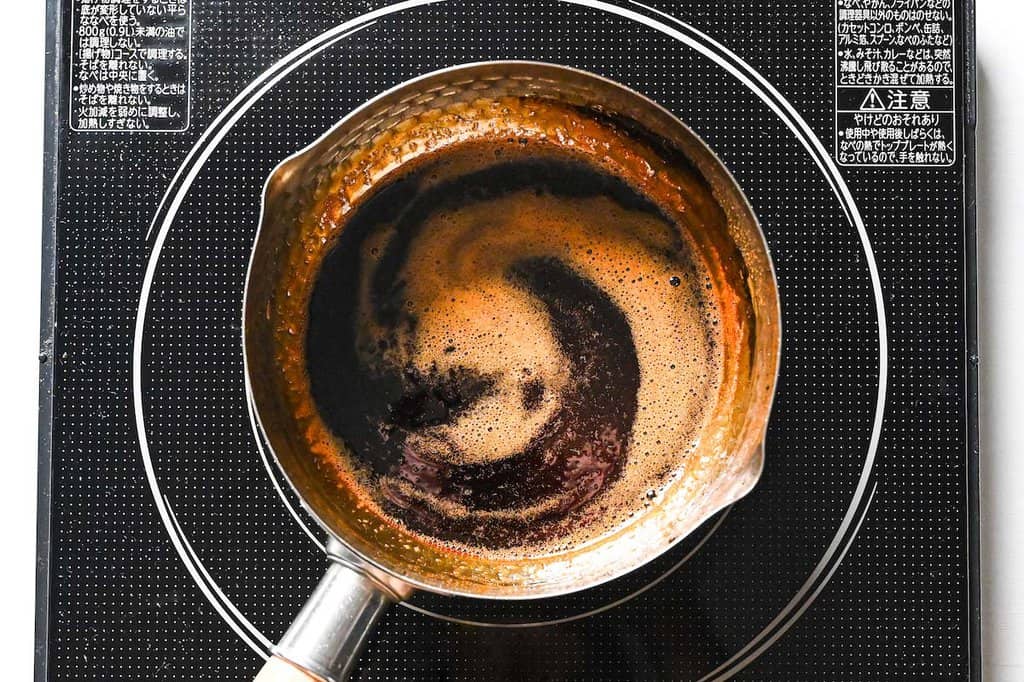
ii. Pull it off the heat while it still looks a touch too loose. It is supposed to look not-quite-thick-enough in the hot pan.
Here is the whole game. The sauce thickens a lot as it cools, so the hot pan lies to you. Reduce it until it looks right while hot and the cold sauce practically turns to candy when it’s cold. You pull it earlier than feels safe, somewhere that looks slightly thin, because the cooling does the rest. You will reduce it less than you think, and more than you think, both at once.
i. Take the pan off the heat and let the sauce cool. This is when it finds its real thickness.
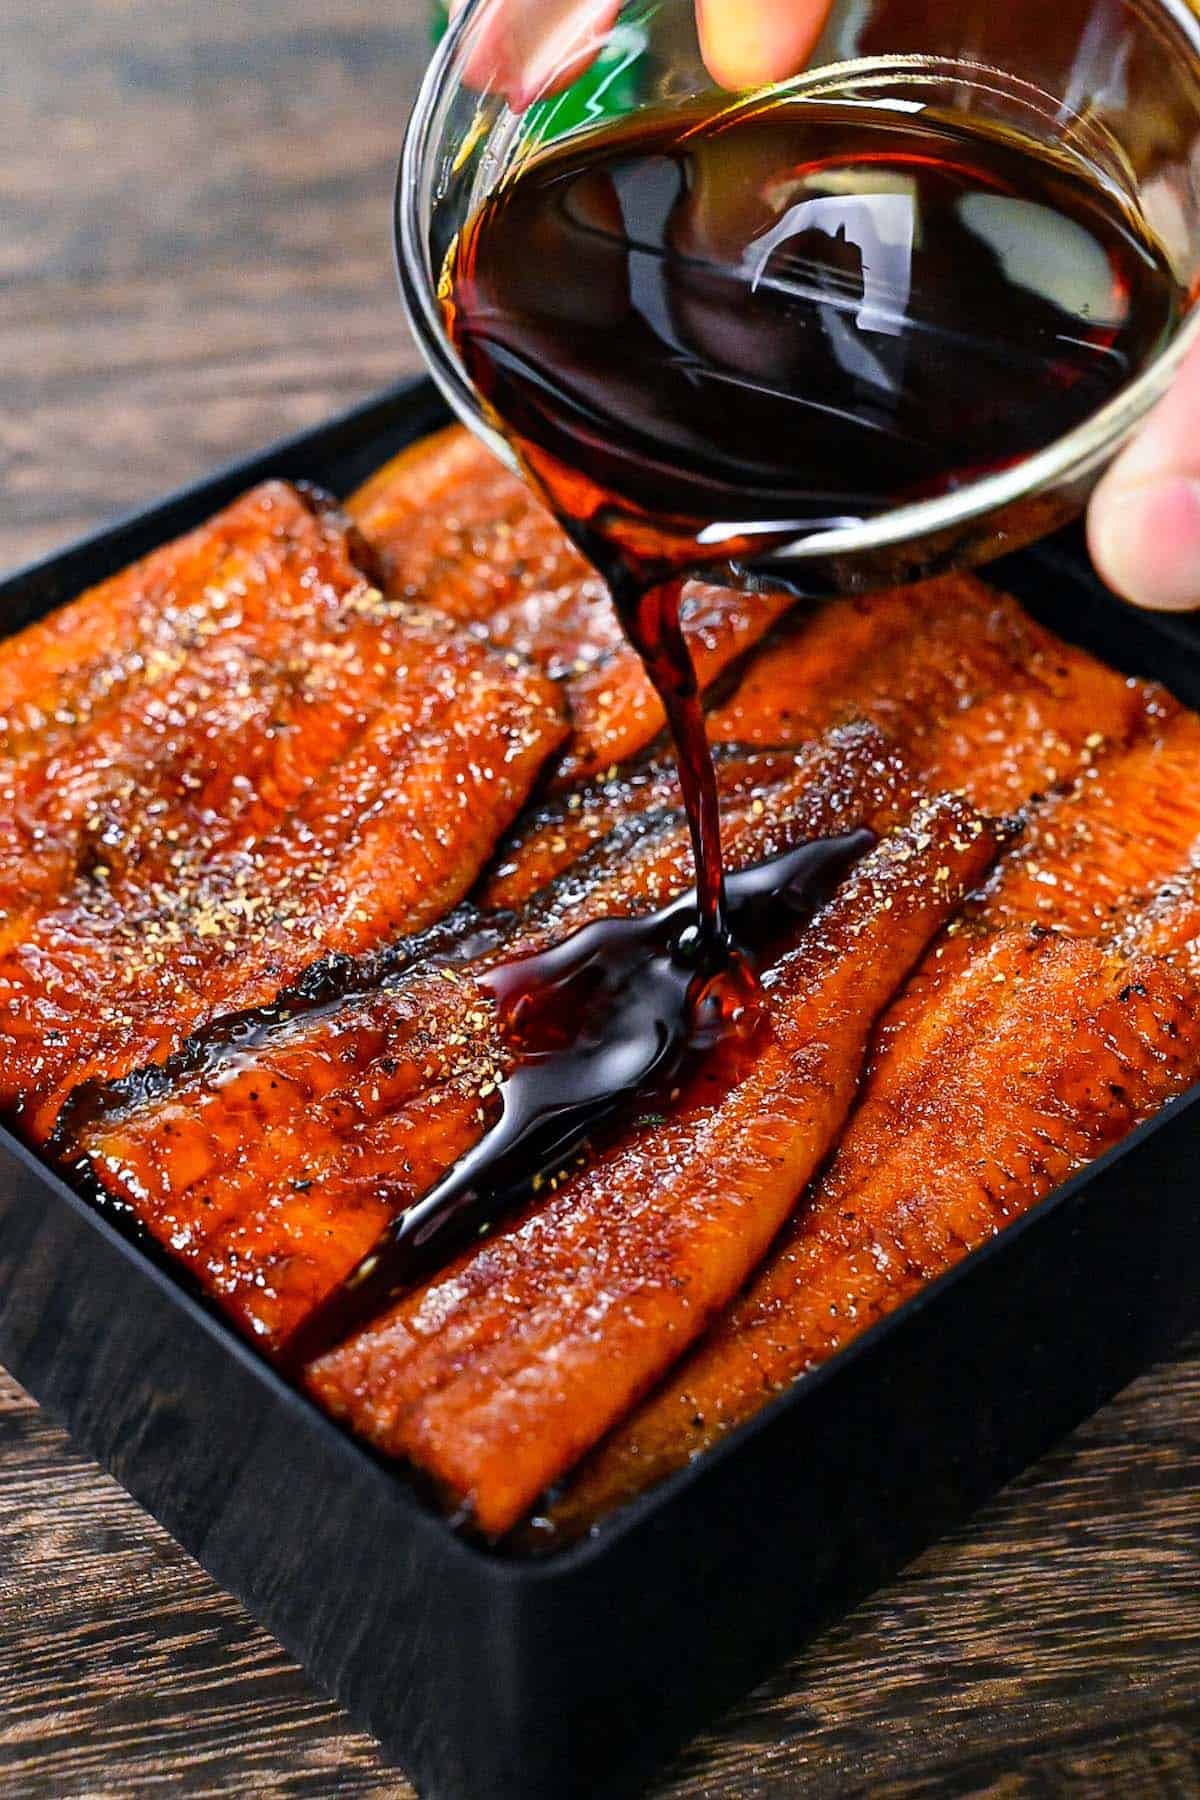
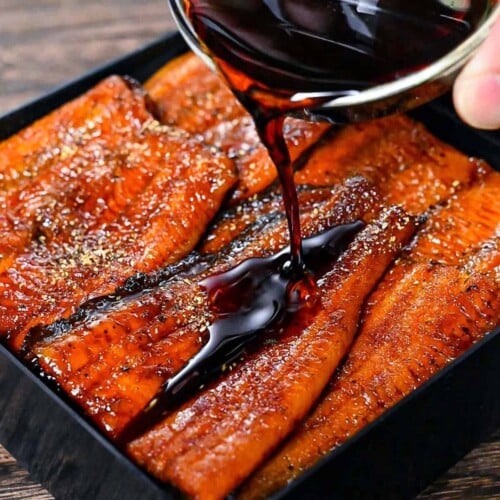
ii. If you cooked eel bones in it, strain them out now. Then brush it over unagi or pour it over rice.

Essential Tips & Tricks
- The moment the sugar starts to melt, pour in the liquid. The sugar should look wet and syrupy and just starting to move, not amber, not glassy, not a finished caramel. Take it to a dark caramel and it tips from rounded sweetness to acrid in a few seconds, and a scorched batch cannot be saved. Hit it early and you get the deep base note without the bitterness.
- Add the soy sauce after the heat is down, never at the start. Soy scorches faster than anything else in the pot, and a scorched batch carries a burnt edge you cannot stir back out. Drop the heat to low first, then stir it in, so the aroma stays in the sauce instead of burning off the top.
- Pull it off the heat while it still looks too thin. The sauce thickens hard as it cools, so the hot pan reads thinner than the real result. Reduce until it looks right while hot and the cold sauce sets up like candy. Stop when it falls off the spoon in slow, heavy drops, somewhere that feels a touch underdone.
With these simple tips in mind, you’re set for success every time you make unagi sauce.
Storage & Meal Prep
Fridge: Let the sauce cool completely, then pour it into a clean, airtight glass jar and wipe the rim before you cap it. It keeps 2 to 4 weeks refrigerated, with the first 2 weeks being the best window for aroma.
Freezer: Not recommended.
Meal prep: This sauce rewards a double batch. Make extra, jar it, and you have a glaze ready for grilled chicken, salmon, or a bowl of plain rice on a night when cooking feels like too much.
What to Serve With This Recipe
Eel Sauce Troubleshooting
You reduced it too far. The sauce keeps tightening as it cools, so a pan that looked perfect while hot turns into a sticky, chewy block by the time it is cold. Set it back over low heat and stir in a little water or mirin, a teaspoon at a time, until it loosens back to a syrup that coats a spoon. Next time, pull it off the heat while it still looks slightly too thin.
The sugar or the soy scorched on heat that ran too high. A truly burnt batch cannot be rescued, since the acrid note will not stir out, so this one is mostly about prevention: pour the liquid in the moment the sugar starts to melt, and add the soy only after the heat is down.
It probably just needs more time, or it needs to cool. Tare thickens by reduction alone, so keep it at a low simmer a few minutes longer and watch how it falls off the spoon. Resist the urge to reach for cornstarch, which is not how this sauce is made and leaves a gluey texture. Remember that it firms up noticeably as it comes down to room temperature.
More Japanese Sauce Recipes
Hungry for more? Explore my Japanese sauce recipe collection to find your next favorite.
Did You Try This Recipe?
I would love to hear your thoughts!
💬 Leave a review and ⭐️ rating in the comments below. 📷 I also love to see your photos – submit them here!
Homemade Unagi Sauce (Sweet Eel Sauce)

Ingredients
- 3 tbsp turbinado sugar (zarame) coarse light brown sugar
- 1 tsp dark brown sugar muscovado or similar
- 5 tbsp sake
- 5 tbsp mirin
- 5 tbsp Japanese soy sauce (koikuchi shoyu)
My recommended brands of ingredients and seasonings can be found in my Japanese pantry guide.
Can’t find certain Japanese ingredients? See my substitution guide here.
Instructions
- Add 3 tbsp turbinado sugar and 1 tsp dark brown sugar to a small saucepan and heat on medium.

- Once it starts to melt, add 5 tbsp sake and 5 tbsp mirin. Stir occasionally while it comes to a gentle boil.
- Let it bubble for 1-2 minutes and then turn the heat down to low, then add 5 tbsp Japanese soy sauce (koikuchi shoyu) and simmer for 10 minutes or until thickened.
- Once thickened to a thin syrup-like consistency, remove from the heat and scoop out any excess foam. Leave to cool to finish thickening.

- Enjoy with eel or brushed over rice!

Do you have a variation of this that does use eel heads and bones? I’ll go to great lengths to make the best eel sauce; sourcing whole eels isn’t out of the question
Hi Eric,
Great question! If you have eel heads and bones, grill them thoroughly (until the bones have no moisture left and the surface is slightly charred) and then add them to the sauce during step 2 with the sake and mirin. Then just follow the recipe as normal and pour the sauce through a strainer at the end to remove the bones.
Hope this answers your question, and hope you like the recipe.