


Featured Comment
I made this for my fiancee and myself today and wow! What an explosion of flavour! It’s a perfect dish!
– @rodmund83 (from YouTube)
Not chicken karaage, not chicken katsu, not tebasaki, not chicken tempura, there’s another Japanese fried chicken that steals hearts in Japan: chicken nanban.
Golden, juicy chicken meets tangy vinegar glaze, then melts under a blanket of tartar sauce. The unusual method behind that juicy crunch? You’ll want to see how it’s done in Japan.
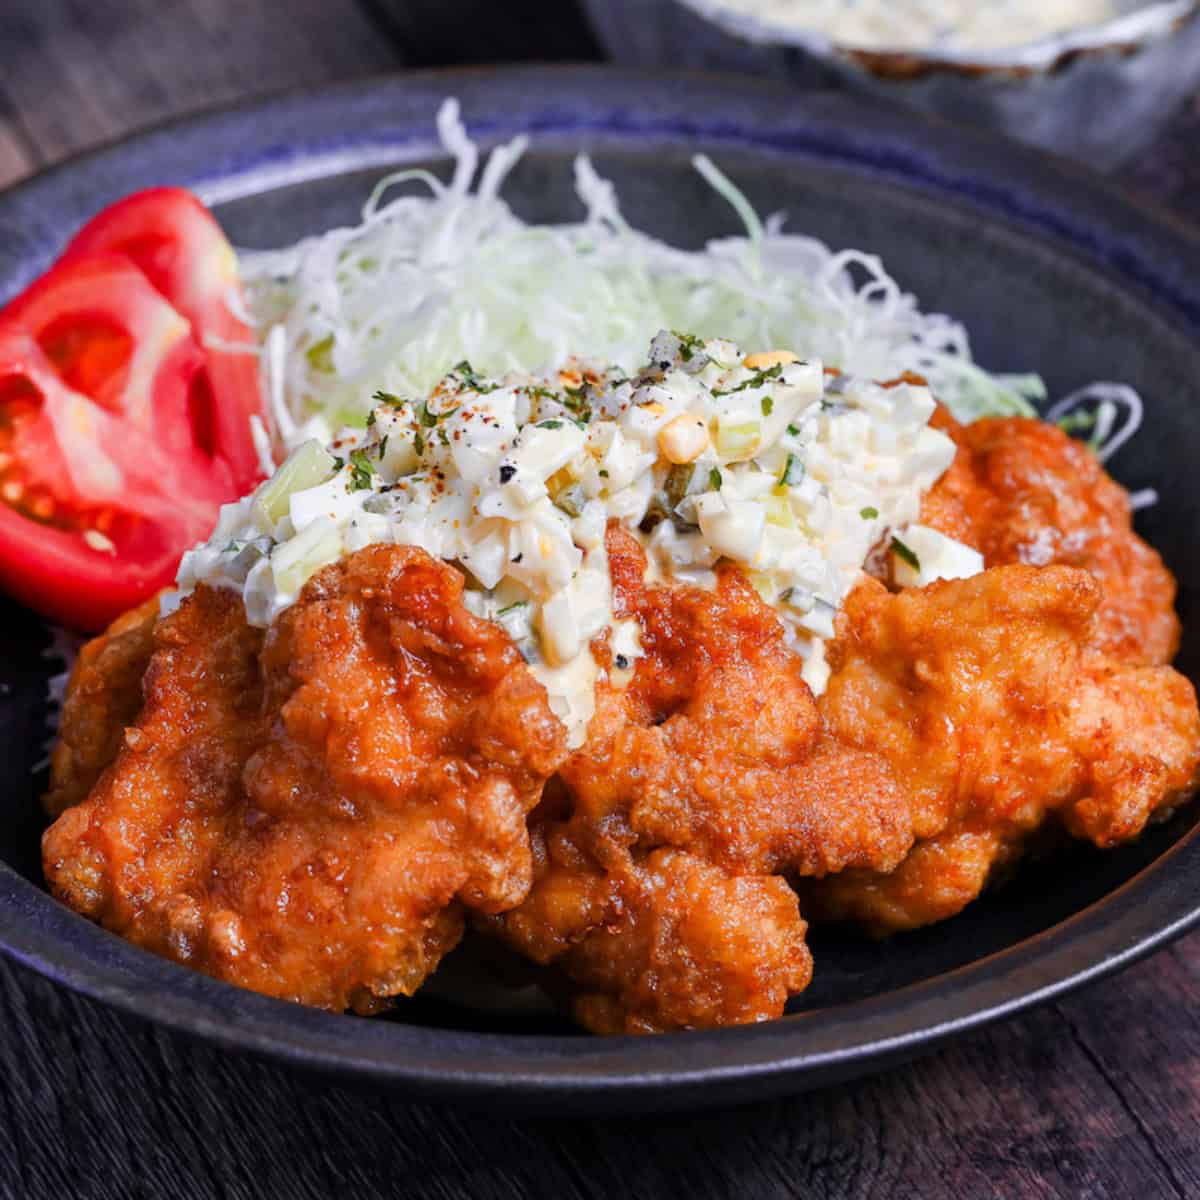
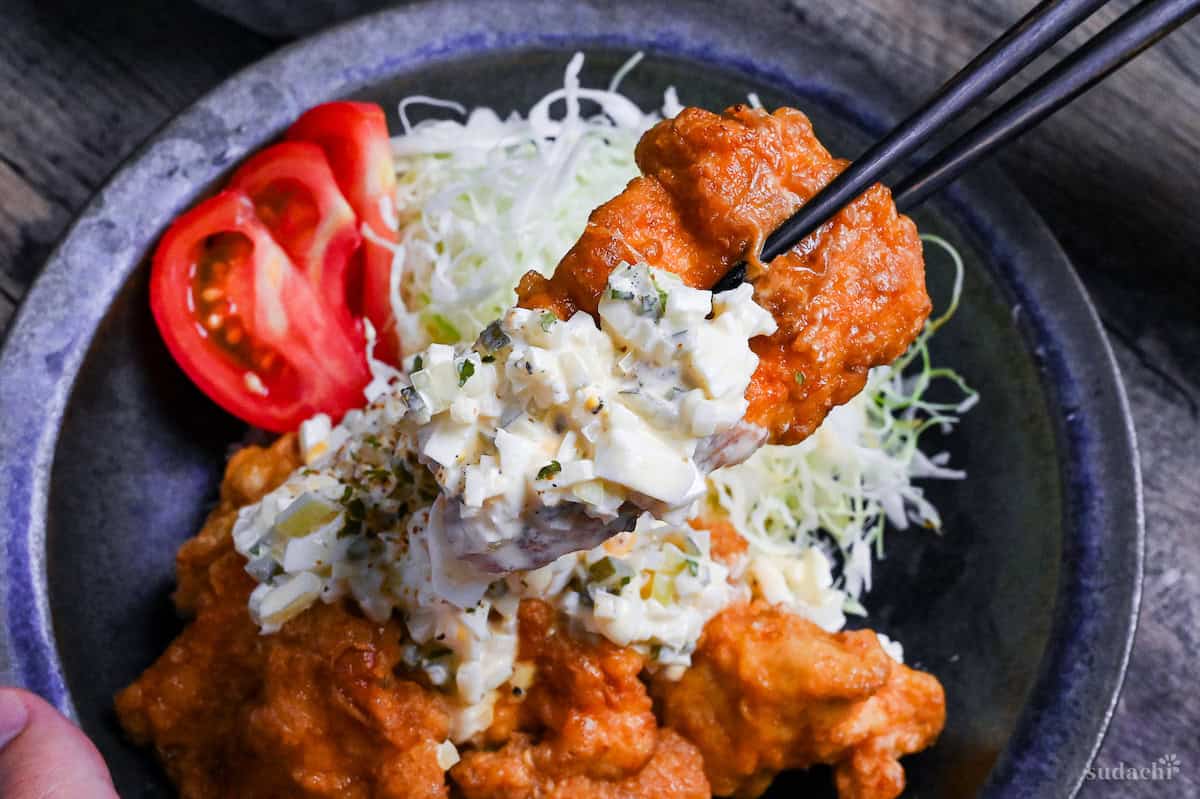
Chicken Nanban
Recipe Snapshot
- What is it? Miyazaki’s crispy chicken soaked in sweet vinegar and crowned with creamy tartar.
- Flavor profile: Juicy, Sweet-sour, Indulgent
- Why you’ll love this recipe: My recipe honors Miyazaki technique and flavor balance, giving you a dish that feels both culturally true and deeply satisfying.
- Must-haves: Chicken breast (or thigh), Rice vinegar, Boiled eggs
- Skill Level: Medium
- Freezer Friendly? Partially
- Suitable for Meal Prep? Partially
Summarize & Save this content on:
What is Chicken Nanban?
Chicken Nanban (チキン南蛮) is a beloved regional dish from Miyazaki Prefecture that pairs crispy fried chicken with a tangy-sweet vinegar sauce, finished with a generous dollop of creamy Japanese tartar sauce. Unlike regular fried chicken, the meat is coated in flour and dipped in egg before frying, creating a delicate, sponge-like crust that soaks up the sauce beautifully.
If you’ve enjoyed black vinegar chicken or sweet sour pork, chicken nanban is definitely up your street.
It’s also a staple at izakaya, where it’s served alongside drinks, as well as in home kitchens and restaurants across Japan. While some places take shortcuts with plain karaage and bottled sauce, true Miyazaki-style Nanban follows careful steps to preserve its harmony of flavors.
Chicken Nanban Ingredients
What You’ll Need for Chicken & Nanbanzu
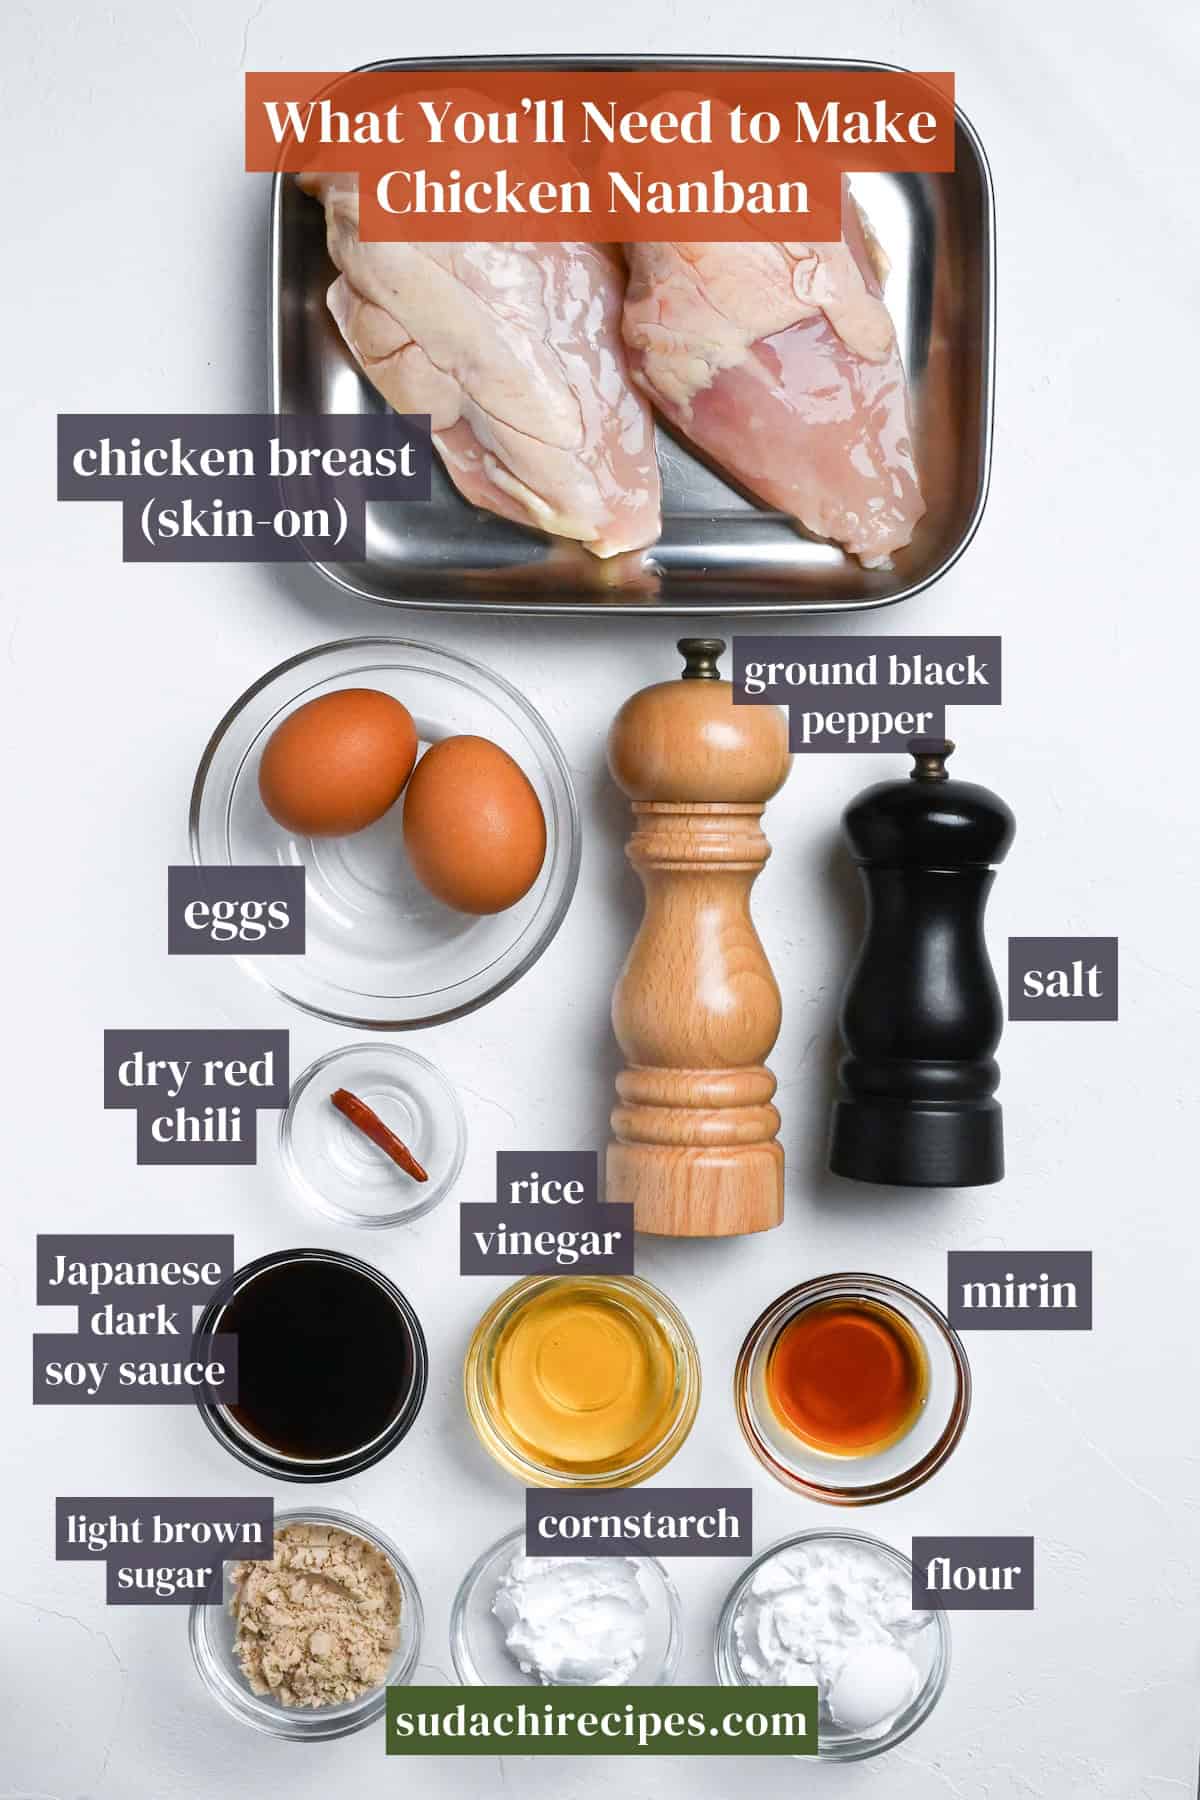
- Chicken: Traditional chicken nanban started with breast meat. The meat’s subtle taste won’t compete with the bold nanban flavors, letting each component shine through. If you prefer the juiciness of thigh meat, go for it! Both cuts work beautifully.
- Coating flour: The secret to nanban’s distinctive texture lies in flour (or all-purpose in a pinch). I’ve added just a touch of cornstarch. If you only have all-purpose flour, no worries! It’ll still taste incredible.
- Nanban-zu: The classic golden ratio is equal parts vinegar, soy sauce, and sugar, but I’ve dialed back the sweetness slightly and added mirin. Want to try the original version? Skip the mirin and use the traditional 1:1:1 ratio.
- Japanese soy sauce: I’m keeping it simple with regular soy sauce throughout, but some restaurants in Miyazaki blends half dark (koikuchi) and half light (usukuchi) soy sauce if you can find them.
What You’ll Need for Japanese Tartar Sauce
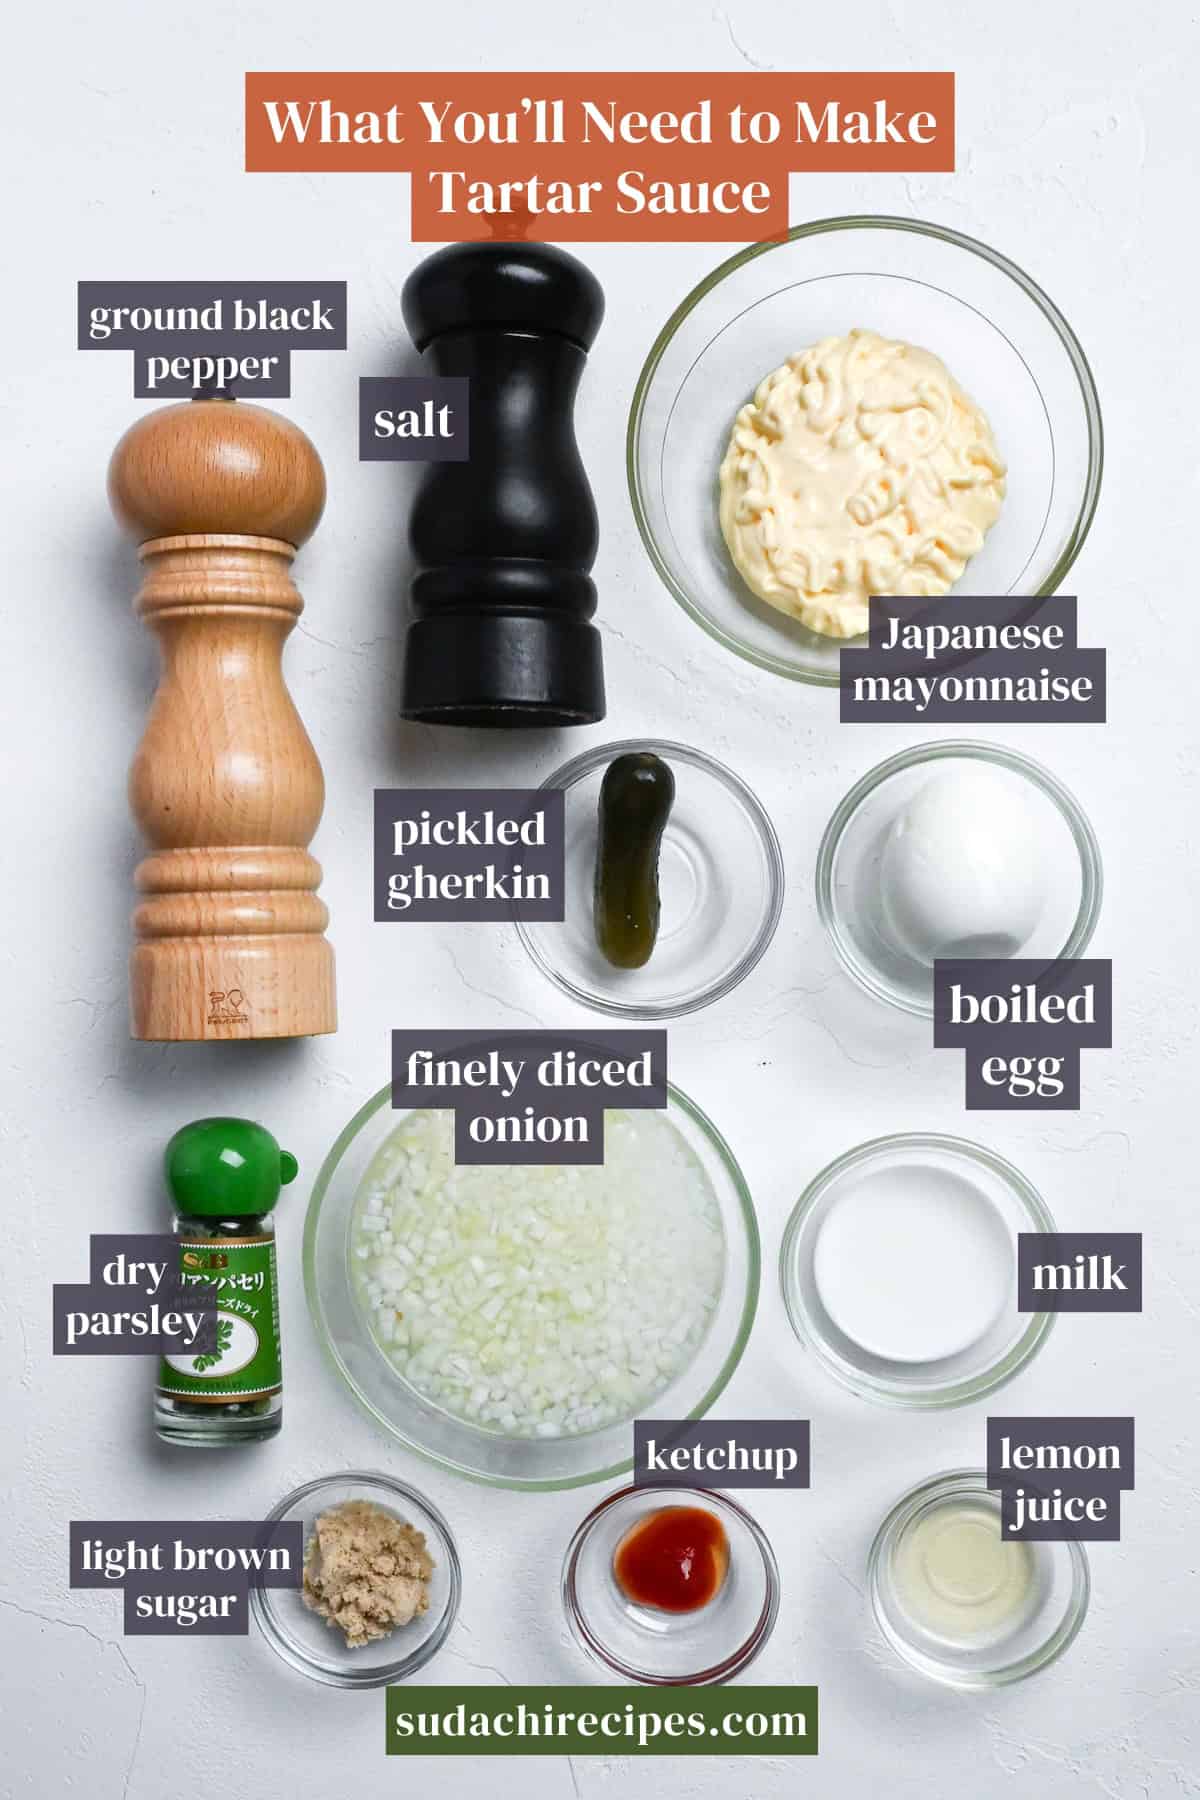
- Mayonnaise: Japanese mayo is the gold standard here, with its richer texture and slightly sweeter taste that complements the tangy sauce perfectly. It’s widely available now. Look for Kewpie at large supermarkets or online.
Substitutions & Shortcut
- Store-bought tartar sauce: Don’t have time to make tartar from scratch? Grab a quality store-bought version and doctor it up with a squeeze of lemon and some finely diced pickles.
- Rice vinegar alternatives: Apple cider vinegar is your best bet. White wine vinegar works too, but use about 10% less since it’s sharper, or dilute it with a splash of water to tame the bite.
- Pickled gherkins: No gherkins? Diced cucumber pickles, pickled daikon, or even diced fresh cucumber will give you that same bright contrast.
Have trouble finding Japanese ingredients? Check out my ultimate guide to Japanese ingredient substitutes!
How to Make My Chicken Nanban
If you prefer to watch the process in action, check out my YouTube video of this chicken nanban recipe!

i. Because the muscle fibers of chicken breast run in different directions depending on the section, it’s easiest to divide the fillet into three parts first.
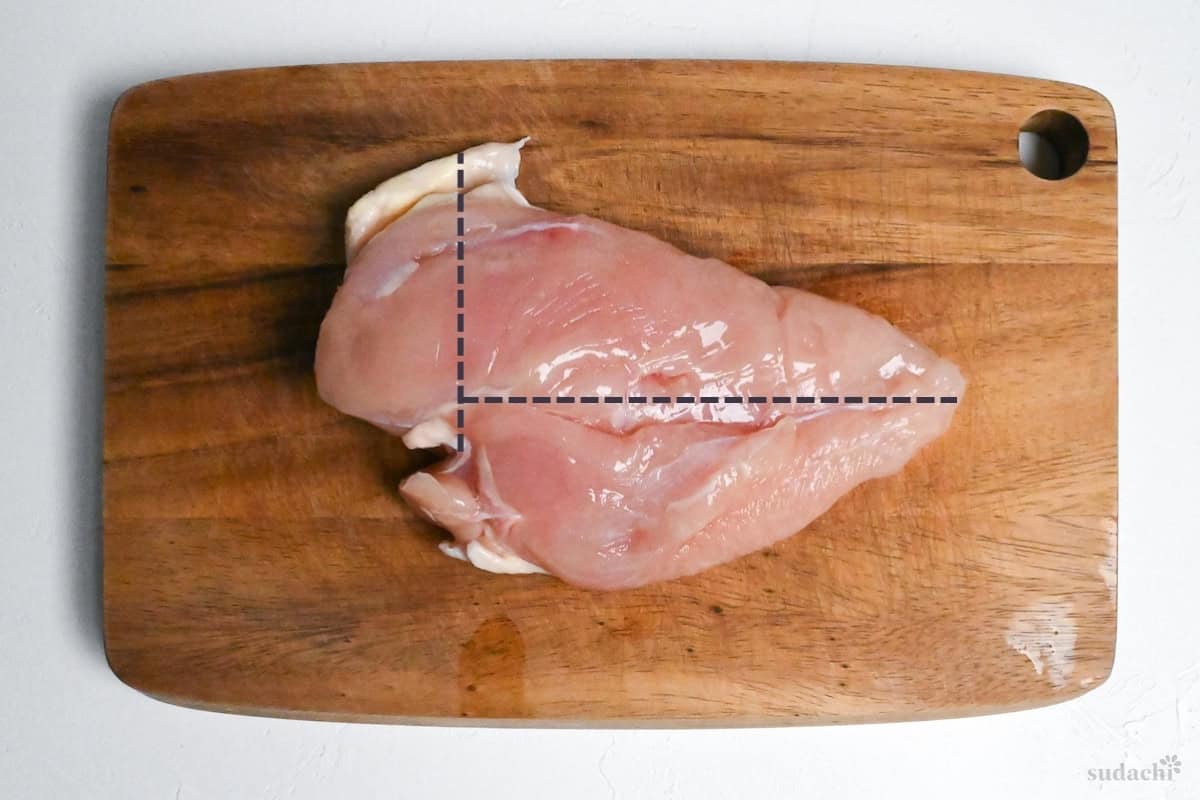
Cut off the thick root end and the section where a thin line of connective tissue runs horizontally, separating the breast into three portions.

ii. Then, slice each portion diagonally against the grain into pieces about 1.5-2 cm (⅝-¾ inch) thick.
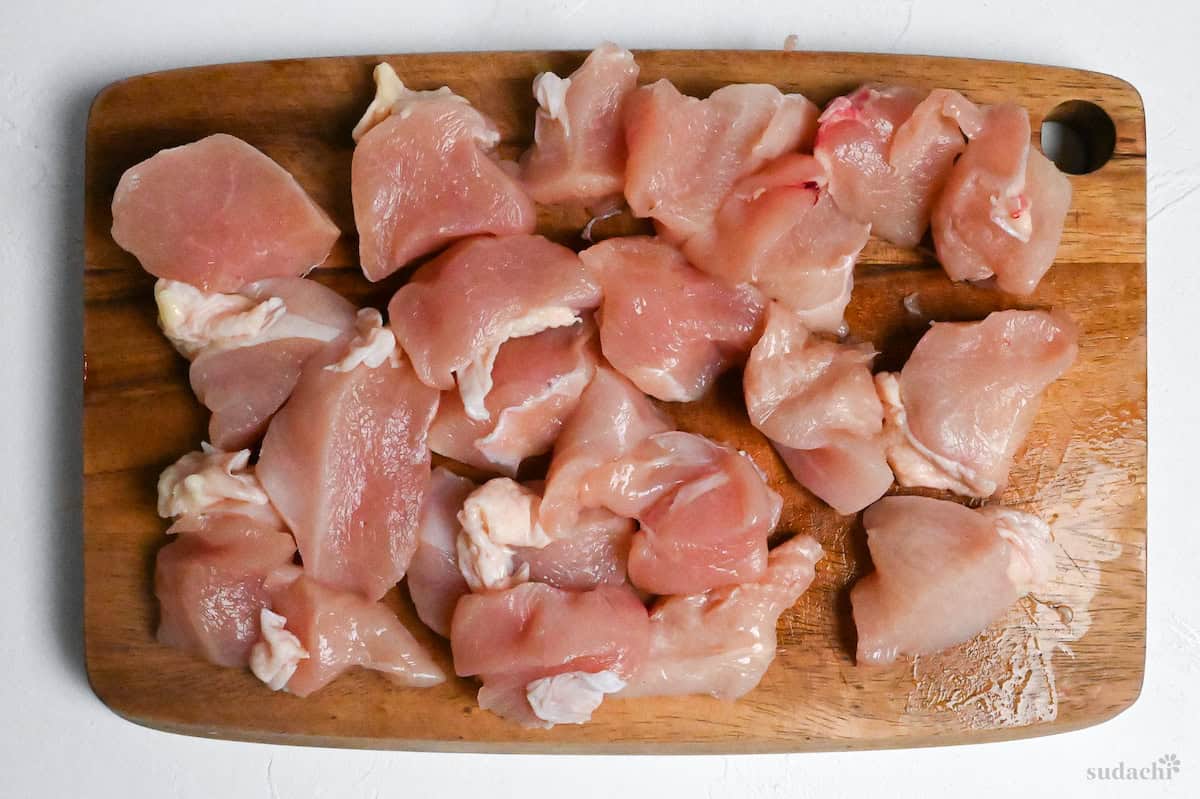
Even thickness helps heat reach the center quickly and prevents the surface from over-browning before the interior cooks through. Aim for pieces with at least one flat side so they sit evenly in hot oil and brown uniformly.
iii. Prick the surface lightly all over with a fork, then blot thoroughly with paper towels.
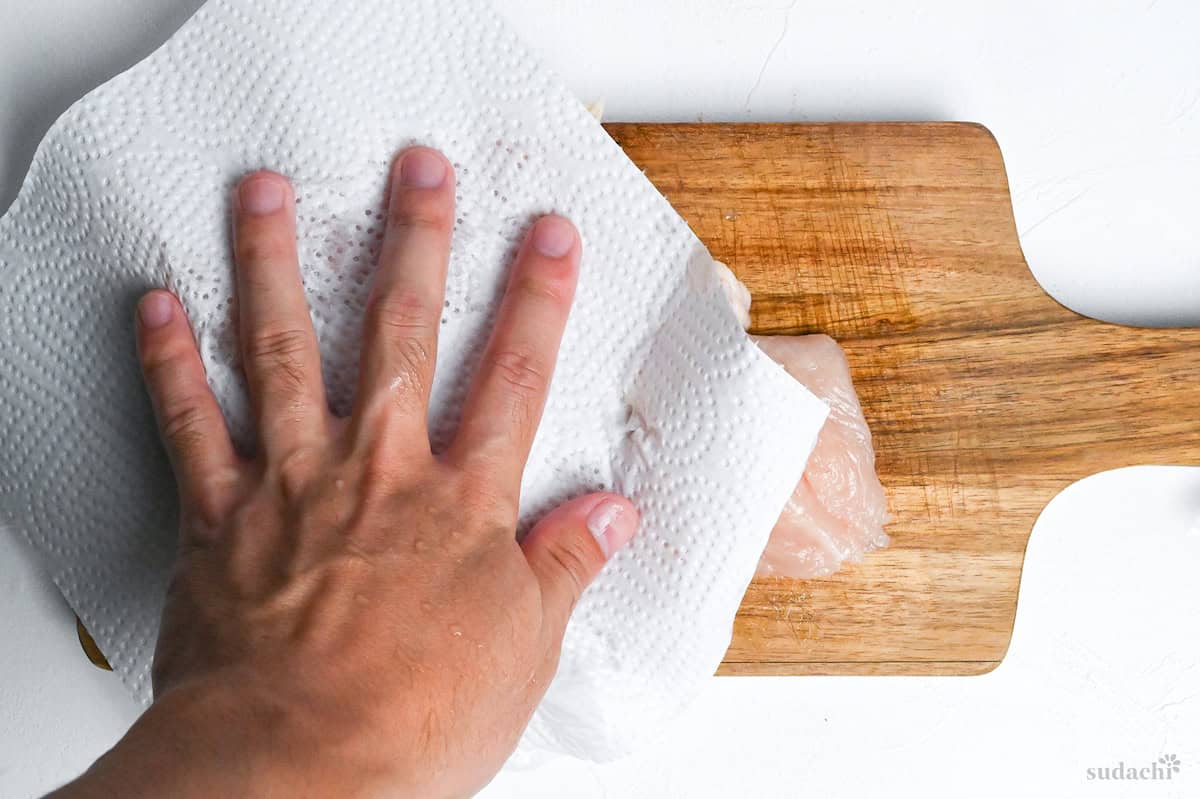
iv. Sprinkle the chicken with salt and black pepper to season the meat itself before any coating goes on.
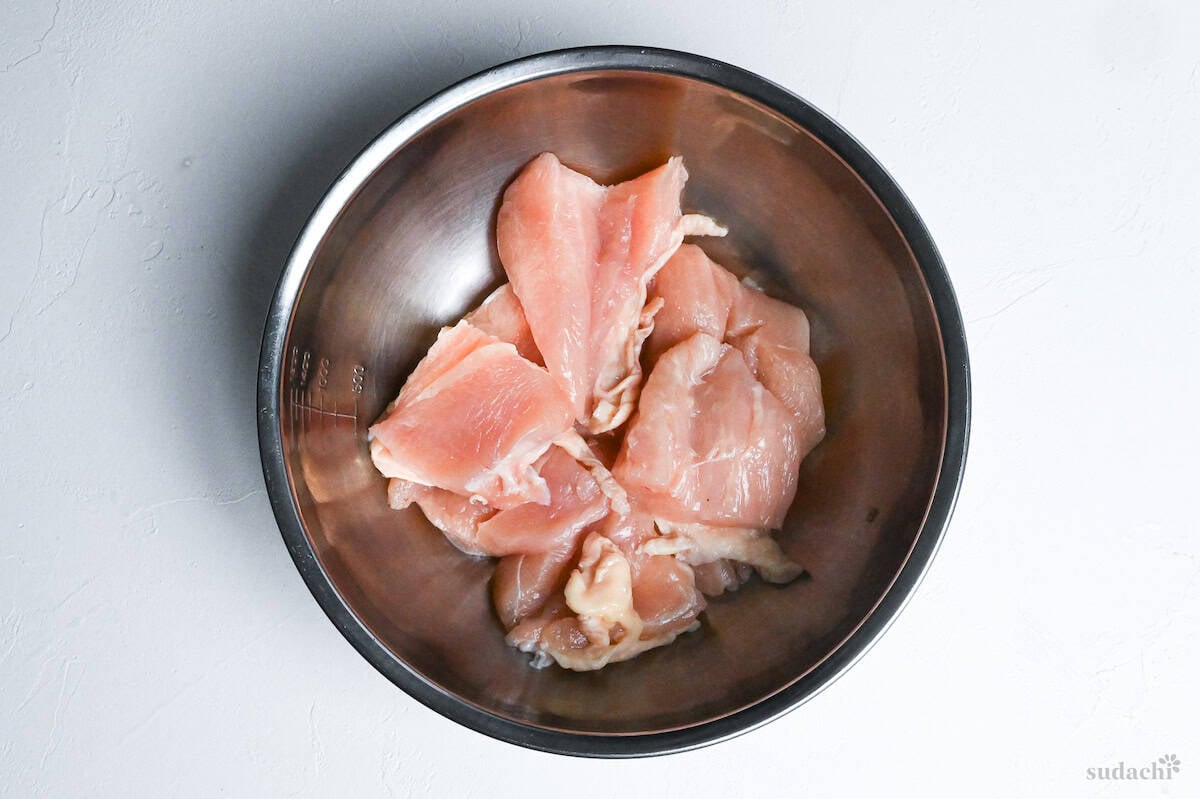
i. Toss the chicken in cake or all-purpose flour + cornstarch, shaking off any excess to leave a whisper-thin coat.
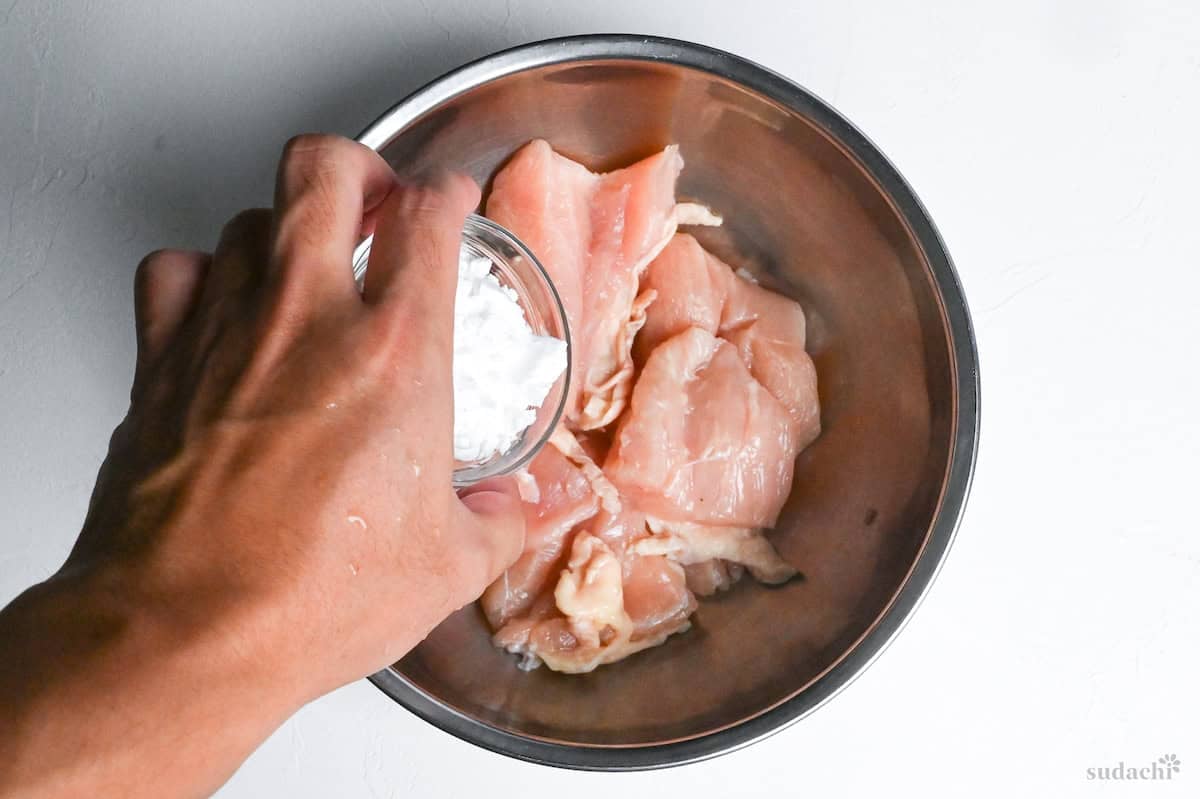
This first, dry layer anchors the egg later and builds a delicate shell that fries up crisp. If you see floury spots, you used too much, tap them off to avoid pasty bites.
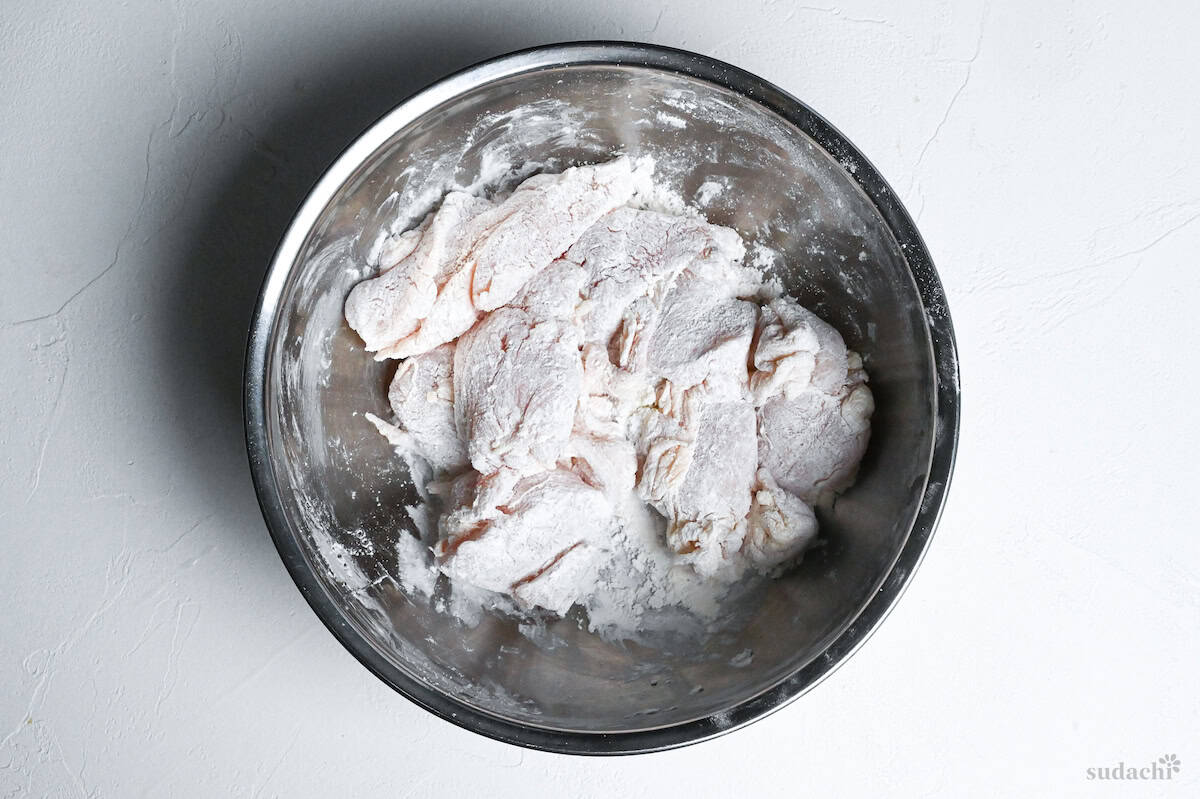
Traditional chicken nanban uses pure flour for the coating, which is what gives it that signature tender texture. If you prefer a crunchier bite, swap to a 1:1 ratio of flour to cornstarch by weight. Increasing starch and reducing gluten typically yields a more brittle, porous crust that resists sogginess.
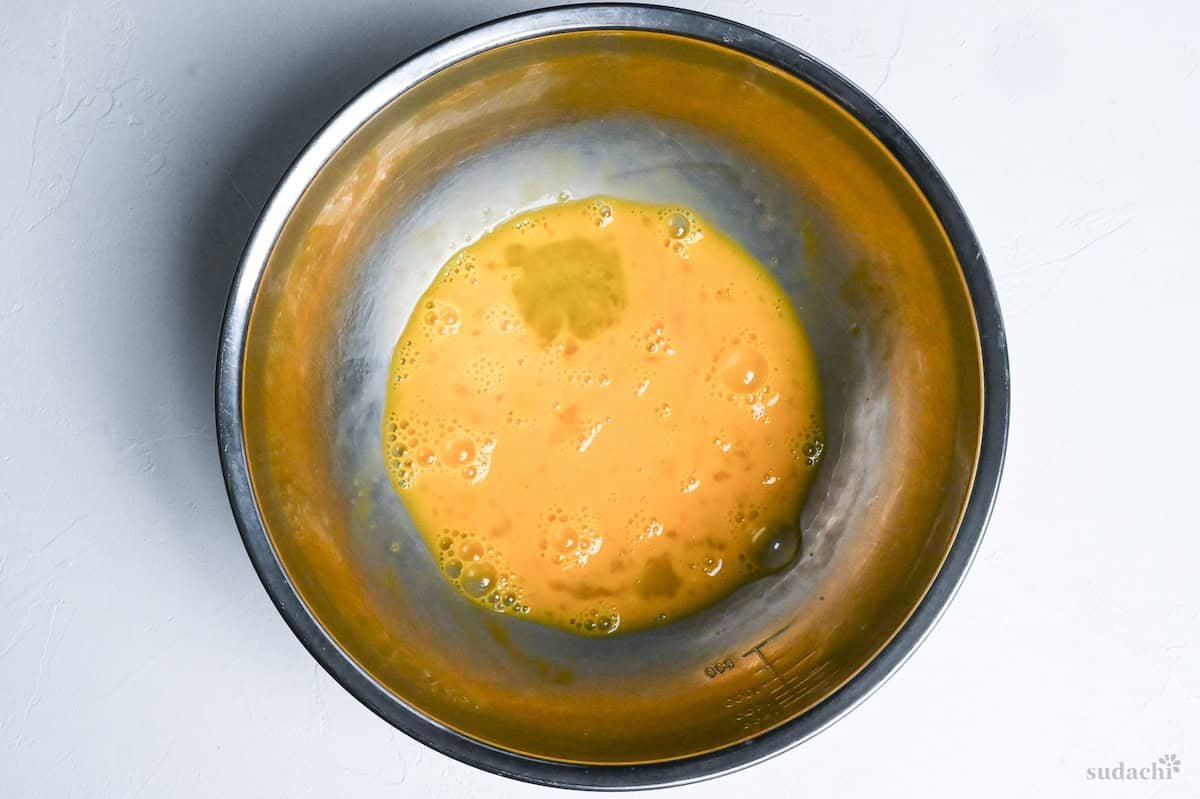
i. Beat eggs in a bowl.
ii. Then submerge the floured chicken so every surface is glossed but not dripping.

iii. The egg sets into a micro-porous shell as it fries, creating little pathways for sauce to cling later. If the egg pools at the bottom, lift each piece and let the excess run off before frying.
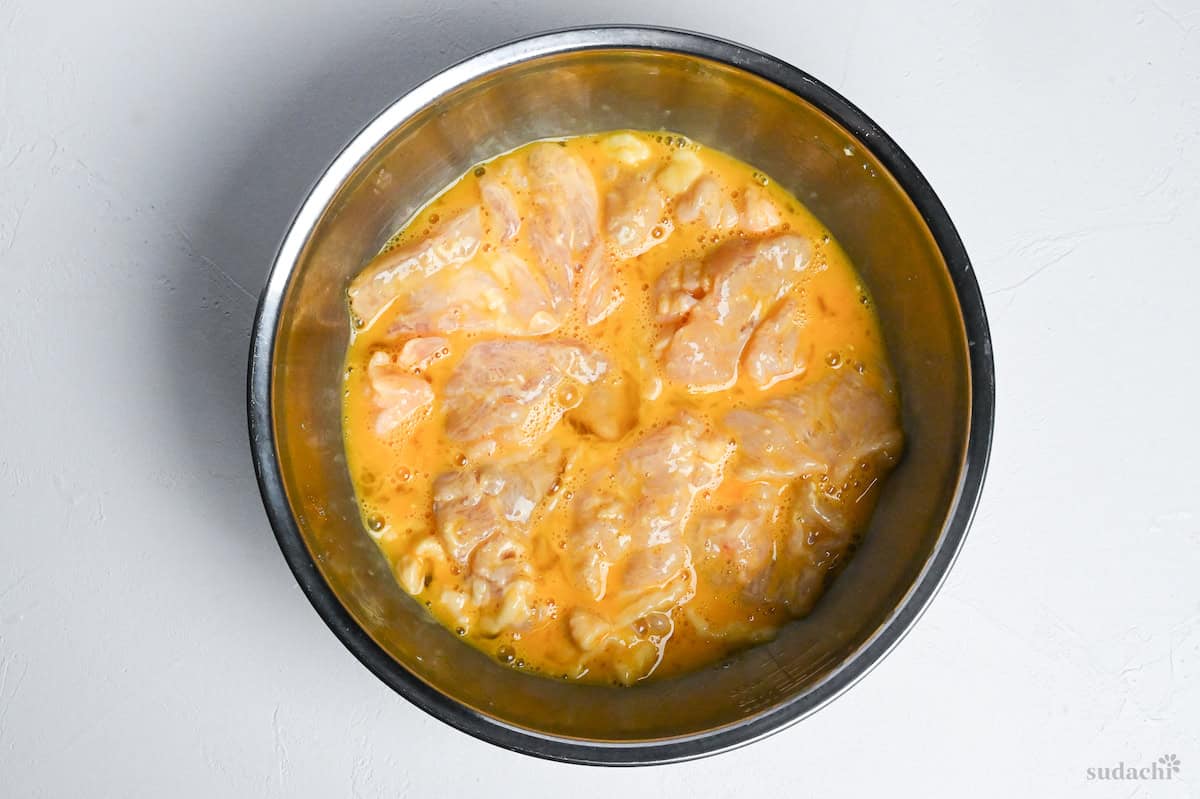
That porous crust invites the nanban sauce to soak in quickly when hot chicken meets cooler sauce. Think of how a sponge soaks up water. The effect is fastest right after frying, before the crust fully firms up. Keep that sauce close to the fryer to take advantage later.
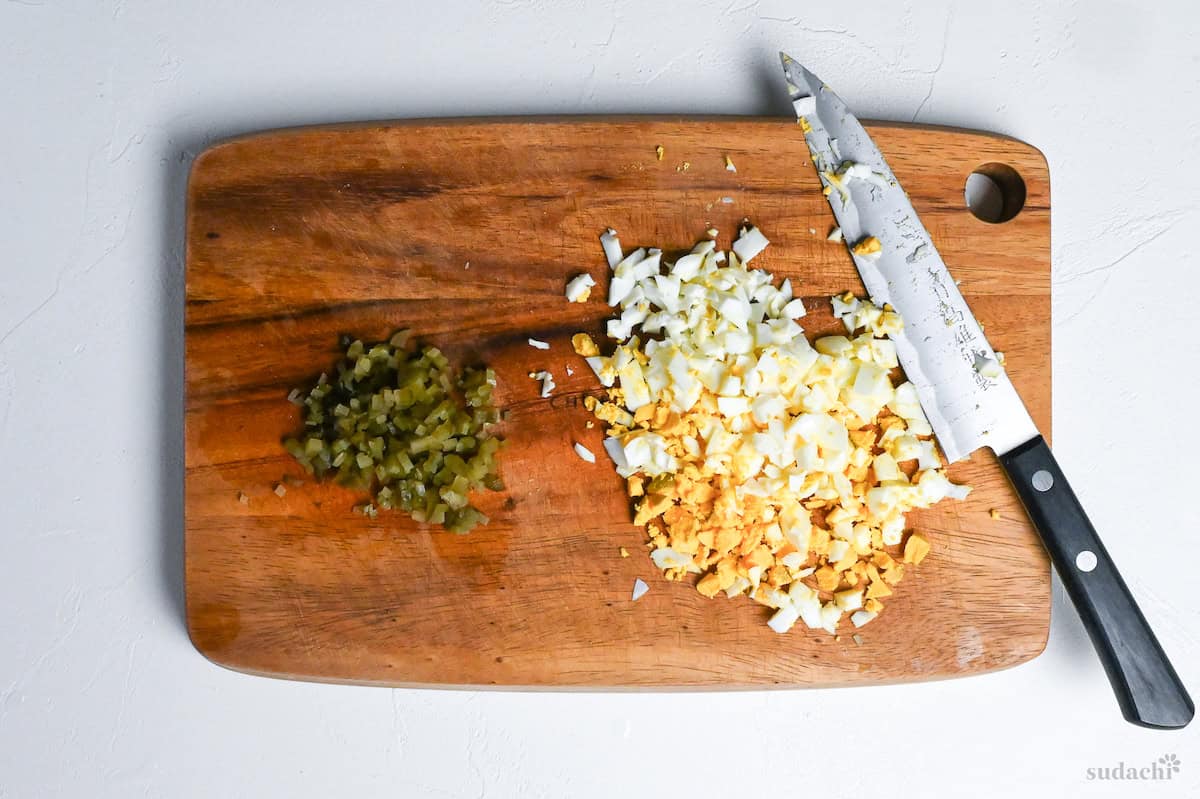
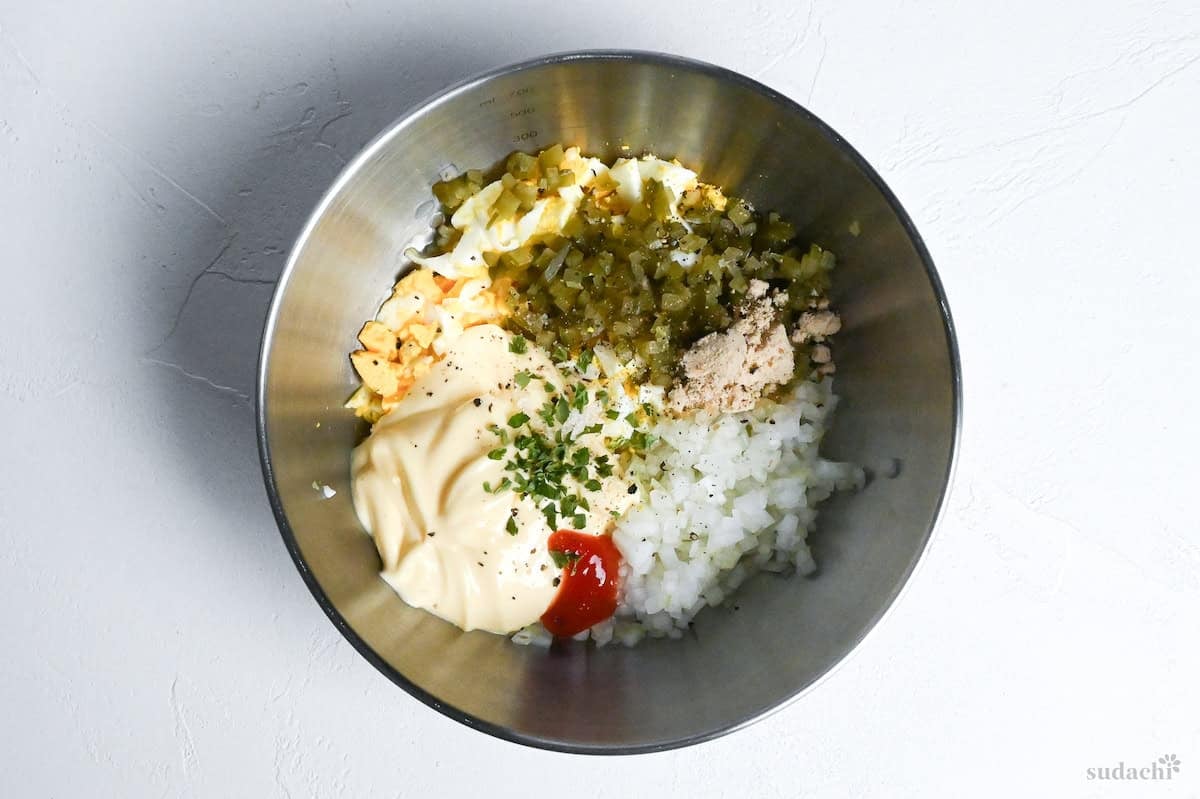
i. While your chicken rests in the egg wash, combine your tartar ingredients.
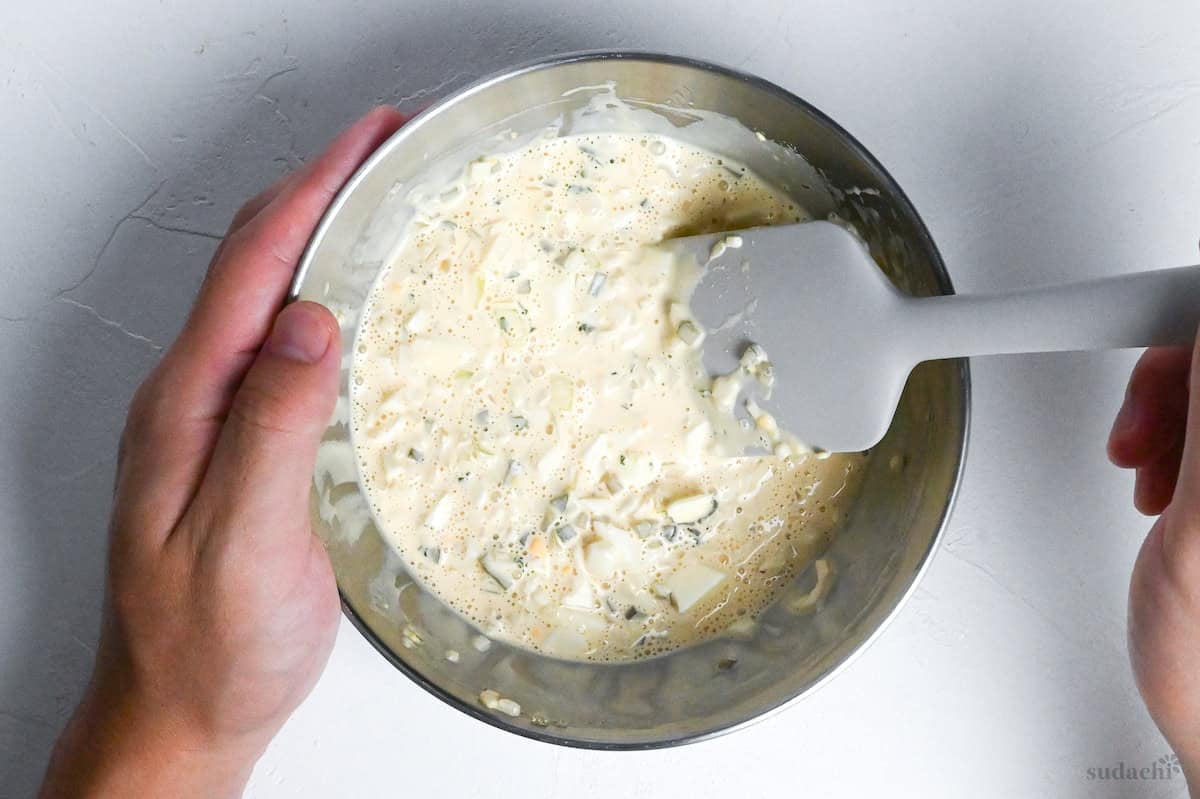
ii. Whisk until creamy and refrigerate until serving.
- Tame That Onion Bite: After mincing your onion, rinse it under cold running water for 30 seconds, then wrap in a clean kitchen towel and squeeze firmly to remove excess moisture. This eliminates the harsh sulfur compounds that can overpower your sauce.
- The Milk Secret: A splash of milk transforms your tartar from thick and gluey to light and silky. It’s optional, but that small addition creates a quality mouthfeel.
- Got Pickle Juice? If you’re using gherkins from a jar, don’t waste that brine! Replace half the milk and sugar with pickle juice for an extra layer of complexity.
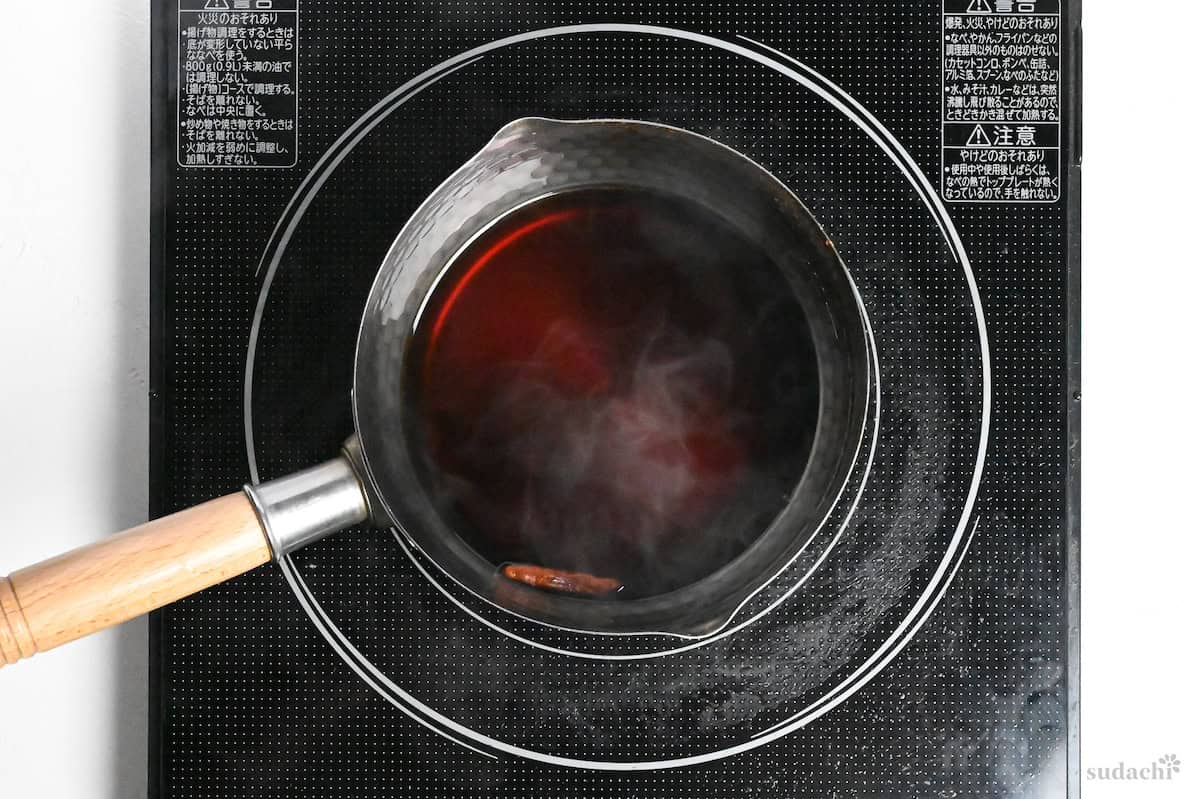
i .In a saucepan, combine Japanese soy sauce, rice vinegar, sugar, mirin, and dried chili (split lengthwise). Bring just to a bare simmer for about 1 minute to dissolve sugar and burn off some of the alcohol in the mirin, then cool to room temperature before using.
i. Preheat neutral frying oil to 170℃ (338°F) in a deep pot.
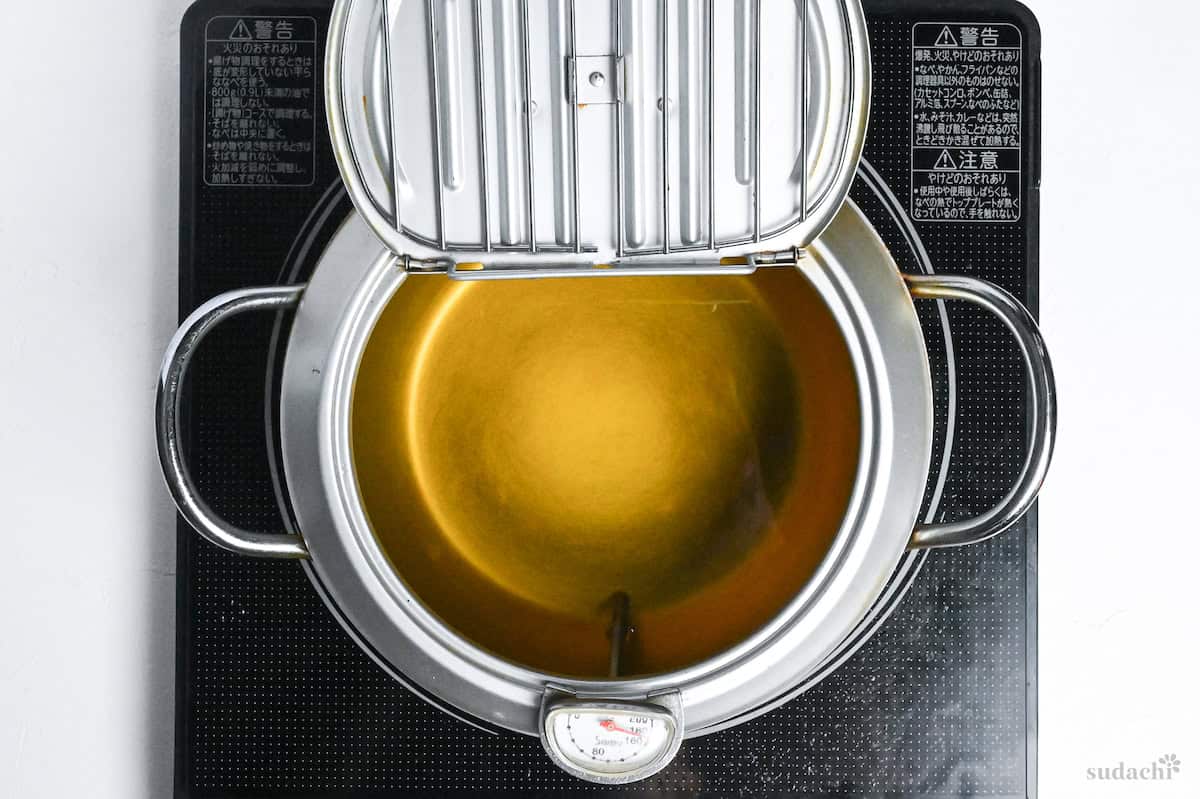
Use a stable, high-smoke-point oil like rice bran or peanut, and do not exceed 180℃ (356°F) to limit oil breakdown and off-flavors.
ii. Lay pieces in skin side down and fry about 3 minutes. Resist touching for the first 60 seconds so the coating gels and releases cleanly.
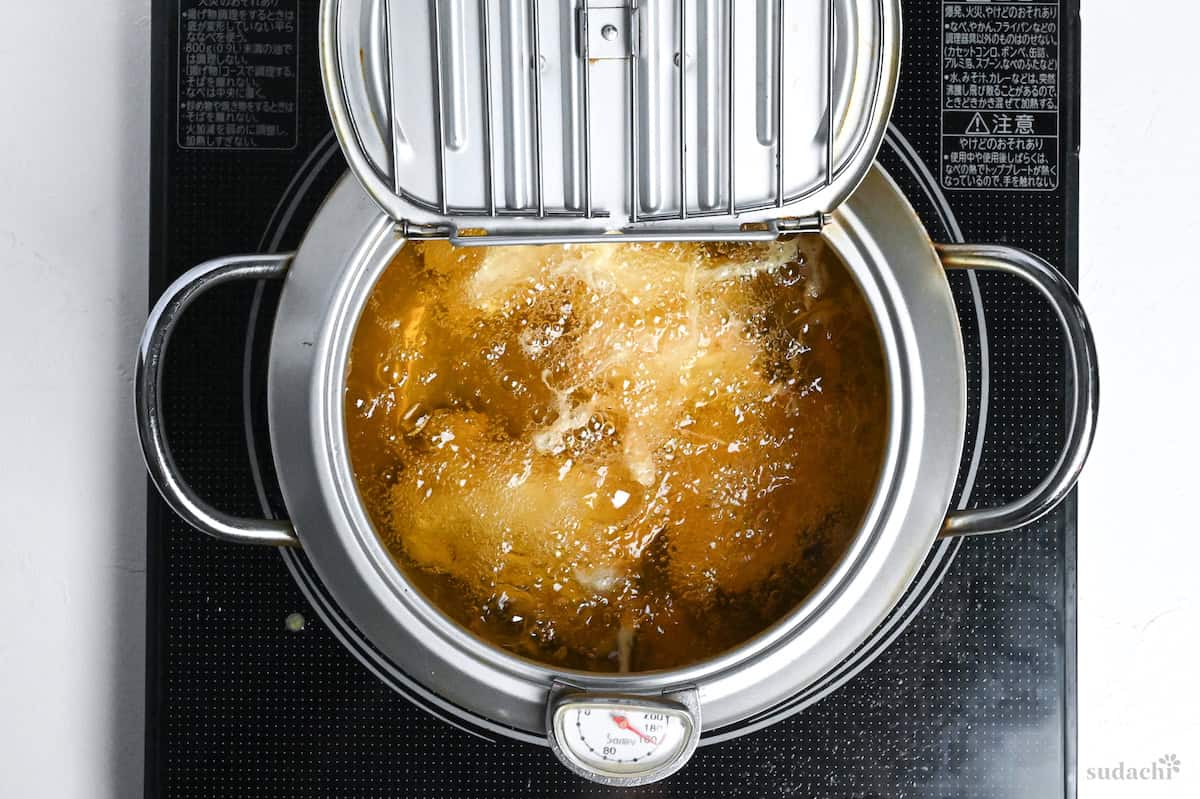
You’re looking for pale golden with vigorous, even bubbling. If browning too fast, nudge the heat down; color should lag just behind doneness here.
Traditional chicken nanban un Miyazaki uses only the egg coating, which creates its signature tender texture. If you crave that satisfying crunch, dust the egg-coated pieces with a light layer of cornstarch before frying. It’s not authentic, but it delivers serious textural contrast.
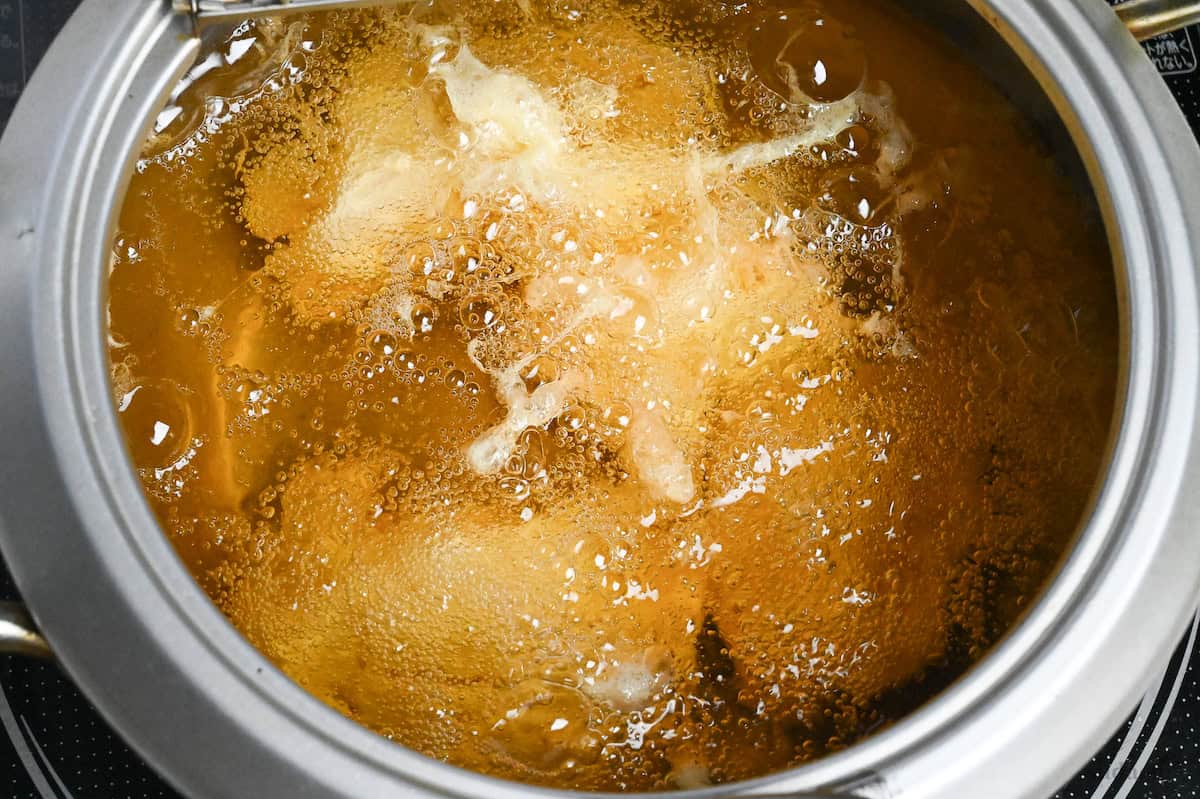
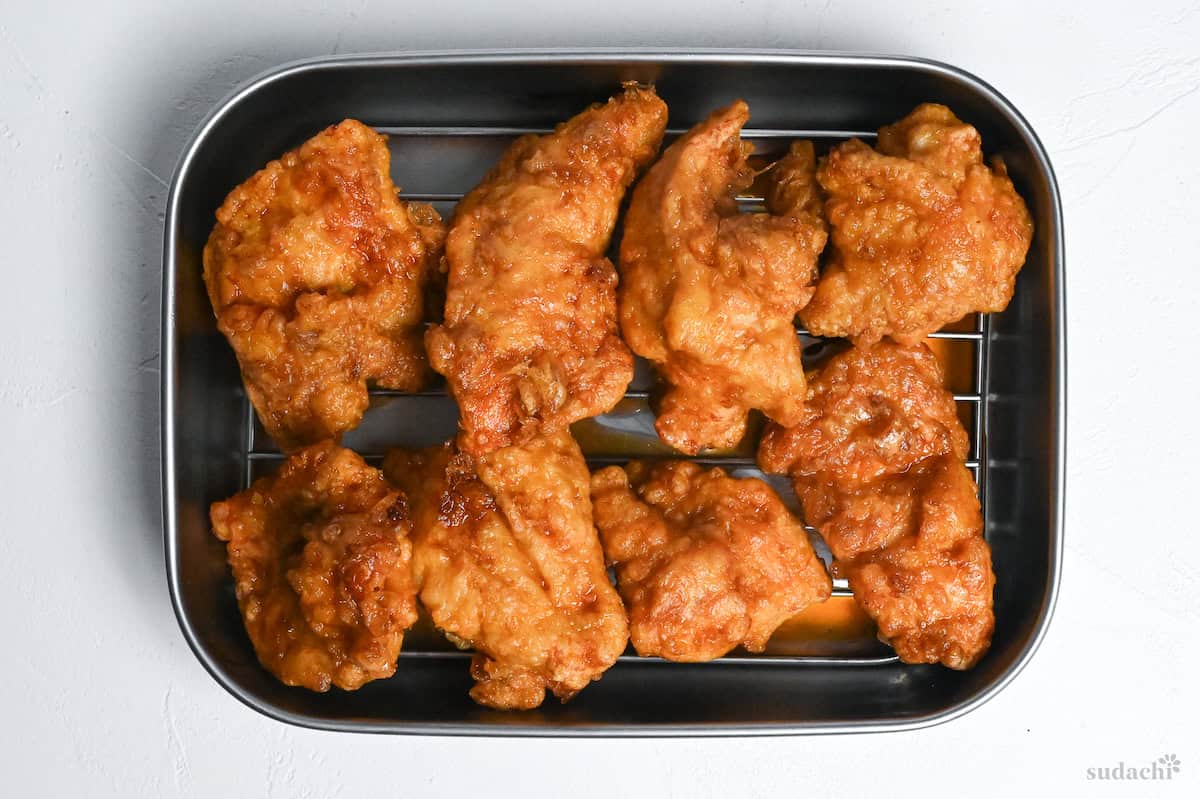
iii. Remove the chicken and let it rest on a wire rack for exactly 3 minutes. Increase your oil temperature to 180°C (355°F).
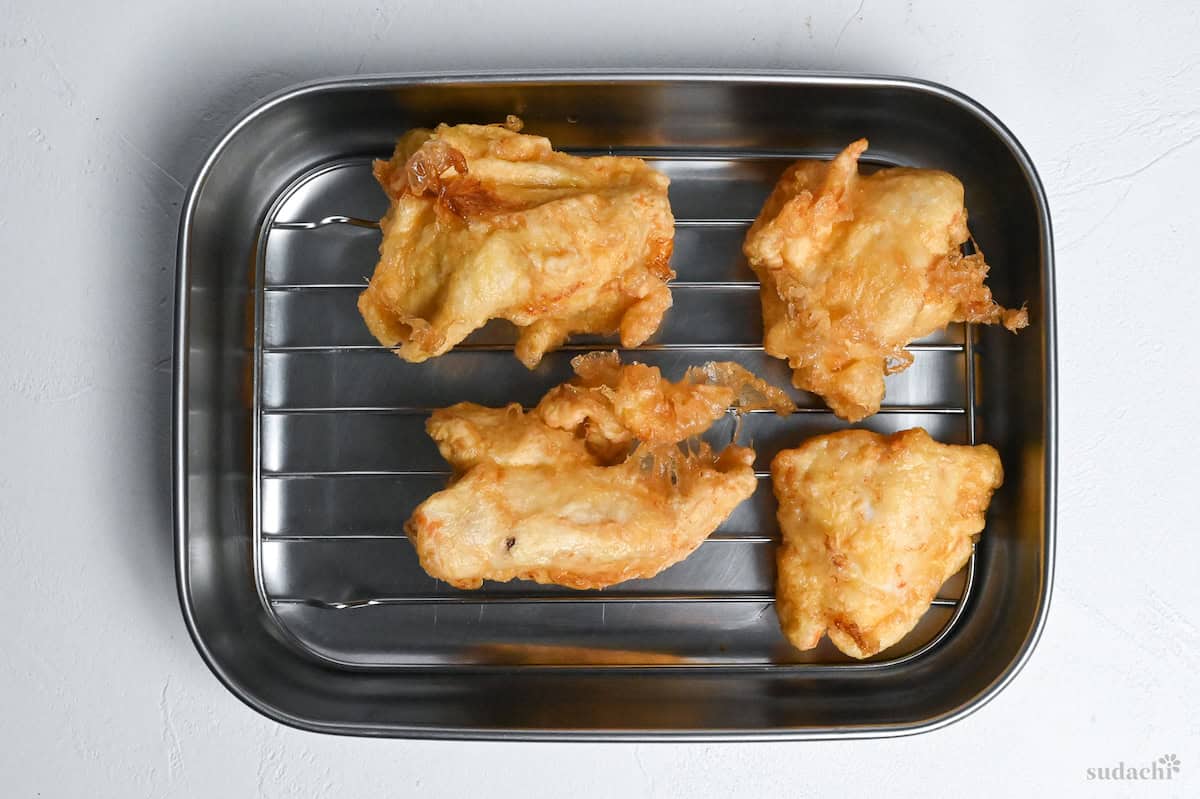
iv. Then return the chicken for a final 2-minute fry. This double-fry technique creates the perfect balance of crispy exterior and juicy interior.

i. Here’s where timing makes or breaks your chicken nanban: the moment you lift the chicken from the oil, let excess oil drain for 15-30 seconds on a rack, then immediately dip each piece into your room-temperature nanban sauce for 10-20 seconds.
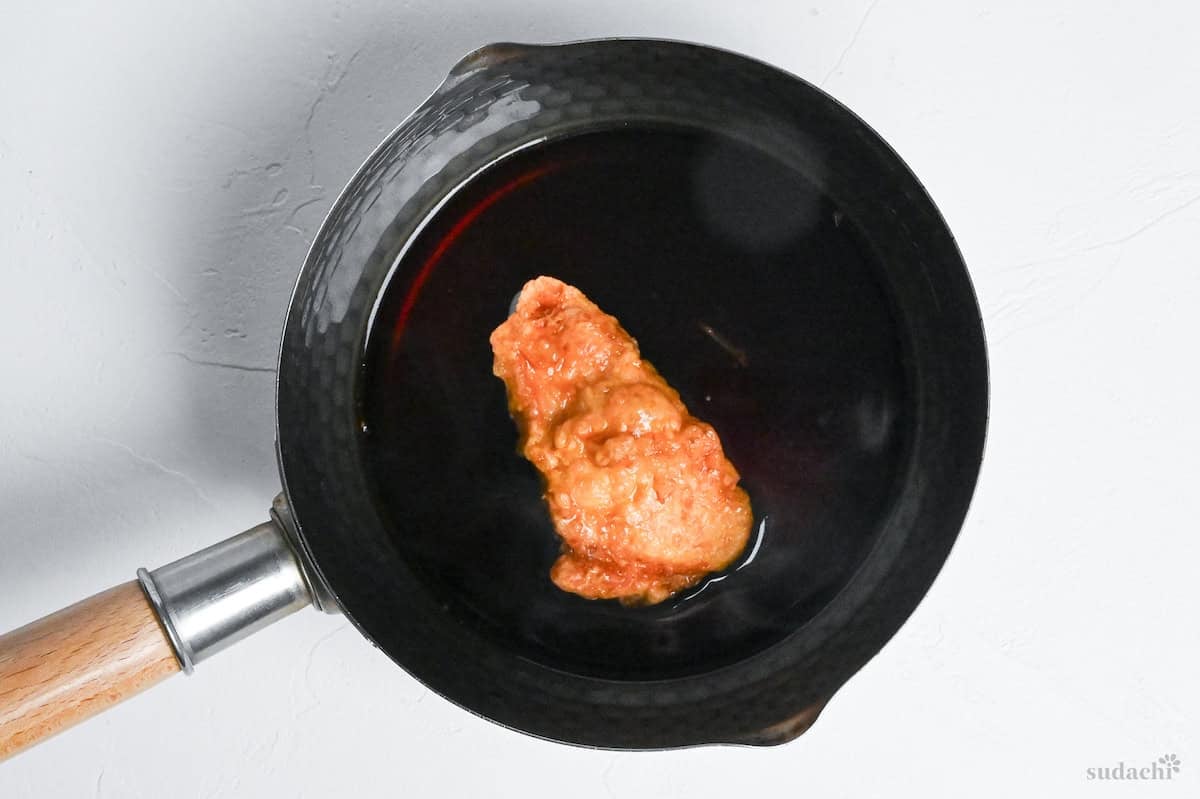
ii. Remove quickly and let the residual heat work its magic.
The temperature contrast is everything. Hot chicken meeting cool sauce creates rapid thermal shock that forces the tangy liquid deep into those air pockets we created with our egg coating. Professional kitchens keep a pan of nanban sauce right beside the fryer for this exact reason.
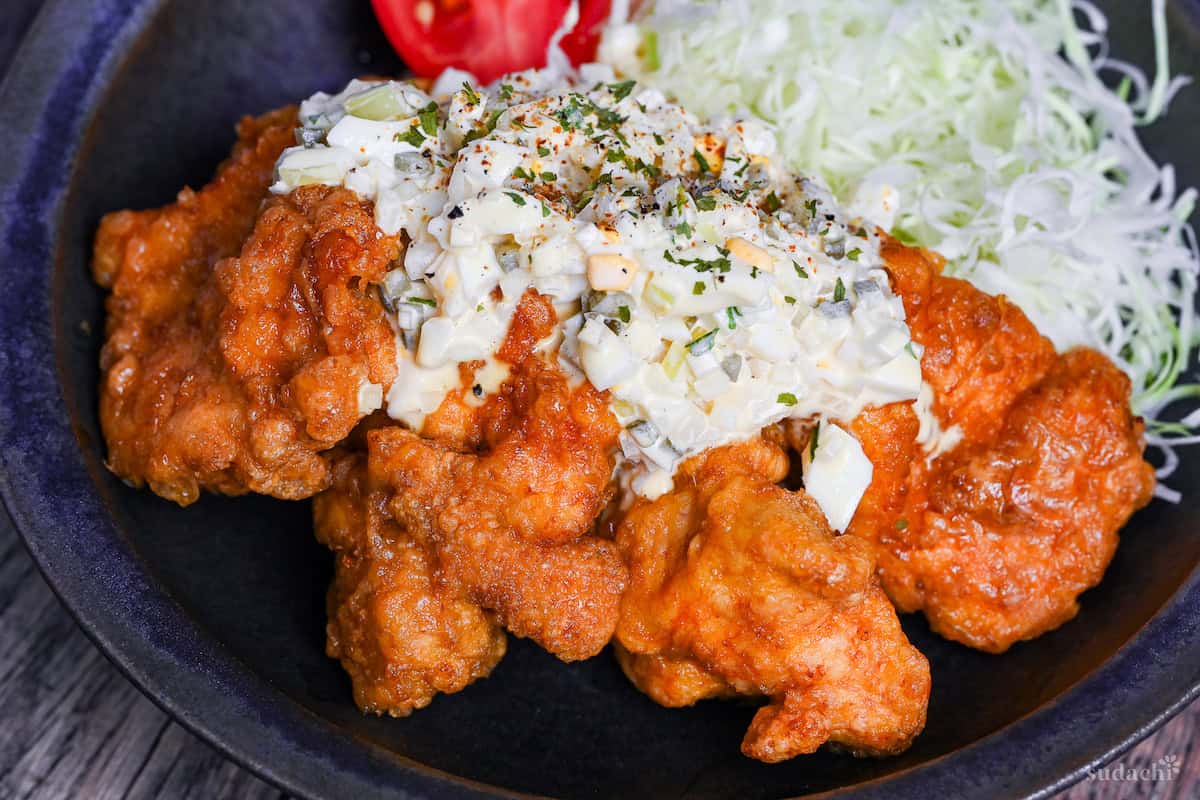
i. Arrange your glazed chicken on plates and generously top with the chilled tartar sauce.
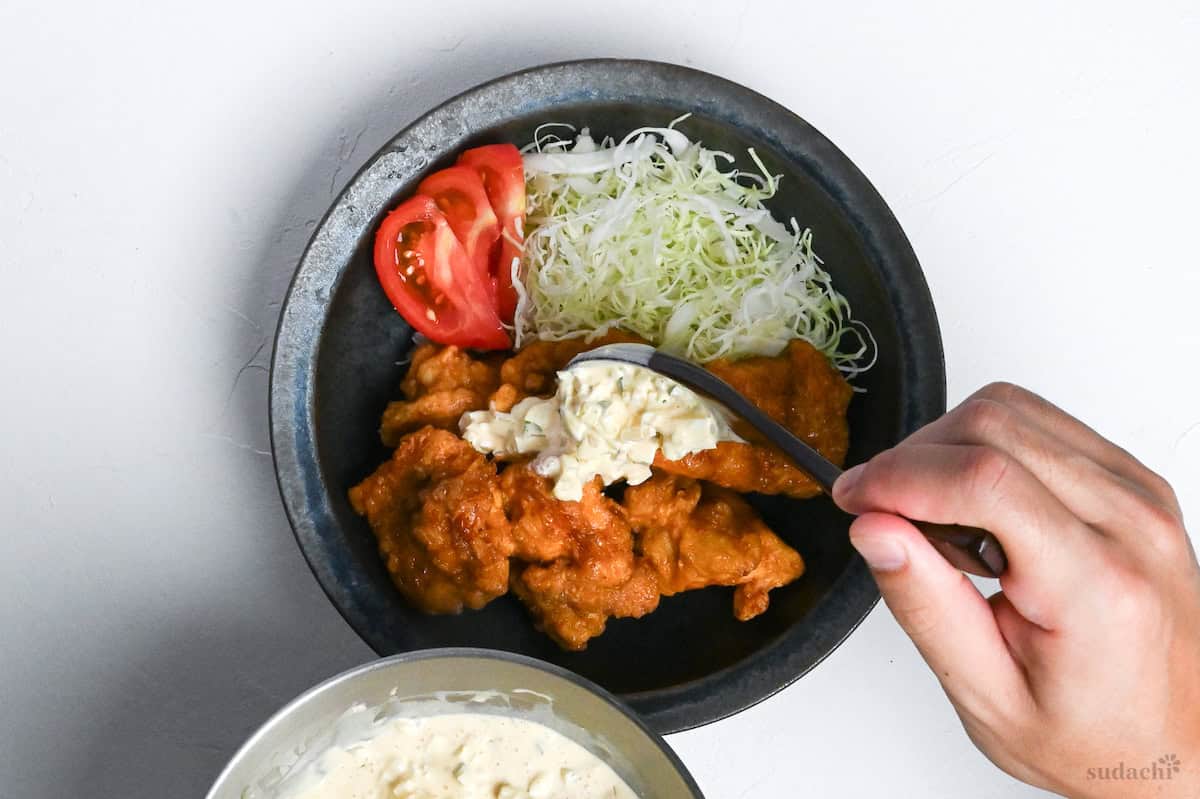
ii. Serve immediately while the coating still has its gentle crispness and the flavors are at their most vibrant.
iii. Enjoy with steamed Japanese rice, authentic miso soup, and some fresh salad for a complete teishoku meal!

Essential Tips & Tricks
- Keep the chicken pieces no thicker than 1.5-2 cm (⅝-¾ in).
- Keep the nanban sauce cooled to room temperature.
- Stick to 170℃ (338°F) for the first fry and 180℃ (356°F) for the second.
- Dip the chicken in sauce for no more than 10-20 seconds.
- Chill the tartar sauce ahead of time
With these simple tips in mind, you’re set for success every time you make authentic chicken nanban.
Storage & Meal Prep
Fridge: Store chicken (already dipped in nanban sauce) in an airtight container for 1-2 days. Expect the crust to soften. Keep tartar sauce strictly separate in its own airtight container and refrigerate up to 2 days.
Freezer: Not recommended once the chicken has been sauced. If you must freeze, do so only with the chicken fried but before dipping in nanban sauce; store up to 1 month and re-sauce after reheating.
Meal Prep: You can prepare components up to 24 hours ahead, make tartar sauce (flavors improve overnight), prepare nanban sauce (keeps refrigerated for 1 week), and season/butterfly chicken.
Reheating: For the sauced chicken: microwave covered for 1 minute at 600W, checking frequently to prevent overcooking. For crispier results, use a toaster oven for 3-4 minutes, covering with foil if edges brown too quickly. Skillet method creates a nice caramelized coating. Heat in a lightly oiled non-stick pan until the sauce glazes and bubbles. Add fresh tartar sauce after reheating.
What to Serve With This Recipe
Chicken Nanban Q&A
Hallmarks of the Miyazaki original: season chicken, dust with flour, then coat in egg before frying. Dip the hot chicken briefly in nanban vinegar while the crust is still porous. Finish often with house tartar (some classic shops serve it without tartar, but the egg-coat + vinegar dip are non-negotiable). Non-traditional chicken nanban often skips the egg coating or merely pour sweet-sour sauce over regular karaage, which misses the signature sauce-soaked, tender-crisp texture.
It originated in the late 1950s-60s in Nobeoka, Miyazaki, reportedly as a staff meal at a yoshoku (Western-style) restaurant before becoming a beloved local specialty. Two famed lineages emerged: “Nao-chan” (no tartar, pure sweet-vinegar finish) and “Ogura” (with generous tartar). The term “nanban” nods to historical “nanban-zuke,” a vinegar-chili marinade introduced via Portuguese influence, hence the brief post-fry dip that defines the dish.
This usually happens from overcooking or inadequate prep. Butterfly thick breast meat to ensure even cooking, don’t fry beyond light golden brown for the first fry.
More Japanese Chicken Recipes
Craving authentic flavors? Browse through my Japanese chicken dishes that bring restaurant-quality taste to your home kitchen.
Did You Try This Recipe?
I would love to hear your thoughts!
💬 Leave a review and ⭐️ rating in the comments below. 📷 I also love to see your photos – submit them here!

Authentic Chicken Nanban (with Japanese Tartar Sauce)

Ingredients
- 450 g chicken breast skin on, or boneless chicken thigh
- salt and pepper to taste
- 3 tbsp all-purpose flour plain flour in UK/AU
- 1 tbsp cornstarch or potato starch
- 2 eggs
- cooking oil for frying
Japanese Tartar Sauce
- 1 small pickled gherkin or fresh cucumber
- ¼ onion rinse after mincing to reduce sharpness
- 1 hard boiled egg
- 4 tbsp Japanese mayonnaise or regular mayonnaise
- ½ tbsp lemon juice
- 2 tsp whole milk
- 1 tsp sugar
- ½ tsp ketchup
- 1 pinch salt and pepper
- parsley dried or finely chopped fresh, for color
Nanbanzu
- 3 tbsp Japanese soy sauce (koikuchi shoyu)
- 3 tbsp rice vinegar or apple cider vinegar
- 2 tbsp sugar
- 1 tbsp mirin
- 1 dried red chili pepper split lengthways, deseeded
My recommended brands of ingredients and seasonings can be found in my Japanese pantry guide.
Can’t find certain Japanese ingredients? See my substitution guide here.
Instructions
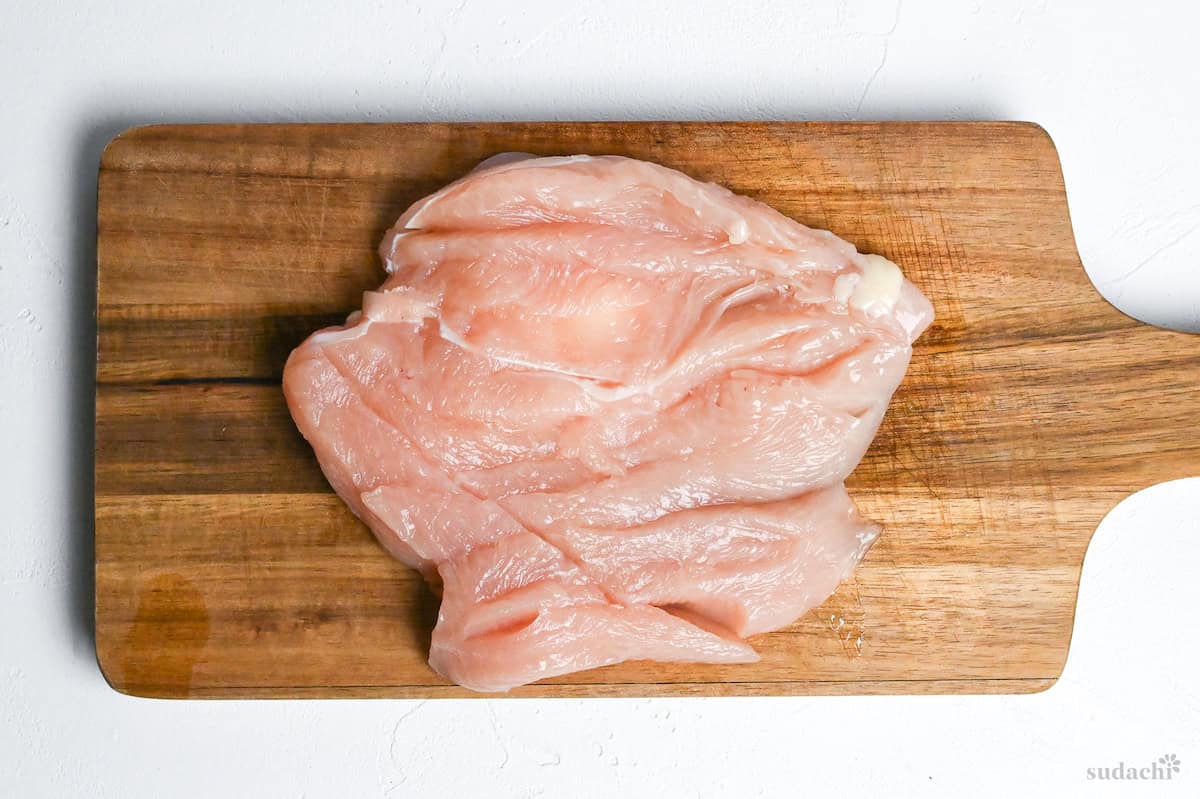
- Butterfly cut 450 g chicken breast so that the thickness is about 1.5-2cm (3/4 inch) all over.

- Cut into large pieces, then pierce each piece all over with a fork. Pat dry with kitchen paper, then sprinkle with a pinch of salt and pepper on both sides and place them in a bowl.
- Add 3 tbsp all-purpose flour and 1 tbsp cornstarch to the bowl. Toss until evenly coated.
- Crack 2 eggs into a separate bowl and whisk until the yolks and whites are combined. Shake the excess flour off of each piece of chicken before placing them in in the bowl with the egg.
- Submerge the chicken pieces in the egg mixture, then cover and place in the fridge while you prepare the other components.
Tartar Sauce
- Finely dice 1 small pickled gherkin, ¼ onion and 1 hard boiled egg.
- Place them in a mixing bowl and add 4 tbsp Japanese mayonnaise, ½ tbsp lemon juice, 2 tsp whole milk, 1 tsp sugar, ½ tsp ketchup, 1 pinch salt and pepper and a pinch of parsley. Mix until everything is combined.
- Cover and refrigerate until serving.
Nanbanzu
- Take a small sauce pan and add 3 tbsp Japanese soy sauce (koikuchi shoyu). 3 tbsp rice vinegar, 2 tbsp sugar, 1 tbsp mirin, and 1 dried red chili pepper split lengthways and deseeded. Heat on medium and stir to dissolve the sugar, boil for one minute then take it off the heat and leave to cool to room temperature.
Chicken Nanban
- Preheat a deep pot of cooking oil to 170 °C (338 °F). Once hot, hold up each piece of chicken to drain off excess egg and place them in the oil with the skin side facing down. Fry for 3 minutes.
- Transfer to a wire rack and rest for 3 minutes. Increase the oil temperature to 180 °C (356 °F).
- Add the chicken pieces back in and fry once more, this time for 2 minutes.
- Rest on a wire rack for 15-30 seconds, then roll each piece in the nanban sauce for 10-20 seconds. Rest each piece on a wire rack while you coat the others.
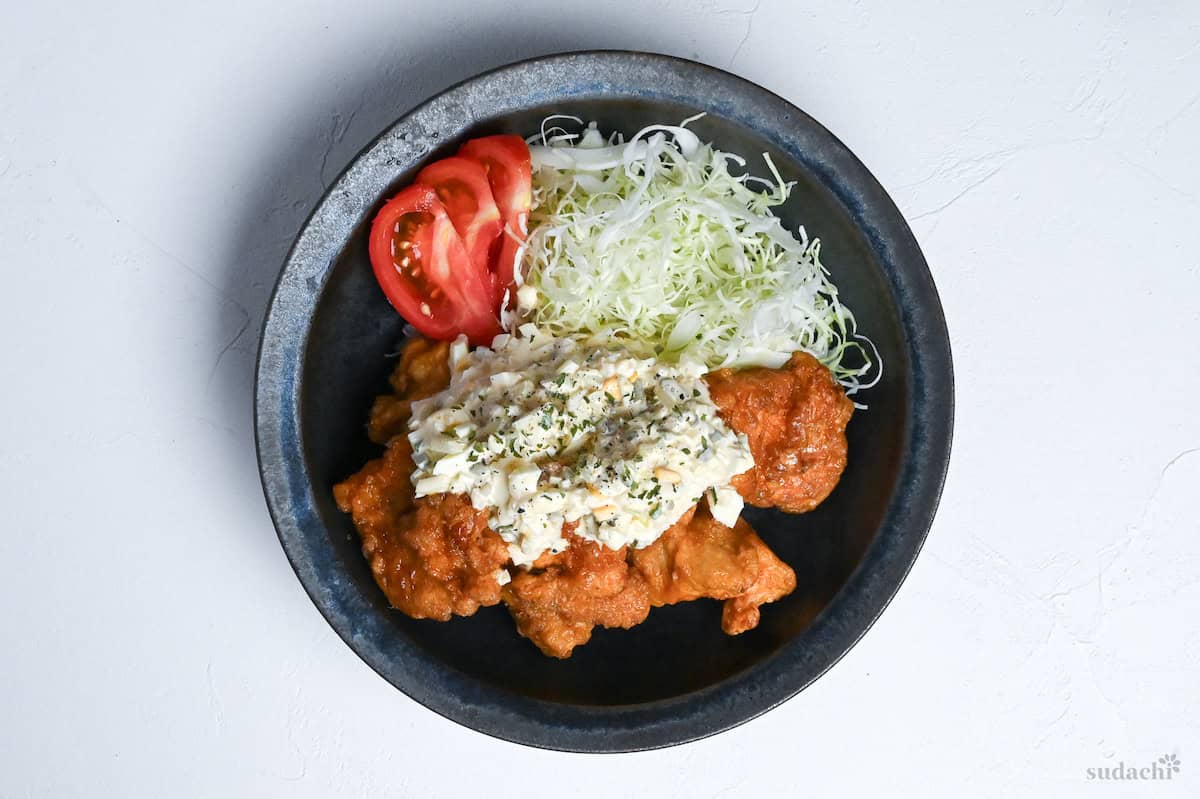
- Transfer to a serving plate and spoon the chilled tartar sauce over the top. Sprinkle with extra parsley for color. Serve with rice, shredded cabbage or your choice of sides. Enjoy!
Video
Made the recipe & it was SO delicious!
Thank you for the 5 star review, so glad you liked it!
Looks great can’t wait to try it!
Hi Suzanne,
Thank you very much!
Yuto
Excellent recipe, simple ingredients and it’s delicious.
Thank you.
Hi Kim,
Thank you for making this recipe and sharing your experience! 🙂
Yuto
Can’t wait to try this. Know it will be delicious.
Thank you so much, Pete, I hope you will enjoy making it! 🙂