


Featured Comment:
“A top-tier and great to make-ahead upgrade for every salad or rice bowl. WOULD be perfect for work-day meal prep, but somehow it always disappears before making it into the lunch box”
– Peti
What Are Salmon Flakes?
Have you ever had those little jars of salmon flakes (鮭フレーク)? These fluffy, coral-colored bits can transform plain rice into something special with just a sprinkle. Each flake has just the right balance of savory and sweet, and it melts a bit when you put it on top of some steaming rice.
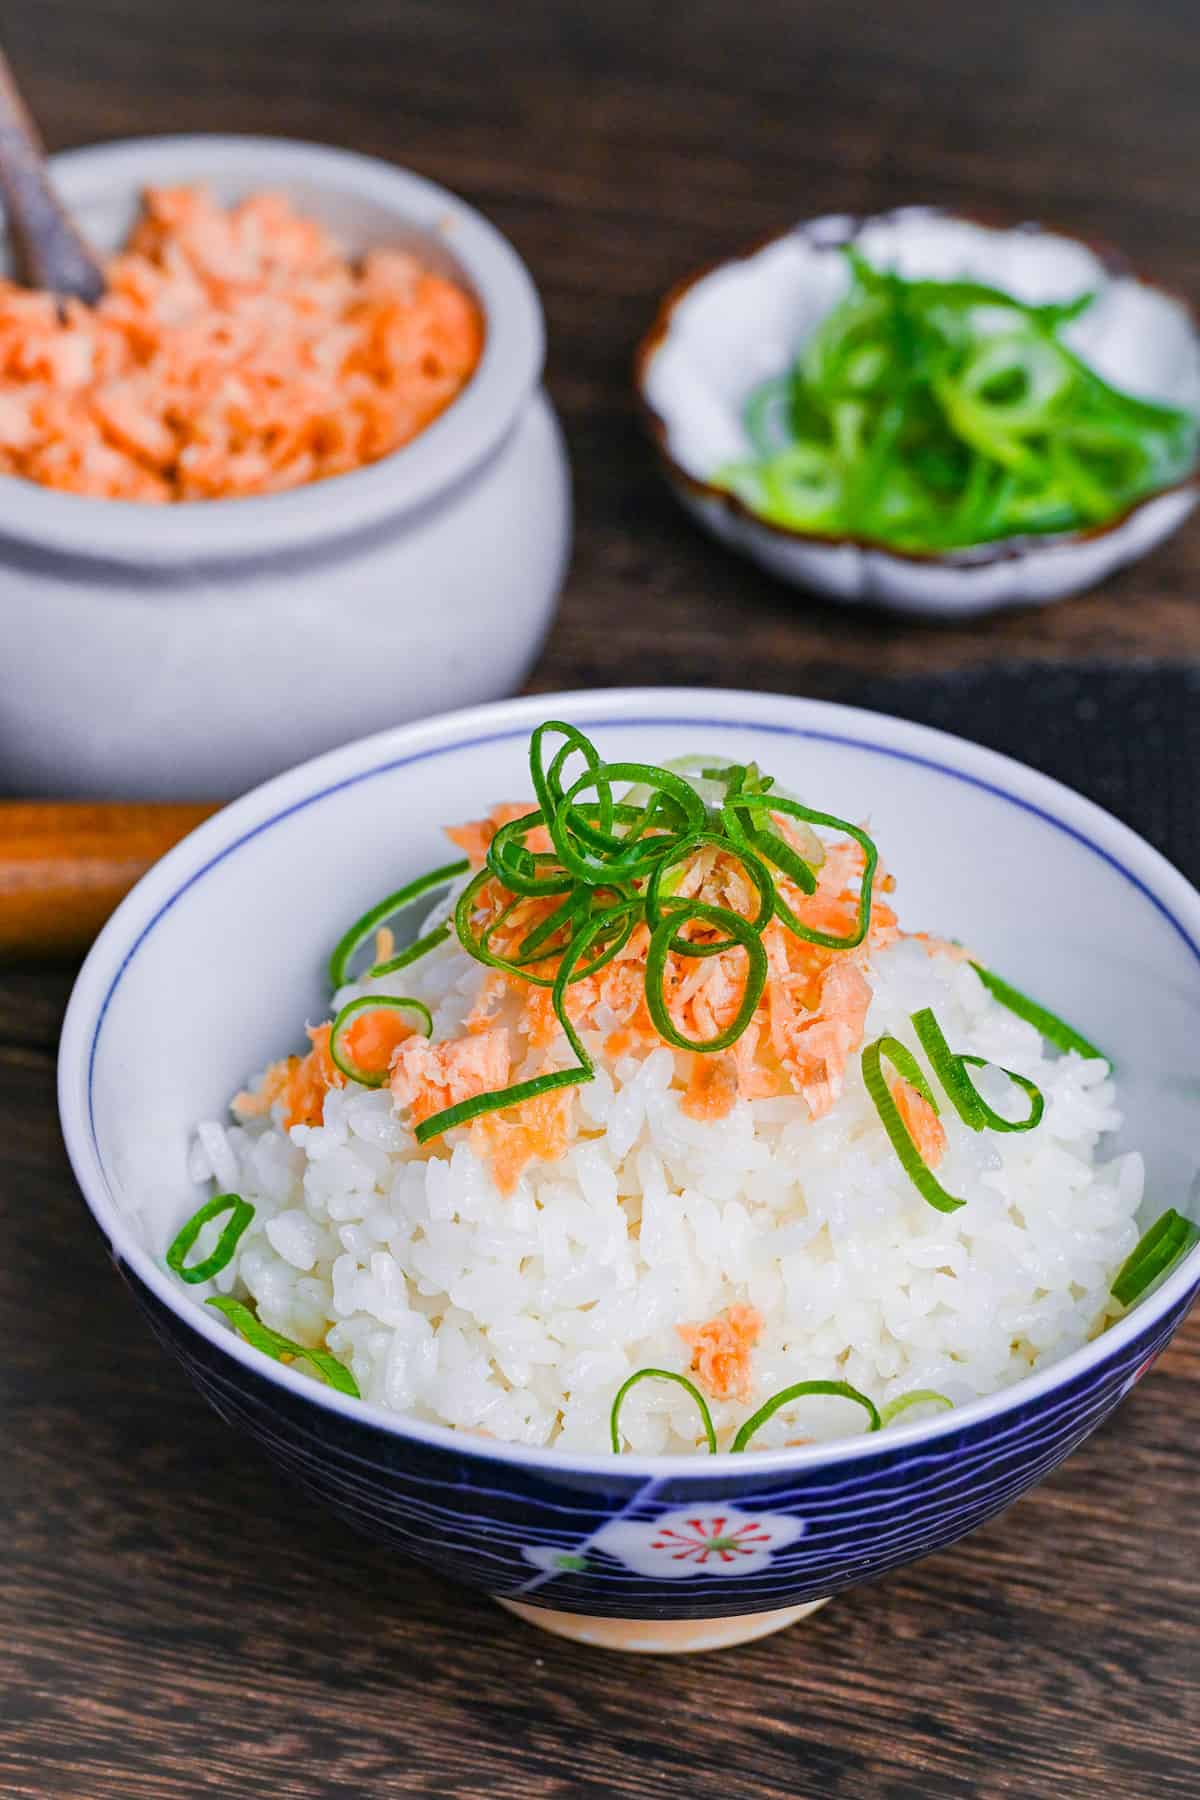
You can use it as a filling for rice balls, served over white rice, or as a topping for ochazuke (rice with green tea), hiyayakko, fried rice, and other dishes.
These salmon flakes bring instant comfort and flavor to the simplest of meals!

How I Developed This Recipe
To be honest with you, the salmon flakes available at supermarkets in Japan are pretty tasty. However, I must say that homemade salmon flakes are even better.
In my recipe, I’ve achieved a perfect balance by incorporating mirin for a hint of sweetness, a combination of butter and soy sauce for depth, and a sprinkle of sesame seeds as a final touch.
These salmon flakes are ideal when served in onigiri or with white rice. I highly recommend trying it out at home. Enjoy!
Visual Walkthrough & Tips
Here are my step-by-step instructions for how to make Homemade Salmon Flakes at home. For ingredient quantities and simplified instructions, scroll down for the Printable Recipe Card below.
If you prefer to watch the process in action, check out my YouTube video of this Salmon Flakes recipe for a complete visual walkthrough!

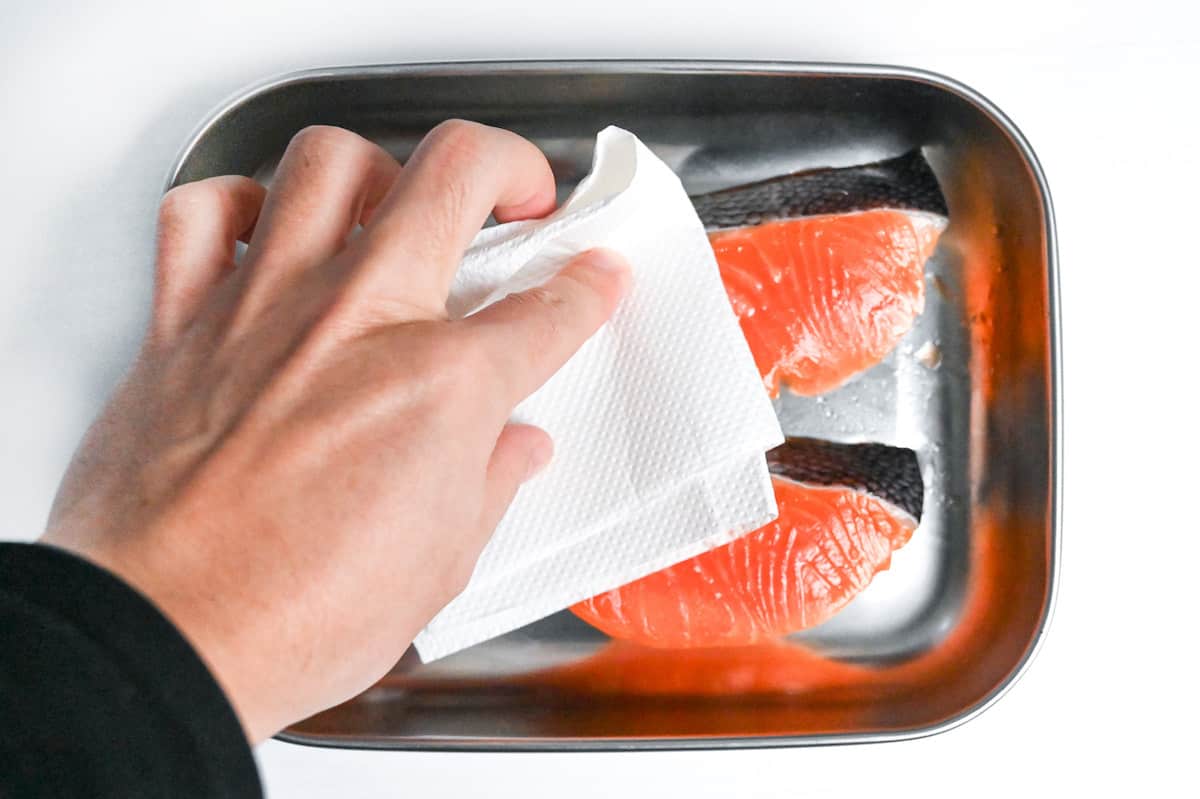
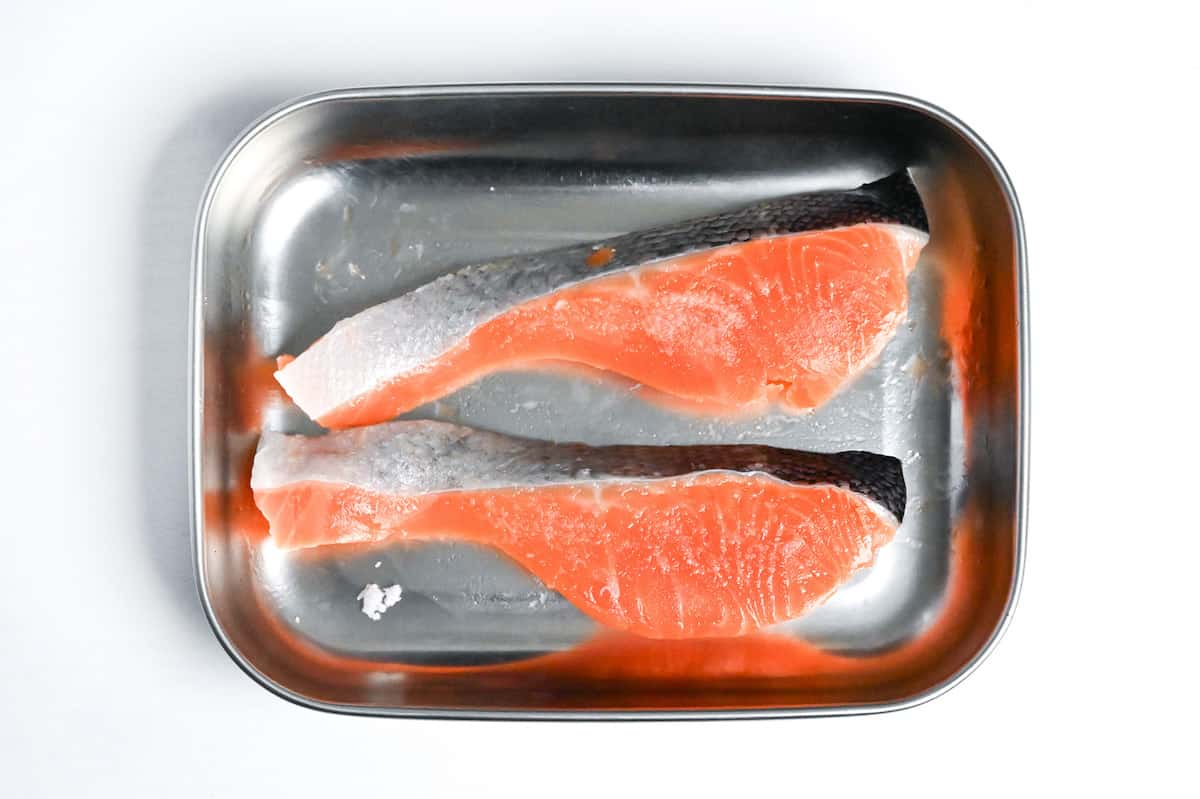
First, let’s get our salmon fillets ready. Gently pat them with kitchen paper to soak up any extra moisture.
Most of the salmon fillets sold in Japan are on the lean side, but when one of my readers used fatty salmon, she had a hard time making flakes because of the fat. So, if you can, it’s better to use lean salmon. Thank you for your valuable feedback, Trish!
Sprinkle a generous pinch of salt over the fillets and let them sit for about 10 minutes. This longer resting time allows the salt to draw out more moisture containing fishy odor compounds through osmotic pressure.
After 10 minutes, give the fillets another good pat with paper towels to soak up the accumulated liquid.
Next, fill a pot with enough water to cover the salmon fillets and bring it to a boil. Once it’s boiling, immediately turn down the heat to low so it’s just barely simmering. The gentle heat is key to preserving the salmon’s moisture and preventing it from becoming tough and dry.
Place the salmon in the water and let it simmer gently for about 5 minutes.

After 5 minutes, take the salmon out of the water and put them in a dish or bowl.
High heat causes fish proteins to contract rapidly, squeezing out moisture and resulting in dry, tough salmon. The gentle simmering prevents this, keeping the salmon juicy.
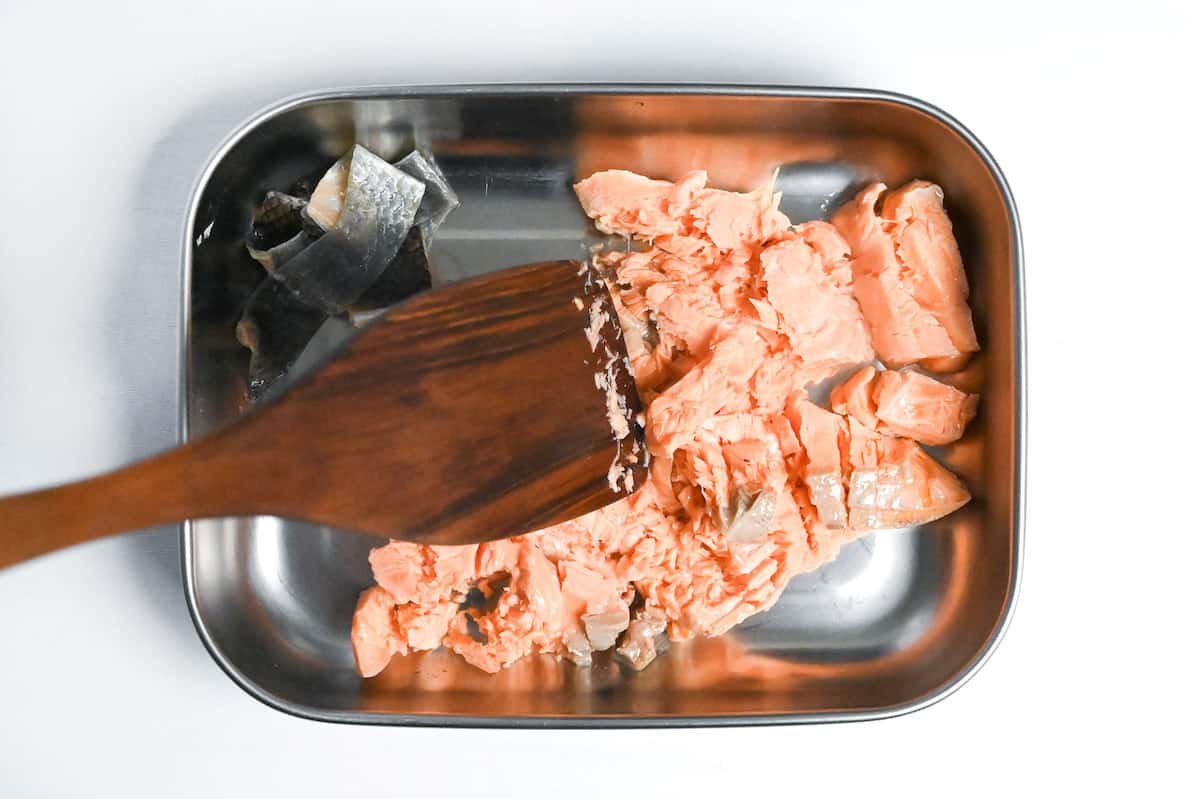
Once the salmon has cooled just enough to handle, gently peel off the skin. The skin should separate easily at this stage.
Now, using a wooden spatula or chopsticks, gently break up the salmon along its natural muscle fibers. This creates those beautiful, tender flakes we’re looking for. A wooden tool applies just the right amount of pressure without mashing the fish.
Don’t worry if the salmon isn’t completely cooked in the center. It’s going to cook more later on.
I simply sprinkled salt and pepper, pan-fried them, and ate them as a little snack until the salmon flakes were ready.
Now’s a good time to check for pin bones. Even if the fillets are labeled “boneless,” there might still be some small bones left. Just run your fingers over the flaked salmon and use tweezers or fish bone pliers to get rid of any bones you find.
Now it’s time to build the flavor. Heat a frying pan over low to medium-low heat.
Put a frying pan over low to medium-low heat and melt some butter. When the butter’s melted, mix in the salmon flakes, a splash of sake, a bit of mirin, and salt.

Slowly cook it until the liquid is almost gone.
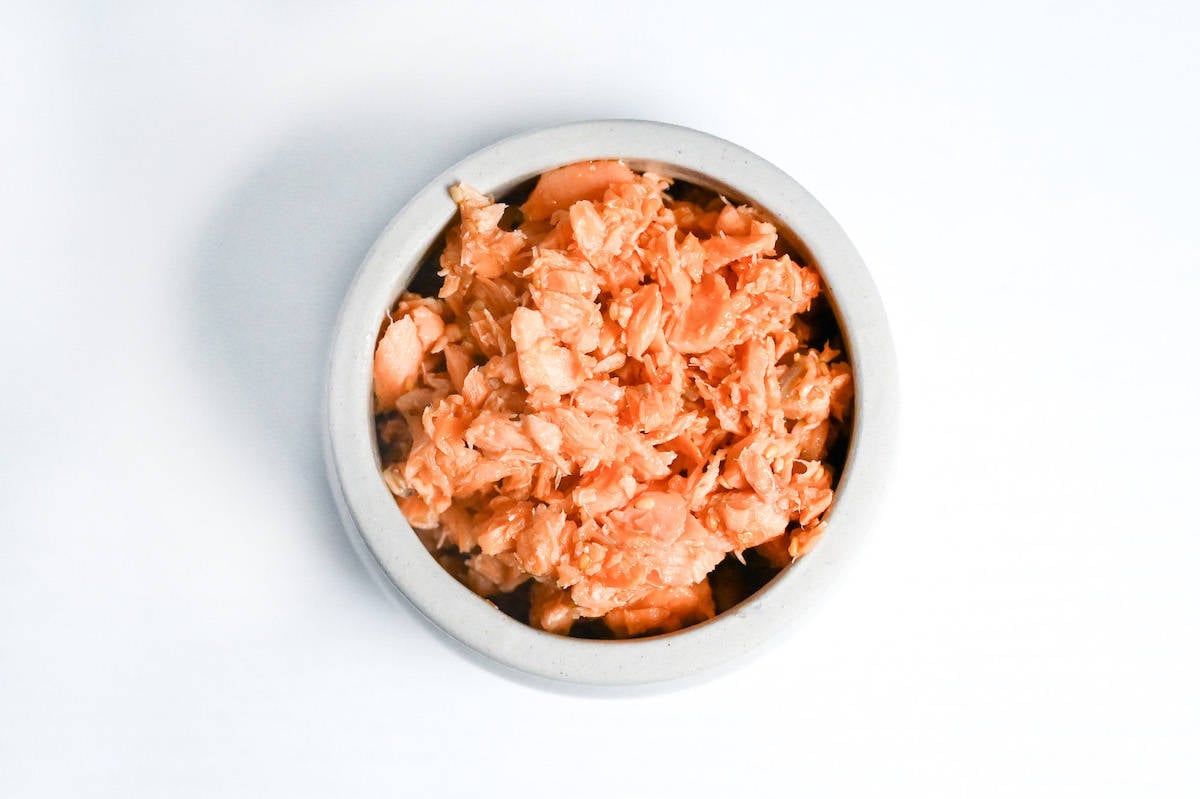
The most critical part of making perfect salmon flakes is achieving the right moisture level. Watch for these signs:
- The salmon should look fluffy with small air pockets forming between the flakes
- The mixture should still appear slightly moist but not wet
- Just before the pan starts to show signs of browning at the edges
- The flakes should move freely in the pan without sticking together
Remove from heat at precisely this stage – before the mixture becomes completely dry. The flakes will continue to dry slightly as they cool, so stopping slightly before they seem done ensures they’ll be perfectly moist when served.
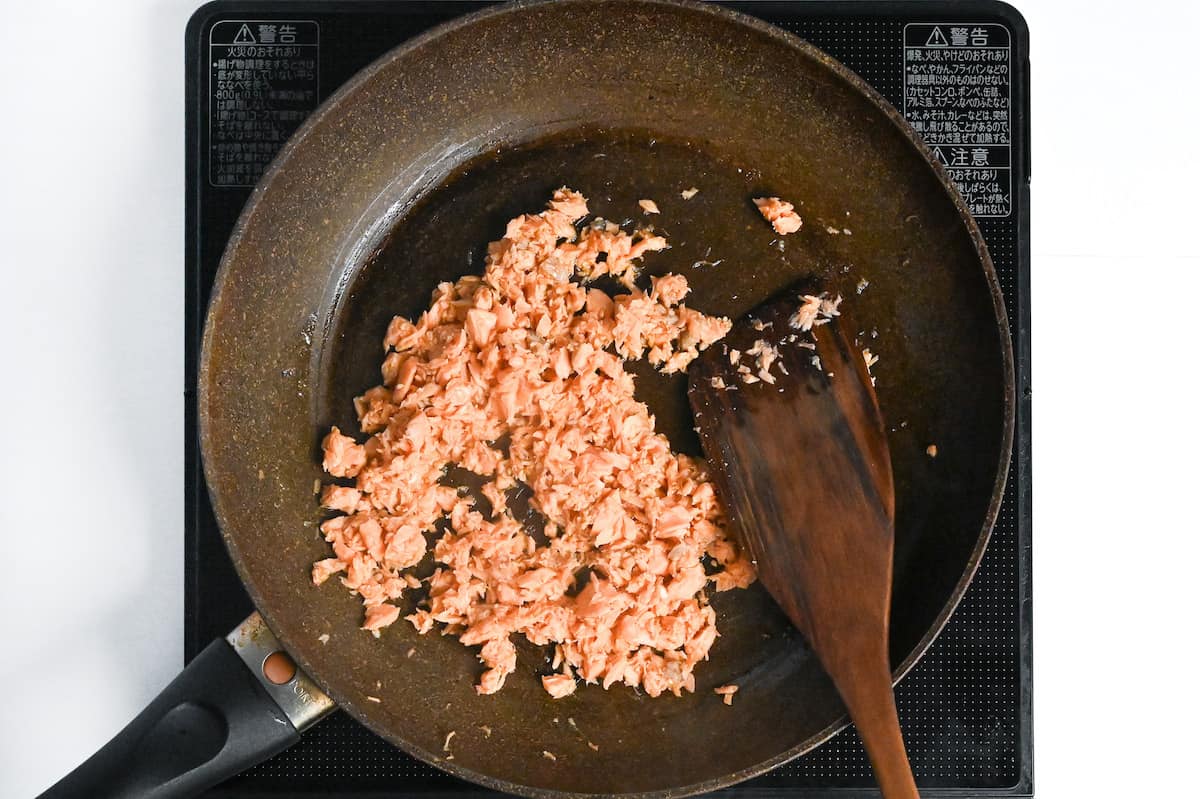
Just before removing from heat, gently fold in soy sauce and toasted sesame seeds, which add a wonderful nutty flavor and pleasing texture contrast to the soft salmon flakes.
If you want to store salmon flakes, allow the salmon flakes to cool completely before storing. Placing hot food in a covered container traps steam, which condenses and creates moisture droplets.
Place the salmon flakes in a clean container and once cooled, cover and refrigerate.
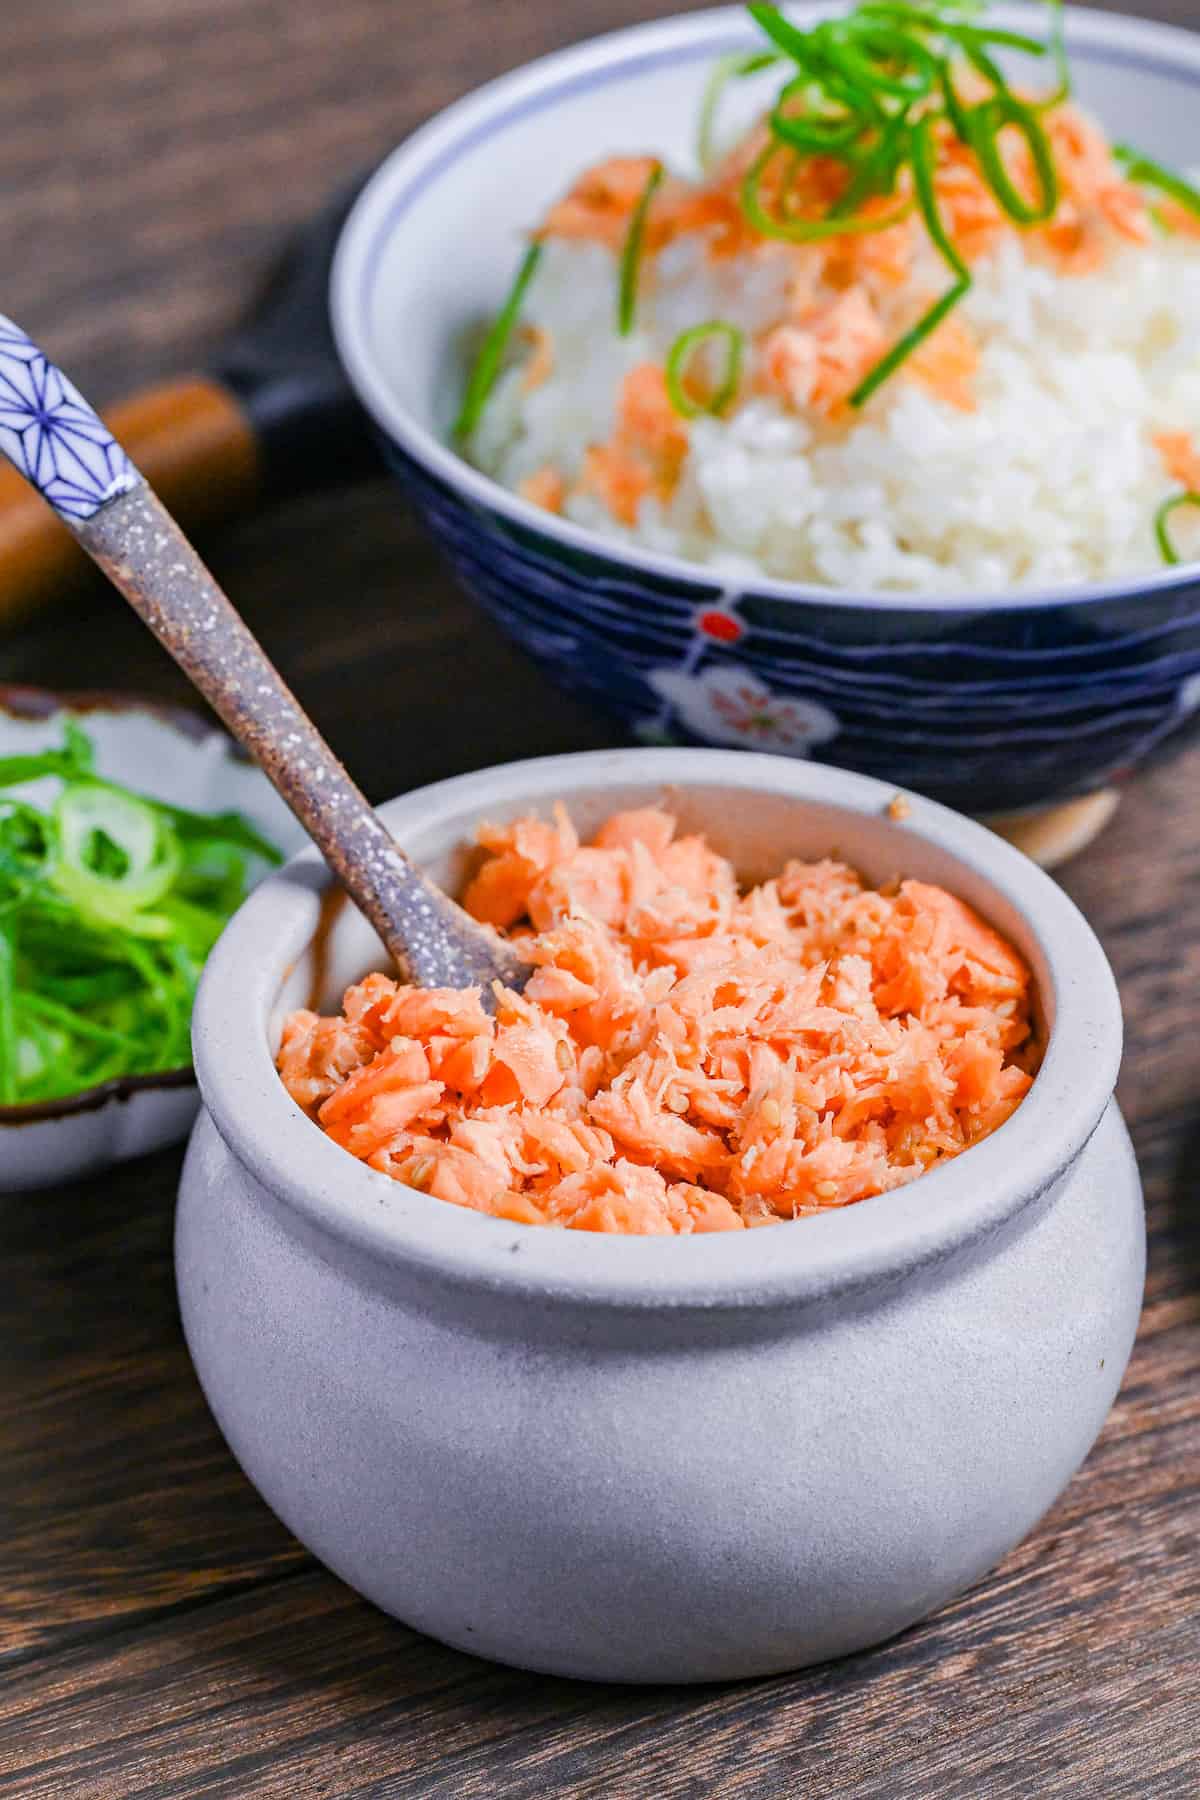
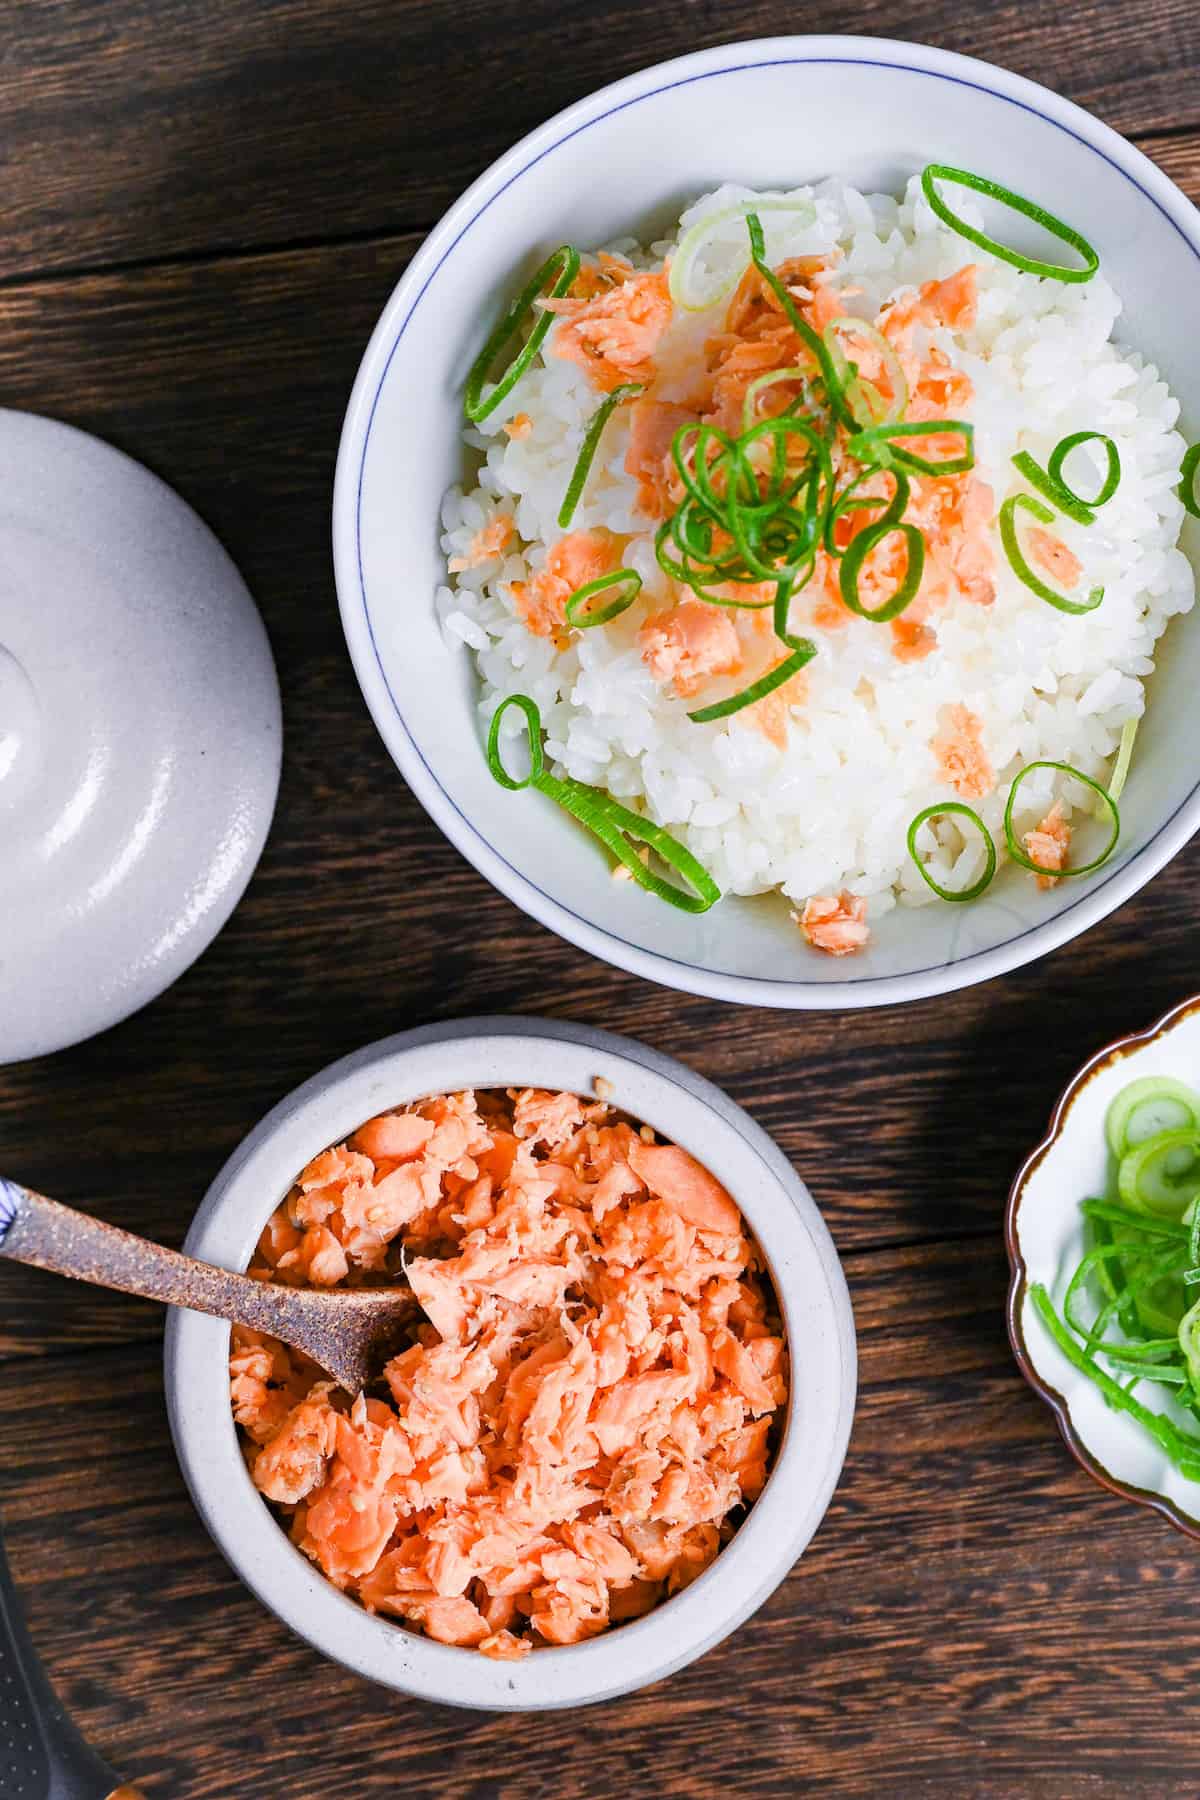
Enjoy with a bowl or rice or use as a rice ball filling!
Jump to Full Recipe MeasurementsEssential Tips & Tricks
- Allow the salted salmon to rest for a full 10 minutes before cooking.
- Never boil the salmon aggressively.
- Remove pin bones after cooking when they’re easier to spot.
- Watch for visual cues when drying the flakes – stop when salmon looks fluffy with small air pockets, while still slightly moist (not completely dry).
- Cool salmon flakes completely before storing.
With these simple tips in mind, you’re set for success every time you make Salmon Flakes.

Meal Prep & Storage
Salmon flakes are excellent for meal prep! This recipe is specifically designed to preserve salmon for multiple uses throughout the week.
- Full Dish Prep: Make the complete salmon flakes recipe, cool thoroughly, and store in airtight containers in the refrigerator. Use within 5 days for optimal freshness.
- Freezer Prep: Portion cooled salmon flakes into small freezer-safe containers or wrap individual servings in plastic wrap before placing in freezer bags. This makes it easy to grab just what you need for meals.
- Make-Ahead Meals: Prepare onigiri (rice balls) with salmon flake filling, wrap individually, and freeze for quick grab-and-go lunches.
For storage, always use clean, sanitized containers with tight-fitting lids. Refrigerate salmon flakes as soon as they’ve cooled completely to room temperature. When stored properly, they’ll last up to 5 days in the refrigerator or up to 1 month in the freezer.
Always use clean utensils when serving to prevent contamination and extend shelf life.

FAQ
Here are answers to frequently asked questions I have received across all platforms, including here, YouTube, Instagram, and Pinterest. If you have any questions, feel free to send them to me anytime! It will be a big help for everyone in this community!
Yes, you can use frozen salmon, but be sure to thaw it completely in the refrigerator overnight before preparing. Pat it thoroughly dry with paper towels after thawing, as frozen salmon often releases more moisture when thawed.
These Japanese salmon flakes aren’t spicy at all. However, you can easily add heat by mixing in a pinch of shichimi togarashi (Japanese seven spice) or ichimi togarashi (ground red pepper).
Absolutely! Popular additions include finely chopped shiso (perilla) leaves, grated yuzu peel, toasted white sesame seeds, or a small amount of minced ginger. For a richer version, some people mix in a little bit of mayonnaise just before serving.
This could happen if you used pre-salted salmon (salted salmon) and then added more salt during cooking. When using salted salmon, skip the initial salting step and reduce additional salt when seasoning.
I hope you enjoy this Homemade Salmon Flakes recipe! If you try it out, I’d really appreciate it if you could spare a moment to let me know what you thought by giving a review and star rating in the comments below. It’s also helpful to share any adjustments you made to the recipe with our other readers. Thank you!
More Japanese Salmon Recipes
- Pan Fried Japanese Teriyaki Salmon
- Japanese Salmon Rice Balls (Sake Onigiri)
- Miso Glazed Salmon (Pan-fried)
- Ponzu Salmon (Pan Fried)
Hungry for more? Explore my salmon recipe collection to find your next favorite dishes!

Japanese Seasoned Salmon Flakes

Ingredients
- 2 salmon fillets (lean fillets), approximately 100g per fillet
- ½ tsp salt to draw out moisture
- 1 tsp butter
- ½ tbsp sake
- ½ tbsp mirin
- ⅛ tsp salt to season
- ¼ tsp Japanese soy sauce (koikuchi shoyu)
- 1 tsp toasted white sesame seeds
My recommended brands of ingredients and seasonings can be found in my Japanese pantry guide.
Can’t find certain Japanese ingredients? See my substitution guide here.
Instructions
- Pat the surface of 2 salmon fillets dry with kitchen paper. Rub ½ tsp salt on both sides and rest for 10 minutes. While you wait, start boiling a pot of water.

- After 10 minutes, the salt will have drawn out the excess moisture, so pat dry once more.
- Once the water is boiling, turn the heat down to a simmer and add the salmon. Simmer for 5 minutes.
- Take the salmon out of the pan and gently shake off the excess water. Transfer it to a container and carefully pull off the skin (you can fry this and eat it as a snack, or discard). Use a spatula to break it up and remove any bones with tweezers.
- Heat a frying pan on low to medium-low and add 1 tsp butter. Once melted, add the salmon flakes along with ½ tbsp sake, ½ tbsp mirin and ⅛ tsp salt. Mix well and continue to heat until the liquid has almost gone.
- Turn off the heat, and mix in ¼ tsp Japanese soy sauce (koikuchi shoyu) and 1 tsp toasted white sesame seeds.
- Use straight away or transfer to a clean container and leave to cool. Once cool to the touch, cover and store in the fridge for up to 5 days.
- Enjoy with rice!
Video
Notes
- Look for visual cues when cooking – stop when salmon looks fluffy with small air pockets while still slightly moist, not completely dry.
- Store in clean containers and always use fresh utensils when serving.
- Store cooled salmon flakes in airtight containers for up to 5 days in the refrigerator or freeze in individual portions for up to 1 month.
- These flakes are great for adding to freshly cooked Japanese rice, rice balls, hiyayakko, or fried rice!
This recipe is so easy to follow and quick! I used it to make a salmon and ikura rice bowl and it was perfect. My family loved it!
Hi Erin,
Thank you for your comment! Salmon flakes and ikura sound so good! I’m glad you and your family enjoyed it! 🙂
Yuto
Hi, I made this today. While it was cooling down, I realised that it was too wet, so I gathered it all up and squeezed it till it was just damp.
It wasn’t water or uncooked sauce, I had seriously fatty salmon fillets…it was fat/oil which I have saved.
I made this so I could make the salmon Ongiri…….
Hi Trish,
Thank you for trying this recipe and sharing your valuable experience! This is an excellent insight as salmon in Japan is typically very lean so I wouldn’t have known without your comment! I’ll add this information to this post and potentially other salmon dishes to help others who might encounter the same issue. I really appreciate it!
Yuto
A top-tier and great to make-ahead upgrade for every salad or rice bowl. WOULD be perfect for work-day meal prep, but somehow it always disappears before making it into the lunch box
Hi Peti,
Thank you so much for making this recipe! Haha, sounds like it’s a winner if it can’t even make it to the lunchbox! Always looking forward to reading your feedback! 🙂
Yuto