

Think impressive Japanese appetizers require more work than classics like karaage, Japanese potato salad, gyoza, or tamago sando? Wait until you hear the sizzle of thin beef meeting glaze, sweet soy, warm ginger, and smoky grill heat curling through the air with zero fuss!
Negimaki offers the visual wow factor your guests screenshot.

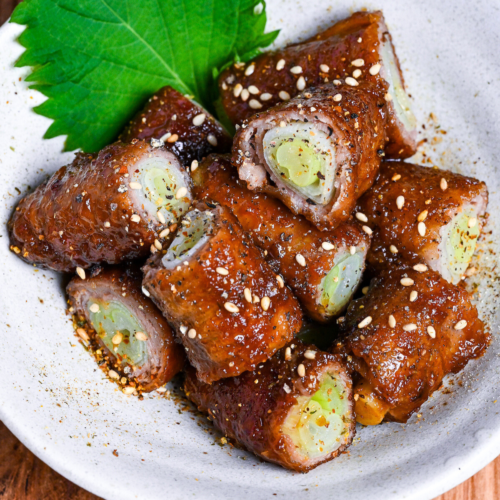
Beef Negimaki
Recipe Snapshot
- What is it? Grilled beef rolls glazed in a sweet-salty teriyaki-style sauce with tender leeks inside.
- Flavor profile: Sweet, Savory, Aromatic
- Why you’ll love this recipe: The recipe delivers restaurant-level presentation with reliable, step-by-step technique, making it easy to serve something impressive without guesswork.
- Must-haves: Thinly Sliced Beef (Paper-thin), Negi (Japanese Leeks/Green Onions/Scallions), Soy Sauce + Mirin (Glaze Base)
- Skill Level: Medium
- Freezer Friendly? Yes!
- Suitable for Meal Prep? Yes!
Summarize & Save this content on:
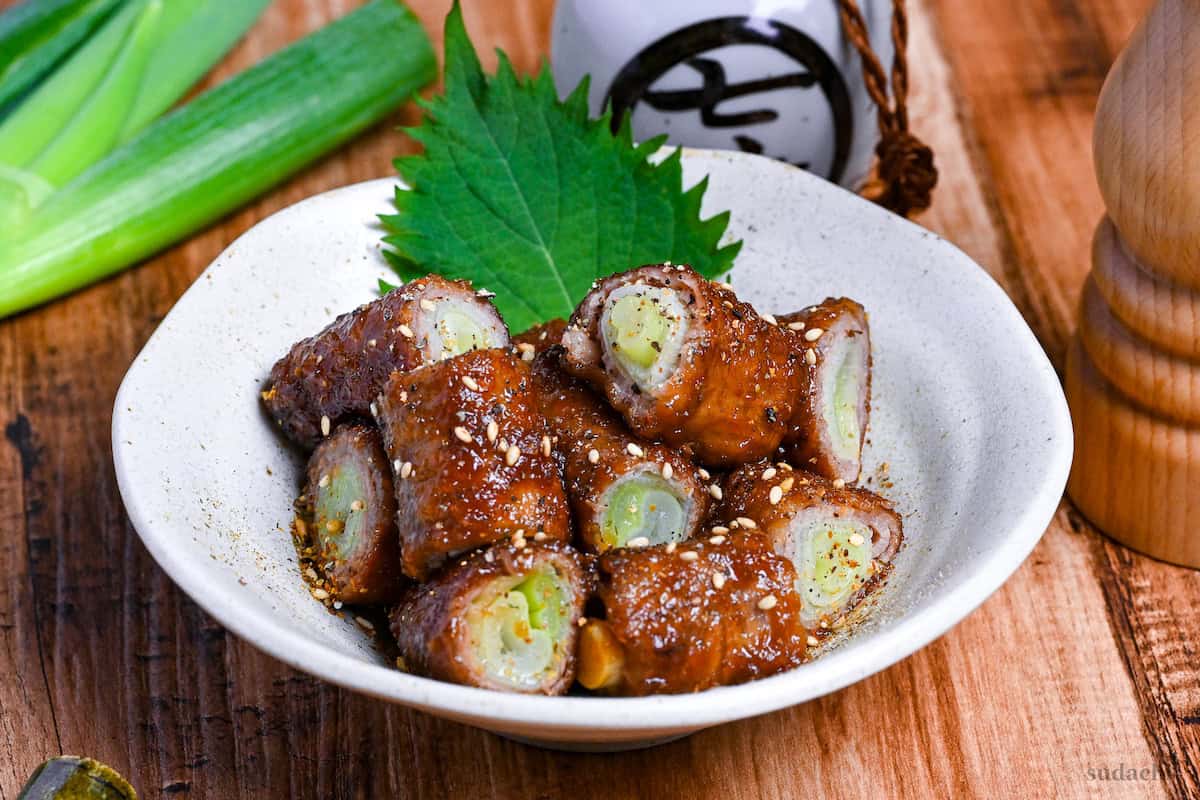
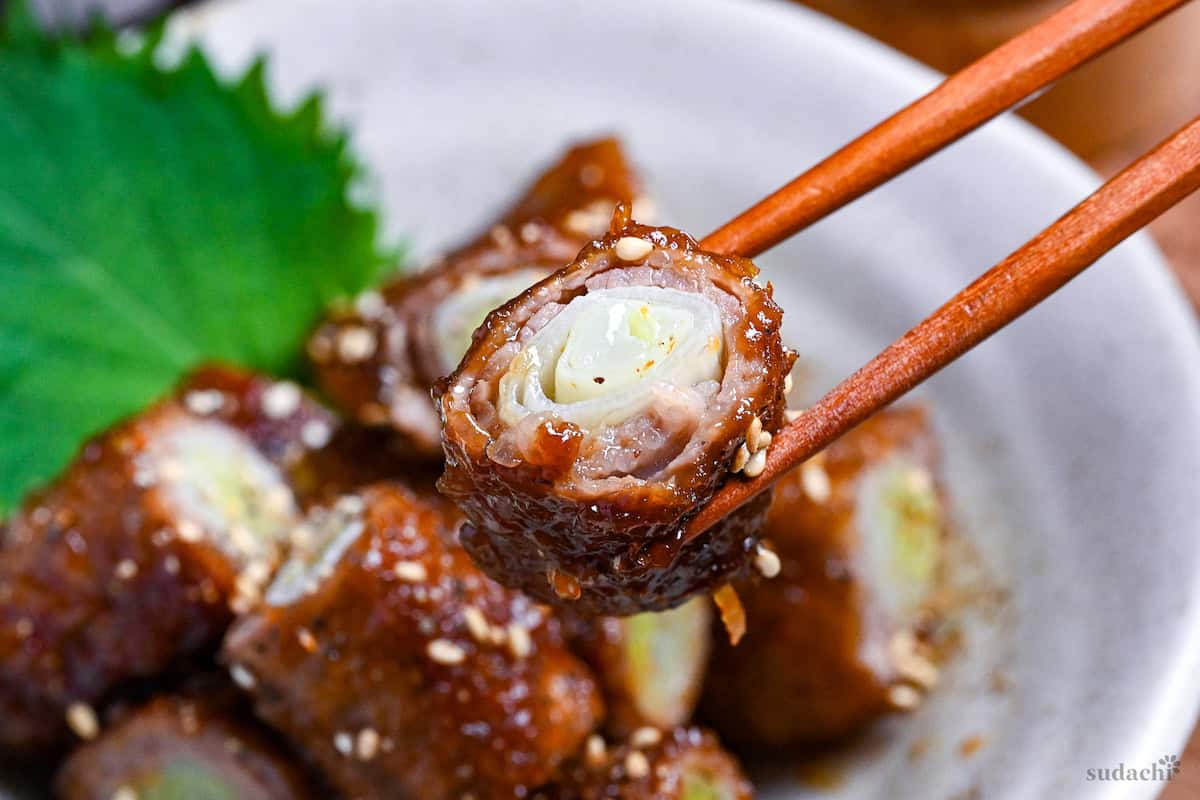
What is Beef Negimaki?
Beef negimaki (牛肉のねぎ巻き) is a dish where paper-thin slices of beef are wrapped around tender negi (Japanese leeks), then seared and glazed like teriyaki until glossy and sweet-savory. Think of it as a tight little beef roll that eats like an appetizer but looks restaurant-level on a platter, ideal when you’re hosting.
Negi can refer to everything from slim green onions to thicker Japanese leeks, the same aromatic you’ll see in dishes like hotpots, negima yakitori, and kamo nanban soba. For my beef negimaki recipe, we use the thicker style so you get that sweet, mellow allium core after grilling.
If you follow the technique, you get max flavor with minimal stress.
Beef Negimaki Ingredients
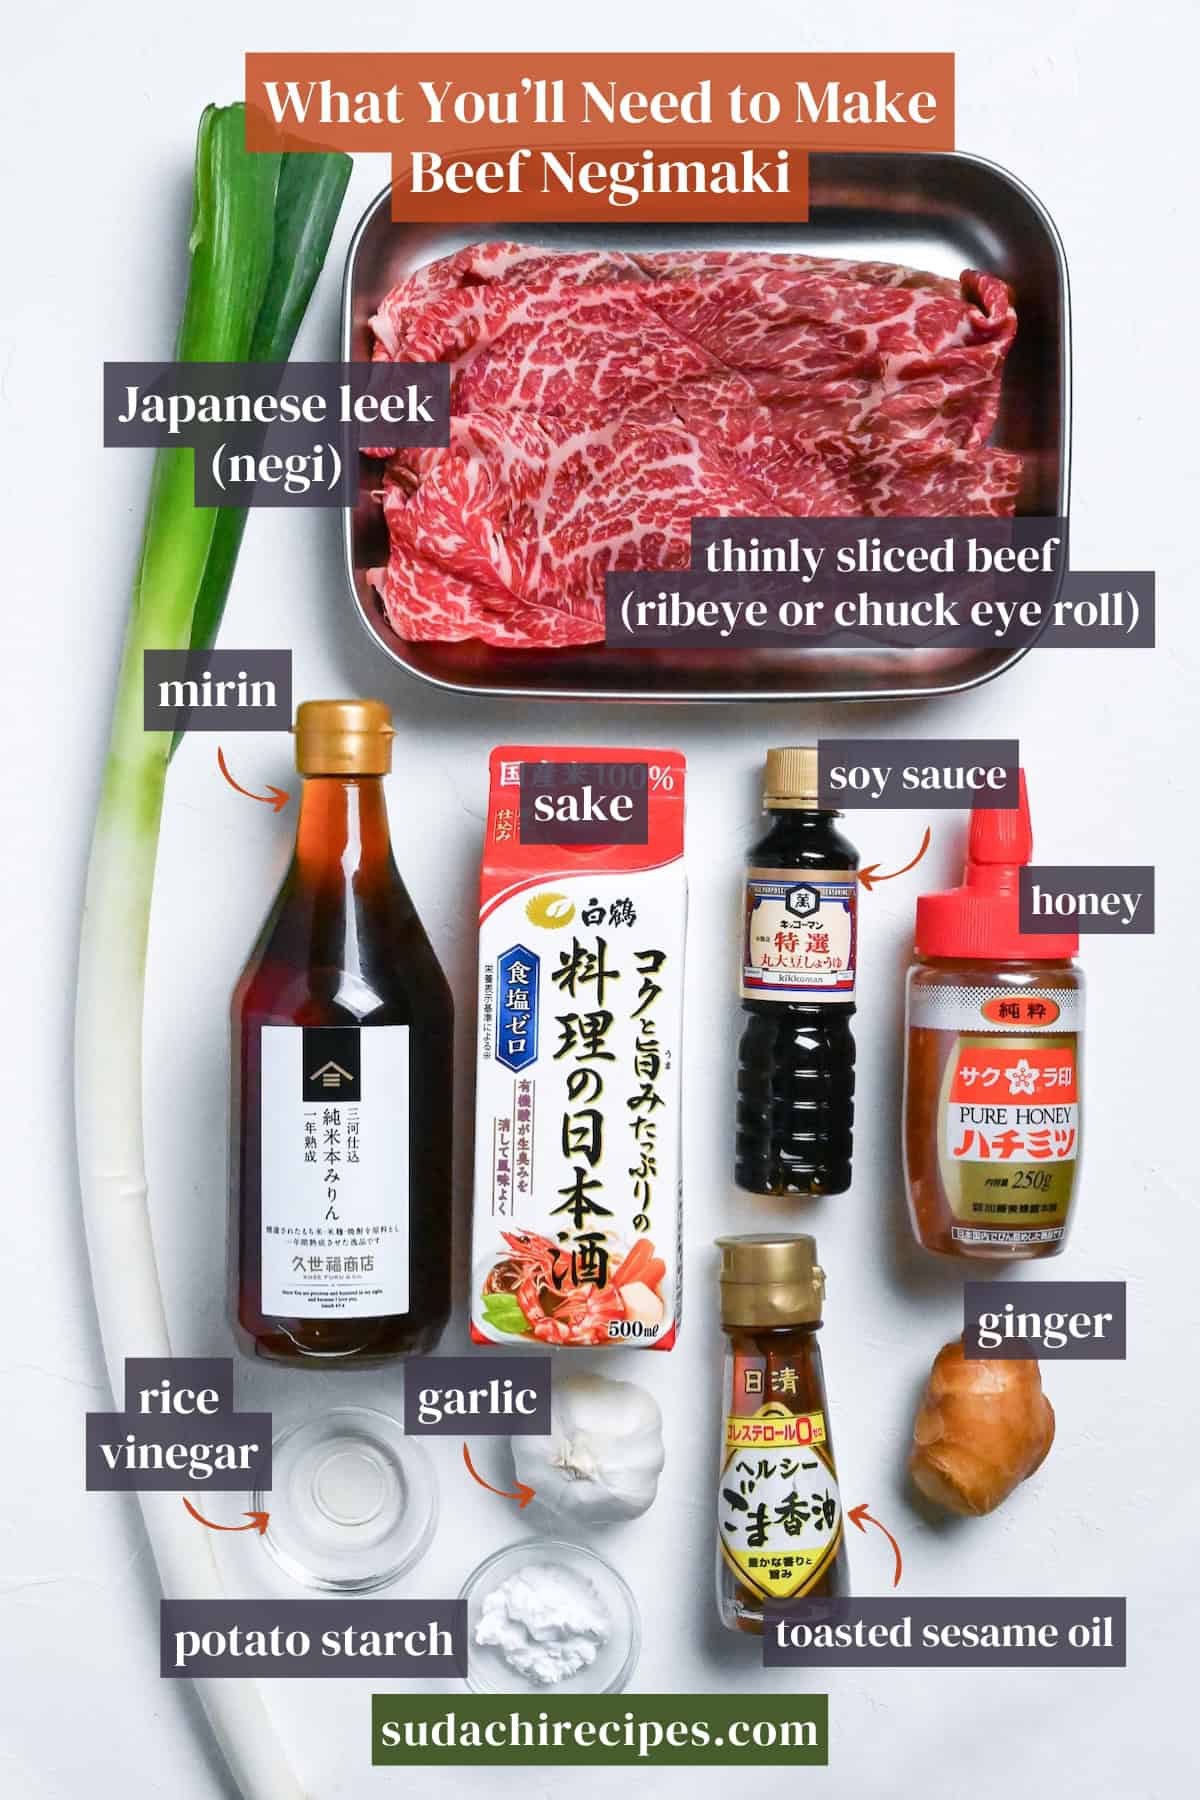
- Thinly sliced beef: You want very thin slices of beef that cook in a flash and stay tender. You can buy pre-sliced “shabu-shabu” or “hot pot” beef at Asian grocers or ask the butcher at mainstream store to slice paper-thin for you. If that’s not an option, you can partially freeze a steak at home and slice it yourself against the grain. I will explain recommended cuts in the later section.
- Negi: True naganegi (sometimes referred as Tokyo negi in the US) sometimes shows up at Japanese or Korean markets, but regular leeks are much easier to find at any supermarket and give you that same tender-sweet center. You can also use thick parts of green onions or scallions if that’s what you have.
Substitutions Ideas
- Japanese soy sauce substitutes: Chinese light soy sauce works in a pinch. It’s slightly saltier, so start with a bit less. Avoid Chinese dark soy sauce. It’s too thick and molasses-heavy for this glaze.
- Mirin substitutes: Dry sherry or white wine plus some sugar captures that similar sweet depth. Cola (yes, really) also works 1:1.
- Sake substitutes: Dry sherry or white wine.
- Potato starch substitutes: Cornstarch or tapioca starch work perfectly.
- Rice vinegar substitutes: White vinegar or apple cider vinegar. Use slightly less, as both are more acidic than rice vinegar’s gentle tang.
Have trouble finding Japanese ingredients? Check out my ultimate guide to Japanese ingredient substitutes!
Recommended Beef Cuts to Use
To create successful beef negimaki, you’ll need thinly sliced beef that can easily wrap around leeks. While Japanese or other Asian supermarkets offer pre-sliced options (labeled for shabu-shabu or sukiyaki), you can absolutely make restaurant-quality negimaki with cuts from your regular supermarket.
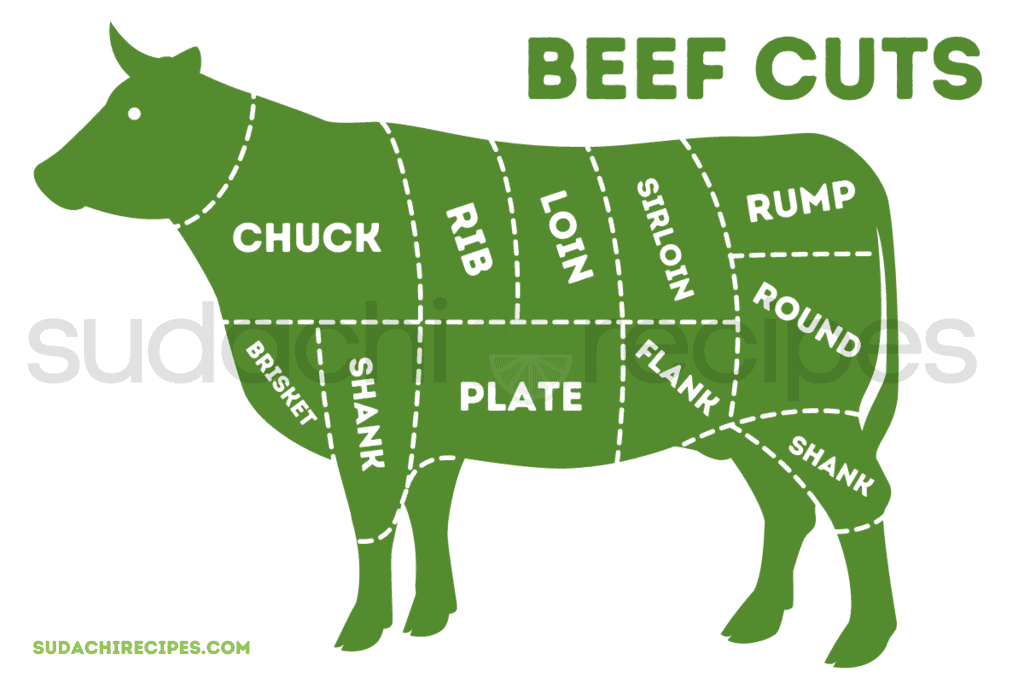
| Cut | Fat Content | Tenderness |
|---|---|---|
| Ribeye | High marbling | Very tender |
| Chuck Eye Roll | Good marbling | Moderately tender |
| Flank Steak | Lean | Somewhat tough unless cut properly |
| Round | Very lean | Can be tough |
However, beef negimaki is a casual dish and doesn’t require top-quality beef like shabu-shabu, yakiniku, or sukiyaki, where the quality of the beef is so important to the quality of the dish itself. Honestly speaking, you can use any cut of beef as long as its thinly sliced.
It’s actually more common to use thin slices of pork for negimaki in Japan. Thinly sliced pork belly or shoulder are best for this.
If you need to thinly slice the meat yourself at home, I recommend placing the block of meat in the freezer for a short amount of time so that the meat becomes firm (not frozen). This will help you cut the meat thinly with ease.
How to Make My Beef Negimaki
i. In a small bowl, mix together Japanese soy sauce, sake, mirin, honey, grated garlic, grated ginger, and rice vinegar. This mix gives you a well-balanced, umami-rich glaze.
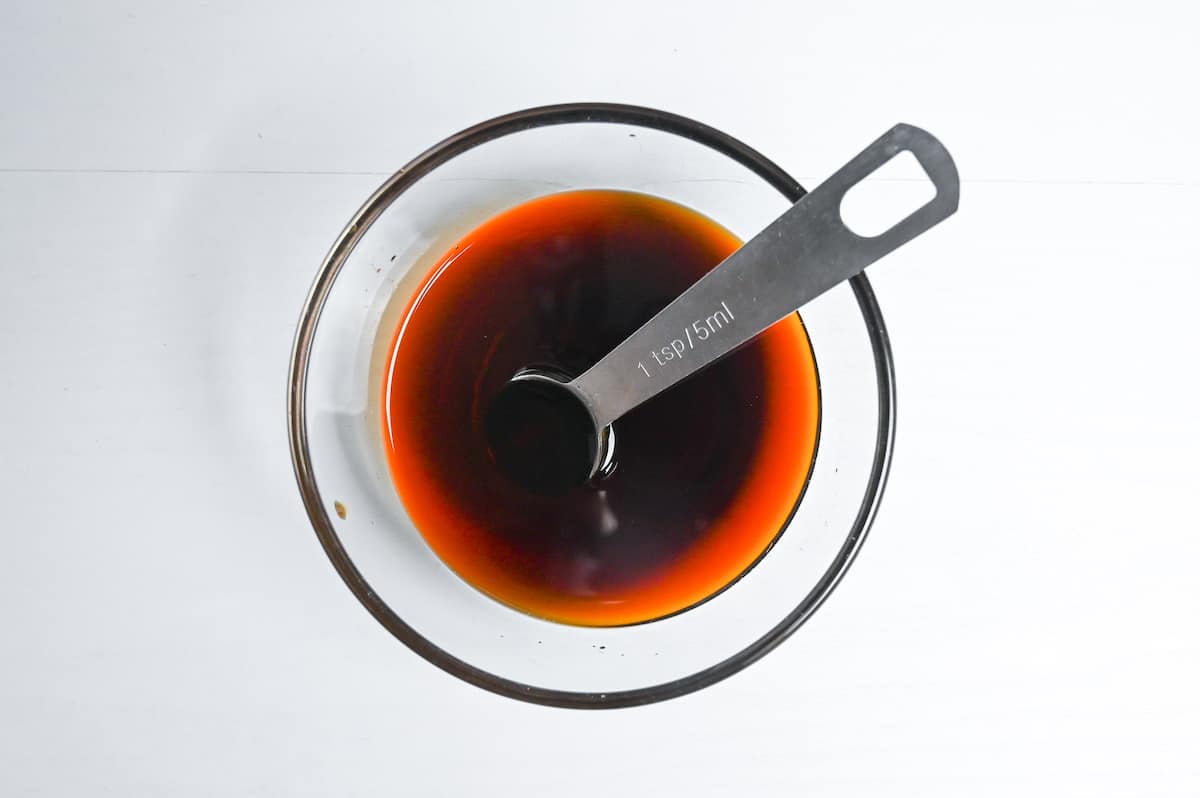
ii. Put the sauce you just mixed near your stove so you can get to it easily while you’re cooking.
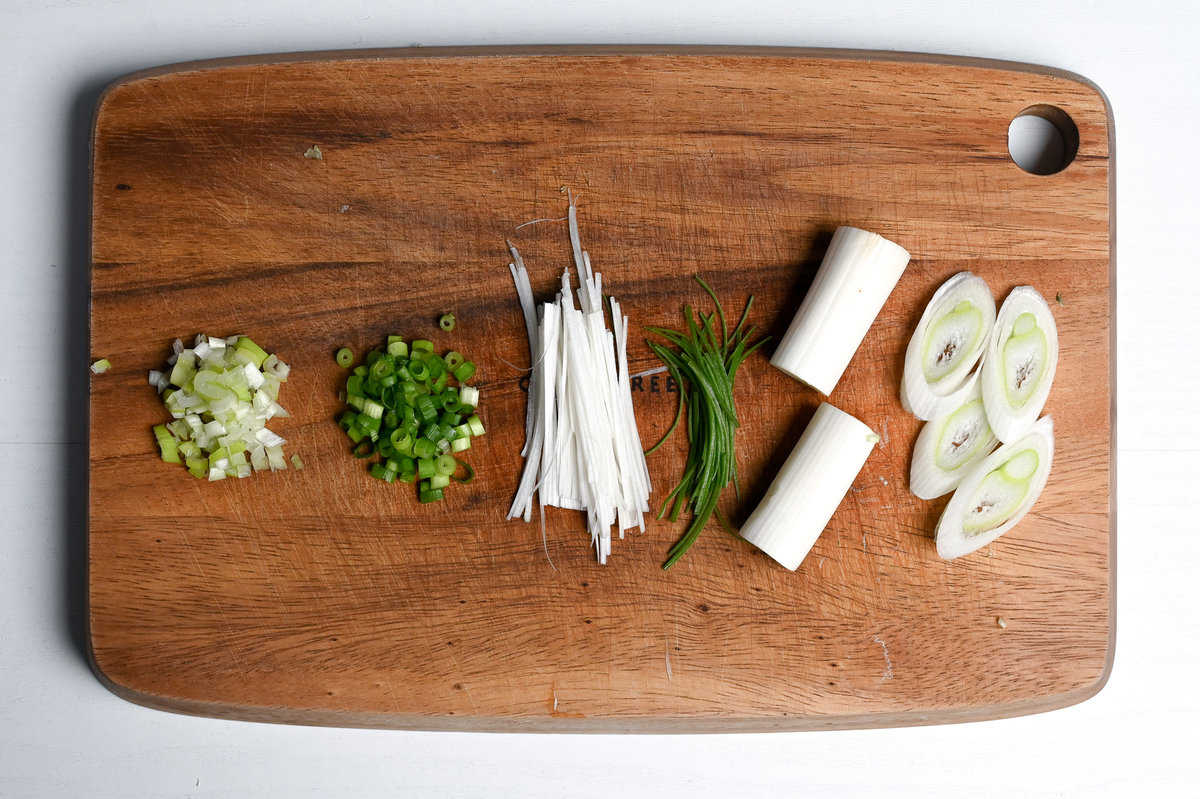
i. Wash your Japanese leeks thoroughly and cut them into 10cm (4-inch) segments. This length is ideal for rolling and gives you perfect bite-sized pieces after cooking.
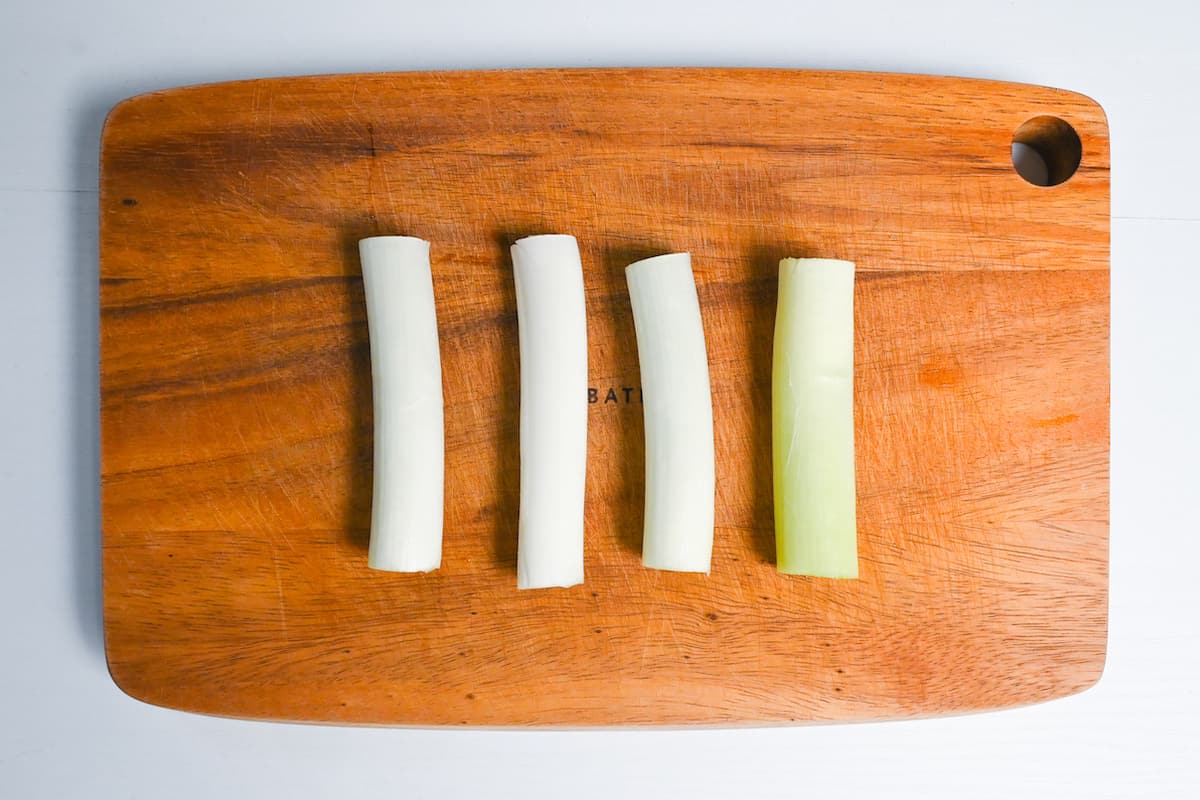
ii. Peeling off one layer of the outer skin will improve the texture too!

iii. Bring a pot of water to a boil and blanch the white parts of your leeks for about 60 seconds (extend to 90-120 seconds for regular leeks, but skip blanching altogether if using green onions).

iv. After blanching, move them to an ice water bath right away, then pat them dry with paper towels.

Blanching makes leeks from crunchy and sharp-tasting to soft and sweet by breaking down the pectin in the cell walls and converting complex starches into simpler sugars.
This is a key step that makes sure your negimaki has that perfect melt-in-your-mouth texture that makes it so satisfying.
i. For the best negimaki, you’ll need very thinly sliced beef, similar to what’s used for shabu-shabu or sukiyaki.

If you’re slicing it yourself, put your beef in the freezer for about 20 minutes, just until it’s firm but not completely frozen. Then, use a very sharp knife to slice it as thinly as you can (go for about 1.5 mm thickness).
You can also request “paper-thin slices for beef rolls” at your local butcher.
If your beef slices are too small to fully wrap around the leek, overlap them slightly on a cutting board before rolling. This creates a seamless wrap that won’t fall apart during cooking.
i. Lay your beef slices flat and place a piece of blanched leek at one end. Roll the beef tightly around the leek, making sure there are no gaps. If your beef is narrow, wrap it diagonally to create a spiral effect up the leek.
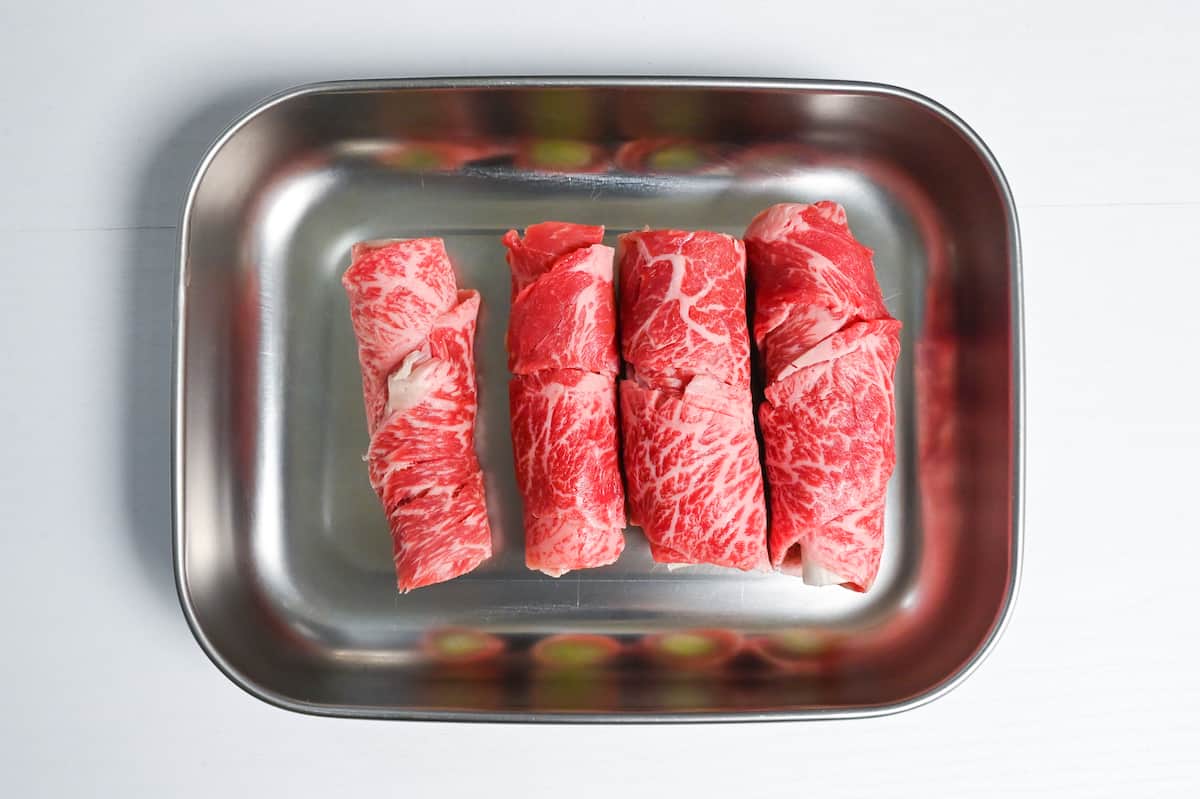
A tight roll makes sure everything cooks evenly, keeps the leek from slipping out, and keeps the juices sealed inside the meat.
ii. If you’ve got more beef than you need, you can use a double-layer rolling method where the beef slices overlap slightly. This helps prevent shrinkage when you’re cooking, making the end result more tender.
i. Lightly dust the rolled beef with potato starch, making sure to shake off any excess. This thin coating serves multiple purposes.
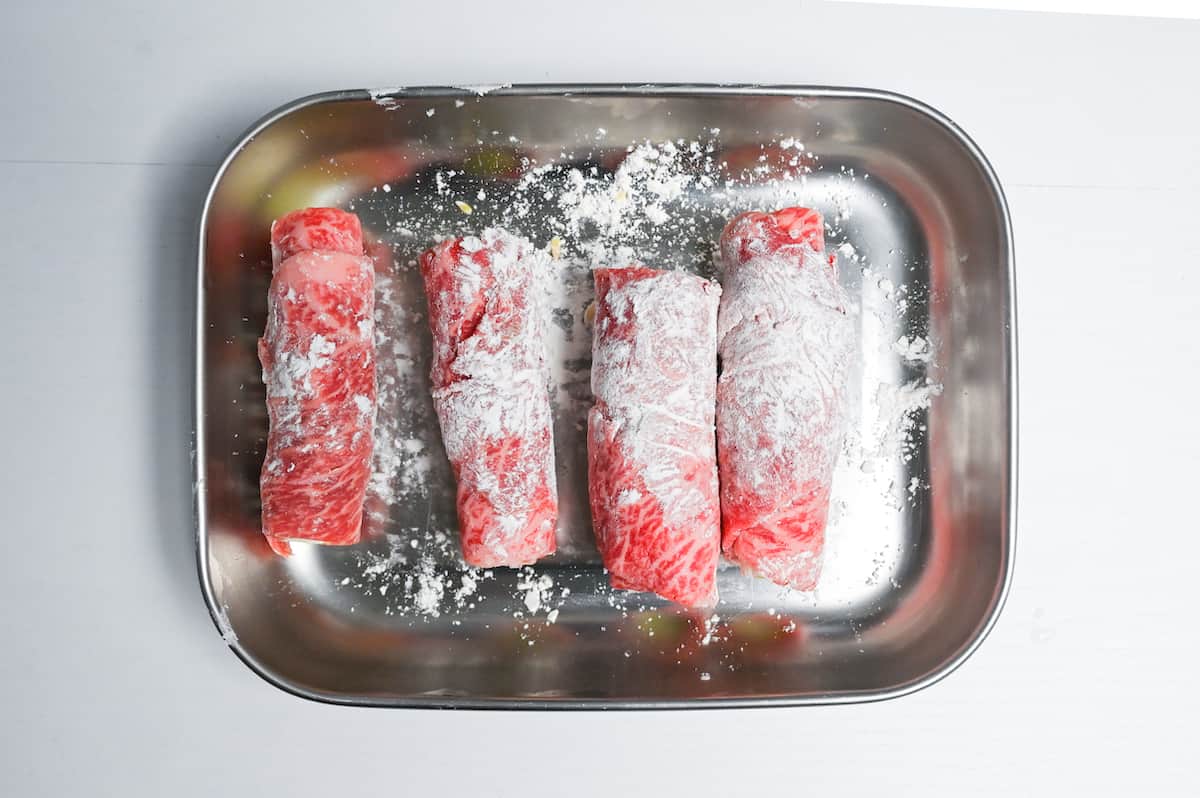
The starch coating creates a beautiful golden-brown exterior through a chemical reaction called the Maillard reaction, which is what gives those delicious browned flavors.
i. Heat a frying pan over medium-high heat. When it’s hot, add cooking oil and swirl it around to coat the surface. First, put your rolls in the pan with the seam-side down. This step is crucial because it seals the roll and bonds the proteins together with heat.

ii. Brown each side quickly, about 30 to 60 seconds per side, and use tongs to turn the meat to make sure it browns evenly.

iii. Resist the urge to use lower heat throughout. The high-heat sear creates a flavor-sealing crust while keeping the inside tender. The whole cooking process shouldn’t take more than 5 minutes, any longer and you risk drying out the thinly sliced beef.
i. When all sides are nicely browned, turn the heat down to medium-low and pour in your prepared sauce. If you want a cleaner flavor, push the rolls to one side and wipe out any excess oil in the pan with kitchen paper before adding the sauce.

ii. Continuously move the rolls in the sauce while it reduces, about 1-2 minutes, until the sauce thickens slightly and develops a beautiful shine. Baste the rolls frequently to ensure even coating.
Watch your sauce carefully – there’s a fine line between perfect glaze and bitter, overly salty reduction. The ideal consistency is when it coats the back of a spoon but still flows slowly.
If it starts to thicken too much, immediately add a tablespoon of water to stop the reduction.
i. Turn off the heat and transfer the rolls to a cutting board.

ii. Allow the rolls to rest for 1-2 minutes before slicing. For the most attractive presentation, cut each roll into half or third.
Drizzle any remaining sauce from the pan over your plated negimaki, then finish with your choice of toppings:
- Sesame seeds
- Shichimi togarashi
- Freshly ground pepper
- Yuzu peels
- Shredded shiso leaves
The rich, savory negimaki pairs beautifully with sharp, bright flavors that cut through its richness.

Essential Tips & Tricks
- Blanch white parts of leeks for exactly 60 seconds, then immediately plunge into ice water for that perfect tender-yet-intact texture.
- Keep beef refrigerated until ready to use – room temperature fatty beef becomes difficult to handle and may tear during rolling.
- Always start cooking with the seam-side down and don’t move the roll for at least 45 seconds to seal the edge and prevent unravelling.
- Use medium-high heat for quick browning, then immediately reduce to medium-low when adding sauce.
- Watch the sauce like a hawk – when it coats the back of a spoon but still flows, it’s perfect. If it gets too thick, add 1 teaspoon of water at a time and whisk thoroughly until it reaches the glossy syrup-like consistency we’re looking for.
With these simple tips in mind, you’re set for success every time you make beef negimaki.
Storage & Meal Prep
Fridge: Airtight container, up to 2 days.
Freezer: Not recommended.
Meal Prep: For make-ahead, you can assemble the rolls (blanched leek wrapped in thinly sliced beef) and store them raw, tightly covered, in the fridge for up to 24 hours.
Reheating: Reheat chilled negimaki gently in a nonstick skillet over low to medium-low heat with a splash of water or extra sauce, turning the pieces until they’re just heated through. Avoid high heat, which can overcook the thin beef and over-reduce the glaze.
What to Serve With This Recipe
Beef Negimaki FAQ
Yes, but thaw it completely in the fridge first, then pat it very dry before rolling. Excess moisture will prevent proper browning and make the glaze watery.
Absolutely. Mix the sauce up to 3 days ahead and refrigerate it in an airtight container. Just give it a quick stir before using.
Always place them seam-side down first and don’t touch them for at least 45 seconds. If a roll does unravel, use tongs to press it back together gently and flip it seam-side down again. A little potato starch on your fingers can help “glue” any loose ends.
More Japanese Party Recipes
- Yaki Onigiri (Grilled Rice Balls)
- Matcha Tiramisu
- Authentic Takoyaki
- Yamachan Chicken Wings (Nagoya Style Tebasaki)
Not sure what to serve? Get inspired by these creative Japanese party food ideas.
Did You Try This Recipe?
I would love to hear your thoughts!
💬 Leave a review and ⭐️ rating in the comments below. 📷 I also love to see your photos – submit them here!
Beef Negimaki (Beef & Leek Rolls)

Ingredients
- 1 ½ tbsp Japanese soy sauce (koikuchi shoyu)
- 2 tbsp mirin
- 2 tbsp sake or dry sherry/white wine
- 1 tsp honey or brown sugar
- 1 tsp rice vinegar
- 1 clove grated garlic or ½ tsp garlic paste for every clove
- 1 tsp grated ginger root or ginger paste
- 1 Japanese leek (naganegi) white part, or regular leek/green onions
- 150 g thinly sliced beef ribeye or chuck eye roll preferred
- 1 tsp potato starch (katakuriko) or cornstarch
- 1 tsp cooking oil
- ½ tsp toasted sesame oil for finishing
- toasted white sesame seeds to taste
- Japanese chili powder (shichimi togarashi) to taste
- ground black pepper to taste
- perilla leaves (shiso) optional for decoration
My recommended brands of ingredients and seasonings can be found in my Japanese pantry guide.
Can’t find certain Japanese ingredients? See my substitution guide here.
Instructions
- Take a small bowl and add 1 ½ tbsp Japanese soy sauce (koikuchi shoyu), 2 tbsp mirin, 2 tbsp sake, 1 tsp honey, 1 tsp rice vinegar, 1 clove grated garlic and 1 tsp grated ginger root. Mix and set by the stove for later.

- Start boiling a pot of water. While you wait, wash 1 Japanese leek (naganegi), cut off the green part and make a shallow incision lengthways to peel off the outer skin.

- Cut the leek into quarters (approx 10cm/4-inches). Once the water is boiling, prepare a bowl of ice water and place it next to the stove. Place the leek pieces in the pot and blanch for 60 seconds (see note if using regular leek/green onions).
- Once blanched, transfer to the bowl of ice water and cool for a minute or so. Don't leave them in the water for too long, take them out and dry the surface with kitchen paper.
- Take 150 g thinly sliced beef and use it to tightly wrap the leeks. Place them in a bowl or container.
- Sprinkle the rolls with 1 tsp potato starch (katakuriko) and cover with a thin, even coating.
- Heat a frying pan on medium-high and add 1 tsp cooking oil. Once thoroughly preheated, place the wrapped leeks in the pan with the seam-side facing down to prevent unravelling.
- Turn every 30 to 60 seconds (depending on the thickness of the meat) until browned all over.
- Reduce the heat to medium-low and pour the sauce from earlier into the pan. Turn the rolls continuously and baste with the sauce occasionally until it becomes glossy and slightly thickened.
- Transfer them to a cutting board and rest for 1-2 minutes before serving. Cut into halves or thirds (optional) and top with ½ tsp toasted sesame oil, toasted white sesame seeds, Japanese chili powder (shichimi togarashi) or ground black pepper to taste. Decorate with perilla leaves (shiso) and enjoy!

Leave a rating and a comment