


Featured Comment:
I love this recipe-way better than a restaurant dish. I added some cubed avocado and it was even more amazing!
– Mary
What is Ebi Mayo?
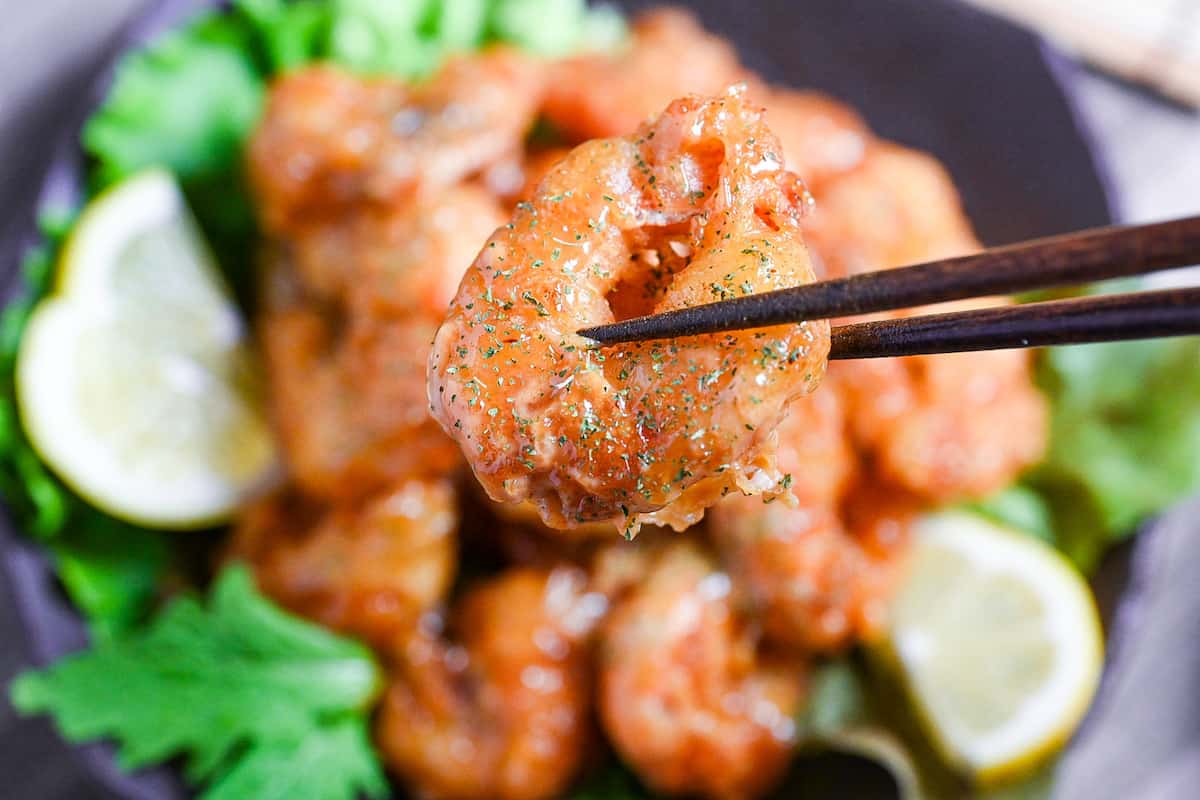
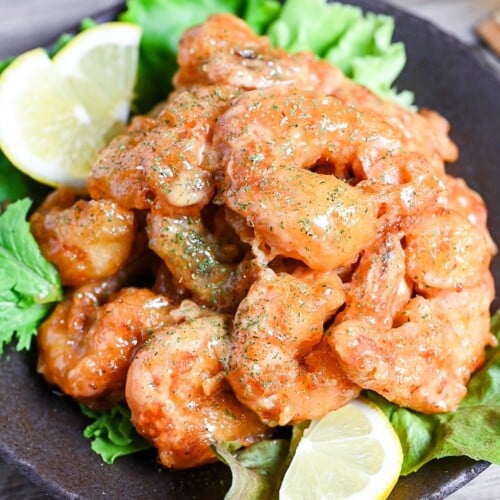
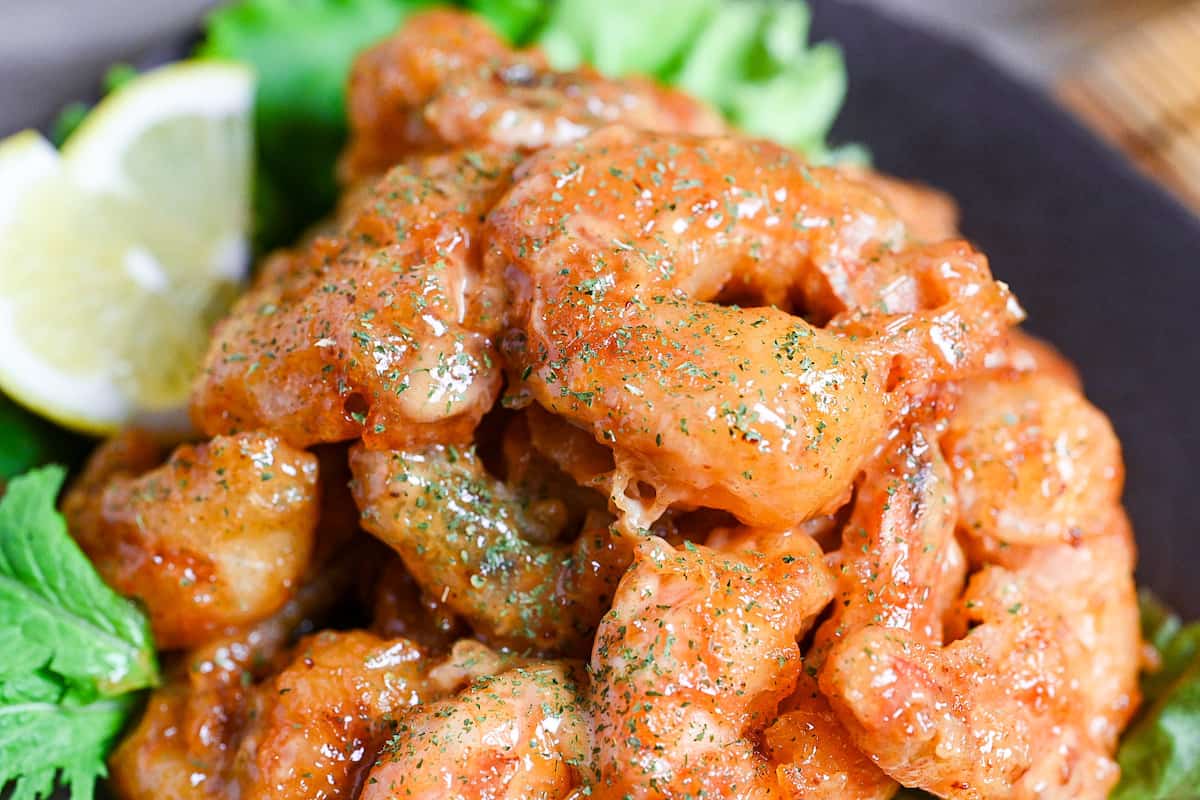
Ebi Mayo (エビマヨ) is a delicious and simple dish featuring fried prawns coated in a flavorful mayonnaise-based sauce. The word “ebi” (エビ) is Japanese for prawn or shrimp, and this recipe typically uses medium to large-sized prawns, such as whiteleg or giant tiger shrimp.
While my recipe involves making a batter and deep frying, some cooks prefer to coat the prawns in potato starch and fry them in a pan. The mayonnaise sauce can be used to fully coat the prawns, drizzled over them, or served on the side as a dipping sauce – it’s up to you!
Ebi Mayo was created by the famous chef Shu Tomitoku (周富徳), also known as “Iron Chef.” Tomitoku was Chinese, born in Japan, and significantly contributed to “Chuka Ryori” (Chinese-style Japanese dishes) in Japan.
While on a trip to LA, Shu tried a mayonnaise-flavored shrimp dish and saw its potential. Inspired by the dish, he tried coating the prawns in starch, frying them, and adding extra seasonings to the mayonnaise, thus creating the first Ebi Mayo.
After introducing the recipe on TV, it became a beloved menu item in Chinese restaurants in Japan and a popular dish to make at home.

How I Developed This Recipe
I have to say, I really enjoyed developing this ebi mayo recipe and I think it shows in the final result. As I said, this dish is a fusion of Japanese and Chinese, but I decided to add another cultural element to the mix.
Yes, it’s inspired by England’s fish and chips, a country where I lived for many years. I used that classic beer batter to make a light and crispy coating, then tossed them in my own special ebi mayo sauce.
I also made sure to get the sauce just right, adding paprika powder and other ingredients to get our own perfect ebi mayo sauce. This recipe is one of my personal favorites and I highly recommend it!
Why I Use Beer Batter for This Recipe
In Japan, beer batter in dishes like ebi mayo is uncommon. However, I decided to incorporate beer batter into this recipe to add a personal touch and achieve a crispy texture at its best. I am proud to say that this batter is the best I have ever made.
Beer batter is a popular choice for fish and chips in the UK, often made with light lagers. The use of beer in batter creates a light and crispy texture due to three key components: carbon dioxide, foaming agents, and alcohol. The CO2 is the bubbles in the beer, and when these react with hot oil, they froth up, making the batter airy. You could also achieve a similar effect with soda water, but it still lacks two other things that beer has.

You know when you pour a beer and a foam layer forms at the top? Well, this foam coats the CO2 bubbles and slows the rate at which they pop, essentially stopping the batter from deflating. It also helps direct the heat to the batter, producing the crispiest coating without overcooking what’s inside.
The alcohol in beer also plays a role by evaporating at a lower temperature than water, resulting in a quicker cooking time and less oil absorption for a crispy and delicious batter.
This versatile batter can be used for prawns, fish, and onion rings. Give it a try and experience the difference for yourself!
Ingredients & Substitution Ideas
- Shrimp: Medium to large shrimp, like whiteleg shrimp (often called king prawns) and giant tiger prawns, give the best results. Don’t forget to devein them for a cleaner taste.
- Garlic Cloves: Personally, I add these to infuse the frying oil with a hint of garlic flavor, but it’s totally optional.
- Batter Ingredients: I use a mix of cake flour, rice flour, baking powder, salt & pepper, and chilled lager beer. If you’re not into using alcohol in your cooking, plain soda water is a great substitute.
- Japanese Mayonnaise: Kewpie mayonnaise is my top pick, but other brands also work.
- Condensed Milk: This is a game-changer in my special ebi mayo sauce. Its unique sweetness and silky consistency really make the sauce. I wouldn’t recommend swapping it out.
- Tomato Ketchup: Any regular ketchup works.
- Vinegar: Rice vinegar (unseasoned) is my go-to, but other options like grain vinegar, apple cider vinegar, and white vinegar will also work.
- Soy Sauce: I’ve written a comprehensive soy sauce guide for some brand recommendations.
- Lemon Juice: Lime juice is a good alternative.
- Paprika Powder: In my honest opinion, this is the secret star of the sauce. You can use regular or smoked paprika powder.
- Dried Parsley: Just an optional sprinkle on top for added flair.
Visual Walkthrough & Tips
Here are my step-by-step instructions for how to make Ebi Mayo at home. For ingredient quantities and simplified instructions, scroll down for the Printable Recipe Card below.
If you prefer to watch the process in action, check out my YouTube video of this Ebi Mayo recipe for a complete visual walkthrough!

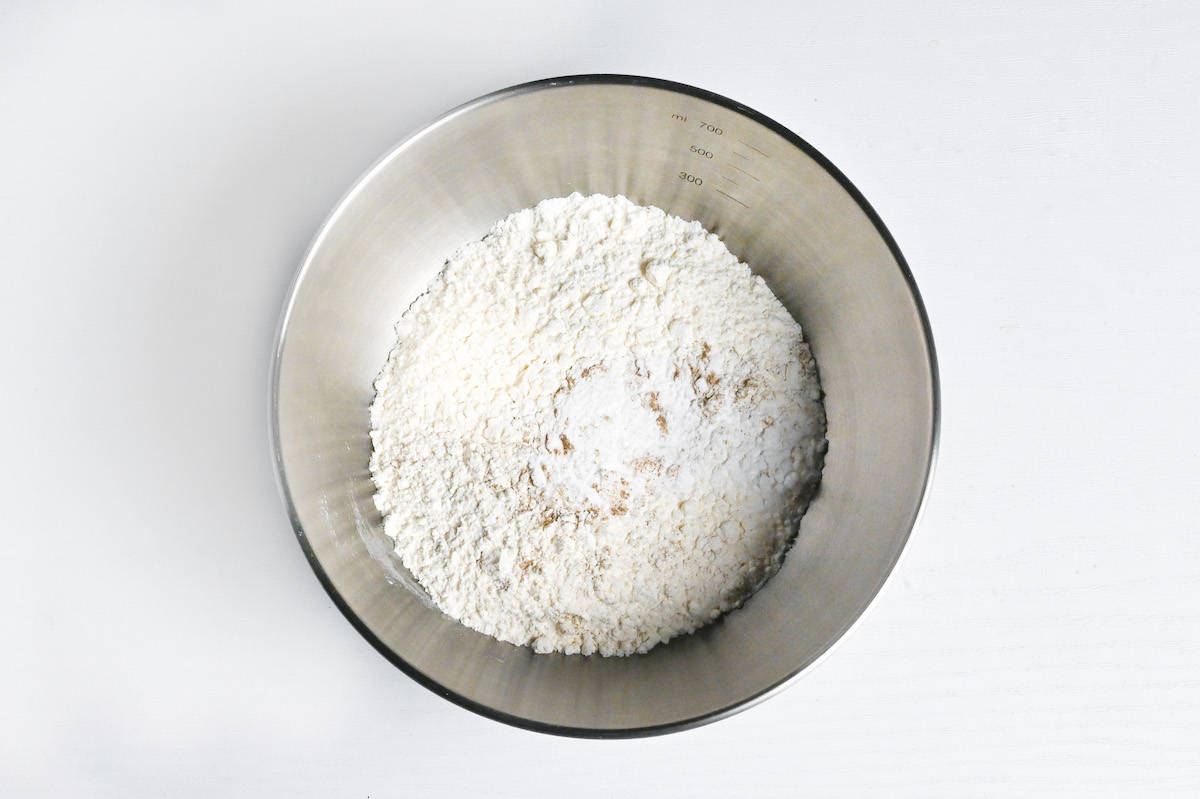
Begin by whisking together your dry ingredients: cake flour, rice flour, baking powder, salt, and pepper in a mixing bowl.
Place the dry mix in the freezer until you’re ready to use it. This crucial step helps reduce gluten formation when the beer is added and creates a temperature differential that promotes the formation of a lighter, more delicate crust when fried.
Remember, hold off on adding the beer at this point.
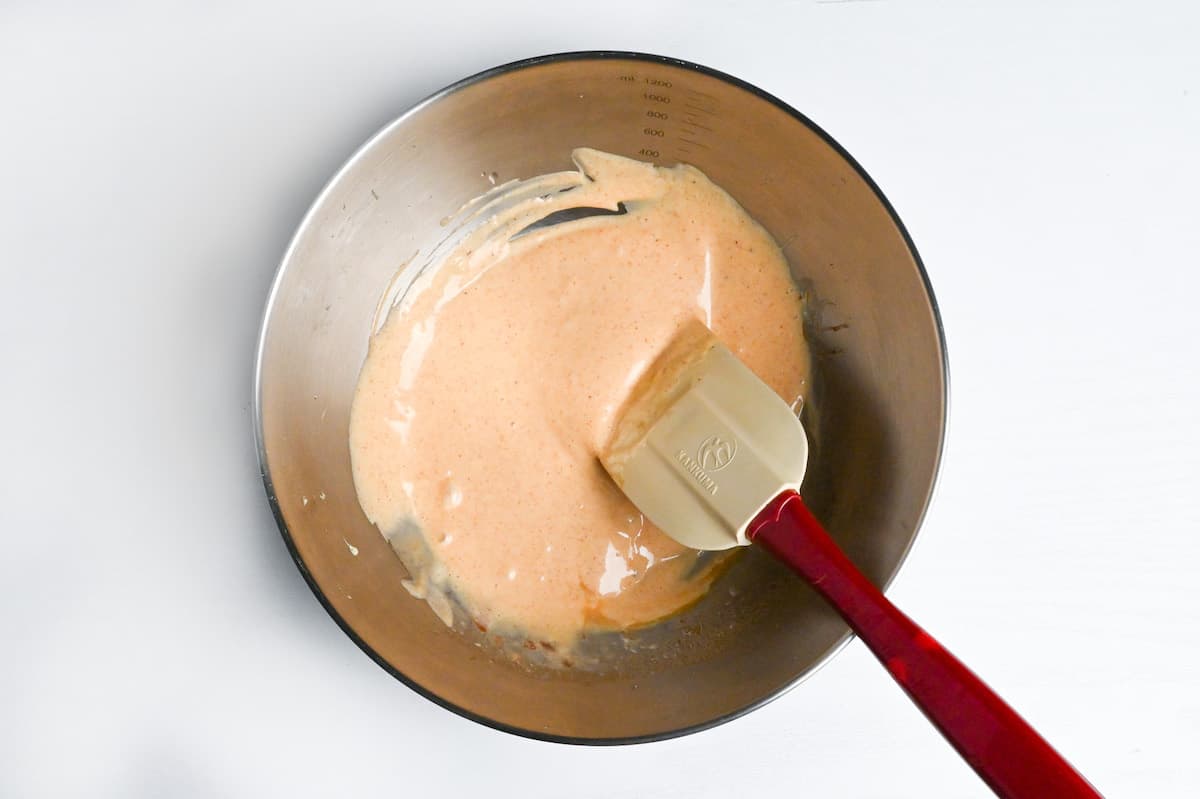
Grab a bowl (large and wide if you’re coating the shrimp, small if you’re just making a dipping sauce) and combine the Japanese mayonnaise, condensed milk, tomato ketchup, rice vinegar, soy sauce, lemon juice, and paprika powder.
Mix until smooth and set aside.
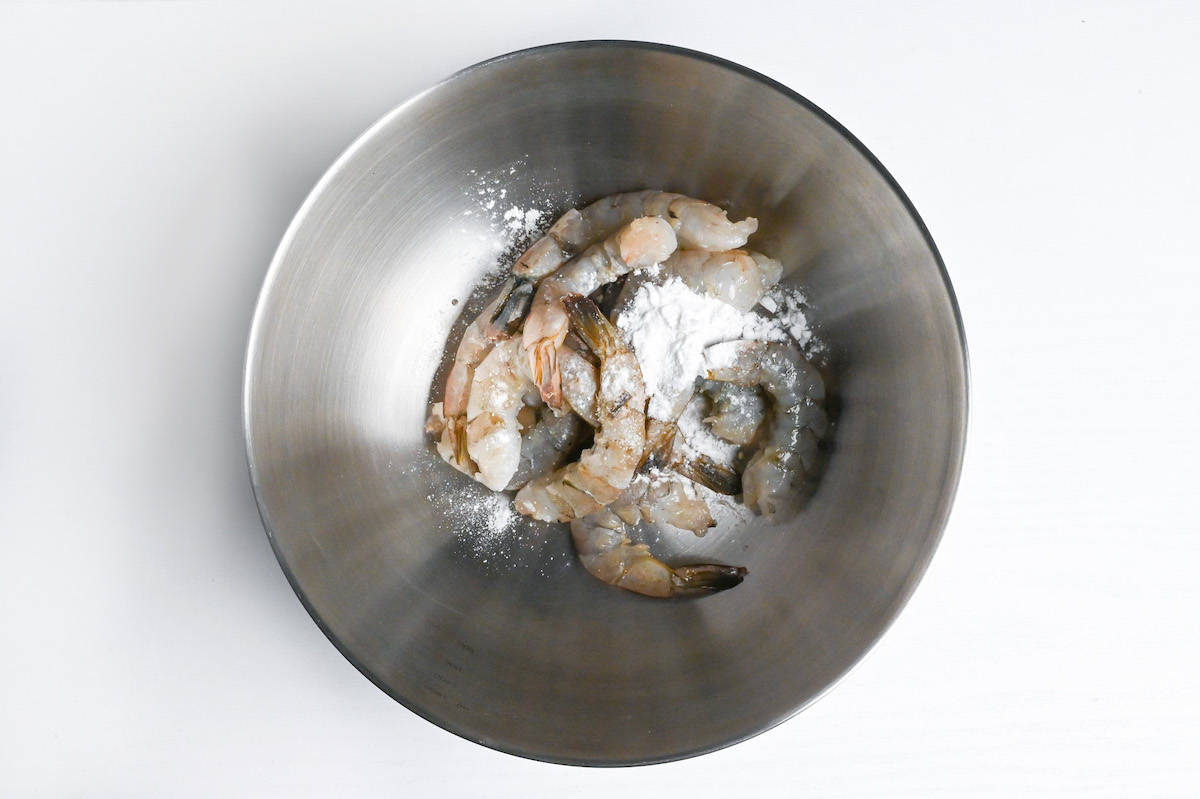
Place deveined and deshelled shrimp in a bowl and rub the surface with cornstarch and a couple of pinches of salt. Massage gently for about 30 seconds, then rinse with cold water and thoroughly pat them dry with paper towels.
This one step makes the shrimp even tastier.
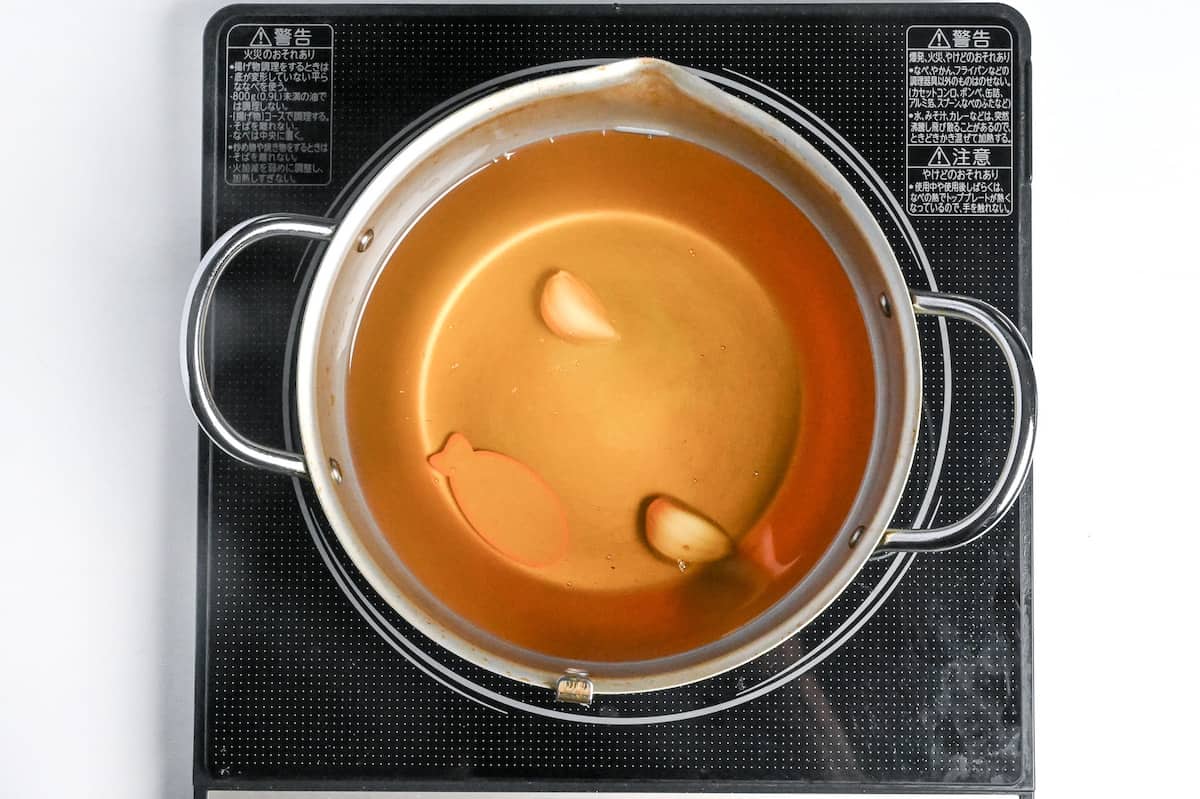
Heat your oil to a sizzling 180-190°C (356-374°F). The oil temperature should be this high for this batter. I use a contactless cooking thermometer when deep-frying. I recommend this because it is convenient to use, no matter your pot!
Also, drop garlic cloves while preheating to infuse the oil with flavor (optional) and remove them before they start to burn.
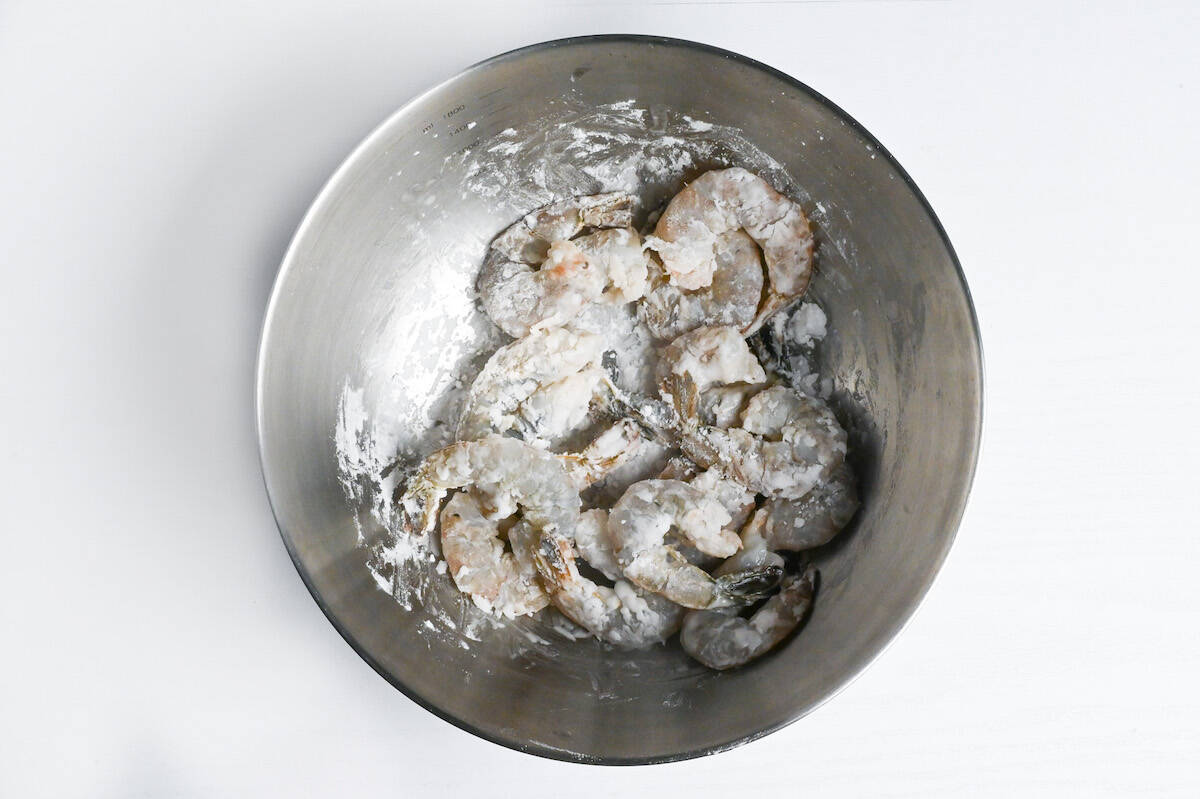
Just before frying, dust your shrimp with a light coating of cornstarch. This step is key to making sure the batter sticks perfectly to the shrimp and creates a moisture barrier between the shrimp and the batter.
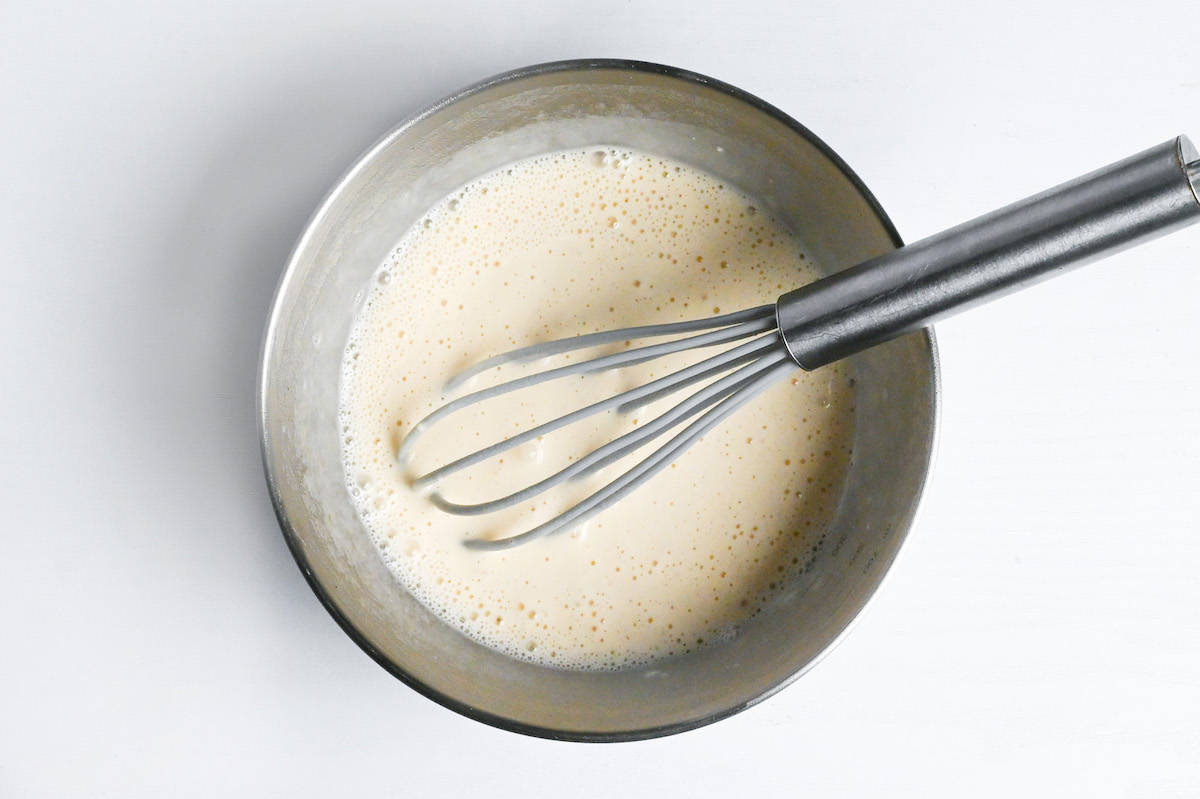
Remove your dry batter mix from the freezer and quickly stir in well-chilled lager beer (or plain carbonated water). Mix with minimal stirring. A few lumps are actually good! Overmixing activates gluten and results in a tougher coating.
Your batter should be thin enough to coat the back of a spoon but thick enough that it doesn’t run off immediately. If your batter seems too thick, add a little more cold beer; if too thin, add a small amount of flour or rice flour.
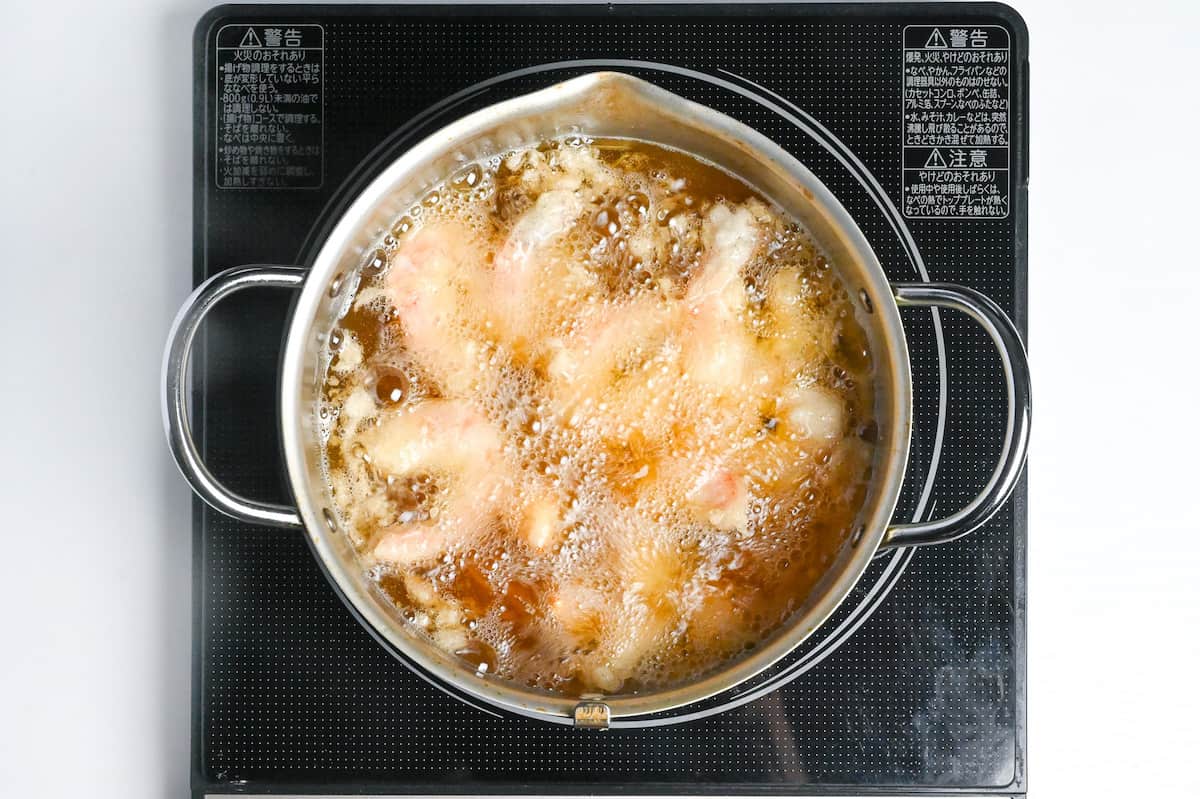
Fry the prawns in batches (in my case, two batches). Avoid overcrowding; we want each prawn to cook evenly. They’ll need about 3 minutes until they’re a lovely golden brown.
The batter should turn a delicate golden brown, not dark brown. You’ll notice the bubbling around the shrimp becomes less vigorous as moisture evaporates from the coating.
This is a reliable indicator that they’re nearly done.
Keep an eye on that garlic if you haven’t already removed it. When it’s dark brown, it’s done its job. Fish it out and discard or eat!
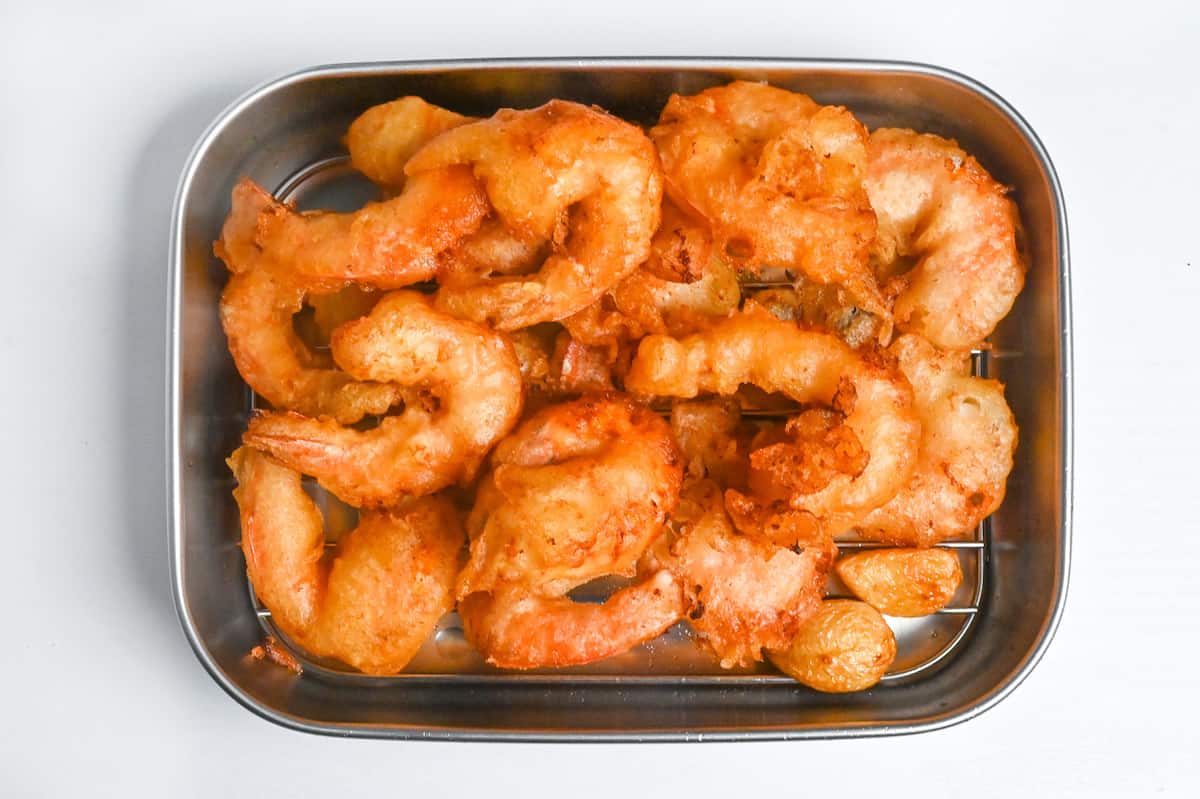
As each batch finishes frying, transfer the shrimp to a wire rack. This allows air to circulate around the entire piece, preventing the bottom from becoming soggy from trapped steam and allowing excess oil to drip away cleanly.
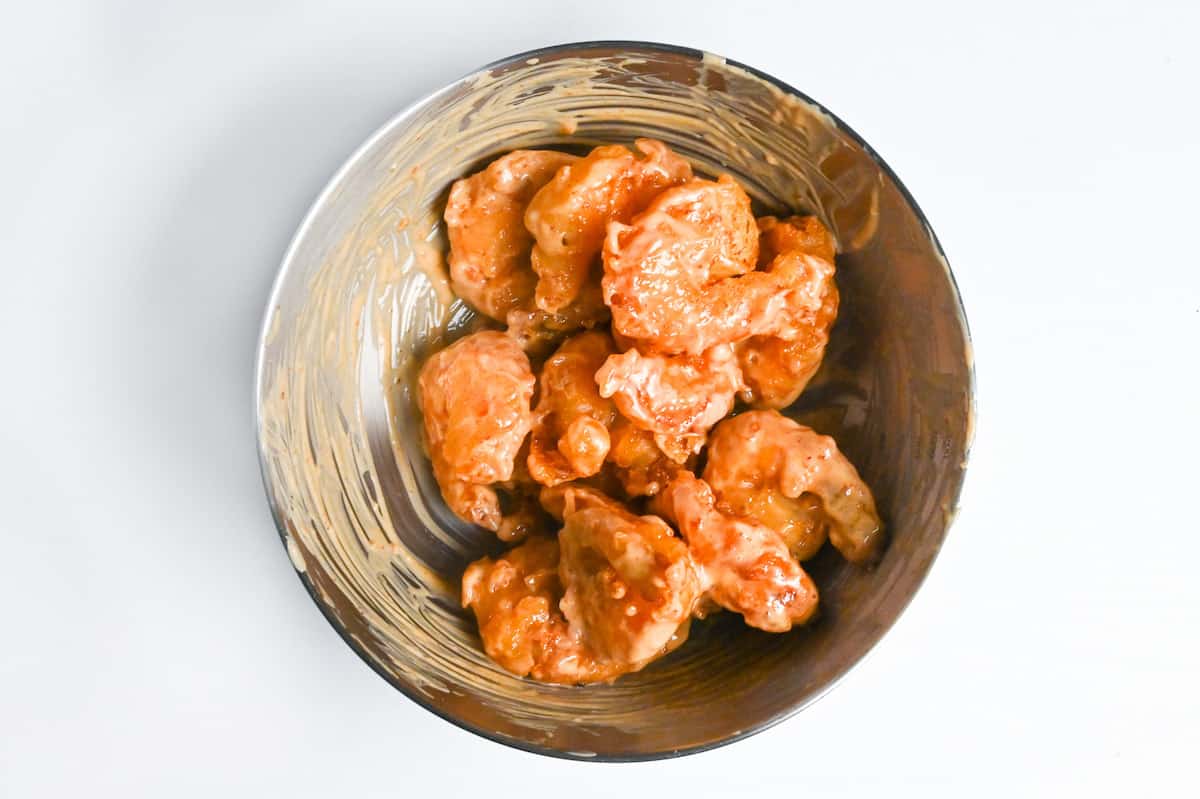
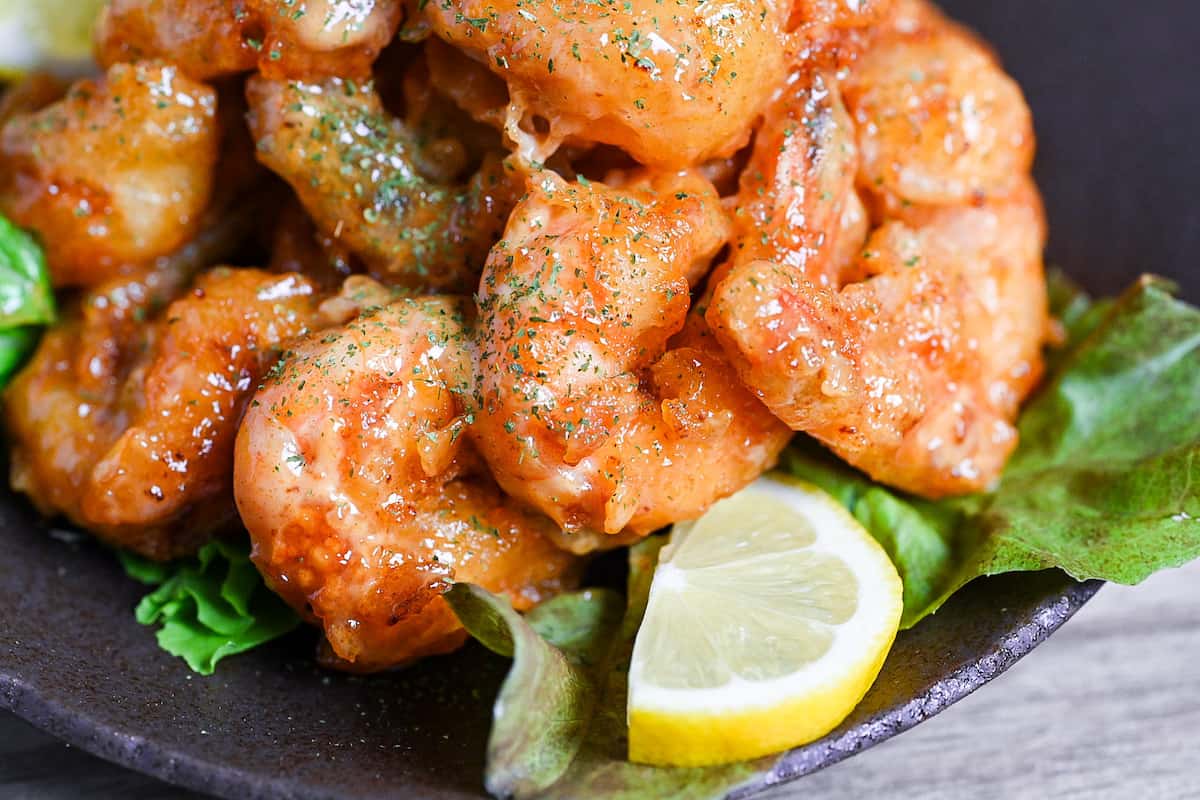
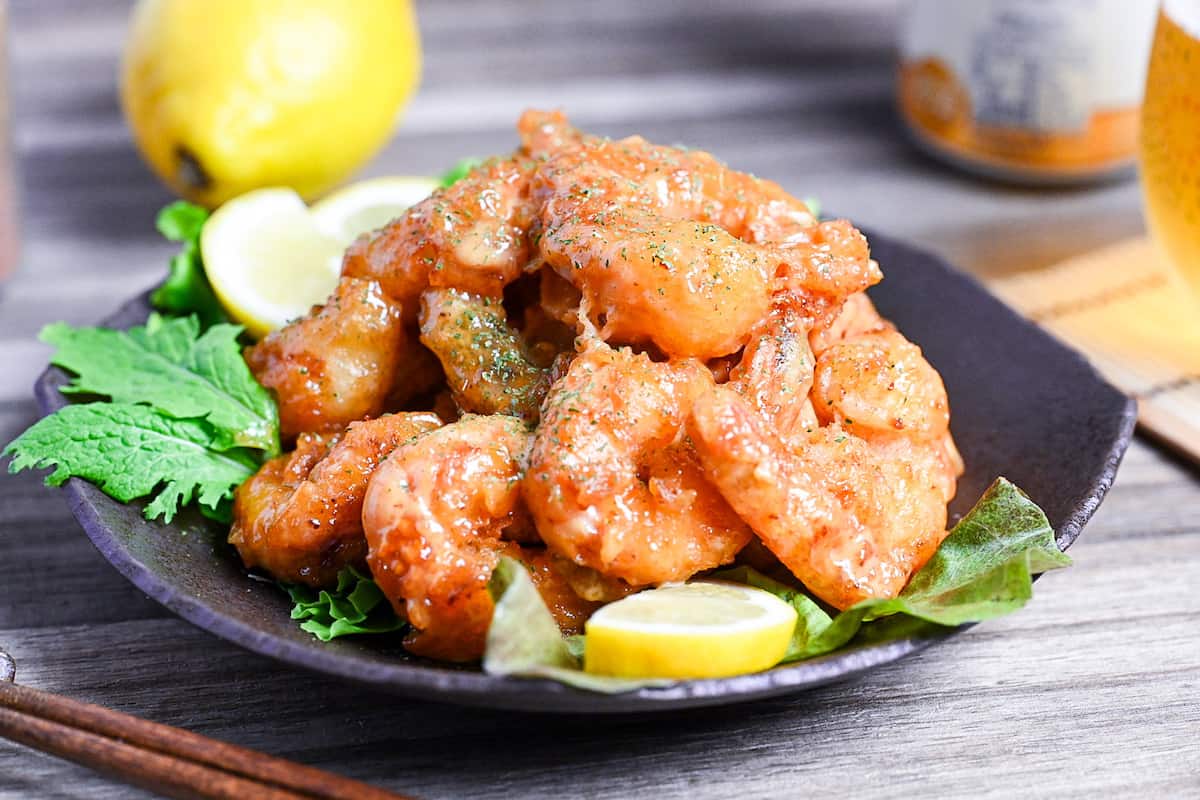
The most critical timing decision: coat the shrimp with the mayo sauce ONLY immediately before serving. If you toss them too early, the moisture from the sauce will quickly soften your perfectly crispy batter.
For best results, put your fried shrimp in a wide, shallow bowl and gently fold in the sauce with a silicone spatula using a lifting motion rather than stirring. This keeps the delicate coating intact while making sure the sauce gets spread evenly.
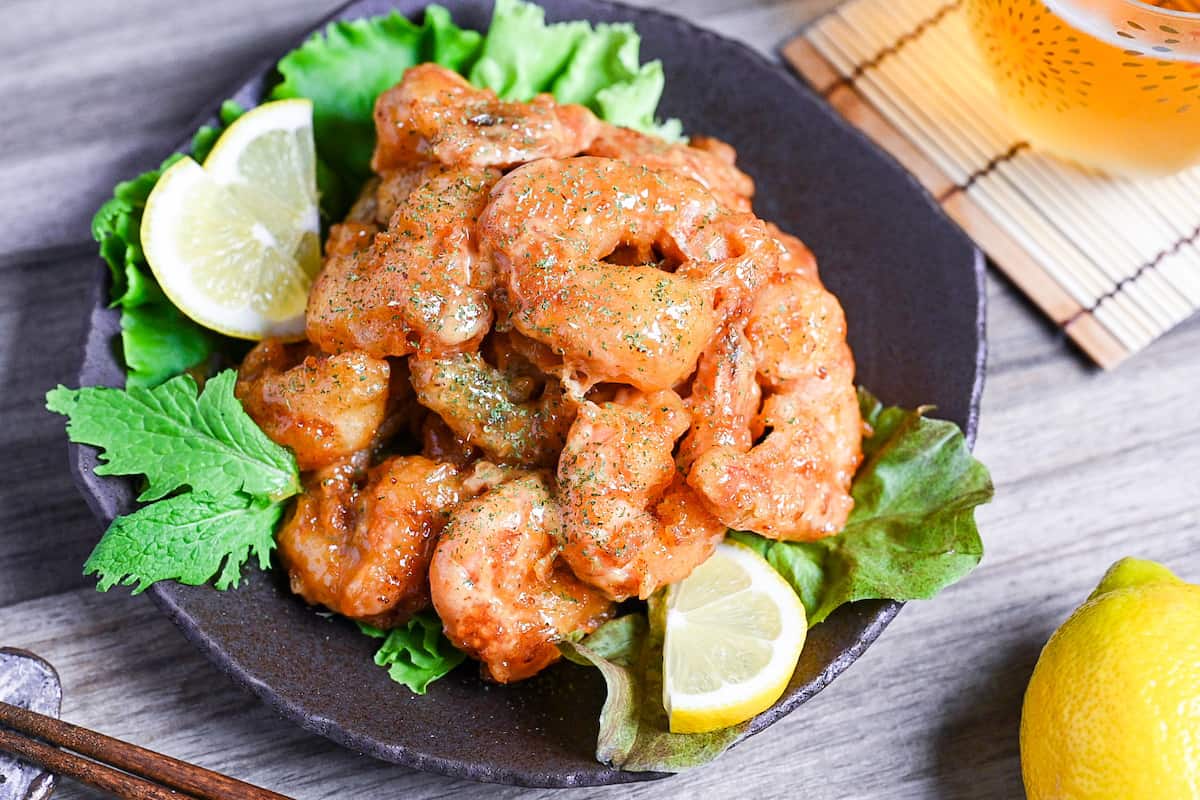
Plate your shrimp immediately after coating with sauce, and finish with a light sprinkle of dried parsley for color contrast and a subtle herbal note.
Jump to Full Recipe MeasurementsEssential Tips & Tricks
- Ensure ALL ingredients are properly chilled before mixing the batter – cold beer, cold flour mixture, and even cold mixing bowl will create the crispiest coating.
- Avoid overmixing the beer batter – a few small lumps are actually desirable.
- Pat shrimp completely dry before dusting with cornstarch.
- Use a wire rack for draining instead of paper towels.
- Coat with sauce ONLY immediately before serving.
- Gently fold rather than stir when coating with sauce, using a lifting motion with a silicone spatula to preserve the delicate batter coating.
With these simple tips in mind, you’re set for success every time you make Ebi Mayo.
Meal Prep & Storage
This dish is not suitable for meal prep.
- Batter Degradation: The crispy beer batter quickly absorbs moisture from the mayo sauce, causing it to become soggy within minutes of coating.
- Texture Loss: The contrast between crispy exterior and juicy shrimp interior is the hallmark of this dish. Even stored separately, reheated fried shrimp loses its distinctive texture and becomes either tough or soggy.
If you have leftover sauce, you can store it in the fridge in a sealed container for about 1 week. For best results, give it a good stir before using it again as some separation might occur.
Serving Suggestions
- Ramen Restaurant-Style Fried Rice
- Japanese Egg Drop Soup
- Izakaya-Style Potato Salad
- Yamitsuki Cabbage
I hope you enjoy this Ebi Mayo recipe! If you try it out, I’d really appreciate it if you could spare a moment to let me know what you thought by giving a review and star rating in the comments below. It’s also helpful to share any adjustments you made to the recipe with our other readers. Thank you!
More Japanese Shrimp Recipes
- Ebi Furai (Deep-fried Shrimp with Panko)
- Ebi Chili (Shrimp in Chili Sauce)
- Shrimp Yaki Udon (Shio Lemon Shrimp Udon Stir Fry)
- Crispy Japanese Shrimp Tempura (Ebiten)
Want more inspiration? Explore my Shrimp Recipe Roundup Post for a carefully selected collection of tasty recipe ideas to spark your next meal!
Ebi Mayo (Fried Shrimp in Mayonnaise Sauce)

Equipment
- Japanese-style fryer
- Stainless steel cooking tray with wire rack
Ingredients
Batter
- 70 g cake flour lower protein content for lighter batter
- 1 tbsp rice flour or corn starch
- ½ tsp baking powder
- 1 pinch salt and pepper
- 100 ml lager beer or soda water, must be very cold
Mayonnaise Sauce
- 4 tbsp Japanese mayonnaise
- 1 tbsp condensed milk sweetened, not evaporated milk
- 1 tsp tomato ketchup
- 1 tsp rice vinegar unseasoned
- ½ tsp Japanese soy sauce (koikuchi shoyu)
- ½ tsp lemon juice or lime juice, freshly squeezed best
- ½ tsp paprika powder regular or smoked
Ebi Mayo
- 250 g shrimp medium to large size, deshelled and deveined, black tiger or white shrimp
- 1 tsp cornstarch for cleaning
- 2 pinches salt for cleaning
- 3 tbsp cornstarch or potato starch
- 2 cloves garlic peeled, whole
- cooking oil neutral with high smoke point
- dried parsley to garnish
My recommended brands of ingredients and seasonings can be found in my Japanese pantry guide.
Can’t find certain Japanese ingredients? See my substitution guide here.
Instructions
- Start by mixing the dry ingredients for the batter (70 g cake flour, 1 tbsp rice flour, ½ tsp baking powder and 1 pinch salt and pepper) Mix well and place them in the freezer until just before using. (Don't add the beer yet.)

- Next, take a large bowl (or small bowl if you prefer dipping) and add all of the sauce ingredients. (4 tbsp Japanese mayonnaise, 1 tbsp condensed milk, 1 tsp tomato ketchup, 1 tsp rice vinegar, ½ tsp Japanese soy sauce (koikuchi shoyu), ½ tsp lemon juice, ½ tsp paprika powder) and mix well. Set aside for later.
- Next, place 250 g shrimp in a bowl and rub with 1 tsp cornstarch and 2 pinches salt. Once evenly coated, rinse with cold water and dry with kitchen paper.
- Heat your oil to 190 °C (374 °F) and drop 2 cloves garlic into the pot while it's heating up. This will add extra flavor to the shrimps, remove and discard once they turn dark brown.
- Add 3 tbsp cornstarch to the prawns and coat them. This will help the batter stick better.
- Take your dry batter from the freezer and add 100 ml lager beer (chilled). Mix well.
- Coat each prawn in the batter and drop them straight into the oil in batches, be careful not to overcrowd the pot. Fry for approximately 2-3 minutes or until golden brown.
- As each batch is complete, transfer the prawns to a wire rack to let any excess oil drain off.
- After a few minutes, place the prawns in the bowl of sauce and gently mix to coat.
- Dish up, sprinkle with dried parsley and enjoy!

Video
Notes
- Chill ALL ingredients for the batter (flour mixture, beer, even the mixing bowl) before combining – cold temperatures significantly improve crispiness by preventing gluten formation.
- Let the batter have small lumps – overmixing activates gluten and results in a tough, dense coating rather than a light, crispy one.
- Use a wire rack instead of paper towels for draining – this prevents steam from softening the bottom of your fried shrimp.
- Coat with sauce ONLY immediately before serving.
- The fried shrimp are best enjoyed immediately and don’t store well.
- Serving ideas: Fried rice, Egg drop soup, Addictive potato salad, Yamitsuki cabbage salad.
The dressing is delicious with the shrimp. I added Furakaki and used Korean Fry mix for the batter (because I had it in the pantry and I wanted to try it). The beer was a wonderful idea. My husband and kids loved the recipe!
Hi Colette,
Thank you for your kind words and generous rating.
Furikake and Korean fry mix, sounds delicious! I’m happy you and your family enjoyed the recipe 🙂
I love this recipe–way better than a restaurant dish. I added some cubed avocado and it was even more amazing!
Hi Mary,
Thank you so much for trying my ebi mayo recipe! I’m really happy to hear it beat the restaurant version and the avocado addition sounds amazing! 🙂
Yuto
Hi Sudachi, I’m loving all your recipes, at least the ones that I’ve tried!
Just a general question regarding any recipe really: When you state Soy sauce in a recipe, can I assume that you always refer to dark soy sauce, unless you say otherwise?
Hi Vincent,
Thanks so much, glad you’re enjoying them! Great question. Whenever I say “soy sauce” in a recipe, I’m referring to Japanese dark soy sauce (koikuchi shoyu), unless I specifically mention otherwise. The only exception is when I call for Japanese light soy sauce (usukuchi shoyu) by name. One thing to keep in mind though, Japanese dark soy sauce is completely different from Chinese dark soy sauce, which is thick and sweet. Japanese dark soy is basically just the standard, everyday Japanese soy sauce you’ll find in most stores.
I hope this helps!
Yuto