




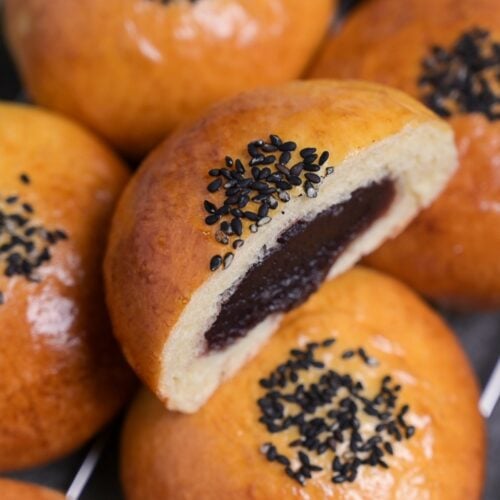
Before cream pan, before melon pan, there was anpan. The bun that started it all. It’s Japan’s original sweet bun, first created in 1874, and more than a century later, you’d be hard pressed to find a Japanese bakery without one on the shelf.
Soft fluffy bread and a generous sweet red bean filling. That’s it. It sounds simple, and it is. In fact, that’s the point. And that’s exactly what I’ve aimed for in this recipe. Buns that stay soft, enough anko that you’re never left wishing there’s more. Make a batch and you’ll understand why this one earned its place in Japanese bakery history.
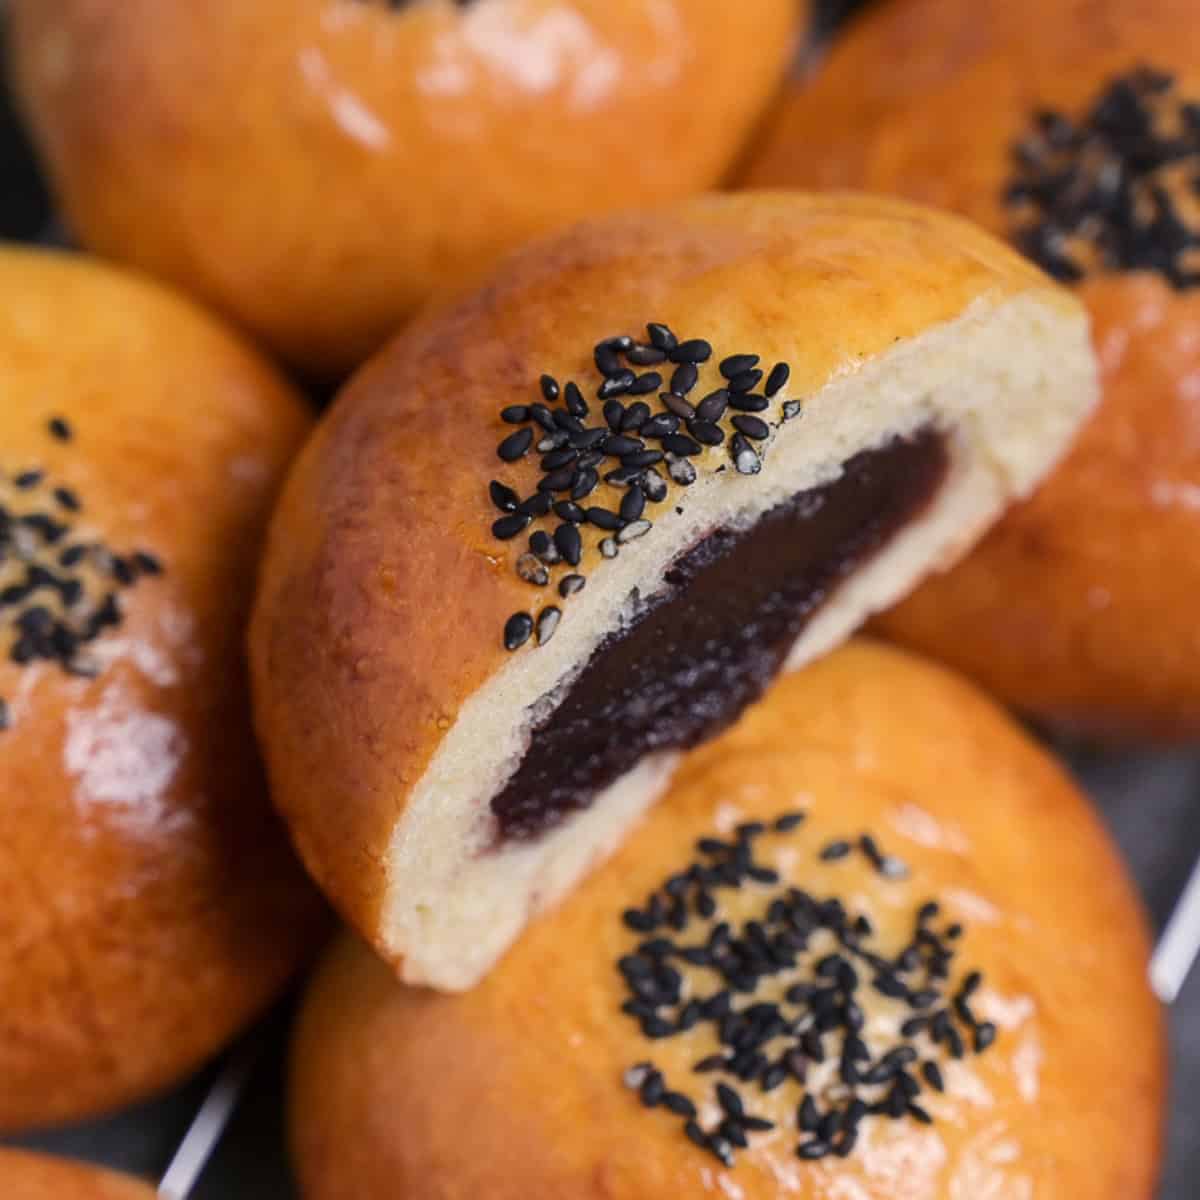
Anpan
Recipe Snapshot
- What is it? A classic Japanese bakery favorite made with a soft, enriched dough wrapped around a sweet red bean paste filling, finished with a golden egg wash and sprinkle of black sesame seeds.
- Flavor profile: Perfectly sweet, nutty, mild.
- Why this recipe works: The slap and fold kneading technique paired with adding the butter to the dough after gluten development (rather than mixing from the start) and a proper windowpane test ensures a soft, stretchy dough that will wrap around the anko without tearing.
- What to expect: Takes roughly 2.5-3 hours, mostly hands-off rising time. Yields 6 generously filled anpan.
- Freezable: Yes.
Summarize & Save this content on:
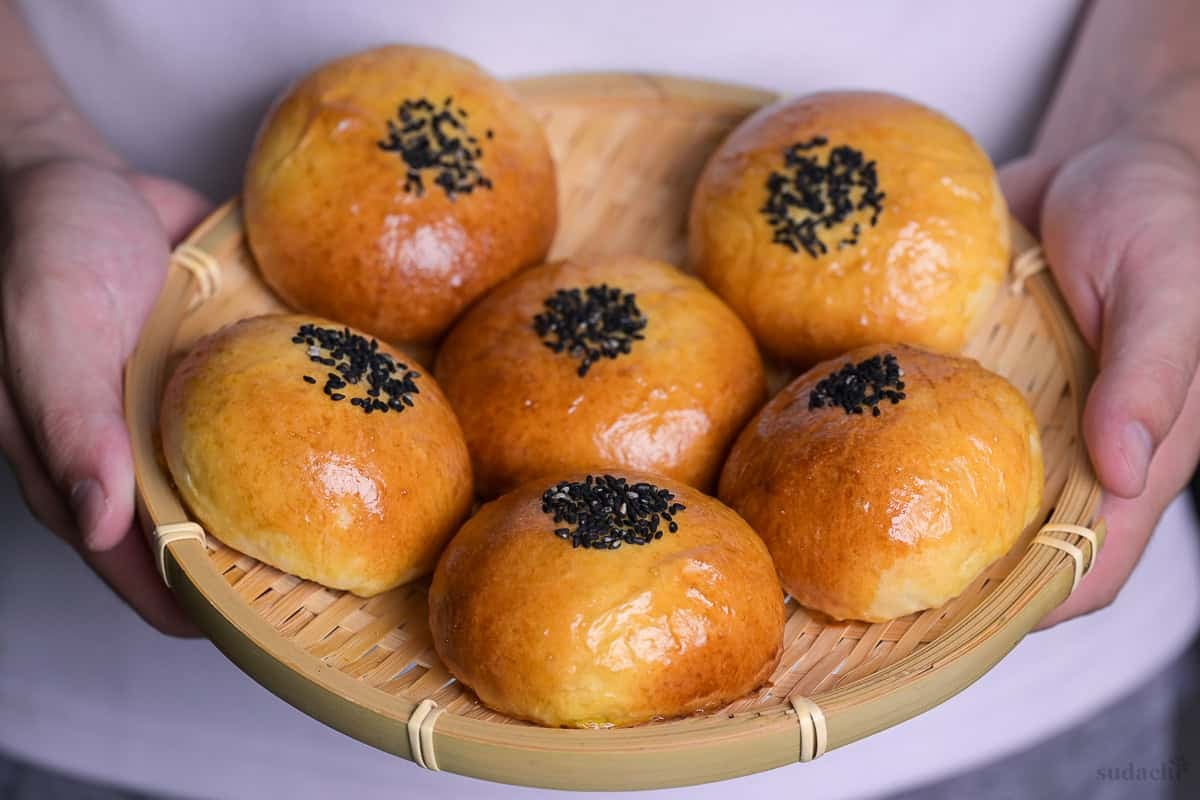
What is Anpan?
Anpan (あんぱん) is more than just a red bean bun, it is one of the first true fusions of Western baking techniques and Japanese ingredients. It is often regarded as the bread that started Japan’s entire kashipan (菓子パン) sweet bread tradition.
It was invented in 1874 by a samurai turned baker called Yasubei Kimura, who founded the Kimuraya bakery in Tokyo. During that time, Western-bread had recently arrived in Japan, but it failed to win over the locals. Kimura took inspiration from manju, a traditional Japanese steamed wheat bun filled with a red bean paste called anko. He swapped the dense skins for fluffy sweet bread, and anpan was born.
If you’ve ever spent time in Japan, you probably know about Anpanman. He is a superhero with anpan for a head, and one of Japan’s most recognized children’s characters. You can find him in pretty much anything from toys and books, to everyday snacks and clothes. It goes to show that anpan is not just a humble bun, but a cultural icon too.
Anpan Ingredients
What You’ll Need to make anpan:
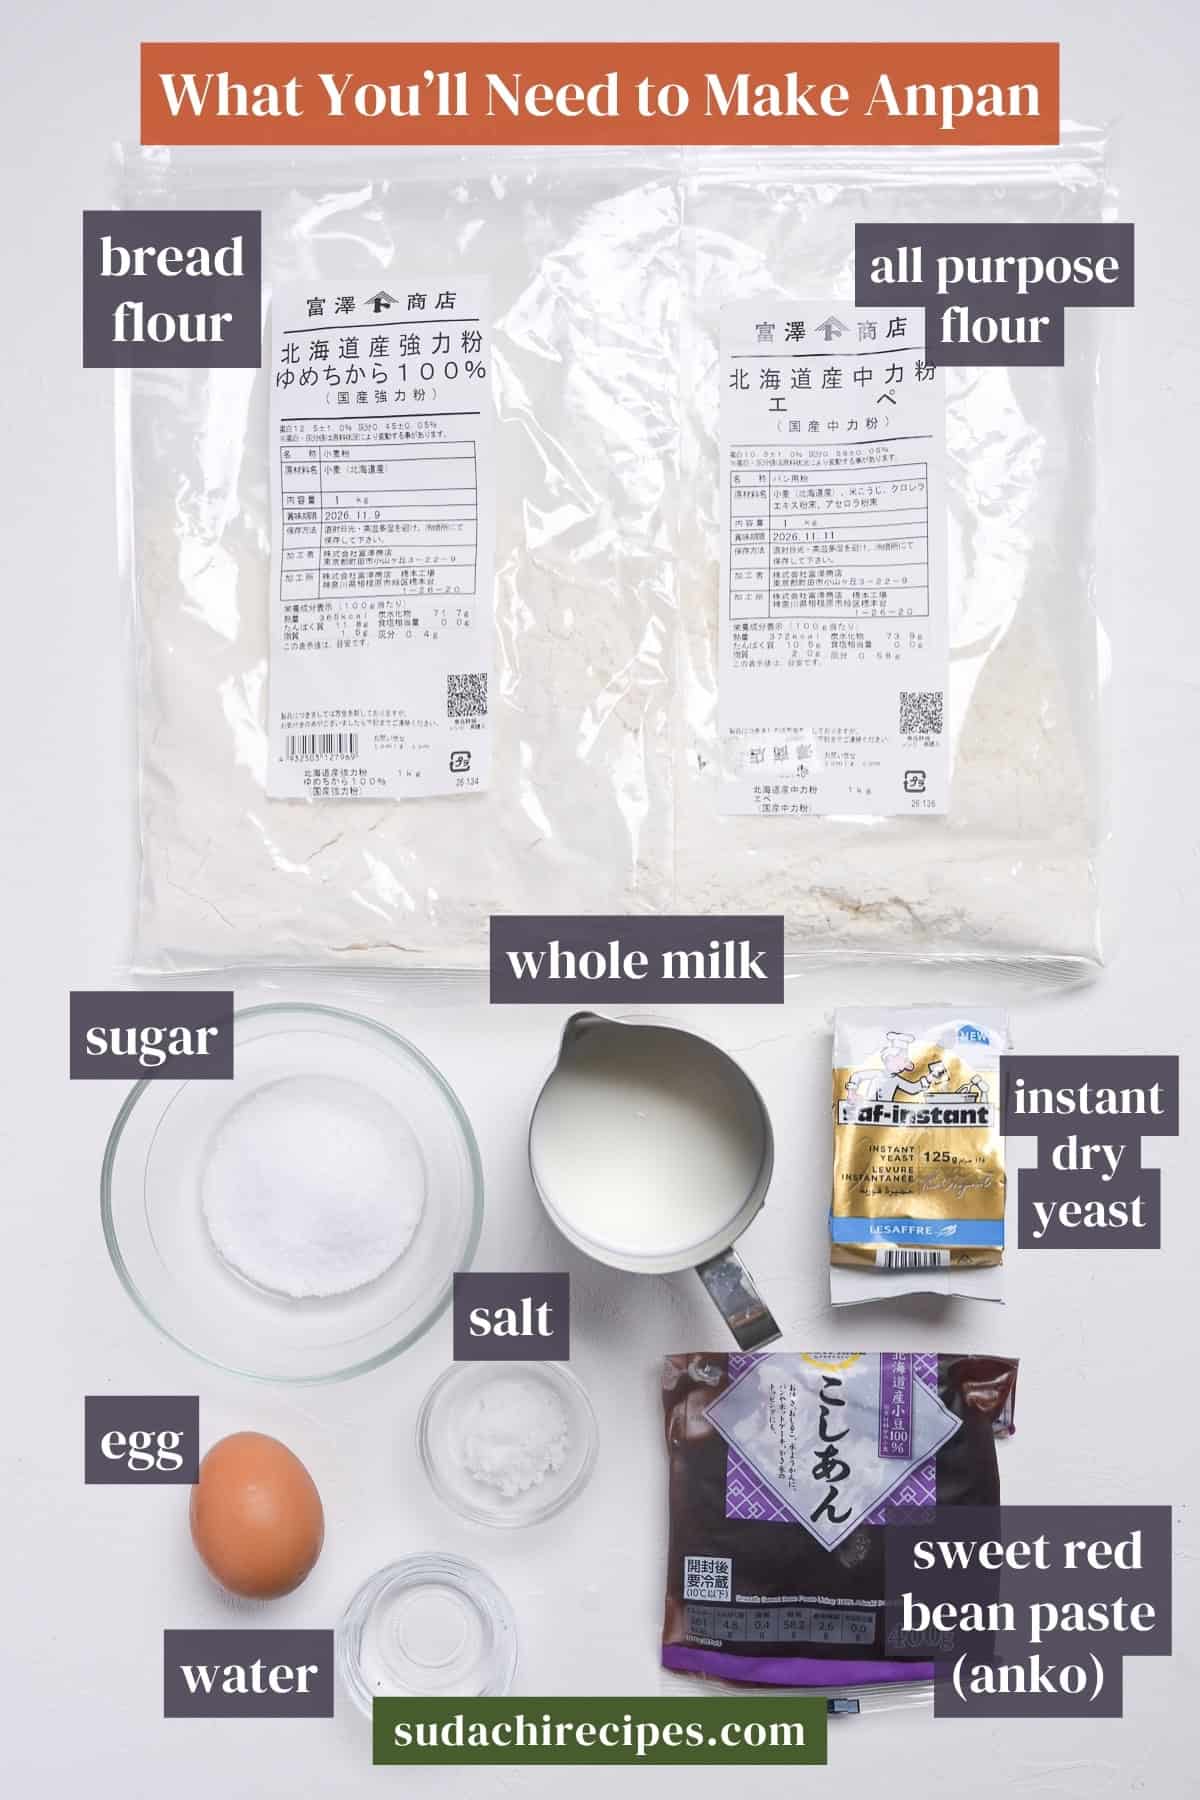
- Anko: I make my anpan with smooth red bean paste (koshian), but you can use chunky tsubuan if you prefer. If you’re making it from scratch, leave plenty of time for cooling (preferably overnight in the fridge).
- Flour: For a softer and more tender crumb, I use a mixture of bread flour and all purpose flour. If you use bread flour only, your buns will be chewier (not a bad thing, just different).
- Instant Dry Yeast: I used saf-instant gold yeast (affiliate link) which is designed especially enriched doughs like this. You can use regular yeast (SAF instant red, or your preferred brand), but keep in mind that the rise might be slower (approx 15-20 minutes more). If using fresh yeast or active dry yeast, check the substitutions section below.
- Unsalted butter: Salted butter can throw off the salt percentage in the recipe, so stick to unsalted.
Substitutions /Variations
- Other yeast types: Keep in mind that instant dry yeast and active dry yeast are not the same thing. Active dry yeast needs to be activated in warm water/milk before adding it to the dry ingredients. If using fresh yeast, use double the weight and rub it into the flour before adding the other dry ingredients.
- Plant-based: Use soy milk and coconut oil instead of milk and butter.
Have trouble finding Japanese ingredients? Check out my ultimate guide to Japanese ingredient substitutes!
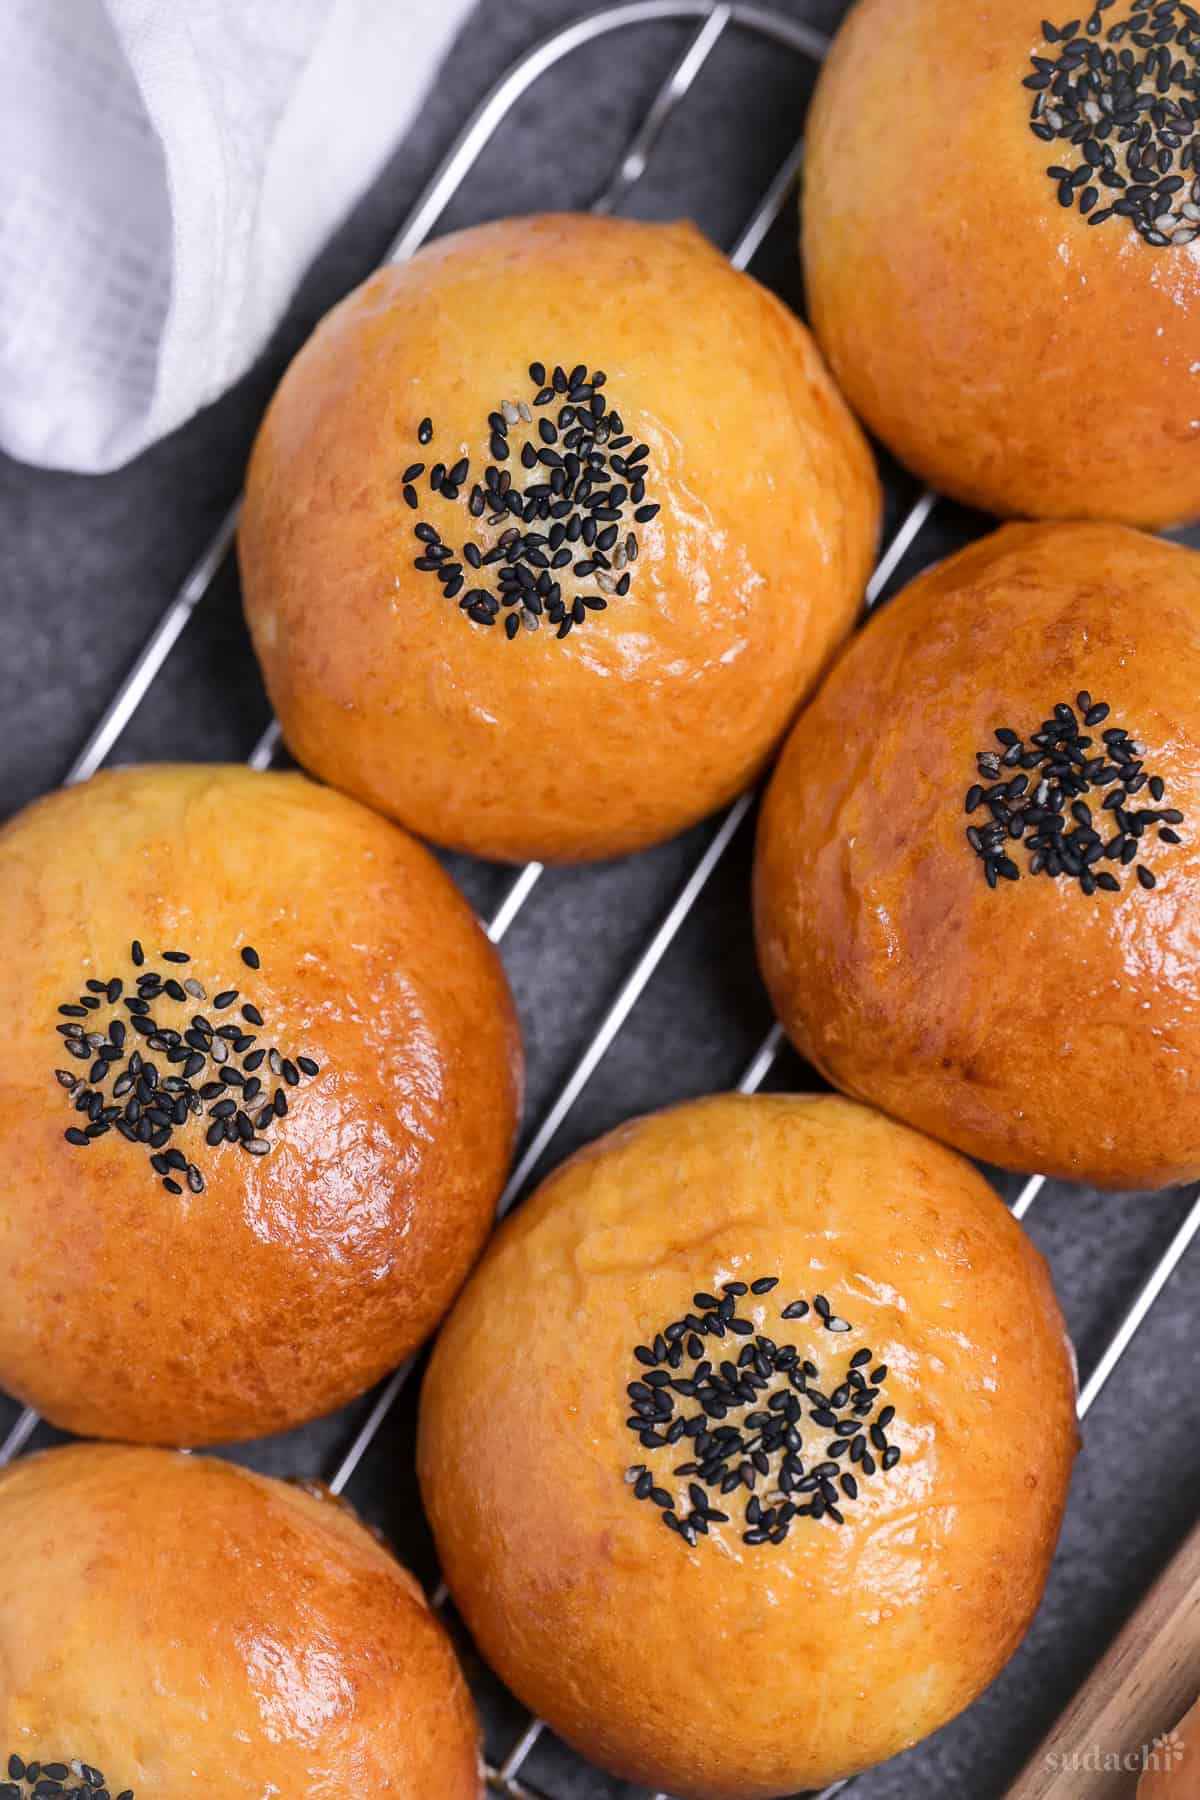
How to Make My Anpan Recipe
Before you start (Mise en place): Have your anko chilling in the fridge before you start the recipe. If you make your own anko, I recommend making it the night before.
To develop this recipe, I used the following tools:
- Bench scraper (my most useful tool for hand kneading!)
- Kneading board for easy clean up
- Digital kitchen scales (accuracy!)
- Large mixing bowl
- Large baking tray and parchment paper
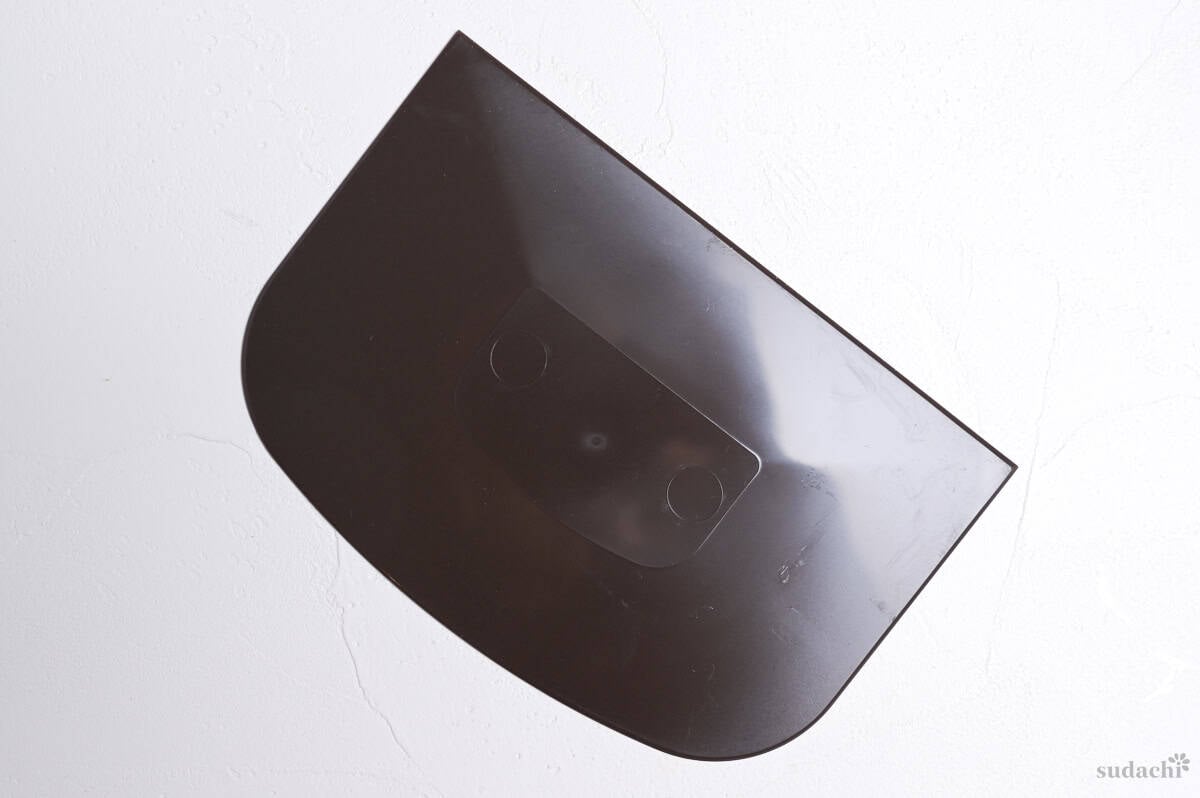
If you don’t want to knead by hand, you can use a stand mixer with hook attachment, or a bread maker and take it out when it’s finished its dough cycle after the first rise.
i. Measure the flours, sugar, instant dry yeast, and salt into a large mixing bowl. Measure the butter and rest on the counter for later.
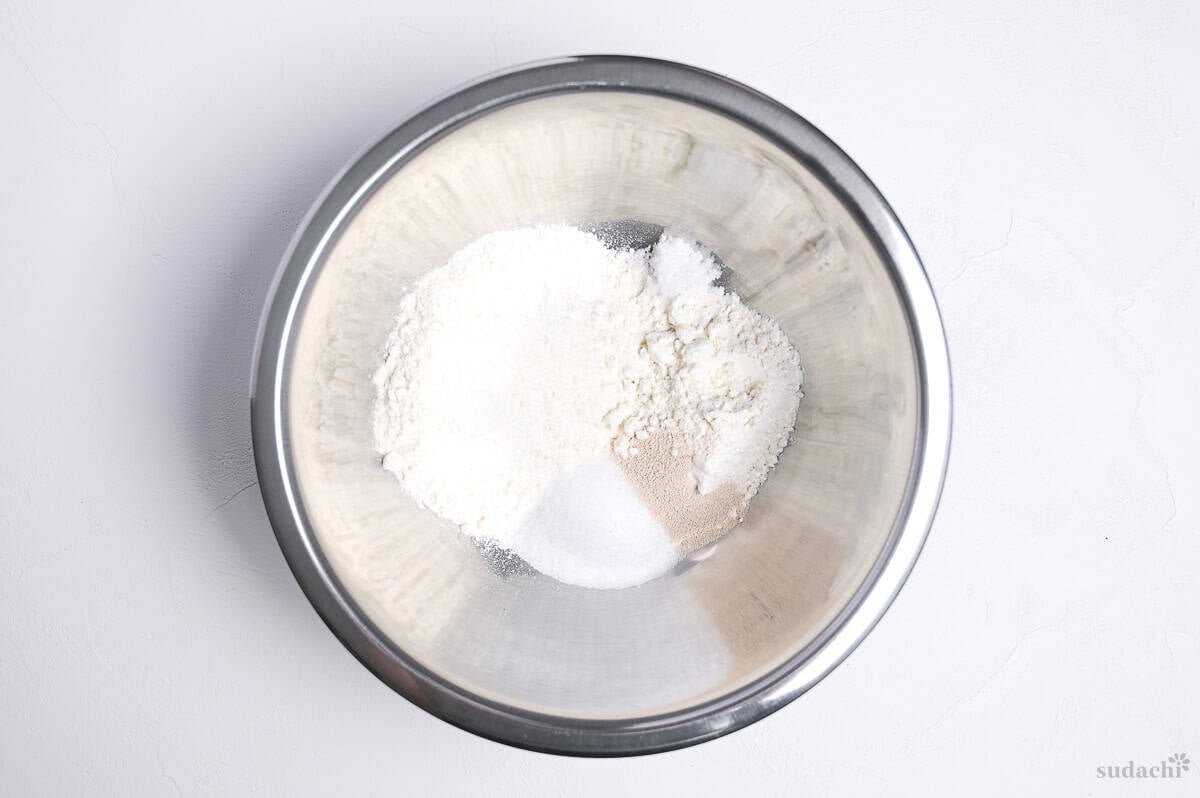
Note: If you use fresh yeast, rub it into the flour before you add the sugar and salt.
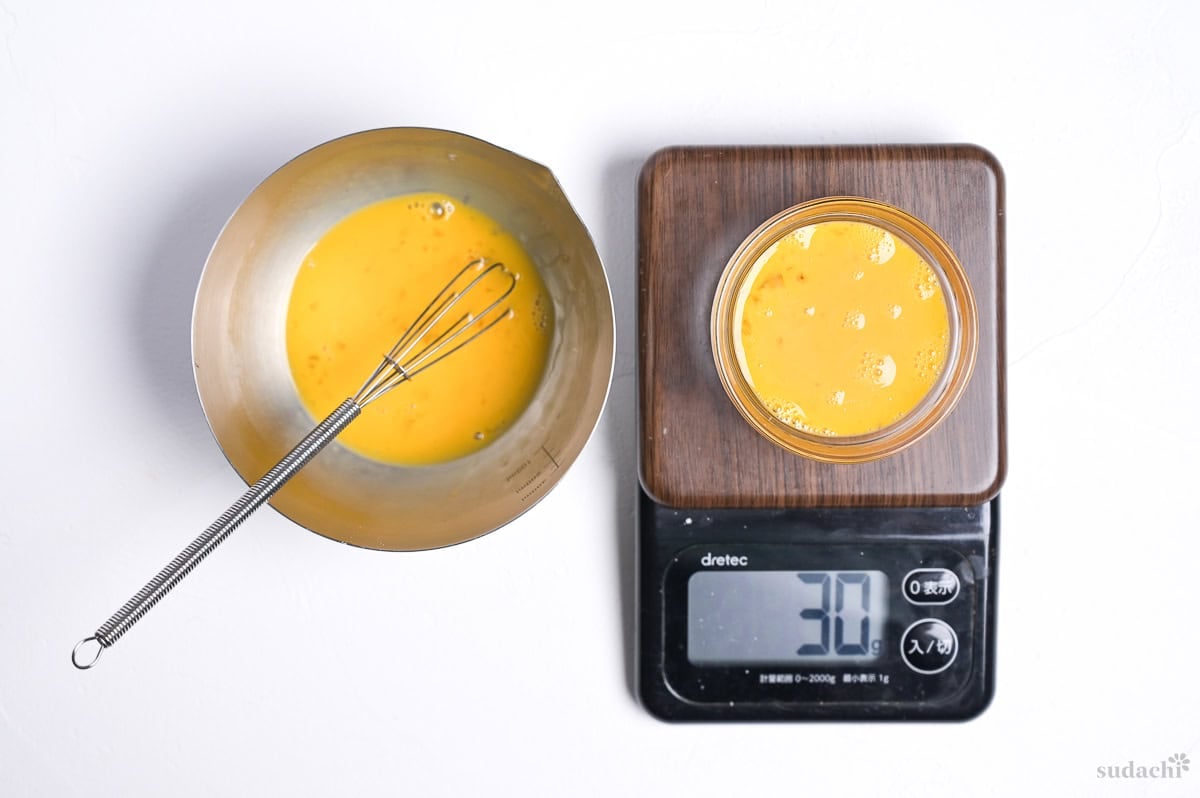
ii. Crack the egg into a bowl and whisk until the yolk and whites are combined. Measure out 30g of the egg mixture into a separate bowl, we will add this to the dough.
Cover the leftovers and store them in the fridge to use for the egg wash later.
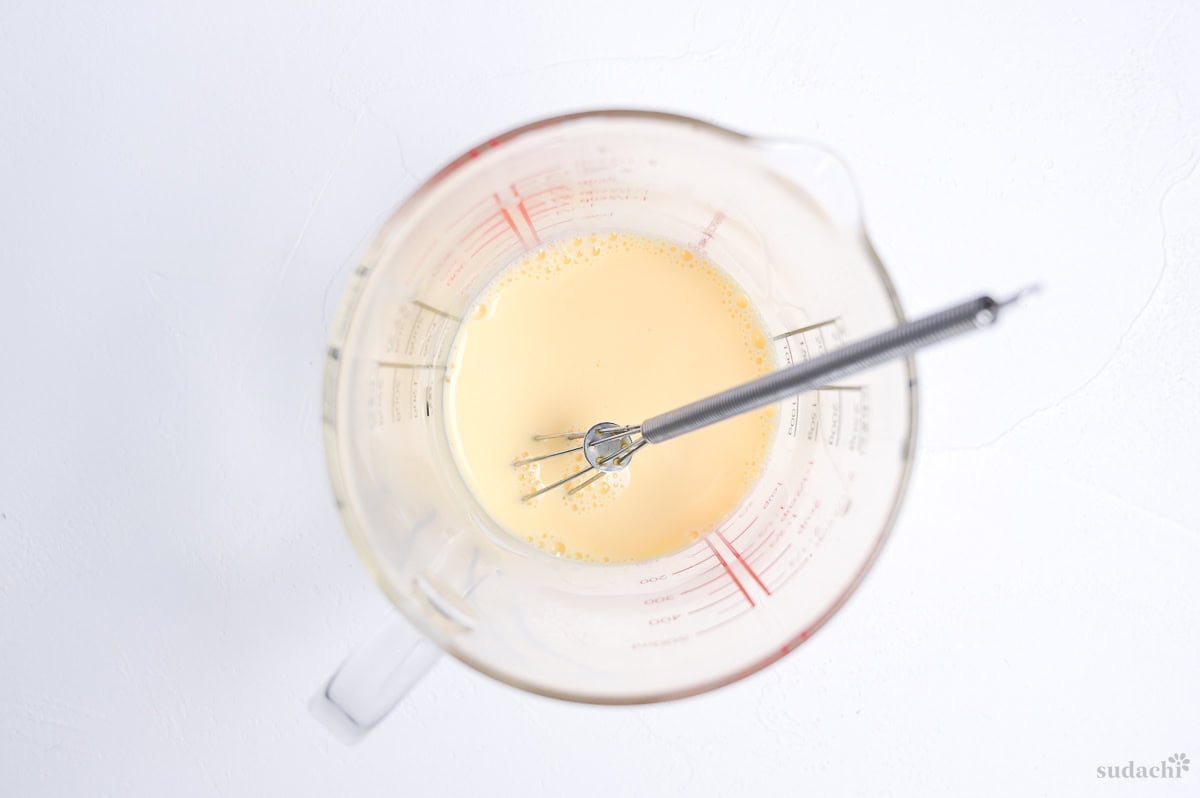
iii. Pour the milk and water into a heatproof jug and microwave for 10-20 seconds, or until it reaches around 40°C/104°F. Add the measured egg and whisk until combined.
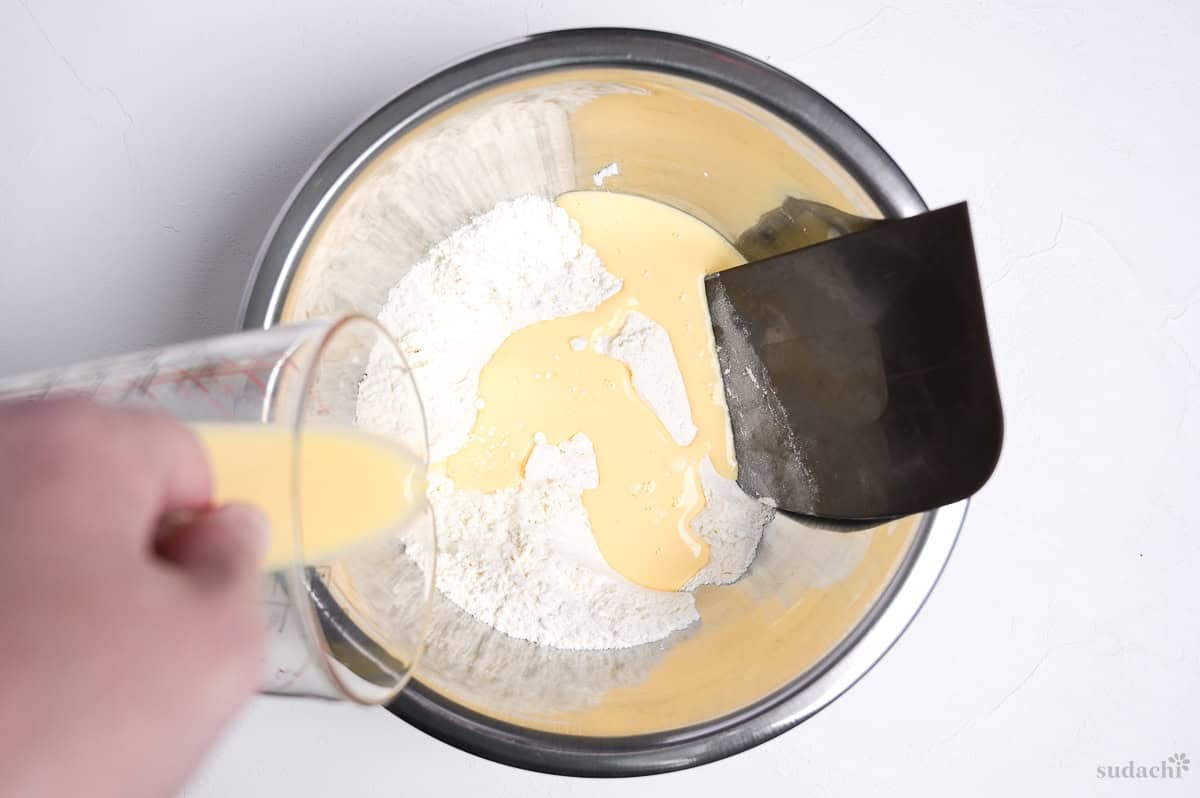
iv. Pour the entire contents of the jug into the bowl, and mix until it forms a rough dough.
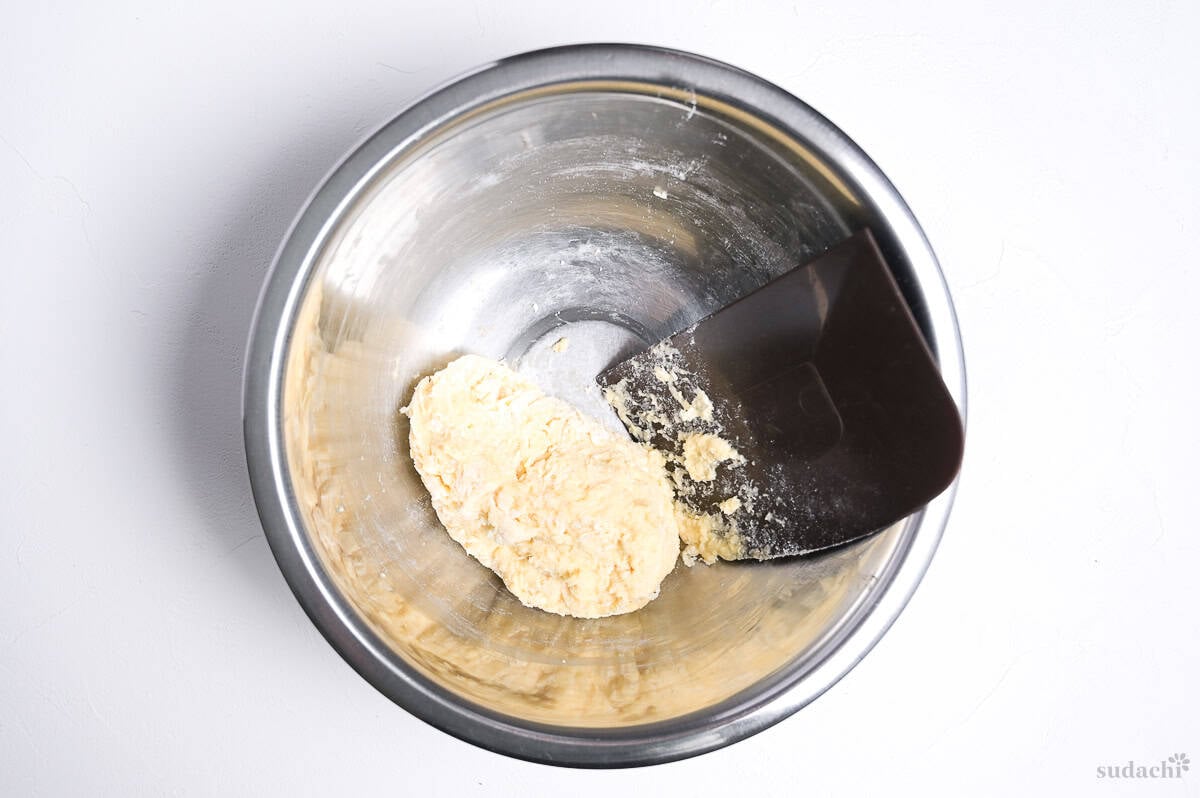
The milk/water mixture should be warm, not hot. Hot water can kill the yeast, or even cook the egg. Dip your finger in, it should feel like a hot bath. If it’s too hot for your finger, it’s too hot for the egg and yeast, so leave to cool for a few minutes.
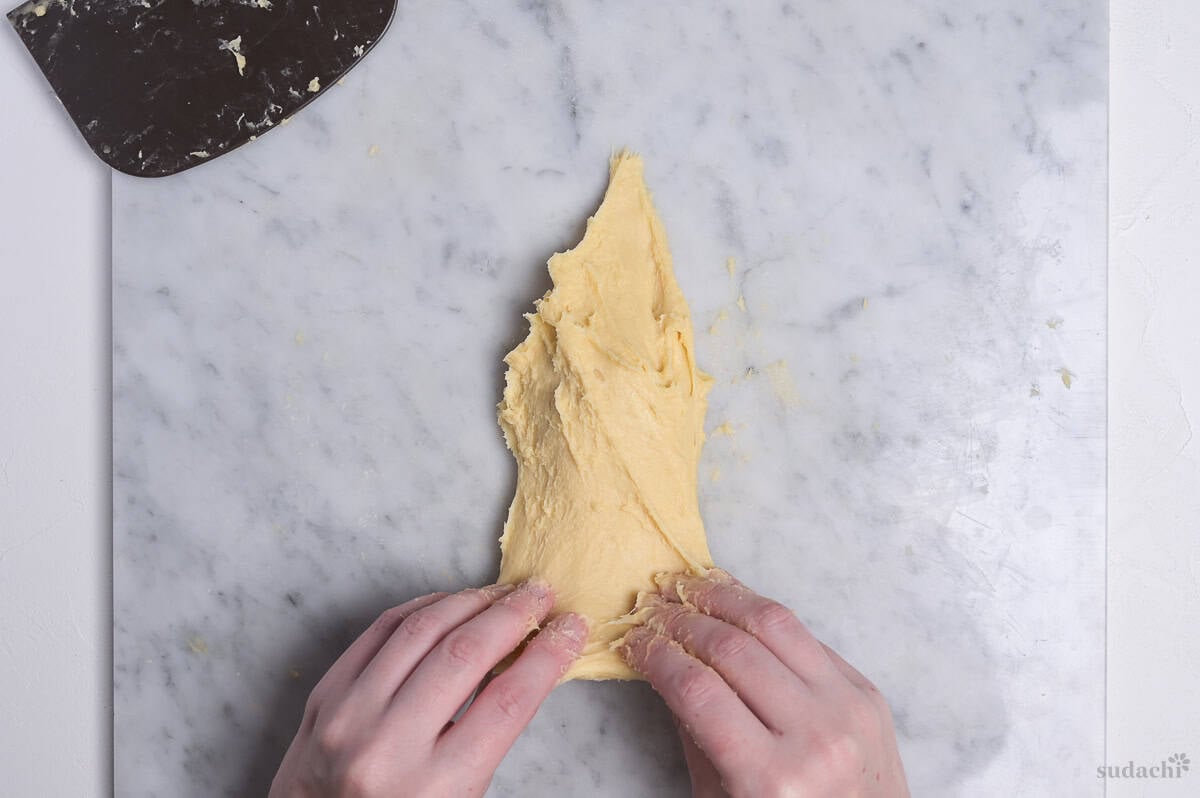
i. Transfer the dough to a clean dry surface. Do not dust it with flour. Spread the dough out, then use a bench scraper or similar tool to scrape it back into a ball. Repeat in the opposite direction, and continue until the dough becomes less sticky and more manageable.
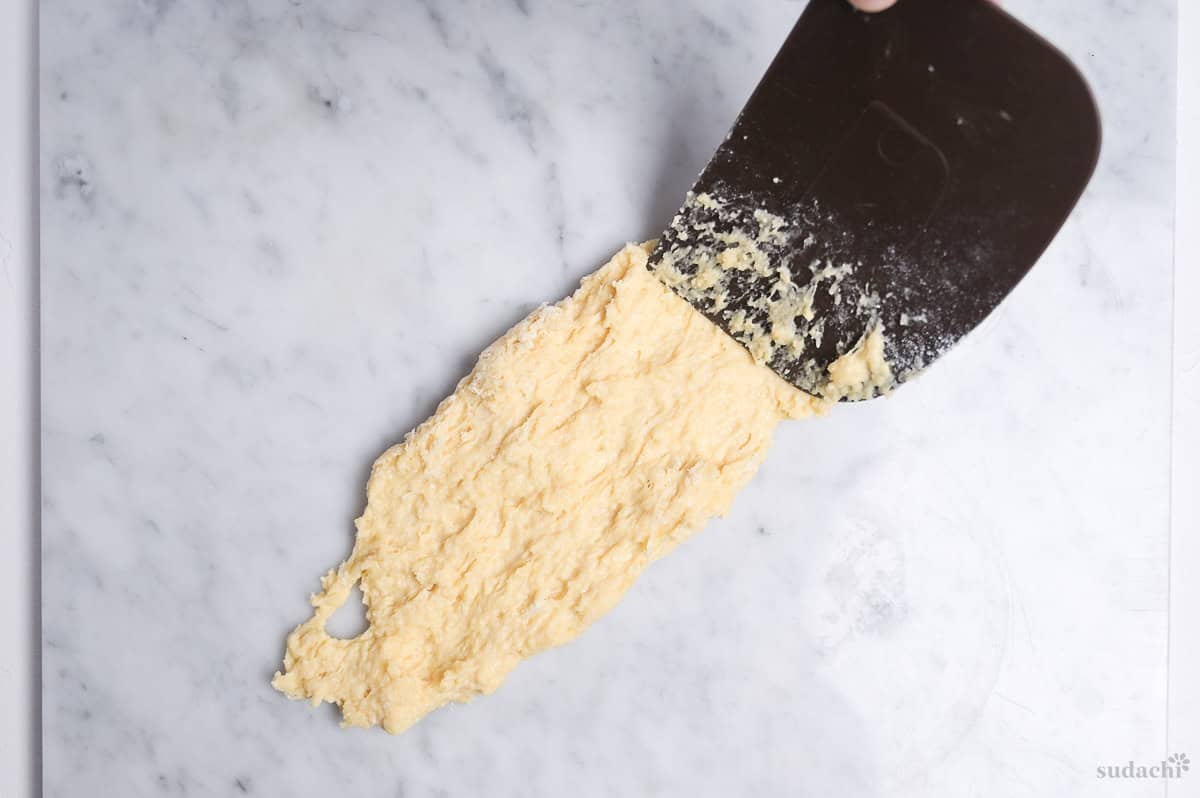
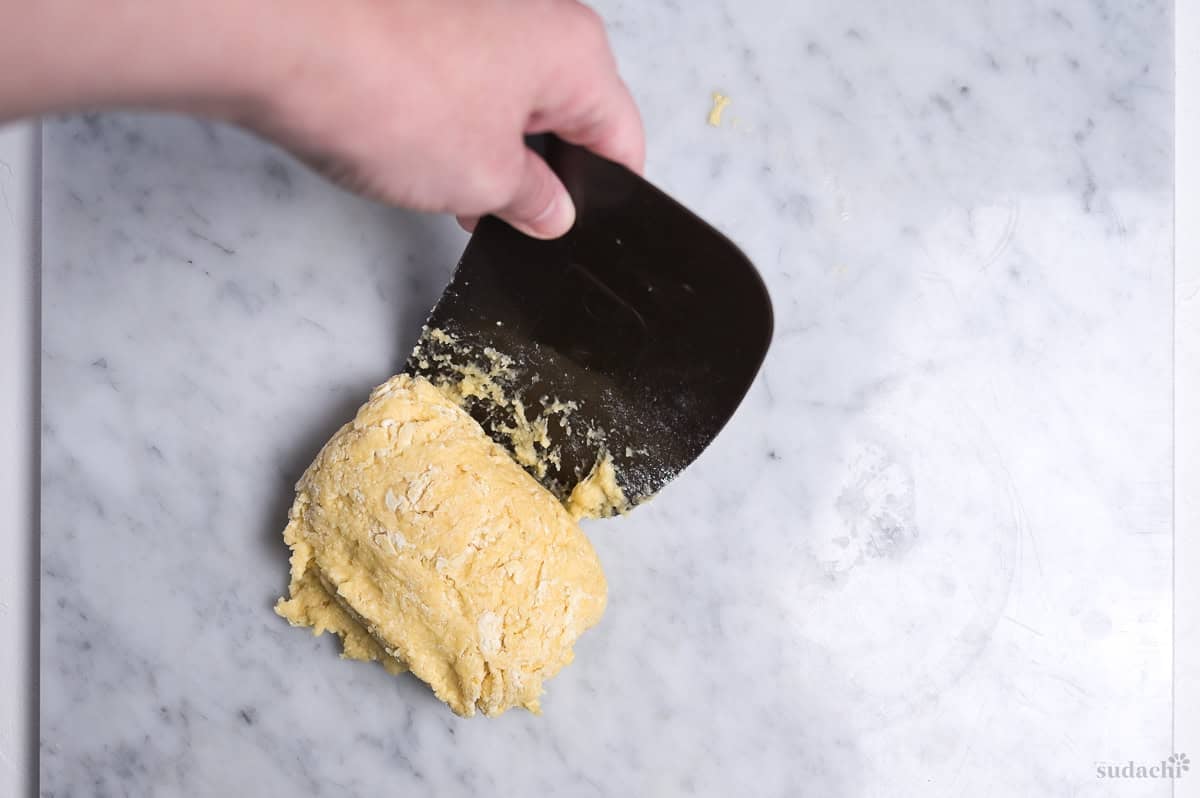
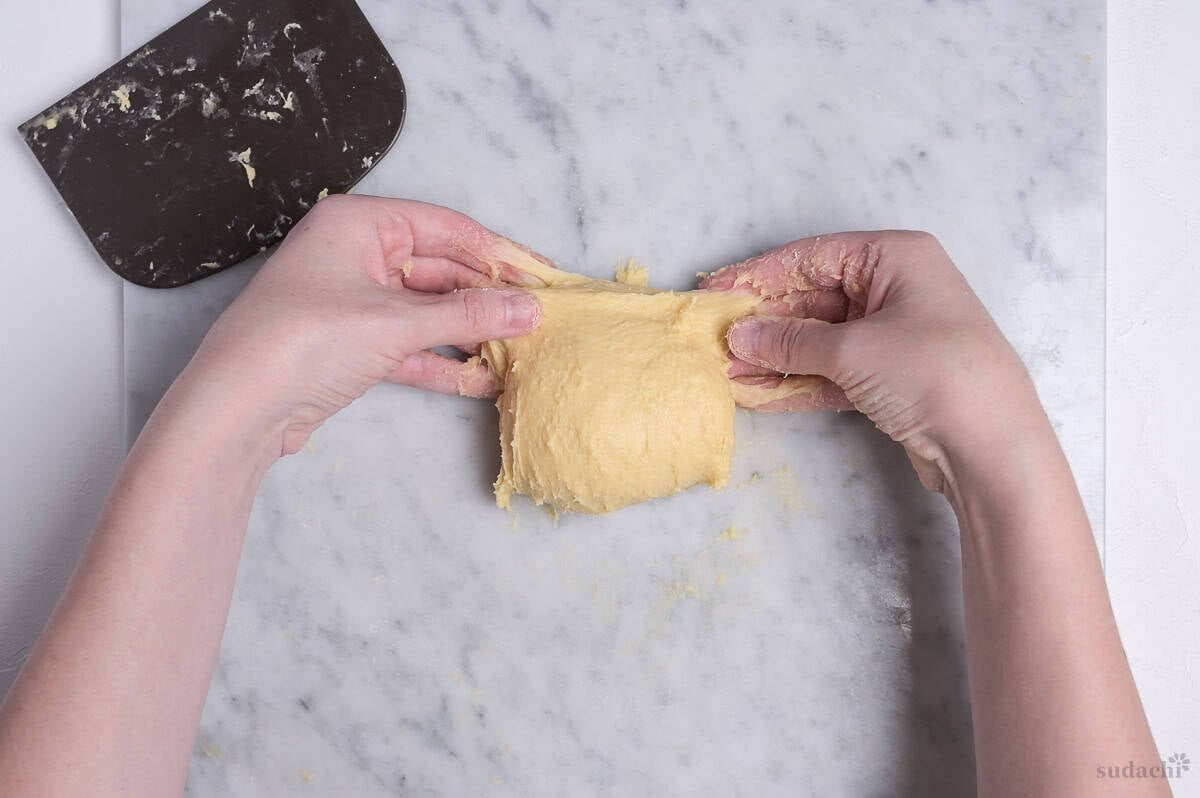
ii. When you can lift the dough without it sticking to your hands, switch to the slap and fold method. Hold two corners of the dough and lift it up, slap it away from you, then stretch it over itself. Turn the dough 90° and repeat this motion until the dough is smooth and stretchy.
iii. The dough is ready for the next step when it passes the windowpane test. Break off a piece of dough and stretch it as far you can without tearing it. It should be thin enough to see light through.
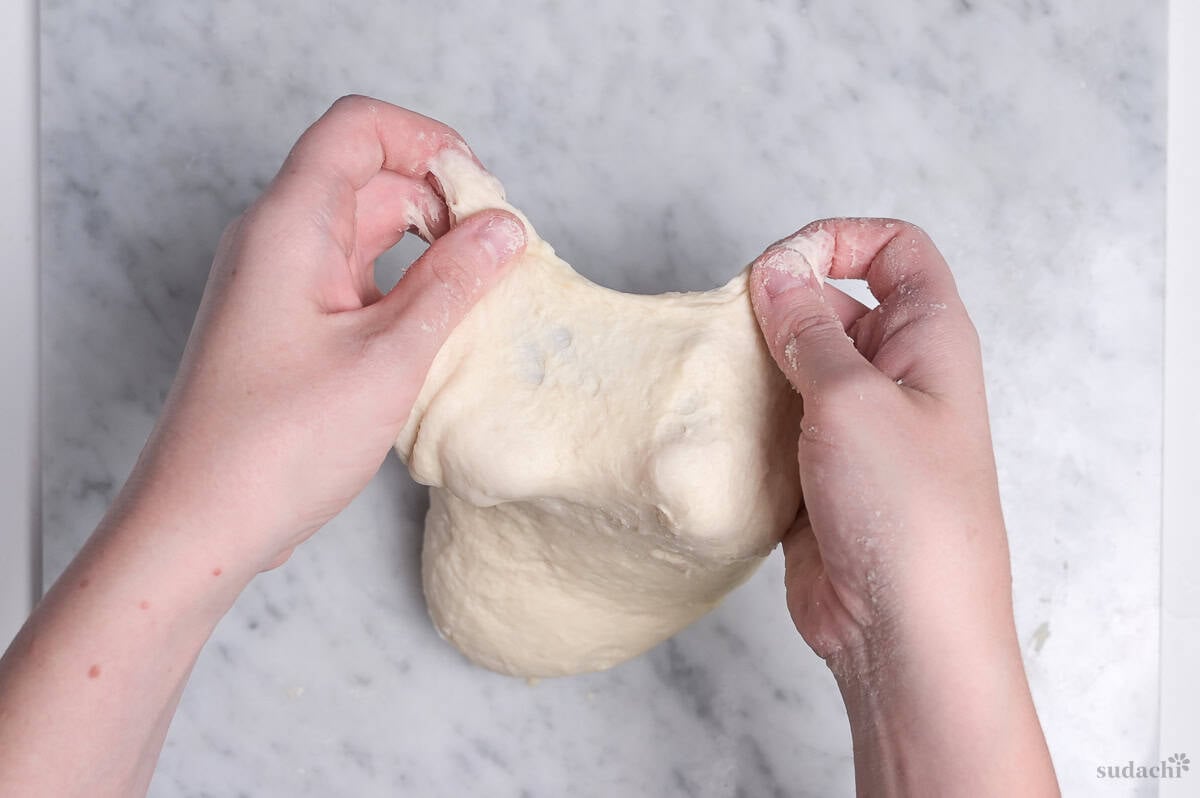
Kneading develops the gluten into strong and elastic networks, leading to a more stable dough with better rise.
Adding butter coats the flour and prevents gluten formation. If you add the butter before the dough is elastic, you essentially stop gluten development, so don’t add it before it passes the windowpane test!
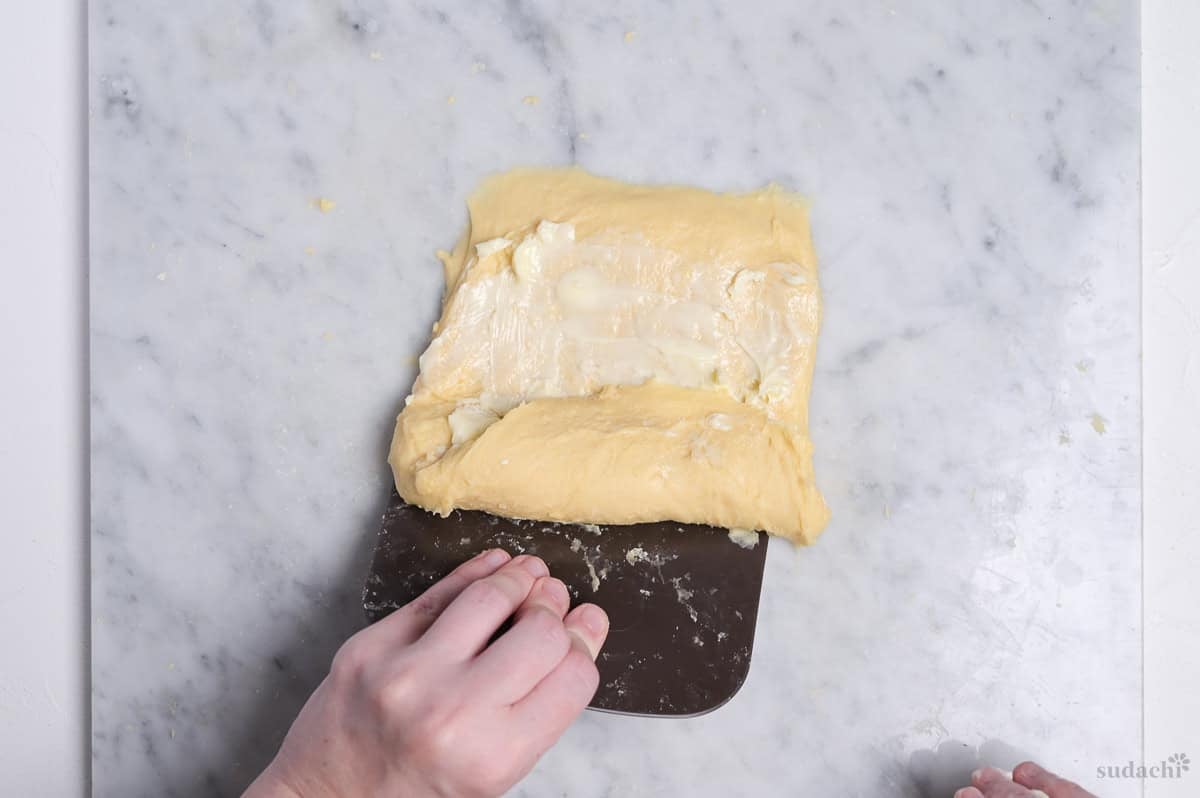
i. Stretch the dough out as far as you can without tearing, and rub the butter over the top in an even layer.
Note: If your dough tears when you spread it, it’s not ready for the butter. Knead until stretchy and doesn’t tear.
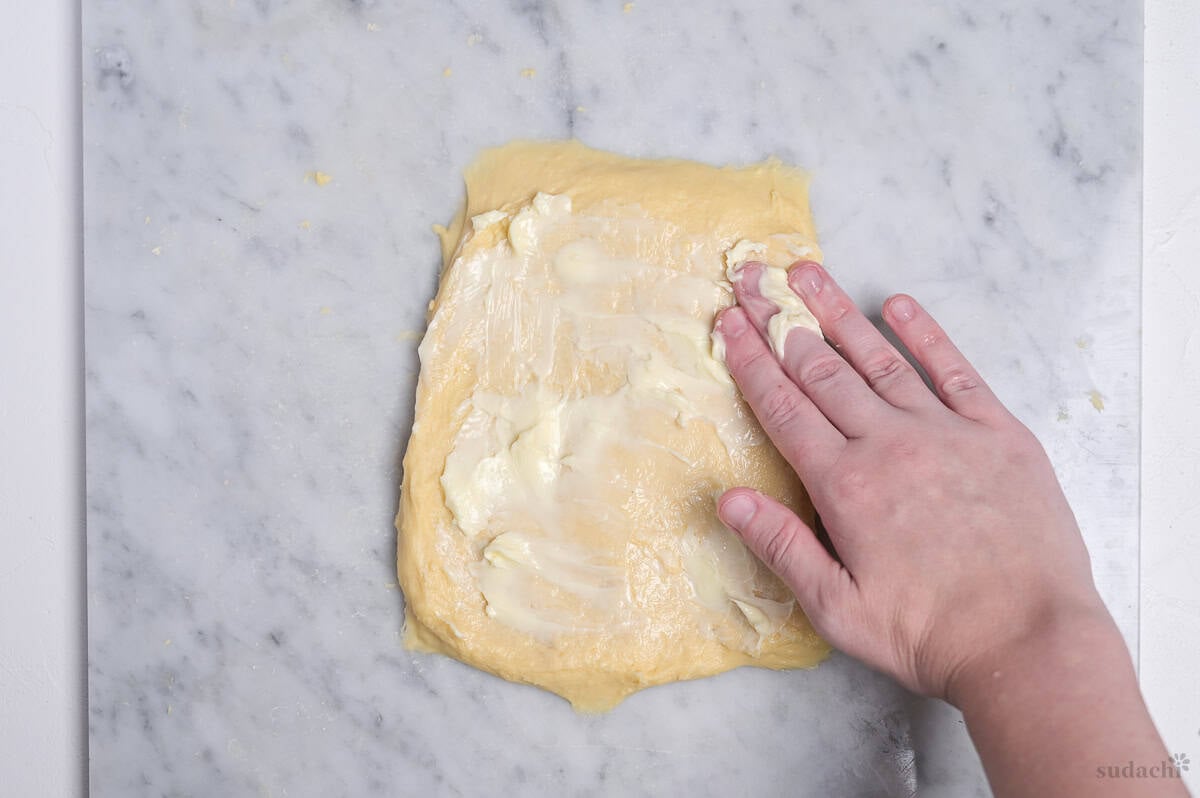
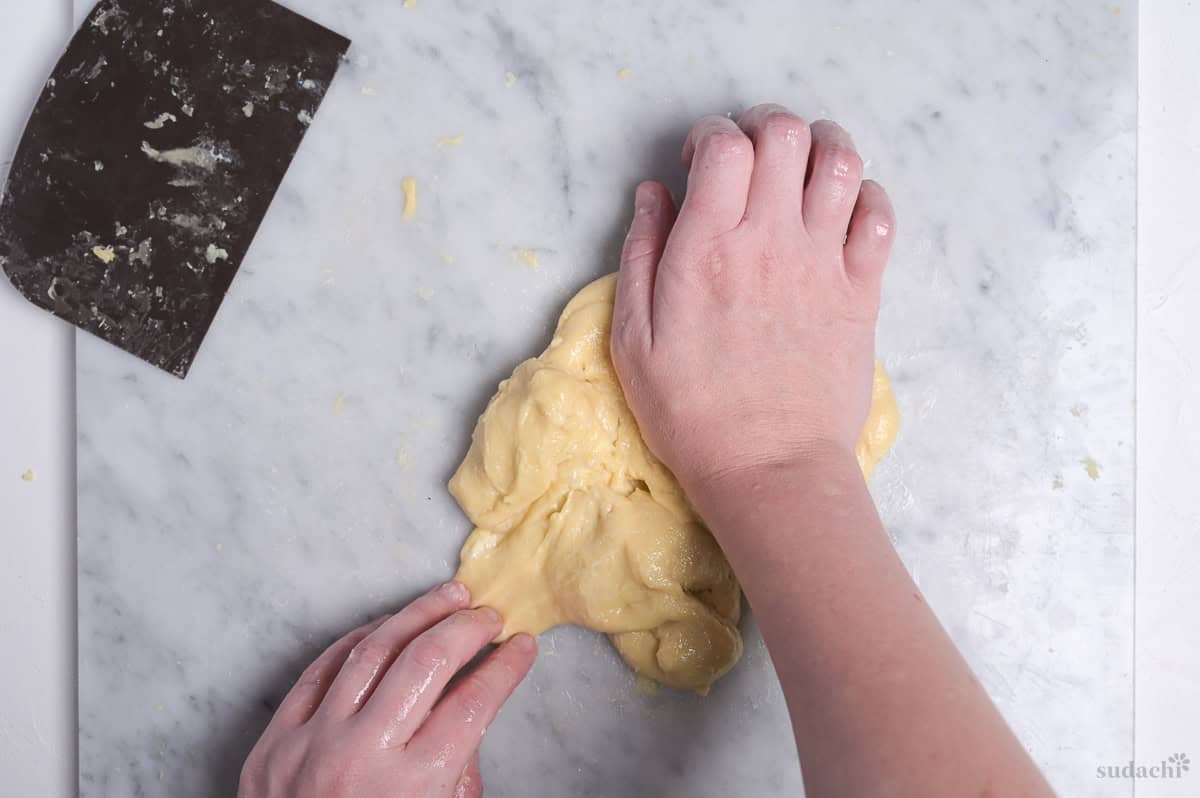
ii. Roll it up, then knead until the butter is worked into the dough. It’s well incorporated when it stops feeling greasy, and feels smooth.
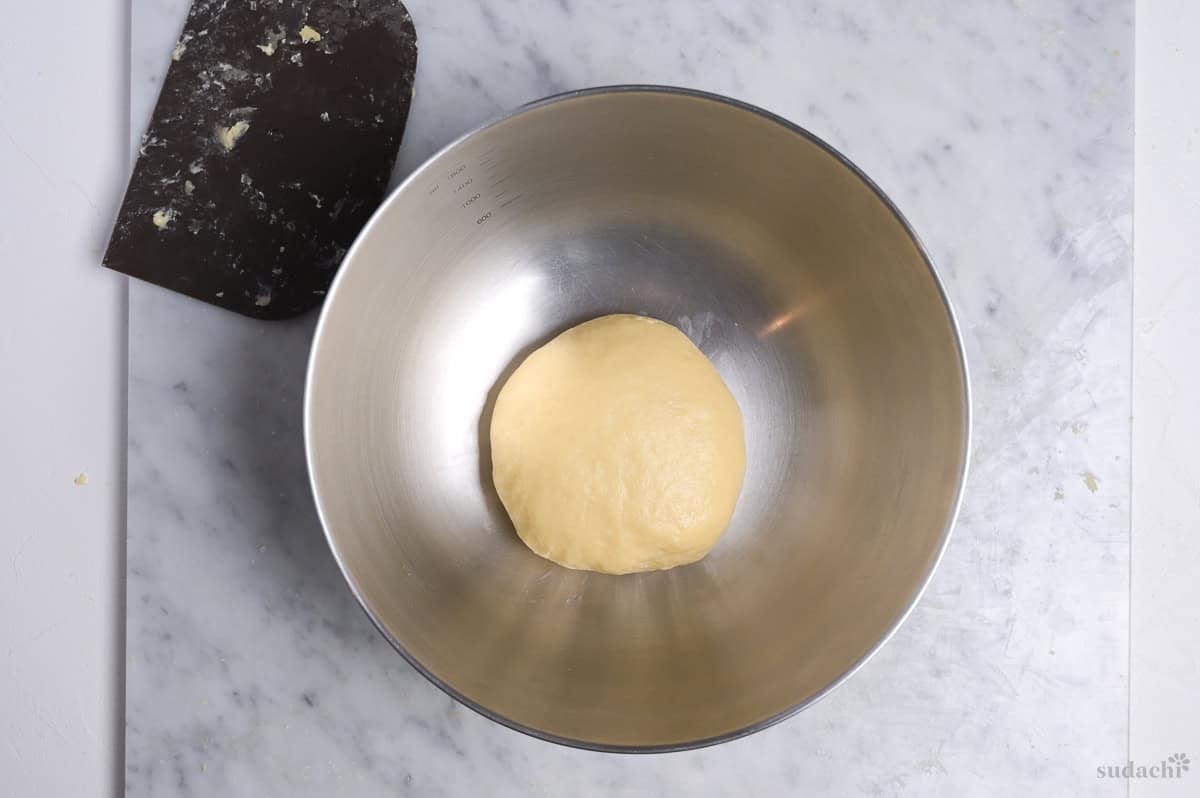
i. Once smooth, place the dough in a large clean bowl and cover with a damp tea towel. This will keep moisture in the bowl and stop the dough from drying out.
ii. Leave to rise in a warm place until doubled in size. Timing varies depending on the temperature of your environment, but it’s usually about 40-60 minutes at 30°C (86°F).
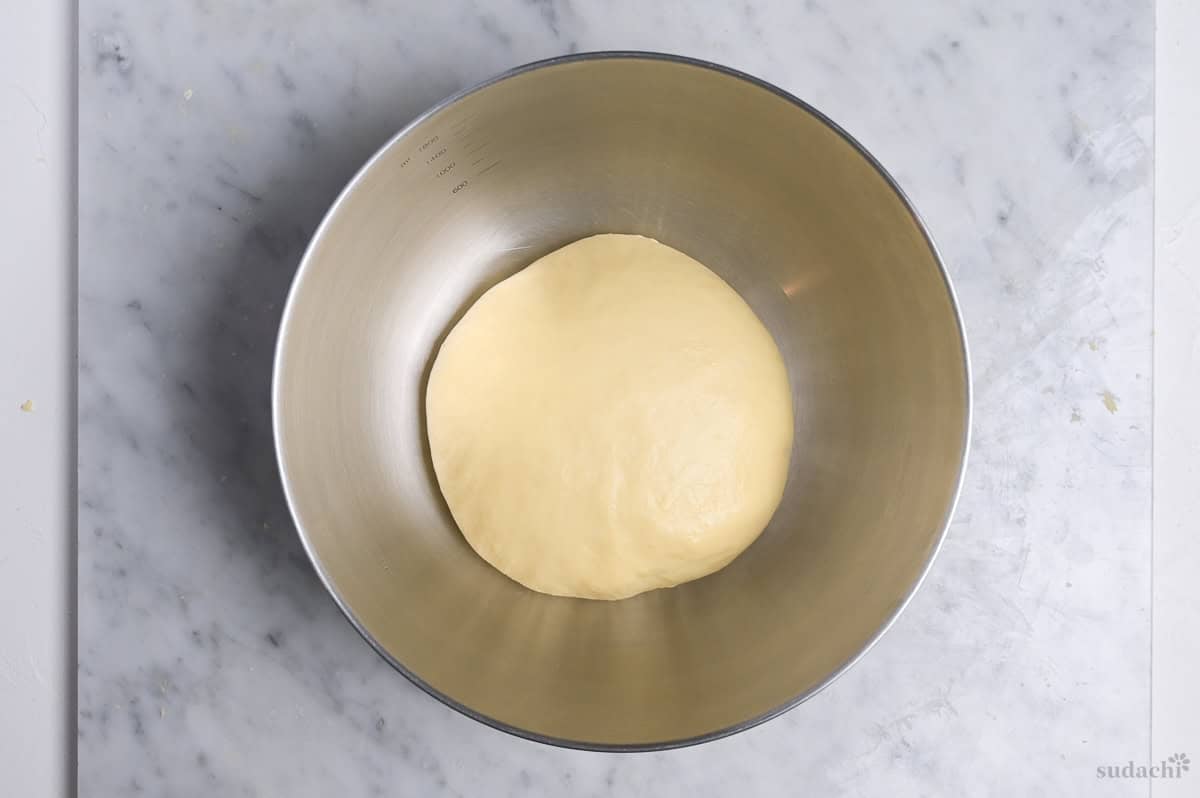
The rate of rise can vary greatly depending on environment temperature and also the freshness of your yeast. That’s why I say wait for it to double in size, rather than give an exact time.
Enriched doughs (containing eggs and butter) typically take longer to rise, so patience is key here. See troubleshooting section if your dough doesn’t rise at all.
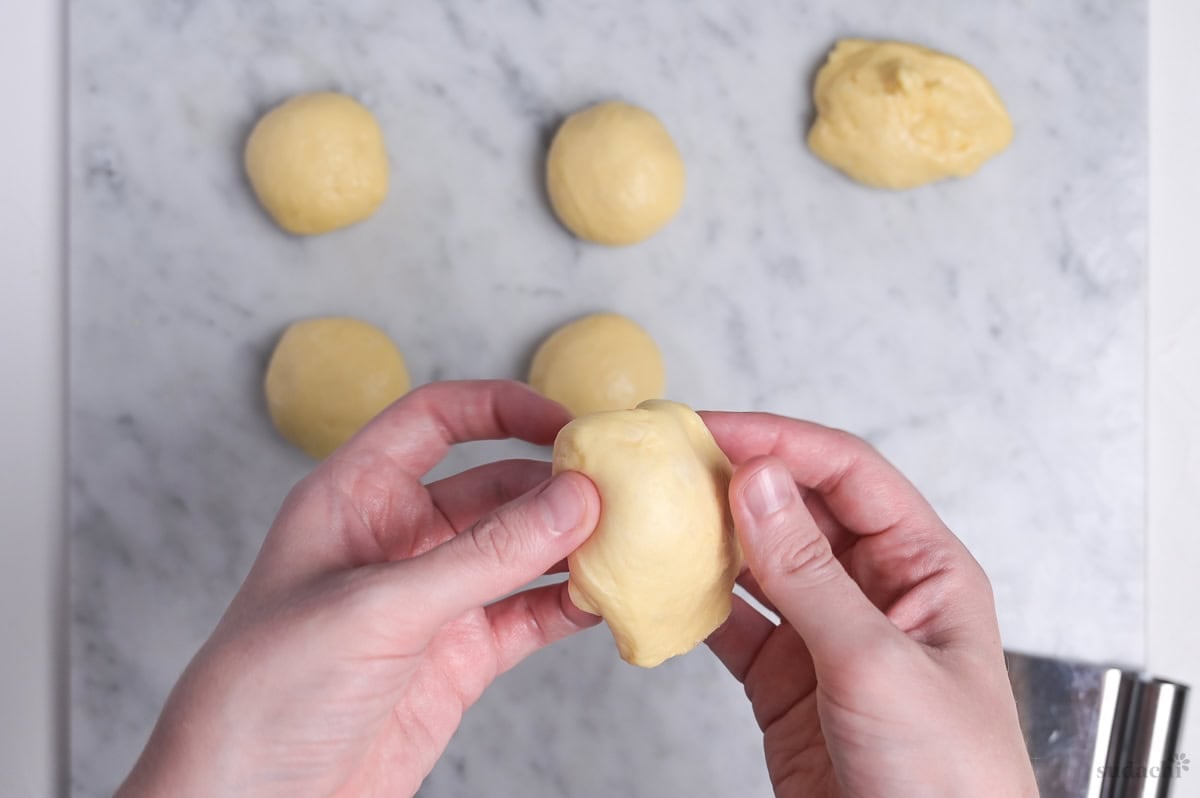
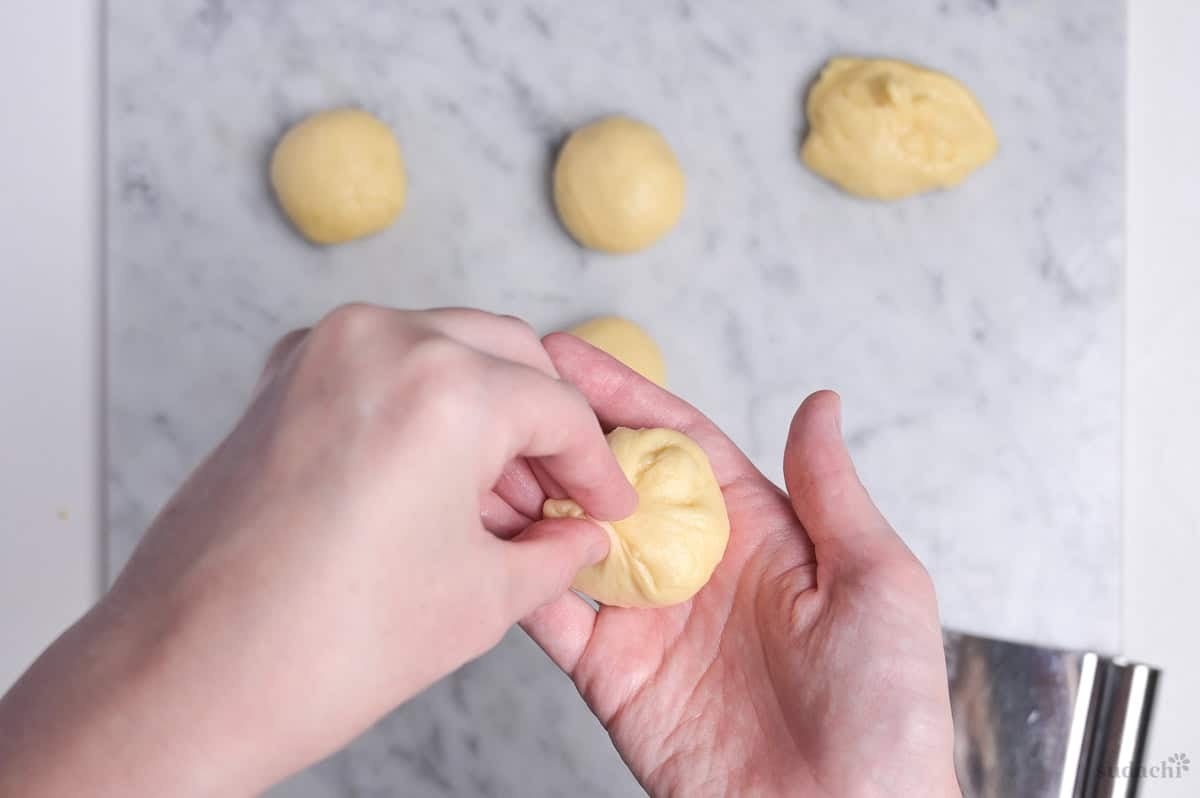
i. When the dough has doubled, degass by pressing it gently in the bowl. Pull it out and cut it into 6 equal pieces. For accuracy, use weighing scales. Each piece should be about 45g each. Roll into balls and pinch the bottoms to secure them.
Note: Do not tear the dough, it can damage the gluten network and create weak spots.
ii. Cover with plastic wrap and rest for 15 minutes.
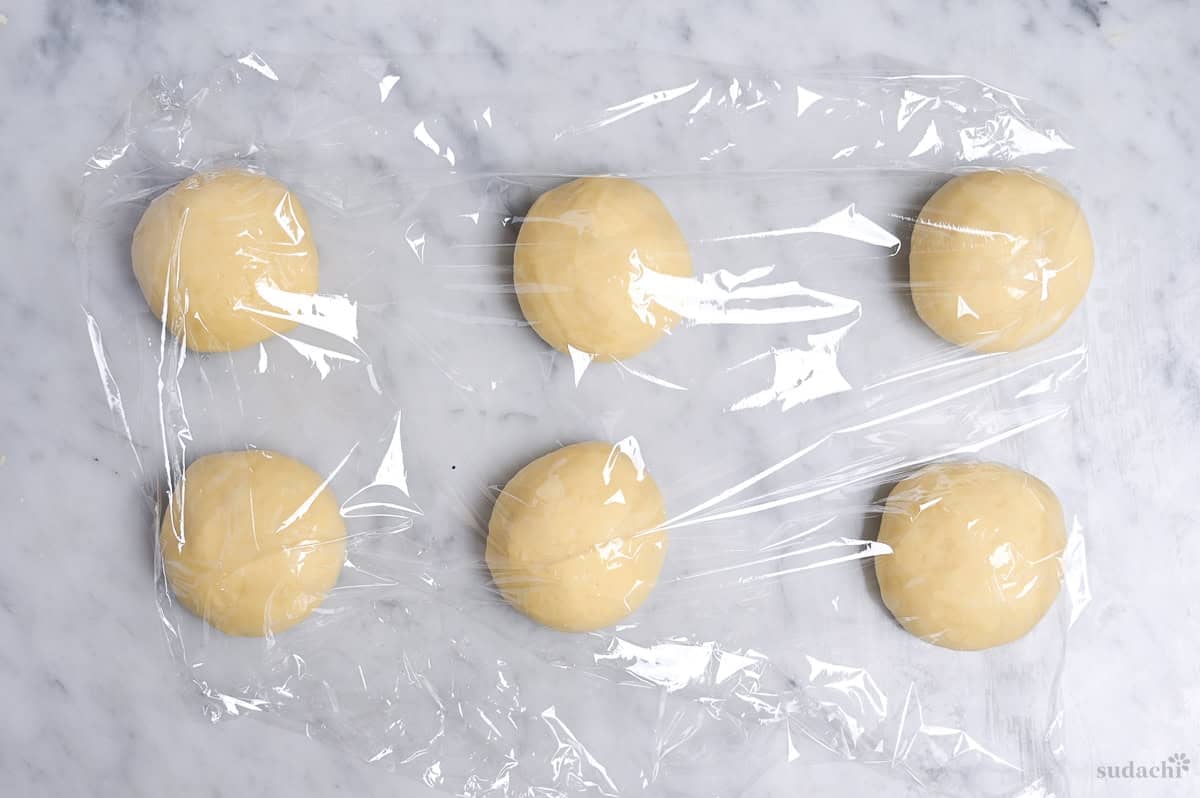
iii. While you wait, roll your anko into 40g balls and keep them in the fridge until it’s time to use them.

I opt for smooth koshian for my anpan, but if you prefer more chunky texture, use tsubuan instead!
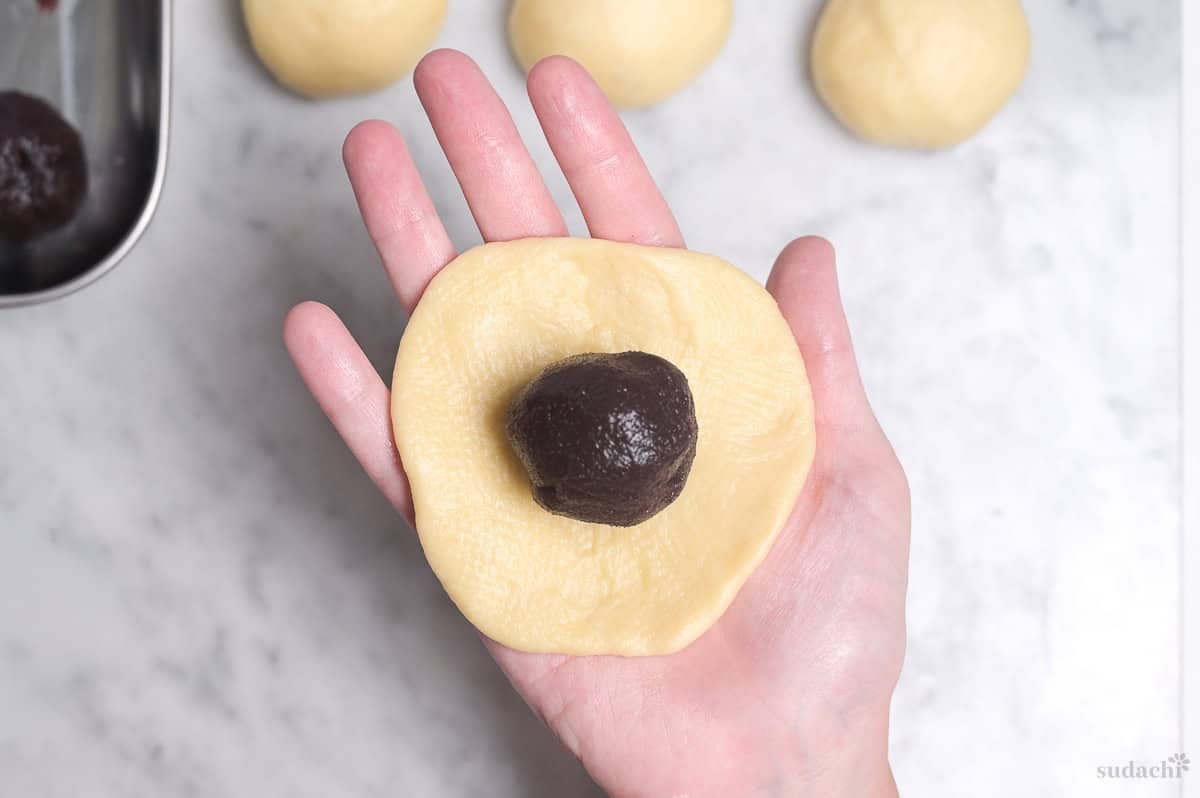
i. Sprinkle your work surface with a light dusting of flour. Place the ball with the pinched side facing up and roll into a circle about 15cm diameter. Place the dough in your palm and position a ball of anko in the center.
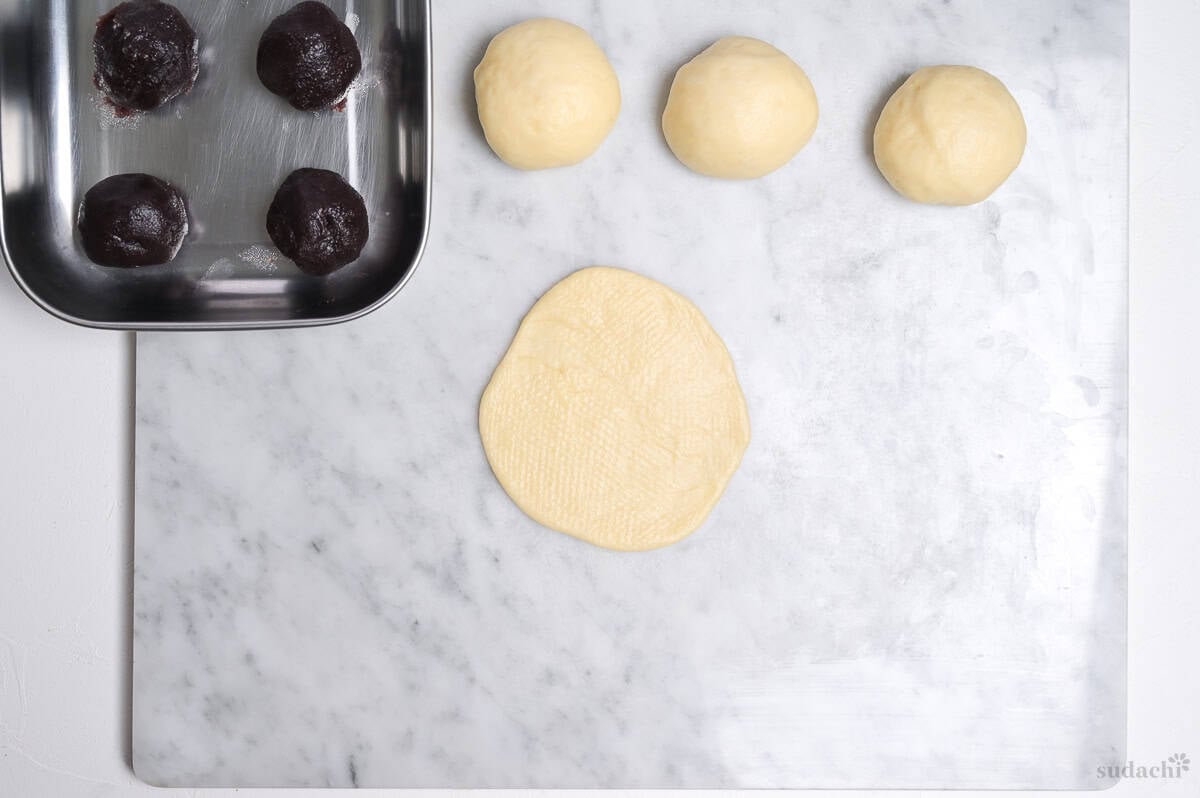
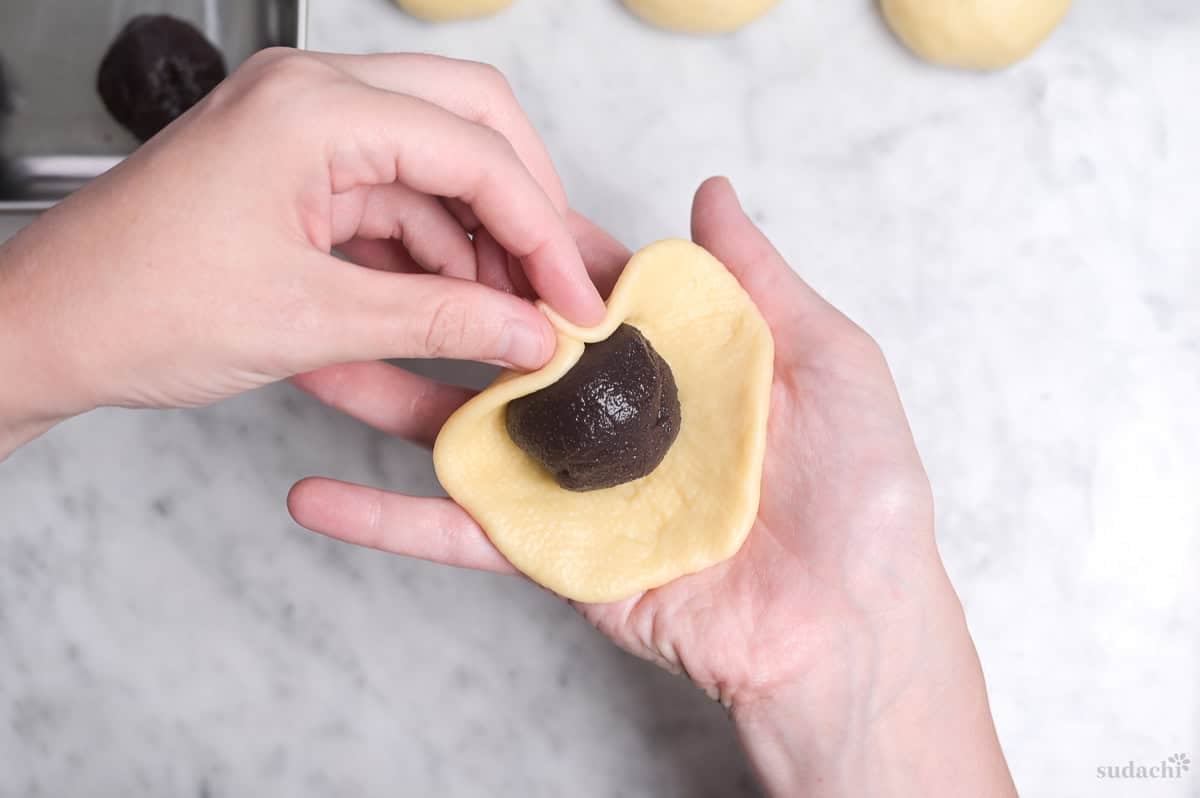
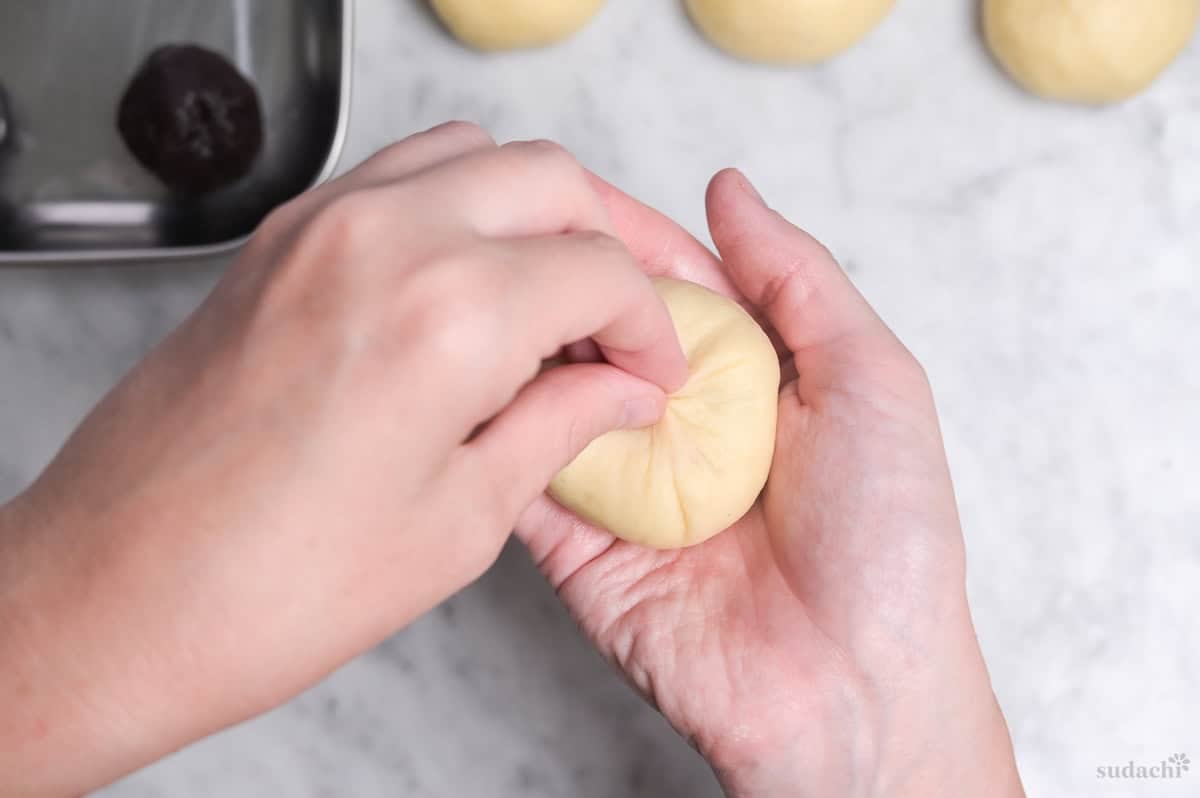
ii. Pull an edge of the dough over the anko, then gather in pleats until the ball of anko is fully wrapped.
iii. Pinch underneath to seal, then roll once more to make a perfectly round ball.
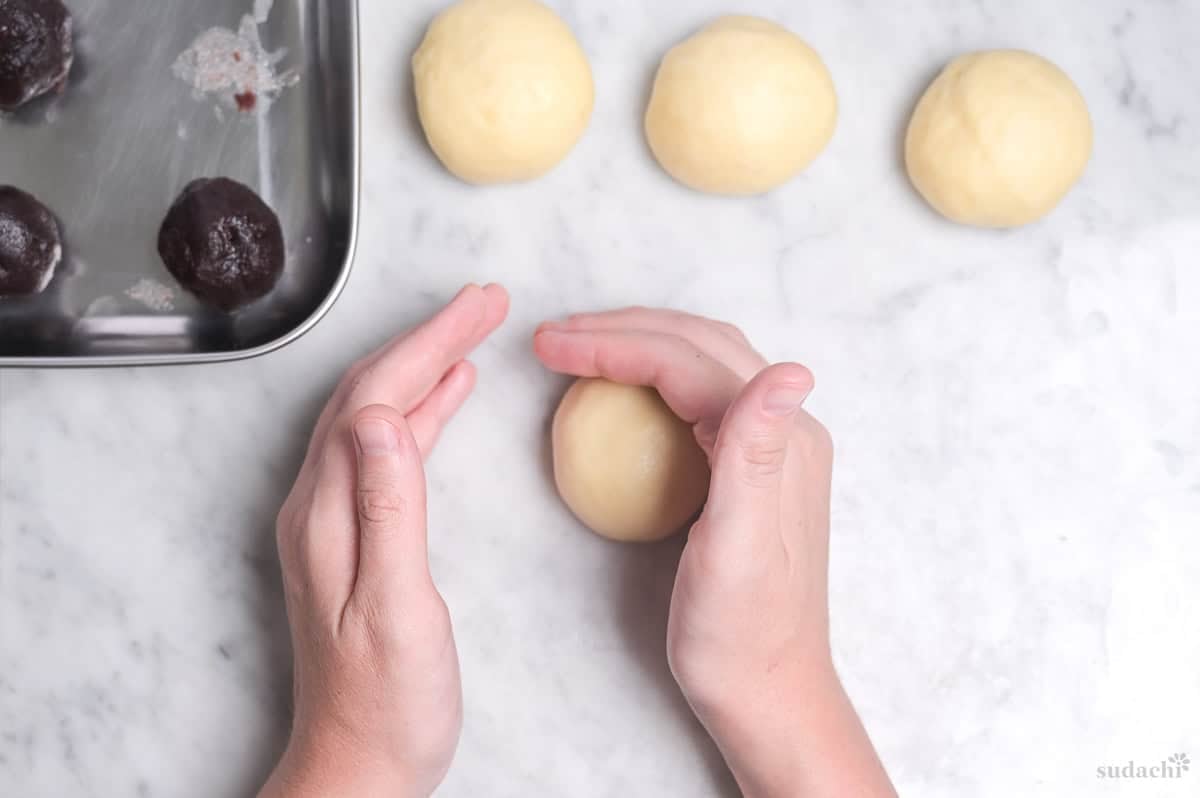
Once shaped, place them on parchment paper spaced apart in a large sealable container. You can keep them in the fridge for up to 16 hours. Rest on the counter for 30-60 minutes to come to room temperature, then continue with the second rise in a warm environment before baking.
i. Place the anpan spaced apart on a baking sheet lined with baking parchment. Cover with plastic wrap and rest in a warm place until risen by 1.5x the original size or pass the finger poke test.
Preheat your oven to 180°C fan/200°F conventional (350°F fan assisted/ 400°F for conventional) before the bread finished rising.
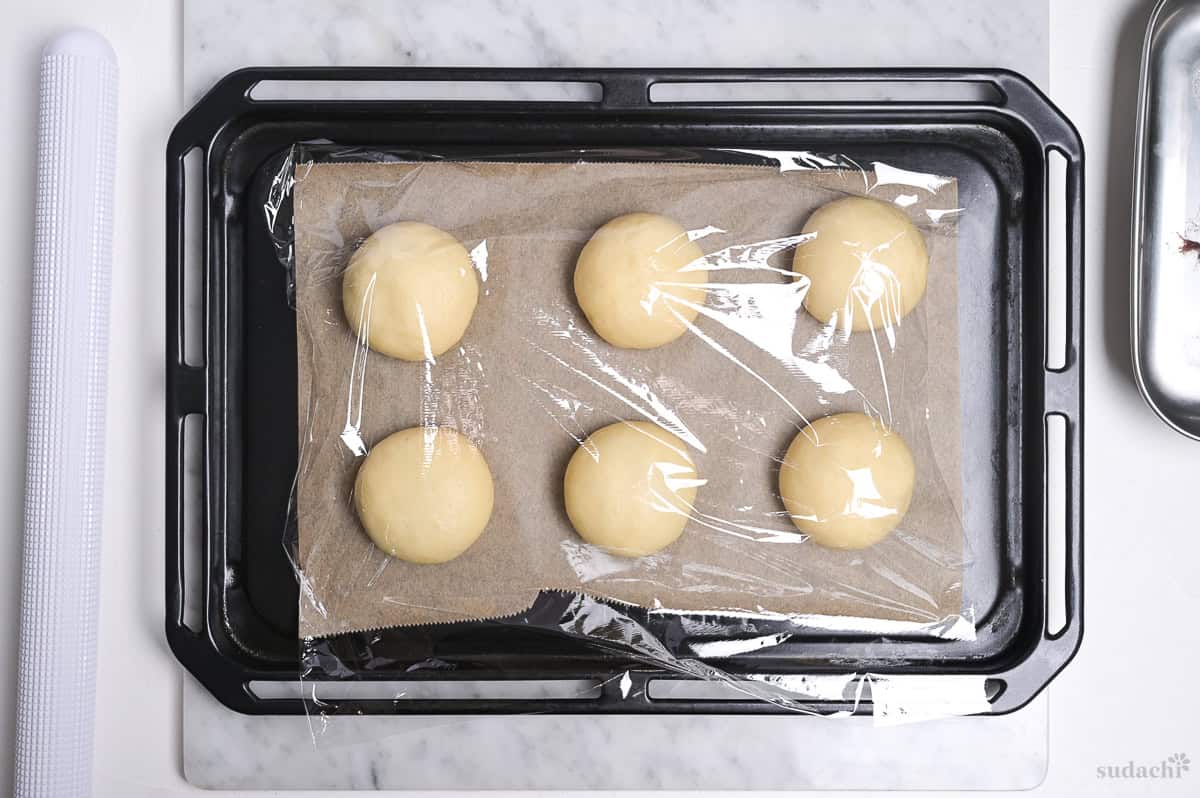
You can check if your dough is properly proofed using the finger poke test. Dip a finger in flour, then press the dough in a not so obvious area. The dough should slowly fill back. If it springs back quickly, it needs more time. If the dent stays put, it’s overproofed.
Bread doesn’t stop rising once it reaches the perfect point, it continues until it becomes overproofed. Overproofed bread can taste sour and be prone to collapse, so if your oven takes a long time to heat up, preheat early.
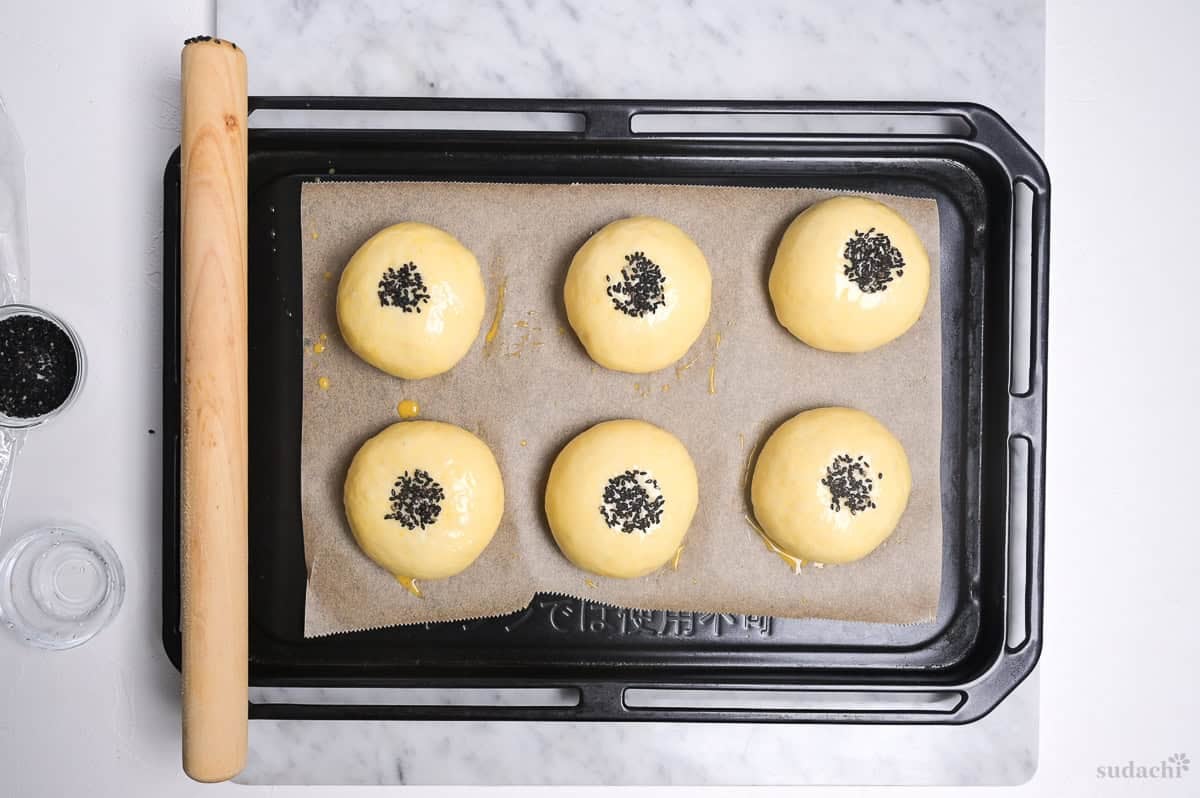
i. Take your reserved egg from the fridge and add a few drops of water (less than ¼ tsp). Whisk and then use a pastry brush to cover the tops and sides of each anpan.
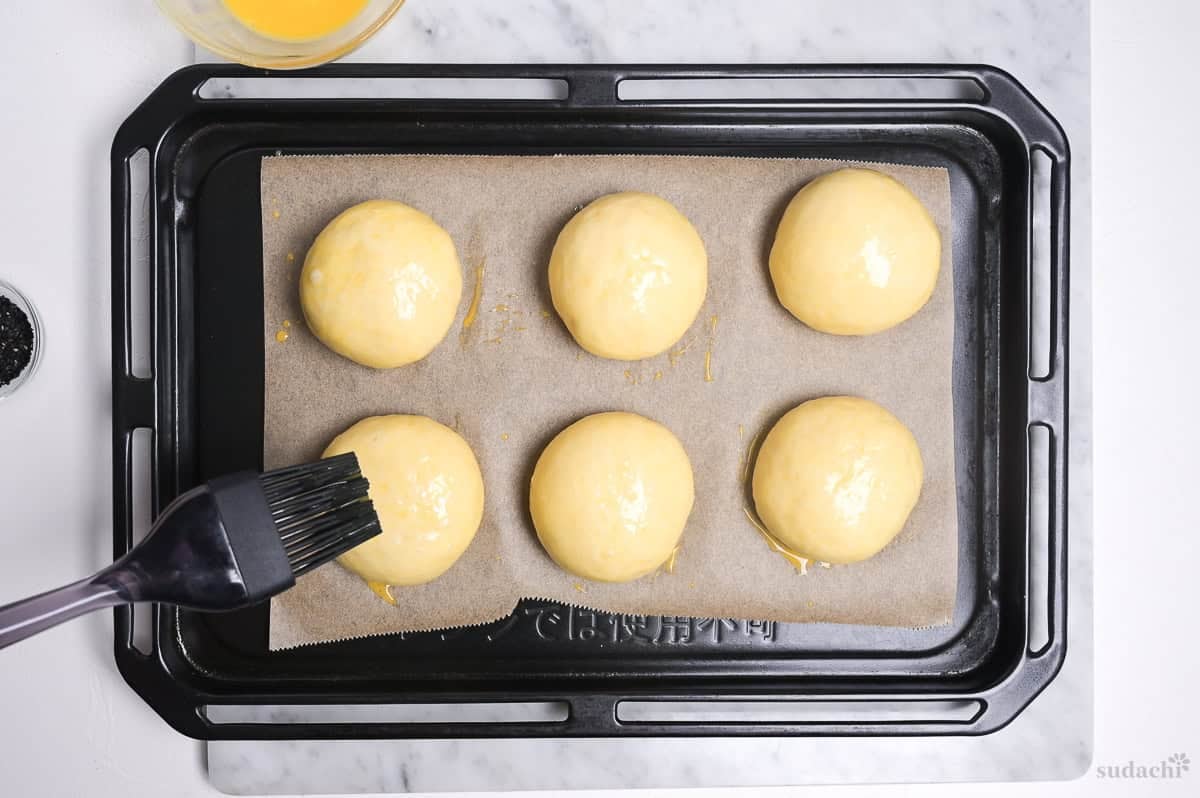
ii. Sprinkle the tops with black sesame seeds.
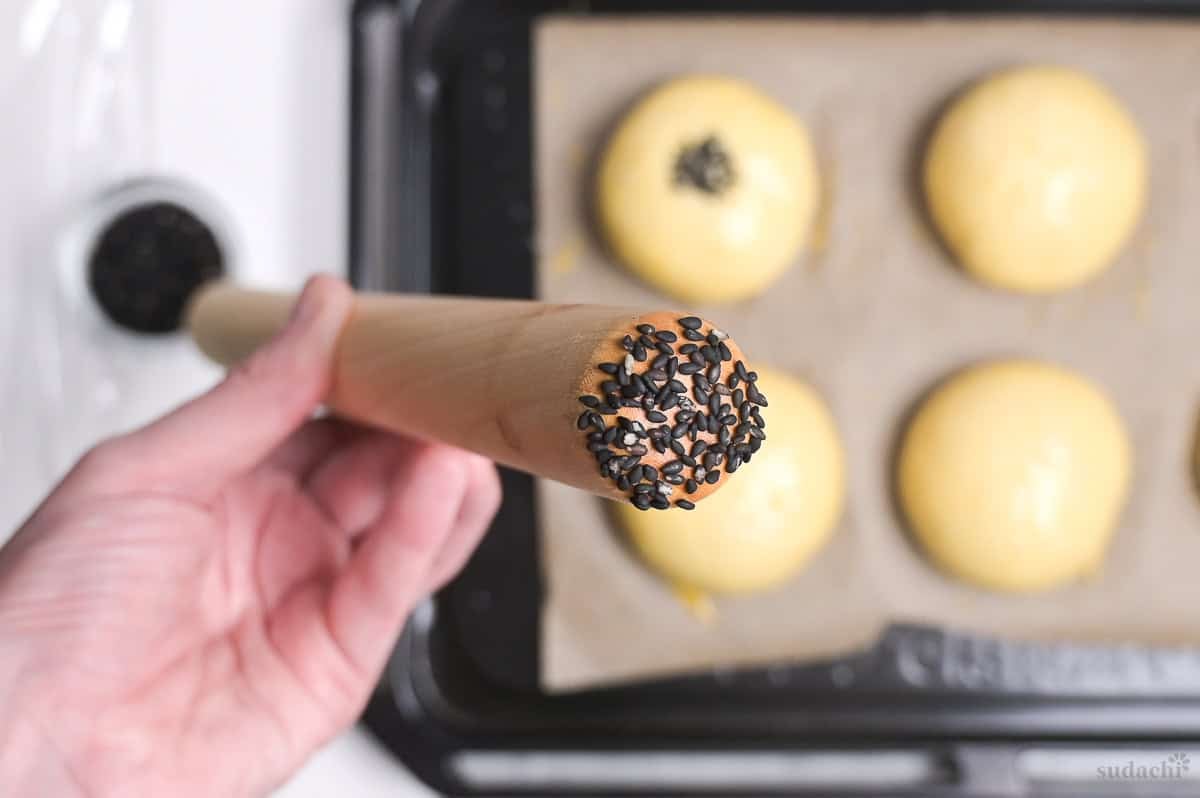
For a perfect circle of sesame seeds, find a cooking utensil that has a wooden handle with a round base. Dip it in water, pat with a kitchen towel to remove the excess and then dip it into a small bowl of sesame seeds. Press the sesame seeds lightly into the middle of the anpan, and they will stick to the egg wash.
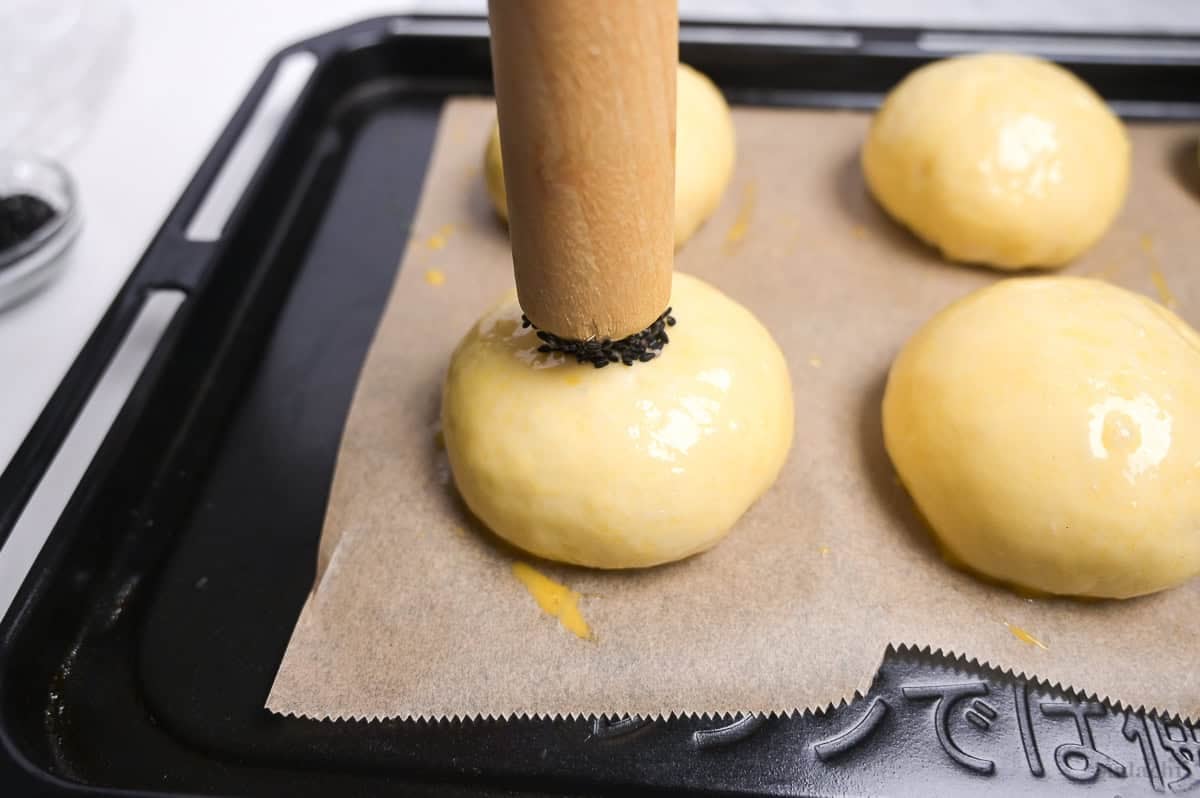
iii. Bake for 12-13 minutes or until golden all over.
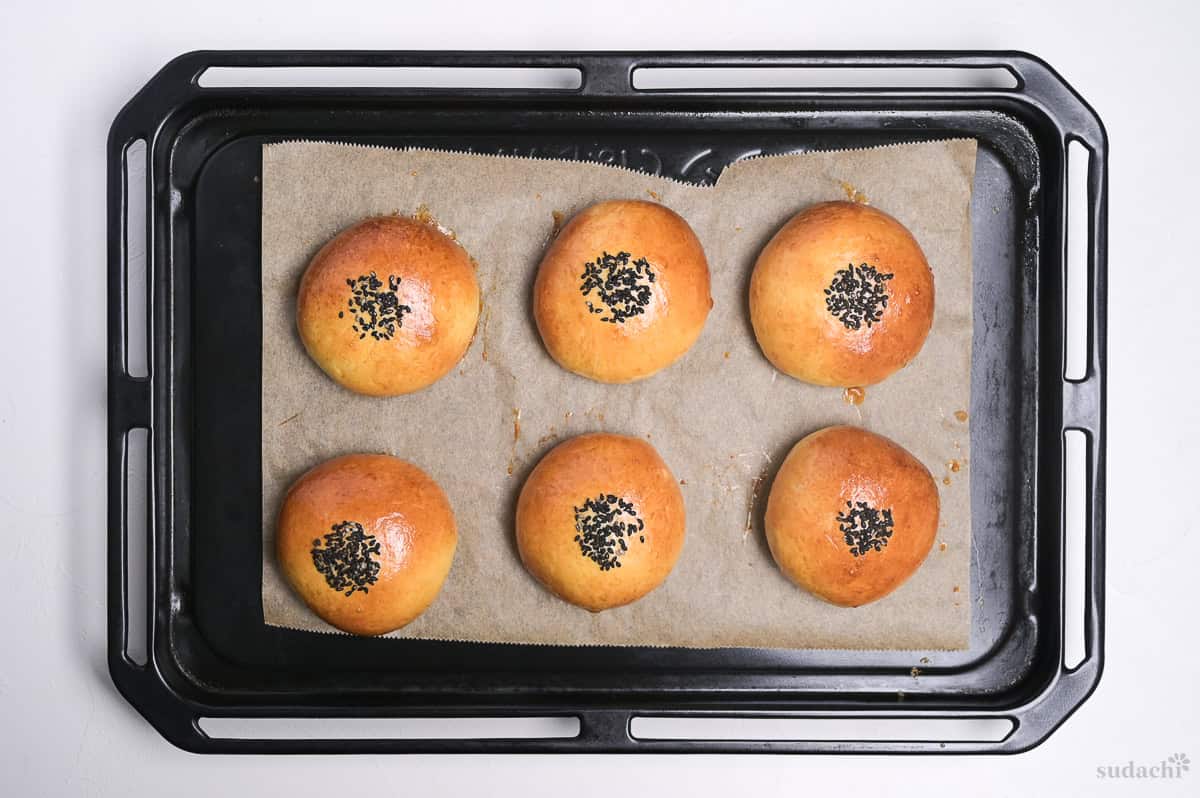
iv. Cool on a wire rack and enjoy the same day.
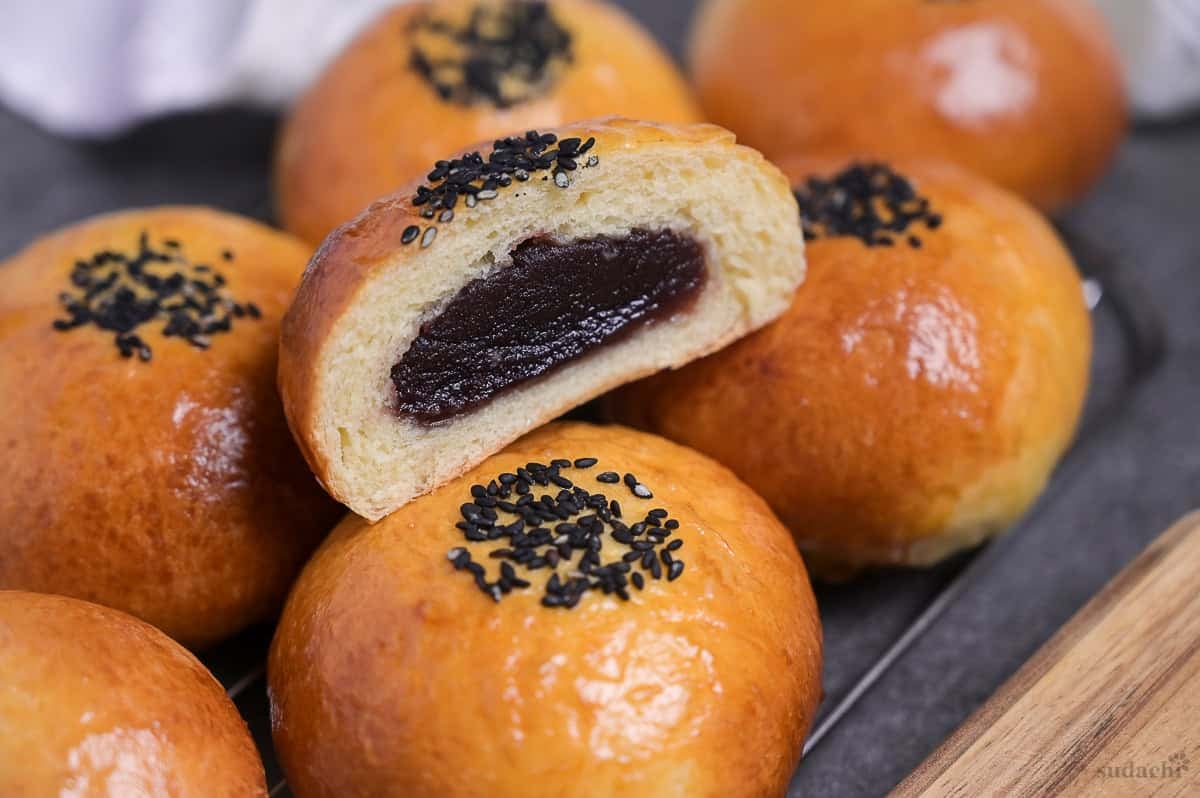
If your oven bakes unevenly you might find some brown quickly while others stay pale. Rotate the baking tray halfway through for even coloring.

Tips for the Best Anpan
- If making your own anko filling, make it first, ideally the day before. It should be fully cooled before filling the anpan. Check out my recipes for smooth red bean paste (koshian) and chunky red bean paste (tsubuan).
- For accuracy, use digital kitchen scales to weigh your ingredients. I don’t provide cup measurements for my bread recipes.
- Avoid adding extra flour when kneading, use a bench scraper to remove dough from surfaces and trust the process. It will become more manageable as you knead it.
- Make sure the dough passes the windowpane test before adding the butter. Butter coats gluten strands and prevents strong bonds forming, so adding it too early can make your bread dense.
- Keep in mind that enriched dough takes longer to rise, so check the condition and not the clock. The first rise should be doubled in size, second rise should be 1.5x in size and slowly spring back when poked.
- Preheat your oven well in advance. If you wait until the bread is ready, it will continue to rise while you preheat and become overproofed. If your oven takes a long time to heat up, start heating it early.
- Turn the baking tray half way through the bake for more even browning.
- If your buns brown too quickly, cover with foil to prevent burning.
- Cool before eating, hot anko is like lava!
With these simple tips in mind, you’re set for success every time you make anpan.
Storage & Meal Prep
Room temperature: Anpan is good for 24 hours in a sealed container. Make sure it is fully cooled before storing. Longer than that, I recommend freezing.
Fridge: Not recommended.
Freezer: Individually wrap and store for up to one month. Thaw at room temperature and revive in the oven for 3-4 minutes at 160°C/320°F.
Prep: You can also make the anpan the night before, follow the steps for kneading, first rise and shaping, then store in an airtight container in the refrigerator for up to 16 hours. Do not bake straight from the fridge, take them out for 1-2 hours to come to room temperature and finish proofing (second rise) before baking.
Make your own anko: If making your own anko from scratch, cook 1-2 days in advance and keep in the fridge. Make sure it’s fully cooled before use.
Anpan Troubleshooting
Please avoid adding flour. High hydration enriched doughs tend to be sticky, it’s perfectly normal. Use a bench scraper to scrape it off your work surface, and use the slap and fold method to help you work it into a manageable dough. Extra flour will leave you with dense and heavy buns.
Firstly, check your yeast is still alive before you start the recipe. Mix it in warm water with some sugar, it should bubble and foam after a few minutes. If not, it’s dead and needs to be replaced. Yeast is sensitive so if your water/milk mixture is too hot, you might kill it by accident. Finally, enriched doughs take longer to rise than lean doughs, so it might need more time.
Dense buns can be caused by a number of issues. Make sure your yeast is active, inactive yeast won’t rise. Use scales to measure your flour (don’t use cups), too much flour can make the bread heavy. Knead until the dough until it passes the windowpane test, and judge the rise by look and feel rather than the clock. Under-kneaded and under-proofed dough will also feel dense.
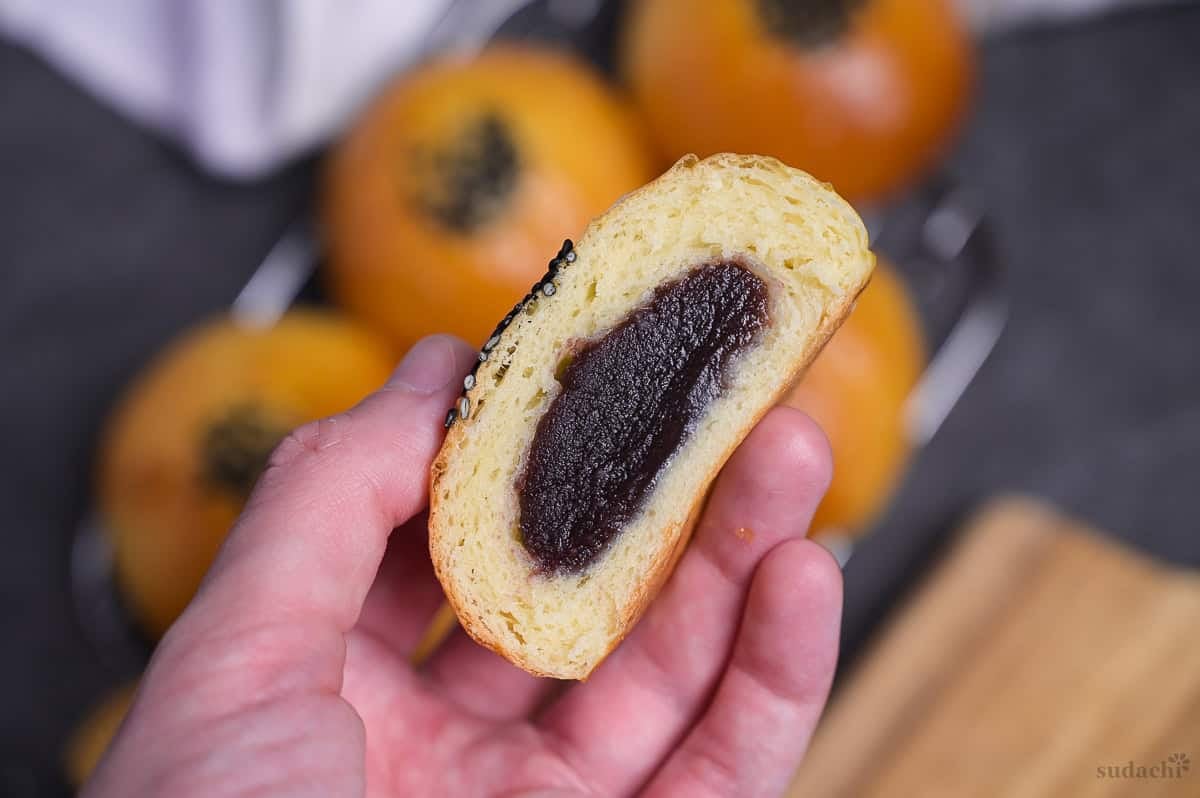
Always chill your red bean paste before rolling. If it’s too soft to roll, you can spoon it into a heap in the center of the dough instead.
More Japanese Bread Recipes
- Cream Pan (Japanese Custard Buns)
- Nama Shokupan (Bakery Style Japanese Milk Bread)
- Mushi Pan (Japanese Steamed Cakes)
- Spiced Kabocha Loaf
Hungry for more? Explore my Japanese bread recipe collection to find your next bake!
Did You Try This Recipe?
I would love to hear your thoughts!
💬 Leave a review and ⭐️ rating in the comments below. 📷 I also love to see your photos – submit them here!
Anpan (Japanese Red Bean Buns)

Ingredients
- 100 g bread flour
- 50 g all-purpose flour
- 3 g salt
- 25 g sugar
- 4 g instant dry yeast or double the weight for fresh yeast
- 30 g whisked egg reserve the rest for egg wash at the end
- 55 g whole milk
- 20 g water
- 20 g unsalted butter room temperature
- 240 g red bean paste (anko)
- black sesame seeds
The ingredient brands and tools I trust are in my Japanese pantry guide and my cooking tools guide.
Can’t find certain Japanese ingredients? See my substitution guide here.
Instructions
- In a large mixing bowl, add 100 g bread flour, 50 g all-purpose flour, 3 g salt, 25 g sugar, and 4 g instant dry yeast and mix to evenly distribute.

- Crack an egg into a bowl and whisk until the white and yolk are combined. Measure out 30 g whisked egg to add to the dough, then cover and store the leftovers in the fridge to use for egg wash later.Measure out 20 g unsalted butter and set it on the counter for later.
- Measure 55 g whole milk and 20 g water into a heatproof jug. Microwave for 10-15 seconds or until warm to the touch (not hot), then add the measured egg and whisk. Pour the contents of the jug into the bowl with the flour, and mix thoroughly until it forms a rough dough.
- Transfer the dough out onto a clean dry surface and use a bench scraper to smear the dough across the surface.
- Scrape the dough back up and repeat smearing and gathering in different directions until it becomes stretchy and more manageable.
- Switch to the slap and fold method. Hold the edges of the dough, slap it onto the surface away from you and stretch it back towards you.
- Pull the dough away from you and over itself. Turn the dough 90° and repeat until smooth and passes the windowpane test.
- Spread the dough out into a large rectangle, as big as you can without tearing it, and spread the room temperature butter over the top.
- Roll the dough up, then knead again until smooth and the dough no longer feels greasy.
- Place the dough in a clean bowl covered with a clean damp tea towel. Leave to rise in a warm draft-free area until doubled in size (approx 40-60mins at 30 °C (86 °F)).
- Degas the dough by pressing it, then weigh it and divide it into approximately 45g pieces. Pull the edges of each piece down and underneath, then gather them into a point at the bottom to make tight ball shapes.
- Loosely cover with plastic wrap and rest at room temperature for 15-20 minutes.
- While you wait, divide 240 g red bean paste (anko) into 40g balls and store in the fridge.

- Lightly dust your work surface with flour and roll each ball out into a 15cm (6") diameter circles. Hold the dough in your palm and place a ball of anko in the center.
- Pull the edge of the dough over the anko and gather, making small pleats until the dough closes.
- Pinch the seam to secure the base and roll on the kneading board once more to make them neat and round.
- Arrange the shaped anpan on baking tray lined with baking paper. Leave plenty of space between each one and cover with plastic wrap. Leave to rise until the size has increased by about 1.5x or they pass the finger poke test (approx 45-60mins at 30 °C (86 °F)). About halfway through, preheat your oven to 180 °C (356 °F) fan or 200 °C (392 °F) conventional.
- Take the leftover egg from the fridge, add about ⅛ tsp water and whisk. Right before baking, use a pastry brush to coat the tops and sides with an even layer of whisked egg.
- Sprinkle black sesame seeds in the center.
- Bake for 12 minutes or until golden brown. Turn the baking sheet around half way through if your oven bakes unevenly.
- Cool on a wire rack until they reach room temperature. Serve and enjoy!
Notes
- Store in an airtight container once cooled.
- Make the anko up to 1-2 days in advance and store in the fridge, it should be fully chilled before use.
- Avoid adding any flour when kneading the dough. It will be very sticky at first and that is normal. It will become more manageable as you knead it.
- The dough should pass the windowpane test (stretches thin enough to see light through without tearing) before adding the butter.
- Enriched doughs take longer to rise because the sugar, egg, and butter are working against the yeast. Base the rise on the size and feel of the dough, not the time it takes. First rise should double in size, second rise should increase by about 1.5x or pass the finger poke test (dent slowly fills back in when poked).
- Preheat your oven early, about halfway through the second rise, or earlier your oven takes a long time to heat up.

Leave a rating and a comment