Disclaimer: This post contains Amazon affiliate links. Sudachi Recipes earn a small percentage from qualifying purchases at no extra cost to you. See disclaimer for more info.

Maki Nakamura
Contributing Writer
Maki is a professional baker with over 15 years experience who worked her way up in a major baking company in Japan.
After honing her skills during an internship in France, she returned to Japan where she specializes in quality control, product development and writing Japanese bread recipes for Sudachi.
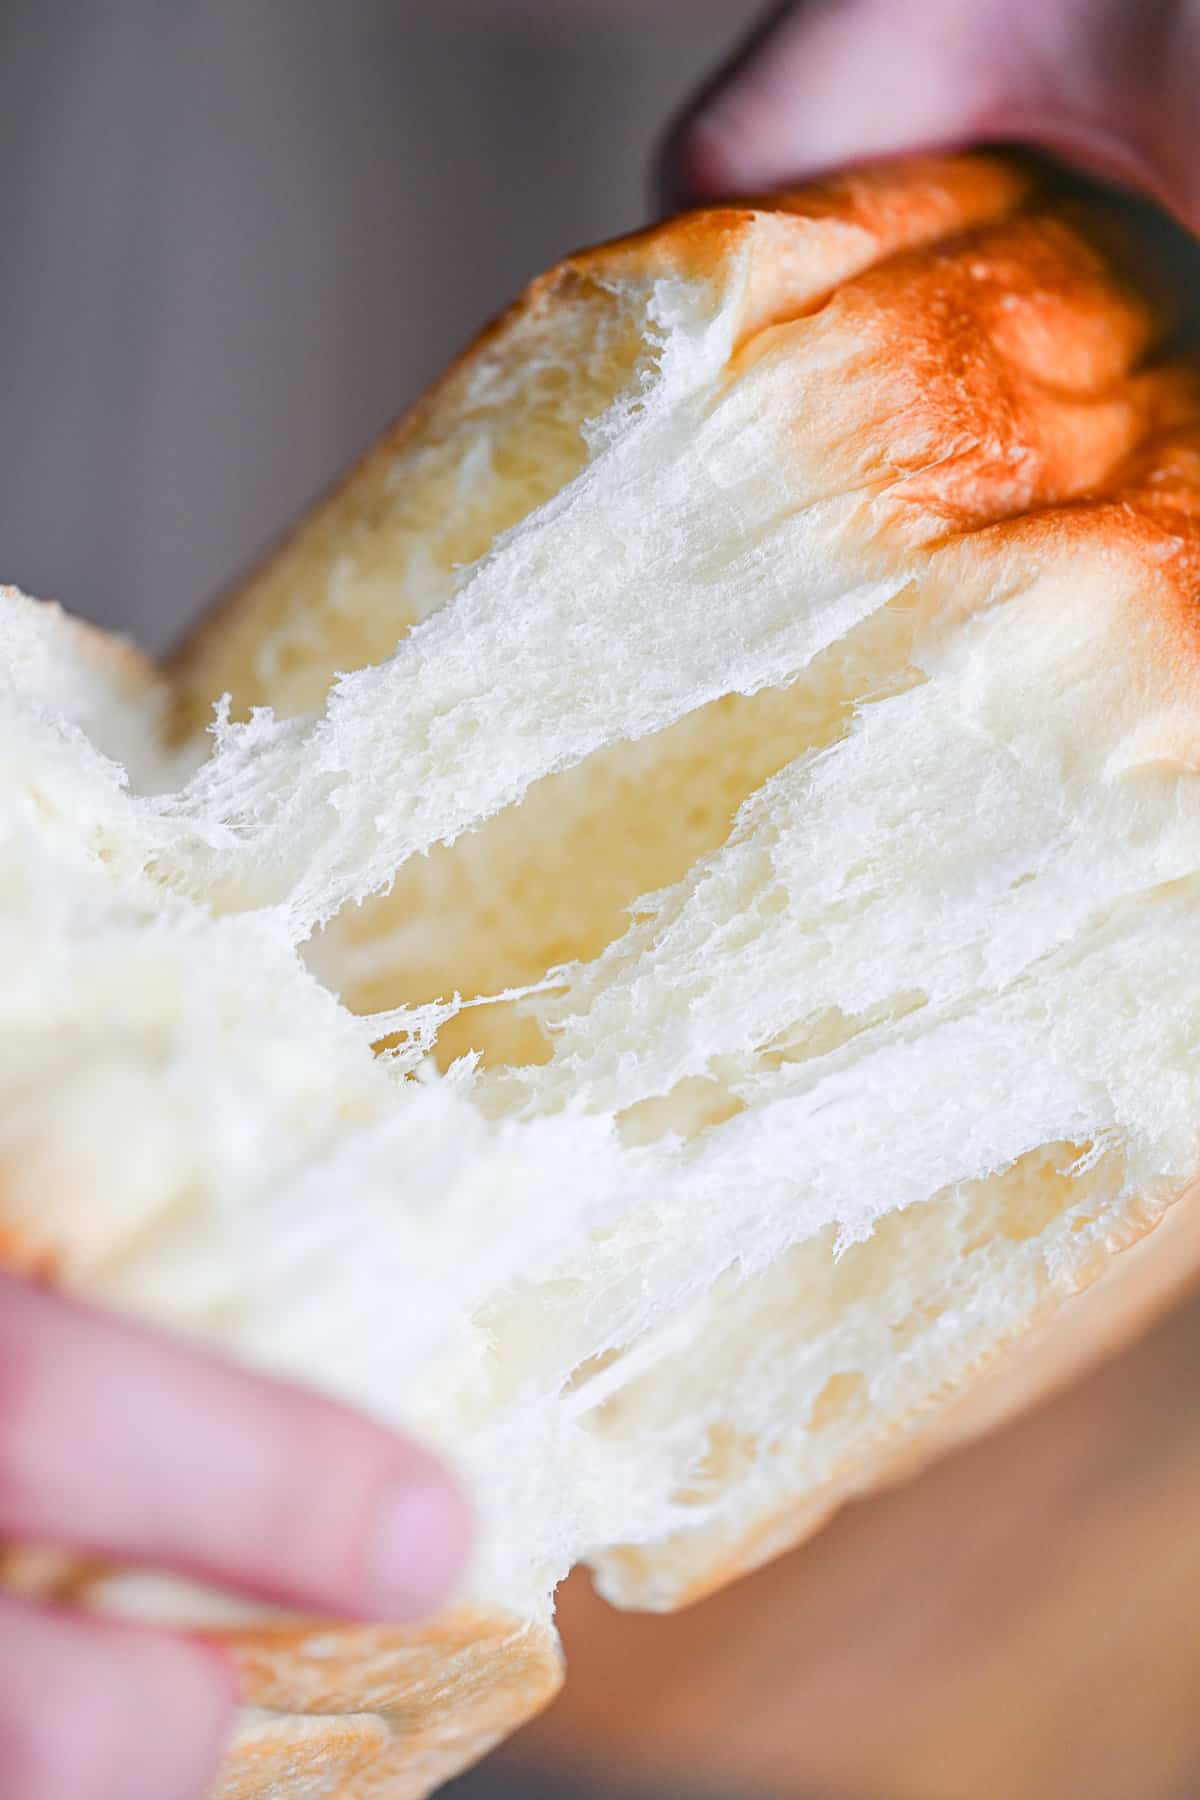
What is Japanese Shokupan?
Japanese bread is a popular breakfast staple enjoyed by people of all ages. Not only is it delicious on its own, but it’s also versatile for toasting, making sandwiches, and countless other creations.
Shokupan (Japanese milk bread), rooted in foreign origins, has evolved in a unique way. It’s truly the bread most associated with Japanese daily life. In this article, we’ll share recipes for this beloved bread and suggest tasty ways to enjoy it.
Let’s explore Japanese bread, which has been refined to suit local tastes and now represents the unique flavor of the country.
Brief History
By global standards, Japan’s bread history is relatively short. Bread first arrived in Japan in 1543 and is believed to have been introduced by the Portuguese. However, it wasn’t until the Meiji period (1868-1912), more than 300 years later, that baking really took off.
The origins of shokupan can be traced back to the Yokohama Bakery, founded by a British baker called Robert Clark in 1865. The first version of shokupan was created for the foreign visitors in Yokohama at the time. Then, in 1888, Clark retired and returned to England, selling his business to a Japanese local and its name was changed to Uchiki Bakery. This historic bakery still operates in Yokohama today.
As other cities with foreign settlements began to produce bread, its popularity spread among the Japanese. The soft pillowy texture of the white tin loaf probably contributed to its appeal. Today, it’s so common in supermarkets that it’s a part of everyday life.
The evolution of British bread to suit Japanese tastes continues to meet the diverse needs of the people.
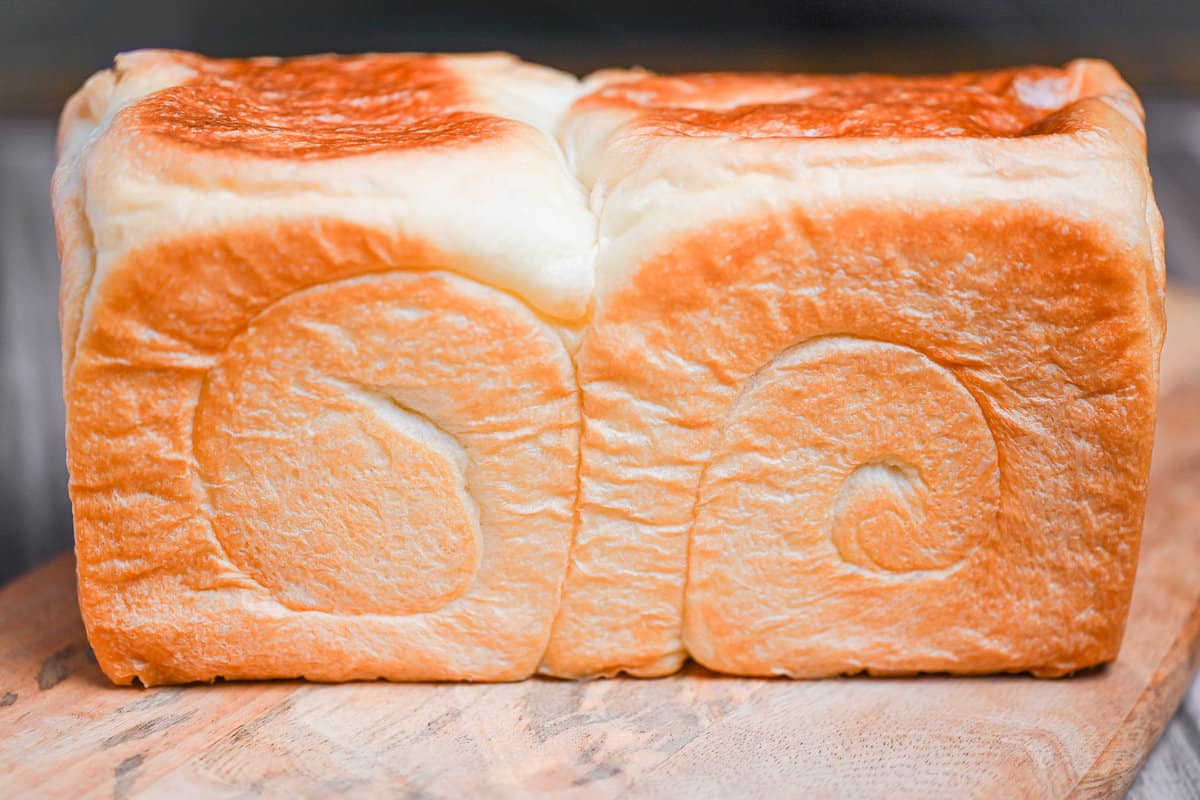
Characteristics of Japanese Shokupan
What makes shokupan unique? Here are some key features:
- Comes in “square bread” (kaku shokupan) and “mountain bread” (yamagata) shapes
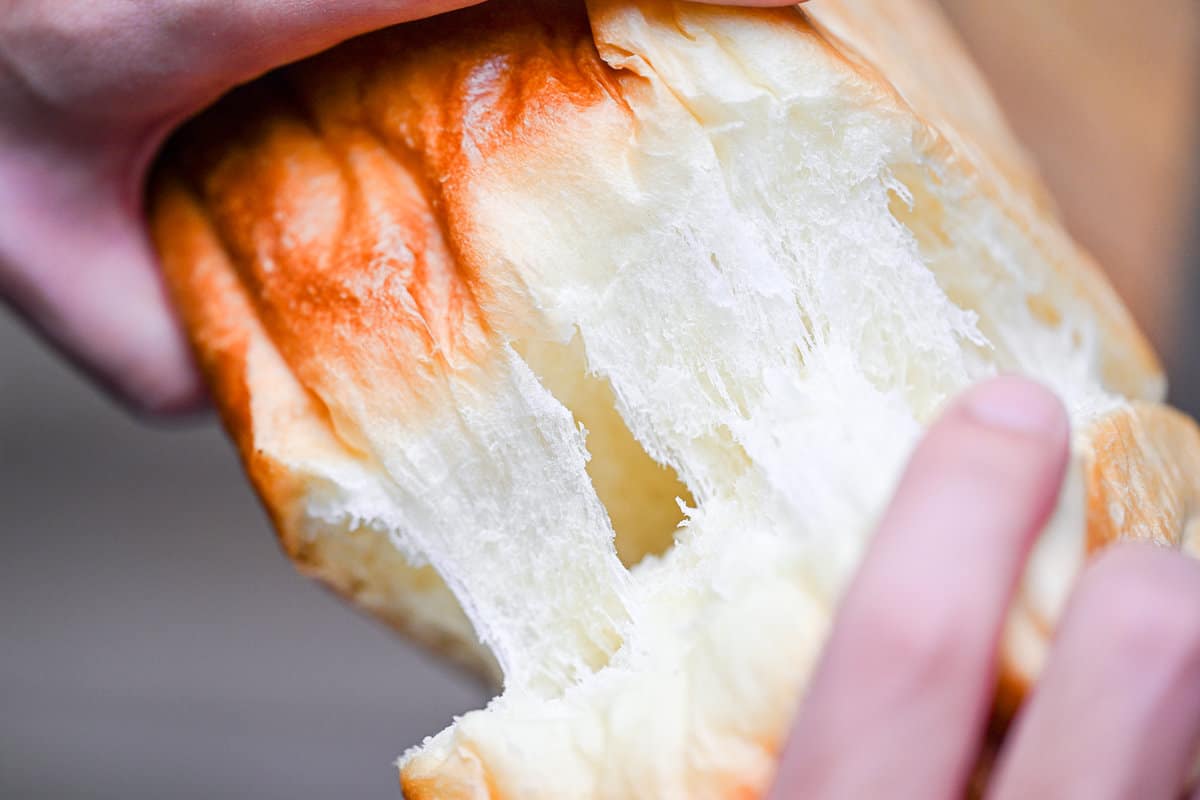
- Soft and fluffy texture
- Sweet and savory
Japanese shokupan includes square bread, which is baked under a cover, and mountain bread, which is baked without a cover and has a raised top. The square version has a moist texture, while the mountain type is light and fluffy.
Compared to similar breads in other countries, Japanese shokupan is softer, fluffier, and heavily flavored with milk and butter, which makes it enjoyable even on its own.
Differences from Similar Breads in Other Countries
The main difference between Japanese shokupan and loaf bread from other countries is its sweetness and softness.
In Western countries, bread is often eaten with soups and sauces, while in Japan, where rice is the main staple, bread is more received as a snack. This may be why soft, flavorful bread that can be enjoyed on its own is preferred in Japan.
Each bread-loving country has its own loaf bread, such as the white sandwich loaf and Pullman loaf in England (known as British bread in Japan), which directly inspired Japanese shokupan. The table below shows the differences between Japanese shokupan and similar bread from other countries.
| Type of bread | Country | Differences |
|---|---|---|
| Pullman Loaf (Sandwich Loaf) | U.K. | Lean bread with few secondary ingredients. Mainly thinly sliced. |
| White bread | U.S | More secondary ingredients such as sugar and fats than English bread. |
| Pain de mie | France | Leaner bread than English bread, although it has more secondary ingredients such as sugar and oil. Mainly thinly sliced. |
| Brioche | France | Made with eggs, more butter and milk. Rich taste with golden crumb color. Different shapes have different names. |
| Toastbrot | Germany | Lean bread with fewer secondary ingredients |
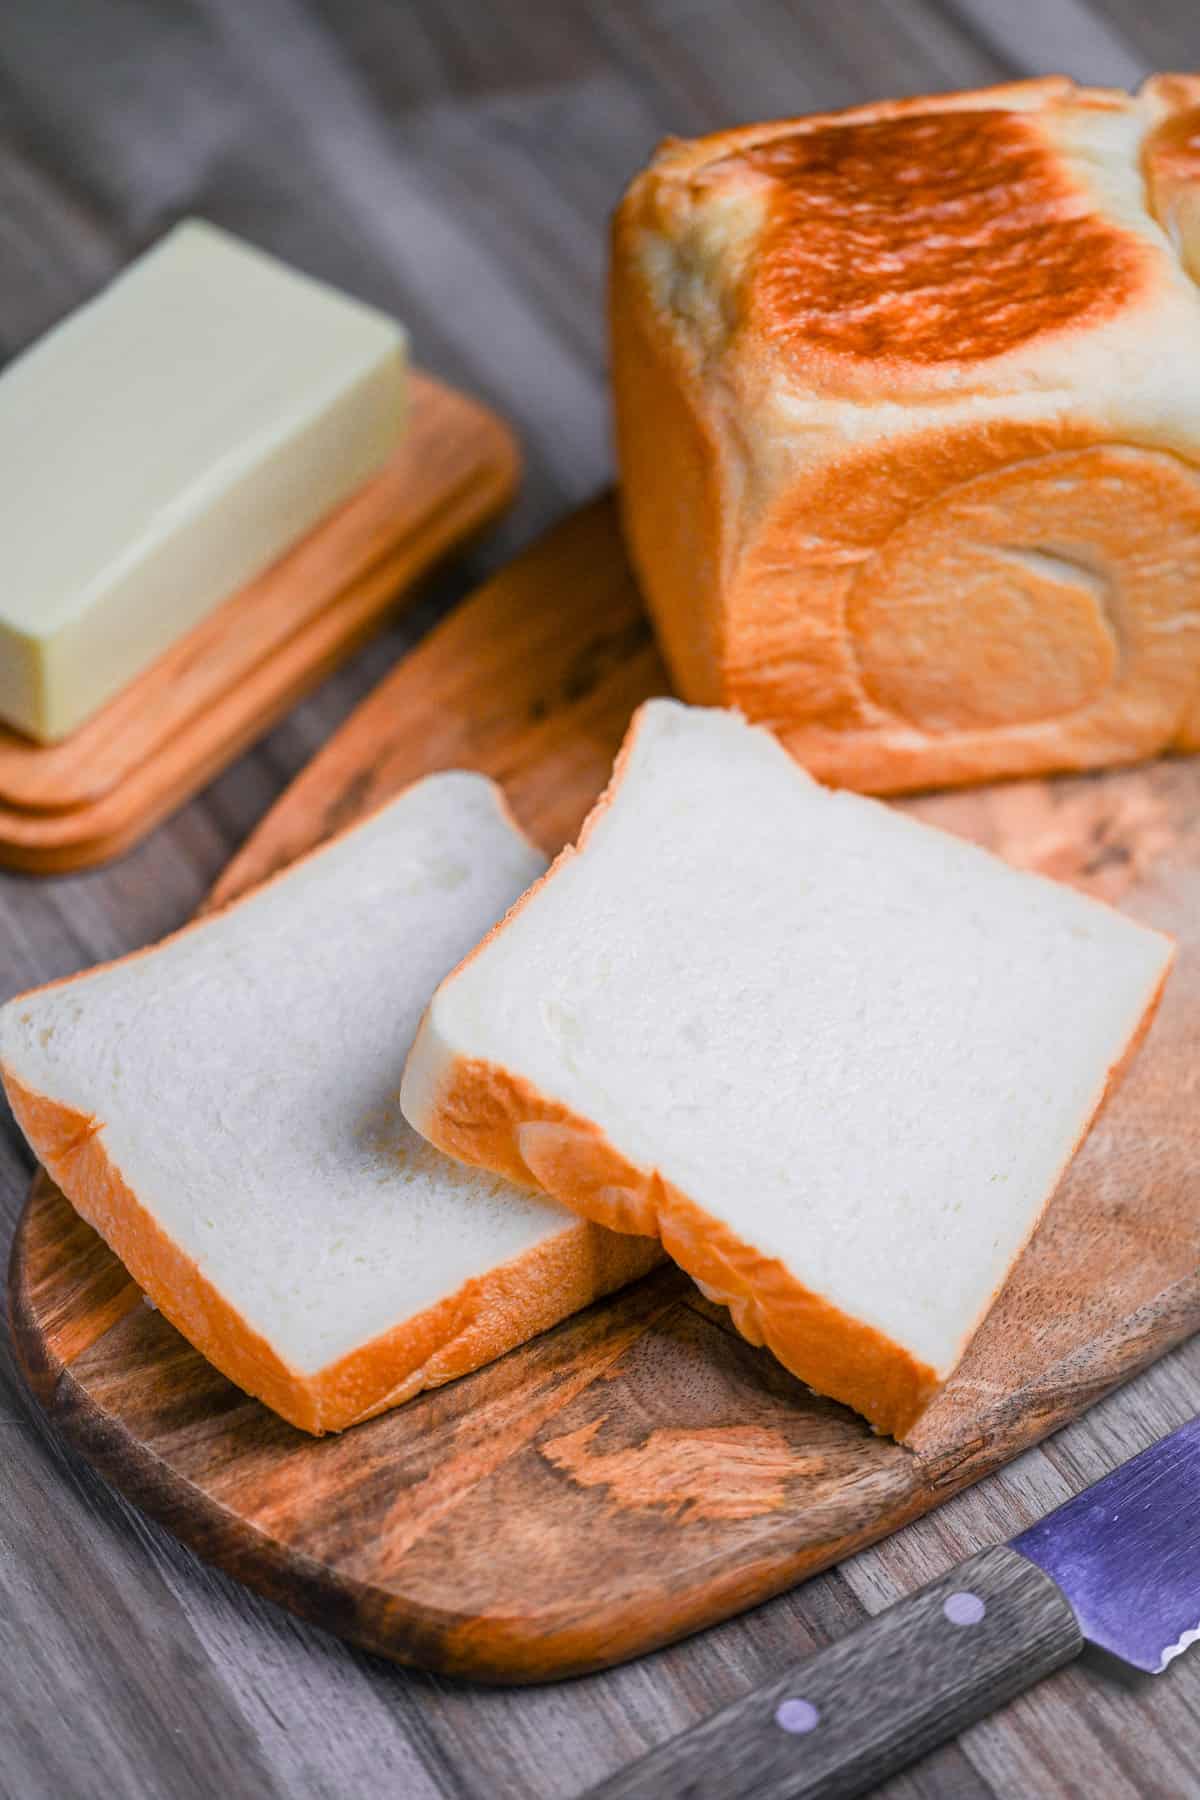
What is “Nama” Shokupan?
Japanese shokupan keeps evolving due to the tireless efforts of bakers. In recent years, a major trend in Japan has been high-end “nama” shokupan.
Since it’s enjoyed without toasting, the term “nama (raw)” is added to this shokupan category. Its luxurious use of fresh cream and honey contributes to its softness and melt-in-your-mouth texture which has won over many fans. To clarify, the bread is not actually raw, just enjoyed untoasted and without extra condiments or toppings.
Though the price is two to three times higher than the usual supermarket shokupan, its attention to detail and special, luxurious feeling make it especially popular. Try a thick slice if you have this type, and you’ll be amazed by its unique texture.
What is Hotel Shokupan?
Hotel shokupan is a special type of shokupan with a richer blend, containing more butter or cream than regular bread. Also known as “hotel bread,” it’s named after the luxury shokupan served in high-class hotels in Japan.
Instead of being square-shaped like nama shokupan, hotel bread is baked in a mountain shape without a lid, featuring a slit on top and butter. Without a lid, the dough stretches nicely, creating a light texture despite its rich ingredients.
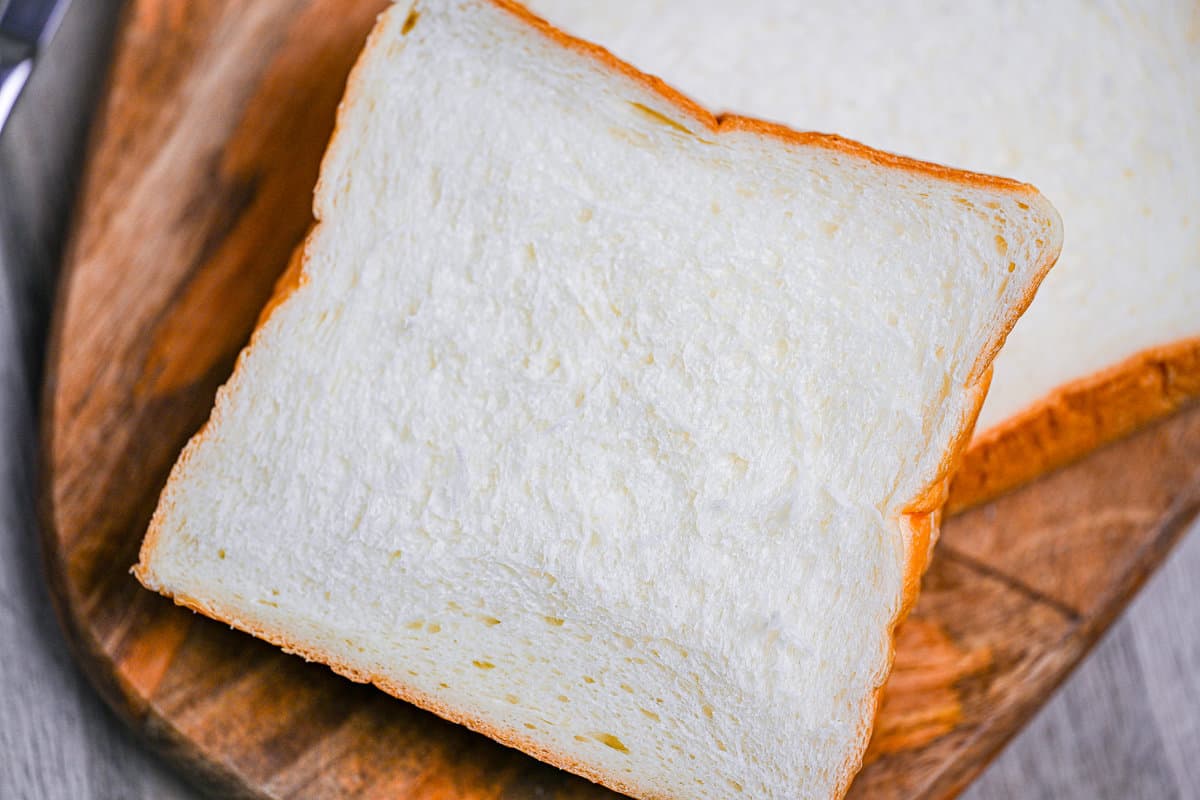
How to Eat Shokupan
As someone who has worked in a bakery for years, I want to share three tasty ways to enjoy the unique features of Japanese bread.
Eat on its own
First, enjoy it plain. The best way to enjoy Japanese shokupan is as it is. Its mild flavor and softness, even without any dipping sauce or jam, is what makes it special.
In particular, nama shokupan is made to be eaten plain and its moist texture is delightful. I recommend trying the bread the day after it’s made or purchased, when the flavors have settled and the bread has cooled to fully appreciate its qualities.
As crispy toast
My next suggestion is to enjoy it on toast. Toasting creates two textures: crispy on the outside and fluffy on the inside.
The trick is to preheat your toaster and cook the surface quickly without losing moisture. Thickly sliced, mountain-shaped bread makes for a particularly crunchy texture.
You can also try a twist on what we call “pizza toast.” Just use sliced bread as a pizza base, add pizza sauce, sausage, peppers, cheese and more, then place it under the grill! This tasty toast is popular for breakfast and lunch, especially with kids!
As a sandwich
While thin-sliced sandwiches are popular abroad, I recommend trying thick-sliced sandwiches with Japanese shokupan.
You can make classic BLT or ham and cheese sandwiches, but one of my favorites is an “egg sandwich.” I personally just fill it with scrambled eggs, although in Japan, the filling can vary between “boiled eggs mixed with mayonnaise and other condiments” or even “tamagoyaki” depending on the region.
Try using karashi (Japanese mustard) mayonnaise for a spicy twist that complements the delicate egg flavor and softness of the bread.

Baking Tools
Here are the necessary and useful tools for making bread using this recipe.
Loaf tin
Loaf tins are essential for making shokupan, and they come in various sizes like 1 loaf, 1.5 loaves, and 2 loaves. To create the authentic shape of nama shokupan, you should use a pan with a cover.
I personally suggest using a 1.5-loaf Teflon-coated tin. The Teflon coating keeps the dough from sticking and makes it easier to remove the bread after baking. The 1.5-loaf size creates more crumbs and a tender texture.
Don’t forget to consider the size of your oven as well!
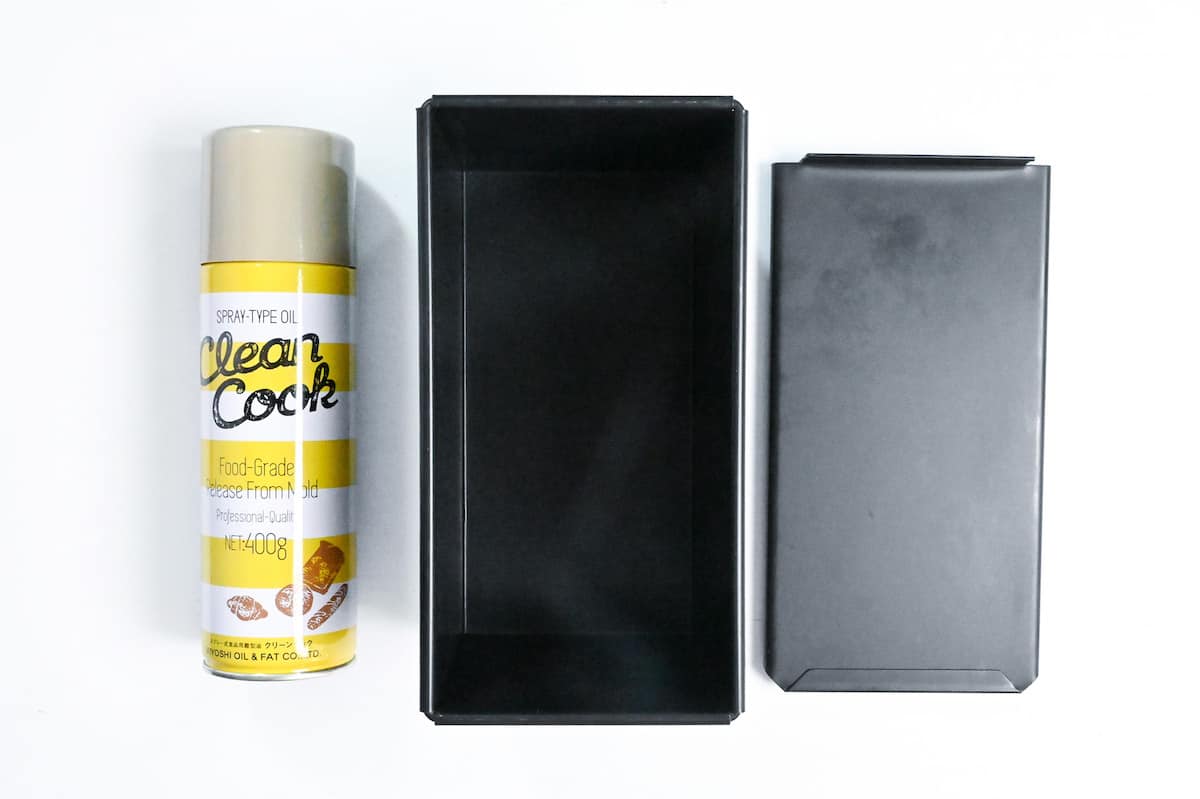
Pan Release Oil (or oil, margarine, butter)
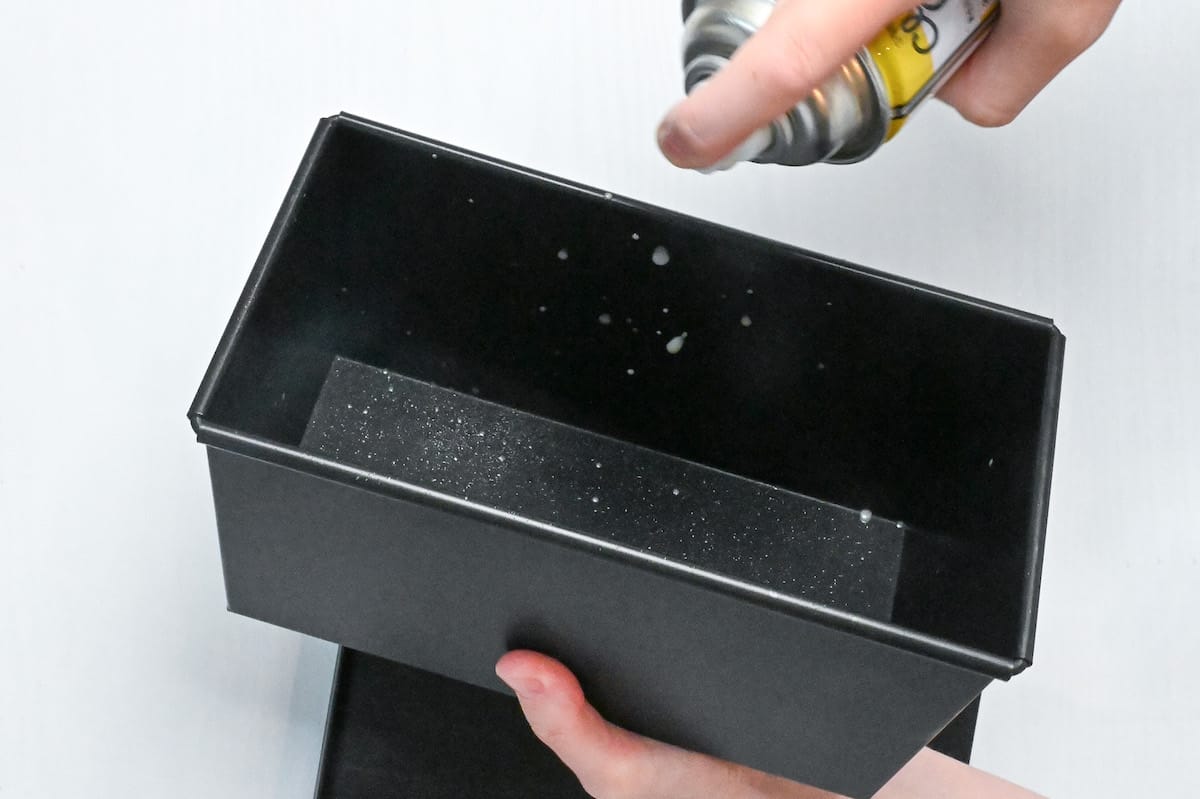
Apply pan-release oil to the inside of the tin to prevent the dough from sticking. Even with Teflon-coated loaf tin, using them without oil isn’t recommended. Especially newly purchased tins tend to make the dough stick, making it hard to remove the bread after baking or causing it to lose its shape.
If the tin doesn’t release well, the bread’s sides may break, creating an hourglass shape. Spray-on release oil is convenient, but you can also use margarine, butter, or vegetable oil. If you use butter, soften it at room temperature for even application.
Always apply oil just before use to make the unmolding process easier.
Digital Scales
This recipe has been meticulously crafted to ensure the softest texture and ultimate taste. Digital scales are used to ensure accuracy, even with liquid ingredients. For that reason, I don’t provide tsp, tbsp or cup measurements for this recipe. For best results I recommend using digital scales and weighing your ingredients using metric measurements if possible.
Bread kneading table (mat or board if possible)
If you’re not using a bread maker, you’ll need a space to knead the dough. Gluten, crucial for bread, forms by forcefully kneading flour with water. During kneading, the dough should be strong enough to withstand beating.
The space is also used for dividing and shaping the dough, taking up room on the table for a while. Flour can make the table messy, so you’ll need to clean it thoroughly.
To knead the dough with force and use the space while waiting for fermentation, get a mat or board ready.
Ingredients
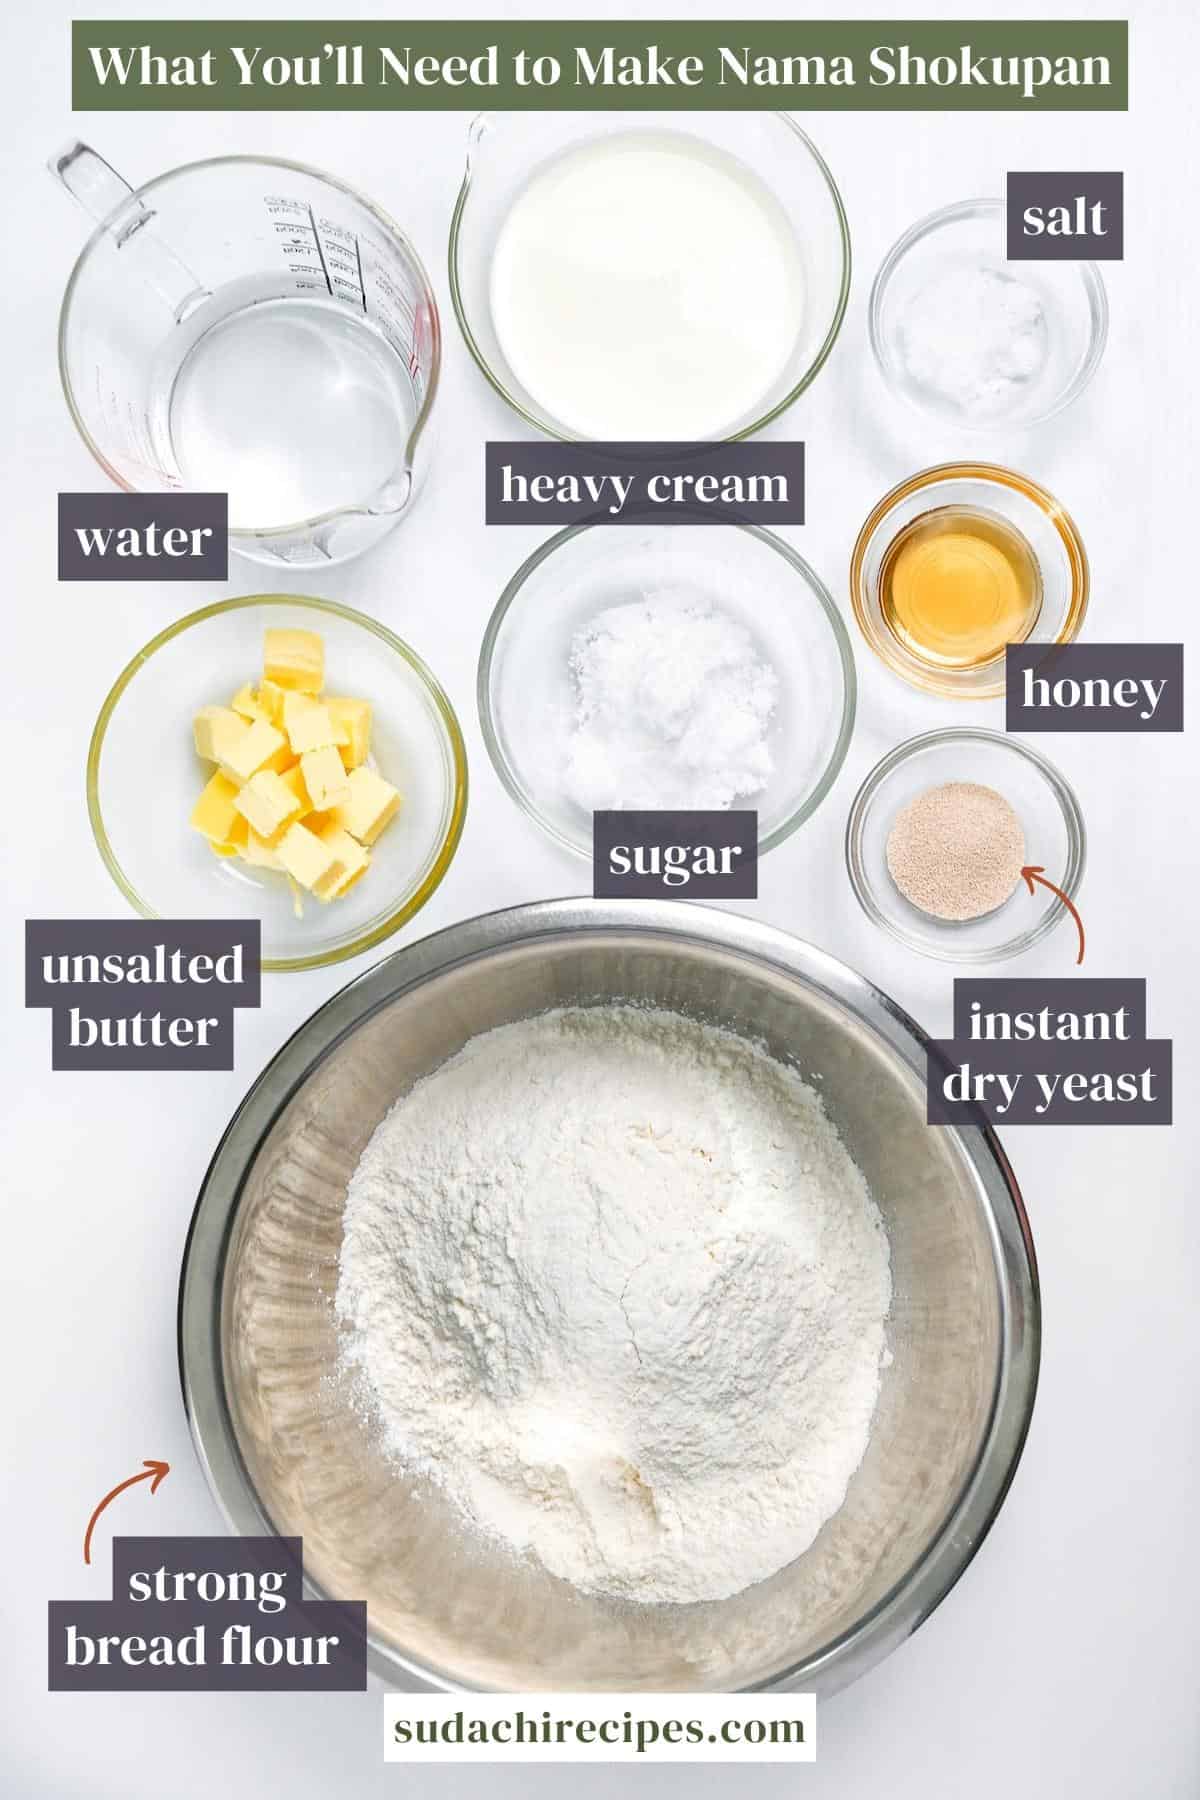
Before introducing the recipe, here are the required ingredients and their roles:
- Strong Flour (Bread flour)– Use strong flour suitable for bread, especially for fluffy baking.
- Instant Dry Yeast – Choose this for its strong, stable fermentation and easy storage.
- Salt – Refined or sea salt both work well.
- Sugar – I use regular white caster sugar not only to add sweetness but to increase the effectiveness of the yeast.
- Honey – Combine with sugar to boost water retention and add flavor.
- Double cream – Opt for double cream (heavy cream) over milk for a richer flavor.
- Water – In hard water areas, use soft water suitable for baking.
- Butter – Always select unsalted butter to avoid changing the salt content in the recipe.
Visual Walkthrough & Tips
Here are my step-by-step instructions for how to make Nama Shokupan at home. For ingredient quantities and simplified instructions, scroll down for the Printable Recipe Card below.
Measure out the ingredients and allow the butter to soften to room temperature. For best results, the dough should be between 24-25°C (75-78°F). In summer, when the room temperature is hot, it’s recommended to chill the flour and liquid to prevent over-fermentation. In winter, the opposite is true, so warm the water and cream to about human body temperature. Be careful not to overheat, as this will kill the yeast.
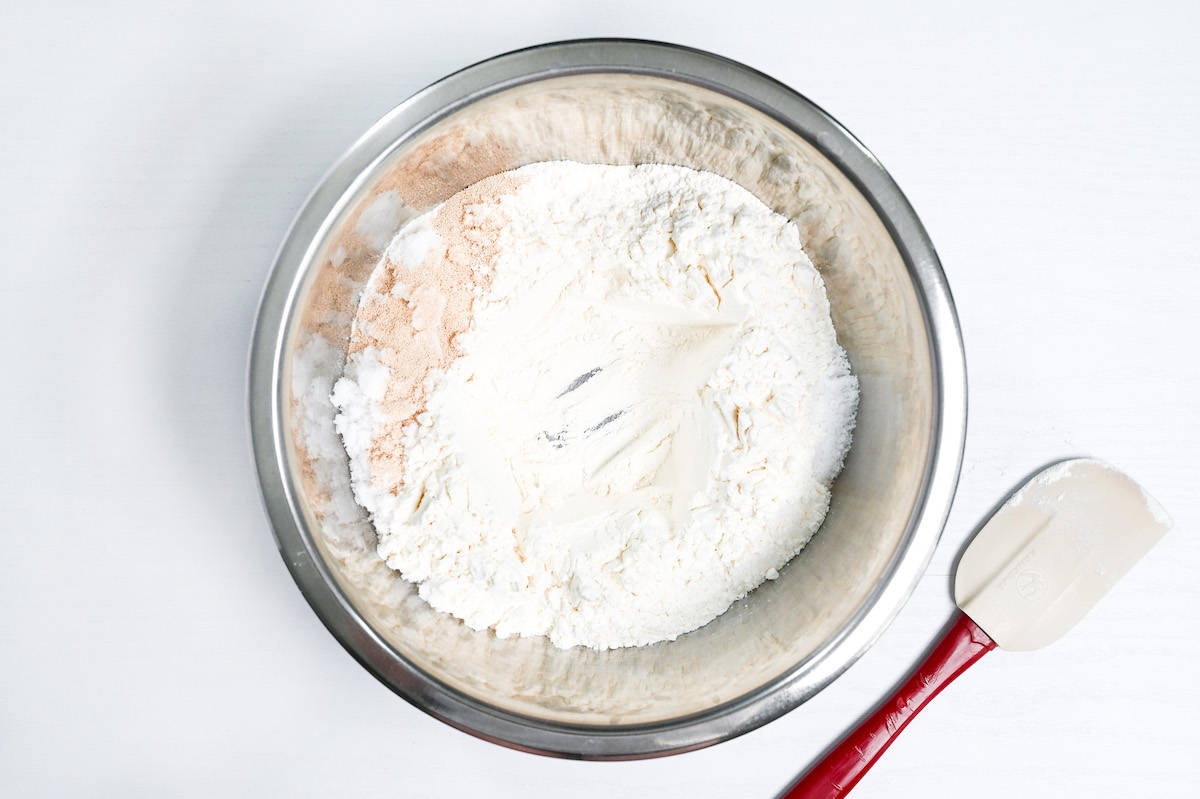
Place the dry ingredients in a bowl. I recommend adding the sugar and yeast on one side of the bowl, then the salt on the other. Adding the yeast and salt separately is to avoid killing the yeast.
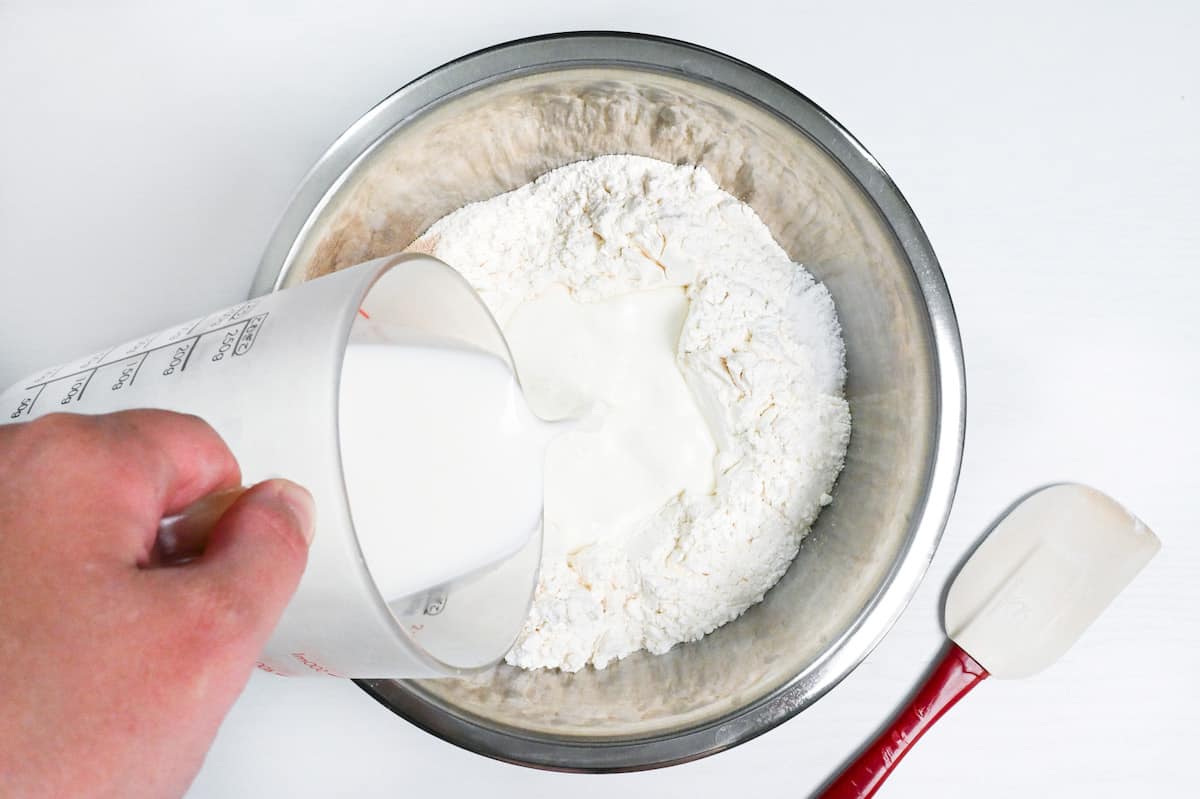
Make a well in the center, add the liquid ingredients and mix, gradually combining everything into a rough dough.
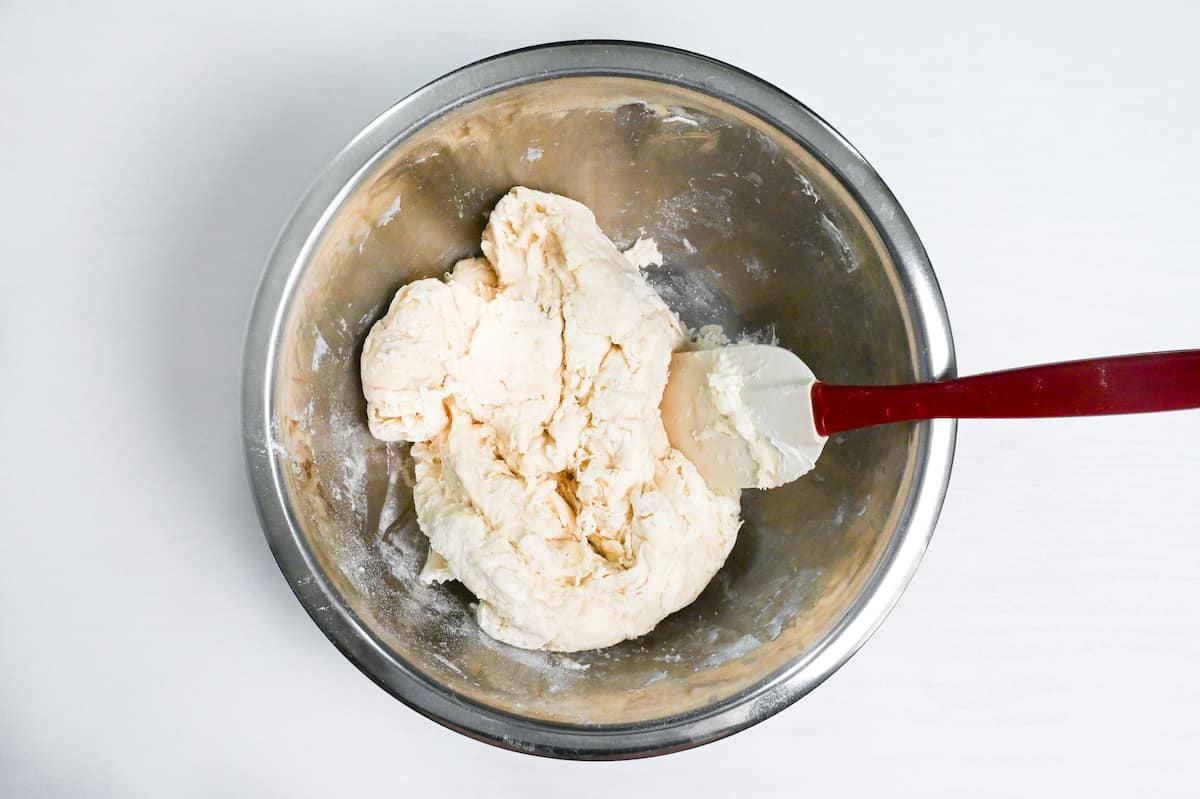
Transfer the dough to a table. Don’t worry if it sticks to your hands; it will become less sticky as you knead. Slap and fold the dough on the table about 10 times, this strengthens the gluten, reduces the stickiness and cools down the dough. Then wrap the dough around your hand, roll and knead it on the surface to warm it up again.
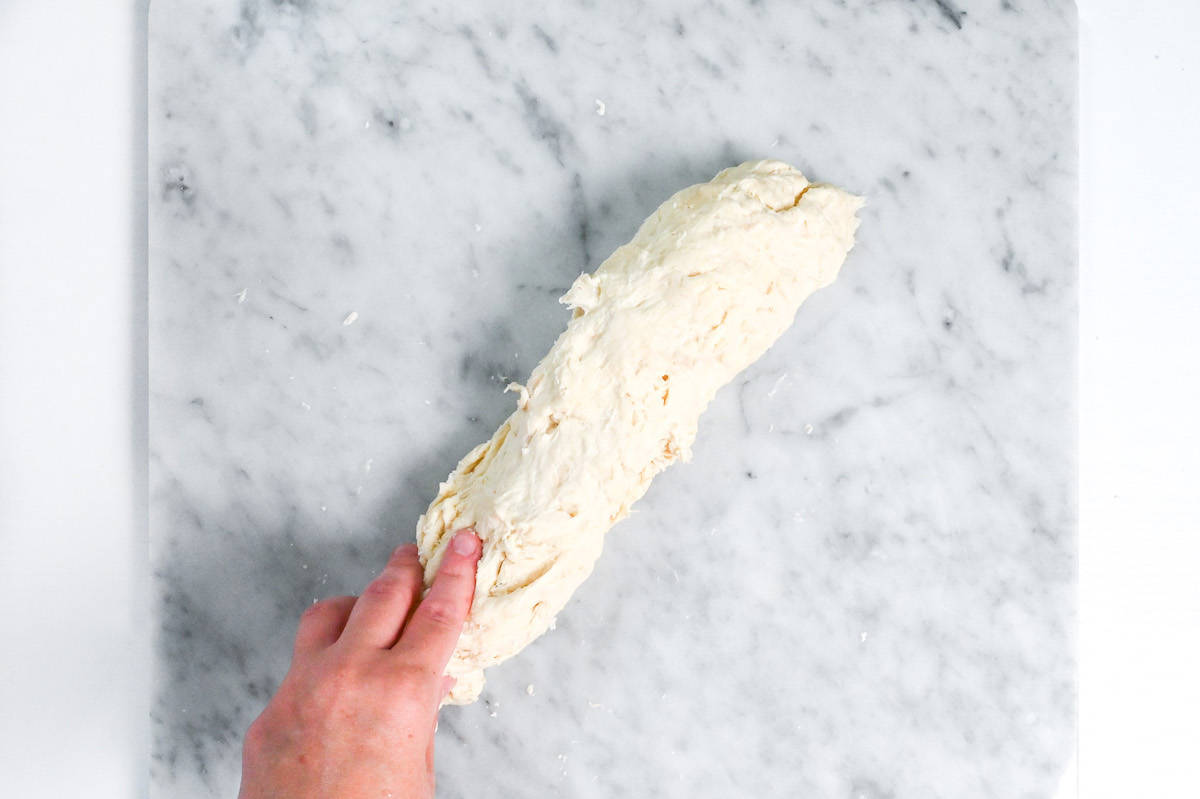
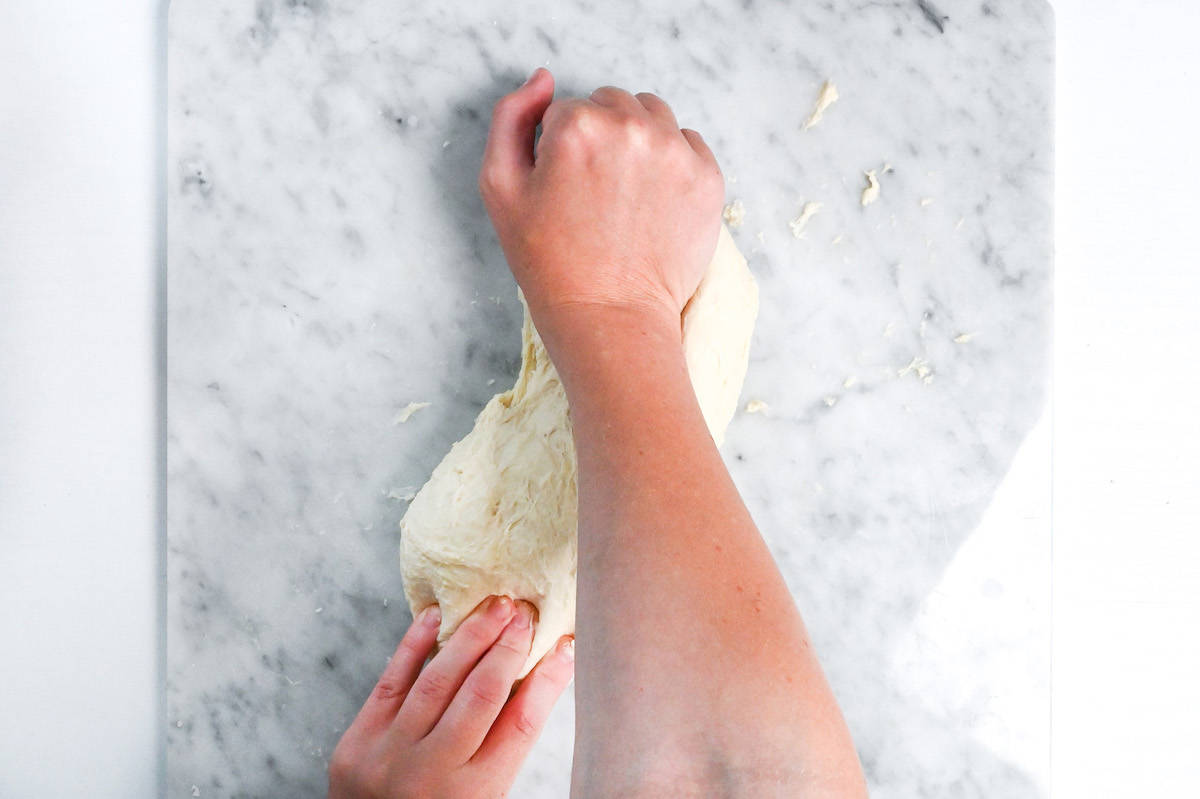
Repeat these steps for about 30 minutes. Your arms may get tired, but it’s worth it – the more effort you put in, the softer and tastier the bread will be.
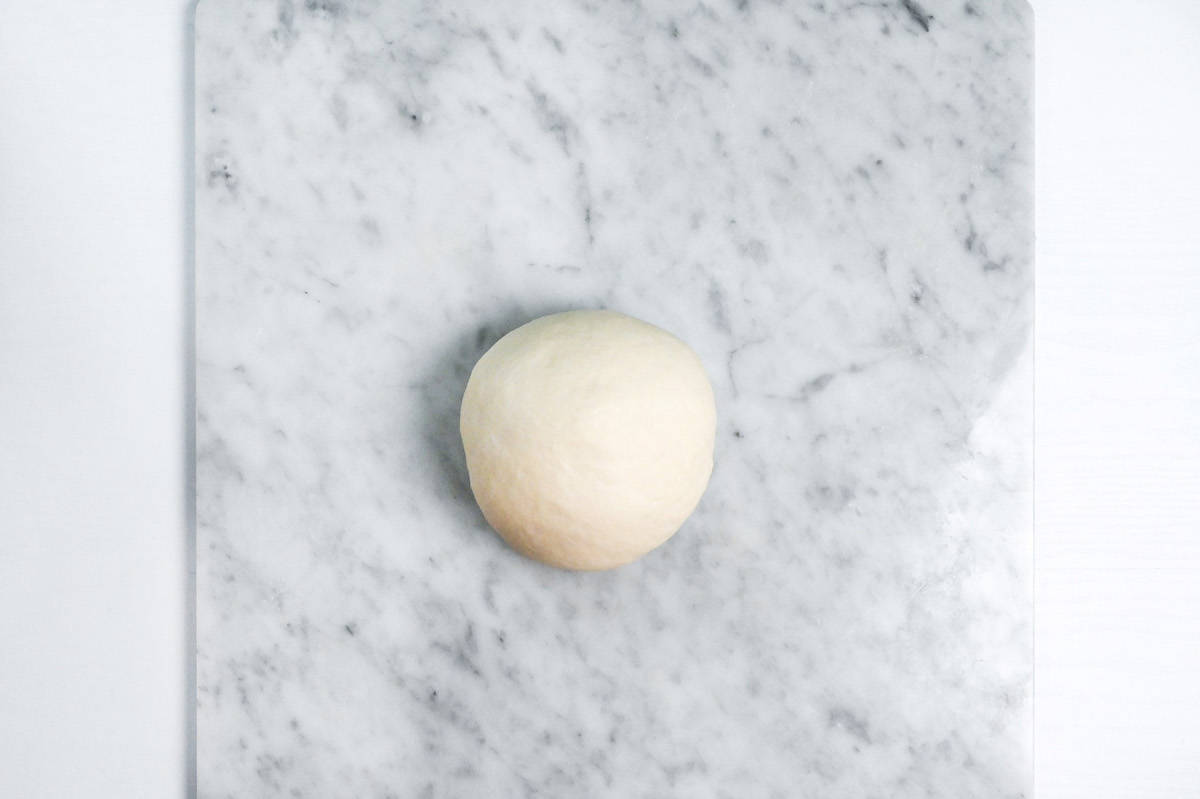
Once the dough is shiny, add the softened butter. Stretch out the dough and place the butter in the center.
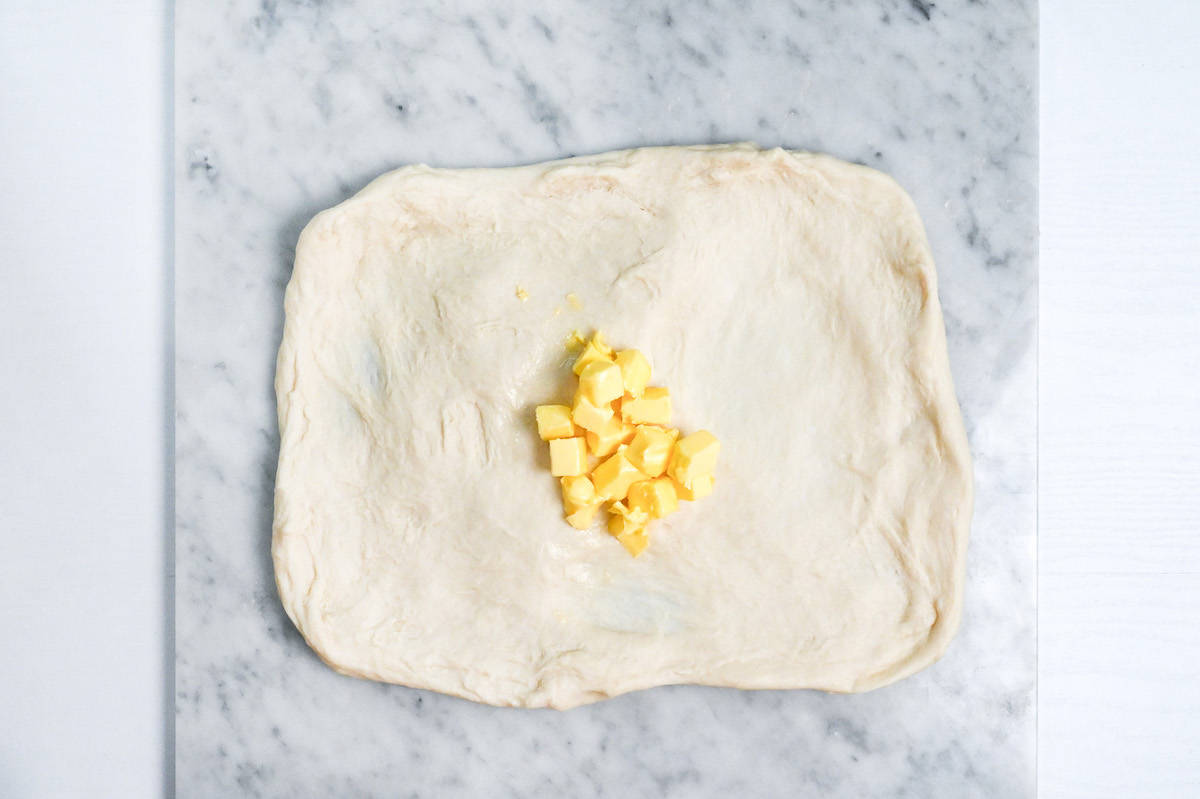
Pull the edges of the dough to the middle to encase the butter and knead. If the butter sticks to the table, don’t worry; it will work its way into the dough through kneading.
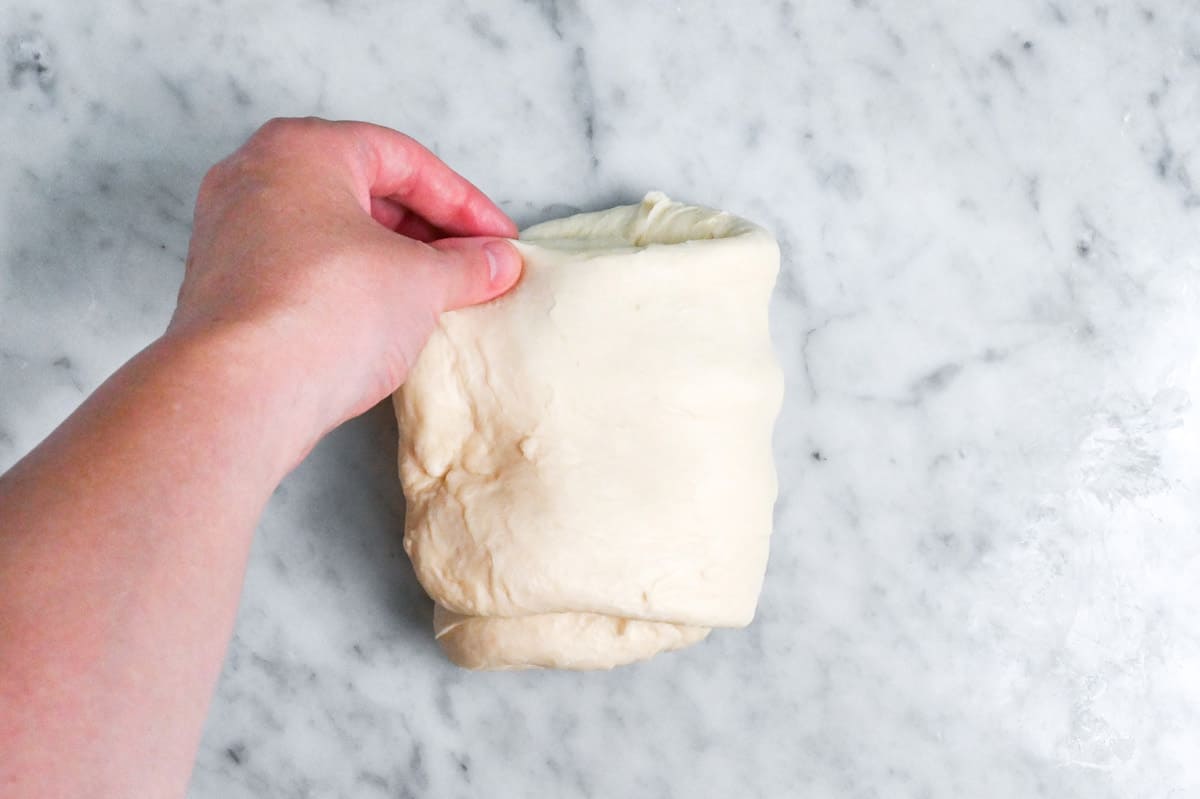
Since gluten is already formed, knead for about 10 minutes to incorporate the butter well.
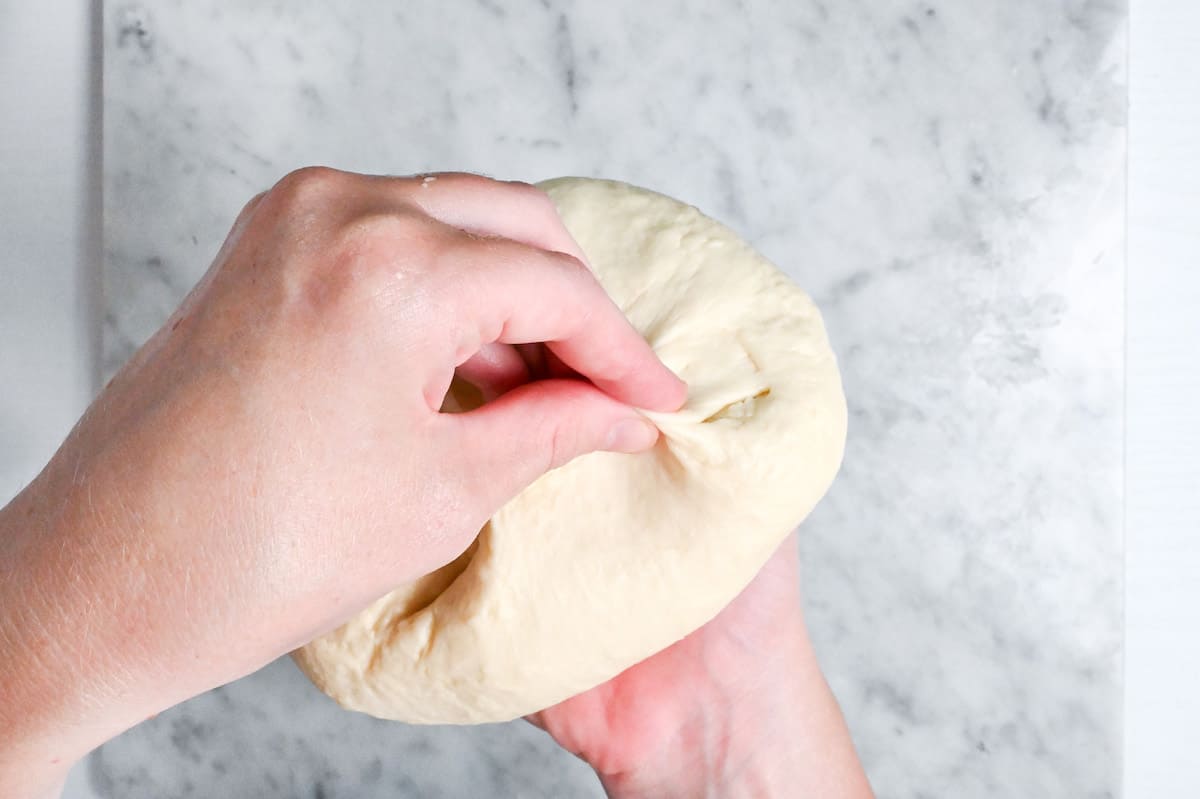
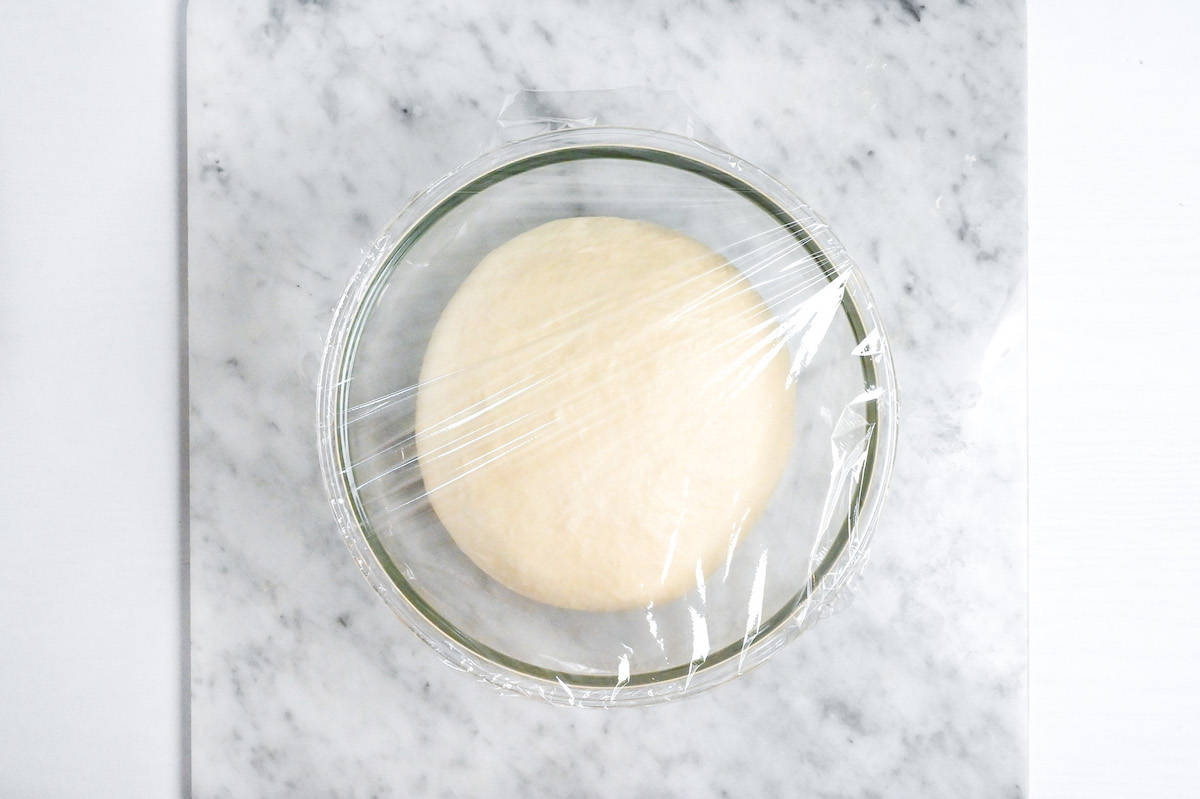
Place the dough on a table and pull the edges toward the center and pinch them together to make the surface tight. This will help the dough rise. Grease a large bowl with salad oil or butter, place the dough in the bowl, pinched side down, and cover with plastic wrap.
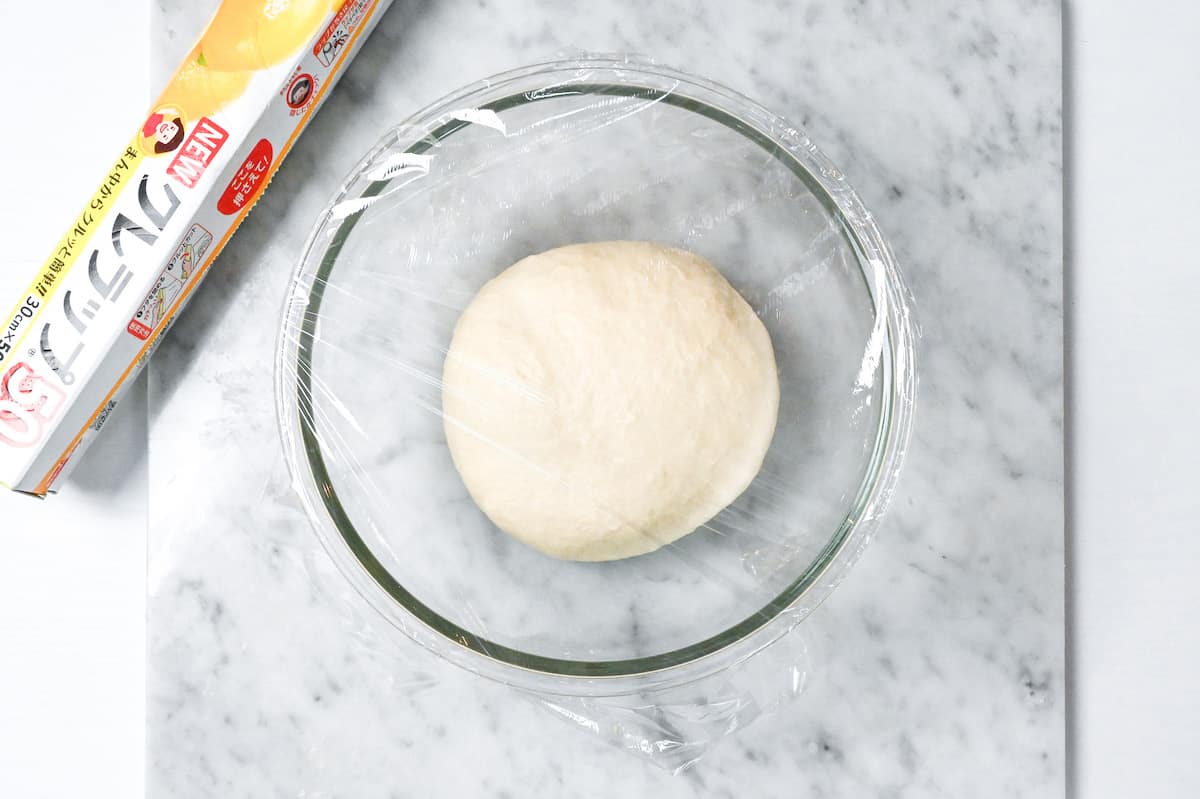
Let it rise in a warm draft-free place (20-25℃ / 68-77℉) for 1 hour or until doubled in size.
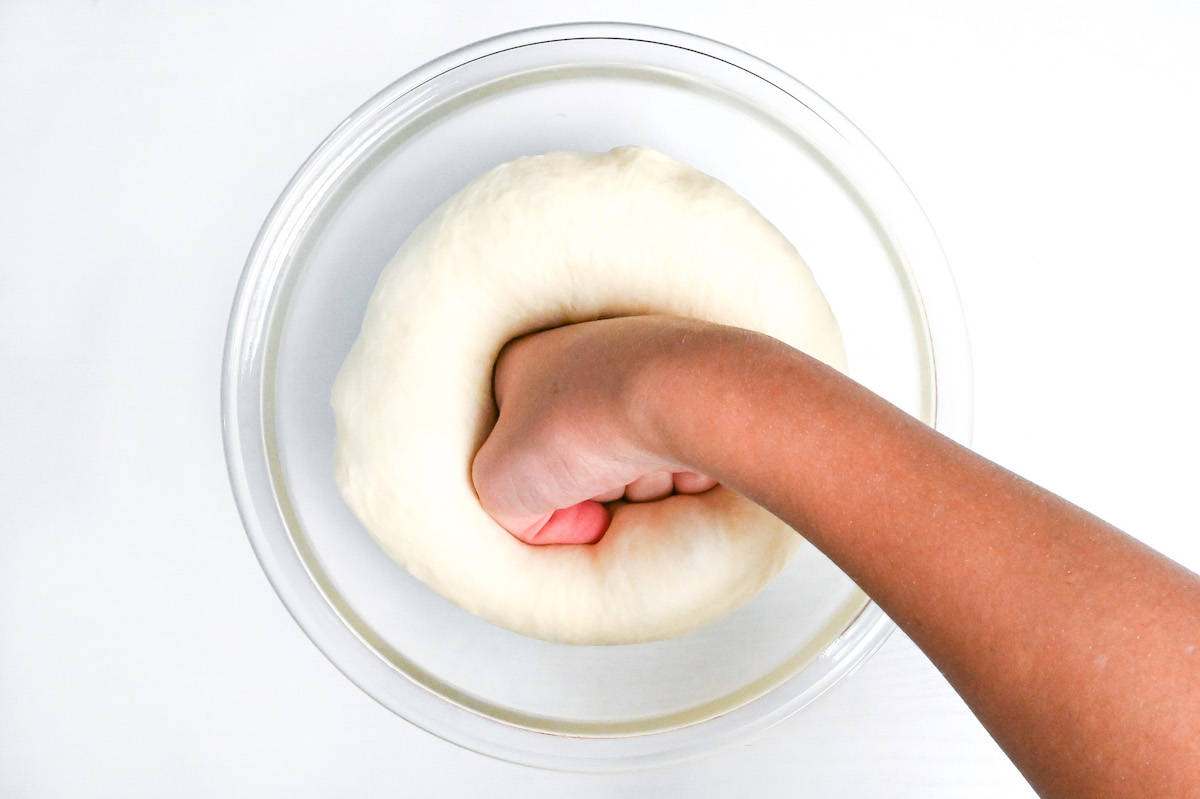
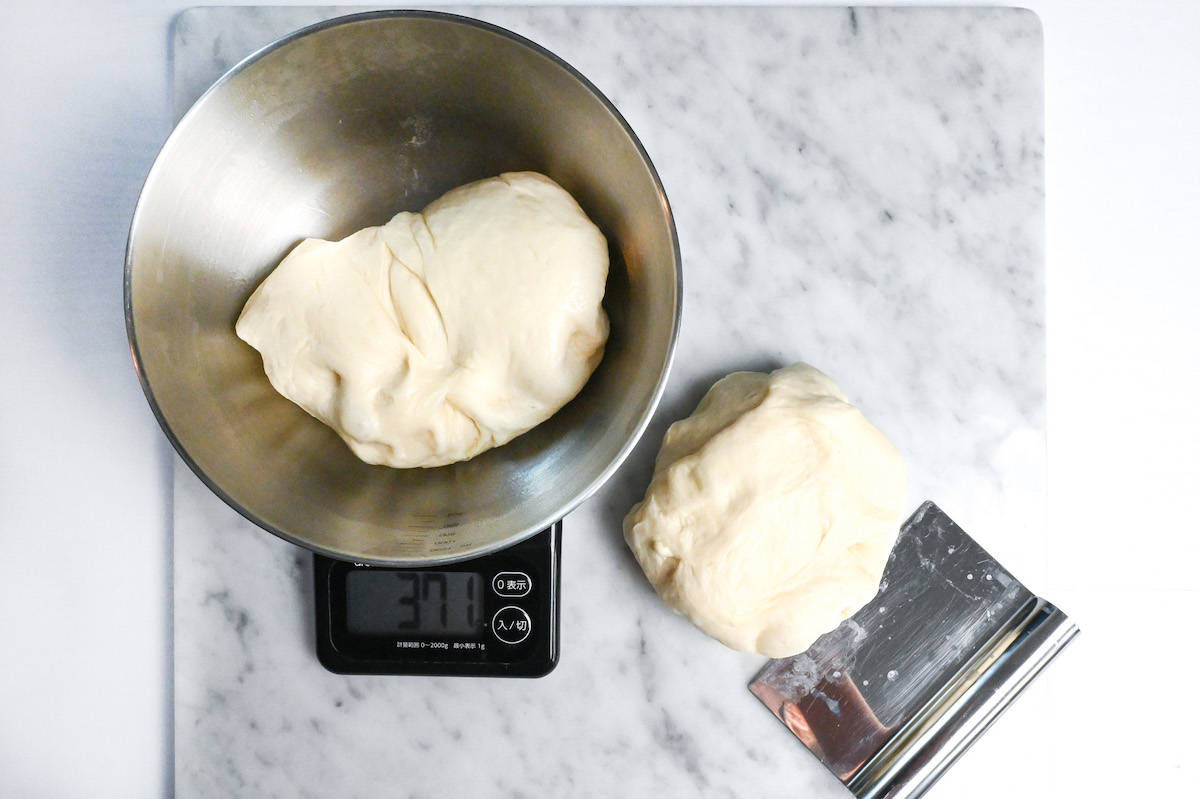
When the dough has doubled in size, punch the air out and then weigh it and cut it into two even pieces. (Mine was 700g so I split it roughly into 350g pieces). It’s okay if two pieces don’t weight exactly the same, but they should be close. Use a scraper or knife to cut quickly, taking care not to tear the dough.
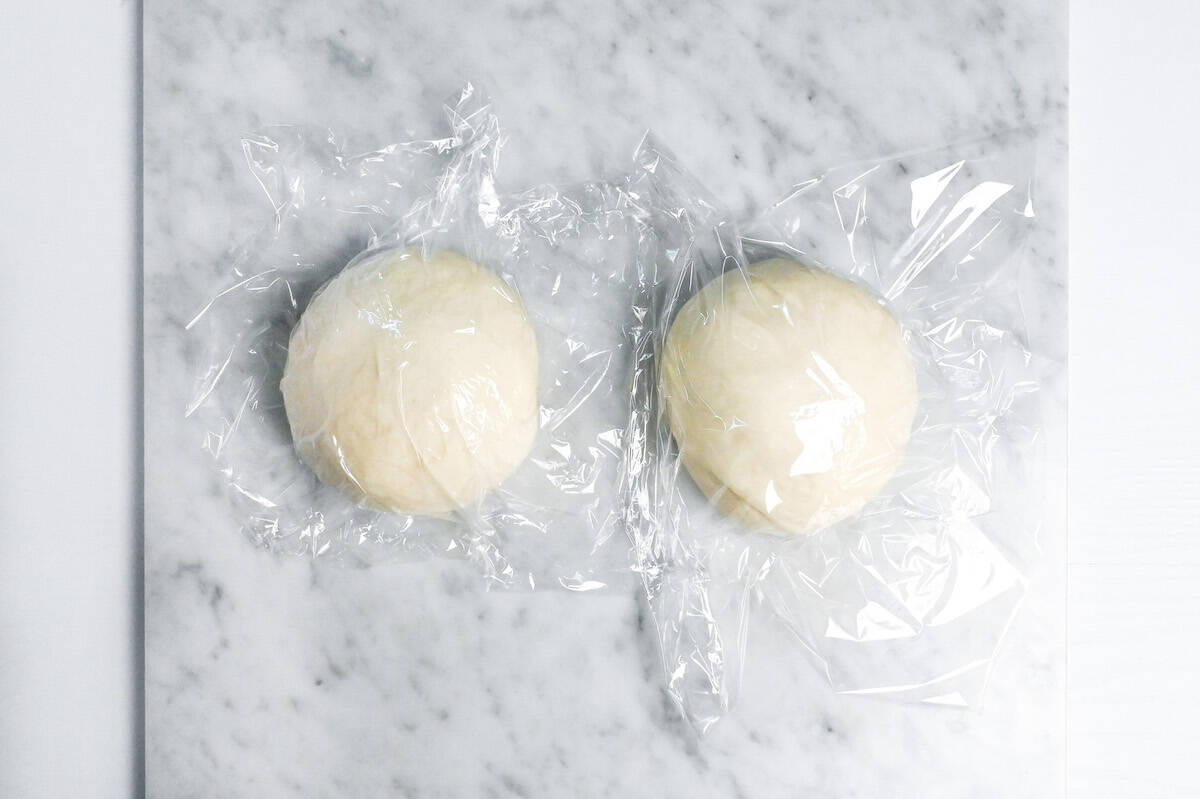
Roll each piece into a ball, place it on a table, cover with plastic wrap, and let them rest for 15 minutes. Meanwhile, coat the loaf tin with a thin layer of release oil for easy removal.
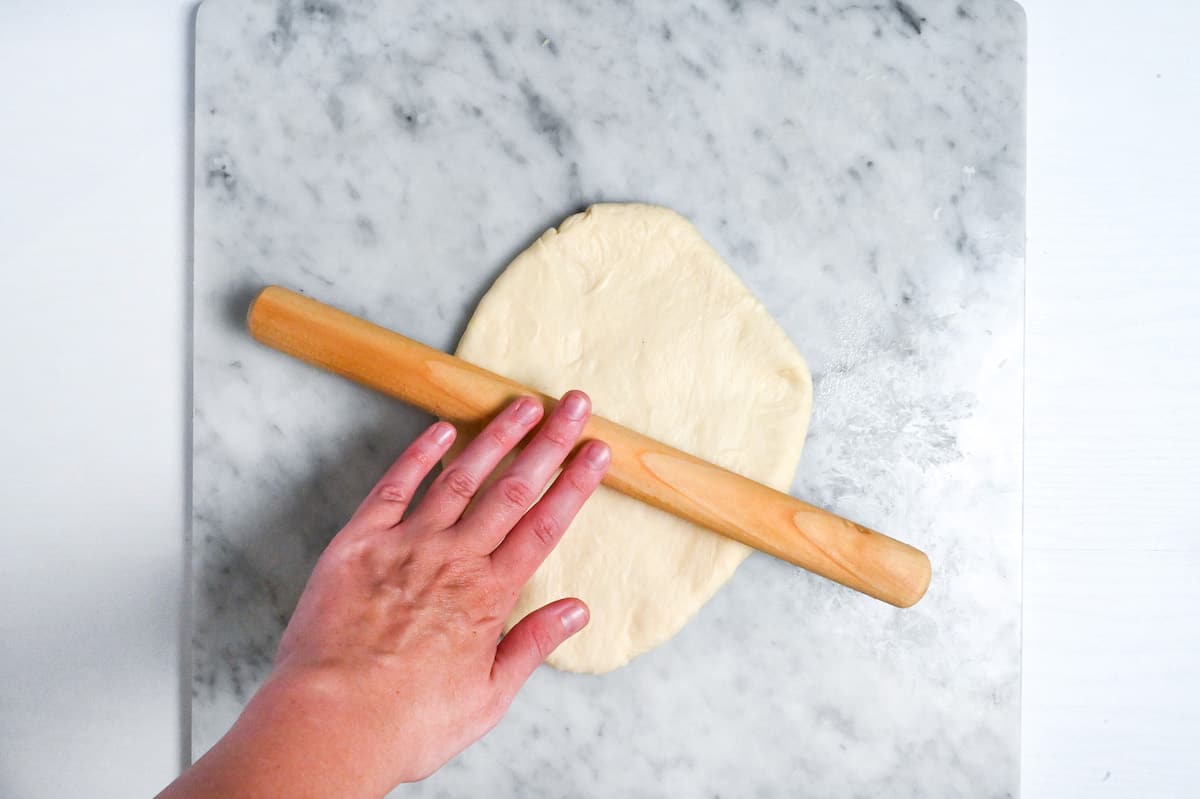
Take a piece of rested dough and place it face down on a floured table. Gently press the dough with the whole palm of your hand to release any gas and roll it out until double the width of your bread pan.
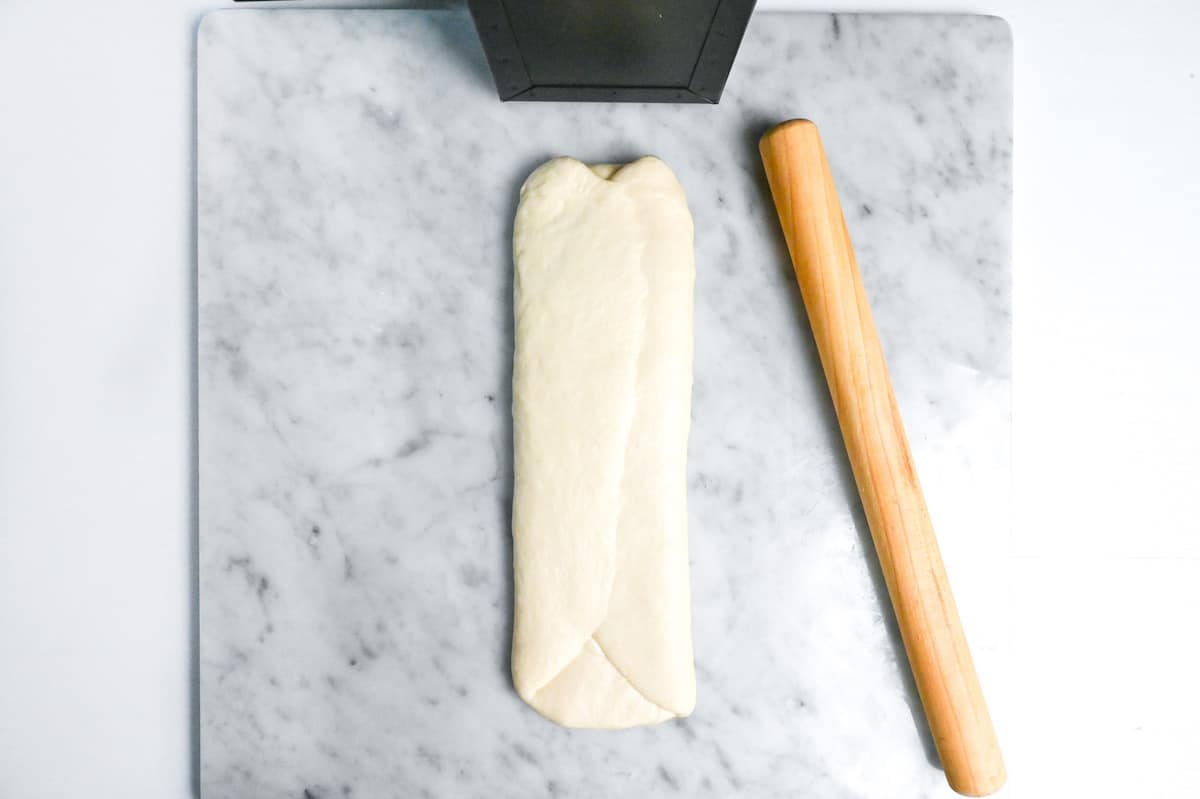
Fold two parallel edges of the flattened dough to the middle to form a rectangle. The width of the rectangle should match the width of the bread pan. Pinch the seam to seal.
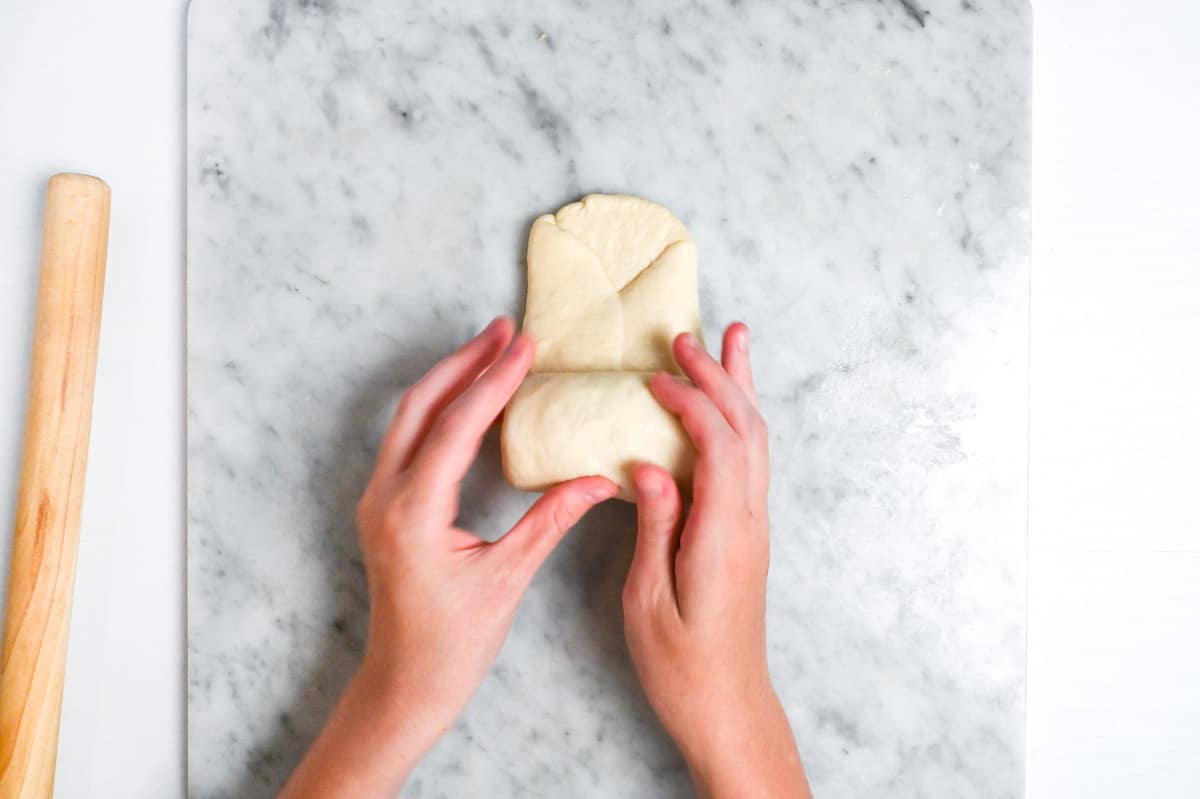
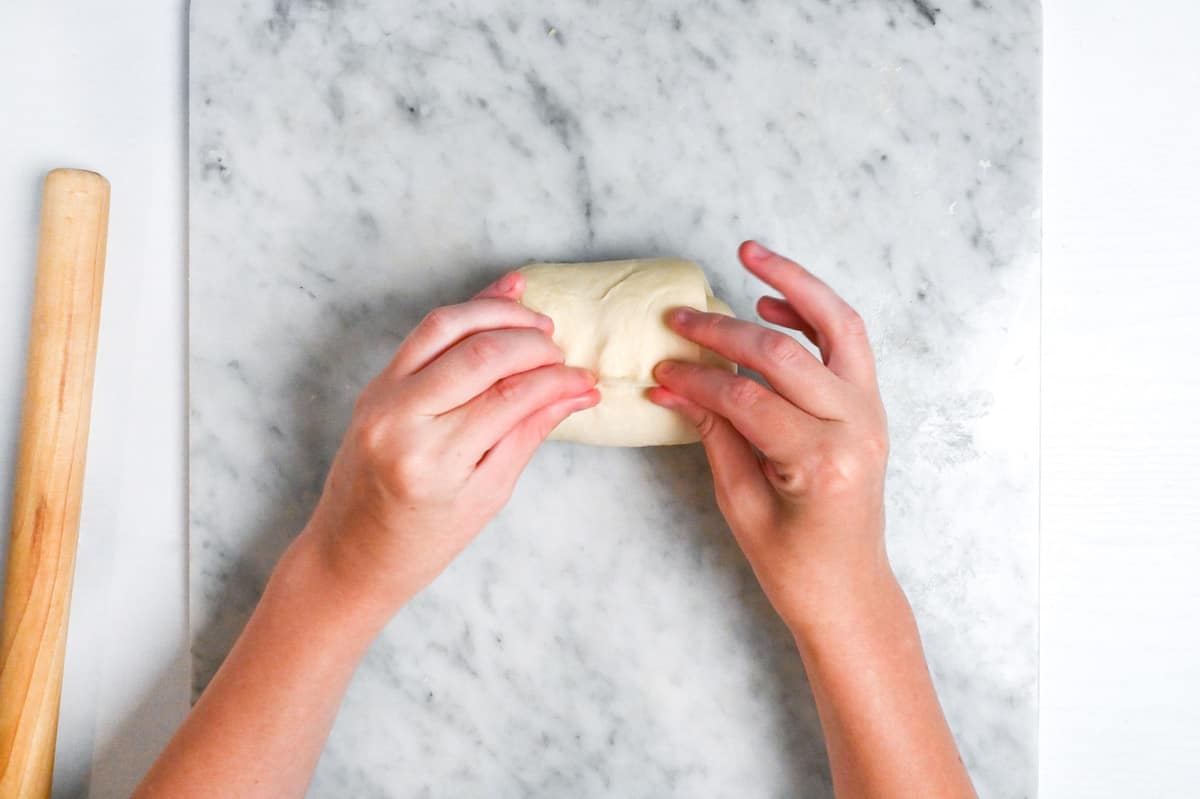
Roll up the dough lengthways to make a neat roll and pinch the seam to seal. Repeat with the other piece of dough.
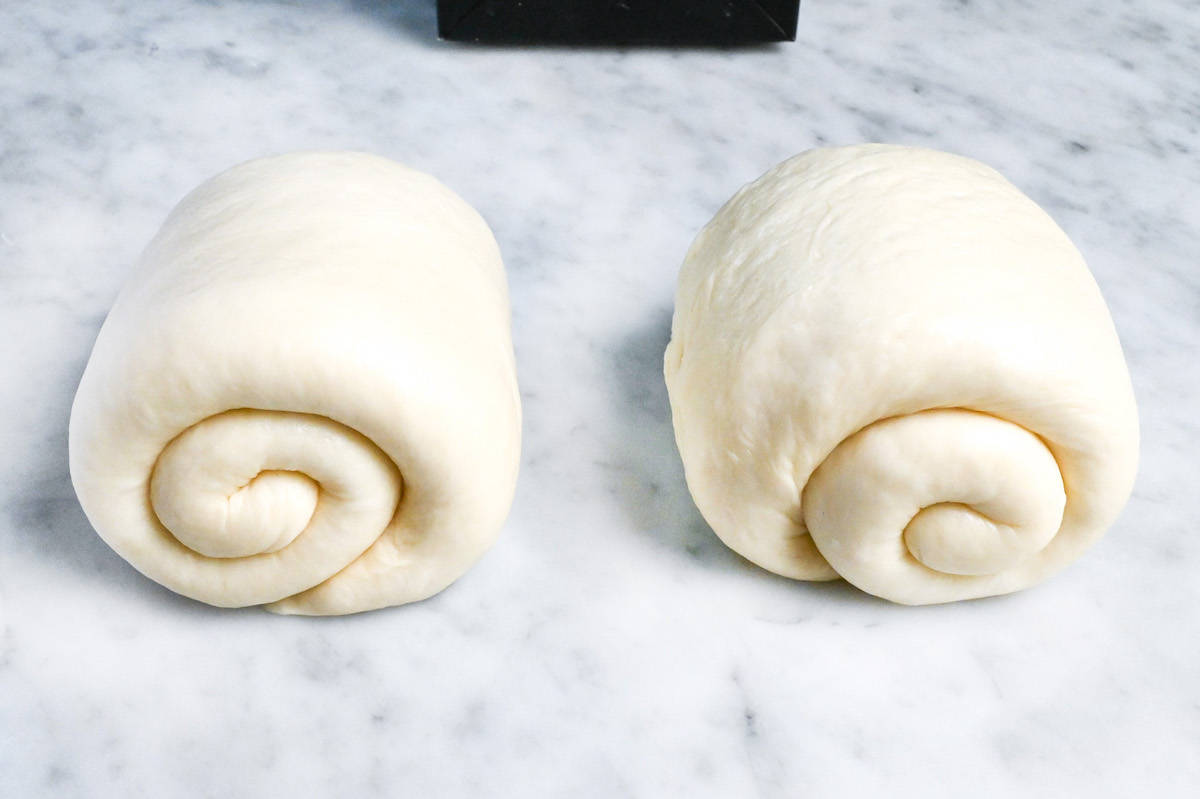
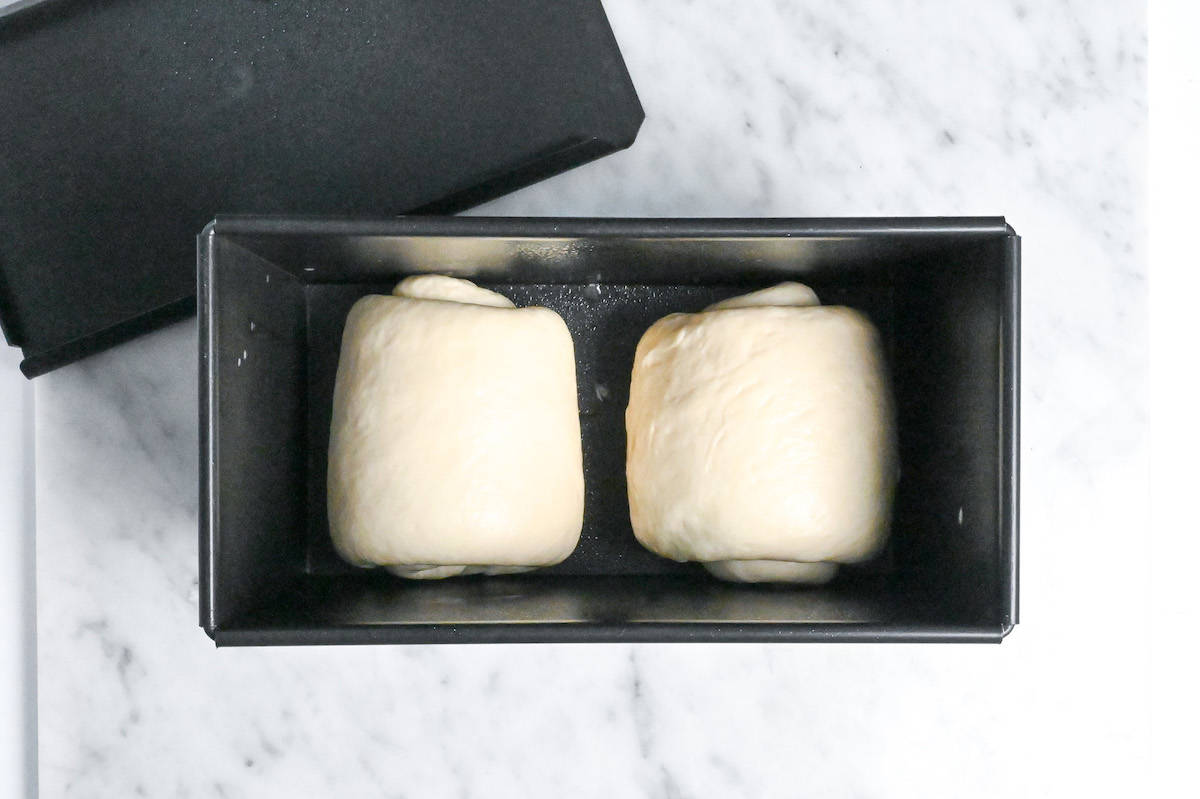
Place each roll in the bread pan with the swirls going in opposite directions and the seams facing down. The swirl sides should be facing outwards against the long edges of the pan. Cover with the loaf pan lid and let it rise at room temperature (20-25℃ / 68-77℉) for 1 hour or until risen to fill the pan by 80% (approximately 2-3cm or 1 inch below the rim of the pan).
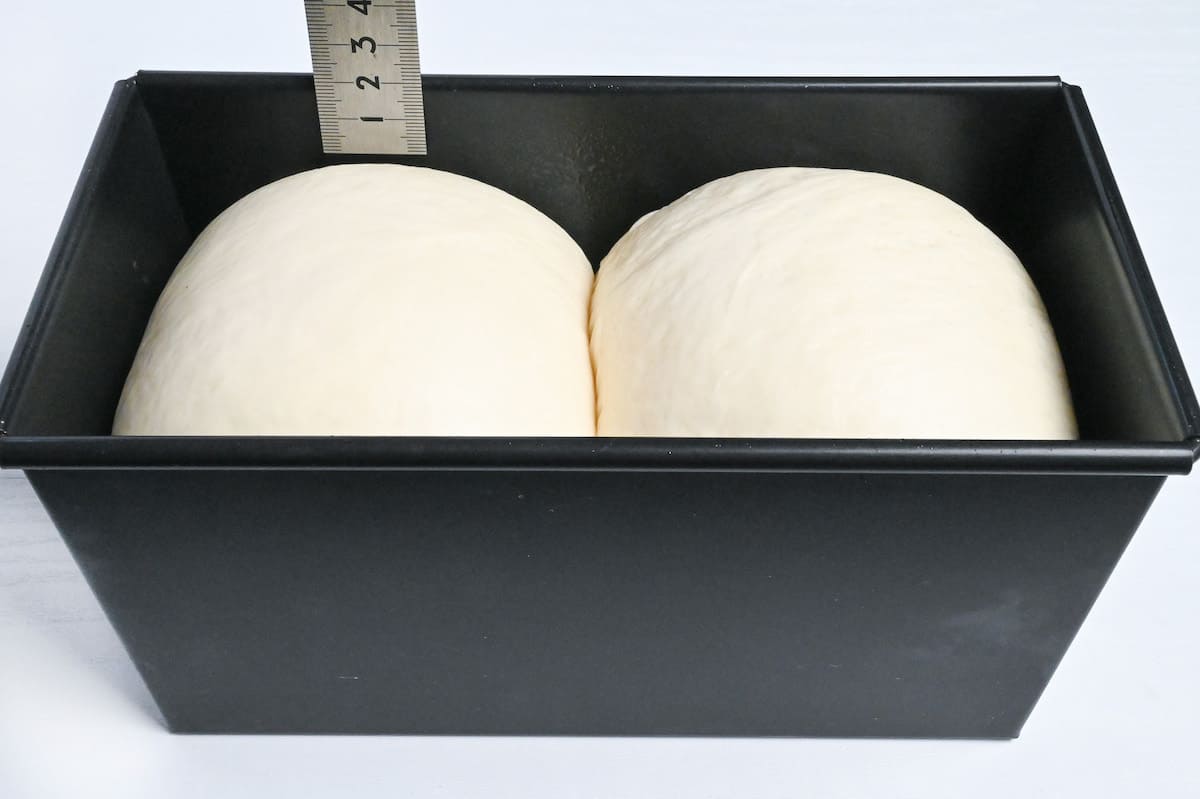
Although the approximate time of the second proof is 1 hour, the time it needs can change depending on the temperature and humidity. Be sure to check your dough regularly and preheat your oven in advance to avoid overproving. If left to rise for too long, the dough becomes unstable and might sink or collapse when baked.

When the dough has risen to fill 1/3 of the pan, start preheating the oven to 210℃ (410℉). Once it’s fully risen (2-3 cm below the rim), lightly mist the top with water and slide it on the cover of the bread pan. Reduce the oven temperature to 200°C (392°F / Gas Mark 6), then place the pan in the oven and bake for 15 minutes.
Once 15 minutes are up, adjust the oven again, this time lowering the temperature to 140°C (284°F) and bake for a further 15-18 minutes. This is to ensure even baking, however, remember that every oven is different, so use this as a guide.
Lightly misting the top of the dough before baking adds a little extra moisture so that the surface of the dough stays flexible. This prevents cracks and helps create a beautiful shape.
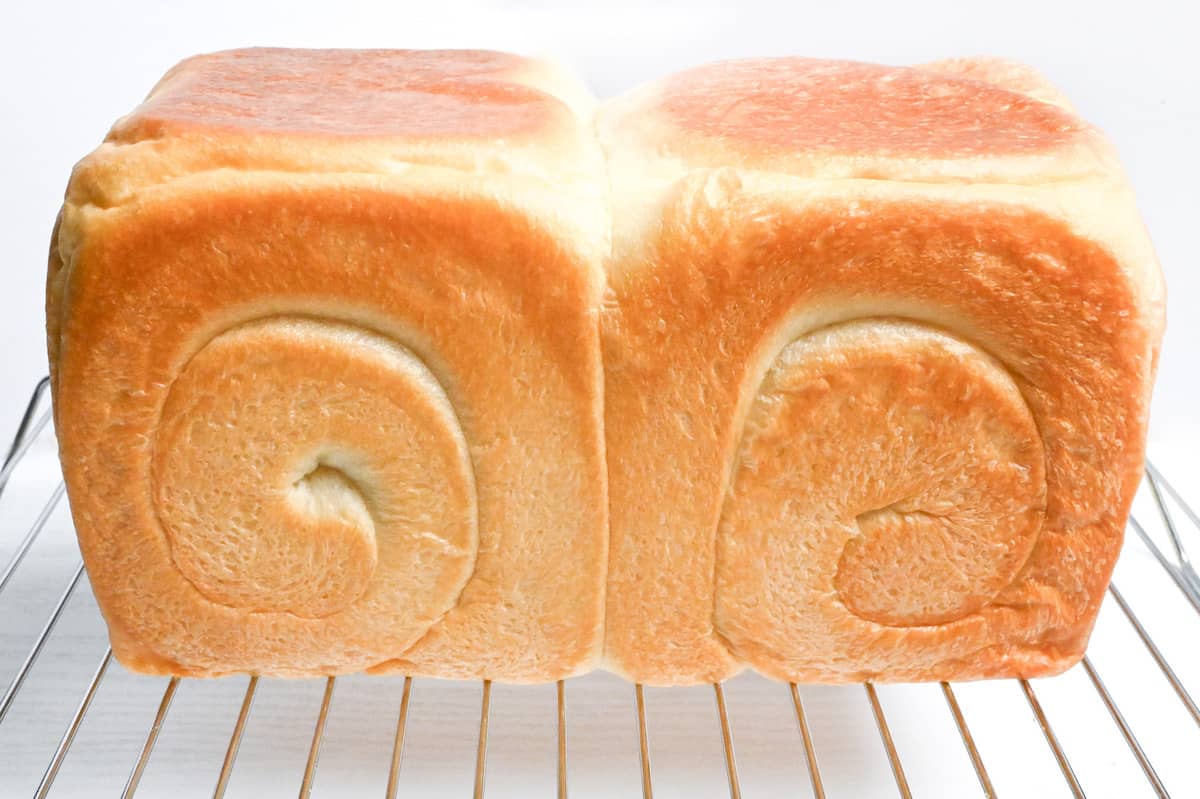
Remove the lid immediately after baking. Drop the entire pan from a height of approximately 15 cm (6 inches) to release the air. Skipping this step can cause the dough to crack, resulting in an hourglass shape.
While it’s still hot, carefully remove the bread from the pan and cool on a wire rack. Wait until the bread is completely cool before slicing to avoid dry edges.
3 Professional Tips and Cautions to Avoid Failure
Baking bread takes both power and finesse. As a pro baker in Japan, I’ll share three essential tips and warnings you should always remember when making shokupan.
Knead VERY Well
Good kneading is crucial! The incredible softness of nama shokupan comes from both the ingredients and thorough kneading, which creates enough gluten to make the bread puffy.
Bread with less gluten will be dense and not soft. Hand kneading can tire your arms, but with a little extra determination, you’ll make amazingly soft bread.
Professionals gently roll out a piece of dough and check for a thin, shiny film. Keep kneading until the surface of the dough is shiny!
Beware of Dryness
Watch out for dryness! Dryness can ruin shokupan dough and cause these problems:
- Dough loses moisture and becomes dry.
- The dough won’t rise well.
- The texture after baking becomes hard.
The dough is most likely to dry out during fermentation if left uncovered. Always cover the dough with plastic wrap or a damp cloth. If the dough feels dry, mist it before fermenting and mist it again if needed.
Keeping the dough moist helps maintain the soft texture that makes shokupan so delicious.
Check the State of Fermentation
Checking the progress of fermentation is crucial when baking shokupan. Fermentation can be faster in the summer and slower in the winter, so the fermentation time will vary depending on the season and temperature.
If the dough isn’t fermented enough before moving to the next step, it won’t rise well during baking and will have a hard texture. In addition, the yeast odor lingers and the aroma, flavor, and taste of the shokupan can be negatively affected.
This recipe provides visual criteria and approximate proofing times. If you’re unsure about judging by appearance, try the “finger test” after the first fermentation.
Dust your finger with flour up to the second joint and poke the fermented, puffed dough. If the hole remains clean when you pull your finger out, the dough has fermented enough. If the hole bounces back and get smaller, let the dough rise longer.
How to Store
Homemade shokupan doesn’t contain any preservatives so the shelf life is considerably shorter than store-bought versions. I recommend eating within 2-3 days for the best taste and texture, and freezing if you don’t plan to eat it in that time frame.
If freezing, slice first and store in sealable freezer bags. Use within 1 month and thaw at room temperature.
Storage summary
Room temperature – 2-3 days (sealed container or bag).
Refrigerated – Not recommended.
Frozen – Up to 1 month.
FAQ
Shokupan is flavored with cream and butter, giving it a slightly sweeter taste than other types of loaf breads.
Brioche differs from shokupan because it is a richer bread, containing eggs, milk and butter.
Shokupan evolved to suit Japanese tastes through trial and error, now differing from other international loaf breads.
Japanese people prefer a softer texture, which is why the loaf has evolved into something a lot softer than the other types of loaf. Typically, the high sugar and fat percentages contribute to a softer loaf.
Nama shokupan is extra fluffy, soft, moist and sweet, so it can be enjoyed without anything on it (nama). Regular shokupan is less sweet and more of an everyday bread.
The exact reason is unknown, but there are theories like the “staple food theory” suggesting it’s a bread to use as a staple food or the “shokupan against sweet breads” theory to distinguish it from sweet bread (kashi pan). Despite this, there are many sweet shokupan variations these days.
I hope you enjoy this Japanese Nama Shokupan recipe! If you try it out, I’d really appreciate it if you could spare a moment to let me know what you thought by giving a review and star rating in the comments below. It’s also helpful to share any adjustments you made to the recipe with our other readers. Thank you!

Nama Shokupan (Japanese Milk Bread) without Bread Machine
Ingredients
- 400 g strong bread flour
- 5 g instant dry yeast
- 26 g caster sugar
- 7 g salt
- 21 g honey
- 95 g heavy cream
- 180 g water
- 45 g unsalted butter softened to room temperature
- oil or butter for greasing
Instructions
- Add 400 g strong bread flour to a large mixing bowl and sprinkle 5 g instant dry yeast and 26 g caster sugar on one side, and 7 g salt on the other so the salt is not touching the yeast.

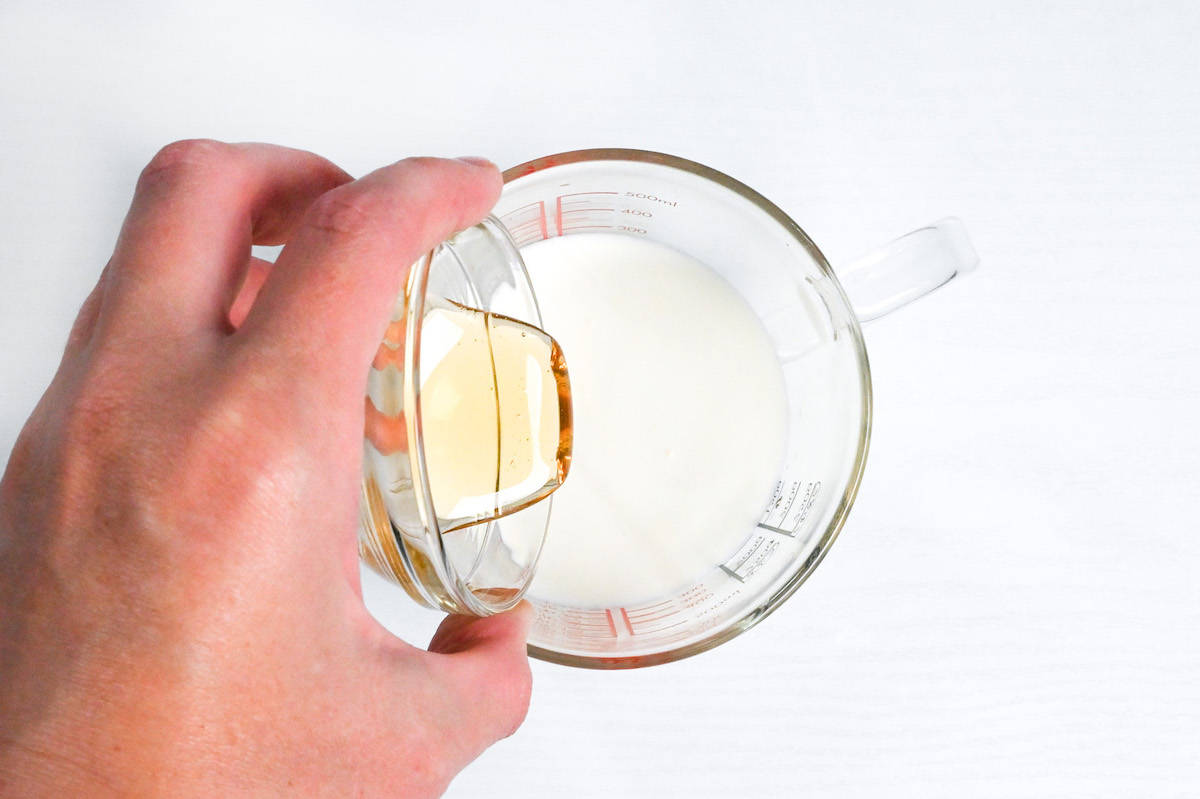
- Mix 21 g honey, 95 g heavy cream and 180 g water in a jug until well combined.

- Make a deep well in the flour and pour in the contents of the jug. Mix until combined to form a rough dough.

- With clean dry hands, tip the dough out onto a kneading board (it will be quite sticky at this point) and slap and fold 10 times. Knead on the board for a few minutes by pushing the dough with the base of your palm folding continuously. Switch back to slapping and folding, after 10 times switch back to kneading.

- Repeat this motion for 30 minutes or until the dough is smooth, stretchy, and shiny. Do the window pane test to ensure it's properly kneaded, you should be able to stretch the dough thin enough to see light through it without it breaking.

- Stretch the dough out onto the board and place 45 g unsalted butter (softened to room temperature, not melted) in the center.

- Pull the edges over to encase the butter and then continue to knead for 10 minutes or until the butter is evenly incorporated.

- Fold the edges of the dough into the center to make it smooth, tight and round on the top, then pinch underneath to secure.

- Grease a large bowl with a thin layer of oil or butter, and place the dough inside with the pinched side facing down. Cover with plastic wrap or a damp tea towel and leave to rise in a warm draft-free environment (20-25℃ / 68-77℉) for 1 hour or until doubled in size. (First rise)

- Once doubled, punch out the air and weigh the dough.

- Cut into two even pieces using a knife or scraper (don't tear). Fold the edges into the center and pinch to make two tight balls.

- Place each piece on a clean surface and cover with plastic wrap or a damp tea towel. Rest for 15 minutes (Bench time).

- While you wait, coat the bread pan with a thin layer of oil or butter.

- Once the bench time is up, take one piece, press it flat and use a rolling pin to roll it into a large circle.

- Fold over two parallel edges to form a rectangle. The rectangle's width should equal the width of the bread pan. Roll lengthways with a rolling pin to increase the length, but be careful not to increase the width.

- Roll up the dough and pinch the seam to secure it. Repeat with the other piece so you have two rolls.

- Place each roll in the bread pan with the swirls going in opposite directions. The seams should be facing down and the sides with swirls facing outwards against the long edges of the pan.

- Cover and let it rise at room temperature (20-25℃ / 68-77℉) for 1 hour or until risen to 2-3cm (1 inch) below the rim of the pan (second rise). Check the dough regularly and when it has risen to fill about 1/3 of the pan, start preheating the oven to 210℃ (410℉).

- When the dough has risen to 2-3 cm below the rim of the pan, spritz the top with a light coating of water and slide on the cover. Reduce the oven temperature to 200°C (392°F / Gas Mark 6) and place the pan in the oven. Bake for 15 minutes, then lower the oven temperature to 140°C (284°F) and bake for a further 15-18 minutes.

- Take the bread pan out of the oven, remove the lid and drop it onto a heatproof surface from a height of approximately 15cm (6 inches). Carefully tip the bread out onto a cooling rack and leave to cool.

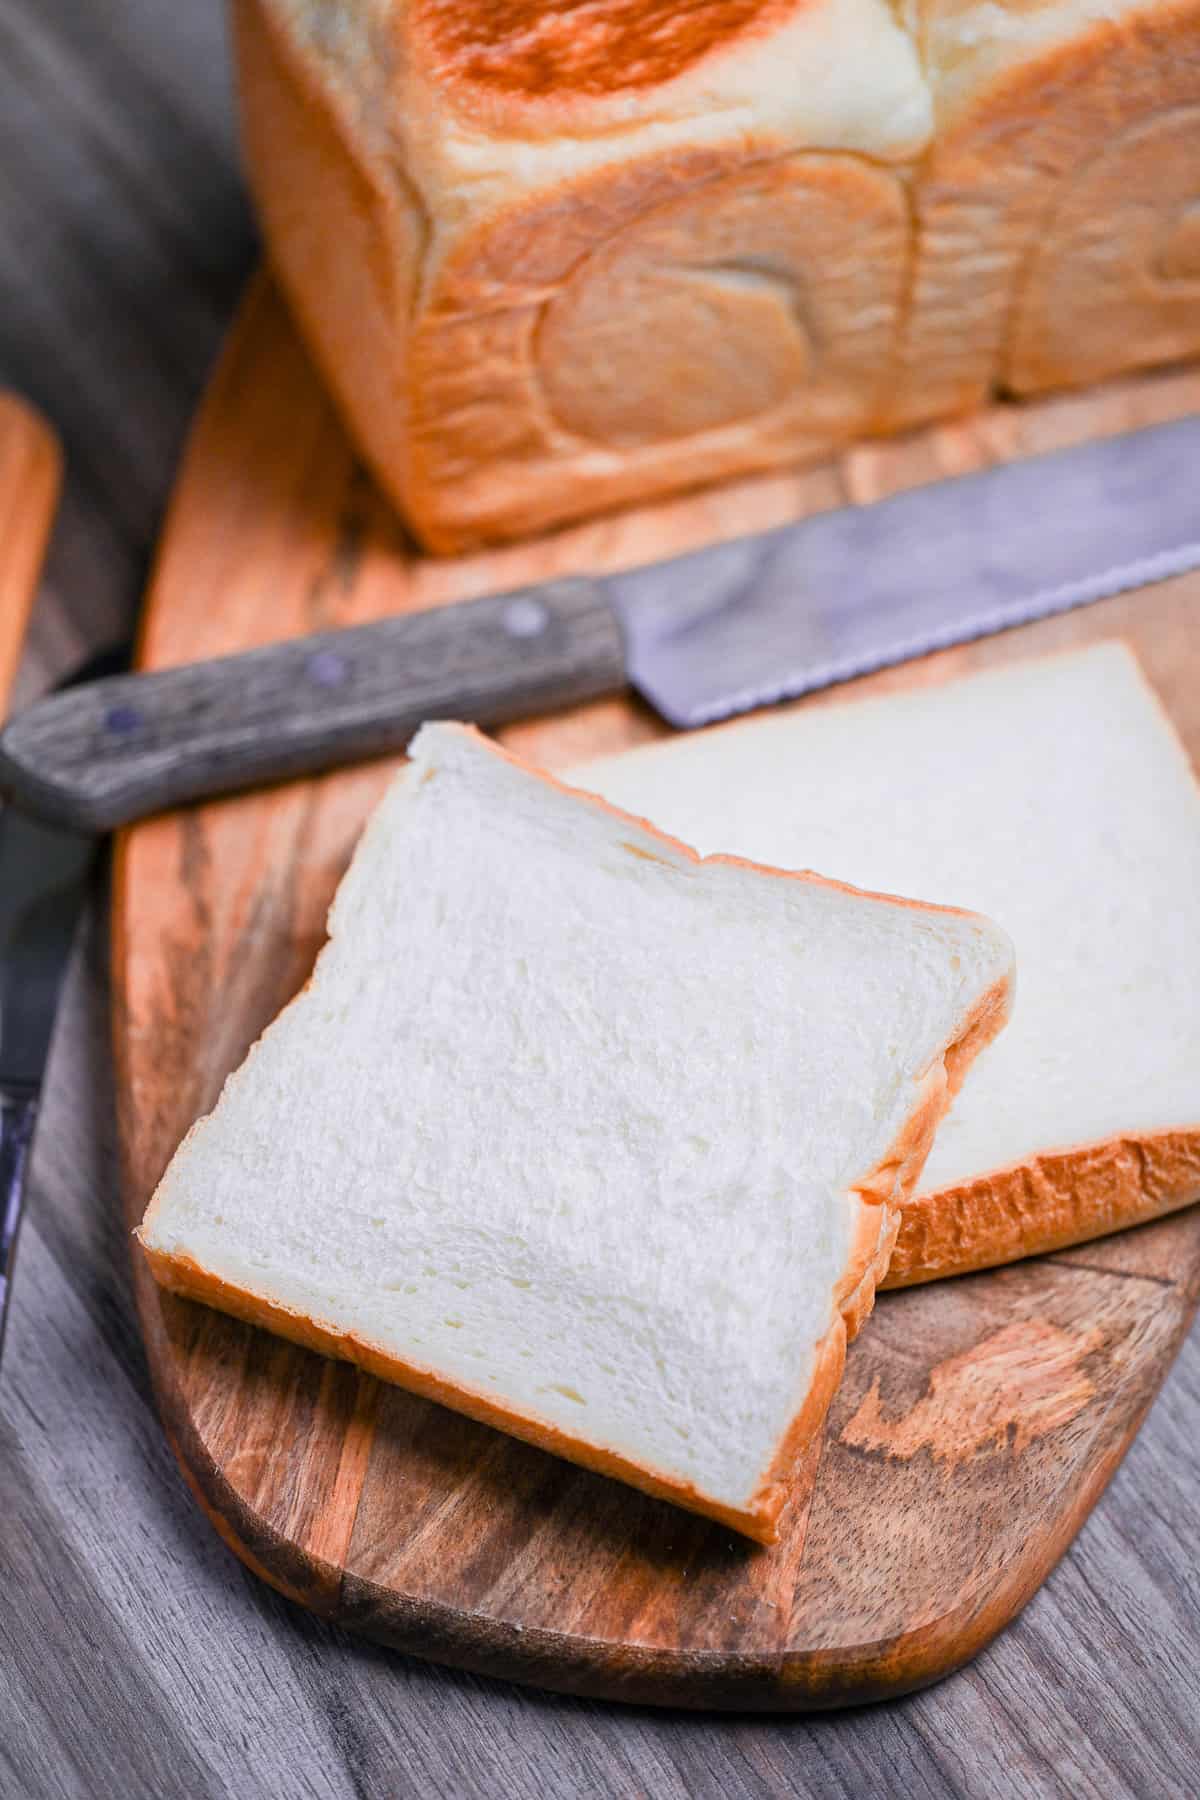
- Cool completely before cutting and serving.

- Enjoy!


Leave a rating and a comment