

The first time you pickle your own gari, you may wonder why the jar is not the loud pink you remember. Here is the good news. Yours will not be neon pink, and that is the proof it is real.
That bright even pink is usually dye. Real gari, from fresh young ginger, blushes a soft uneven pink on its own. Make it at home and your whole sushi night moves up a level.

Sushi ginger
Recipe Snapshot
- What is it? Thin slices of young ginger pickled in a sweet-vinegar brine, the little pink pile that comes with sushi and resets your tongue between different fish. The name comes from gari-gari, the dry crunching sound the ginger makes, and the pink is a real natural reaction between the red stem tips and the vinegar, not dye.
- Flavor profile: Sweet and tart in balance, with neither the sour nor the sweet leading, over a gentle ginger warmth and a clean crunch.
- Why you will love this recipe: It turns a knob of fresh young ginger into a jar of bright, naturally pink-ish gari with about 20 minutes of hands-on work, and the salt-draw-and-squeeze step keeps it crisp and full of flavor instead of watery.
- Must-haves: Fresh young ginger with its pink stem tips, unseasoned rice vinegar, and a clean lidded jar or container.
- Skill level: Easy. The only real skill is slicing thin, and a sharp knife matters more than anything fancy.
Summarize & Save this content on:

What is Sushi Ginger (Gari)?
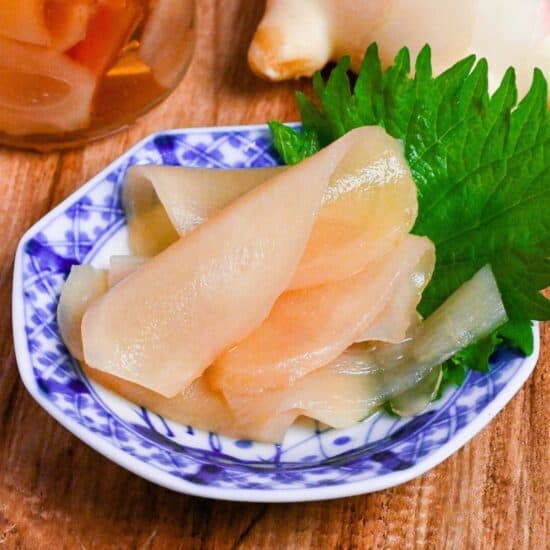
Sushi ginger, known as gari (ガリ), is young ginger sliced paper-thin and steeped in sweet vinegar, the small pink heap that sits next to your sushi. The name is not a recipe name at all. It is the sound, gari-gari, that the ginger makes when you slice it and when you bite it, and it started life as sushi-counter slang before it became a word everyone uses.
This is not just a garnish. You eat a slice between different pieces of sushi to reset your tongue, so a rich, bold mouthful of ikura does not bleed into the next clean bite of white fish. Think of the sorbet that arrives between courses at a long dinner. Same job, smaller package.
Here is the first thing you might run into. Not every pink ginger at a Japanese table is gari. There is a separate pickle, beni shoga, that is made from mature ginger in plum vinegar, much sharper and saltier, dyed a loud red. That one is for yakisoba, gyudon, takoyaki, and okonomiyaki, never for sushi. Gari is the gentle one. Another thing to expect before you start. Homemade gari does not turn the loud, even neon pink of the supermarket tubs. The natural color is a soft, uneven blush, pale in some slices and barely there in others, and that is the real chemistry doing its quiet thing.
Sushi Ginger Ingredients
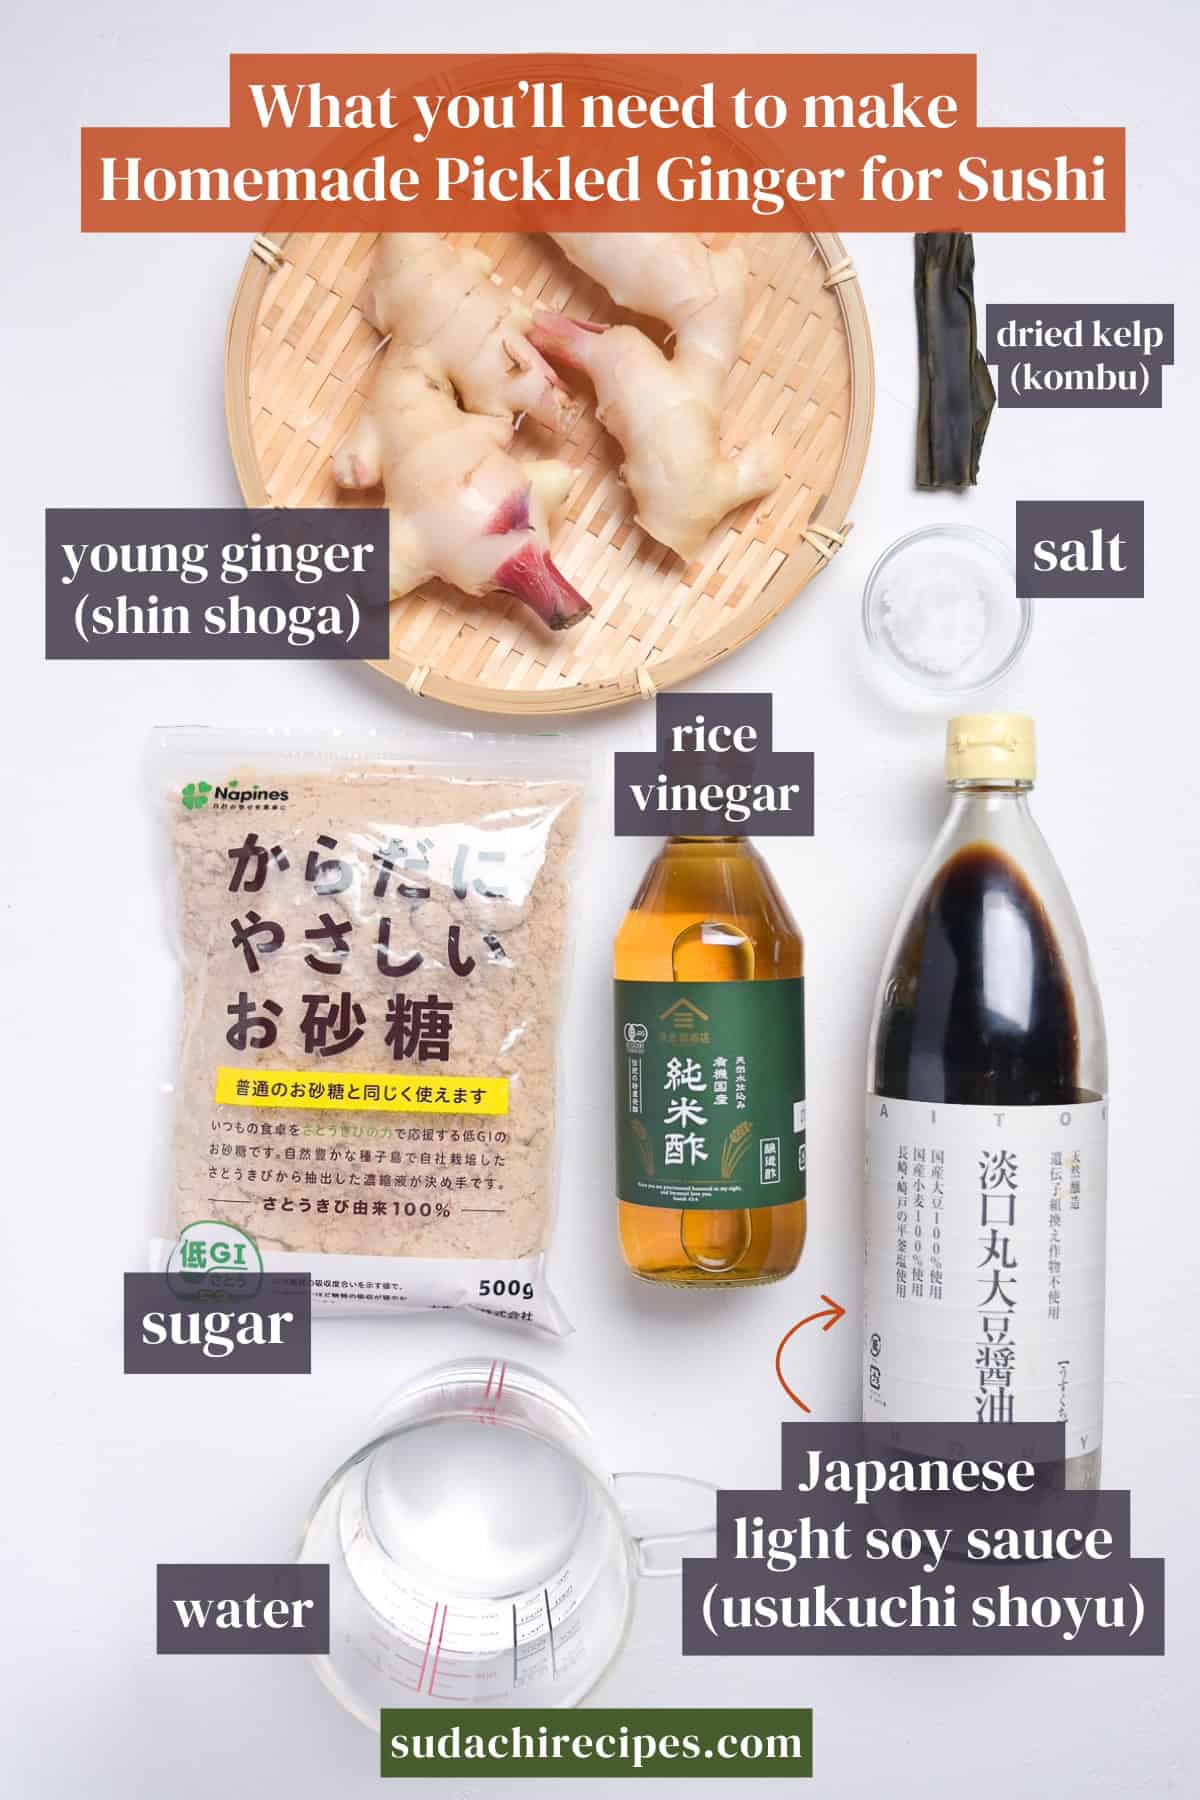
- Young ginger: Also called new ginger or shin shoga, is harvested in early summer with thin, papery skin you can scrape off with a spoon and pink-tinged stems still attached. It is juicier, milder, and far less stringy than the regular kind you keep by the stove. Those pink stems are not decoration. They hold the pigment that gives real gari its blush, so look for ginger with them still on and do not cut them away. To track it down, look for the words baby ginger, young ginger, or new ginger at Asian grocers or farmers markets in late spring through summer.
- Rice vinegar: It is mild and faintly sweet where harsh distilled vinegar would just flatten the ginger. Buy the unseasoned kind, and this part matters more than it sounds. Seasoned rice vinegar, sometimes labeled sushi vinegar, already has sugar and salt mixed in, so if you reach for that one you have to re-tune every other amount in the brine to compensate.
- Sugar: Light brown sugar is my personal go-to, but white sugar pulls in the other direction. It keeps the brine clearer, which lets the natural pink read a little brighter and cleaner in the jar. Neither is the one correct answer. Reach for light brown when you want depth, white when you want the color to pop.
Substitution Ideas
- Young ginger → Mature ginger: The big one, and the swap you might actually need. Regular mature ginger works, but it comes with a stronger personality you have to manage. Slice it even thinner than you would young ginger to fight the tough fibers, blanch it longer at 2 to 3 minutes instead of 1 to tame the heat, and give it a salt massage before pickling. Done carefully it gets you to about 60-70 % of the experience. What it will not do is turn pink, because mature ginger has lost the pigment that lives in young ginger’s red stems. It also stays spicier and chewier no matter what you do, so go in expecting a cream-colored, livelier pickle rather than a soft pink one.
- Unseasoned rice vinegar → Apple cider vinegar: The most acceptable stand-in if you can’t get rice vinegar. It brings a fruity note and works mechanically, but the result comes out tangier and less rounded than the real thing. White wine vinegar or champagne vinegar will do in a pinch with a similar trade-off. Plain distilled white vinegar is the last resort, and if that is all you have, cut it with a little water and add a touch more sugar to soften its sharp edge. Treat any of these as the backup, not the goal.
- Light brown sugar → White sugar: An easy swap that changes the look more than the method. Where light brown leans into a deeper, rounder sweetness, white keeps the brine clean and clear so the natural pink comes through a touch brighter.
- Japanese light soy sauce → Regular Japanese soy sauce: I use light (usukuchi) for the color, but you can certainly make this with regular soy sauce. Just expect the color will be darker.
Have trouble finding Japanese ingredients? Check out my ultimate guide to Japanese ingredient substitutes!
How to Make My Sushi Ginger
If you prefer to watch the process in action, check out my YouTube video of this gari recipe!

i. Combine the water, rice vinegar, sugar, light soy sauce, and the piece of kombu in a saucepan.
ii. Heat it over medium just until it begins to bubble around the edges. You want it almost at a boil, not actually boiling.
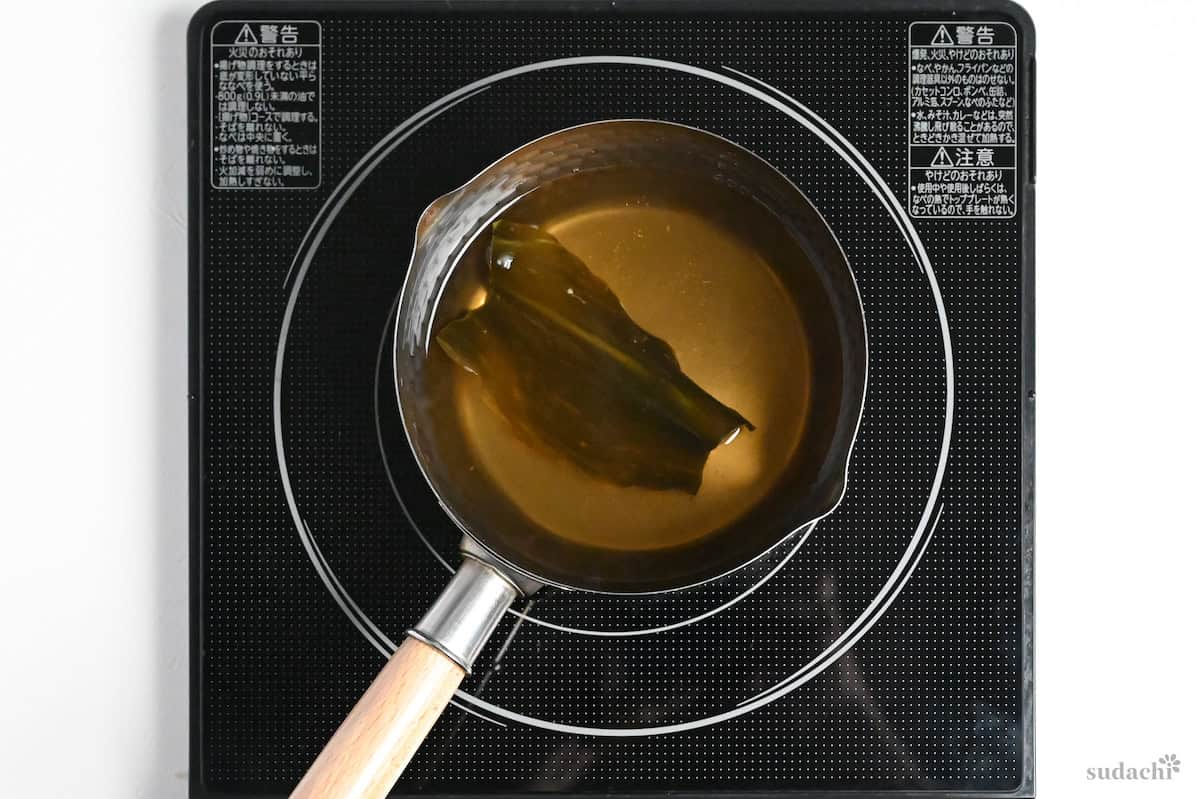
iii. Turn the heat off immediately and let the brine cool all the way to room temperature. Leave the kombu in for now.
Warming the brine dissolves the sugar and pulls the umami out of the kombu, but a hard, rolling boil drives off the bright sour aroma of the vinegar and can turn the liquid slippery from the kelp. You lose the very thing you came for. Bring it to the edge, then back off the heat and let it cool on its own.
i. While you wait for the brine to cool, rinse the ginger, then cut it into 5 cm (2 inch) sections before you clean it. Cutting first lets you rub the dirt out of the crevices with your fingers in a bowl of water.
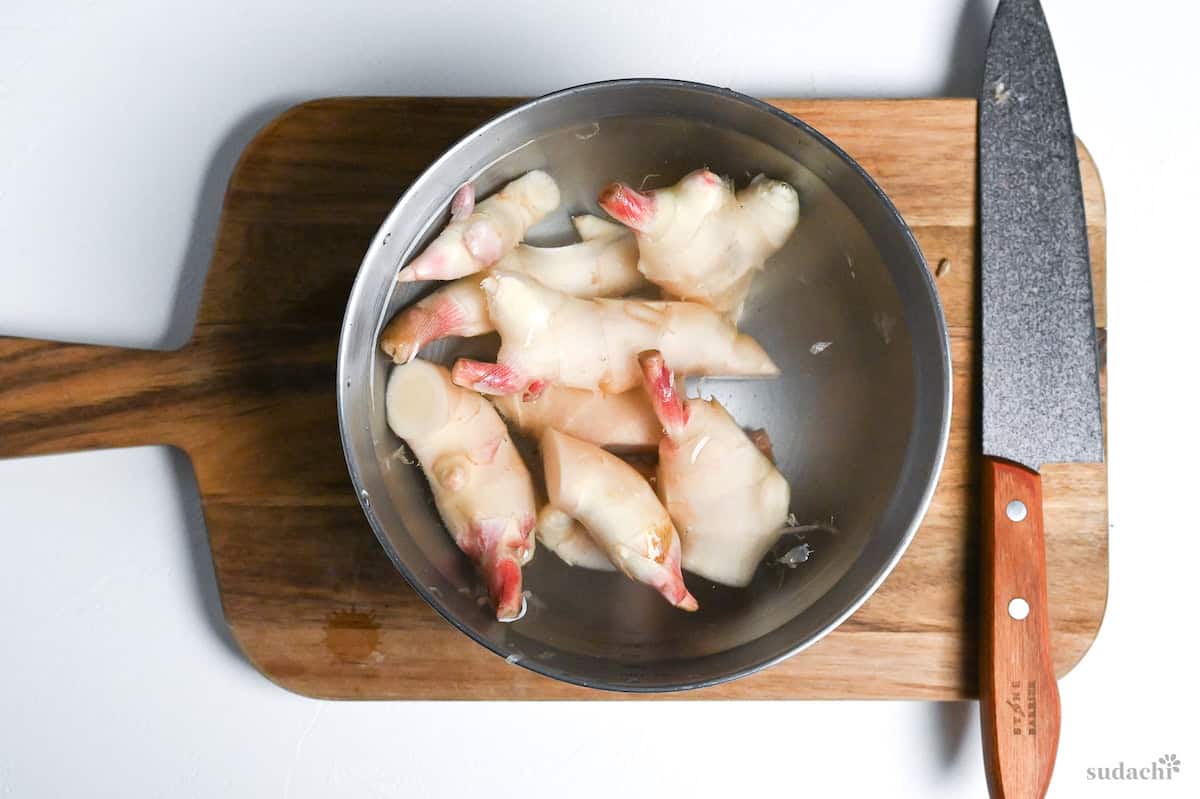
ii. Scrape off any brown or dirty spots with the edge of a spoon. Young ginger skin is thin and the aroma lives right under it, so do not peel it like a carrot.
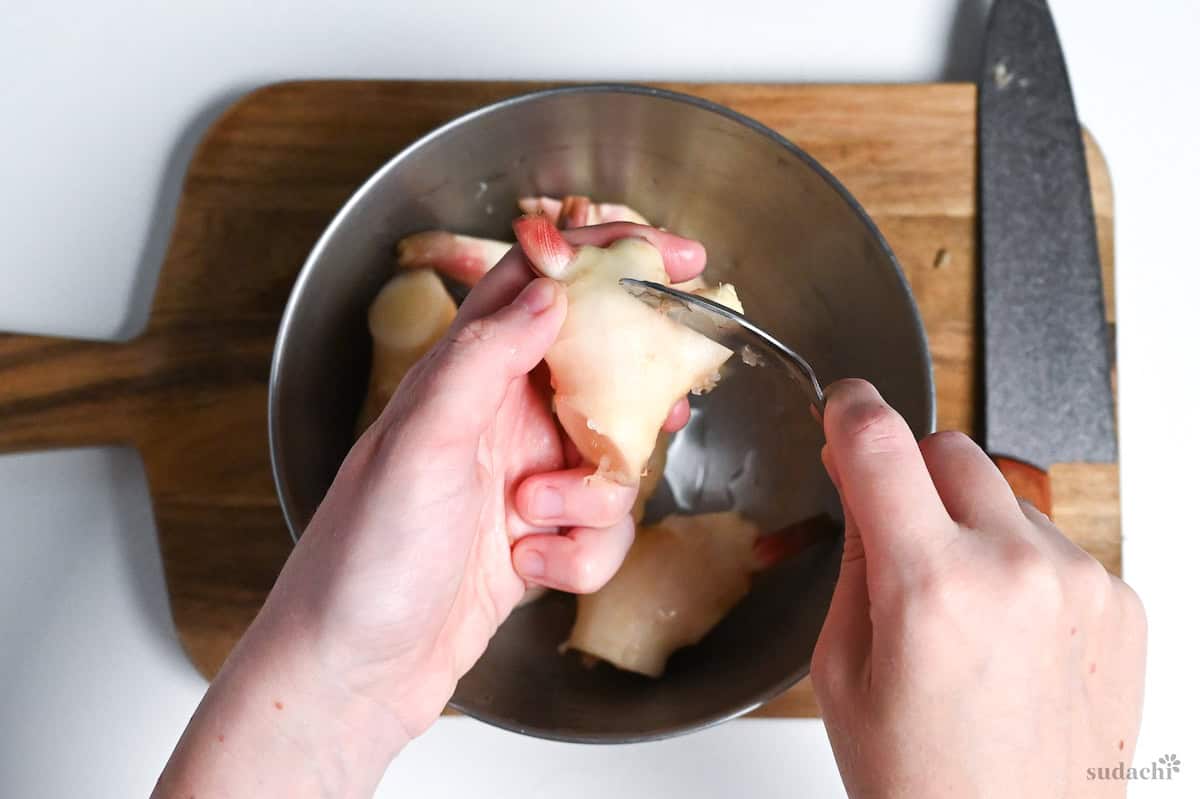
iii. Find the reddish stem tips and trim them off, then set them aside in their own little pile. These are your color. Keep them. We add them back at the very end.
i. With the cleaned ginger sections in front of you, slice the body as thinly as you possibly can, aiming for around 1 to 2 mm. Thin enough that a slice bends and you can almost see through it.
ii. Slice along the fiber, lengthwise, not across it. This gives you a cleaner crunch and slices that hold together instead of going soft and ragged.
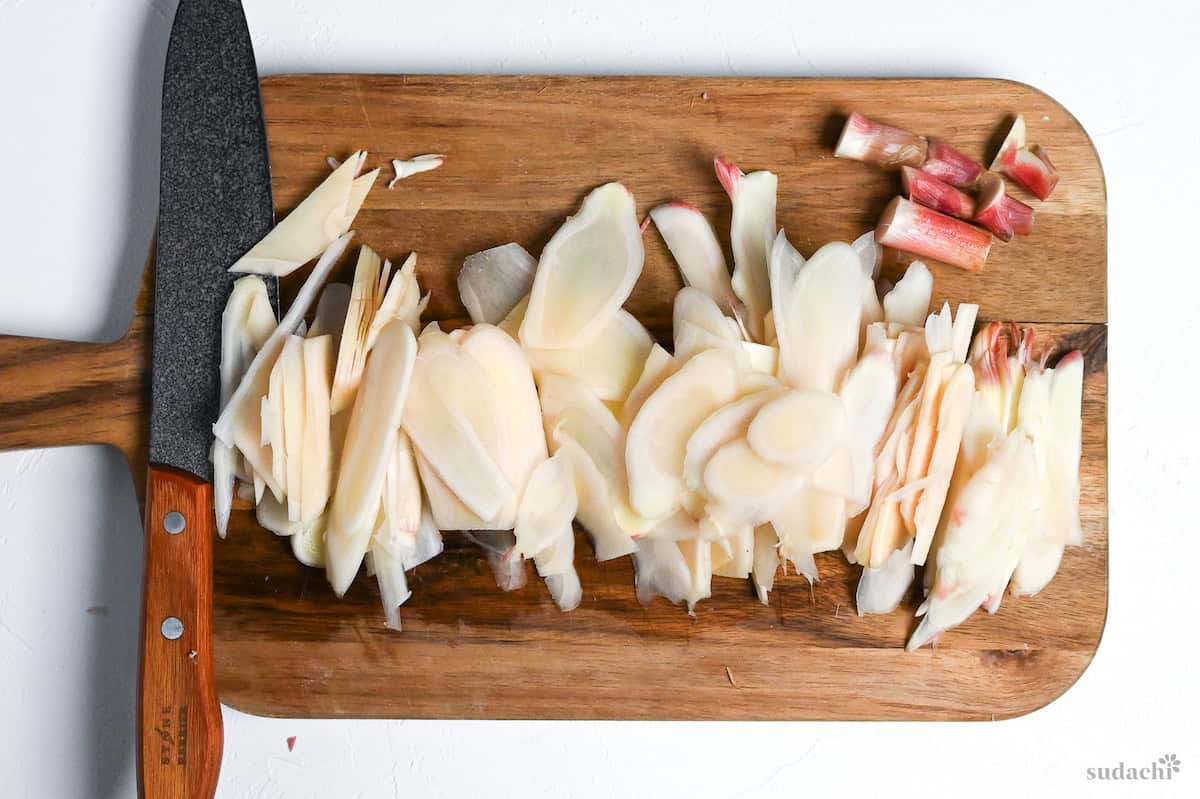
iii. Keep that reserved pink-stem pile close by. Slice those too, and do not let them wander into the trash.
The blush in real gari is not dye and it is not luck. The red stem tips of young ginger carry pigments called anthocyanins, packed into the stem base at roughly 10 times the level found in the main root. When the acid of the vinegar meets them, they shift to pink, the same pH-driven color change you see in red cabbage and blueberries. Leave the stems out and your jar stays pale. Drop them back in and they color the whole batch.
i. Bring a separate pot of water to a rolling boil.
ii. Add the sliced ginger and the pink stems together and blanch for 1 minute.

iii. Drain everything in a colander straight away.
Some might wave at blanching as an optional way to soften the ginger. It is actually how you set the heat. Around 1 minute keeps the ginger crunchier and a little spicier, closer to 2 minutes mellows it out. Go much longer than that and you start washing the ginger’s character into the cooking water, so once you know how spicy you like it, you can adjust the clock on your next batch. For now, 1 minute is a good honest starting point.
i. While the drained ginger is still hot, sprinkle it evenly with the salt and toss to coat. Let it rest until it is cool enough to handle comfortably.

ii. Now squeeze. Gather the ginger in your hands and press the liquid out, working in small handfuls. Press with your palm rather than wringing it like a cloth.

iii. Squeeze until the slices stop dripping and feel damp rather than wet. Resist the urge to plunge them into ice water to cool faster, which strips away too much of the ginger’s heat and aroma along with the water.
If you only take one thing from this recipe, take this one. The salt sprinkled on the hot ginger draws water out of the slices by osmosis, and the squeeze drives the rest of it out by hand. That is the whole point. Slices full of their own water cannot soak up the brine, so they dilute it instead, and you end up with pale, weak, watery gari that never quite tastes like anything.
Hot ginger gives up its water far more easily than cool ginger, so salting while it is still warm is doing real work, not just saving time. Press firmly, but do not go to war with it. Crush the slices too hard and you flatten the crunch that gives gari its name in the first place. Firm, patient, palm-pressed. Damp, not dripping. That is the target.
i. Lift the cooled kombu out of the brine and discard it.
ii. Combine the squeezed ginger, those reserved pink stems, and the cooled brine in your sterilized lidded jar/container. Make sure the ginger is fully submerged.

iii. Cover tightly and refrigerate for at least 24 hours before your first taste. The color and flavor keep deepening for several days, so the wait is part of the recipe.

Fresh out of the squeeze, the ginger is still sharp and the brine has not moved into it yet. Cold time in the jar is when the slices, now empty of their own water, drink the sweet vinegar in, the raw heat softens, and the acid pulls the pink out of the stems and spreads it through the batch. A few hours in, you will see the color start to come up. A day in, it tastes like gari. A week in, even better.
This recipe makes a large amount of sushi ginger. It keeps well, but if you don’t use it that often, you can cut the amount in half or a quarter and use a small jar or container for pickling.

Essential Tips & Tricks
- Keep the red stem tips, do not throw them away. The blush in real gari lives almost entirely in those reddish stem bases, which carry roughly 10 times the pigment of the main root. Cut them, blanch them, and drop them back in the jar with everything else. Leave them out and your gari stays pale yellow no matter how long it sits, and mature ginger has so little of this pigment left that it will not pink for you at all.
- Let the blanch time set the heat, because that is the dial. Around 1 minute keeps the ginger crunchier and a little spicier, closer to 2 minutes mellows it out. This is not a soften-it-up afterthought, it is the single move that decides how hot the finished gari tastes. If your first batch comes out sharper than you like, give the next one a longer blanch and slice a touch thinner.
- Salt the ginger while it is still hot. Hot slices give up their water far more readily than cool ones, so the salt pulls moisture out faster and the slices end up drinking in the brine instead of watering it down. Wait until everything cools and you lose most of that effect.
- Slice along the fiber, not across it. Cutting lengthwise down the grain gives you a cleaner crunch and slices that hold their shape, while cutting across leaves them soft and ragged by the next day. Aim for around 1 to 2 mm, thin enough that a slice bends and you can almost see through it.
The pink and the heat are what people get wrong, so nail those 2 and the rest of this recipe is just patience.
Storage & Meal Prep
Fridge: Keep the gari in a clean, sealed jar with the slices fully submerged in their brine, and use a clean utensil every time you reach in rather than the chopsticks you are eating with. It is at its best eaten within about 1 month.
Freezer: Not recommended.
Make ahead & repurpose: This makes a generous batch and only gets better over the first days as the flavor and color settle in, so it is a natural make-ahead. Do not pour out the leftover ginger brine once the gari is gone, it is excellent stirred into sushi rice, whisked into a dressing, or used in a namban marinade. I would not reuse it to pickle a second batch though, since the acidity drops after the first round and takes the preserving power with it.
What to Serve With This Recipe
Sushi Ginger Troubleshooting
Almost always it is one of two things. Either you used mature supermarket ginger, which has lost the pigment that does this, or you trimmed off the reddish stem tips before slicing. That pink lives in the young ginger’s red stem bases reacting with the vinegar’s acid. Next time buy young ginger with the pink stems still on and keep those stems in the jar. If young ginger is genuinely out of reach, tuck 1 thin slice of beet into the jar to coax some natural color out.
The blanch was too short, or you were working with mature ginger, which is sharper to begin with. The good news is that the raw heat keeps mellowing in the brine over the first several days, so give it more time before you judge it. For the next batch, blanch closer to 2 minutes instead of 1 and slice the ginger thinner, both of which pull more bite out before it ever hits the jar.
Two usual suspects. You may have sliced across the fiber instead of lengthwise along it, which leaves the slices ragged and soft, or you blanched well past 2 minutes and cooked the crunch out. Slice down the grain, keep the blanch at 1 to 2 minutes, and press gently when you squeeze so you do not crush the slices flat.

More Japanese Pickle Recipes
- Easy Takuan (Yellow Pickled Daikon)
- Bettarazuke (Sweet Daikon Pickle)
- Shibazuke (Kyoto-Style Pickles)
- Kohaku Namasu
Once this jar of gari is underway, browse my full collection of Japanese pickle recipes and pick your next jar.
Did You Try This Recipe?
I would love to hear your thoughts!
💬 Leave a review and ⭐️ rating in the comments below. 📷 I also love to see your photos – submit them here!

Pickled Sushi Ginger (Homemade Gari)

Ingredients
- 250 ml water
- 125 ml unseasoned rice vinegar (komezu) unseasoned, not seasoned sushi vinegar
- 80 g light brown sugar or white sugar for a clearer, brighter pink
- 1 tsp Japanese light soy sauce (usukuchi shoyu) or regular soy + pinch salt
- 1 small piece dried kelp (kombu) about 5cm (2-inch) piece
- 340 g young ginger root (shin shoga) with pink stems
- 1 tsp salt non-iodized, for salting the blanched slices
My recommended brands of ingredients and seasonings can be found in my Japanese pantry guide.
Can’t find certain Japanese ingredients? See my substitution guide here.
Instructions
- Take a saucepan and add 250 ml water, 125 ml unseasoned rice vinegar (komezu), 80 g light brown sugar, 1 tsp Japanese light soy sauce (usukuchi shoyu) and 1 small piece dried kelp (kombu). Heat the mixture until almost boiling, then turn it off and leave to cool.

- Cut 340 g young ginger root (shin shoga) into 5cm pieces. Place them in a bowl of water and gently rub the surface clean with your fingers, getting into the crevices.
- Use the edge of a spoon to scrape off any discolored parts of the thin outer skin.
- Cut off the pink parts and set them aside for later. With a sharp knife, slice each piece in the direction of the grain about 1-2mm thick, as thinly as you can.
- Bring a pot of water to a rolling boil, then add the ginger slices (including the pink parts) and blanch for 1 minute.
- Drain in a colander and sprinkle with 1 tsp salt. Toss a few times and leave to rest until cool.
- Once cool enough to touch, squeeze out the excess liquid.
- Pour the cooled pickling liquid into a sealable container and remove the kombu. Add the ginger slices, including the pink parts to add color to your gari.
- Seal and refrigerate for at least 24 hours.
- Serve with sushi and enjoy!

Leave a rating and a comment