


Featured Comment
IT’S THE BEST SAMON OF MY LIFE!!! Thank you so much, it’s a life changing experience 😂
★★★★★
– @yenefferdevengerberg2690 (from YouTube)
What if the best miso salmon you’ve ever made took just 10 minutes from pan to plate?
Glossy miso glaze clings to crisp salmon skin, releasing a sweet-salty aroma that fills the kitchen before your rice even steams. It’s simpler than teriyaki salmon or ponzu salmon and here’s the quiet trick that caramelizes the miso without burning.
Pan-Fried Miso Salmon
Recipe Snapshot
- What is it? 10-Minute Pan-Fried Miso-Glazed Salmon with Caramelized Edges.
- Flavor profile: Sweet-Savory, Garlicky, Toasted
- Why you’ll love this recipe: The miso glaze delivers deep umami with pantry staples she already has, turning simple salmon into a cozy, flavor-packed meal in just 10 mins.
- Must-haves: (ingredients or tools)
- Skill Level: Easy
Summarize & Save this content on:
How I Developed This Recipe
I’ve created plenty of miso-based recipes, like keichan yaki, miso marinated pork, salmon miso soup. They’re all easy but this one? I really went above and beyond, stripped everything down to the absolute essentials.
I tested brushing concentrated glaze onto already-seared salmon using residual heat. No burns. No babysitting. Just foolproof caramelization every time. It’s the simplest recipe on this entire website. Grab salmon on your commute home and dinner’s done before your favorite weeknight show has even started!
Pan-Fried Miso Salmon Ingredients
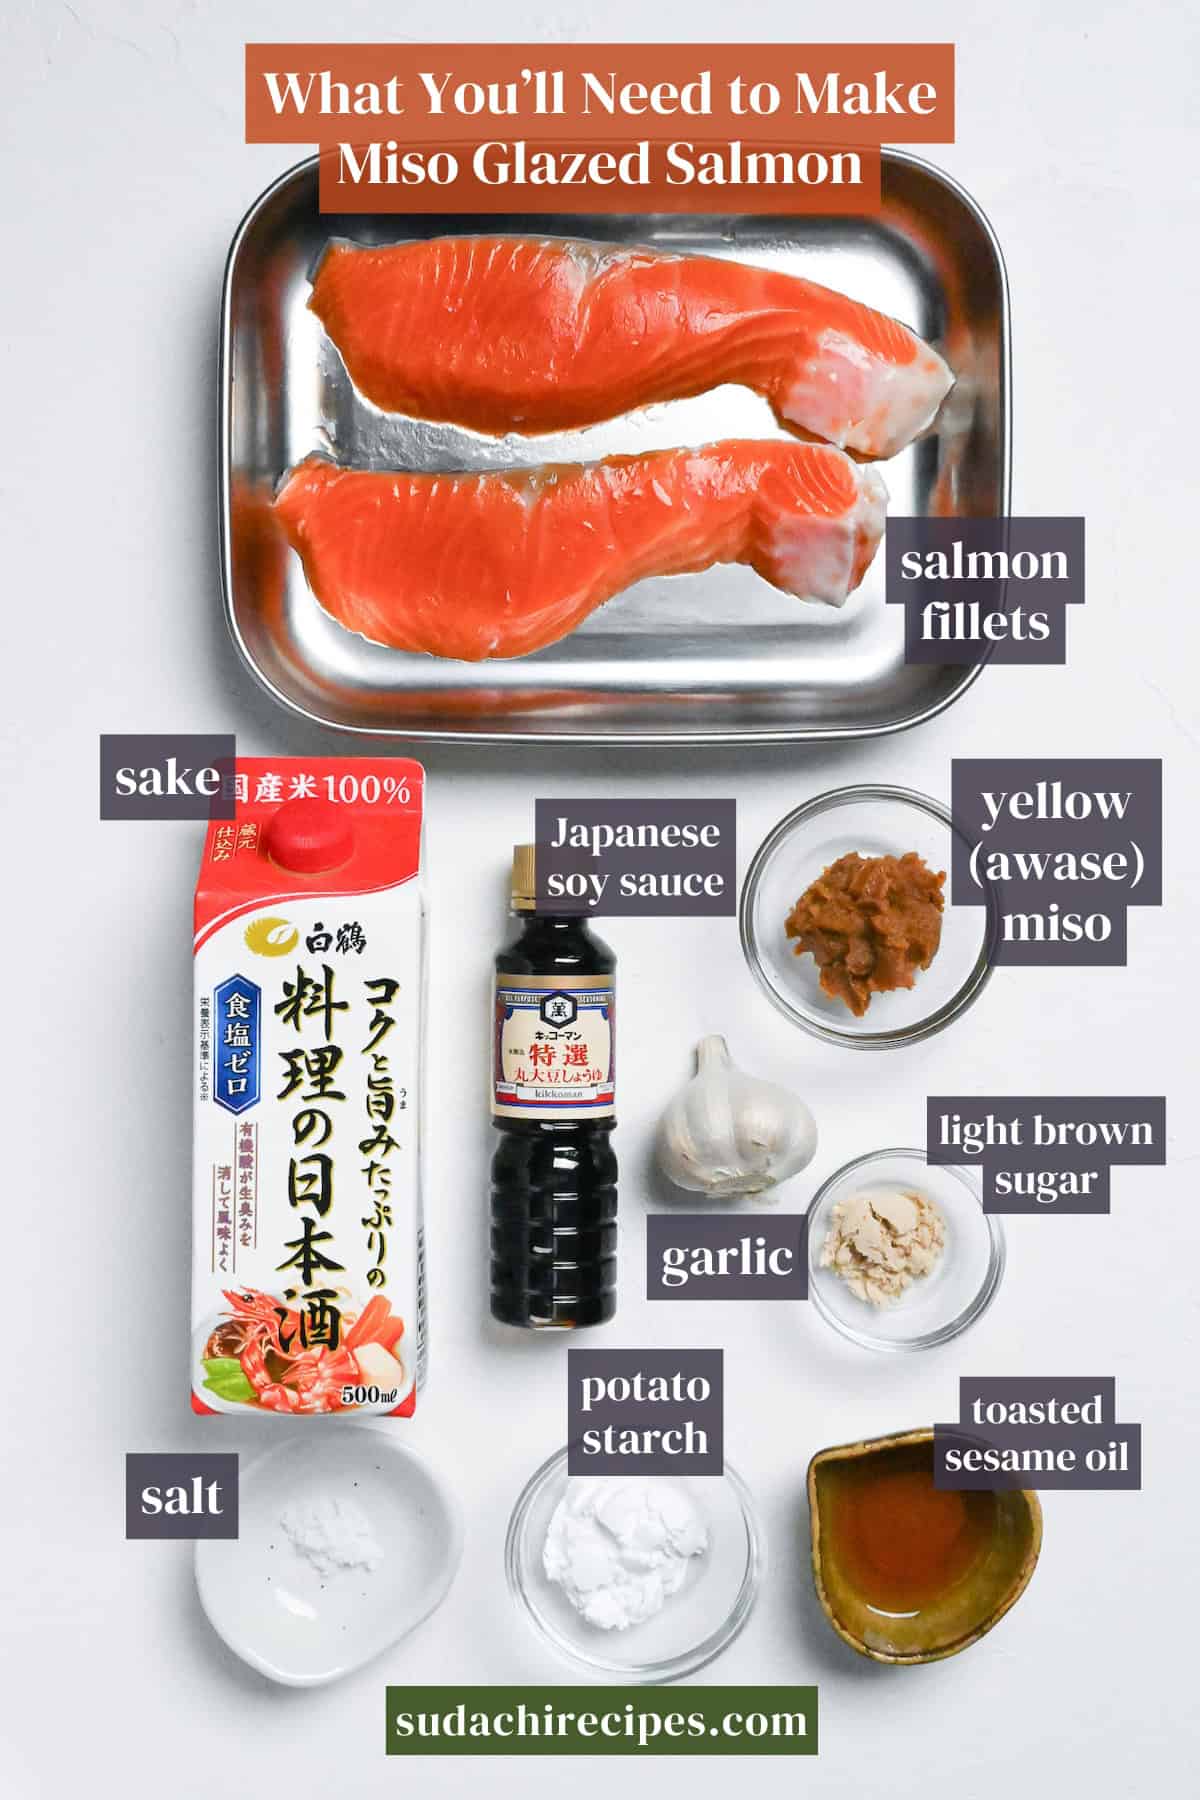
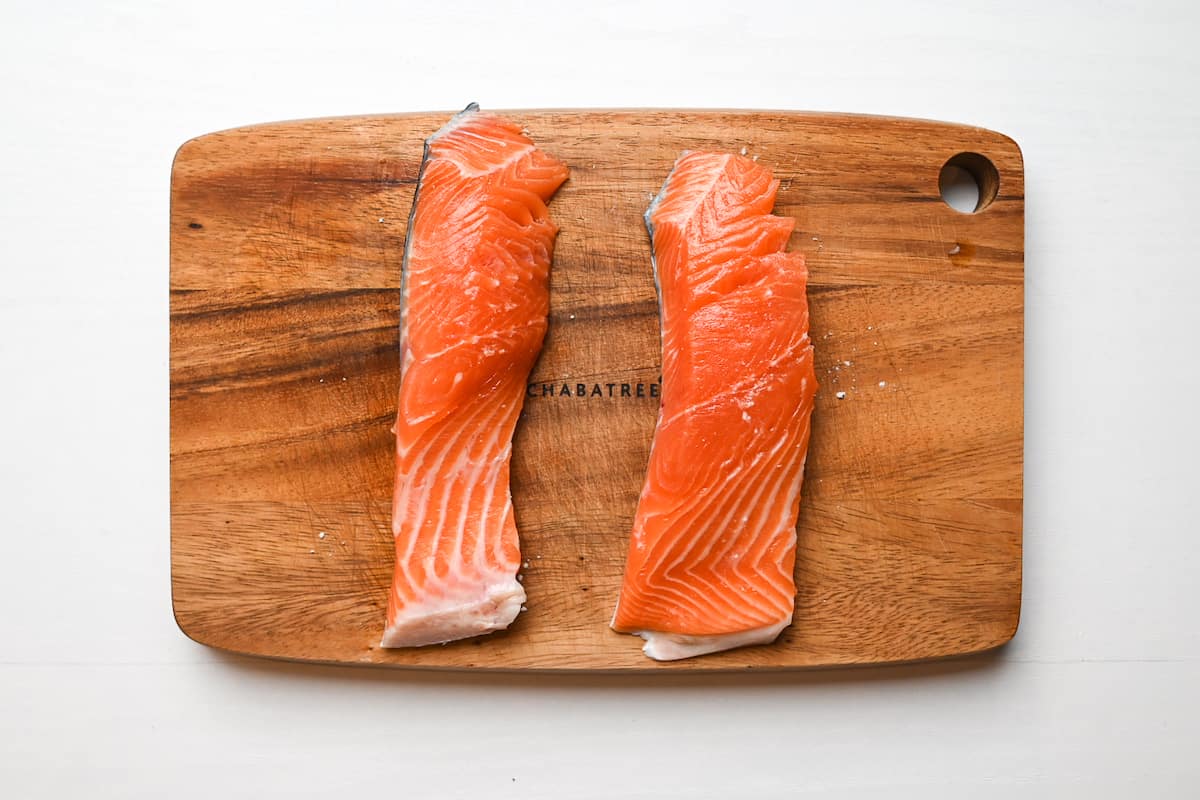
- Salmon: Use any salmon you like! Atlantic for a mellow, buttery bite, or sockeye/coho if you want a leaner, brighter flavor that stands up to the glaze. You’ll find fresh Atlantic fillets at mainstream grocers, wild options rotate seasonally. If salmon’s sold out or pricey, swap in steelhead trout for a similar look and texture.
- Miso paste: Yellow miso (also called blended or awase miso) is your best bet. Or you can mix equal parts red miso and white miso to create your own balanced blend at home. Red miso alone tastes too intensely salty for this recipe, while white miso can make the glaze overly sweet, so a blend is key.
- Sake: No sake at home? Dry sherry or white wine work as good subs. For an alcohol-free option, swap in an equal amount of water. The glaze will still coat beautifully and taste delicious.
How to Make My Pan Fried Miso Salmon
If you prefer to watch the process in action, check out my YouTube video of this miso salmon recipe!

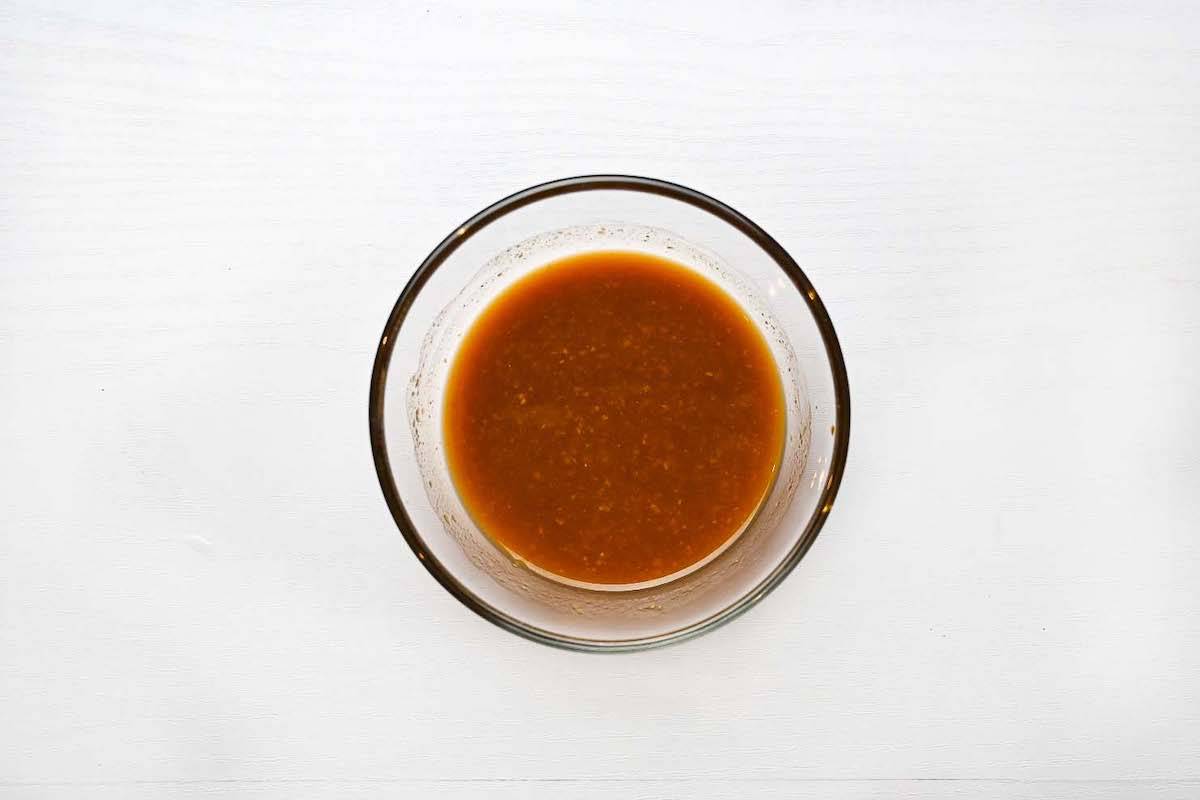
Before you start: In a small bowl, whisk awase (yellow) miso, sake, grated garlic, Japanese soy sauce, and light brown sugar until smooth. If it looks too pasty, whisk in 1-2 tsp water until it flows like warm honey for easy brushing.
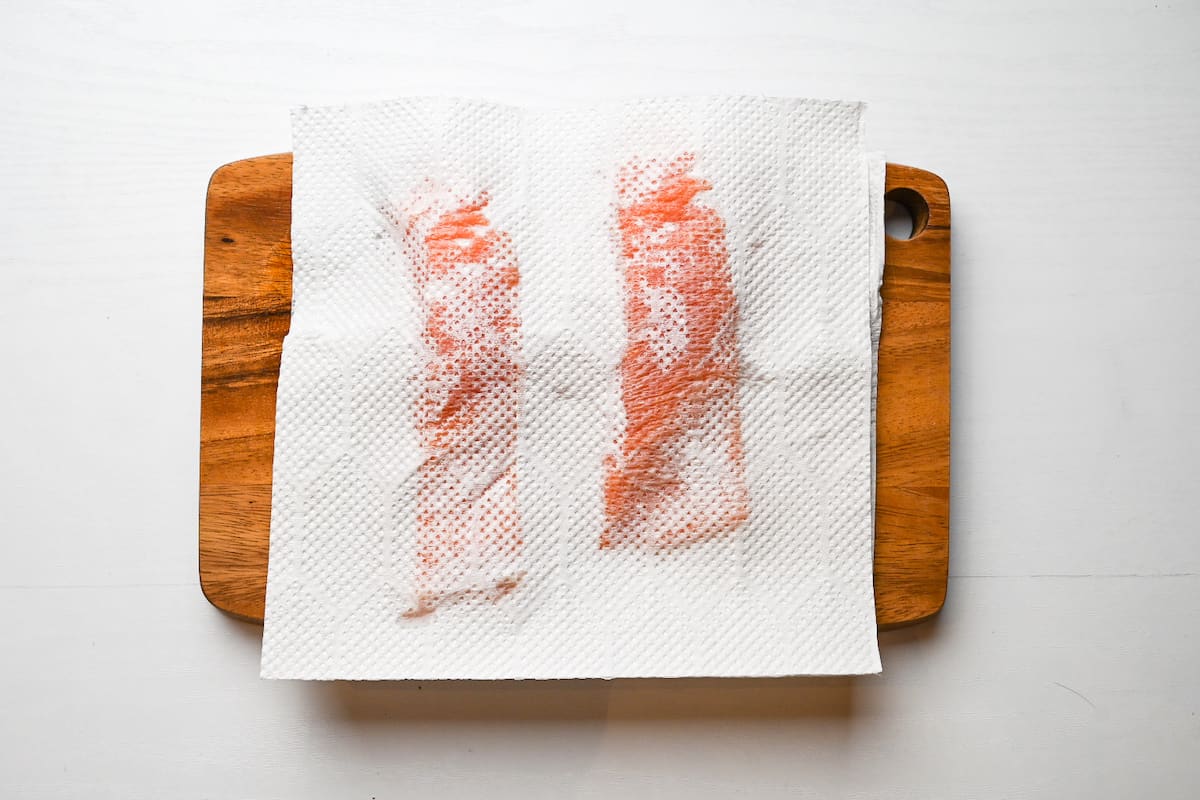
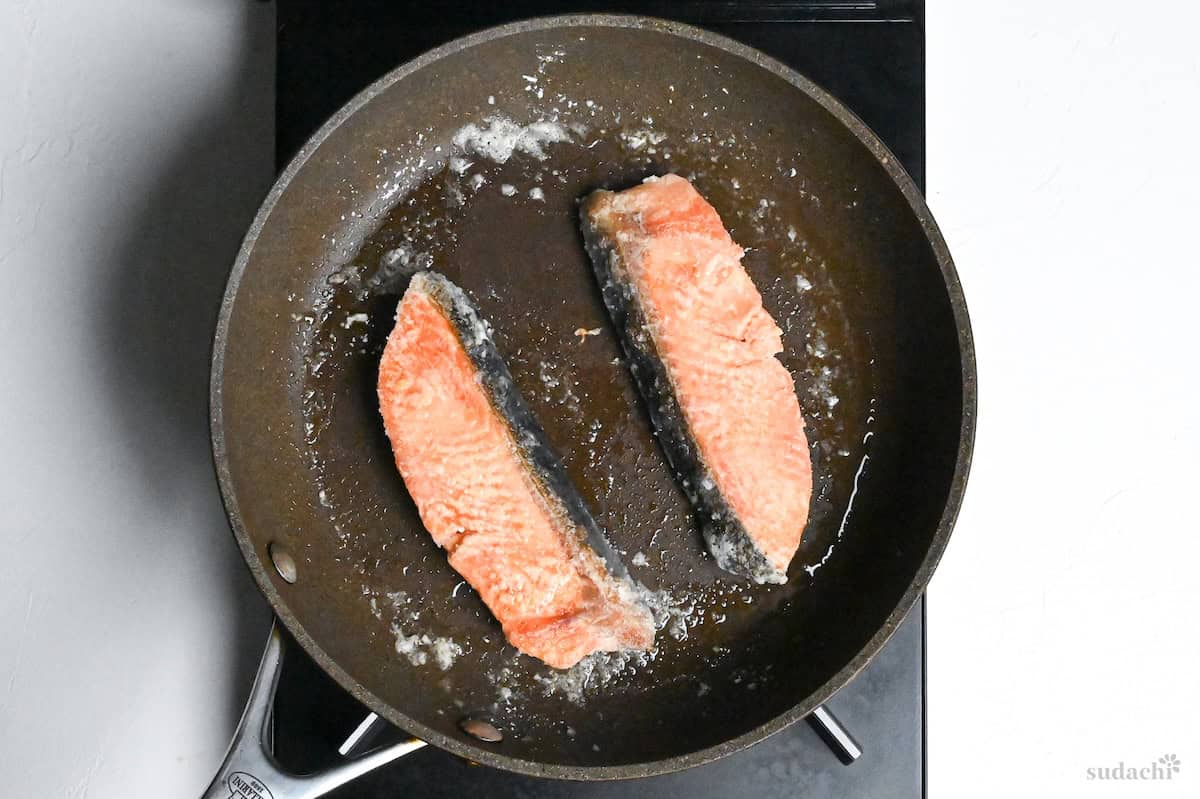
i. Set your frying pan over medium-high heat. While it warms, pat salmon fillets dry on all sides with paper towels. Make sure to press, don’t rub, so the flesh doesn’t tear.
ii. Season both sides lightly with salt.
iii. Then dust in a thin, even coat of potato starch (or cornstarch). Tap off the excess so you see the fish, not a white blanket.
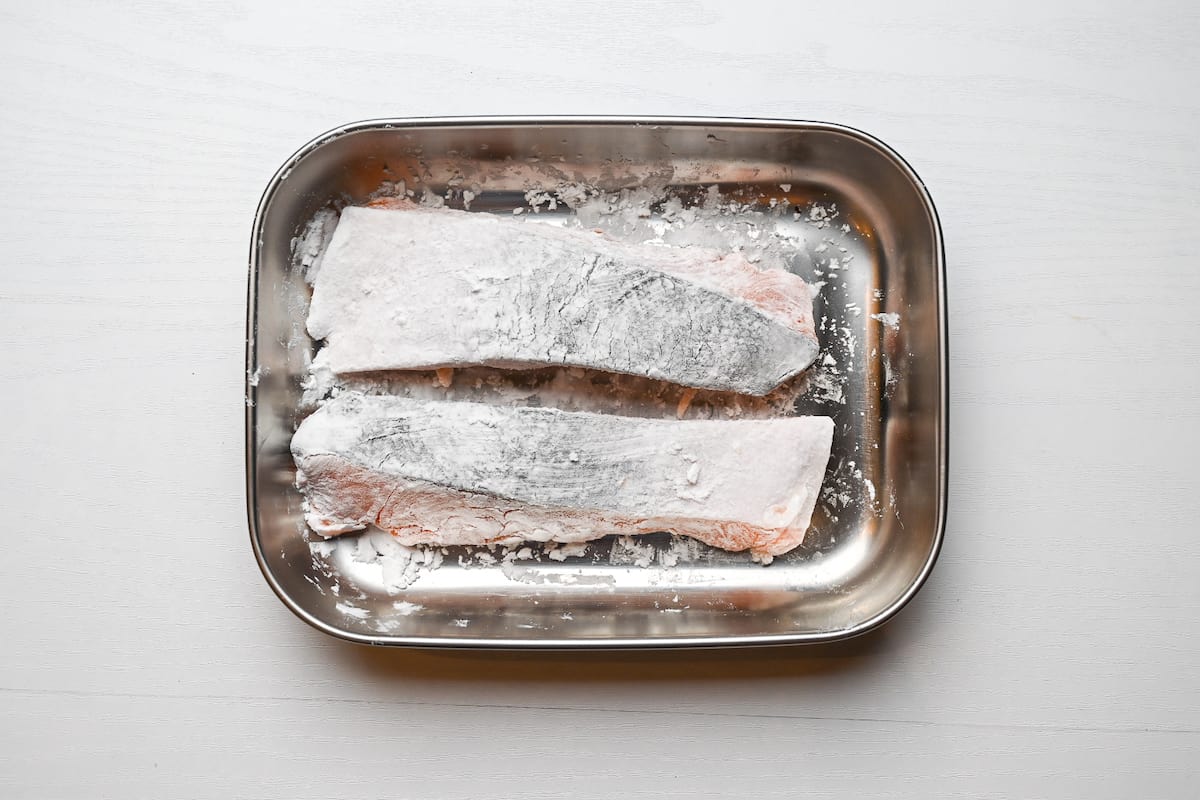
Potato starch tends to fry up crisper and “glassier,” while cornstarch yields a slightly firmer shell. Both are good, so use what’s in your pantry. Keeping the layer thin prevents gummy spots and promotes even browning.
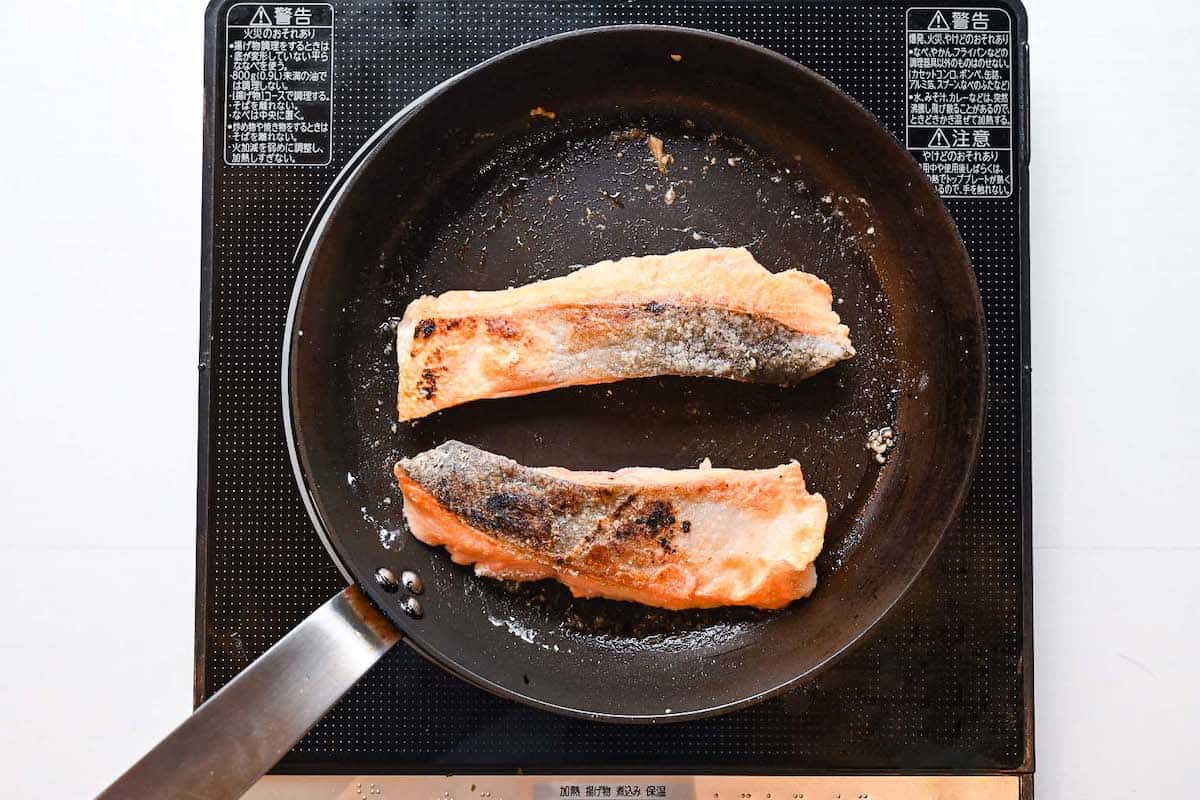
i. Add neutral cooking oil to your hot skillet. It should glide across the surface. Lay the salmon fillets skin-side down and resist the urge to move them. Sear skin-side for 3 minutes until the skin releases easily from the pan and looks golden-crisp.
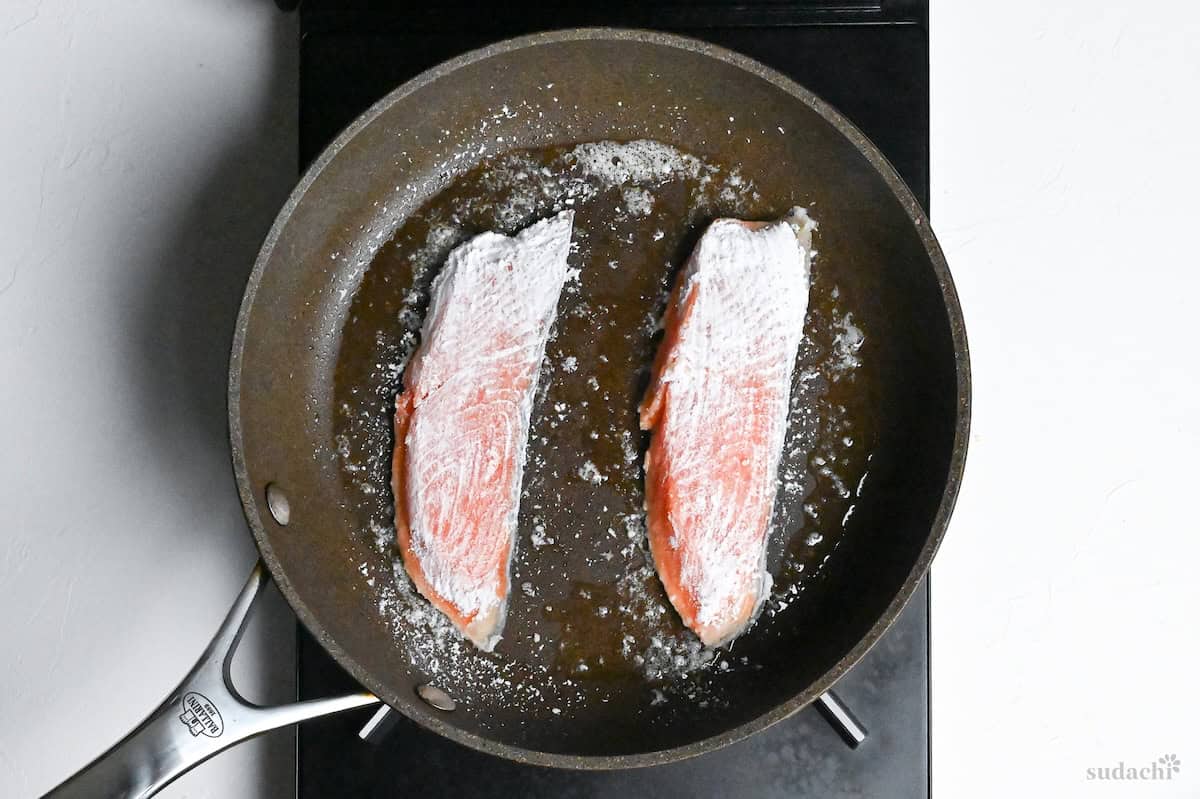
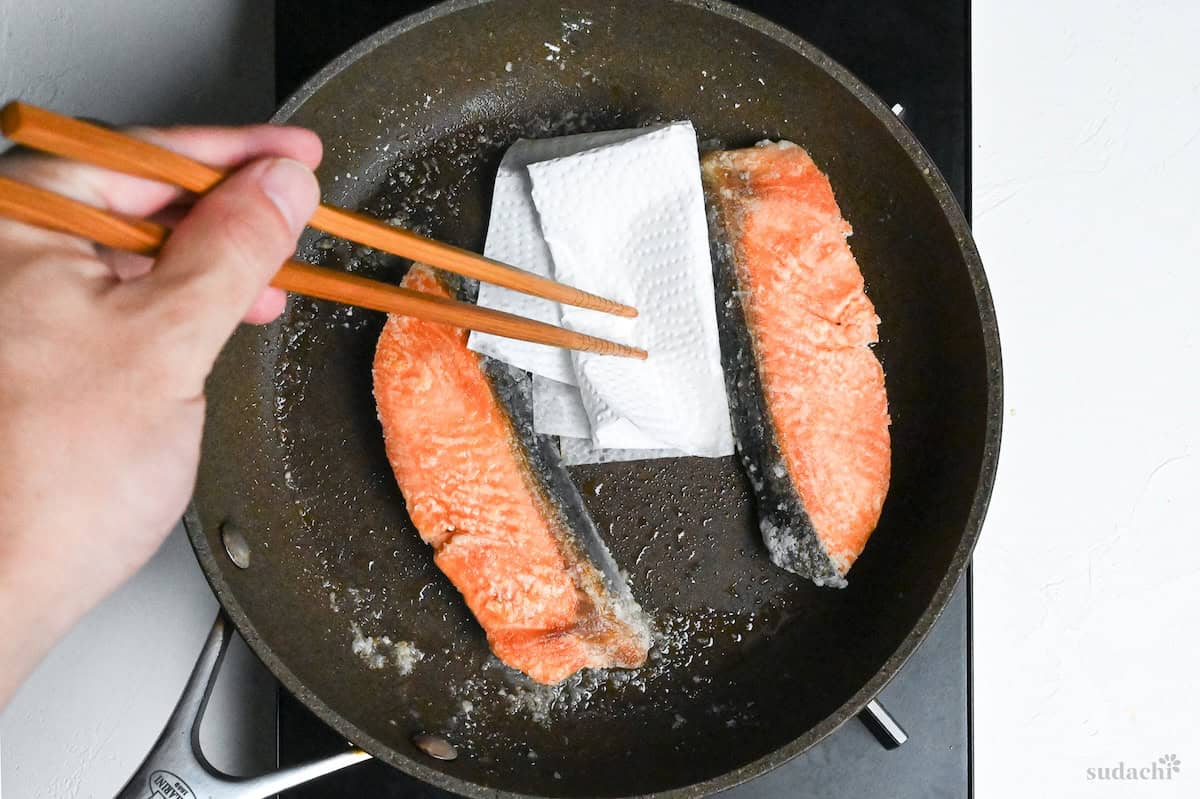
ii. Then flip and cook flesh-side for 1 to 2 minutes or until cooked through.
Standard fillets work perfectly with the timing above, but if you’ve scored thicker portions, give the flesh side an extra minute. For tall, restaurant-style fillets (less common but stunning) quickly sear all four sides by balancing the fillet on its edges for 20 to 30 seconds each. This ensures even cooking and a gorgeous all-around crust.
i. Wipe off any excess oil using a paper towel.
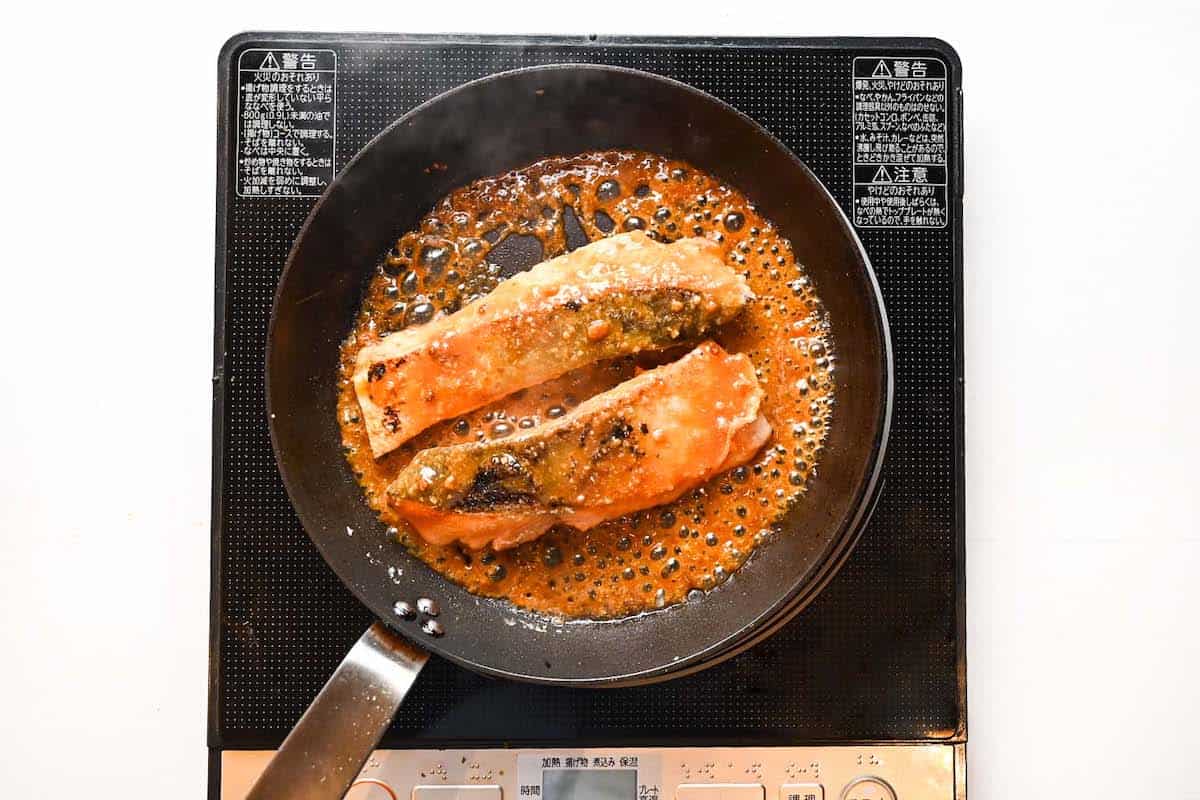
ii. Turn off the heat completely. Using a pastry brush, paint the miso glaze over the top and sides of each fillet in smooth, deliberate strokes.
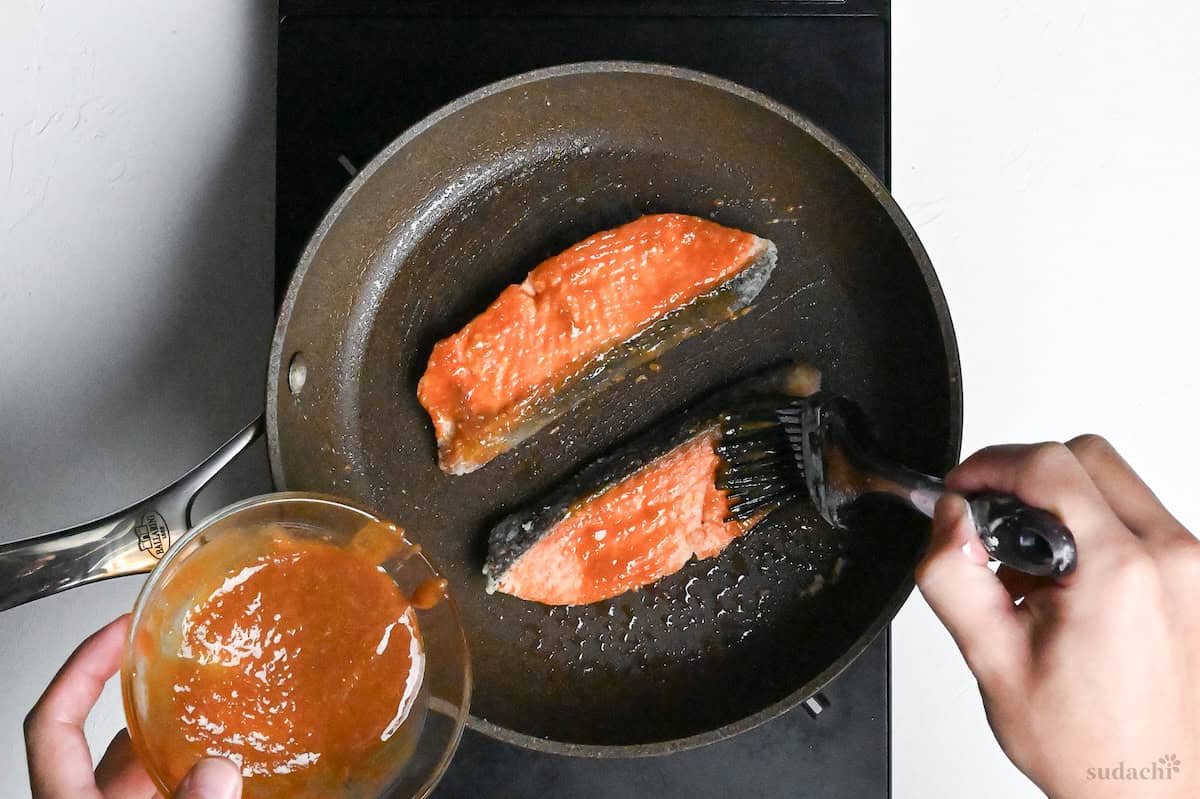
iii. Flip the salmon and brush the other side, but go light on the skin, or it’ll turn overly salty while the flesh stays balanced.
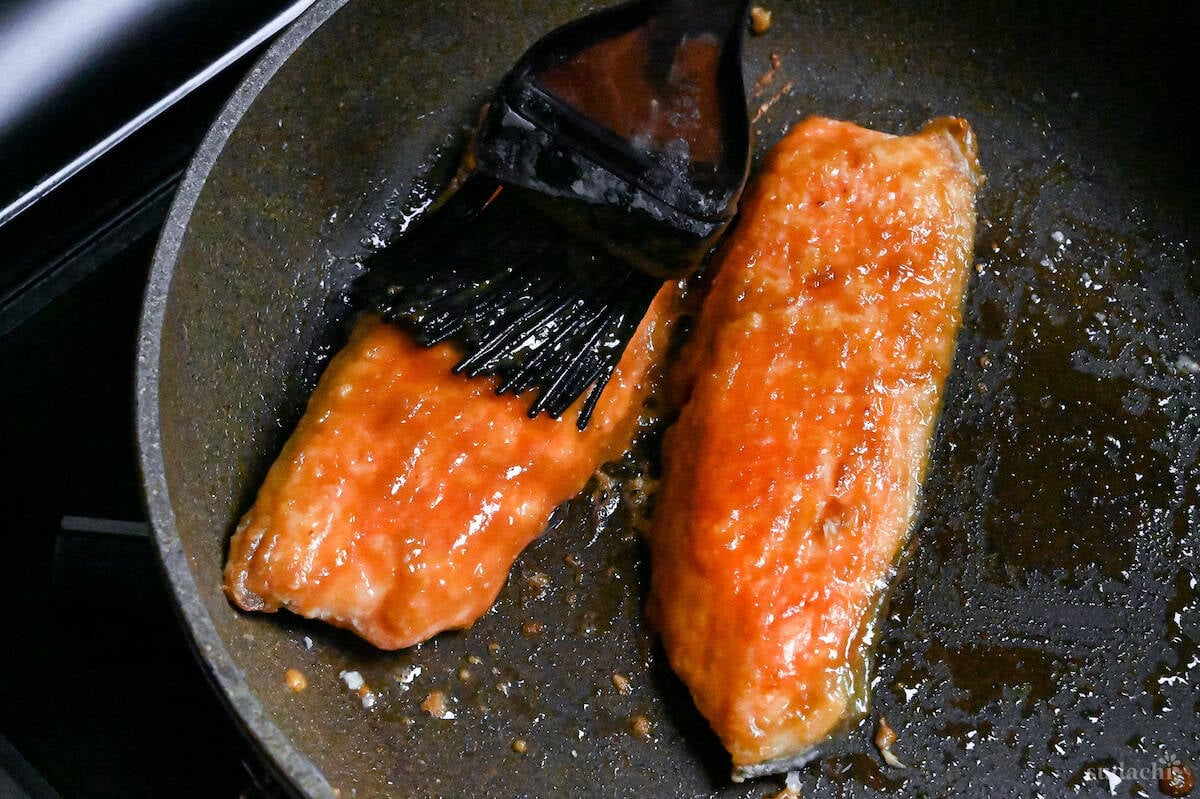
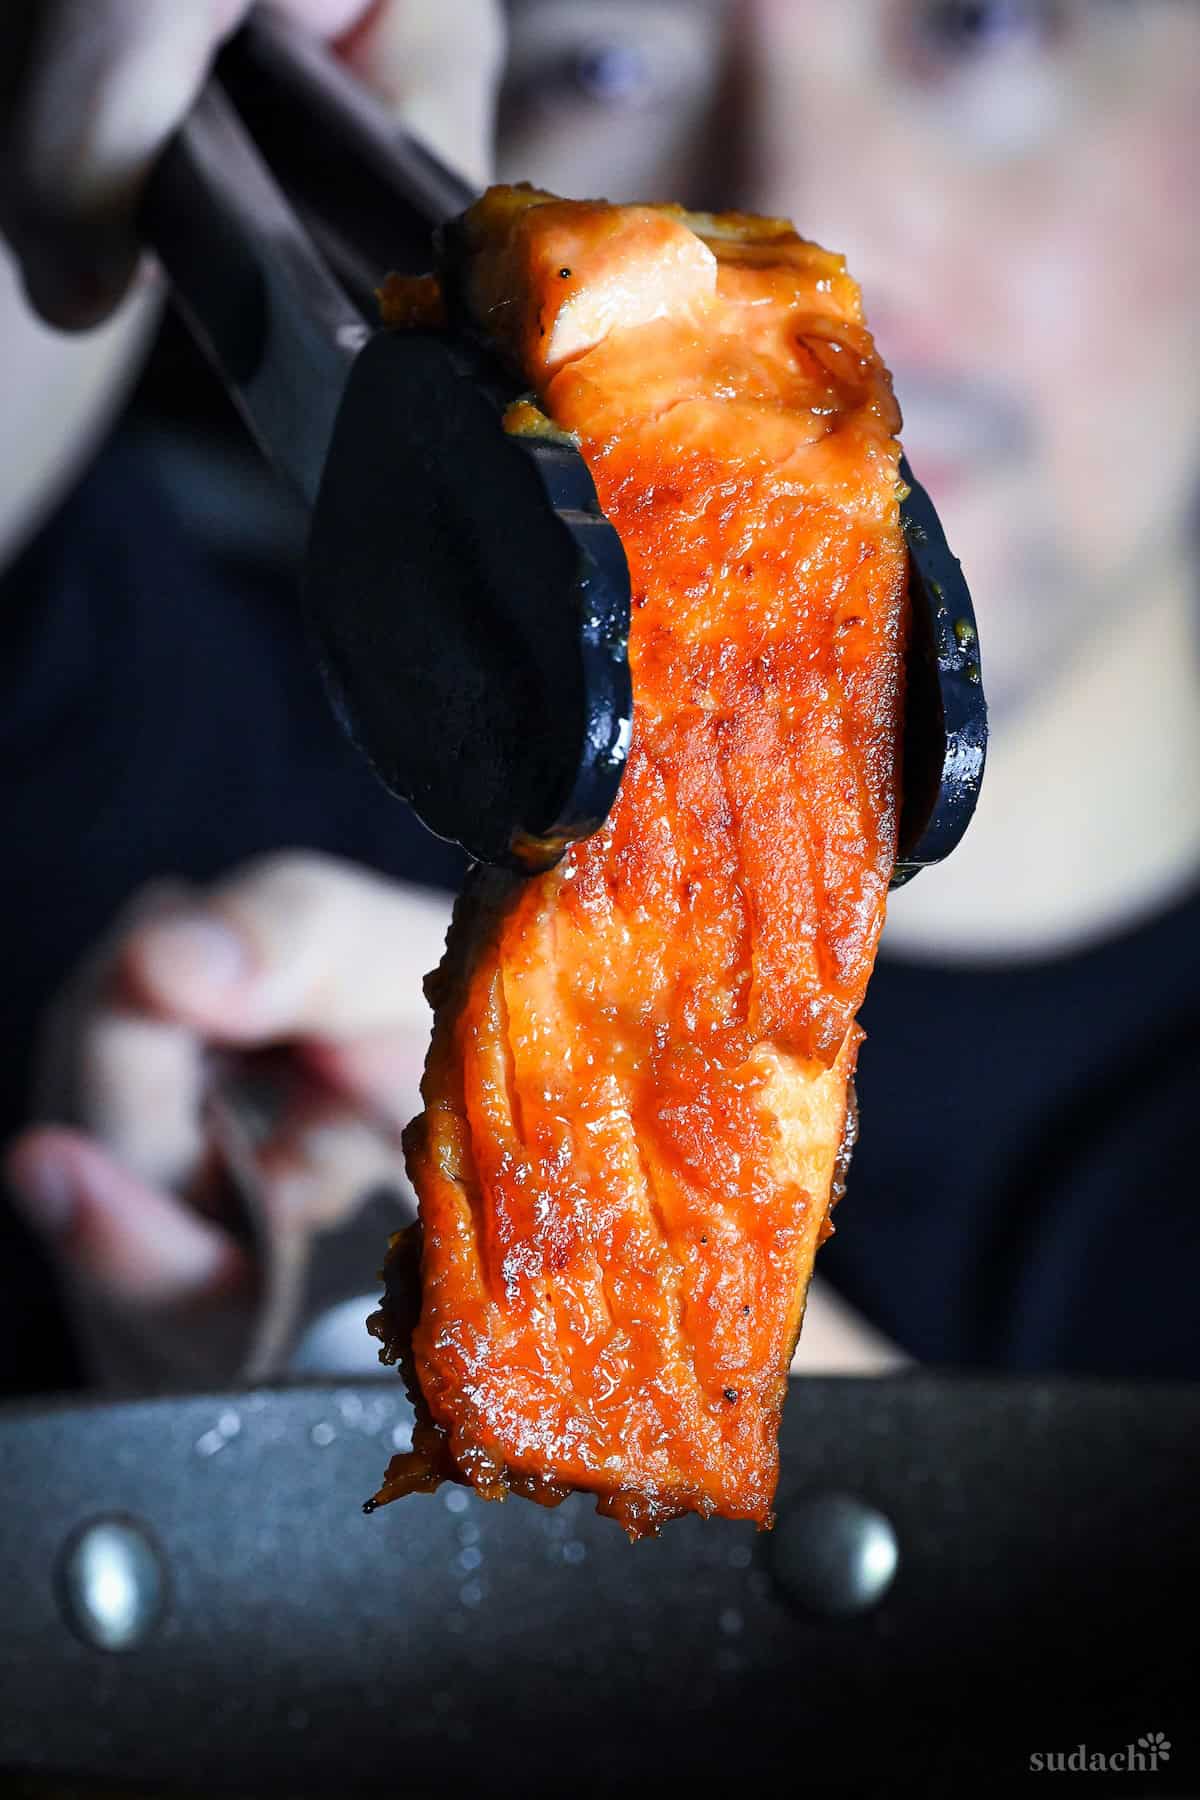
The residual heat from the pan gently warms the glaze into a glossy, lacquered finish without scorching the miso’s delicate sugars. If you don’t have a pastry brush, the back of a spoon works. Just dab and spread gently.
Miso is notoriously quick to burn because of its sugar and protein content. Even a few extra seconds over direct heat can turn your glaze from glossy amber to bitter char. By turning off the flame first, you’re using the pan’s residual heat to melt and thicken the glaze into the fish safely.
This technique also gives you control: you can brush methodically, ensuring every surface gets coated without panic. Originally, this recipe called for spooning glaze over the top, but brushing distributes it more evenly and looks cleaner on the plate.
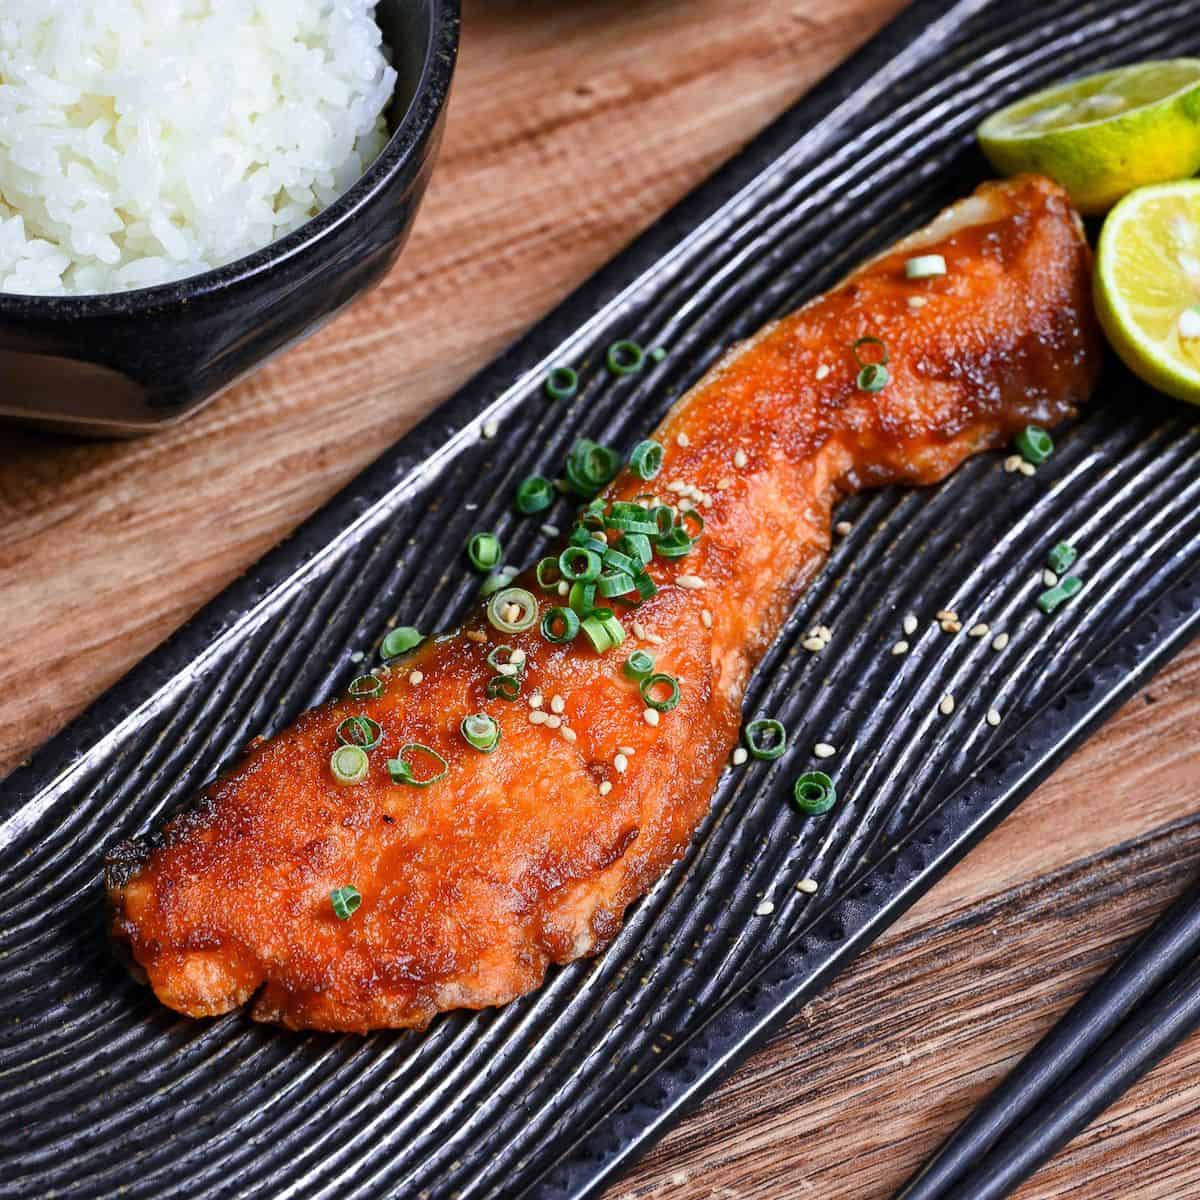
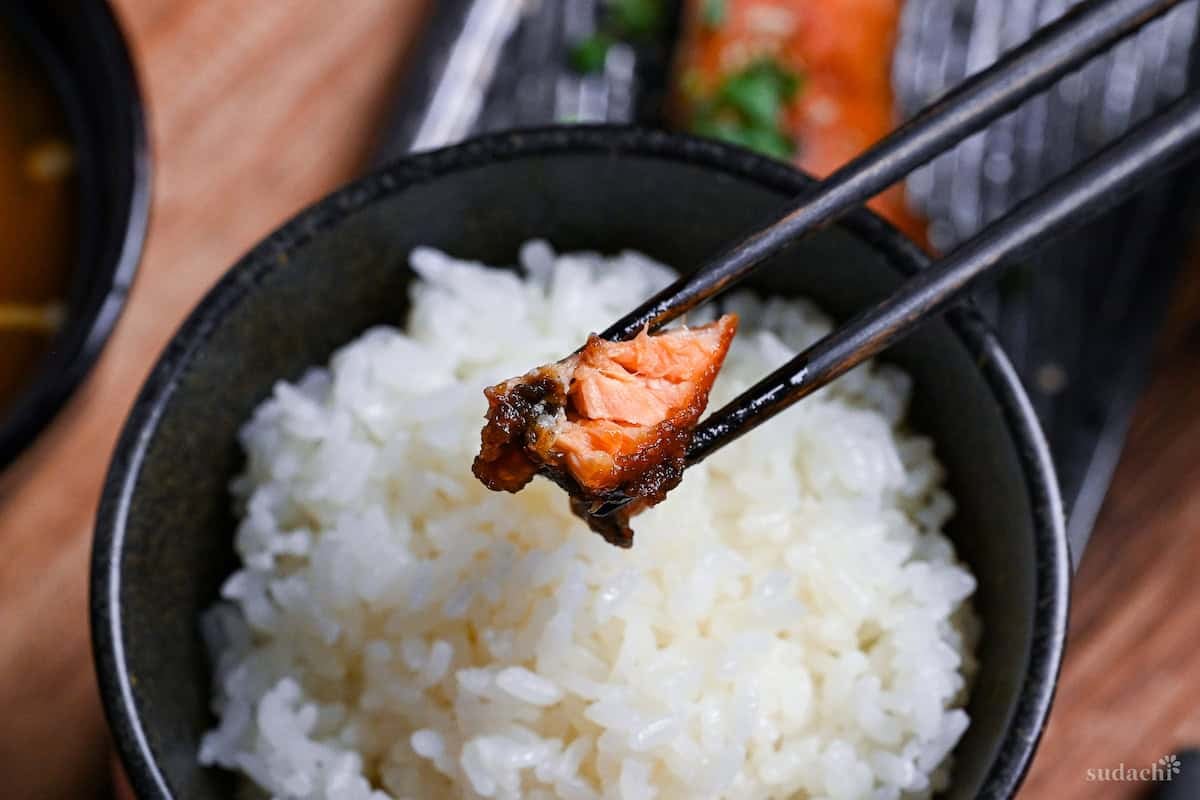
i. Slide the glazed salmon onto plates and scatter finely sliced green onions rounds over the top for a fresh, sharp contrast to the sweet-savory glaze. Finish with a few drops of toasted sesame oil. It’ll perfume the dish with nutty warmth the moment it hits the hot fish.
ii. Serve immediately. Pair with leftover steamed Japanese rice and miso soup, then you’ve just pulled off a the most delicious weeknight dinner in under 10 minutes on a Tuesday night!


Essential Tips & Tricks
- Whisk the glaze fully smooth. Undissolved miso or sugar burns faster and tastes uneven.
- Pat salmon completely dry before pan frying.
- Turn off the heat before glazing. Miso and sugar scorch extremely easily. Using residual heat sets a shiny glaze safely.
- Brush glaze thinly on the skin side. Too much glaze here makes the skin overly salty and soggy.
- Serve with plain steamed rice. The miso glaze is intentionally bold and savory. Pairing it with neutral rice balances the saltiness and lets the umami shine in harmony.
With these simple tips in mind, you’re set for success every time you make miso glazed salmon.
Storage & Meal Prep
Fridge: Store cooked miso-glazed salmon in an airtight container for up to 2 days. Let it cool completely before sealing.
Freezer: Not recommended.
Meal Prep: You can prep the salmon up to the pre-searing stage. Pat dry and salt, then refrigerate it covered for up to 24 hours. Make the miso glaze up to 3 days ahead and store it in the fridge.
Reheating: For refrigerated leftovers, reheat gently in a covered skillet over low heat until warmed through, adding a spoonful of water to create light steam and prevent drying.
What to Serve With This Recipe
Miso Glazed Salmon FAQ
Sake in here works in three ways by eliminating fishy odors, tenderizing the meat, and adding a subtle umami flavor. But because this recipe only calls for a small amount, you can substitute it with dry white wine, sherry, or water if you don’t have sake on hand.
This recipe follows the Japanese home-cooking principle that most dishes are meant to be eaten with plain steamed rice. The glaze is intentionally bold so that each bite of salmon seasons a mouthful of rice. Think of the rice as the “balancer,” not just a side. If you plan to serve this miso glazed salmon without rice (for example, with salad or roasted vegetables), reduce both miso and soy sauce when making the glaze. This keeps the flavor balanced and prevents the saltiness from overwhelming lighter accompaniments.
Miso and sugar scorch quickly at high heat. Always brush the glaze after turning off the heat, letting residual warmth caramelize it gently. Think of it as “painting with heat,” not frying the sauce.
More Japanese Salmon Recipes
Hungry for more? Explore my Japanese salmon recipes to find your next favorite dishes!
Did You Try This Recipe?
I would love to hear your thoughts!
💬 Leave a review and ⭐️ rating in the comments below. 📷 I also love to see your photos – submit them here!

Miso Glazed Salmon (Pan-fried)

Ingredients
Miso Glaze
- 1 tbsp yellow miso paste (awase) or manually mix white and red at 50/50
- 1 tbsp sake
- 1 tsp grated garlic fresh or paste, avoid jarred garlic in oil
- 1 tsp Japanese soy sauce (koikuchi shoyu)
- 1 tsp light brown sugar
Salmon
- 300 g salmon fillets skin-on, typically 2-3 fillets, or trout
- 2 pinches salt
- 1 tbsp potato starch (katakuriko) or cornstarch
- 1 tbsp cooking oil
- finely chopped green onions
- toasted sesame oil for finishing
My recommended brands of ingredients and seasonings can be found in my Japanese pantry guide.
Can’t find certain Japanese ingredients? See my substitution guide here.
Instructions
- Mix 1 tbsp yellow miso paste (awase), 1 tbsp sake, 1 tsp grated garlic, 1 tsp Japanese soy sauce (koikuchi shoyu) and 1 tsp light brown sugar in a small bowl until well combined.

- Preheat a frying pan on a medium-high setting. While it preheats, wash 300 g salmon fillets with cold water and pat them dry with kitchen paper.
- Sprinkle both sides of the salmon with 2 pinches salt and coat with 1 tbsp potato starch (katakuriko).
- Once the pan is hot, add 1 tbsp cooking oil, place the salmon fillets in the pan with the skin side down and fry for 3 minutes.
- Flip and fry the other side for 2 minutes or until the salmon reaches an internal temperature of 52 °C °C (126 °F). (This may take a little longer for particularly thick fillets.) Use kitchen paper to wipe away excess oil.

- Turn off the heat and brush the miso all over the surface using a pastry brush. (If you don't have a brush, see next step.)
- If you don't have a pastry brush, pour the sauce into the pan and move the salmon around gently until both sides are evenly coated.
- Plate up, sprinkle with finely chopped green onions and serve with plain rice and miso soup. Enjoy!
Video
Really love your recipes and especially this miso salmon. It’s a household favourite! I was wondering if it would work to substitute the salmon with cod fish sometimes or if you have another recipe for miso cod? Thank you so much 🙂
Hi Kelly,
Thank you for the comment and making this recipe!
Yes, this recipe should work with any fish fillets, including cod.
But if you use cod, you might want to do a bit of prep before frying to soften the odor (you can check out one of the techniques in my old teriyaki cod video here: https://www.youtube.com/watch?v=scgmP2sxG-A
Yuto
Parfait!
Thank you!
We made this for New Years and paired it with your Sesame Spinach Salad (Horenso no Goma-ae) and rice. The salmon and spinach salad were the perfect complement to each other. It was all very delicious. Thank you for the recipes. Happy New Years.
Hi Marielena,
Thank you so much for sharing! I’m so glad you enjoyed both the salmon and the spinach salad together! This kind of feedback really makes my day! Happy New Year to you too!
Yuto
Your recipes always come out delicious and I can’t wait to make this one!
You are always my go to for Japanese food recipes
Arigato
Hi Luisa,
Thank you so much for your kind words! I’m happy that my recipes have become your go-to, it means a lot! Looking forward to sharing more recipes in the future! 🙂
Yuto
Absolutely delicious. One of the best recipes I’ve made of yours and it’s logged in as one of my go-to dinners now. You’ve really changed how I cook meals living in Japan. I’ve also got your cookbook in my basket on Amazon 🙂
Hi Ralph,
Thank you so much for making my recipes part of your kitchen and sharing your photo! It really means a lot. Since you’re living in Japan too, you probably have easy access to all the ingredients I use — so I bet you’ll be able to make any of the recipes on my website! And huge thanks for grabbing a copy of my cookbook too
Yuto
Hello Yuto! Is this dish called Sake Misoyaki in Japanese? Also, will this preparation work with chicken?
Hi Stephen,
Thank you for your question! This dish doesn’t really have fixed name, but I’d call it “Sake no Misoyaki (鮭の味噌焼き)” in Japanese. And yes, it would work really well with chicken, especially thighs. Just be sure to extend the cooking time accordingly! 🙂
Yuto
I made this recipe according to the description. It turned out to be extraordinarily delicious.
Hi Simona,
Thank you so much for trying it! I’m really happy to hear it turned out so delicious! 🙂
Yuto
I made this with some boneless chicken breasts that I butterflied for shorter cook time and it turned out deliciously for my first try at it. I would prefer that all the potato starch become brown and crisp alol over and not globby. But I’m certain that was my error and that I used too much in some spots. Overall it’ll be a great recipe for fish and chicken.
H Stephani,
Really glad you enjoyed it! I’ve never actually tried this one with chicken myself so I can’t say for sure, but I assume chicken’s surface might make even dusting a little trickier. Either way, sounds like a great first try! 🙂
Yuto
Thank you, this is a lovely recipe and I have made it many times.
Is it possible to substitute the salmon for tofu?
Hi Christa,
So glad you love it and keep coming back to it! Tofu would absolutely work here. You might just need to tweak how you cook it. If you check out my teriyaki tofu bowl recipe (https://sudachirecipes.com/tofu-donburi/), the method I use for the tofu there would be a great starting point! 🙂
Yuto
Hi Yuto,
Thank you, I followed the recipe exactly and it was fantastic! I always had trouble pan-frying salmon with a sweet sauce because the sauce burned easily. Your technique is a game changer!
Hi Christina,
Thanks so much for giving it a go! Really glad the technique helped you crack that sweet sauce problem and you enjoyed the recipe! 🙂
Yuto