


Featured Comment
I already knew how to make flan but the texture of japanese puddings was just so smooth and melt in your mouth that i had to learn how to make it. I looked up so many recipes until I found yours! And I must say it came out perfect, I even used half of the pudding mixture to make a coffee flavoured one!
★★★★★
– Shruthi
Craving that extra smooth and creamy purin you tried in Japan? This homemade nameraka purin is the no-fuss version.
No oven, no water bath, no tricky timing or temperatures. Just mix, chill, and enjoy the softed, creamiest spoonfuls.
Note: This recipe is designed to be served in cups, not turned onto a plate. I’m currently working on a baked purin for this, stay tuned!

No bake nameraka purin
Recipe Snapshot
- What is it? A silky, ultra-creamy, no-bake Japanese custard purin with a layer of rich homemade caramel.
- Flavor profile: Creamy, vanilla, caramel.
- Why you’ll love this recipe: This no-bake purin is a melt-in-mouth treat made with simple, accessible ingredients. Unlike oven-baked, or steamed, you don’t need perfect timing or temperatures for this recipe. Just mix, chill, and enjoy!
- Must-haves: pasteurized eggs, gelatin powder, 6x100ml OR 4x150ml purin cups (heatproof, glass recommended), light-colored saucepan for the caramel.
- Skill Level: Easy
- Freezer Friendly No
Disclaimer: This post may contain Amazon affiliate links. Sudachi earns a small percentage from qualifying purchases at no extra cost to you. See disclaimer for more info.
What is Purin?
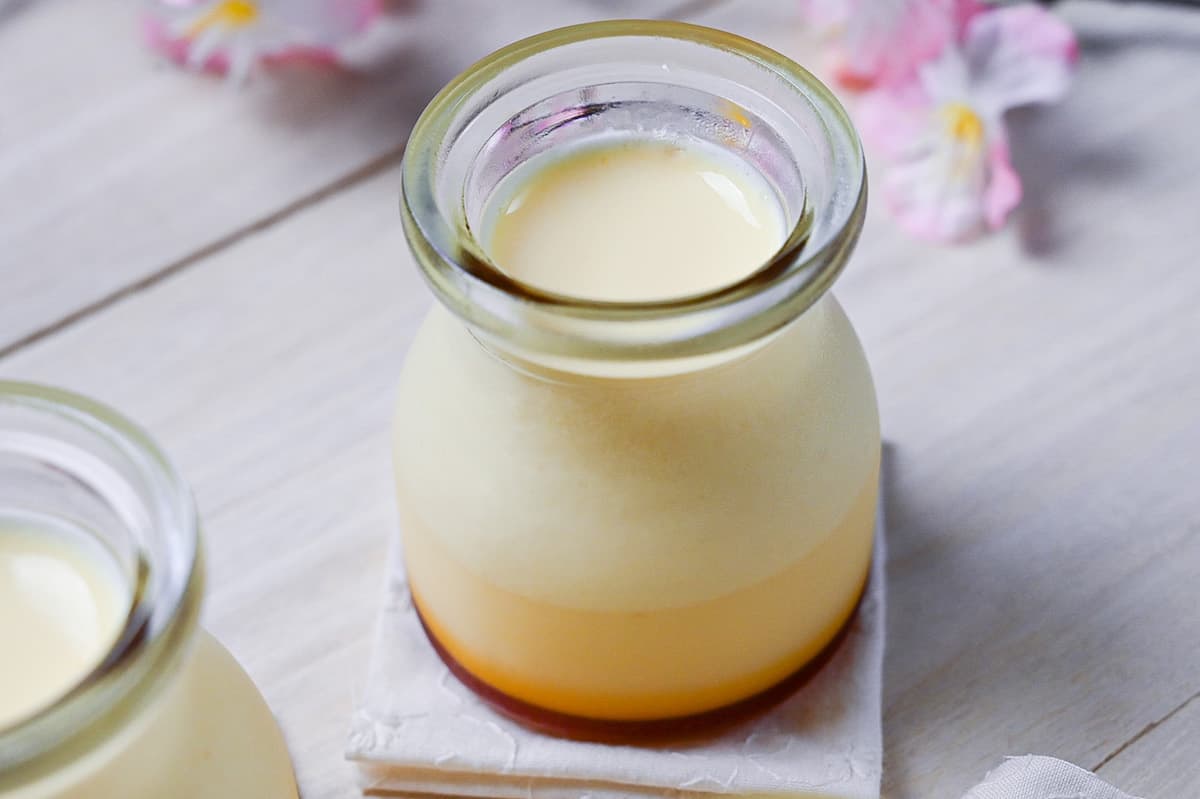
Purin is one of the most loved desserts in Japan, enjoyed by kids and adults alike. It’s made with a sweet set custard served with a thin, luxurious layer of rich caramel.
Although it’s very similar to flan or créme caramel, made with familiar ingredients such as eggs, sugar, milk, and cream, Japanese “purin” is usually served in individual serving cups, and defined by how it is set: baked (yaki purin), steamed (mushi-purin) or gelatin-set purin.
My recipe is a gelatin version, which is more like the ones you’d find in convenience stores and supermarkets in Japan. Because it’s no-bake and sets with gelatin, it can be softer, creamier and less eggy than baked or steamed custards.
Silky No-Bake Purin Ingredients
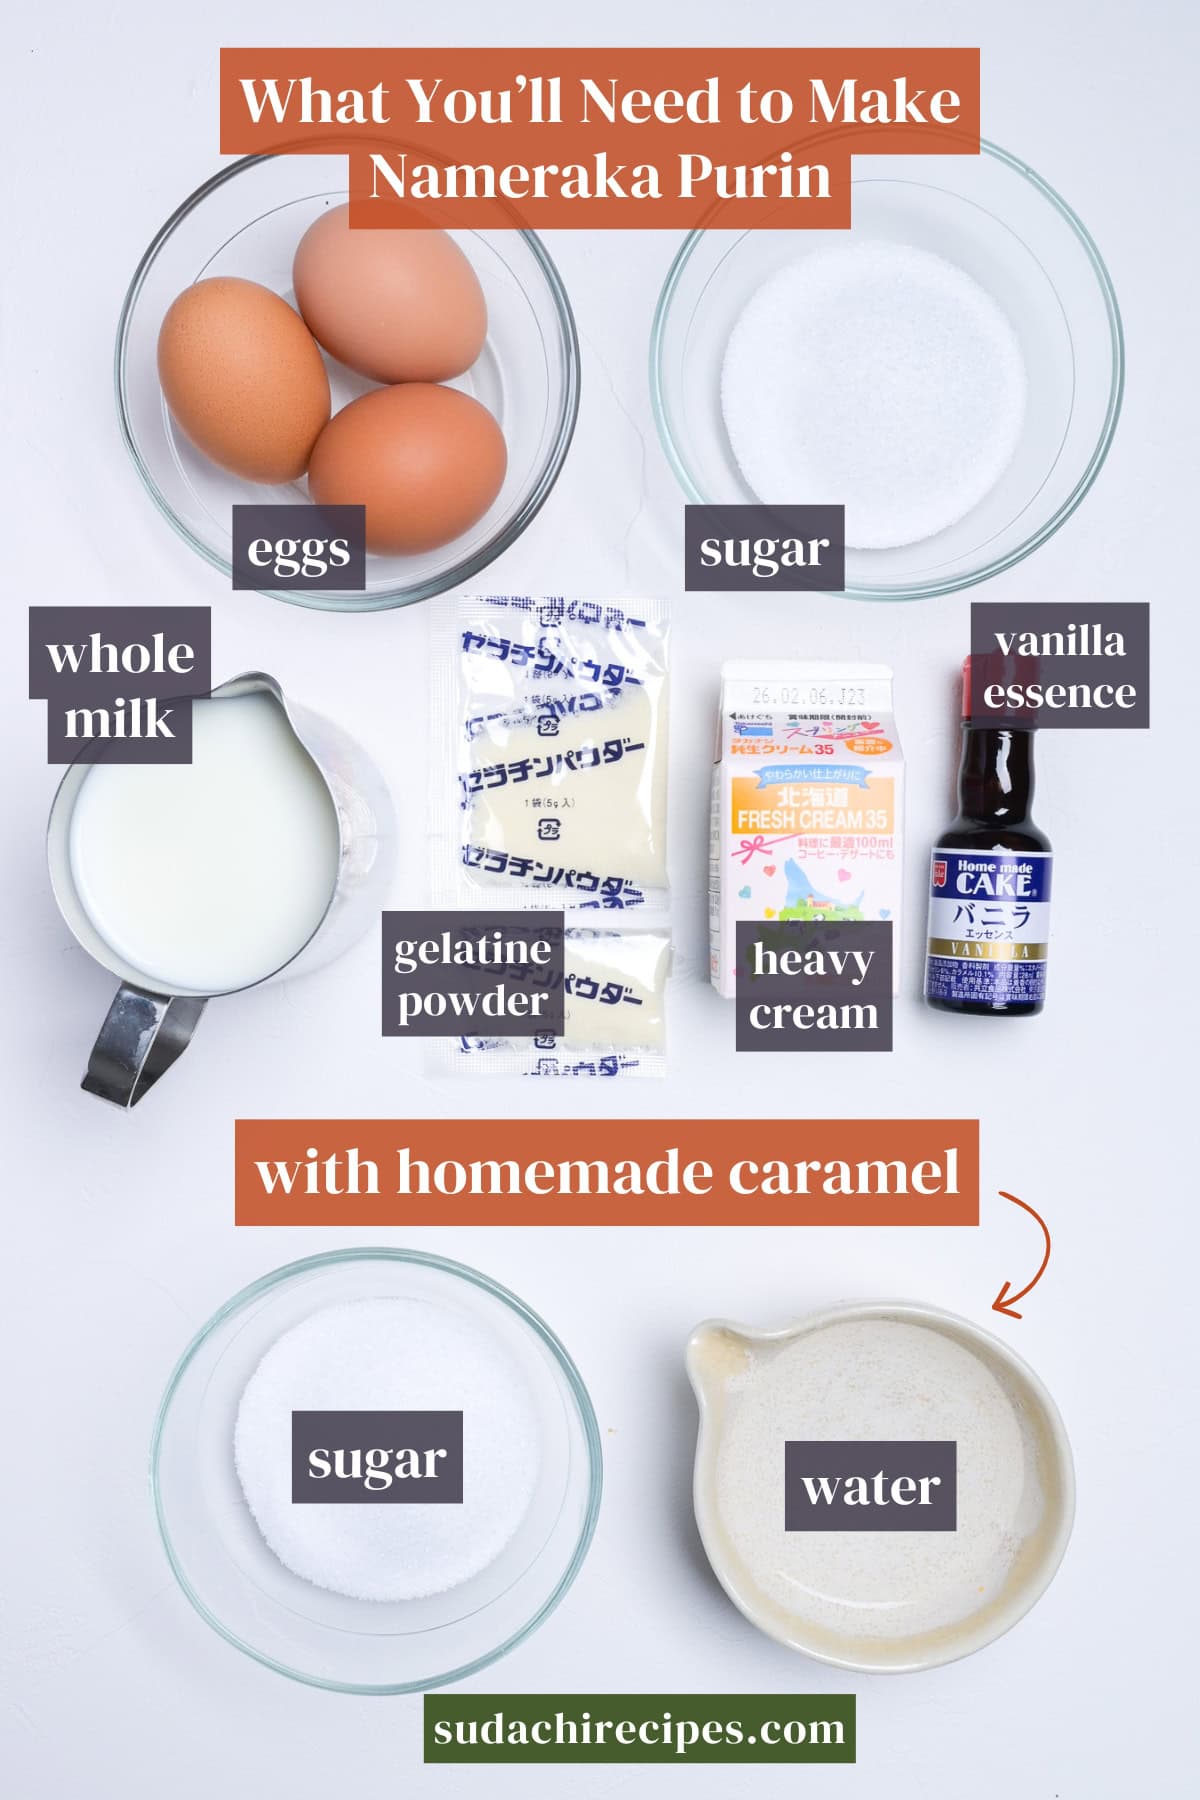
- Pasteurized eggs: The eggs in this recipe are gently heated but aren’t fully cooked, so use pasteurized eggs that are safe to eat raw (all eggs in Japan are treated and eaten raw regularly). For more information about egg safety, see the American Egg Board website.
- Gelatin: This recipe relies on gelatin to set the purin. I use gelatin powder, but you can use gelatin leaves if you like.
- Dairy: I use a mixture of whole cows milk and heavy cream (35% fat or more) for a rich and creamy taste.
- Vanilla essence: If using vanilla extract, use half the amount stated in the recipe.
Substitution Ideas
- Dairy: My readers have had success with using almond milk which gives the purin a mild nutty flavor, but keep in mind that this recipe uses gelatin so it won’t be plant-based even if you change the milk.
- Flavor variations: This recipe is a great base for other flavors of purin. Switch the vanilla for other flavored essences or extracts of your choice! One of my readers enjoyed a coffee version too!

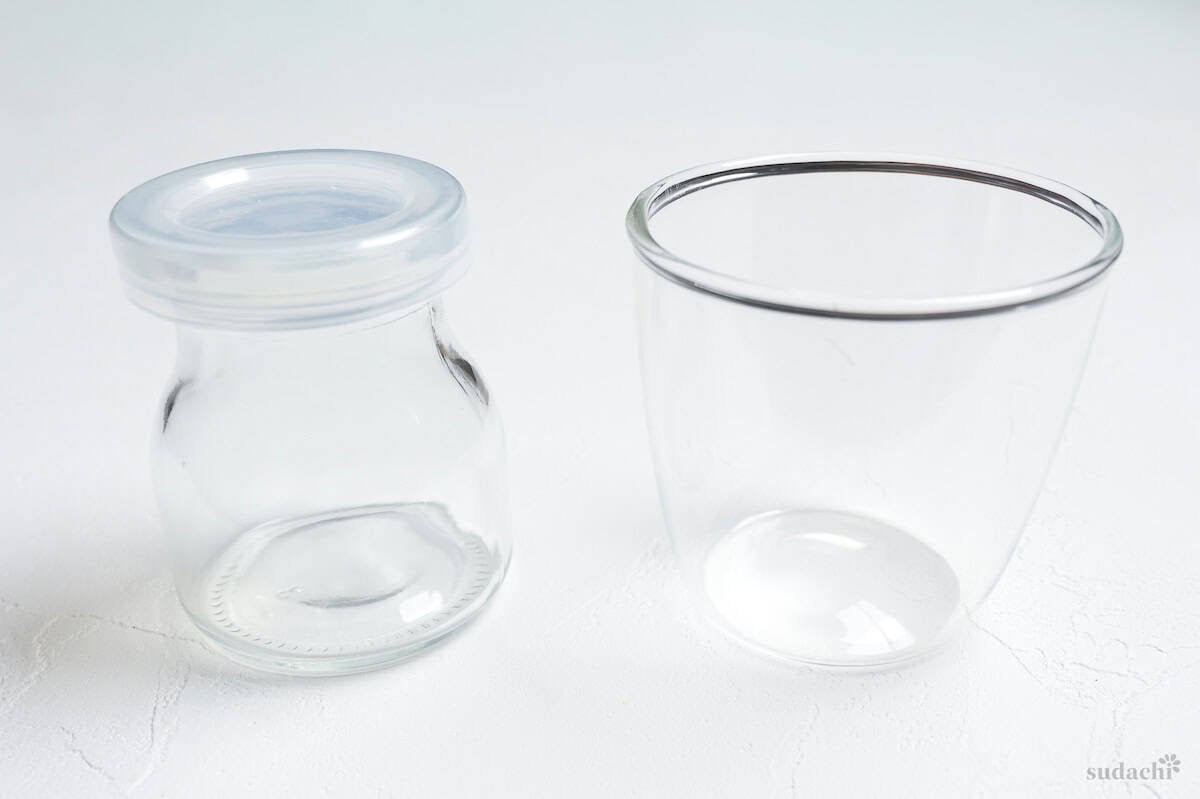
Recommended Pudding Cups for Purin
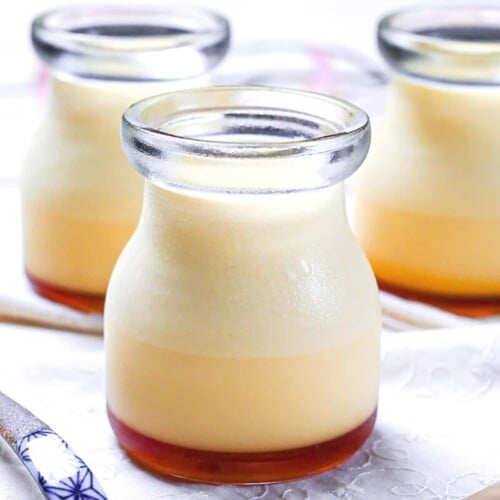
One of the most iconic features of Japanese style purin, is the milk bottle shaped cups that they are served in. If you live in Japan, it’s easy to find these purin cups with lids in 100 yen stores (Japanese version of a dollar store) but if you live outside of Japan, you can also order them from Amazon like these ones here.
Since hot caramel is used in this recipe, use heatproof containers such as glass jars or ceramic ramekins. Avoid sudden temperature changes like adding hot caramel to cold containers, warm them in hot water or microwave for 20-30 seconds before pouring the caramel to prevent cracks.
The base recipe makes about 550-600ml of purin mixture, I recommend using 6 x 100ml purin cups (3.5 fluid oz) for the best caramel to custard ratio, alternatively you can use 4 x 150ml (5.5 fluid oz) containers for larger portions.

How to Make My Nameraka Purin Recipe (No Bake Method)
If you prefer to watch the process in action, check out my YouTube video of this no-bake silky Japanese purin recipe!
This recipe works best with 6 x 100ml glass purin cups, ideally with lids for storage. For larger portions, you can use 4 x 150ml cups instead.
You will need to use heatproof containers, but if you don’t have purin cups, ceramic ramekins are the next best option.
Before you start, pour the milk, sugar, and gelatine powder into a microwavable container. I recommend a spouted container or jug for easy pouring.
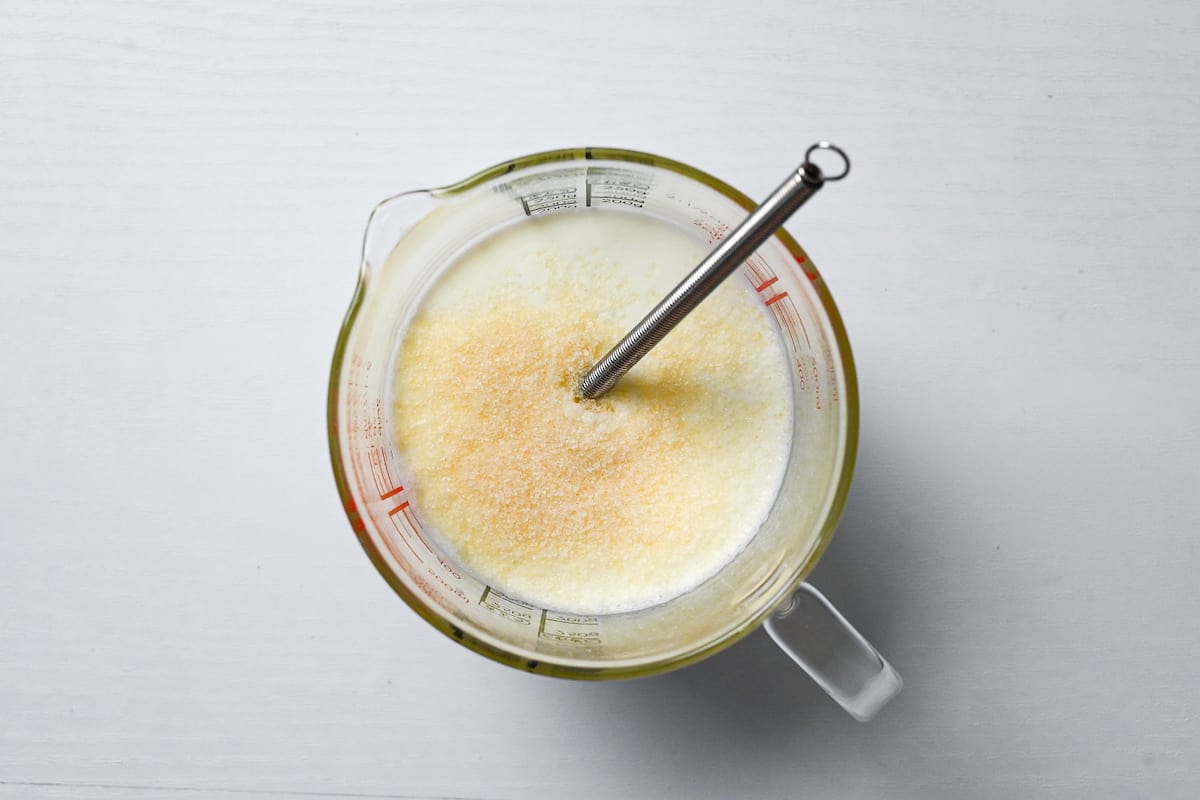
Set it aside for 5-10 minutes while the gelatine granules “bloom” and use this time to make the caramel.
Tip: Instead of pouring milk over the gelatin, sprinkling the powder over the top of the milk will help prevent clumps of gelatin from sticking together!
Making caramel can feel a little scary, but if you follow my tips, you’ll be surprised how easy it is! No thermometers required, just a keen eye!
- Use a silver pan (not black) so you can easily see when the caramel changes color
- Heat on medium/medium-low so that it doesn’t brown too quickly
- Do not stir (this can cause crystallization); instead, tilt and swirl the pan from time to time to promote even heating.
- Add the water one-third at a time (this cools the caramel, prevents burning and thins it out at the end).
- Stand back and wear oven gloves when you add the water as it might sizzle and splash. Using hot water will soften the reaction.
- Pour the caramel into the containers while it’s still hot
Pour the sugar into a cold, light-colored sauce pan, and add one-third of the water.
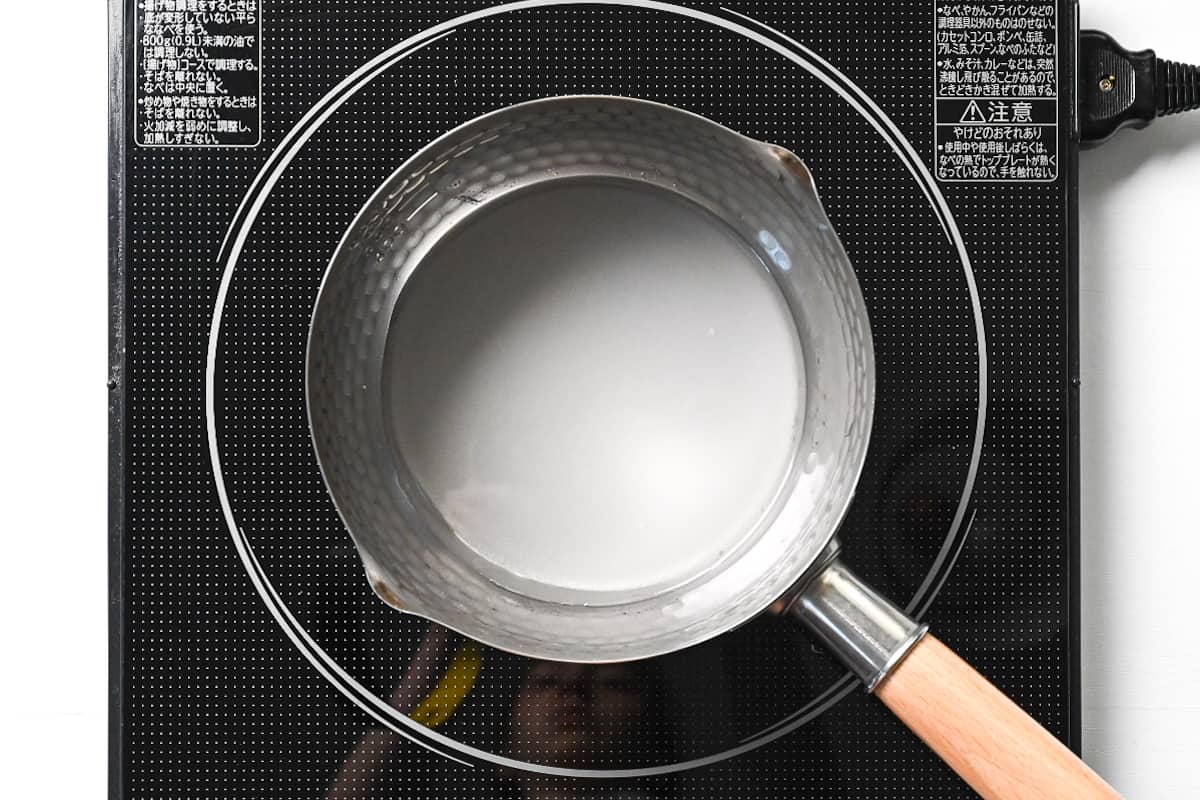
Give it a mix, scrape down the sides if needed, and place it on the stove over a medium/medium-low heat.
It might change color quickly in some areas due to heat spots on your stove or pan, so swirl it gently or tilt the pan to cook it evenly. Do not stir it once it’s bubbling, as this can cause the caramel to crystallize.
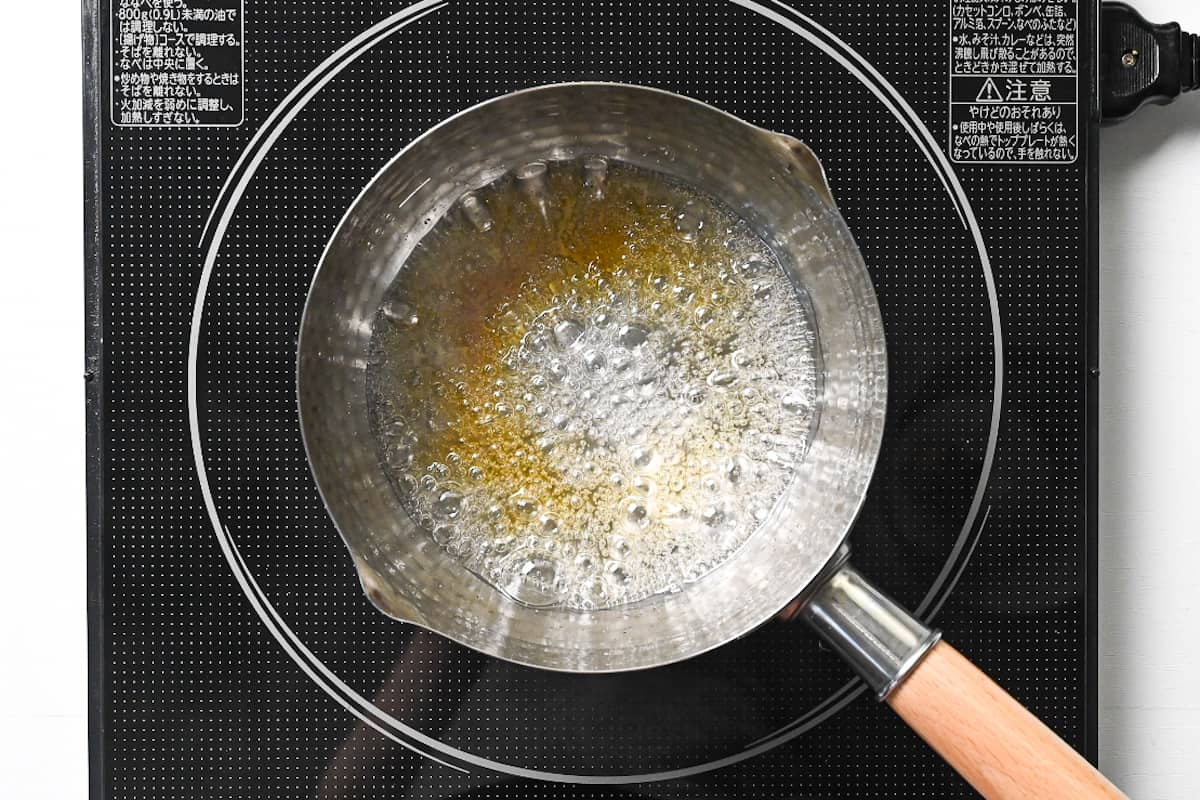
When the sugar and water start to become a little golden, add another third of the water. Tip: It will sizzle loudly, but less so if you use hot water.
Be careful of the caramel splashing and sizzling; stand back and protect your skin by wearing long sleeves or oven gloves.
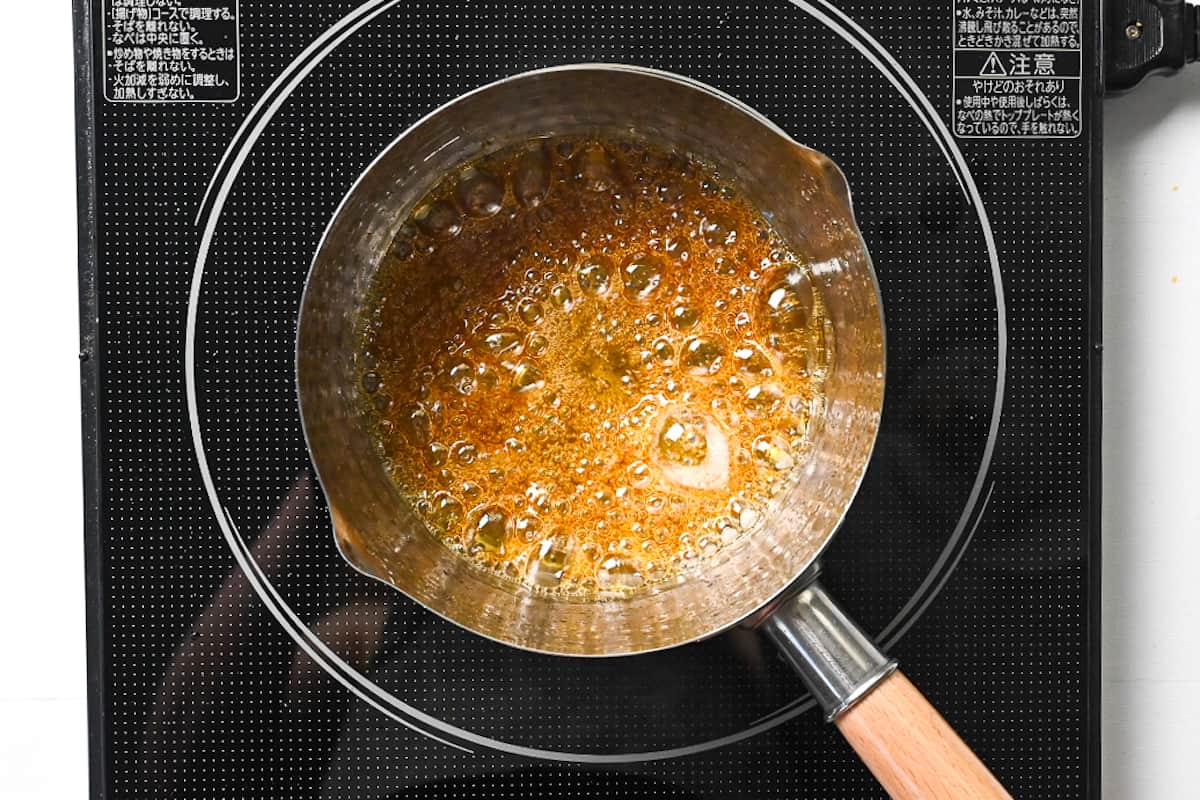
Continue to swirl or tilt the pan when necessary, and once the caramel turns a deep amber, pour in the last third of water.
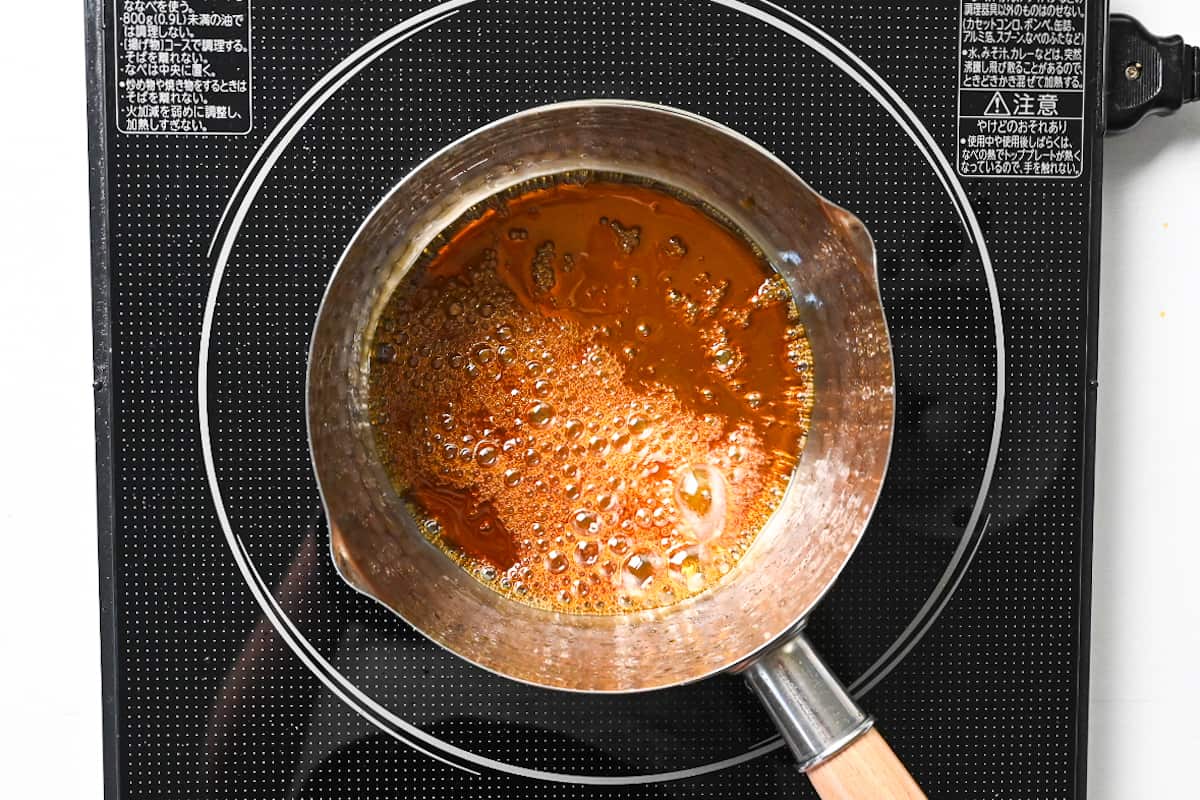
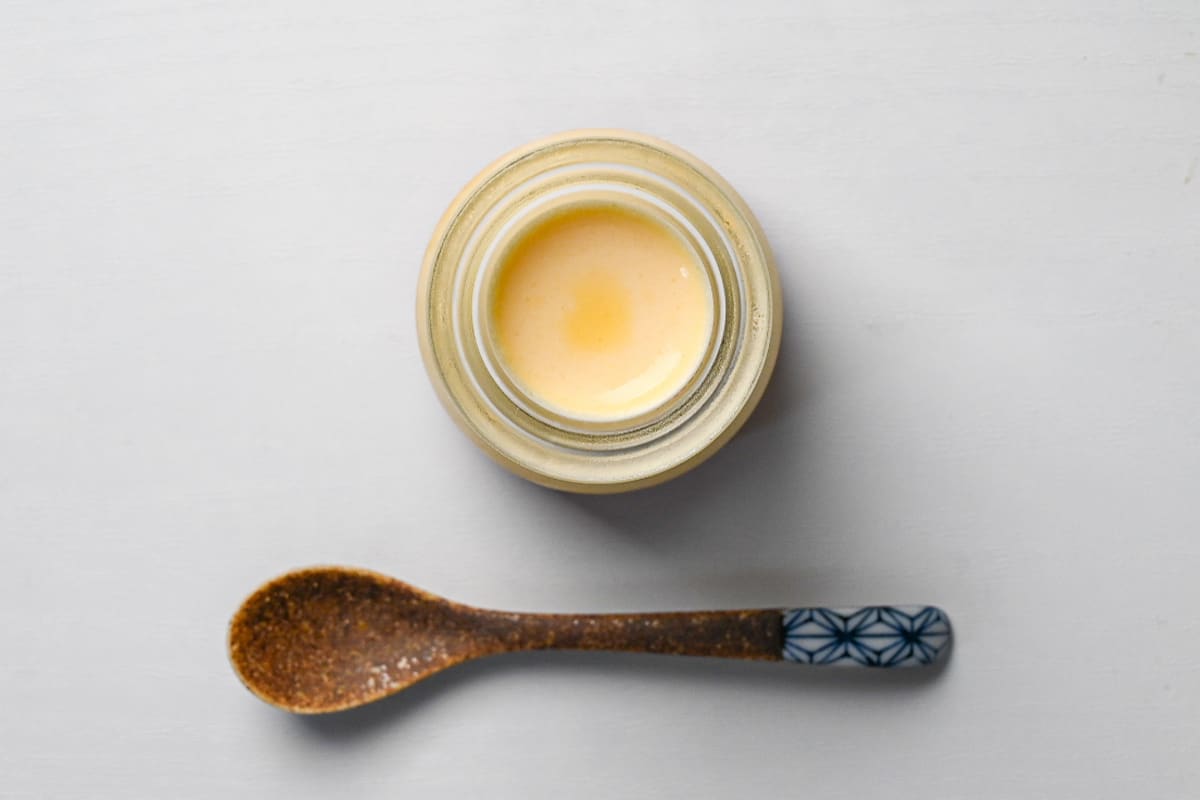
Remove the pan from the heat and swirl it around to help cool it down slightly. Then pour it into your heatproof purin containers and set aside for later.
If your purin cups are very cold, the sudden temperature change of the hot caramel can cause the glass to crack. To prevent this, fill the cups with hot water (not boiling) water to warm them, alternatively microwave for 20-30 seconds.
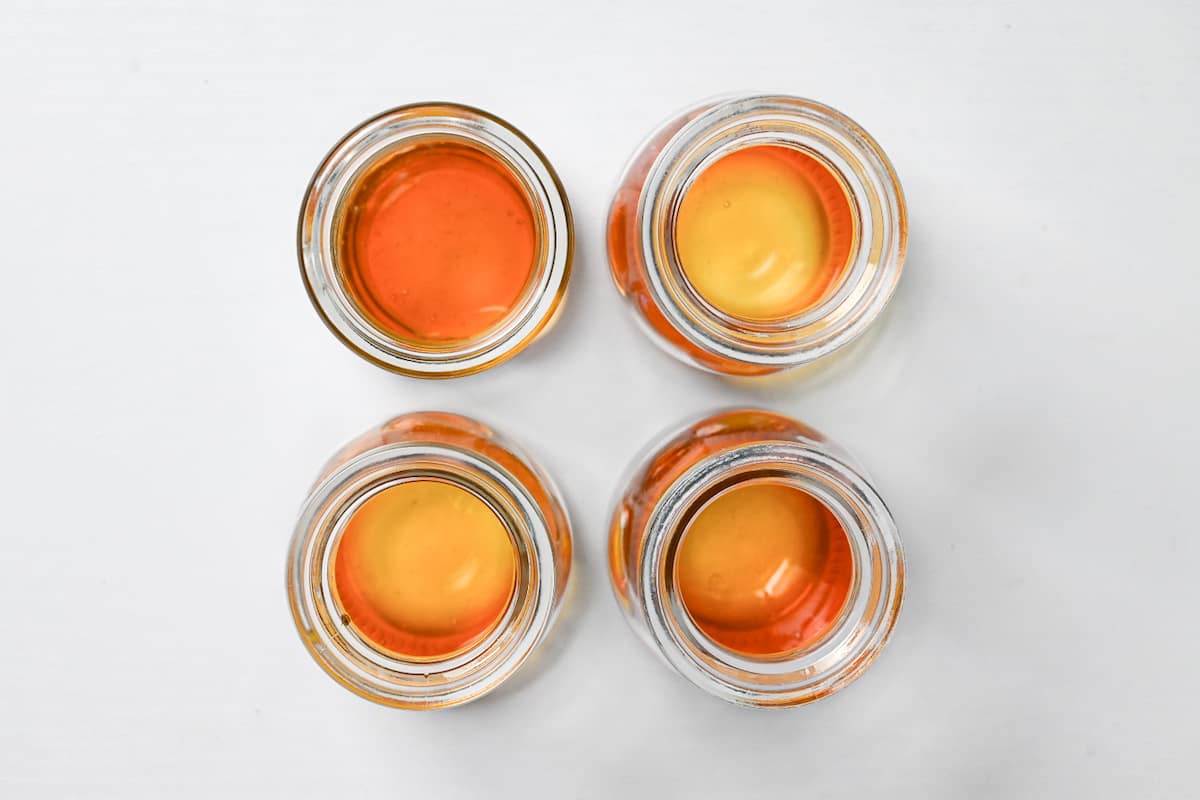
Once they’ve cooled, store them in the fridge to help set the caramel further.
Once you’ve finished the caramel, the gelatin should have bloomed and is ready to be melted.
Heat your milk using your preferred method. You can warm it in a pan on the stovetop over low/medium-low heat, or use a microwave. I usually start with 2 minutes at 600W.
The goal here is to melt the gelatin without overheating the milk. Whole cow’s milk can be heated up to 60-70℃ (approx 140-160°F) before it starts to scold, so be careful not to overheat it.
Note that gelatin starts to lose its setting properties if heated above 75℃, even more reason not to overheat!
Heat the milk slowly over a low or medium/low heat and stir continuously to ensure it doesn’t form a skin. If you don’t have a thermometer, check for small bubbles appearing around the edge of the pan and take the pan off the heat quickly to prevent scolding.
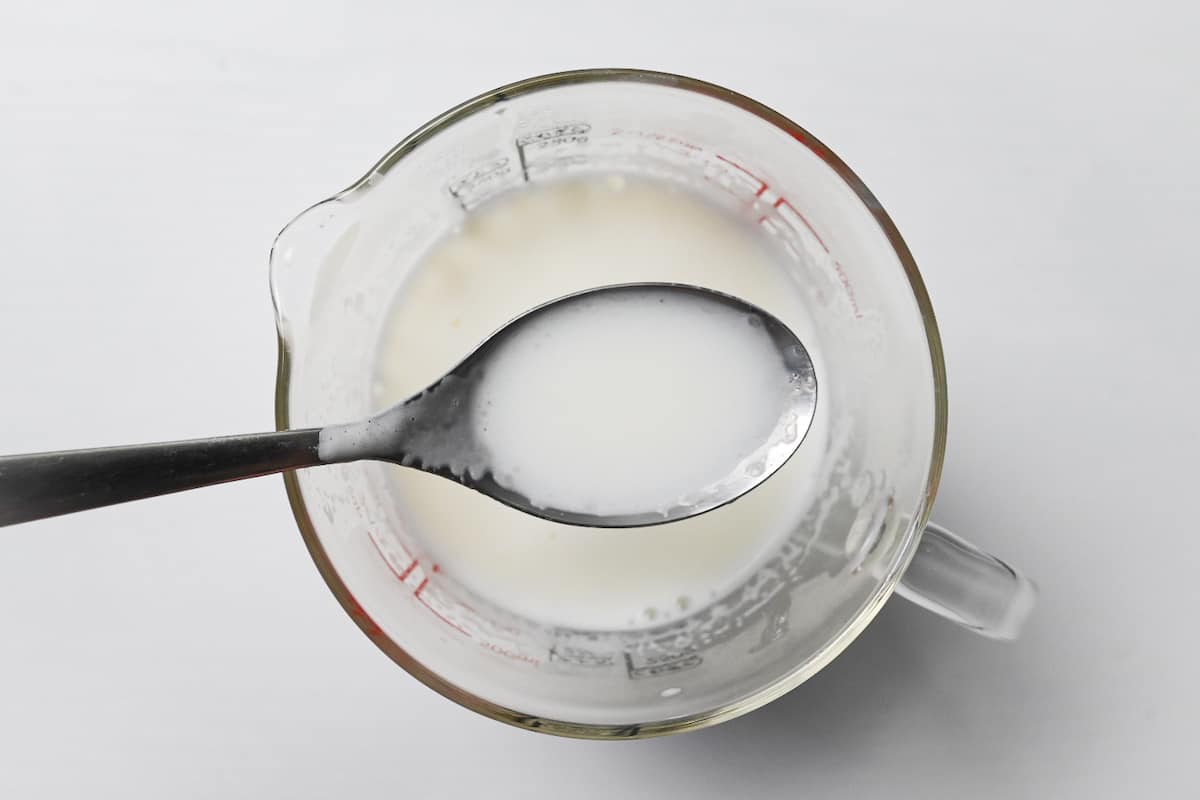
Mix it thoroughly, then scoop and inspect for grains of gelatin powder.
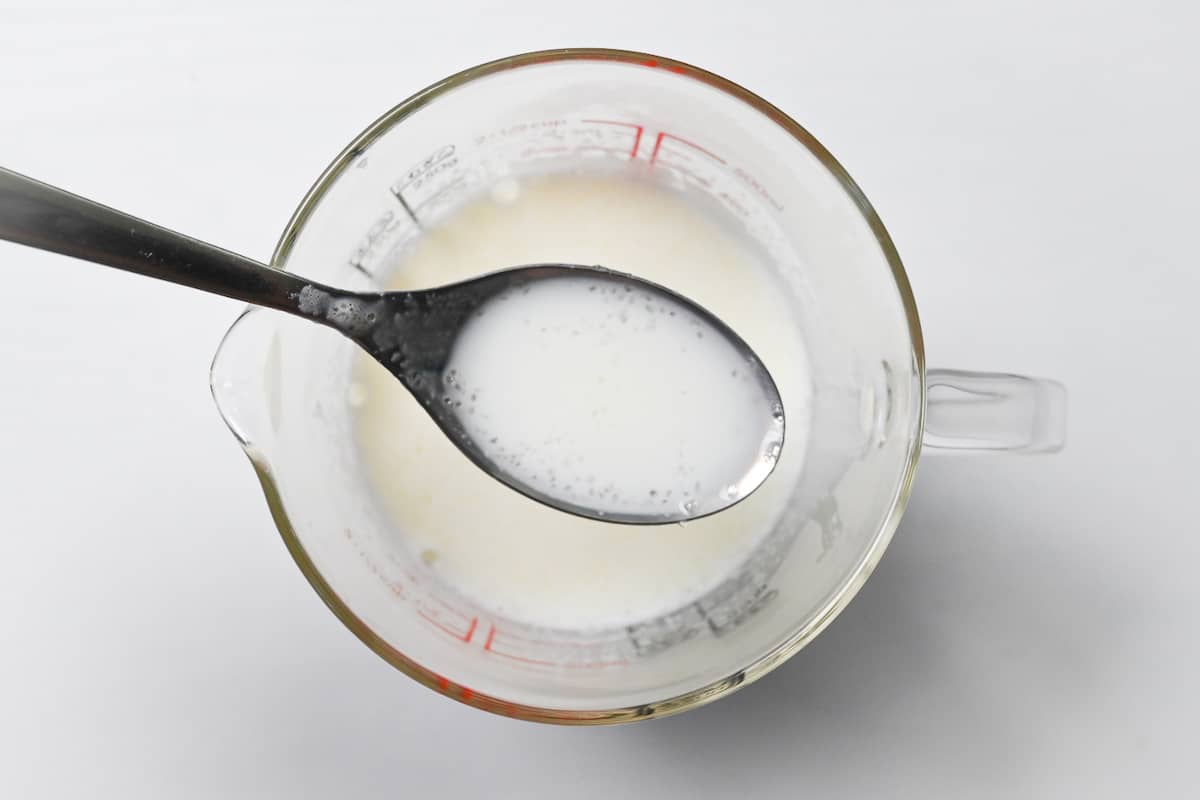
Continue to heat (microwave in 20-30 second intervals) and keep mixing thoroughly until the gelatin powder is fully melted.
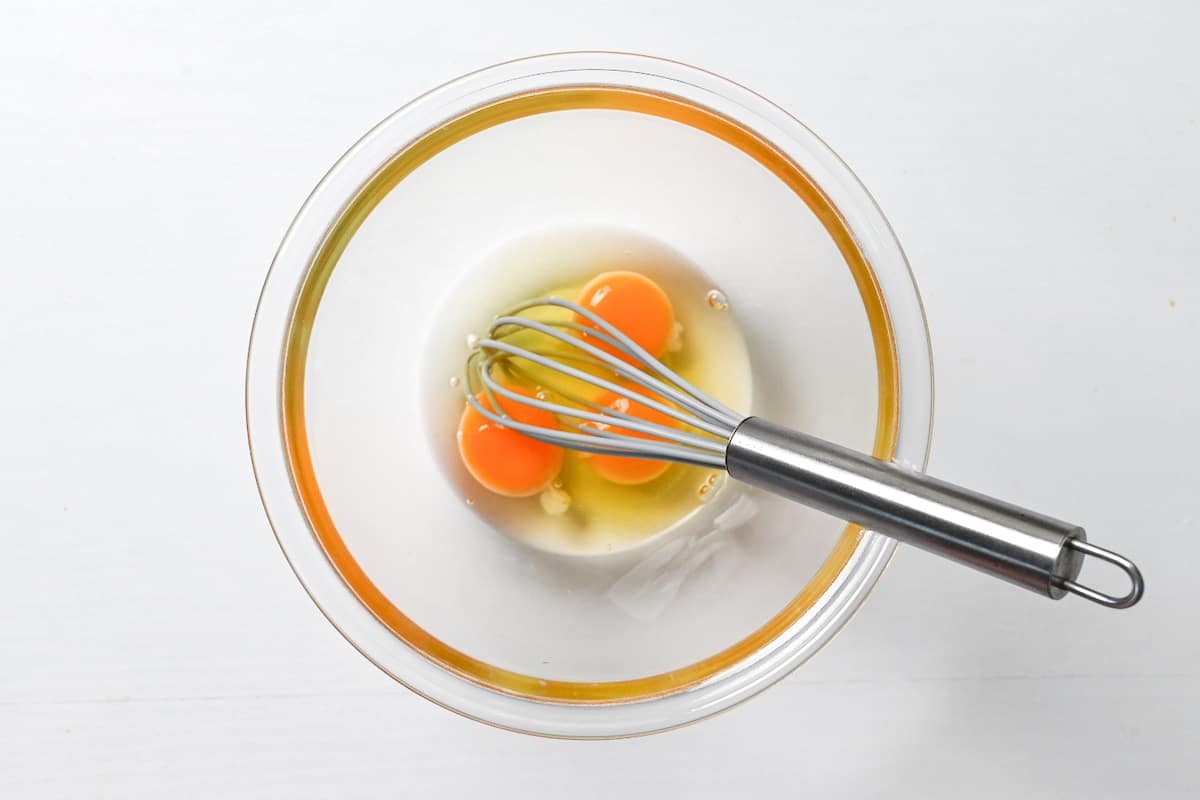
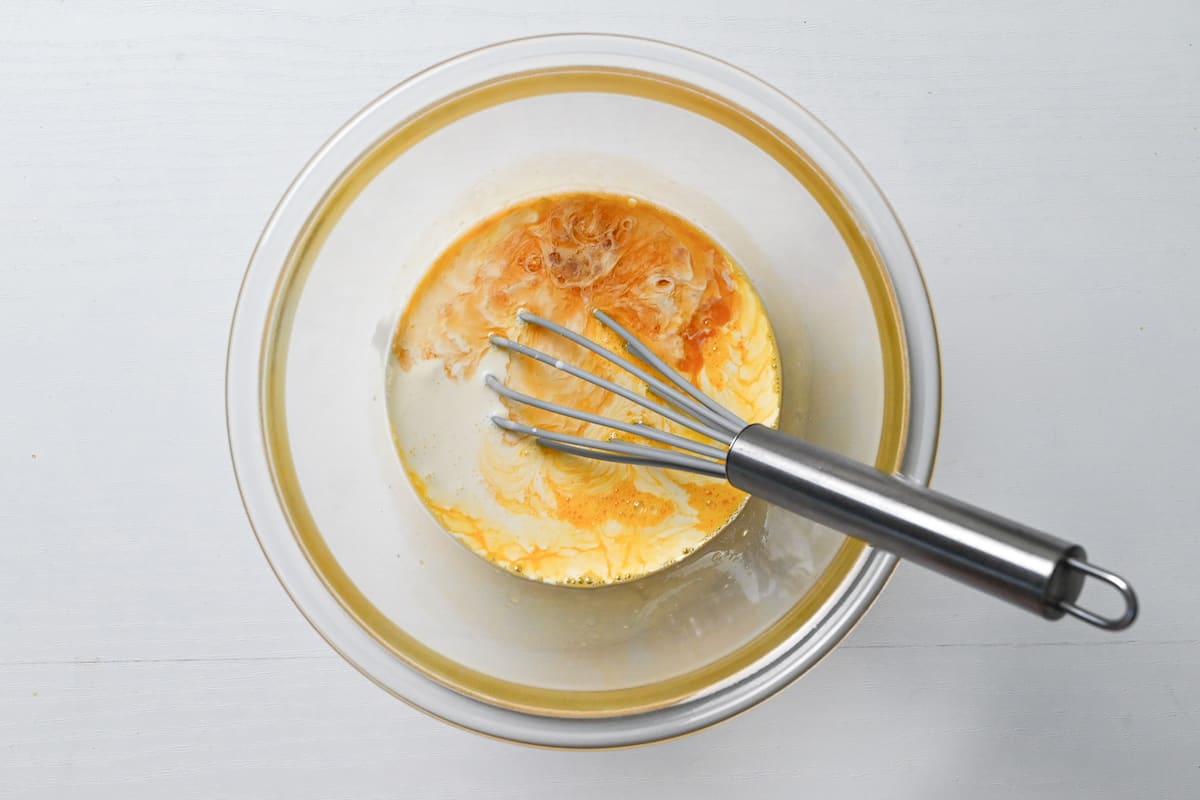
Crack the eggs into a heatproof bowl and whisk until the yolks and whites are combined.
Next, add the heavy cream and vanilla essence and whisk again.
Slowly pour the hot milk into the bowl while whisking gently to temper the eggs.
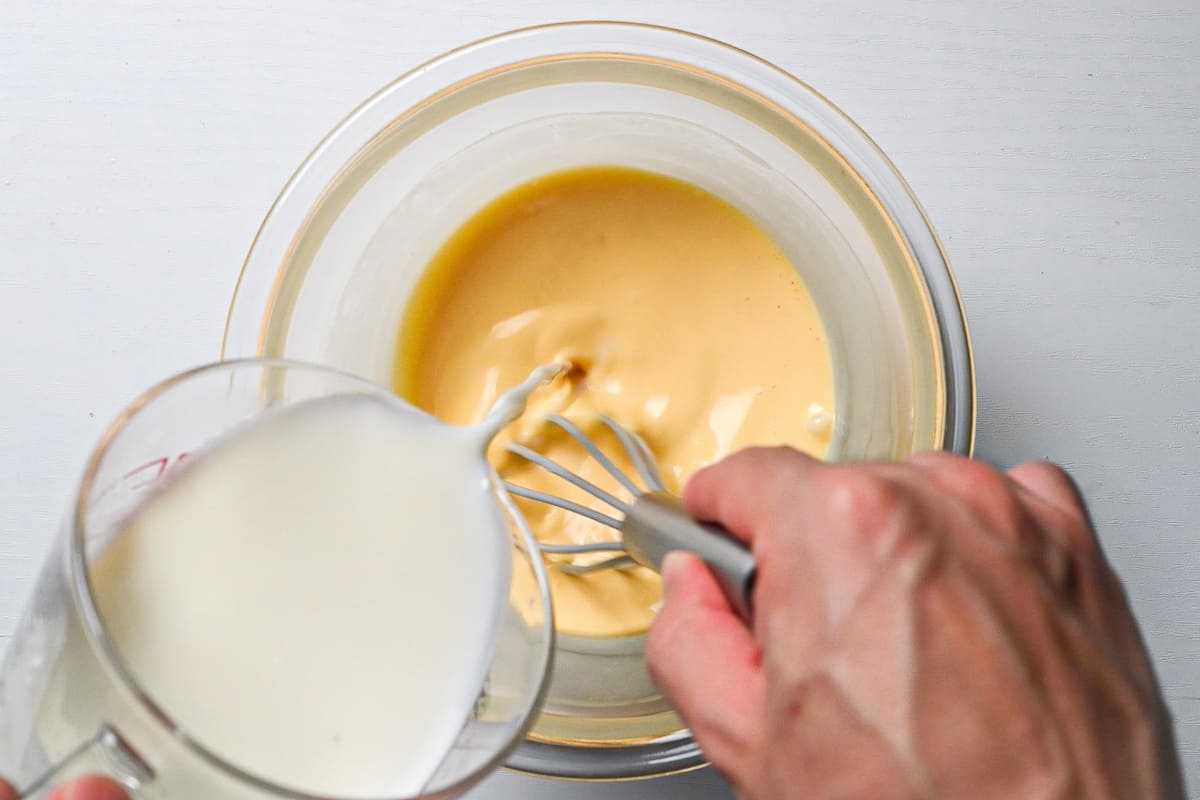
Pouring too much hot milk at once can create lumps of cooked egg! Slow and gradual is the best approach here.
Once everything is mixed, pour the mixture through a fine mesh sieve. This will catch any lumps of gelatine powder or egg that you might have missed, making your custard extra smooth and silky.

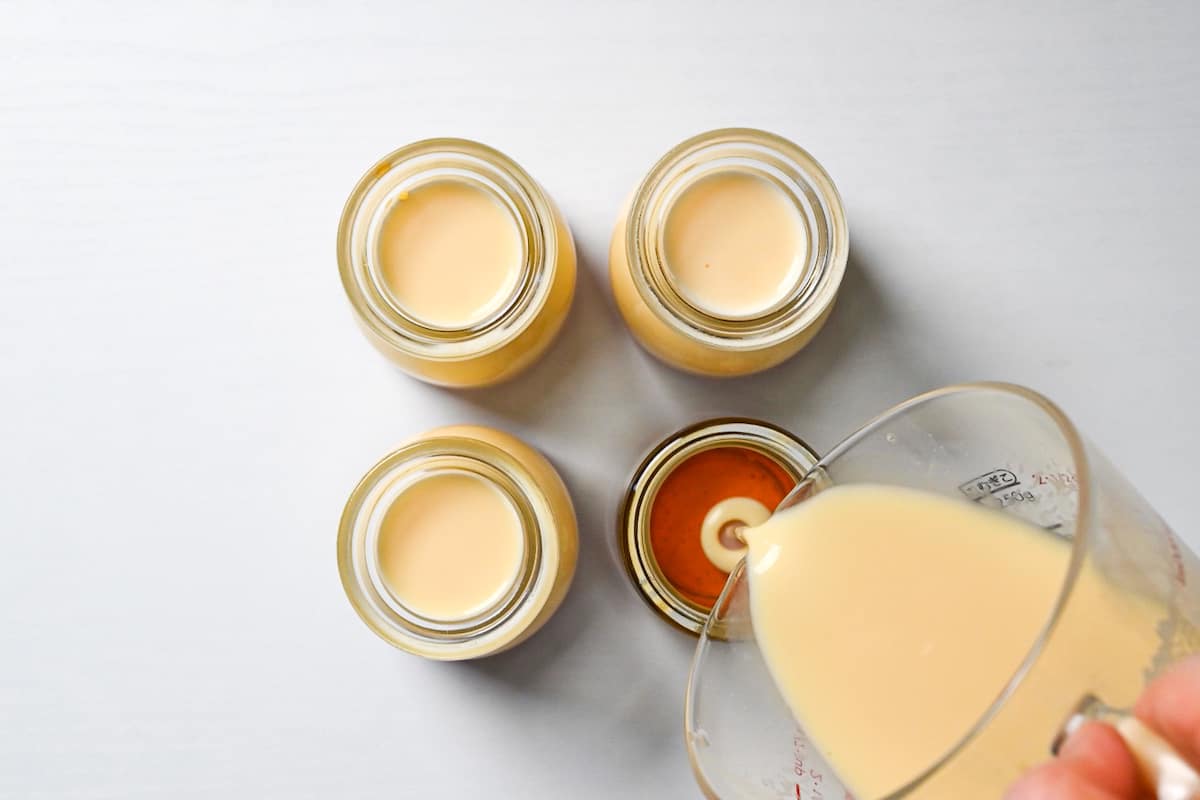
Finally, pour the mixture into the purin cups over the caramel. Leave a little bit of space at the top to prevent spills.
If your purin cups came with lids then place them on top, if not, seal the top with plastic wrap or foil. Place them in the fridge and chill for 3-4 hours, or until set.
This purin recipe takes about 3-4 hours to set enough to eat, but they really taste best if you rest them overnight.
Enjoy this extra silky and creamy Japanese purin!

Essential Tips & Tricks
- Use a silver saucepan for making the caramel so you can easily see when the color changes.
- Add hot water to caramel to reduce sizzles and splashes.
- Protect your skin with long sleeves and oven mitts in case of splashing caramel.
- If your purin cups feel especially cold, warm them in hot water (not boiling) or in the microwave so that they don’t crack when you add hot caramel.
- Don’t boil the milk, keep it around 60-70℃ (Approx 140-160°F). You don’t need a thermometer, stop heating when small bubbles appear around the edges and mix frequently to prevent a skin from forming.
- If heating milk on the stove top, use a low or medium-low setting to bring the temperature up gradually. This will prevent scorching and curdling.
- Strain the mixture to remove any lumps of egg or gelatin, your purin will be silky smooth.
- Refrigerate for at least 3-4 hours, ideally overnight.
With these simple tips in mind, you’re set for success every time you make Japanese nameraka purin.
Storage
Fridge: Store covered in the refrigerator and eat within 2-3 days.
Freezer: Not suitable.

No Bake Purin FAQ
Gelatin strengths can vary across brands, so check the packaging and increase if necessary.
It depends, but my purin recipe contains uncooked eggs so it’s better to eat it within 2-3 days max. Baked or steamed purin will last longer.
I wouldn’t recommend it.
It is said that pudding was introduced to Japan in the late Edo period (1603-1868) and early Meiji period (1868-1912). The name “purin” (プリン) comes from the English word “pudding” which was mentioned in a document from around 1872.
Purin and flan are from the same dessert family made with set custard and a caramel layer. They contain similar ingredients, however, flan is sometimes made with condensed milk and baked to set the eggs, whereas Japanese purin is made with milk/cream and commonly set with gelatin. Baked purin in Japan is known as yaki purin. There is also a steamed variation known as mushi purin.
In Japan, Purin has a wide variety of flavors! Some of them are available all year around, others appear depending on the season. For example, pumpkin and chestnut are often found in Autumn whereas I’ve seen limited edition strawberry in spring, or mango in summer. Other purin flavors you can find in Japan:
– Matcha
– Sweet potato
– Black sesame
– Chocolate
All of these interesting flavors just go to show how much Japanese people love purin! You can experiment with the flavors by switching out the vanilla essence for a different essence, extract, or powder!

More No-Bake Japanese Dessert Recipes
- Japanese Style Lemon Rare Cheesecake (no bake)
- Coffee Jelly (With Plant-Based options)
- Mizu Yokan (Red Bean Jelly)
- Anmitsu (Kanten Jelly Dessert with Red Bean Paste)
Want more inspiration? Explore my Japanese Dessert Roundup Post for a carefully selected collection of tasty recipe ideas to spark your next tea party!
Did You Try This Recipe?
I would love to hear your thoughts!
💬 Leave a review and ⭐️ rating in the comments below. 📷 I also love to see your photos – submit them here!
Nameraka Purin (Silky No Bake Japanese Custard Pudding)
Equipment
- Purin Cups 6x100ml or 4x150ml
Ingredients
For the caramel
- 50 g white sugar
- 60 ml hot water
For the custard
- 300 ml whole milk
- 50 g white sugar
- 7 g gelatin powder
- 3 pasteurized eggs
- 100 ml heavy cream 35% fat or higher
- ½ tsp vanilla essence or half the amount of vanilla extract
My recommended brands of ingredients and seasonings can be found in my Japanese pantry guide.
Can’t find certain Japanese ingredients? See my substitution guide here.
Instructions
- Before you start, pour 300 ml whole milk into microwavable container and stir in 50 g white sugar and 7 g gelatin powder. Mix and leave the gelatin to bloom for 5-10 minutes. While you wait, make the caramel.

Make the caramel
- Measure out 60 ml hot water. Add one-third of the water to a cold saucepan along with 50 g white sugar. Mix them together and scrape down the sides before you turn on the heat.
- Heat on a medium/medium-low setting and bring to a bubbling state. Tilt and swirl the pan occasionally to help the sugar heat evenly.
- When it starts to turn golden, add another third of the hot water. Be careful of the caramel splashing and sizzling, stand back and wear long sleeves or oven mitts to protect your hands.
- Continue to heat the caramel and tilt the pan from time to time to ensure even coloring. Once it starts to turn a deep amber color, add the last third of the water.Take it off the heat and swirl the caramel around by tilting the pan in a circular motion to incorporate the water and cool the caramel down a bit.
- Pour the caramel into 4-6 heatproof containers. After a few minutes, place in the refrigerator to set.
Make the custard
- Microwave the jug of milk, sugar and gelatin from step 1, for 2 minutes at 600W. Alternatively, heat on the stovetop on low/medium-low while stirring continously.
- If any grains of gelatin are remaining, continue to heat in the microwave in 20-30 second increments, mixing each time until the gelatin is completely melted. Be careful not to overheat and scold the milk.
- Crack 3 pasteurized eggs into a heatproof mixing bowl and whisk until the yolks and whites are combined.
- Add 100 ml heavy cream and ½ tsp vanilla essence and whisk again.
- Pour a small amount of the hot milk mixture into the egg mixture and mix to temper the eggs. Add the rest of the milk gradually while whisking gently.
- Rinse out the jug and place a strainer over the top. Pour the custard mixture through the sieve to remove any stubborn lumps of gelatin powder or egg.
- Pour the custard into the containers, leaving a small space at the top to prevent spills.Cover with lids or plastic wrap and chill in the refrigerator for 3 hours minimum, preferably over night.
- Serve and enjoy!
Video
Notes
- Store in the refrigerator and consume in 2-3 days.
- Use a light-colored saucepan for making the caramel so it’s easy to see when the color changes.
- Use hot water when making caramel to reduce sizzles and splashes.
- Wear long sleeves or oven mitts to protect your skin from potential splashing caramel.
- If your purin cups feel cold, warm them in hot water (not boiling) or in the microwave so that they don’t crack when you add the hot caramel.
- Don’t boil the milk, keep it around 60-70℃ (Approx 140-160°F). You don’t need a thermometer, stop heating when small bubbles appear around the edges and mix frequently to prevent a skin from forming.
- If heating milk on the stove top, use a low or medium-low setting to bring the temperature up gradually to prevent scorching and curdling.
- Strain the mixture to remove any lumps of egg or gelatin and make your purin extra smooth.
- Refrigerate for at least 3-4 hours, ideally overnight.
Thank you for this recipe. I have been looking for this for over a year. And now i found yours. I made it yesterday and could not put it down. So good, just perfect. But, i made a sugarfree version of it. So, i used almond milk and heavy cream, with the eggs and gelatine, with stevia drops. And minimal effort too.
Thank you for your comment and generous rating. I’m happy you enjoyed the recipe!
I visited Japan last year and I missed having the puddings there so much!
I already knew how to make flan but the texture of japanese puddings was just so smooth and melt in your mouth that i had to learn how to make it. I looked up so many recipes until I found yours!
And I must say it came out perfect, I even used half of the pudding mixture to make a coffee flavoured one! its such a good base!
I did however have to make the caramel twice, but atleast now I know how to make a a liquidy caramel!
Hi Shruthi, thank you for trying the recipe and sharing your photo, it looks delicious! I’m happy you enjoyed it.
Caramel can be a bit tricky but I’m glad you could make it on your second try. I also love your idea of making coffee flavor, I must try that!
Yuto
I think next time to make a coffee version I will have to figure out a coffee syrup. just mixing it into the base didnt give that strong of a flavour, something about the flavour profile was a bit off without a syrup. Im going to experiment though!
I think lemon syrup might also be nice, kind of like panna cotta flavours but purin texture!
Did you use instant coffee last time? Perhaps you can try adding more instant coffee to the hot milk mixture and use a coffee flavored syrup instead of caramel.
Using powders like coffee or matcha is a good way to change the flavor of the base, I think you’d have to be careful with syrups since they will change the liquid amount and I’m not sure how it will affect the texture. Probably the best thing to do is swap the vanilla essence for other flavor extracts, I know lemon extract is available. I’m also a big fan of lemon so if I try it, I’ll let you know how it goes!
Thank you for your input! Hope you enjoy experimenting with more purin flavors!
ahh, i wanted to try the original flavour as well, so i added a few spoonfuls of strong brewed coffee to half the purin mixture at the end.
I think next time if i want coffee i’ll add the instant powder directly to the milk and try making a coffee syrup!
but essence does make sense for the other flavours, Im going to eventually try with some indian flavours like rose milk and cardamom, my grandma will like it more than coffee for sure
That sounds great!
I love your ideas, they’re very creative and sound delicious!
So delicious!! I’m not sure if mine set properly, since it was just a little liquidy, but either way, I love this recipe. I’m a high school student and I usually have to wake up pretty early most mornings to catch my bus, so it was really great to make something the day before and just have multiple servings of it ready throughout the week.
Hi Lottie,
I’m so glad you enjoyed it, thank you for sharing that! Even if the texture was a little softer than expected, I’m really happy it still worked for you, and I love hearing that it helped make your busy mornings a bit easier! 🙂
Yuto
Excellent. I made it without the sugar, but followed the recipe as written and it is delicious. Very nice texture, so nice to not have to steam or bake it. I am getting ready to make more so that I have a ready breakfast for a few days. Domo Arigato!
Hi Joanne,
Thank you so much! Great to know it works well even without the sugar, that’s really helpful for others to hear too! I love that you’re making extra batches for breakfast prep too! 🙂
Yuto
i made purin. followed the exact directions and came out yummy!
Hi Michele
Thank you so much for trying this recipe and sharing your picture! So glad it came out well for you, it looks great! 🙂
Yuto