
Featured Comment
I gave this jelly a try today. Wasn’t sure what to expect, but it was a pleasant surprise! so refreshing in the heat!
★★★★★
– Li
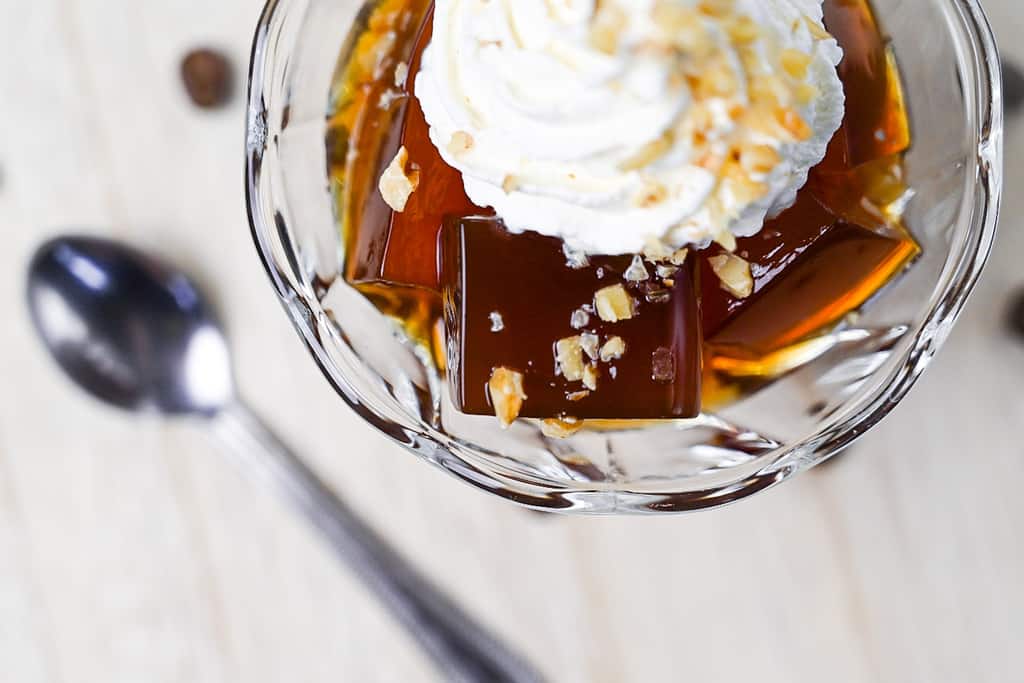
Jelly desserts aren’t just for kids! In Japan, they can be elegant, refreshing, and surprisingly grown-up. This coffee jelly combines the nostalgic fun of a wobbly chilled dessert with the bold, bittersweet flavor of coffee, making it perfect for hot days when you need a little lift.
If you love sweet treats like purin, yokan, or other softly set Japanese desserts, this is another simple pleasure worth adding to your rotation. Keep reading to see how easy it is to make at home, plus bonus serving ideas to make it your own!

COFFEE JELLY
Recipe Snapshot
- What is it? A light, refreshing dessert made with strong sweetened coffee set into a delicate jelly. Customize with cream or your favorite toppings for a cool, elegant boost.
- Flavor profile: Bold, bittersweet, refreshing.
- Why you’ll love this recipe: It’s simple, make ahead friendly, and feels surprisingly elegant for such a low-effort dessert. It also contains plant-based options!
- Must-haves: Your favorite coffee (espresso shots or coffee powder, etc.), setting agent (gelatine, kanten, or agar agar), jug or saucepan for mixing, plus cups or molds for chilling.
- Skill Level: Easy.
- Freezer Friendly: No.
Disclaimer: This post may contain Amazon affiliate links. Sudachi earns a small percentage from qualifying purchases at no extra cost to you. See disclaimer for more info.
What is Japanese Coffee Jelly?
Coffee Jelly (コーヒーゼリー) or “kōhii zerii” as it’s known in Japanese, is a refreshing and satisfying dessert made using strong black coffee that has been sweetened with sugar and then solidified using a setting agent.
Jelly desserts are extremely popular in Japan, especially in hotter months when something light, cold and refreshing is the perfect way to cool down in the Japanese summer heat and humidity.
The beauty of this recipe is the fact you can customize it to suit your tastes and dietary preferences. Use your favorite coffee paired with your favorite toppings, and swap gelatin for kanten or agar agar to make it suitable for plant-based diets too!
Coffee Jelly Ingredients
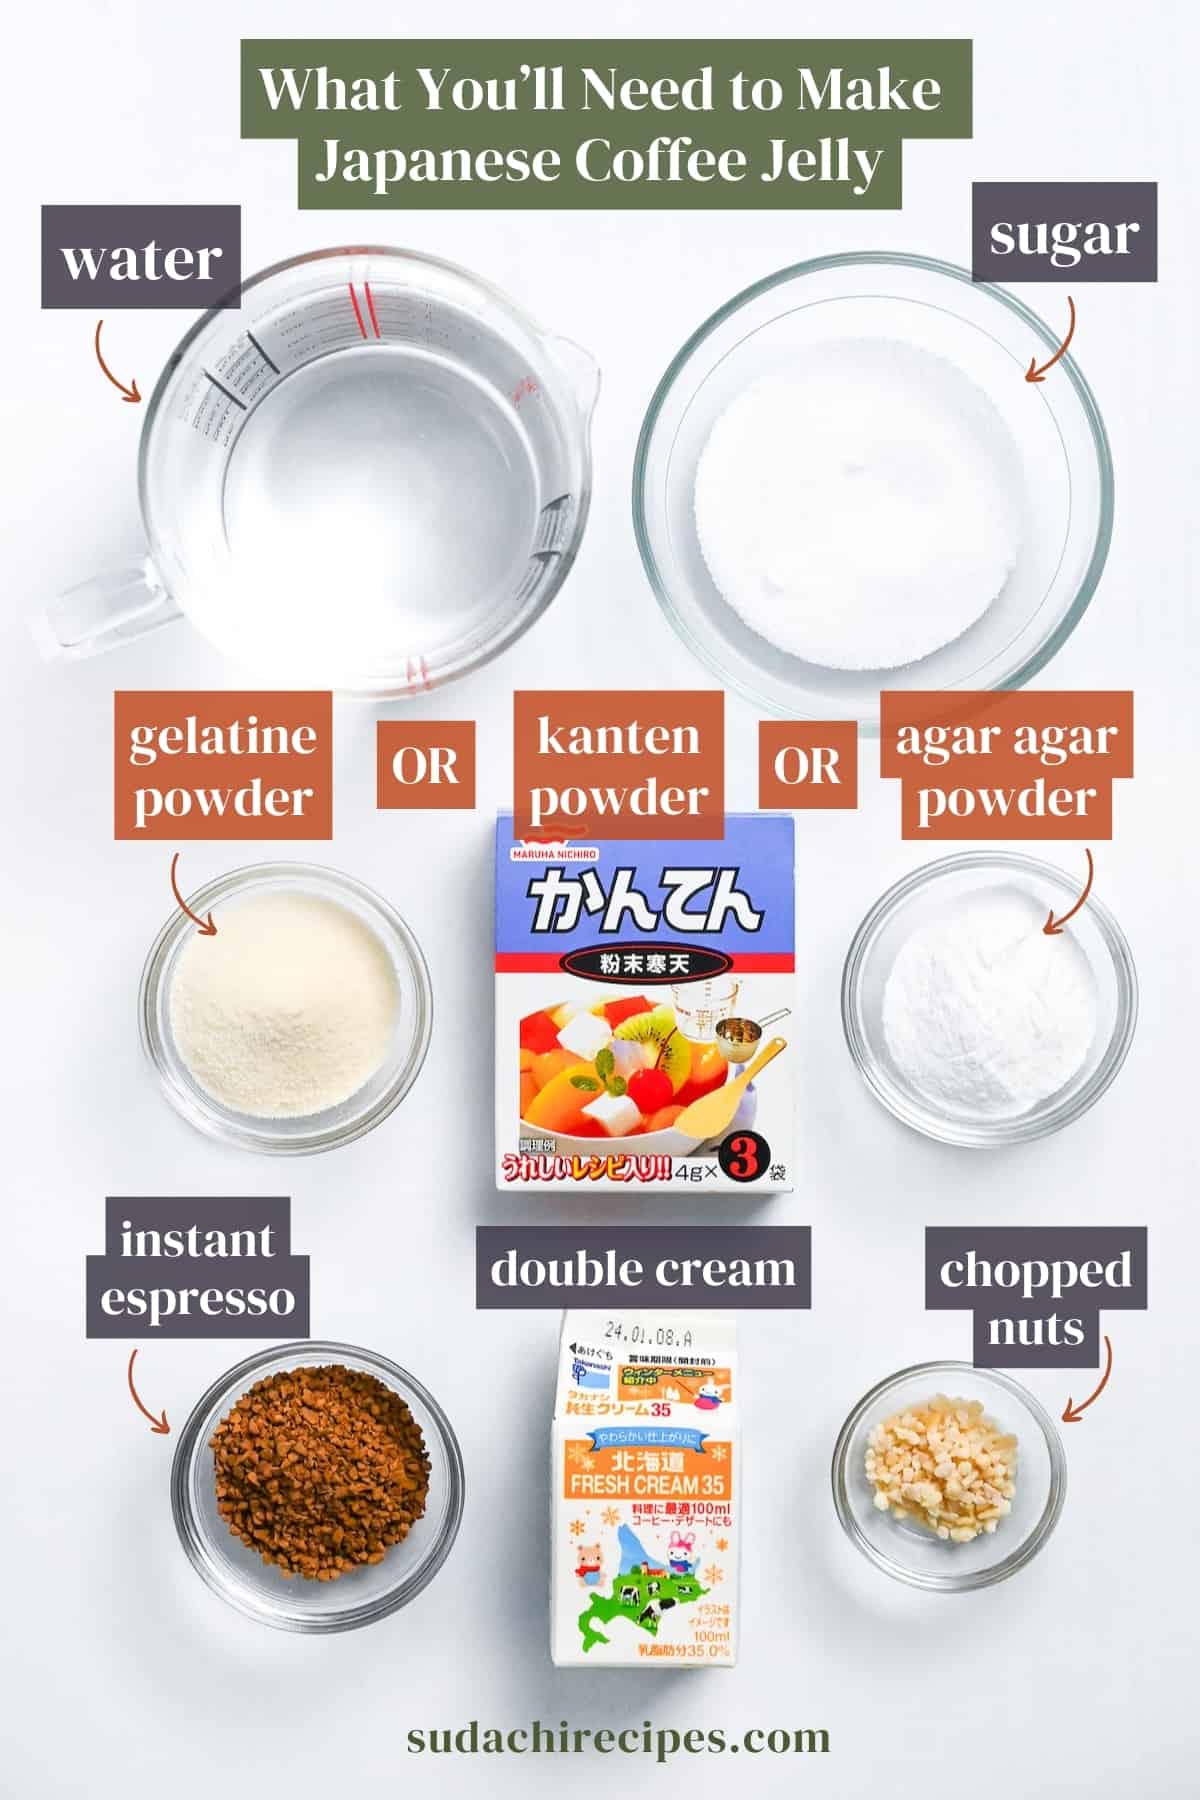
- Setting agent: You can make this recipe with gelatin, kanten or agar agar (affiliate) depending on accessibility and dietary needs, I’ve provided instructions how to use each of these in the post. I personally use the powdered versions since they make it easier to control the firmness of the jelly. Using kanten or agar agar will make it suitable for vegetarians and vegans.
- Coffee: Opt for a high-quality instant espresso or coffee powder for best results. If you’re using espresso shots from a coffee machine, reduce the water amount by 30ml for each single espresso shot to maintain the same liquid ratio in the recipe. Generally I’d recommend 120ml espresso (2 double shots) to 380ml of water to bring the total back up to 500ml. Depending on how strong you want your coffee jelly to be, you can experiment with the ratio, but make sure to adjust the water amount to keep the correct water ratio in the recipe.
- Sugar: I use white caster or granulated sugar, but you can experiment with light brown sugar or other sugars for different flavor profiles.
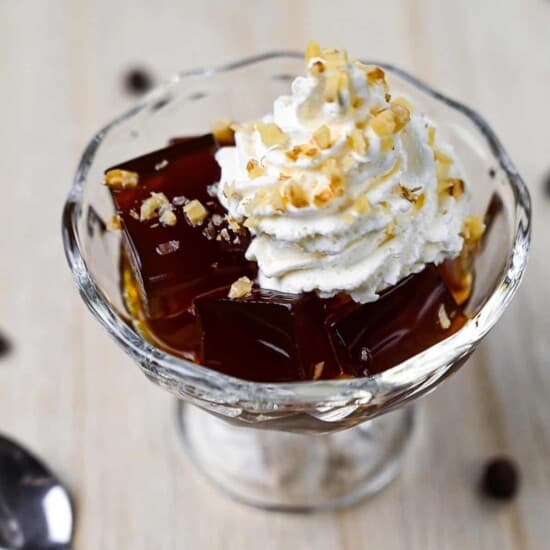
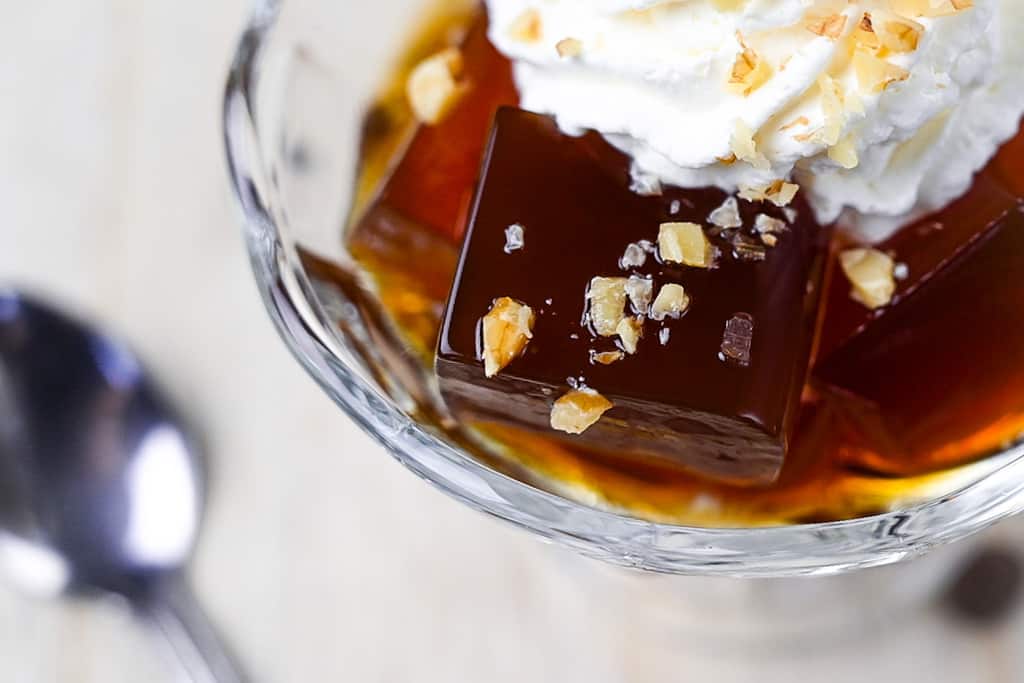
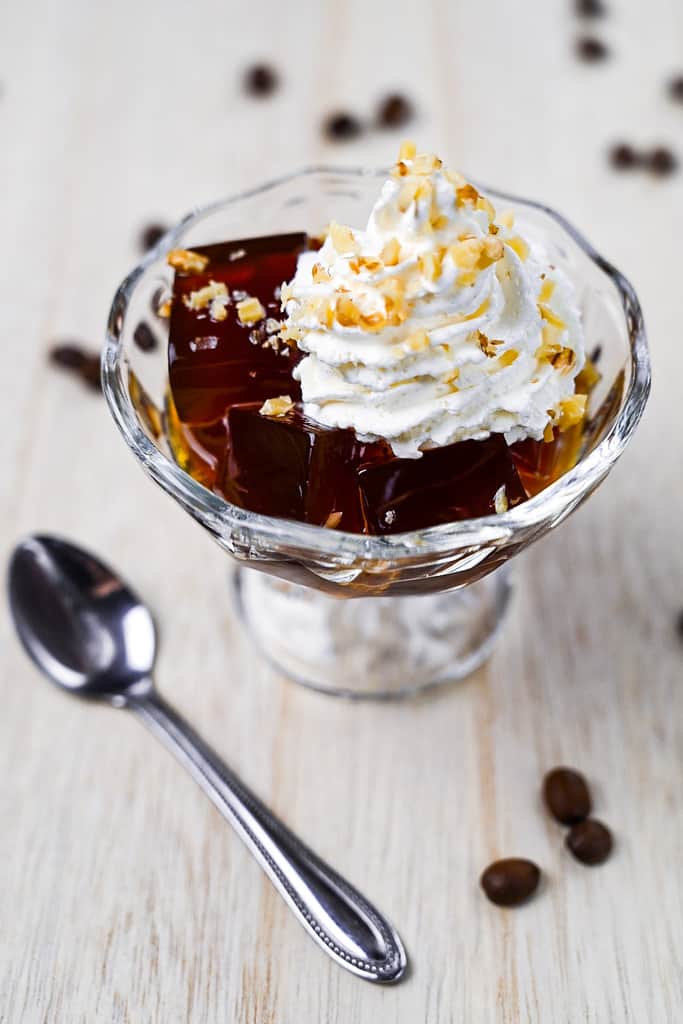
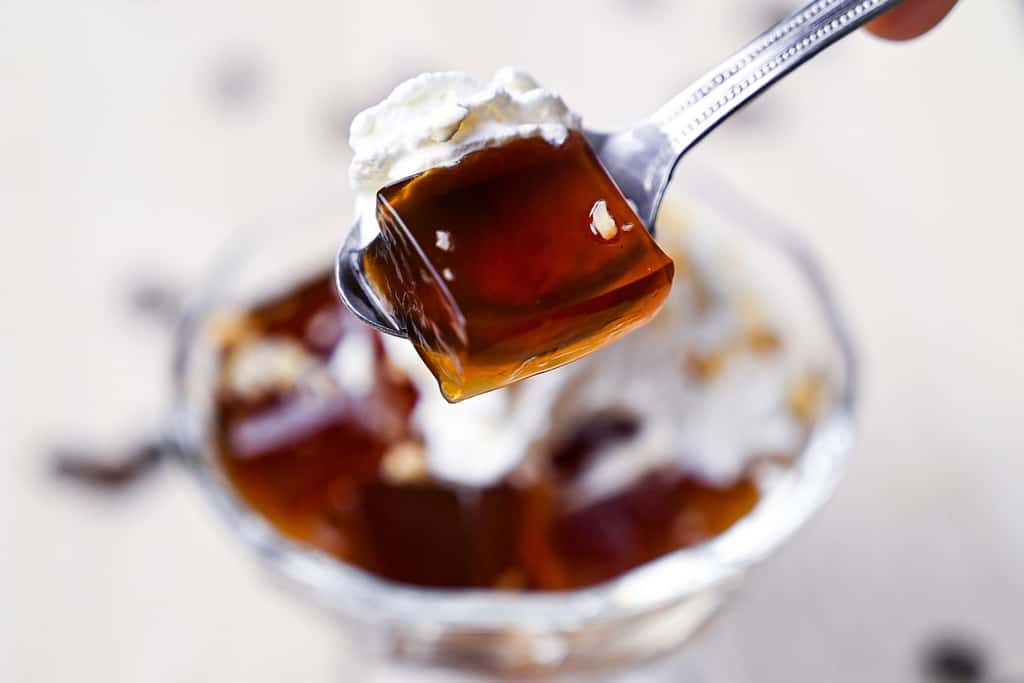
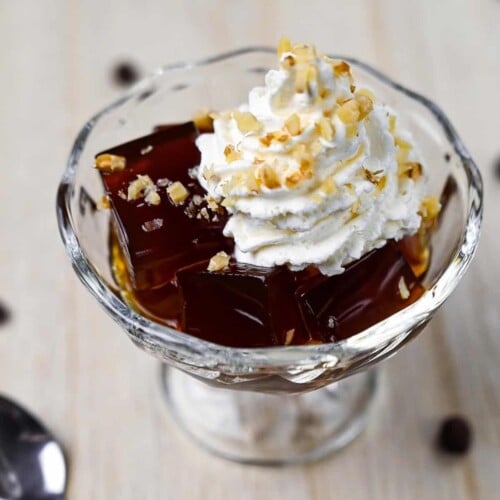
- Toppings: Coffee Jelly is typically topped with whipped cream, heavy cream or condensed milk. I also like adding a few chopped nuts (walnuts or almonds) for added texture, and a drizzle of flavored syrup (I like Monin’s hazelnut syrup).
Gelatin vs. Katen vs. Agar Agar: Pros & Cons
In order to make jelly, you will need to use a setting agent. I’ve included how to make this recipe with gelatin, kanten and agar agar, but what are the differences?
Gelatin is a translucent and flavorless coagulant made from the collagen of animal parts. It’s easy to use and can be simply mixed and melted into hot liquid to create jelly desserts. A few cons include setting time (takes at least 3-4 hours in the fridge) and not being suitable for plant-based diets.
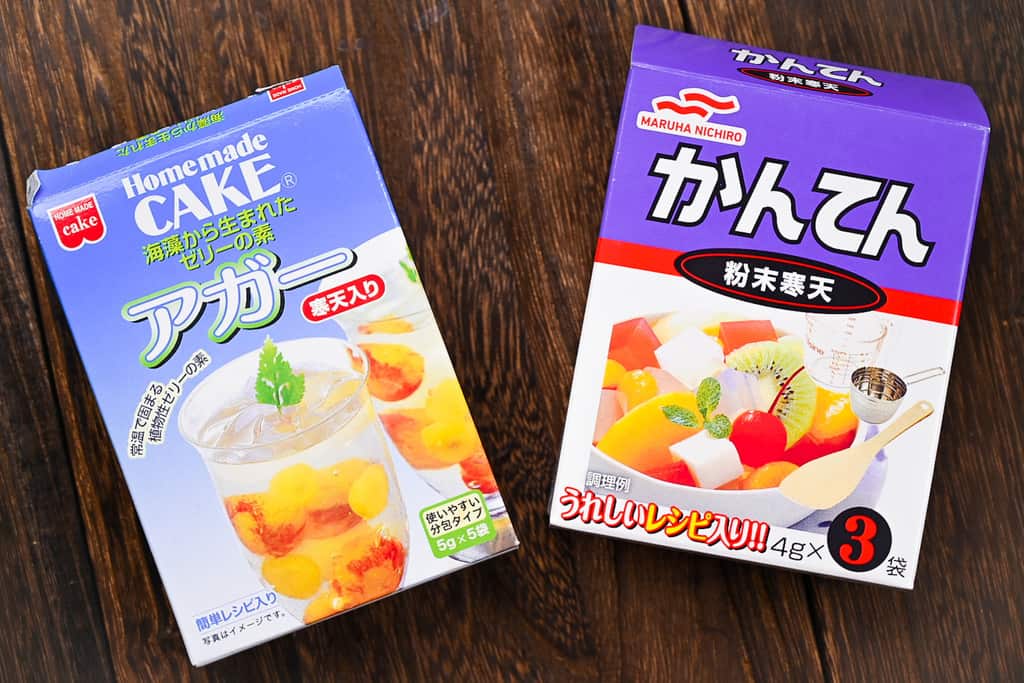
Kanten (寒天) is a plant-based setting agent made from type of red seaweed called gelidiales or tengusa in Japanese. It needs to be boiled for several minutes to activate the setting quality and cannot be simply dissolved like gelatine. Jelly made with kanten sets very fast (within 1 hour) even at room temperature, it is also firmer and not completely translucent, which can make it look a little cloudy. Although kanten is sometimes translated as “agar agar”, they are not the same thing and cannot be used interchangeably.
Finally, “agar agar” is a general term used for seaweed-based setting agents, making it plant-based. Agar agar was designed to mimic the texture of gelatine, resulting in a clear and jiggly jelly without the use of animal parts. Like Kanten, it needs to be boiled for it to set. You could say that agar agar is the best of both worlds, however they vary from brand to brand so you need to be more careful about the water ratio. I recommend using an agar agar that can be used as a 1:1 substitute for gelatine when following this recipe.
See the chart below for the qualities, pros and cons of each setting agent.
| Setting Agent | Gelatin | Kanten | Agar Agar |
| Ingredients | Collagen from bones and tendons of cows or pigs. | Red algae (tengusa/gelidiales) | A mixture of algaes including red seaweed. (Varies by brand). |
| Vegetarian/Vegan | No | Yes | Yes |
| Ease of Use | Very Easy: Dissolve in hot liquid. | Easy: Boil for 5 minutes. | Easy: Boil for time stated on packaging (might vary). |
| Firmness | Soft and jiggly | Firm, doesn’t jiggle | Medium jiggle, firmer than gelatin. |
| Transparency | Clear | Slightly cloudy | Clear |
| Setting Time | 4 hours minimum refrigeration | 1 hour room temperature | Varies depending on brand. Generally 1-2 hours. |
How to Make My Coffee Jelly Recipe
The base recipe makes 500ml (2 cups) worth of jelly. Prepare molds, a lunch box or small square cake pan that fits 500ml of liquid. For cubes about 1 inch (2.5cm) tall, use a 14-15cm (5.5-6″) square container or a rectangular container with similar dimensions. Keep in mind that larger containers will makes the jelly thinner, and it will set quicker. The opposite is true for small/tall containers. Thicker jelly stays warm in the center leading to longer setting time.
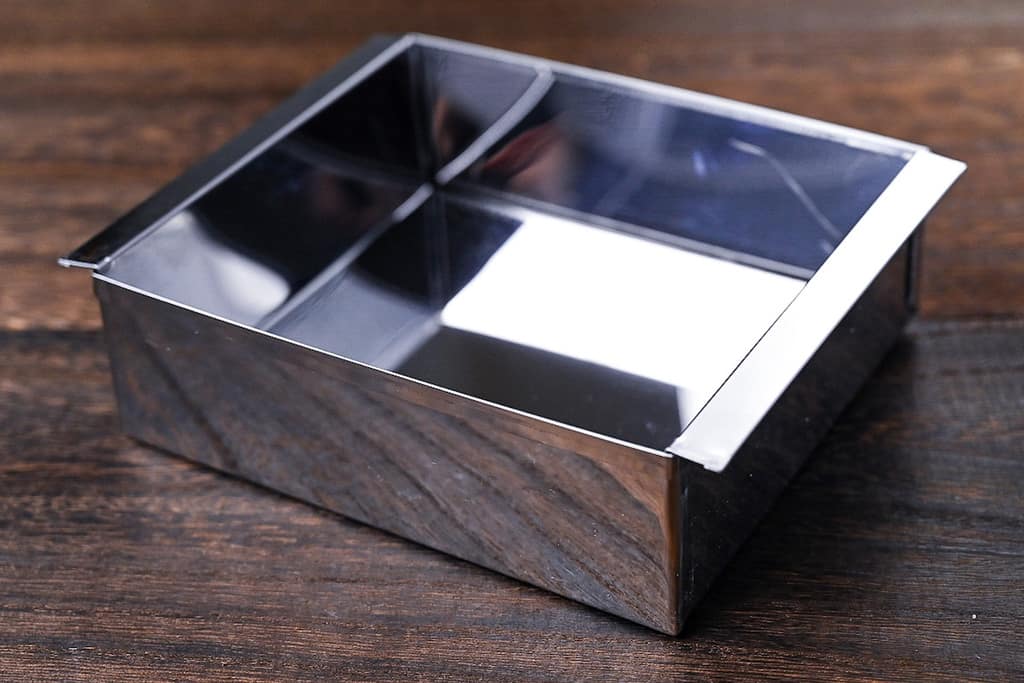
Since we will be filling the mold with hot liquid, make sure your molds are heatproof.
Gelatin Method
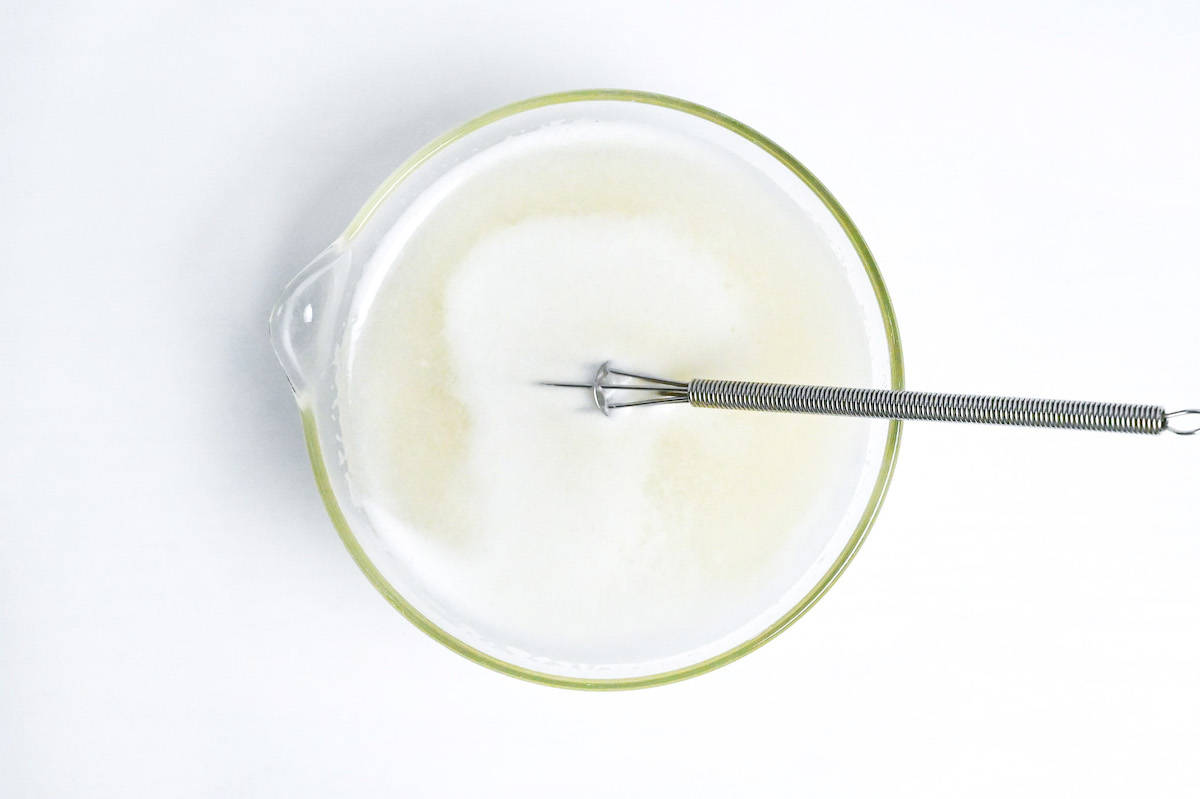
Take a bowl and add about one-third of the water (cold). Sprinkle the gelatin powder over the top of the water, and mix. Avoid putting the gelatine powder in the bowl first, since pouring water over gelatin can make it lumpy. Using cold water will ensure the gelatine hydrates evenly.
Leave it to bloom for 5-10 minutes.
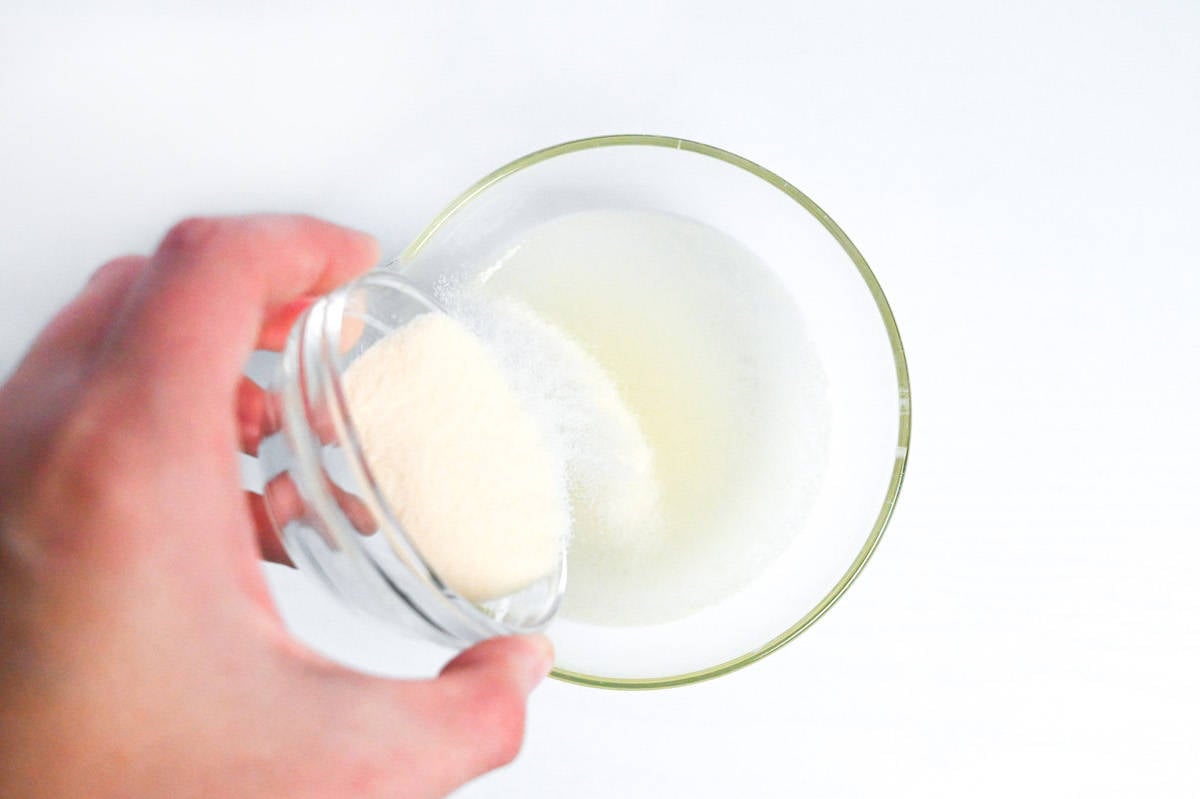
Once bloomed, it should look have expanded and absorbed some of the water.
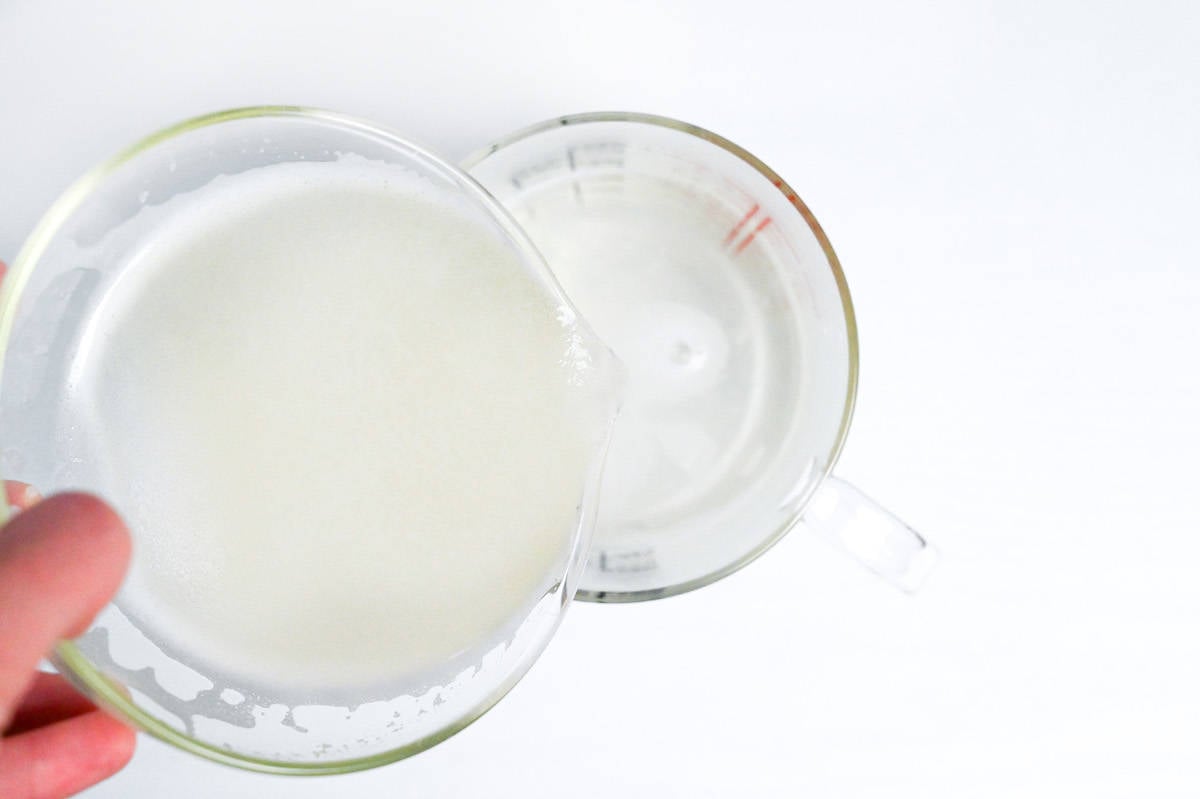
Boil the rest of the water and pour it into a heatproof jug. Note: If using espresso shots instead of coffee powder, reduce the amount of water by 30ml for every single shot of espresso used.
Pour in the bloomed gelatin and mix until completely dissolved.
Next, add the sugar.
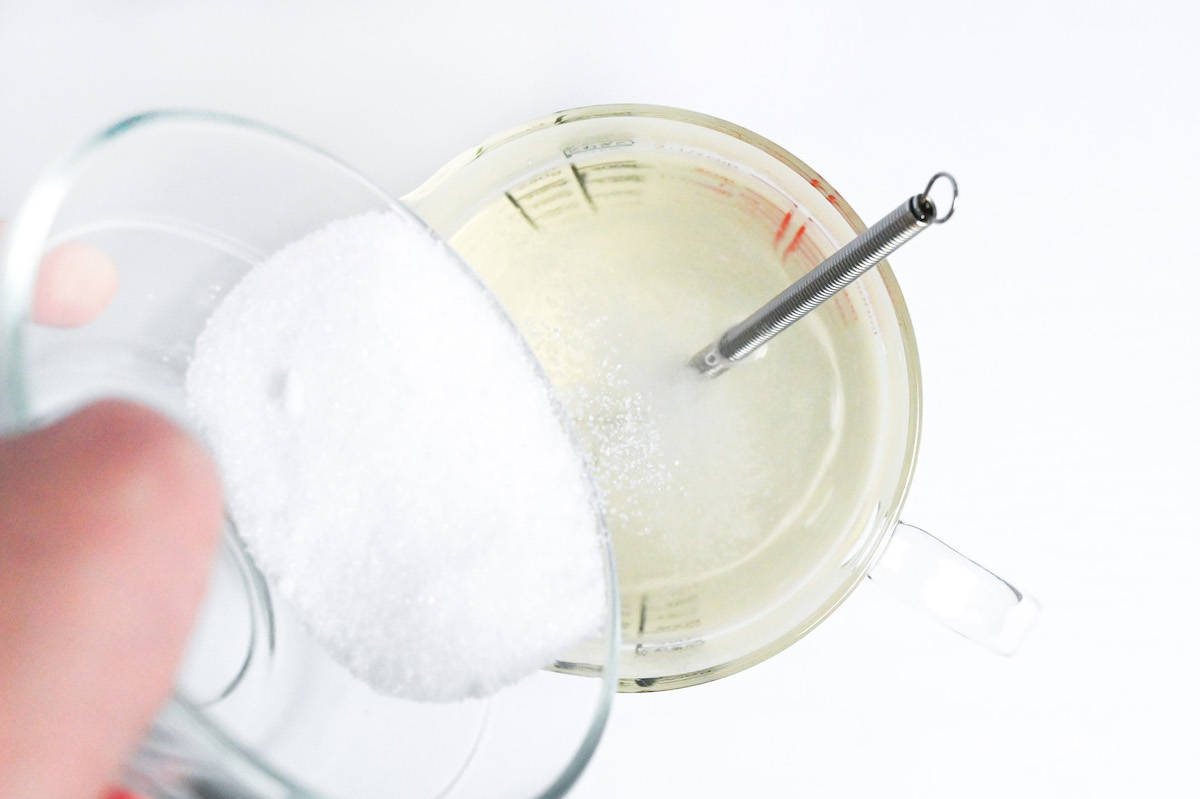
I add sugar first so that I can easily see when it has dissolved, but you can add the sugar and coffee powder at the same time if you prefer.
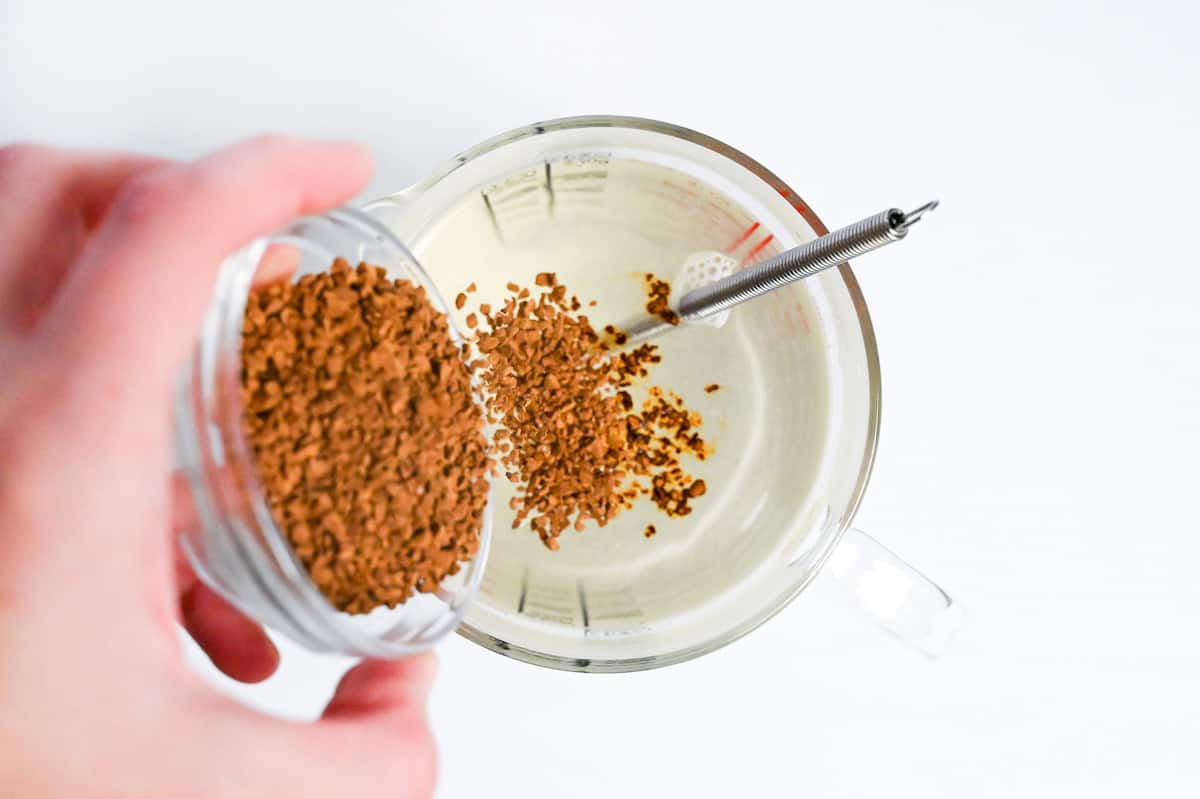
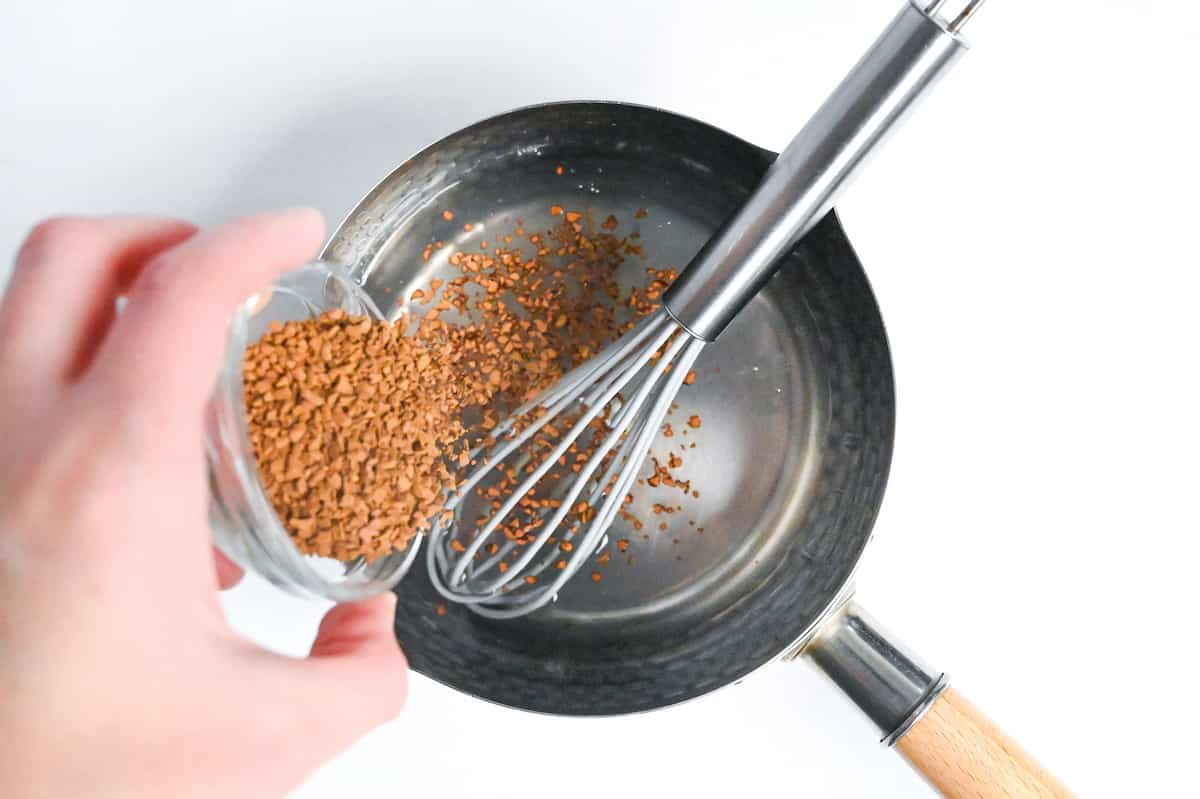
Then add the coffee granules (or espresso shots) and mix well. Scoop off the foam for a cleaner finish.

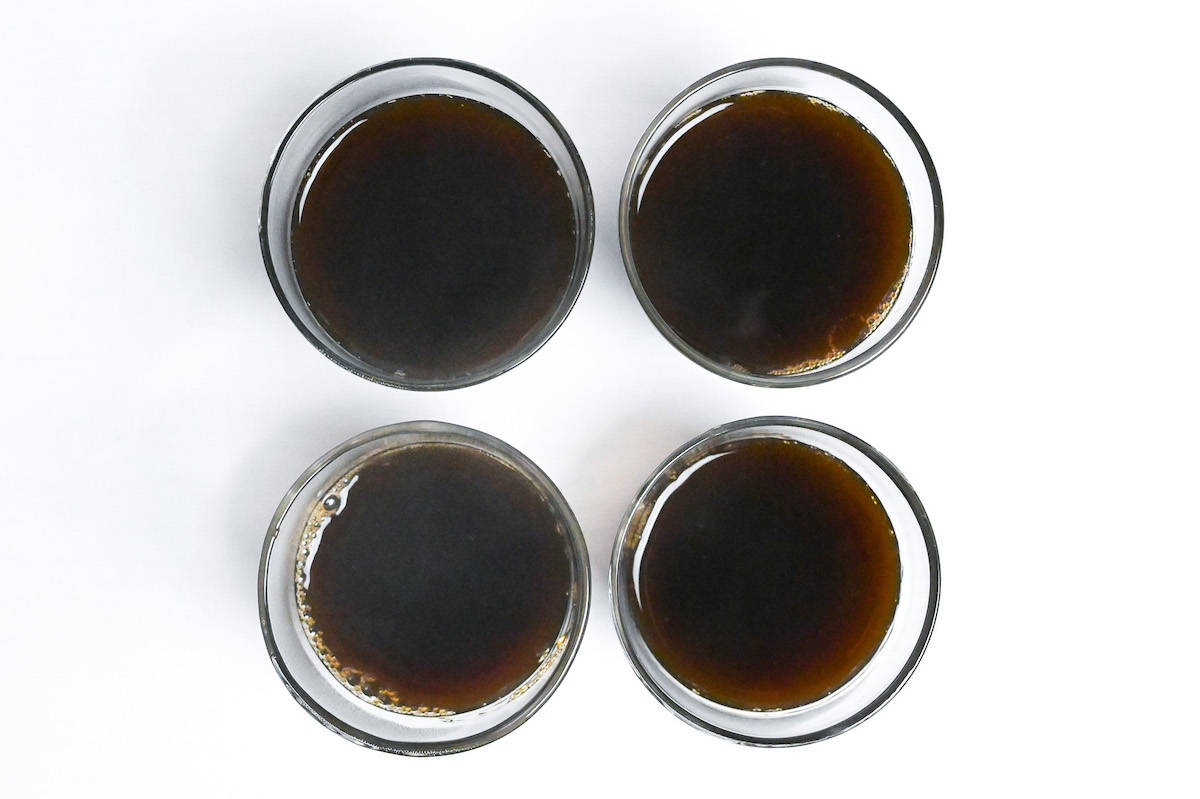
Pour into molds or serving cups. If you want to cut it into cubes, pour it into a lunchbox lined with plastic wrap so that it’s easy to remove later.
Cool to room temperature, then cover and chill in the refrigerator for at least 4 hours or until set.
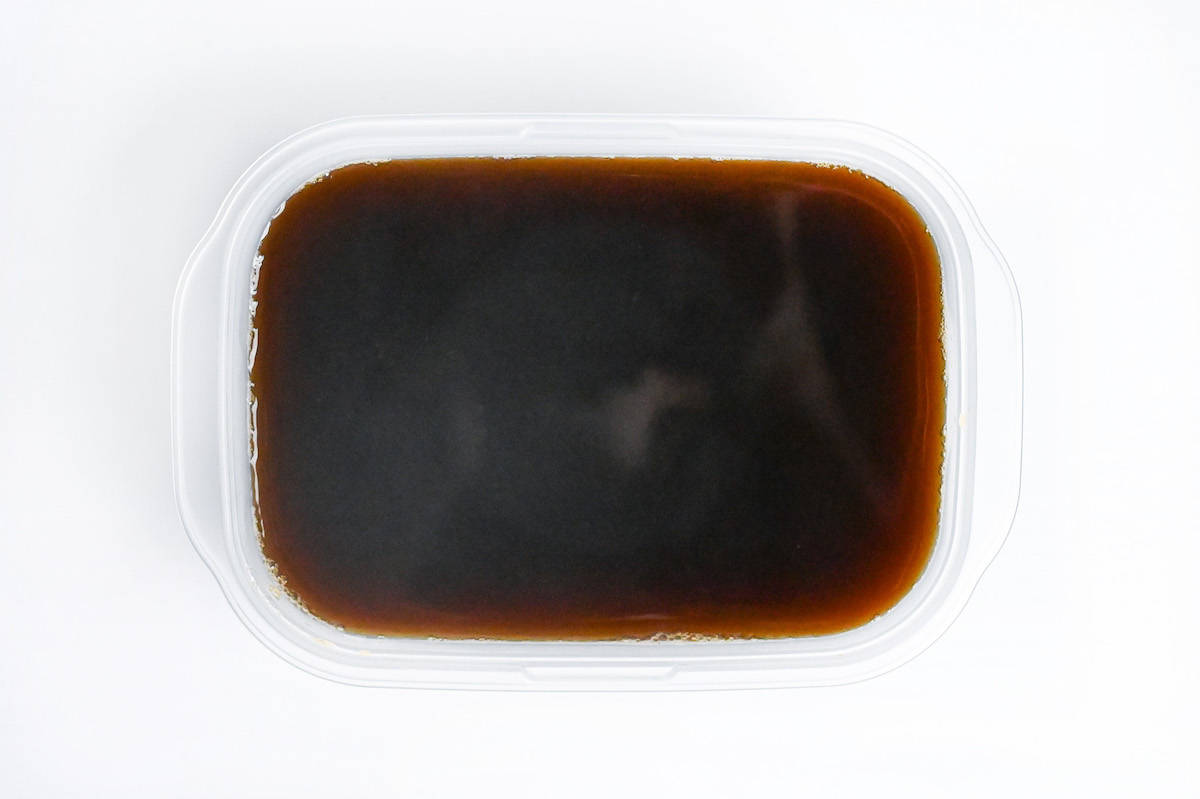
Once set, cut into cubes if necessary, and serve with your choice of toppings.
Kanten/Agar Agar Method
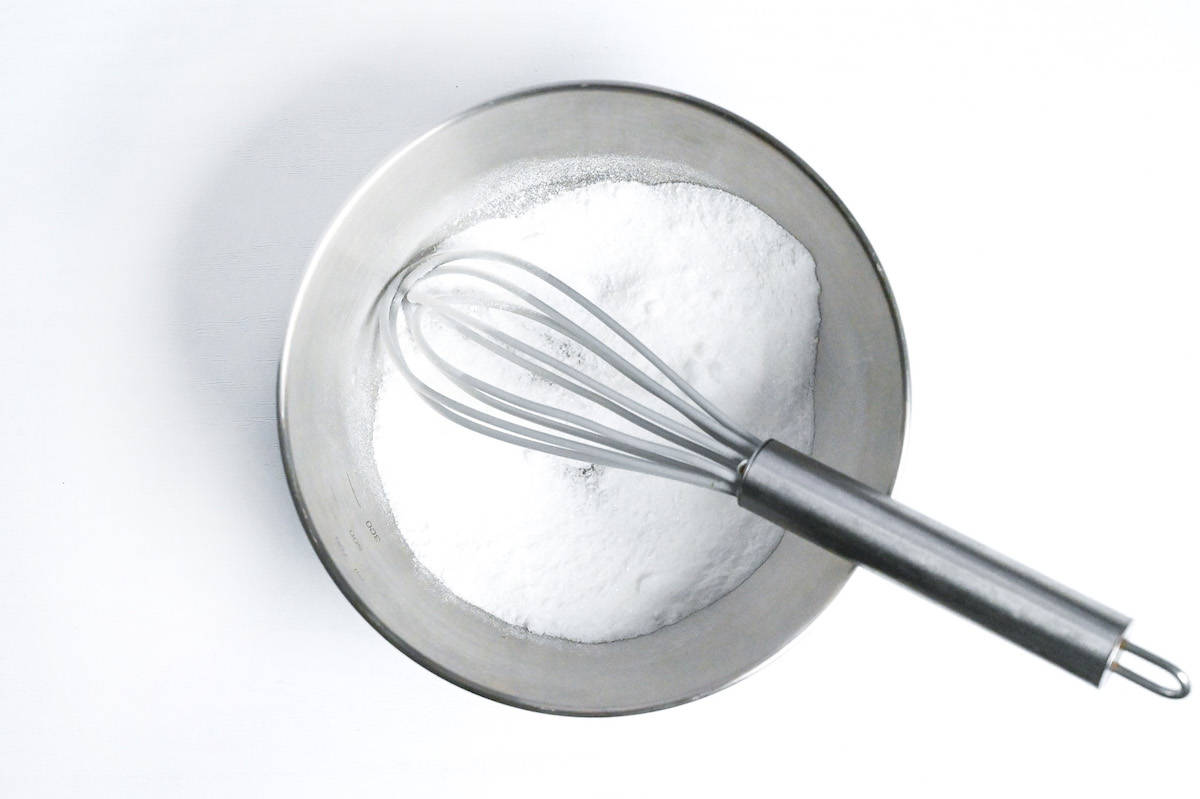
Add the sugar and kanten or agar agar to a bowl and mix until evenly distributed.
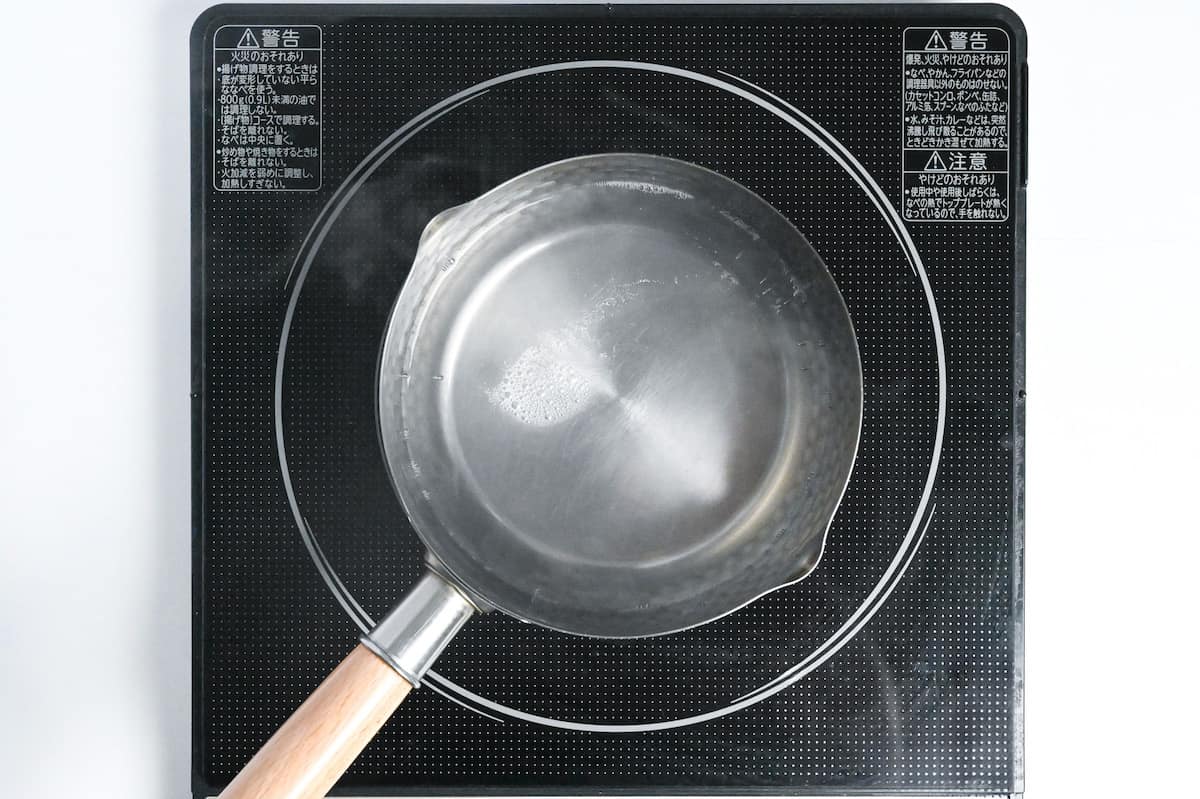
Add cold water to a saucepan and sprinkle in the sugar and kanten/agar mixture. Mix and then place the pan on the stove over a medium heat.
Note: If using espresso shots, reduce the water by 30ml for every espresso shot you plan to use in this step.

Bring the mixture to a boil and let it bubble gently for 5 minutes. Scrape the bottom of the pan with a silicone spatula and mix occasionally to prevent burning/sticking.
After 5 minutes, remove the pan from the heat.
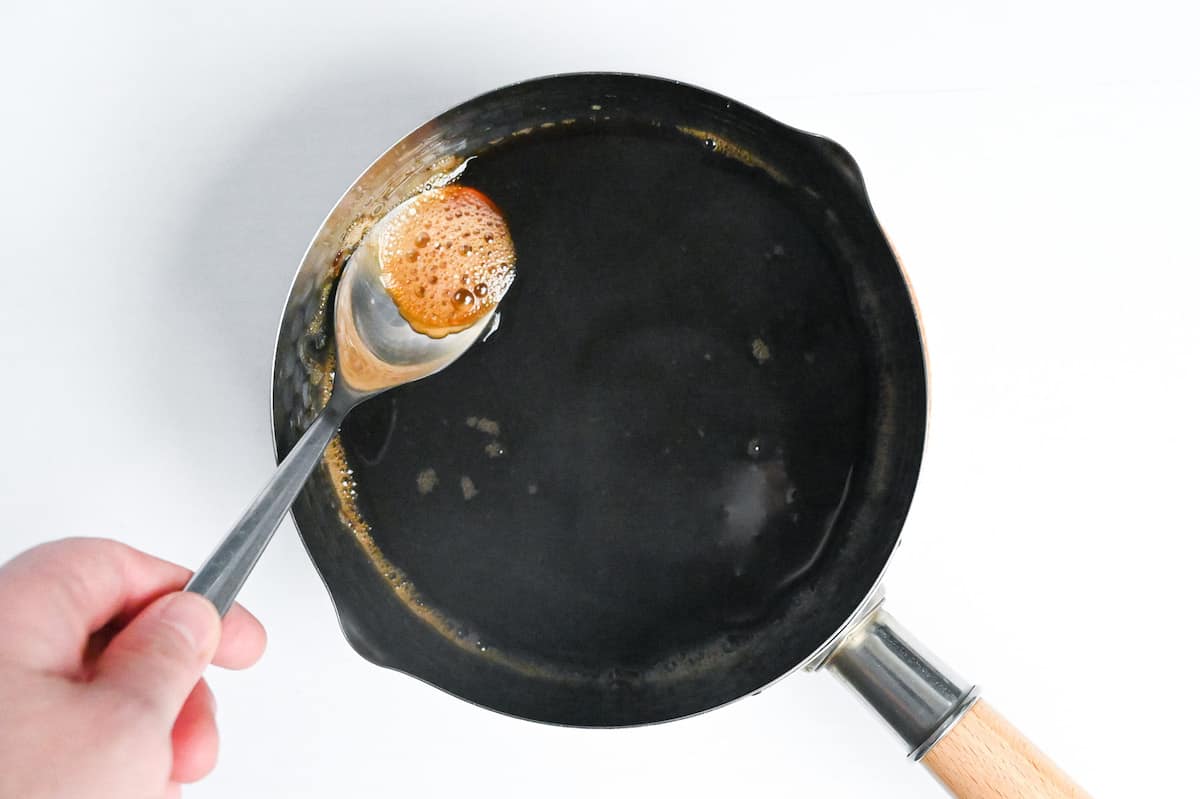
Add the coffee and mix gently until dissolved. Keep mixing gentle, vigorous whisking can cause air bubbles and foam.
Scoop excess foam and bubbles with a spoon.
Transfer to molds or serving cups and leave to cool. Once it reaches room temperature, chill in the refrigerator.
Coffee Jelly made with kanten or agar will be ready in 1 hour, but might still be warm. Refrigerate until chilled before serving. Gelatin coffee jelly takes around 4 hours.
Add your choice of toppings and enjoy!
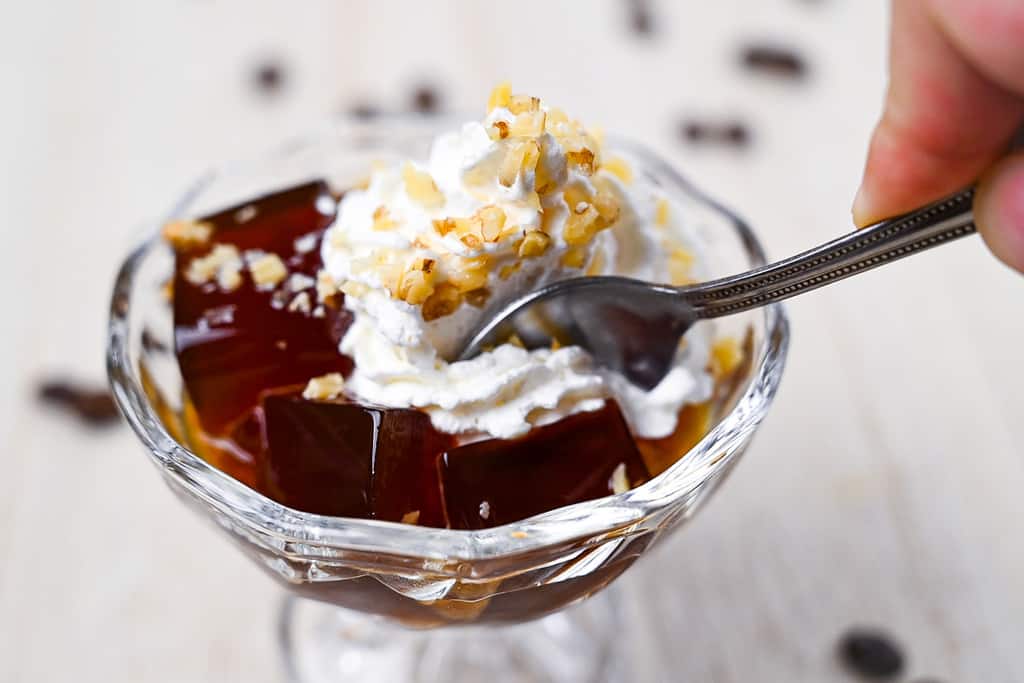
Topping & Serving Ideas
Coffee Jelly can be enjoyed in various ways, try out some of these ideas!
- With whipped or heavy cream, or a plant based alternative (coconut cream etc)
- With condensed milk
- With ice cream
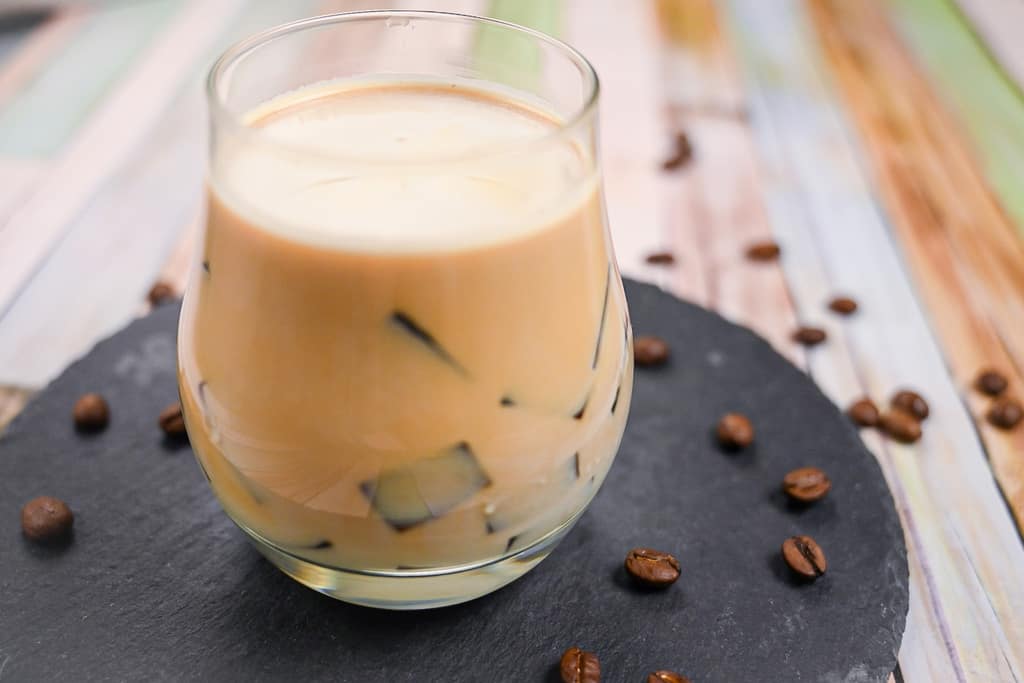
- Cut into cubes and added to drinks (iced coffee, milkshakes, etc)

Essential Tips & Tricks
- The base recipe makes 2 cups (500ml) of jelly. Use a 5-6″ (14-15cm) square container/pan for 2.5cm (1 inch) thick jelly cubes. A rectangular container with similar dimensions also works fine (like a lunchbox). You can use molds if you like. Whatever you use, make sure it’s heatproof.
- Use high-quality instant espresso, coffee powder or espresso shots that you enjoy drinking for best results.
- If using espresso shots from a coffee machine, reduce the water amount by 30ml for every single espresso shot used. I usually do 120ml espresso (2 double shots) to 380ml water to bring it back up to 500ml total. Always adjust the water amount when increasing or decreasing the amount of espresso to keep the same liquid ratio.
- Increase or decrease the coffee and sugar to suit your taste preference.
- If using agar agar, keep in mind that results can vary from brand to brand. Always check the packaging for exact measures and adjust the water accordingly.
- For best results, keep refrigerated and eat within 2 days. Add cream or toppings right before serving.
- The coffee jelly tends to become a bit watery after extended refrigeration, but it’s still good to eat for up to 2-3 days.
With these simple tips in mind, you’re set for success every time you make coffee jelly.
How to Store
Fridge: Coffee jelly is best eaten as soon as possible (preferably within 2 days). Water tends to seep out after extended storage, even if it’s still good to eat. The gelatin version can be stored in the fridge for about 5 days, the kanten or agar version should be consumed within 3 days max.
Freezer: Not suitable.
Serving suggestion: Keep chilled and unmold right before serving.
Japanese Coffee Jelly FAQ
When making coffee jelly with gelatin, almost any kind of coffee can be used since the gelatine powder can simply be dissolved in the hot coffee.
Kanten or agar need to be boiled to activate their setting properties, and boiling already-made coffee (drip coffee for example) can make it taste bitter or burnt. That is why it is better to boil the kanten/agar before adding the coffee, so instant coffee, instant espresso or espresso shots more suitable.
Kanten is a setting agent made with red algae (gelidiales) and has a firm texture once set. Agar was created to mimic the texture of gelatine as is made from various types of algae, including the same red algae that is used to make kanten. Jellies made with agar have a softer, more gelatine-like texture.
More Japanese Dessert Recipes
- Silky Japanese Purin
- Warabi Mochi with Kuromitsu
- Lemon Rare Cheesecake (no bake)
- Mizu Yokan (Red Bean Jelly)
Want more inspiration? Explore my Japanese Dessert Roundup Post for more ideas!
Did You Try This Recipe?
I would love to hear your thoughts!
💬 Leave a review and ⭐️ rating in the comments below. 📷 I also love to see your photos – submit them here!
Japanese Coffee Jelly

Ingredients
Setting agent (choose 1)
- 15 g gelatin powder or
- 15 g agar agar powder or
- 2 g kanten agar powder (each sachet is usually 4g)
Other ingredients
- 500 ml water if using espresso shots, reduce the water by 30ml for each shot used (see note)
- 2 tbsp instant coffee powder preferably instant espresso powder or espresso shots
- 2-3 tbsp sugar or to taste
- toppings of your choice cream, ice cream, flavored syrups, chopped nuts etc
My recommended brands of ingredients and seasonings can be found in my Japanese pantry guide.
Can’t find certain Japanese ingredients? See my substitution guide here.
Instructions
Gelatin
- Take a small bowl and 200ml cold water. Sprinkle in 15 g gelatin powder, mix and leave to bloom for 5-10 minutes.

- Boil the other 300ml water and pour it into a heatproof jug. Pour the bloomed gelatin in and mix until dissolved.
- Add 2-3 tbsp sugar and 2 tbsp instant coffee powder. Mix until dissolved and scoop out any foam that forms at the top.
- Pour into a square/rectangular mold or serving cups. Let it cool to room temperature, then cover and refrigerate for about 4 hours or until fully set.
- Once set, cut it into cubes (or serve in cups) and add toppings of your choice.

Kanten or Agar Agar
- Pour 2-3 tbsp sugar and 2 g kanten agar powder (or 15 g agar agar powder) into a bowl and mix thoroughly.
- Pour 500 ml water into a cold saucepan. Sprinkle the kanten and sugar mixture over the top, and mix thoroughly.
- Place the pan on the stove and bring to a boil over medium heat. Boil for 5 minutes, stirring occasionally and then remove from the heat.
- Leave to cool for a few minutes and the add 2 tbsp instant coffee powder. Gently mix until dissolved, avoid vigorous whisking which can create too much foam or air bubbles.
- Scoop out any foam with a spoon.
- Pour into molds or serving cups and cool to room temperature before placing in the fridge to set fully. This will take approximately 1 hour (varies with agar agar).
- Once set, cut into cubes or serve straight from a cup with your choice of toppings. Enjoy!
Notes
- The base recipe makes 2 cups (500ml) of jelly. Use a 5-6″ (14-15cm) square for 2.5cm (1 inch) thick jelly cubes. A rectangular container with similar dimensions also works fine (like a lunchbox). Just make sure it’s heatproof.
- Opt for a high-quality instant espresso, coffee powder or espresso shots for best results.
- If you choose to use espresso shots from a coffee machine, reduce the water amount by 30ml for every single espresso shot used to maintain the same liquid ratio in the recipe. Generally I’d recommend 120ml espresso (2 double shots) to 380ml of water to bring the total back up to 500ml. Depending on how strong you want your coffee jelly to be, you can play around with the ratio. Just don’t forget to adjust the water amount when increasing or decreasing the amount of espresso.
- You can reduce or increase the coffee and sugar to suit your taste preference.
- If using agar agar, keep in mind that results can vary from brand to brand. Always check the packaging for exact measures and adjust the water accordingly.
- For best results, keep refrigerated and eat within 2 days. Add cream or toppings right before serving.
- The coffee jelly tends to become a bit watery after extended refrigeration, but it’s still good to eat for up to 2-3 days.
The amount of water in cups is incorrect, I believe.
Thank you! I’ve updated the recipe with the correct measurement.
I gave this jelly a try today. Wasn’t sure what to expect, but it was a pleasant surprise! so refreshing in the heat!
Hi Li,
I’m so glad you gave it a try! It really does shine on a warm day! 🙂
Yuto