

Featured Comment:
Wow was this tasty! So glad i tried this recipe. So comforting. Thank you!
– embee
What is Chikuzenni?
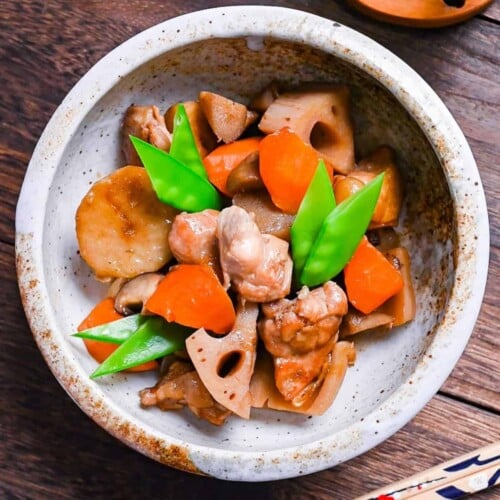
Chikuzenni (筑前煮) is a traditional Japanese “nimono” (simmered) dish that originates from Northern Kyushu. It brings together a mix of chicken, konnyaku (devil’s tongue) and root vegetables such as carrots, lotus root and burdock root. These ingredients are first sautéed in oil before being simmered all together in a pot with a dashi broth seasoned with soy sauce and sugar. The result? A dish boasting a beautifully balanced sweet and savory flavor.
What’s fascinating is how this regional delicacy has won the hearts of people all over Japan. It is said to have become well known throughout Japan as a result of its introduction into school lunches as a well-balanced dish, and its use of auspicious ingredients also makes it an important element of Japanese New Year’s meal.
Visual Walkthrough & Tips
Here are my step-by-step instructions for how to make Authentic Chikuzenni at home. For ingredient quantities and simplified instructions, scroll down for the Printable Recipe Card below.
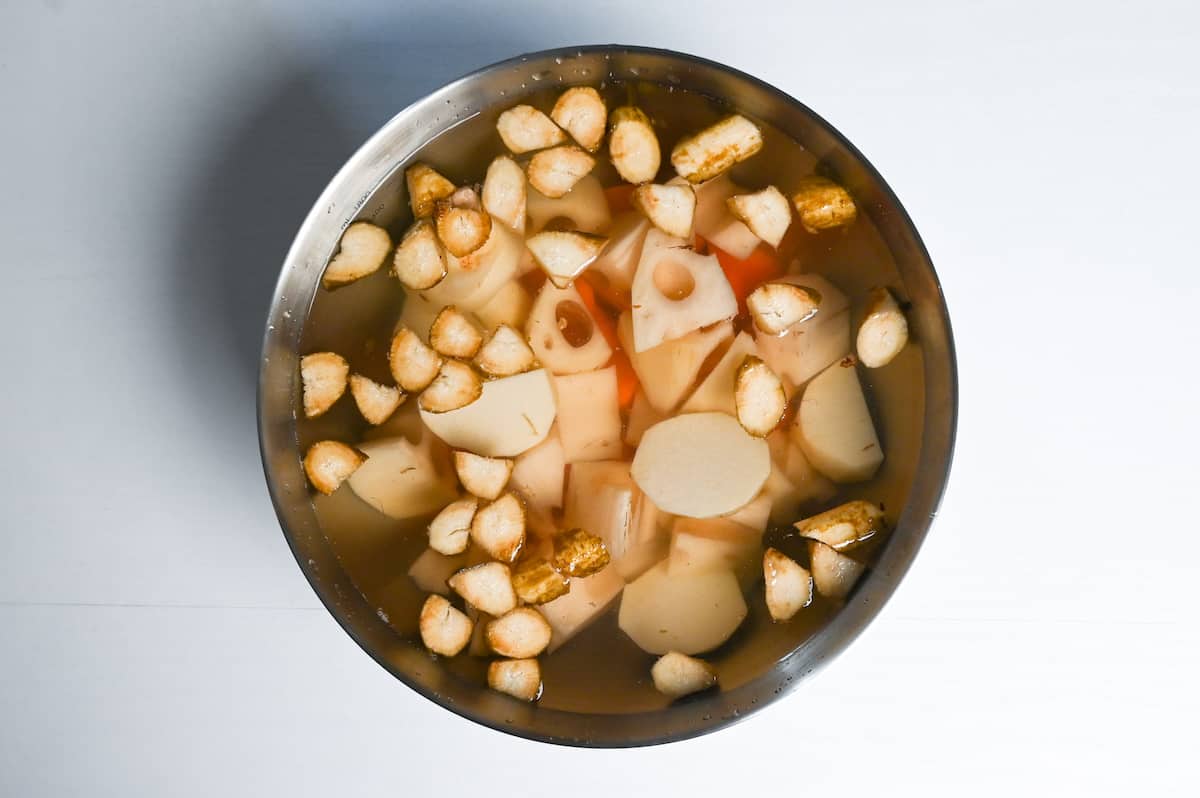
Take a pot that fits a steaming basket, fill it with water and bring it to a boil. While you wait, wash, peel and cut the carrot, lotus root, burdock root and taro into bitesize pieces. They should be fairly large so that they don’t cook too quickly and fall apart during the cooking process. Once cut, soak in water to prevent discolorization.
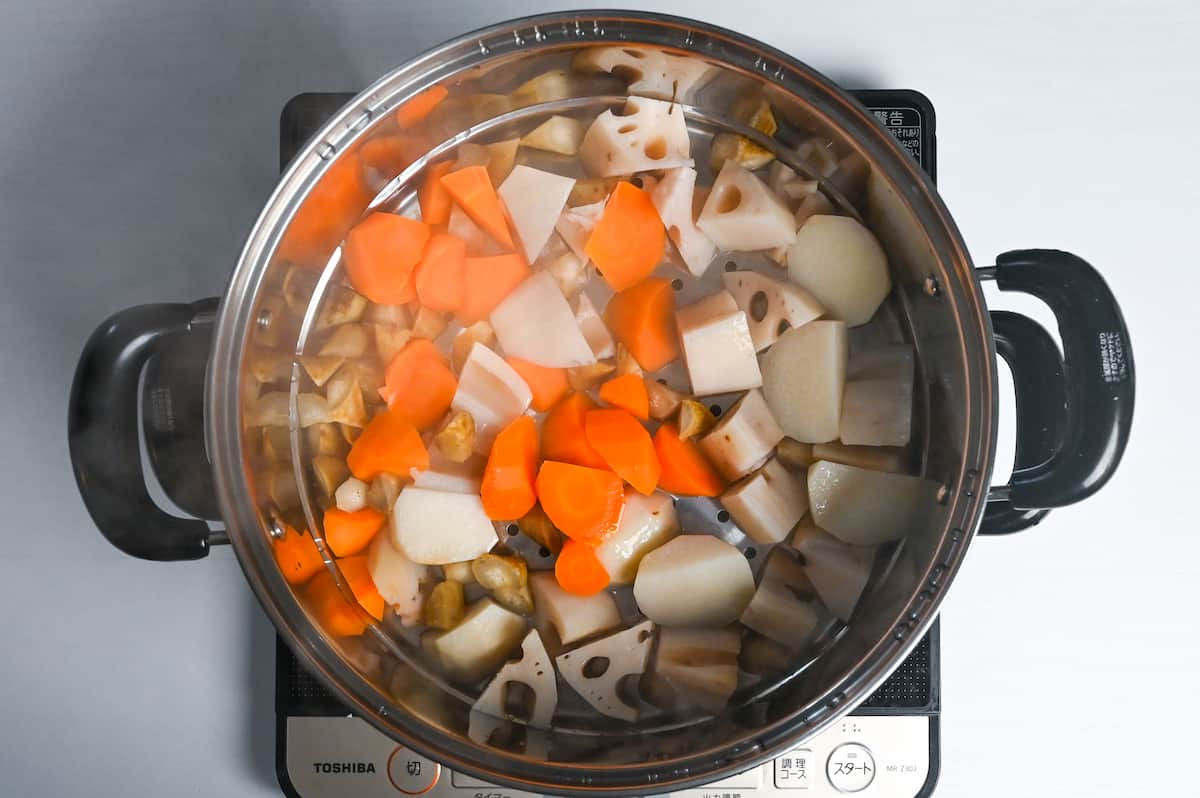
Once the pot of water is boiling, drain the bowl and place the carrot, lotus root, burdock root and taro in the steaming basket. Steam over a medium heat for 10 minutes.
While they’re steaming you can start cooking the chicken. Once 10 minutes are up, be sure to remove the steaming basket from the heat to avoid overcooking.
Traditionally, chikuzenni is made by parboiling each ingredient separately before adding them together to the final pot. I personally like to steam the root vegetables together not only to save time, but to keep the nutrients and color intact. Feel free to parboil them in water if you don’t have a steamer.
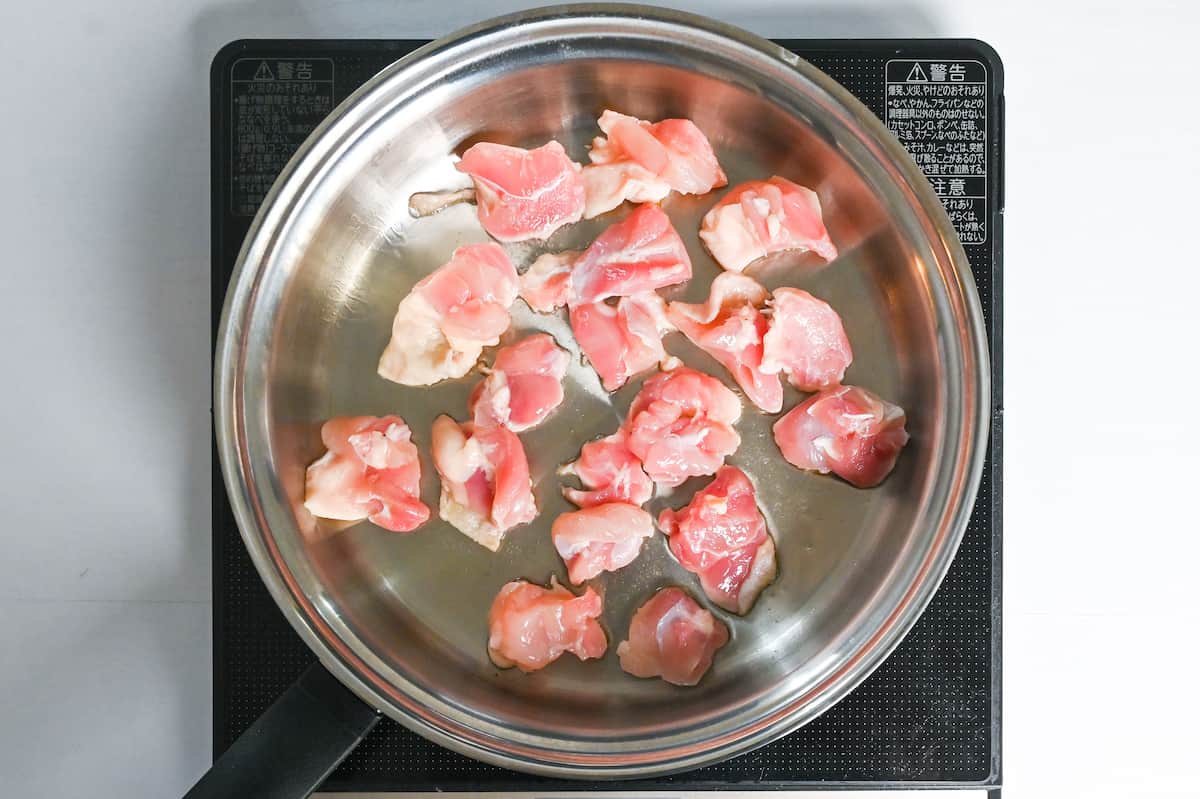
Heat a large pan or pot on medium. Once hot, add a drizzle of sesame oil and place the pieces of chicken thigh in the pan with the skin side facing down. Seal on all sides until golden.
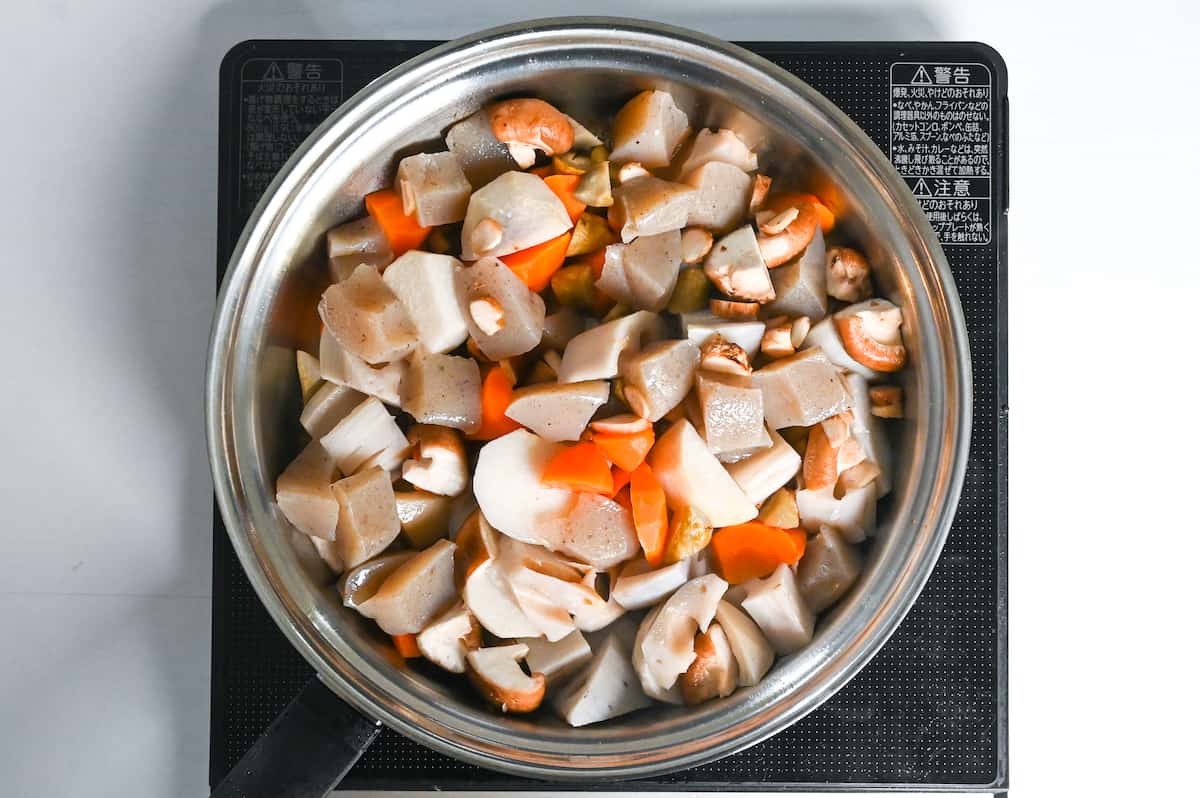
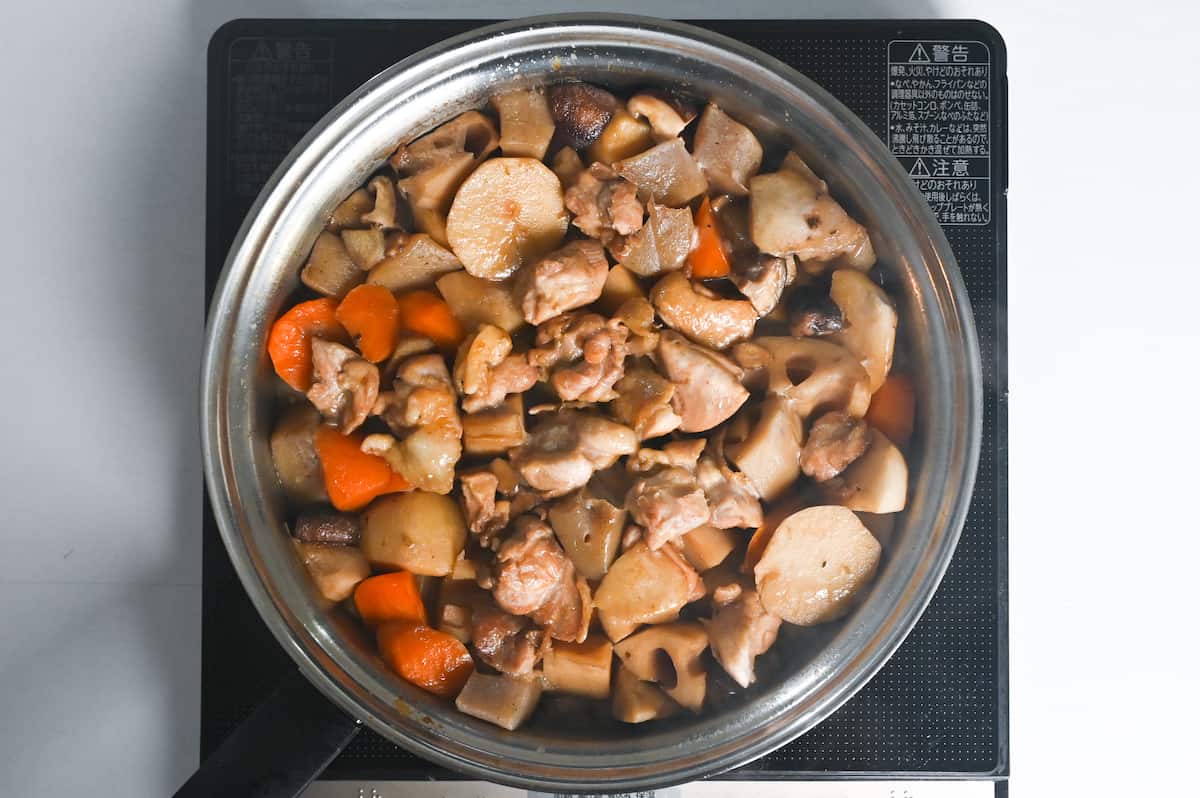
Once the chicken is sealed, add the steamed vegetables to the pot along with the shiitake mushrooms (quartered) and konnyaku (cut into bitesize pieces). Mix thoroughly and fry for about 1 minute.
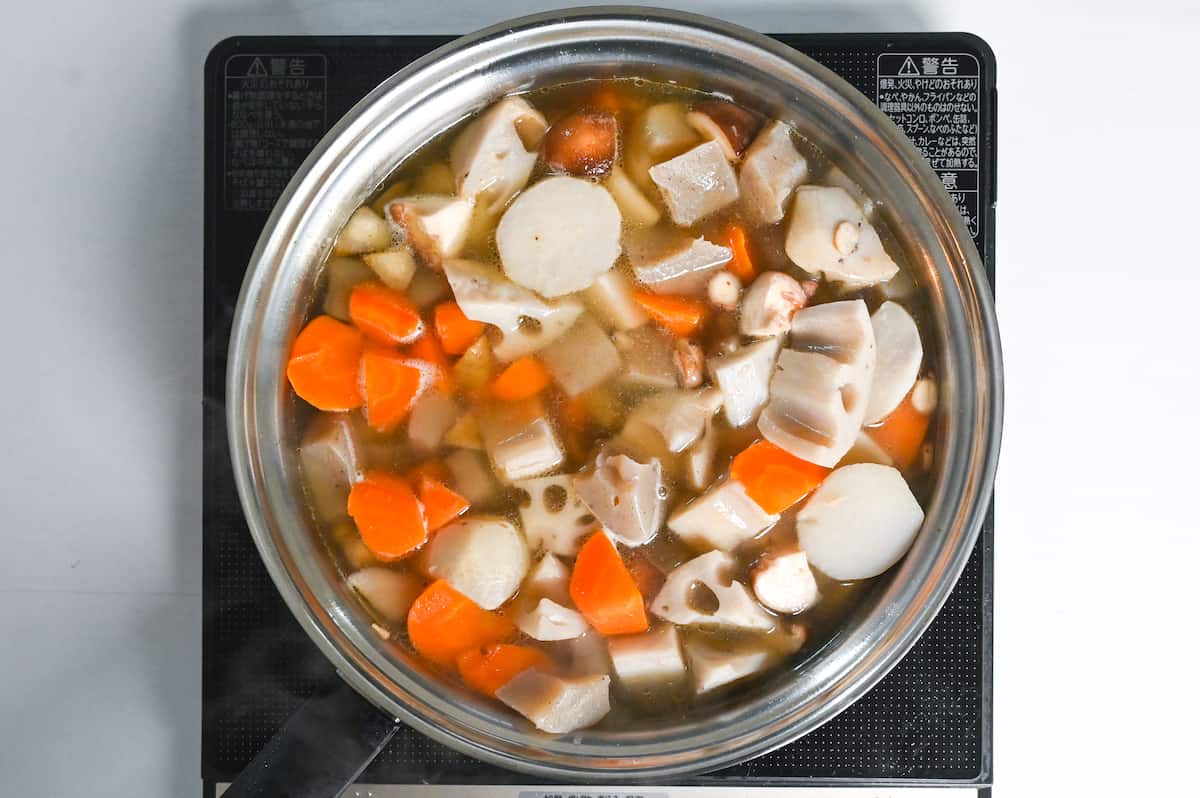
Pour the dashi into the pot and add light brown sugar and sake.
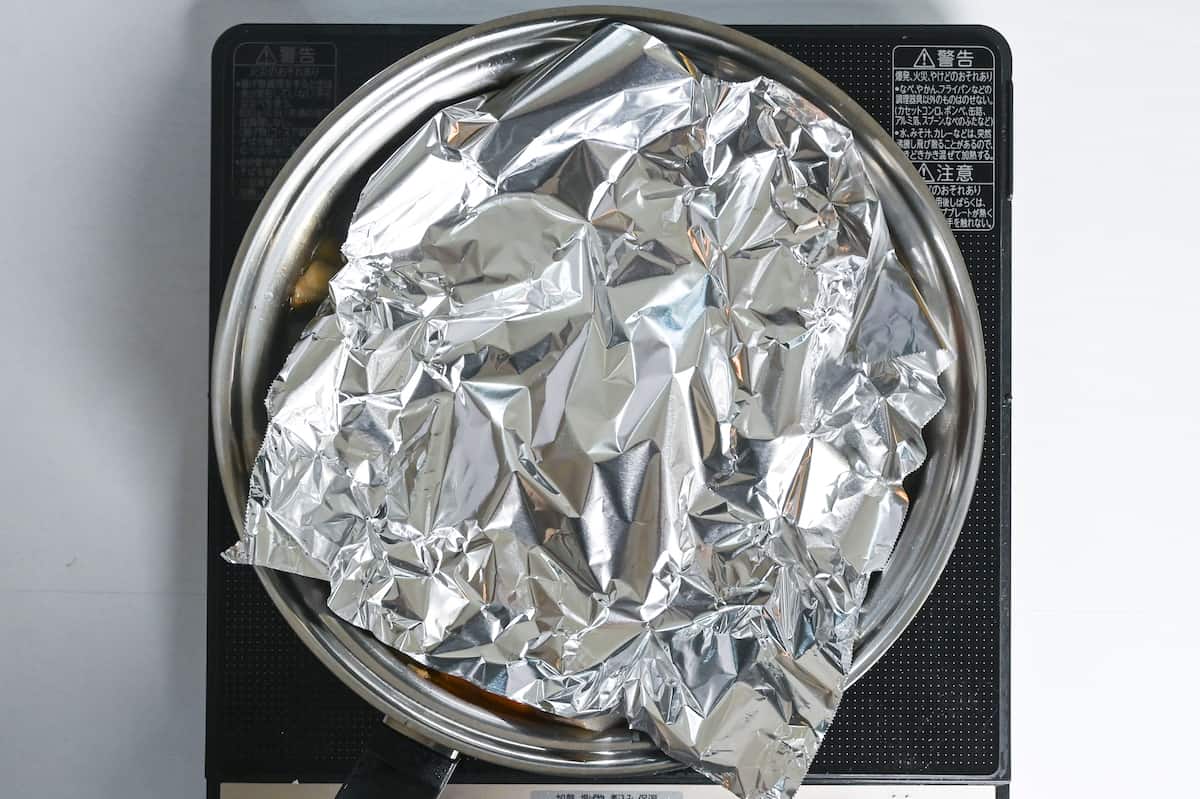
Place a drop lid on top, it should be in direct contact with the surface of the ingredients and broth. This will stop the ingredients from moving around too much and prevent them from breaking. If you don’t have a drop lid (or in my case, don’t have a big enough drop lid!) you can use baking paper or foil.
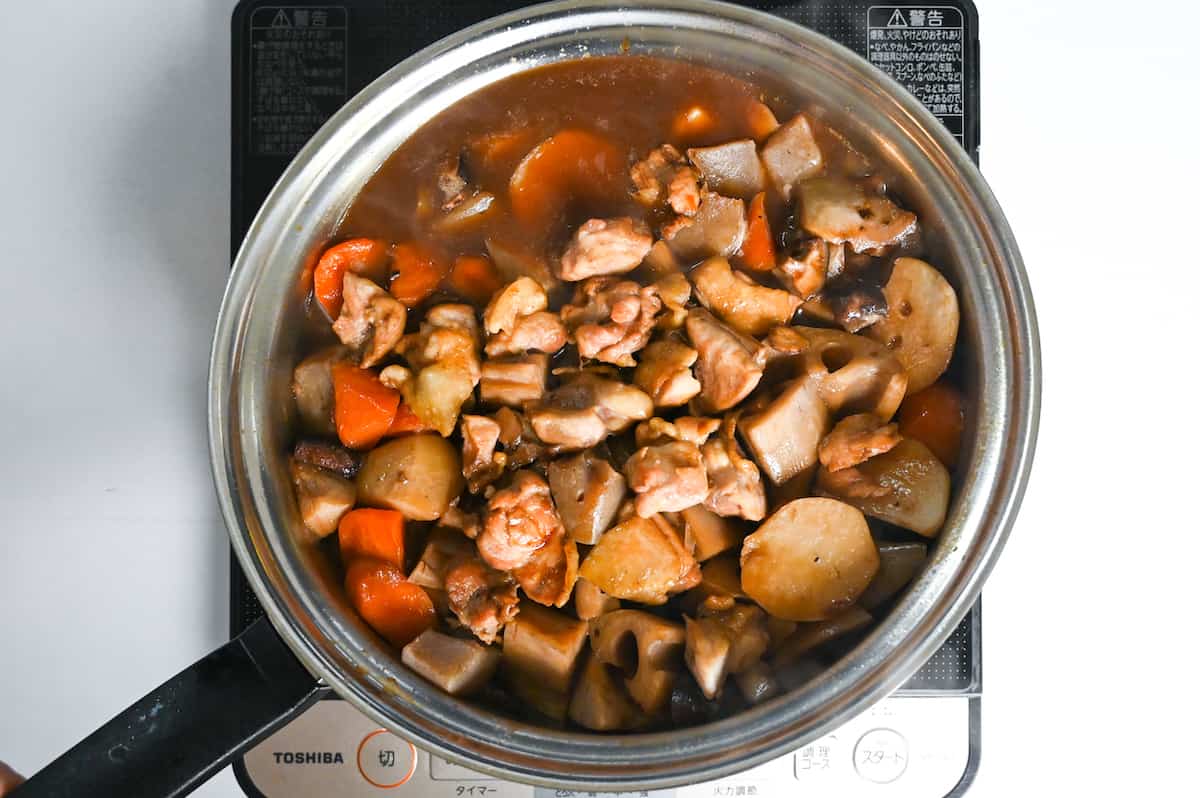
Bring the liquid to a boil and then turn the heat down to medium-low. Allow to simmer until the liquid is reduced by half (about 10 minutes).
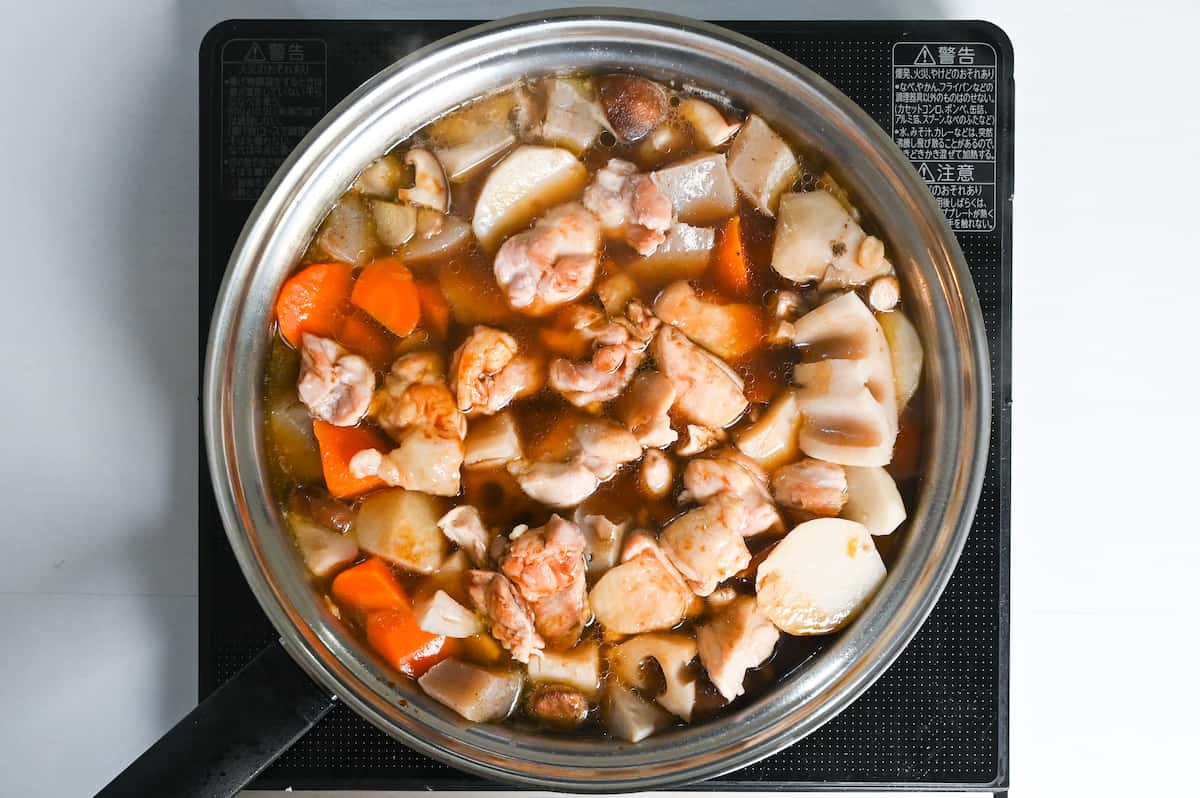
Peel back the drop lid and pour in the soy sauce and mirin. Tilt the pan from side to side to distribute the condiments evenly; avoid mixing since this might break the vegetables. Place the drop lid back on and continue to simmer until the liquid is reduced to one-third.
Once the liquid has reduced, remove the pan from the heat and allow it to cool for one hour. This is an optional step for the best flavor, but if you don’t have time, you can move on to the next step.
Add soy sauce and mirin and bring to a boil over medium heat. Tilt the pan to evenly distribute the condiments, again avoiding mixing. Feel free to taste test and add additional soy sauce, mirin or sugar to suit your taste.
Once boiling, turn the heat back down to simmer.
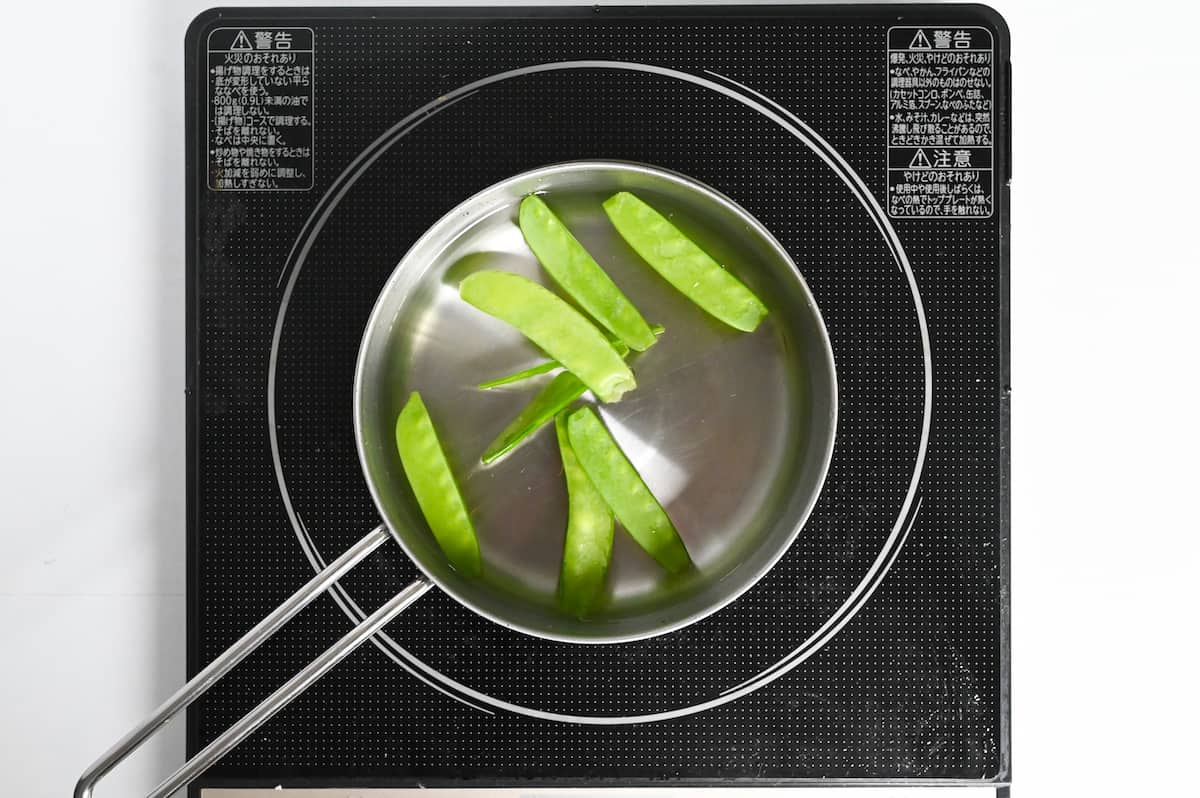
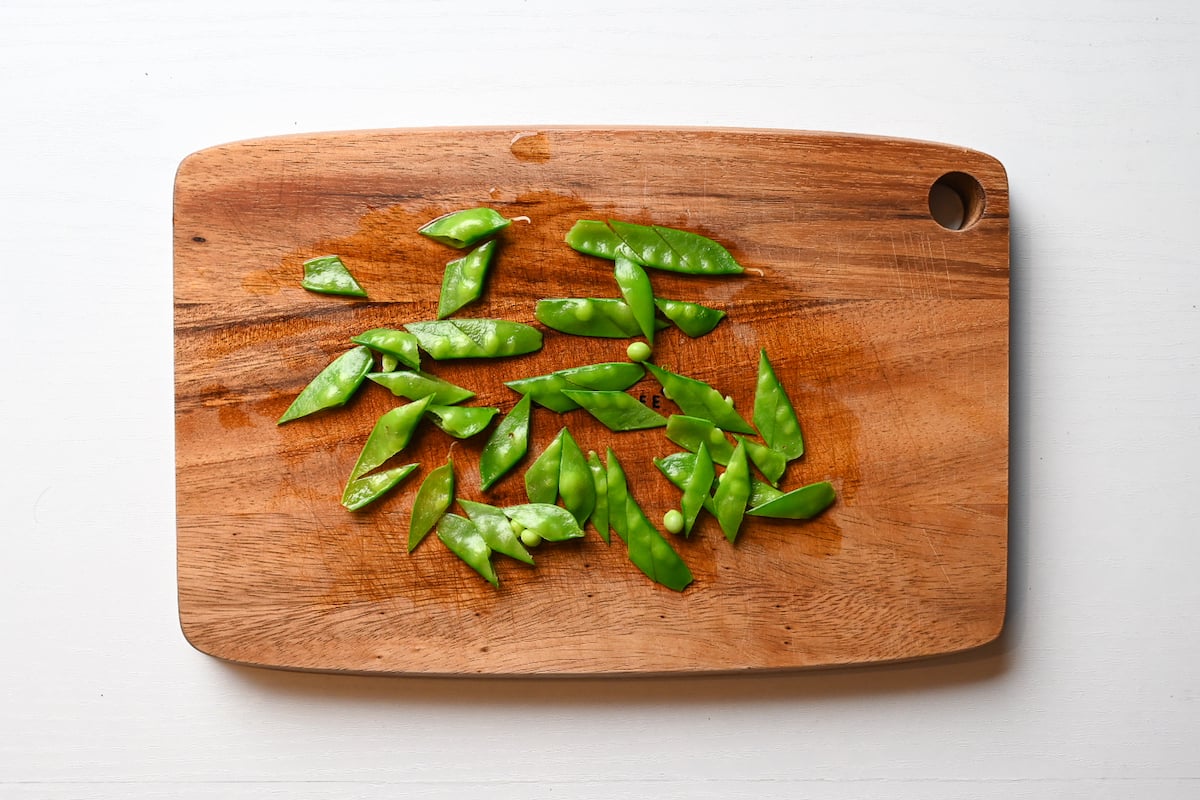
Boil a small pot of water and blanch the snow peas for about 1 minute. Use a mesh spoon to remove them from the pot, run them under cold water, and cut them in half.
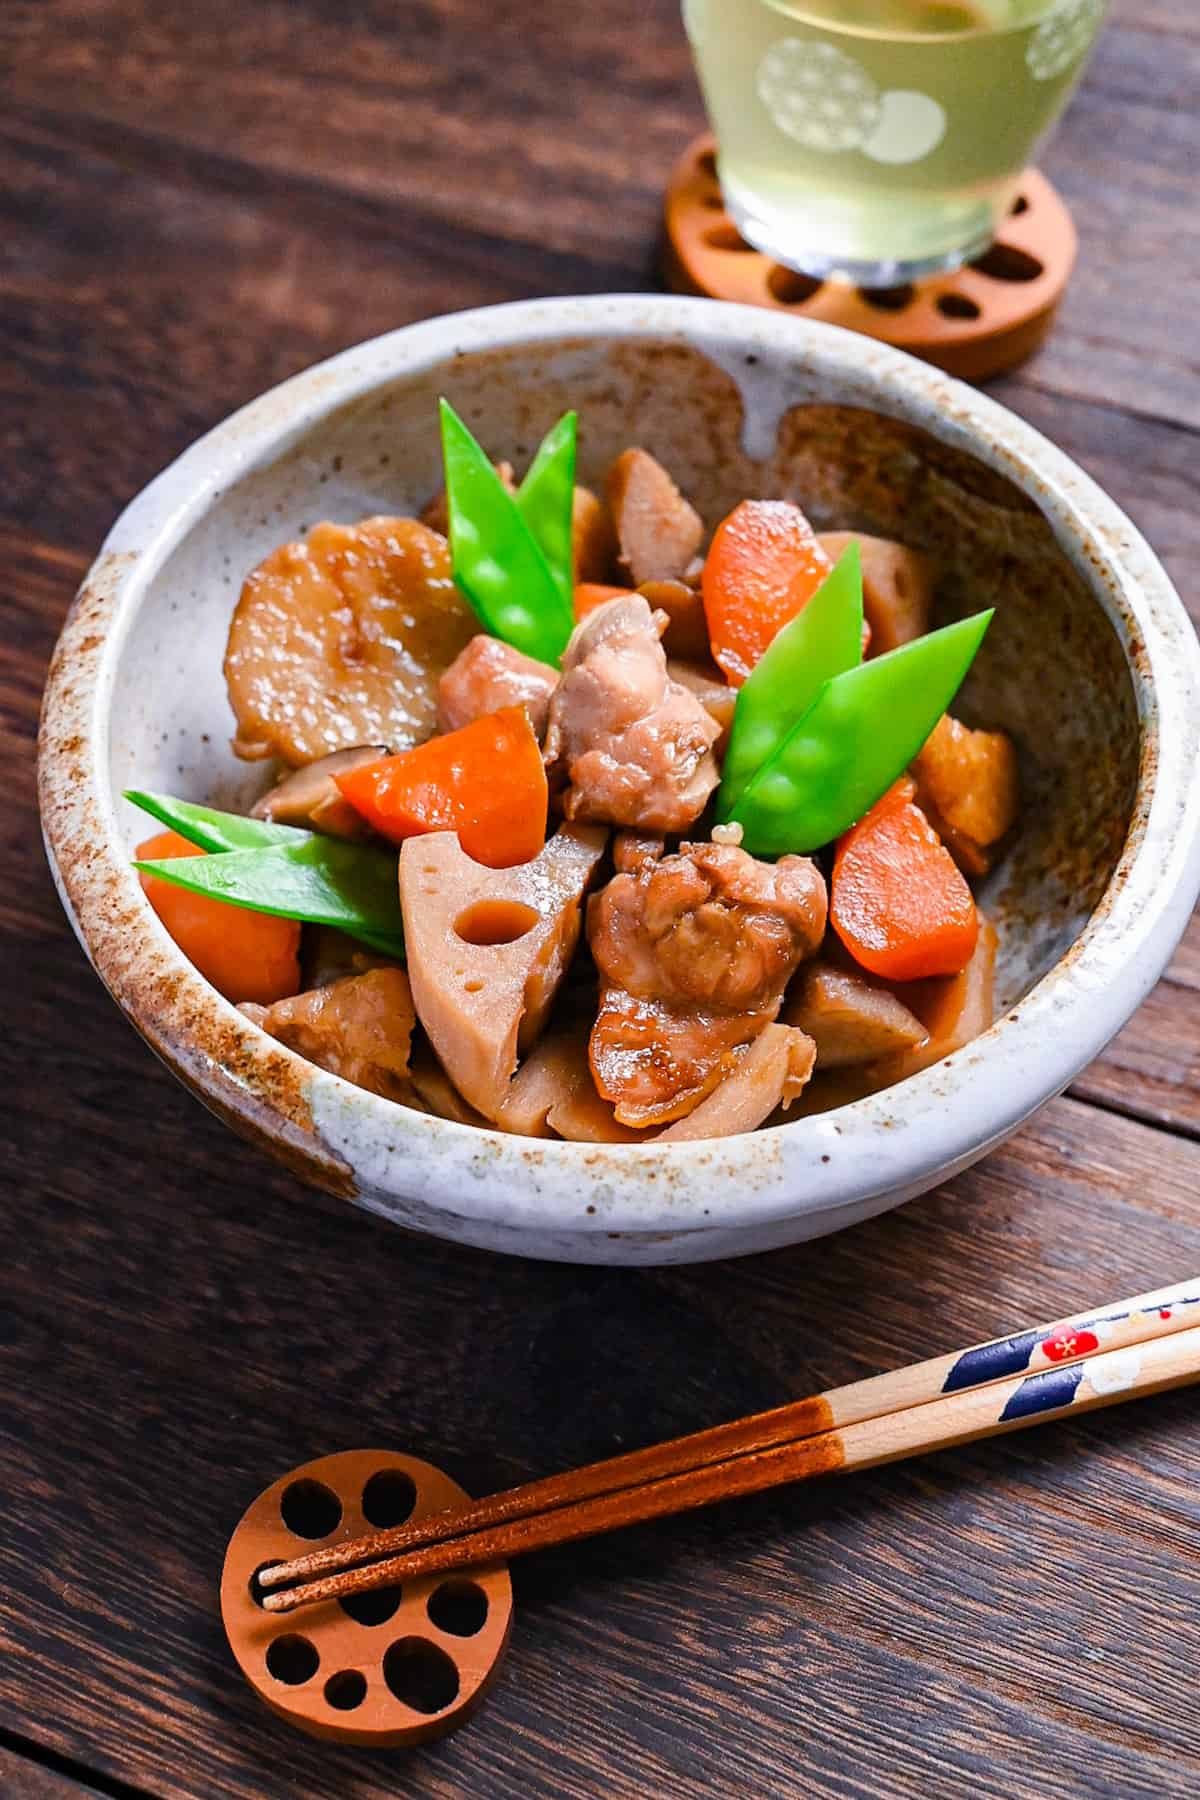
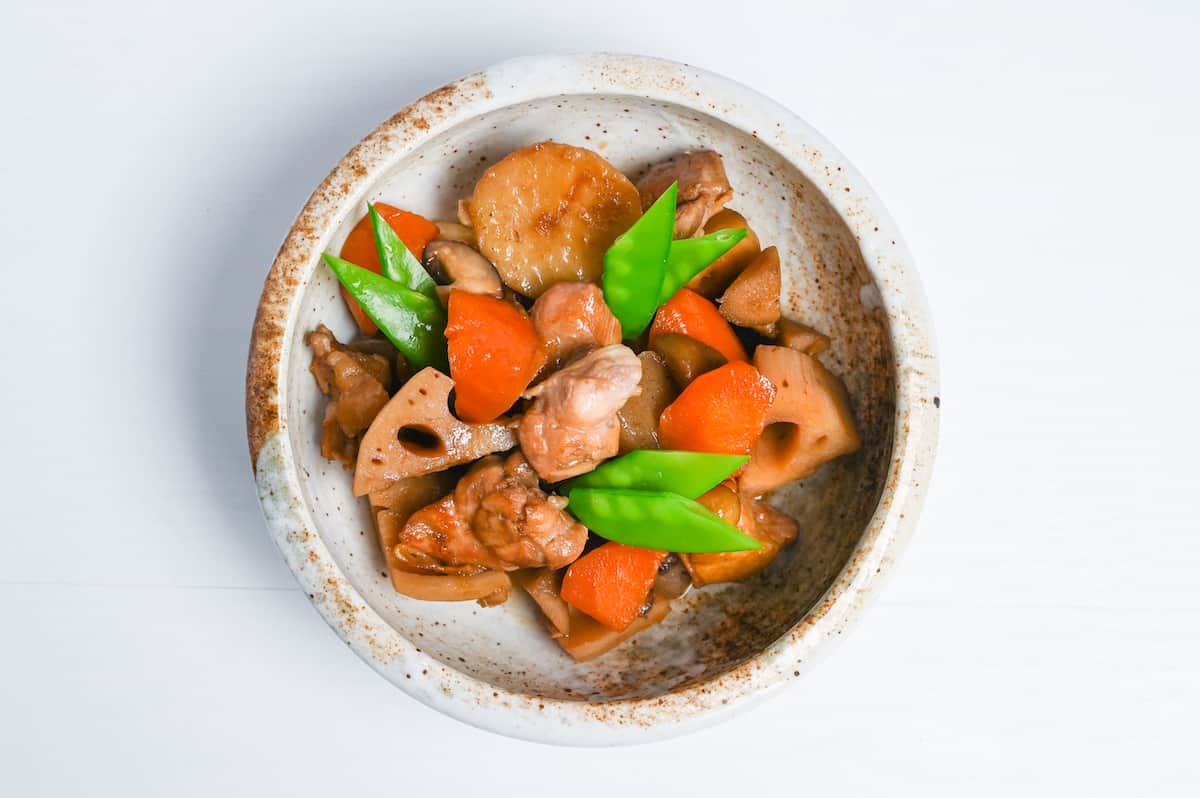
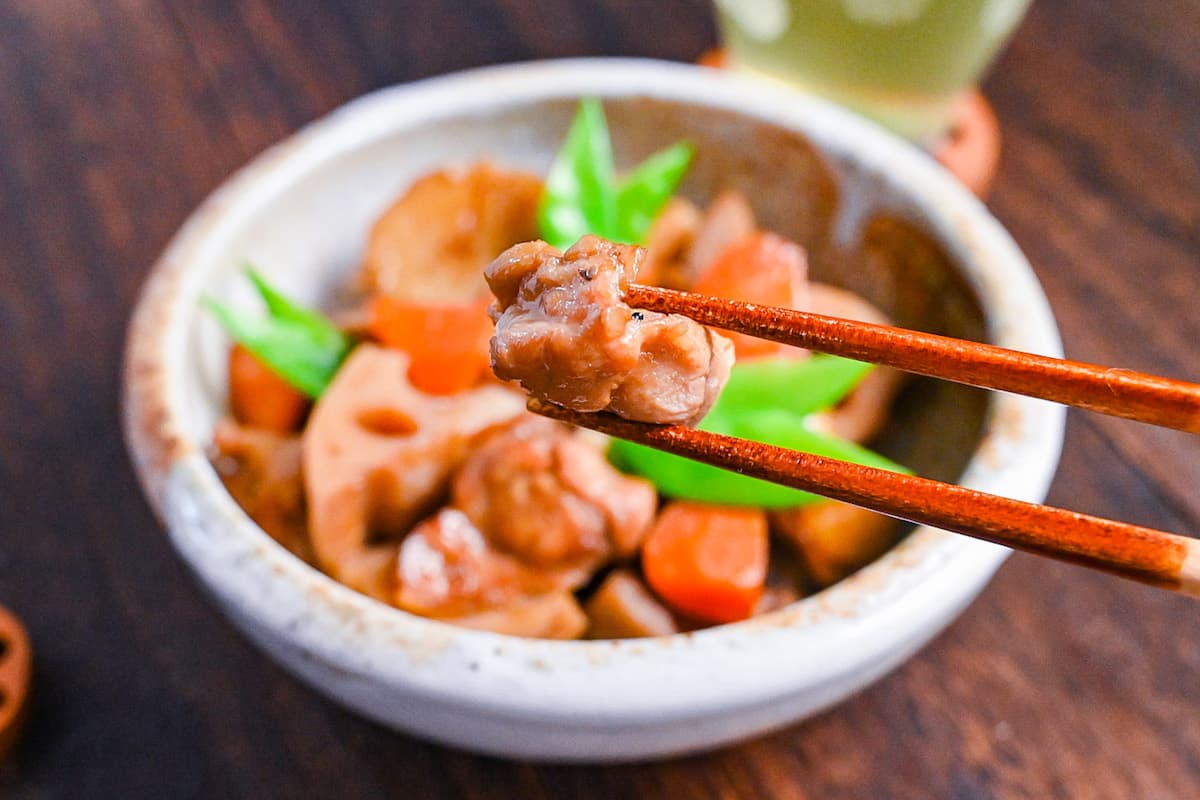
Divide the chikuzenni into serving bowls and decorate with snow peas.
Enjoy!
Jump to Full Recipe MeasurementsHow to Store
When it comes to storing Chikuzenni, there are a few things you need to keep in mind. You can keep it at room temperature in winter for a short while, around 2 hours. If you plan to eat it soon after cooking, room temperature is okay.
But if you’re not eating it immediately, it’s best to let it cool and store it in the fridge for safekeeping. Also, if it’s summer or if you live in a warm country, avoid leaving it at room temperature as this can make it spoil more quickly. Wondering how long Chikuzenni lasts in the fridge? You’re looking at about 3 to 4 days.
Now, let’s talk about freezing. You could stretch its life to a whole month by freezing! However, remember, Chikuzenni has certain ingredients, like konnyaku, that don’t freeze well. So, it’s a good idea to eat up these elements on the day you cook, before you decide to freeze the rest.
If you do freeze Chikuzenni, a handy tip is to include the liquid in the storage container. Why? This simmering broth not only infuses even more flavor into the ingredients while freezing but also prevents them from drying out. Now that’s a win-win!
I hope you enjoy this Chikuzenni recipe! If you try it out, I’d really appreciate it if you could spare a moment to let me know what you thought by giving a review and star rating in the comments below. It’s also helpful to share any adjustments you made to the recipe with our other readers. Thank you!
More Japanese Simmered Recipes
Chikuzenni (Nishime/Gameni)

Ingredients
- 100 g carrot roughly cut (rangiri)
- 100 g lotus root (renkon) 1cm slices
- 100 g burdock root (gobo) roughly cut (rangiri)
- 150 g Japanese taro (satoimo) (satoimo) rough bite-size pieces
- 1 tbsp toasted sesame oil
- 300 g boneless chicken thigh skin-on, large bitesize pieces
- 3 fresh shiitake mushroom quartered (or left whole for osechi)
- 200 g konjac (konnyaku) roughly cut bite-size pieces
- 500 ml dashi stock
- 2 tsp light brown sugar
- 4 tbsp sake
- 4 tbsp Japanese soy sauce (koikuchi shoyu)
- 4 tbsp mirin
- 10 snow peas
Finishing condiments
- ½ tbsp Japanese soy sauce (koikuchi shoyu)
- 1 tbsp mirin
The ingredient brands and tools I trust are in my Japanese pantry guide and my cooking tools guide.
Can’t find certain Japanese ingredients? See my substitution guide here.
Instructions
- Start heating a pot of water with a steaming basket. While you wait for the water to boil, wash, peel and cut 100 g carrot, 100 g lotus root (renkon), 100 g burdock root (gobo) and 150 g Japanese taro (satoimo) according to the notes in the ingredient list. As each ingredient is cut, place the pieces in a bowl of cold water to prevent discoloration.

- Once the water is boiling, place all the root vegetables in the steaming basket and steam for 10 minutes over medium heat. (When the time is up, immediately remove the basket from the heat to avoid overcooking.)
- Heat a large pot on medium and once hot, add 1 tbsp toasted sesame oil. Place 300 g boneless chicken thigh in the pot with the skin side down and sear on all sides.

- Add the steamed root vegetables, 3 fresh shiitake mushroom and 200 g konjac (konnyaku) to the pot and mix until evenly distributed.
- Next, add 500 ml dashi stock, 2 tsp light brown sugar and 4 tbsp sake.
- Place a drop-lid (or piece of foil/baking paper) on top directly touching with the ingredients and broth. Bring to a boil, then turn the heat down to medium-low and simmer until the liquid is reduced by half (approx 10 mins).
- Peel back the drop lid and add 4 tbsp mirin and 4 tbsp Japanese soy sauce (koikuchi shoyu), then tilt the pan to evenly distribute the condiments through the broth (don't mix). Place the drop lid back on and continue to cook until the liquid is reduced by one-third.
- Optional step: For a deeper flavor, turn off the heat, cover and allow it to cool/rest for 1 hour. Once it's cool to the touch you can store it in the refrigerator.
- Add the ½ tbsp Japanese soy sauce (koikuchi shoyu) and 1 tbsp mirin to the pan, bring to boil and then lower the heat to a simmer. Tilt the pan occasionally to move the liquid around, do not mix.
- Bring a small, separate pot of water to a rolling boil and blanch 10 snow peas for 30-60 seconds.
- Remove the snow peas from the pot using a mesh spoon and rinse them under cold water. Cut in half diagonally.

- Divide the chikuzenni into serving dishes and decorate with the blanched snow peas. Enjoy!
Wow was this tasty! So glad i tried this recipe. So comforting. Thank you!
Hi Embee,
Thank you so much for trying this recipe! I’m happy to hear you enjoyed it! 🙂
Yuto