

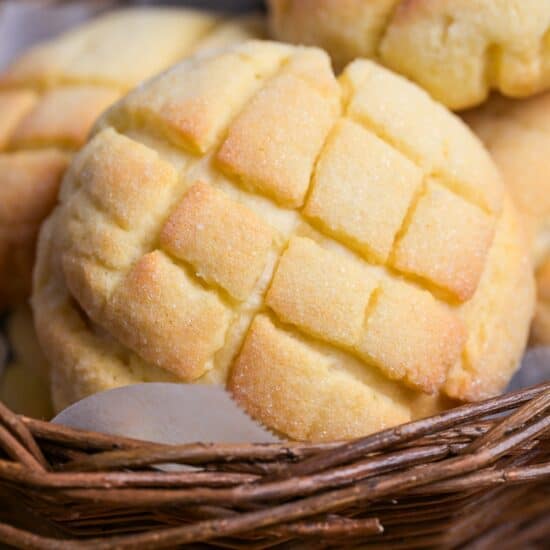


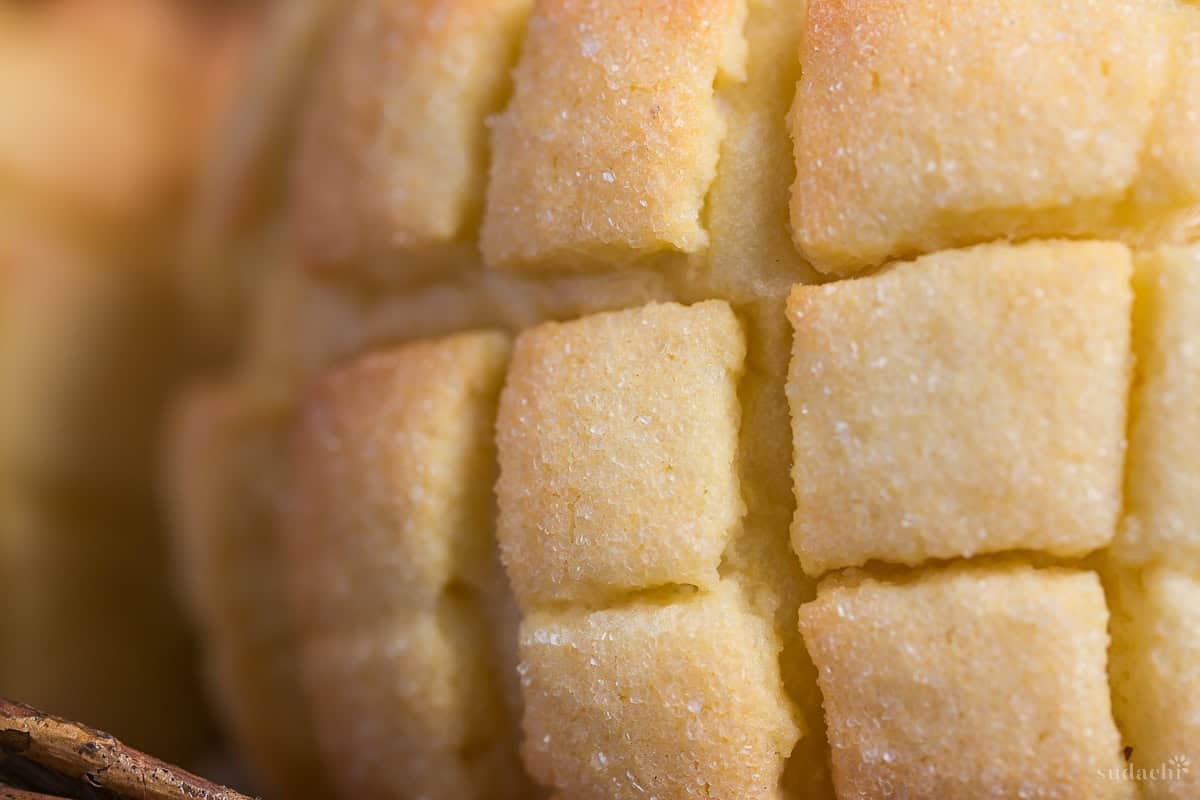
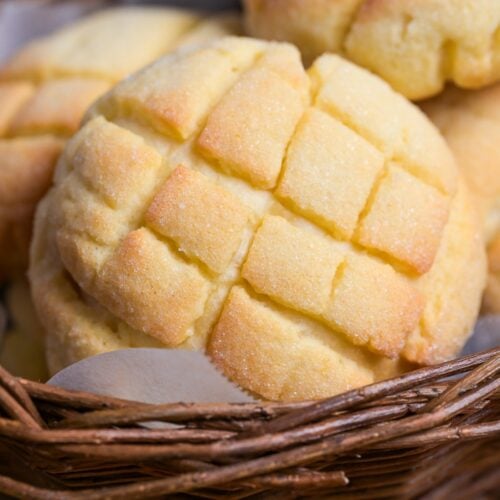
Anpan brought the red bean, cream pan brought the custard, and melon pan brings the crunch. It’s the last of Japan’s three beloved kashipan, and arguably, the most iconic sweet bread that Japanese bakeries have to offer.
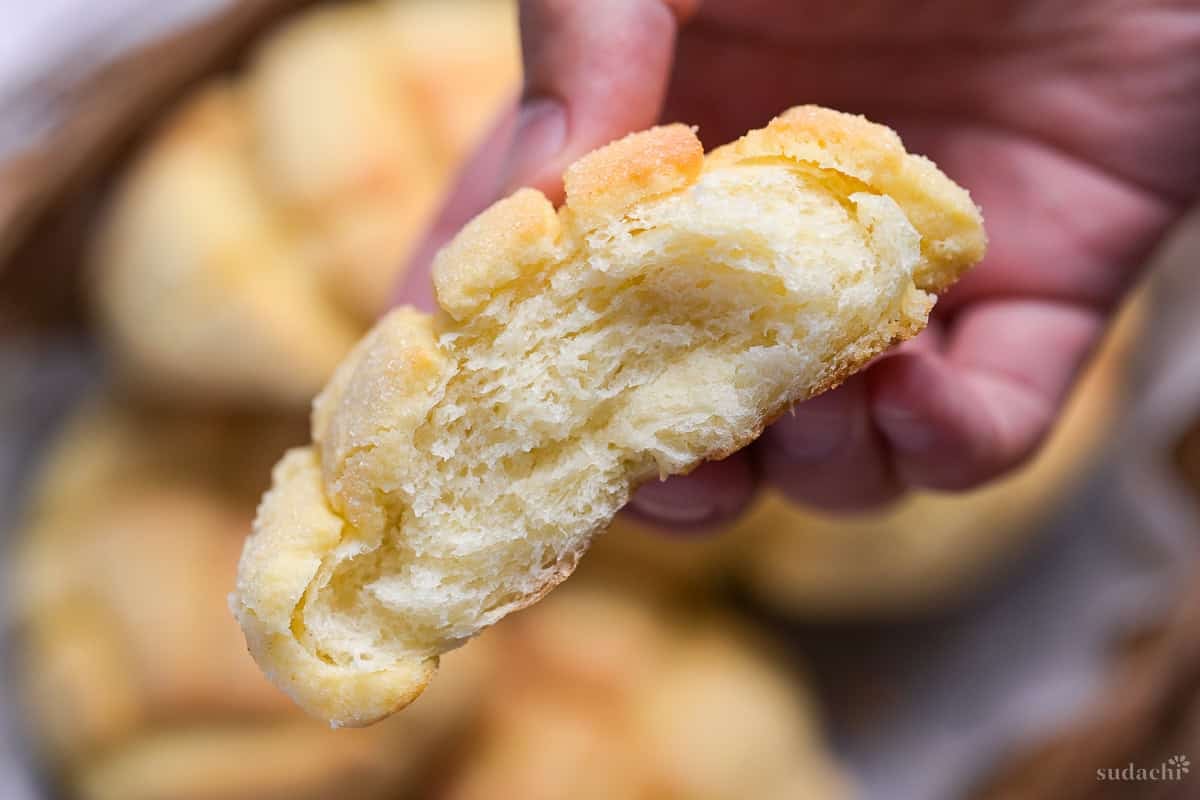
Pillowy soft bread hidden under a crisp, sweet cookie crust that shatters with every bite. That is what it should be, and those contrasting textures are the exact things I chased in this recipe. Make a batch and find out what the fuss is all about.
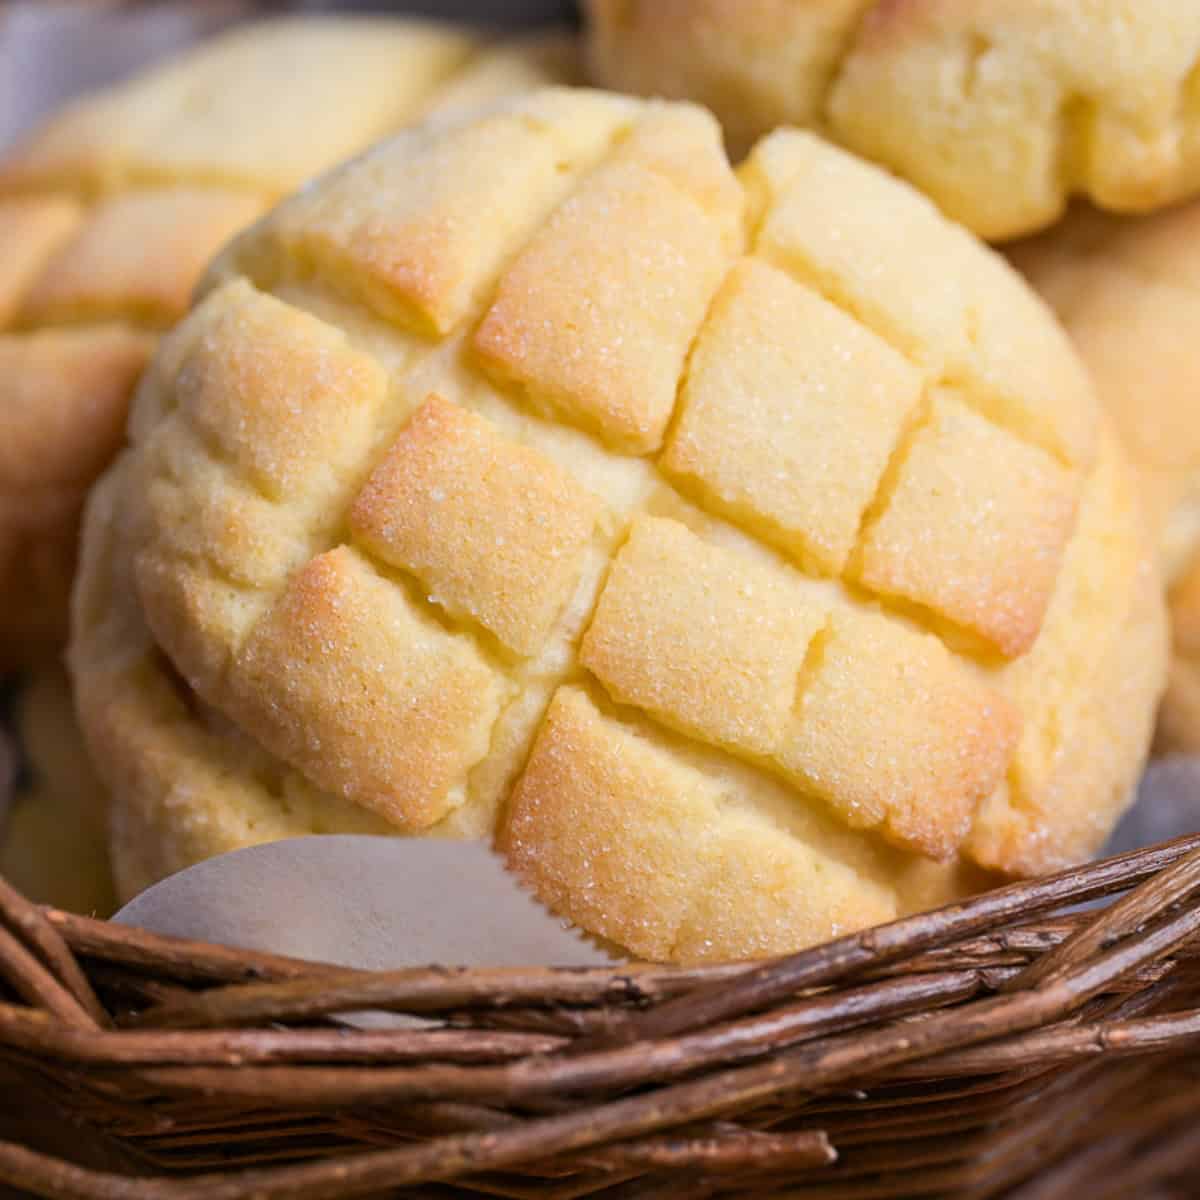
MELON PAN
Recipe Snapshot
- What is it? A Japanese bakery classic made with soft, fluffy bread topped with a crisp cookie shell. The cookie is scored with a signature pattern that resembles melon skin, and finished with glistening sugar.
- Flavor profile: Buttery, sweet, crisp.
- Why this recipe works: This recipe uses a high hydration dough with tangzhong for an extra pillowy texture that holds moisture, topped with a crackly cookie made with a blend of wheat and almond flour, creating a short and crisp exterior.
- What to expect: The recipe takes roughly 3 and a half hours, mostly hands off rising time. Making the tangzhong and cookie dough feels like a lot, but can be made in advance. Yields 6 melon pan if you follow the base recipe, but easy to double or triple for larger batches.
- Freezable: Yes.
Summarize & Save this content on:
What is Melon Pan?
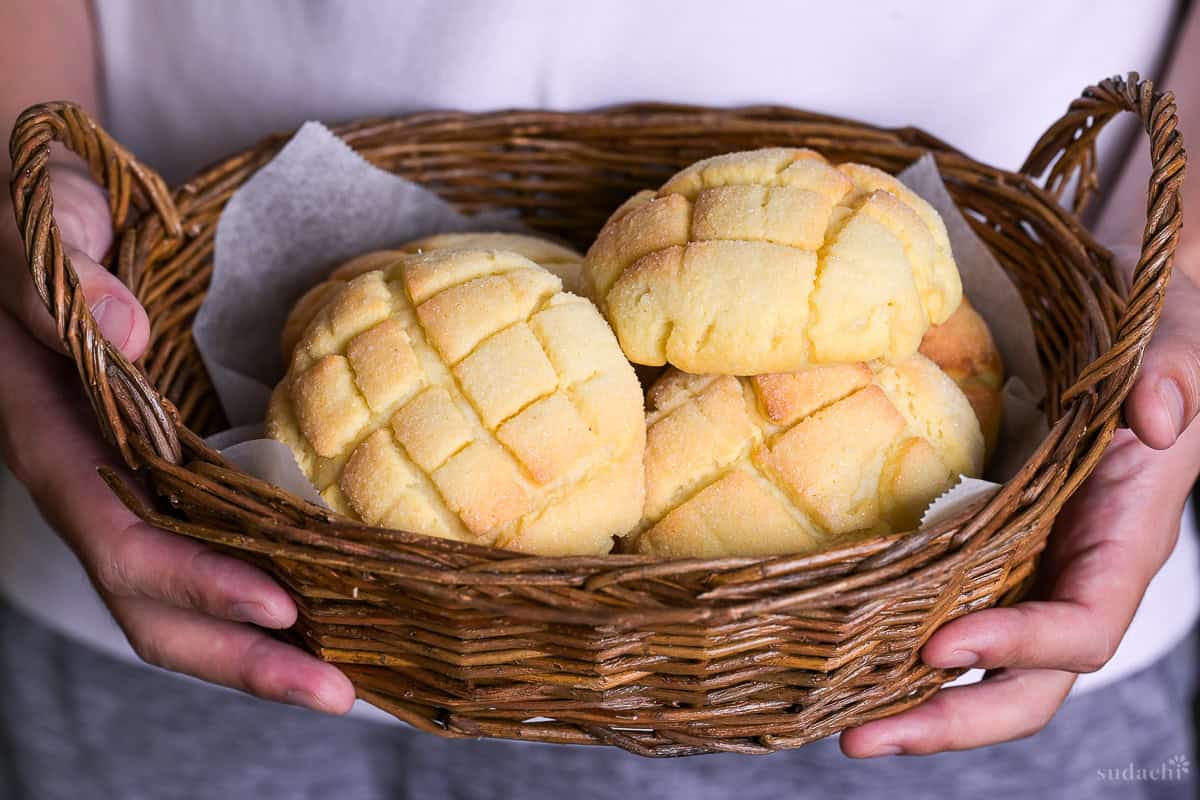
Melon pan (メロンパン) is one of Japan’s most recognizable breads, instantly identified by its crackled, dome-shaped crust. Despite the name, it doesn’t contain any melon or melon flavorings. Instead, it gets its name from its resemblance to the netted rind of a muskmelon (sometimes known as oriental melon).
You can find melon pan in nearly every bakery and convenience store across Japan, and its popularity has inspired countless variations including chocolate chip-studded, matcha flavored, and even versions stuffed with soft-serve ice cream at street stalls.
Despite its popularity, it’s still pretty hard to find melon pan outside of Japan. It might seem like a lot of work, but nothing beats freshly baked melon pan while it’s still warm. The convenience store versions have nothing on homemade, so I hope you give my recipe a try.
Unlike anpan, whose origin traces cleanly back to a single Tokyo bakery in 1874, melon pan’s history is murkier and there are several competing theories about where and when it first appeared.
The most plausible theory is that it traces back to Kobe in the 1930’s, when a bakery called Kinseido sold a round bread named “sunrise” filled with white bean paste and topped with a biscuit dough. It is believed that this was the earliest version, before it spread across Japan and became known as “melon pan”.
I’ve had my fair share of disappointing melon pan. Dry bread, paired with a soft and sad cookie shell. Those are the two things that I swore my version would never have.
My first goal was getting the bread as soft and moist as possible. High hydration dough gets you there, but kneading by hand can be challenging so I turned to tangzhong. It is a Chinese technique where water (or milk) and flour are heated together to form a gel. It is different from yudane, the Japanese method of pouring boiling water over flour. Tangzhong doesn’t just soften the bread, it turns the water into a gel that is actually easier to knead by hand, while still letting the dough hold more water than usual.
For the cookie, I wanted it to be sweet and flavorful in contrast to that soft bread. Almond flour was a trick I picked up from my bread making class, which makes the cookie dough richer while keeping it “short” so it crumbles and crunches exactly the way it should.
Melon Pan Ingredients
What You’ll Need for MELON PAN
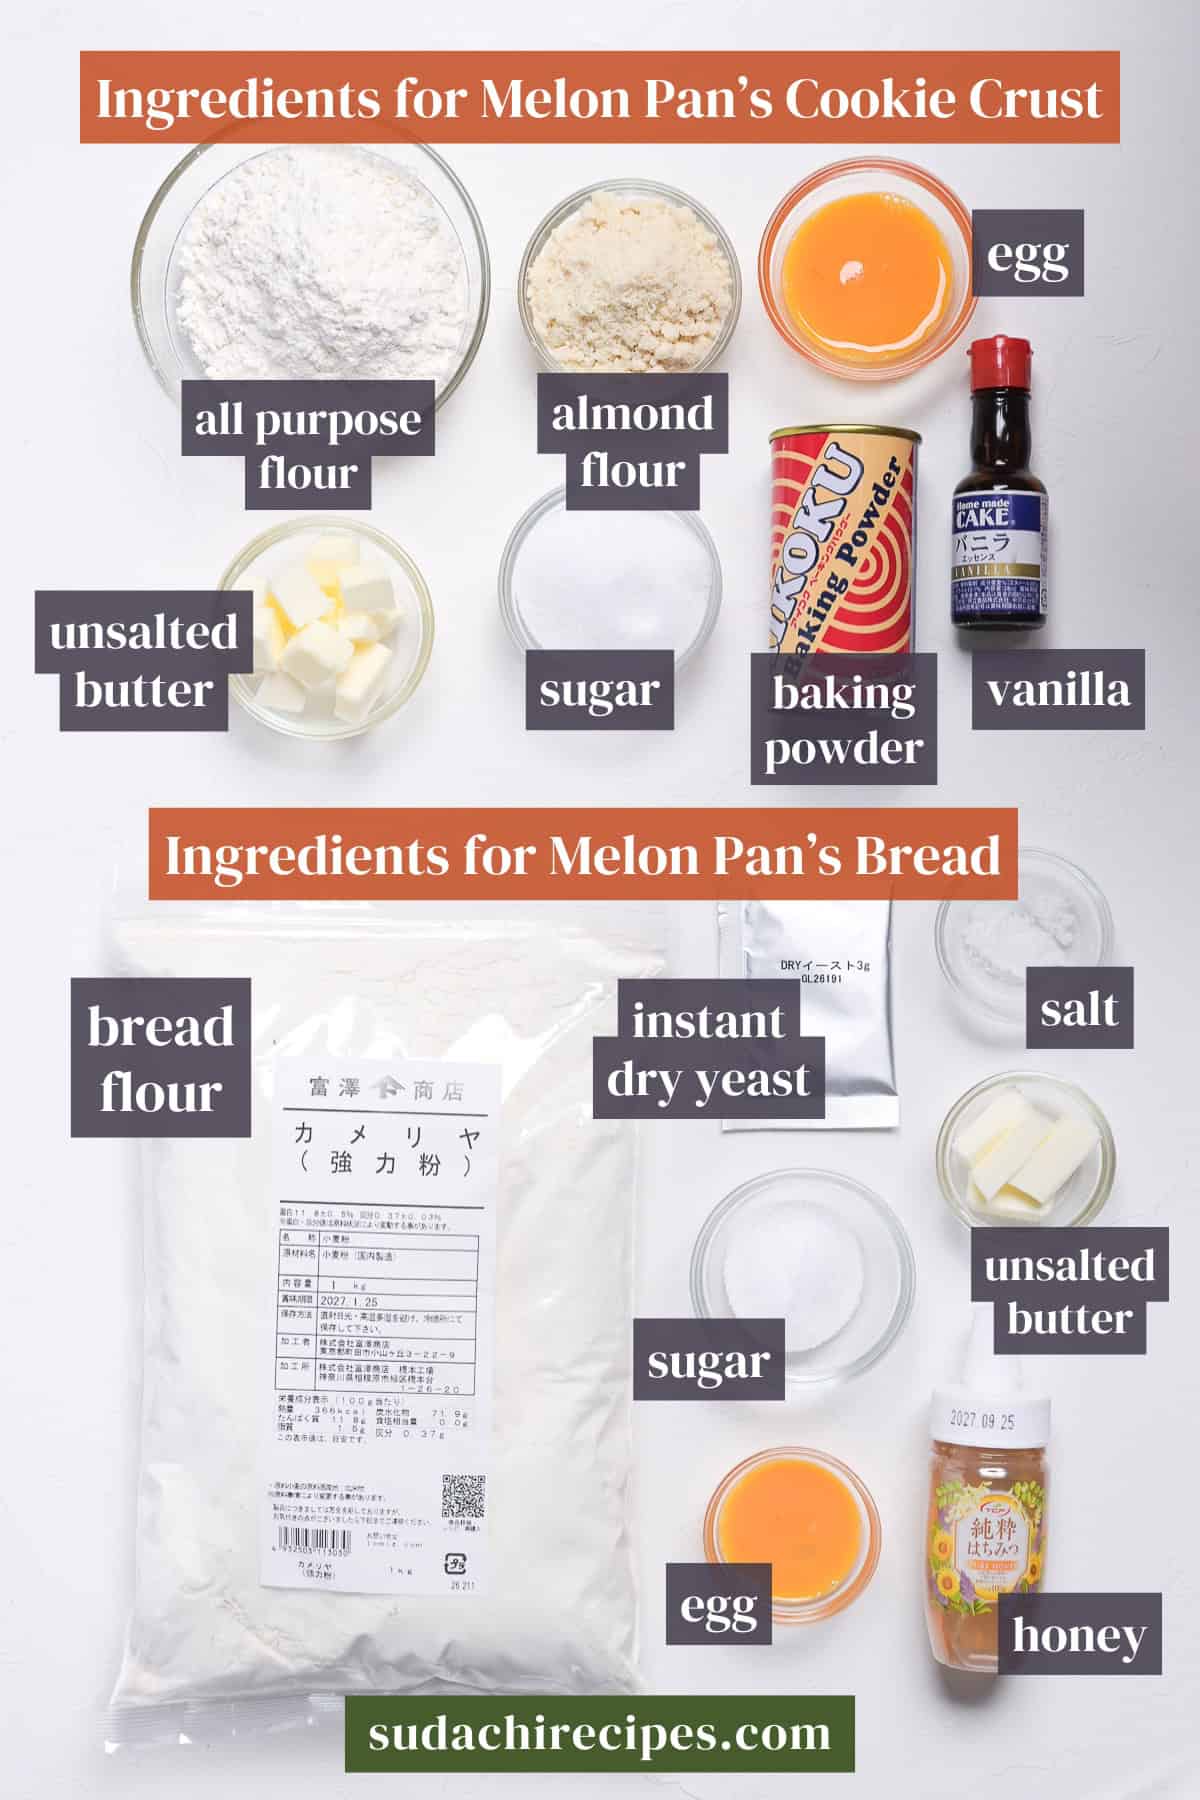
- Flours: I use a blend of AP flour and almond flour for a short and crunchy cookie dough with a hint of nuttiness, then bread flour only for the melon pan.
- Yeast: I used instant dry yeast for this recipe, so you can mix it straight in with the dry ingredients.
- Unsalted butter: Stick to unsalted to avoid throwing off the salt percentage in the recipe.
- Sweeteners: I used white granulated sugar, plus a small amount of honey in the bread dough to contribute to a moister crumb and hint of floral sweetness.
Substitutions & Variations
- Almond flour in the cookie dough → This is an optional ingredient used for a hint of nuttiness, extra fat and a shorter, more crumbly texture. The cookie dough comes together just fine with all purpose flour only.
- Active dry yeast → Instant dry yeast and active dry yeast are not the same ingredient. Active dry yeast needs to be activated in warm water before adding it to the dry ingredients, this causes a problem since the water in this recipe is used entirely in the tangzhong. For 6 melon pans using active dry yeast, mix 3.75-4g active dry yeast with 20g of water, reduce the tangzhong to 100g water with 20g flour, then increase the flour in the main bread recipe to 130g.
- Fresh yeast → If using fresh yeast, use double the weight (6g for 6 melon pans) and rub it into the flour before adding the other dry ingredients.
- Honey → I use a small amount of honey to improve texture and flavor, but if you can’t use honey, replace it with the same amount of agave syrup or sugar in this recipe.
- Cookie flavorings → I use a few drops of vanilla in the cookie crust, but you can swap with a flavor of your choice either using a different essence (almond, etc), lemon zest, or swap a small amount of flour for matcha or strawberry powder which will also change the color.
- Fillings → Some versions contain chocolate chips so feel free to add them if you like. It’s not uncommon to cut melon pan open and add fillings such as custard cream, whipped cream or even ice cream.
Have trouble finding Japanese ingredients? Check out my ultimate guide to Japanese ingredient substitutes!
How to Make My Melon Pan Recipe
Before you start (Mise en place): Measure out the butter and bring to room temperature before you start.
If you want to save time on the day, you can make the tangzhong and cookie dough the night before and keep them in the fridge. Make sure to bring the tangzhong to room temperature before use.
To develop this recipe, I used these tools:
- Bench scraper (my favorite tool for hand-kneading)
- Kneading board (not essential but easy to clean)
- Digital scales for accuracy
- Large mixing bowl
- Rolling pin and plastic wrap for the cookie dough
- Large baking tray and parchment paper
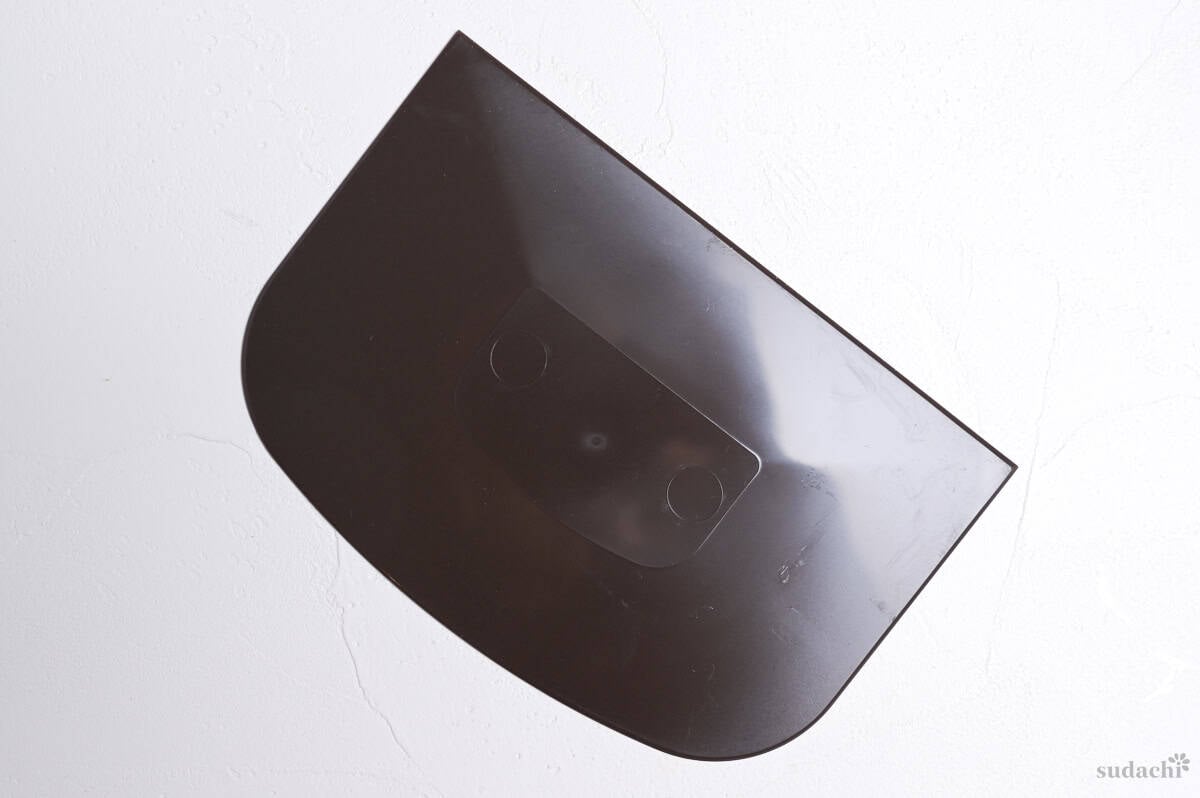
Note: If you prefer, you can knead the dough using a stand mixer with hook attachment, or a bread maker until the dough cycle after the first rise.
i. Mix 25g bread flour and 120g of cold water together in a saucepan until smooth. Using cold water from the beginning prevents gummy lumps.
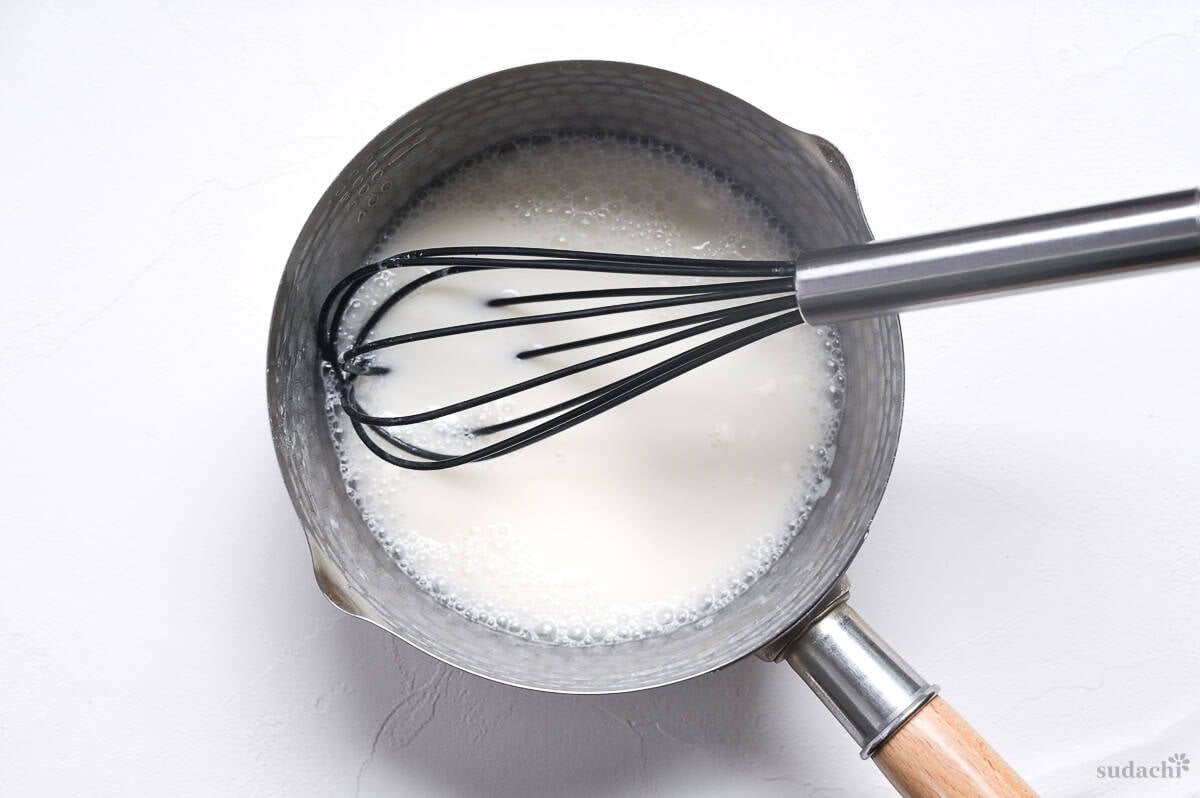
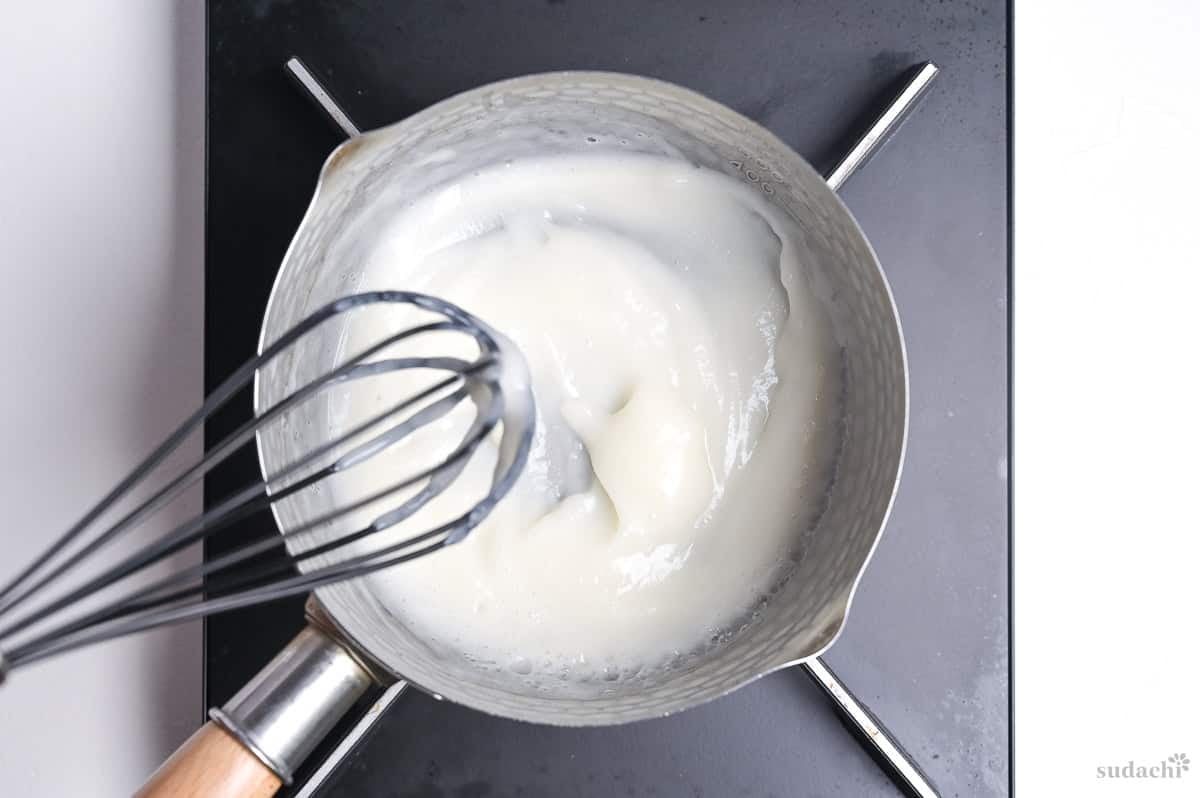
ii. Heat on low and stir continuously, scraping the bottom of the pan as it heats so that no areas catch.
Once it has thickened to a paste/custard-like consistency (around 60-65°C/140°F), immediately lift the pan off of the heat and scrape the mixture into a heatproof bowl.
iii. Cover the bowl and leave to cool to room temperature while you work on the cookie dough.
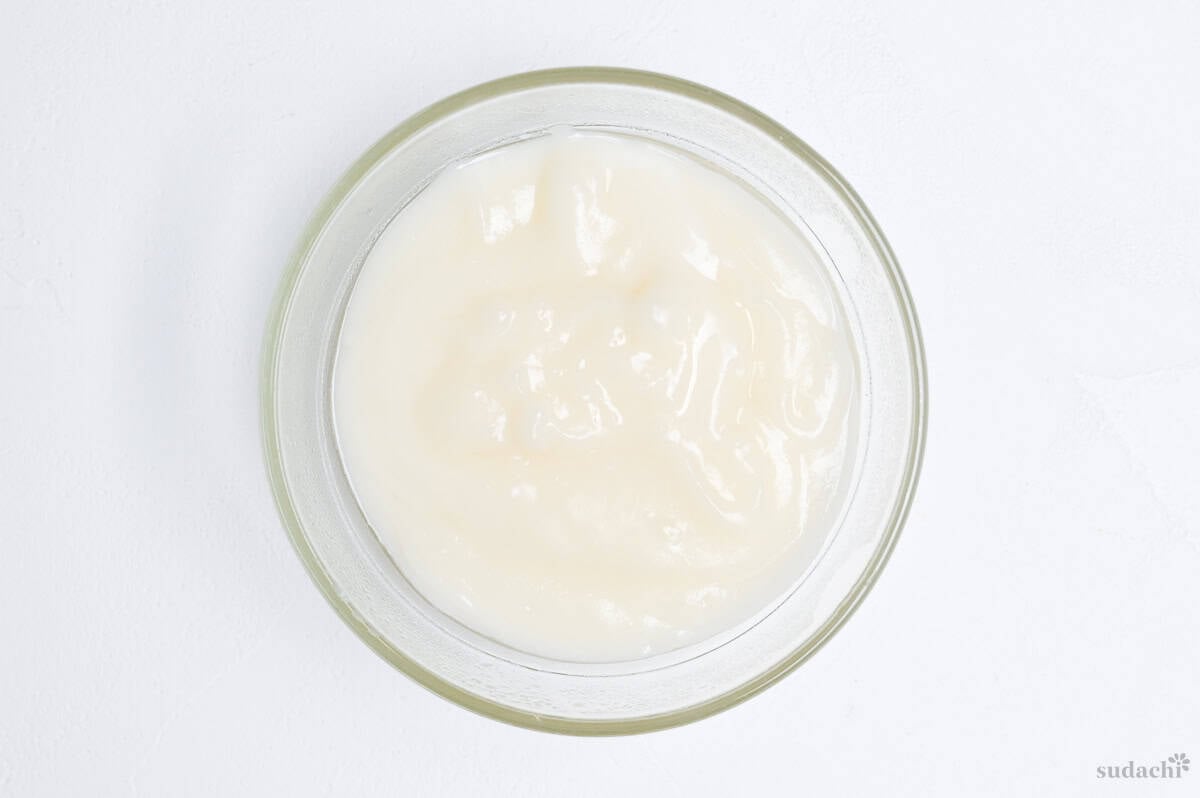
You can make tangzhong the night before to save time on the day of baking. Just bring it to room temperature before you use it to make your dough, since fridge-cold tangzhong can slow the yeast activity.
i. Cream the butter and sugar together until smooth and pale.
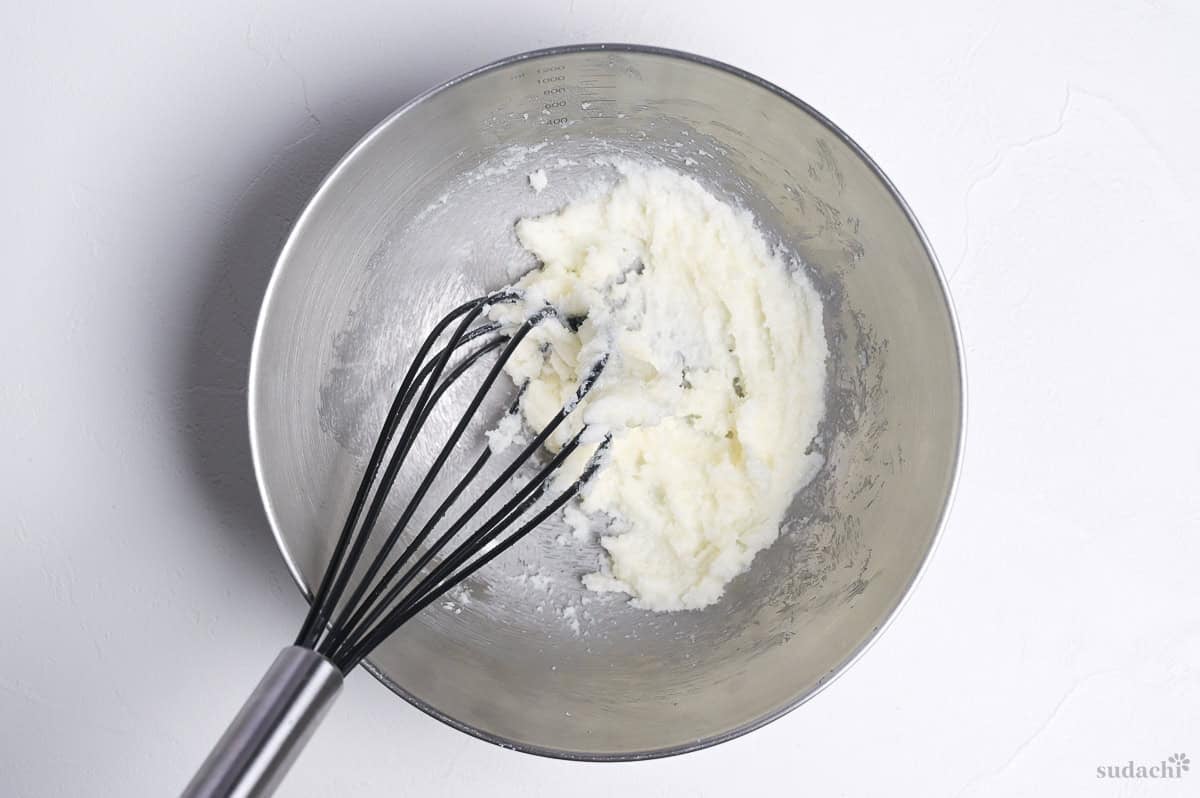
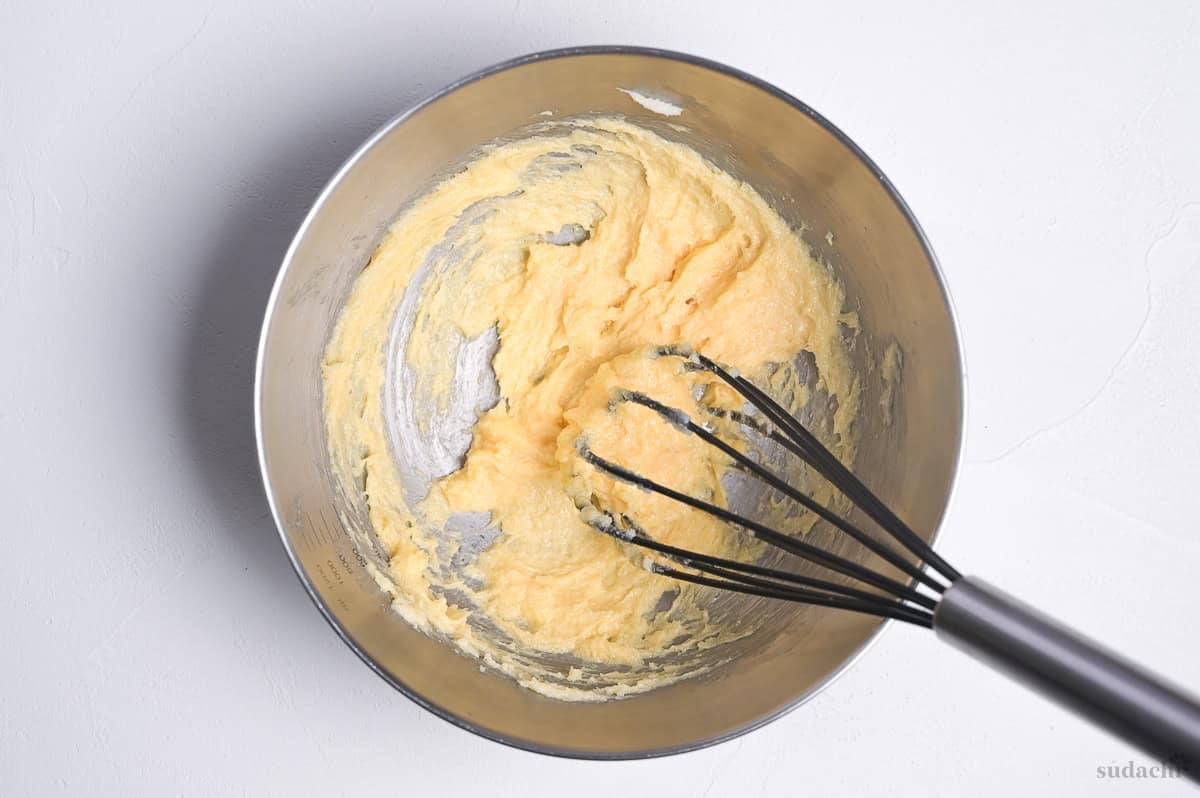
ii. This recipe uses one egg divided between the cookie dough and bread dough. Crack it into a bowl, whisk thoroughly and divide.
Set the bread portion aside for later, and add the cookie portion (20g) to the creamed butter one-third at a time to prevent splitting. Whisk thoroughly between each addition.
If you want to add any colorings or flavorings (vanilla, etc), you can add them now before the dry ingredients.
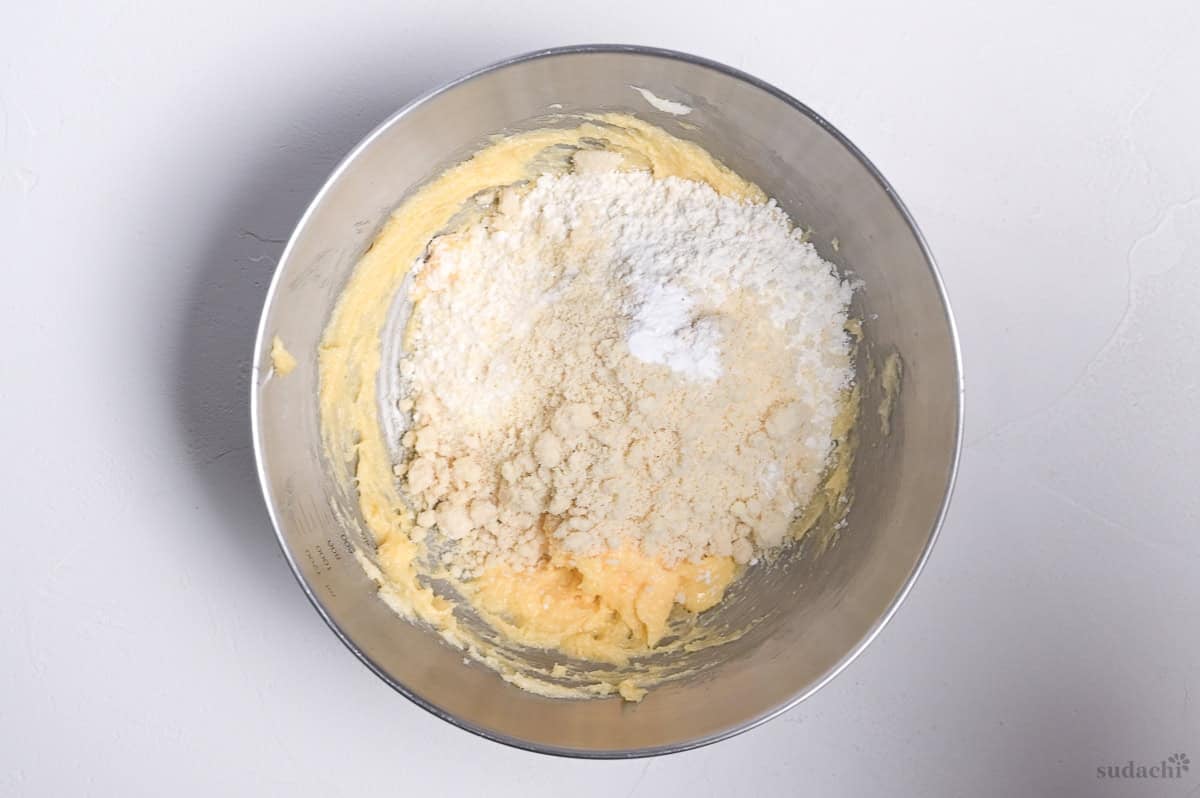
iii. Add the flour, almond flour, and baking powder. Fold it in with a spatula and stop as soon as there are no more streaks of dry ingredients.
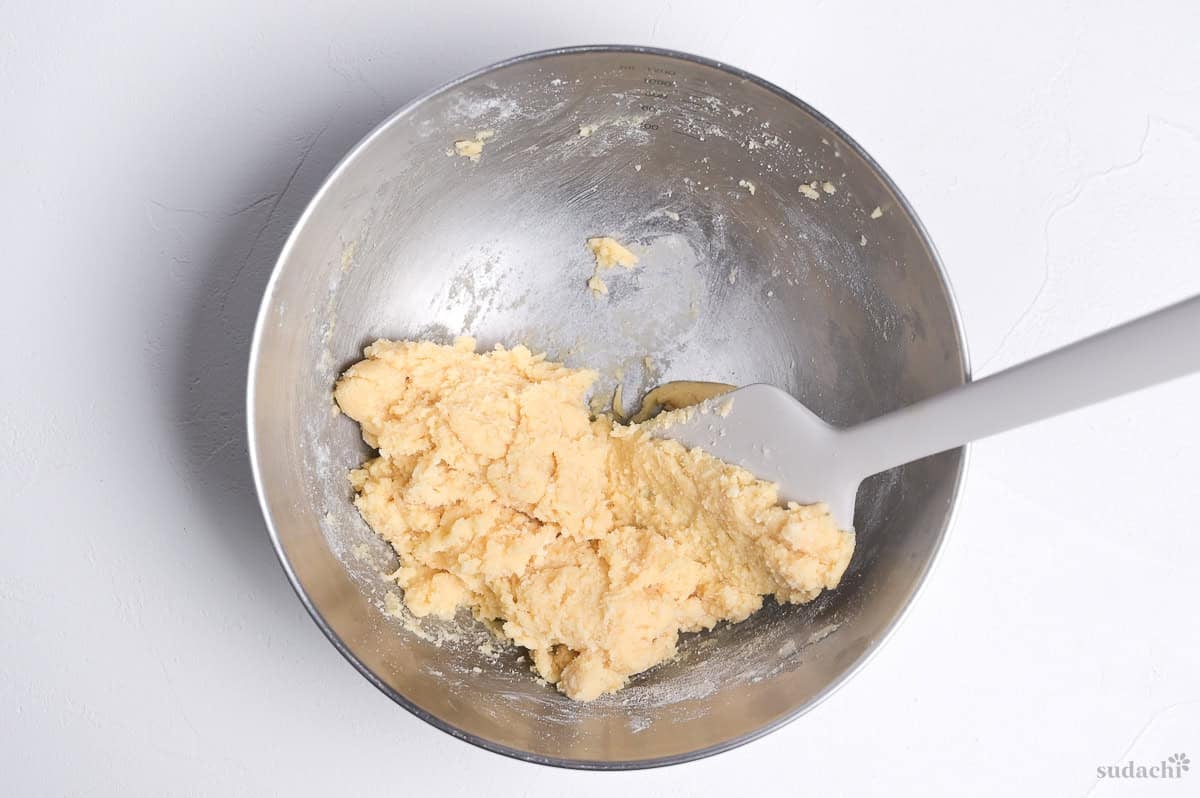
iv. Wrap and refrigerate while you make the bread.
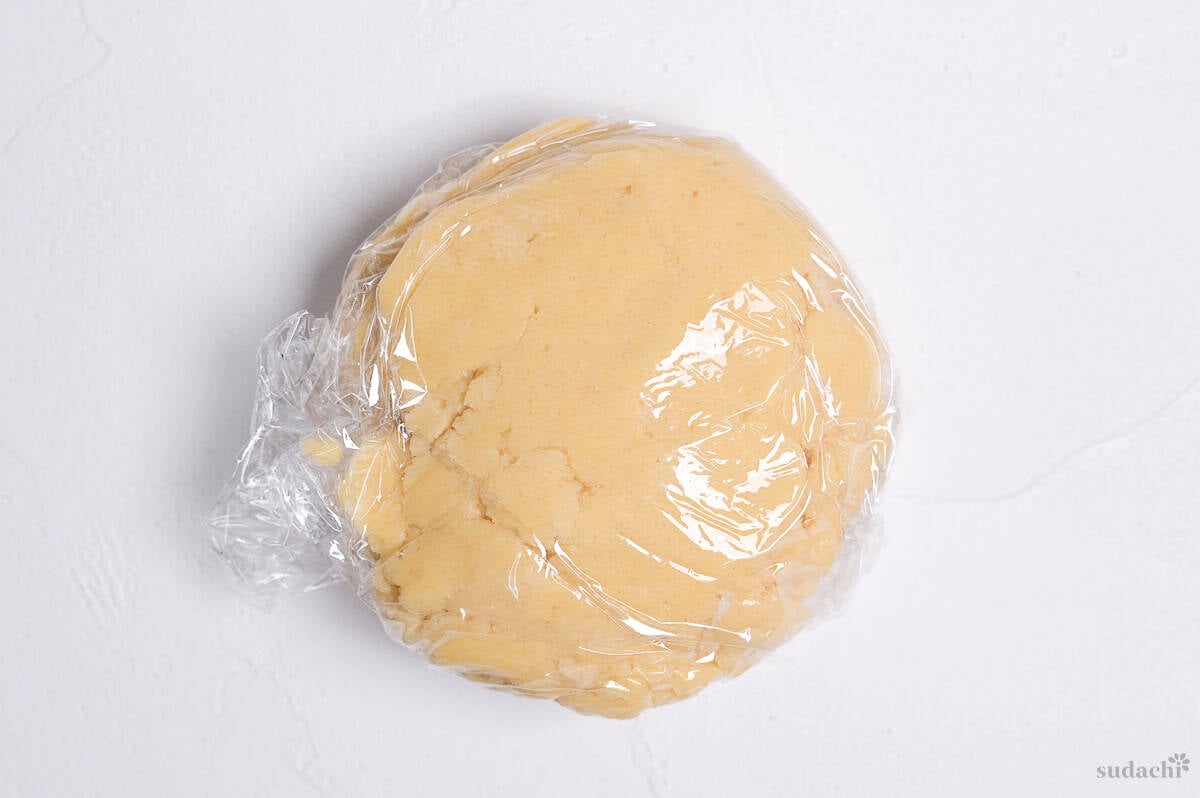
You can make the cookie up to 3-5 days in advance and keep it in the fridge. If you want to make extra batches for future use, divide into balls and freeze on a tray, then transfer to a sealable bag and freeze for up to 1-2 months. Thaw in the fridge over night.
i. Gather your ingredients. Measure the bread flour, sugar, salt and instant dry yeast and place in a large mixing bowl. Squeeze the honey into the egg and whisk until combined.
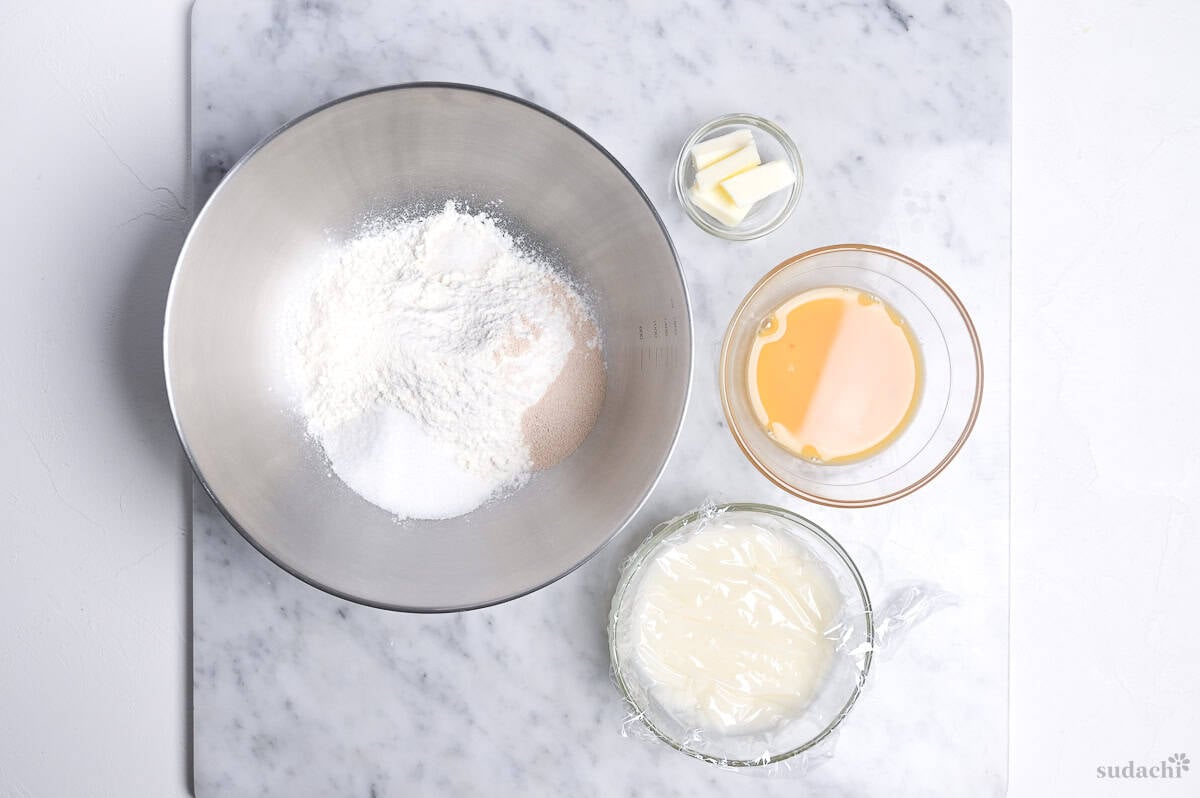
ii. Pour the egg/honey mixture into the bowl, and add the tangzhong. Don’t add the butter yet.
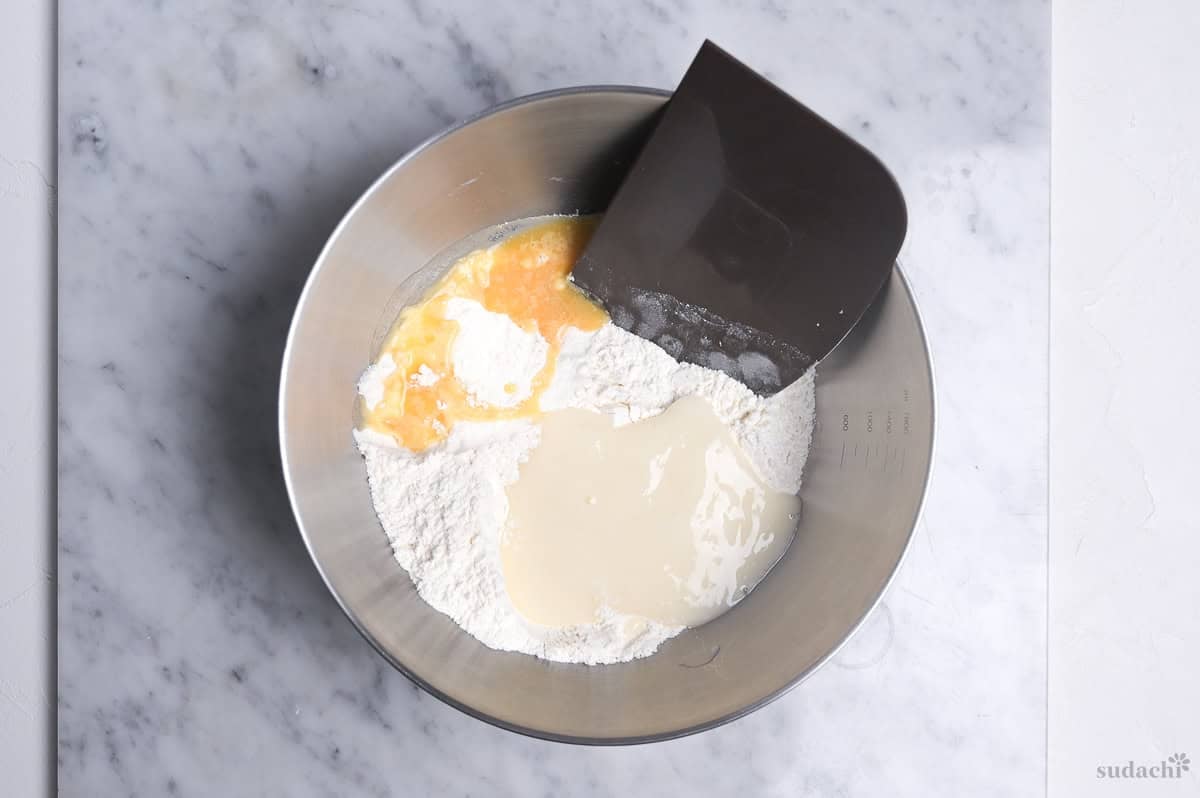
iii. Use the bench scraper to mix everything together using a cut and fold motion, until a rough dough forms.
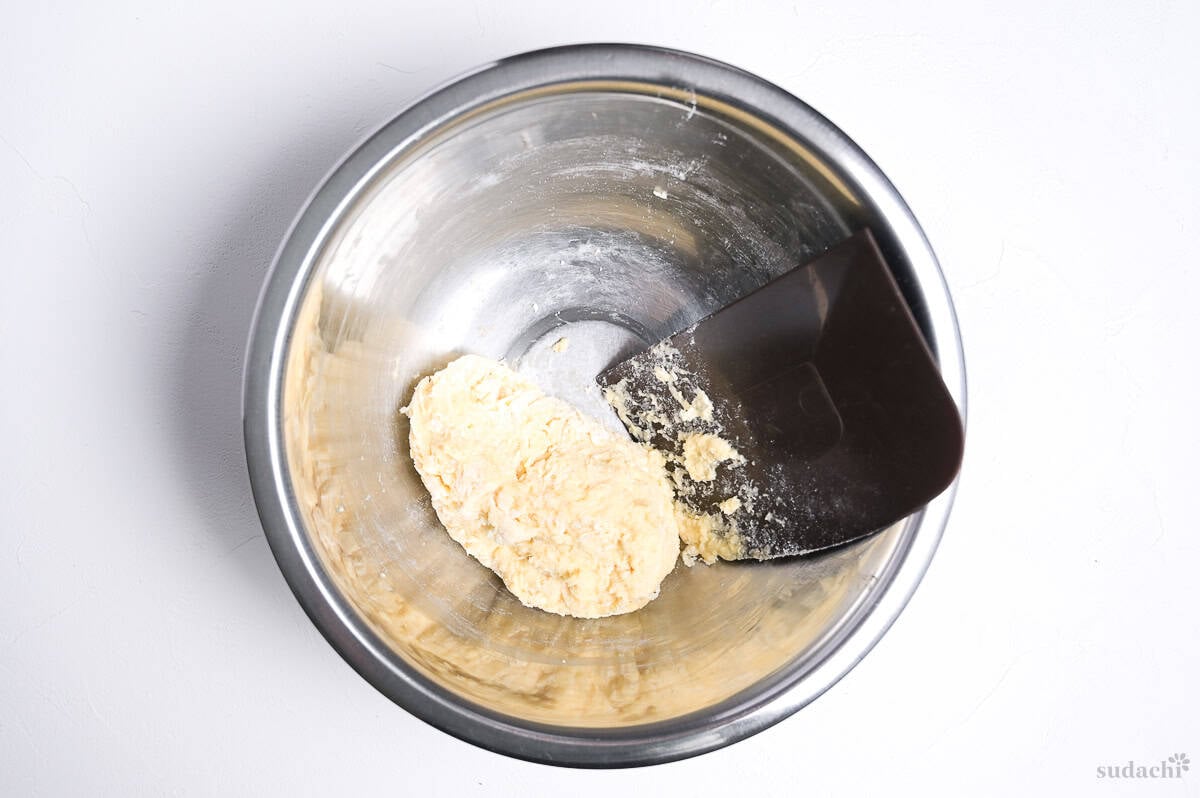
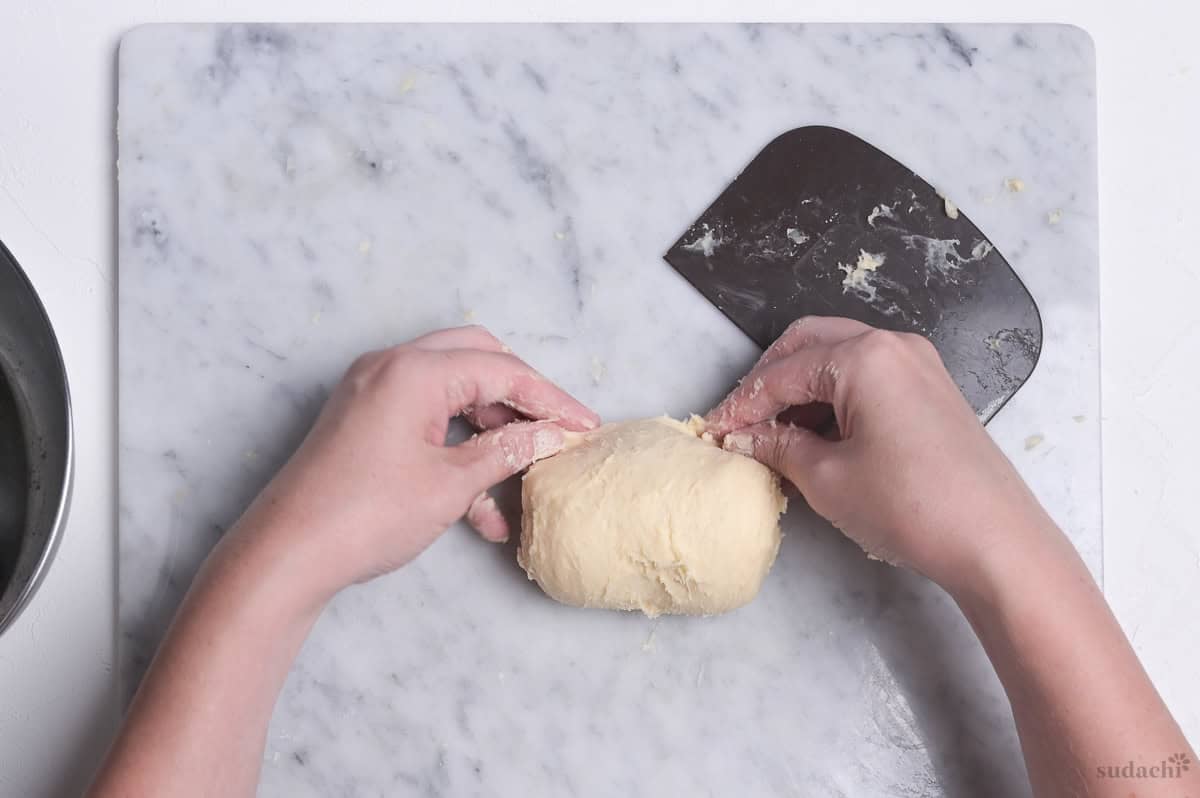
i. Scrape the dough onto a clean dry surface. Use the scraper to spread the dough out, the scoop it back up into a ball. Repeat in the opposite direction, and continue the motion until it becomes smoother, less sticky and manageable by hand.
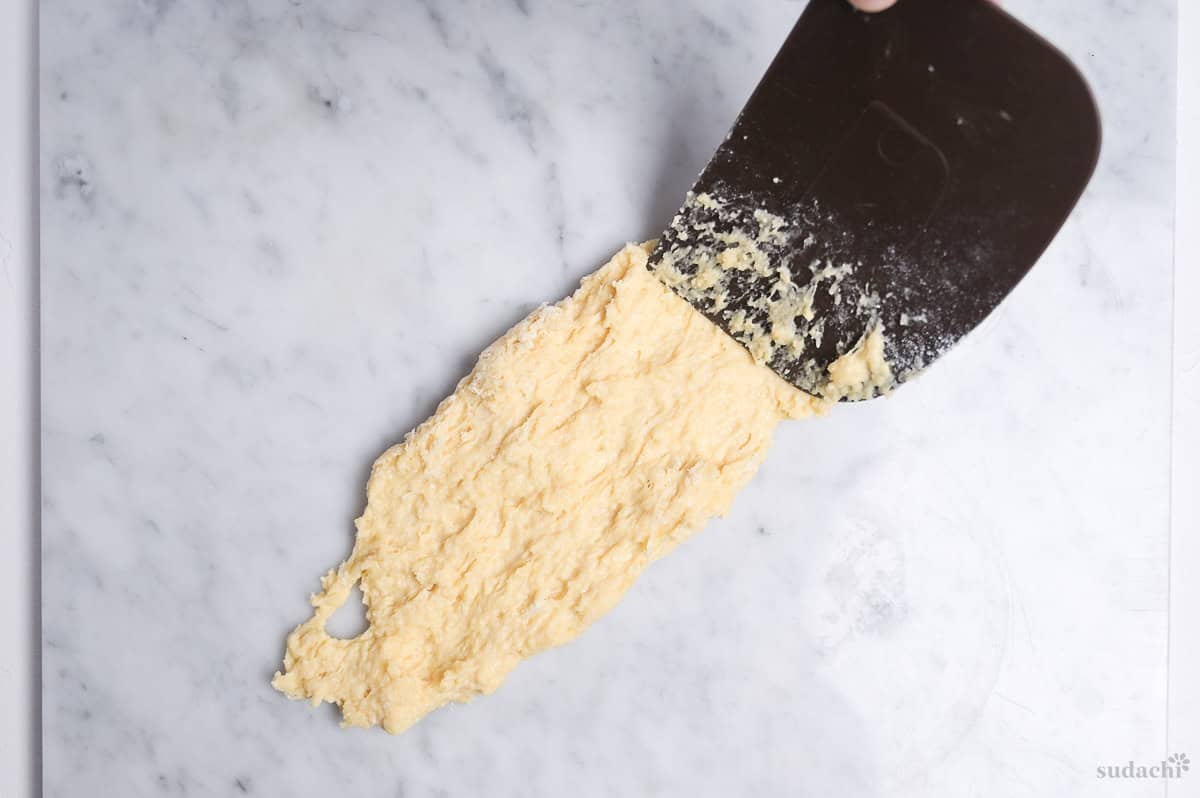
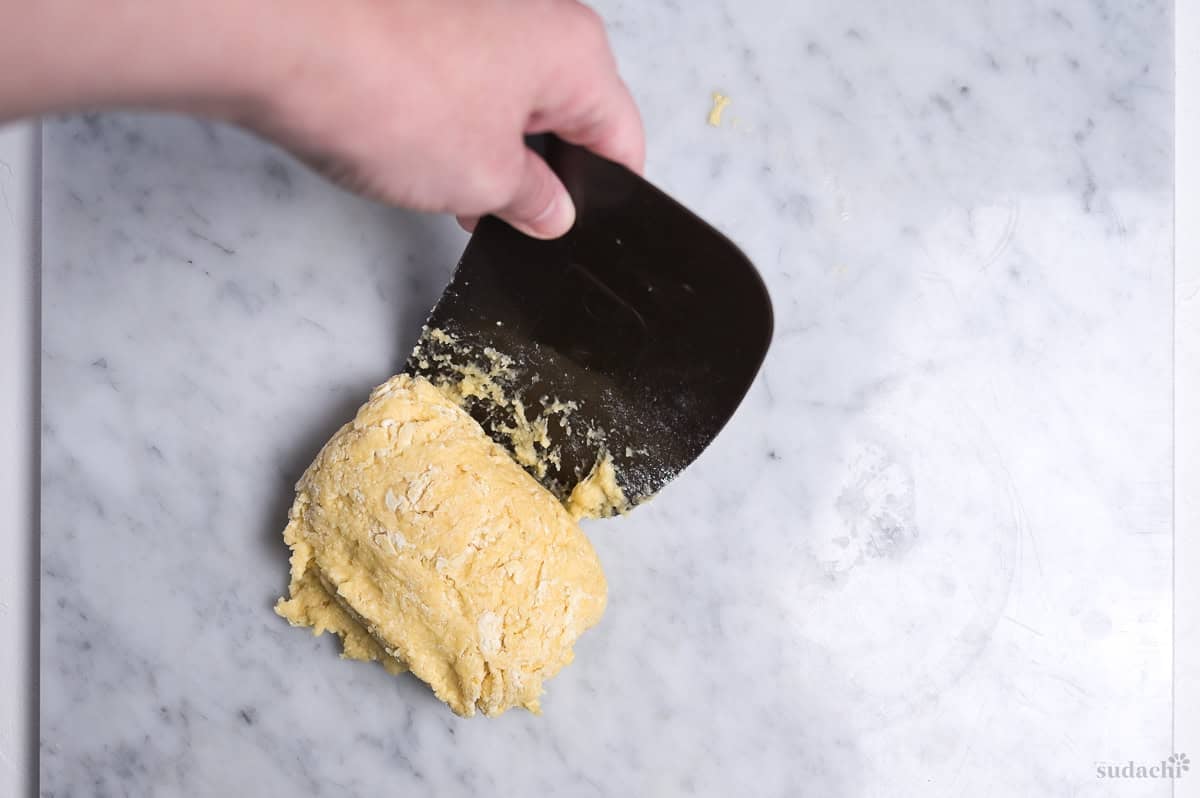
ii. Once you can lift the dough without it sticking to your hands, switch to the slap and fold method. Hold two parallel edges of the dough, lift and slap it away from you. Stretch the dough back towards you and then over itself. Turn the dough 90° and repeat until smooth, shiny and passes the windowpane test.
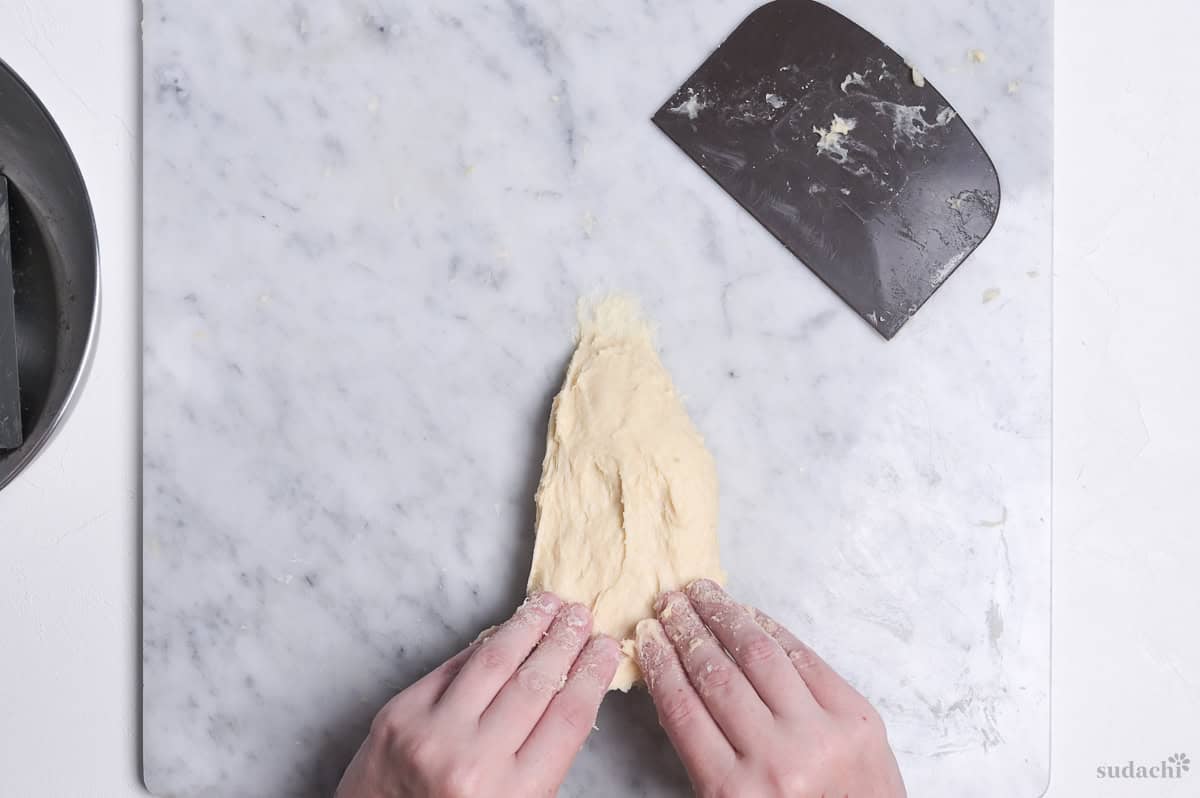
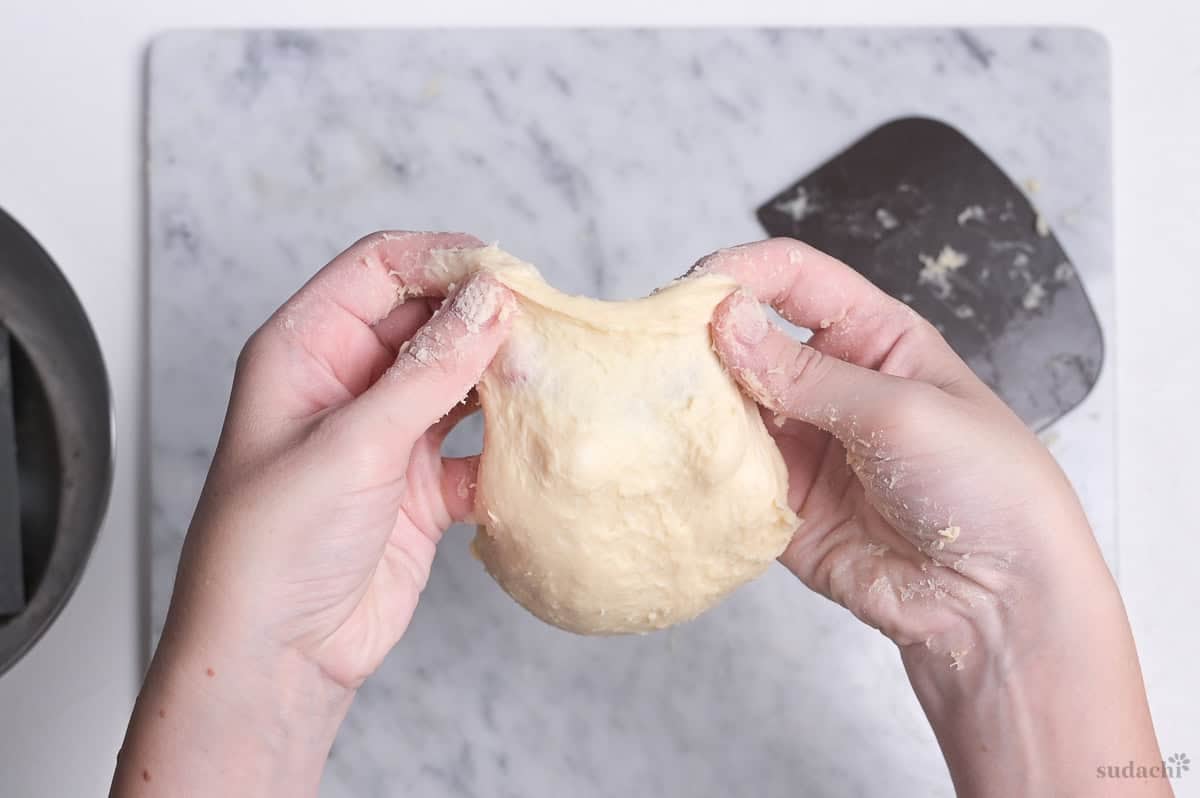
Kneading the dough strengthens the gluten network, making it stretchy and capable of holding the gases produced by the yeast during fermentation (rise). Cut off a piece of the dough, stretch it and hold it up to a light, if you can see through it, it has passed the windowpane test.
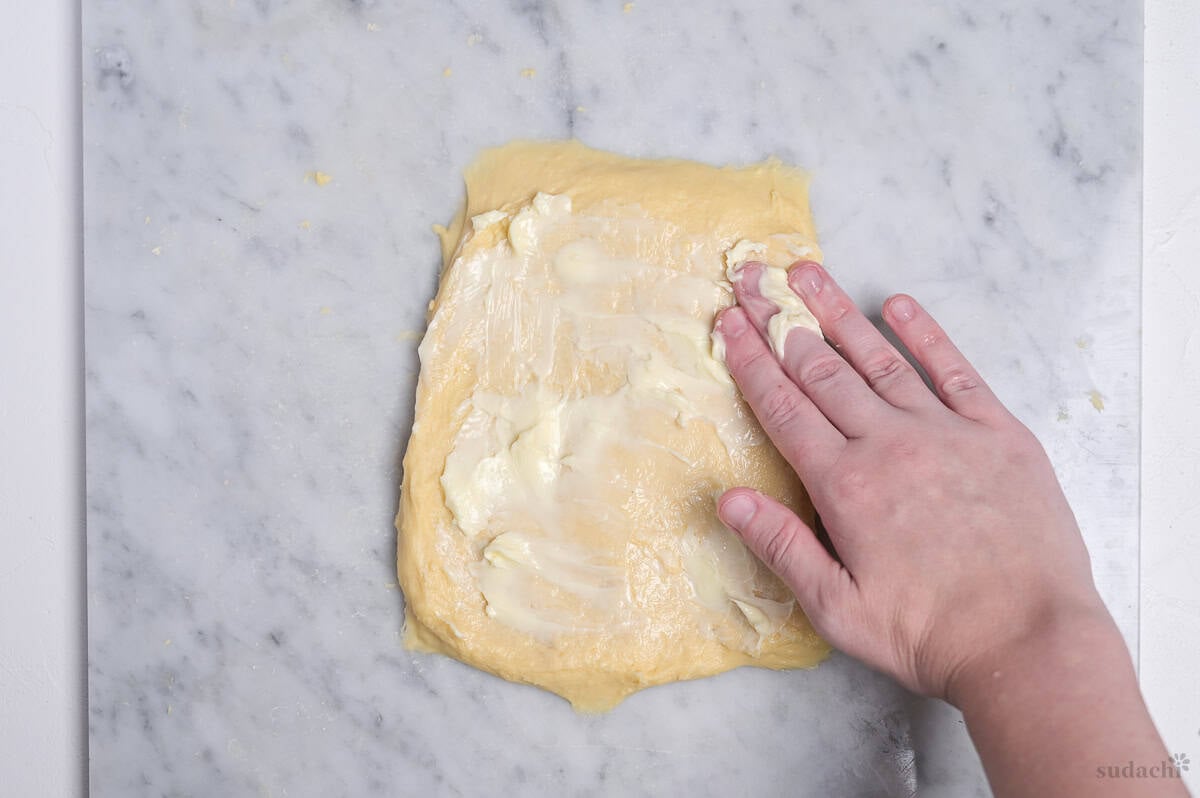
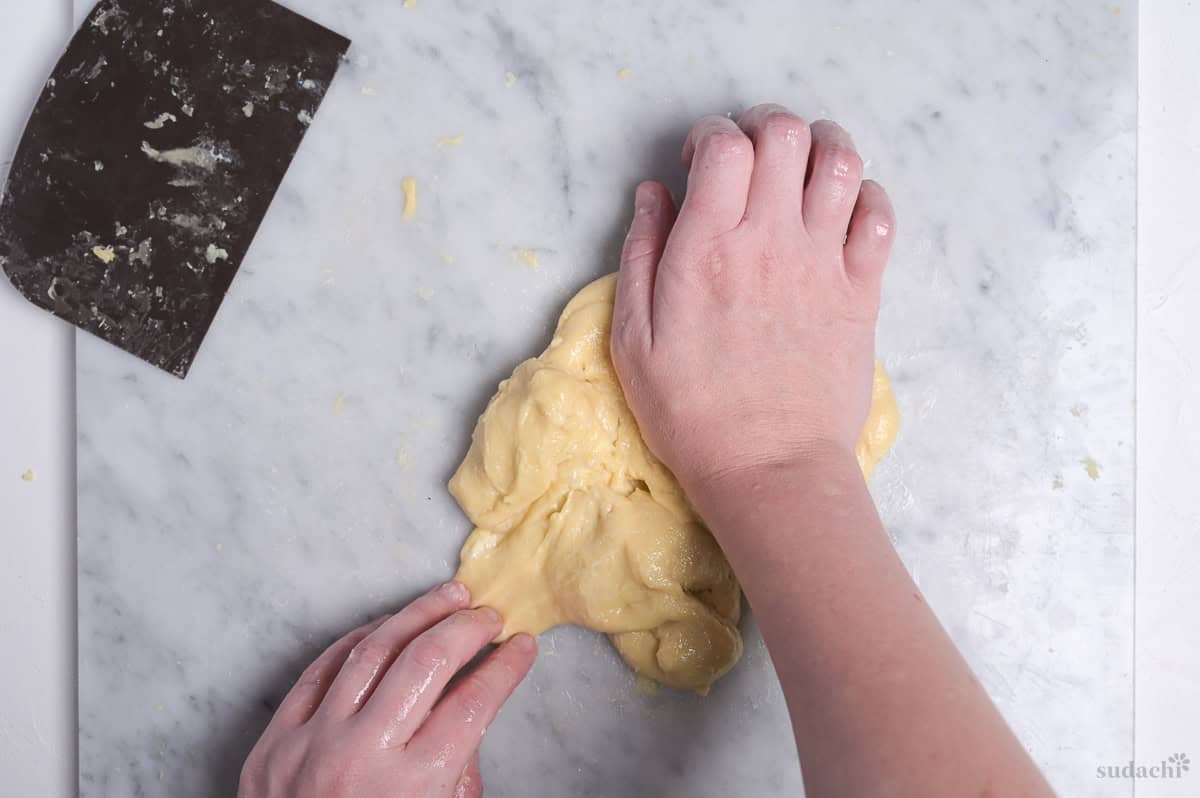
i. Stretch the dough out on your work surface and rub the room temperature butter over the top in a thin even layer.
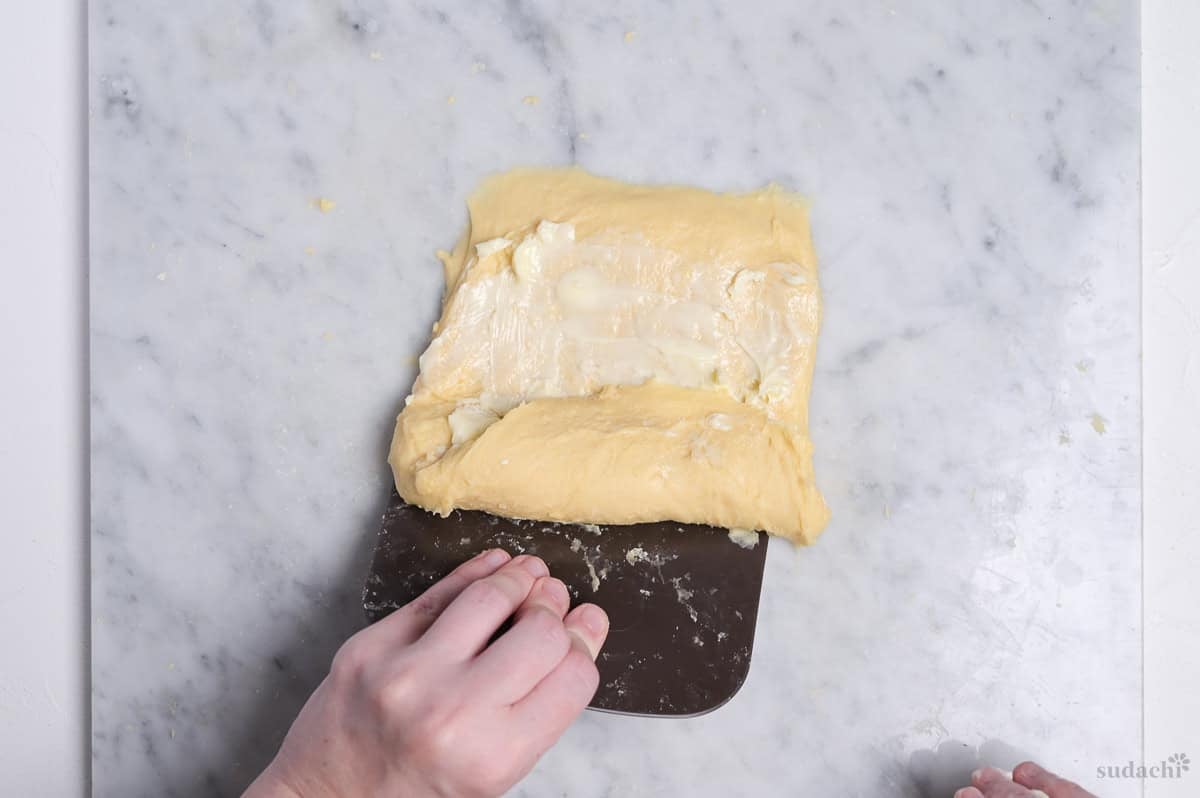
ii. Roll it up, then knead until well incorporated. It will feel greasy at first, but that greasiness will disappear when the butter is incorporated into the dough.
i. Once smooth, roll the dough tight and pinch it underneath. Place it in a lightly oiled bowl with the pinch side facing down, and cover with a damp tea towel.
Rest in a warm place until doubled in size (about 1 hour at room temperature). The rise time depends on the environment and condition of the yeast so check the conditional occasionally rather than relying solely on the clock.
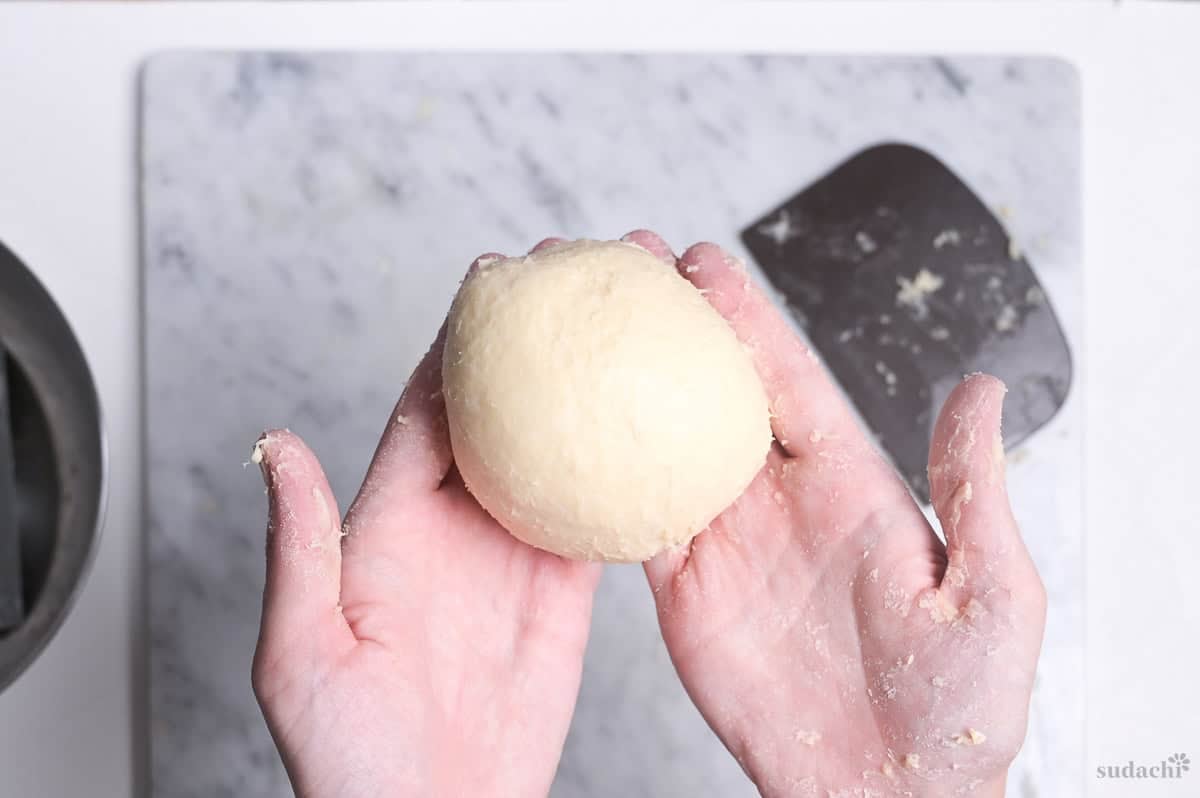
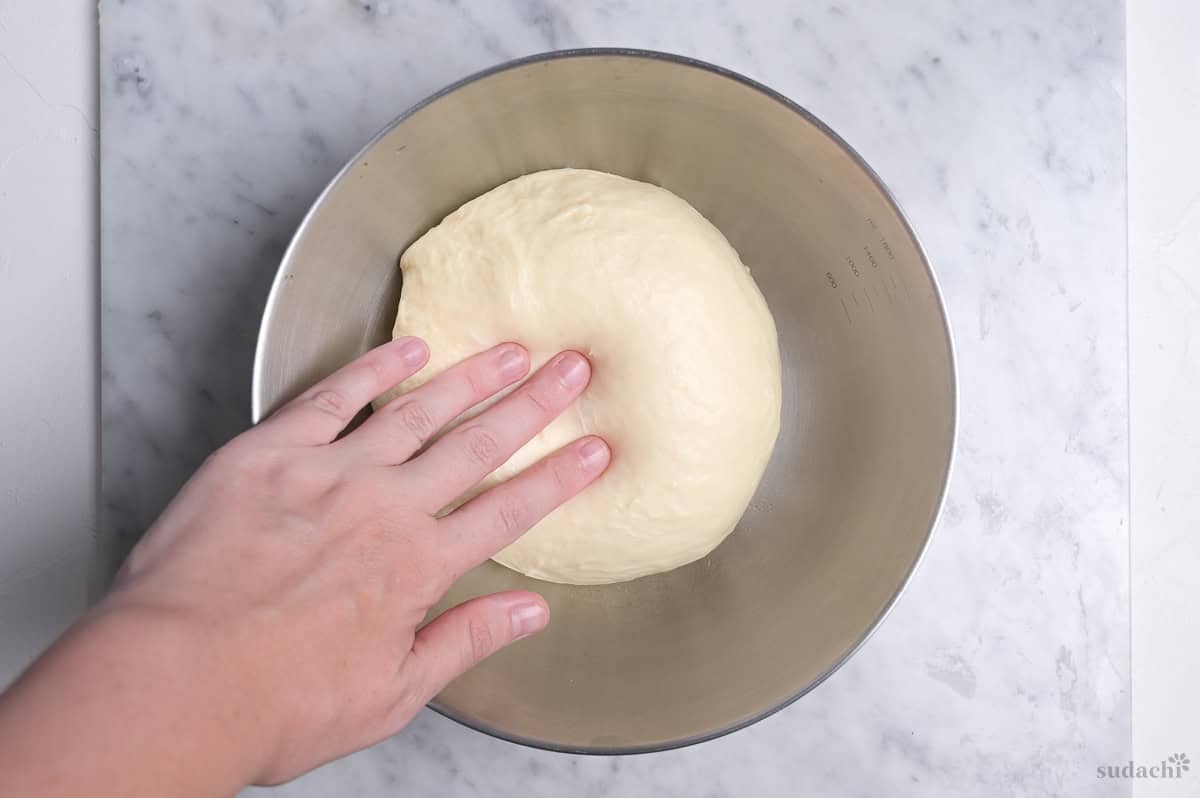
ii. Once doubled in size, gently press the dough to degas. Lift it out of the bowl and tuck the edges down and under, almost like turning the dough inside out. Repeat this 5 times until the top is tight and smooth.
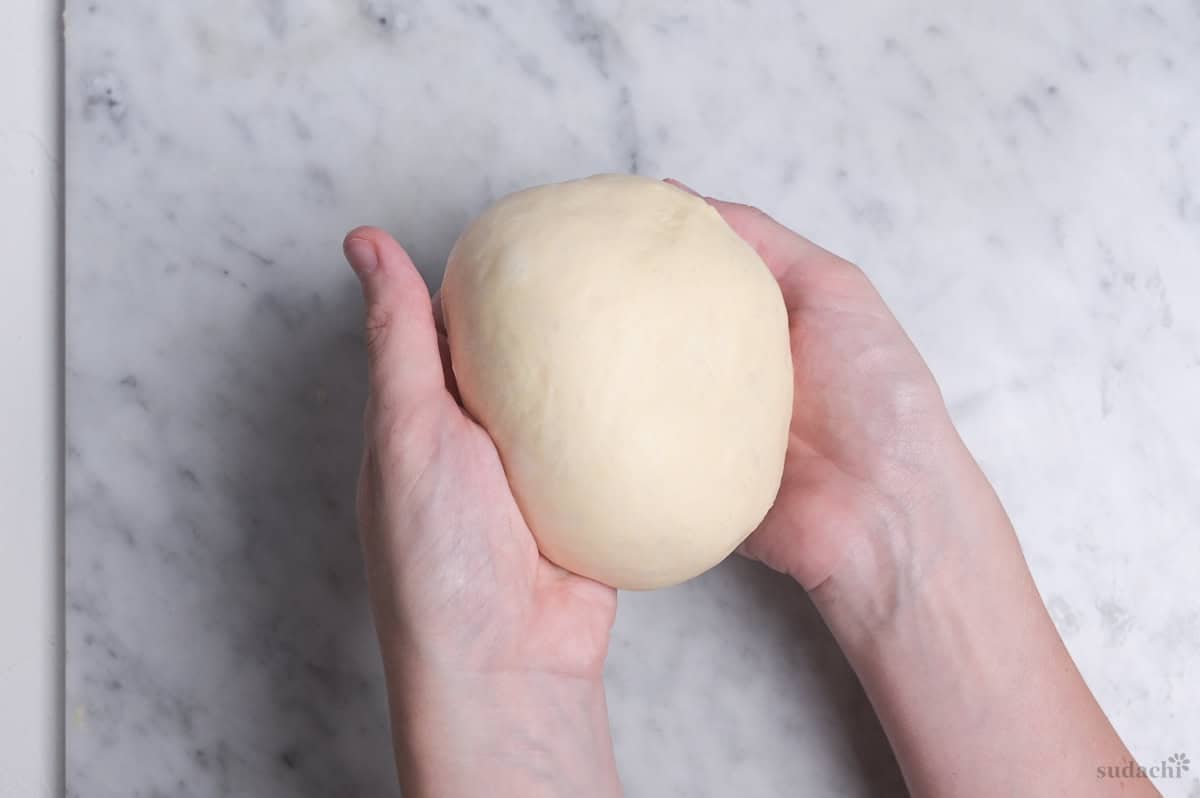
iii. Pinch the base of the dough, return it to the bowl and cover. Rise again until about 1.5x the original size, about 20-30 minutes.
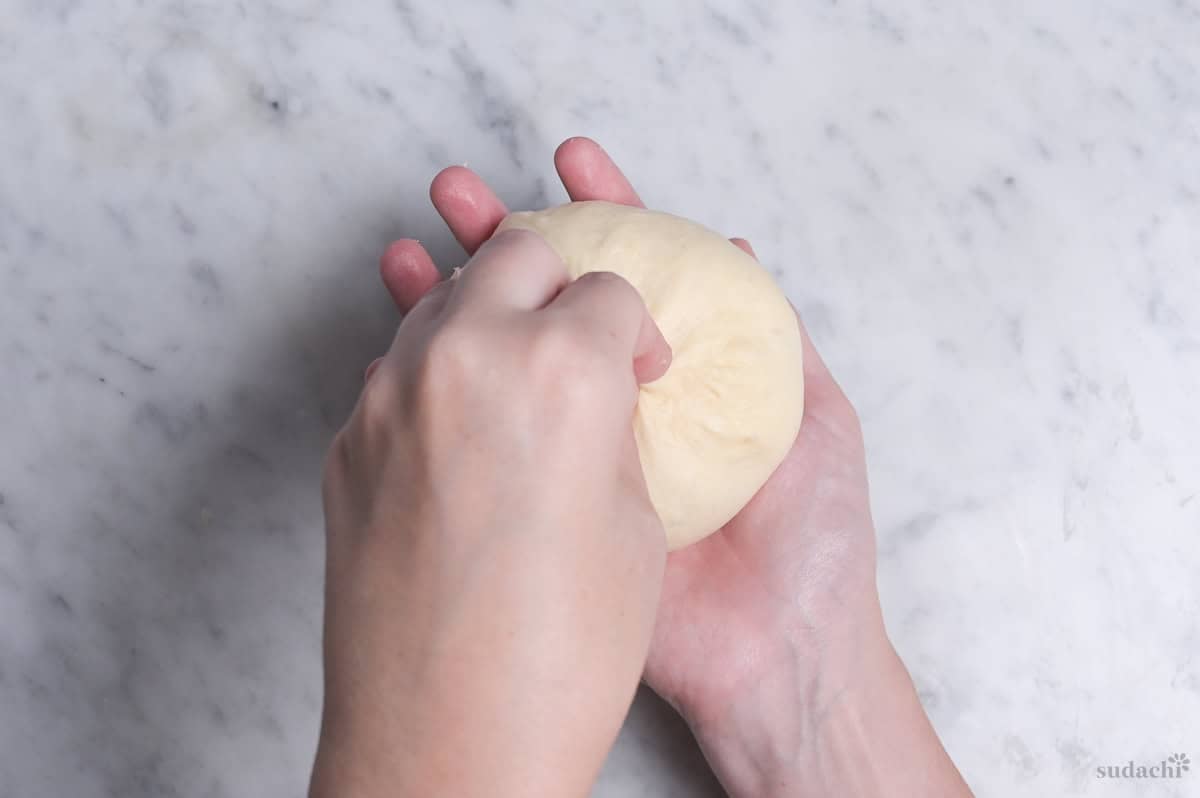
An extra rise relaxes the gluten that gets tightened during degassing and re-rounding so that the dough divides and shapes cleanly. This creates a more even final rise that is supposed to expand more predictably once the cookie is placed on top.
i. Degass the dough once more, weigh it and divide into 6 equal pieces (about 45g / 1.58 oz each). Roll into balls and rest under the damp tea towel or plastic wrap for 15-20 minutes.
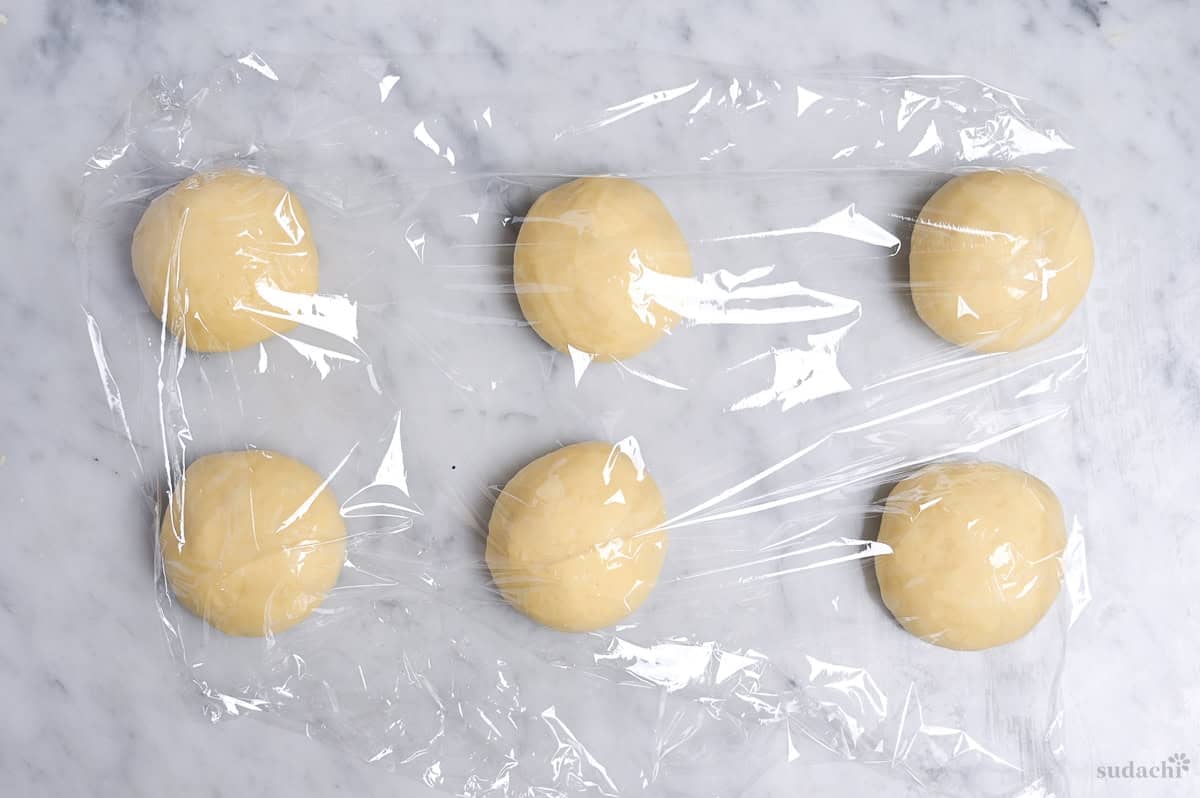
ii. While you wait, take the cookie dough from the fridge and divide into 6 equal pieces, about 35g (1.23oz) each. Roll into balls.
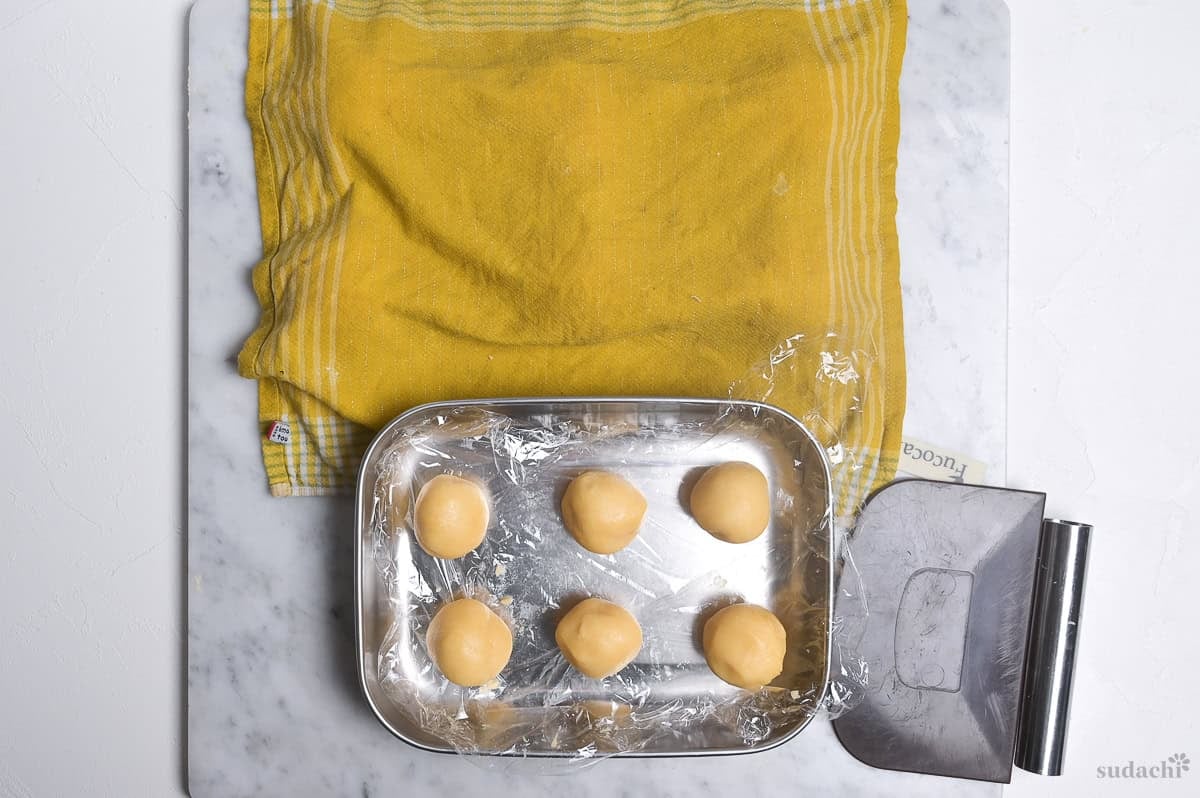
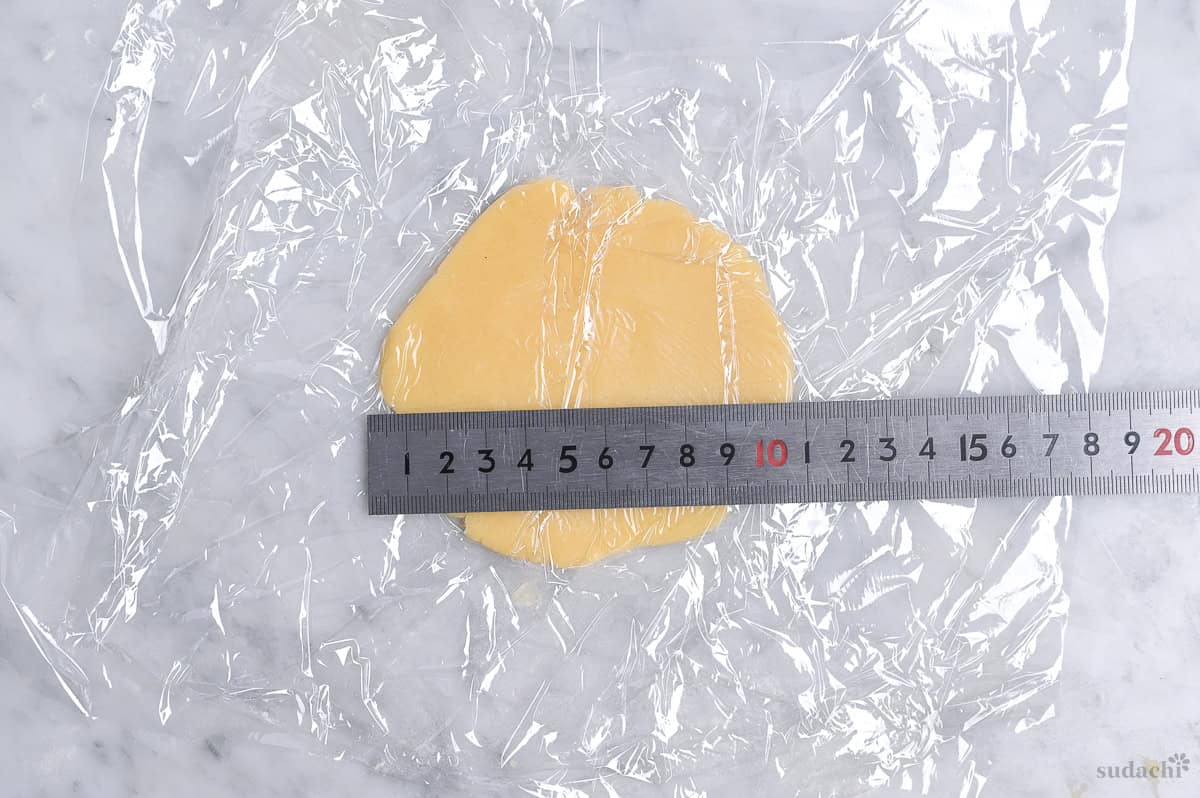
iii. Place a ball of cookie dough between two pieces of plastic wrap and press it down with your palm. Roll it into a circle about 10cm in diameter (4 inches across) and about 3-4mm thick.
iv. Stack them in a container until the bench time is over.
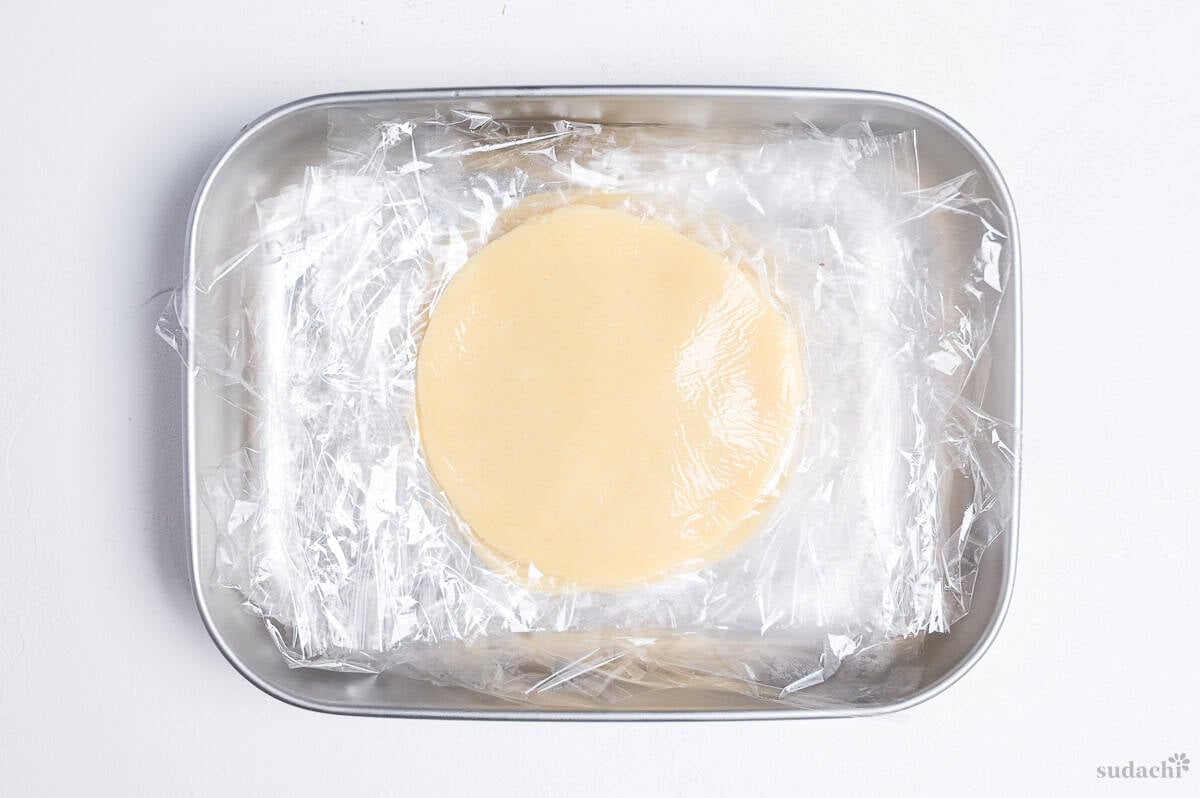
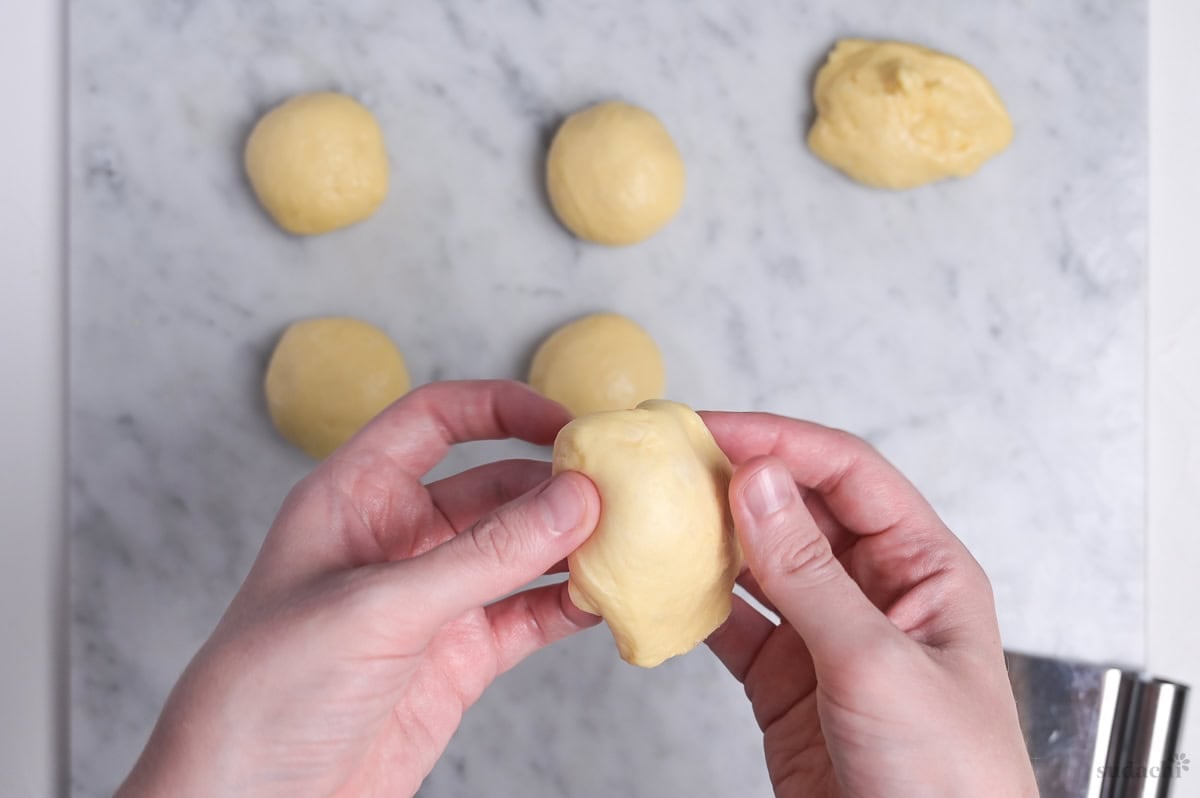
i. Lightly dust your hands and work surface with flour. Press the dough balls to degas again, and reshape into tight balls. Pinch the base to seal.
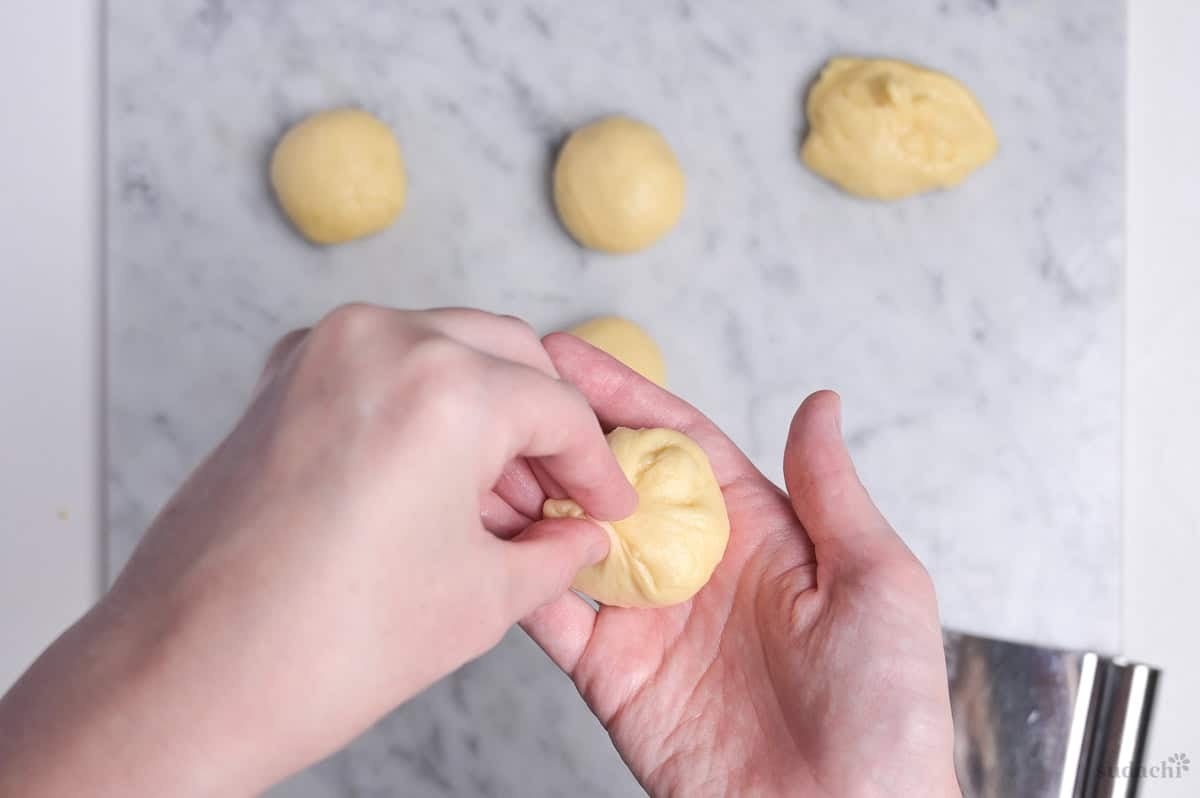
ii. Take a piece of cookie dough and peel off the top layer of plastic wrap. Place a ball of bread dough in the center and wrap the cookie dough around the edges, leaving the base exposed so there’s room to expand for the final rise.
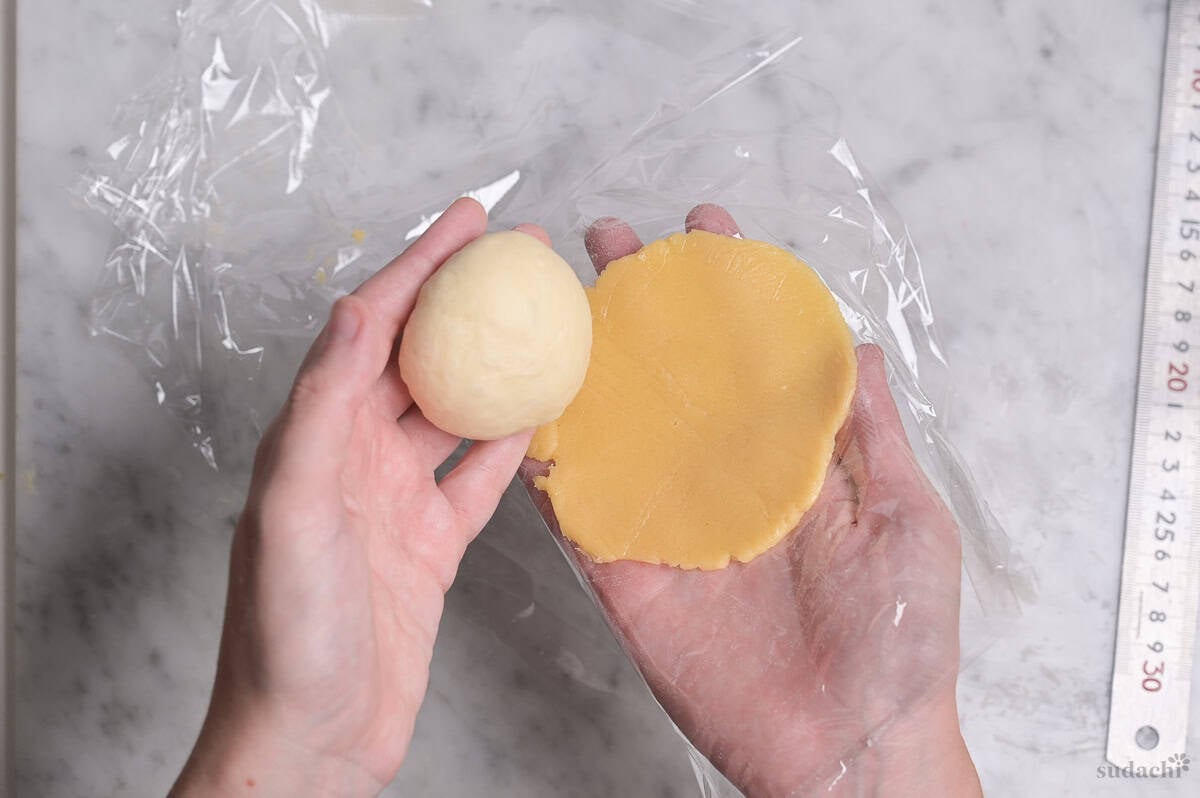
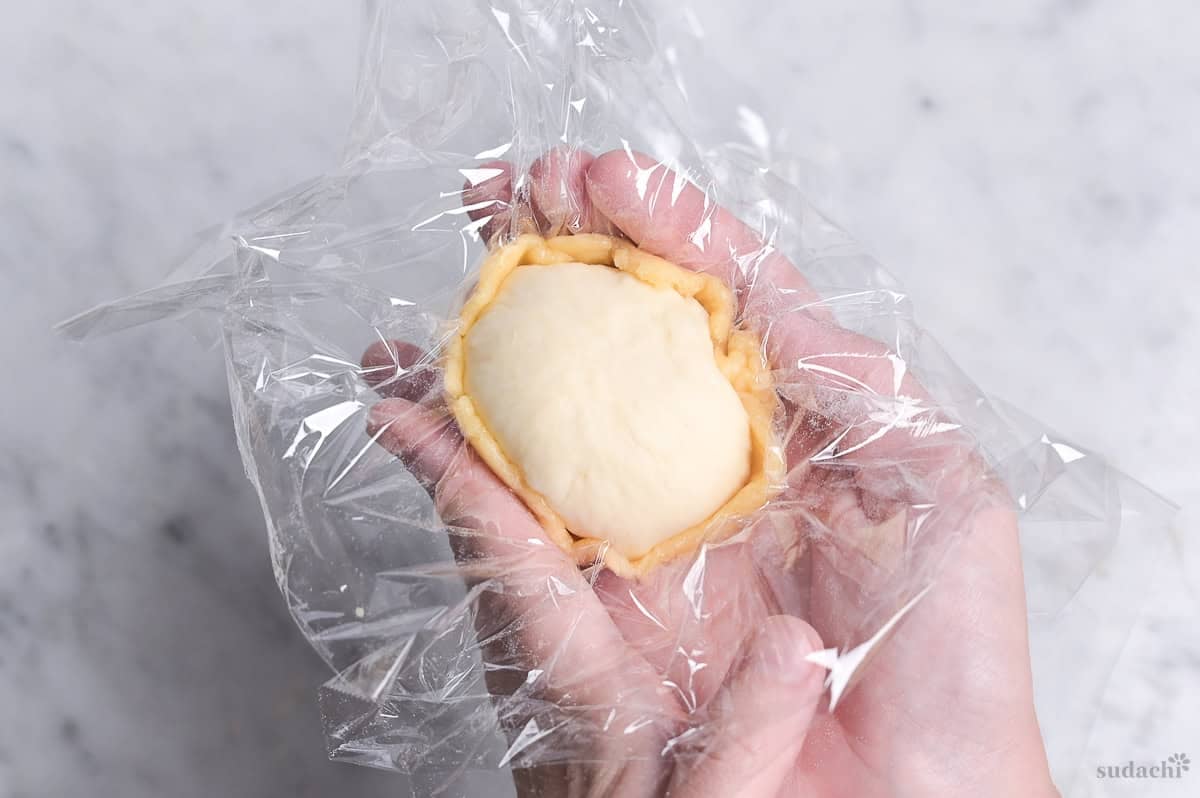
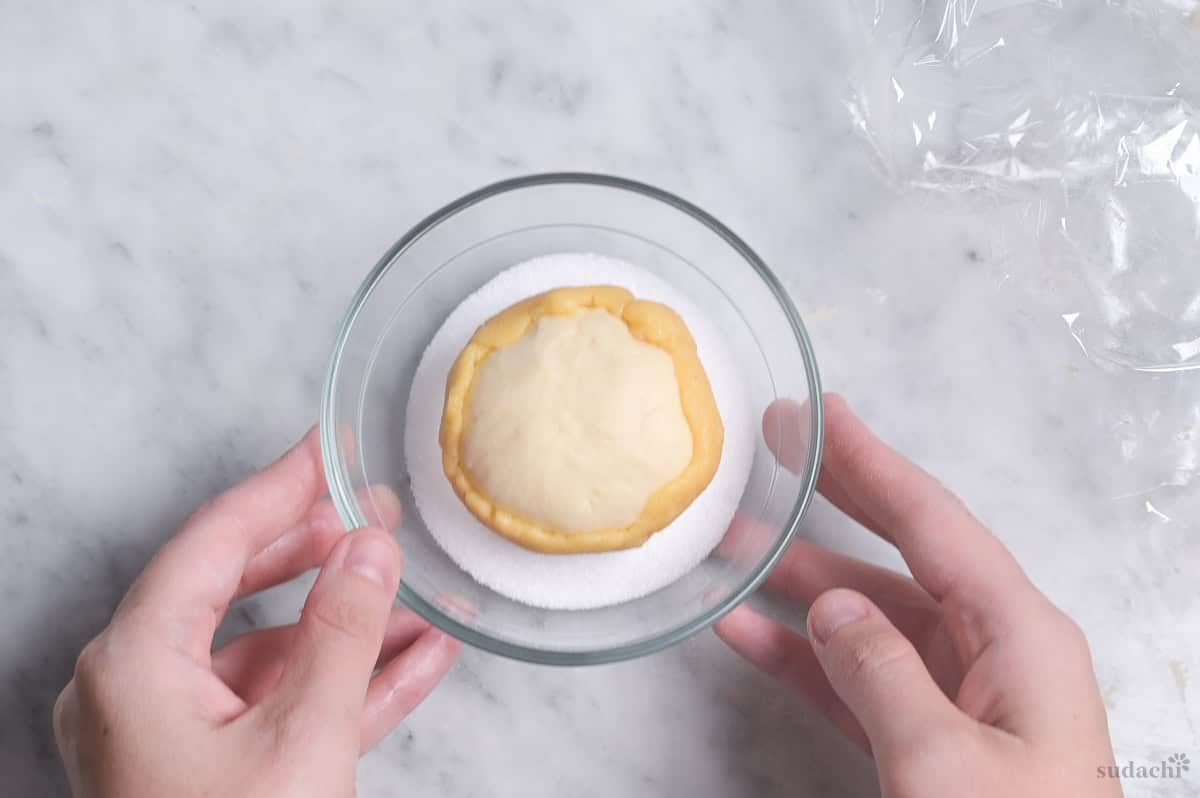
iii. Pour granulated sugar in a small bowl. Carefully remove the plastic wrap and roll the cookie side in the sugar until it has a thin even coating.
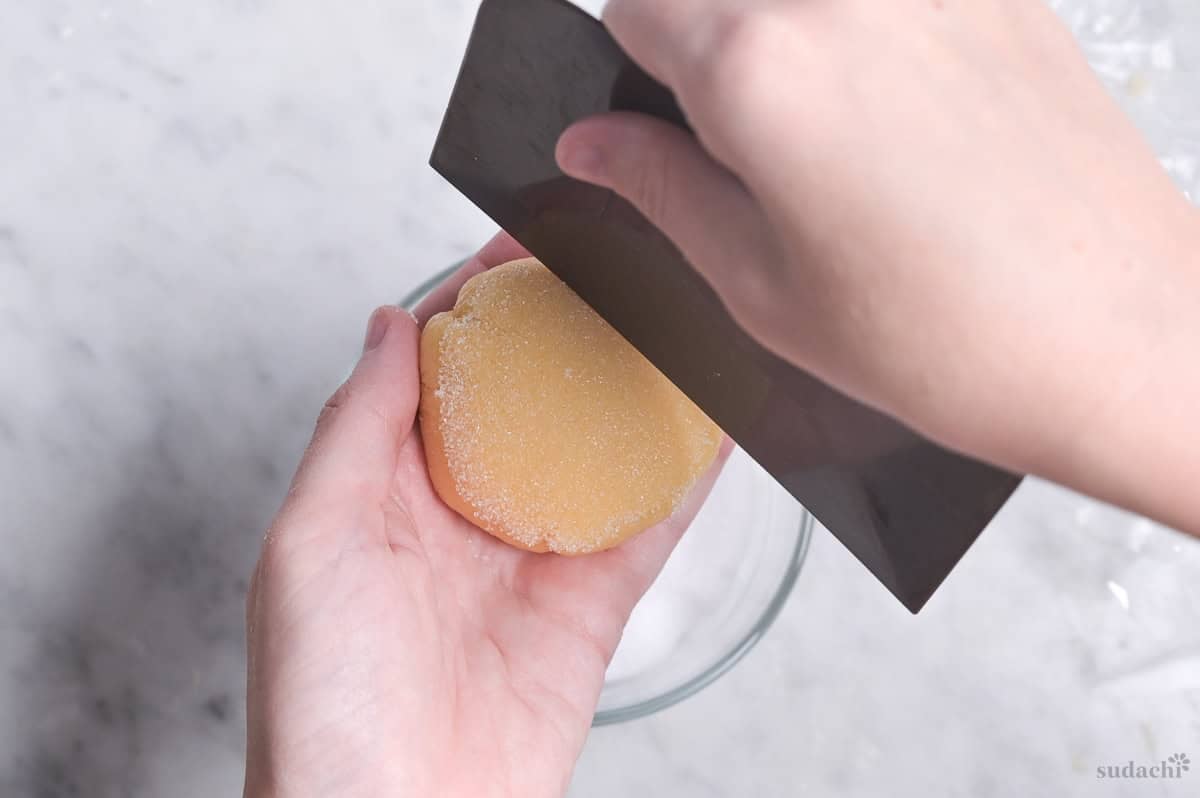
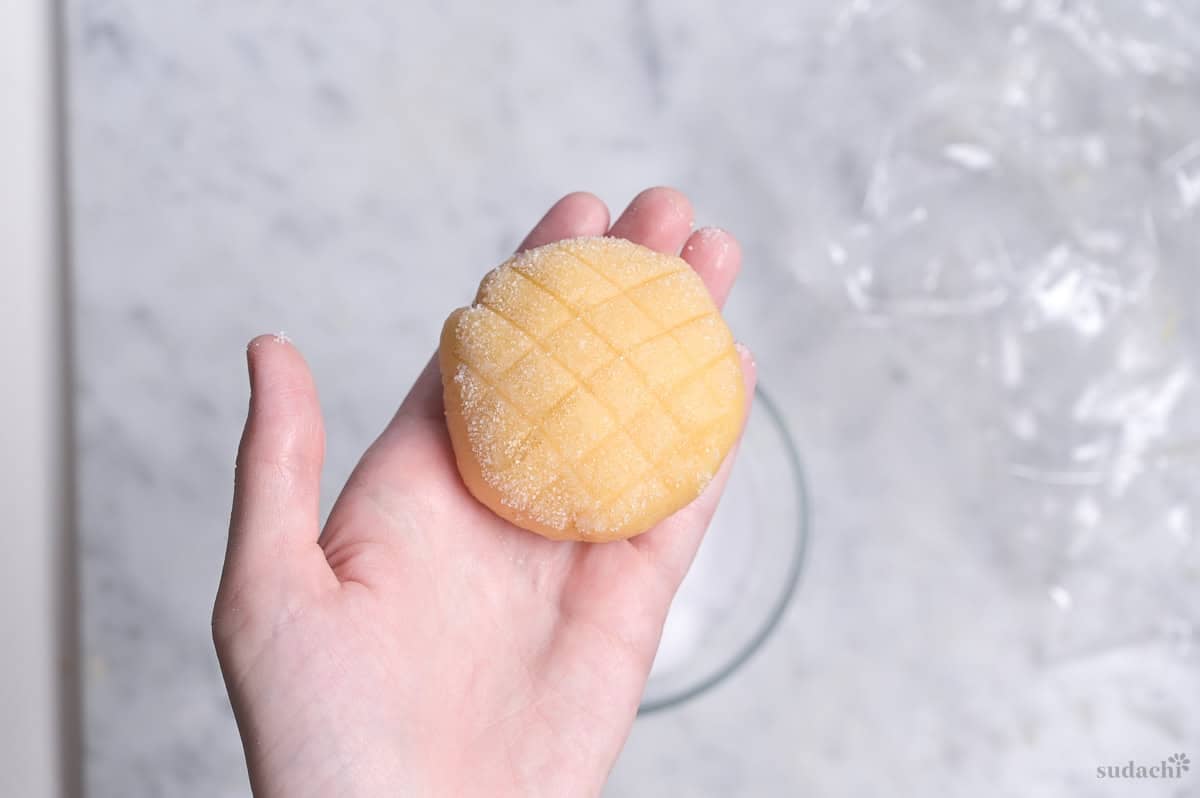
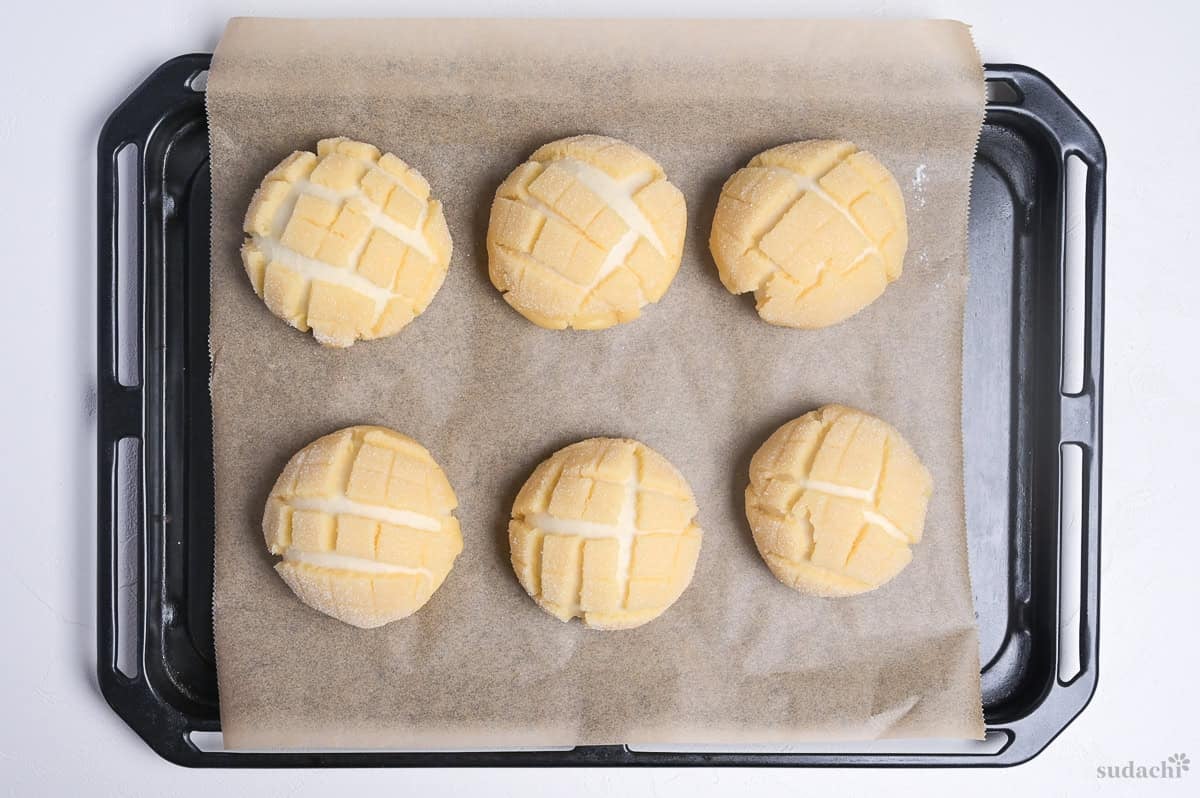
iv. Using a bench scraper or cutlery knife, press 4-5 lines horizontally and vertically in a crosshatch pattern on the top. Do not drag the knife, just press it halfway through the cookie dough.
This pattern is not just for decoration. When the bread dough expands during the final rise, the cookie dough will tear. The incisions create weak points, which will create intentional tears in lines rather than random cracks.
v. Arrange each melon pan spaced apart on a lined baking tray. Leave to rise uncovered at room temperature until 1.5 times bigger than the original size and the cookie dough is starting to tear (about 45 minutes – 1 hour).
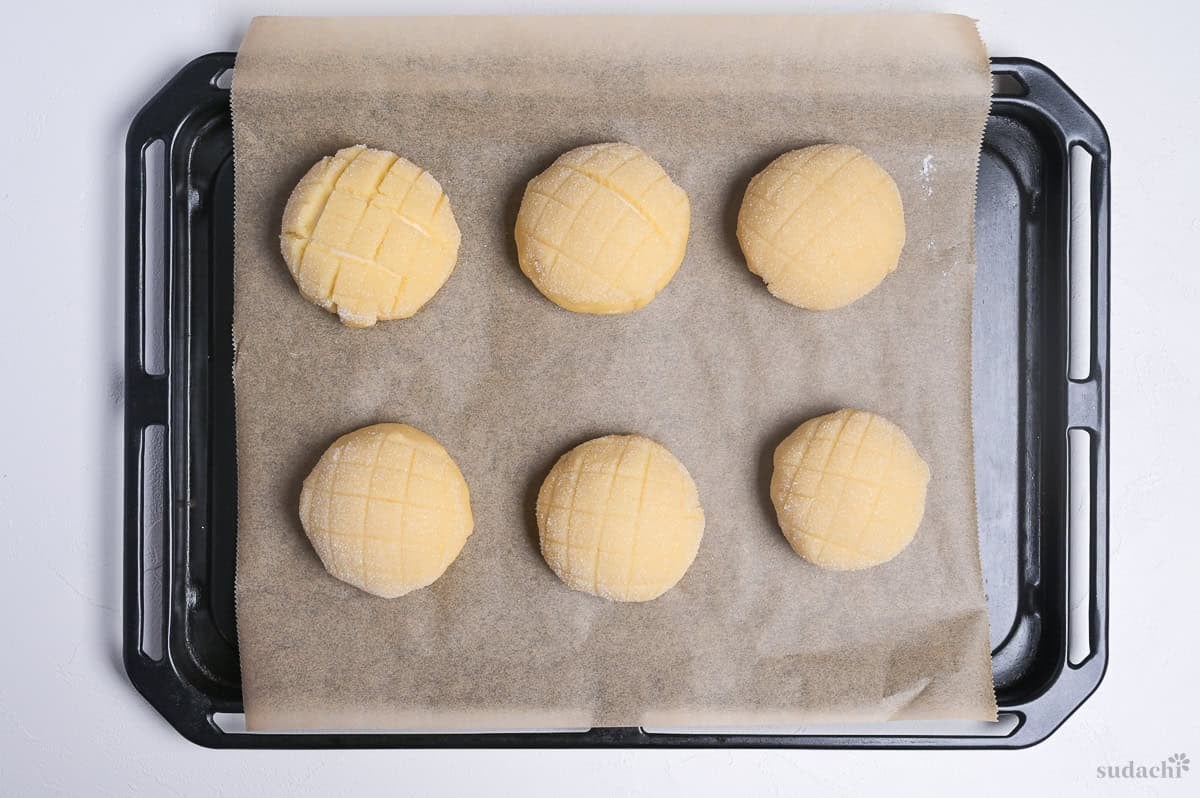
Don’t wait for them to finish rising before heating the oven. If your oven takes a long time to reach the correct temperature, preheat early. I usually start heating about 20 minutes after final shaping.
i. Preheat your oven to 200°C (392°F). Once the melon pan have grown 1.5x bigger and the cookie dough has started to tear, place them in the oven and reduce the temperature to 190°C (374°F).
Bake for 10-12 minutes, and turn the tray halfway through for more even baking.
ii. Take them out of the oven and transfer to a wire rack to cool slightly.
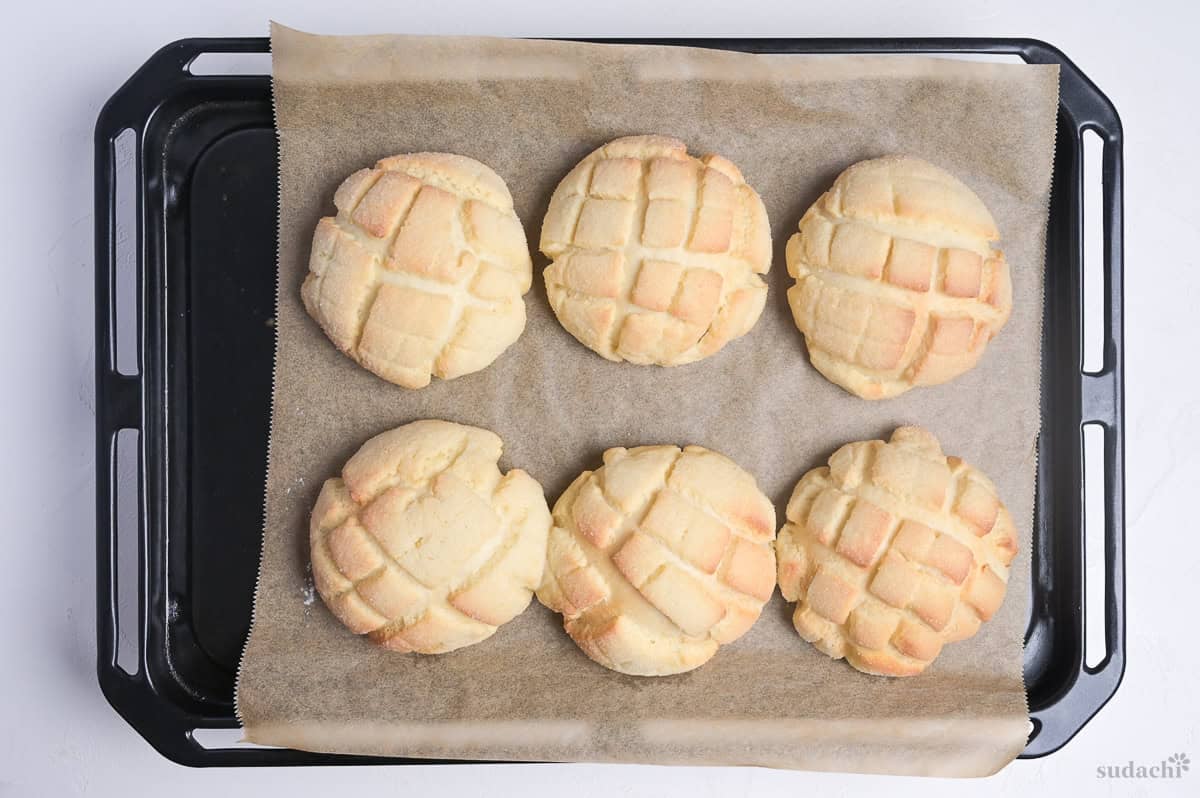
Enjoy them while they’re still warm!
If you follow the default recipe, it will make 6 melon pans.
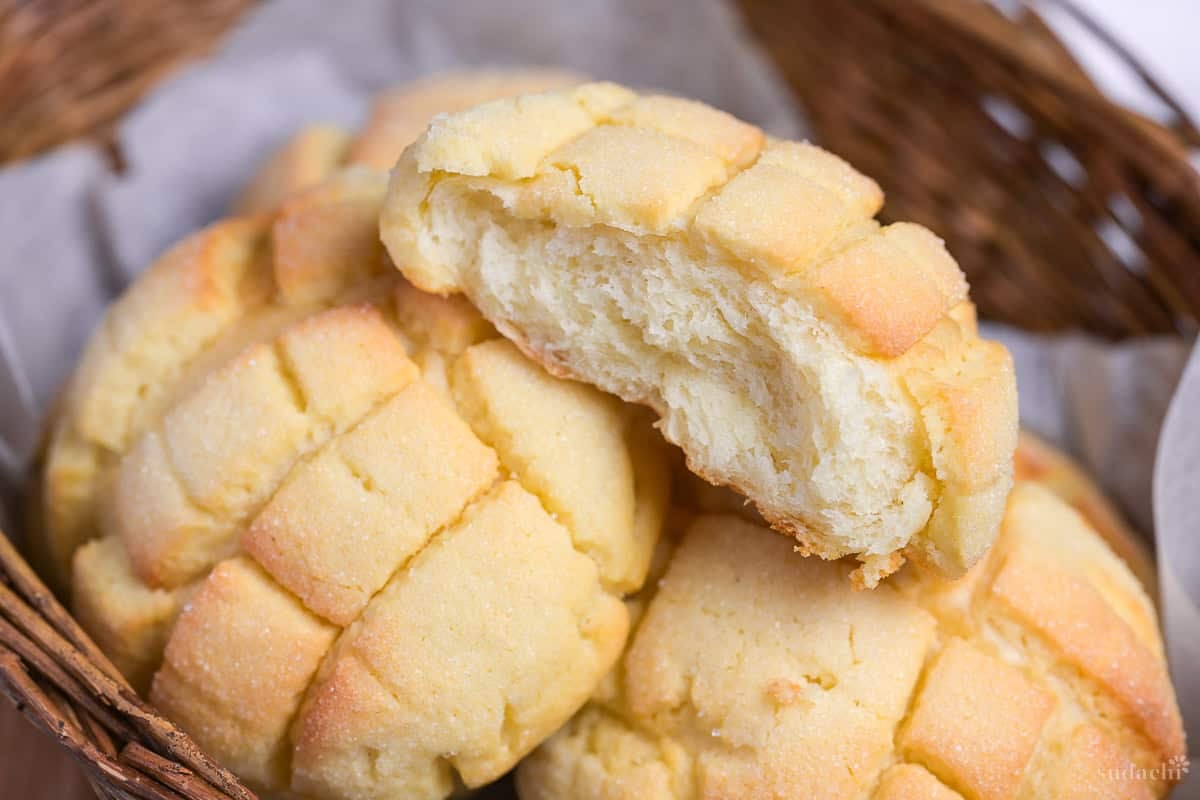

Tips for the Best Melon Pan
- Use digital kitchen scales to weigh your ingredients for best accuracy and consistent results.
- Make the tangzhong and cookie dough the night before and store in the fridge to save time on the day you make them. Be sure to bring the tangzhong to room temperature before use.
- Avoid adding extra flour when kneading the dough. It will be tempting in the beginning when the dough is very sticky but that is normal. It will become more manageable as you knead.
- Before you add the butter, make sure the dough passes the windowpane test (stretches thin enough to see light through without tearing).
- Base the rising time on the look and feel of the dough, not the clock. First rise should almost double in size, second and final rise should increase by about 1.5x.
- Preheat your oven early, about halfway through the final rise, or earlier your oven takes a long time to heat up.
- Cool fully before storing in an airtight container at room temperature and consume within 1-2 days.
- Refresh the cookie tops by warming them in the oven for 5-6 minutes if you eat them the next day (they soften overnight).
- Freeze them to preserve the texture of crunchy cookie and soft bread.
With these simple tips in mind, you’re set for success every time you make Japanese melon pan.
Storage & Meal Prep
Room temperature: Cool fully before storing in a sealed container (warm bread in a sealed container will make the cookie tops turn soft and soggy).
Freezer: Airtight container, 1-2 months.
What you can prepare in advance: Make the cookie dough and tangzhong the night before and store in the fridge. Bring the tangzhong to room temperature before use.
Reheating: Thaw in the microwave and bake in the oven for 5 minutes to re-crisp the cookie tops.
Melon Pan Troubleshooting
The scoring on the cookie dough is not just for decoration, it’s there to help control where the cookie cracks when the bread expands during the final rise and baking. If you don’t score it enough, it might break in places you didn’t intend. I recommend more incisions rather than less.
It can also be caused by rolling the cookie dough thin, or over-proofing the buns (when they expand too far). Roll the cookie dough about 3-4mm thick and make sure to preheat your oven early so that it’s ready as soon as proofing has finished.
I developed this recipe using a high hydration dough with tangzhong specifically to make the bread part as soft and light as possible. If it still comes out dense, this could have been caused by inactive yeast, insufficient kneading or the environment is too cold for a good rise.
Test your yeast before you start the recipe to make sure it is still active. Mix 3g of yeast with 4 tbsp warm water and 1/2 tsp sugar. Stir and rest for 5-10 minutes. If it foams, it’s good to use. If nothing happens, replace it.
Knead until the dough passes the windowpane test and rise until almost doubled in size on the first rise, and increased by 1.5x on the second and third.
This can happen if the cookie layer is too thick, it doesn’t have time to become crispy all the way through due to the short baking time of the bread. Roll it about 3-4mm thick.
Keep in mind that the cookie slowly absorbs moisture from the bread, so it naturally turns soft over time. Let them cool completely before storing in an airtight container, trapped heat will make the cookie soft. Store in the freezer if you don’t plan to eat them the same day, this will preserve the texture of both the bread and cookie. Refresh the cookie’s crispiness in the oven for 5 minutes or so.
This is a high hydration dough (80%) so being sticky and difficult to manage is expected in the beginning. Use a bench scraper or a similar flat edged tool to remove it from the work surface. Spread and scoop until it becomes more manageable. Do not add more flour, your bread will become dense. Trust the process, as you knead, it will become less sticky.
I do recommend a thin dusting of flour on your hands and work surface during the final shaping.
More Japanese Bread Recipes
- Anpan (Japanese Red Bean Buns)
- Cream Pan (Japanese Custard Buns)
- Nama Shokupan (Bakery Style Milk Bread)
- Mushi Pan (Japanese Steamed Cakes)
Hungry for more? Explore my Japanese bread recipe collection for more ideas for your next bake!
Did You Try This Recipe?
I would love to hear your thoughts!
💬 Leave a review and ⭐️ rating in the comments below. 📷 I also love to see your photos – submit them here!
Japanese Melon Pan

Ingredients
Tangzhong
- 25 g bread flour
- 120 g water
Cookie Dough
- 40 g unsalted butter
- 50 g granulated sugar
- 20 g whisked egg reserve the leftover egg for the bread dough
- 2 drops vanilla essence
- 70 g all-purpose flour
- 30 g almond flour or all purpose flour
- ⅛ tsp baking powder
Bread Dough
- 15 g unsalted butter room temperature
- 125 g bread flour
- 15 g sugar
- 3 g instant dry yeast or double the weight for fresh yeast
- 3 g salt
- 12 g whisked egg
- 5 g honey
- granulated sugar a few tbsp in a small bowl to coat the cookie dough later
The ingredient brands and tools I trust are in my Japanese pantry guide and my cooking tools guide.
Can’t find certain Japanese ingredients? See my substitution guide here.
Instructions
Make the Tangzhong
- Mix 25 g bread flour and 120 g water (cold) together in a pan until smooth. Place the pan on the stove and heat on low while stirring continuously. Once thickened to a paste (around 60 °C (140 °F)) immediately lift the pan off the heat.

- Transfer the tangzhong to a heatproof bowl, cover the bowl and leave to cool to room temperature.
Cookie Dough
- Whip 40 g unsalted butter and 50 g granulated sugar together in a bowl until smooth and pale.
- Add 20 g whisked egg one-third at a time and whip well between each addition, then add 2 drops vanilla essence.
- Fold in 70 g all-purpose flour, 30 g almond flour and ⅛ tsp baking powder until there are no more streaks of dry ingredients.
- Wrap and refrigerate while you make the bread dough.
Bread
- Measure out 15 g unsalted butter and set it aside to come to room temperature. In a large mixing bowl, add 125 g bread flour, 3 g salt, 15 g sugar, and 3 g instant dry yeast. Whisk 12 g whisked egg and 5 g honey together in a separate bowl until combined. Your tangzhong should be cooled by now.
- Add the tangzhong and whisked egg/honey mixture to the dry ingredients and mix everything together thoroughly until it forms a rough dough.
- Transfer the dough out onto a clean dry surface and use a bench scraper to smear the dough across the surface.
- Scrape the dough back up and repeat smearing and gathering in different directions until it becomes stretchy and more manageable.
- Switch to the slap and fold method. Hold the edges of the dough, slap it onto the surface away from you and stretch it back towards you.
- Pull the dough away from you and over itself. Turn the dough 90° and repeat until smooth and passes the windowpane test.
- Spread the dough out into a large rectangle, as big as you can without tearing it, and spread the room temperature butter over the top. Roll it up, then knead until smooth and no longer feels greasy.
- Place the dough in a clean bowl covered with a clean damp tea towel. Leave to rise in a warm draft-free area until doubled in size (approx 1 hour at room temperature.
- Press the dough to degas, then lift it out of the bowl and tuck the edges down and underneath. Repeat 5 times and then pinch the base. The top of the dough should be tight and smooth. Rest again for 20-30 minutes.
- Degas the dough once more, then weigh it and divide it into approximately 45g/1.58 oz pieces. Pull the edges of each piece down and underneath, then gather them into a point at the bottom to make tight balls.
- Loosely cover with plastic wrap and rest at room temperature for 15-20 minutes.
- While you wait, divide the cookie dough into equal pieces (about 35g / 1.23oz) each. Roll into balls, then roll each one between two pieces of plastic wrap until 10cm (4") in diamter. Stack them into a container and keep in the fridge until it's time to shape.
- Lightly dust your work surface and hands with flour and roll each piece of dough flat into a 10cm (4") diameter circles. Tuck the edges back under and pinch into tight balls.
- Take a piece of cookie dough and carefully peel off the top layer of plastic wrap. Place the dough with the pinched side facing up, and wrap the cookie dough around the top, leaving the bottom of the bread dough exposed so there is room to expand.
- Pour granulated sugar into a bowl. Peel the plastic wrap off of the top of the cookie dough and roll it in the sugar.
- Use a bench scraper or cutlery knife to press 4-5 lines horizontally and vertically across the cookie dough to make a crosshatch pattern. Avoid dragging the knife, as this will catch the dough and make the lines messy.
- Arrange the shaped melon pan on baking tray lined with baking paper, leaving plenty of space between each one.
- Leave to rise uncovered until the size has increased by about 1.5x and the cookie dough is starting to tear at the incisions (about 45 minutes). Preheat your oven to 200 °C (392 °F) in advance, well before they finish rising.
- Place the tray in the oven on the middle shelf and lower the temperature to 190 °C (374 °F). Bake for 10-12 minutes or until lightly golden. Turn half way through to ensure even baking.
- Tranfer to a wire rack until cool enough to touch, and enjoy while they're still warm!

Notes
- Once fully cooled, store in an airtight container at room temperature and consume within 1-2 days.
- If you want to eat them the next day, warm them in the oven to refresh the crunchy cookie tops (they soften overnight).
- If you don’t plan to eat them the same day, freezing is the best way to store them.
- Make the tangzhong and cookie dough the night before and store in the fridge, bring the tangzhong to room temperature before use.
- Avoid adding any flour when kneading the dough. It will be tempting in the beginning when the dough is very sticky but that is normal. It will become more manageable as you knead.
- The dough should pass the windowpane test (stretches thin enough to see light through without tearing) before adding the butter.
- Enriched doughs take longer to rise because the sugar, egg, and butter are working against the yeast. Base the rise on the size and feel of the dough, not the time it takes. First rise should almost double in size, second and final rise should increase by about 1.5x.
- Preheat your oven early, about halfway through the final rise, or earlier your oven takes a long time to heat up.

Leave a rating and a comment