


Disclaimer: This post may contain Amazon affiliate links. Sudachi earns a small percentage from qualifying purchases at no extra cost to you. See disclaimer for more info.
Featured Comment:
Made this cake so many times! Absolutely delicious every time (even if I messed up a little😂) Thank you!❤
– @emilyguo1933 (from YouTube)
What is Matcha Roll Cake?
Roll Cake (ロールケーキ) also known as Swiss roll or Jelly roll in other countries, is a type of light sponge cake filled with cream, chocolate, or jam and then rolled into a cylinder. While the original Swiss roll comes from central Europe, this light and fluffy treat is well-loved all over the world and is especially appreciated in Japan, where it can be found in specialist cake shops and bakeries in a variety of different flavors.
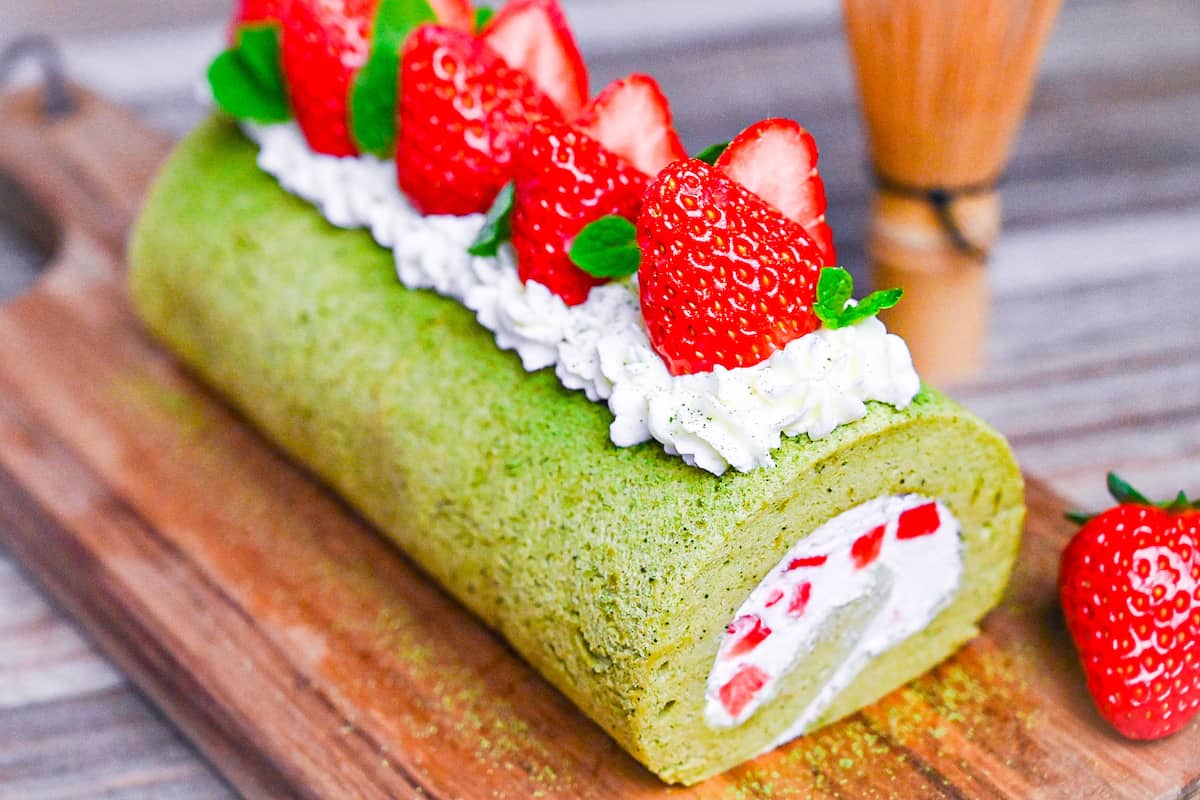
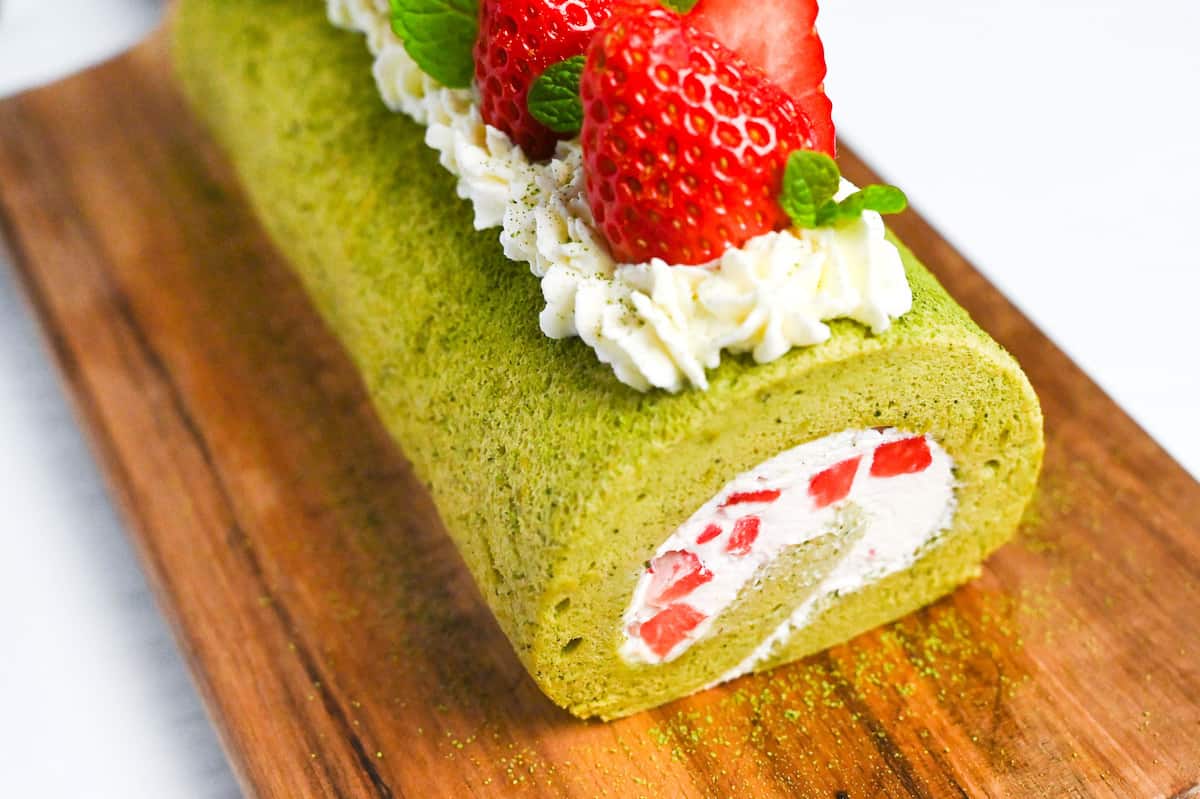
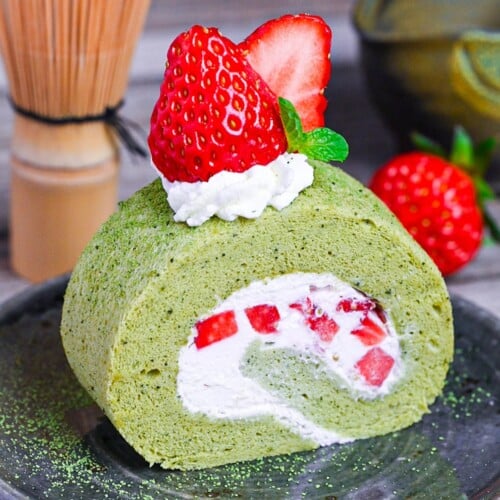
Matcha Roll Cake in particular infuses the subtle earthy flavor of green tea powder into the roll cake’s sponge creating a delightful dessert with a Japanese twist. The taste of matcha goes especially well with fresh cream, vanilla, and strawberries, so I’ve incorporated all of these elements into my recipe!
What makes Japanese Roll Cake Different?
While Japanese roll cakes might look similar to other Swiss rolls from other countries, there are a few subtle differences. Firstly, Japanese roll cakes are not as sweet as their Western counterparts, and this is true for most Japanese desserts in general.
Secondly, the filling is nearly always cream and rarely jam, I have never seen a jam roll cake in Japan. Instead, they are often filled or decorated with fresh fruits such as strawberries, kiwi, grapes, mikan orange, etc. Fresh fruits are quite expensive in Japan and are considered a luxury, often given as gifts. With this in mind, roll cake is not an everyday cake and is seen more as a special occasion cake for celebrations such as birthdays or Christmas.
Lastly, Japanese roll cakes come in some unusual flavors, see more below!
Unusual Roll Cake Flavors in Japan
While the classic flavors are the most popular (vanilla or chocolate), there are also many more unusual flavors of roll cake that you might only find in Japan. Some examples might be:
- Matcha (green tea powder)
- Kinako (roasted soybean flour)
- Hojicha (roasted green tea)
- Kocha (black tea)
- Kurogoma (black sesame)
- Purin (flan)
- Sakura (cherry blossom)
Matcha is definitely my favorite from the list, and I hope you enjoy it too. If you’ve tried any unusual roll cake flavors in Japan or your home country, share them in the comments below!
Ingredients & Tools
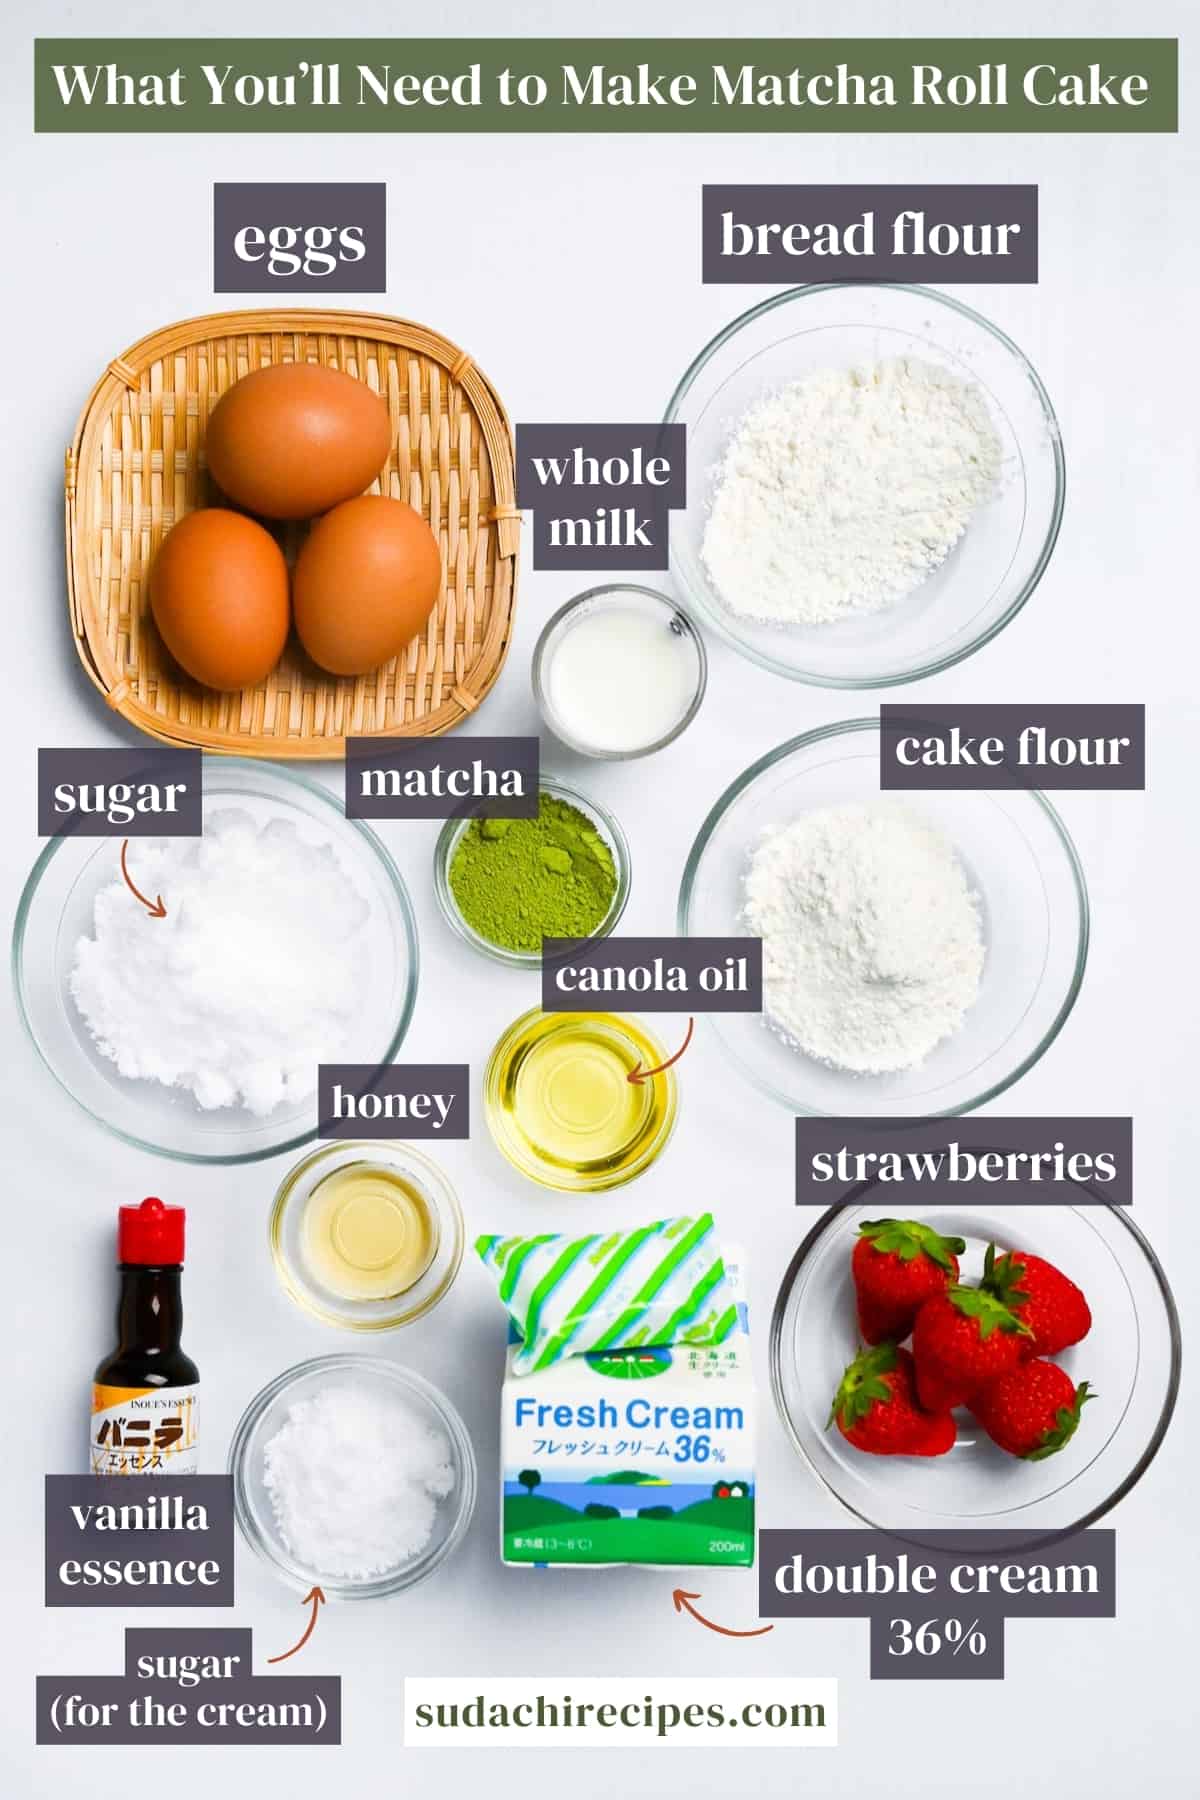
- Flour – I use a combination of cake flour and bread flour to create a light and fluffy result with flexibility. Of course, feel free to use regular all-purpose flour and avoid using only bread flour.
- Sugar – White caster sugar is used to whip meringue and flavor the cream. I opt for caster sugar since it has a simple sweetness and dissolves easily.
- Eggs – The eggs are separated and used to make the base batter and meringue. I recommend separating them while cold and then bringing to room temperature before you start the recipe.
- Matcha – Matcha green tea powder is used to add subtle flavor and vibrant color to the sponge. Opt for a good quality culinary matcha, no need to splash out on the highest grade for this.
- Whole milk – Adds moisture to the sponge and helps make the texture more tender.
- Honey – Adds a slight stickiness to the texture which improves flexibility when rolling.
- Oil – Using oil rather than butter makes the sponge more flexible, making it less likely to crack or break when rolled.
- Double Cream – Used to fill and decorate. I recommend using 36% milk fat or higher for a rich and creamy filling.
- Strawberries – Fresh strawberries are a delightful pairing with matcha and are great for decorating, but feel free to use other fruits of your choice such as raspberries or cherries instead. I recommend berries with a slight tart flavor over tropical fruits or citrus. For a more traditional pairing, try adding some anko or boiled adzuki beans!
- Vanilla essence – Another flavor that goes great with matcha! If using vanilla extract, make sure to half the amount.
As for tools, I’ve made this recipe in both a 25x25cm (approx 10×10″) and 22x26cm (8.5×10″) square or rectangular baking pan and it’s worked well, but if you are using a standard US jelly roll pan (10×15″) you will need to multiply the ingredients by 1.5. You will also need baking parchment and plastic wrap. A piping bag with a star nozzle is optional for decorating.
When selecting matcha powder, choose one that is bright green, vibrant, and smells fresh. Dull matcha is either old or low quality and won’t taste good. I always recommend buying matcha in small quantities and using it up within about one month. The color and flavor will deteriorate over time so there’s no need to buy it in bulk. Once opened, store in a light-blocking airtight container, refrigeration will help maintain the color and flavor.
Visual Walkthrough & Tips
Here are my step-by-step instructions for how to make Matcha Roll Cake at home. For ingredient quantities and simplified instructions, scroll down for the Printable Recipe Card below.
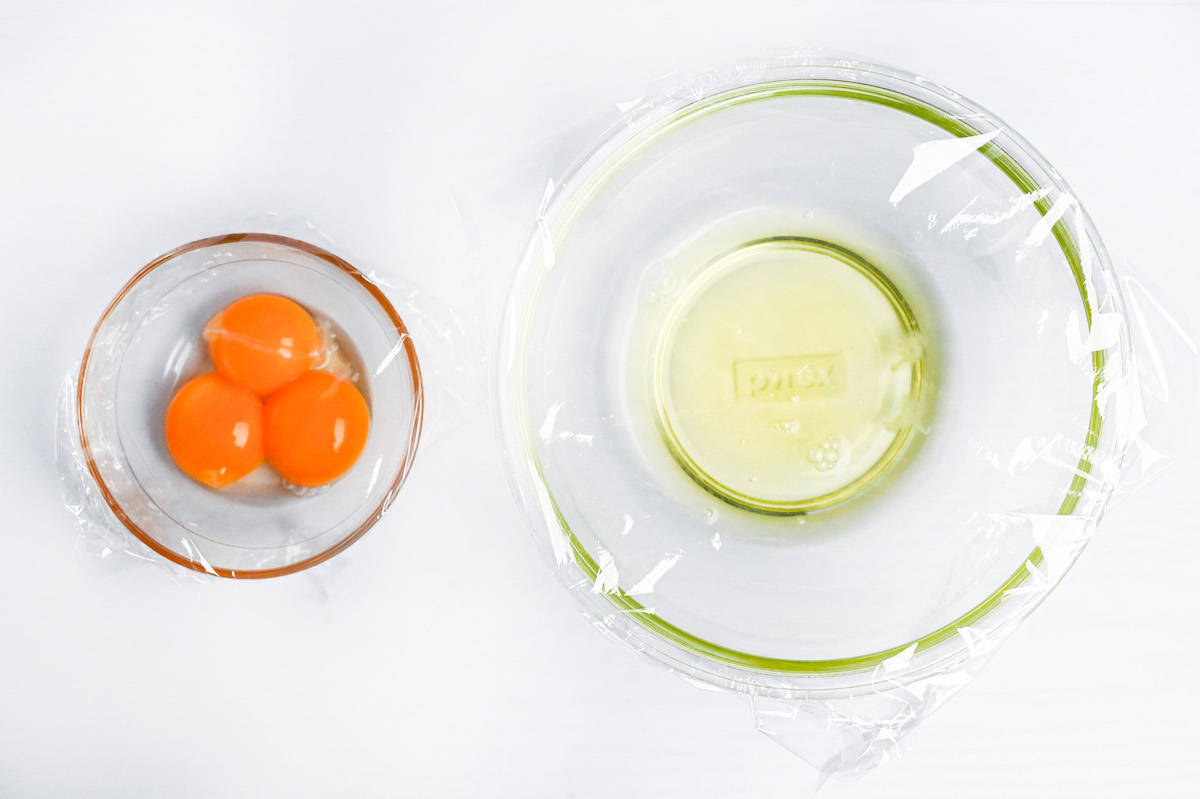
Take your eggs from the fridge and separate the yolks and whites while they’re still cold. Make sure the whites are in a clean, dry bowl suitable for making meringue. Cover the bowls to stop them from forming a skin and let them come to room temperature for about 20 minutes.
Use this time to measure out your other ingredients. Apart from the cream and strawberries, it is better if all your ingredients are room temperature so that they are easier to mix together.
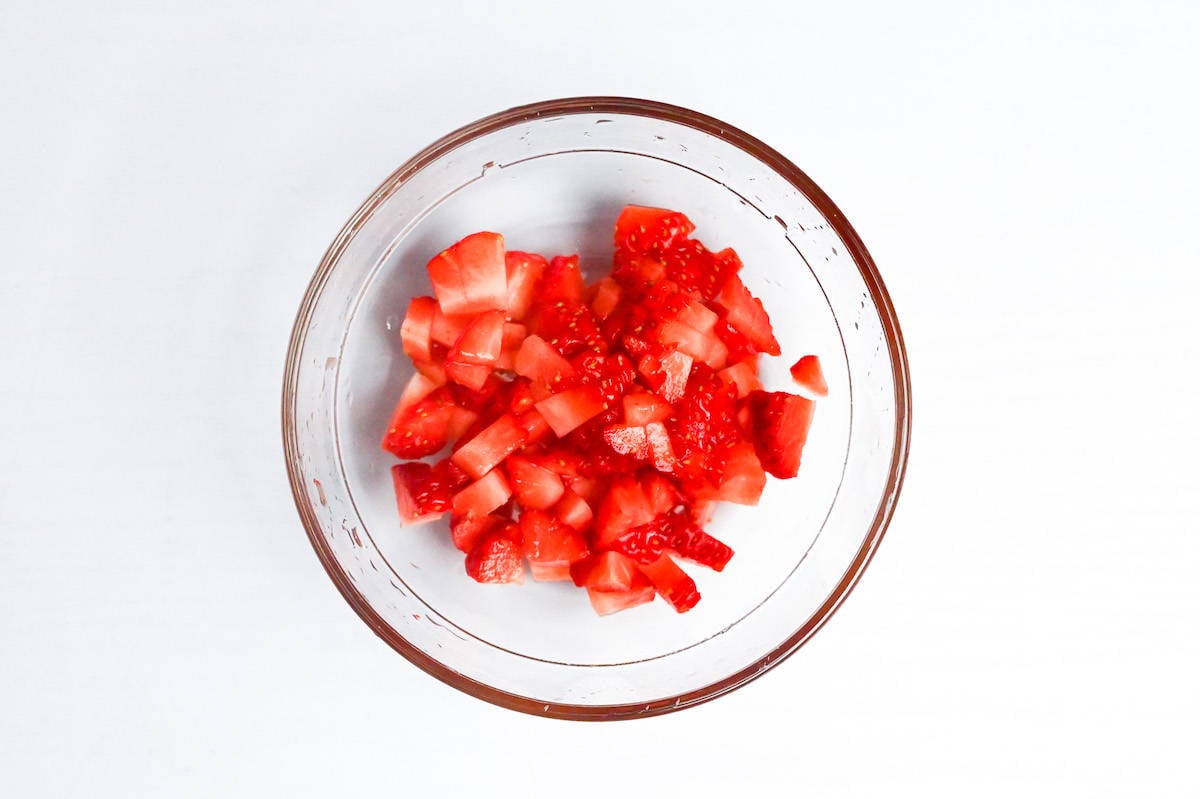
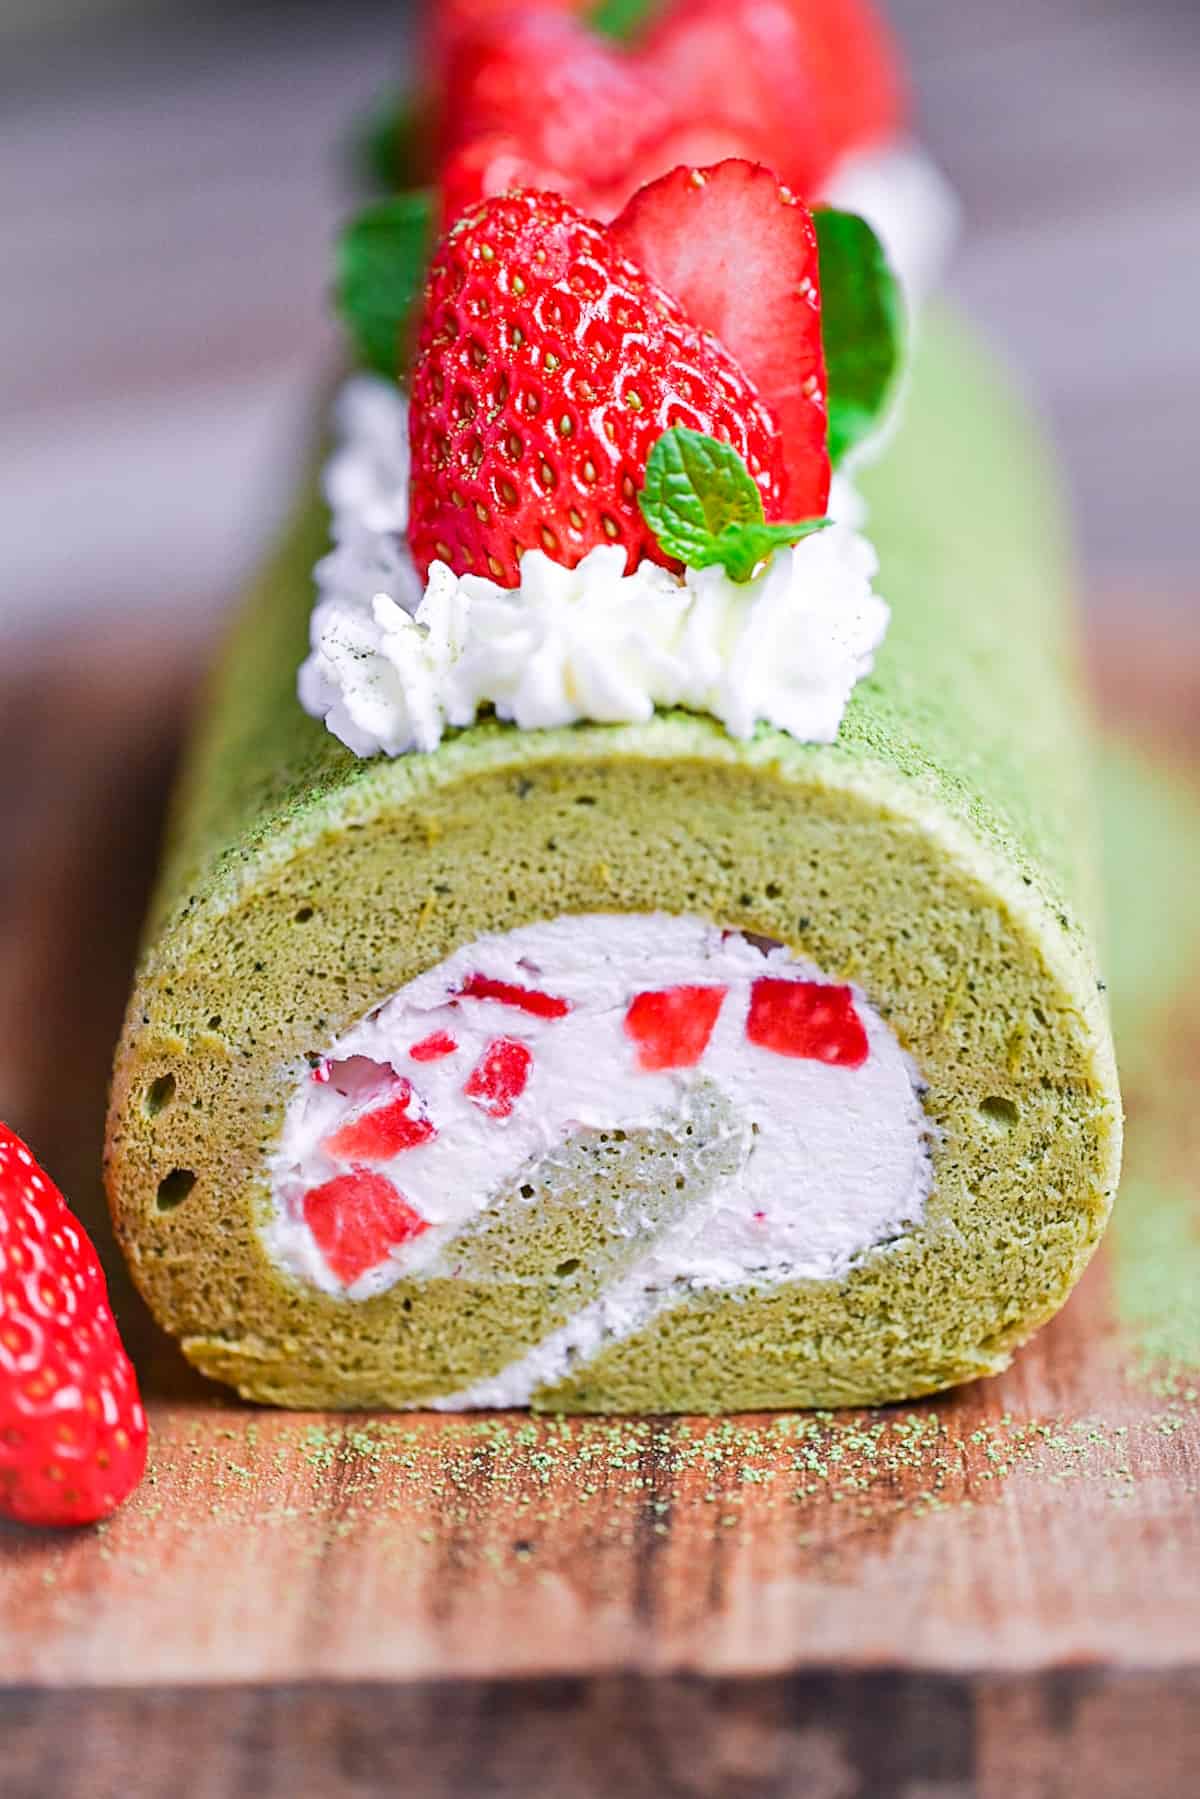
Wash and dry your strawberries, then finely dice half of them for the filling. The smaller the dice, the easier it will be to roll your cake. Keep the strawberries and cream in the fridge until it’s time to assemble.
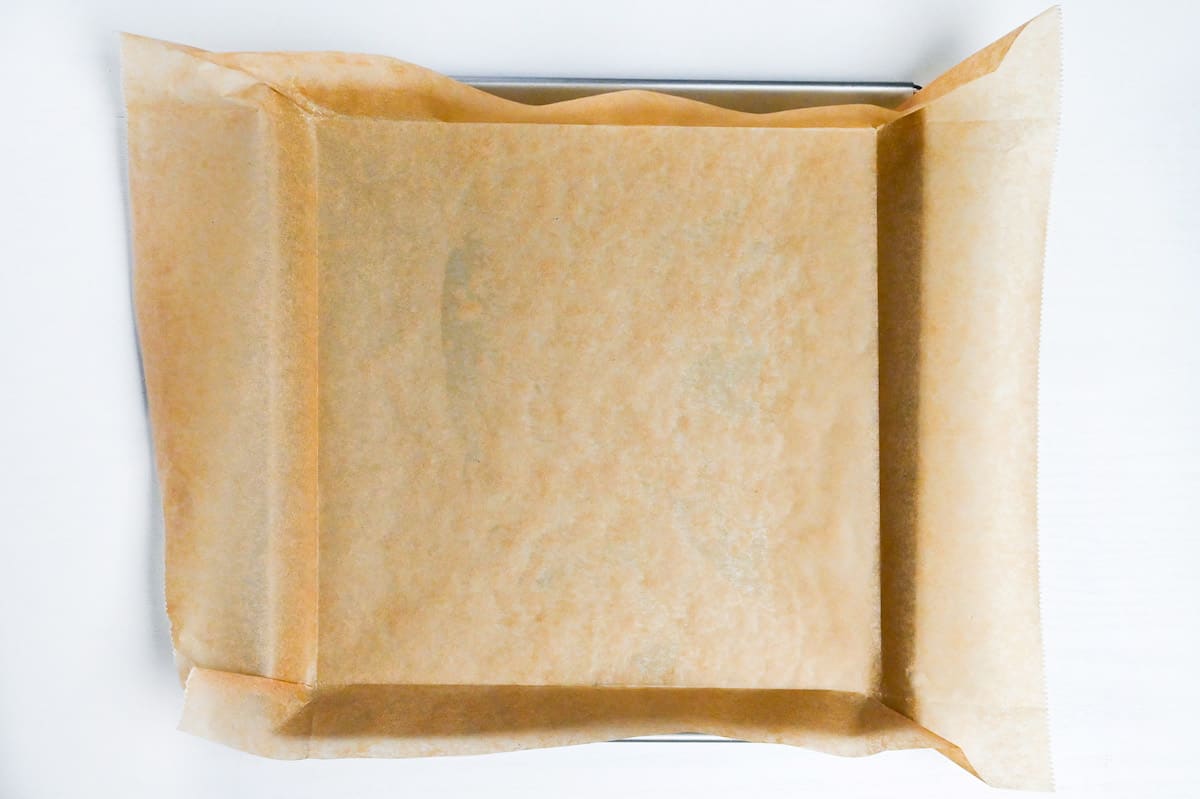
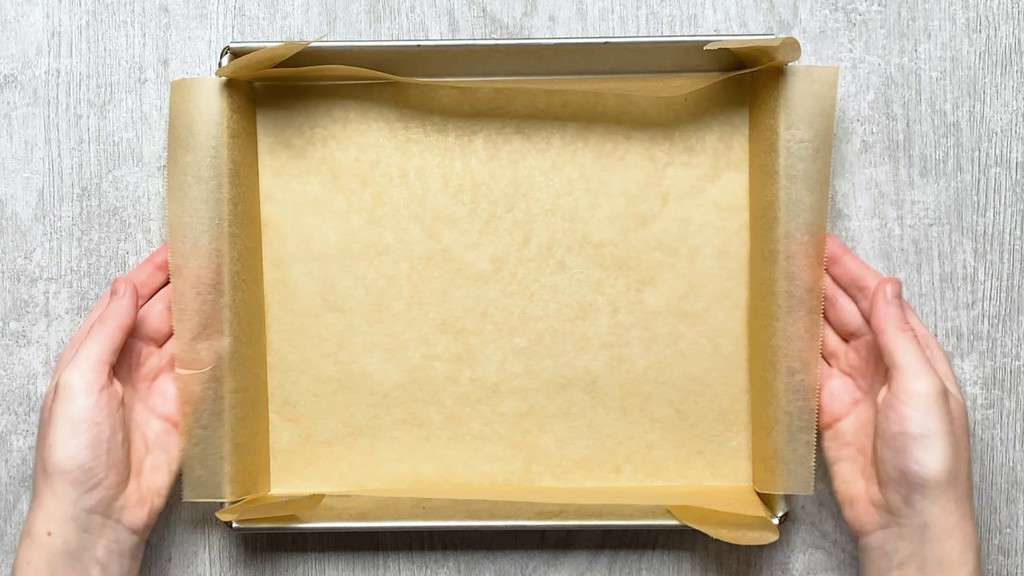
Line your pan with baking parchment and make sure it hangs over the edges, this will make it easier to remove the sponge once it’s baked.
I mentioned earlier that I’ve made this recipe in 25x25cm (approx 10×10″) and 22x26cm (8.5×10″) square or rectangular baking pans, but if you are using a standard US jelly roll pan (10×15″) you will need to multiply the ingredients by 1.5
Make the Sponge
Start preheating your oven to 160°C (320 °F) fan. (A higher setting might be required for conventional oven.)
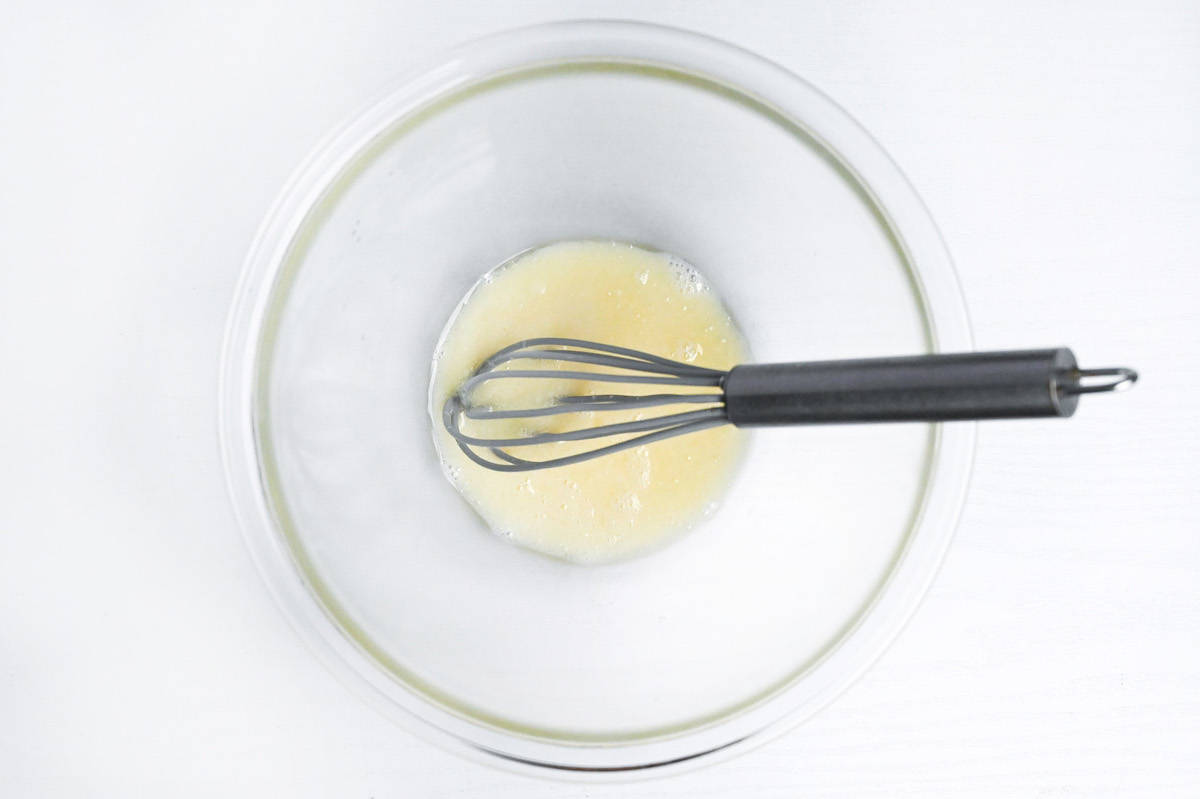
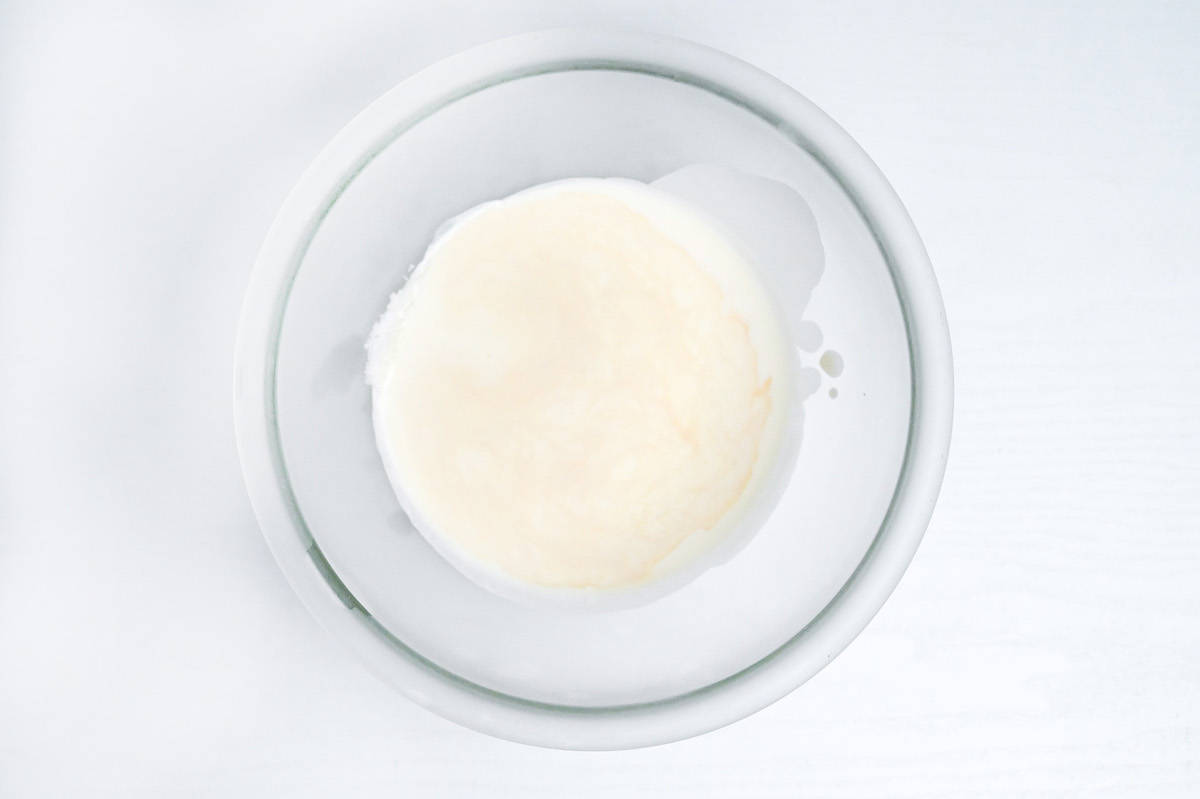
Add the whole milk, canola oil and honey to a heatproof bowl and microwave for 20 seconds at 600W. Whisk thoroughly and then add the egg yolks.
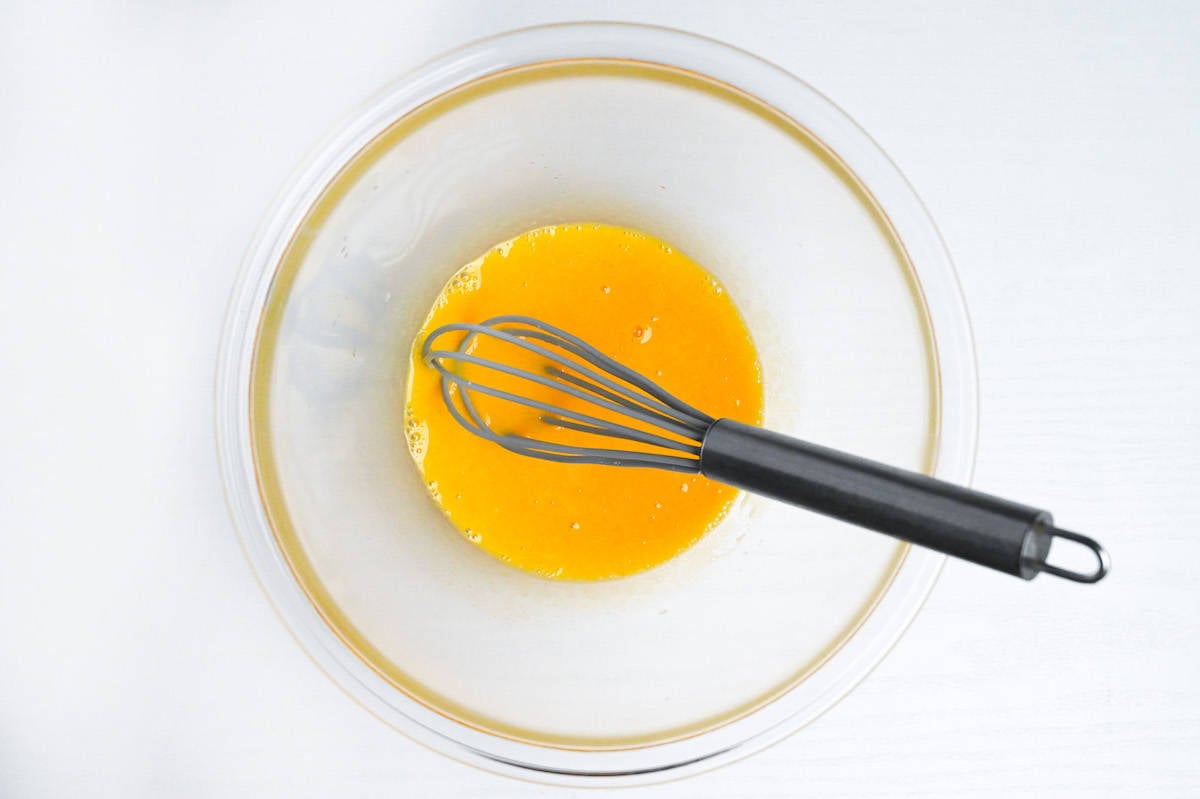
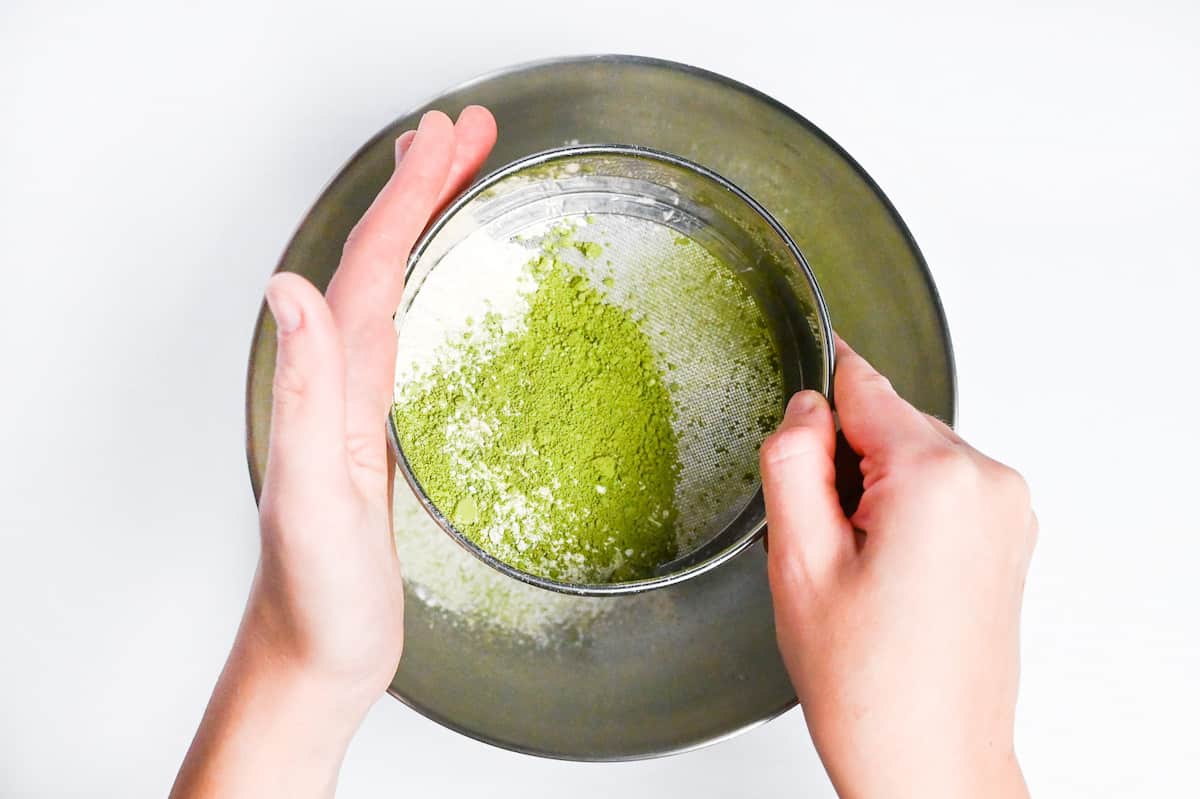
Sift the cake flour, bread flour and matcha powder into a separate bowl, then pour it back into the sieve and sift into the wet mixture.
Whisk until smooth and then set aside.
Start whipping the egg whites, and once they become foamy, add the sugar one-third at a time. Make sure the sugar is fully incorporated into the mixture before adding the next third.
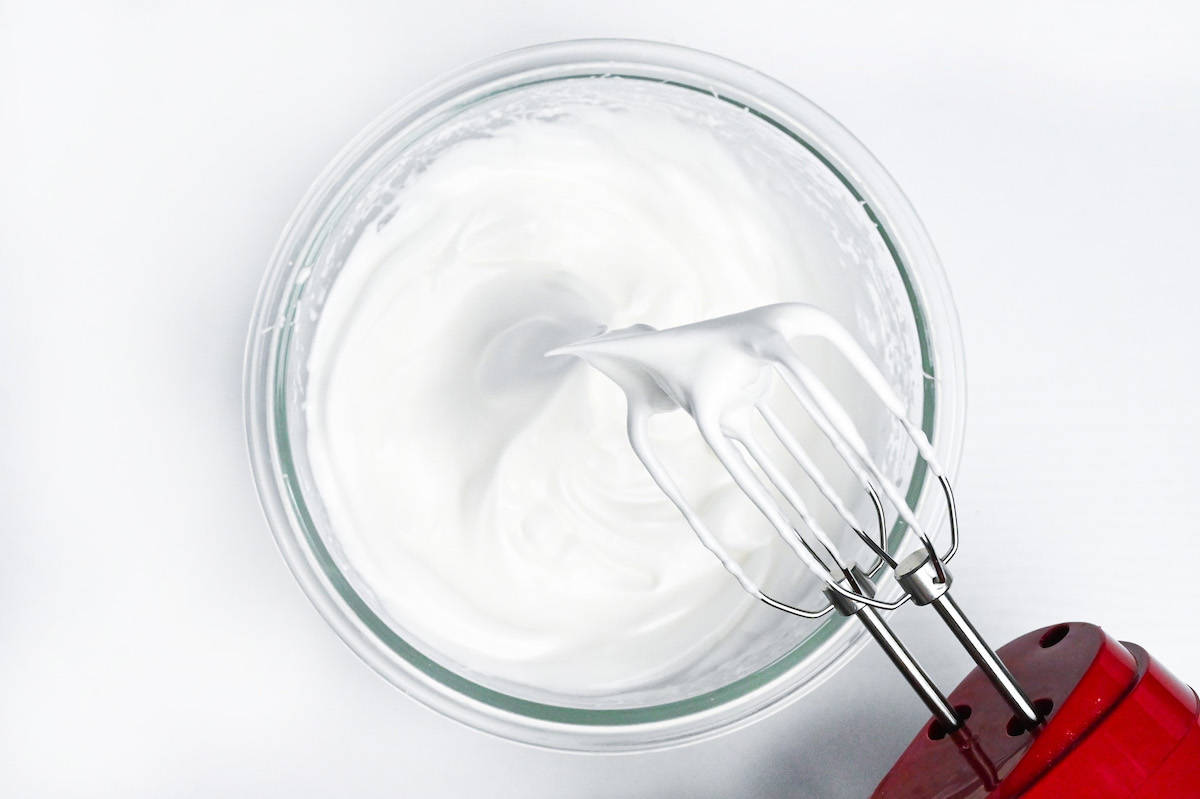
Continue to whip until the meringue has stiff peaks. It should point up firmly without folding over.
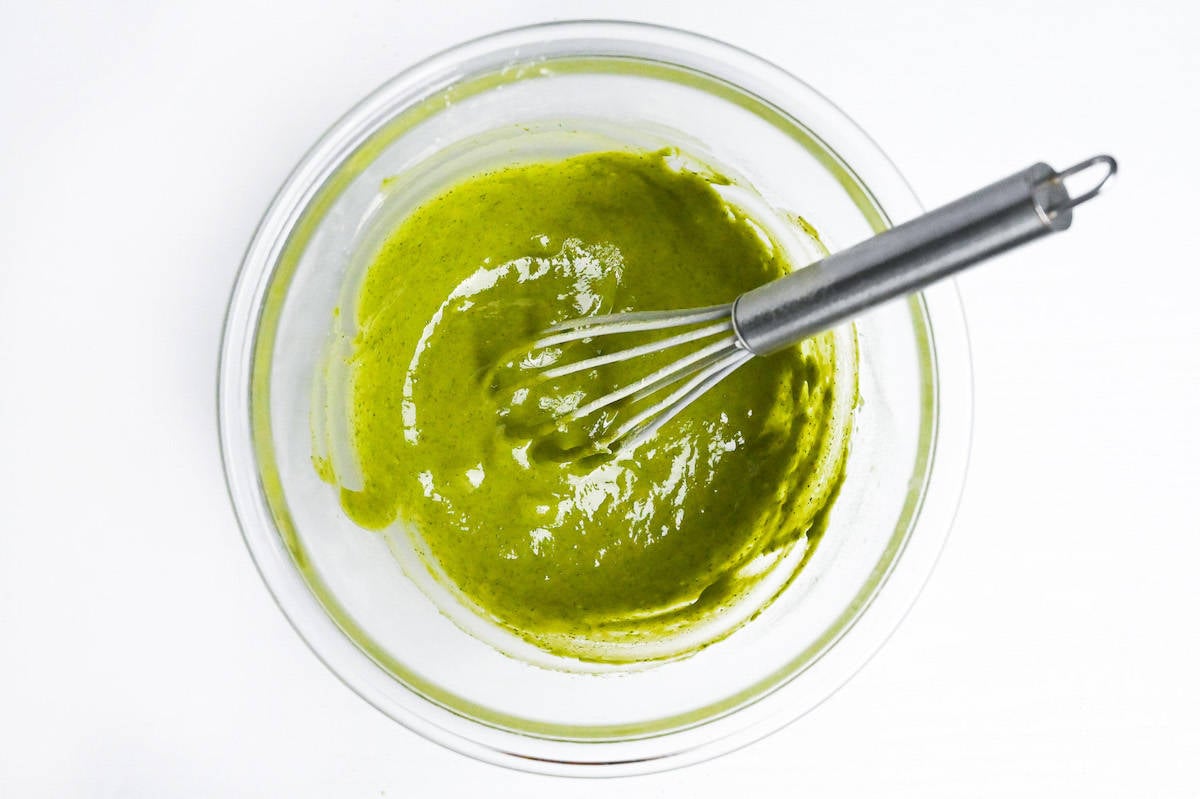
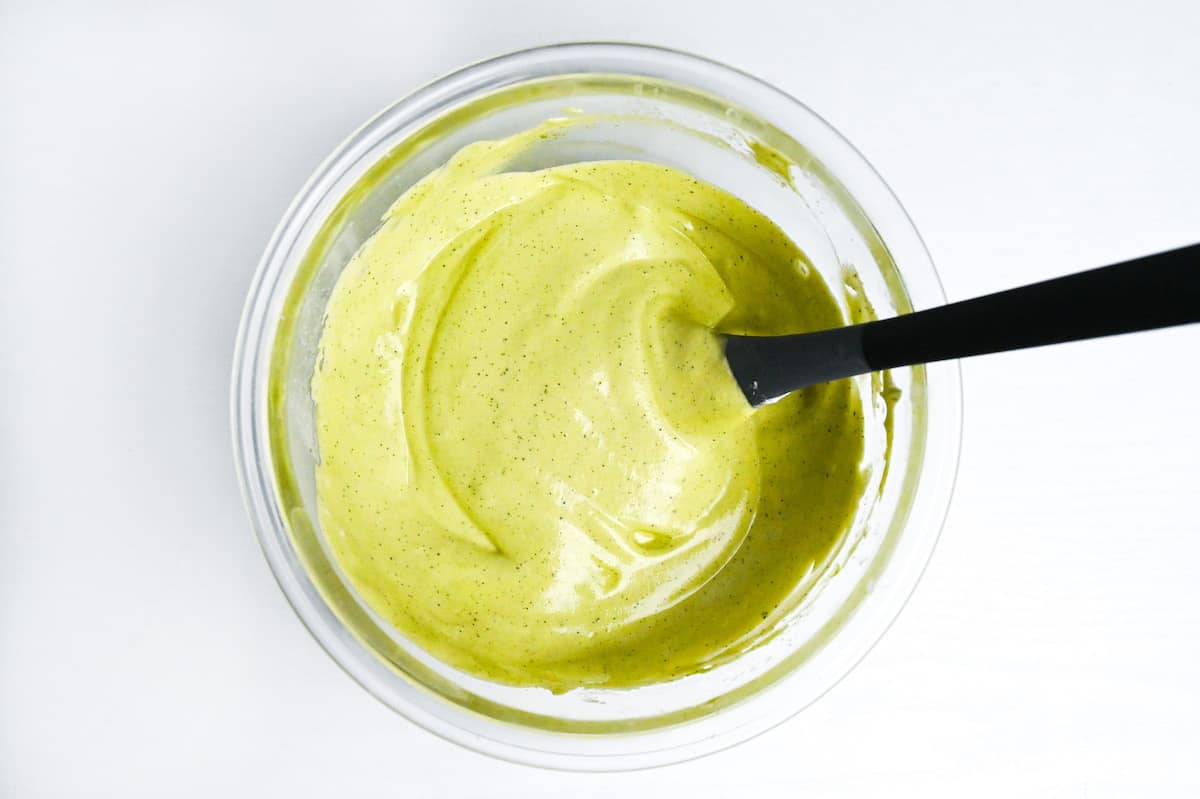
Add one-third of the meringue to the matcha batter and whisk to loosen the mixture. Don’t worry about losing the air too much at this point.
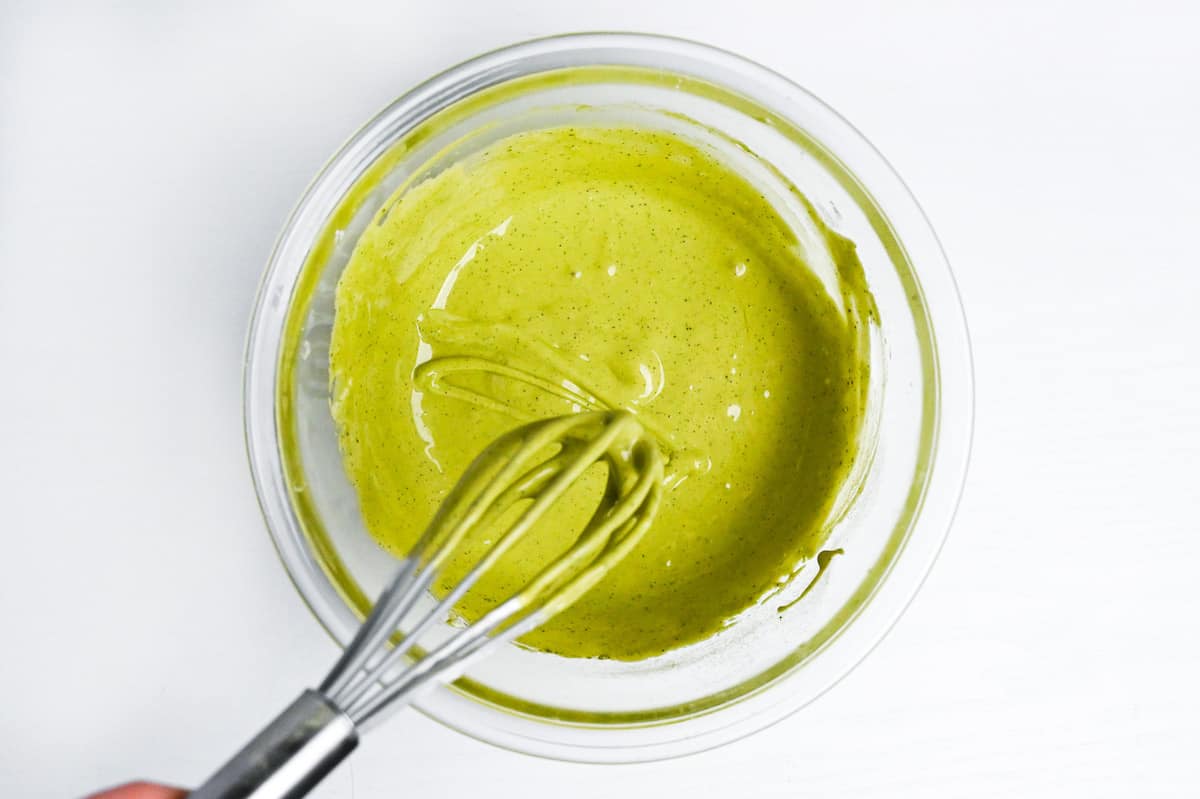
If the matcha batter is still too thick, add a little more meringue but make sure to save at least half of the meringue for folding in. The batter should be loose enough to make ribbons (pictured above).
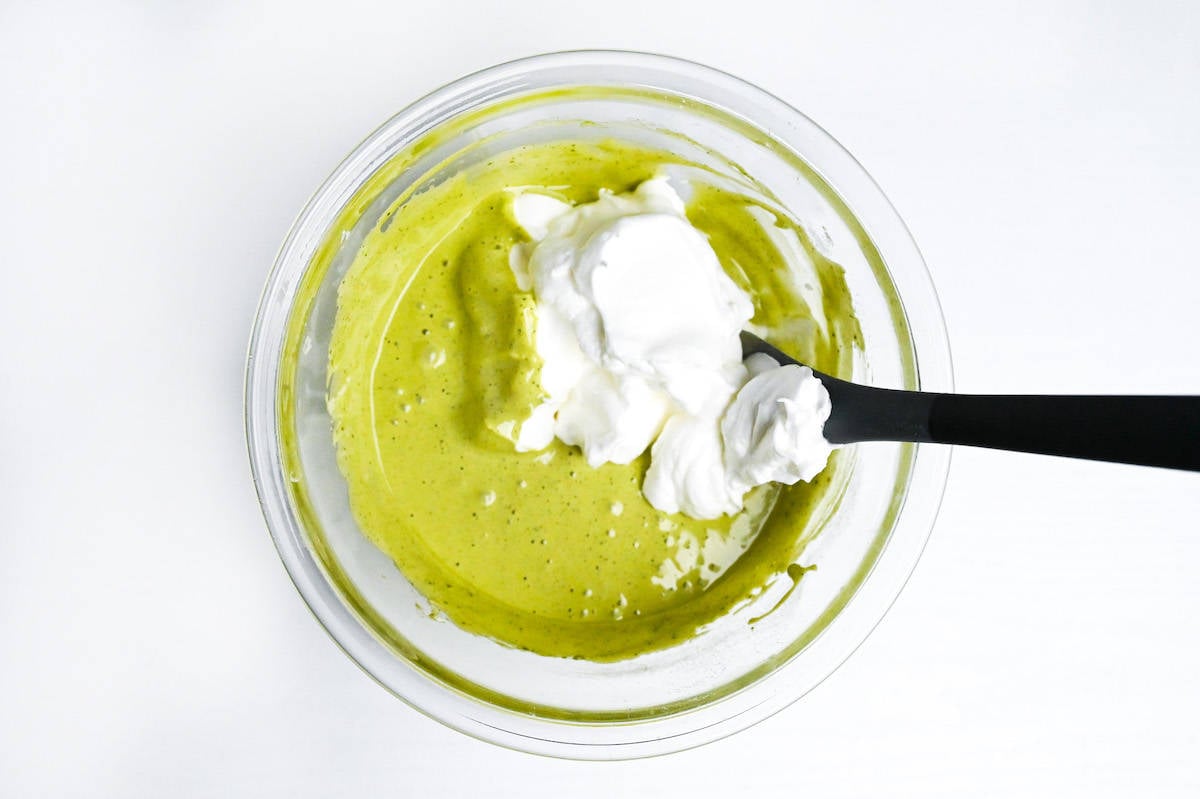
Gently fold in the rest of the meringue using a spatula, being careful not to mix too vigorously. It’s important that we keep in as much air as possible at this point. Fold the batter, turn the bowl and repeat until there is no more white to be seen.
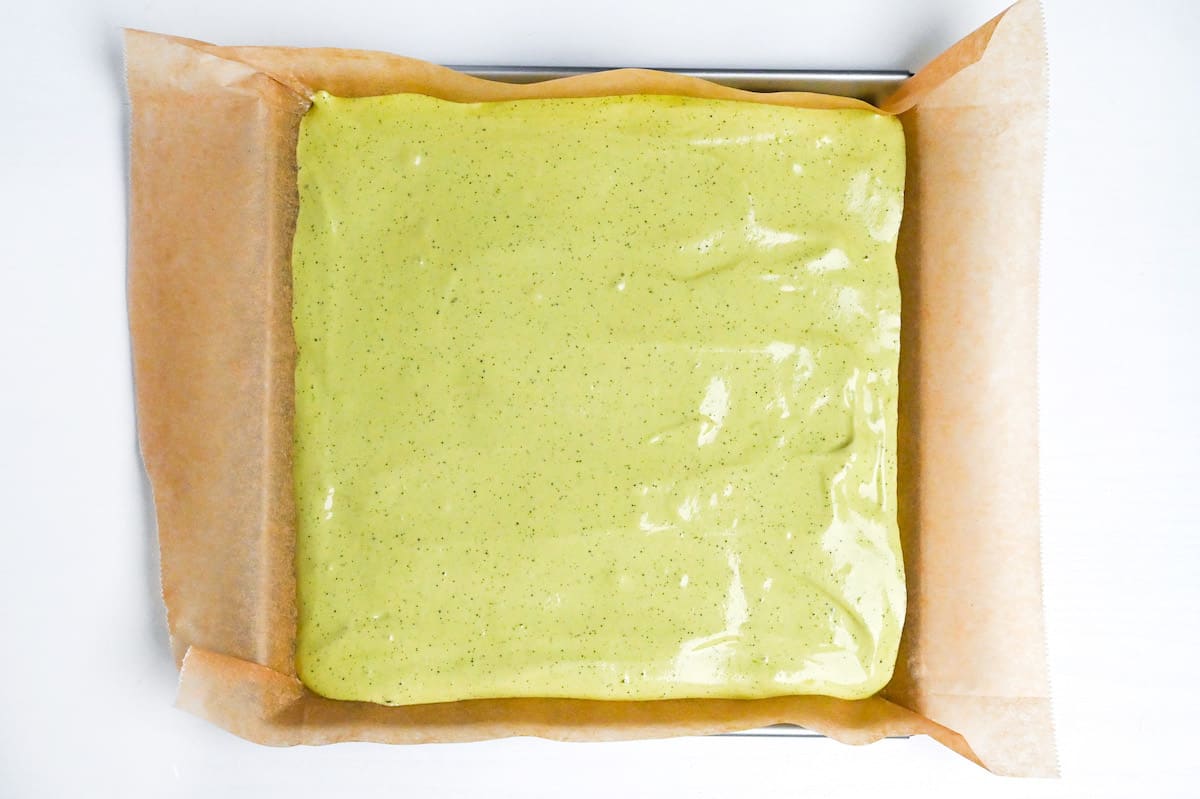
Pour the mixture into your cake pan and spread it out, making sure to push the batter into the corners. Once smooth, drop it on the counter twice to pop any large air bubbles and place it in the oven for 15-20 minutes. I recommend checking on it after 12 minutes and taking it out of the oven as soon as you start to see any browning.
During the baking time, place a glass bowl in the freezer. This will be used to whip the cream later.
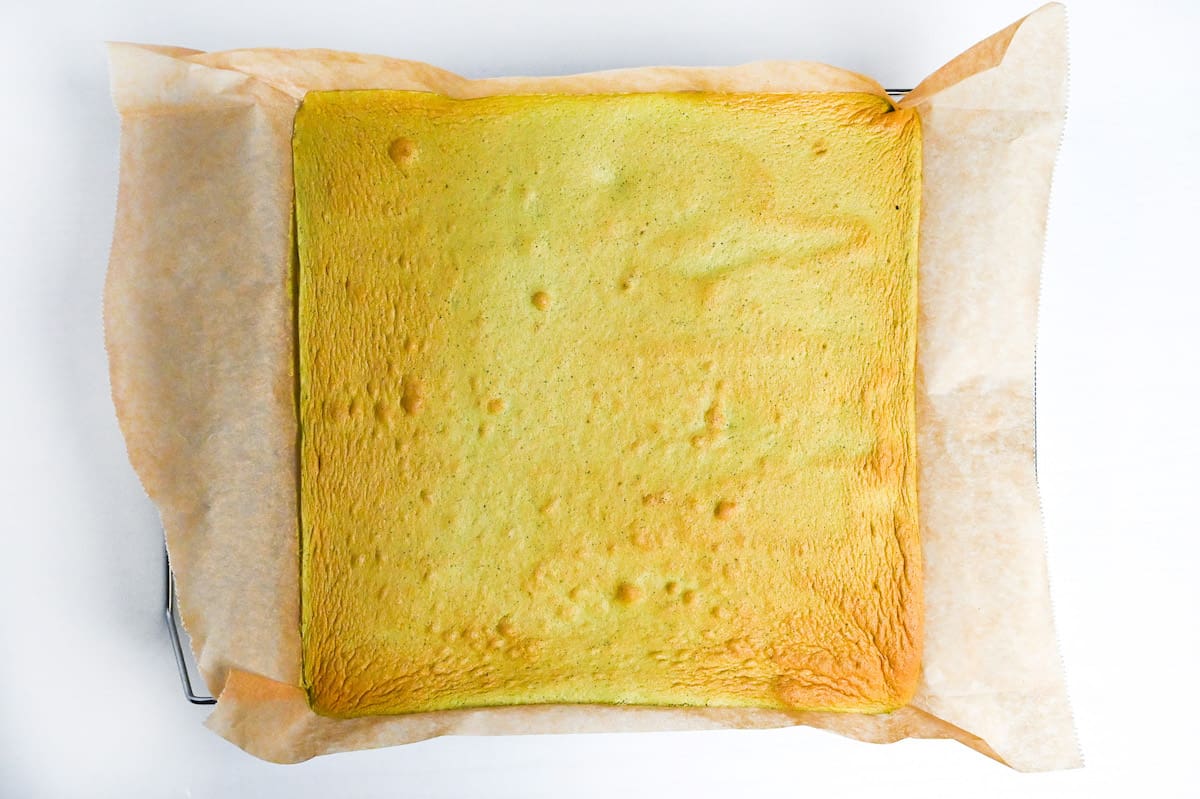
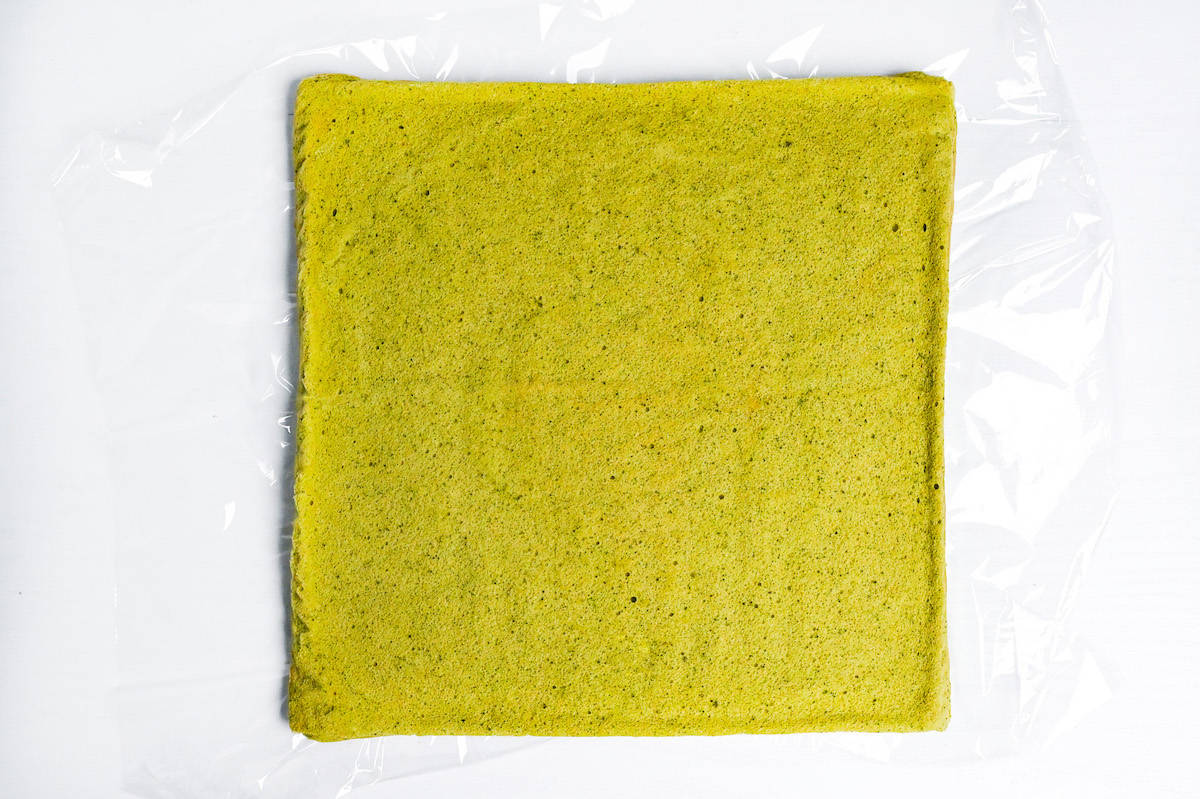
Once it’s out of the oven, immediately remove the sponge from the pan to prevent any residual cooking. You can use the excess baking paper to gently slide it onto a wire rack to cool.
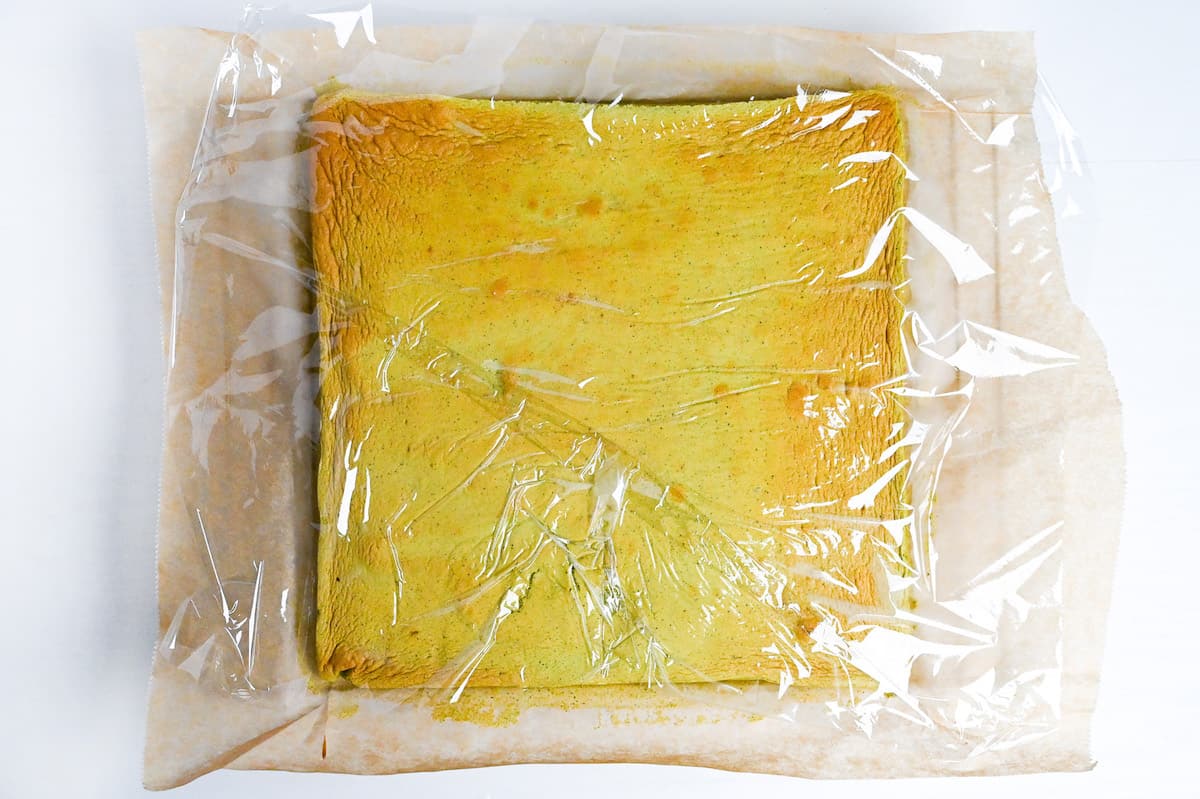
Carefully peel the edges of the baking paper and cover the surface of the cake with plastic wrap to stop it from drying out. Let it cool down for 10-15 minutes.
Make the Filling and Assemble
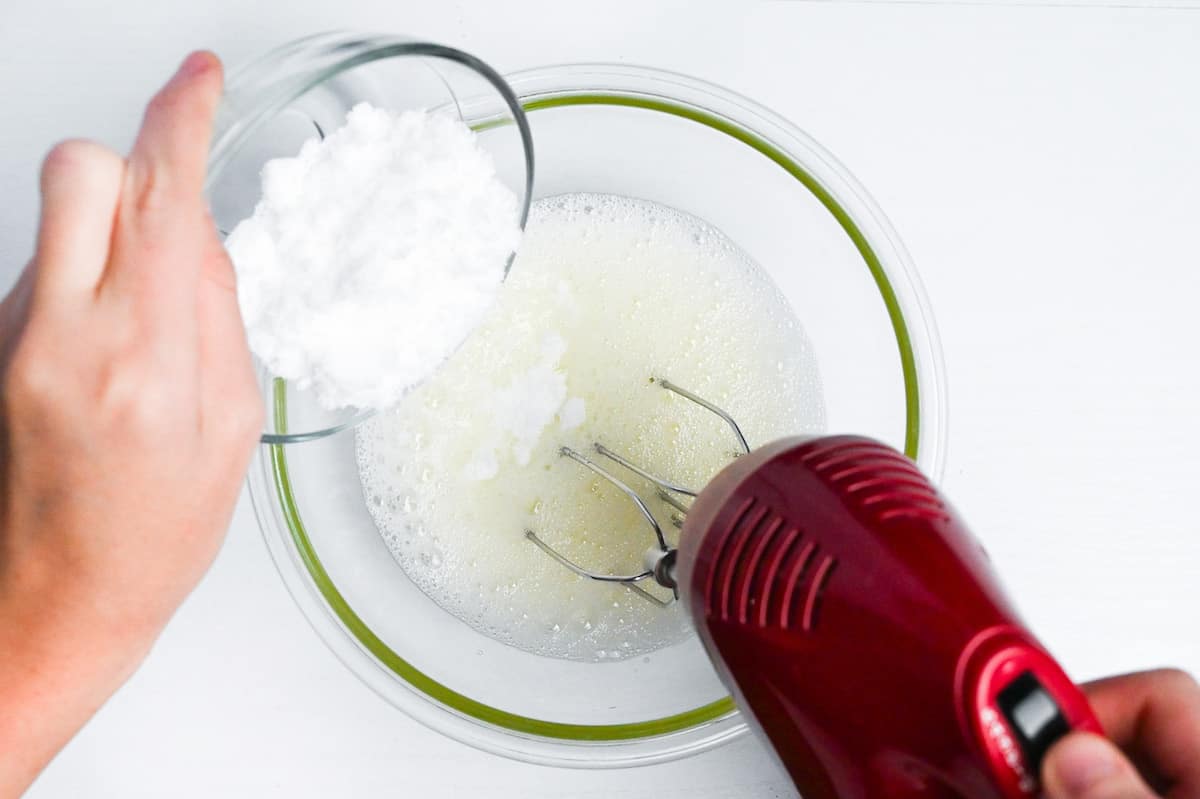
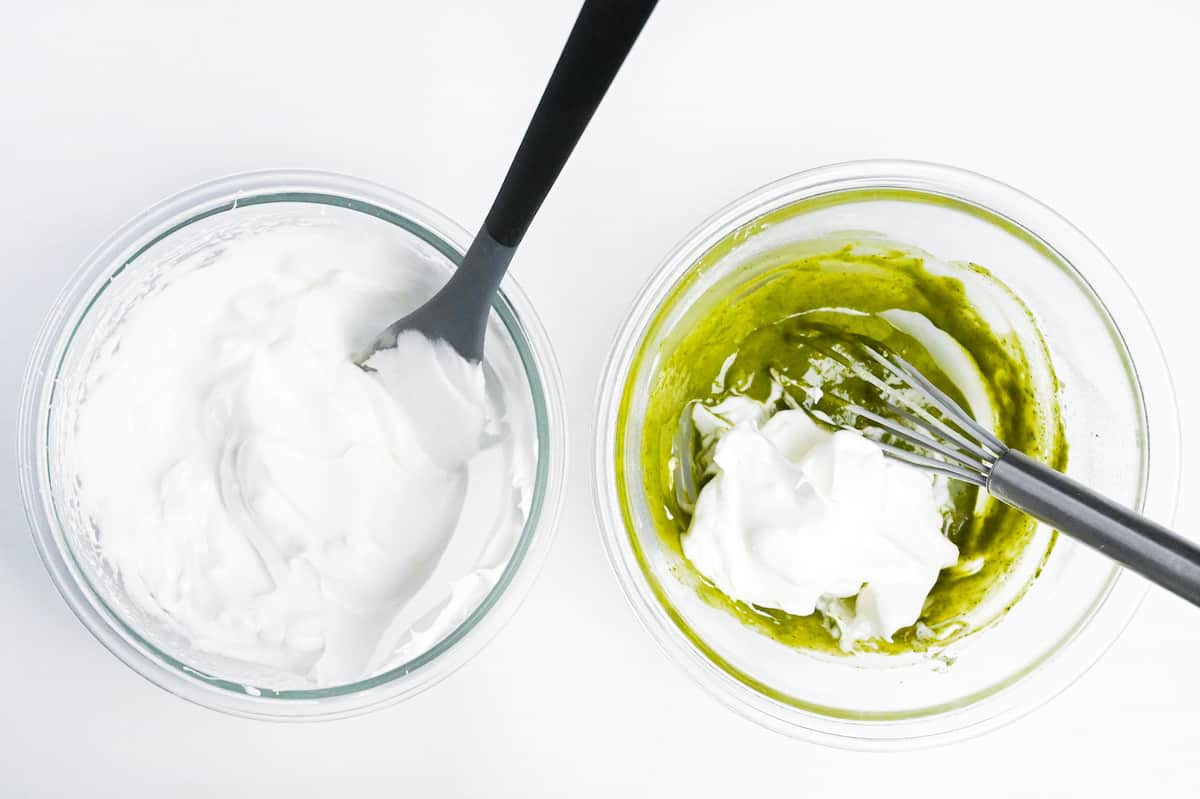
Take the mixing bowl from the freezer and add your heavy cream, sugar and vanilla essence. Whip together until thick enough to spread. Transfer a few tbsp to a piping bag and store it in the fridge to decorate later.
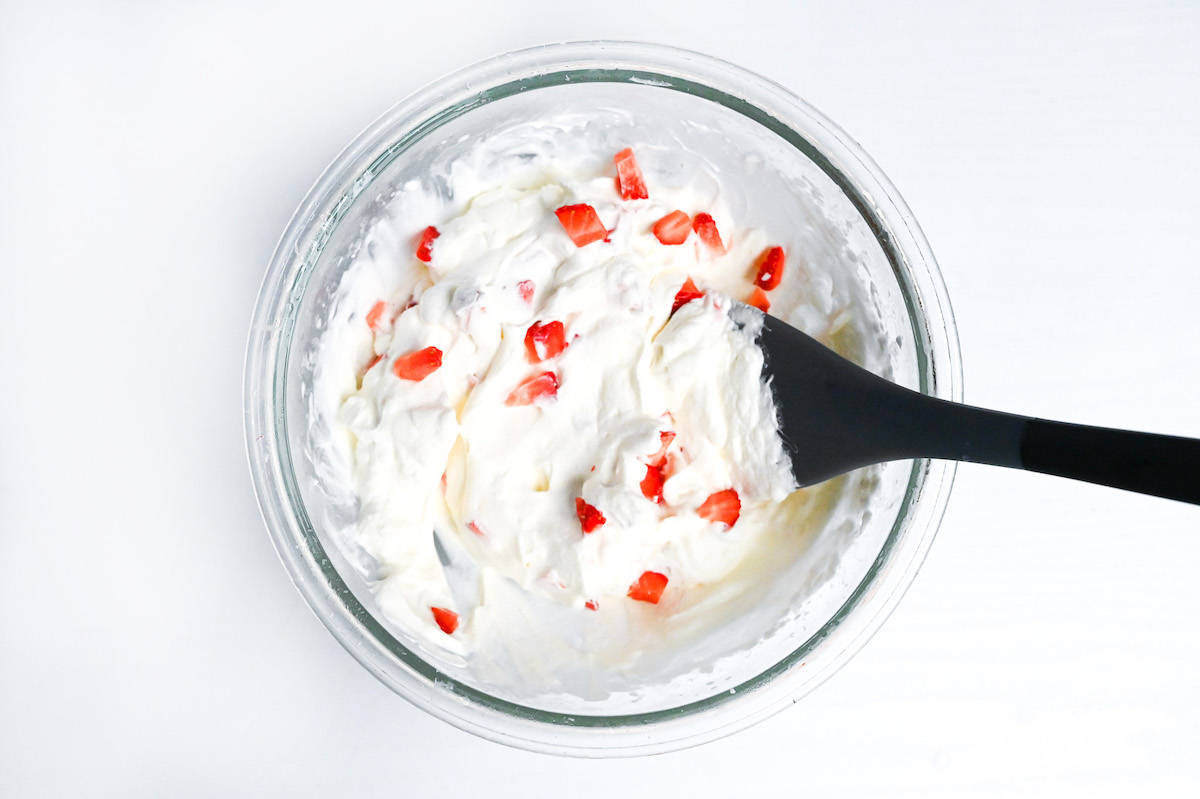
Add the finely diced strawberries and mix until evenly incorporated.
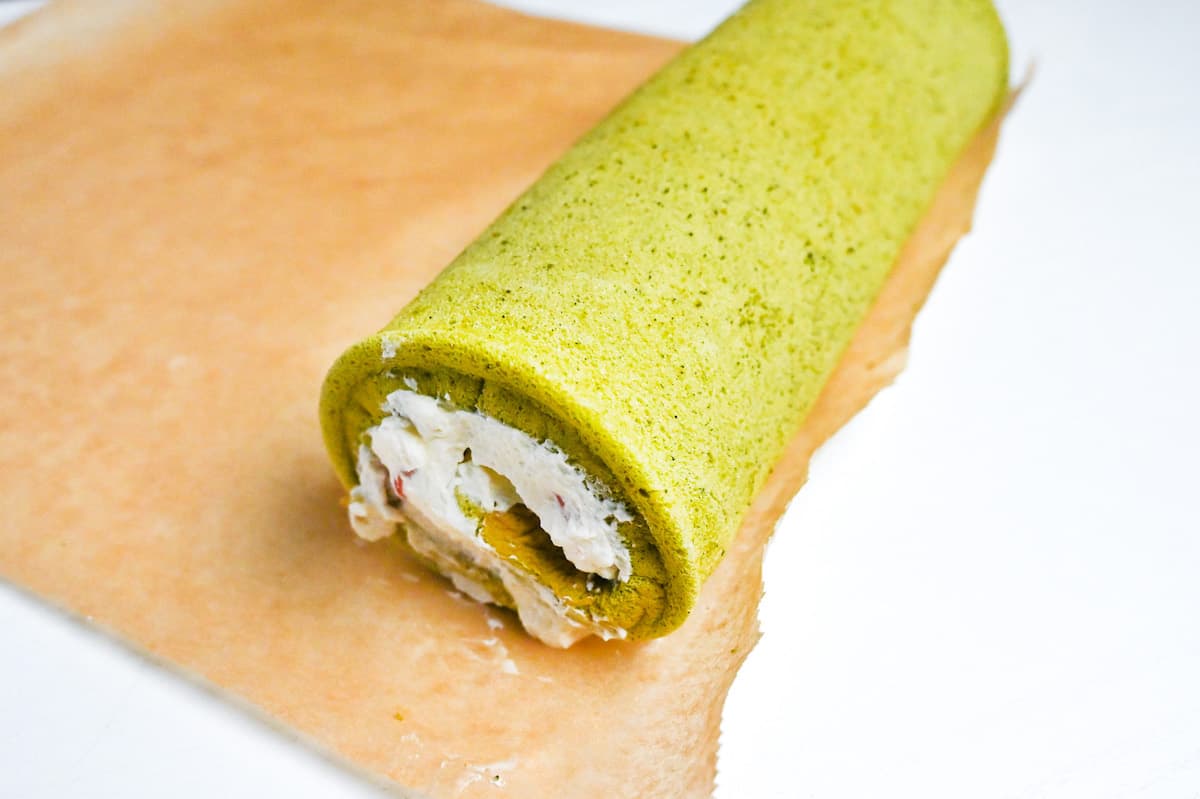
Flip the sponge over and peel off the baking paper. Replace it with a new piece of baking paper and flip it over once more. Peel the plastic wrap off of the surface, don’t worry if a thin layer of the sponge comes off, this will be the inside of the cake.
The plastic wrap side is the inside of the cake, the baking paper side is the outside.
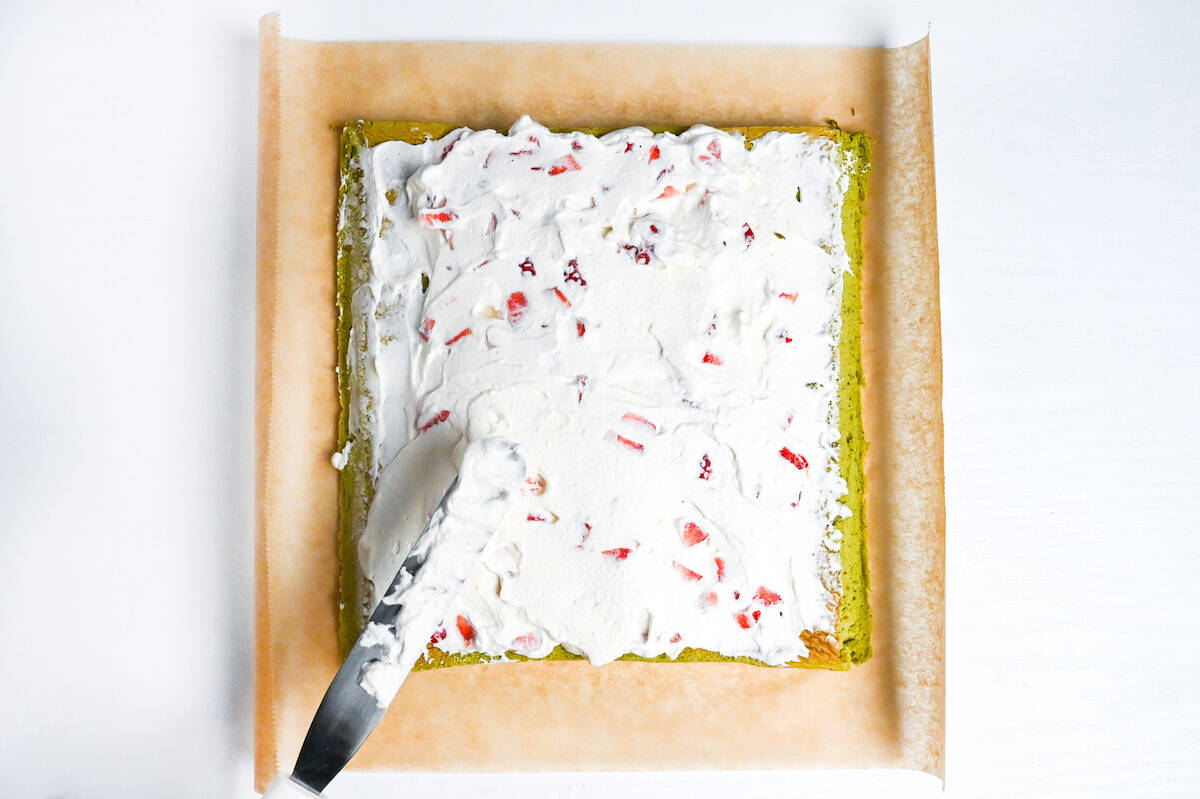
Trim two parallel edges at a slight angle to make it easier to roll, then add your cream. Spread the cream thick in the middle and then thin at the edges to stop it from bursting out.
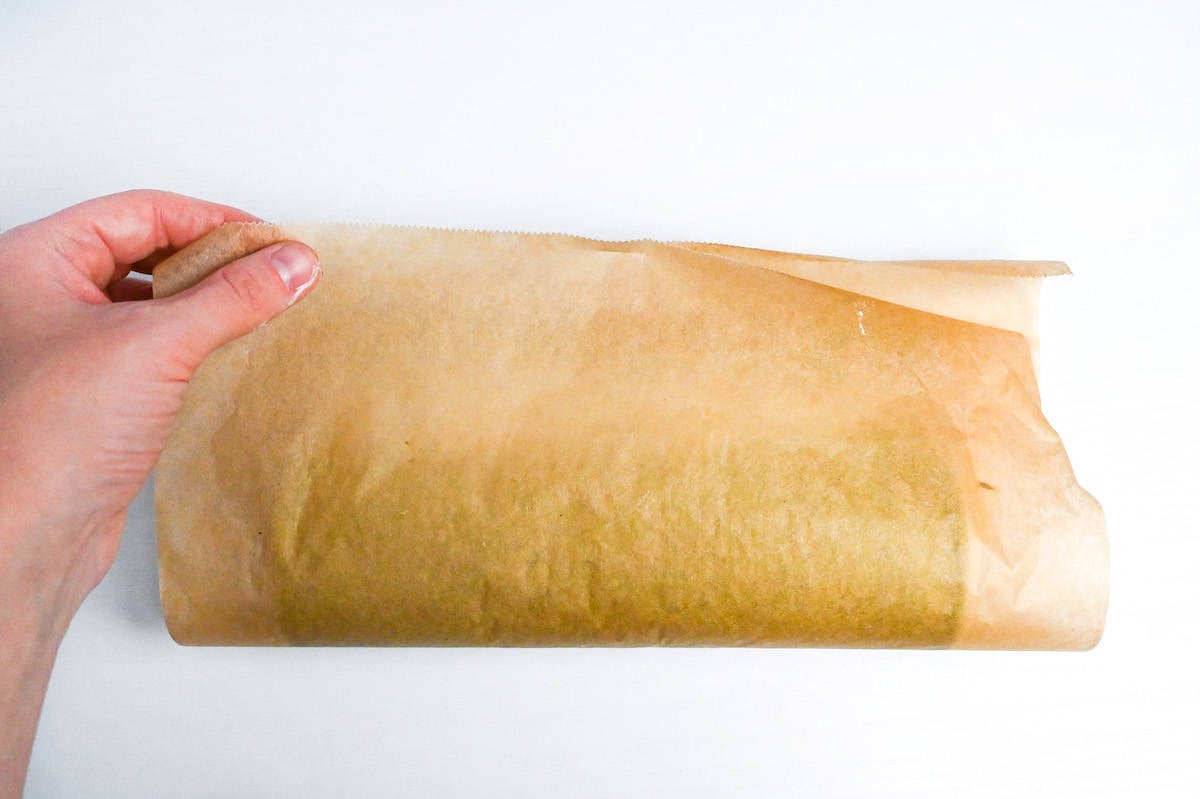
Use the baking paper to help you roll the cake tightly. Scrape away any excess cream and wrap the baking paper firmly around the outside, folding in the edges.
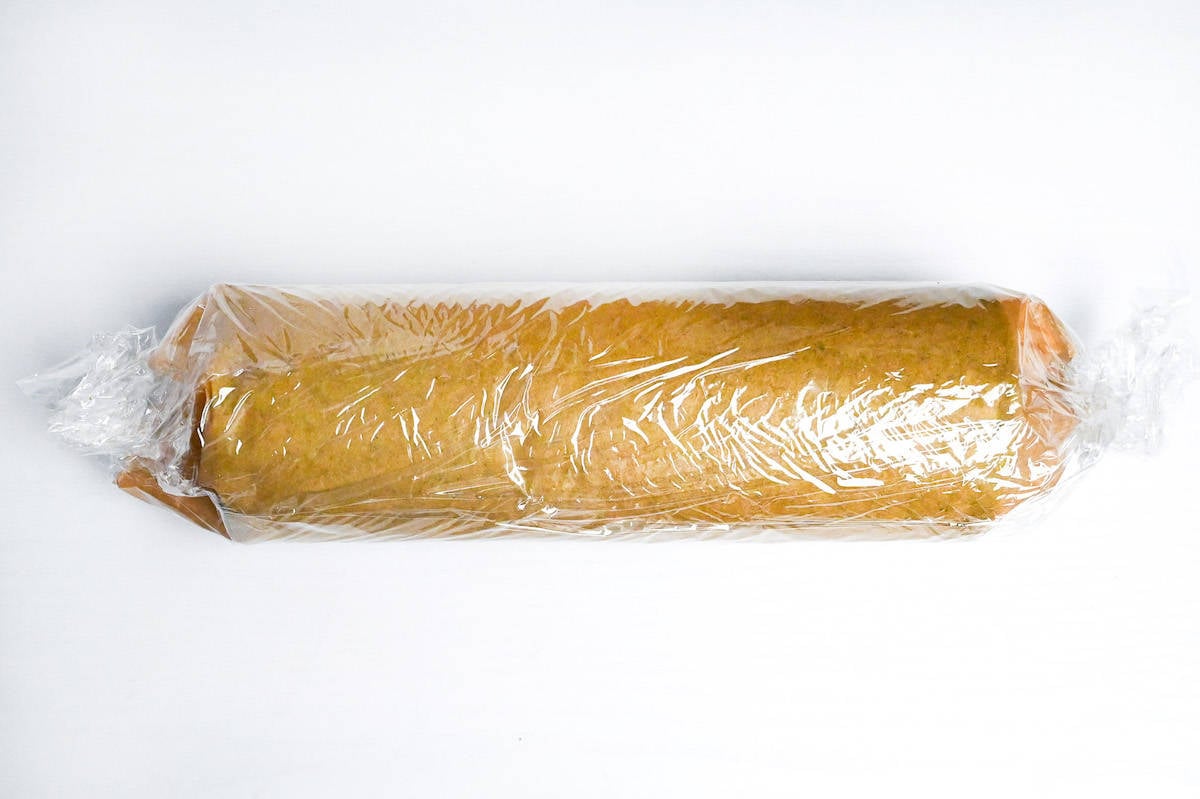
Wrap once more, this time with plastic wrap to stop it from drying out, and chill in the refrigerator for 1 hour to stabilize the cream.
Unwrap the cake and trim off the ends using a warm, sharp knife. (Perfect opportunity to taste test!)
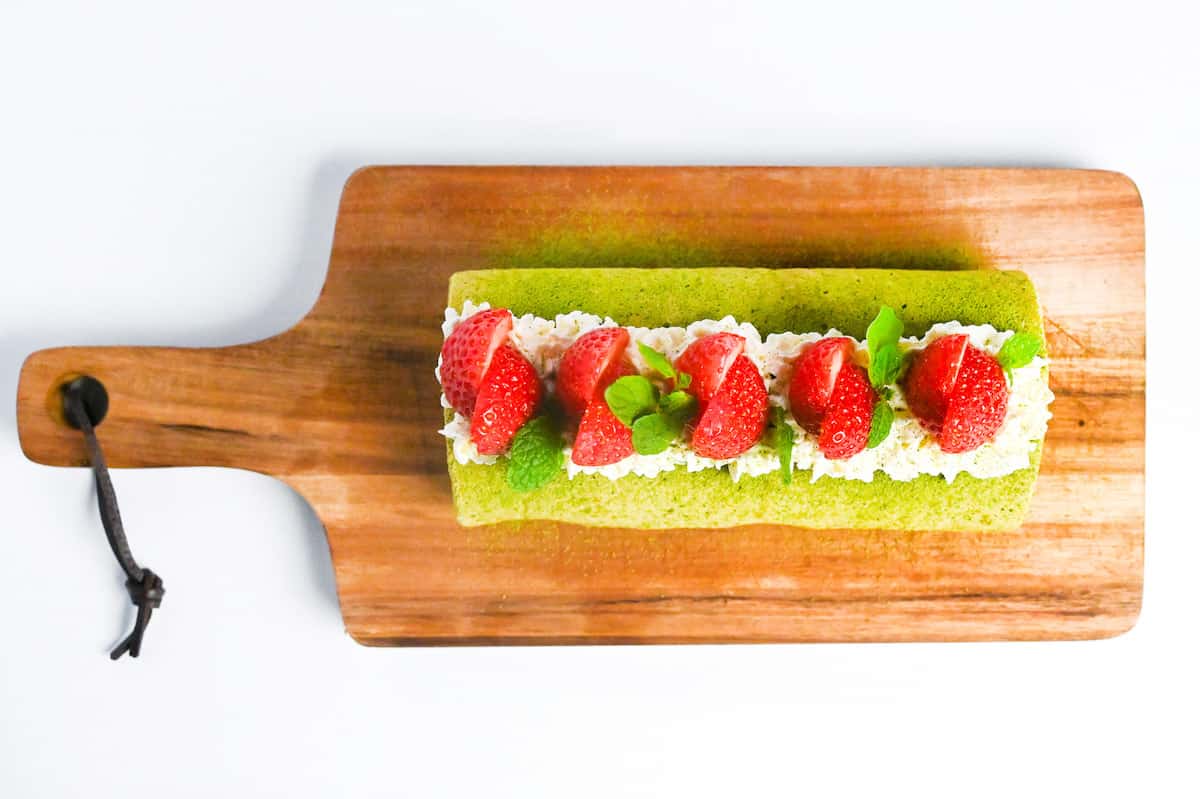
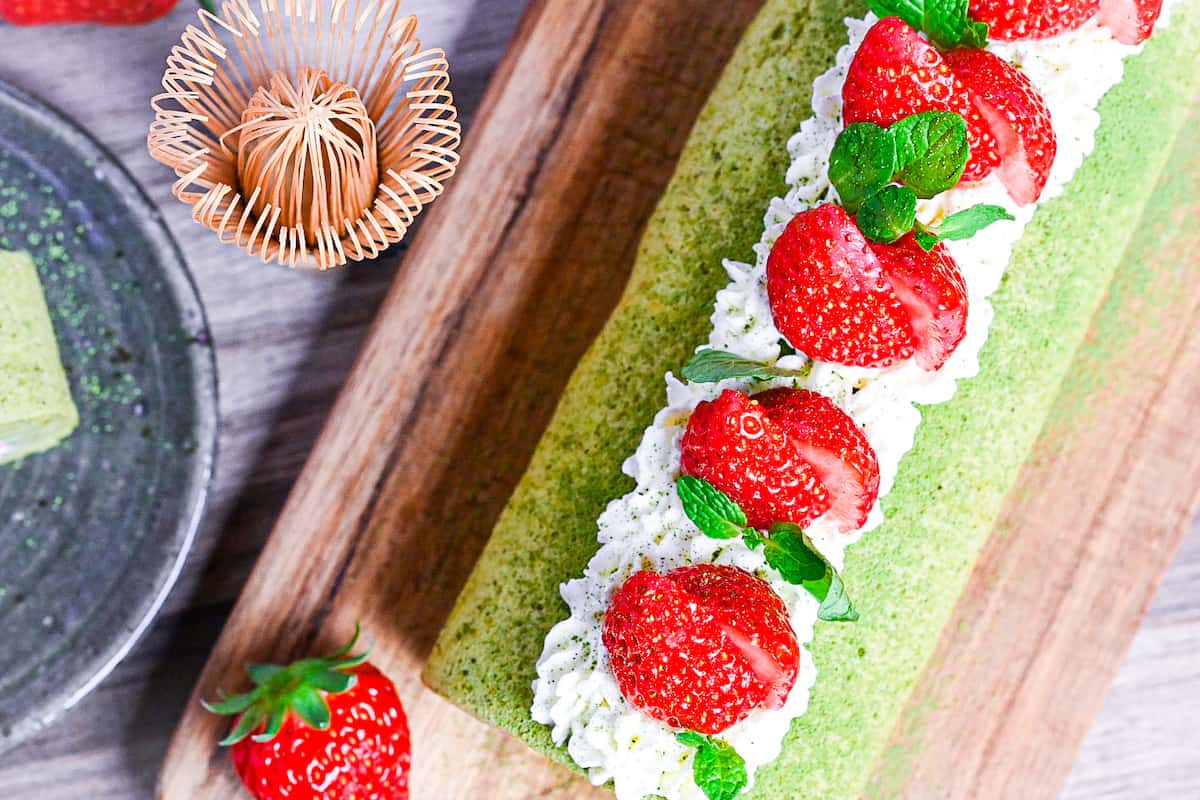
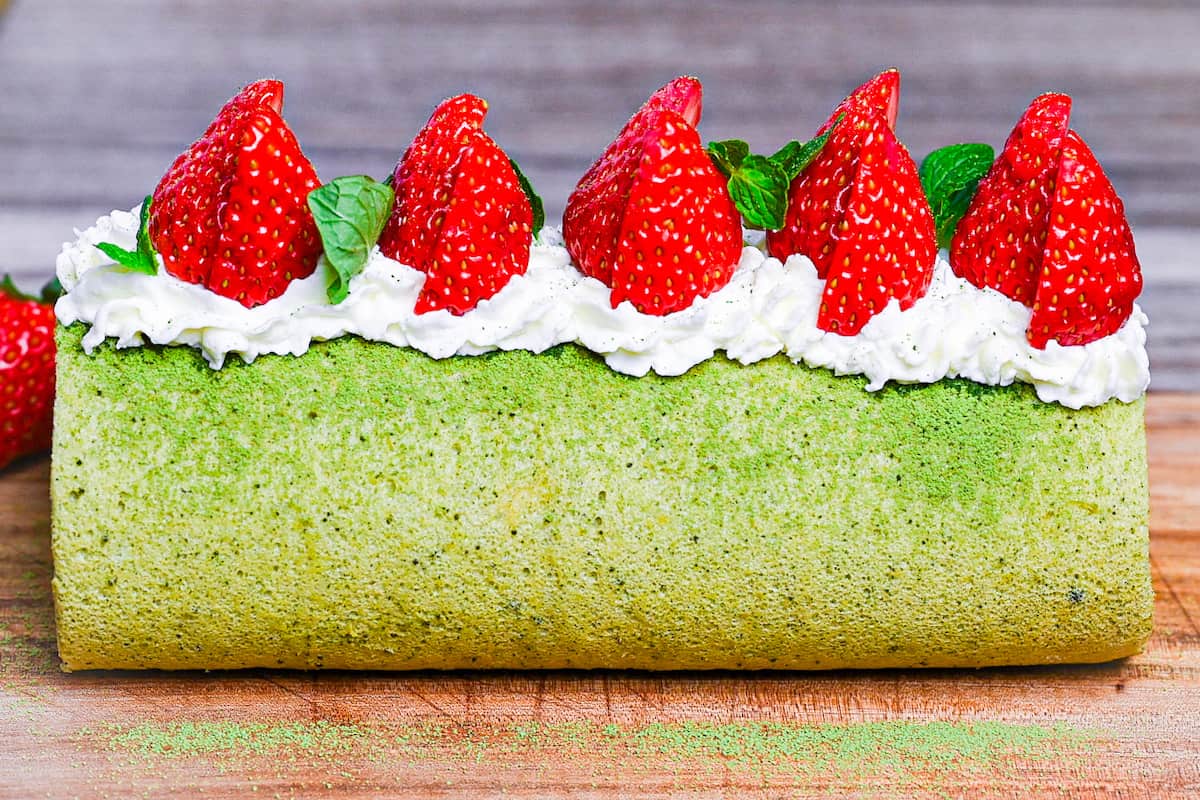
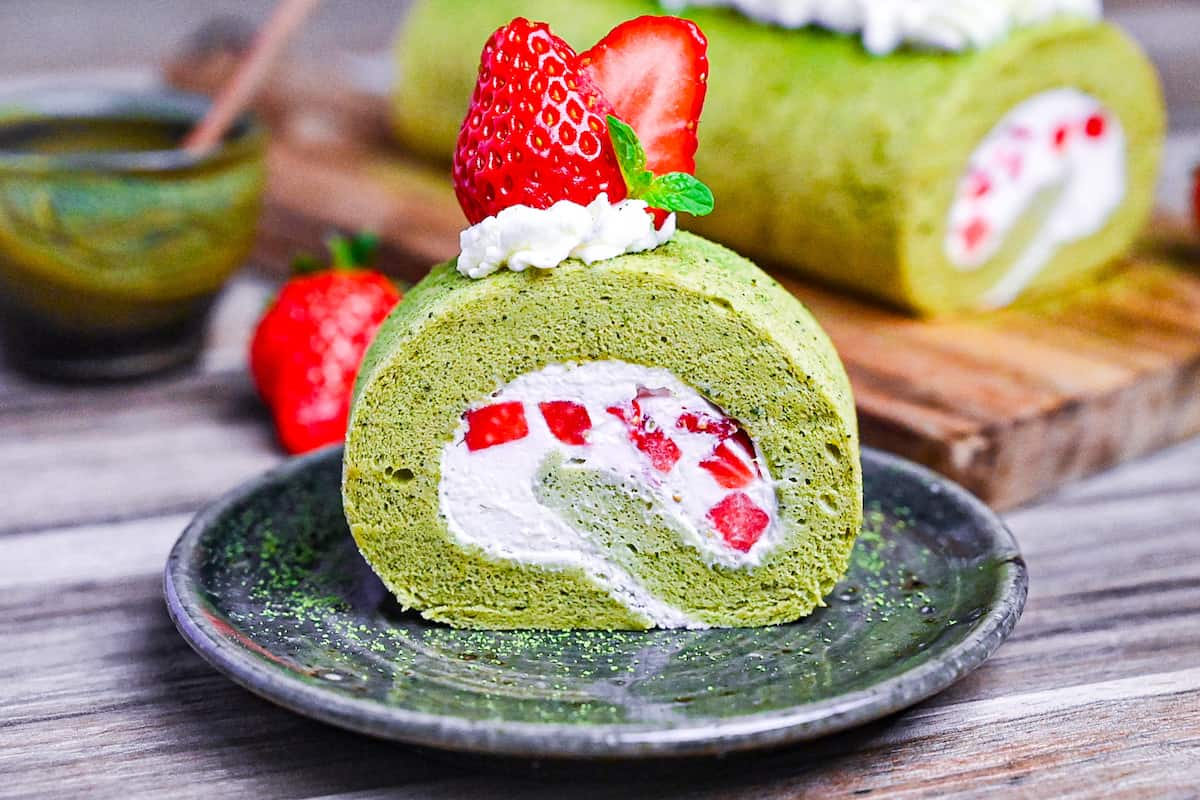
Decorate the top with leftover cream and strawberries, and sprinkle with powdered sugar or matcha.
Enjoy homemade matcha roll cake with family and friends!
Tips & Tricks
Making a successful roll cake might take a little practice, so here are some tips to help you make it perfectly!
Let’s start with tips for fail-free meringue:
- Use a clean, dry bowl (preferably glass).
- Chilled eggs separate more easily, so separate them straight from the fridge.
- Use a separate bowl for separating the eggs and then transfer them to their appropriate bowls, this way you won’t ruin the whole batch if one yolk breaks.
- Let the eggs warm to room temperature before making meringue. I recommend covering them so they don’t dry out too.
- Add sugar one-third at a time to ensure it is incorporated evenly.
- Caster sugar or granulated sugar dissolves easily and helps stabilize the meringue.
- Use a medium speed on the electric whisk. A high speed will create bigger bubbles which can make the meringue unstable.
- Aim for stiff peaks, they shouldn’t fold over!
More tricks for the perfect matcha roll cake:
- Be sure to sift the dry ingredients, not only to break down any lumps but also to aerate the flour.
- Fold gently once the meringue is added to the batter – we don’t want to lose that precious air!
- Check regularly when baking – the oven time and temperature is just a guide. Be sure to take the sponge out of the oven before it starts to brown. I recommend checking on it after 12 minutes just to be safe.
- Add the cream while the sponge is still slightly warm – what?! This advice might sound strange but the sponge can still be just a little warm (but not too much) when you add the cream. That is because roll cake is more flexible when it’s warm, so you’re less likely to get cracks. Of course, too warm will melt the cream so you need to find that even middle ground.
- Do not refrigerate the sponge before rolling – this will dry it out, making the texture more rigid and likely to break when rolled.
- Cut the strawberry small – not only will it be easier to roll but it will also be more evenly dispersed throughout the cream.
- Be sure to chill the assembled roll cake for at least 1 hour before serving. This improves the texture of the cake and stabilizes the cream.
Troubleshooting
The hardest part about making a successful roll cake is making it flawless and crack-free after rolling. Here are the main reasons why it might crack and how to prevent it.
Over-baked
The most common reason for a cracked Swiss roll is baking for too long. The sponge is a lot thinner than your usual cake, so it’s a very easy mistake to make.
To avoid overbaked sponge cake, make sure to bake on the middle shelf of a fan oven at 160°C (320°F) for no more than 15-18 minutes. After 12-13 minutes, keep checking the cake and take it out as soon as it starts to brown, it should be springy to the touch.
If your oven doesn’t have a fan you might need to adjust the temperature and check more frequently. It might also require turning to ensure even baking.
Overbaking can also occur if you leave it in the baking pan after you’ve removed it from the oven. When left in the hot pan, it continues to cook in the residual heat. This is not a huge problem for regular cakes, but it can cause issues with roll cakes, so be sure to remove it from the pan immediately and transfer it to a cooling rack.
Dried Out
While dry roll cake is often a result of overbaking, it can also happen if you leave it out to cool for too long in the open air. Leaving your cake exposed will dry out the surface and can lead to cracks when you roll it.
To prevent this, place a plastic wrap or baking parchment over the top of the cake to help lock in the moisture while it’s cooling.
Too Cold
While we want the sponge to be cool enough that the cream doesn’t melt, if it’s too cold, it becomes rigid and more likely to crack or break when rolled.
To avoid this, make sure to cool the cake at room temperature. Do not be tempted to put it in the fridge before rolling or adding the cream.
Roll cake sponge is thin and cools quickly. It’s fine to add the cream while the cake is still slightly warm, I recommend adding the cream and rolling it after about 10 minutes of cooling time.
How to Store
Matcha Roll Cake is best served after a few hours when the cream has stabilized (making it easier to cut). I also find the sponge has a better texture once it’s had some time to rest.
Since it contains fresh cream, roll cake should be stored in the refrigerator and consumed within 2-3 days.
I do not recommend freezing this matcha roll cake, especially when it contains fresh strawberries.
Storage summary
Room temperature – Not recommended.
Refrigerated – 2-3 days.
Frozen – Not recommended.
I hope you enjoy this Matcha Roll Cake recipe! If you try it out, I’d really appreciate it if you could spare a moment to let me know what you thought by giving a review and star rating in the comments below. It’s also helpful to share any adjustments you made to the recipe with our other readers. Thank you!
More Christmas-Themed Recipes
Matcha Roll Cake (Green Tea Swiss Roll)

Ingredients
Sponge Ingredients
- 3 egg
- 30 ml whole milk
- 20 ml cooking oil neutral flavor like canola etc.
- 7 g honey
- 20 g unbleached cake flour
- 25 g bread flour
- 5 g matcha powder
- 60 g white caster sugar
Filling and Toppings
- 150 ml heavy cream 36% or higher
- 15 g white caster sugar
- ½ tsp vanilla essence
- 12 strawberries half for filling, half for decorating
- powdered sugar or matcha powder for dusting
The ingredient brands and tools I trust are in my Japanese pantry guide and my cooking tools guide.
Can’t find certain Japanese ingredients? See my substitution guide here.
Instructions
- Separate the whites and yolks of 3 egg into two bowls and cover them while they come to room temperature.

- While you wait, measure out the rest of your ingredients. Wash and dry 12 strawberries, finely dice half of them and save the other half for decorating the top of the cake. Store them in the refrigerator for later.
- Once the eggs reach room temperature, preheat the oven to 160 °C (320 °F) fan (higher setting might be required for conventional oven). Line the roll cake pan with baking paper. (Make sure to leave some hanging over the edges so it's easier to lift out later.) See notes for pan size.

Making the Sponge
- Take a microwavable mixing bowl, add 30 ml whole milk, 20 ml cooking oil and 7 g honey then microwave for 20 seconds at 600W.
- Whisk thoroughly and then whisk in the egg yolks until well combined.
- Sift 20 g unbleached cake flour, 25 g bread flour and 5 g matcha powder into a separate bowl and then mix well to make sure the matcha is incorporated into the flour.
- Sift once more into the wet ingredients and whisk until smooth. Set aside for later.
- Take the bowl of egg whites and whip them using an electric whisk. When they become white and foamy, add 60 g white caster sugar one-third at a time, ensuring it's fully incorporated before adding the next third.
- Continue to whip until it forms a meringue with stiff peaks that don't fold over.
- Add about one third of the meringue to the matcha batter and whisk it well to loosen the matcha batter.
- If it's too hard to mix, add more meringue, a little at a time and whisk well. (Make sure to leave at least half of the meringue for folding.) The matcha batter should be thin enough to leave ribbons on the surface.
- Add the rest of the meringue to the batter and carefully fold, turning the bowl with each fold. Be careful not to overmix and lose too much air.
- Pour the cake mixture into the lined pan. Smooth it out and push it to the corners using a knife or offset spatula.
- Drop the pan on the counter twice before placing it in the oven on the middle shelf. Bake for 15-20 minutes. (Check after 12 minutes and take it out when it starts to brown. It should be springy to the touch when done.) While it's baking, place a glass mixing bowl in the freezer to chill. This will be for whipping the cream.
- Take it from the oven and immediately remove the cake from the pan by pulling up the edges baking paper and sliding it onto a cooling rack. Carefully peel the edges of the baking paper and cover the top with plastic wrap. Leave to cool for 10-15 minutes.
Whipped Cream and Assembly
- Remove the bowl from the freezer and add 150 ml heavy cream, 15 g white caster sugar and ½ tsp vanilla essence.
- Using an electric whisk, whip the cream until firm and stable. Transfer a few tablespoons to a piping bag for decorating and store in the fridge for later (optional). Mix the diced strawberries into the rest of the cream.
- Take the roll cake, flip it over and peel off the baking paper, replacing it with a new larger sheet (this will help with rolling).
- Flip it back over and peel off the plastic wrap. (It's okay if some peels off, this will be the inside of the cake.) Cut the edges at a slant for a neater finish and spread the cream over the surface. Spread it thinner at the edges to prevent the cream bursting out when you roll it.
- Roll the cake up tightly using the baking paper to help you. Scrape off any excess cream that might burst out of the seams.
- Fold in the ends of the baking paper and wrap the whole cake with plastic wrap. Place in the fridge for at least one hour to stabilize the cream.
- After 1 hour, unwrap the roll cake and cut off each end. Optional: Decorate with extra whipped cream and strawberries or dust with powdered sugar before serving.
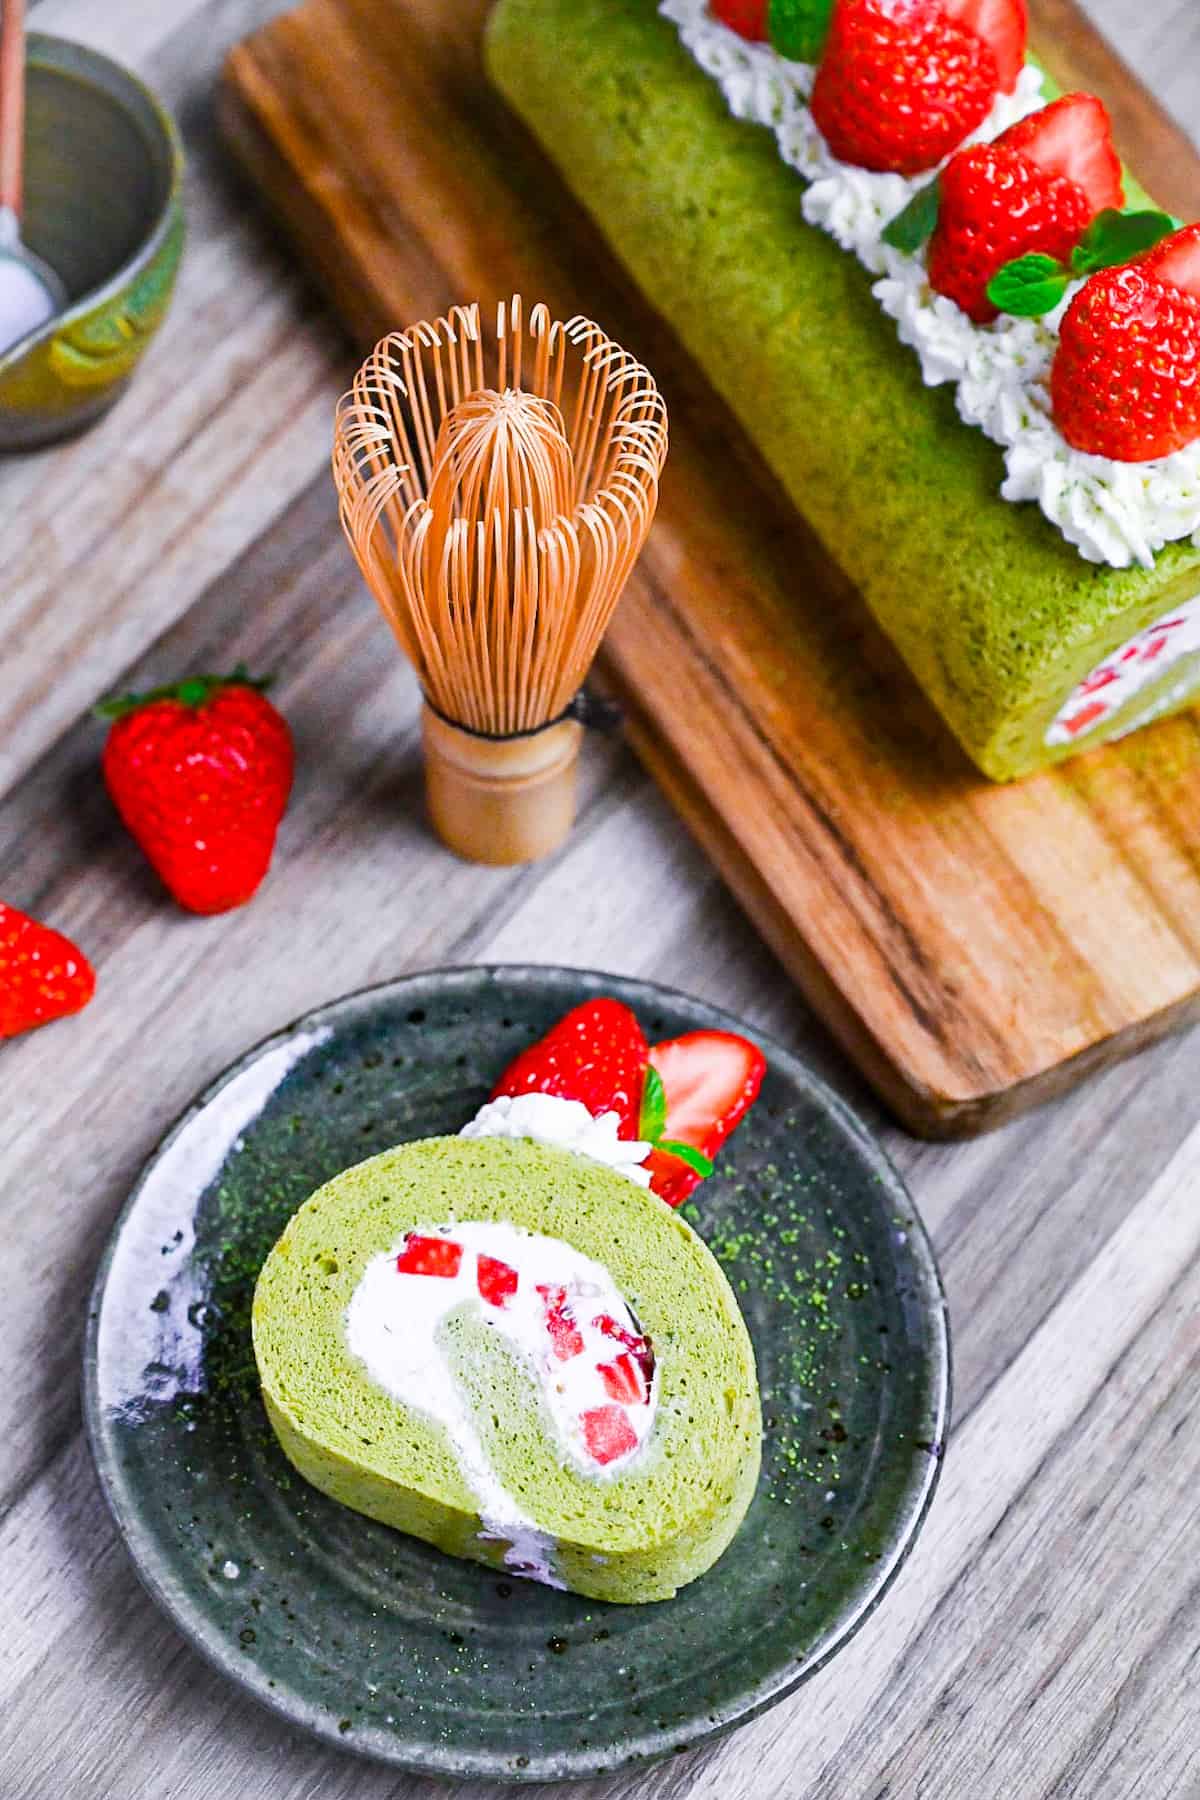
- Cut into thick slices with a warm knife and enjoy!
Video
Notes
- This recipe works for 25x25cm (approx 10×10″), 22x26cm (8.5×10″) or similar size square or rectangular baking pans, but if you are using a standard US jelly roll pan (10×15″) you will need to multiply the ingredients by 1.5 (12 servings).
- Store leftovers in the refrigerator in an air tight container and eat within 2-3 days.
OMG! Best recipe, best roll, best texture, best flavour!! This will become a family favourite!
Hi Karan,
Thank you for trying this recipe! I’m absolutely thrilled that you loved the roll! 🙂
Yuto
I was wondering if I can make this the day before I’ll be serving it or not? I’m not sure I’ll have enough time on the day itself!
Hi Ceri,
Absolutely! Making it the day before actually works great. It gives everything time to set, so I’d even recommend it! 🙂
Yuto