


Disclaimer: This post may contain Amazon affiliate links. Sudachi earns a small percentage from qualifying purchases at no extra cost to you. See disclaimer for more info.
Featured Comment
We’ve made this Japanese Christmas Cake the last few years and look forward to making it again this year.
– Susan (from Pinterest)
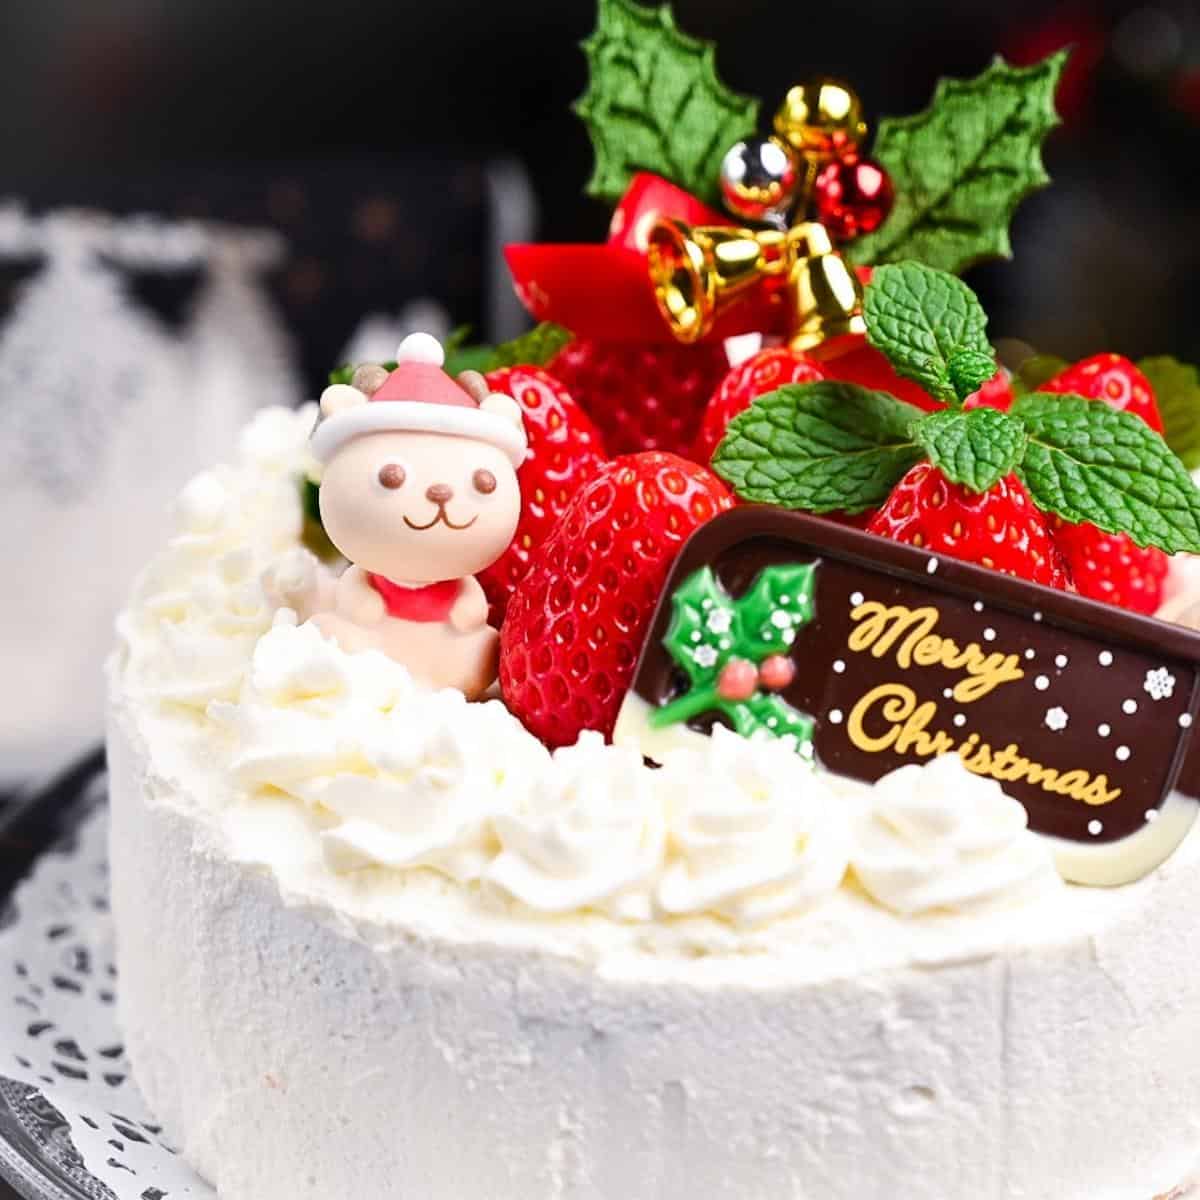
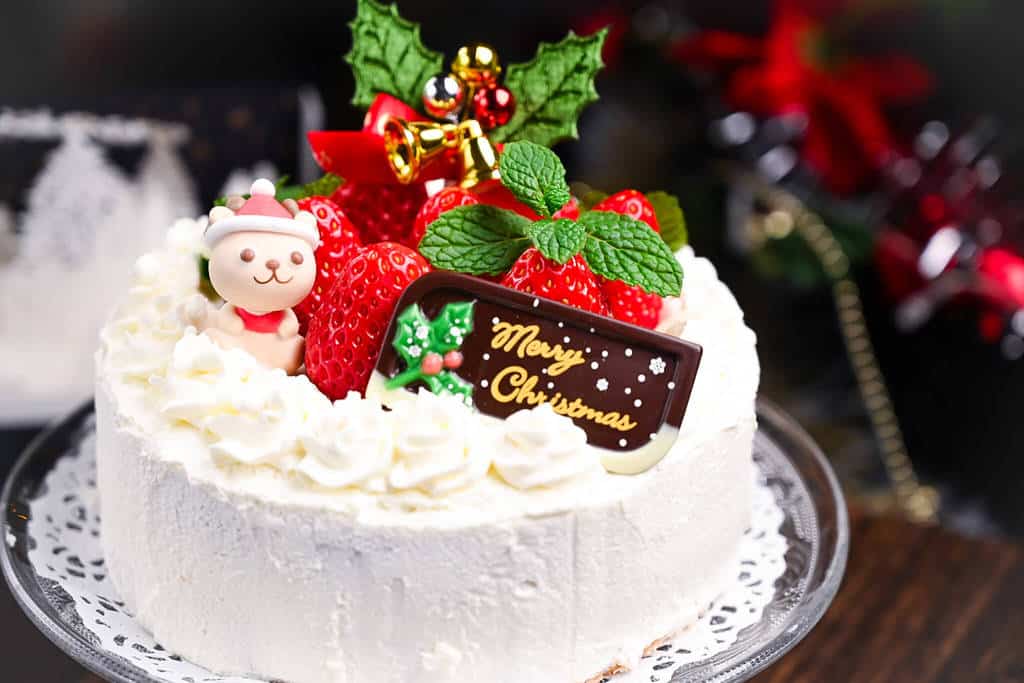
As with every big holiday, food plays a huge part, and Japan has its own unique traditions when it comes to Christmas. In fact, it might surprise you to learn that Christmas is typically celebrated by eating fried chicken (specifically KFC), soy-glazed chicken leg quarters and Strawberry Shortcake, Japan’s own iconic Christmas cake!
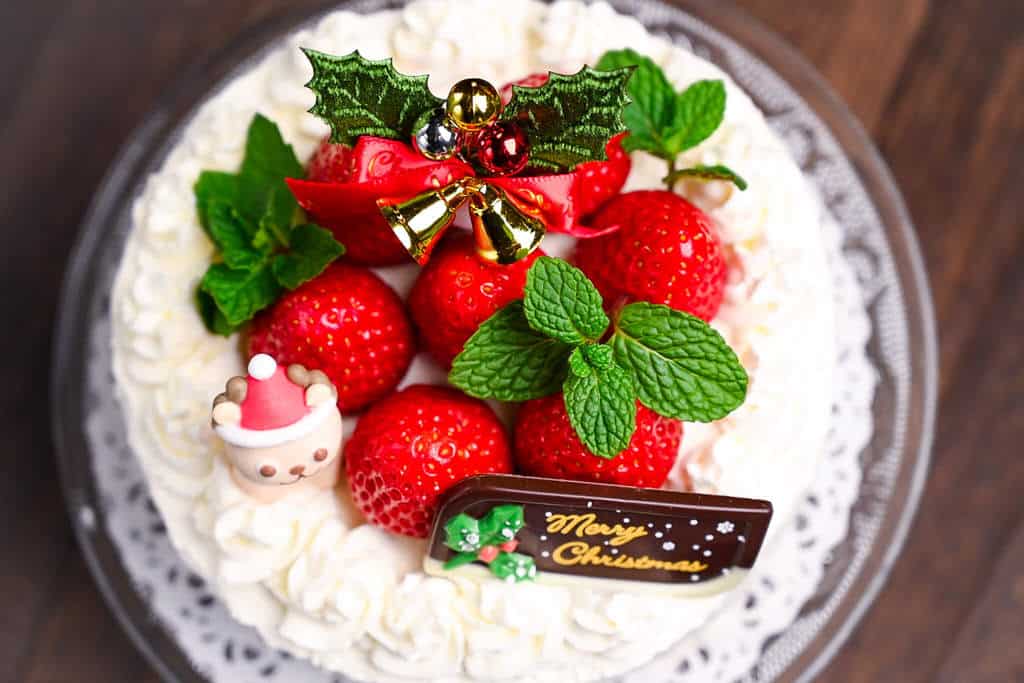
This airy sponge is topped with lashings of fresh cream and tangy strawberries, the perfect addition to a festive spread that the whole family will love!
Japanese Christmas Cake
Recipe Snapshot
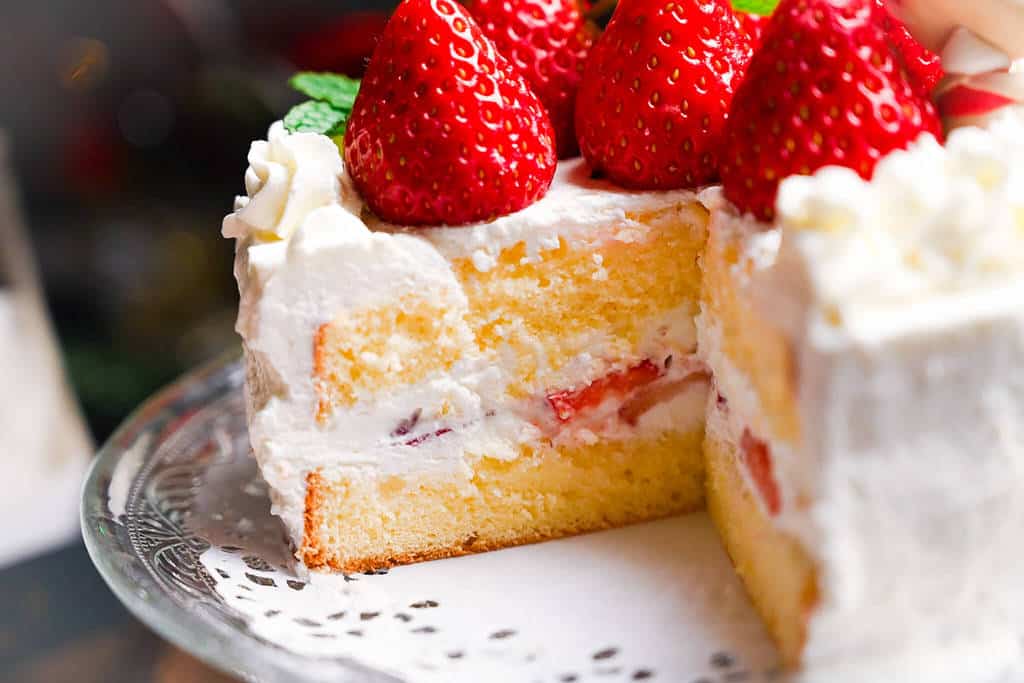
- What is it? A light and fluffy Genoise sponge topped with whipped cream and fresh strawberries.
- Flavor profile: Light, Creamy, Fresh.
- Why you’ll love this recipe: Layers of ultra-fluffy sponge, lightly sweetened whipped cream and juicy strawberries creating a cake that is simple, elegant and perfectly sweet.
- Must-haves: 15cm (6″) cake pan, electric whisk, glass mixing bowl
- Skill Level: Hard
- Freezer Friendly? Partially.
Summarize & Save this content on:
What is Japanese Christmas Cake?
Strawberry shortcake is a light and delicate cake made with layers of fluffy Genoise sponge topped with whipped cream and fresh strawberries.
It’s the go-to celebration cake for birthdays and special occasions, but you’ll see it most at Christmas, when greenhouse-grown strawberries fill Japanese supermarket shelves despite being out of season.
Unlike the rich European Christmas cakes packed with dried fruits and spices, the Japanese version is simple, soft, and gently sweet, making it a festive family favorite across generations.
Strawberry Shortcake Ingredients
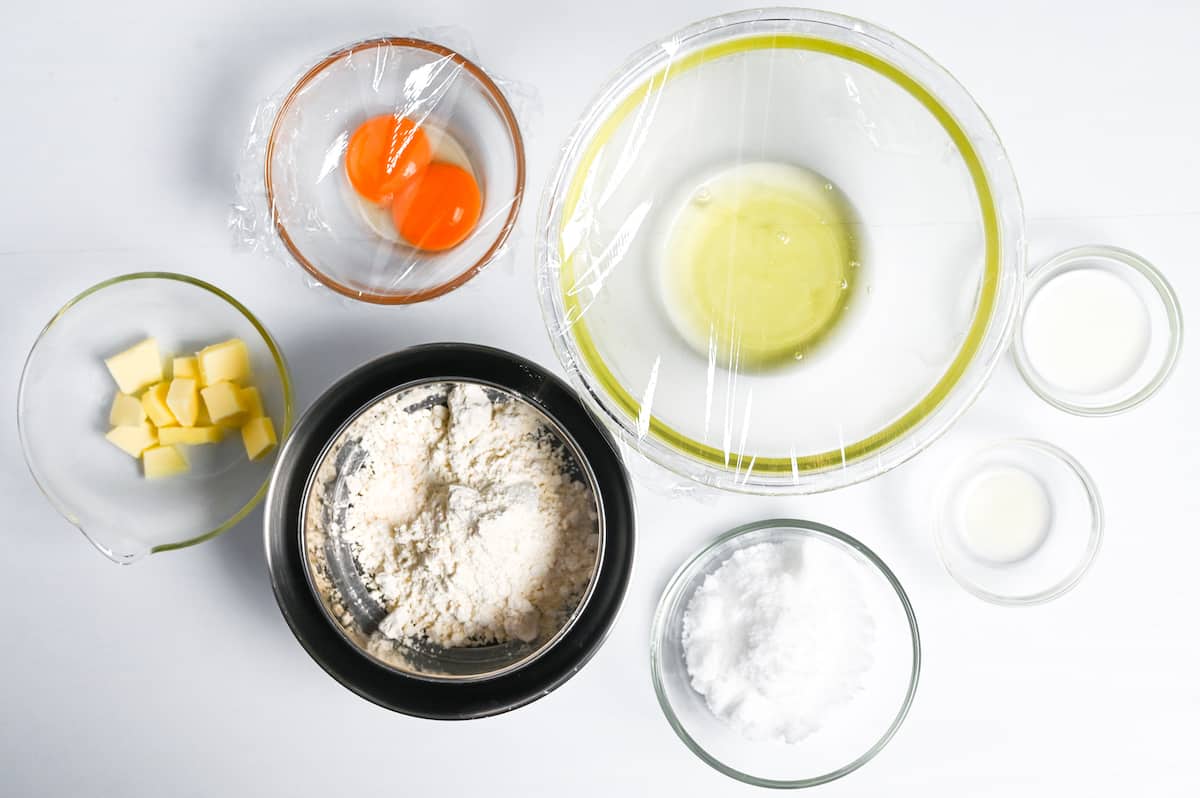
What You’ll Need for the sponge:
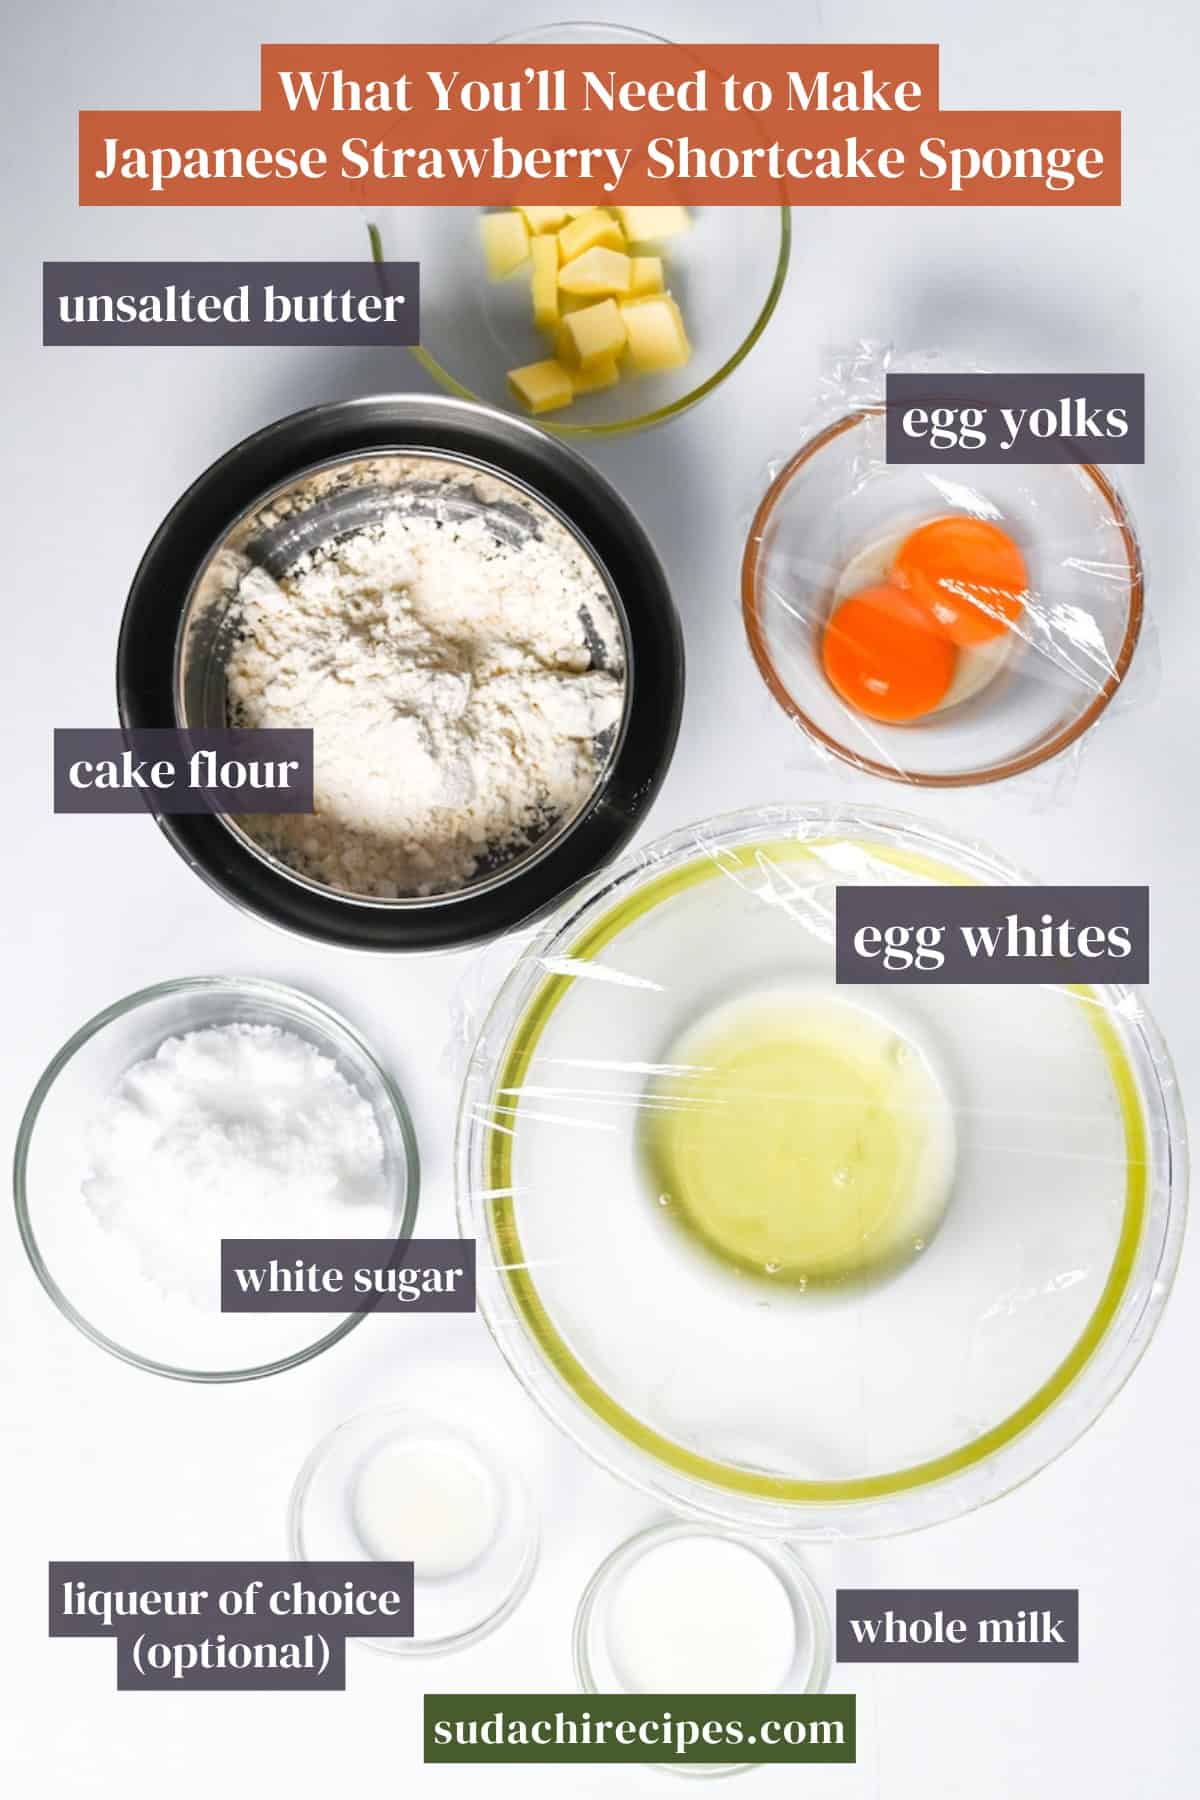
- Eggs – Standard large eggs (approx 50g each) are the essential ingredient to make the meringue and help the cake rise. No baking powder is used in this recipe, this recipe relies purely on the rise from a good meringue.
- Cake flour – a type of flour with a low gluten content. Sifted 2-3 times makes the sponge extra light and airy.
- Liqueur (optional) – to make a syrup to lightly soak the sponge and add a hint of extra Christmassy flavor! I use Grand Marnier or Cointreau orange liqueur but you can swap out for your personal favourite. Brandy or rum also work great. Feel free to omit if you prefer not to use alcohol.
cream and toppings:
- Heavy cream – between 36-45% milk fat to ensure a rich and creamy topping that whips well and holds its shape.
- Flavorings – powdered sugar for sweetness and smooth texture, vanilla essence (or extract).
- Decorations – mint leaves, Christmas chocolates or cake toppers.
equipment for this recipe:
- Electric hand whisk – sure, it’s possible to make it without one. But you run the risk of not getting enough air into your mixture and it takes a lot longer too. (If you want to try making it by hand, try buying a balloon whisk. It’s especially for getting air into meringues and cakes by hand.)
- Tempered glass (pyrex) or stainless steel mixing bowl – cream needs to stay chilled while whipping so it’s better to use a mixing bowl made from a heat sensitive material. Plastic mixing bowls are not recommended.
- 15cm (6″) cake pan with a removable base (See example – affiliate link) this will make it easier to remove your cake from the mold without damaging it.
- Baking paper or parchment – for easy removal and a beautiful finish.
- Icing spatula and a piping bag with star nozzle – optional for decorating.
How to Make Japanese Christmas Cake
Before you start: Measure the sponge ingredients in advance and let them come to room temperature for 20-30 minutes before you start, this will help them combine more easily. Since eggs tend to separate more easily when they’re cold, separate the yolks and whites, then cover them to stop them from drying out.
The opposite is true for the cream; heavy cream should be thoroughly chilled before whipping. I recommend keeping your mixing bowl in the fridge too!
1. How to make Genoise sponge
Genoise sponge is light and fluffy but also rich and moist. What sets it aside from a regular sponge cake is using butter to make it richer and more flavourful. It also uses eggs as the only rising agent, without baking soda or baking powder in this recipe.
Preheat your oven to 180°C (356°F) or 170°C (338°F) for fan-assisted or convection while you make the batter.
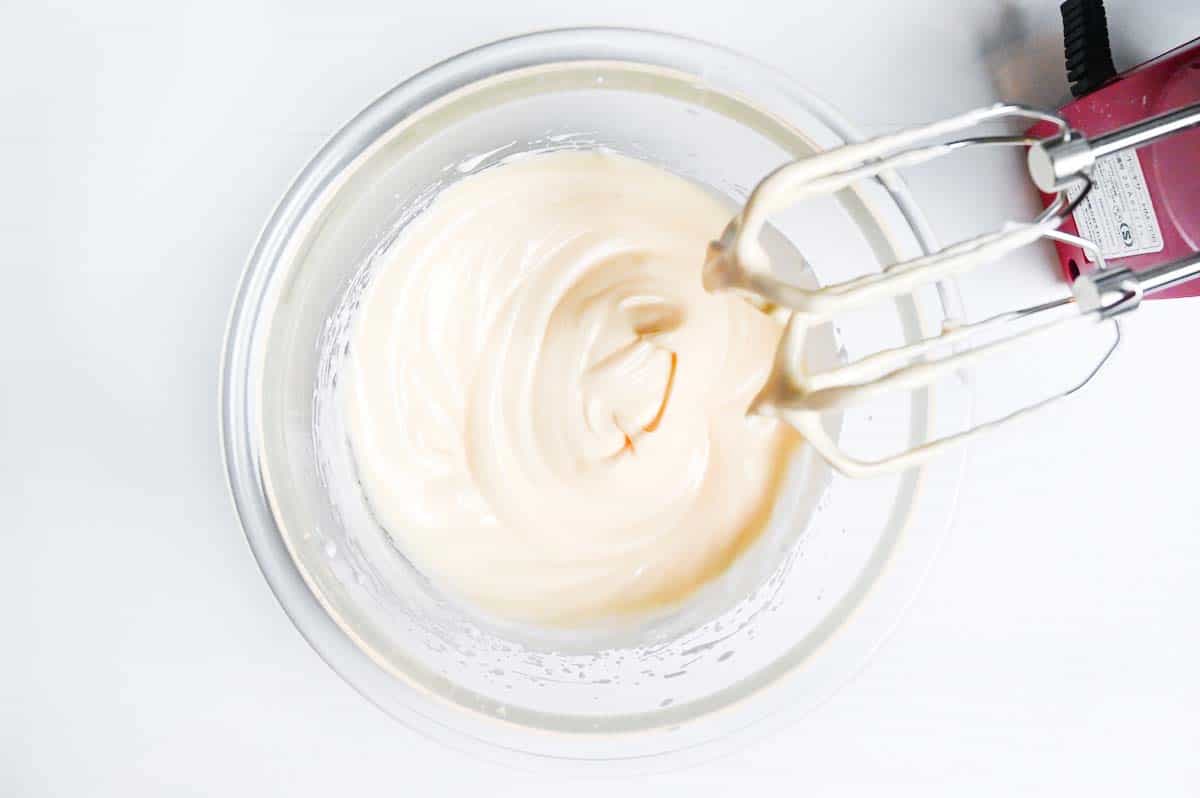
i. Place the egg whites in a glass bowl and add the lemon juice. Whip with an electric mixer on medium speed until foamy and doubled in size.
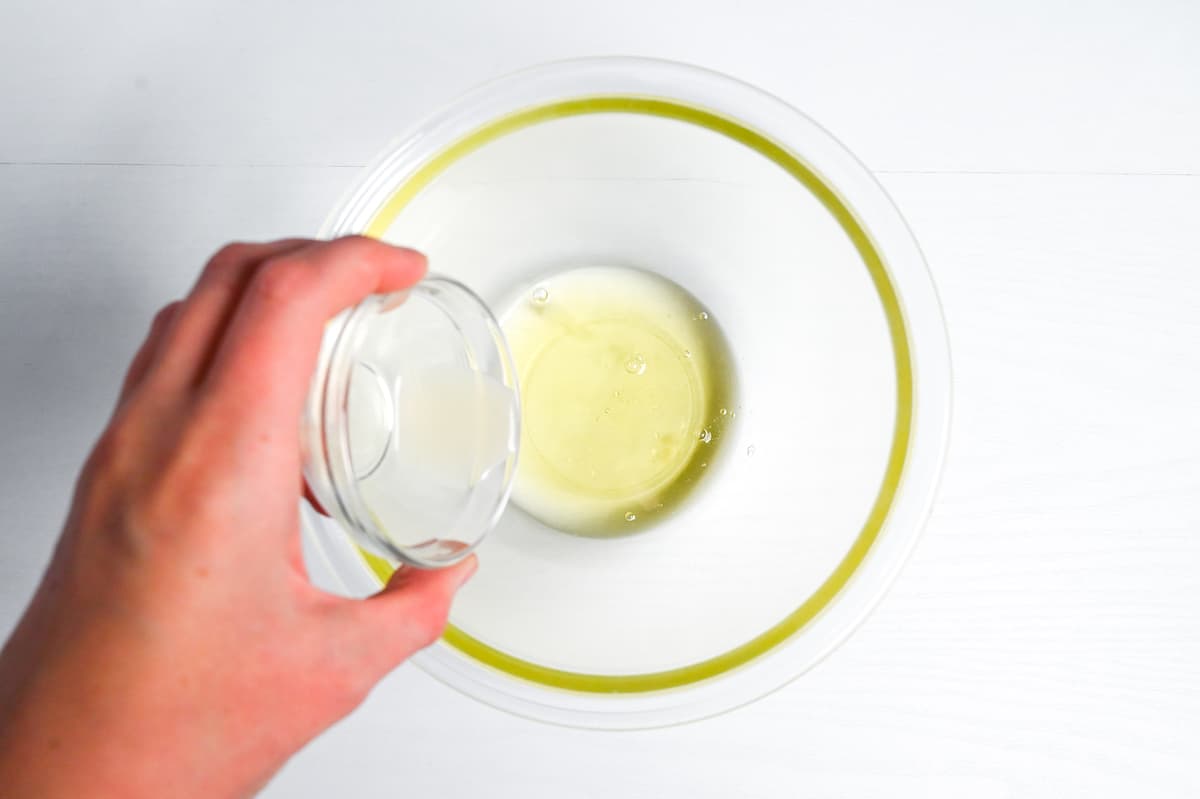
The acidity in lemon juice helps aerate the egg whites and make them more stable when whipping. The cake will not taste like lemon.
ii. Gradually add the sugar in three or four parts, making sure it’s fully incorporated between each addition. The sugar stabilizes the egg whites and helps turn it into a beautiful, glossy meringue.
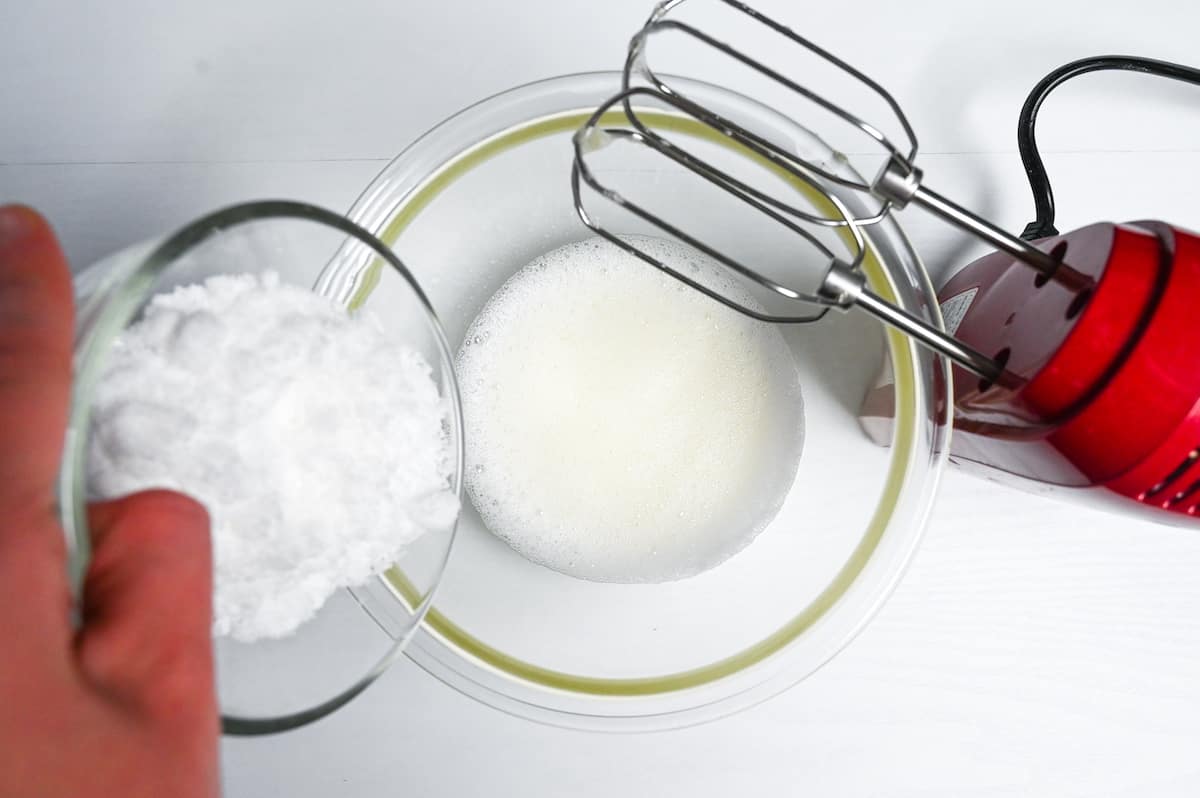
By adding the sugar slowly, one-third at a time, the sugar crystals can dissolve slowly without crushing the air out of the mixture.
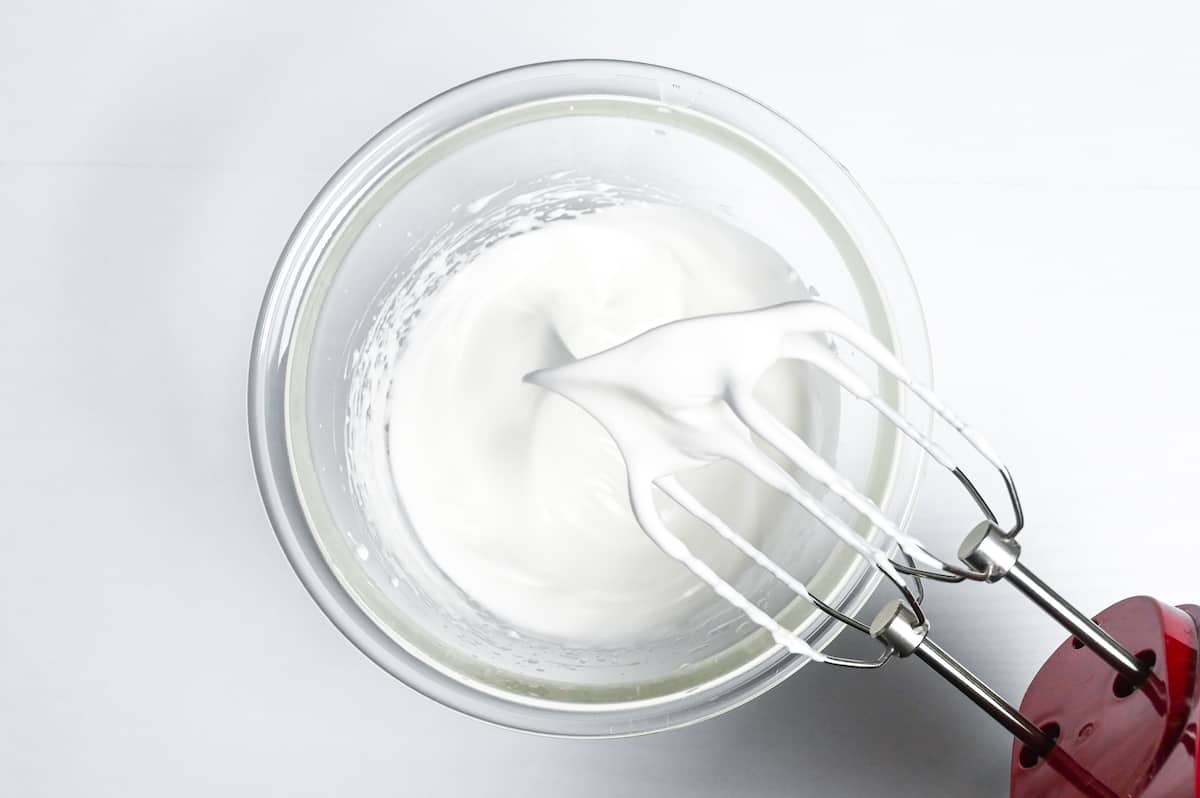
iii. Whip until the meringue has stiff, pointy and stable peaks. Use a medium speed to avoid large, unstable air bubbles.
Add the egg yolks one by one, and whisk with the electric mixer for a short time until combined. (About 10-20 seconds for each yolk.) Be careful not to whisk for too long otherwise you risk beating the air out of the meringue.
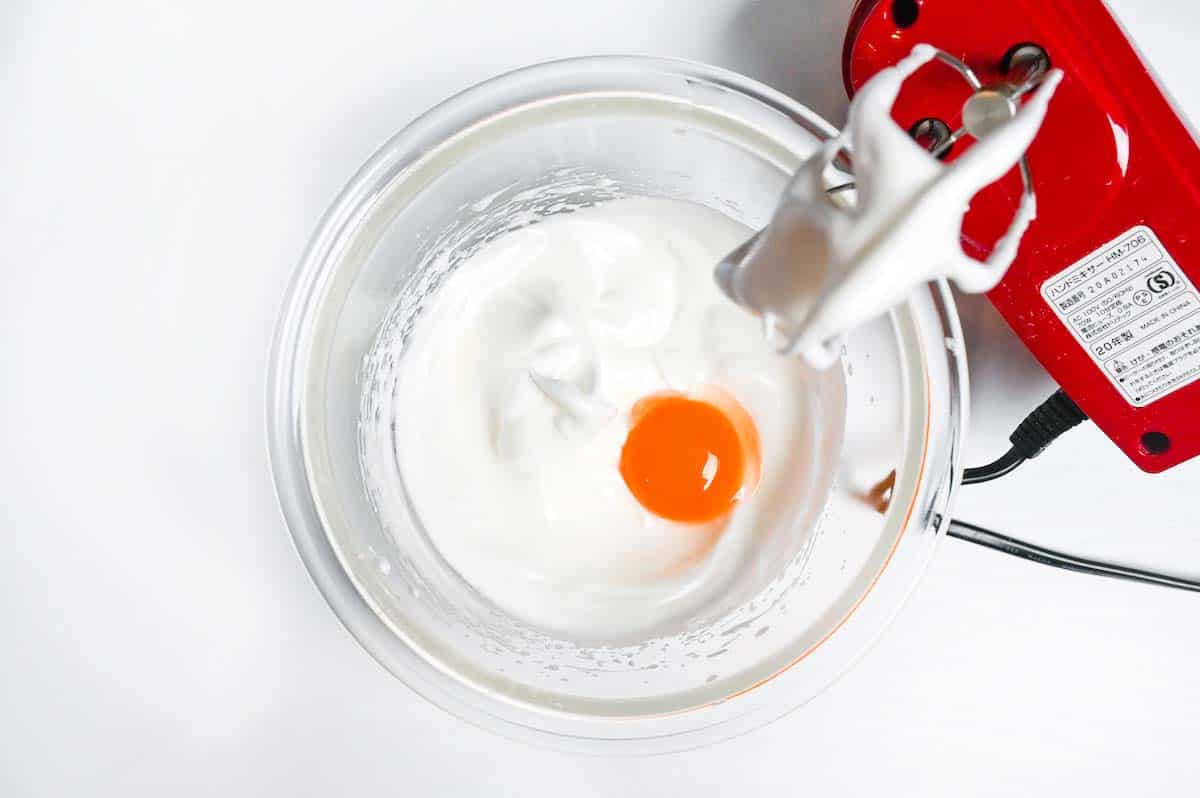
As soon as the egg yolks are combined with the whites, stop whisking.
i. Sift the flour 2-3 times in a separate bowl to ensure it’s airy and lump free.
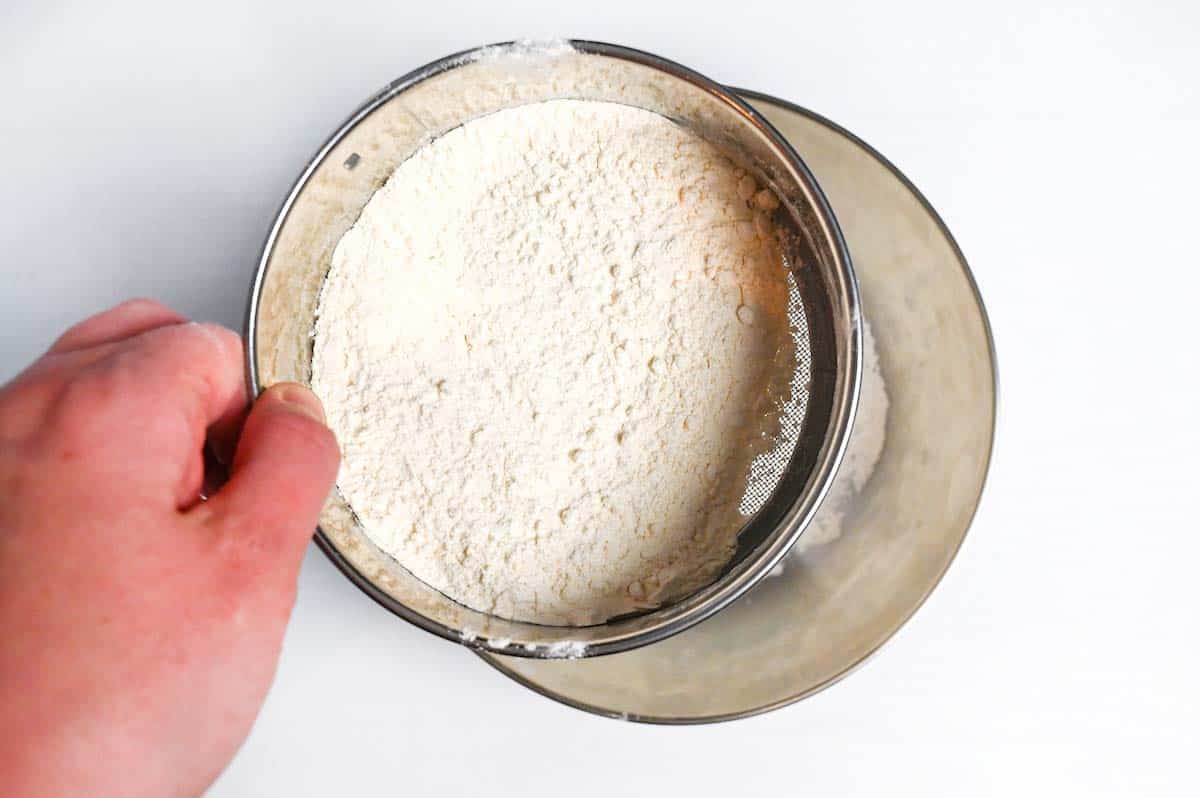
ii. Sift the flour again, this time into the egg mixture. Add it one-third at a time and mix gently using a silicone spatula to prevent air loss.
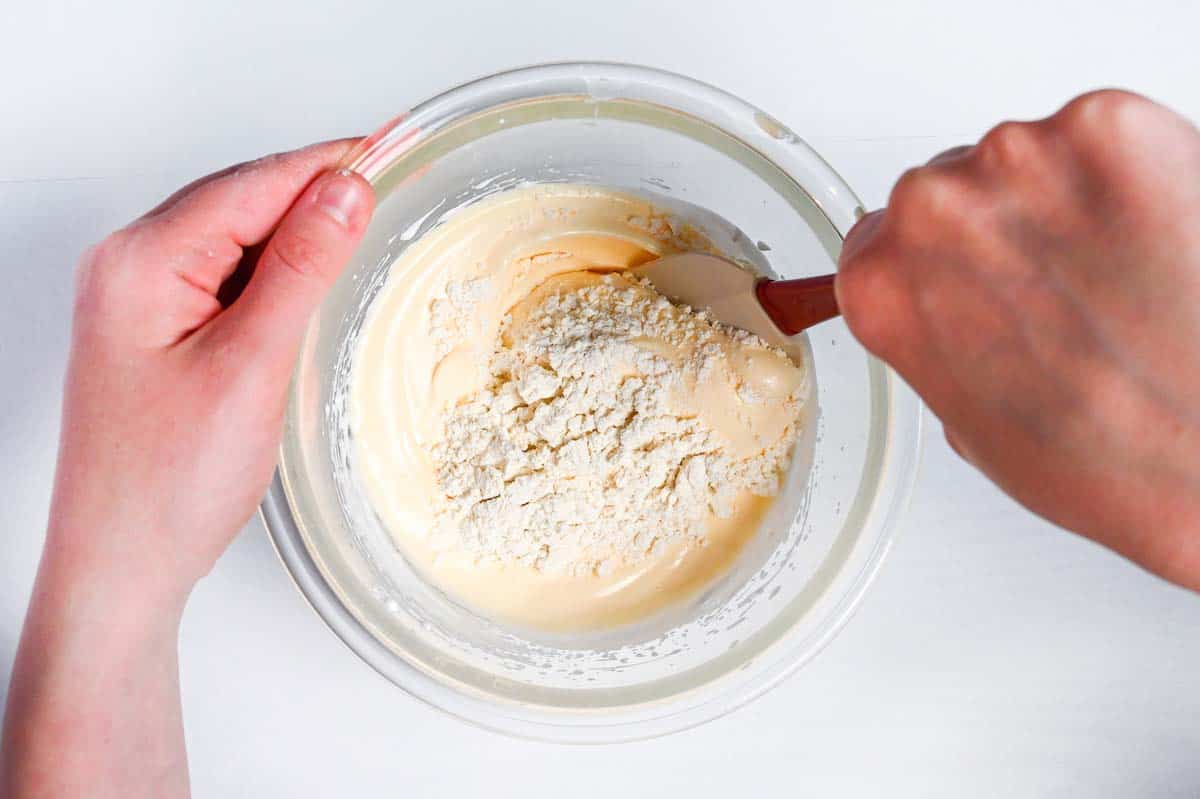
iii. As soon as the flour is incorporated, stop mixing.
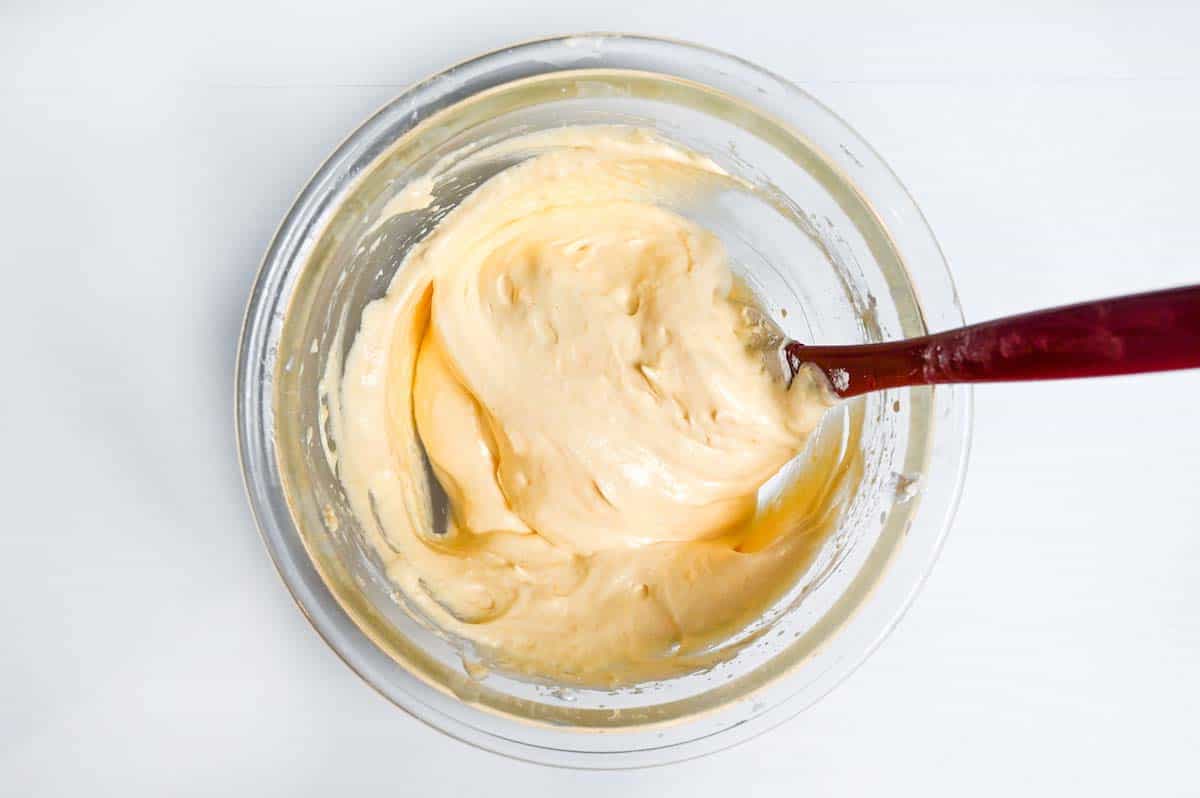
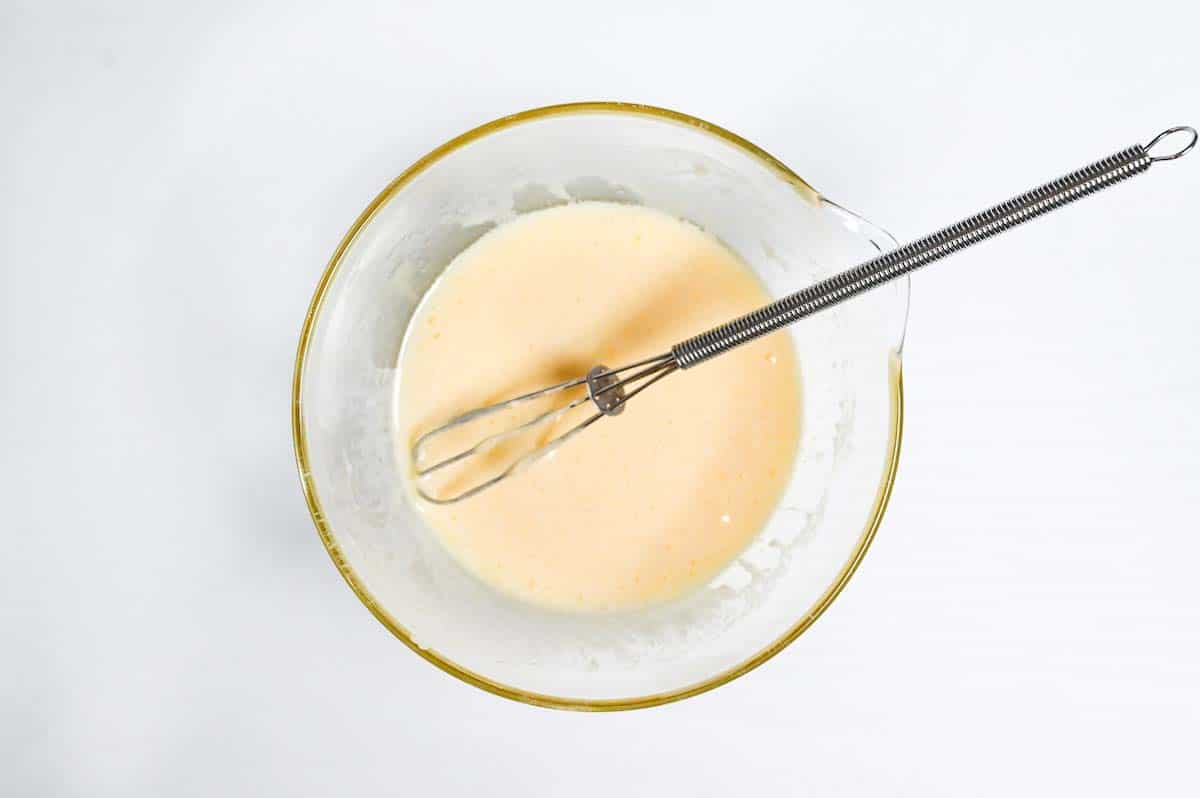
i. Melt the butter in a small bowl, add the milk and whisk thoroughly. Add 1-2 tbsp of the sponge batter.
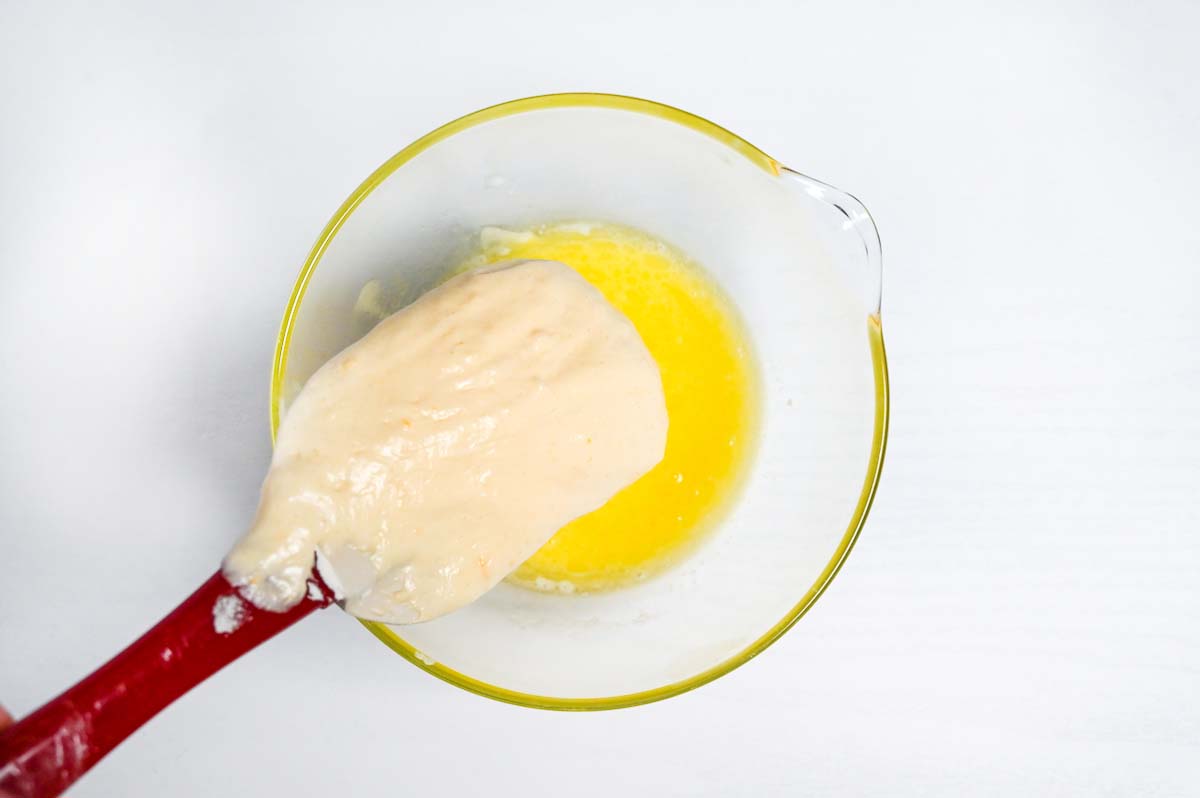
ii. Whisk thoroughly until combined. This will help make the consistency similar to the cake batter, making it easier to combine without over-mixing. This is called tempering.
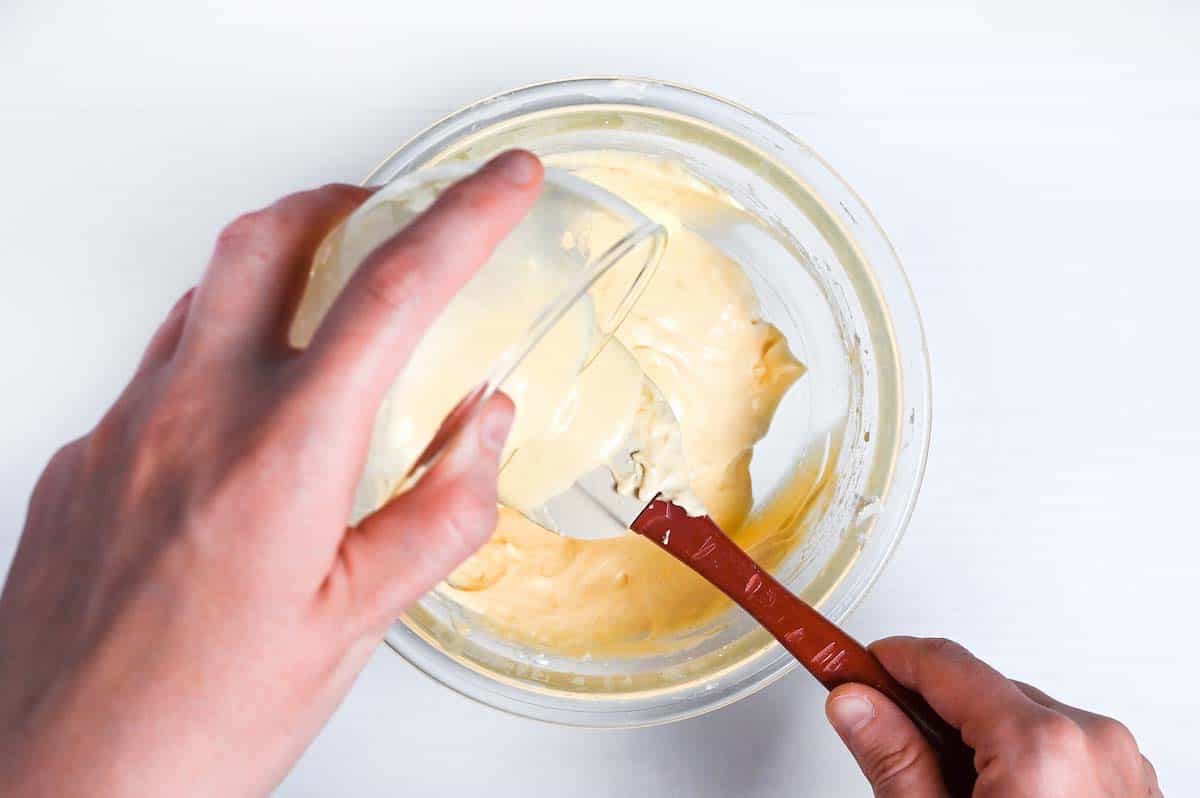
iii. Pour the tempered mixture into the rest of the batter and mix them together gently until combined.
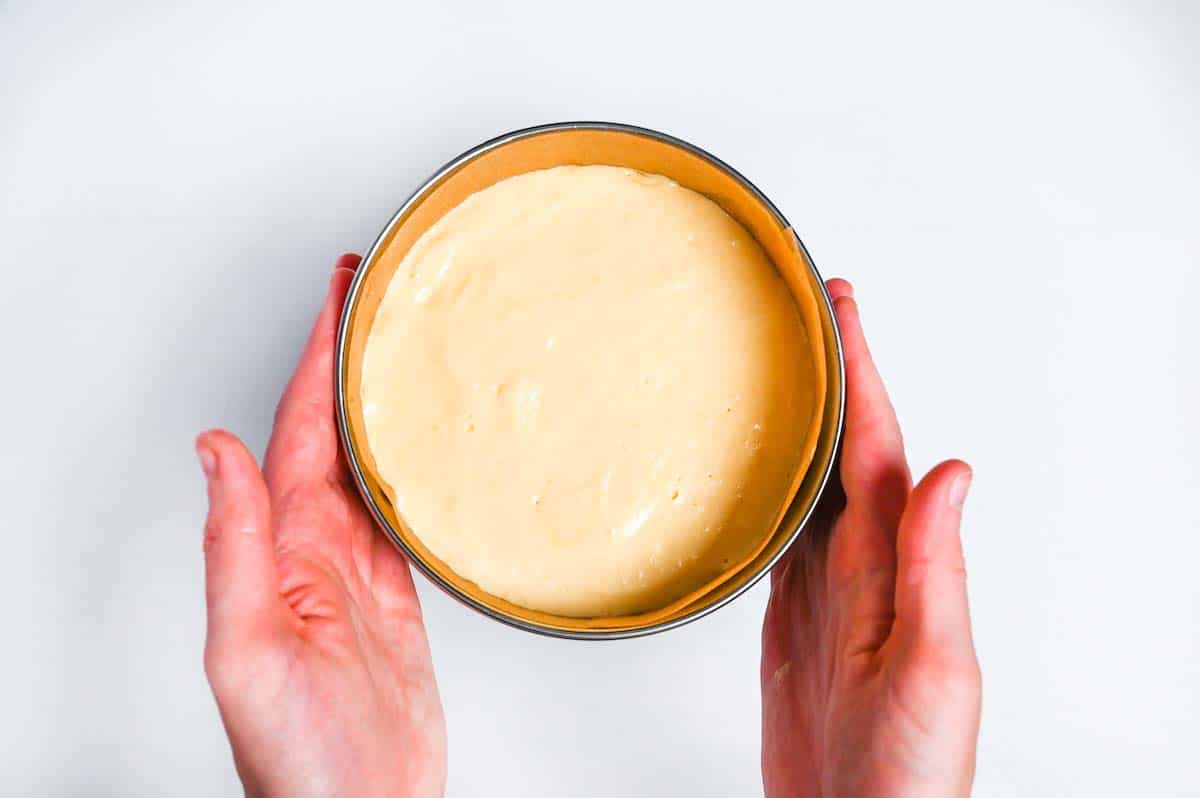
i. Line the base and sides of your cake tin with baking parchment. You can use a bit of butter to help them stick to the surface of the tin.
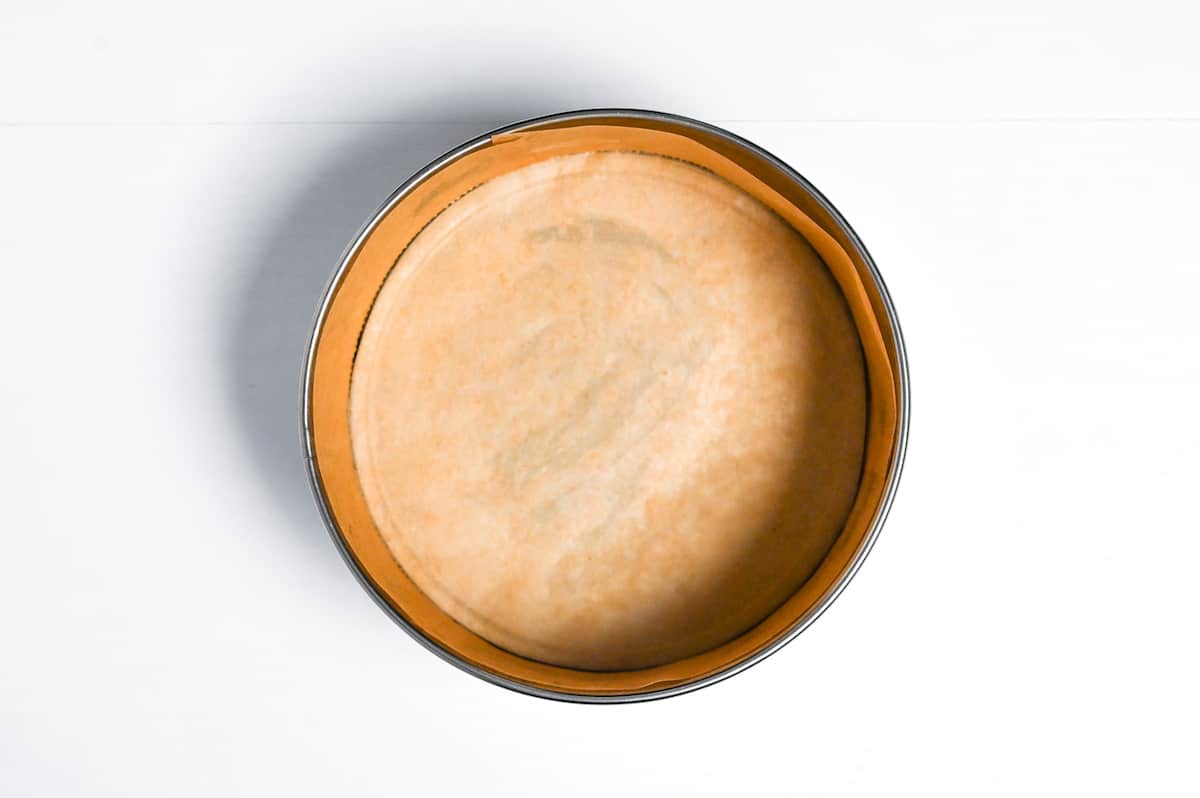
ii. Pour the batter into the tin and smooth out the top. Drop the tin onto a hard surface a couple of times to push any large air bubbles to the top and then immediately place in the preheated oven on the middle shelf.
iii. Bake for 22-25 minutes or until golden and springy to the touch.
Opening the oven will allow the hot air to escape and cause the cake to deflate and shrink, so don’t be tempted to open it until it’s done!
i. Once it’s baked, remove the sponge from the oven and drop on to the counter from a high of about 20cm (8 inches). This helps prevent shrinking.

ii. Carefully remove it from the cake tin (wear oven mitts and be careful not to burn yourself!) and then leave it to cool on a wire rack.
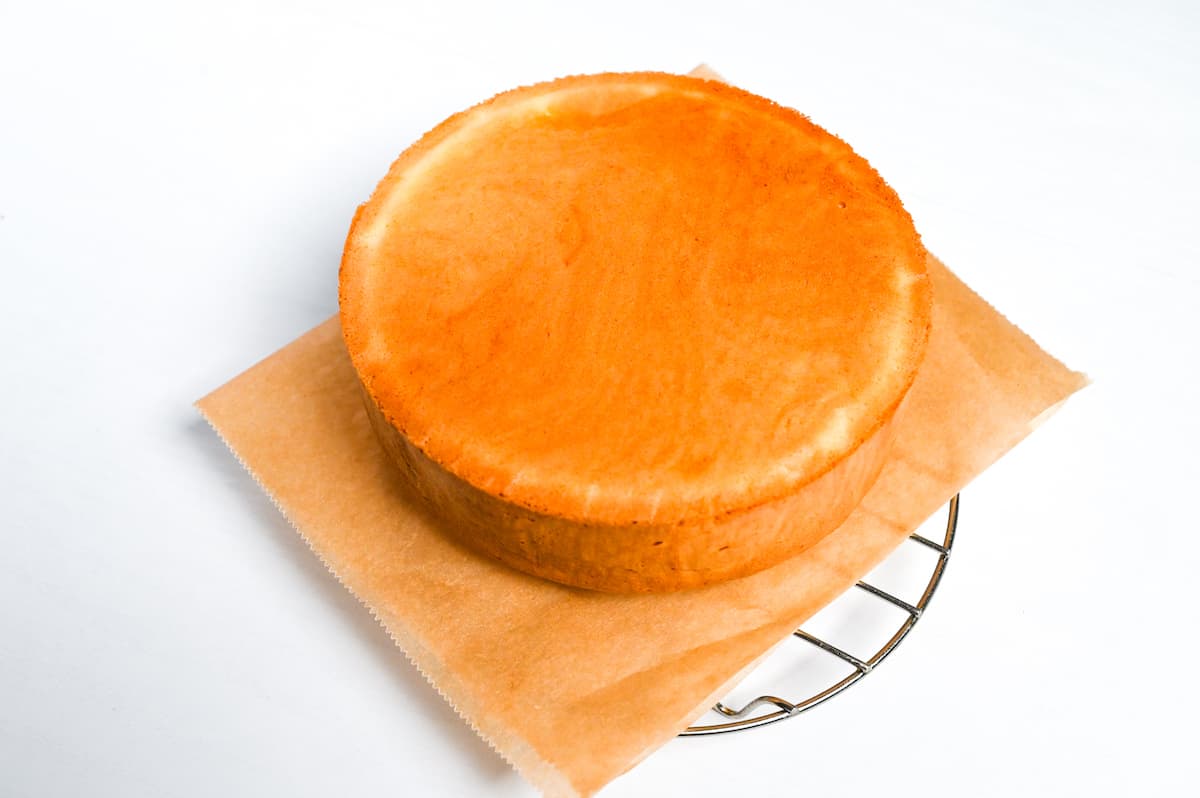
iii. Once cool to the touch, carefully peel off the baking parchment.
2. Make the syrup
The sponge is also typically brushed with a sugar syrup flavored with a small amount of liqueur. (The liqueur is optional.) This adds extra moisture and flavor to the cake.
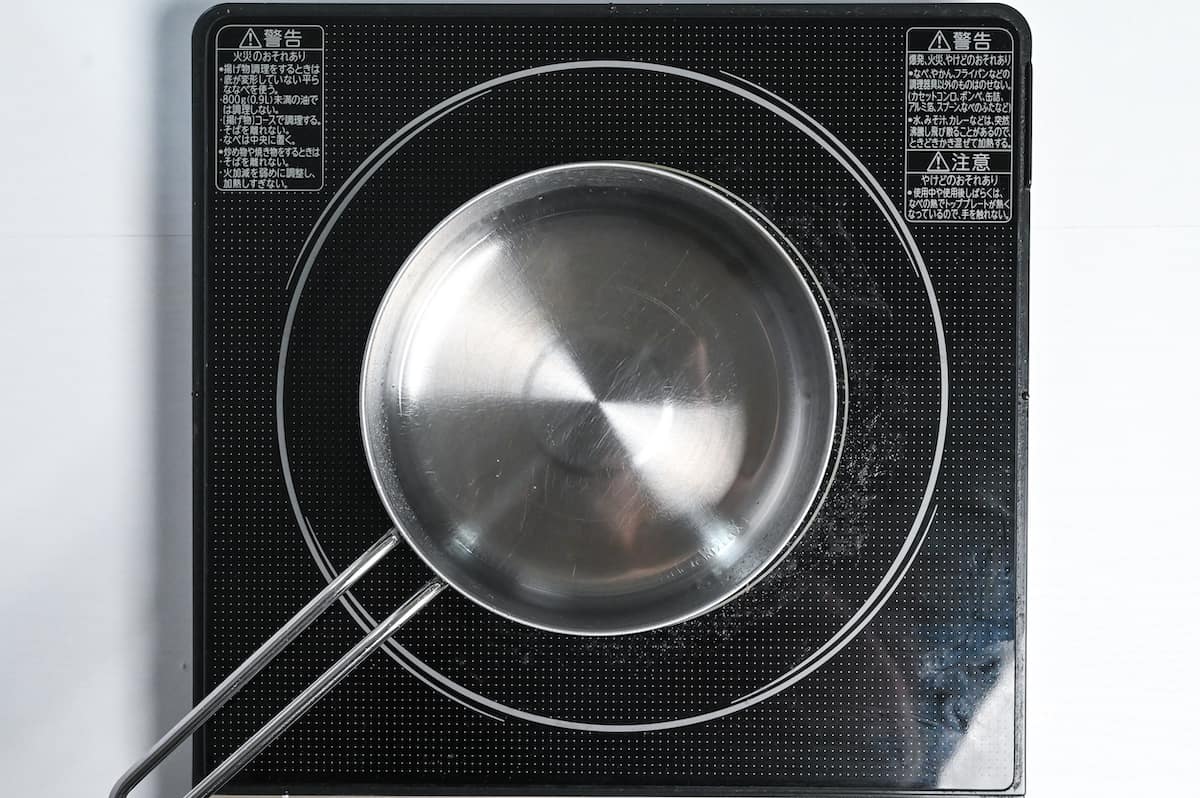
Mix the caster sugar, water, and liqueur (optional) in a small pan. Bring to a boil over medium heat while stirring to dissolve the sugar. Once it starts to bubble, stop mixing and boil for 1 minute to burn off some of the alcohol.
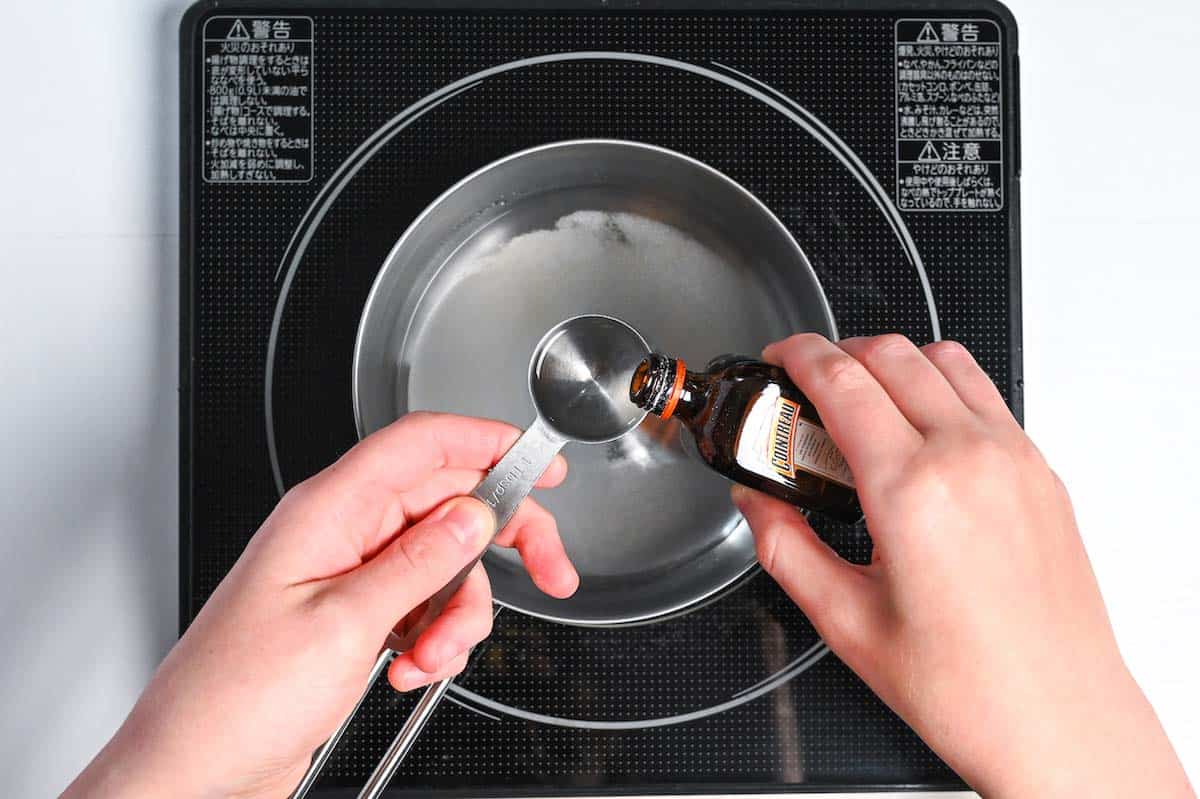
Remove from the heat and set aside.
Once the cake has cooled, cut off the top “dome” to make it flat and level, then cut it in half. Use some kind of level to keep it perfectly even. (I used two clean pieces of wood, but a thick chopping board or even a couple of books could work.)

Tip: If you prefer a thinner sponge, you could even cut it into three! Just be careful when handling as thinner sponges are more delicate and easy to break.
Generously brush the tops of the sponge with syrup. If you have some leftovers, you can use it on the top of the cake later.

3. Toppings & Assembly
In this section, I will show you how to prepare the strawberries for the top and filling and how to whip the cream to fill and decorate your strawberry shortcake.
The cake should be fully cooled and the cream should be straight from the fridge (chilled). I also recommend chilling the bowl, but if you forgot, you can place the bowl in the freezer for 5-10 minutes while you prepare the strawberries.
Wash the strawberries and dry them thoroughly using kitchen paper to avoid droplets of water ruining the cream. Select 8 beautiful and uniform strawberries and remove the stems, then place them on kitchen paper to absorb the excess moisture. These will be for the top.
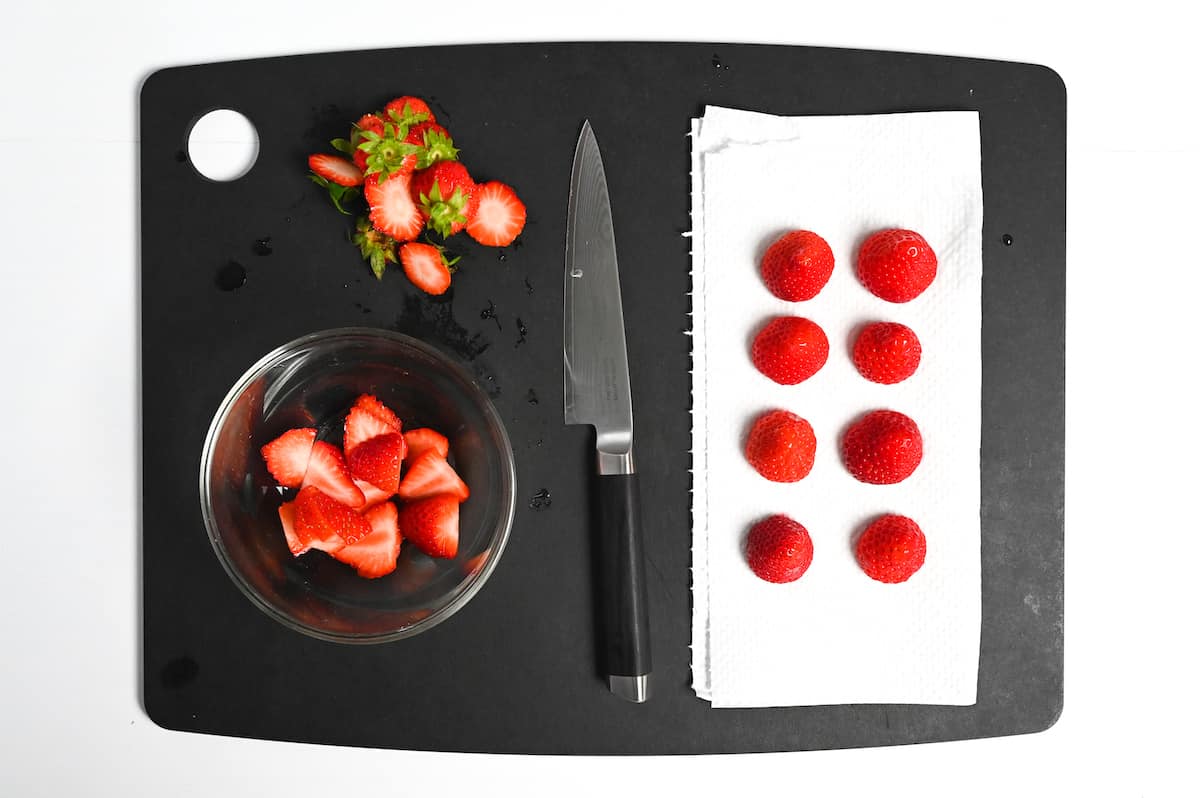
Cut the rest into slices; these will be used to fill the middle of the sponge.
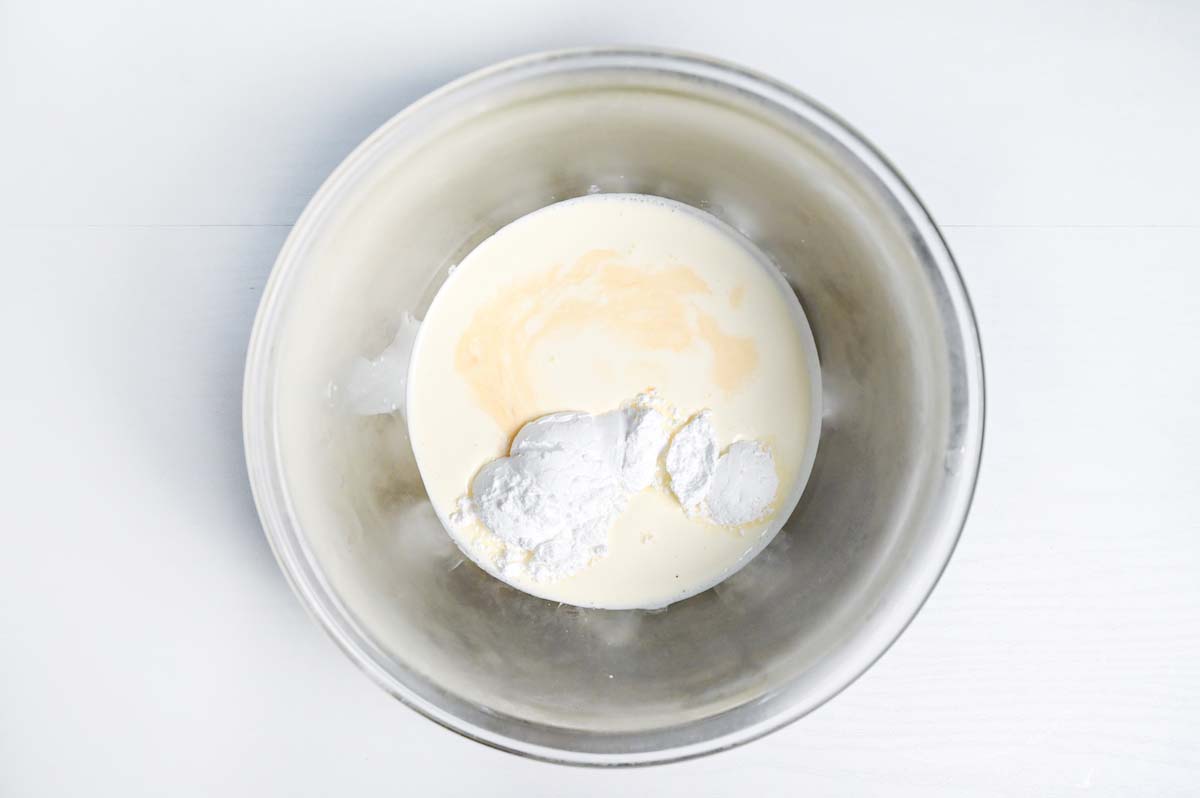
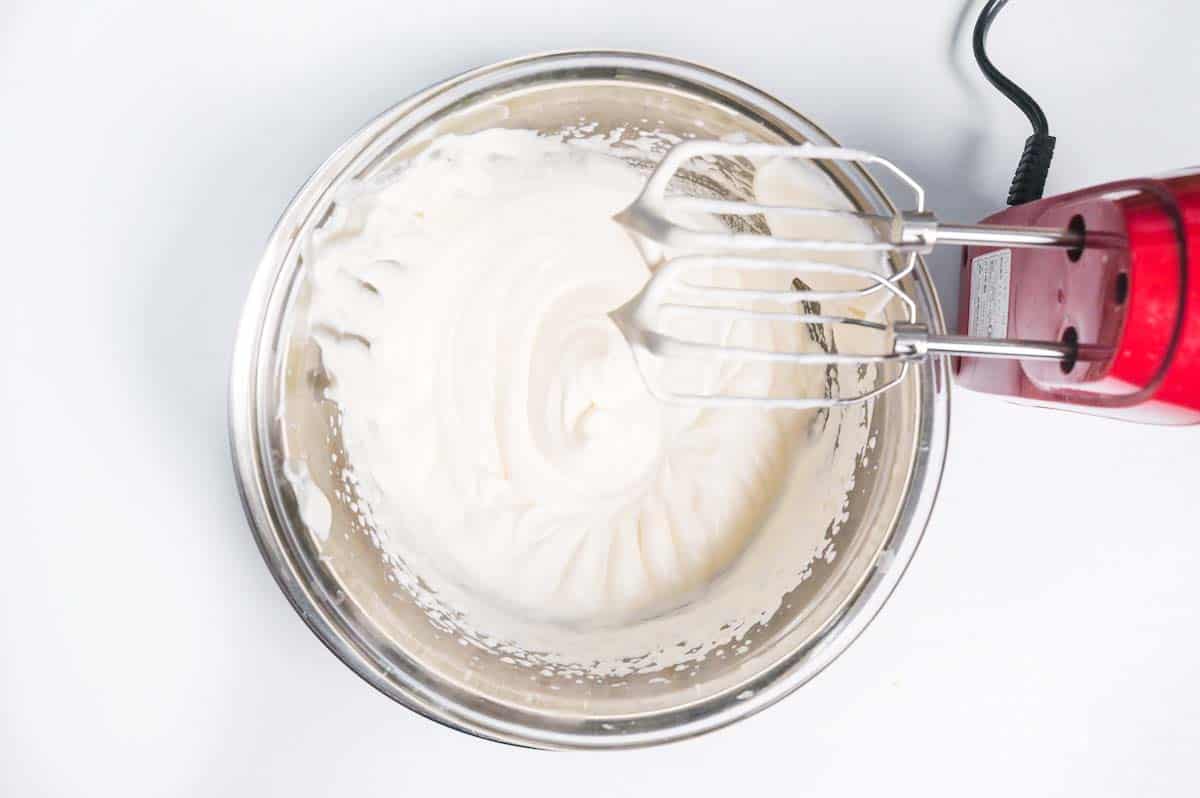
i. Take a chilled mixing bowl (glass or steel) and place it in a larger bowl filled with ice. Pour the cream into the bowl and add the powdered sugar and a few drops of vanilla.
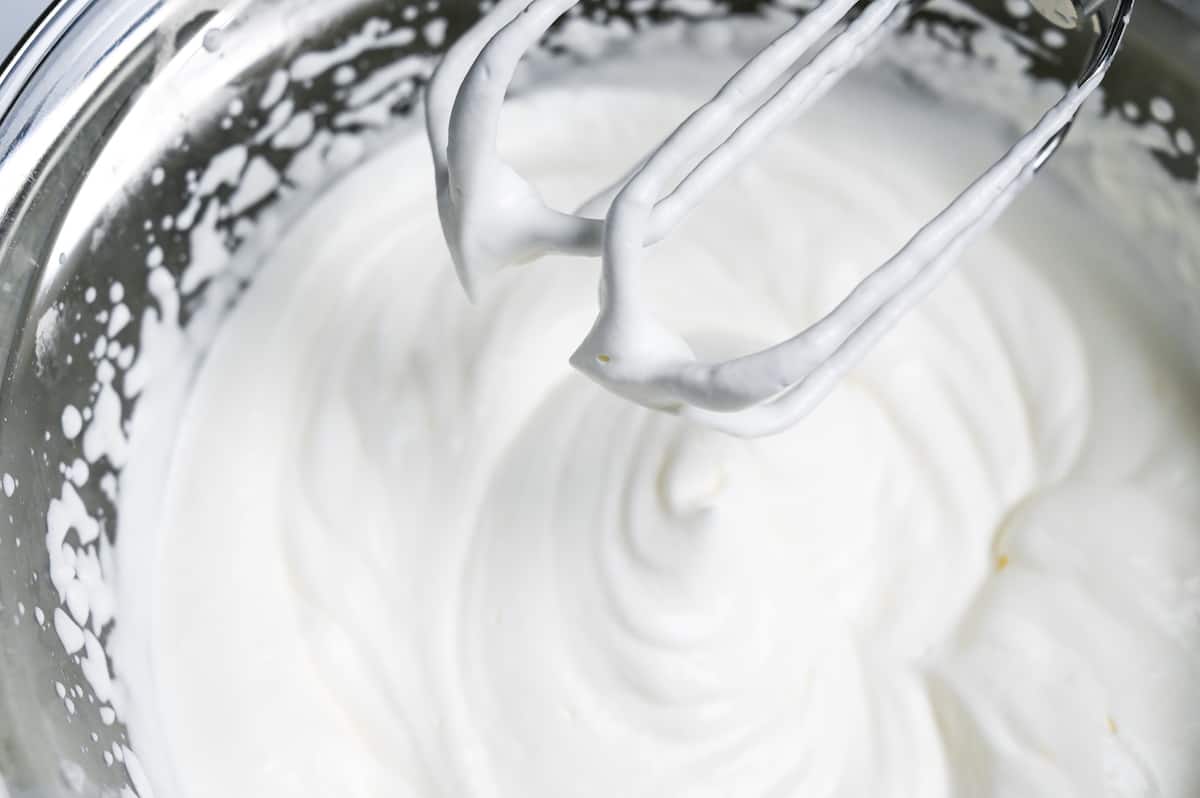
ii. Whip the cream using an electric whisk until it reaches stiff peaks.
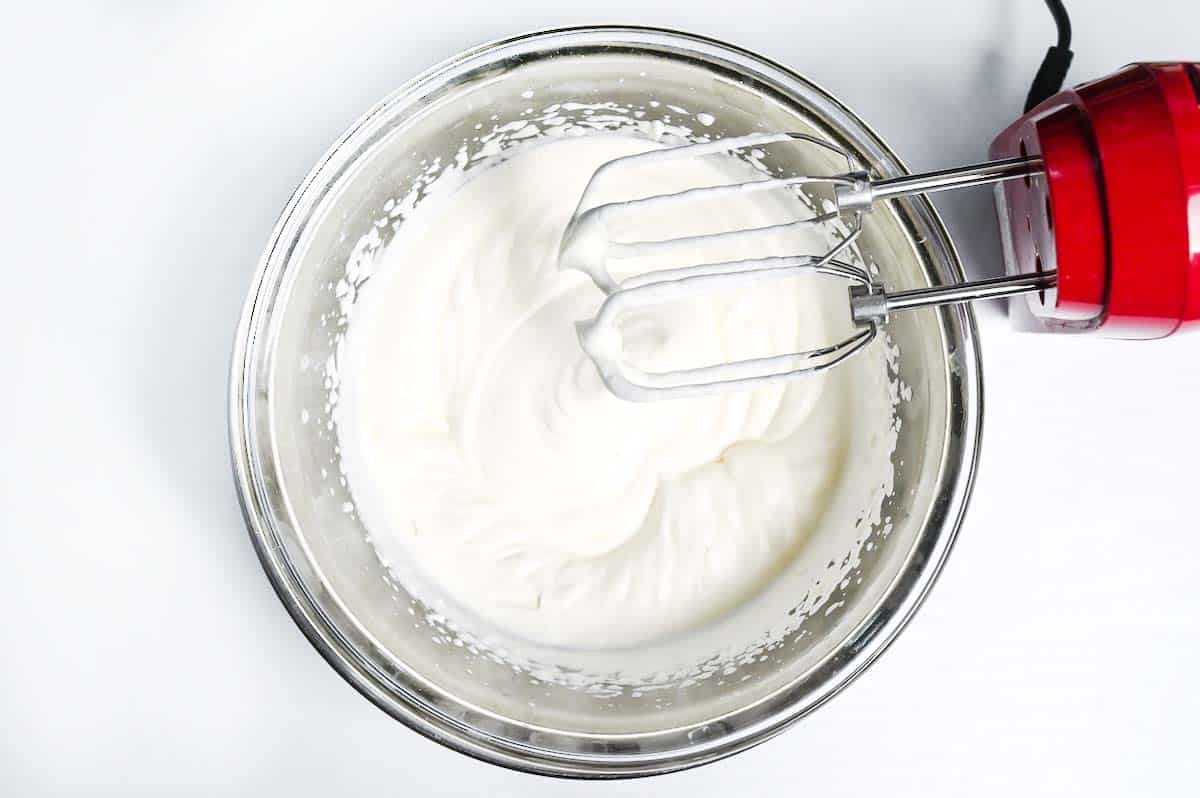
Transfer about one-third of the cream to a piping bag and place it in the fridge for later.
i. Apply a generous layer of whipped cream on the tops of both pieces of the cake, then top one side with sliced strawberries.
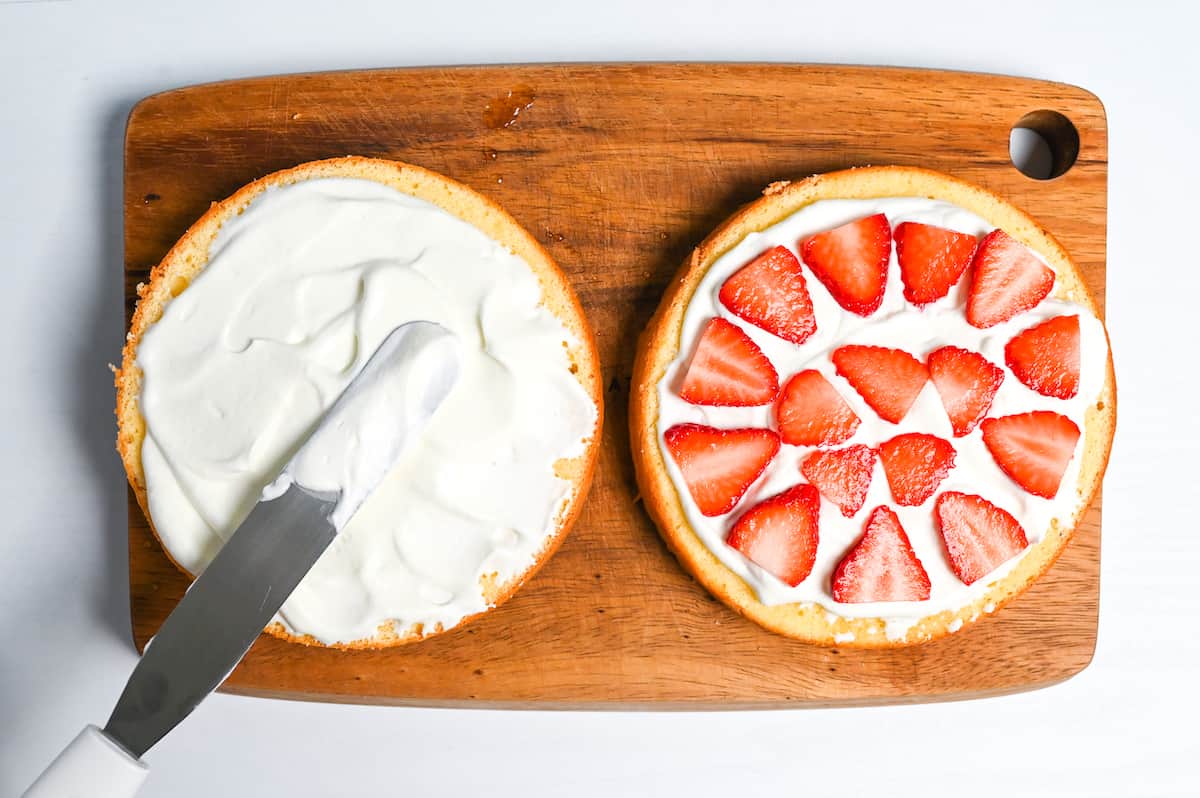
ii. Flip the cream-only piece onto the strawberries to sandwich them between the cream. If you have leftover syrup, you can brush it over the top of the cake.

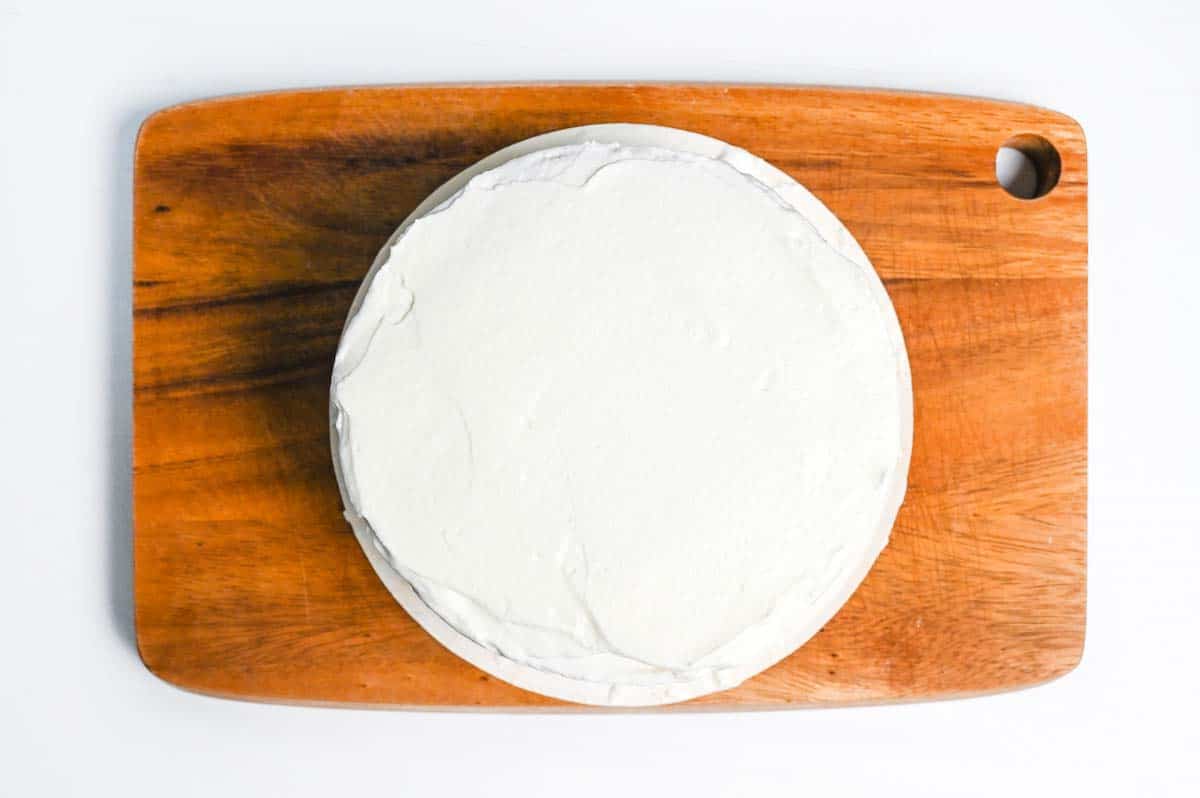
i. Add a thin layer of cream to smooth down any crumbs (it should probably be a bit thinner than what I did). It’s okay if the sponge is still showing through at this point.

ii. If you find the cream starts to soften/loosen, whip again to make it thicker. Just be careful not to over-mix.
Add another layer of cream to the sponge, this time make it thick and smooth. Make sure to coat the edges too.
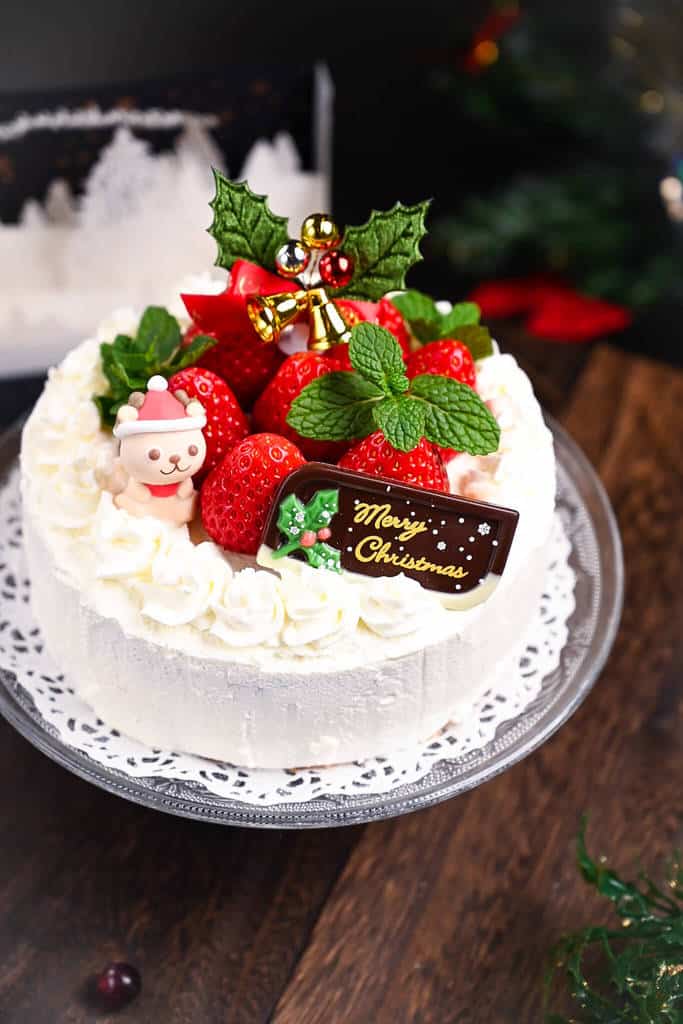
iii. Pipe swirls around the edges and arrange the strawberries and decorations on top.
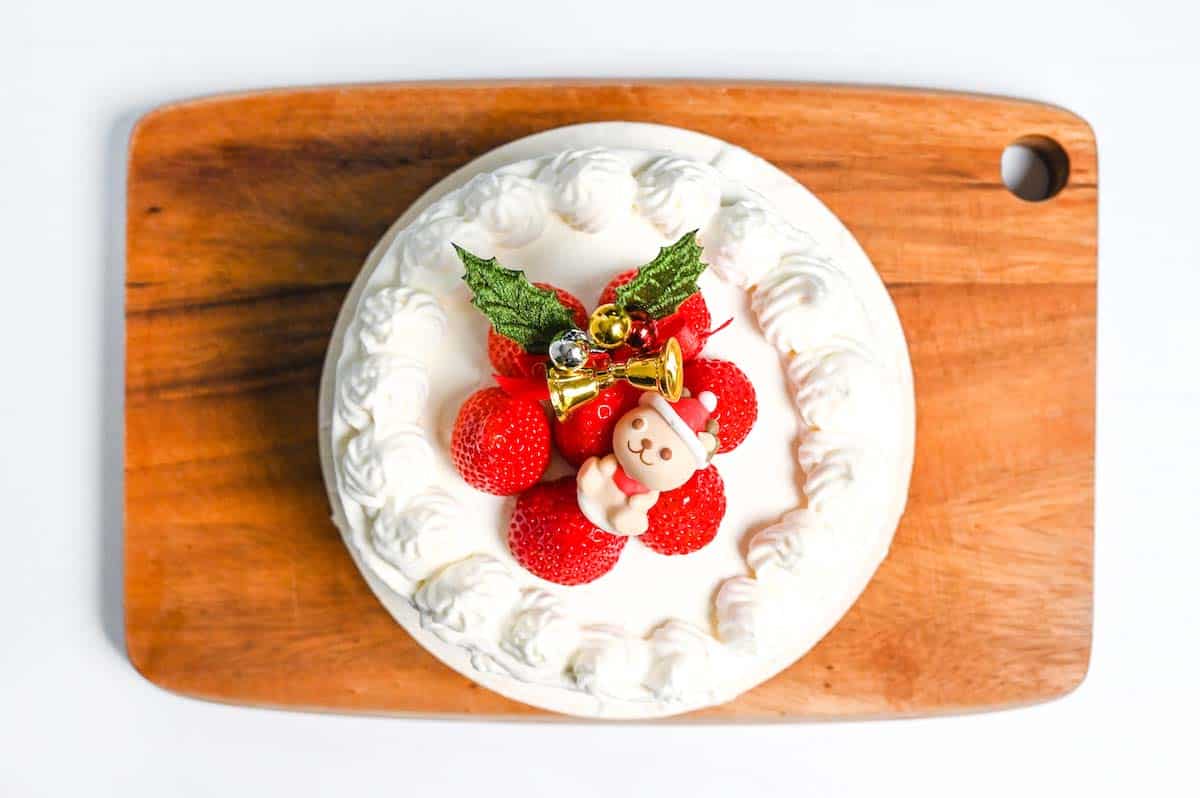
Enjoy your delicious homemade Japanese Christmas cake with family and friends!

Essential Tips & Tricks
- Bring the sponge ingredients to room temperature: if all the ingredients are at room temperature, they mix together more easily. Less mixing = less air lost. This results in a fluffier and more even sponge. Room temperature eggs also tend to whip better when they’re at room temperature, but…
- Separate the eggs while cold: typically it’s easier to separate the eggs while they’re cold, so separate them first and then let them come to room temperature. I also recommend covering them so they don’t dry out or form a film!
- Use scales: For accuracy, I recommend using scales and weighing all of your ingredients accurately. Measuring with cups and tablespoons can cause unexpected results.
- Use cake flour – cake flour is a “weak flour” meaning it has a low gluten content (but not gluten-free) and creates a lighter cake.
- Sift the flour multiple times – this will make the flour well-aerated, lump free and light! I sift twice before starting and then once more when adding it to the batter.
- Make a stable meringue – whip the eggs using a medium speed and add the sugar gradually to ensure your meringue is stable. Whip until it reaches stiff peaks, they should point upwards and hold their shape without folding over! This is key to getting the perfect rise.
- Temper the melted butter and milk – pouring the butter and milk straight into the batter is sure to break some precious air bubbles, not to mention be difficult to mix in. To temper them, add a couple of spoonfuls of sponge batter and whisk them together. The consistency will be a little more similar and easy to combine.
- Drop the cake on the counter – do this before and after baking. Before baking helps push the air bubbles to the top and prevent sinking. Dropping after baking “shocks” the cake and also prevents sinking and shrinking.
- Remove the baking parchment after the sponge has cooled – removing it too early can cause shrinking.
With these simple tips in mind, you’re set for success every time you make Japanese strawberry shortcake.
Oven Tips
All ovens are different and sponge cake recipes tend to recommend between 160°C and 180°C (320°F – 356°F). It might take a few tries to get it perfect as many ovens run at slightly different temperatures.
My fan oven runs hot, so I preheat to 170°C and bake for 23 minutes. I recommend checking the cake after 20 minutes (without opening the oven door) and then every 1-2 minutes after that.
Making This Recipe in Larger Cake Pans
If you’re doubling or tripling the recipe for a larger cake tin, you will need to increase the cooking time. You might also need to bring down the temperature slightly to ensure it’s cooked through without browning too quickly on top.
Doubling the recipe will make a considerably larger cake (20cm or 8 inches), so if you want the middle ground you can multiply the recipe by 1.5 (for 18cm or 7inch cake).
Here is a handy list of ingredients and baking times when increasing the size based on an oven temperature of 170-180°C (338-356°F) in an electric fan oven.

Strawberry Shortcake Troubleshooting & FAQ
This is often to do with the meringue. Since we rely on the eggs for the rise instead of baking powder and other rising agents, it’s vital that the meringue is the right consistency. If you don’t whisk it enough then there won’t be enough air to make it rise. That said, if you over-whisk it you also start losing the air you’ve created. It’s quite a delicate process. For best results, whisk until the meringue reaches firm and stable peaks that point up, rather than folding over.
Dense sponge could also be down to mixing the batter too much after adding the flour and butter. Stop using a whisk after the eggs are mixed and switch to a silicone spatula to mix in the flour, butter and milk.
Shrinkage can happen when cake is undercooked, the top is golden but the middle is raw. Opening the oven door will cause it to sink, so do not be tempted to open the oven while it’s cooking.
Also, don’t forget to drop the cake tin on a hard surface before and after putting it in the oven! The first time moves the air bubbles to the top and the drop after baking shocks the cake which helps with preventing shrinking.
The surface being cracked usually means that the temperature is too high so the top cooked too quickly and then ripped when the middle expanded. I bake my sponge at 170°C (338°F) but if it doesn’t work for you, your oven might run hot and you can try lowering the temperature.
Doming is natural when the cake rises and is usually a good thing. Cool it upside down to flatten doming and trim off the top once cooled for a more polished look. If it’s overly domed or cracked on top, your oven temperature might have been too high.

How to Store
Room temperature: The sponge can wrapped and kept in an airtight container for 2-3 days. Once cream is added, it shouldn’t be out of the fridge for prolonged periods.
Fridge: Once decorated, store in the fridge and consume within 2 days.
Frozen: The undecorated sponge can be wrapped tightly and stored in sealed bags in the freezer for up to 1 month. Thaw at room temperature. Once decorated with cream and fruits, it can’t be frozen.
If you are making this cake for a special occasion, you can make it up to a month in advance and keep it frozen. Thaw for a few hours at room temperature or overnight in the fridge, and decorate on the day of serving.
More Japanese Christmas Recipes
Did You Try This Recipe?
I would love to hear your thoughts!
💬 Leave a review and ⭐️ rating in the comments below. 📷 I also love to see your photos – submit them here!

Fluffy Japanese Christmas Cake (Strawberry Shortcake)

Equipment
- 15cm (6 inch) Cake Tin
- Pyrex Glass Mixing Bowls
- Electric Hand Mixer
Ingredients
Sponge Cake
- 2 egg whites
- 2 egg yolks
- 60 g white caster sugar
- ½ tsp lemon juice
- 60 g unbleached cake flour sifted, or pastry flour, low-protein, around 7-8%
- 20 g unsalted butter melted + extra to grease the cake pan
- 1 tbsp milk
Syrup
- 20 g white caster sugar
- 40 ml water
- 1 tbsp liquor of choice (optional) I used Grand Marnier or Contreau
Topping / Filling
- 300 g heavy cream at least 36% milk fat – thoroughly chilled
- 3 tbsp powdered sugar
- ¼ tsp vanilla essence of half the amount of vanilla extract
- 12 strawberries
- mint leaves optional for decoration
The ingredient brands and tools I trust are in my Japanese pantry guide and my cooking tools guide.
Can’t find certain Japanese ingredients? See my substitution guide here.
Instructions
- Measure out the sponge ingredients, separate the eggs and leave everything out to reach room temperature for about 20-30 minutes. (Cover the eggs to stop them from drying out). Chill a mixing bowl to whip the cream later.

- Grease the cake tin with a thin layer of butter over the base and sides and line it with parchment paper. Start preheating your oven to 180 °C (356 °F) (170 °C (338 °F) for fan assisted).
- In a clean, dry glass mixing bowl, add 2 egg whites and ½ tsp lemon juice. Set your electric mixer to a medium-high setting and whisk until foamy and doubled in size.

- Add 60 g white caster sugar one-third at a time, making sure it's fully incorporated before adding the next third.
- Continue to whisk on a medium speed until the meringue is smooth and glossy with stable, stiff peaks.
- Add 2 egg yolks one at a time, whip using the electric mixer for about 10-15 seconds for each yolk and stop as soon as they're incorporated into the meringue.
- Sift 60 g unbleached cake flour twice into a separate bowl. Sift once more, this time into the egg mixture, adding it one-third at a time and folding it gently with a silicone spatula. Repeat until all of the flour is incorporated into the mixture, being careful not to over-mix.
- Mix 20 g unsalted butter (melted) and 1 tbsp milk in a small bowl. Add about 2 tbsp of the sponge batter and whisk them together to temper them.
- Pour the tempered mixture into the cake batter and fold in gently with the spatula.
- Once combined, pour the mixture into the lined cake tin and smooth the top and drop the cake tin twice onto a hard surface from about 10cm (4 inches) high. Place on the middle shelf of the oven and bake for 20-30 minutes. (Check the cake after 20 minutes and remove once it's golden brown. I usually take it out at 23-24 minutes.)
- Once the sponge is fully cooked, take it out from the oven and drop it on a hard surface from about 20cm high (8 inches). This will help prevent sinking and shrinking.
- Turn upside down onto a wire rack and remove the cake tin. (Be careful not to burn yourself.) Leave to cool for about 1 hour.
Syrup
- In a small pan, add 20 g white caster sugar, 40 ml water and 1 tbsp liquor of choice.
- Bring to a boil over a medium heat while stirring continuously. Once it starts bubbling, stop stirring and boil for 1 minute before removing it from the heat.
- Once the cake has cooled, cut off the top (as thinly as possible to not waste too much) and then cut in half horizontally.
- Brush the top of each half generously with syrup and save any leftovers for later.
Toppings
- Wash 12 strawberries, dry them thoroughly with kitchen paper and remove the stems. Save 7-9 of the most beautiful ones for decorating and slice the rest for the filling.
- Take a large bowl and add a few handfuls of ice, then take a smaller glass or steel bowl (preferably chilled) and place it on top of the ice. Pour in 300 g heavy cream and add 3 tbsp powdered sugar and ¼ tsp vanilla essence.
- Use an electric whisk (or balloon whisk if you're whisking by hand) and whip until the cream has peaks and becomes spreadable. Place about 1/3 of the cream in a piping bag and refrigerate for later.
Assembly
- Place 2-3 spoonfuls of whipped cream in the center of each half of the sponge. Spread it out to the edges until even and arrange the strawberries on one half.
- Flip one half onto the other so that the strawberries are sandwiched between two layers of cream. Brush any leftover syrup on the top of the cake and place it on a easy-to-turn surface (e.g. cake board, paper plate etc.)
- Spread the whipped cream out thinly over the edges. This is a crumb coat (to smooth down crumbs) so scrape off any excess into a separate bowl so that crumbs don't mix in with the rest of the cream.
- Spread out the cream using an icing spatula, making sure the whole cake is smoothly and evenly covered on the top and sides.
- Pipe swirls around the edge and place the strawberries in the center. Decorate with mint leaves and Christmas decorations for a festive finish. Enjoy!
Video
Notes
- Use scales and gram measurements for more accurate and consistent results.
- The liqueur in the syrup is optional, you can omit it completely. I used Grand Marnier orange liqueur or Contreau.
- All ovens are different and sponge cake recipes usually recommend a temperature between 160°C and 180°C (320°F – 356°F). Reduce the oven temperature if it’s browning too quickly or cracking.
- If your cream starts to soften while you’re icing the cake, whip it again to help it thicken (be careful not to whip too long) or place it in the fridge for a while to firm back up.
- The plain sponges can be wrapped and frozen for 1 month. The decorated cake is best eaten the same day and refrigerated until serving. Keep refrigerated and consume within 2 days.
Leave a rating and a comment