
The rich flavor and naturally bright green color of matcha makes it the perfect ingredient for adding some Japanese flair to your festive bakes this year.
Matcha roll cake and matcha rare cheesecake are show stoppers for sure, but what about something bitesize that also makes a great gift? These matcha butter cookies tick all those boxes.

Matcha butter cookies
Recipe Snapshot
- What is it? A crisp and buttery matcha flavored cookie that can be piped.
- Flavor profile: Matcha, sweet, buttery.
- Why you’ll love this recipe: These swirled butter cookies infused with vibrant matcha powder bring a refined Japanese twist to your holiday baking and are perfect for gifting.
- Must-haves: Matcha powder, piping bag, melting chocolate for decorating.
- Skill Level: Medium
- Freezer Friendly? Yes.
Summarize & Save this content on:
What Are Matcha Butter Cookies?
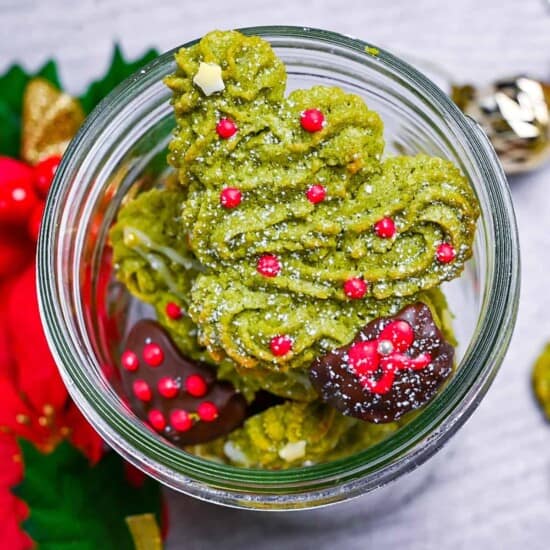
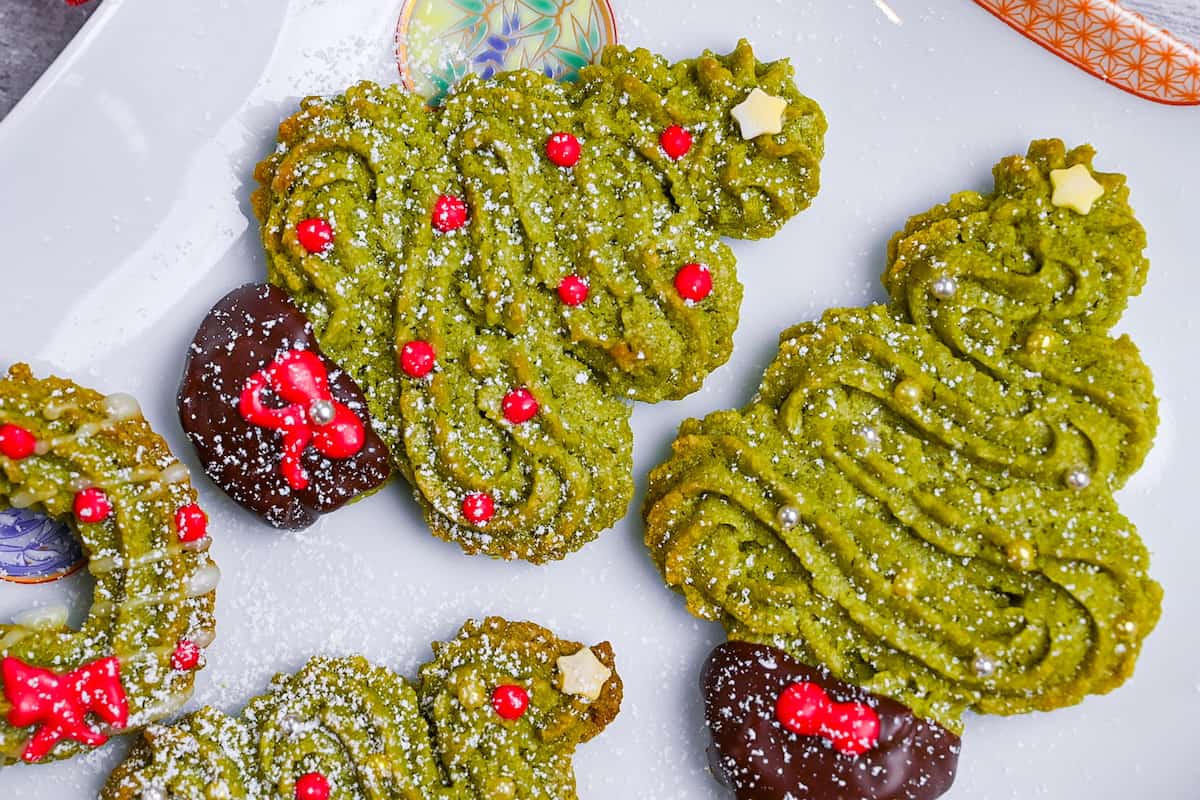
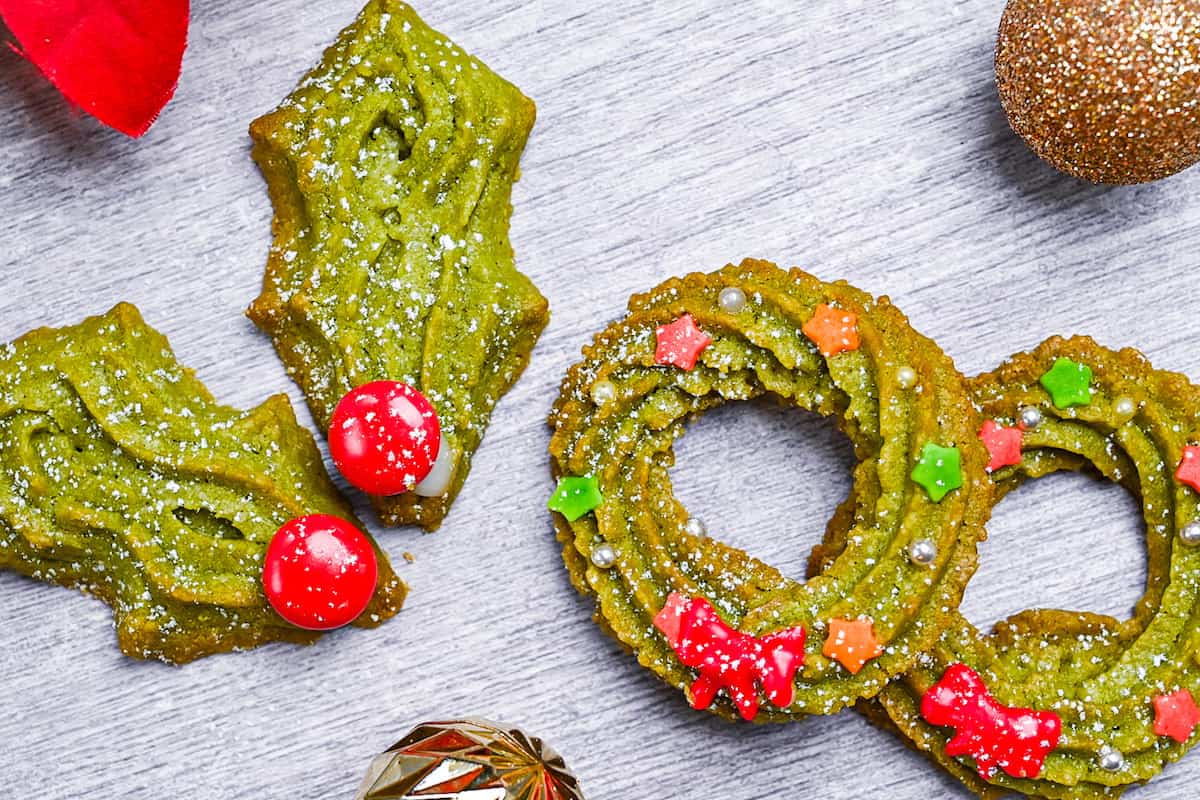
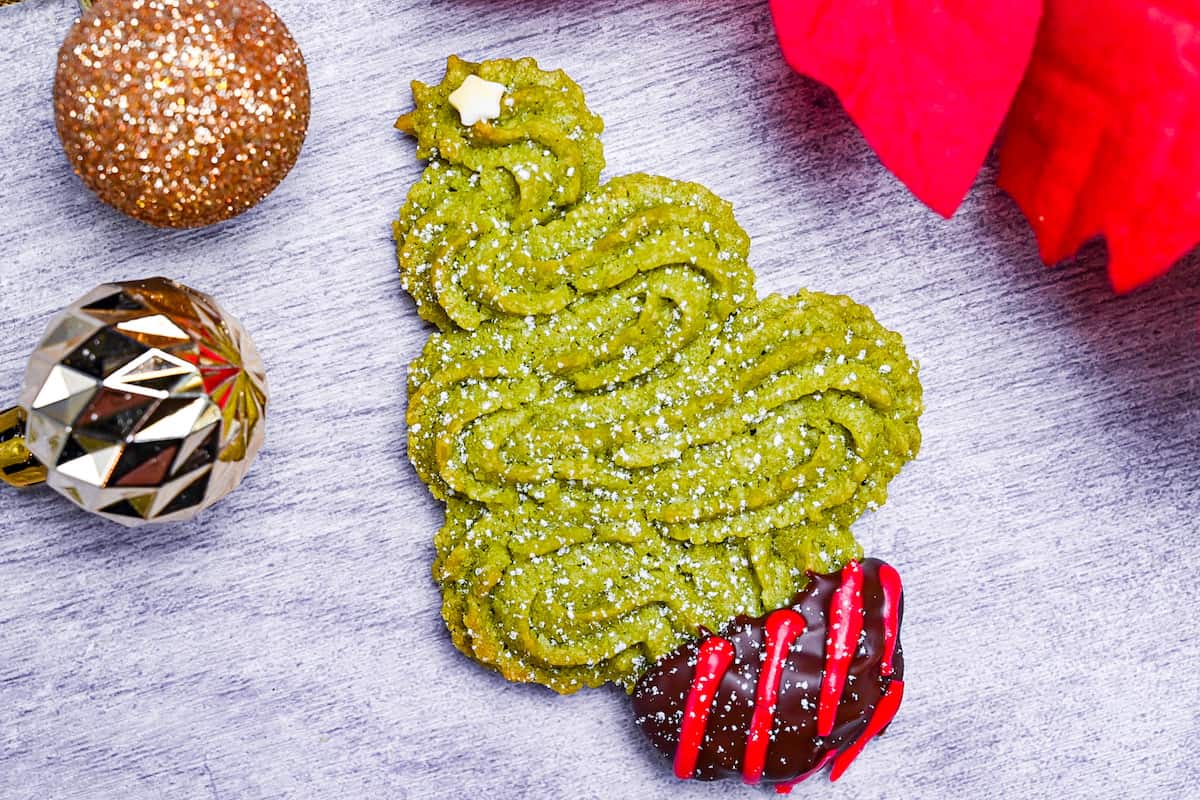
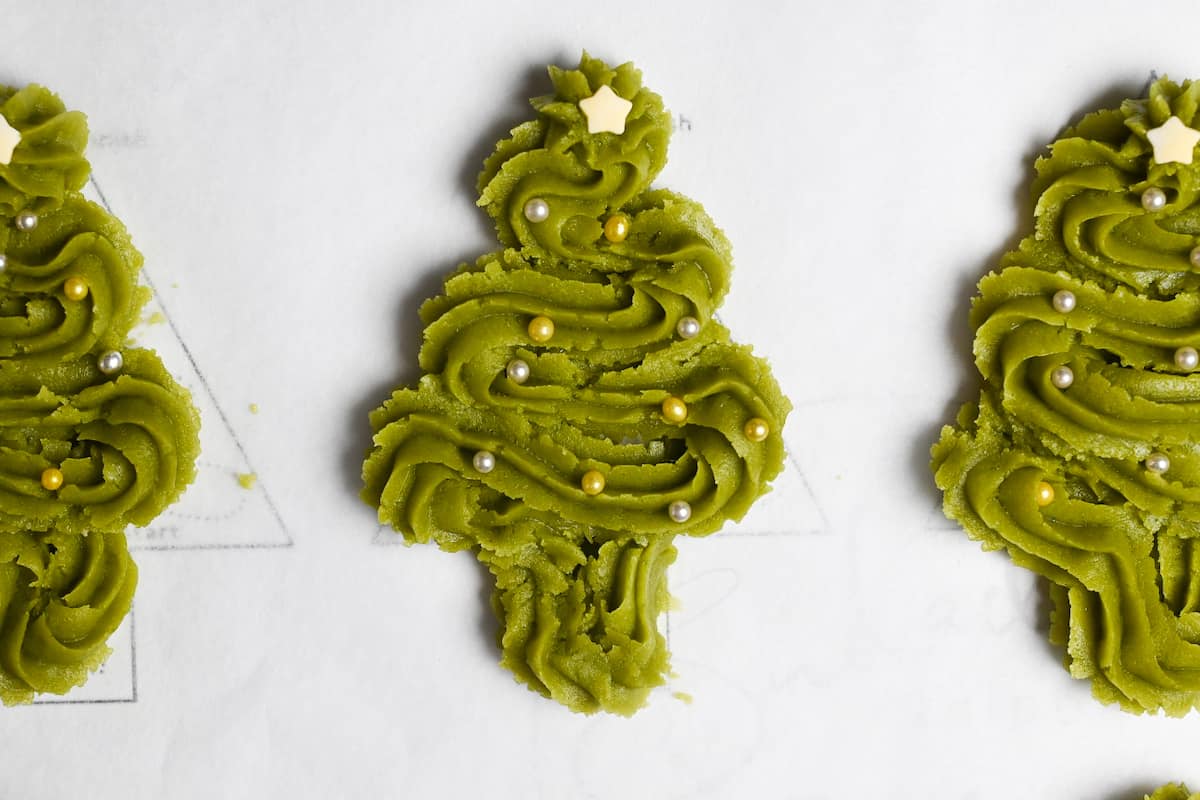
Matcha butter cookies are rich, sweet treats made with Japanese matcha powder for a naturally vibrant green color and effortlessly festive look. The texture is lightly crisp and delicately crumbly, similar to shortbread but with added egg yolk and milk to create a pipe-able dough that holds beautifully defined shapes.
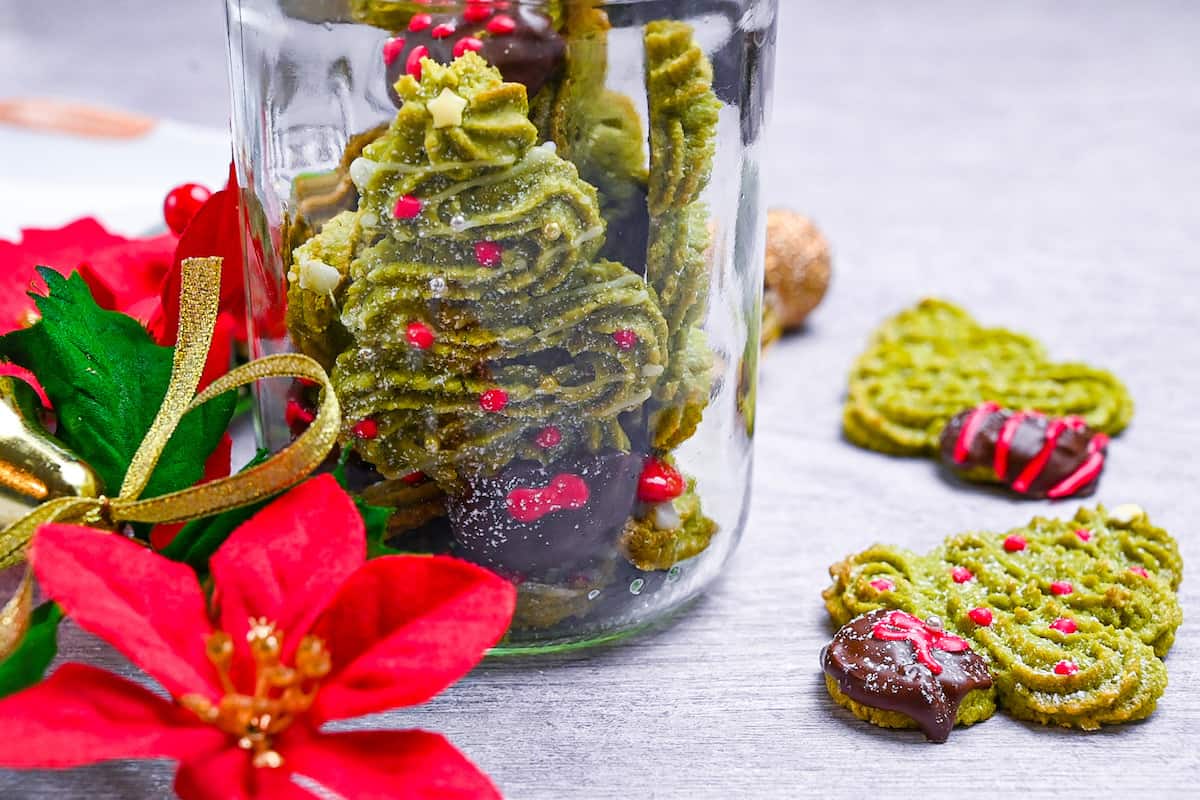
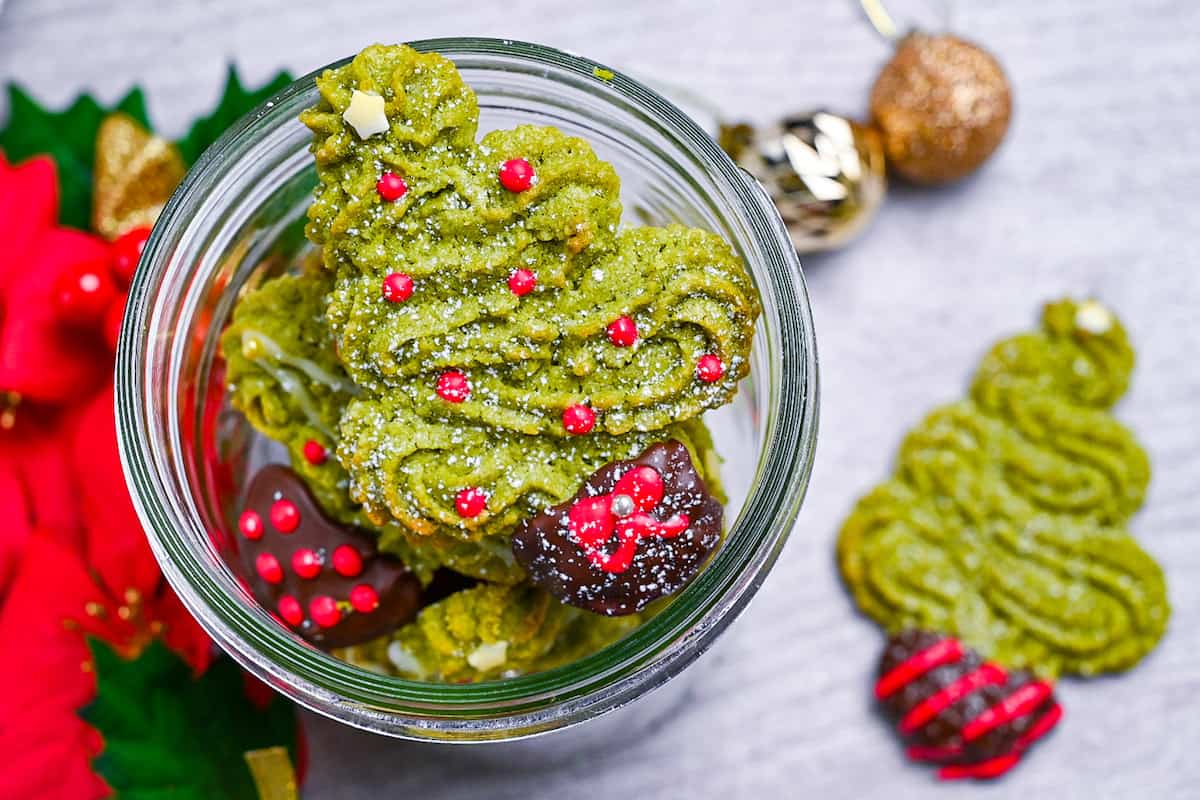
I love using this recipe for Christmas tree shaped cookies, but it works just as well for wreaths, holly leaves or any design you want to try throughout the year. It’s an easy, eye-catching way to bring a touch of Japanese flair to your holiday baking.
Matcha Butter Cookie Ingredients
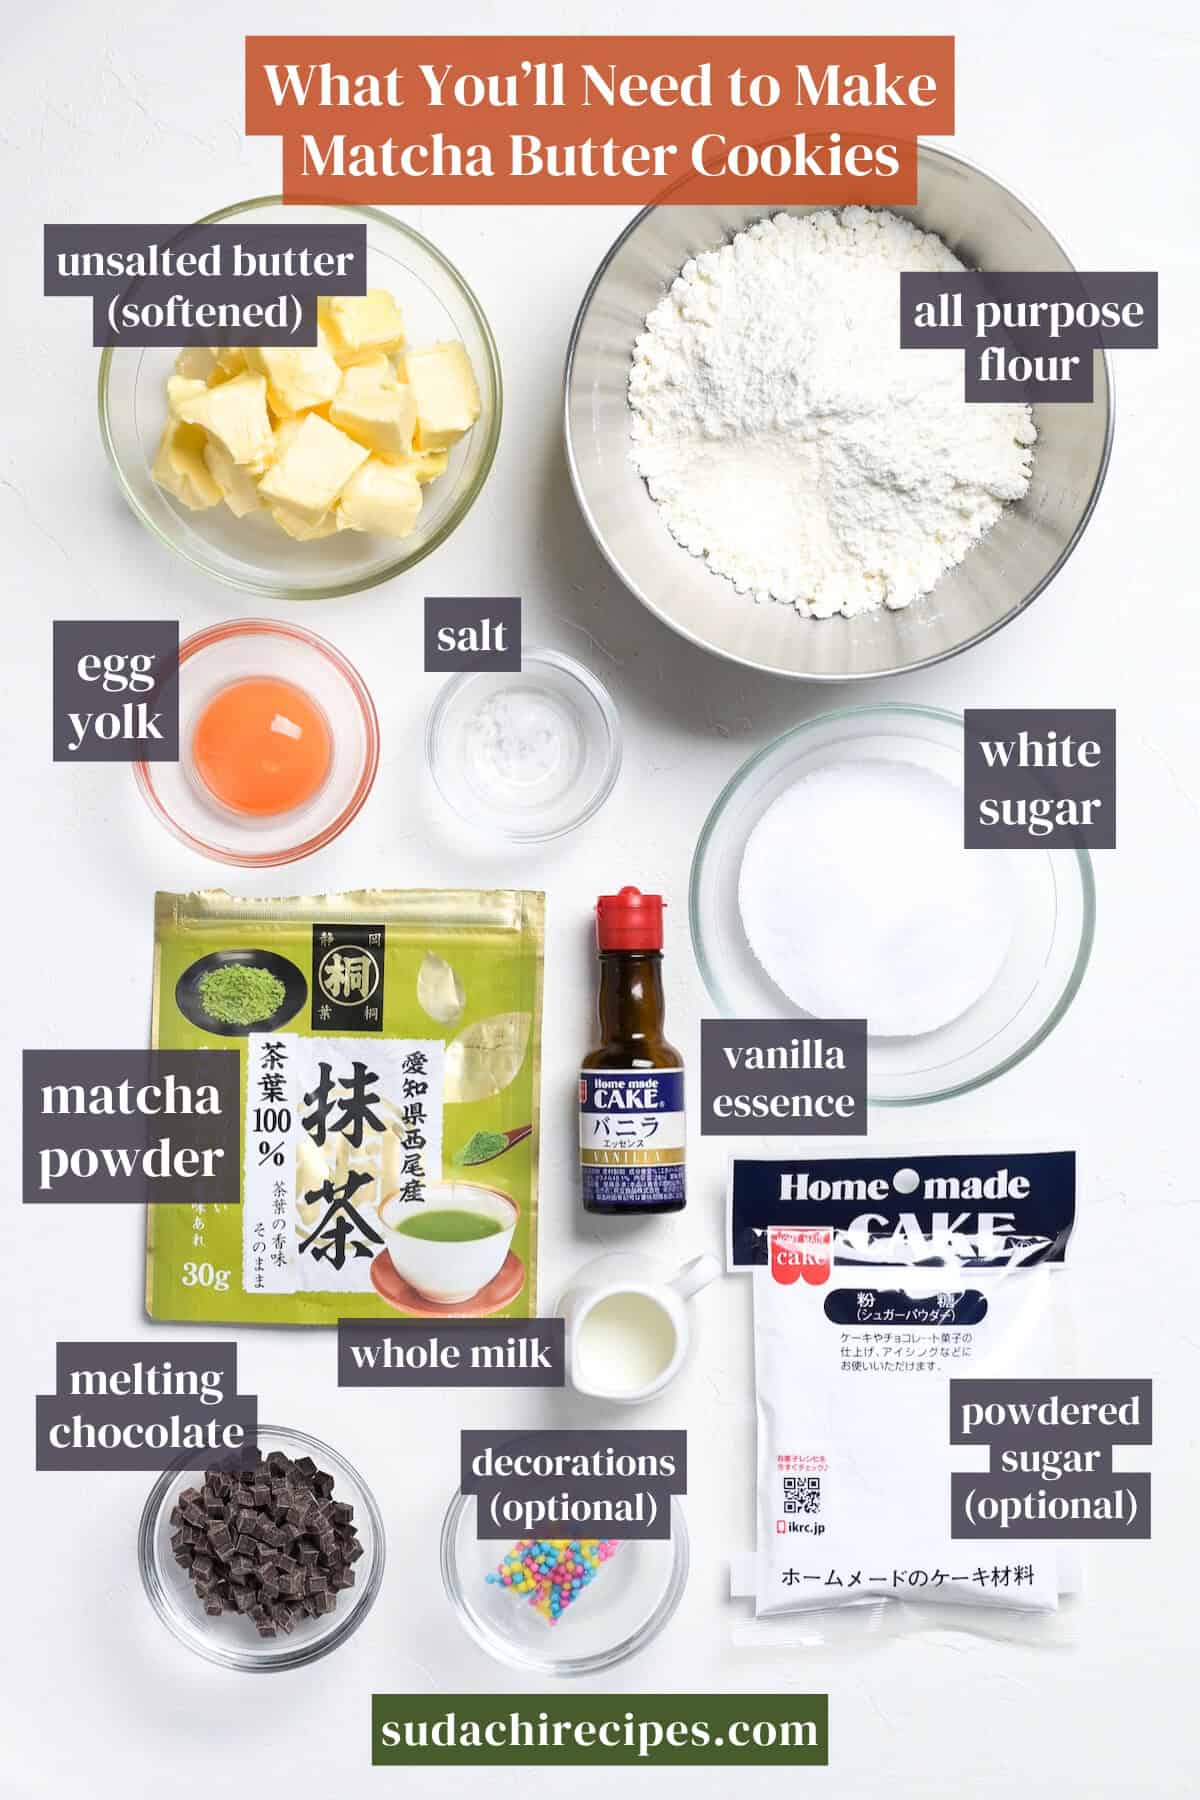
- Unsalted Butter: Using unsalted butter allows us to control the salt more accurately, and helps avoid salty cookies. The butter should be soft (room temperature) before starting. Do not use melted butter (I explain why in the walkthrough).
- Granulated Sugar: Granulated sugar is my go-to for a slightly crispy texture, helping cookies maintain shape and not spread too much.
- Plain Flour: Simple all-purpose flour works best. Cake flour works in a pinch but might be less defined.
- Matcha Green Tea Powder: Choose bright green, high-quality matcha for baking. It’s now more accessible, often found in supermarkets, tea stores, or online. Perfect for adding natural color and flavor, especially for festive recipes!
- Chocolate & Powdered Sugar: You can get creative with melted chocolate of your choice, powdered sugar or sprinkles.
- Other Ingredients: Egg yolk, vanilla essence, whole milk, and a pinch of salt.
How to Make My Matcha Butter Cookies
Before you start: Bring your butter to room temperature for easy creaming and clear a shelf in the fridge or freezer to chill the piped cookies before baking.
The first step is to mix the butter and sugar together until creamy and smooth. To do this easily, the butter should be room temperature or slightly warmer so it’s easy to combine with the sugar.
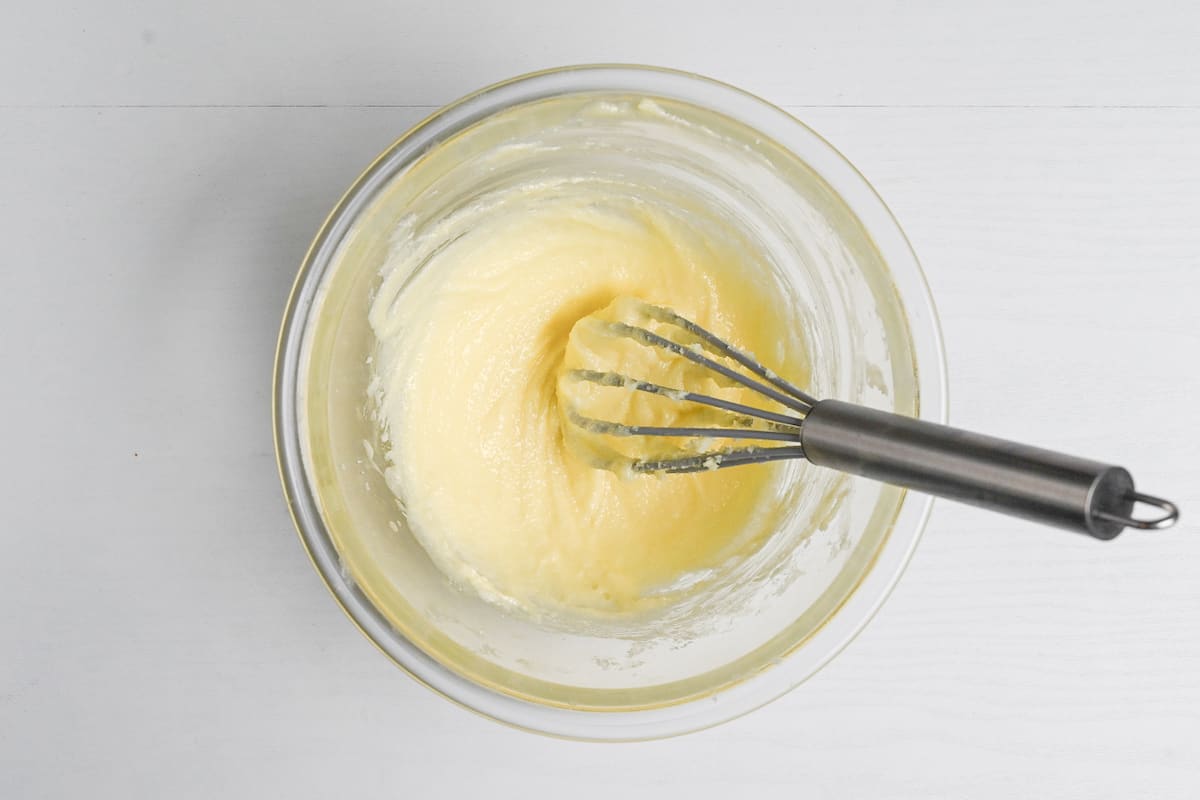
You shouldn’t use melted butter for two main reasons. Firstly, it won’t cream properly, and when you add the flour, it will absorb too quickly and can make the cookies dense and uneven. They’re also more likely to spread in the oven if you use melted butter.
For best results, butter should be soft enough to easily press a dent with your finger.
Whisk in the egg yolk and vanilla essence until combined. The egg yolk adds moisture and helps bind the cookies, and vanilla adds an extra depth and sweetness that compliments the matcha.
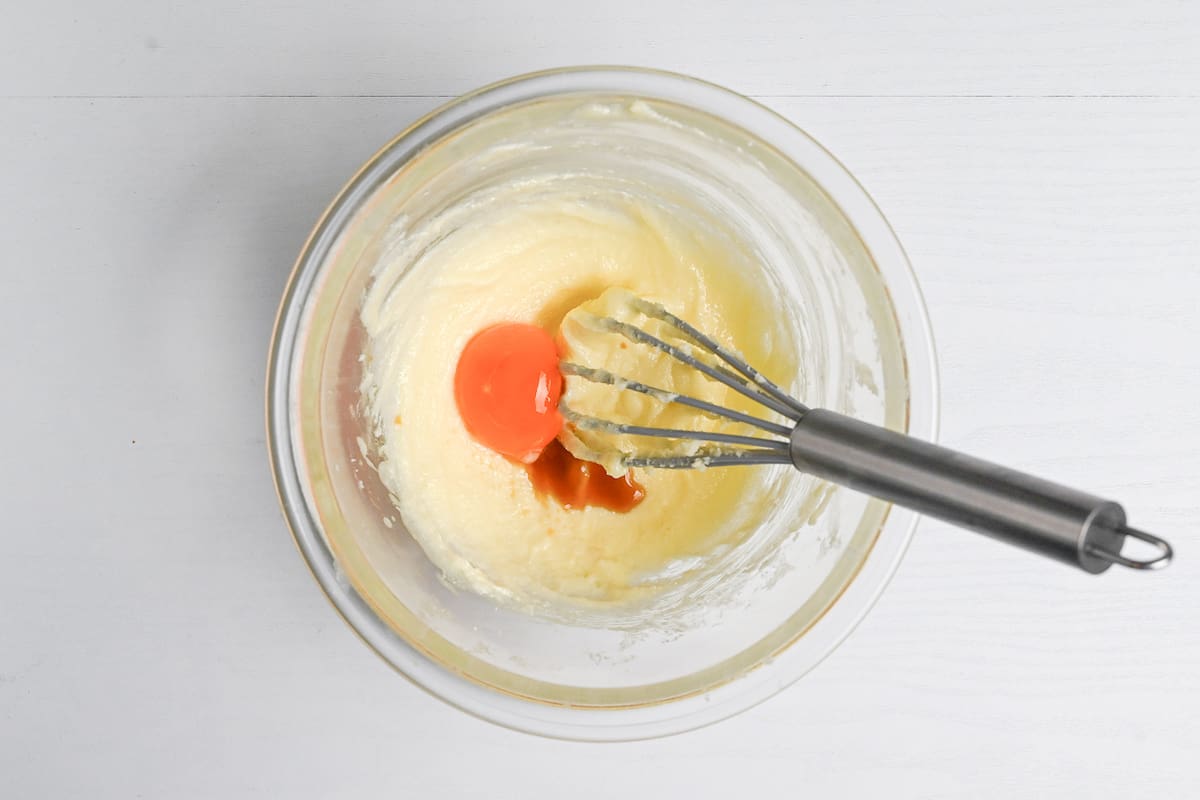
If you’re using vanilla extract, use half the amount.
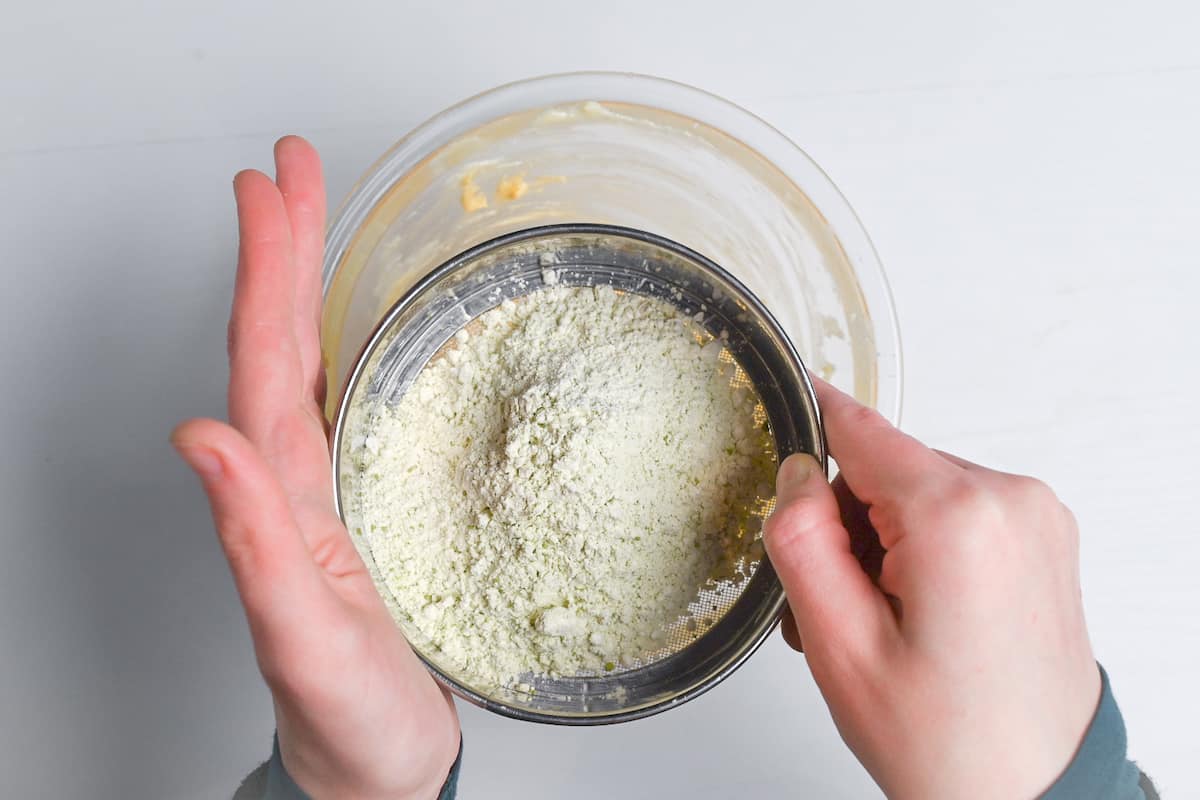
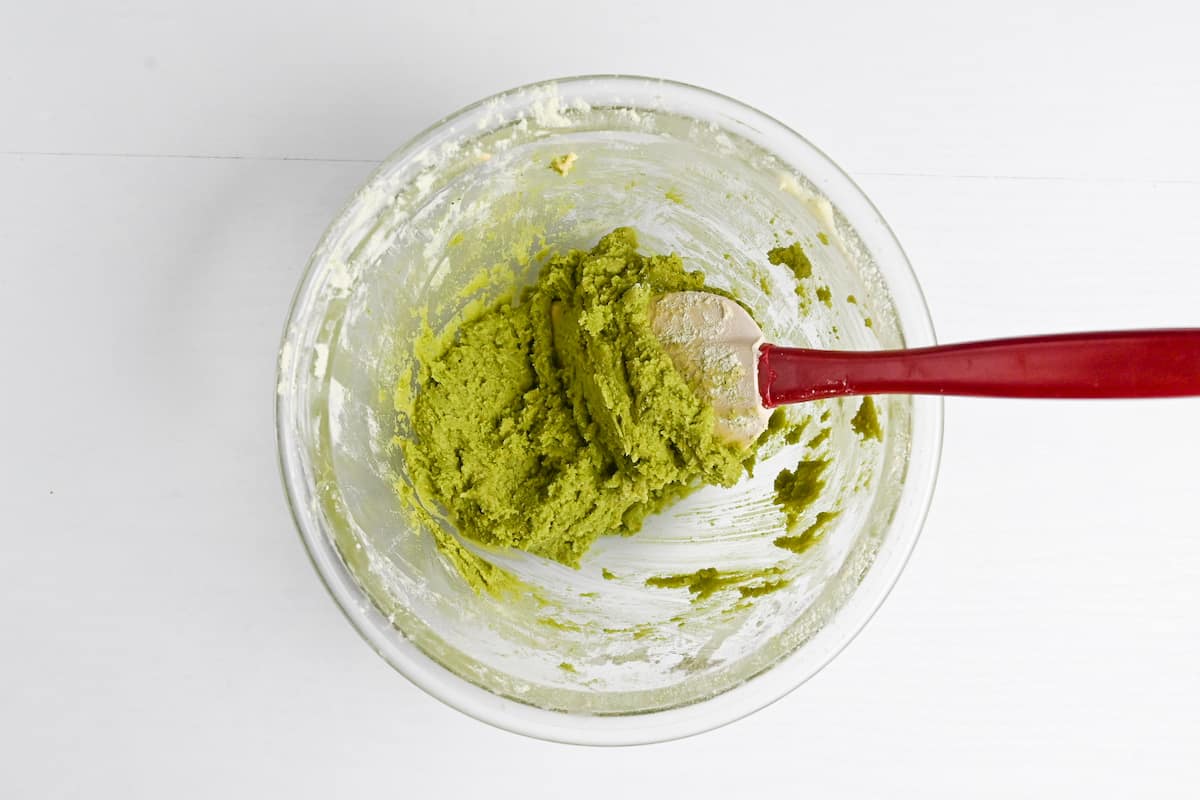
For an even result, I recommend mixing the flour, matcha and salt together in a separate bowl before adding it to the creamed butter.

Sift the dry ingredients into bowl to ensure there are no lumps of matcha, and then mix with a spatula or wooden spoon to combine. Avoid over-mixing, stop as soon as there are no more dry bits of flour.
If the dough is very stiff and difficult to mix, add a small amount of whole milk (about 1/2 tsp at a time) until it’s slightly softer and pipe-able. It should still be quite firm and stable for a defined end result.
For this recipe, you will need a piping bag and a star nozzle. Place the bag in a tall glass, drop the nozzle in and add the dough to the piping bag.
If you’re doubling or tripling the recipe, I recommend adding half or one-third of the dough at a time so that it doesn’t become too warm in your hands. Cut the tip of the bag and push the dough down. Twist up the top and you’re ready to pipe!
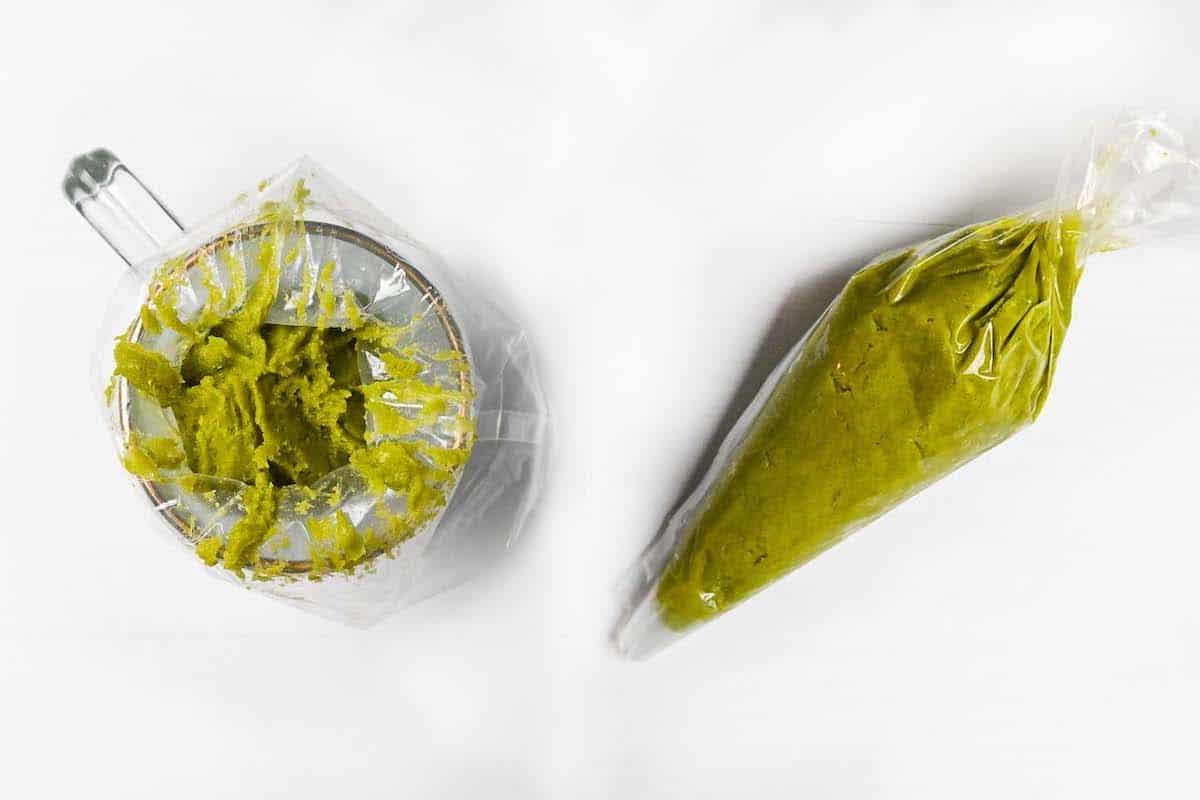
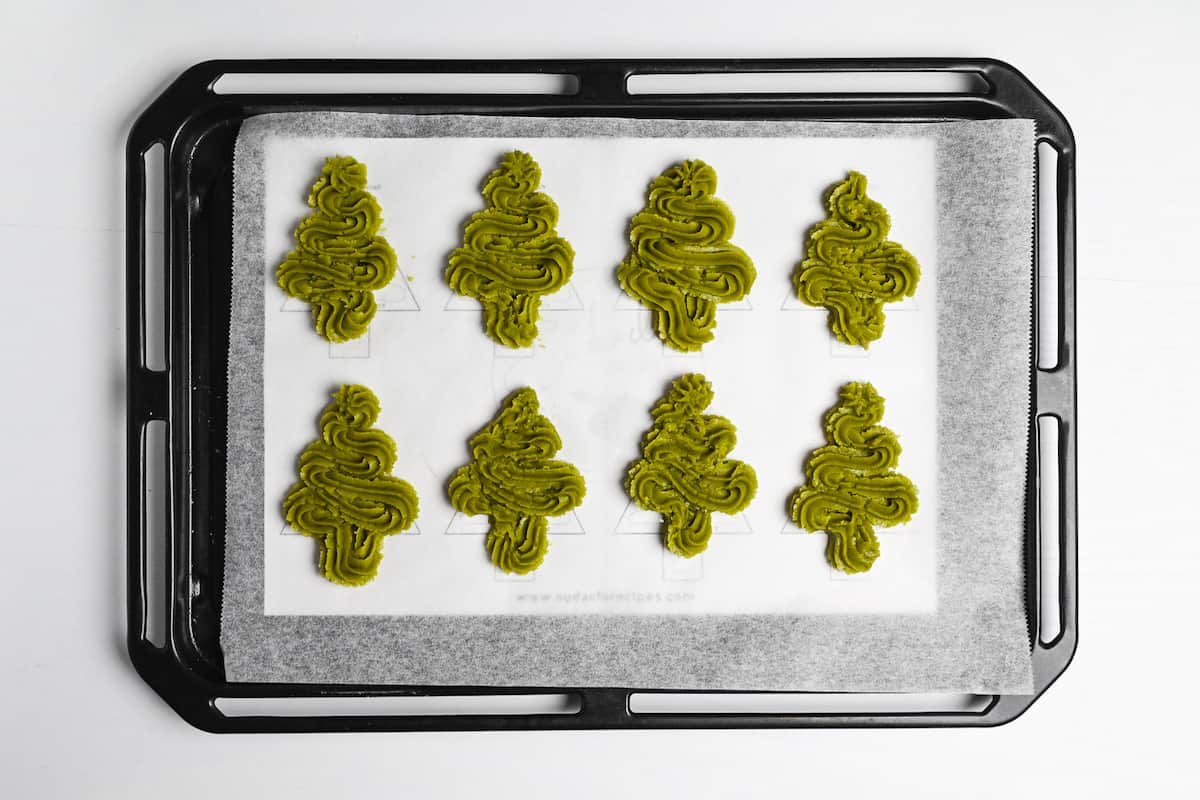
Line a baking sheet with baking paper and pipe your designs, leaving about 2cm of space between each cookie. If the dough is still too stiff to pipe, try running the piping bag under warm water for a minute to help soften it further.
I recommend drawing your designs on a piece of paper and placing it underneath the baking paper so that you can trace it. Draw a “U” shape for the trunk, then pipe from left to right to make the tree branches.
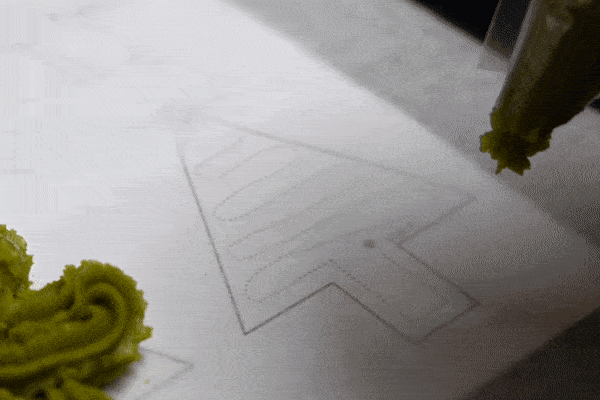
If you like, you can download my free printable Christmas tree template here!
If you’re decorating with sugar sprinkles or decorations that don’t melt, you can add them before baking too. Don’t add chocolate or meltable decorations until later.
For best results, chill in the fridge or freezer for 20-30 minutes before baking!
When your cookies have about 10-15 minutes left of chilling, preheat your oven to 170°C (340°F).
Once fully preheated, bake on the middle shelf for 12-15 minutes or until the edges start to turn golden.
I recommend baking single trays in batches to ensure even cooking, but if you increase the recipe and want to use multiple shelves, you can swap and turn them every 5 minutes to ensure they’re all evenly cooked.
These cookies are very delicate when they first come out of the oven, so avoid moving until they’ve cooled. I recommend 20 minutes or until they reach room temperature to avoid broken cookies.
Decorate as you like! I usually dip the tree trunks in chocolate and dust them with powdered sugar for a simple approach, but my wife decorated them this time, and she really went to town.
You can use things like royal icing, different colors of chocolate, sprinkles, etc! Why not go all out? It’s Christmas after all!
Jump to Full Recipe Measurements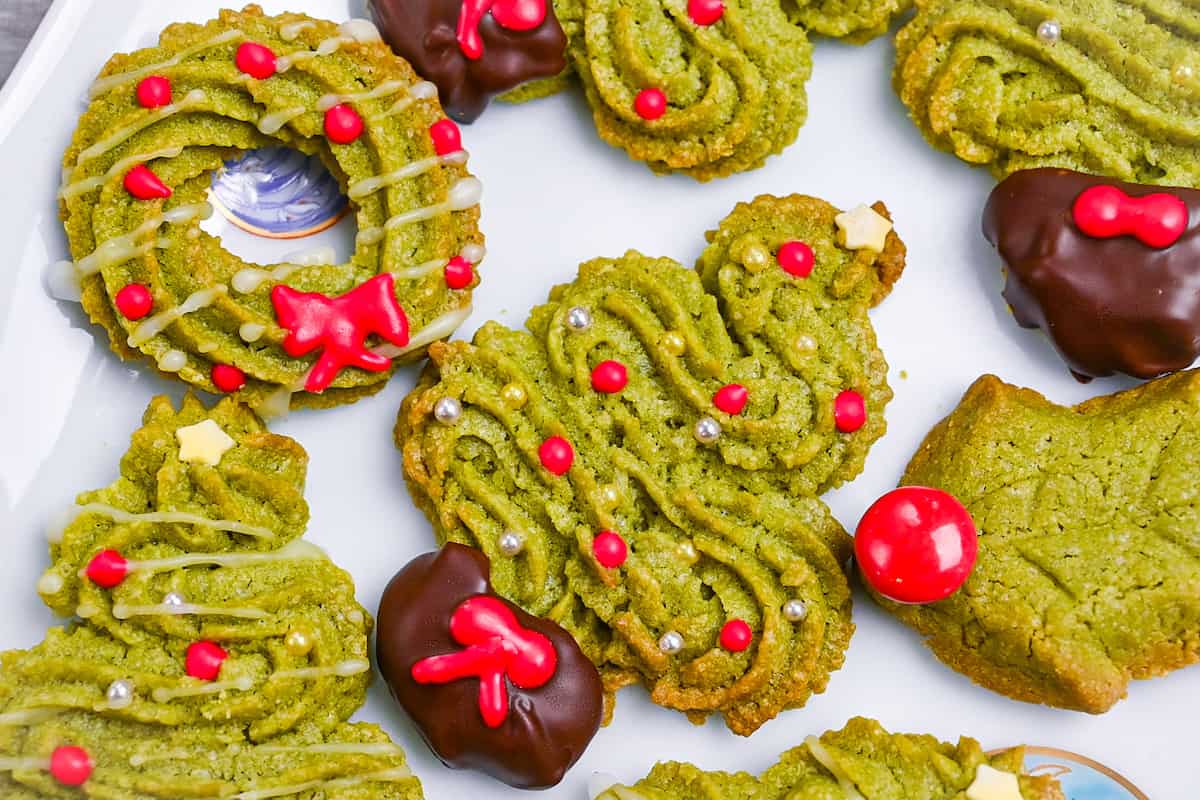

Essential Tips & Tricks
- Bring the butter to room temperature for easy creaming. Avoid using melted butter as it can make the cookies greasy and dense.
- The dough is quite stiff so use a strong piping bag, or double bag the mixture to prevent breaks.
- If the dough is too hard to pipe, add whole milk a little at a time or run the piping bag under warm (not hot) water to loosen it.
- If the dough is too soft, chill in the fridge briefly to firm it up.
- Chill the piped cookies for at least 20-30 minutes to prevent spreading. You can do this in the fridge or freezer.
- Bake one tray at a time for more even results, or swap the trays every 5 minutes.
- Take them out of the oven when the edges start to brown and let them cool before moving them from the baking tray.
With these simple tips in mind, you’re set for success every time you make these matcha butter cookies!
How to Store
Fridge: Airtight container, up to one week.
Freezer: Flash freeze on a tray for 1 hour, then transfer to a sealable bag or container for up to 2 months. Keep in mind that they’re quite fragile so lay them flat and avoid placing anything on top of them to prevent breaking. You can also freeze the unbaked piped cookies the same way and bake from frozen.
Free Printable Template
If you missed it in the post, you can download my free printable Christmas tree cookie template!
Troubleshooting
Add a small amount of milk to the dough a little at a time to loosen it, just be careful not to add too much. Alternatively, try running the piping bag under warm water for a few seconds to soften it.
Chill the mixture in the fridge to firm up the butter a bit.
Make sure you pipe the cookies thickly to make them more sturdy, piping thin will make them too delicate. And make sure to wait until they’re fully cooled before moving them.
There are a number of reasons cookies might spread. Not enough chilling time, butter was too warm, dough was over-mixed or oven was too hot or not preheated enough. Using a silicone baking mat can also prevent spreading, since they give the underneath of the cookie something to cling to.
More Japanese Christmas Recipes
Did You Try This Recipe?
I would love to hear your thoughts!
💬 Leave a review and ⭐️ rating in the comments below. 📷 I also love to see your photos – submit them here!

Matcha Christmas Tree Cookies

Equipment
- Pyrex Glass Mixing Bowls
- Star Piping Nozzle
- Disposable Piping Bag
Ingredients
- 100 g unsalted butter softened/room temperature
- 50 g granulated sugar
- 1 egg yolk
- ½ tsp vanilla essence or half the amount of vanilla extract
- 120 g all-purpose flour
- 2 tsp matcha powder
- 1 pinch salt
- 1-2 tsp whole milk optional, to loosen the dough
Optional ingredients for decorating
- 50 g chocolate melted (optional for dipping or drizzling)
- toppings of your choice sugar stars, chocolate stars, sprinkles etc.
- 1 tbsp powdered sugar for icing or dusting (optional for decorating)
The ingredient brands and tools I trust are in my Japanese pantry guide and my cooking tools guide.
Can’t find certain Japanese ingredients? See my substitution guide here.
Instructions
- Beat the 100 g unsalted butter and 50 g granulated sugar together in a bowl until pale, creamy and smooth. Add 1 egg yolk and ½ tsp vanilla essence, mix until incorporated.

- In a separate bowl, mix 120 g all-purpose flour, 2 tsp matcha powder and 1 pinch salt until evenly distributed, then sift them into the wet ingredients and mix with a spatula or wooden spoon until it forms a stiff dough.
- To make the dough easier to pipe, add 1-2 tsp whole milk. If it still seems too stiff then add a little more milk, ½ tsp at a time.
- Transfer the mixture into a strong piping bag with a star nozzle.
- Line two baking sheets with baking paper and place the tree template underneath. (You can download my template or draw your own shapes on a piece of paper.)

- Pipe the dough onto the baking paper, leaving 2cm between each cookie. (If the mixture is too stiff, massage the piping bag with your hands to warm it a little. You could also hold it under warm water to soften it further, but be careful not to warm too much.)

- Chill the cookies in the fridge for 20-30 minutes before baking. Start preheating your oven to 170 °C (338 °F) about 10 minutes before you take them out of the refrigerator.
- Bake the cookies on the middle shelf for 12-15 minutes or until they start to turn light brown around the edges. (Don't let them brown completely.)Once baked, let them cool for 20 minutes before moving to avoid breaking.

Decorating
- Customize the cookies with your own decorations. If you want to cover the trunks, melt 50 g chocolate using your preferred method and use a spoon to spread it over the cookie.To stick toppings of your choice (or other decorations) to the top, mix 1 tbsp powdered sugar with a tiny drizzle of milk or lemon juice and mix until combined. It should have a thick consistency. (If it's too runny, add more powdered sugar.) Use a chopstick to dab the top with the sugar paste and attach the stars. You could also sprinkle with powdered sugar for a snowy finish.
- Store in an airtight container and consume within a week. Enjoy!
This looks amazing. I am wondering if I can substitute with a gluten free flour.
Thank you! I haven’t tried with gluten free flour myself so I can’t say for sure, but it’s definitely worth a try as long as you use a gluten free flour blend designed to be a 1:1 substitute for wheat flour. Good luck and let us know how it goes if you try it!
This recipe looks good and promising! Is it okay if I substitute the butter with shortening? 🙂
Thank you! I haven’t tried it myself so I can’t say for sure, but it should work in theory. You might find the dough is stiffer if you use shortening, so in that case you might need to add a little extra milk to make it pipeable. If possible, use a butter flavored shortening to keep the taste closer to the original recipe. Good luck and let us know how it turns out!
These turned out so cute! I was nervous about the piping, but the detailed instructions made it easier than expected.
Thank you, Desirae! 🙂
I made these and they turned out great. You feel the matcha flavour, crispy on the outside and fluffy inside, not too sweet as I like.
Hi Sue,
Thank you so much for making these! I’m really happy to hear you enjoyed the matcha flavor and that the texture turned out great! 🙂
Yuto