

Disclaimer: This post may contain Amazon affiliate links. Sudachi earns a small percentage from qualifying purchases at no extra cost to you. See disclaimer for more info.
Featured Comment
“Made the pound cake with kuromame left over from osechi and sugar substitute for the diabetics in my household. The cake was light, delicious and quick to make.”
– Christine
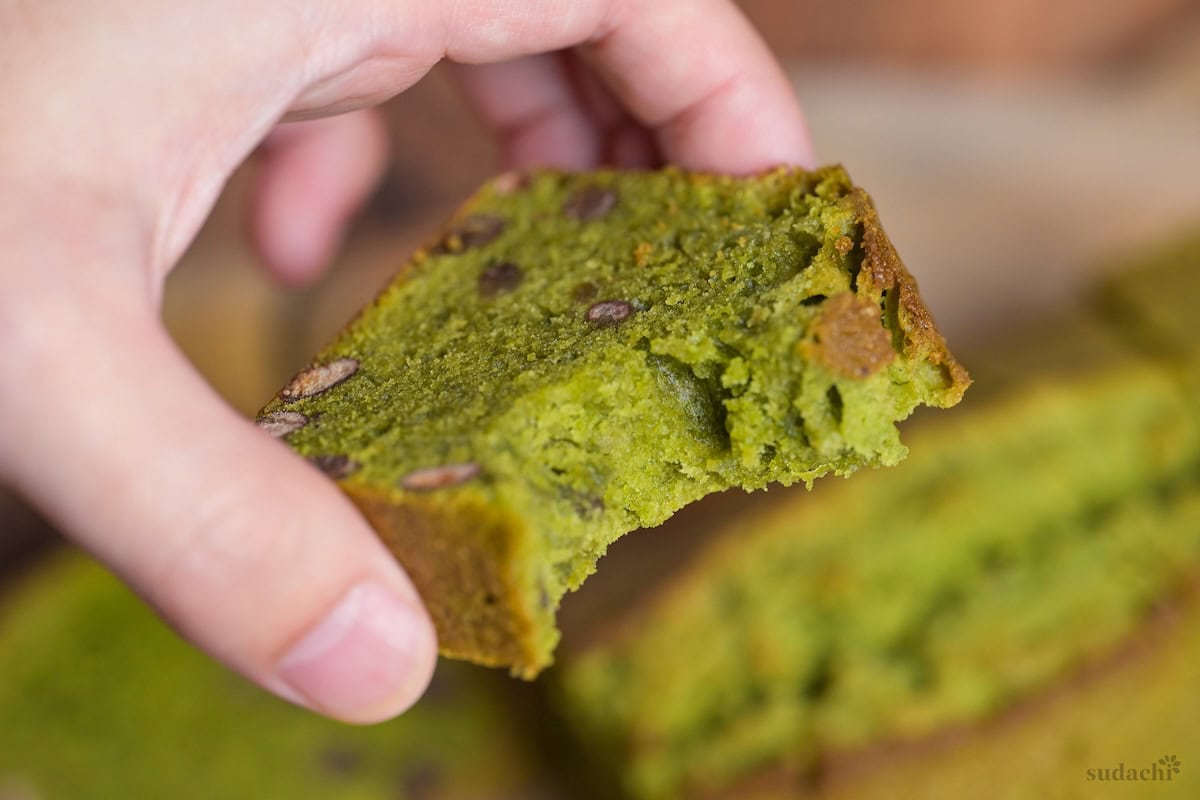
Cakes in Japan are often celebrated for their light, fluffy, cloud-like texture (think strawberry shortcake and chiffon cake), but this matcha and adzuki pound cake is the delicious opposite in the best way.
Think deep green-tea flavor, perfectly buttery and moist, with naturally sweet adzuki red beans dotted throughout for little pops of creamy sweetness. It’s great for snacking, gifting, or serving with tea or coffee.
I’ll also teach you my method for getting that perfect dome and iconic crack!

Matcha and Adzuki Bean Pound Cake
Recipe Snapshot
- What is it? A soft and buttery matcha pound cake studded with sweet adzuki beans that bakes up moist, tender, and perfect for slicing.
- Flavor profile: Fragrant matcha, balanced sweetness, buttery.
- Why you’ll love this recipe: This easy, no-fuss cake produces bakery-worthy results with a gorgeous green tea flavor, vibrant color and feels special without being fussy. The red beans add natural sweetness and texture so that every slice is moist, flavorful, and not overly sweet.
- Must-haves: Good quality matcha, electric whisk, 18×7.5cm (7x3inches) loaf pan or similar.
- Skill Level: Easy.
- Freezer Friendly: Yes!

What is Japanese Pound Cake?
Japanese pound cakes come in many different flavors ranging from standard vanilla or lemon, to more unusual options such as matcha, roasted green tea (hojicha), and black bean. Today I’m going to show you how make Matcha Pound Cake, which is one of my personal favorites!
Japanese pound cake is typically a little lighter and fluffier than pound cake found in the West, but it still has that rich, buttery and moist texture that is loved by many. My version contains boiled adzuki beans, which are a perfect pairing for matcha due to their natural sweet taste and creamy texture.
This Matcha and Adzuki Pound Cake makes a wonderful snack or afternoon tea cake, so I hope you can enjoy this one with family and friends!
Matcha Pound Cake Ingredients

- Cake flour: This low-gluten wheat flour will give your cake a softer and lighter crumb while still being rich and dense. Because cake flour is lighter, it rises better and gives pound cakes a better dome shape.
- Matcha powder: Use a good quality from a trusted brand, no need to use the very expensive stuff here (save that for drinking!). Matcha powder that is bright green with a pleasant aroma indicates freshness, if your matcha is dark and has a musty smell, I recommend replacing it. Keep opened matcha in an airtight container in a dark, dry place to extend its shelf life.
- Adzuki beans: Your adzuki beans will need to be boiled before you start the recipe. You can either buy the dried beans and boil them yourself, or you can save time and buy canned adzuki beans (affiliate link) that have already been cooked. Boiling instructions: Wash the beans and boil for 10 minutes, then replace the water (to remove astringency), boil for another 40-50 minutes until soft enough to crush with your fingers. Make sure you cool them before using them in your cake. If adzuki beans aren’t your thing, omit them or try adding white chocolate chips, nuts or dried fruit instead!
I used a 18×7.5cm loaf pan (7x3inches) for this recipe, so aim for a pan with similar dimensions. If using smaller or larger pans, you will need to adjust the baking time.
Substitution Ideas
- Adzuki Beans → Chocolate chips, dried fruits or nuts: While matcha and adzuki beans make the perfect match for a distinct Japanese flavor, matcha is versatile and goes well with white chocolate, or dried berries.
- Cake flour → All purpose flour: You can use all-purpose flour if it’s more accessible, but final result might be slightly heavier.

How to Make My Matcha Adzuki Pound Cake
Before you start, bring the butter and eggs to room temperature. This will make creaming the sugar easier, and the eggs incorporate better.
Preheat your oven to 175°C (350°F) and line your 18×7.5cm (7x3inches) loaf pan with baking parchment.
Whisk the eggs, milk and vanilla in a jug and set aside.

Sift the cake flour and matcha into a bowl and mix well. Scoop out 1 tbsp and set aside for later (we will use this to coat the adzuki beans). Then, add the baking powder and a pinch of salt.


Whip the room temperature butter until smooth, then add the sugar and continue to whip until pale and creamy. It’s important to incorporate plenty of air at this stage, so whip thoroughly for several minutes.
Gradually add the egg mixture from earlier while whisking continuously.
Note that if your eggs are chilled, or you add too much at once, then the batter might split. You can prevent this by making sure you use room-temperature eggs and add them slowly to the butter and sugar. If it does split, don’t worry too much as you can save it when you add the dry ingredients.


Add the dry ingredients one-third at a time and mix on a low speed between each addition until well incorporated. Stop mixing when there is no more dry flour.


Whether you’re using your own boiled adzuki beans or the canned variety, I recommend rinsing them and patting them dry to prevent adding unnecessary moisture to the batter.
Sprinkle with the 1 tbsp matcha/flour saved from earlier and toss until evenly covered, then add them to the batter. Coating the beans with flour will help stop sinking to the bottom of the cake.
Save a few to sprinkle on the top if you like.


Mix well, then pour the batter into the loaf pan and smooth out the top.
Tip: Help the iconic crack form neatly by drawing a line in the center with a spatula.

Bake for 40-50 minutes or until you can pierce the center with a skewer and it comes out clean.
When it’s cooked and the skewer comes out clean or with just a few moist crumbs, transfer the pan to a wire rack and cool for 5-10 minutes before removing the cake from the pan and letting it cool completely.

Once cool enough to touch, cut, serve and enjoy!


Essential Tips & Tricks
- Measure ingredients accurately – This recipe is pretty forgiving, but for consistent results, I recommend using measuring scales over cups, especially for dry ingredients. If using cups, sift the flour and pour it into the cup (avoid scooping packed flour).
- Test your baking powder – Once opened, baking powder deteriorates, especially in hot or humid environments. Check your baking powder is still good by adding 1/2 tsp to a bowl and pouring boiling water over it. If it bubbles, it’s still good. If not, you’ll need a new batch.
- Room temperature ingredients – Ingredients combine better when they are all the same temperature and this is especially important in baking, where overmixing can ruin a cake. This recipe calls for soft butter and room-temperature eggs. If you forgot to take them out of the fridge ahead of baking, try these tips: Place chilled eggs in warm (not hot) water for 5 minutes. For butter, microwave a cup of water for 2 minutes, while you wait, cut the butter into cubes. Take the cup out and place the butter in the warm microwave for a few minutes. It’s important not to use melted butter for this recipe as this can make it heavy or greasy.
- Avoid over mixing – Mixing too much causes gluten formation which will make your cake heavy or chewy. Using cake flour prevents this to some extent, but stop mixing once all the flour is incorporated just to be safe.
- Tips for adzuki beans – Your adzuki beans should be completely cooked before they’re added to the batter, so make sure you can crush them right to the core with your fingers before adding them to your cake. Coating them with a dusting of flour will help stop them from sinking to the bottom too.
- Test with a skewer – Make sure your cake is fully cooked by piercing it with a skewer. Pierce through the crack not only to conceal the hole, but also because this area is the part that cooks the slowest. The skewer should come out clean or with a few moist crumbs. If you see any wet batter on the skewer, return the cake to the oven and check every 3-5 minutes until it’s done.
With these simple tips in mind, you’re set for success every time you make Matcha and Adzuki pound cake.
How to Store
Room temperature: If it’s winter or you live in a cool climate, you can keep it in an airtight container in a cool dry place for 1-2 days.
Fridge: For warmer climates or in spring/summer, wrap with plastic wrap and store in a sealed container in the refrigerator for 4-5 days.
Freezer: Wrap and freeze it whole, or cut into slices and wrap individually for convenient snacking. Store in a sealable freezer bag or airtight container to protect it from freezer burn. Freeze for 1-2 months and thaw at room temperature.
Matcha Pound Cake Q&A
This is usually caused by over-baking. Check the cake around the 35-40 minute mark and pierce with a skewer until it comes out with a few moist crumbs. You can also try a lower oven temperature if your oven runs hot (reduce by 5-10℃/40-50℉). Too much flour is also a contributor, measure with scales for best results.
This can happen if you mix too much, contributing to gluten formation. Stop mixing as soon as there is no more dry flour.
Opening the oven too early can or baking at a too-low temperature can cause the center to collapse. Use an oven thermometer to check if your oven runs cool.
More Matcha Dessert Recipes
- Matcha and White Chocolate Muffins
- Dark Chocolate and Matcha Brownies
- Matcha Roll Cake with Strawberries & Cream Filling
- Matcha No-Bake Cheesecake
Want more inspiration? Explore my Japanese Desserts Post for a carefully selected collection of tasty dessert ideas to spark your next sweet craving!
Did You Try This Recipe?
I would love to hear your thoughts!
💬 Leave a review and ⭐️ rating in the comments below. 📷 I also love to see your photos – submit them here!

Matcha Pound Cake with Adzuki Beans

Ingredients
- 2 eggs
- 20 ml whole milk
- 2-3 drops vanilla essence or 1 drop vanilla extract
- 100 g unbleached cake flour or all purpose
- 1 tbsp matcha powder
- ½ tsp baking powder
- 1 pinch salt
- 100 g granulated sugar
- 100 g butter softened (room temperature)
- 100 g boiled adzuki beans
My recommended brands of ingredients and seasonings can be found in my Japanese pantry guide.
Can’t find certain Japanese ingredients? See my substitution guide here.
Instructions
- Before you start, preheat your oven 175 °C (347 °F) and line a 7×3" (18×7.5cm) loaf pan with baking paper. Crack 2 eggs into a jug and add 20 ml whole milk and 2-3 drops vanilla essence. Whisk until combined and set aside.

- Sift 100 g unbleached cake flour and 1 tbsp matcha powder together into a bowl and whisk. Scoop out 1 tbsp and save it in a small bowl for later. Add ½ tsp baking powder and 1 pinch salt to the bowl and mix.
- In a separate bowl, whip 100 g butter and 100 g granulated sugar together until pale and smooth. Gradually add the egg mixture while whisking.
- Add the dry ingredients to the wet ingredients one-third at a time and whisk until smooth and there are no more lumps of dry flour. Be careful not to over-mix.
- Pour 100 g boiled adzuki beans into a separate bowl and pat them with kitchen paper to remove excess moisture. Add the tablespoon of matcha flour from earlier and toss until evenly coated to help prevent sinking.
- Mix the flour-dusted adzuki beans into the cake batter until evenly distributed.
- Pour the batter into the lined loaf pan and bake for 40-50 minutes at 175 °C (347 °F) or until a skewer comes out clean or with just a few moist crumbs.
- Cool in the pan for a few minutes then remove and finish cooling on a wire rack. Once cool enough to touch, slice and enjoy!
Made the pound cake with kuromame left over from osechi and sugar substitute for the diabetics in my household. The cake was light, delicious and quick to make.
Hi Christine,
Thank you for trying this recipe and sharing your experience! I love your adaptation with leftover! I’m happy to hear you enjoyed it! 🙂
Yuto