


Featured Comment
I loved the seasoned hamburger, it was a big hit at New Years.
– Windsofchange (from Pinterest)
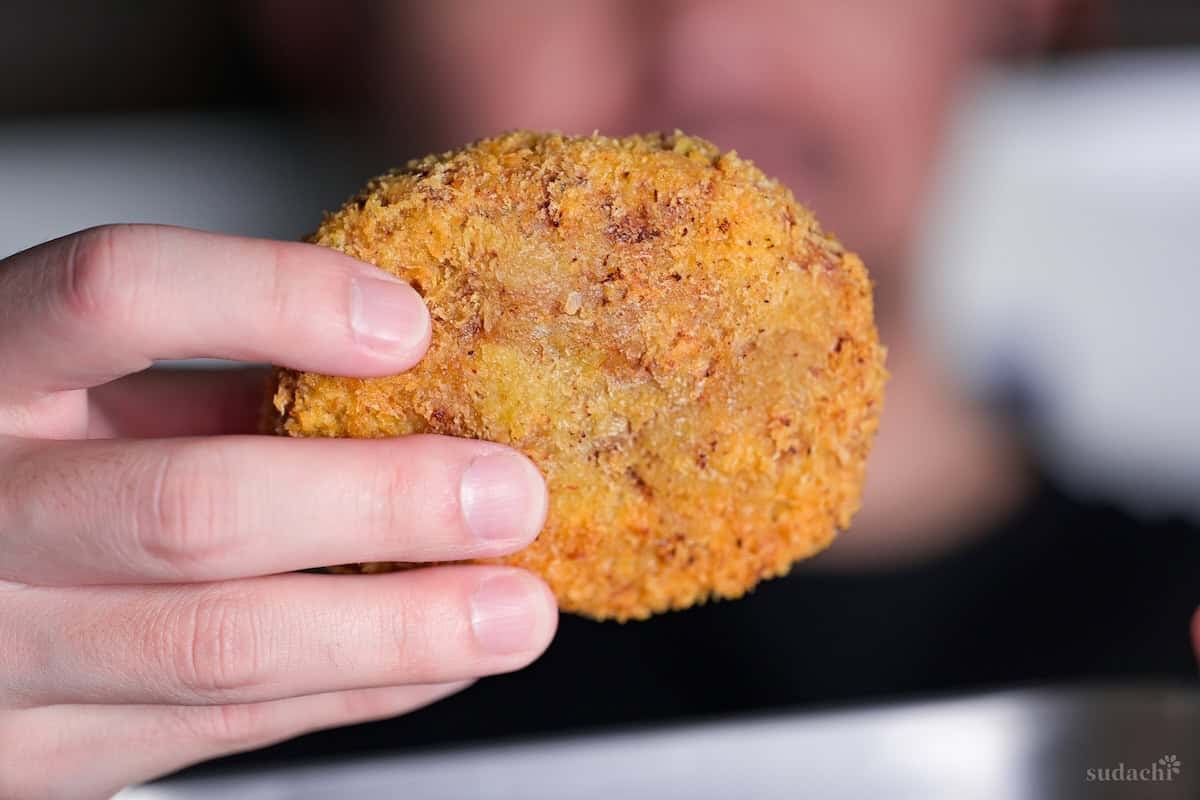
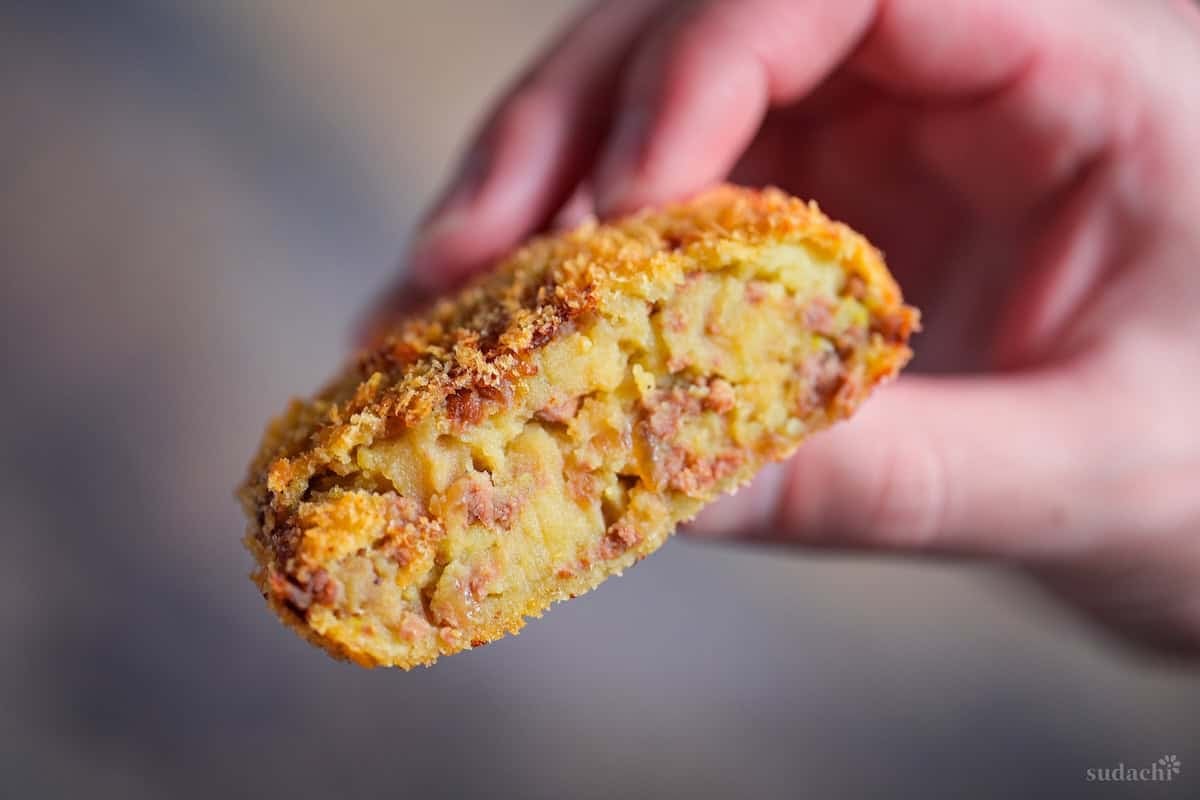
Korokke is my comfort food. Konbini croquettes do the job, but they can’t touch the ones from a butcher shop, that shattering panko crust giving way to creamy, soy-seasoned potato and meat inside.
This is my attempt to recreate those childhood korokke at home. The secret isn’t complicated: soy sauce, mirin, and a pinch of nutmeg folded into the filling change everything. I hope you’ll taste the difference.

Korokke
Recipe Snapshot
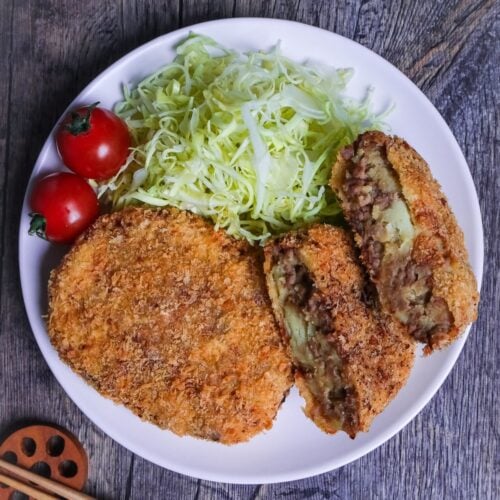
- What is it? Potato korokke, a yōshoku-style deep-fried croquette with a seasoned meat-and-potato filling, triple-coated in flour, egg, and panko for a shattering crust.
- Flavor profile: Mild, buttery mash layered with soy-mirin umami.
- Why you’ll love this recipe: Butcher-shop style korokke at home! Measured steps control moisture + chilling so they hold shape, fry cleanly, and stay crunchy.
- Must-haves: Starchy potatoes (fluffy mash), Japanese soy sauce, panko breadcrumbs.
- Skill Level: Medium: manageable for anyone comfortable with stovetop frying.
Summarize & Save this content on:
What is Korokke?
Korokke (コロッケ) is a Japanese yōshoku (Western-influenced) age-mono (deep-fried) dish. A filling (most often mashed, boiled potatoes mixed with sautéed onion and sometimes minced meat) is shaped into an oval, coated in flour, egg, and breadcrumbs, then deep-fried until the crust turns crisp and golden.
The word “korokke” is a Japanese adaptation of the French “croquette” (some sources also point to the Dutch “kroket”). According to the Journal of Cookery Science of Japan (2019), potatoes are described as having been incorporated into everyday home cooking in Japan from the end of the Taishō period (1912-1926) through the early Shōwa era (1926-1989). Other classic Japanese potato dishes include nikujaga and Japanese potato salad, but most of them are inspired by Western dishes.
This idea lines up with how historian Naoto Minami (2004) describes the bigger picture: Western food culture wasn’t simply imported unchanged. Instead, it was adapted within Japanese food culture, giving rise to Japanized Western dishes, which then spread among urban households in modern Japan.
Now, korokke is widely enjoyed as an everyday staple in Japan at convenience stores, supermarkets, yoshoku restaurants, and butcher shops even beyond meat and potatoes such as crab cream croquettes and kabocha korokke.
Japanese Croquette Ingredients
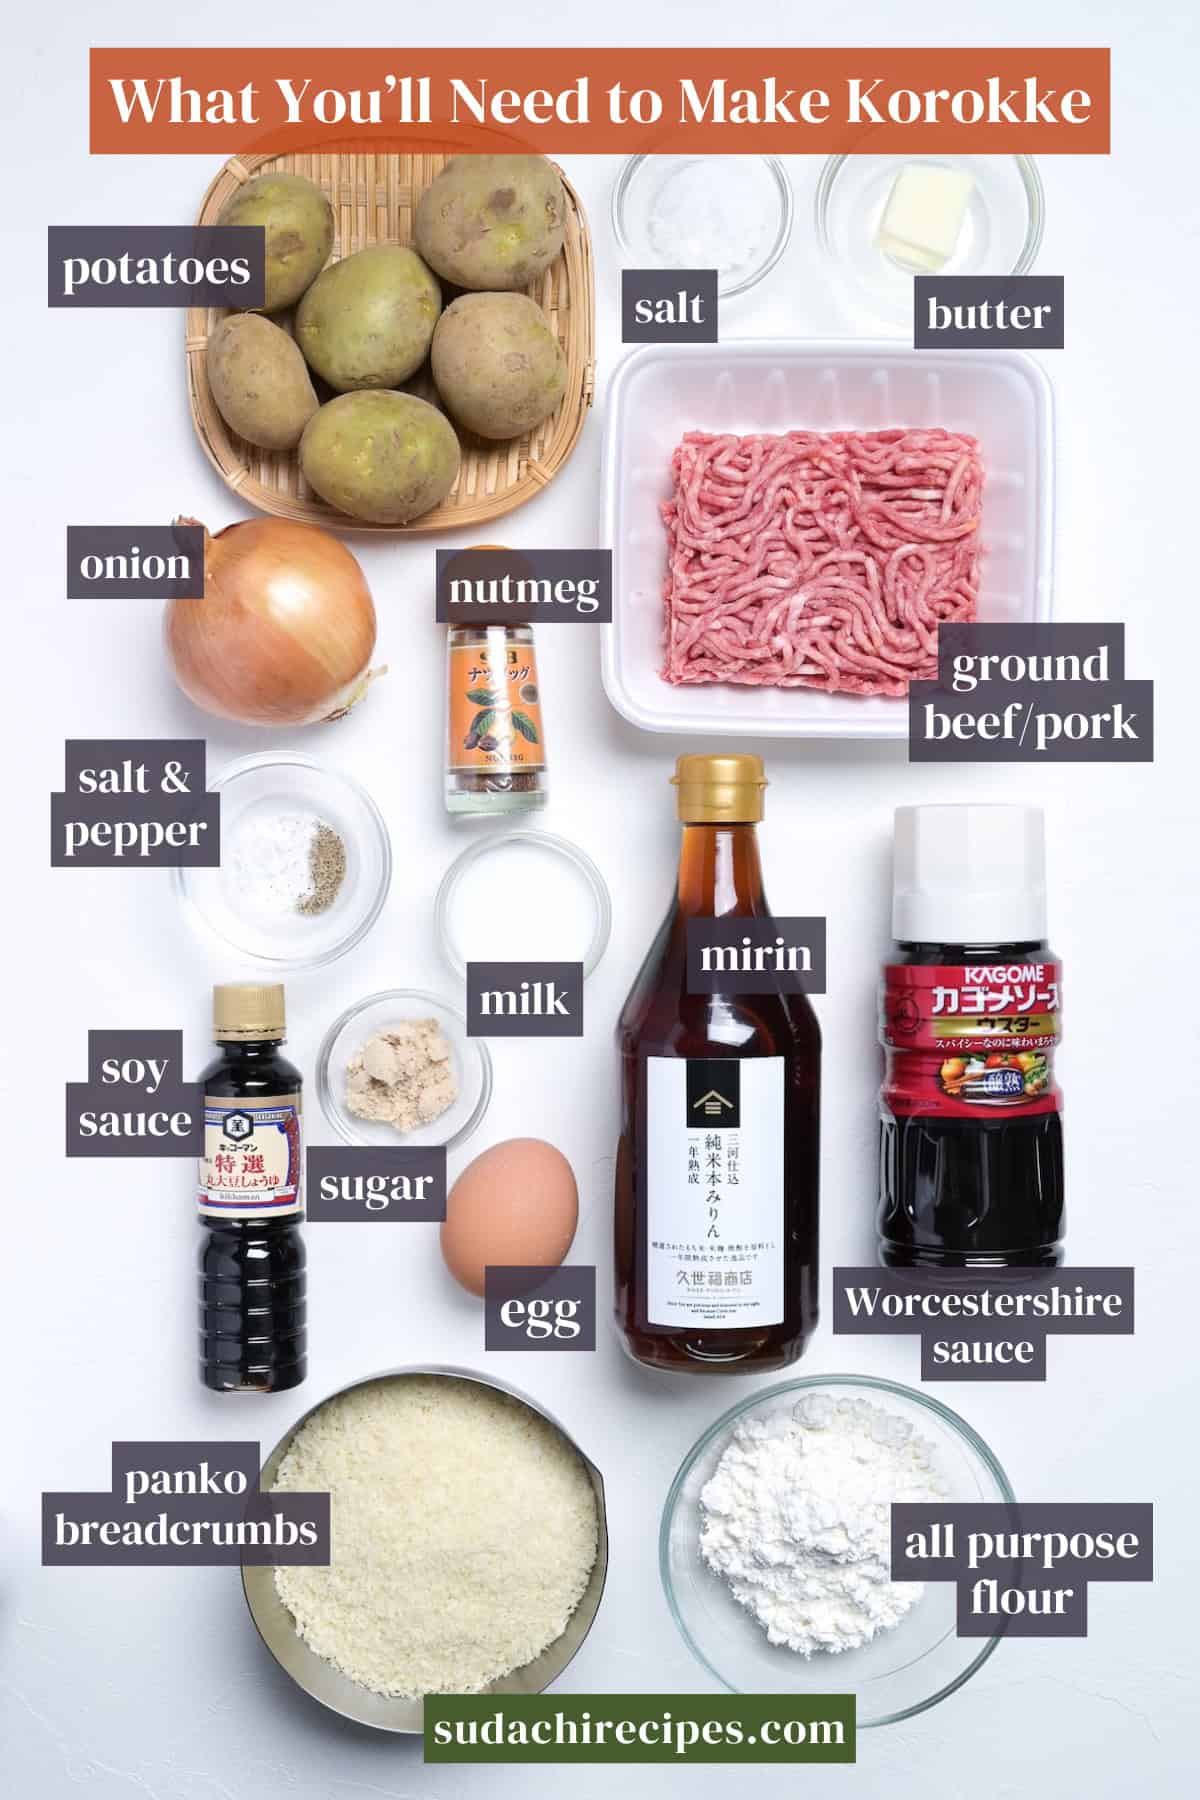
- Starchy Potatoes (like Russet or Yukon Gold): Starchy potatoes are the secret to that fluffy, creamy interior that makes korokke so satisfying. Look for starchy varieties at any grocery store. They mash smoothly and hold together beautifully when shaped and fried. Waxy potatoes (like red or fingerling) won’t give you the same result.
- Ground Meat: My recipe uses 50/50 beef-pork mix for a juicier, slightly sweeter result, but 100% beef/pork is also fine. Beef gives korokke a bold, rich umami with a stronger “meaty” presence, while pork is juicier with a gentle natural sweetness that creates a softer, more homey flavor profile. Conclusion: 50/50 mix gives you the best of both worlds.
- Worcestershire Sauce: A drizzle of Worcestershire sauce at the table is the traditional finishing touch. Japanese brands like Bulldog or Kagome are slightly milder and sweeter than British Worcestershire, but either works.
Substitution Ideas
- Butter → Any neutral oil works if you need a dairy-free option, but you’ll lose that subtle richness butter adds to the onions.
- Whole milk → Any milk you have on hand will do the job.
- Panko breadcrumbs → Regular breadcrumbs will coat and fry up just fine, but the crust won’t be as light and shatteringly crispy. It will be thinner and more compact. For the crunchiest results, stick with panko if you can (you can make Japanese panko at home easily).
- All-purpose flour (for batter and dusting) → Rice flour or cornstarch both work for a gluten-free version. The coating may be slightly more delicate, so handle the korokke gently during breading.
- Worcestershire sauce (for serving) → Tonkatsu sauce or Japanese brown sauce (chūnō sauce) is fine alternative if you already own one of these.
- Cooking oil → Any neutral, high-heat oil like vegetable, canola, or rice bran oil works perfectly for frying (I always use rice bran oil). Avoid olive oil.
Have trouble finding Japanese ingredients? Check out my ultimate guide to Japanese ingredient substitutes!
How to Make My Meat & Potato Korokke
If you prefer to watch the process in action, check out my YouTube video of this korokke recipe!

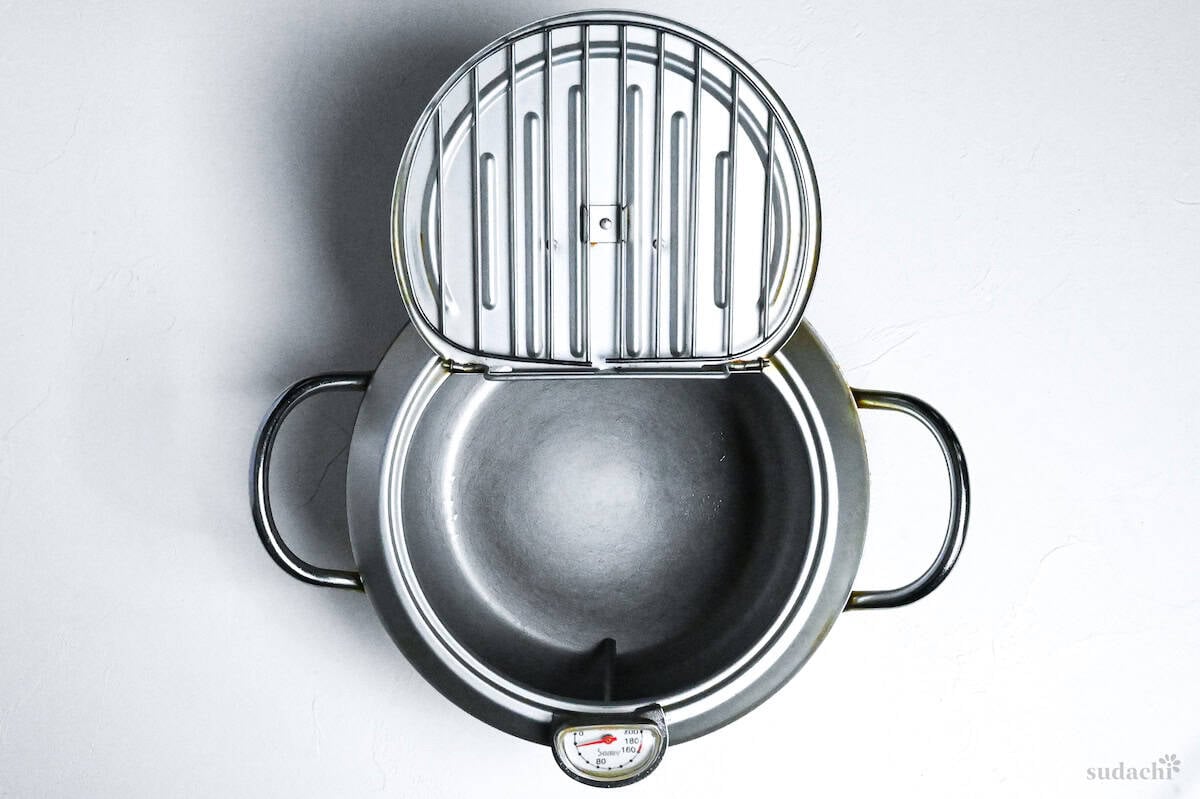
To develop this korokke recipe, I used my tempura pot with a built-in thermometer & wire rack (highly recommended if you do frying from time to time).
i. Cut your potatoes into roughly equal chunks (about the size of a golf ball works well). Give the cut pieces a quick rinse under cold water to wash away surface starch.
ii. Place the potatoes in a pot, cover them with cold salted water, and bring it all up to a boil together.
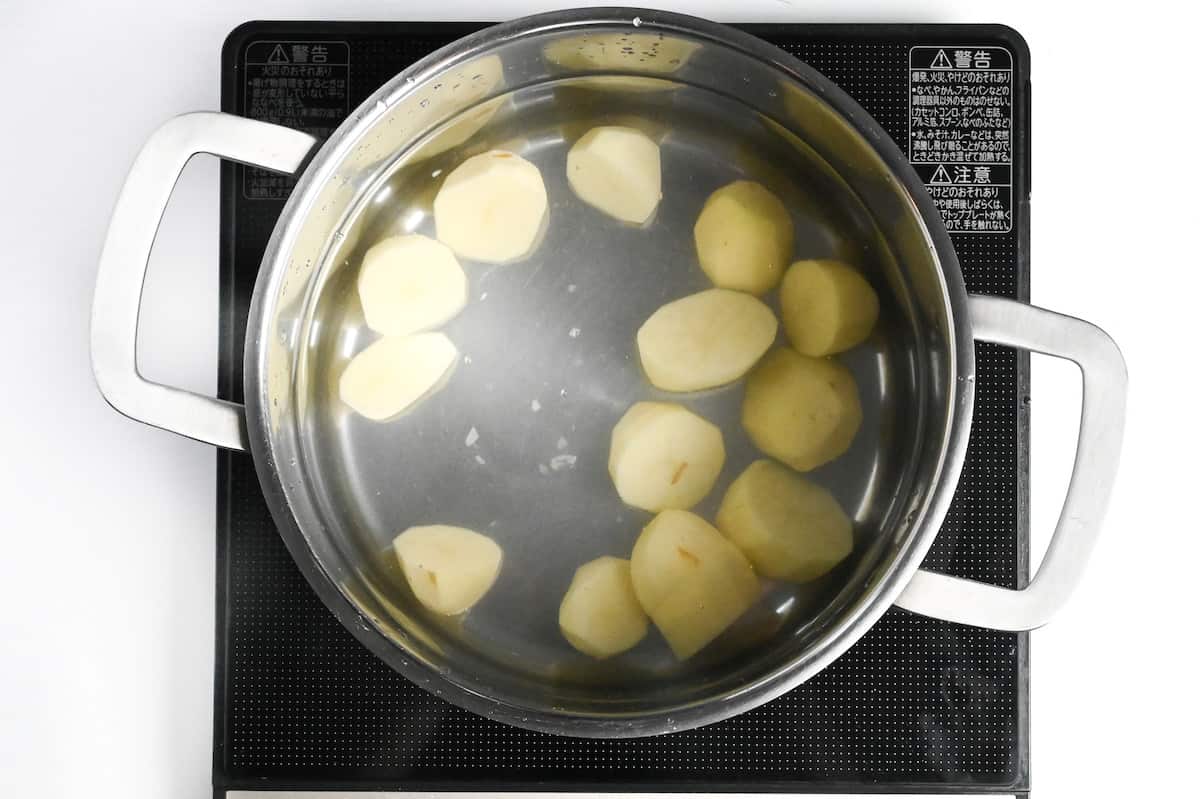
Starting cold lets heat penetrate gradually and evenly from the outside in. Drop potatoes into already-boiling water, and the outsides overcook before the centers catch up, leaving you with a grainy, uneven mash. It’s a small habit that pays off.
iii. Once the water hits a rolling boil, dial the heat back to medium and let the potatoes simmer gently. You’re looking for a fork to glide through the center of the largest piece with zero resistance, usually around 15 to 20 minutes depending on size.
iv. Next up, you’ll drain these and drive off every last bit of unwanted moisture.
After draining, you can return the potatoes to the empty pot and set it back over low heat for about 30 seconds, shaking the pot gently. You’ll see wisps of steam escaping. This optional step is great for fail-free korokke.
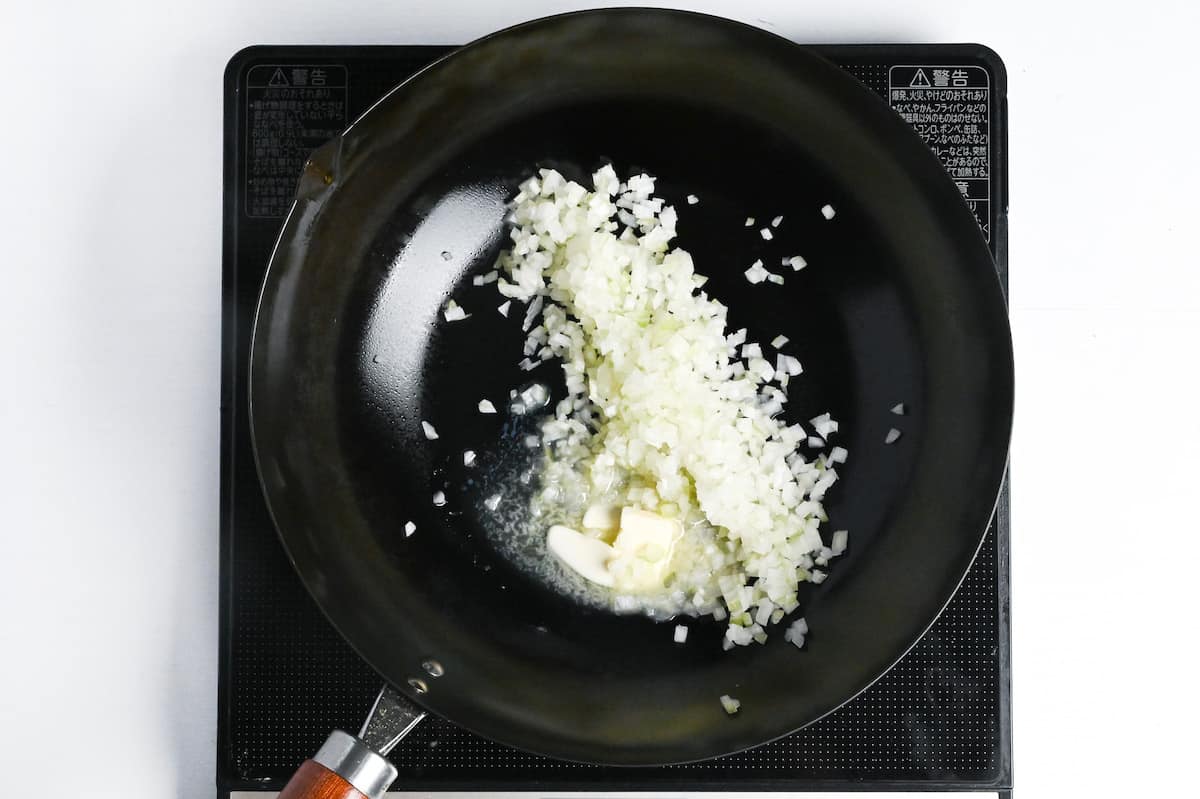
i. While the potatoes simmer, grab a frying pan (I used a wok) and set it over medium heat. Add the unsalted butter and let it melt until it starts to foam. Listen for a faint, lazy sizzle that tells you the water in the butter is cooking off and the pan is ready.
ii. Tumble in the diced onions and cook them, stirring occasionally, until they turn soft and slightly translucent, almost glassy at the edges.
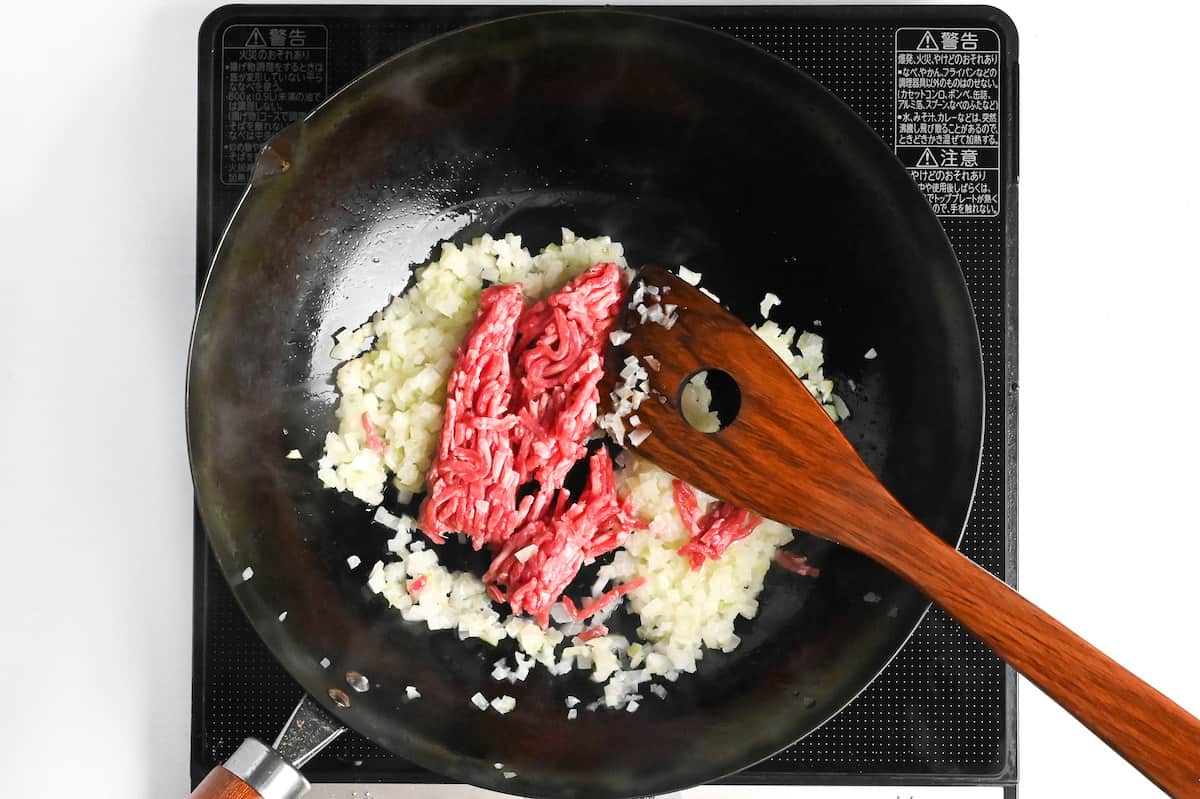
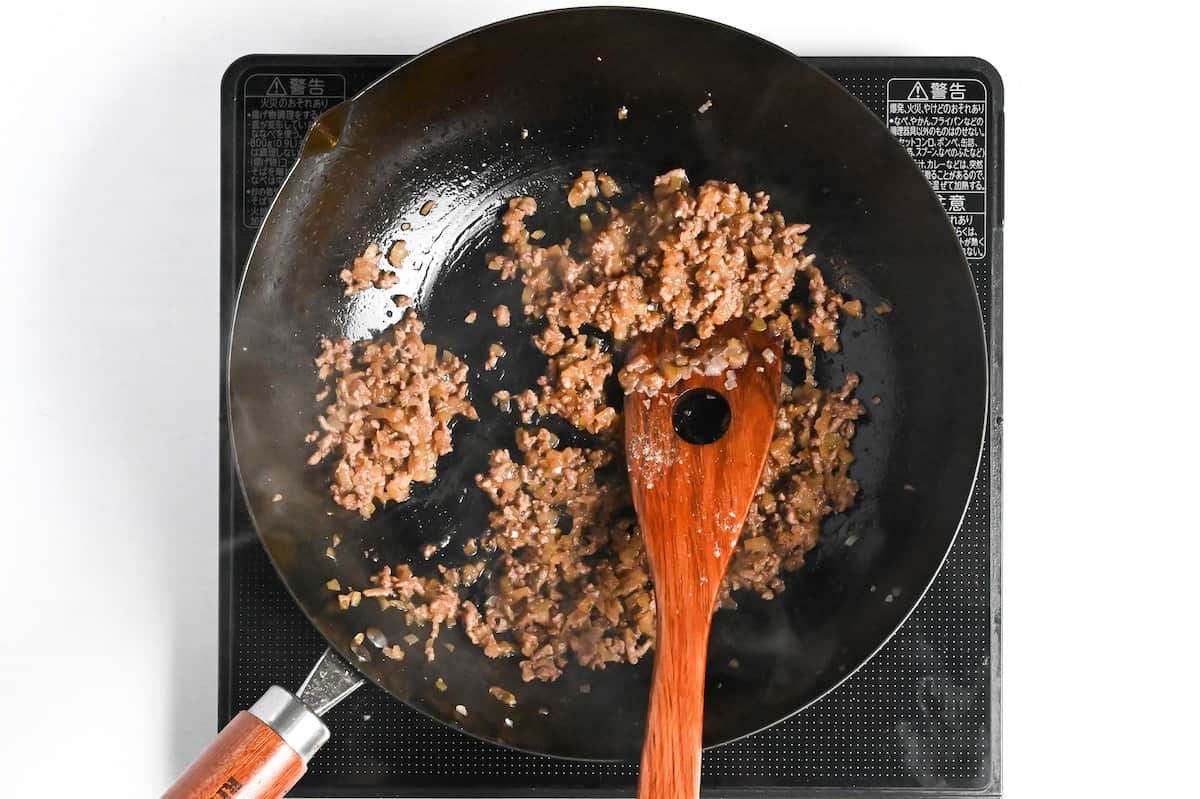
i. Push the onions to one side of the pan and add the ground meat to the cleared space. Break the meat apart with a spatula and cook it until absolutely no pink remains.
ii. Once the beef is cooked through, stir it together with the onions.
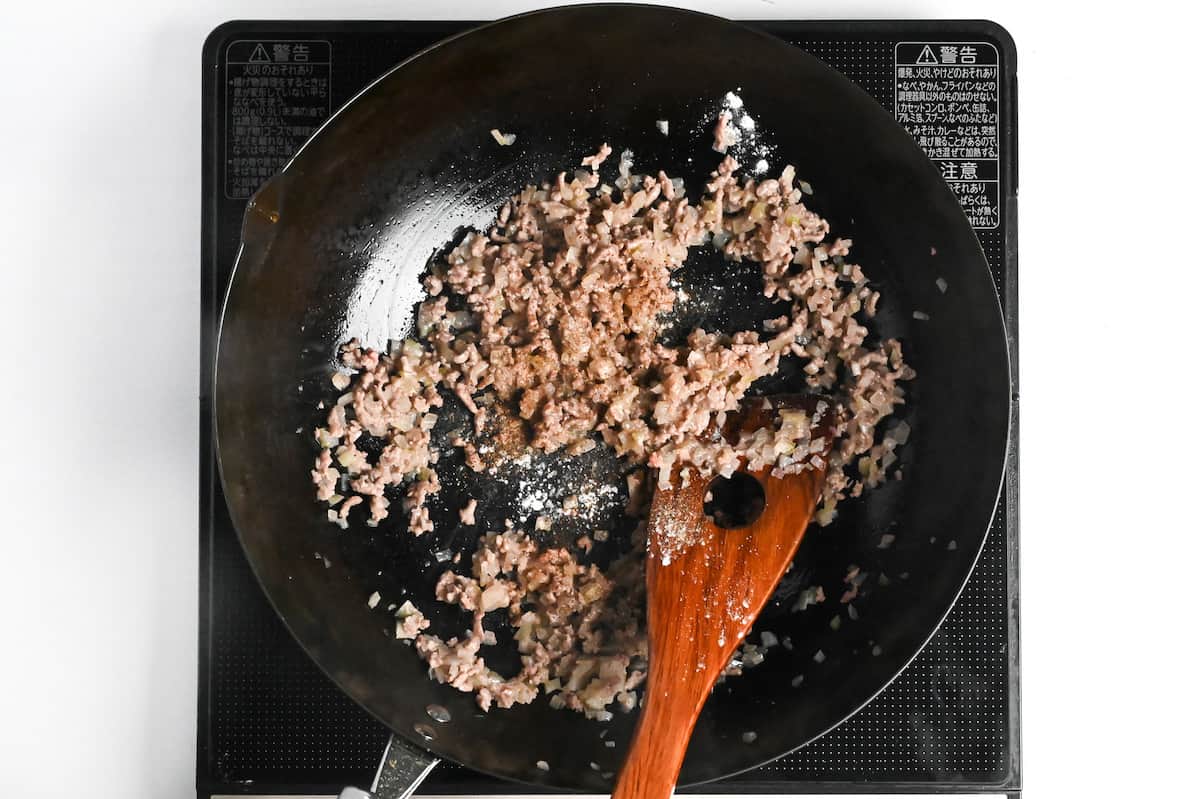
iii. Sprinkle in salt, pepper, and nutmeg. Pour in the soy sauce, sugar, and mirin.
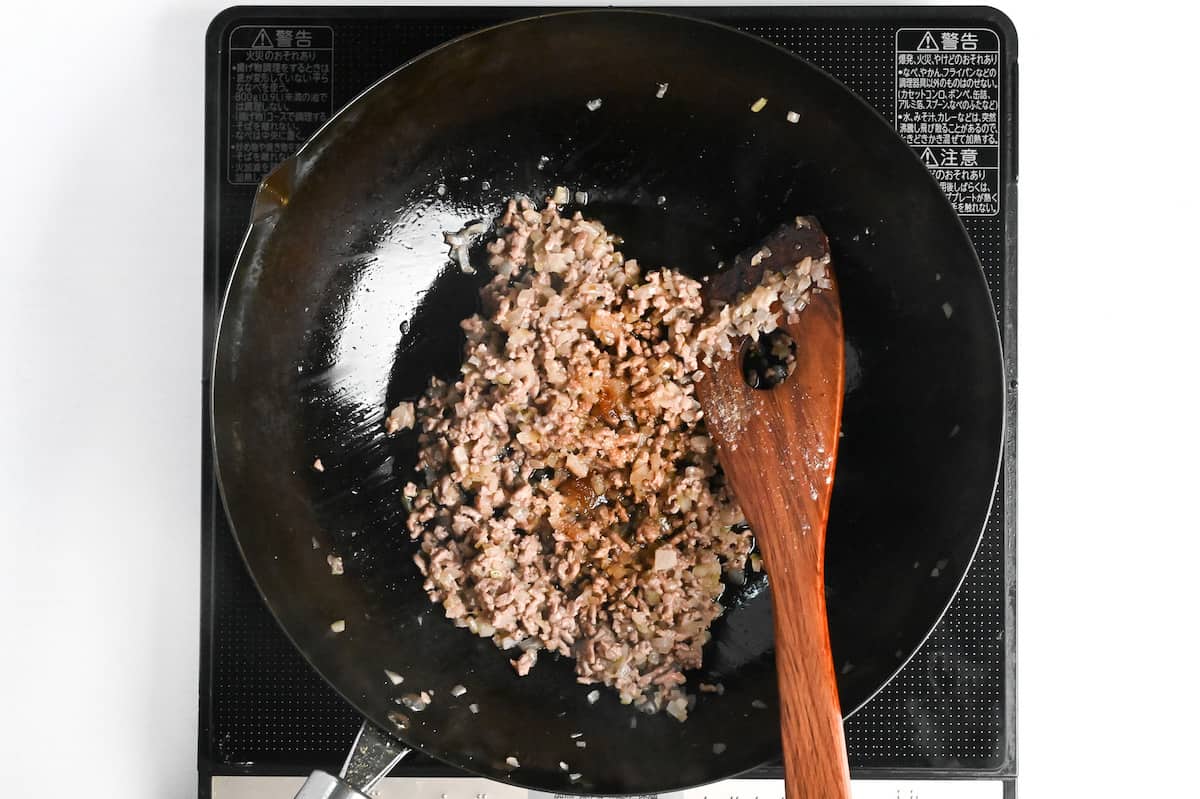
iv. Then keep cooking and stirring until the liquid is fully absorbed and the pan looks nearly dry.
Excess moisture is the single biggest reason korokke fail. Wet filling generates steam during frying, and that steam pushes outward until it cracks the crust, resulting in the dreaded blowout and a pot of oil contaminated with potato. Every moisture you remove now is pressure your crust won’t have to withstand later.
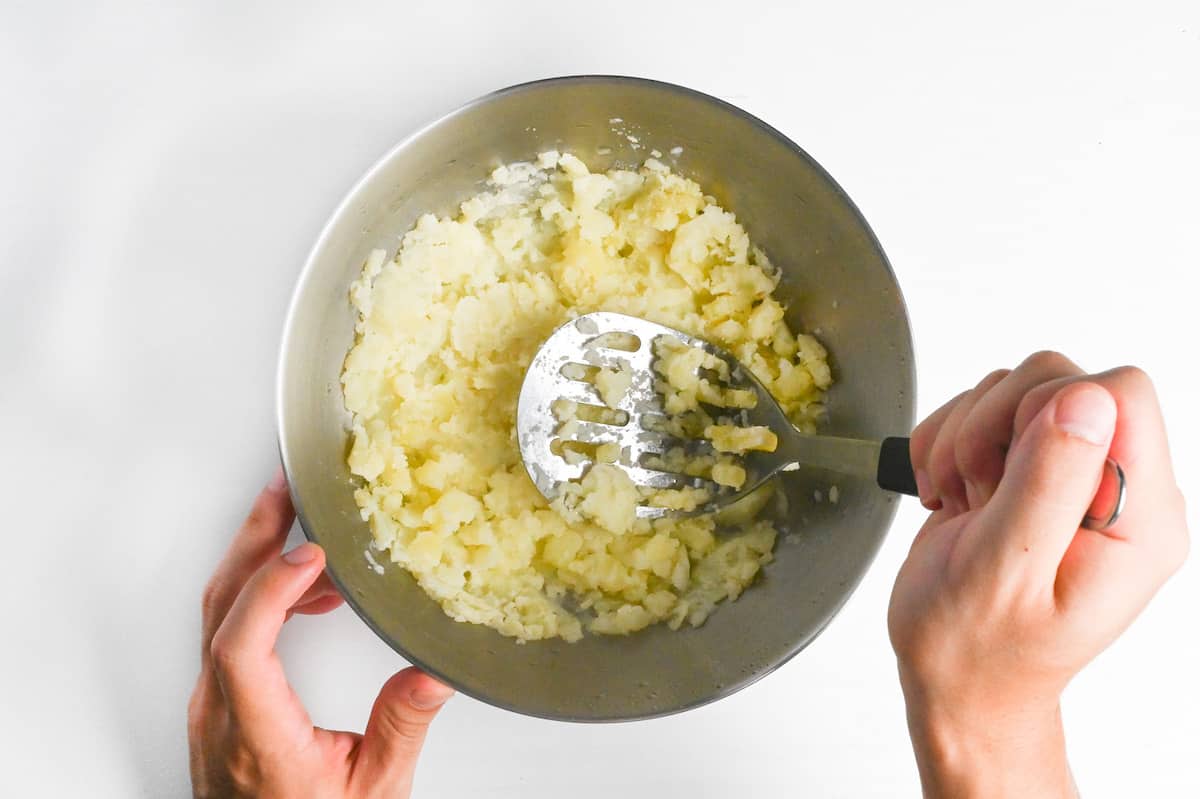
i. Transfer the hot, steamed-off potatoes to a large bowl and mash them right away. Hot potatoes mash smoothly because their swollen starch granules are pliable. Add a small splash of whole milk as you mash to help things along, creating a creamier consistency that shapes easily.
ii. Once you have a smooth mash, fold in the cooled beef-and-onion mixture.
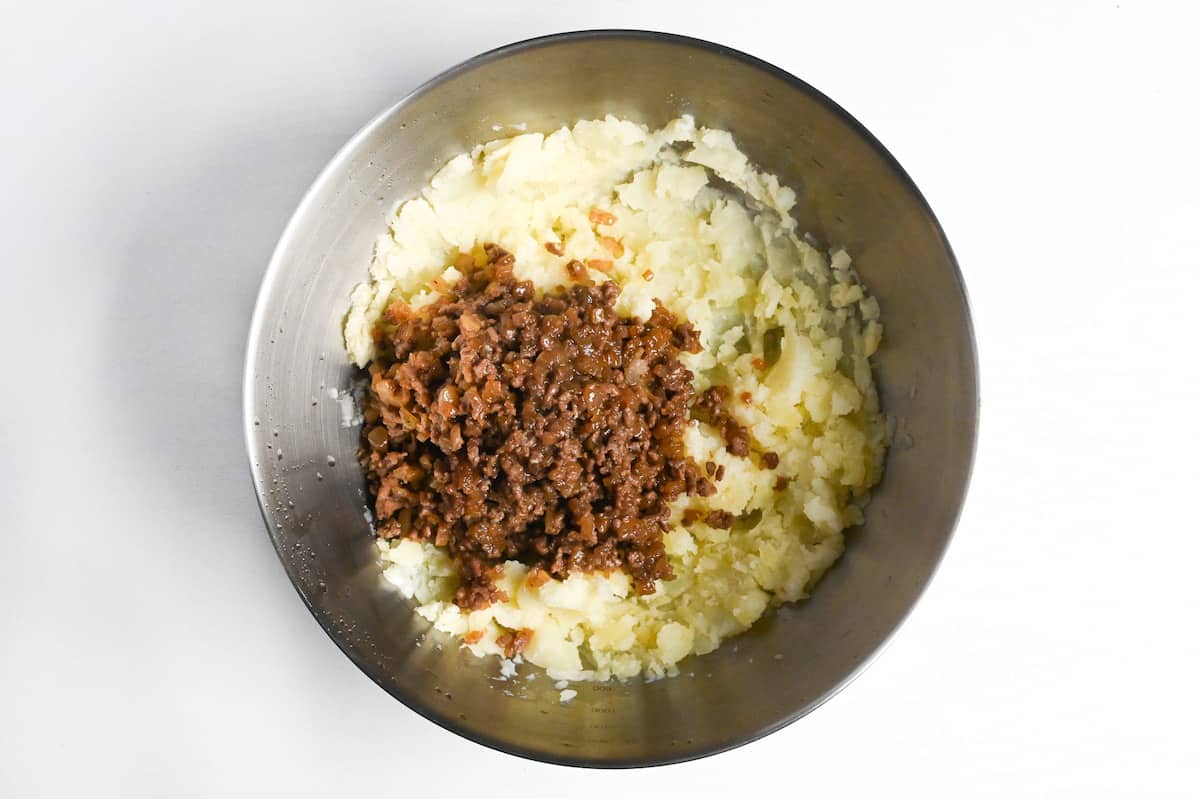
iii. Use a spatula or large spoon and work with broad, gentle strokes. Mix just until the meat is evenly distributed throughout the potato. Resist the urge to stir aggressively.
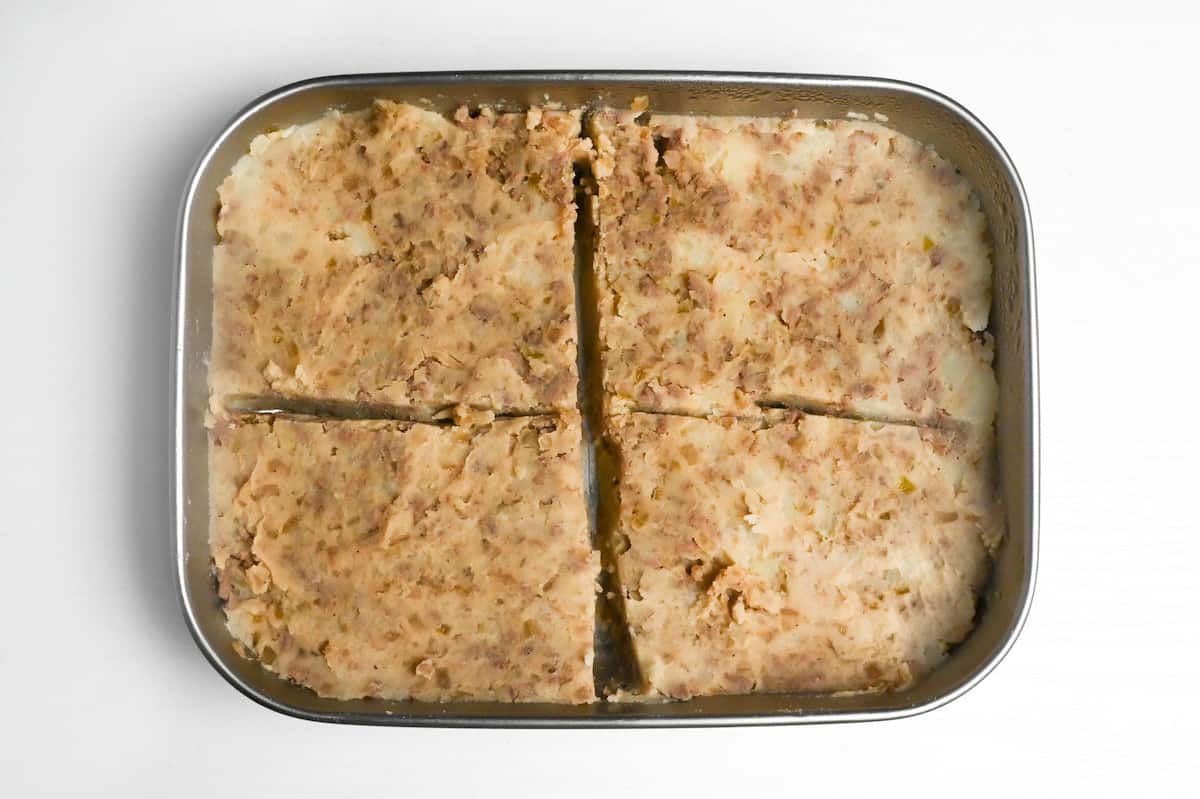
i. Spread the combined mixture into a wide, shallow container. A sheet pan or large baking dish works fine. The wider you spread it, the faster heat escapes and moisture evaporates from the surface.
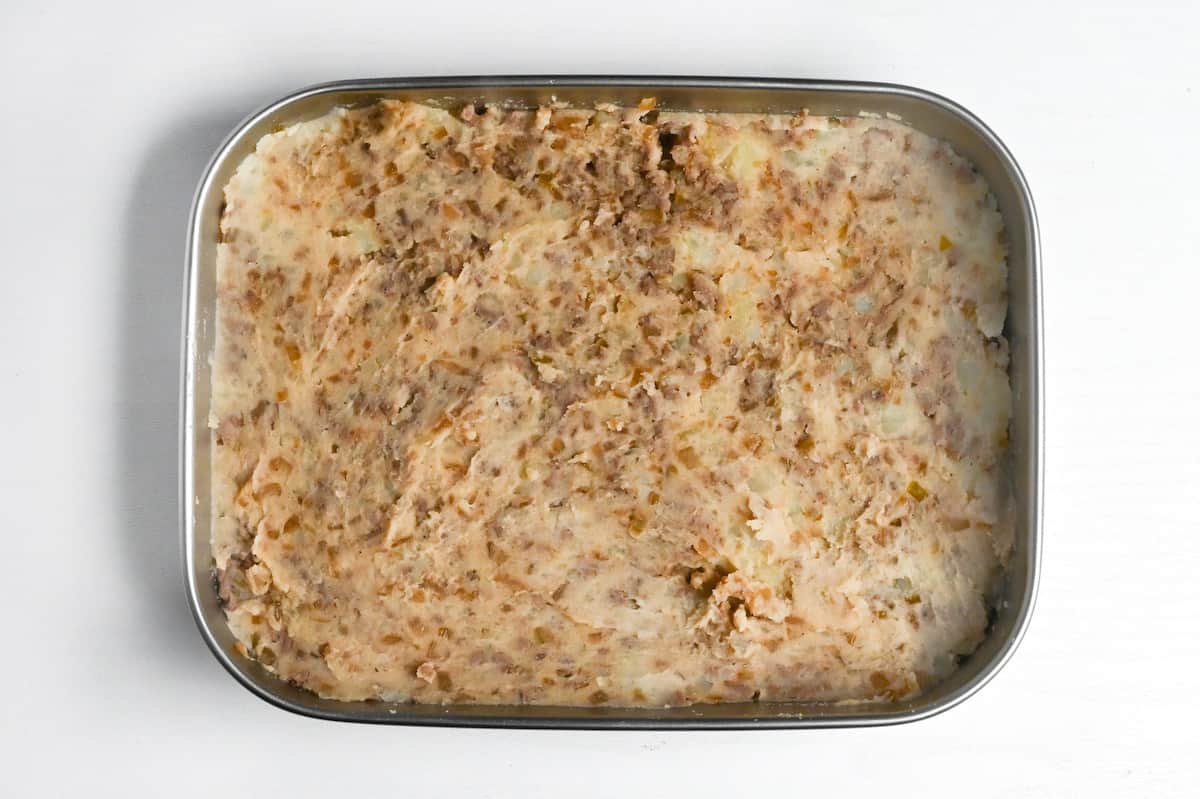
ii. Let it cool until comfortable to touch, then cover and refrigerate for at least 30 minutes, or up to overnight.
This step does three critical things at once. First, it firms the fats in the mixture, giving the filling structural rigidity so it holds its shape when you handle it. Second, it tightens the starch matrix, making each patty denser and more resistant to cracking. Third, and most importantly, it lowers the internal temperature so that when the korokke hits hot oil, the temperature differential isn’t extreme enough to generate an explosive burst of steam.
i. Remove the chilled filling from the fridge. Divide it into 4-6 even portions. Eyeballing is fine, but consistent sizing makes sure every korokke fries at the same rate.
ii. Shape each portion into a flat oval about 2cm thick. The classic oval isn’t just tradition. A flat, even shape means heat penetrates uniformly from all sides, and you get a reliable crust-to-filling ratio in every single bite.

Run your hands lightly over each patty to eliminate cracks, seams, or rough edges. Any imperfection on the surface is a potential weak point where steam can escape and oil can intrude during frying.
iii. Pour enough neutral oil into a heavy-bottomed pot to submerge the korokke completely. Bring the oil to 170-180°C (340-356°F).
iv. While we wait, prepare your three-stage coating assembly. Whisk together cold water, egg, and all-purpose flour in a bowl until smooth and lump-free.
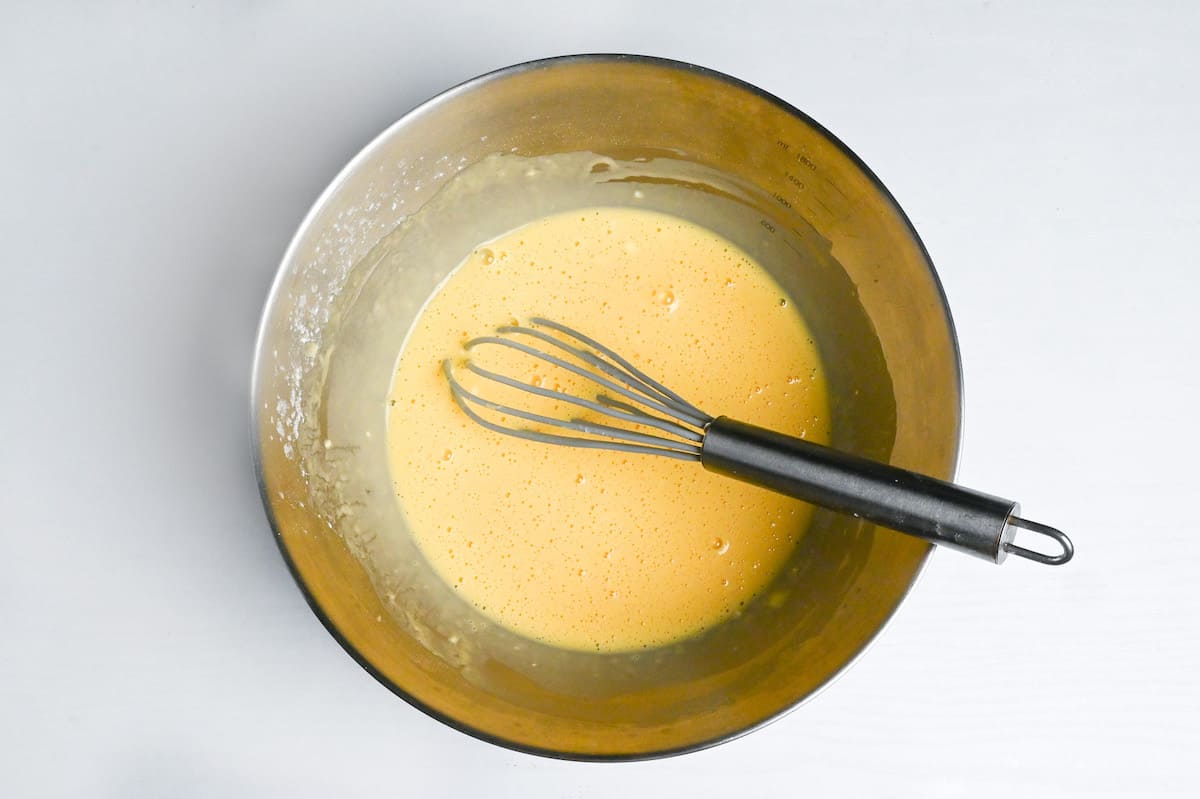
This combination creates a unified batter that clings more evenly than the traditional separate flour-then-egg dip. It’s actually safer this way.
v. Set out a plate of plain flour and a plate of panko breadcrumbs alongside the batter bowl.
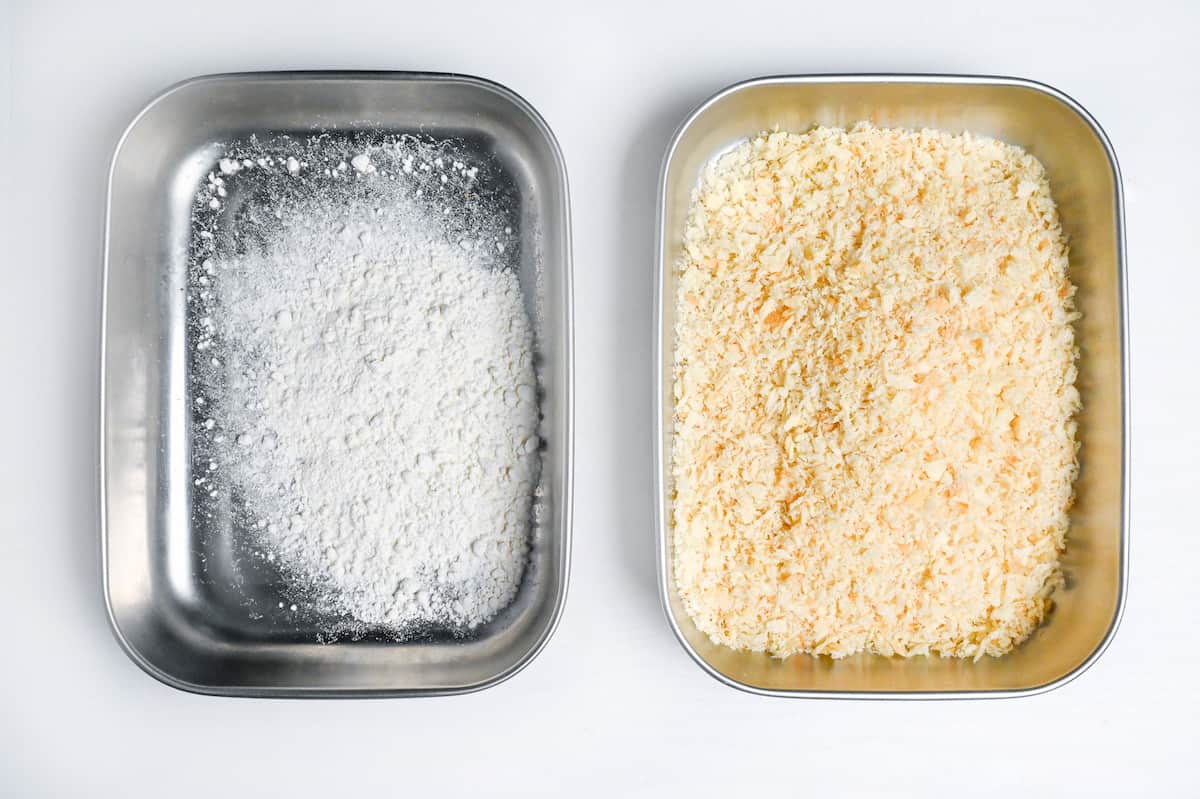
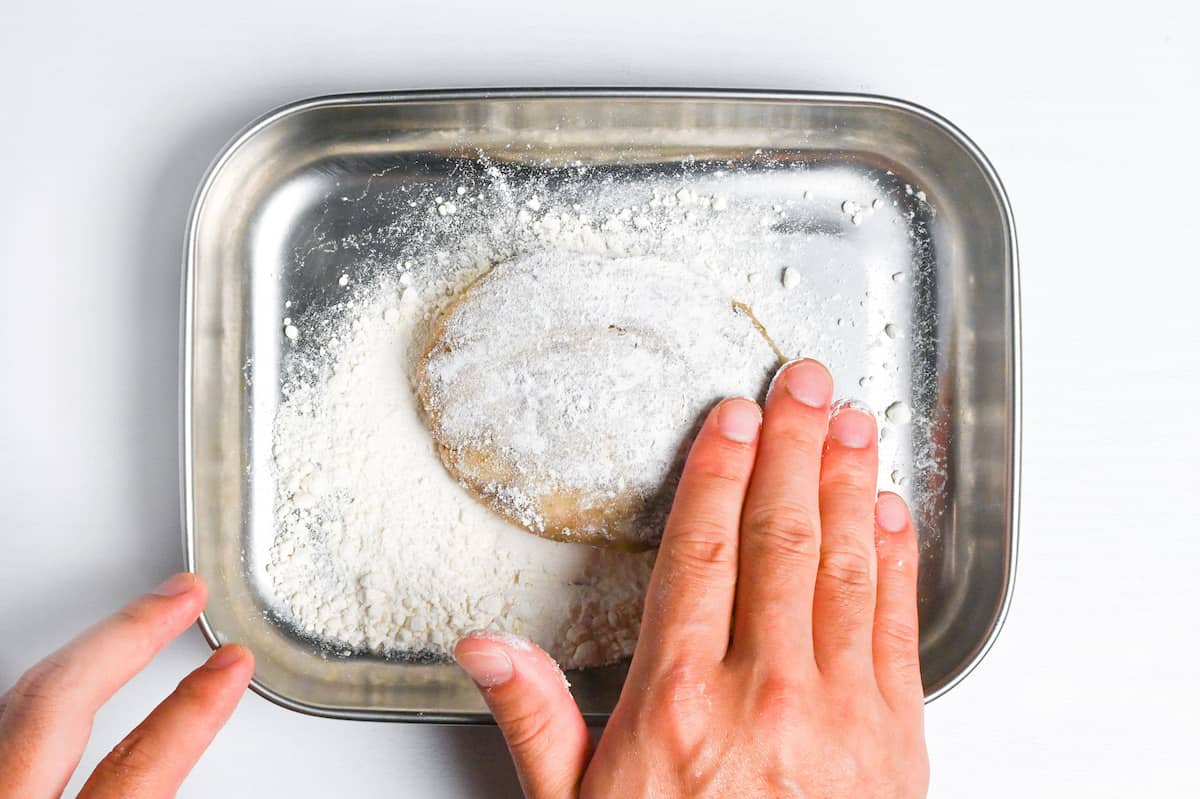
vi. Roll each korokke first in a light dusting of plain flour. This gives the wet batter something to grip.
vii. Next, dip it into the egg batter, letting any excess drip off for a count of 2.
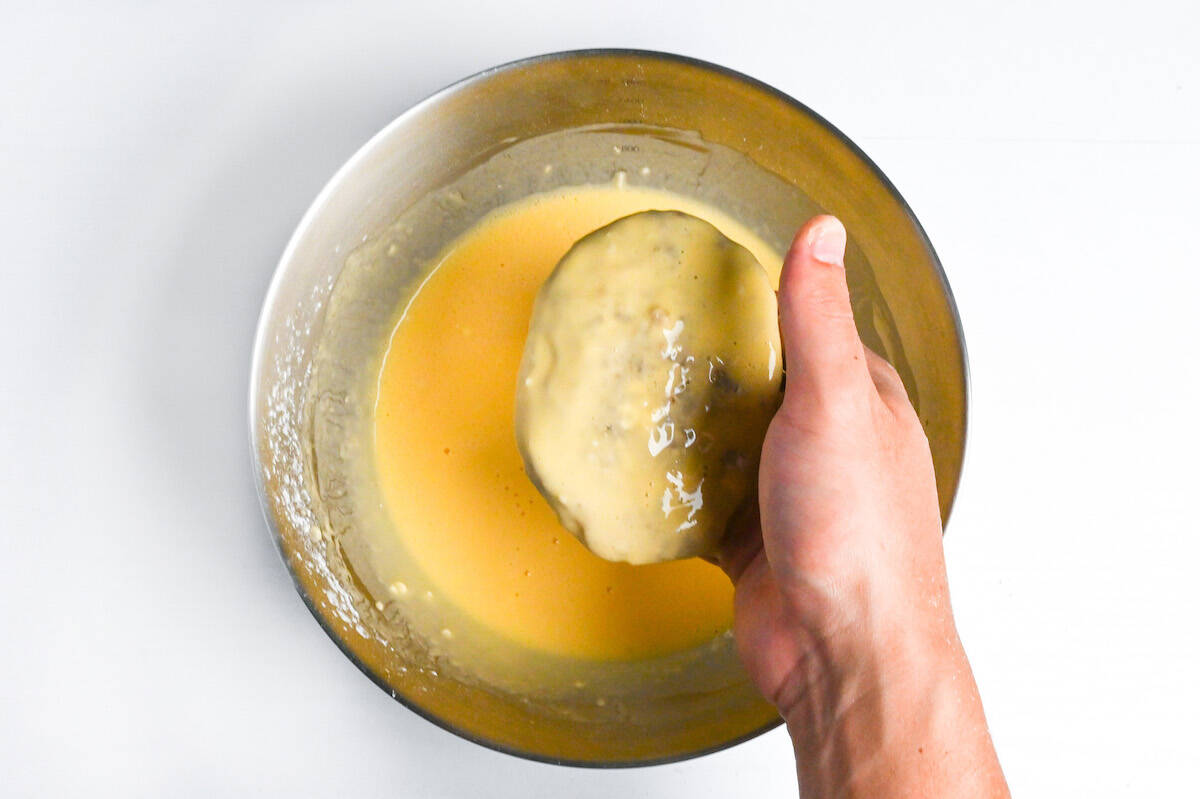
viii. Finally, lay it in the panko and press the crumbs gently but firmly onto every surface. You want full, even coverage with no bare spots peeking through.
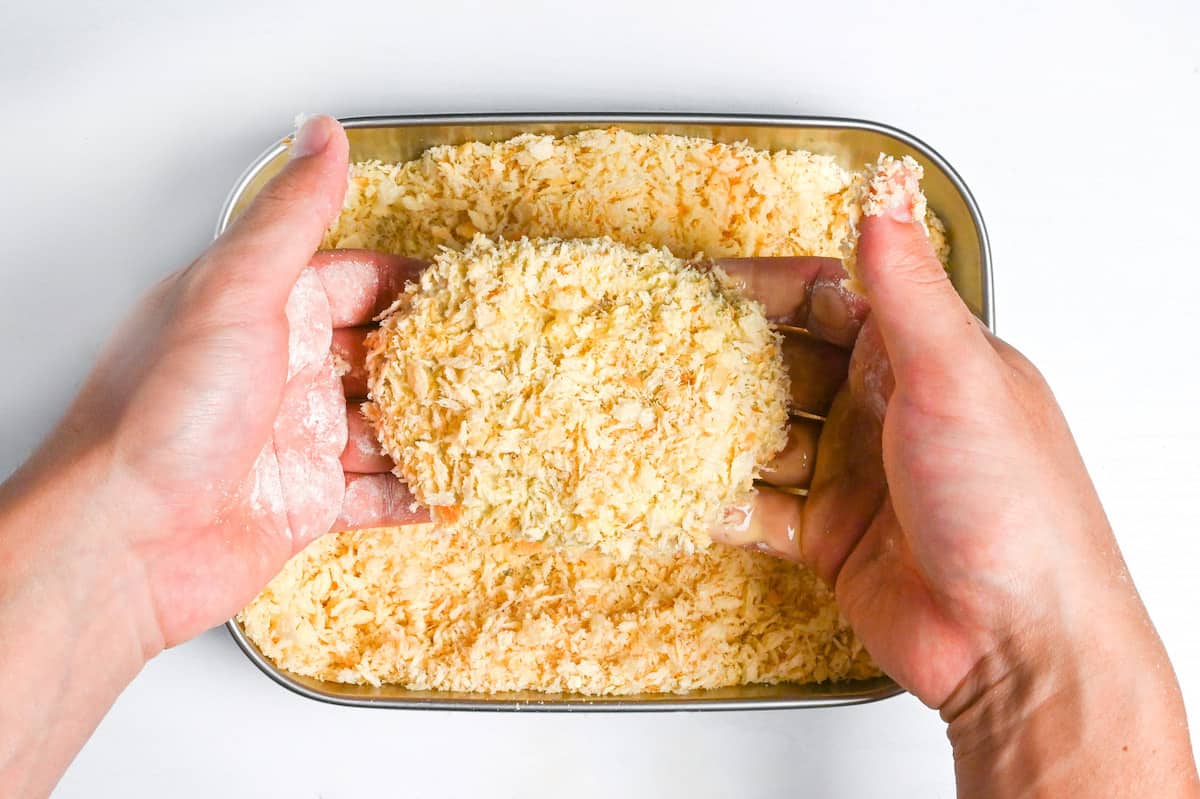
That continuous shell of flour-batter-panko is what becomes your protective armor in the oil. It seals the filling in, keeps the oil out, and delivers that signature shattering crunch.
i. Gently lower two or three korokke into the hot oil (never more than your pot can hold) with a few centimeters of space between each piece.

Overcrowding drops the oil temperature rapidly, and that temperature crash is exactly what leads to soggy, oil-logged crusts.
Once they’re in, resist every urge to touch them. For the first 60 to 90 seconds, the egg proteins in the batter are setting and the panko lattice is locking into a rigid shell. Nudging them with chopsticks or tongs during this fragile window can crack the still-soft crust and cause filling to leak.
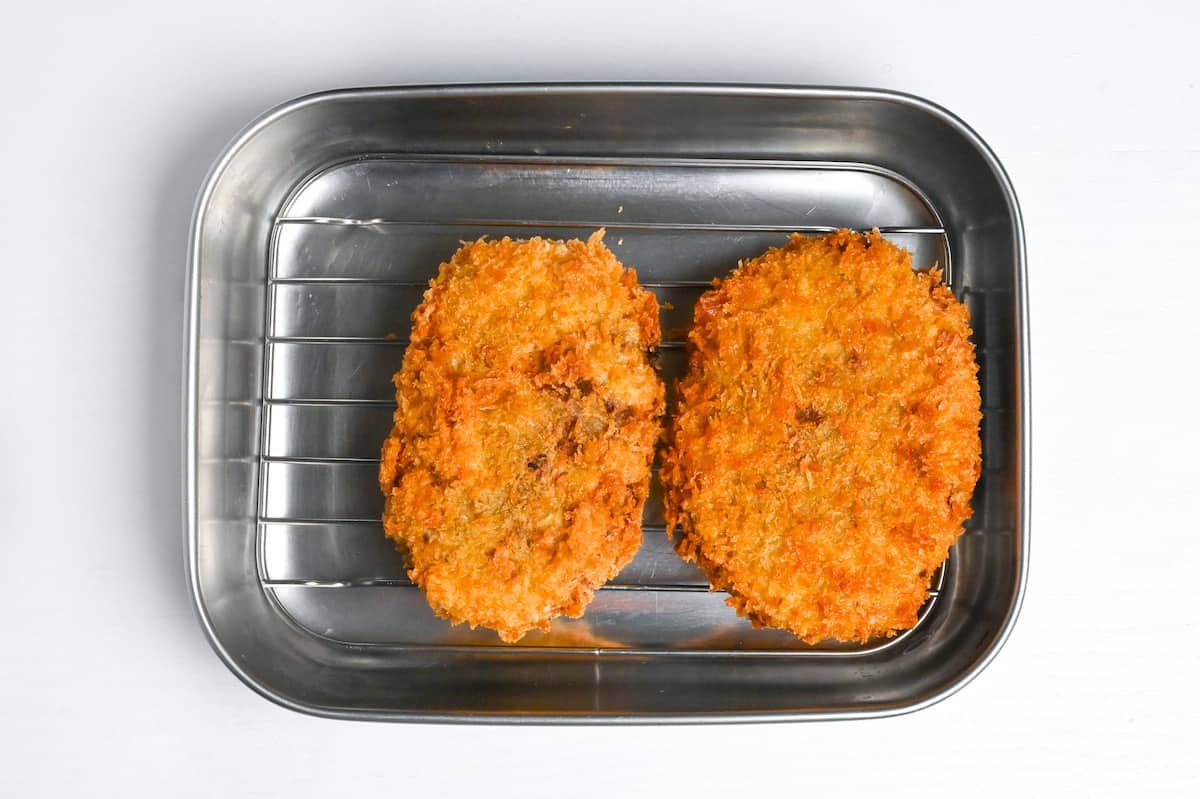
ii. Flip once and cook until deep-golden and crisp. Remember, the filling is already cooked, so all you need to care about is the crispiness and the color on the outside. Trust your eyes and ears over the clock for this.
iii. Lift the finished korokke out of the oil and place them on a wire rack set over a sheet pan. Never directly onto paper towels or a flat plate. A rack allows air to circulate underneath, so steam vents away from the crust instead of getting trapped against it and turning your crispy shell leathery.
iv. Let them rest for about 2 minutes before serving.
i. Plate your korokke on a bed of finely shredded raw cabbage.

ii. Drizzle Worcestershire over the top, or serve it alongside for dipping.

Essential Tips & Tricks
- Choose starchy potatoes and cut evenly, because fluffy mash binds cleanly.
- Start potatoes in cold salted water and simmer (don’t hard-boil), because gradual heat cooks through evenly.
- Chill shaped, breaded korokke and fry in plenty of oil at 170-180℃ (338-356°F) in small batches.
With these simple tips in mind, you’re set for success every time you make korokke.
Storage & Meal Prep
Fridge: Store cooked korokke in an airtight container for up to 2 days. The panko crust will soften as condensation and moisture migration rehydrate it. The potato interior also firms in the fridge from starch retrogradation, so expect a slightly denser bite.
Freezer: Recommended: freeze shaped, breaded (unfried) korokke in a single layer until solid, then seal in an airtight freezer bag/container for up to 1 month to prevent freezer burn and coating damage. Freezing fully fried korokke is not recommended for best results.
Meal Prep: Make the filling 1-2 days ahead, spread to cool, then chill until firm. This moisture management step makes shaping/breading cleaner and reduces bursting risk. For true weeknight ease, bread and freeze pre-fry so you only need to deep-fry and sauce at serving time (crispness is always time-limited after frying).
Reheating: Use dry heat: reheat on a wire rack in a 200℃ (392°F) oven or air fryer until hot and steaming with a re-crisped surface; avoid microwave-only reheating because steam heat turns the crust soggy.
What to Serve With This Recipe
Korokke FAQ
This almost always comes from weak structure. The filling was too wet, not chilled long enough, or the coating had bald spots that couldn’t set into a shell. Aim for a filling that feels cool, firm, and shapeable (not sticky), then let the crust set untouched for the first minute so the egg proteins “lock” the panko. If one starts leaking, pull it out immediately, leaks snowball into more breakage.
Bursting is steam pressure. Excess internal water flashes into steam and blows out through the weakest seam. Fix it by drying the potatoes well after boiling, cooking the onion/meat until the pan looks nearly dry, and keeping oil in the 170-180℃ (338-356°F) zone so the crust sets quickly without overheating. If they split early, your filling is usually too wet or too warm.
Greasy korokke usually means the oil was too cool or dropped too much when you added a batch, so the crust didn’t form fast enough and oil moved in as water moved out. Fry in small batches, wait for the thermometer to recover between rounds, and use a deeper pot with enough oil for stable heat. The crust should sound lively (steady sizzle) and turn golden, not pale.
More Japanese Ground Beef Recipes
- Milano Doria (Meat Gratin)
- Okinawa Taco Rice
- Menchi Katsu (Ground Meat Cutlet)
- Hambagu (Japanese Hamburger Steak)
Hungry for more? Explore my Japanese ground beef recipe collection to find your next favorite dishes!
Did You Try This Recipe?
I would love to hear your thoughts!
💬 Leave a review and ⭐️ rating in the comments below. 📷 I also love to see your photos – submit them here!
Korokke (Japanese Meat and Potato Croquette)

Ingredients
- 300 g potato starchy variety such as Russet or Yukon Gold, not waxy
- ½ tbsp salt for boiling
- 1 tbsp butter or neutral oil
- 100 g onion finely diced
- 100 g ground meat 50/50 beef-pork mix or 100% beef/pork
- 1 pinch salt and pepper
- 1 pinch nutmeg powder
- 1 ½ tbsp Japanese soy sauce (koikuchi shoyu)
- 1 tsp sugar
- 2 tsp mirin
- 1 tbsp whole milk at room temperature
- Worcestershire sauce optional, to serve
Batter
- 50 ml cold water
- 1 egg
- 5 tbsp all-purpose flour plus extra for dusting
- 75 g panko breadcrumbs or regular breadcrumbs
- cooking oil neutral, high smoke point, for deep frying
My recommended brands of ingredients and seasonings can be found in my Japanese pantry guide.
Can’t find certain Japanese ingredients? See my substitution guide here.
Instructions
- Cut 300 g potato roughly into similar-sized chunks and submerge them in a deep pot of cold water. Stir in ½ tbsp salt, then heat on medium-high until it reaches a boil. Reduce the heat to medium and gently boil until fork-tender.

- While the potatoes are boiling, heat a frying pan on medium-low and add 1 tbsp butter. Once melted, add 100 g onion and cook until softened and slightly translucent. Stir regularly and keep the heat low to prevent browning.
- Increase the heat to medium, add 100 g ground meat, and fry until browned all over.
- Sprinkle in 1 pinch salt and pepper and 1 pinch nutmeg powder. Mix well and then add 1 ½ tbsp Japanese soy sauce (koikuchi shoyu), 1 tsp sugar and 2 tsp mirin.
- Fry until the liquid is absorbed, then turn off the heat and set aside to cool slightly.
- Transfer your cooked potatoes to a large heatproof bowl and mash them while they're still hot with 1 tbsp whole milk .
- Once the mashed potato is smooth, add the mince and mix until the ingredients are evenly distributed.
- Transfer the mixture to a wide, heatproof container and leave to cool. Once cool to the touch, place a lid or plastic wrap over the top and chill in the refrigerator for 30 minutes.
Coating and frying
- Preheat your cooking oil to 180 °C (356 °F). While you wait, make a batter by mixing 50 ml cold water, 1 egg and 5 tbsp all-purpose flour together in a bowl.
- Prepare two plates, one with a few tablespoons of flour and one with 75 g panko breadcrumbs.
- Remove the filling from the fridge and divide into 4-6 pieces.
- Roll each piece into a flat oval shape.
- Coat the shaped korokke in plain flour, then the egg batter, then a generous coating of panko breadcrumbs.
- Place the korokke straight into the heated oil. I recommend cooking them in batches to avoid overcrowding the pan. You can keep the shaped korokke in the fridge/freezer while you cook.
- Once crispy and golden, transfer to a wire rack and rest for a few minutes to drain any excess oil.
- Serve with a drizzle of Worcestershire sauce and enjoy!

My husband who is from Japan recalled childhood with his granny in the home, and her warm korokke awaiting him as an afterschool snack. He was thrilled when we received a food processor as a marriage gift 45 years ago, and it had a cookbook that featured French croquettes. I think he would be equally excited if I were to use the authentic Japanese recipe.
Yes, korokke is a nostalgic food for many Japanese people. I hope you try the recipe and enjoy it with your husband! Thank you for your comment!