

Featured Comment
Delicious, they taste just like the ones I’d buy in Japan! Such an easy recipe to follow too, these will be a staple in my house from now on!
★★★★★
– Harri
If ichigo daifuku is the playful spring treat and warabi mochi the summer cool-down, dorayaki is the all-season comfort, two golden pancakes hiding a heart of sweet anko.
Like ohagi or mitarashi dango, it bridges tradition and simplicity. But there’s one quiet detail that decides whether your dorayaki stays pillowy or turns dense.

Dorayaki
Recipe Snapshot
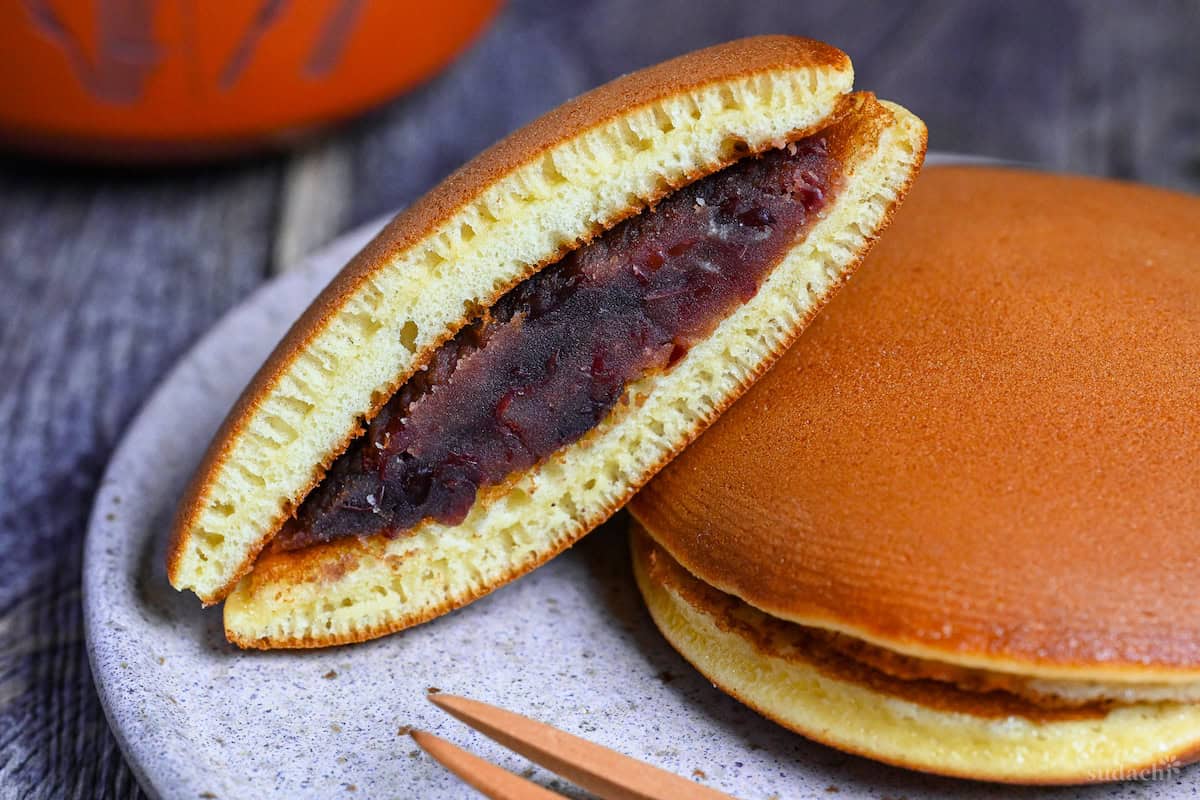
- What is it? Fluffy Japanese pancakes filled with sweet red bean paste.
- Flavor profile: Sweet, Malty, Comforting
- Why you’ll love this recipe: It delivers authentic Japanese results without the intimidation factor. Unlike mochi or dango that require special techniques and ingredients, this uses familiar pancake skills and pantry items you already have.
- Must-haves: Red bean paste, Honey, Flat-pan
- Skill Level: Medium
- Freezer Friendly? Yes!
Summarize & Save this content on:
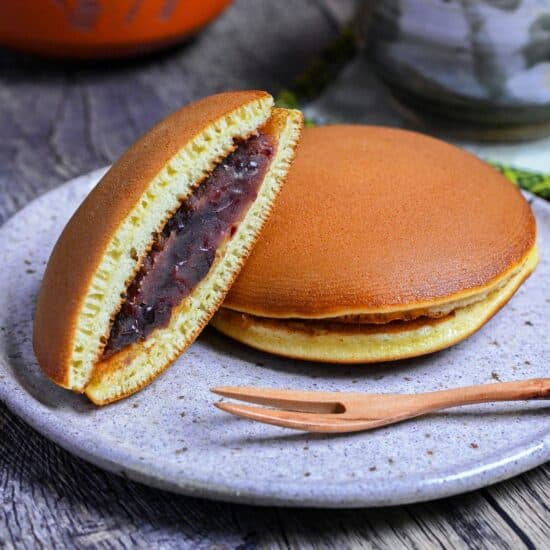
What is Dorayaki?
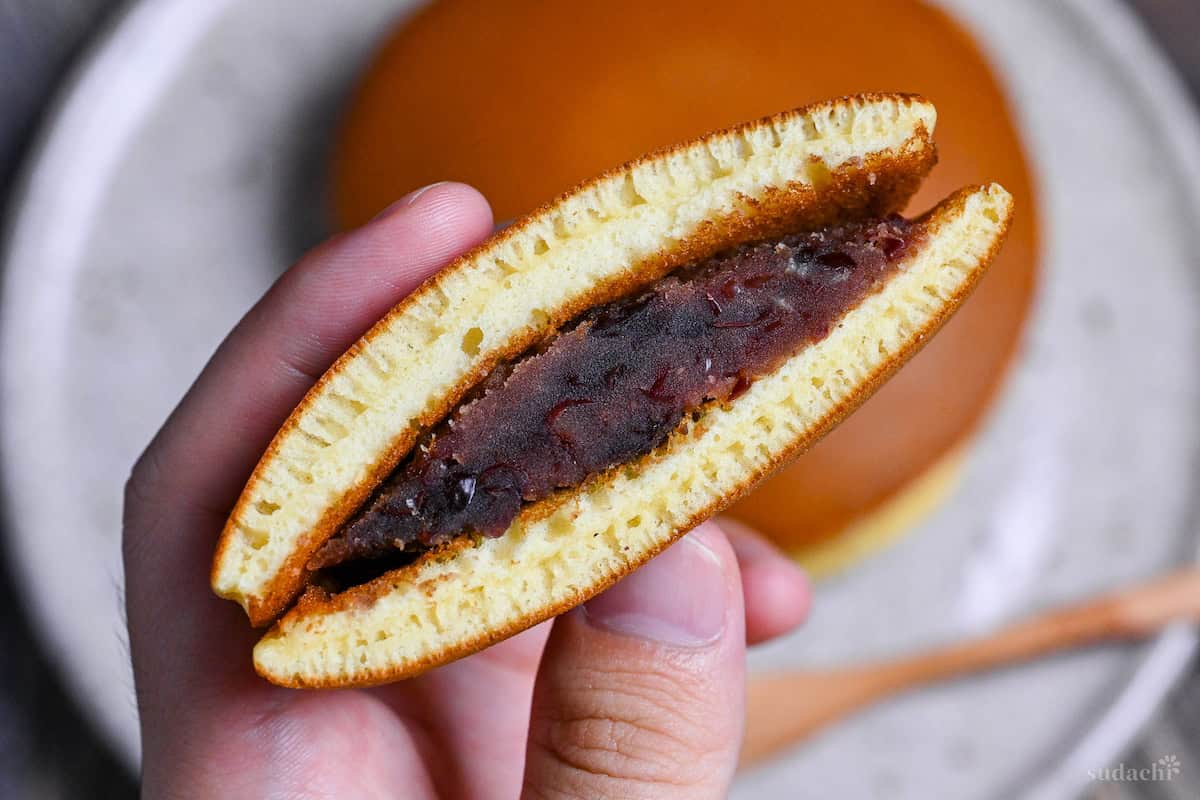
Dorayaki (どら焼き) is a classic Japanese confection: two soft, honey-kissed pancakes sandwiching a generous layer of anko (sweet red bean paste). Its name comes from “dora (銅鑼),” meaning gong, which its round shape resembles. According to legend, the wandering monk-warrior Benkei once cooked batter on a gong and filled it with bean paste as thanks to a kind villager, possibly the earliest “dorayaki.”
The treat evolved through centuries, from savory fu no yaki (麩の焼き) in the Muromachi era (1336-1573) to the sweet, folded Sukesō-yaki (助惣焼) of Edo (1603-1868). The modern, two-layered version appeared in Tokyo’s Meiji era (1868-1912), inspired in part by Western-style hotcakes.
Today, dorayaki is a nostalgic comfort found everywhere from traditional wagashi shops to convenience stores, and even immortalized as Doraemon’s favorite snack.
Dorayaki Ingredients
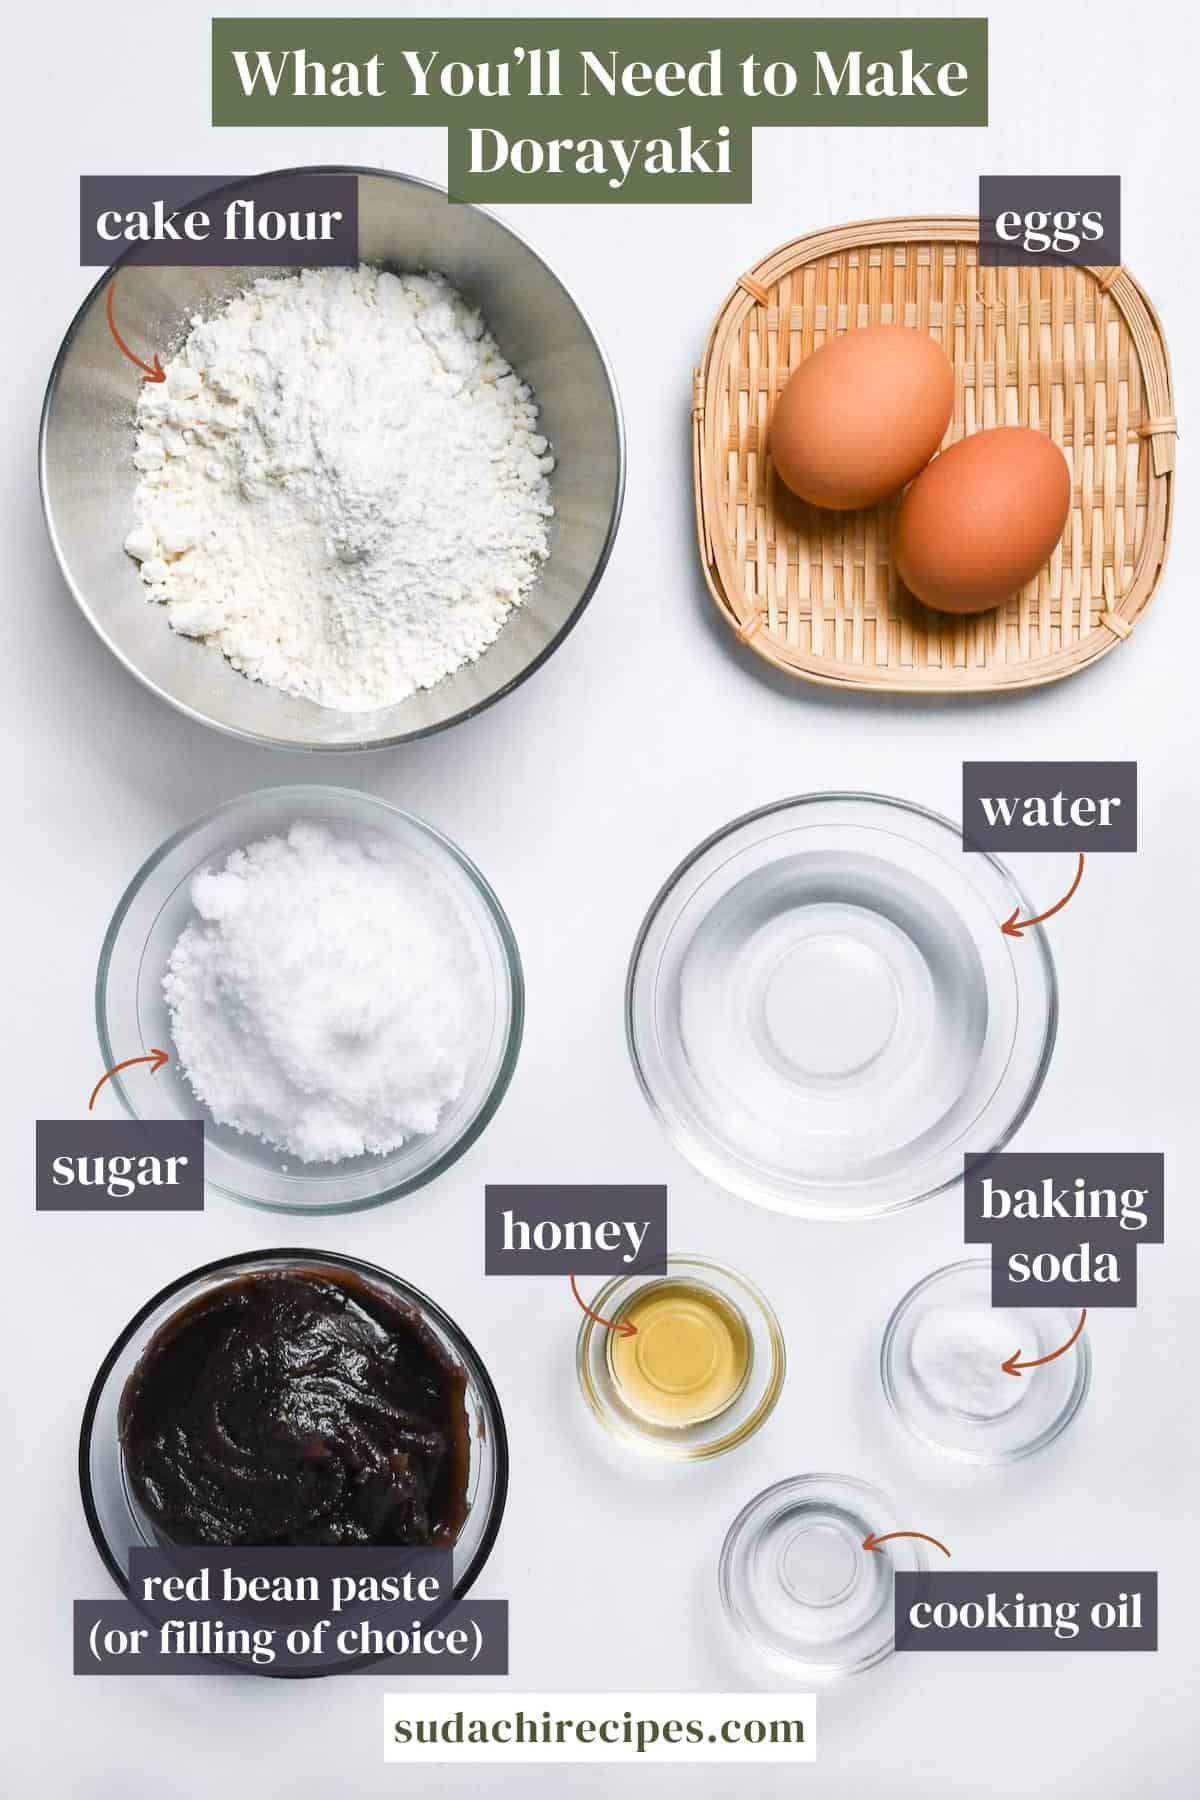
- Cake flour: I opt for cake flour (weak flour) in my recipe. This soft, low-protein wheat flour keeps dorayaki batter tender and gives you a fluffy, cake-like bite. If you can’t find it, all-purpose flour works fine! Some traditional makers even prefer it for a slightly sturdier pancake that holds its shape when filled.
- Sugar: Beyond sweetness, sugar is your secret weapon for keeping these pancakes soft and moist. It also creates that beautiful golden-brown color and toasty aroma as the pancakes cook. Use regular granulated white sugar for this recipe.
- Anko (sweet red bean paste): The classic dorayaki filling (both smooth koshian and chunky tsubuan are fine). No time to make your own? Look for ready-to-use anko in cans or tubs at Asian groceries or order online where multiple brands are easy to find.
Variations
- Matcha Dorayaki: Sift 1 teaspoon of matcha powder into your dry ingredients for earthy, lightly bitter pancakes with a green hue. Pair with white bean paste or whipped cream for stunning contrast.
- Chocolate Dorayaki: Replace 1 tablespoon of flour with unsweetened cocoa powder for rich, dark brown pancakes that taste decadent with chocolate or red bean filling.
- Fruit-Flavored Anko: Mix fruit puree (like strawberry) into white anko paste for a bright, tangy filling with gorgeous color. Use about 1 part puree to 5 parts paste.
- Matcha or Chocolate Anko: Stir 1 teaspoon of matcha or cocoa powder into white or red bean paste for earthy or rich fillings.
- Cream Cheese Filling: Blend softened cream cheese with red bean paste for a tangy, creamy filling that balances sweetness with richness. Actually popular in modern Japanese bakeries.
- Salted Butter or Cheese Filling: Tuck a pat of salted butter or a slice of cream cheese inside with the bean paste for an addictive sweet-salty combo.
Have trouble finding Japanese ingredients? Check out my ultimate guide to Japanese ingredient substitutes!
How to Make My Dorayaki
If you prefer to watch the process in action, check out my YouTube video of this dorayaki recipe!

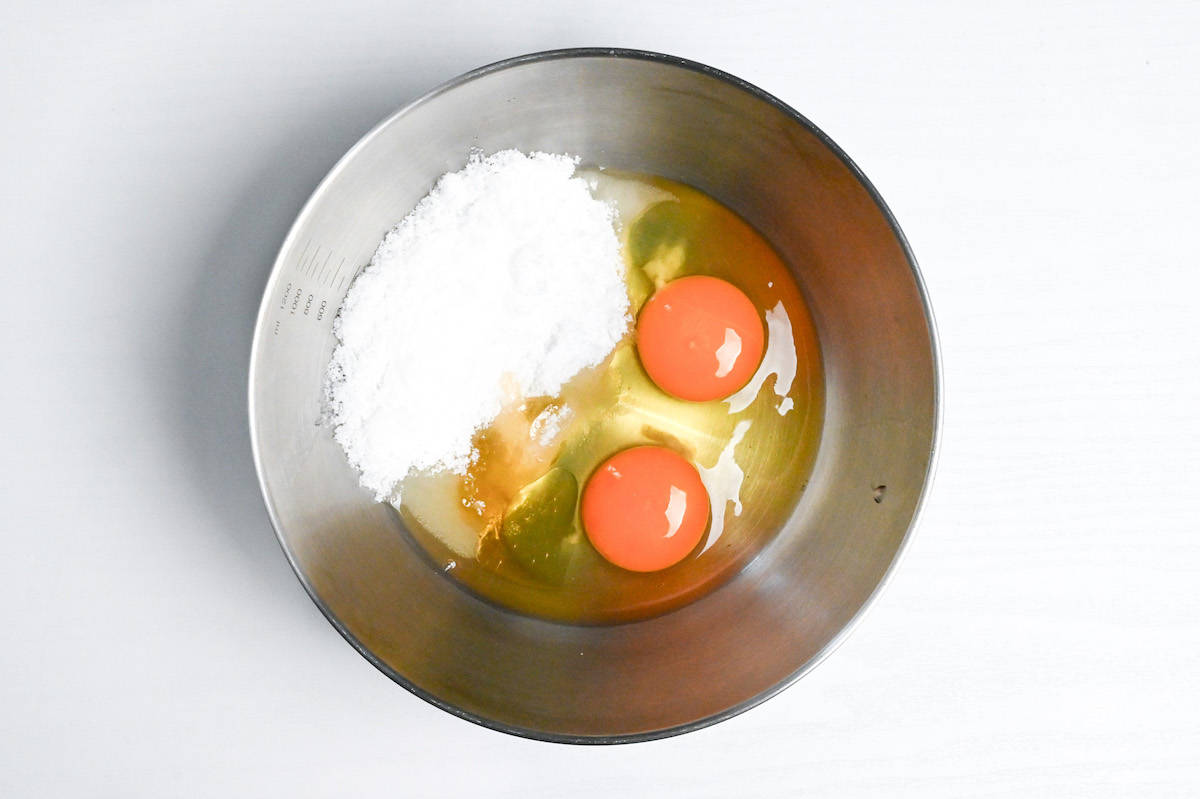
i. Whisk sugar, honey, and a pinch of salt with the eggs until the mixture looks slightly paler but not foamy. This dissolves sugar into the egg’s water and helps the batter hold tiny bubbles for a tender crumb.
ii. Stop while it’s still fluid and glossy.
At low levels, sodium chloride suppresses bitterness and makes sweetness pop, which lets the honey’s floral notes come through clearly. Keep it truly “pinch level” so it seasons without tasting salty.
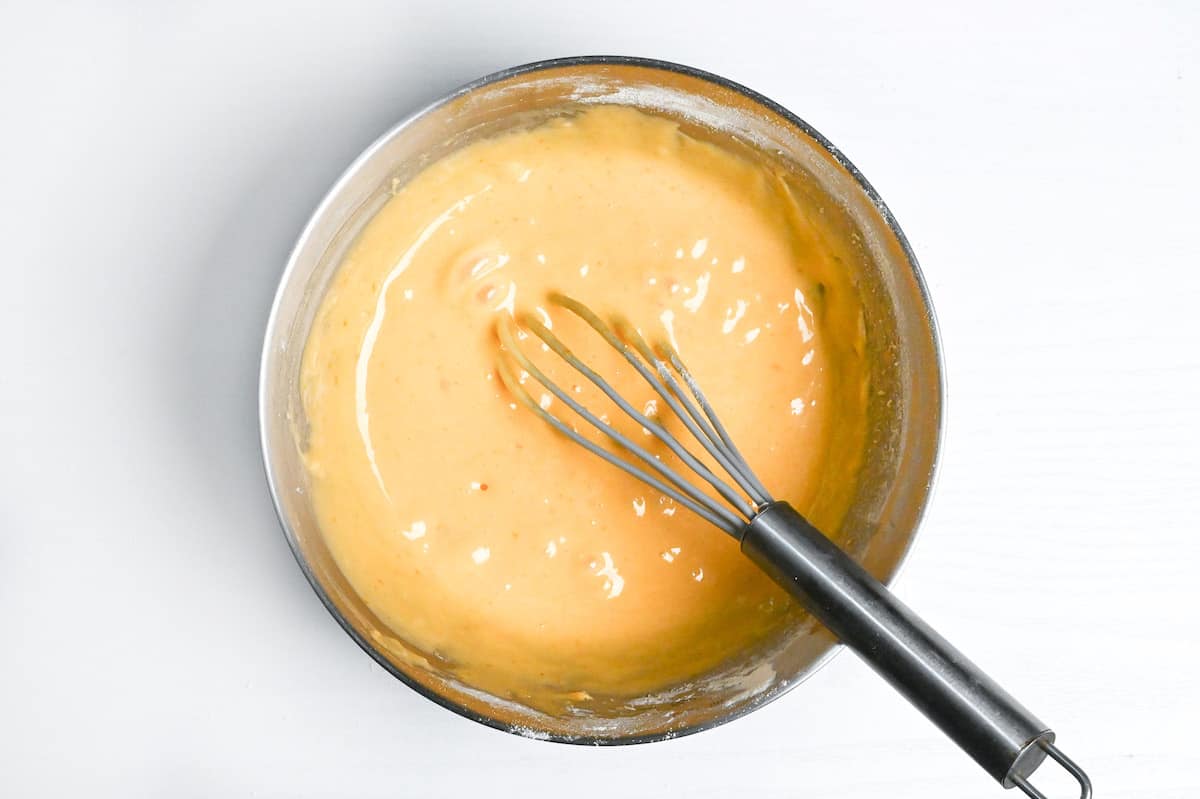
iii. Sift cake flour (or a low-protein flour) with baking soda directly over the bowl, then whisk just until most dry streaks disappear. Minimal mixing limits gluten development so the cakes stay soft.
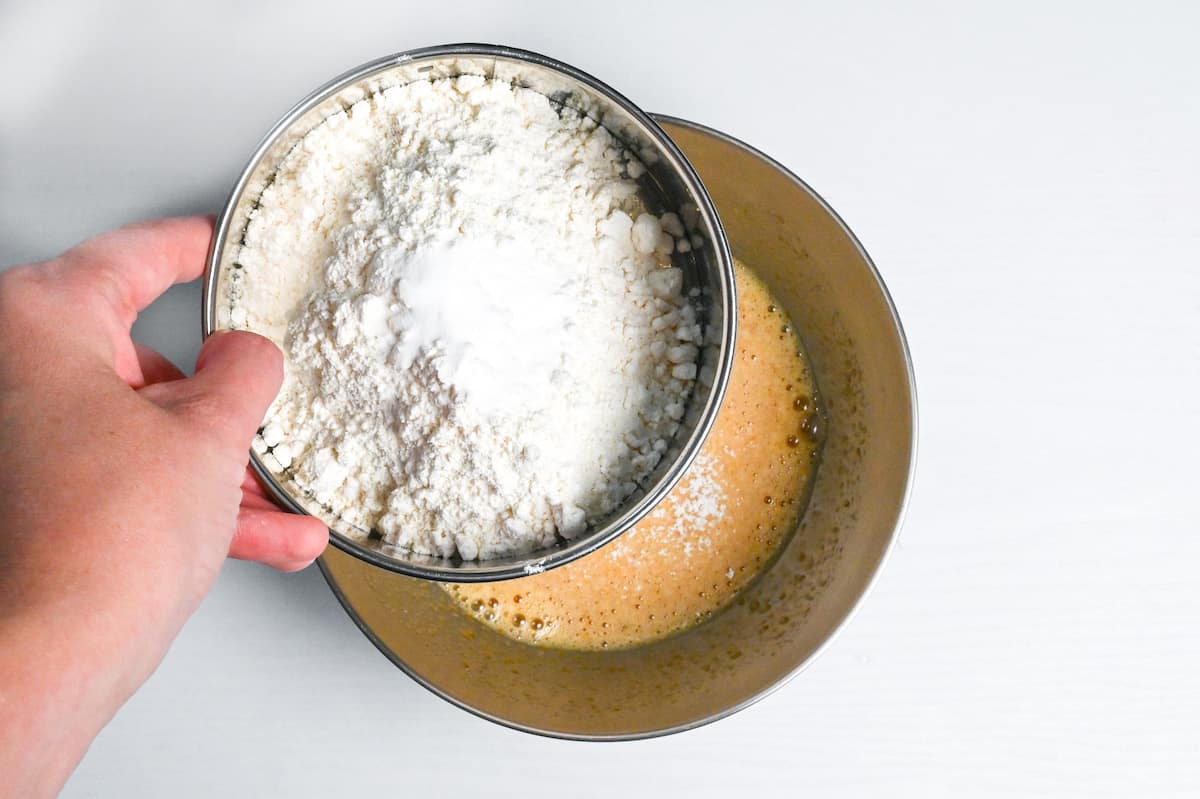
iv. It’s fine if a few tiny lumps remain. They hydrate during the rest. If cake flour is hard to find, make a quick substitute with all-purpose flour.
Cake flour (lower protein) yields a finer, more flexible “skin”, all-purpose works but can be a touch chewier.
v. Drizzle in neutral oil and fold 5-10 strokes, just enough to coat the batter. A trace of fat “shortens” gluten by coating flour proteins, which helps the skins bend without cracking.
vi. Stream in water and whisk briefly until pourable and silky. Use room-temperature water to keep viscosity predictable.
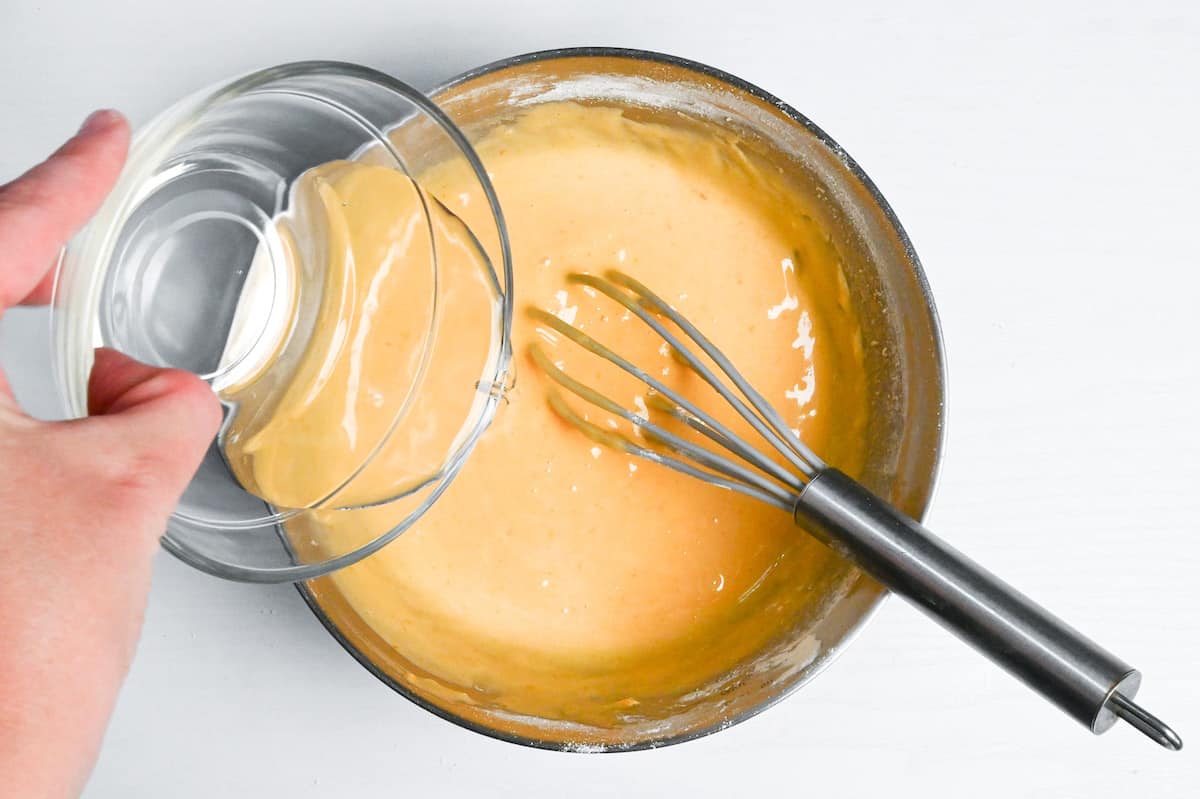
vii. You’re aiming for a batter that flows in a steady ribbon.
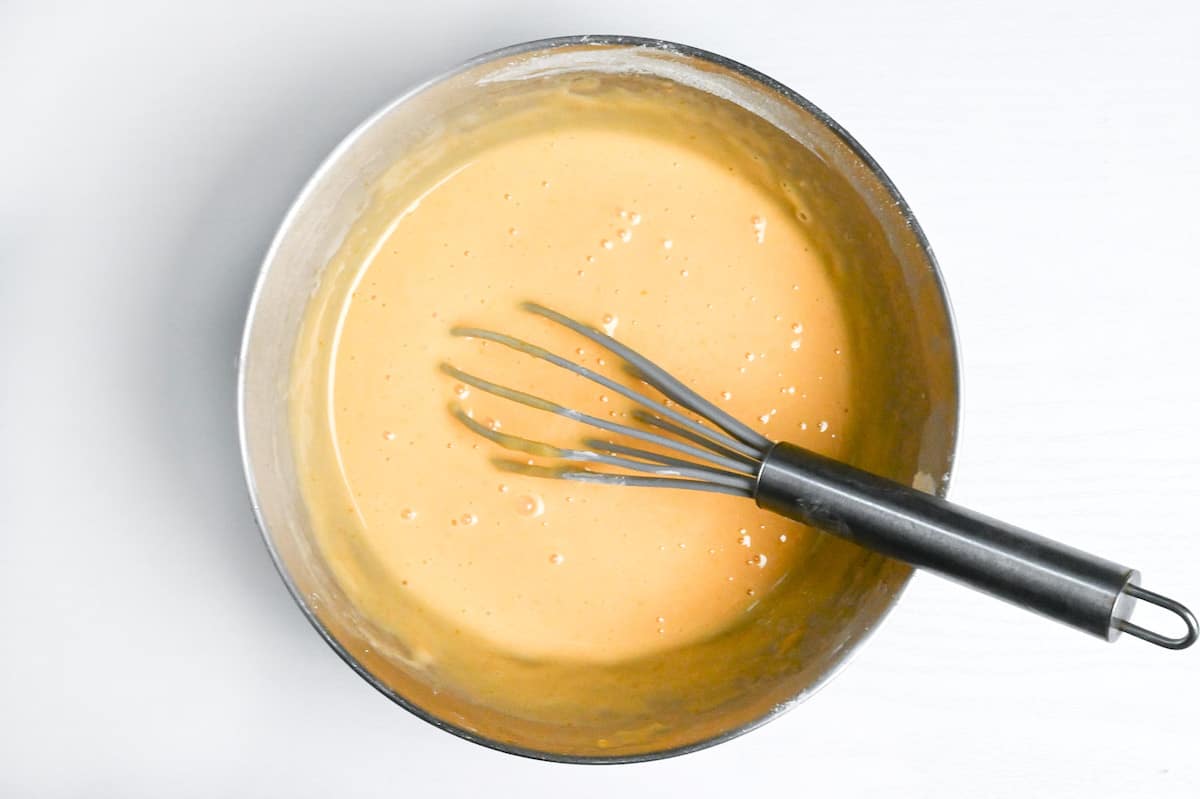
viii. Transfer the batter to a spouted container, cover, and refrigerate 15 minutes. This rest hydrates flour for a finer crumb and lets bubbles even out so the dorayaki cook flat.

i. Preheat a nonstick or well-seasoned pan over low to medium-low heat to 170-180℃ (338-356°F).
ii. Lightly oil the surface, then wipe with kitchen paper until only a thin film remains, excess oil causes mottled spots. You’re looking for gentle heat that sets the batter without scorching the honey.
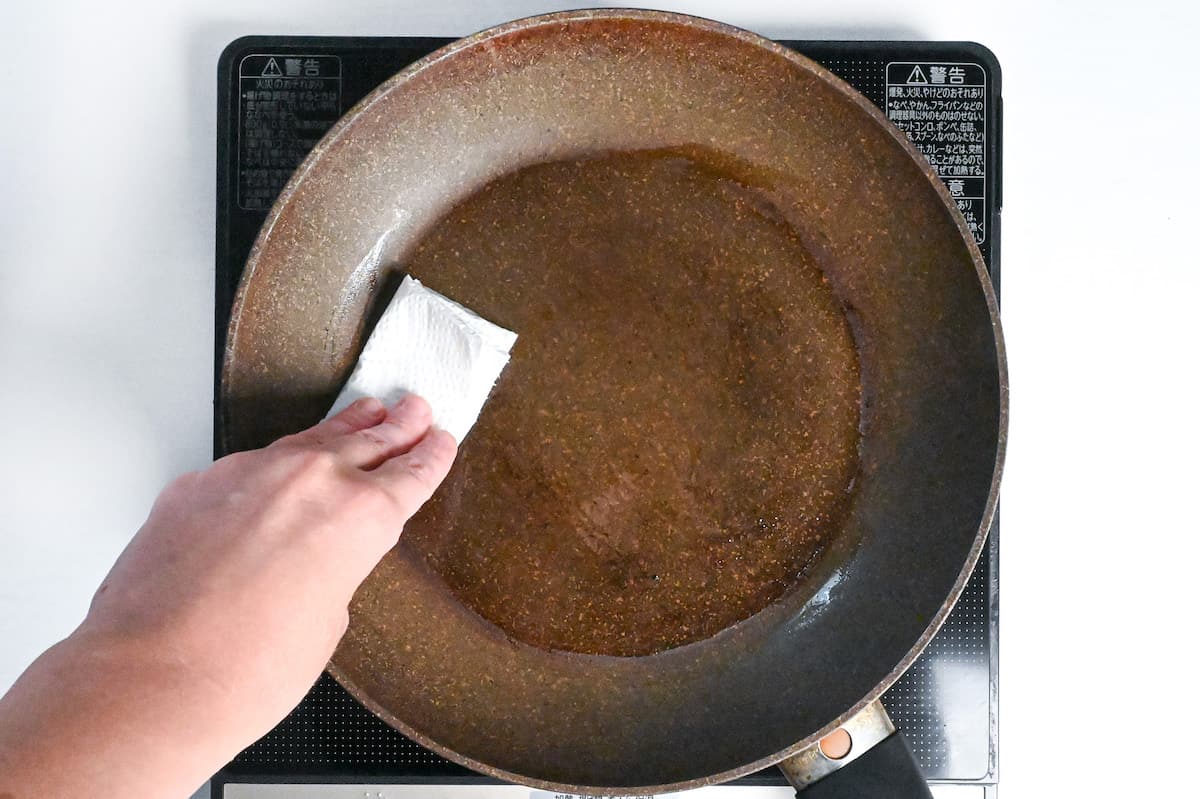
Professional wagashi griddles often run hotter (about 180-190℃ / 356-374°F) for speed and even color on copper plates, but at home, slightly cooler heat avoids overbrowning in sugar-rich batters.
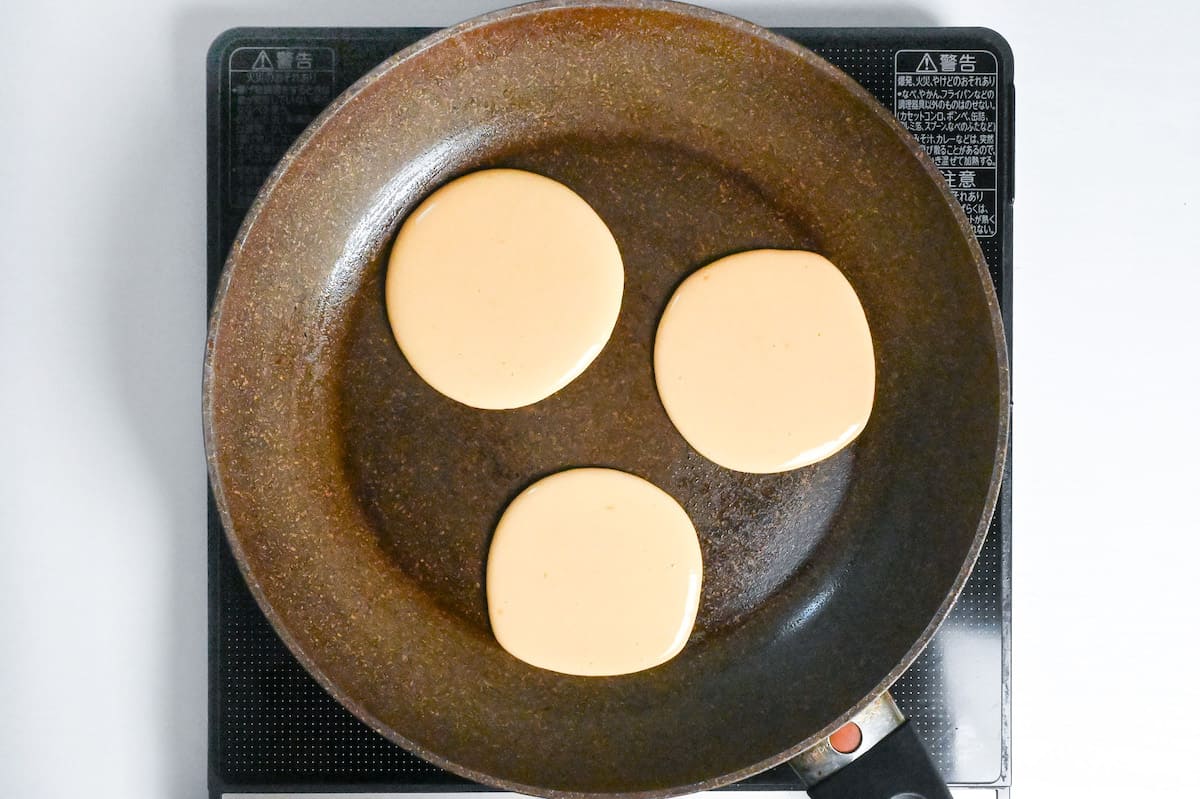
i. Stir the batter once to redistribute ingredients, then pour in one steady spot so it spreads into a neat circle about 8 cm (3 in) across. For that size, 22-25 g (just over 1 tablespoon) per cake is a good target. Don’t swirl the spoon, let gravity shape the round. If your pan fits, cook 2-3 at a time with space between them.
ii. Cook the first side until the outer 3-4 mm dry and the two or three surface bubbles break and leave tiny craters, about 60-120 seconds.
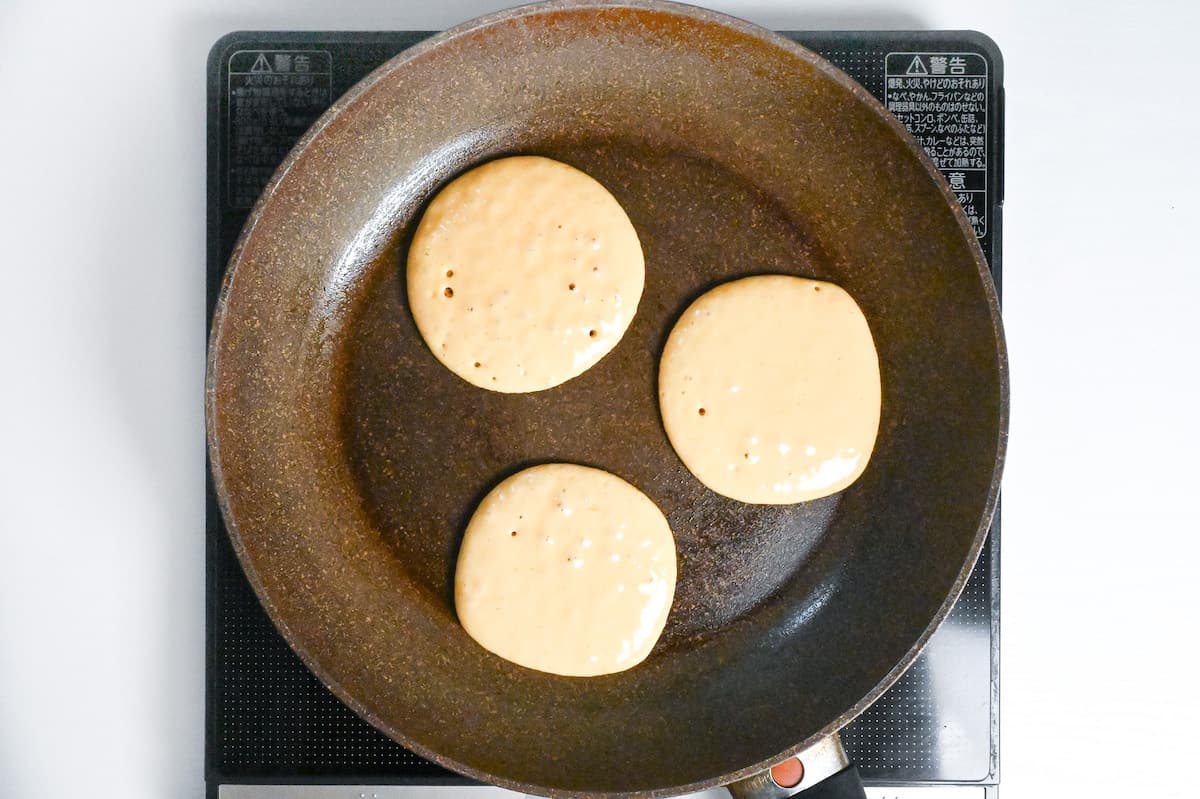
iii. If bubbles race across the surface and the color darkens too fast, your pan is too hot! Lower the heat and wait 30 seconds.
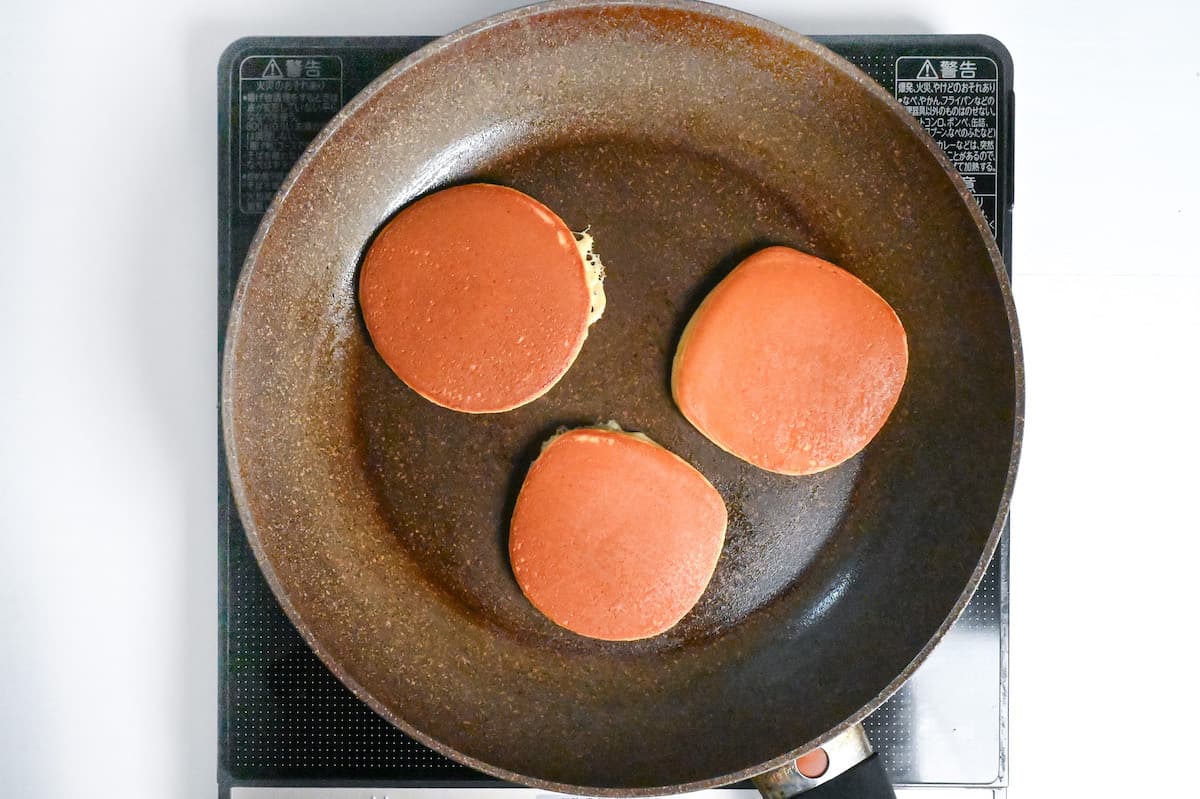
i. Slide a thin spatula under the cake and flip gently. Cook the second side 40-60 seconds, just until set and lightly colored. The interior should be springy to the touch, with no wet shine.
Scorching before bubbles form = pan too hot or oil not wiped thin enough. Pale and rubbery = heat too low or batter under-rested. A quick 5-minute pause off heat can rescue a pan that got too hot between batches.
ii. Before each new pour, rub on a thin film of oil and wipe off to leave only a sheen. This prevents sticking without creating “freckled” spots from oil pooling. If your second side consistently darkens faster, dial the heat down a notch and give the pan 30 seconds to stabilize.

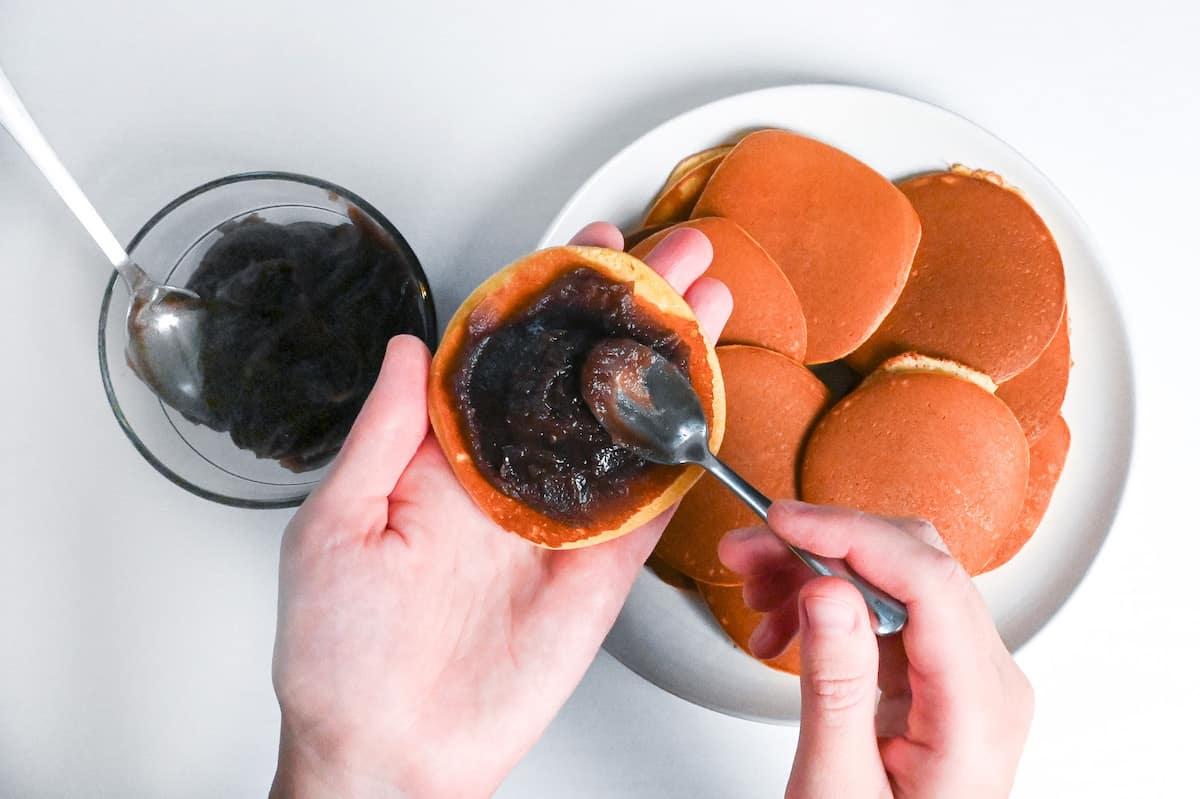
i. Weigh 300 g sweet red bean paste (anko). Spread about 2 Tbsp on the flat side of the pancake, concentrating it slightly thicker in the center and thinner at the edges, leaving a 5 mm border. Assemble while the skins are warm so moisture migration helps the edges seal.
ii. Top each with another pancake and press gently to seal. For neat sides, trim any escaped anko with a butter knife, then move finished dorayaki to a rack to cool until barely warm.
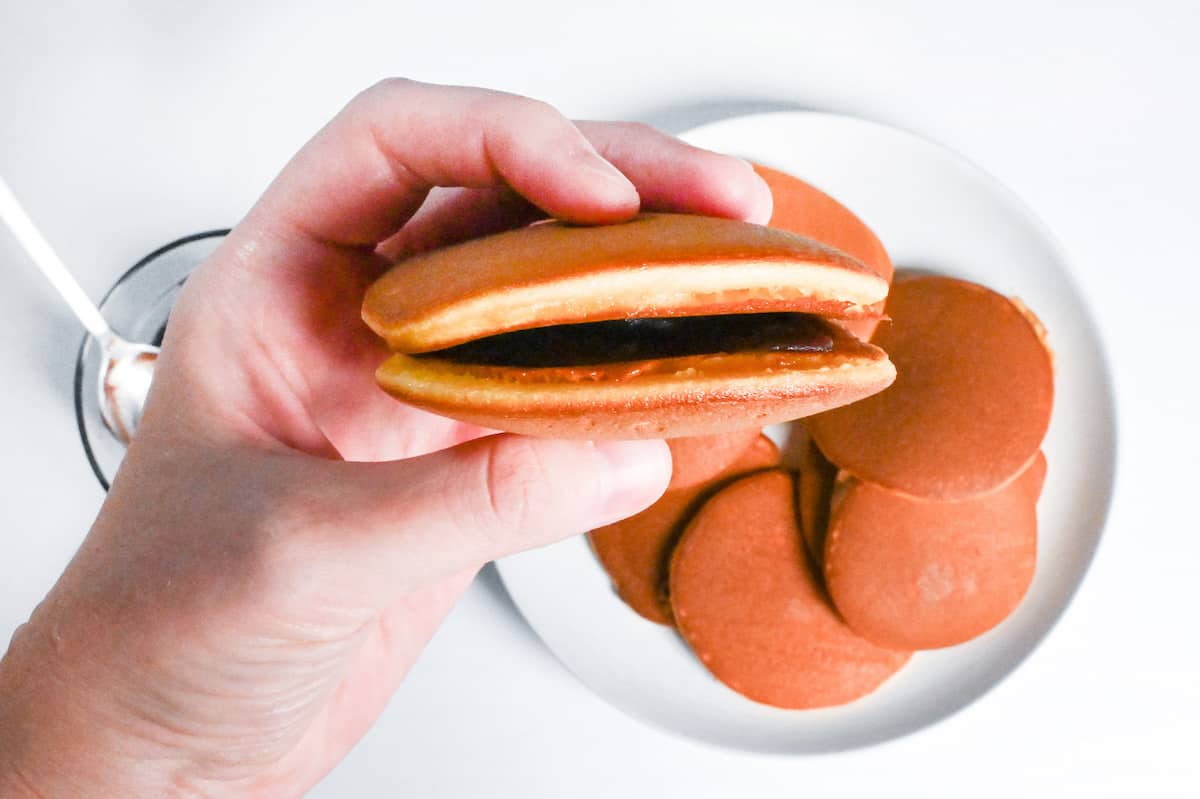
Dorayaki taste best after a short rest (10-15 minutes) when the moisture has redistributed into the pancakes.
Enjoy!

Essential Tips & Tricks
- Rest the batter. Chill for 15 minutes to let flour hydrate and bubbles even out.
- Use a paper towel to leave only a sheen of oil on the pan.
- Mix the batter right before use to redistribute the ingredients.
- Pour in one spot. Let the batter spread naturally into a circle, no spoon swirling.
- Flip by cues, not clock. Watch for the outer rim to dry and surface bubbles to pop. That’s your sign to flip.
- Sandwich the anko while skins are warm.
- Rest for 10-15 minutes before eating, the moisture will settle and the texture will be perfect!
With these simple tips in mind, you’re set for success every time you make dorayaki.
Storage & Meal Prep
Fridge: Okay for 1-2 days. The pancakes firm/dry up in the cold, losing their soft texture so make sure to wrap each dorayaki individually in plastic wrap or store in an airtight container.
Freezer: Excellent for longer storage. Wrap each assembled dorayaki tightly in plastic wrap, then place in a freezer bag or airtight container to prevent freezer burn and odor absorption. They’ll keep for up to 3 weeks with good quality. Thaw overnight in the refrigerator or use your microwave’s defrost setting.
Reheating: Microwave gently, wrapped, at 500W for 10-15 seconds until just warm. The goal is to revive the tenderness, not to make it hot. Best served at room temperature.
Dorayaki Q&A
Uneven heat or too much oil is the main cause. Always preheat the pan thoroughly, then lower the heat before pouring the batter. Wipe off any excess oil, only a thin film should remain. If you see freckles or pale rims, clean the pan and try again with less oil.
Pour the batter in one steady spot and let it spread naturally, don’t swirl with a spoon. If it spreads unevenly, you pan might not be flat, or the batter may be too thick, add 1 tsp of water at a time to fix. If it runs too thin, add 1 tbsp of flour. Also, avoid high heat, too hot and it sets before spreading.
Likely overmixing, overcooking, or too little honey. Use only cake flour, mix lightly, and shorten the second-side cooking time. Honey keeps the skins tender, so don’t skip it. If they’ve hardened, wrap with anko and rest overnight, or microwave briefly with a damp paper towel to soften.
More Japanese Sweets Recipes
If you loved this dish, you’ll definitely want to explore my full collection of recipes for Japanese desserts!
Did You Try This Recipe?
I would love to hear your thoughts!
💬 Leave a review and ⭐️ rating in the comments below. 📷 I also love to see your photos – submit them here!

Easy Dorayaki (Japanese Red Bean Pancake)

Ingredients
- 2 eggs room temperature
- 70 g sugar white granulated
- 1 ½ tbsp honey
- ⅛ tsp salt fine sea salt preferred
- 120 g unbleached cake flour or pastry flour, low-protein, around 7-8%
- ½ tsp baking soda
- ½ tsp cooking oil for batter, flavorless neutral oil like vegetable, canola, rice bran works best
- 3 tbsp water room temperature
- cooking oil for frying
- 300 g red bean paste (anko) about 2 tbsp per pancake, koshian for smooth texture, tsubuan for chunky
The ingredient brands and tools I trust are in my Japanese pantry guide and my cooking tools guide.
Can’t find certain Japanese ingredients? See my substitution guide here.
Instructions
Dorayaki Batter
- Crack 2 eggs into a mixing bowl and add 70 g sugar, ⅛ tsp salt, and 1 ½ tbsp honey. Whisk until well combined.

- Sift 120 g unbleached cake flour and ½ tsp baking soda into the bowl and whisk until smooth. Then drizzle in ½ tsp cooking oil and give the batter just 5 to 10 lazy folds to incorporate it.
- Add 3 tbsp water and mix once more.
- Transfer the mixture into a jug or bottle and store in the refrigerator for 15 minutes.
Frying
- Start heating the pan on a low heat for about 5 minutes before you plan to start. Thorough preheating yields more even results. Add a small amount of cooking oil to the pan, then use kitchen paper to spread a thin even film and wipe any excess.
- Take the batter from the fridge and give it a quick mix to redistribute the ingredients. Pour the batter into the pan approximately 8cm (3 inch) diameter per pancake. Try and keep each pancake spaced well apart to prevent merging. Depending on the size of your pan, cook 1-3 at a time.
- Cook until the edges start to dry and you see bubbles forming on the top, typically 1-2 minutes.
- When you see two to three surface bubbles pop to form tiny craters, use a spatula to carefully flip each pancake and cook on the other side for about 40 seconds to 1 minute or until cooked all the way through.
- Transfer to a plate and grease the pan before each batch. Repeat until all of the batter is used up.
- Add about 2 tbsp to the center of one pancake, spreading it thicker in the middle to create dorayaki's classic dome shape.
- Place another pancake on top and lightly press to seal it. Repeat until all the dorayaki are filled. For best results, rest for 10-15 minutes and enjoy!
Video
Can U plse advise whether baking soda is same as baking powder.
Hi Gloria,
No they’re not the same thing, you need to make sure it’s baking soda.
I actually tried the recipe with baking powder and it didn’t work.
Hope that helps!
I appreciate you for putting the measurents so Americans can understand too! I just made my red bean paste and now going to try to make the pancakes.
Thank you for the comment! I hope you will enjoy dorayaki too! 🙂
Yuto
Delicious, they taste just like the ones I’d buy in Japan! Such an easy recipe to follow too, these will be a staple in my house from now on!
Hi Harri,
Thank you for the lovely feedback and sharing your picture! Looking great! I’m glad to hear you enjoyed the recipe!
Yuto
They turned out perfect! Very easy recipe and so tasty 🤤
Hi Kk,
Thank you so much for trying my recipe and sharing your picture! Looks great! I’m happy that you enjoyed it! 🙂
Yuto