

Disclaimer: This post may contain Amazon affiliate links. Sudachi earns a small percentage from qualifying purchases at no extra cost to you. See disclaimer for more info.
Featured Comment:
“I made this today!! By far the best among others which I’ve made!!”
– @nanamitakuminonaka2075 (from YouTube)
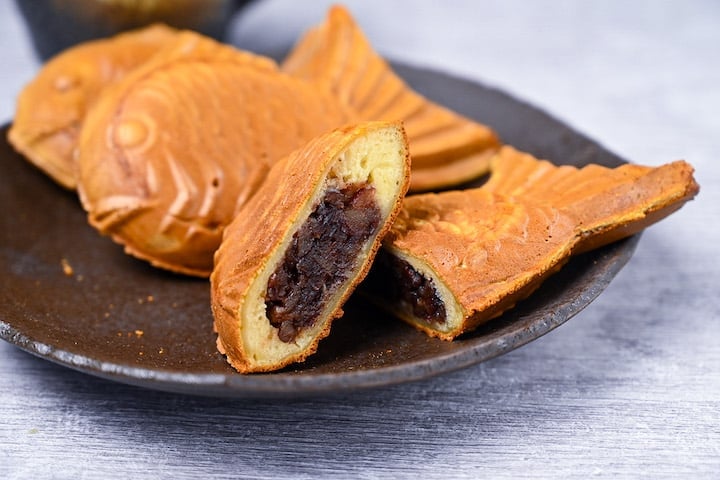
What is Taiyaki?
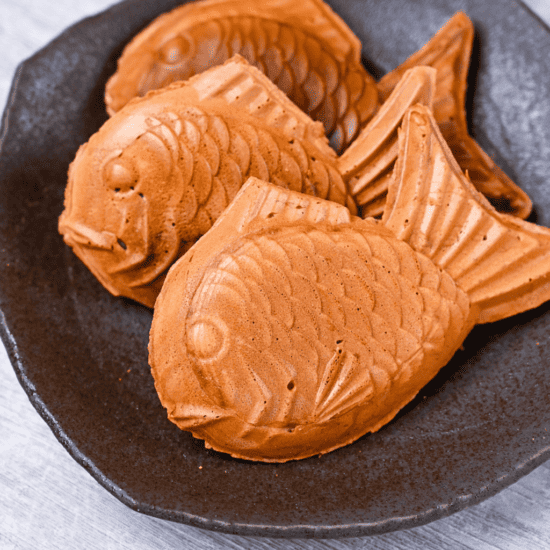
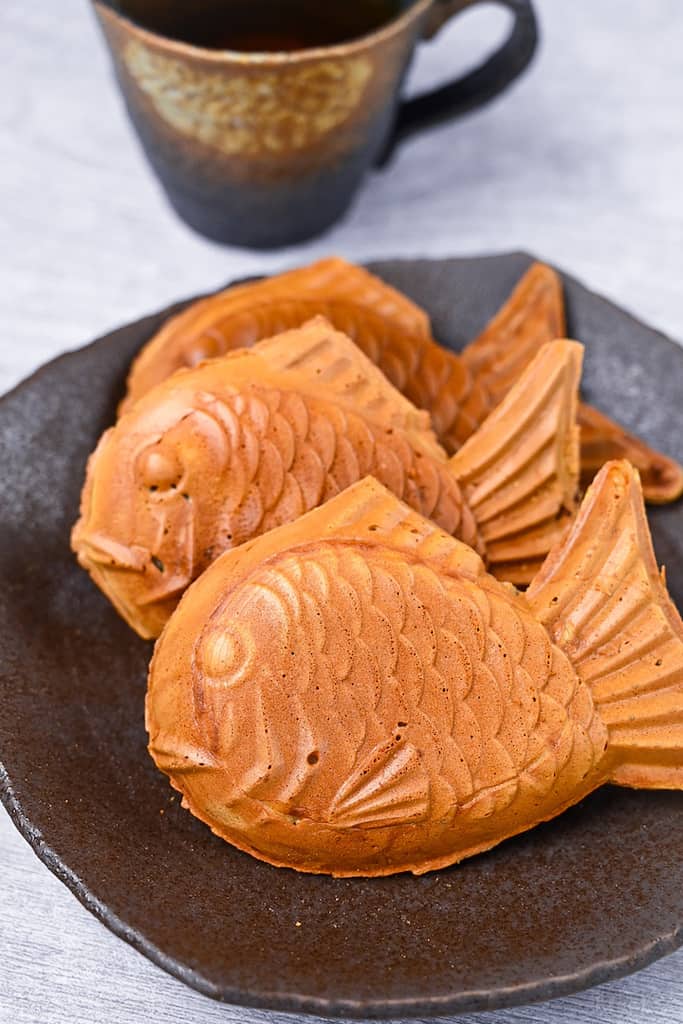
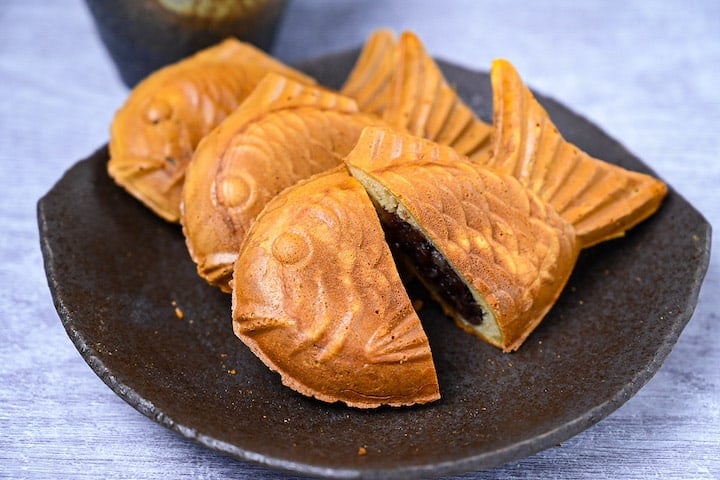
Taiyaki is a type of “wagashi” (和菓子) Japanese sweet. A waffle-like batter is poured into a fish-shaped mold and filled with a sweet adzuki red bean paste called “anko”. It is a common street food snack sold by street vendors and specialty food stalls across Japan.
The name comes from “tai (鯛)”, the Japanese word for red sea bream, and “yaki (焼き)” which means to grill or fry. The Sea Bream is supposed to bring good luck, which is one of the reasons this iconic sweet is well-loved by children and adults alike.
Nowadays, Taiyaki are sold in a variety of shapes and sizes. The filling is not only limited to sweet red bean paste, but also cream, cheese, matcha, chocolate, and many other popular flavors are available too.
Ingredients & Substitution Ideas
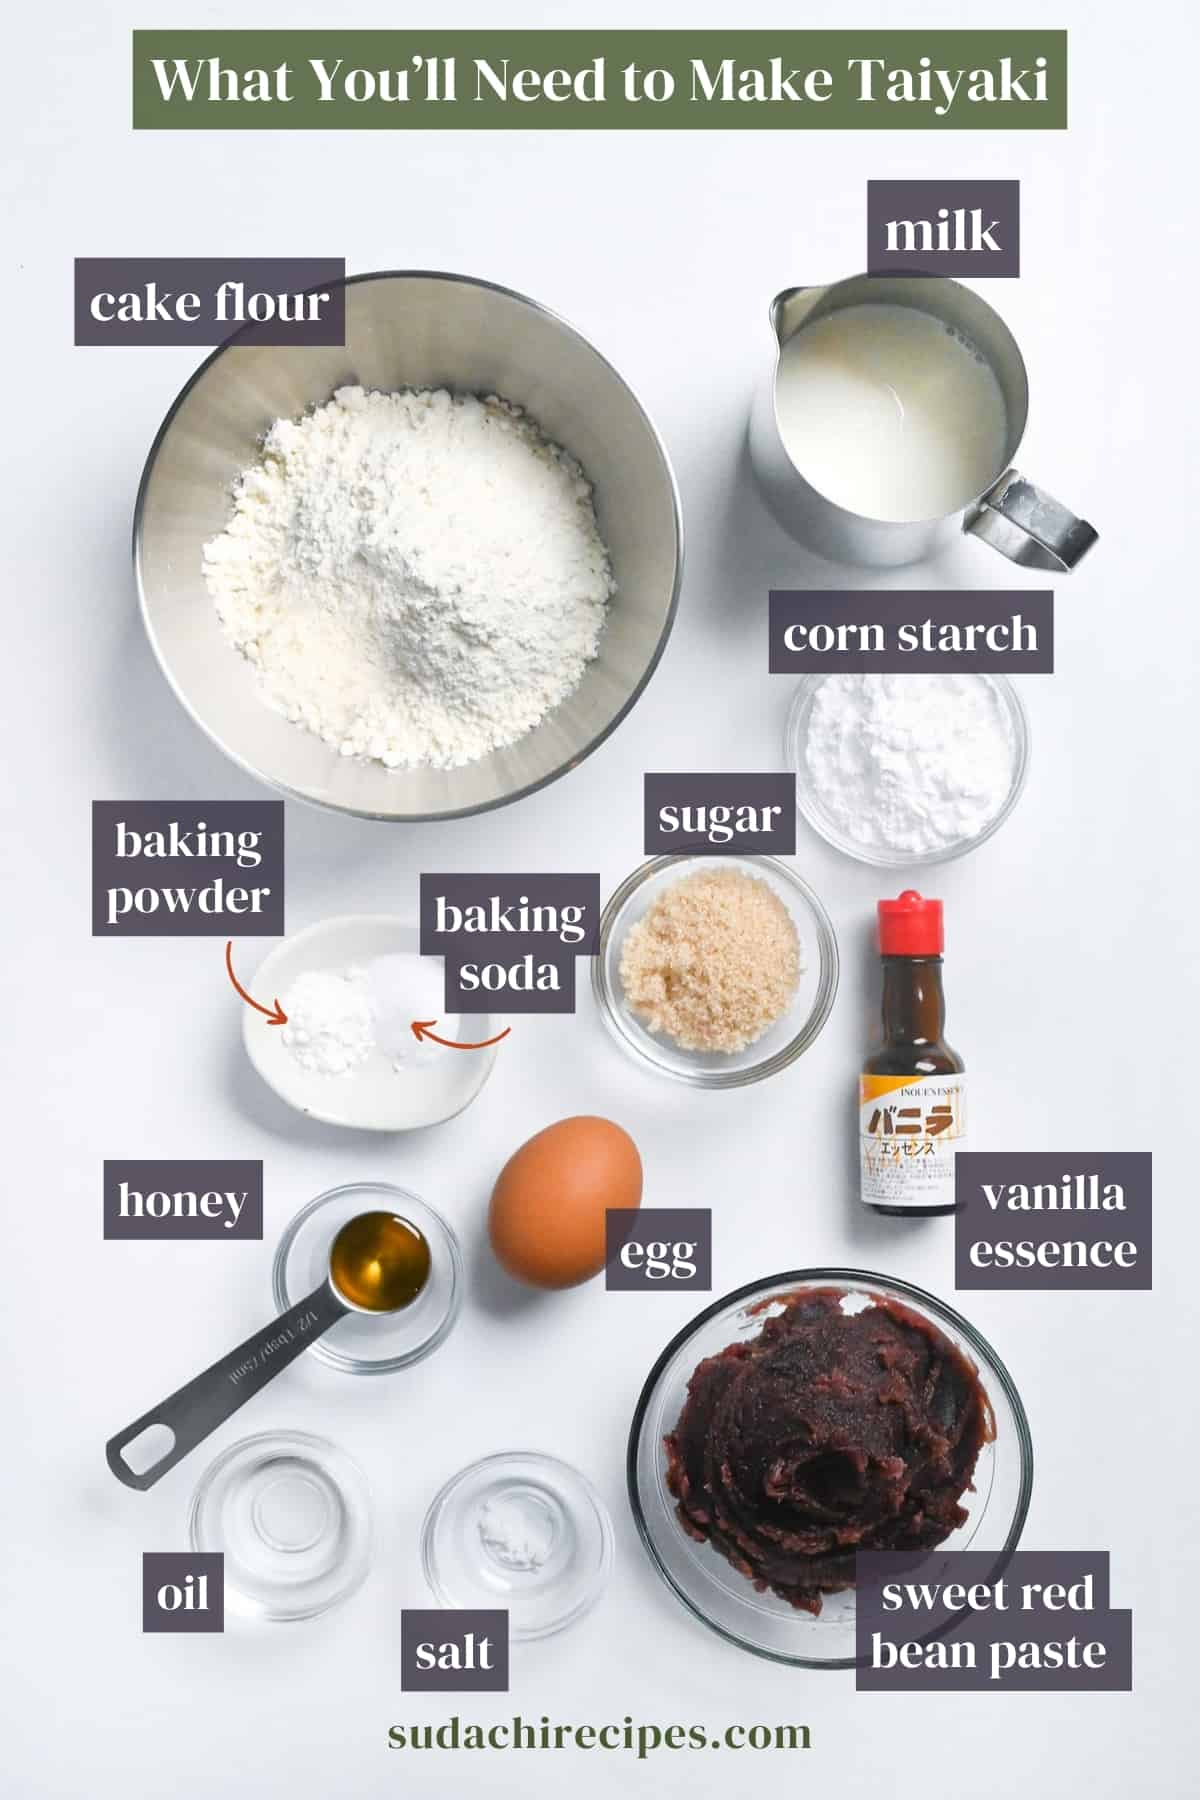
To make this Taiyaki recipe, you will need the following ingredients:
- Cake Flour: Using low-gluten wheat flour will ensure your Taiyaki is light and crispy. All-purpose flour is not recommended.
- Corn Starch: Mixing starch into the flour will help prevent gluten forming, again making the texture of the batter light.
- Rising Agents: Both baking soda and baking powder help the batter puff up, improving its texture and shape.
- Sugar: I opt for light brown sugar for a gentle sweetness with added moisture in the batter. White sugar can be used instead but might create a sweeter and slightly drier result.
- Honey: I like to add honey to lightly flavor the batter, but maple syrup also works.
- Salt: A pinch of sea salt helps to balance and enhance the flavor of the Taiyaki.
- Egg: Acts as a binder and rising agent.
- Vanilla Essence: A hint of vanilla really helps this batter shine. If using vanilla extract, use half the amount.
- Whole Milk: Acts as a binder that makes the batter tender and more flavorful.
- Cooking Oil: Used in the batter to make the Taiyaki moist and tender, and to grease the mold and prevent sticking. Avoid using butter since it’s more likely to burn.
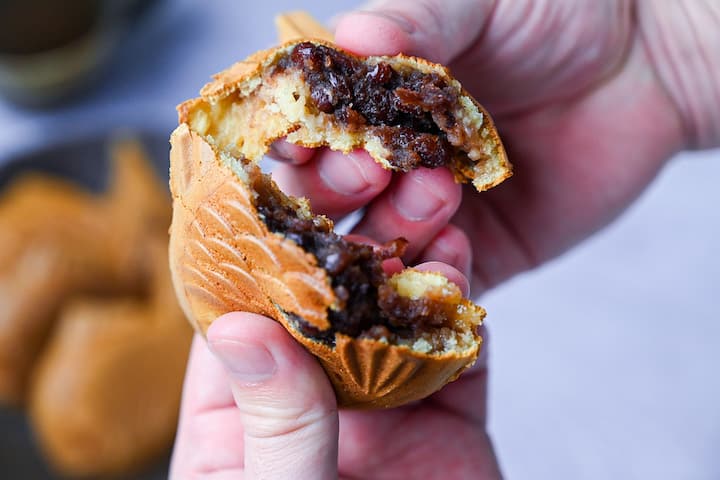
- Sweet Red Bean Paste (Anko): Red bean paste is the most common filling used in Taiyaki. You can choose from a smooth type called “koshian” or a chunky type called “tsubuan”. If you’re interested in making your own, check out my homemade tsubuan recipe. If you’re not a fan of anko, feel free to use a different filling such as custard, chocolate, cream cheese or jam.
Best Taiyaki Makers for Home Use
A Taiyaki Maker is an essential tool for making the iconic sea bream shape for Taiyaki, it’s virtually impossible without one. Luckily they are pretty affordable and straightforward to use.
In this section, I will introduce the three main types of Taiyaki makers/molds available for home use, and the pros and cons so that you can choose the most suitable one for you!
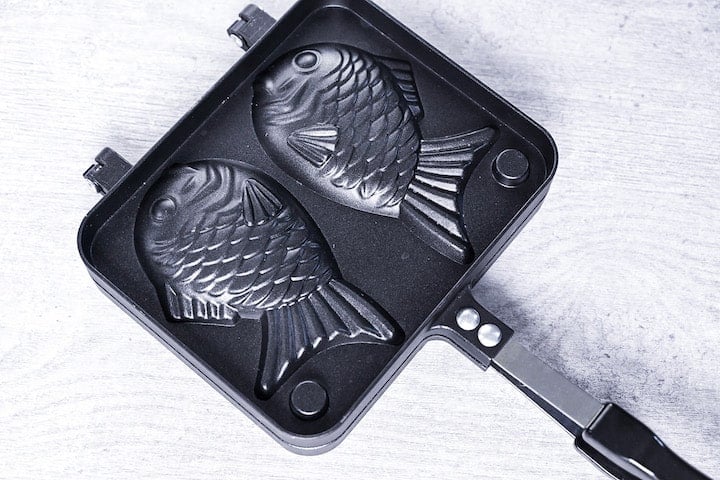
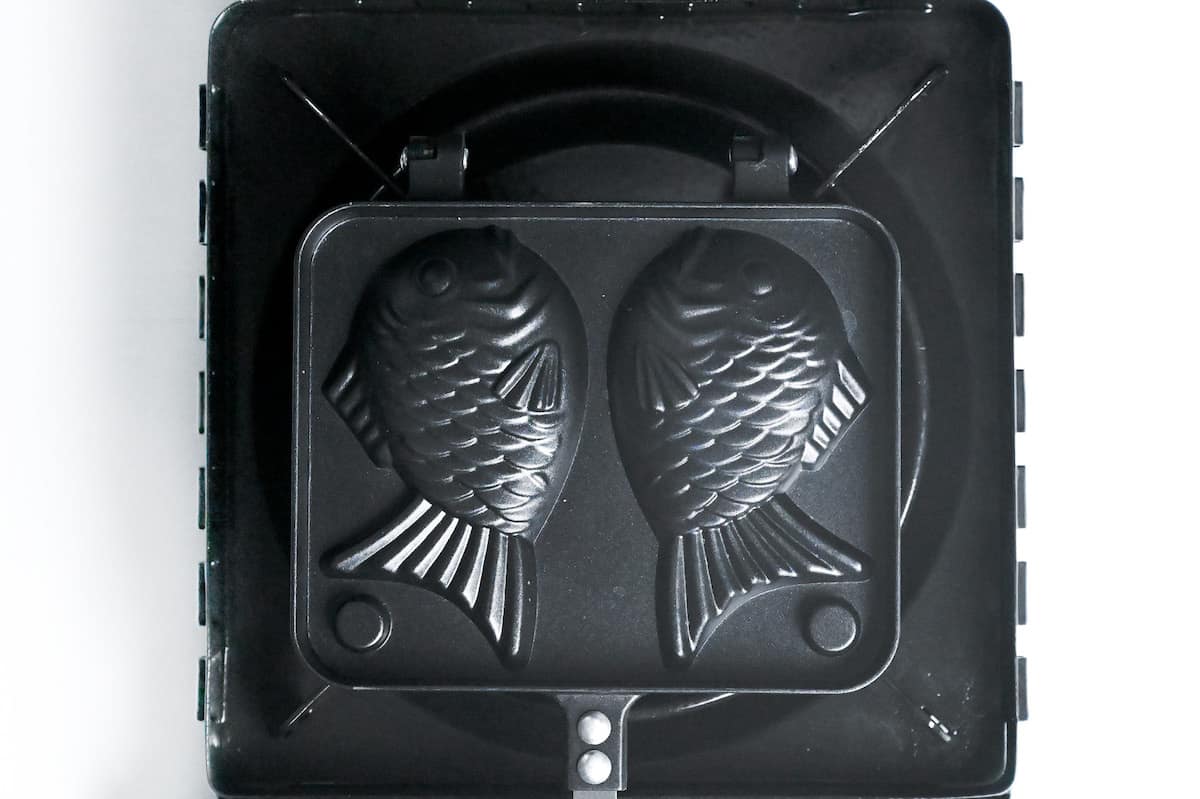
- Iron Taiyaki Maker (pictured above): Most similar to what Taiyaki shops use, the home version is a compact iron plate with two Taiyaki molds and a long handle designed for stove top use. The thick ironware ensures slow and even cooking, creating a crispy crust and defined shape. It can be a little more expensive and hard to handle compared to other types, and they’re not dishwasher friendly, but the pros certainly outweigh the cons and I personally use this type. (They should work on both gas or electric stoves, but check the description carefully before purchasing.) You can purchase Iron Taiyaki Molds on Amazon (affiliate link).
- Non-stick Aluminum Taiyaki Maker: Similar to the iron Taiyaki maker, but made of aluminum alloy and coated with fluroplastic instead. This type is non-stick, light and easy to handle with a lower price tag, however there are a few cons. The shape of the Taiyaki tends to be slightly less defined with an uneven color and the nonstick coating tends to wear down over time, however it’s a great budget option and easy for beginners! You can purchase a nonstick aluminium Taiyaki maker on Amazon here.
- Electric Taiyaki Maker: One of the easiest ways to make Taiyaki is with an electric Taiyaki maker. It’s similar to a waffle maker and cooks both sides so it’s easier to add softer fillings such as custard or chocolate. Because it doesn’t use fire, youy can have fun making Taiyaki with your kids. A few cons are the maker itself is bulkier so it takes up more room in storage, while the Taiyaki molds tend to be smaller. They are also more expensive than the other two options. You can purchase electric Taiyaki Makers on Amazon here (affiliate link).
Visual Walkthrough & Tips
Here are my step-by-step instructions for how to make Authentic Taiyaki at home. For ingredient quantities and simplified instructions, scroll down for the Printable Recipe Card below.
If you prefer to watch the process in action, check out my YouTube video of this recipe for a complete visual walkthrough!
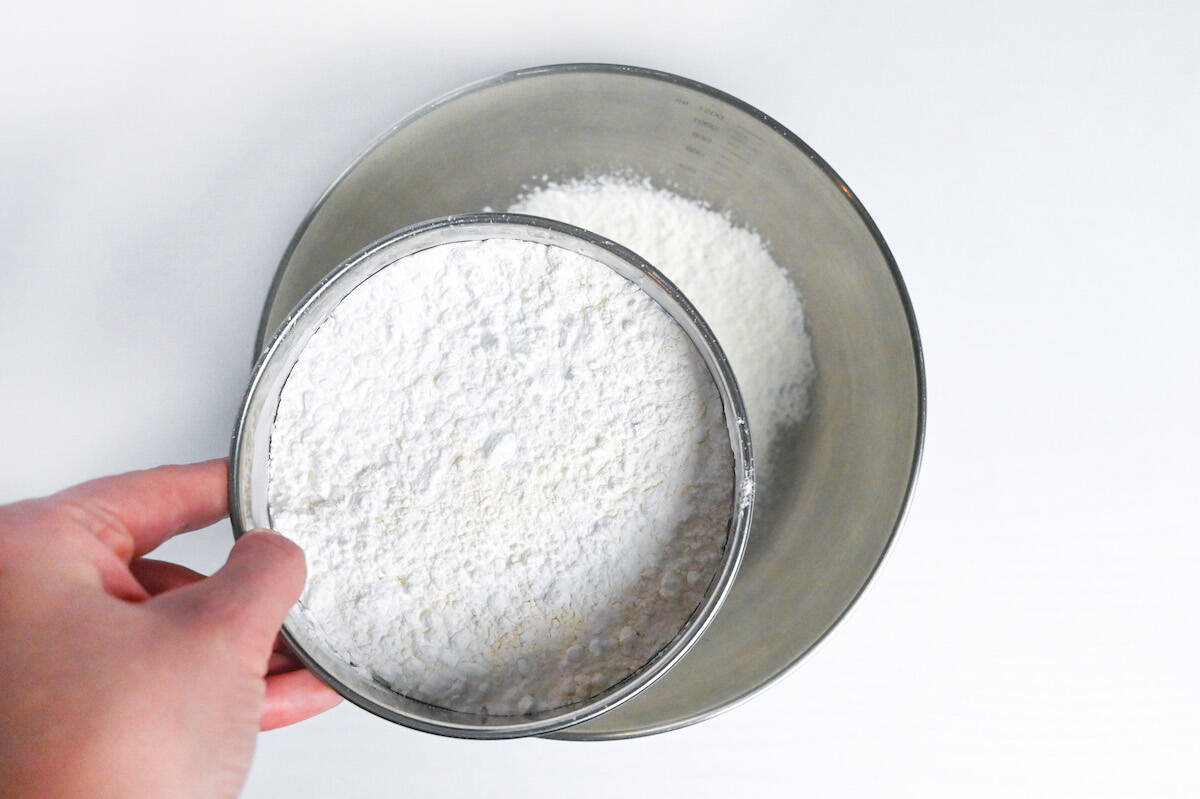
Sift the cake flour, cornstarch, baking soda, and baking powder into a bowl and mix to distribute evenly.
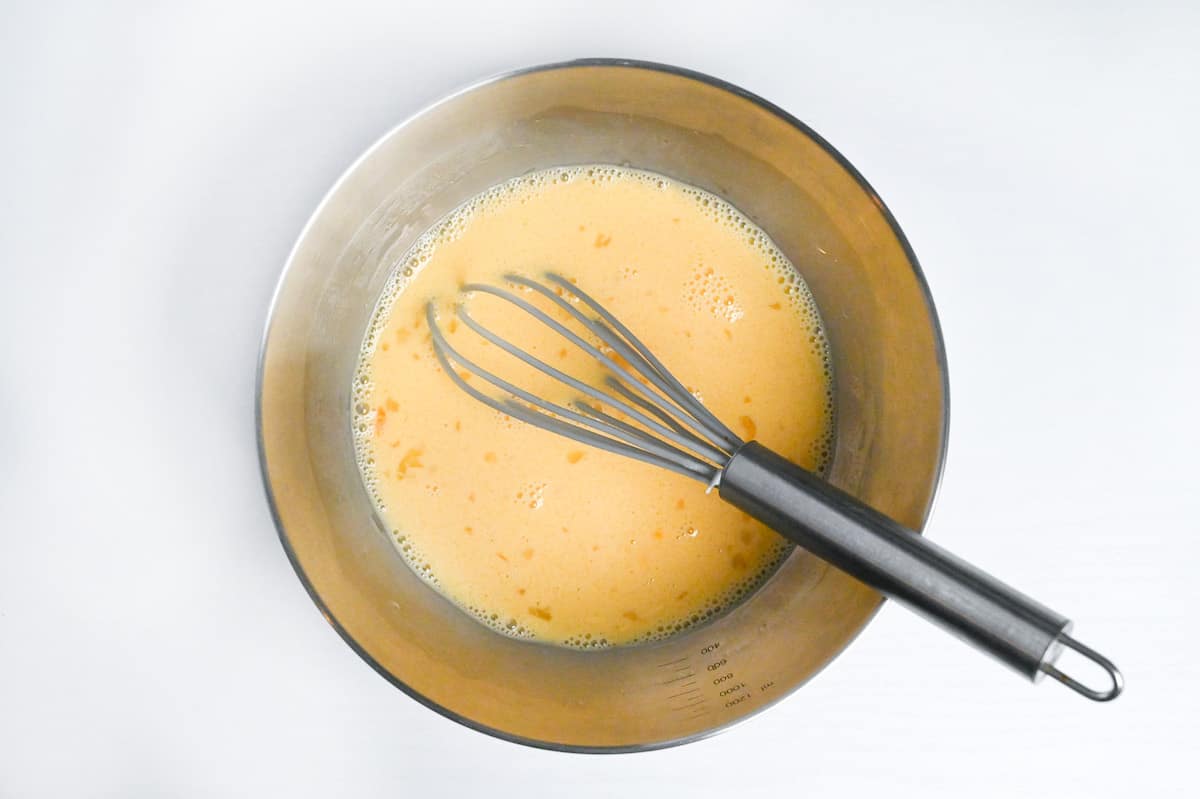
In a separate bowl, add light brown sugar and eggs. Whisk until combined, then add the honey, salt, and cooking oil. Finally pour in the whole milk while whisking until smooth.
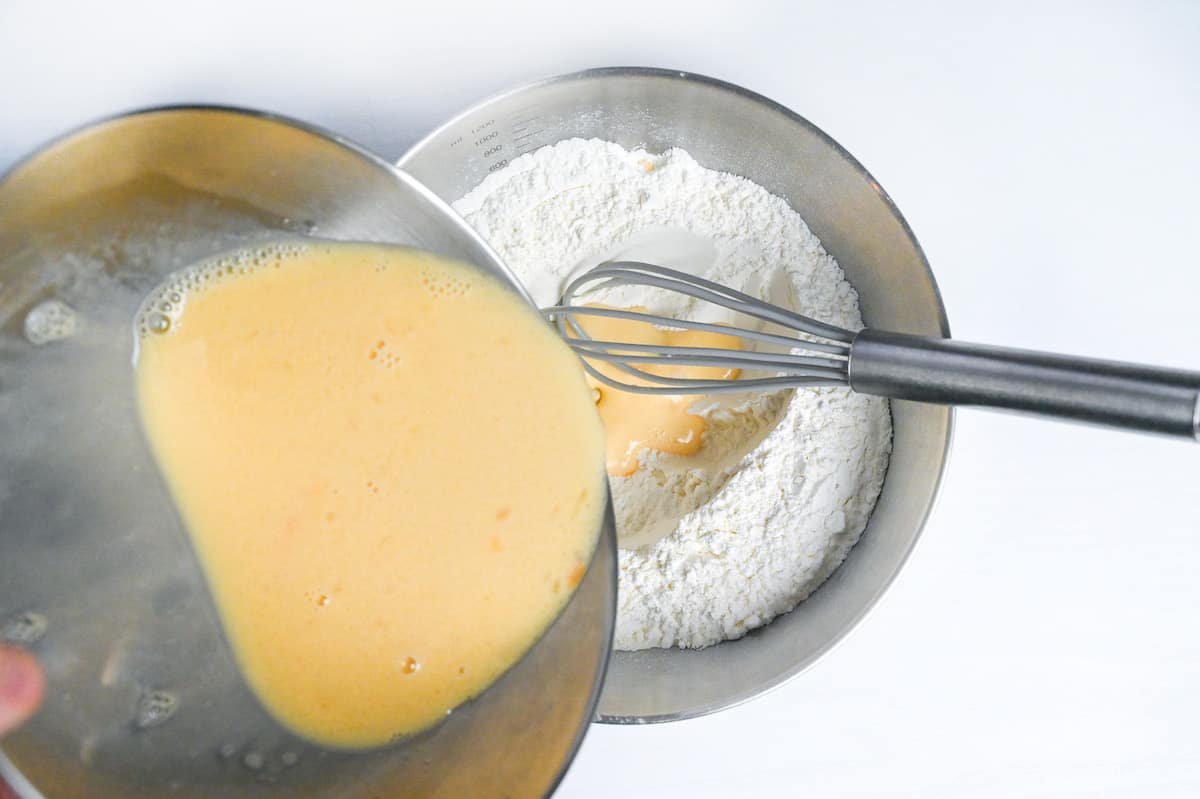
Make a well in the centre of the dry ingredients and pour in the liquid ingredients while whisking.
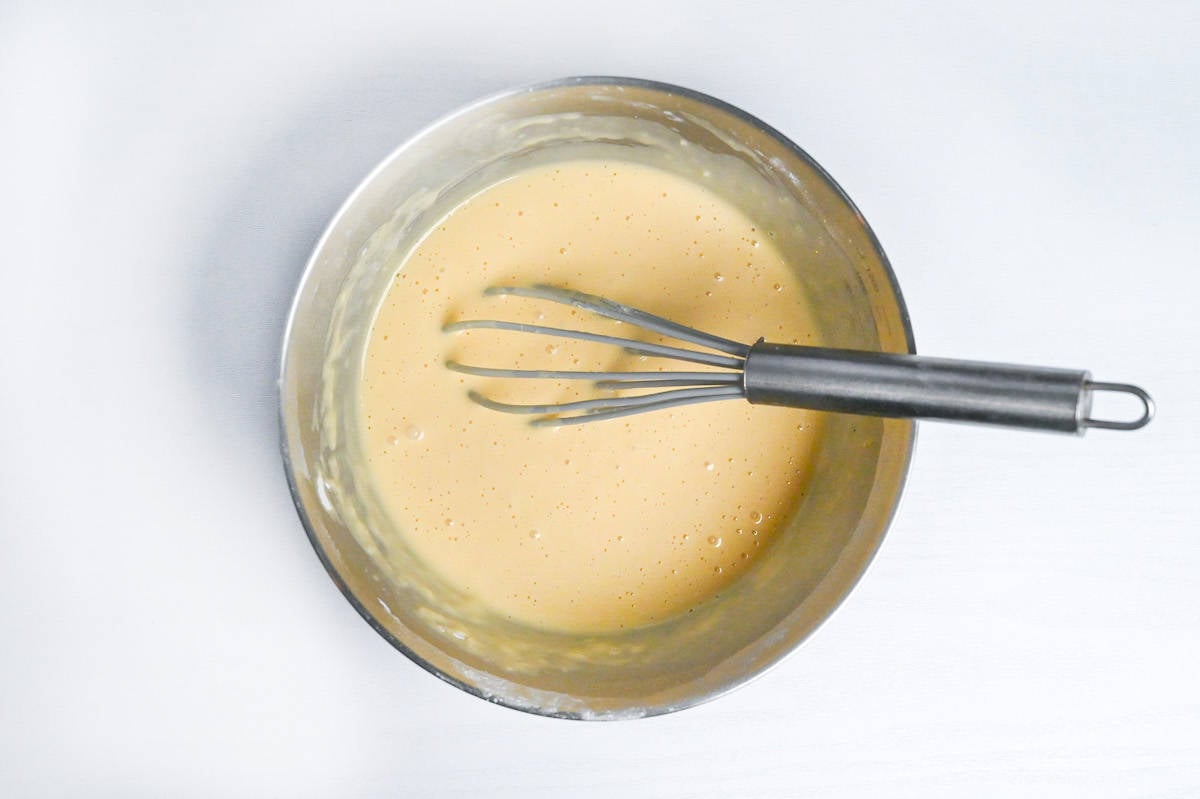
Gently whisk until smooth, be careful not to mix too vigorously or make too many air bubbles.
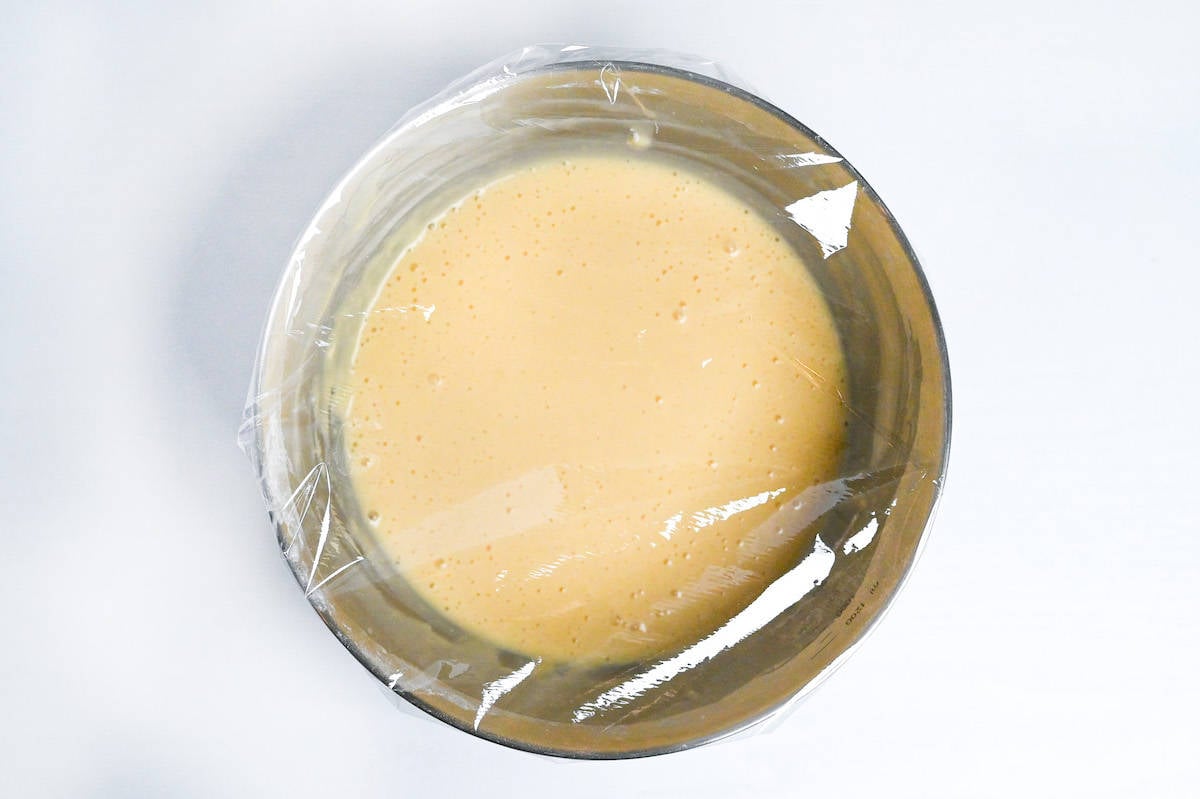
Cover the bowl and rest in the refrigerator for 30 minutes.
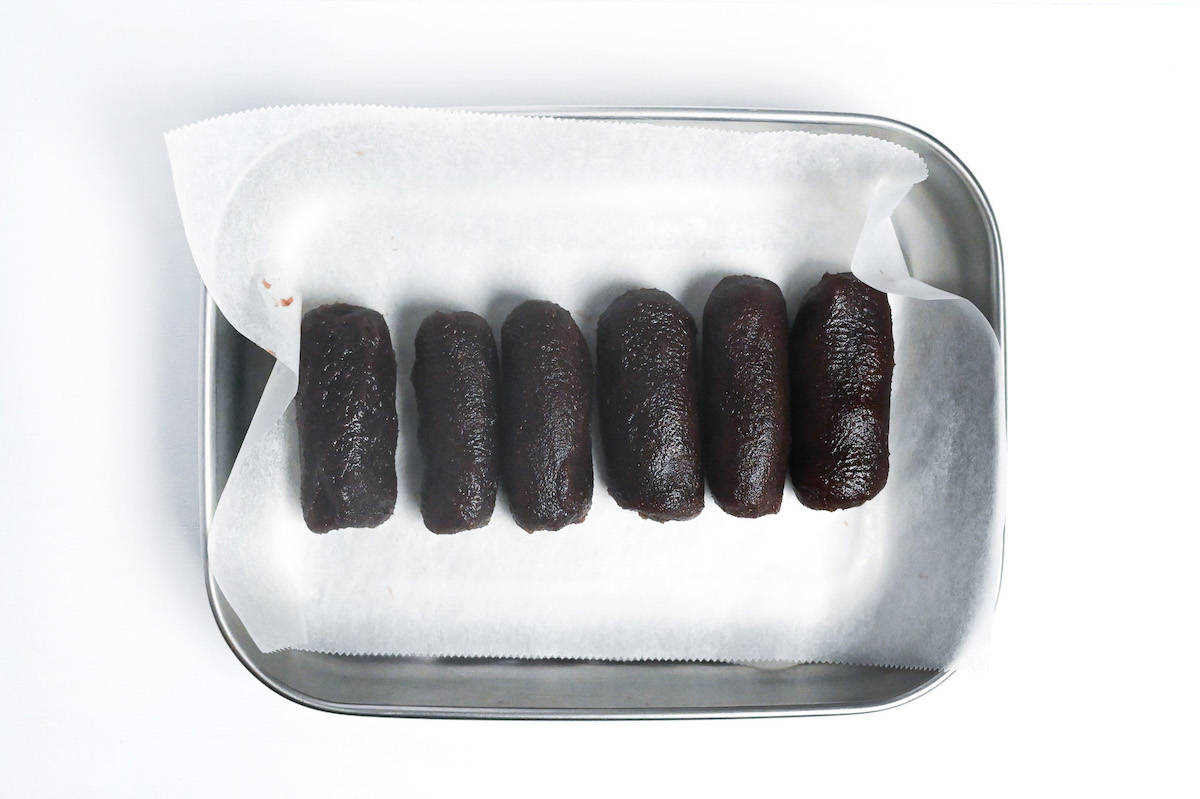
While you’re waiting, divide your red bean paste into portions and roll them into cylinders. This will save time when it comes to cook them. I recommend using about 40g (2.5oz) per Taiyaki, although this can vary depending on the size of your Taiyaki maker.
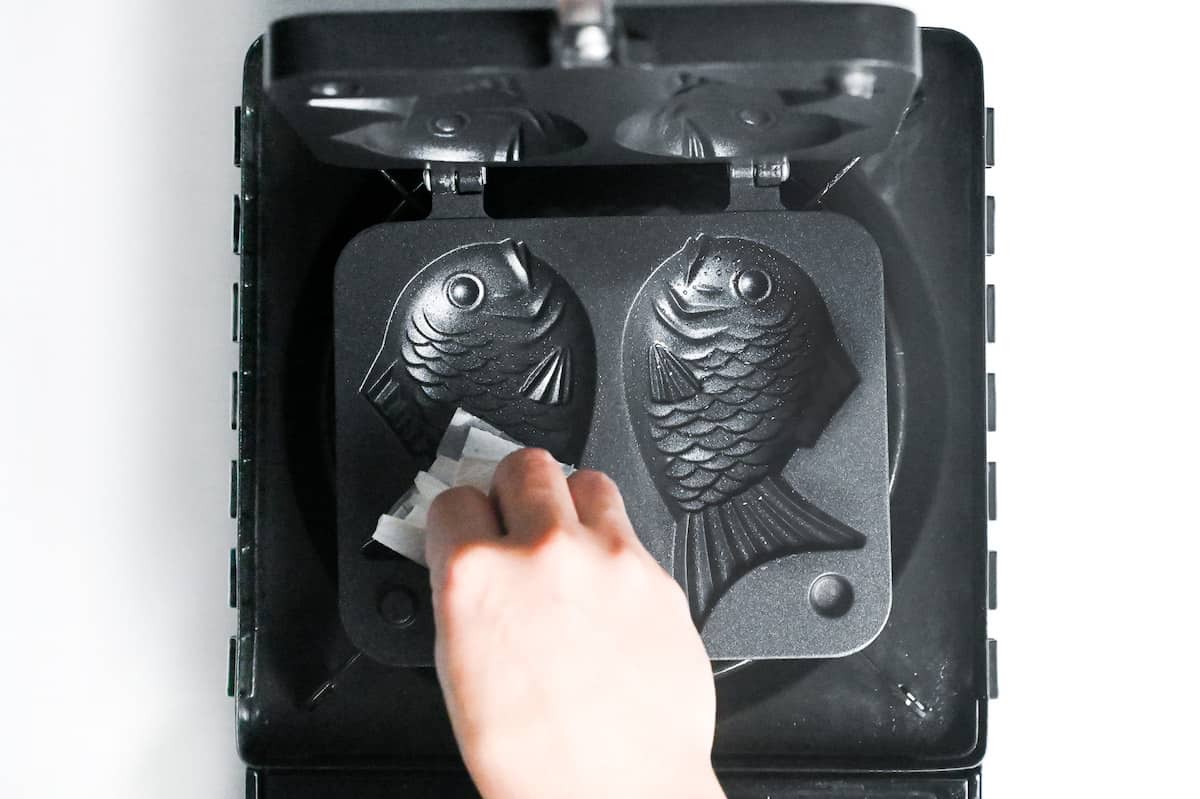
Once 30 minutes have passed, grease both sides of the Taiyaki mold with a thin, even layer of cooking oil. I recommend using kitchen paper to get into the grooves and wipe away any excess oil spots. Start heating the Taiyaki mold on one side, on a low or medium-low setting for about 5 minutes to ensure it’s evenly heated.
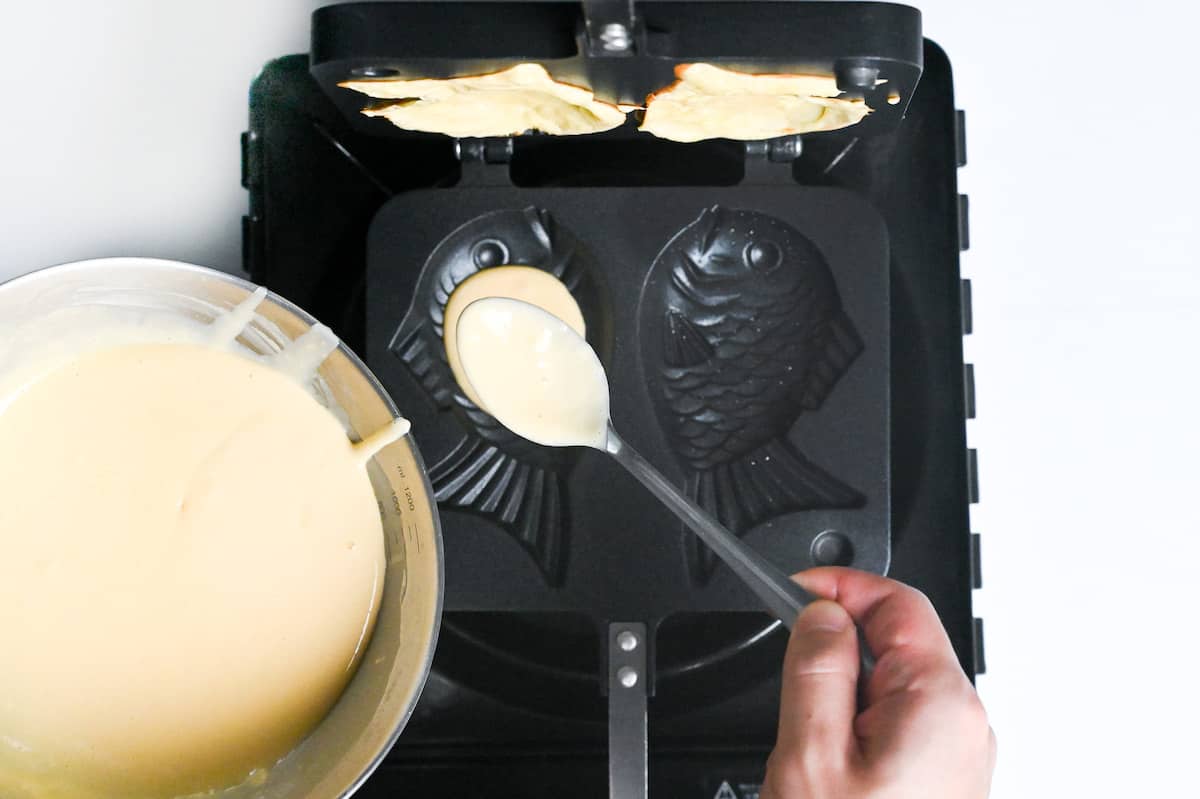
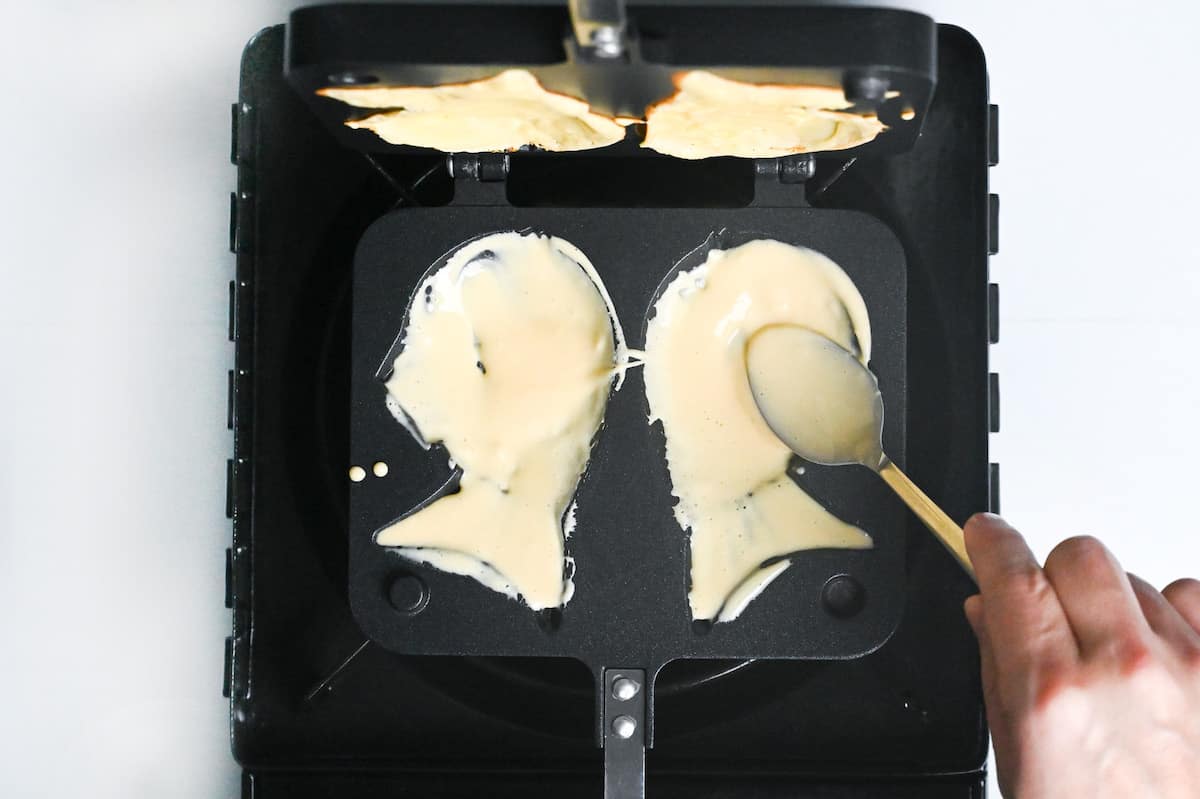
Once hot, take the batter from the fridge and add 1-2 tbsp to each heated mold (be careful not to overfill).
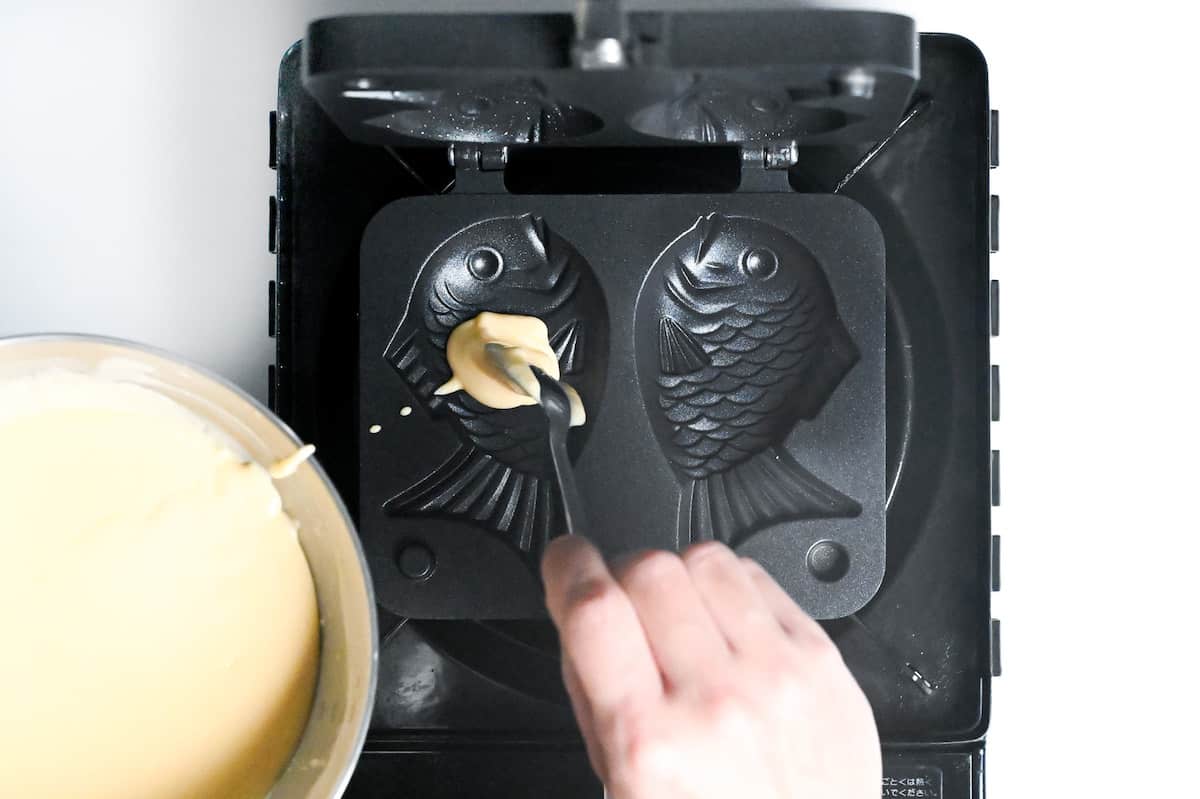
Spread it around using the back of a spoon, making sure to go outside the edges too. This will prevent it from falling when you flip the mold.
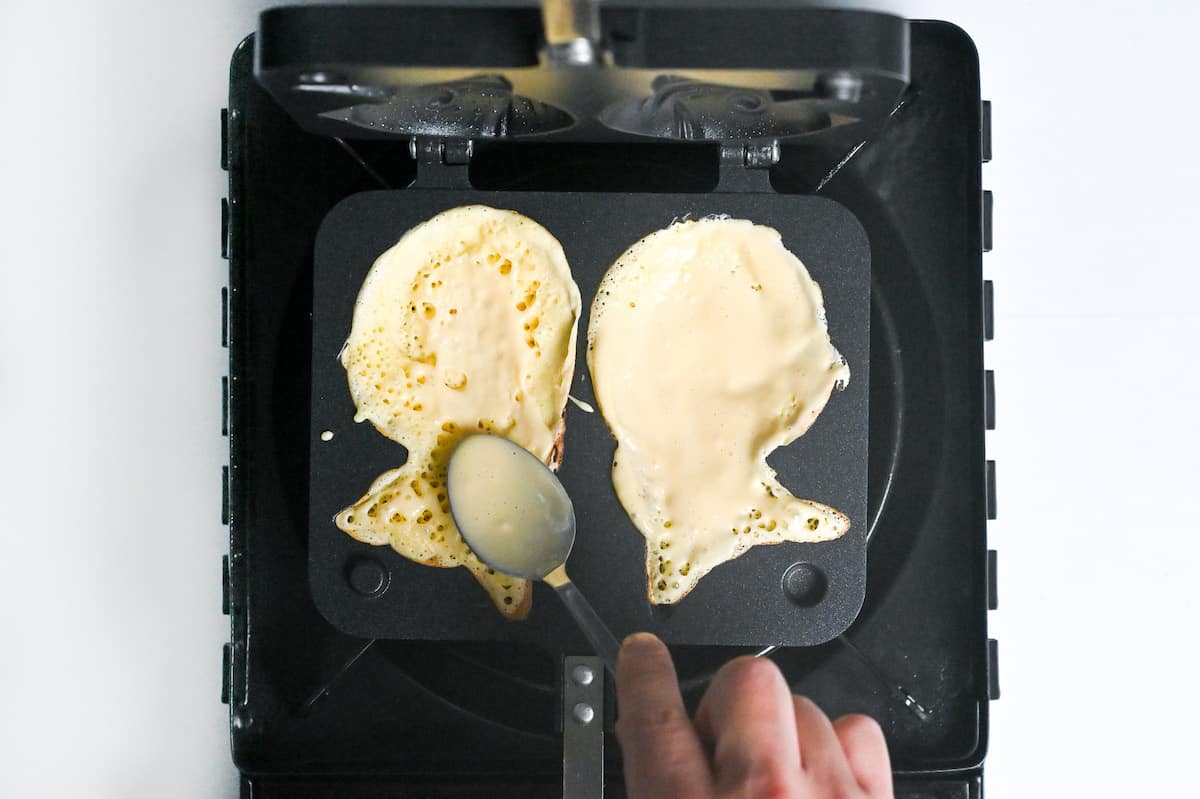
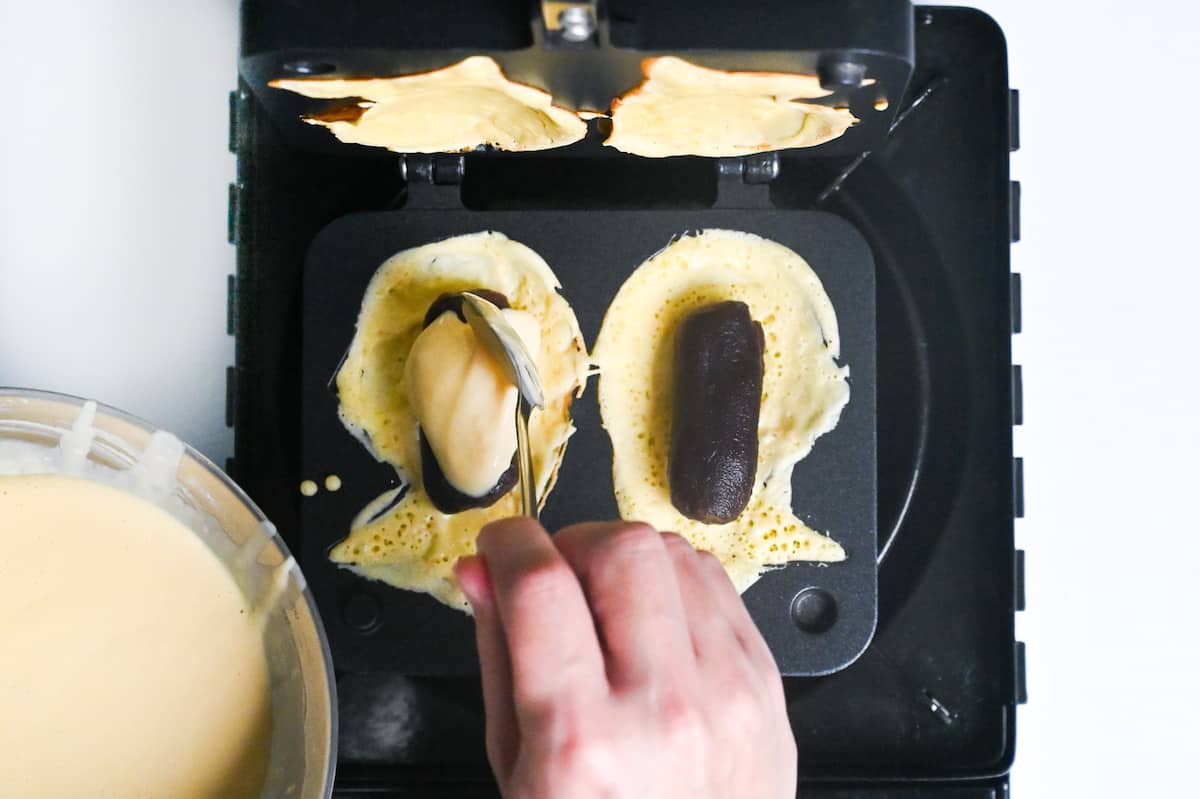
Once it’s set, flip the mold so the empty one is on the stove and repeat the same as before, spreading 1 tbsp of batter in each mold.
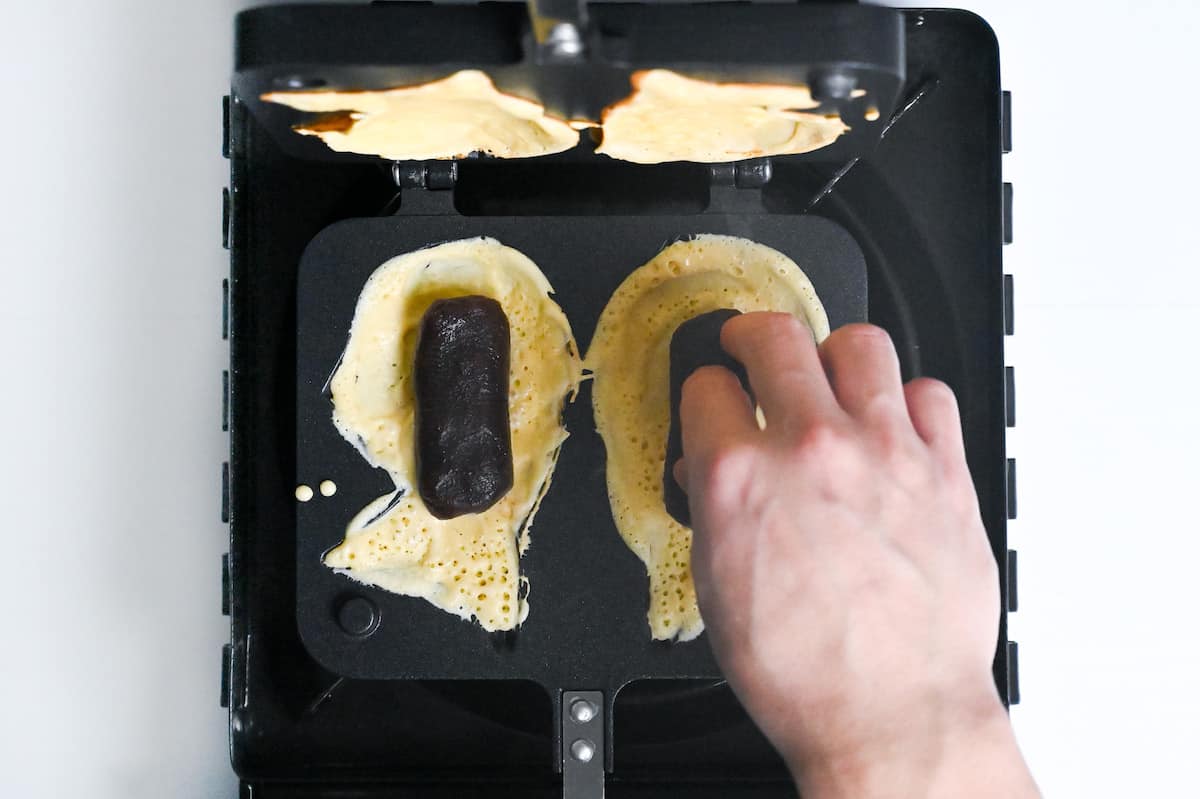
Before it cooks, place one cylinder of red bean paste in the center of the wet batter and drizzle another tbsp of batter over the top to act as a glue.
Close the mold and heat for 1 ½ to 2 minutes on each side.
Repeat until all the batter and anko is used, making sure to grease the mold thoroughly between each batch.
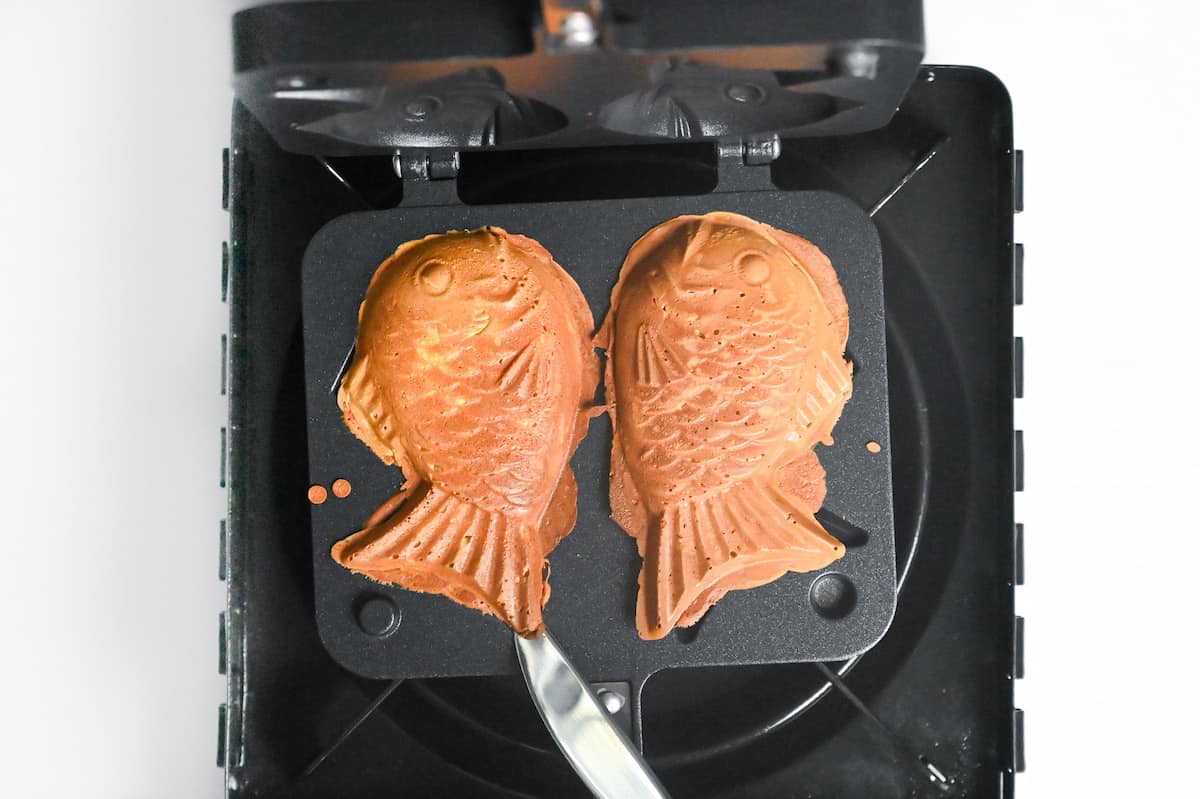
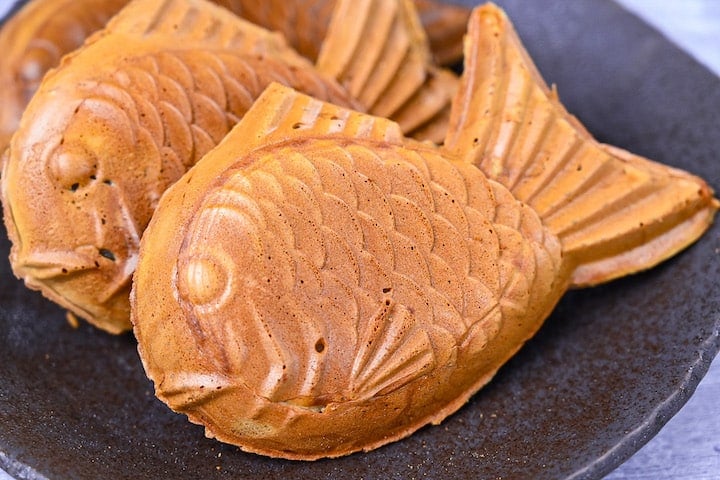
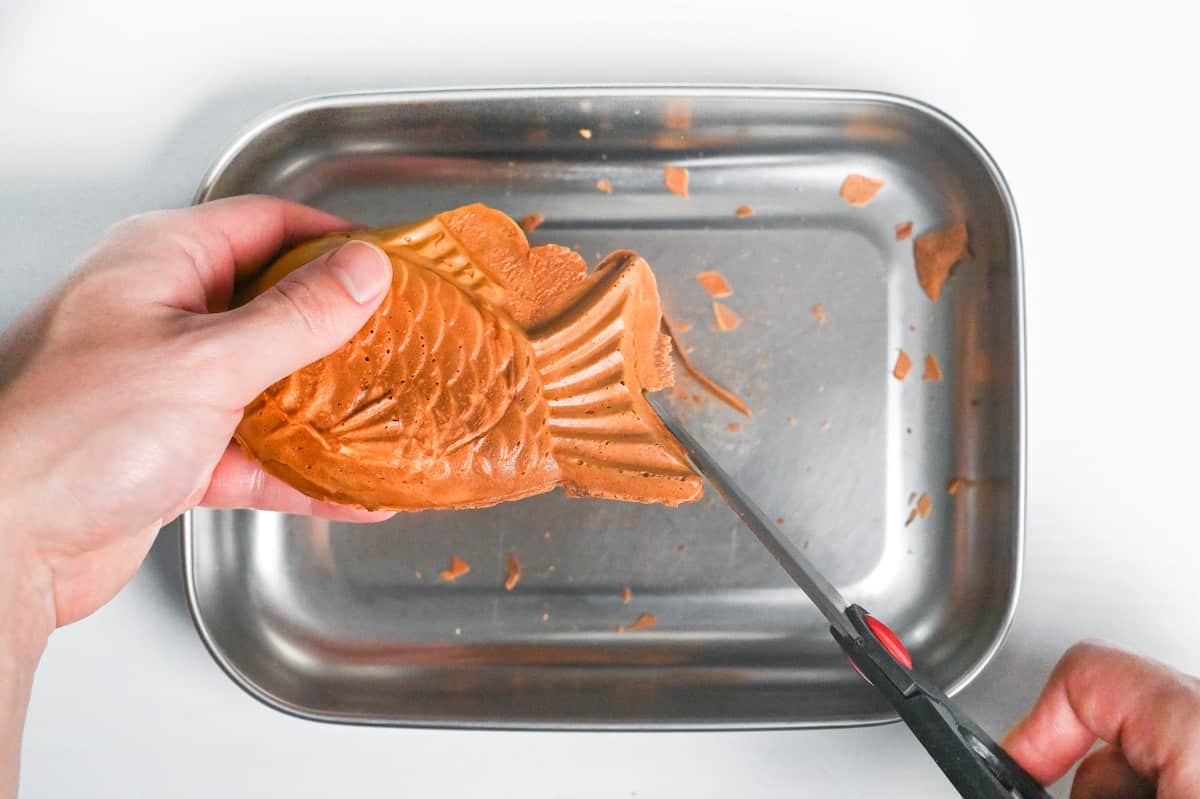
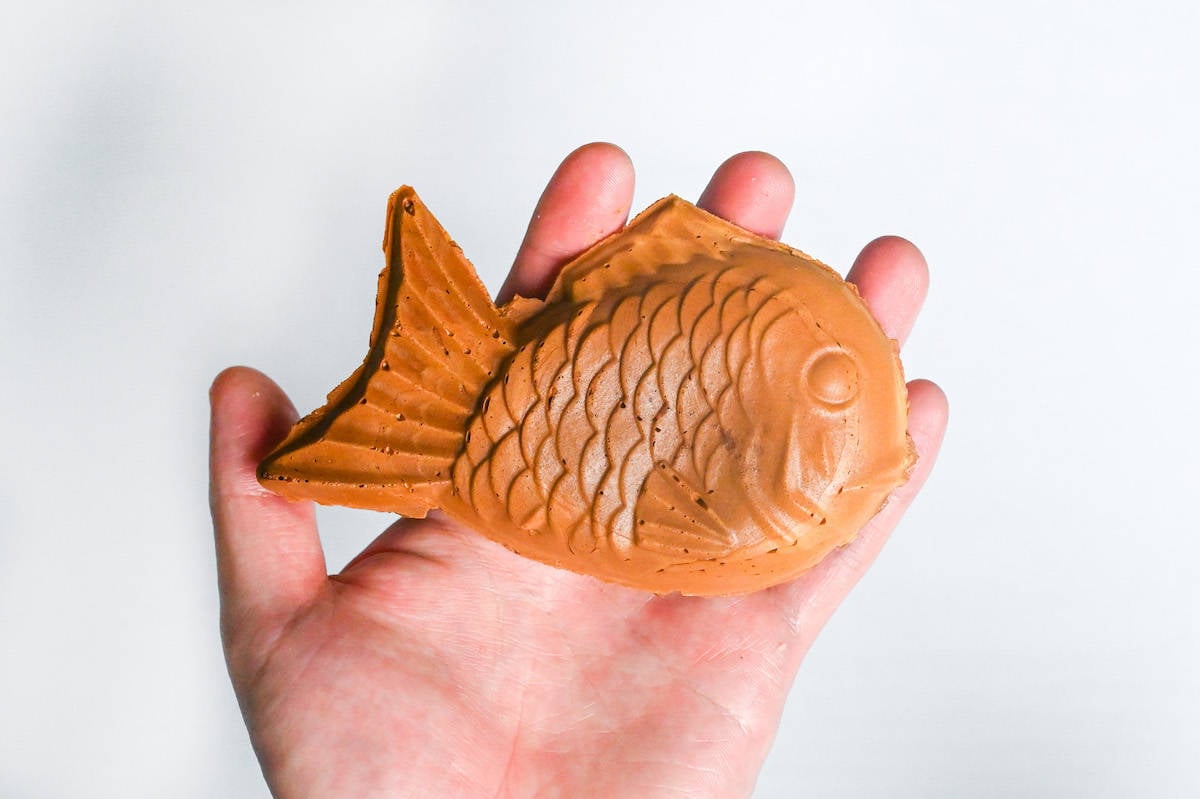
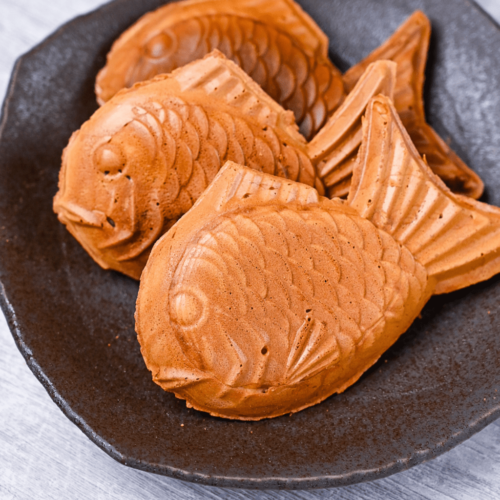
Once golden and cooked through, remove the Taiyaki from the mold. For a neater finish, you can trim around the edges with kitchen scissors.
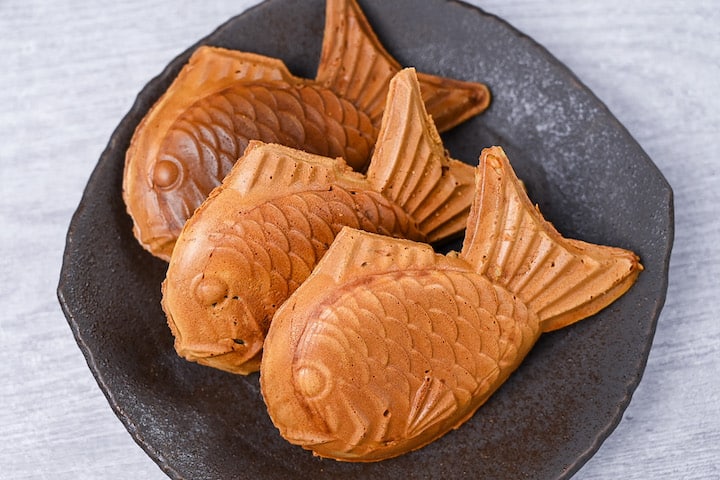
Enjoy!
Tips & Tricks
Whether it’s getting the perfect shape or achieving the best texture, making perfect Taiyaki can be a little tricky. Here are my tips to help you get it right every time!
- Use cake flour: It is important to use wheat flour with a low gluten content to ensure your batter is light and fluffy. High gluten flours can result in a chewy and heavy Taiyaki.
- Sift the flour: Avoid lumpy batter by sifting the flour!
- Don’t over-mix: Mixing too vigorously or for too long can cause gluten to form which will make the batter dense and chewy. Using the tips above will help reduce the likeliness of this happening, but it’s still important not to over mix.
- Grease the mold: For a beautiful finish, be sure to spread a thin, even layer of grease over the mold. The best way to do this is to rub a small amount of vegetable oil over the mold using kitchen paper, this will allow you to get the oil into all the nooks and crevices while wiping away any excess (pools of oil can create dark spots on the surface). I don’t recommend using butter since it’s more likely to burn.
- Add batter to fill one third of the mold on each side, this is the ideal amount for the right batter to filling ratio.
- Act fast: Spreading the batter evenly over the mold is more important than filling it neatly and staying inside the lines. If you go outside the edges, you can trim them with scissors after it’s cooked. (I even recommend going out of the lines because it stops the Taiyaki falling out of the mold when it’s flipped!)
- Don’t overfill: Too much filling is likely to burst out and make the mold sticky. Anko also burns easily so it could burn onto your mold which is a real pain to clean! For my mold I generally use 40g of anko per Taiyaki.
- Divide the filling in advance: Measuring the anko and rolling it into cylinders in advance will create a stress-free cooking experience. If using wetter fillings like custard or chocolate spread, it might be better to divide and freeze them.
- Use a bit of batter for sealing: Drizzling a small amount of batter before closing the mold will act like a glue and help seal the Taiyaki.
- Use a medium-low heat to ensure the Taiyaki is cooked through without burning the outside.
How to Store
Taiyaki is best eaten fresh, but if you make a batch and want to eat them later, the best way to store is to cool, wrap, and freeze them.
To reheat cooled Taiyaki, microwave for 20 seconds at 600W and crisp up in a toaster oven/oven.
To reheat frozen Taiyaki, microwave for 1-2 minutes at 500W to defrost, then finish in the toaster oven or oven to revive the crispiness.
Storage Summary
Room temperature – Several hours.
Refrigerated – 1-2 days.
Frozen – Up to 1 month.
FAQ
Taiyaki is fish-shaped, more specifically, the shape of a sea bream (known in Japanese as “Tai”). Although it is a common fish to eat in modern days, this wasn’t always the case. In fact, during the Meiji Era (1868-1912) sea bream was rarely eaten by regular people and was considered a luxury food. Because of Taiyaki’s shape, regular people could enjoy the luck and luxury brought from eating sea bream in a sweet pastry form!
According to the “Encyclopedia of Food Origins,” Taiyaki was first created by Seijiro Kanbe, the first owner of a shop named “Naniwaya Honten”, which was founded in 1909. He started selling a type of thick pancake filled with red bean paste called “Imagawayaki”. Unfortunately, Imagawayaki was not successful and he began to experiment, pouring the batter into quirky shaped molds. It is believed that the first Taiyaki was actually in the shape of a turtle! However the shape of the Sea Bream is considered lucky and won over the hearts of the people, becoming an iconic sweet nationwide.
Takoyaki is a savory snack made up of round balls of fried batter filled with boiled octopus and drizzled with a variety of sauces. Taiyaki on the other hand, is a sweet snack made with a waffle-like batter filled with sweet red bean paste and shaped like a fish, Taiyaki does not contain any real fish. The names Takoyaki comes from “tako” which means octopus in Japanese, and Taiyaki is from “tai” which is the Japanese word for sea bream, the fish-shape that it is based on.
The most common filling for Taiyaki is sweet red bean paste (known in Japanese as “anko”). However, it is not uncommon to find less traditional fillings such as custard, cream, chocolate, and even cream cheese.
I hope you enjoy this Homemade Taiyaki recipe! If you try it out, I’d really appreciate it if you could spare a moment to let me know what you thought by giving a review and star rating in the comments below. It’s also helpful to share any adjustments you made to the recipe with our other readers. Thank you!
More Wagashi Recipes
- Dorayaki (Red Bean Pancake)
- Ichigo Daifuku (Strawberry Mochi)
- Sakura Mochi (Cherry Blossom Rice Cake)
- Mitarashi Dango (Dango with Sauce)
Want more inspiration? Explore my Japanese Dessert Roundup Post for a carefully selected collection of tasty recipe ideas to spark your next tea party!
Taiyaki (Japanese Fish Shaped Waffle)

Ingredients
- 125 g unbleached cake flour or AP flour
- 25 g cornstarch
- ½ tsp baking soda
- ½ tsp baking powder
- 20 g light brown sugar
- 1 egg
- 150 ml whole milk
- ½ tbsp honey
- 1 pinch salt
- 1 drop vanilla essence
- 1 tsp cooking oil + extra for greasing
- 240 g red bean paste (anko) check out my homemade chunky red bean paste recipe here
The ingredient brands and tools I trust are in my Japanese pantry guide and my cooking tools guide.
Can’t find certain Japanese ingredients? See my substitution guide here.
Instructions
- Sift the dry ingredients (25 g cornstarch, 125 g unbleached cake flour, ½ tsp baking soda and ½ tsp baking powder) into a bowl and mix.

- In a separate bowl add 20 g light brown sugar and 1 egg. Whisk until combined, then add ½ tbsp honey, 1 pinch salt, 1 drop vanilla essence, 1 tsp cooking oil and mix well. Finally, pour in 150 ml whole milk while whisking until smooth.
- Make a well in the dry ingredients and add the liquid ingredients one-third at a time, whisking gently each time until the ingredients are combined and smooth.
- Cover the bowl and rest in the refrigerator for 30 minutes.
- Divide 240 g red bean paste (anko) into equal pieces for each taiyaki, approx 40g (2.5oz) each. Roll into cylinders, cover and store in the refrigerator until it's time to cook.
- After 30 minutes have passed, grease both sides of the taiyaki pan with a thin layer of cooking oil. Use kitchen paper to spread it evenly into the grooves of the mold. Place one side of the mold onto the stove and turn the heat on low/medium-low. Heat for a few minutes.
- Once hot, add 1 tbsp of batter to each heated mold and spread it around using the back of a spoon. Make sure to go over edges of the taiyaki shape to stop it from falling when you flip the mold.
- Once it's set (cooked enough that it doesn't run out), flip so that the empty one is on the stove and add 1 tbsp of batter to each mold. Spread evenly with the back of a spoon.
- Place an anko cylinder into the centre of each taiyaki.
- Drizzle another tbsp of the batter over the top of the anko filling to act as a glue.
- Close the mold and heat for another 1 1/2 to 2 minutes on each side. (This varies from stove to stove so make sure not to leave it unattended, you can flip it when you can smell the sweet, baked smell of taiyaki.)
- Remove the cooked taiyaki from the mold and repeat until you've used all of the batter and anko.
- Optional: Use kitchen scissors to trim around the edges to neaten up the shape.
- Enjoy!
Video
Notes
- Best eaten the same day. Store leftovers in the freezer. Defrost at room temperature and revive the crispiness using a toaster oven or grill.
- Feel free to try out other fillings such as custard, chocolate, peanut butter, etc!
Easy recipe to follow. I didn’t have the cake flour and I subbed in regular all purpose flour. Big mistake. Turned out dry and condensed. Beyond my problem, the taiyaki came out good. Needs extra sugar for my taste. Cooked fast and was easy to come off the pan!
Thank you for your comment and rating! Yes unfortunately because all purpose flour has a higher gluten content, it will often make the batter dense. I’ll update the post to make that clearer for future readers, thank you for your feedback!
Thank you so much for sharing recipe I was planning to sell taiyaki for my future small business I hope you can share the exact measurements for 24 servings.. Thank you so much again and have a good day
You’re welcome! You can either multiply the ingredient quantities by 4, or if you’re viewing the recipe on a desktop you can hover on the “servings” number on the recipe card and choose the number of portions using the slider.
Good luck with your business venture!
Hi, I finally found the Taiyaki mould I bought over a year ago and so looked for a recipe and found Sudachi. I followed the recipe exactly and made 6 delicious Taiyaki.Thank you for your excellent recipe and website. What an amazing resource and a reminder of our visit to Japan. I shall visit again, both the web pages and Japan!
Hi Charles,
Thank you so much for your comment! That makes me so happy to hear! I’m glad the recipe worked well for you, and it’s wonderful that it brought back memories of your trip to Japan. Thank you for sharing this with me! 🙂
Yuto
I should add 5 stars to my comment just sent