

Disclaimer: This post may contain Amazon affiliate links. Sudachi earns a small percentage from qualifying purchases at no extra cost to you. See disclaimer for more info.
I might not buy store-bought rayu anymore.

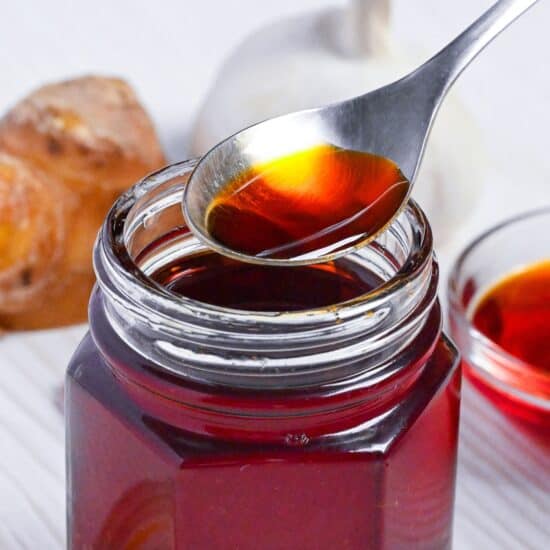
Maybe this picture explains it all? Can you smell it? The best rayu I’ve ever had! And it was 10 times easier than I thought!

Gently heat with the aromatics.

Then mixing with chili powder.

That’s it! Keep reading to find out how it’s done!
What is Rayu?
Have you been searching for that perfect depth of flavor that store-bought chili oils just can’t deliver? Making your own rayu (Japanese-style chili oil) is a revelation that transforms everyday dishes while allowing for complete customization at a fraction of the cost.
Rayu (ラー油, 辣油) is a chili-infused oil that adds both heat and complex flavor to Japanese cuisine, particularly in Japanese-Chinese (Chuka) dishes. While chili oil originated in China, Japanese rayu has evolved into something distinctively its own.
So what makes Japanese rayu unique? Two essential elements define its character: First, while Chinese versions typically use neutral oils like rapeseed, Japanese rayu incorporates toasted sesame oil as its foundation, imparting a distinctive nutty richness.
Second, Japanese rayu is usually milder than other Asian chili oils, so it’s not as spicy.

Key Ingredients
- Neutral cooking oil: I used a 50/50 blend with toasted sesame oil to create the perfect balance for your rayu. If you can, select high-quality oils like cold-pressed rapeseed or canola. You can also adjust this ratio: increase neutral oil for subtlety or increase sesame oil for more pronounced nuttiness.
- Toasted sesame oil: This is what makes Japanese rayu different from other chili oils. Use toasted sesame oil for its intense aroma and rich, complex flavor profile.
- Ginger root: Thick slices with the skin still on are easier to remove and still give off that nice smell. The skin has special flavor compounds that make the flavor more complex. To get the most flavor, you can gently crush the slices to release their essential oils before infusion.
- Dried red chili peppers: Select medium-heat varieties with balanced flavor profiles rather than just heat. Include the seeds for a nice complex character and depth.
- Garlic: Cut into thick slices similar to the ginger preparation. Quality matters here. Fresh, plump cloves will infuse a richer, more nuanced flavor than older garlic.
- Pure red chili pepper powder: If you can, try to use 100% pure chili powder, like Ichimi Togarashi (Japanese single chili pepper). Other options include Korean chili (milder with more complex flavor notes) or Sichuan chili powder (more aromatic with citrusy notes). Each variety will give your rayu a unique flavor.
- Japanese leek (green part only): It adds a subtle, distinctive aroma that makes rayu delicious. If you can’t find it, regular leek greens can be used as a substitute.
Visual Walkthrough & Tips
Here are my step-by-step instructions for how to make Japanese Rayu at home. For ingredient quantities and simplified instructions, scroll down for the Printable Recipe Card below.
If you prefer to watch the process in action, check out my YouTube video of this rayu recipe for a complete visual walkthrough!

Combine equal parts neutral cooking oil and toasted sesame oil in a heavy-bottomed pan or wok. This 50/50 ratio creates the foundation of my Japanese rayu, balancing the neutral oil’s clean heat conduction with the rich, nutty complexity of toasted sesame oil.
For best results, use high-quality oils-cold-pressed rapeseed, rice bran oil, or high-oleic safflower oil pair beautifully.

Heat over medium until it reaches precisely 160°C (320°F). This temperature is crucial-too low and you won’t extract the aromatics’ essential compounds; too high and you’ll burn them, creating bitter notes that can’t be removed.
Toss a bit of ginger in the oil. If it sizzles gently with small bubbles forming around it, the oil is at the perfect temp. If it bubbles vigorously or the oil smokes, it’s too hot, so take it off the heat right away and let it cool a bit.
Another way to tell if the oil is ready is to look for very small ripples across the surface, but no smoke.
Why this temperature matters?
When you get it to 160°C, you’ll see how the aromatic compounds release really well without burning. Paying attention to the temperature is what makes homemade rayu so much better than the store-bought kind.
Turn the heat down low and add your ginger slices (5 mm or 0.2 inch thick with skin on), garlic (cut into thick slices), and the green part of the Japanese leek (roughly chopped). Open up the dried chili peppers and add them along with their seeds.
If you can’t find Japanese leeks, you can use green part of leeks or shallots instead.
Simmer this aromatic mix for 10 minutes.

Don’t be tempted to crank up the heat or shorten the infusion time. Patience is key to developing those deep, complex flavors that make homemade rayu worth the effort.
For even more aromatic release, lightly crush the ginger and garlic with the flat side of your knife before adding to the oil. This breaks the cell walls and releases more of their essential oils.
While the oil infuses, put your red chili powder in a bowl that can handle heat (I opt for a glass bowl). For my chili powder, I used ichimi togarashi, but other great options include Korean chili powder, Aleppo pepper, or Sichuan chili powder. Each type will give your rayu a unique flavor and heat level.
Add a small amount of water and mix to create a thick paste. The consistency should be like wet sand-just moist enough to clump together without being soupy.

This little step is key to making sure your chili powder doesn’t burn when you add the hot oil. The water creates a protective layer that lets the chili infuse without scorching, getting rid of that bitter taste that can mess up your homemade chili oil.
Just be careful not to add too much water, as too much moisture can lead to some pretty dangerous splattering when the hot oil hits it.

Adjust the amount of chili powder to suit your heat preference. But remember, you can always add more, but you can’t take it away! Here is the rough guide:
- For mild rayu: Use 1-1.5 tablespoons of chili powder
- For medium heat: The recipe’s 2 tablespoons is perfect
- For spicy rayu: Increase to 2.5-3 tablespoons
- For extra complexity: Mix different types of chili powders
After exactly 10 minutes of infusion, remove the pan from heat. Position a fine-mesh stainless steel strainer over the bowl containing your chili paste. The mesh should be fine enough to catch even small seed fragments while allowing the infused oil to pass through cleanly.

And hot oil is no joke. Use oven mitts and pour slowly and carefully to avoid splashes.

Give the strained oil and chili paste a stir with a heat-resistant utensil, just until they’re well combined. You’ll start to see the vibrant red color spreading through the oil.
Allow your rayu to cool completely to room temperature before transferring to a clean, sterilized glass container.

Enjoy your homemade rayu to take Japanese dishes like gyoza, tantanmen, or cold tofu to the next level. It’s also great in marinades for meat, dressing for cold noodles, or as the secret ingredient in dipping sauces!
Jump to Full Recipe MeasurementsHow to Store
First and foremost, make sure to let your oil cool completely before storing it. Once cooled, transfer it to a jar with a tight-sealing lid and place it in the refrigerator. Just a heads-up: If your fridge is too cold, the oil might solidify. So make sure to move the jar to a warmer spot in your fridge like in the door. I also recommend using a glass container since the chili powder is prone to staining.
Before storing your rayu, it’s crucial to properly sterilize your jars. Here’s a quick process:
- Boil the jars thoroughly
- Dry them completely
- Ensure they’re clean and free from any residue
With proper refrigeration, your homemade rayu should stay fresh for at least a month. However, it’s always wise to do a quick freshness check before each use. Give it a sniff – if you detect any sour notes, it’s best to discard it and make a new batch.
If you do not plan to use a lot of it, you may want to make it in half the recipe or even less.

Alternative Store-Bought Options
Thanks for reading this guide on making rayu at home! If you’ve made it this far, I hope you’re inspired to try making your own batch of this flavorful chili oil.
However, if you’re not quite ready or are looking for a convenient alternative, there’s good news. For those seeking a reliable store-bought option, S&B’s rayu is a great choice.
S&B has rayu available in both small and large bottles in the United States.

FAQ
Here are answers to frequently asked questions I have received across all platforms, including here, YouTube, Instagram, and Pinterest. If you have any questions, feel free to send them to me anytime! It will be a big help for everyone in this community!
Homemade rayu is better than store-bought in some ways. You can control the quality of the ingredients, using premium oils and fresh aromatics that big producers just can’t match. You can adjust the heat level to your liking, and get a lot more depth and complexity by using different aromatics.
Homemade rayu undergoes a fascinating transformation. When first made, individual components remain distinct, with separate notes of sesame, garlic, and chili. After 24-48 hours of resting, these elements harmonize into an integrated flavor profile with remarkable complexity.
If you don’t have a thermometer, toss a small piece of ginger into the oil. If it sizzles gently with small bubbles forming around it, the temperature is just right. If it bubbles vigorously or the oil starts smoking, it’s too hot.
While chili oil originated in China, Japanese rayu has two key differences: First, Japanese rayu incorporates toasted sesame oil as its base instead of just neutral oils, giving it a distinctive nutty richness. Second, it’s typically milder than its Chinese counterpart, both in terms of heat level and the amount of spices used.
I recommend using high-quality oils for the best results. Rapeseed and rice bran oil work beautifully for this rayu. In this recipe, I’ve used rapeseed oil.
I hope you enjoy this Homemade Rayu recipe! If you try it out, I’d really appreciate it if you could spare a moment to let me know what you thought by giving a review and star rating in the comments below. It’s also helpful to share any adjustments you made to the recipe with our other readers. Thank you!
Make These Dishes with Homemade Rayu!

Homemade Rayu (Japanese-Style Chili Oil)

Ingredients
- 125 ml cooking oil neutral oil of your choice
- 125 ml toasted sesame oil
- 3 slices ginger root 5mm (0.2 inch) thick
- 1 garlic clove
- 1 Japanese leek (naganegi) green part, roughly cut
- 5 dried red chili peppers
- 2 tbsp chili powder
- ½ tbsp water
The ingredient brands and tools I trust are in my Japanese pantry guide and my cooking tools guide.
Can’t find certain Japanese ingredients? See my substitution guide here.
Instructions
- Pour 125 ml cooking oil and 125 ml toasted sesame oil into a deep pan and heat over medium until 160 °C (320 °F). Use a thermometer to accurately check the temperature.

- Reduce the heat to low and add 3 slices ginger root, 1 garlic clove and 1 Japanese leek (naganegi). Take 5 dried red chili peppers and rip them open before dropping them into the oil along with the seeds. Heat on low for 10 minutes.
- While the mixture is cooking, add 2 tbsp chili powder to a large heatproof bowl and sprinkle with ½ tbsp water. Mix well and then place a sieve on top.
- After 10 minutes has passed, remove from the heat and pour the hot oil through the sieve and into the chili powder.
- Mix until well combined, then leave to cool to room temperature before transferring to a sealable container.
- Enjoy!


Video
Notes
- Allow your rayu to rest for 24-48 hours before using to achieve maximum flavor complexity and integration.
- Replace Japanese leeks with green part of regular leek or shallot if unavailable in your area.
- Store in a sterilized, airtight glass container in the refrigerator for up to 2 months, checking for freshness before each use.
- If you notice a change in smell (particularly a sour smell) it’s better to discard it.
Leave a rating and a comment