

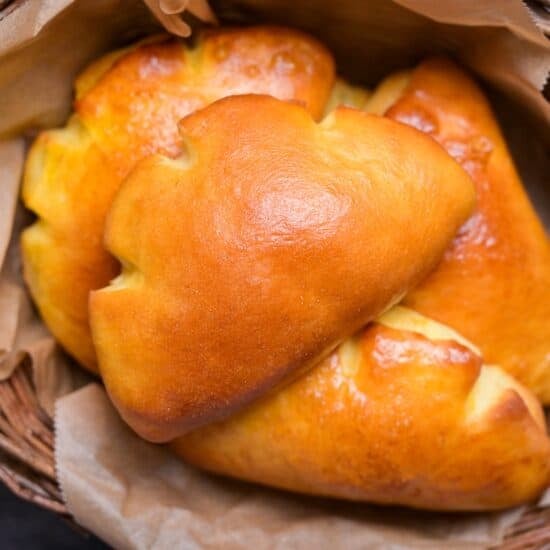


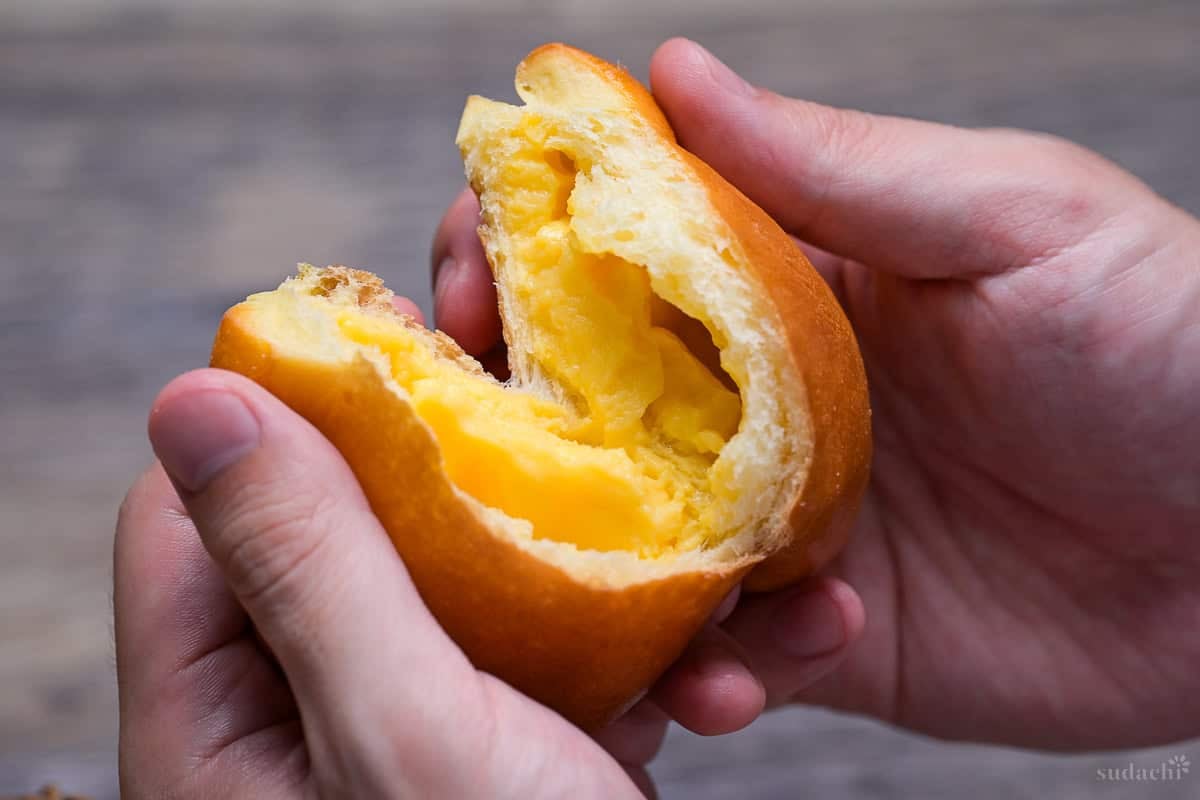
It is my grandmother’s favorite. It is also my 4 year old son’s favorite. Two people, generations apart, reaching for the same soft little bun filled with silky vanilla custard, that is cream pan.
One of Japan’s classic kashi-pan, it waits in bakeries across the country, a sweet snack that quietly wins over everyone who meets it. The good news is that it’s easier to make at home than you would think, and I will show you exactly how.
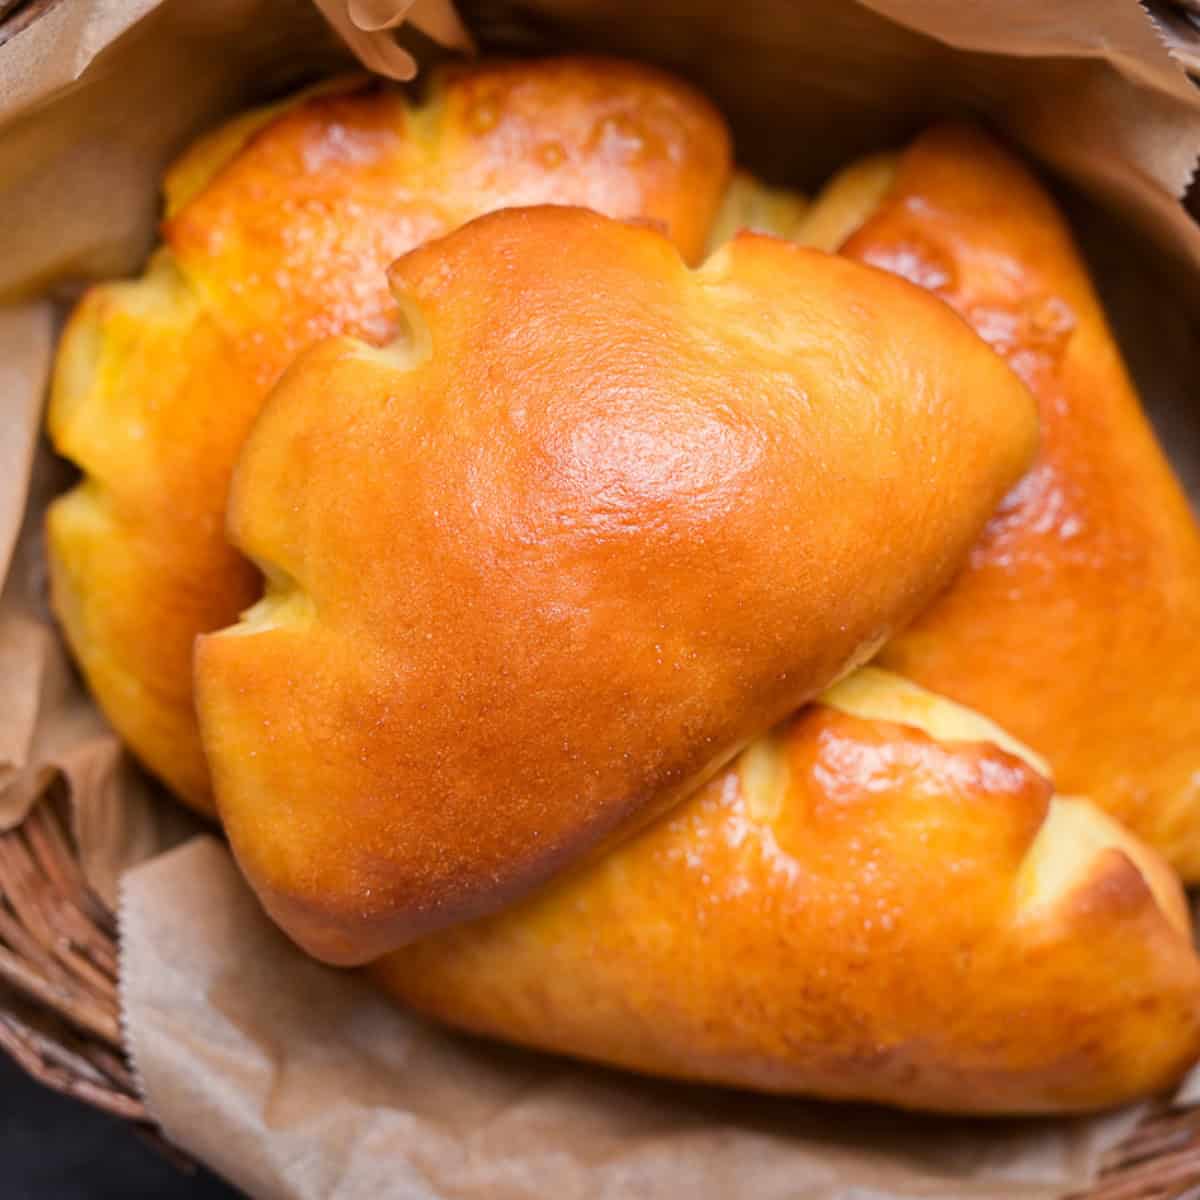
Japanese kurimpan
Recipe Snapshot
- What is it? A soft, lightly sweet Japanese bread bun filled with a generous layer of smooth homemade vanilla custard. My recipe helps you create freshly baked Japanese bakery style cream pan in your own oven.
- Flavor profile: Creamy, vanilla, gentle sweetness.
- Why you’ll love this recipe: I developed this recipe after attending a kashi-pan class, so the methods and ingredients used are inspired by a real Japanese bakery. The custard uses a one-pan method with no egg tempering and you can make it ahead of time.
- Must-haves: Bench scraper (if kneading by hand), rolling pin for shaping, and kitchen scissors for cutting the slits (not essential, but they make the cuts cleaner).
- Skill Level: Medium, making enriched dough is a little challenging for beginners, but if I can do it, so can you!
- Freezer Friendly? No.
What is cream pan?
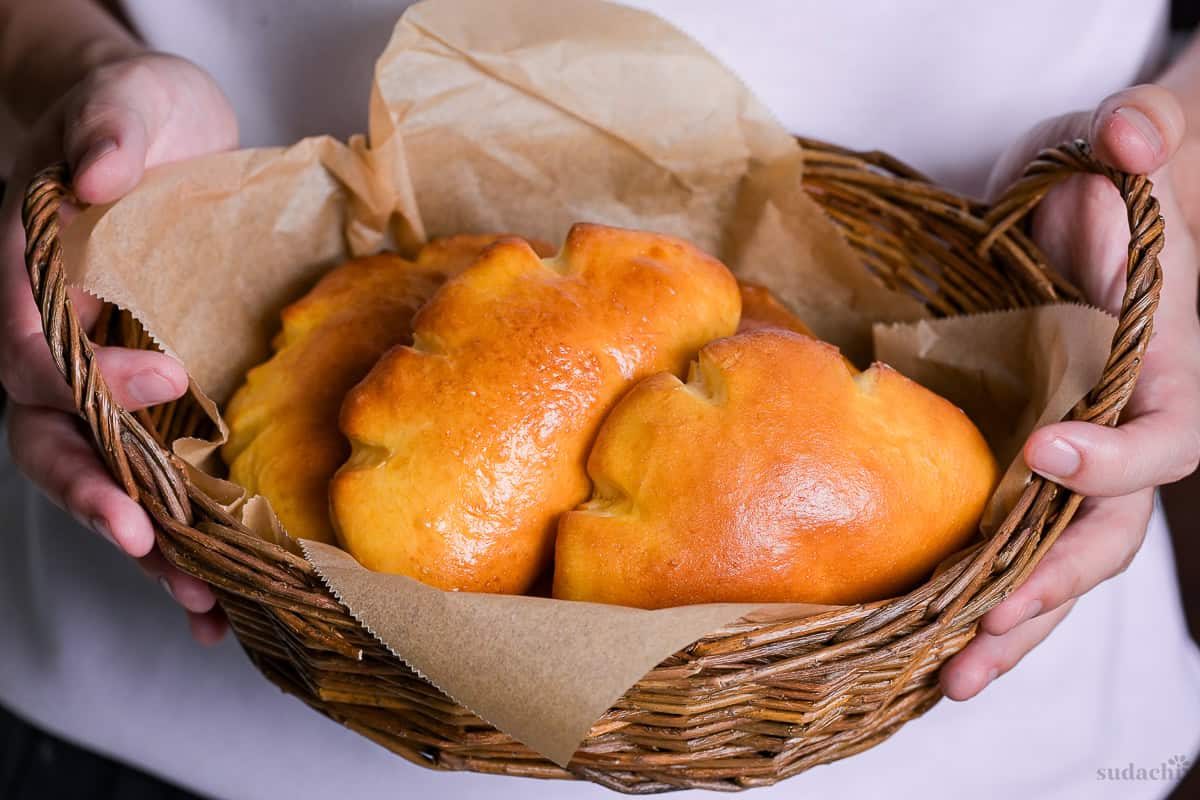
Cream pan (クリームパン) is a soft, subtly sweet Japanese bun filled with a generous helping of smooth vanilla custard. It is one of the most common sweet breads found in bakeries across Japan, sitting somewhere between a bread and a pastry.
It was one of the classic trio of Japanese sweet breads, alongside anpan and jam pan, that drove the kashi-pan (菓子パン) boom of the Meiji era. Tokyo bakery Kimuraya invented anpan first, a bun filled with sweet red bean paste called anko, and it became a national hit. Their jam pan came next, followed later by rival bakery Nakamuraya’s cream pan. Nakamuraya took the same stuffed-bun idea and filled it with a vanilla custard inspired by choux cream.
Why the glove shape?
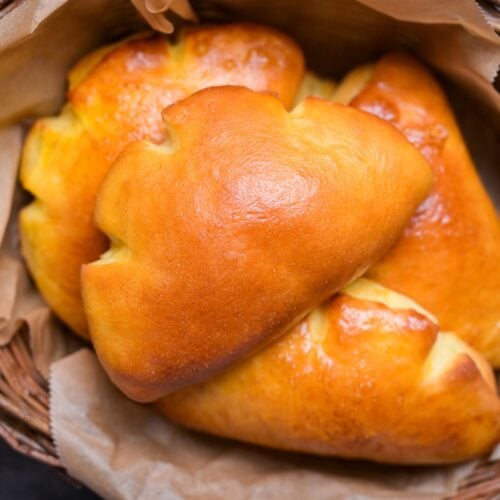
One of cream pan’s most recognizable features is its glove-like shape, but it’s not just for decoration. When a filled bun rises, the dough expands but the custard inside does not, leaving a hollow gap that makes the bun look under filled and disappointing.
Many bakers cut slits into the dough to release the trapped air so the bread sits snugly against the cream, and the resulting shape happened to resemble a baseball glove. The look is a product of solving the gap, not a design choice, and only became the norm after World War II. Originally, cream pan was a smooth half-moon shape with no slits and some Japanese bakeries still make it that way to this day.
Cream Pan Ingredients
What You’ll Need for cream pan (bread)
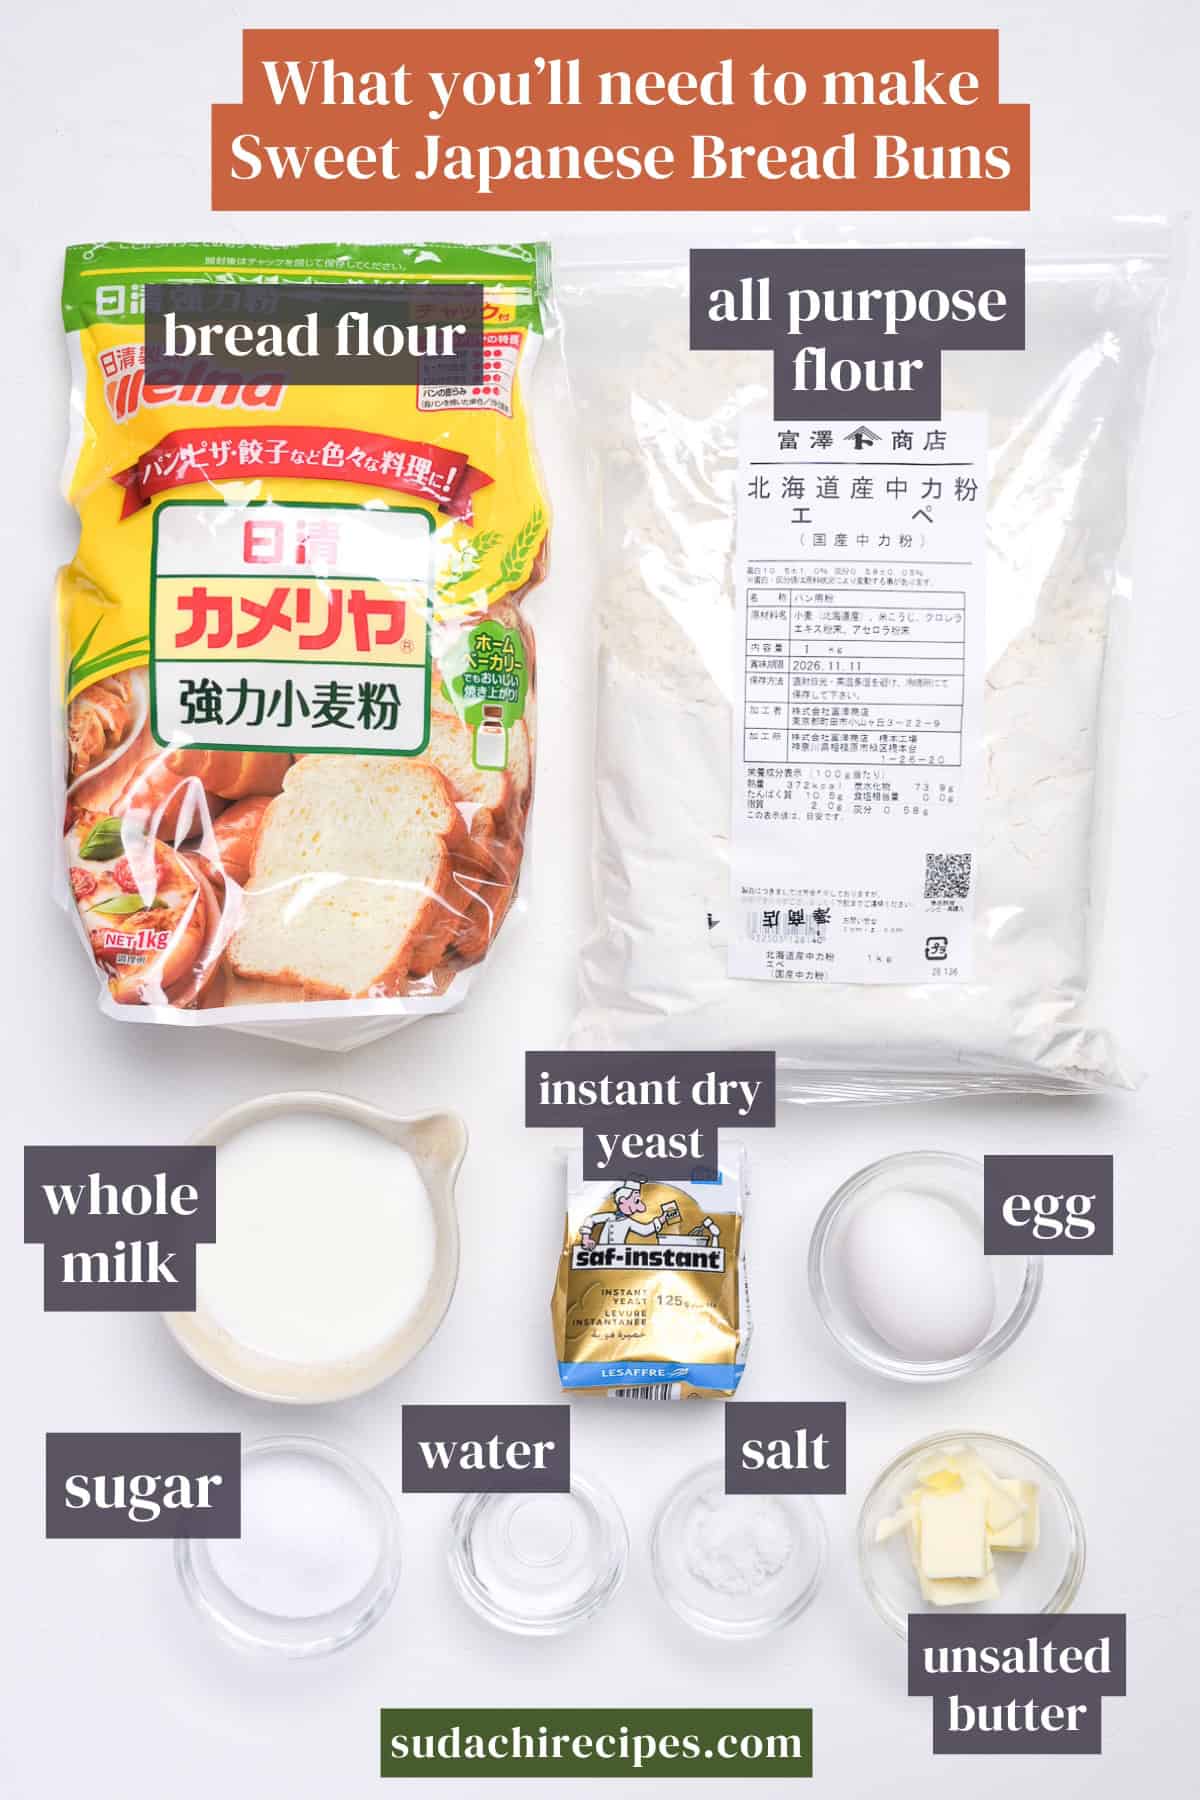
- Flour: I use a blend of bread flour and all purpose flour for a softer and more tender crumb. This was a little trick I learned from my baking class and I applied it to my own recipe.
- Instant dry yeast: I use saf-instant dry yeast (red or gold both work for this recipe). Important note: instant dry yeast and active dry yeast are not the same product. Instant dry yeast can be added straight into the mixture, no prep. If you are using active dry yeast, you will need to activate it in warmed water before you add it to the dry ingredients. You can also expect a slower rise, about 15-20 minutes more. See more about using fresh yeast or active dry yeast in substitutions below.
- Unsalted butter: Stick to unsalted butter to avoid altering the salt percentage in the recipe.
pastry cream INGREDIENTS (filling)
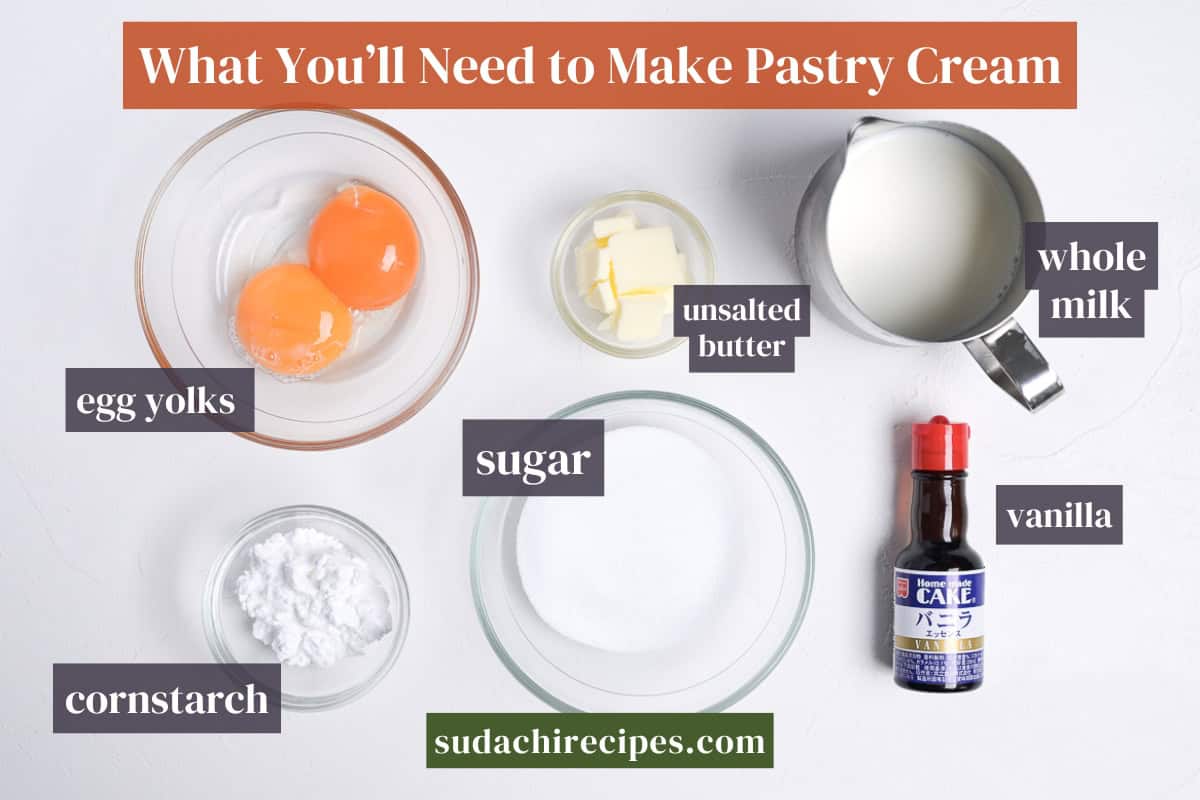
- Cornstarch: I tested the pastry cream with flour and starch, and starch came out on top. The flour version had a great texture, but seeped into the buns and leaked out during baking. Cornstarch had a firmer, more jelly-like texture that held up better in the oven.
- Vanilla: I use ½ tsp vanilla essence in the base pastry cream recipe. If using extract, use half the amount. If you want to use vanilla pods/beans, use one-third of a pod.
Substitutions /Variations
- Yeast (bread): If you use active dry yeast, increase the amount by 25% (1.25x more). If you prefer to use fresh yeast, double the weight of yeast in the recipe.
- Cornstarch (pastry cream): Potato starch and tapioca starch are the best substitutes for thickening the pastry cream in this recipe.
- Vanilla: Experiment with different flavors through extracts, powders and tea bags. Some ideas include almond extract, matcha, coffee and earl grey tea.
Have trouble finding Japanese ingredients? Check out my ultimate guide to Japanese ingredient substitutes!
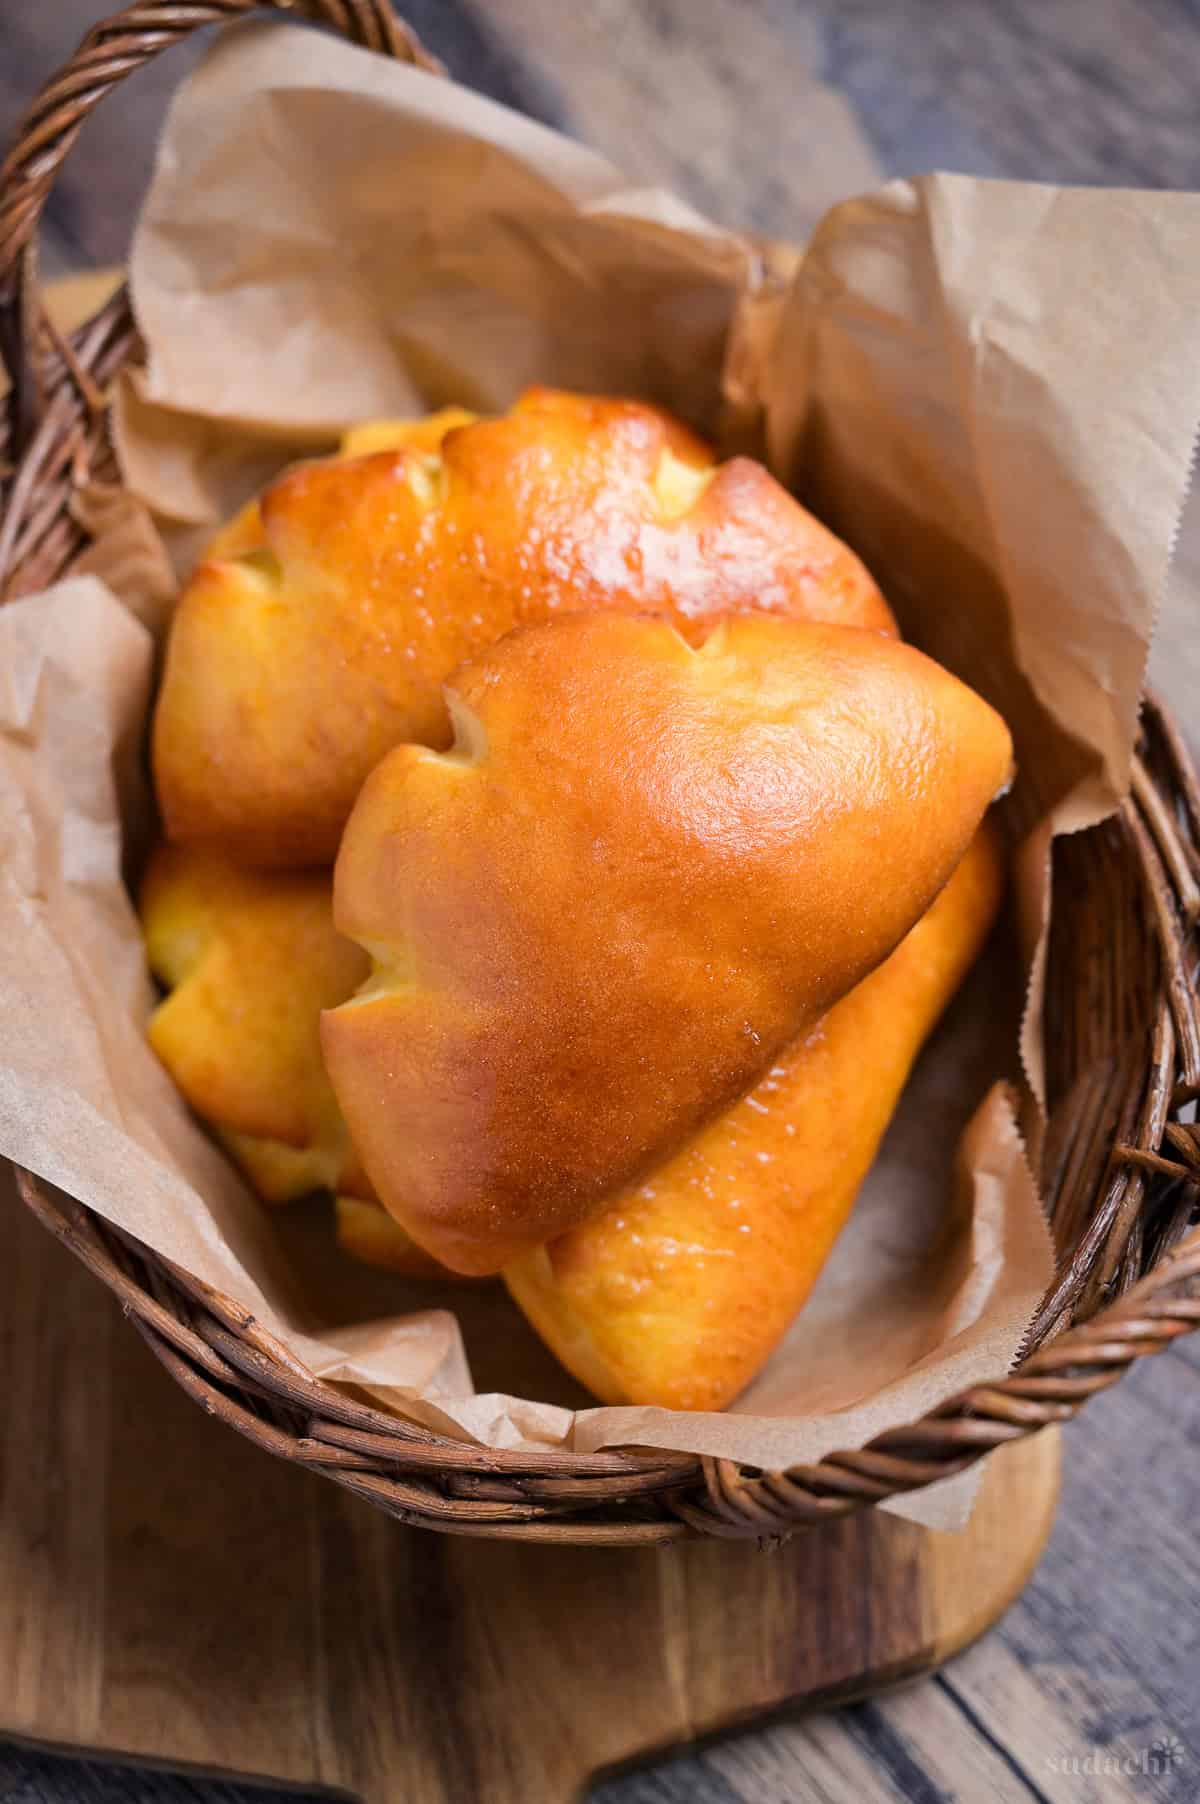
How to Make My Cream Pan Recipe
The first step of this recipe is making the pastry cream. If you follow these steps, it will be cool and ready to use by the time the dough is ready. If you want to speed up the process on the day, prepare the pastry cream the night before (or up to 2-3 days in advance) and keep it in the fridge.
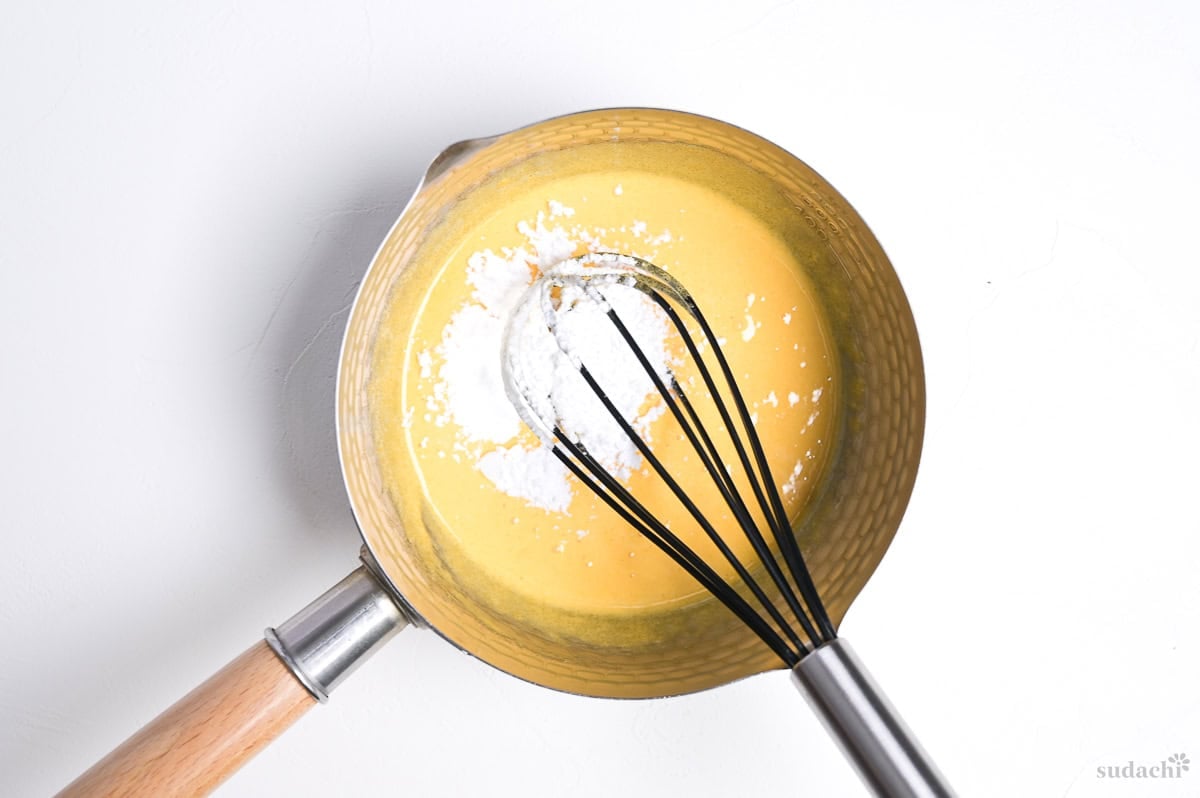
i. Whisk the egg yolks and sugar in a cold saucepan until pale and creamy. This loosens the mixture, making it easier to incorporate the starch without lumps. Whisk in the cornstarch, then once combined, slowly pour in the milk while whisking.
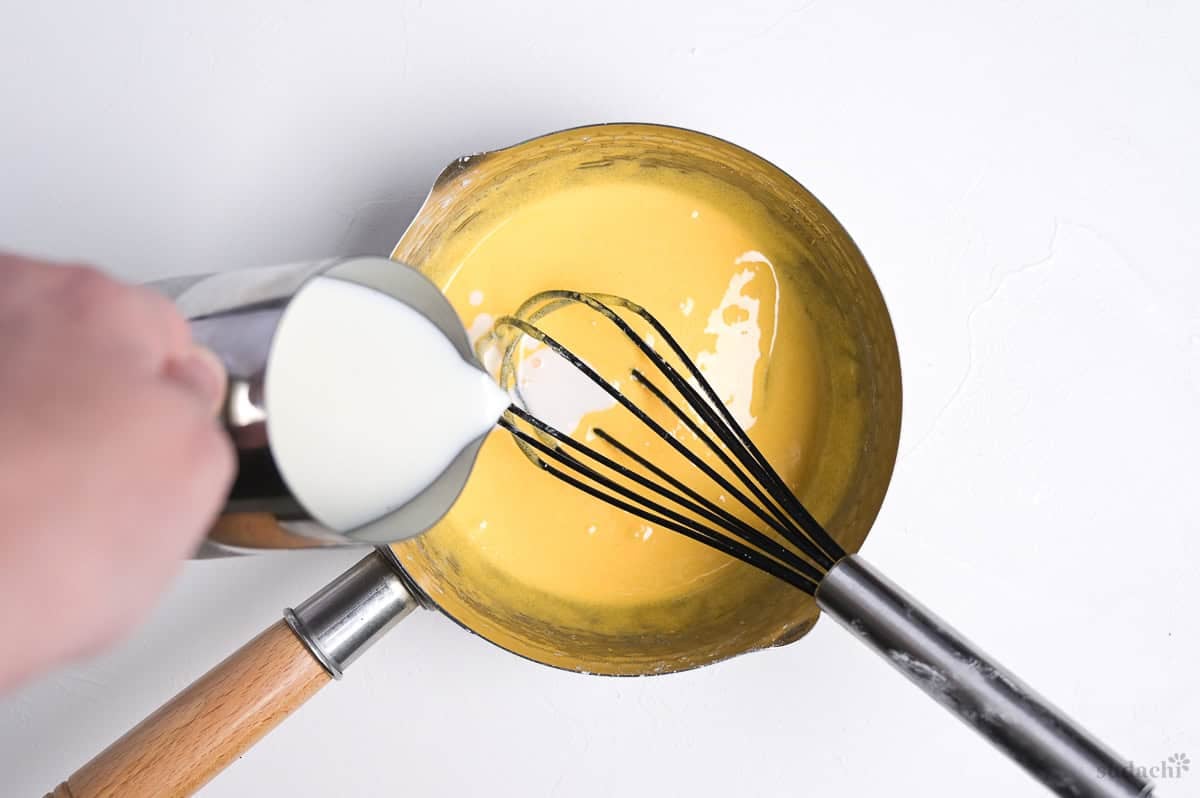
ii. Move the pan to the stove and heat on low. Whisk continuously around the middle, edges and sides to make sure nothing catches. Once it starts to bubble, keep mixing vigorously for 1 minute and immediately take it off the heat. Stir in the vanilla essence and butter until glossy and combined.
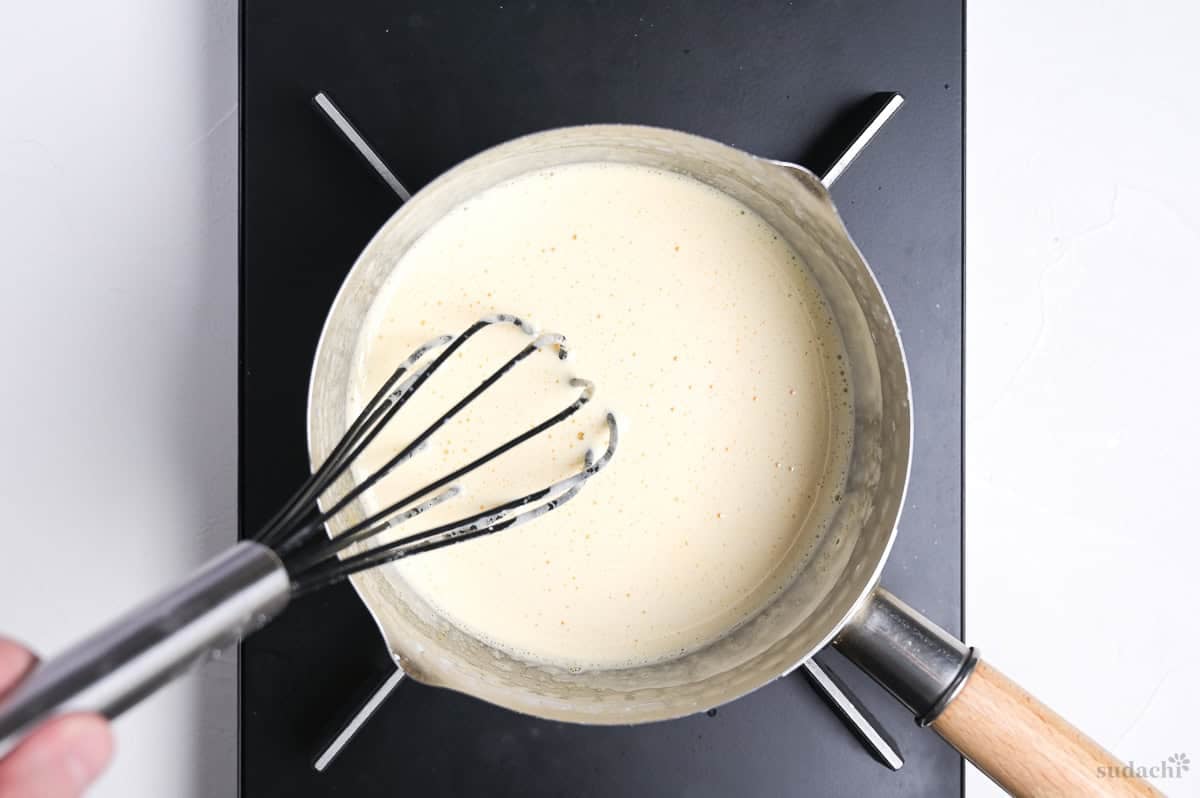
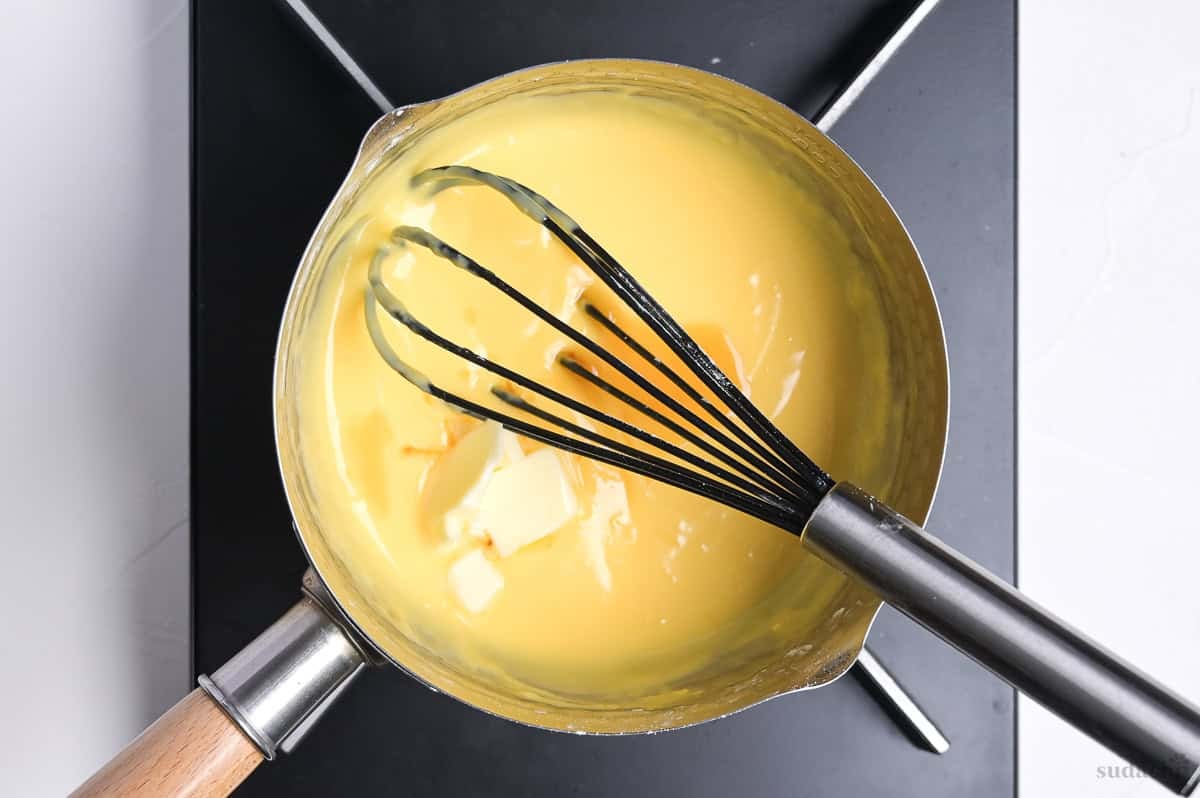
iii. Pour the hot pastry cream into a heatproof container, the wider the container the quicker it will cool. Cover with plastic wrap touching the surface to prevent a film forming on top. I like to place some ice packs on top to cool it faster.
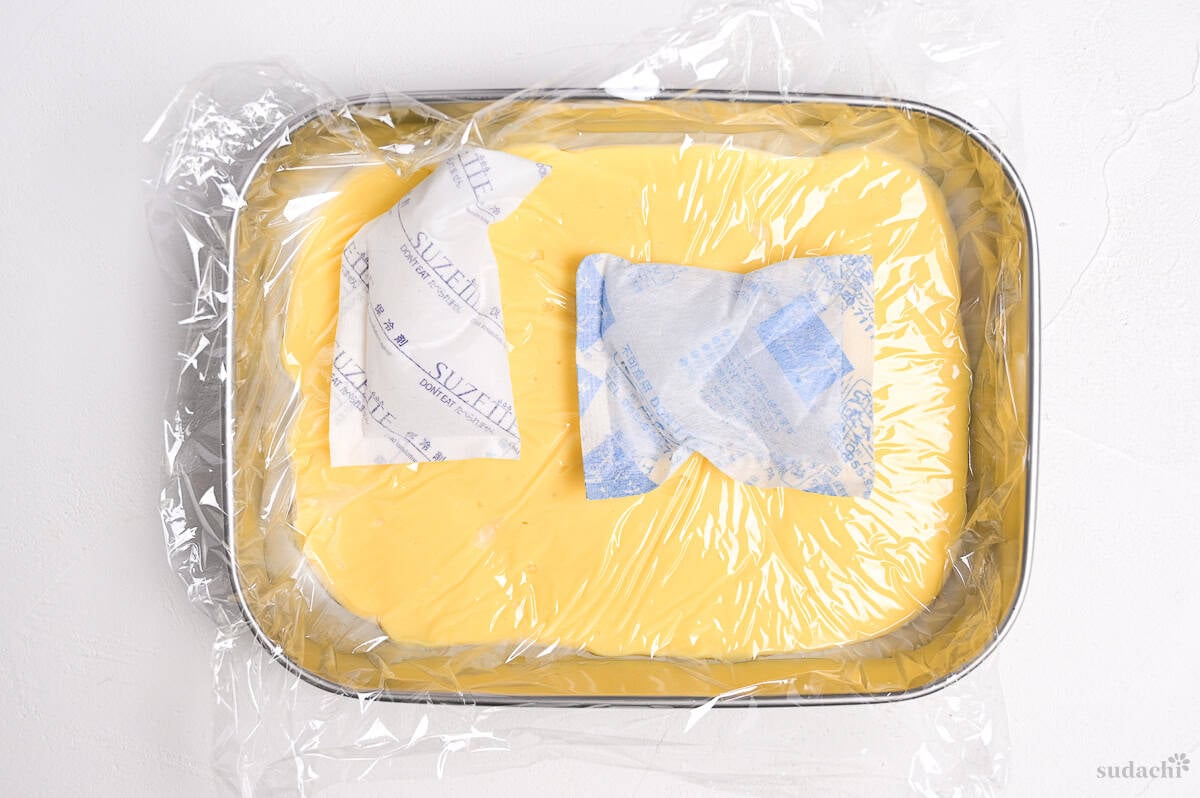
iv. Once it’s cool enough to touch, place it in the fridge to chill fully.
Many pastry recipes start by heating the milk first and then tempering the eggs, but I find as long as I use a low heat and whisk continuously, it’s not needed. The only time I would heat the milk first, is if I am using vanilla pods, heating the seeds and pod in the milk extracts more flavor.
Before you start the bread dough:
- Crack an egg into a bowl with a small pinch of salt and whisk until the yolk and white are combined. The salt helps break down the eggs’ structure, making it whisk together more uniformly, and divide better later.
- Wash your kneading surface and dry it thoroughly.
- Measure out your butter and bring it to room temperature while you knead the dough.
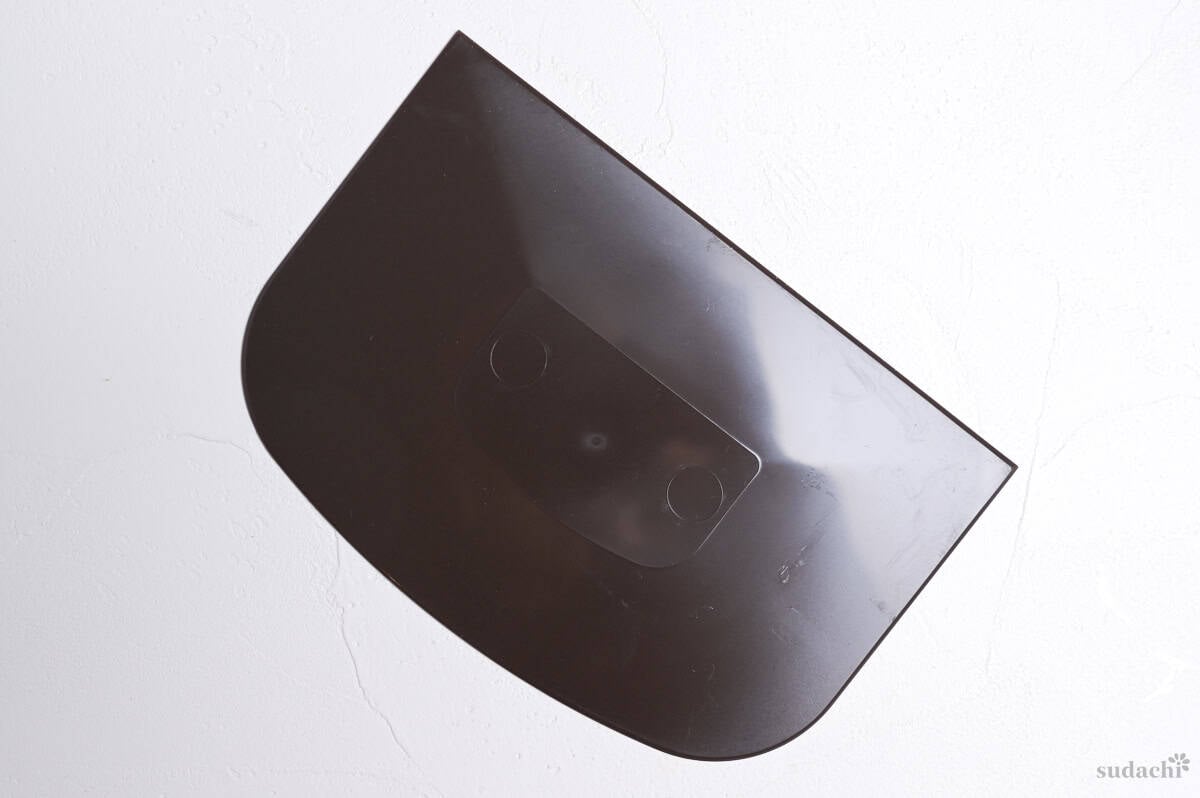
I developed this recipe to knead by hand. Using a bench scraper makes it a lot easier to scoop up the dough during the early sticky stages. If you don’t have one, similar alternatives would be a firm plastic spatula, a clean plastic lid, or anything rigid with a straight edge.
Alternatively, you can use an electric mixer with hook attachment.
A kneading board is useful but not essential.
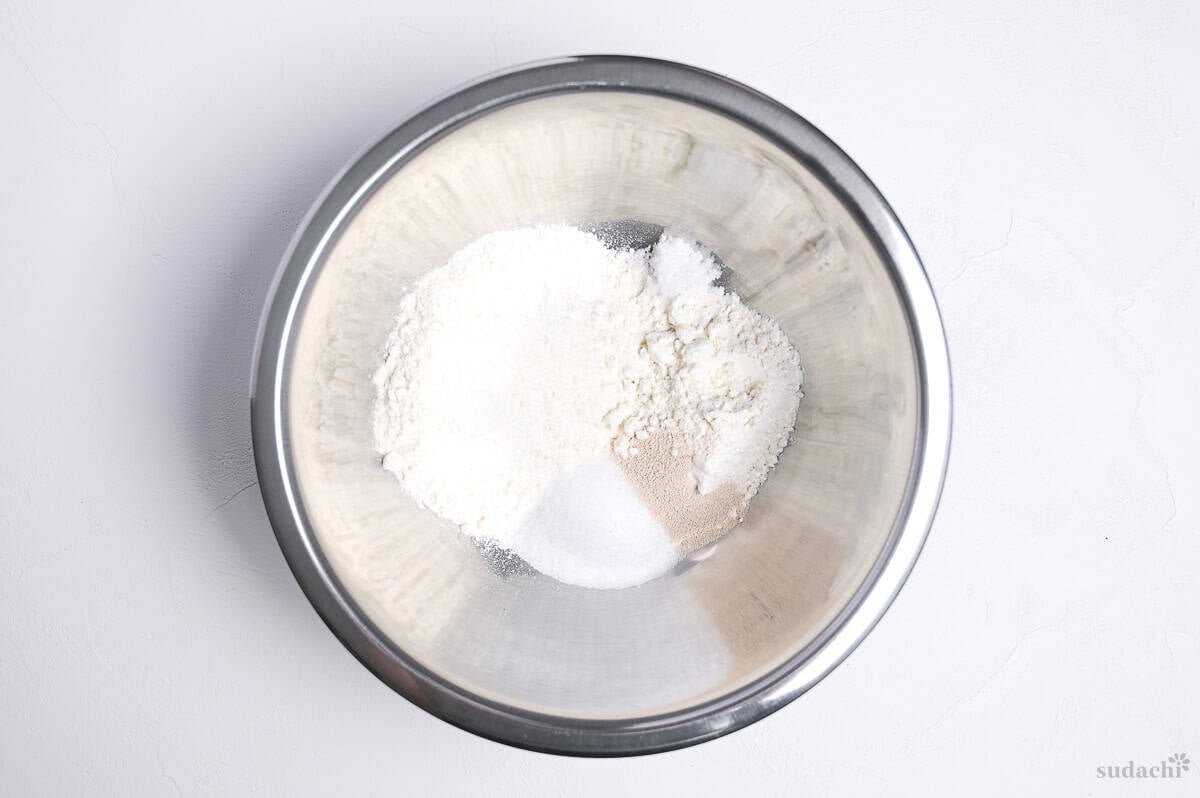
i. Weigh the flours, salt, sugar, and instant dry yeast into a large mixing bowl.
If you are using fresh yeast: Crumble it into smaller pieces and rub it into the flour first. Once combined, add the sugar and dry ingredients.
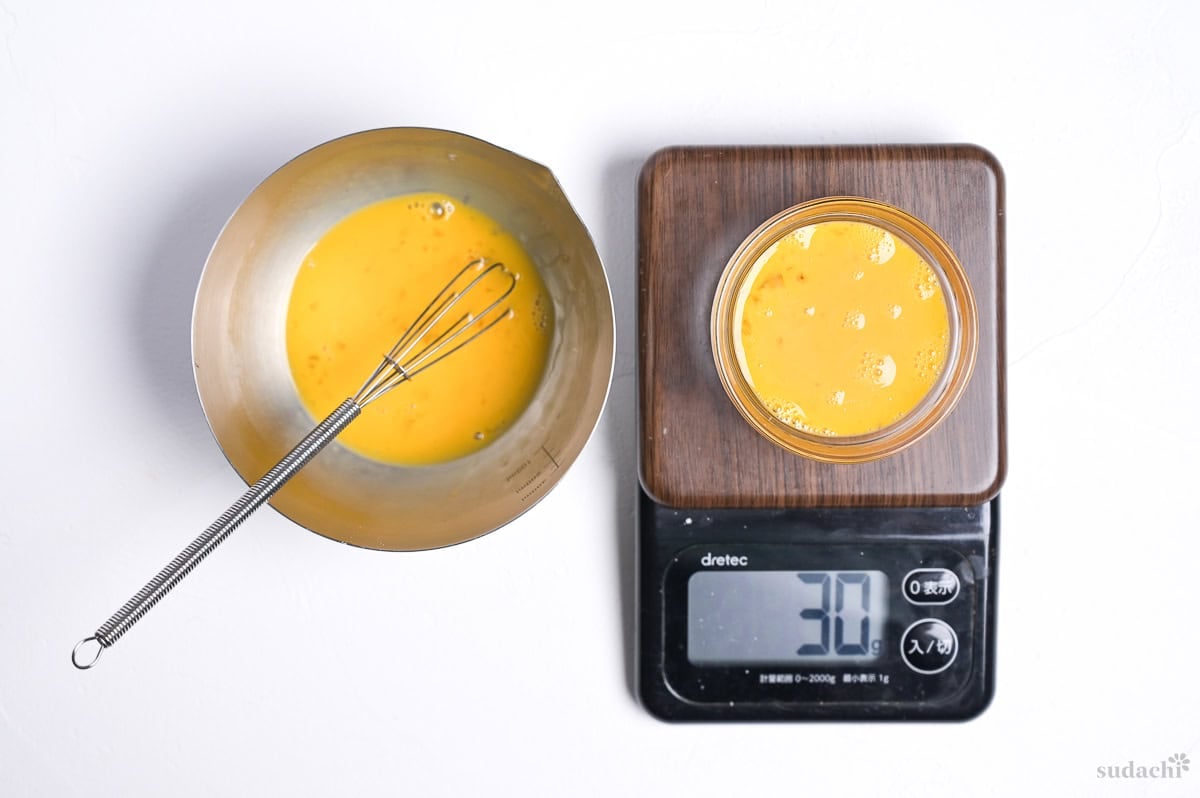
ii. Measure 30g of the whisked egg into a small bowl and store the leftovers covered in the fridge. We will use it later for egg wash.
Pour the milk and water into a jug, and heat in the microwave for 10-20 seconds, until it feels like a hot bath (about 40°C/104°F). Add the 30g of egg into the jug and whisk until combined.
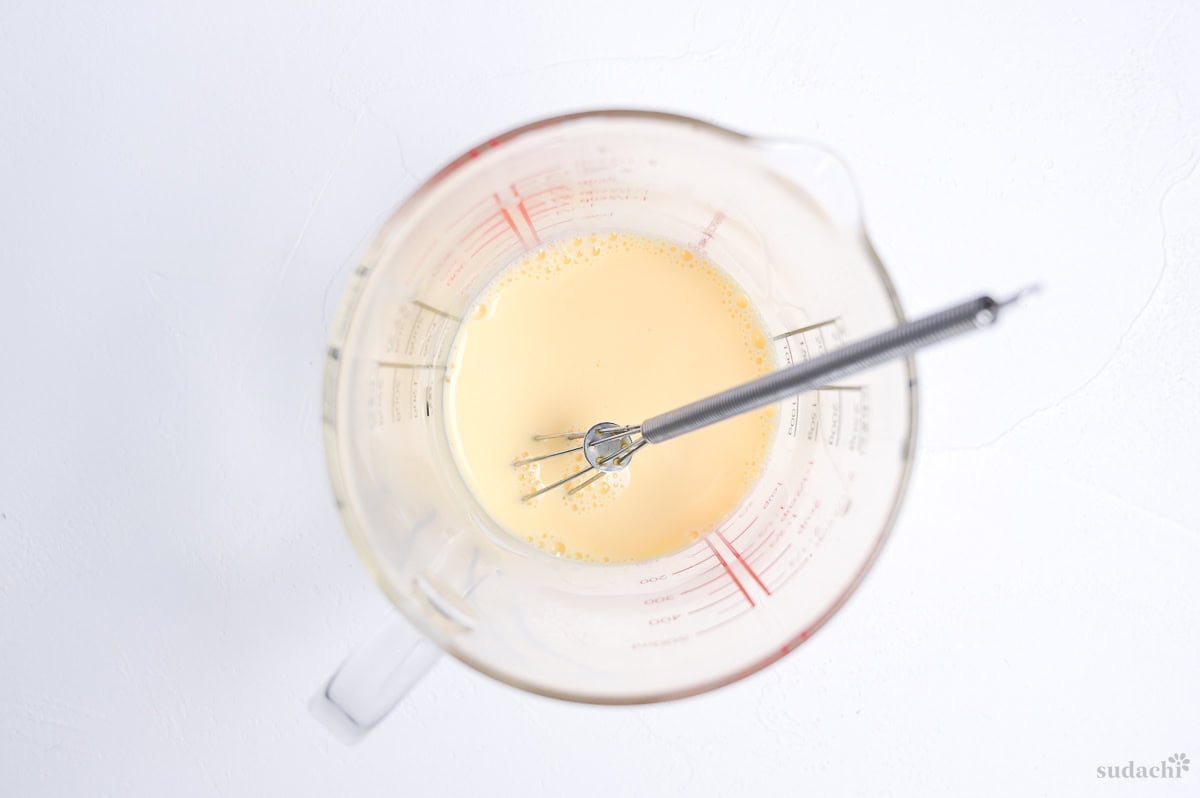
iii. Pour the contents of the jug into the mixing bowl all in one go.
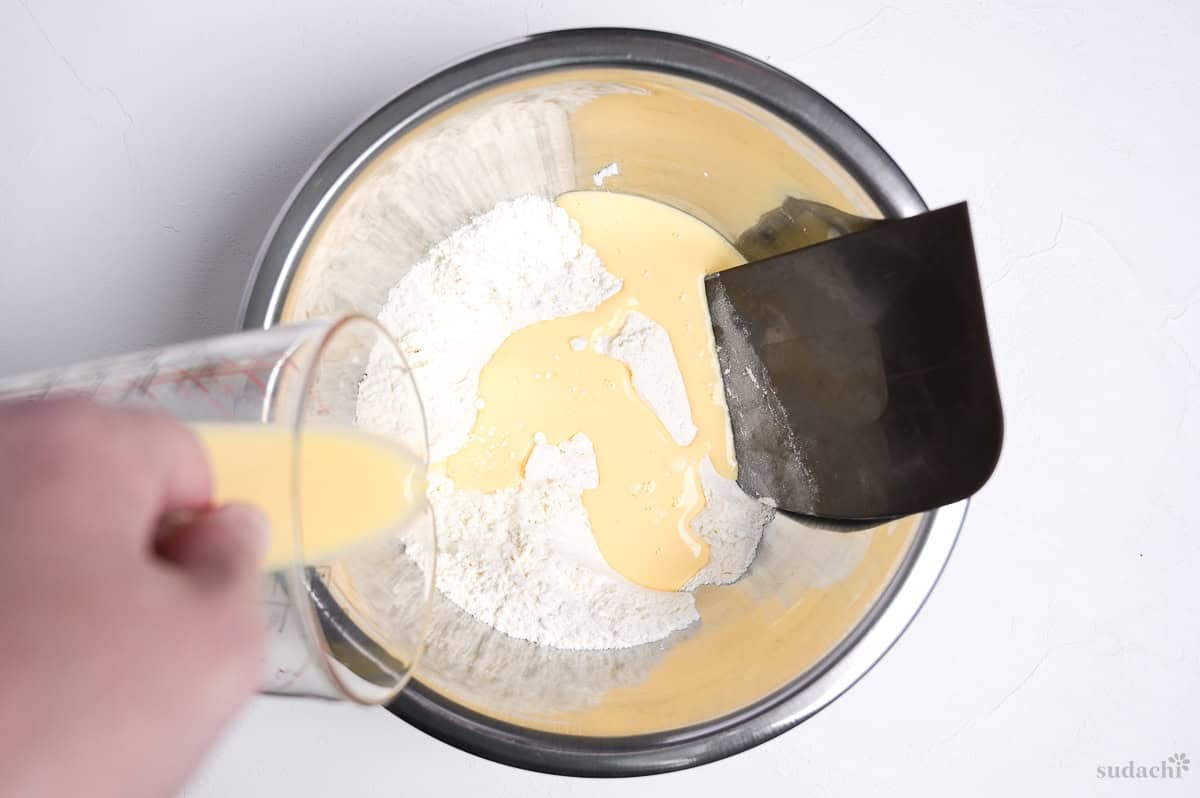
iv. Mix until a rough dough comes together, and scrape the edges of the bowl to make sure you get every bit of dry flour.
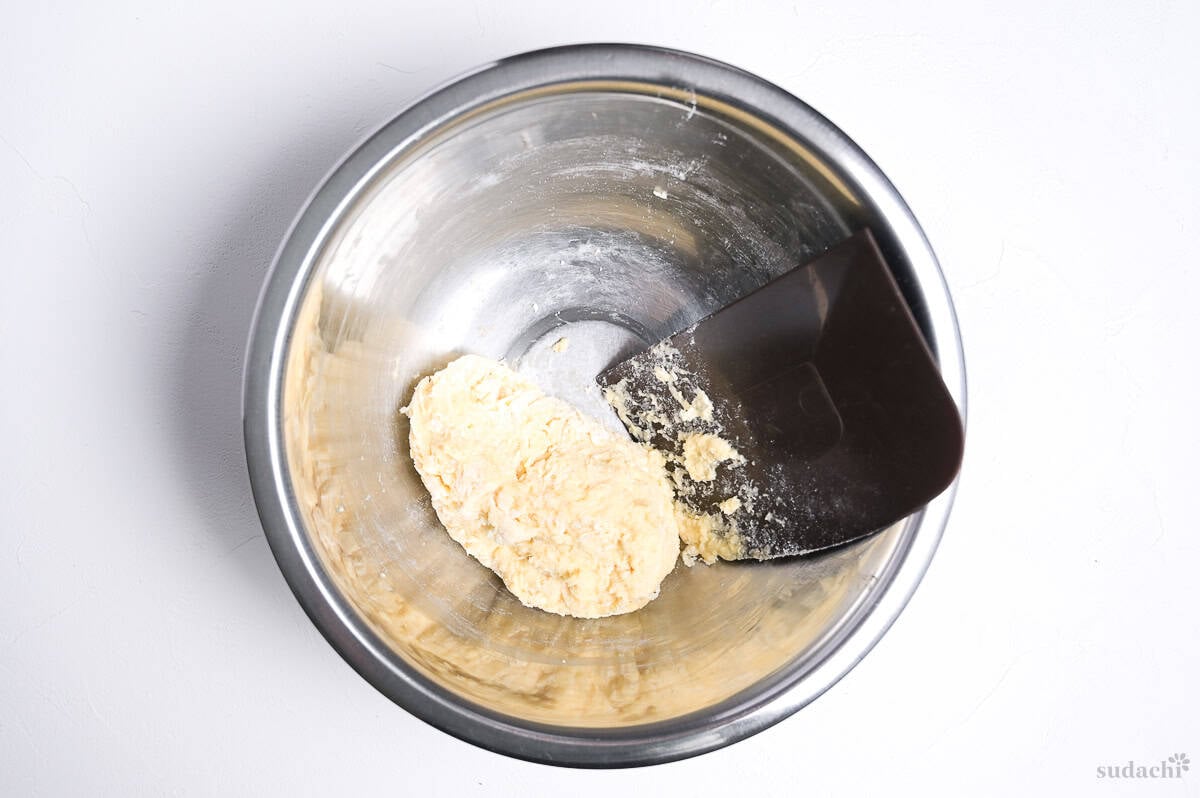
i. Tip the dough out onto a clean dry work surface. Use your bench scraper to spread the dough out, then scoop it back into a ball. Repeat in the opposite direction, and continue until the dough stops sticking to the surface.
Important: Do not dust extra flour. It’s always tempting to “fix” sticky dough by dusting your hands and work surface with flour, but if you do that then the dough is going to absorb it and become hard and dry. Trust the process, it will become more manageable through kneading.
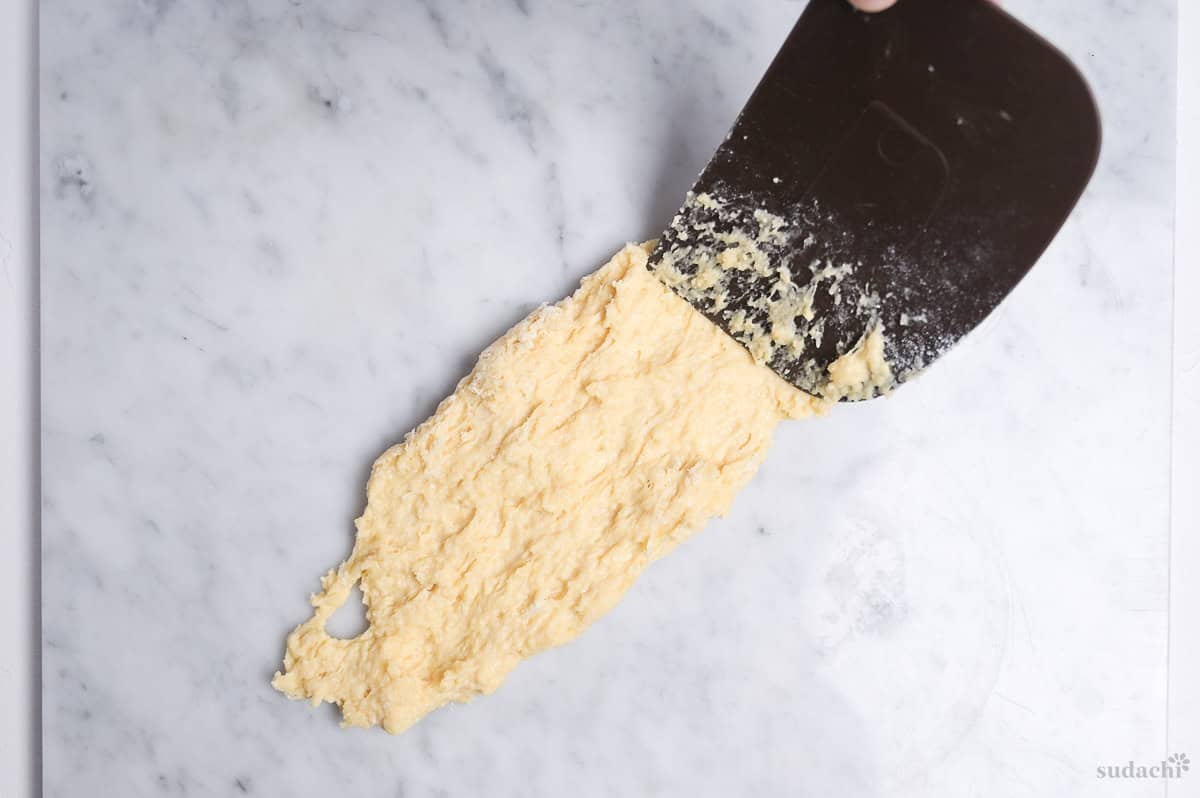
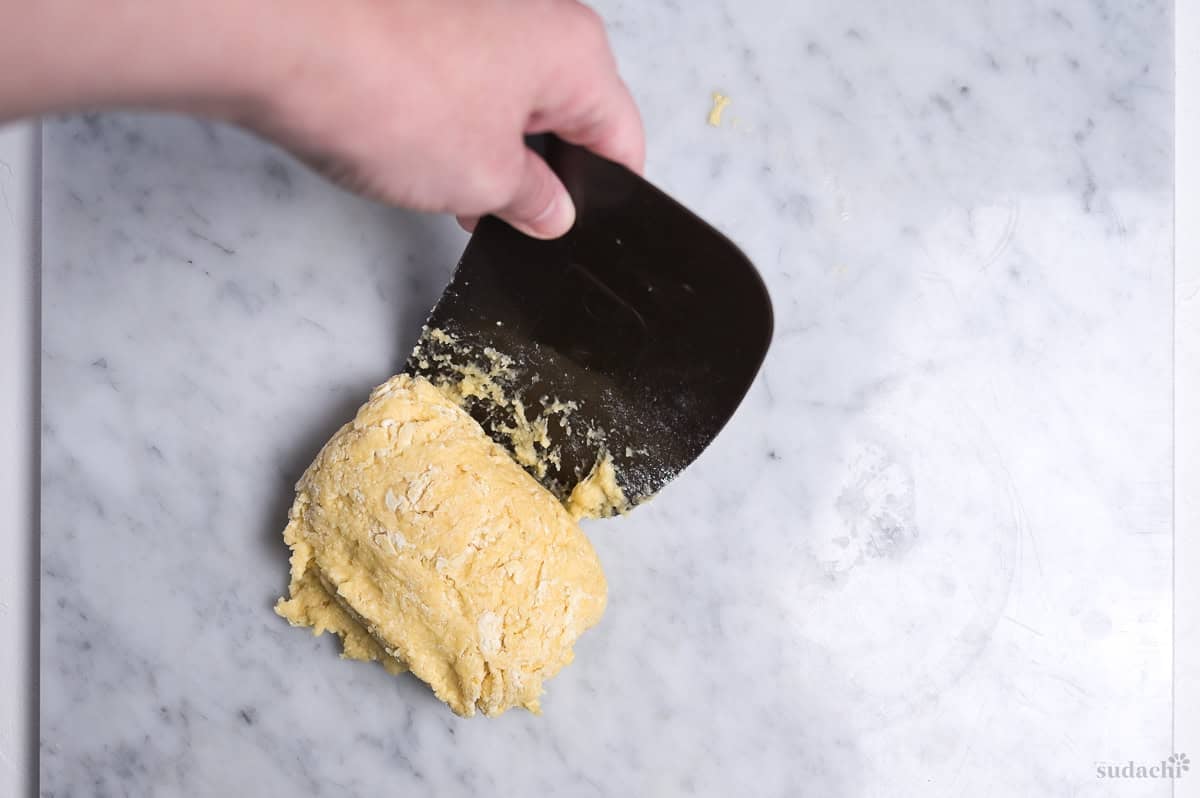
ii. Once the dough becomes less sticky and easier to manage, switch to the slap and fold method. Pull the dough up off the board, slap it away from you, pull it back towards you and stretch it over itself. Turn the dough 90° and repeat.
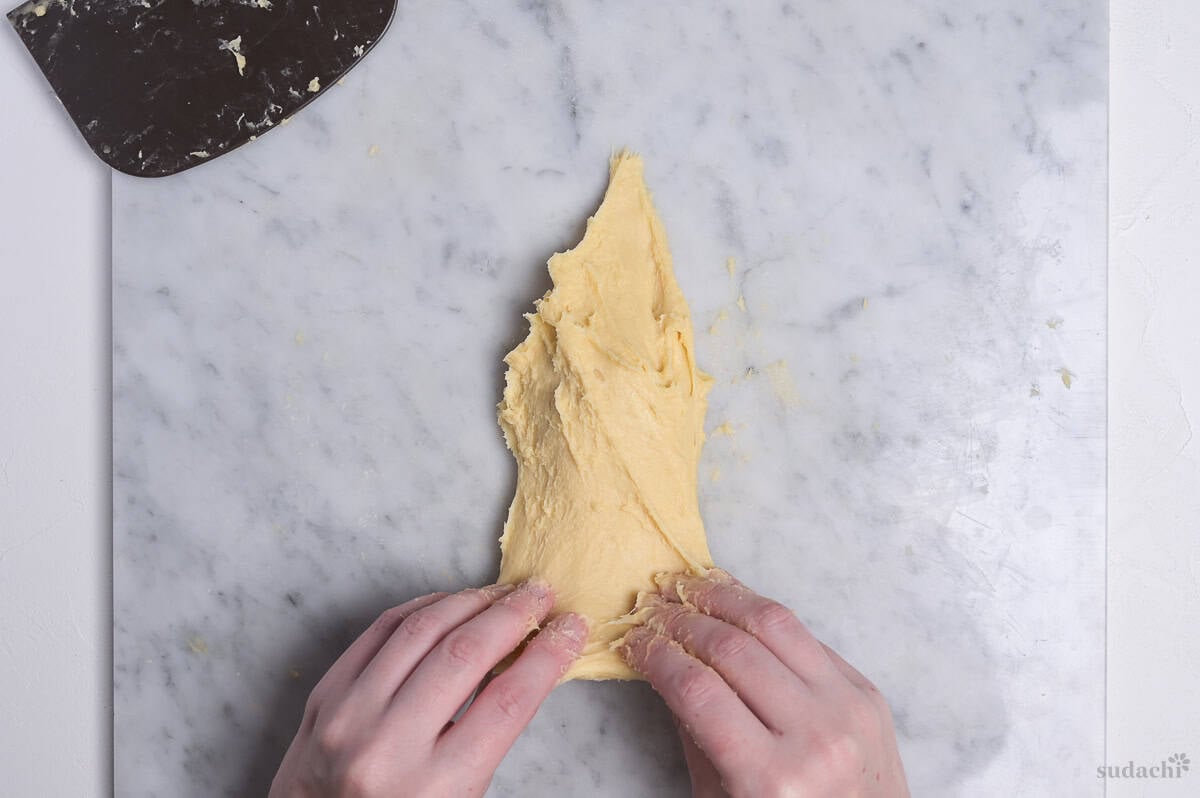
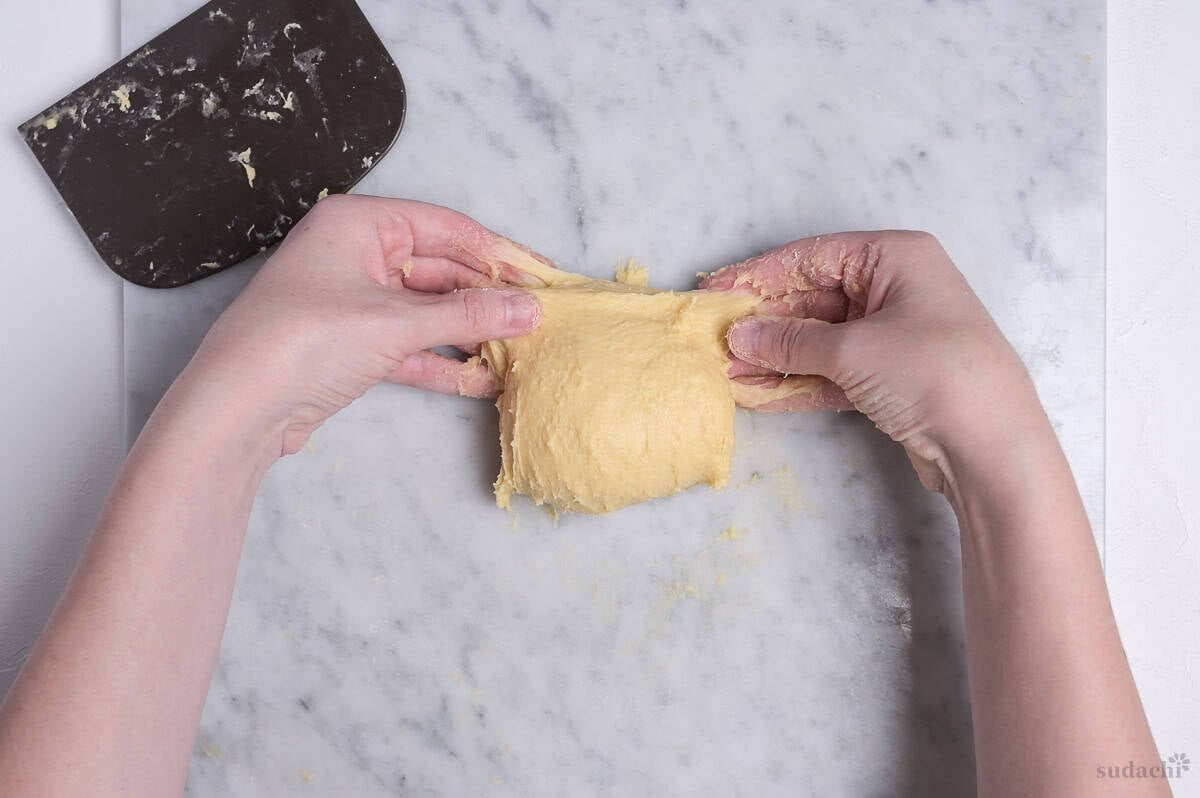
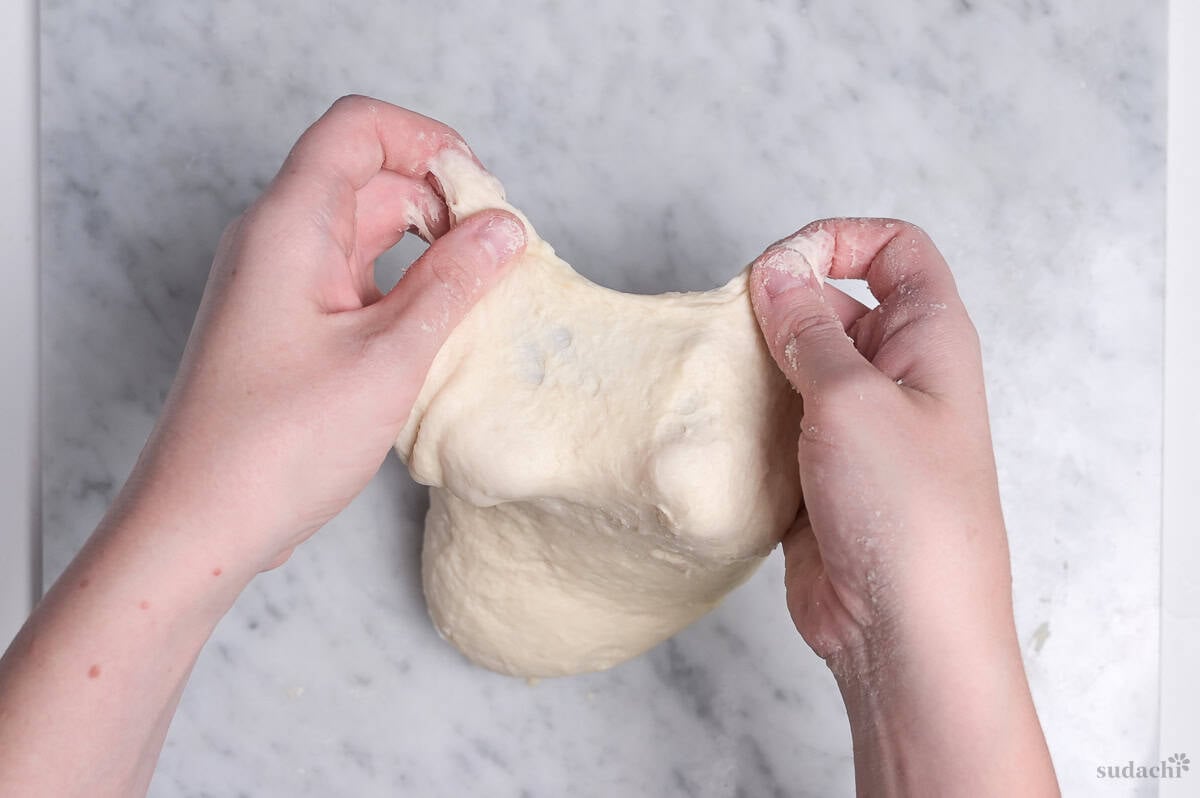
iii. Continue to slap and fold until the dough is smooth and passes the windowpane test.
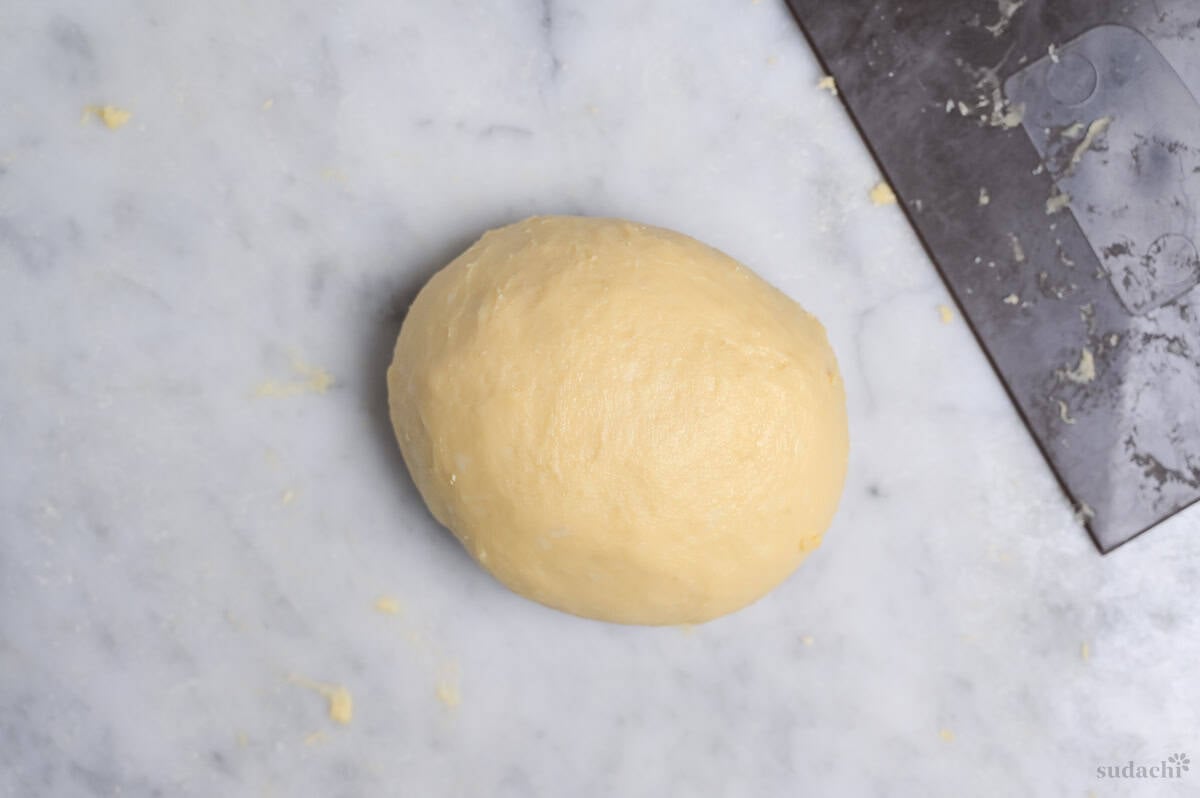
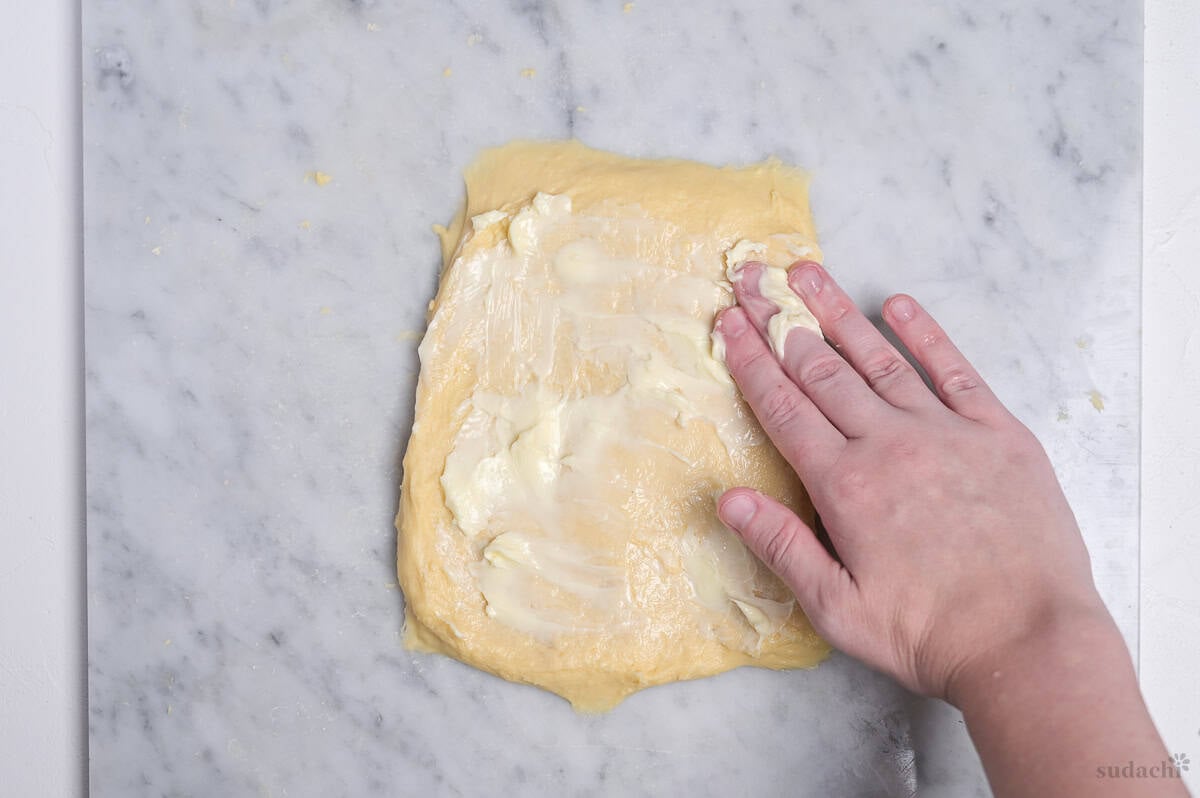
i. Stretch the dough out into a large rectangle and spread the room temperature butter in an even layer over the top.
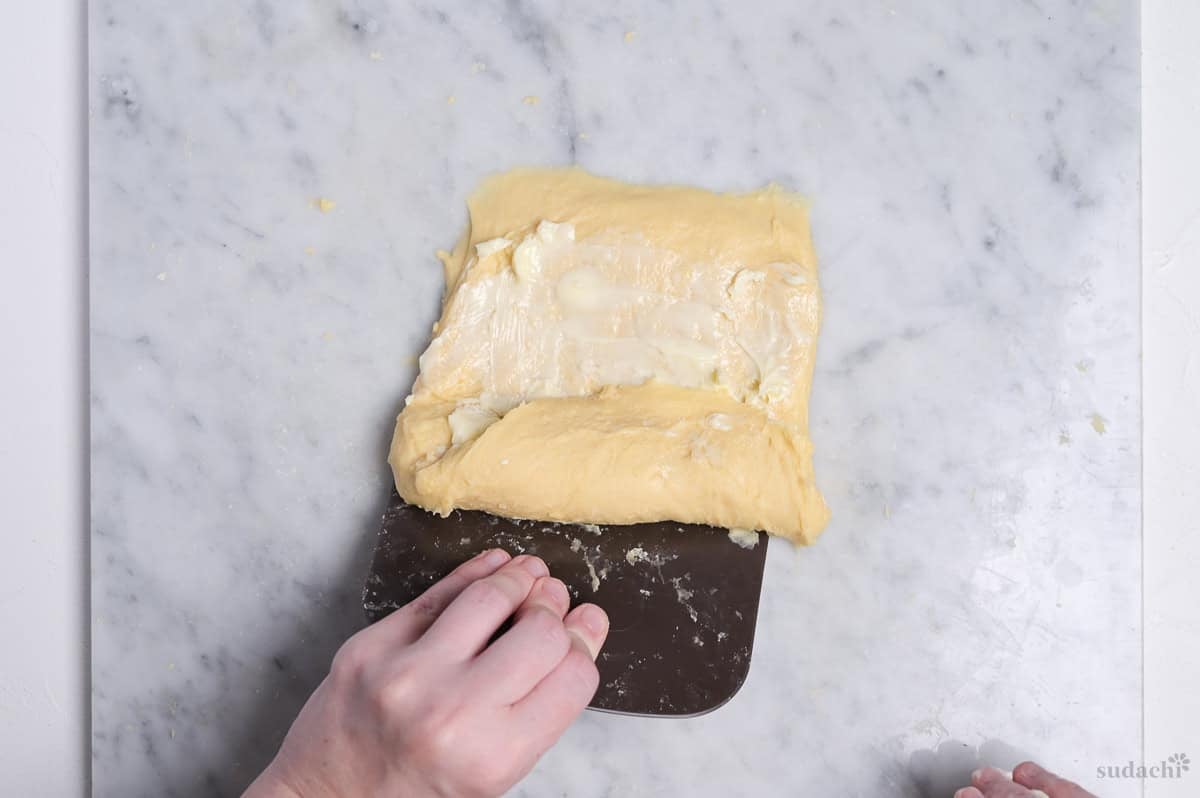
ii. Use your scraper to roll the dough up so the butter is wrapped inside.
iii. Knead by hand until the butter is incorporated. It should feel smooth and not greasy.
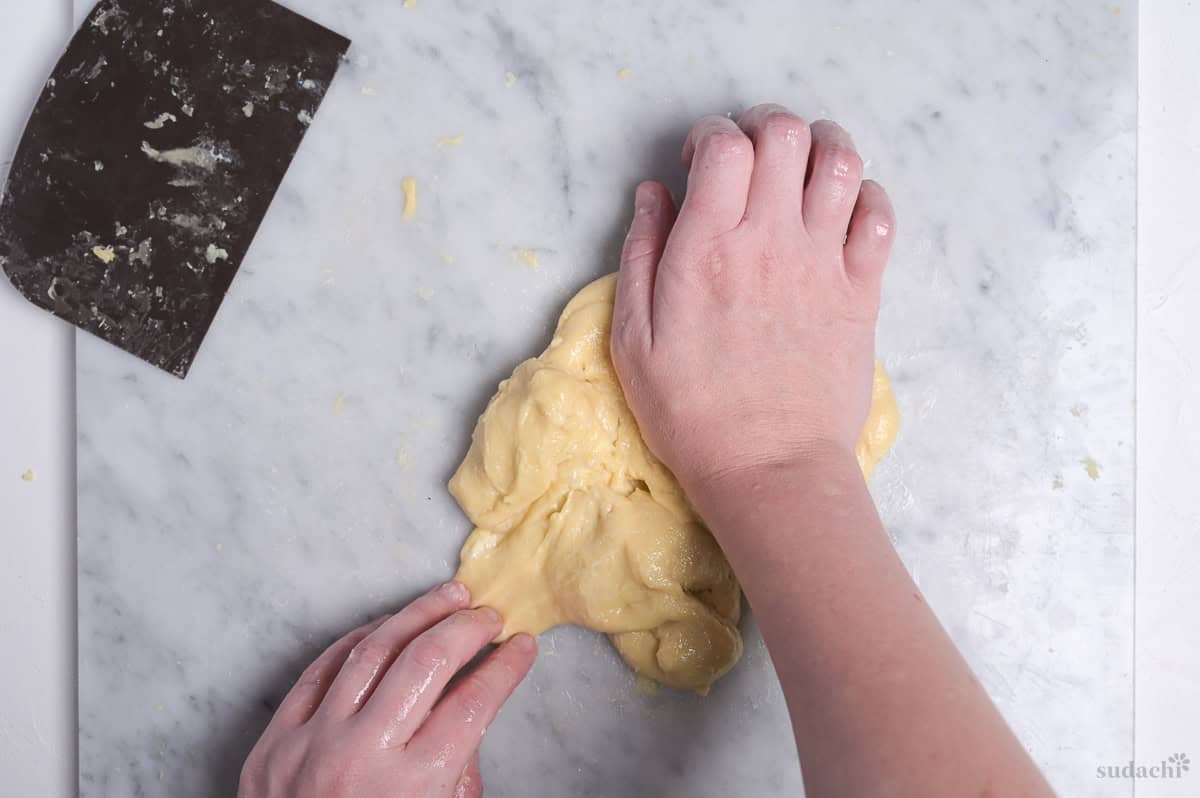
Kneading develops the gluten in dough, making it stretchy and elastic. This network traps the gas from the yeast so the bread rises and holds its shape. Dough that hasn’t been kneaded enough can’t hold the gas, and ends up dense.
To test it, tear off a small piece of dough and stretch it thin. If it is translucent enough to see light through without tearing, the gluten is well developed and you can move onto the next step.
i. Place the dough in a clean bowl and cover with a damp tea towel so that it doesn’t dry out or form a crust. Leave to rise in a warm place until doubled in size. The time depends on the environment, but in general it takes about 40 minutes to 1 hour at 30°C (86°F).
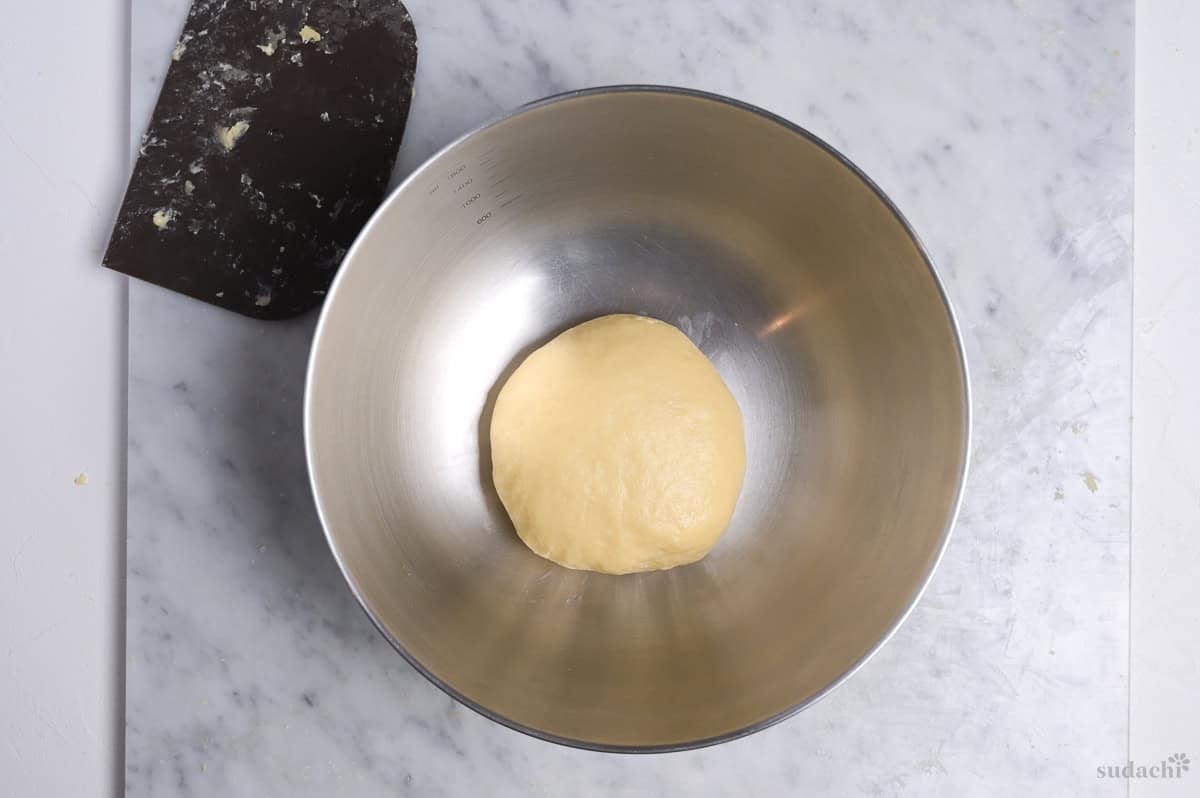
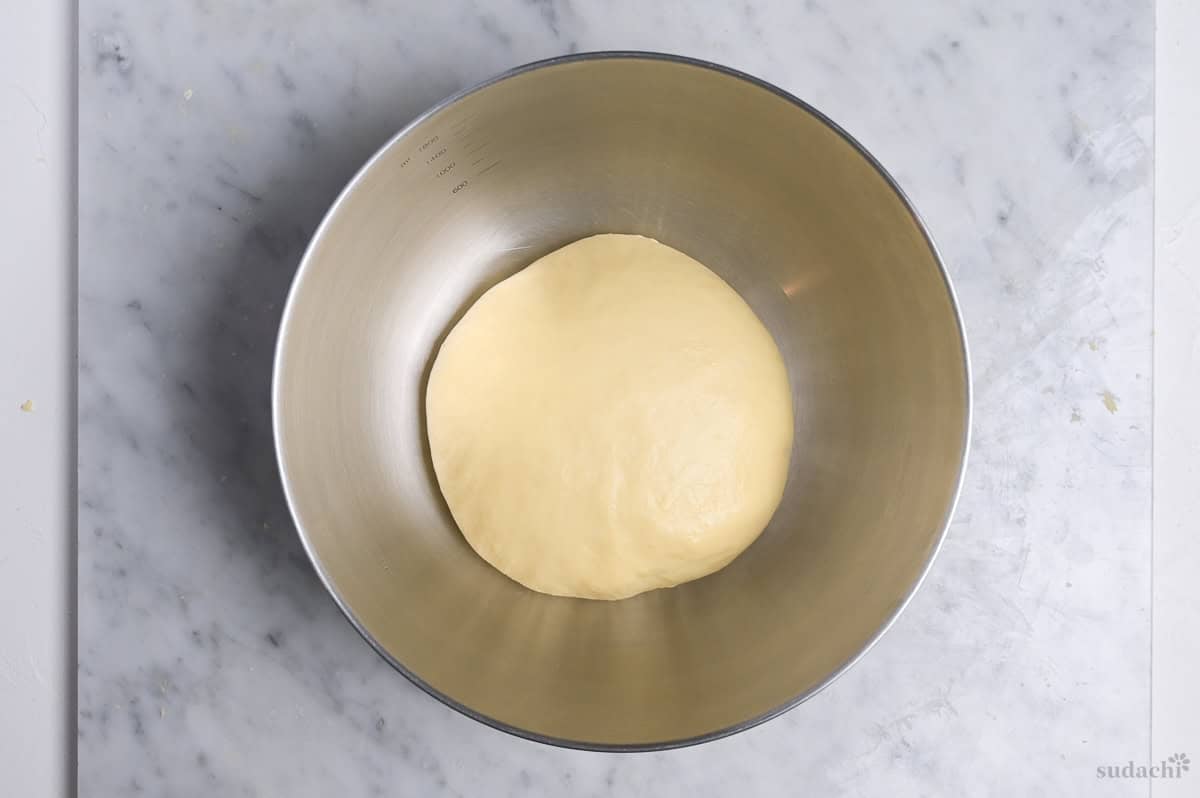
Rise time depends mostly on temperature and the freshness of your yeast. I gave an estimate time as a guide, but it’s better to watch the dough and not the clock. It’s ready when it has roughly doubled in size.
Keep in mind that enriched doughs that contain eggs and butter take longer to rise, so it might feel slow compared to lean bread doughs.
i. Once the dough has doubled in size, press it down gently to release the big air bubbles. Divide it into six equal pieces, weigh them on a scale to make them exactly the same. They should be about 45g each.
Shape each piece into a ball. Pull the edges down and under, gathering them into a point at the bottom so the top stretches smooth and tight. Pinch the gathered seam closed so it doesn’t come loose.
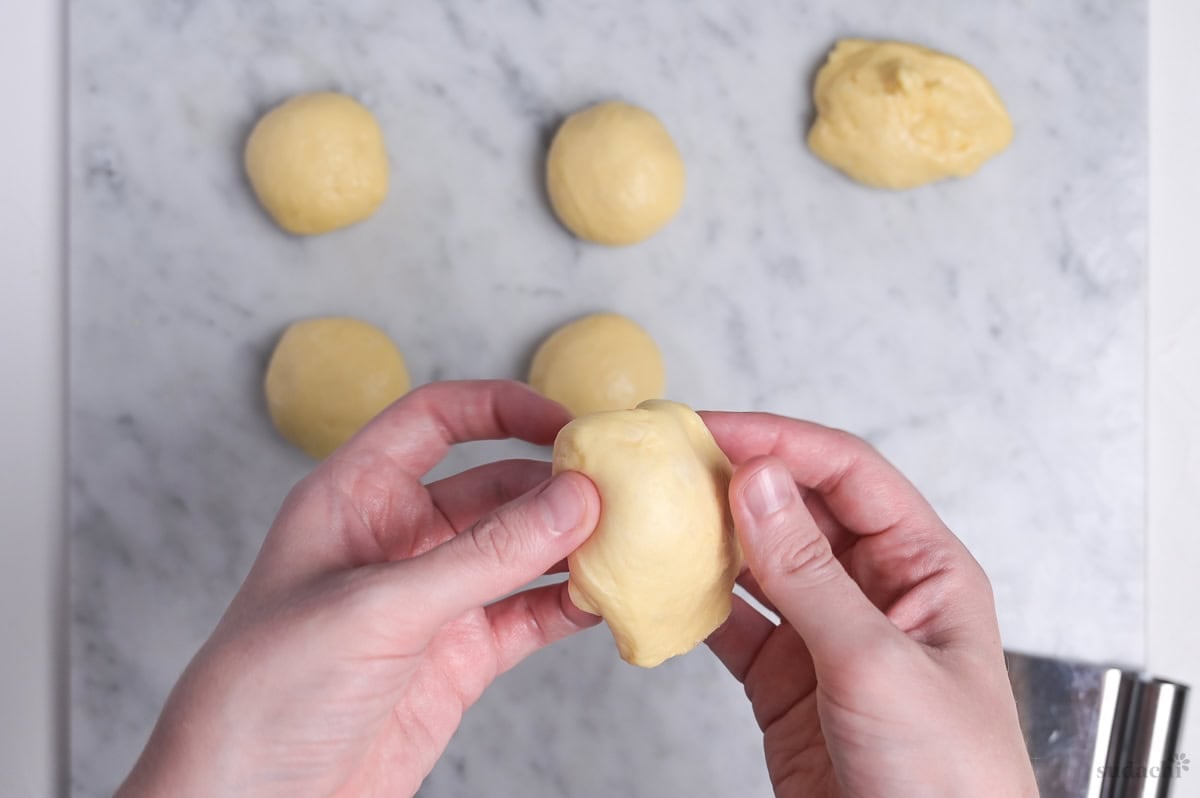
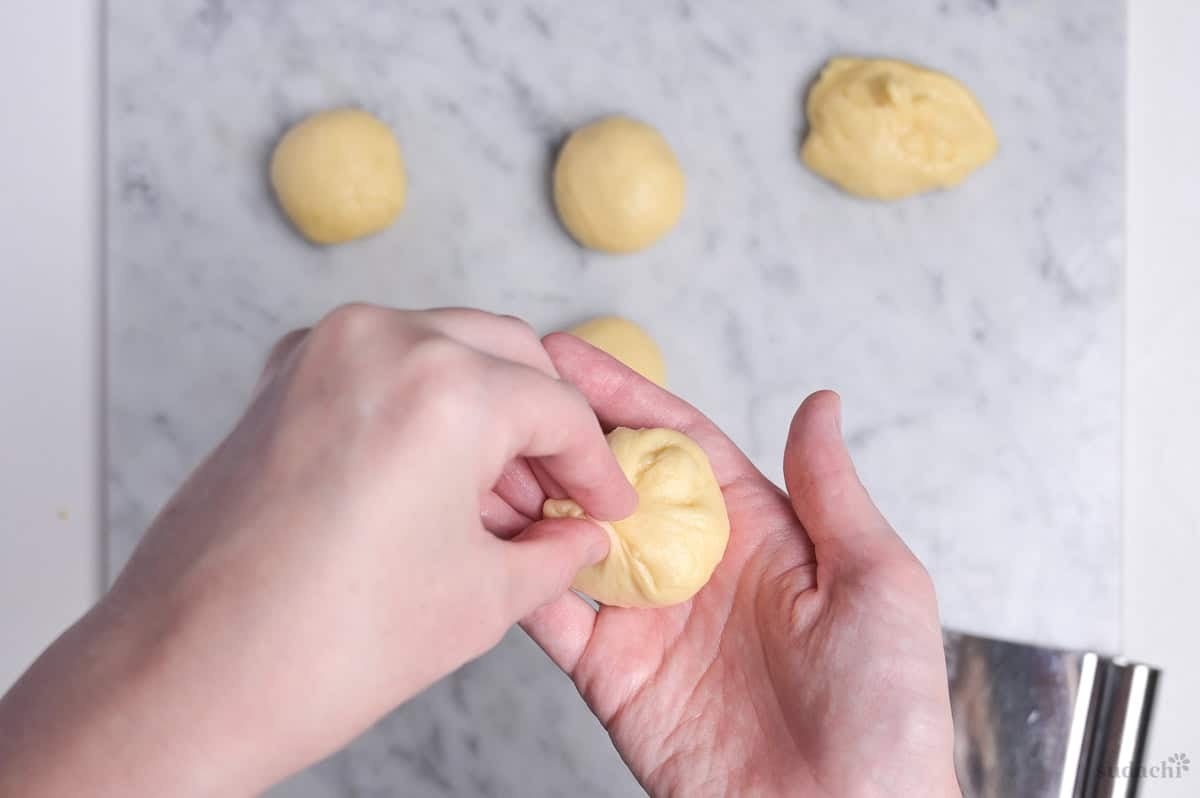
ii. Cover with a piece of plastic wrap and leave to rest for 15 minutes.
After cutting and shaping, the gluten becomes tense and tight. A short rest allows the gluten to relax so that it’s easier to shape.
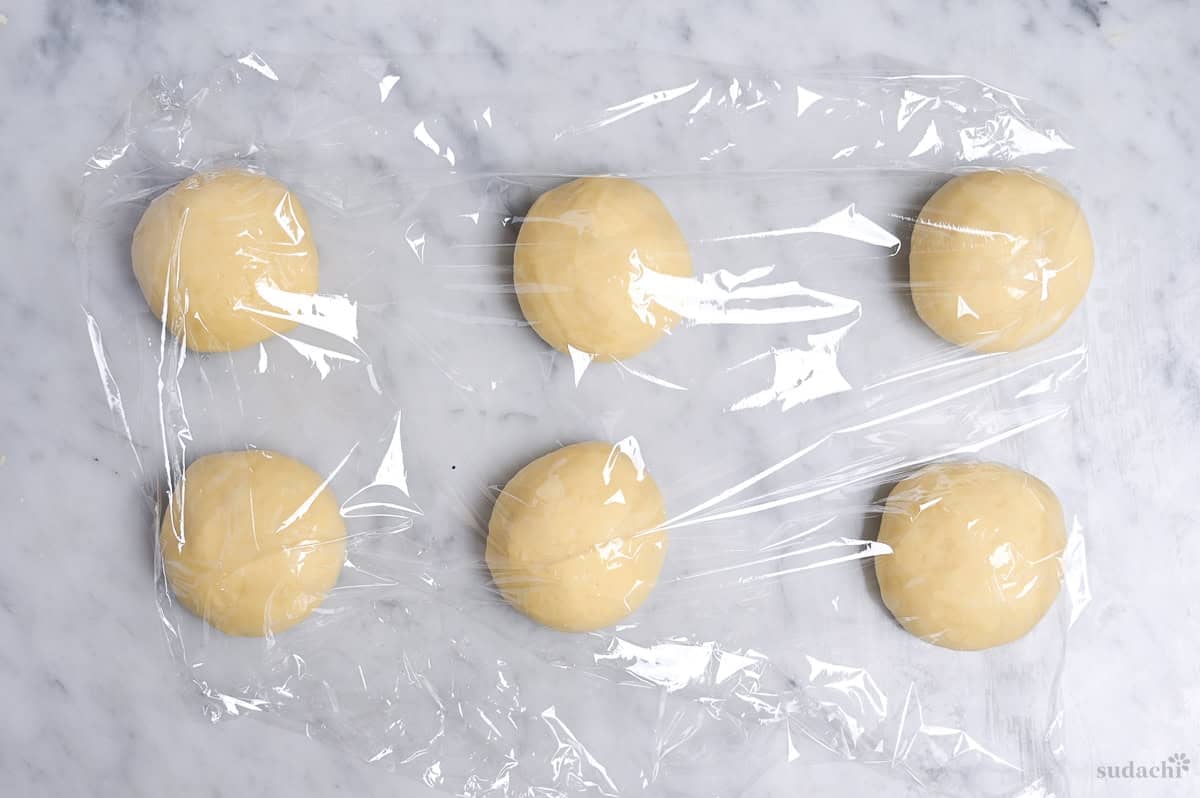
iii. While you wait, take your pastry cream from the fridge and divide into 6 equal pieces. They should be about 40g each.
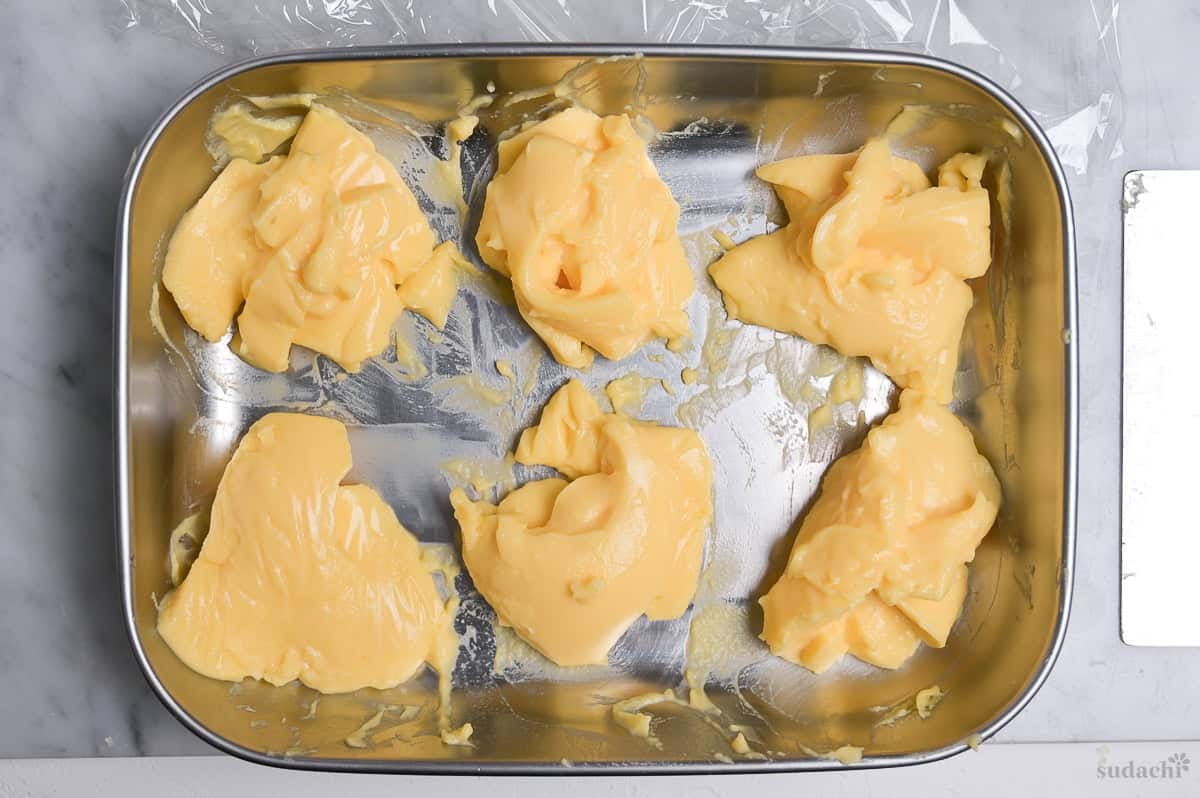
iv. Line a baking sheet with parchment paper ready for the next step.
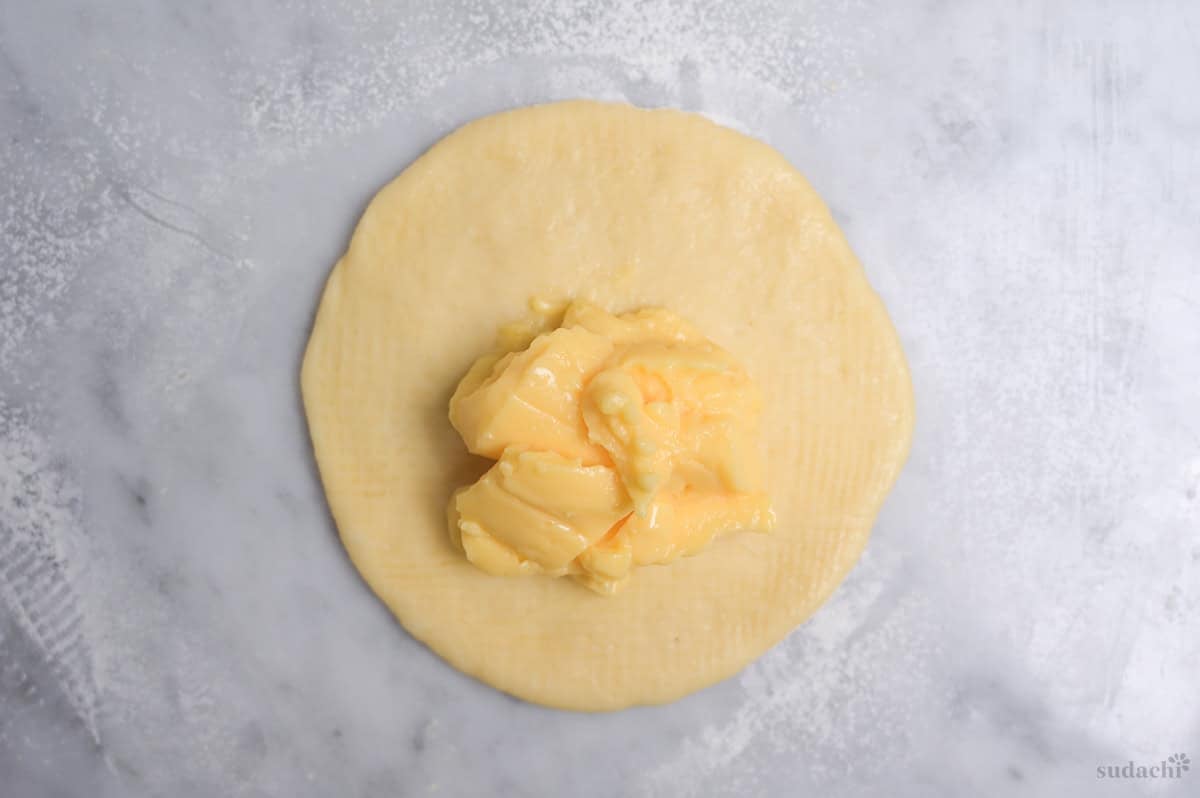
i. Once the bench time is up, dust your work surface with a light sprinkle of flour and roll each ball of dough into a disc with a diameter of about 13-15cm. Spoon the pastry cream in the center, making sure it doesn’t touch the edges.
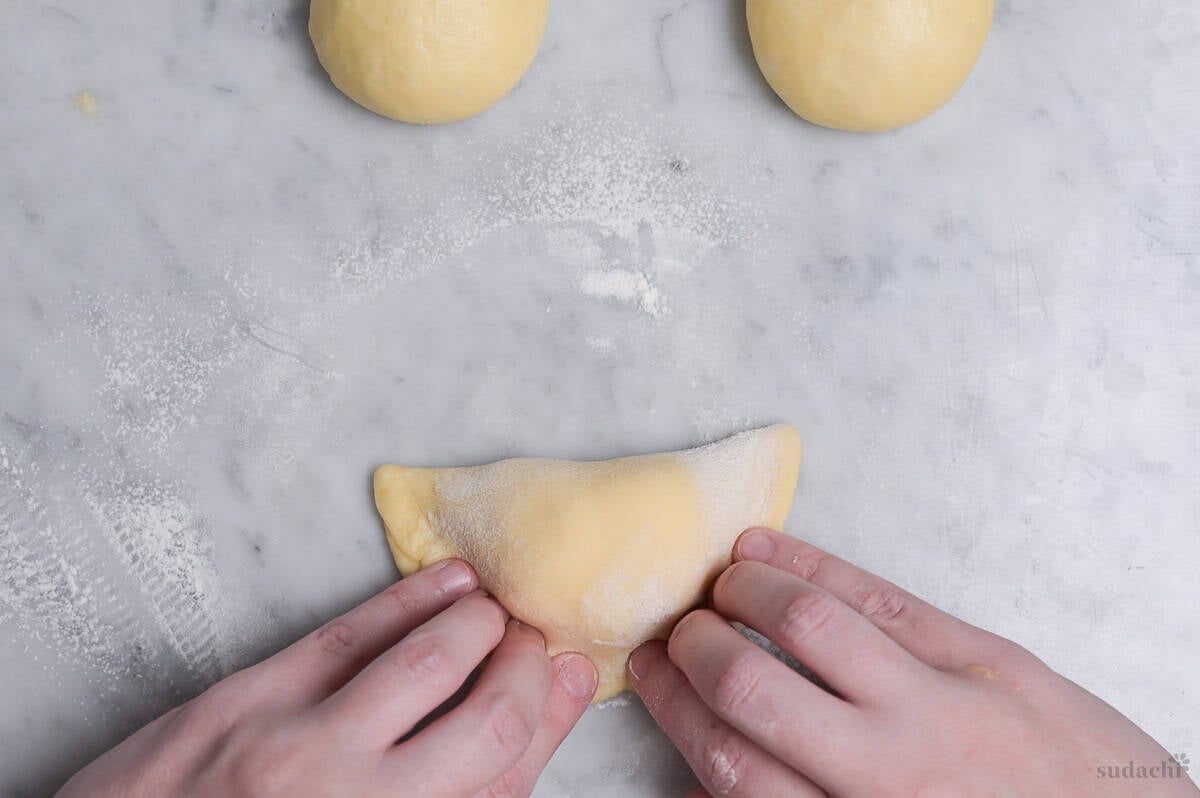
ii. Pull the top over the pastry cream and firmly press down the edges, pushing the cream back to make sure it doesn’t burst out.
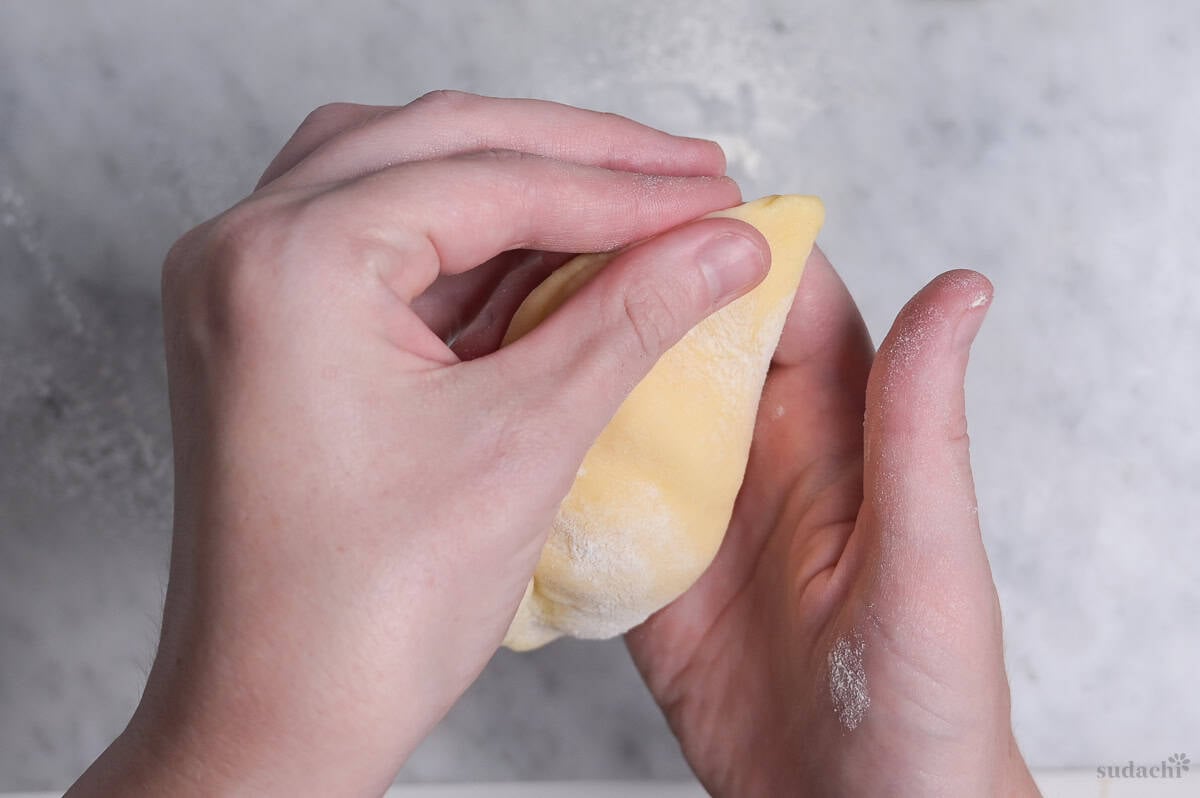
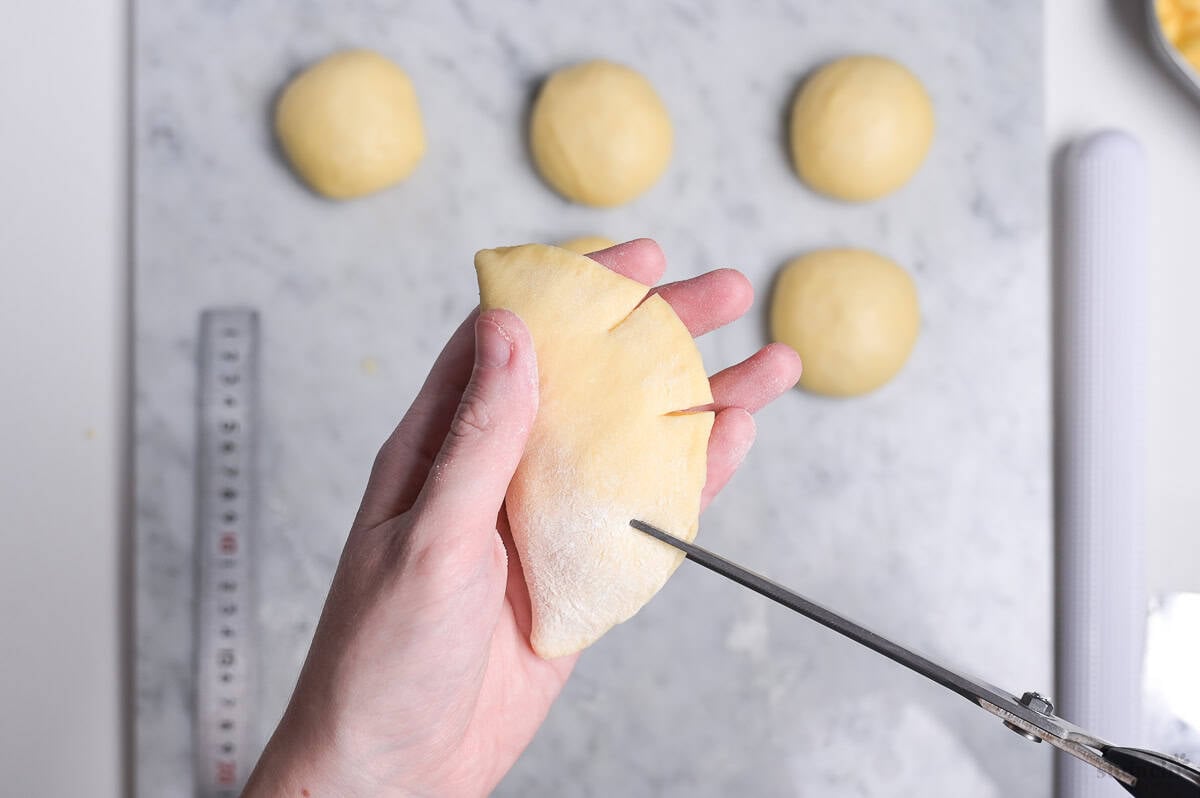
iii. Lift up the shaped cream pan and pinch the border to secure it tightly. Then, use kitchen scissors to make 3-4 cuts on the rounded edge.
i. Arrange them spaced apart on the lined baking tray and cover with plastic wrap. If you live in a dry environment, spritz with a small amount of water.
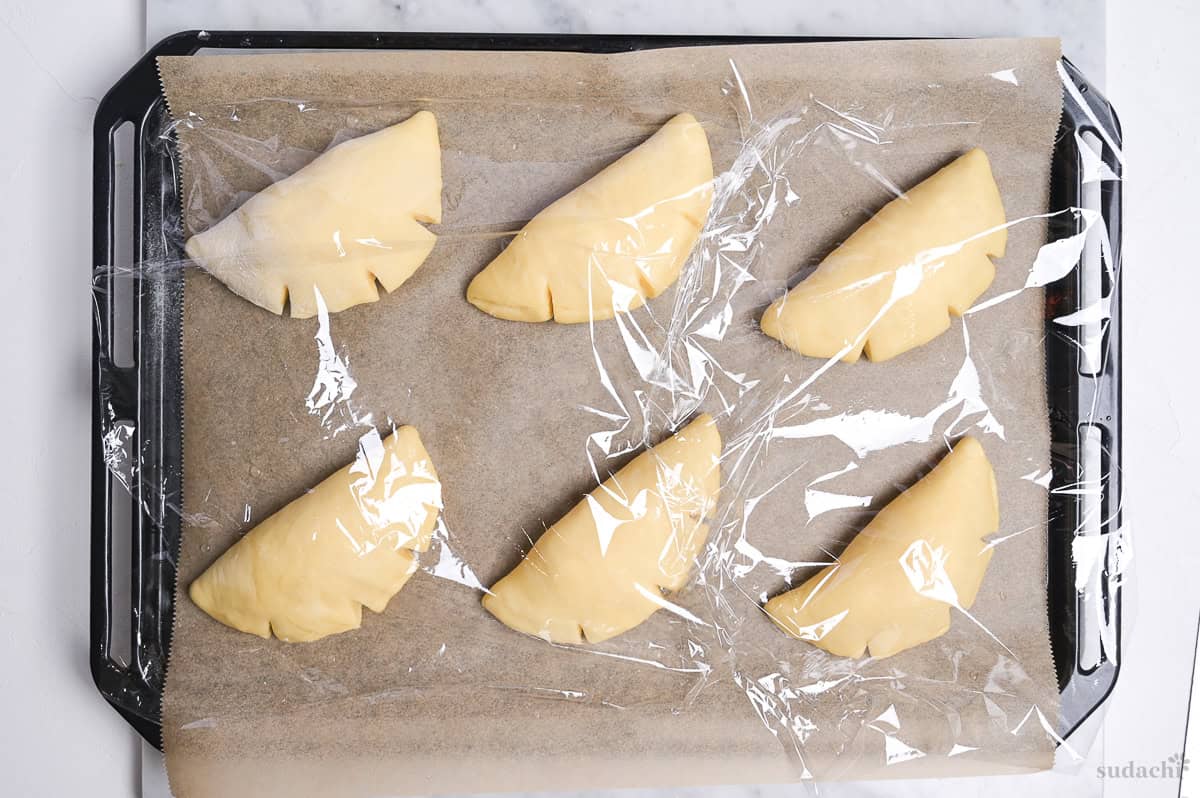
ii. Place in a warm, draft-free place for the second rise. It should rise about 1.5x, which takes approximately 45 minutes to 1 hour at 30°C (86°F).
Important: Preheat your oven well before your bread finishes rising. If your oven takes a long time to heat up, then start early. I usually start preheating around 30 minutes into the final rise. Set the temperature to 180°C fan/200°F conventional (350°F fan assisted/ 400°F for conventional).
Once the dough is shaped, it can be harder to tell if it has risen enough and timing varies depending on the temperature. If you’re not sure, use the finger poke test. Dip your finger in flour and gently press the dough. If it springs back quickly, it needs longer. If it slowly fills back in most of the way, it’s ready to bake. If the dent stays put, it’s over-proofed.
i. Once your cream pans have passed the finger poke test, take your reserved egg from the fridge and whisk it with a few drops of water. Brush a thin even layer over each bun.
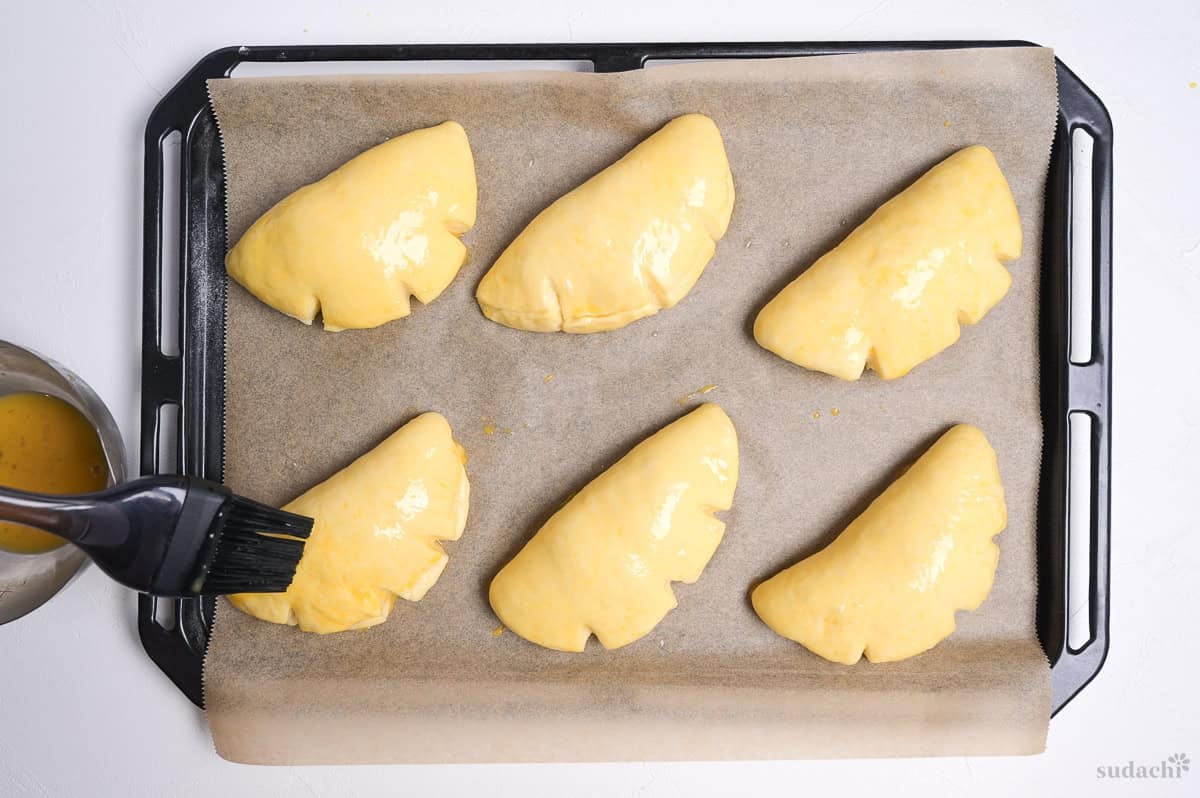
ii. Bake for 12 minutes or until golden brown all over.
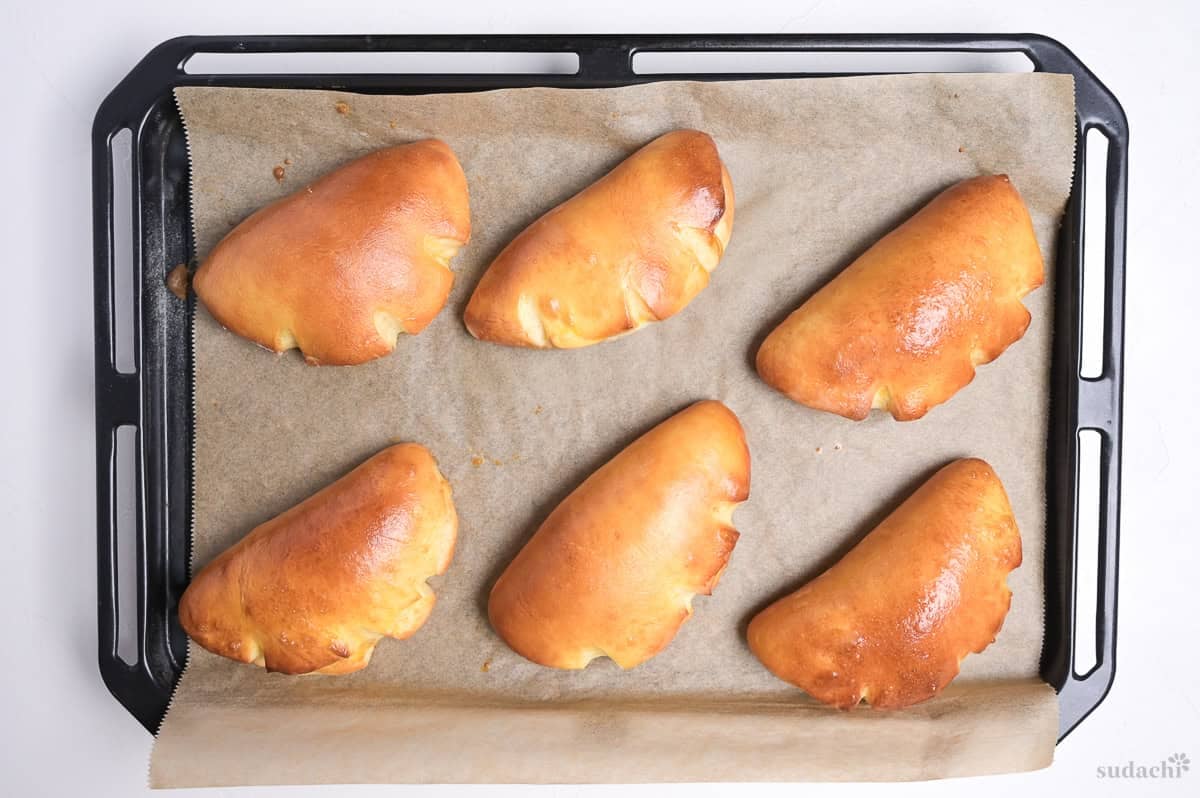
iii. Leave to cool fully before eating and enjoy the same day.
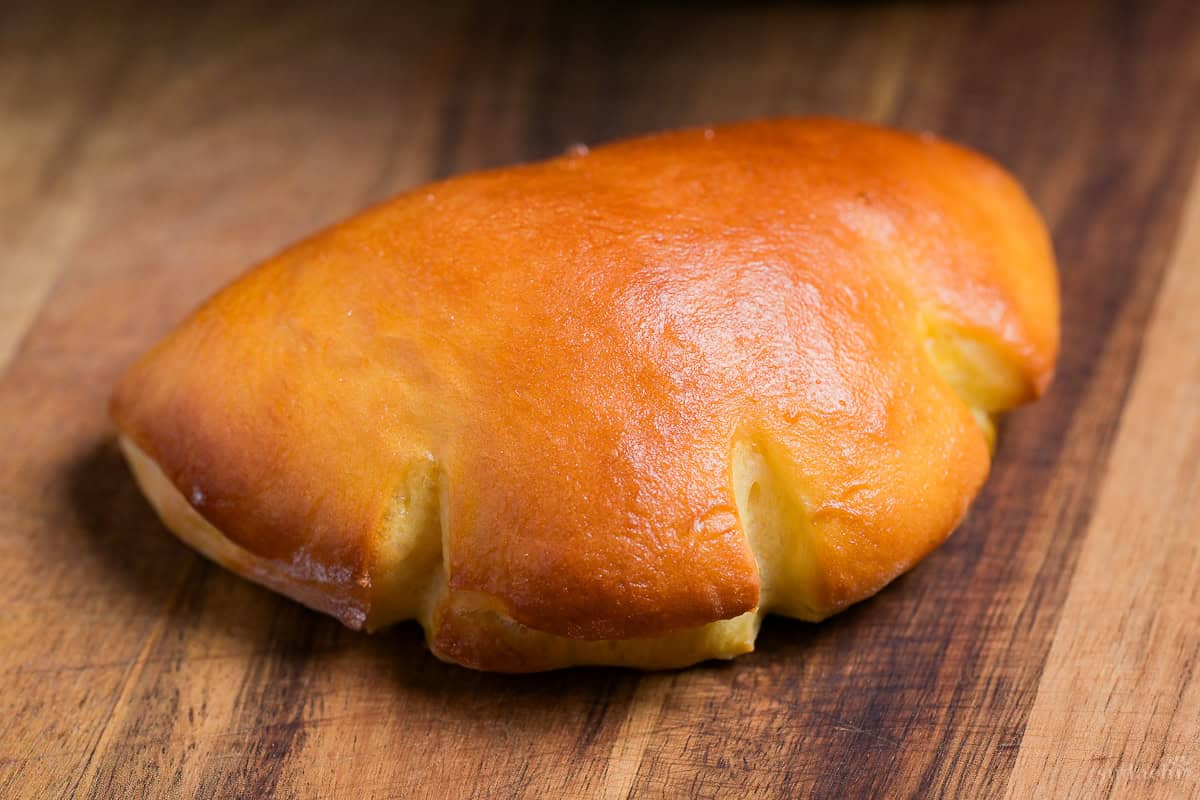
If you follow the default recipe, you will make 6 cream pans.

Essential Tips & Tricks
- You can absolutely make the pastry cream right before you start the bread, but I do recommend making in advance so there’s one less thing to do on the day. It can be kept in the fridge for 2-3 days.
- Keep the pastry cream on a low heat and whisk continuously so it doesn’t catch.
- Boil for 1 minute to ensure the starch is cooked, and don’t stop whisking.
- If your custard gets lumpy, fix it with a vigorous whisk off the heat (or immersion blender). You can also strain it with a mesh strainer to make it smooth.
- Make sure plastic wrap is touching the surface of the pastry cream as it cools, otherwise a skin will form on top.
- When you knead the bread dough, it will be very sticky at first. Avoid adding flour, use a bench scraper and the slap and fold method to make it smooth.
- Make sure the dough passes the windowpane test before you add the butter.
- Enriched doughs take longer to rise, so base the end point on the dough’s size and not the clock. First rise should be doubled in size, second rise is about 1.5x bigger and passes the finger poke test.
- When filling the dough, make sure not to let the pastry cream touch the edges otherwise the seam won’t close properly.
- Preheat your oven thoroughly. I recommend around half way through the second rise or earlier if you know your oven takes a long time to heat up. If you wait until the dough is ready, it will continue to rise while you heat the oven and become over proofed.
- If your oven bakes unevenly, turn the baking sheet around half way through.
- I know it’s tempting to eat them straight from the oven, but they taste best cooled to fully enjoy the custard filling.
With these simple tips in mind, you’re set for success every time you make Japanese cream pan.
Storage & Meal Prep
Room Temperature: The pastry cream filling is perishable and should not be kept at room temperature for extended periods.
Fridge: Store in an airtight container and eat the same day. The bread will firm up a bit in the fridge, but a few seconds in the microwave or a short rest at room temperature should bring it back.
Freezer: Not suitable.
Prep: You can make the pastry cream 2-3 days ahead and keep it in the fridge until you use it.
Troubleshooting
It is natural for high hydration enriched doughs to be very sticky, especially at the beginning. Using a bench scraper and the slap and fold method should help you work it into a manageable dough, but this can take longer if you are a beginner. Don’t give up, and avoid adding extra flour because this will make the final bread dense and hard.
Enriched doughs typically take longer to rise since they contain butter, sugar and eggs which slow down the fermentation. If it’s not rising at all, check your yeast is alive (mix with warm water and sugar in a jug, it should bubble/foam after a few minutes). Also, be careful not to warm the milk/water too much because temperatures above 50°C/122°F will kill the yeast.
First, some density is normal. Cream pan is an enriched dough, so its crumb is meant to be tender and close rather than airy like a lean loaf. Otherwise, genuine denseness is usually an under-proofing issue since sweet dough ferments slowly and is easy to bake before enough gas has built up. Judge the rise by the look and feel of the dough rather than the clock. Other problems include not kneading enough, adding too much flour, or using old yeast. Knead until it passes the windowpane test before you add the butter, avoid adding flour while kneading and make sure your yeast is alive.
This can happen when the pastry cream was not brought to a full boil, so the starch never fully gelatinized. It needs to bubble for 1-2 minutes while whisking continuously to make it stable.
This can happen if your seam isn’t pressed firmly enough, or if you cut the slits too big. Be careful not to overfill the bun or let the pastry cream touch the edges of the dough, otherwise it won’t seal properly. It could also be a sign that your pastry cream is too runny to start with, which can be prevented with sufficient boiling for 1-2 minutes.
Lumps usually means that it caught at the bottom of the pan, either from insufficient mixing or using a too high heat. The good news is you can fix it either with vigorous mixing (or an immersion blender) off the heat to break up the lumps, or pass it through a sieve to remove them.
Yes you can, and I even recommend it so it is fully chilled and set before shaping. You can keep it in an airtight container in the fridge with plastic wrap pressed on the surface for 2-3 days.
More Japanese Bread Recipes
- Nama Shokupan (Japanese Bakery Style Bread)
- Mushipan (Japanese Steamed Cakes)
- Nikuman (Japanese Steamed Pork Buns)
- Spiced Kabocha Loaf Cake (Japanese Pumpkin Bread)
Hungry for more? Explore my Japanese bread recipe collection for more ideas for your next bake!
Did You Try This Recipe?
I would love to hear your thoughts!
💬 Leave a review and ⭐️ rating in the comments below. 📷 I also love to see your photos – submit them here!
Cream Pan (Japanese Sweet Custard Buns)

Ingredients
Pastry Cream (Custard)
- 2 egg yolks
- 45 g sugar
- 10 g cornstarch
- 180 ml whole milk
- 15 g unsalted butter
- ½ tsp vanilla essence or half the amount vanilla extract, or ⅓ vanilla pod.
Sweet Bread
- 1 egg divided
- 110 g bread flour
- 40 g all-purpose flour
- 3 g salt
- 25 g sugar
- 3 g instant dry yeast or double the amount of fresh yeast
- 55 g whole milk
- 20 g water
- 20 g unsalted butter room temperature
The ingredient brands and tools I trust are in my Japanese pantry guide and my cooking tools guide.
Can’t find certain Japanese ingredients? See my substitution guide here.
Instructions
Pastry Cream
- Take a saucepan and add 2 egg yolks and 45 g sugar. Whisk until pale and creamy, then add 10 g cornstarch and whisk until well incorporated.

- Measure out 180 ml whole milk and pour a small amount into the pan. Whisk until smooth, then gradually add the rest of the milk while whisking.
- Move the saucepan to the stove and heat on low/medium-low. Whisk continuously and let it boil for 1 minute before taking it off the heat.
- Stir in 15 g unsalted butter and ½ tsp vanilla essence.
- Pour it into a wide heatproof container and place a piece of plastic wrap directly on the surface. Place a few ice packs on top to cool it faster, and once cool enough to touch, store in the fridge for later.
Bread
- Crack 1 egg into a bowl and add a small pinch of salt. Whisk until the egg and yolks are combined, then measure out 30g (1oz). Cover the leftovers and store in the fridge for later.Measure out 20 g unsalted butter and set it on the counter for later.
- Take a large mixing bowl and add 110 g bread flour, 40 g all-purpose flour, 3 g salt, 25 g sugar, and 3 g instant dry yeast. Mix to distribute the ingredients.
- Pour 55 g whole milk and 20 g water into a microwavable jug. Heat in the microwave for 10-15 seconds to warm slightly, then stir in the 30g of whisked egg. Pour the contents of the jug into the bowl with the flour, and mix thoroughly until a dough comes together.
- Tip the dough out onto a clean dry surface. Use a bench scraper of something similar to smear the dough across the surface.
- Gather the dough back up with the scraper, and repeat smearing and gathering until it becomes less sticky and more manageable.
- Switch to the slap and fold method. Hold the edges of the dough, slap it away from you and pull it back towards you.
- Stretch the dough away from you and over itself. Turn the dough 90° and repeat until smooth and passes the windowpane test.
- Stretch the dough over the surface as big as you can without tearing it, and spread the butter over the top.
- Roll up the dough, then knead again until smooth and well incorporated. The dough should feel moist but not greasy.
- Place the dough in a clean bowl and cover with a clean damp tea towel. Leave to rise in a warm draft-free area until doubled in size (approx 40-60mins at 30 °C (86 °F)).
- Press the dough to degas, then weigh and divide it into 45g pieces. Pull the edges of each piece down and under, then gather them into a point at the bottom to make a smooth and tight ball.
- Cover loosely with plastic wrap and rest and room temperature for 15-20 minutes.
- While you wait, divide your pastry cream into 40g portions.
- Lightly dust your work surface with flour and roll each ball out into a disc about 15cm (6") in diameter. Place the pastry cream in the center, making sure it doesn't touch the edges.
- Pull the top of the dough over the pastry cream and thoroughly press the edges while pushing the cream back.
- Lift up the dough and pinch the edges to make sure they're secure, then use kitchen scissors to make 3-4 slits around the edge.
- Arrange the shaped cream pan spaced apart on a baking tray and cover with plastic wrap. Leave to rise until the size has increased by about 1.5x or pass the finger poke test (approx 45-60mins at 30 °C (86 °F)). About halfway through, preheat your oven to 180 °C (356 °F) fan or 200 °C (392 °F) conventional.
- Take the whisked egg from the fridge and add about ⅛ tsp water. When the cream pan is ready to bake, use a pastry to brush with an even layer of whisked egg over the tops.
- Bake for 12 minutes or until golden brown. If your oven bakes unevenly, turn the baking sheet around half way through.
- Leave to cool fully before eating, and enjoy!

Notes
- Once cool, store leftovers in the fridge in a sealed container. Bring to room temperature before eating.
- Make the pastry cream up to 2-3 days in advance and store in the fridge with plastic wrap touching the surface to save time on baking day.
- If your pastry cream becomes lumpy, fix it with vigorous whisking off the heat, or an immersion blender, or strain through a mesh sieve.
- Avoid adding any flour when kneading the dough. It will start off very sticky and that is normal. It will become more manageable as you knead it.
- Make sure the dough passes the windowpane test (stretches thin enough to see light through without tearing) before you add the butter.
- Sweet breads take longer to rise because of the sugar, egg, and butter. Base the rise on the size and feel of the dough, not the clock. First rise should double in size, second rise should increase by about 1.5x or pass the finger poke test (dent slowly fills back in when poked).
- Preheat your oven well in advance, about halfway through the second rise, or earlier if you know your oven takes a long time to heat up.

Leave a rating and a comment