Disclaimer: This post may contain Amazon affiliate links. Sudachi earns a small percentage from qualifying purchases at no extra cost to you. See disclaimer for more info.
What is Kanpyo Maki?
Kanpyo Maki (かんぴょう巻き) is a type of thin “hosomaki” sushi roll that is made by rolling dried kanpyo, which has been rehydrated in water and cooked in a sweet and savory sauce, with vinegared sushi rice and nori seaweed.
Kanpyo itself is made by peeling the pulp of gourd into thin strips and drying them in the sun.
The taste is a balanced blend of sweetness from the sugar and saltiness from the soy sauce. It pairs well with the sour tang of vinegared rice, creating a unique flavor.
Historically, Kanpyo Maki is believed to have been around since 1750-1776, and by the late 18th century, it had become a common food item.


How I Developed This Recipe
When it comes to cooking, I’m mostly self-taught, except for sushi, which I learned through a short hands-on experience with a professional in Tokyo.
In this recipe, I have combined my method of cooking kanpyo with the technique for rolling thin hosomaki rolls that I learned from a veteran chef.
I have structured the whole article in an easy-to-follow way, with lots of pictures and gifs so that anyone can make it easily at home. I hope you try making this recipe at home!
Key Ingredients & Substitution Ideas
- Kanpyo (dried gourd strips): This is the most important ingredient in kanpyo rolls. Always use dried strips. They can be purchased online (affiliate link) or in well-stocked Asian supermarkets.
- Light Brown sugar: I go for light brown sugar because it gives a rich sweetness that I love. But you can easily swap it with regular white sugar.
- Soy sauce: I personally only used dark soy sauce, but if you’re aiming for a lighter color, mixing half dark and half light soy sauce, along with using white sugar is a good option. Check out my article on soy sauce if you’re curious about the different kinds of soy sauce in Japan.
- Mirin: For that genuine Japanese taste, you have to stick to Hon Mirin (本みりん). If you’re not sure what hon mirin is or which brand to pick, take a look at my mirin guide. It’s got everything you need to know.
- Vinegared Sushi Rice: Not just any rice will do for sushi; it has to be vinegared rice (sumeshi). This is cooked Japanese rice that’s been mixed with vinegar, sugar, and a bit of salt. It’s a must for the right taste and texture. If you’re not sure how to make it, I’ve got a recipe for sushi rice.
- Sushi Nori Seaweed: This is also a must item for any types of Japanese sushi. Since we’re making hosomaki (those skinny sushi rolls), you’ll need to cut the nori sheets in half in advance.

Visual Walkthrough & Tips
Here are my step-by-step instructions for how to make Kanpyo Maki at home. For ingredient quantities and simplified instructions, scroll down for the Printable Recipe Card below.
First, wash the dried kanpyo with fresh water to remove any dust or debris.
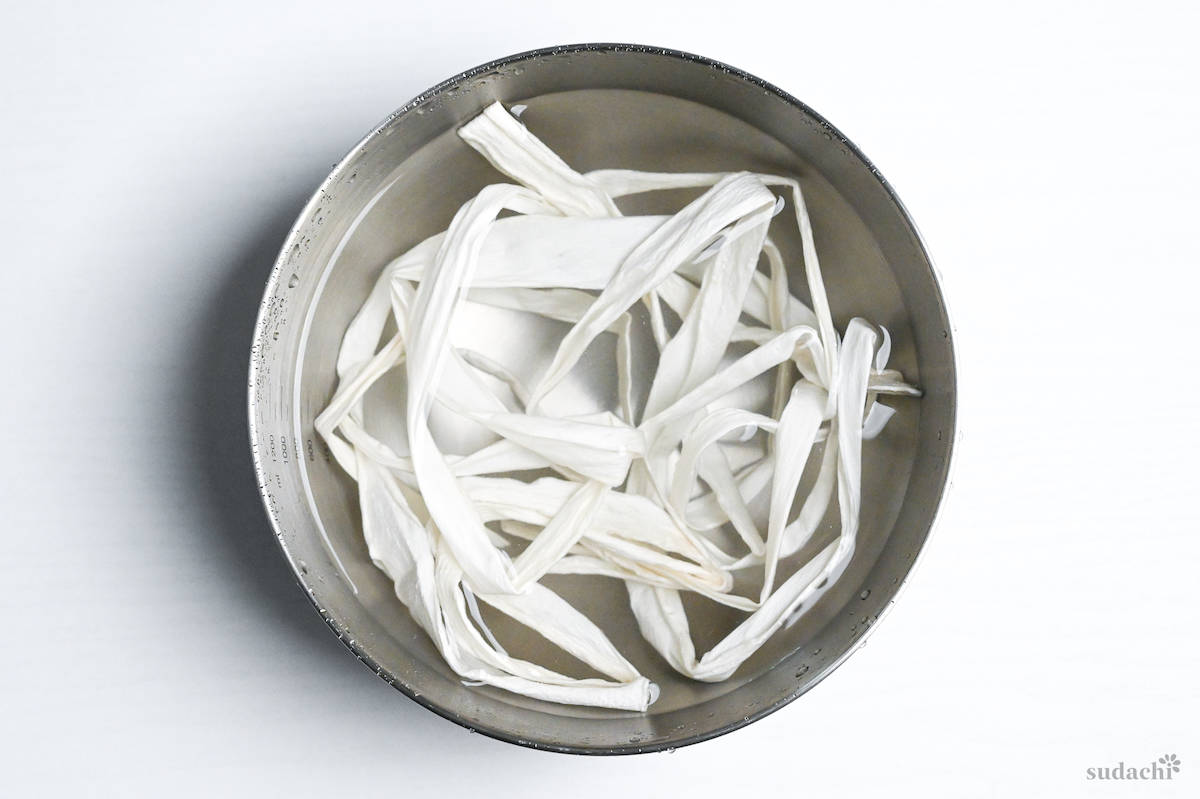
Next, toss them into a bowl with salt and start rubbing them with your hands. This step helps to make the kanpyo fibers puff up again after they’ve dried out and it also makes them heat up better.
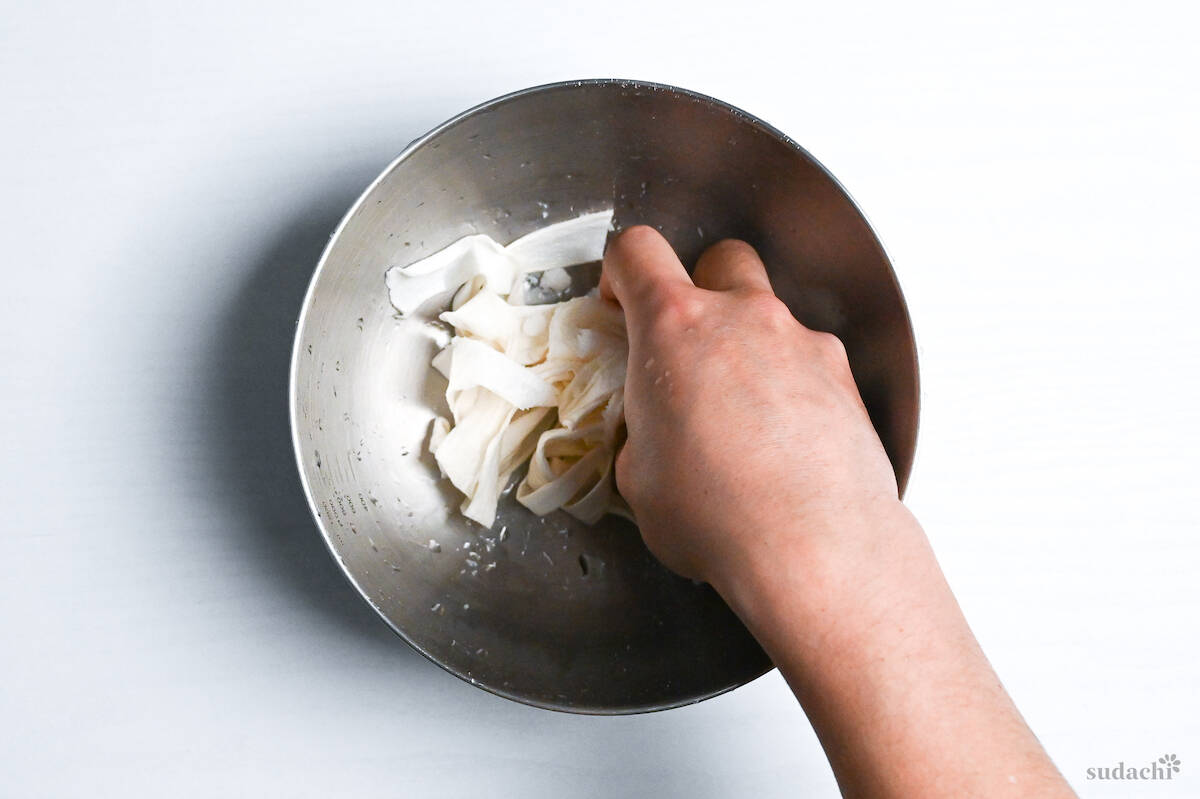
I learned the hard way in the past that rubbing too hard can break the kanpyo in later steps, so I only gently massage the kanpyo for about 1 to 2 minutes.
Once done with the salt rub, give them another rinse under running water.
Next, get a pot of water boiling. When it starts bubbling, turn the heat down to a medium-low setting, add the kanpyo, and let it cook for 15 minutes.
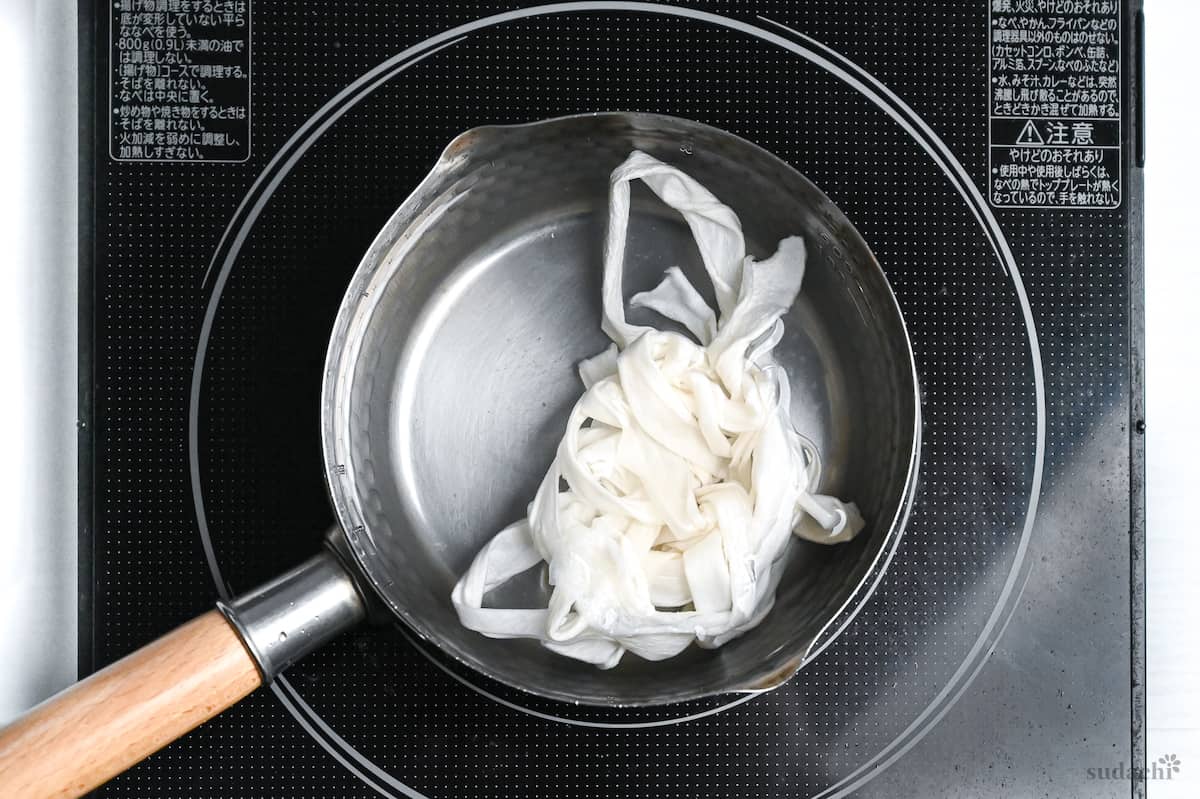
After boiling, cool the kanpyo with cold water and squeeze the water out by hand.
Then, it’s time to add flavor! Drain the water and transfer the kanpyo to a frying pan along with brown sugar, soy sauce, and mirin. Heat everything up over medium heat until it starts boiling, then turn the heat down to low.
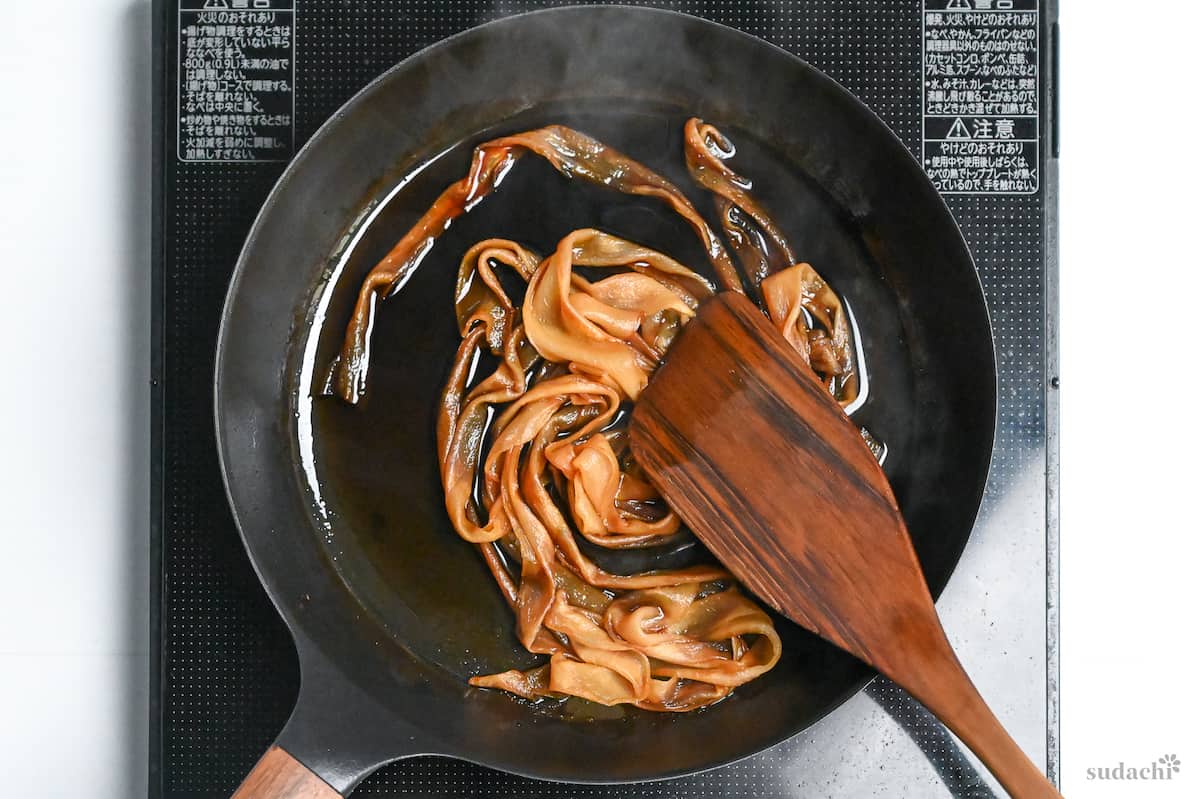
Keep it simmering until all the liquid has soaked into the kanpyo.
Finally, when there’s no more liquid left, turn off the heat. Once the kanpyo has cooled down, use kitchen shears to cut it into shorter strips. At this point, I recommend making sure the strips are about the same length as the sushi nori so that kanpyo is not too long or too short.
Add rice vinegar, sugar and salt to a small bowl and mix thoroughly until dissolved.
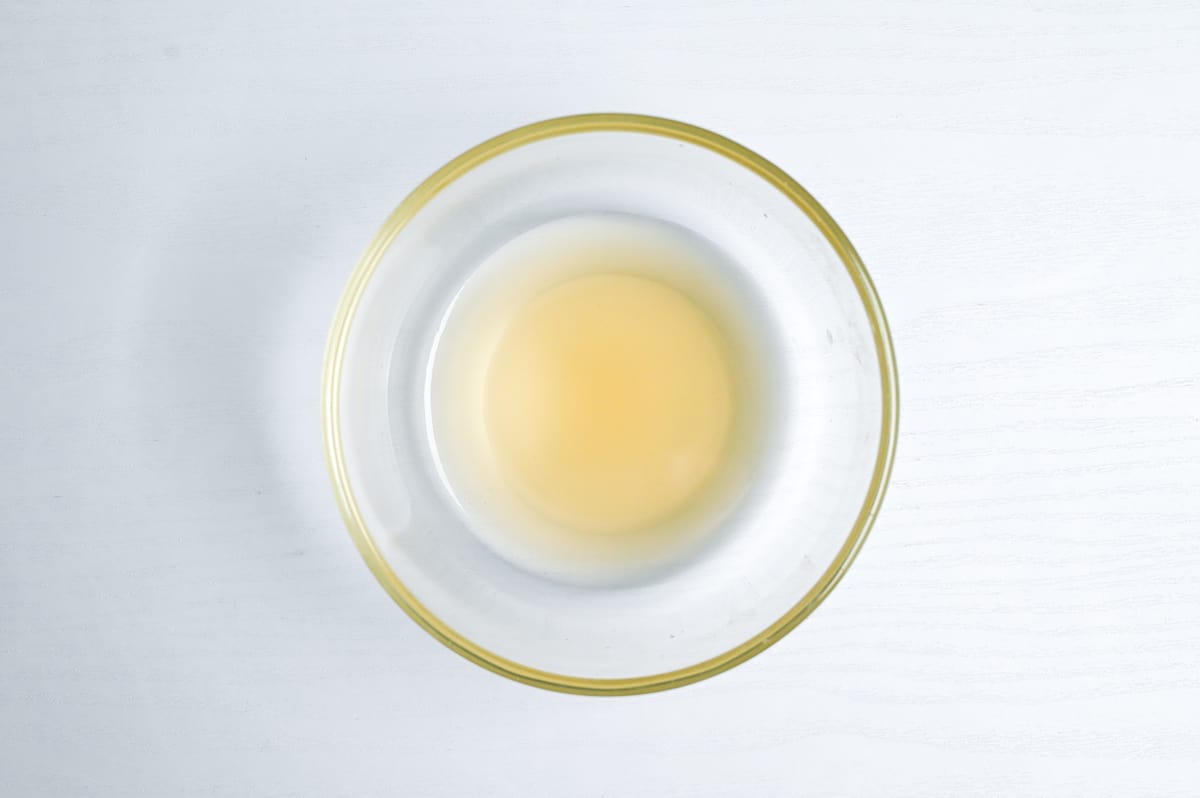
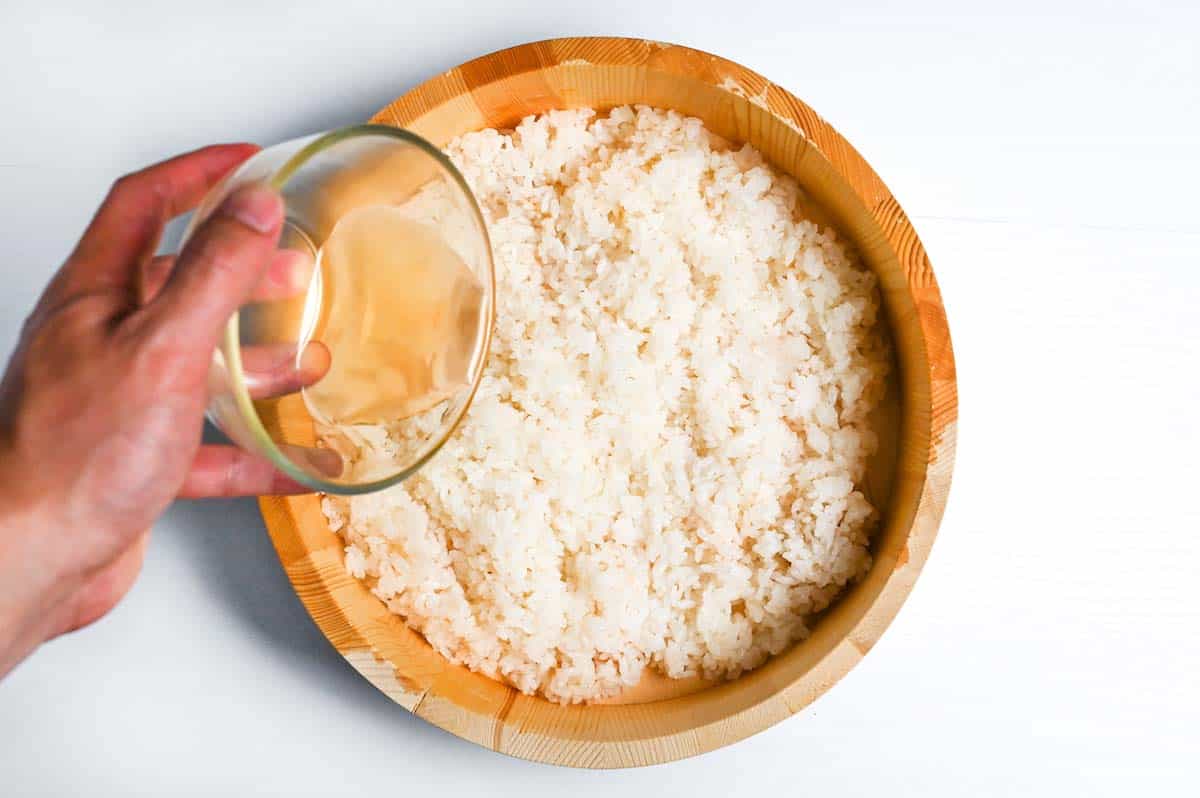
Pour the mixture over the cooked rice and mix with a rice paddle while fanning to cool it. Cover with a clean damp tea towel to prevent it from drying out.
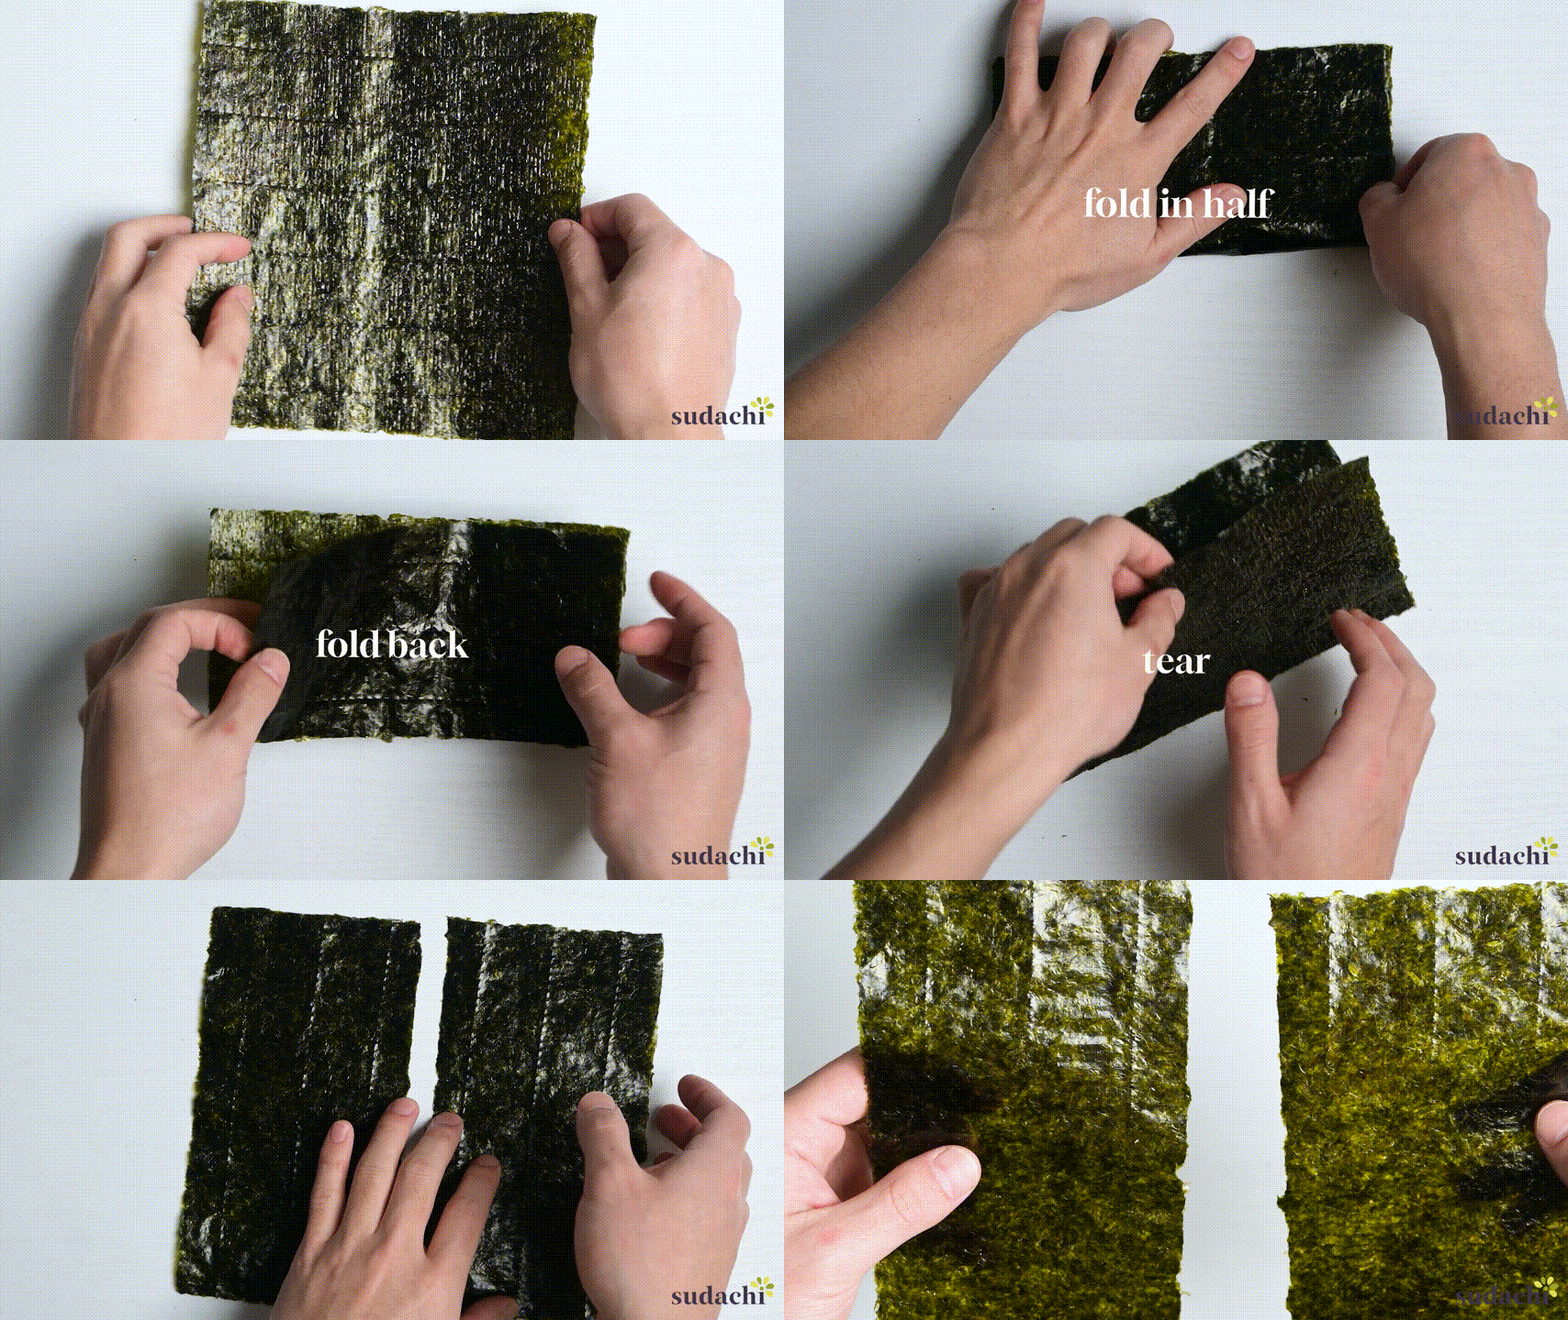
Since Kanpyo Maki is a type of thin sushi roll (hosomaki), each roll requires half a sheet of nori. Simply fold the sheets in half, press the crease and carefully tear it in half.
Set up your station with the sushi rice, cut nori, simmered kanpyo and a bamboo rolling mat. You will also need a bowl of water to prevent the rice from sticking to your hands when handling it.
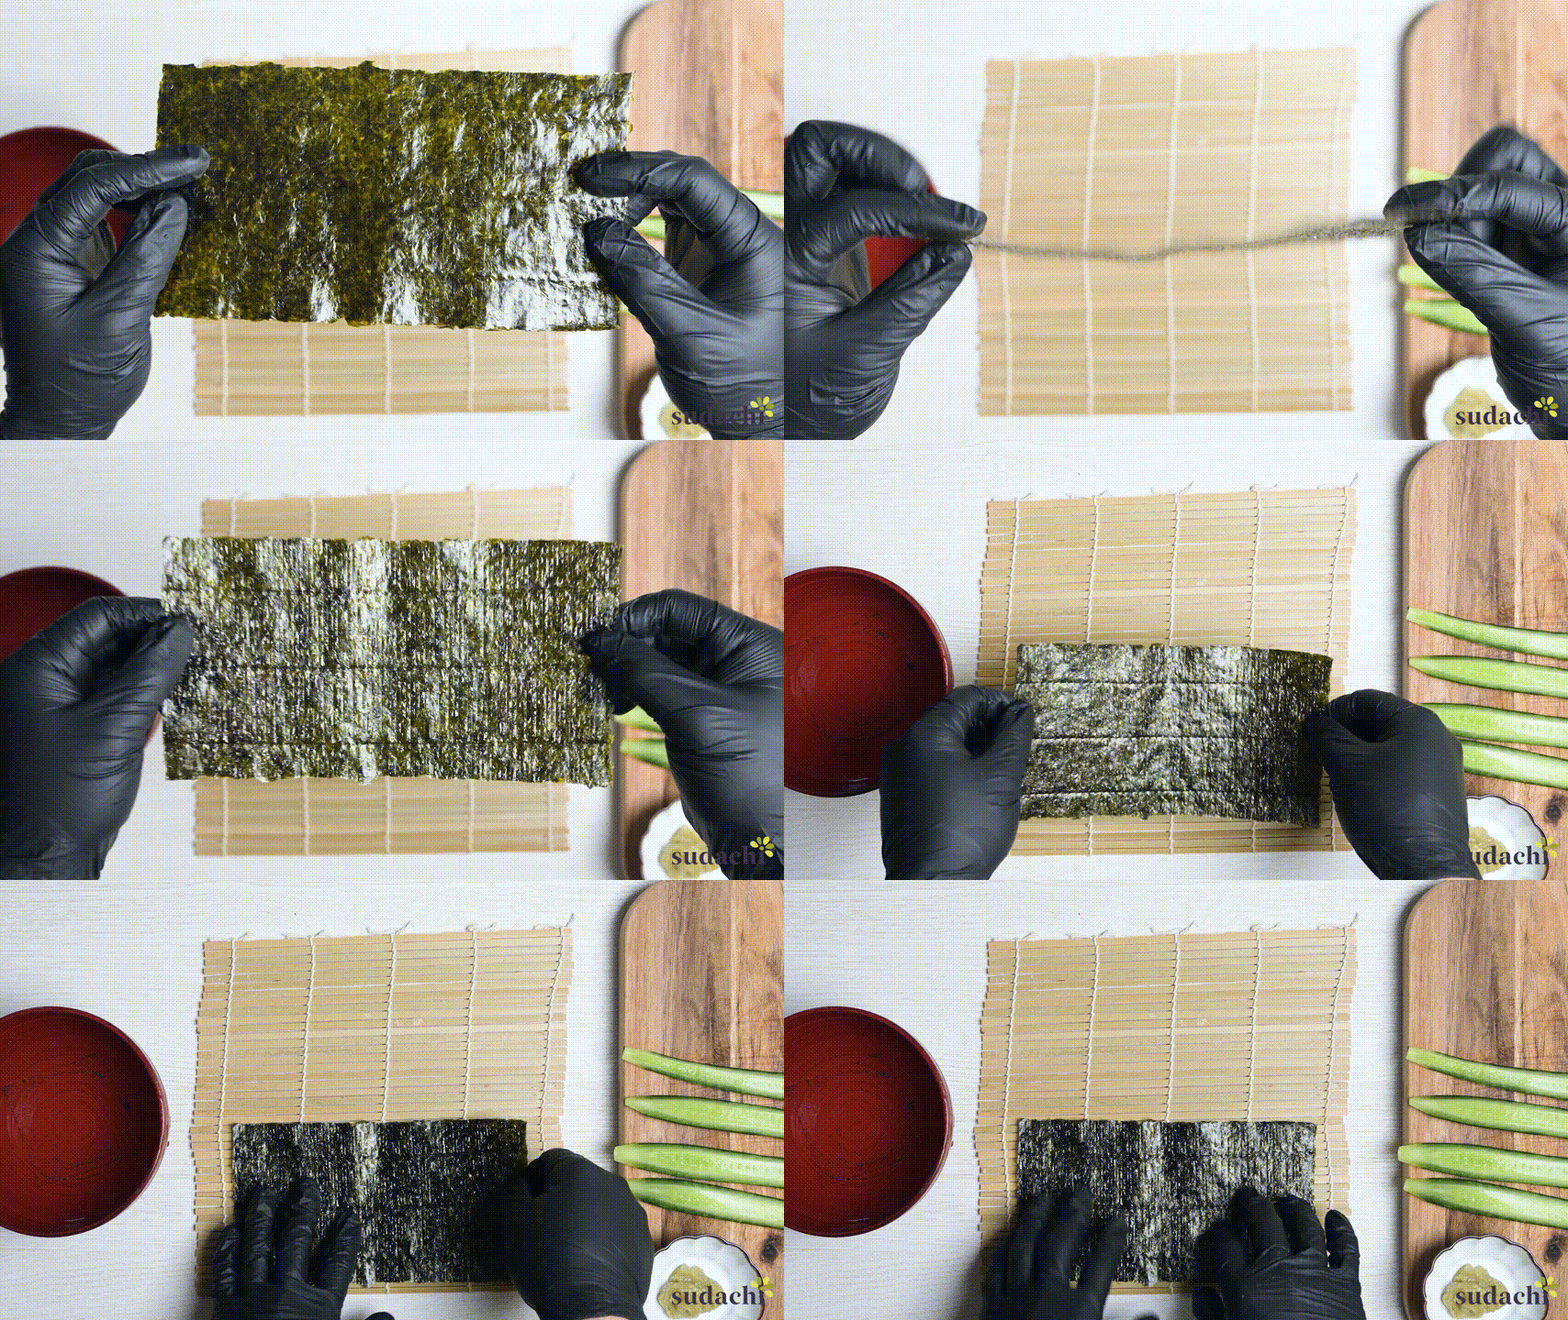
Place the sushi mat in front of you with the bamboo sticks laying horizontally. Place the nori with the rough side facing up and the bottom edge is lined up with the bottom of the sushi mat.
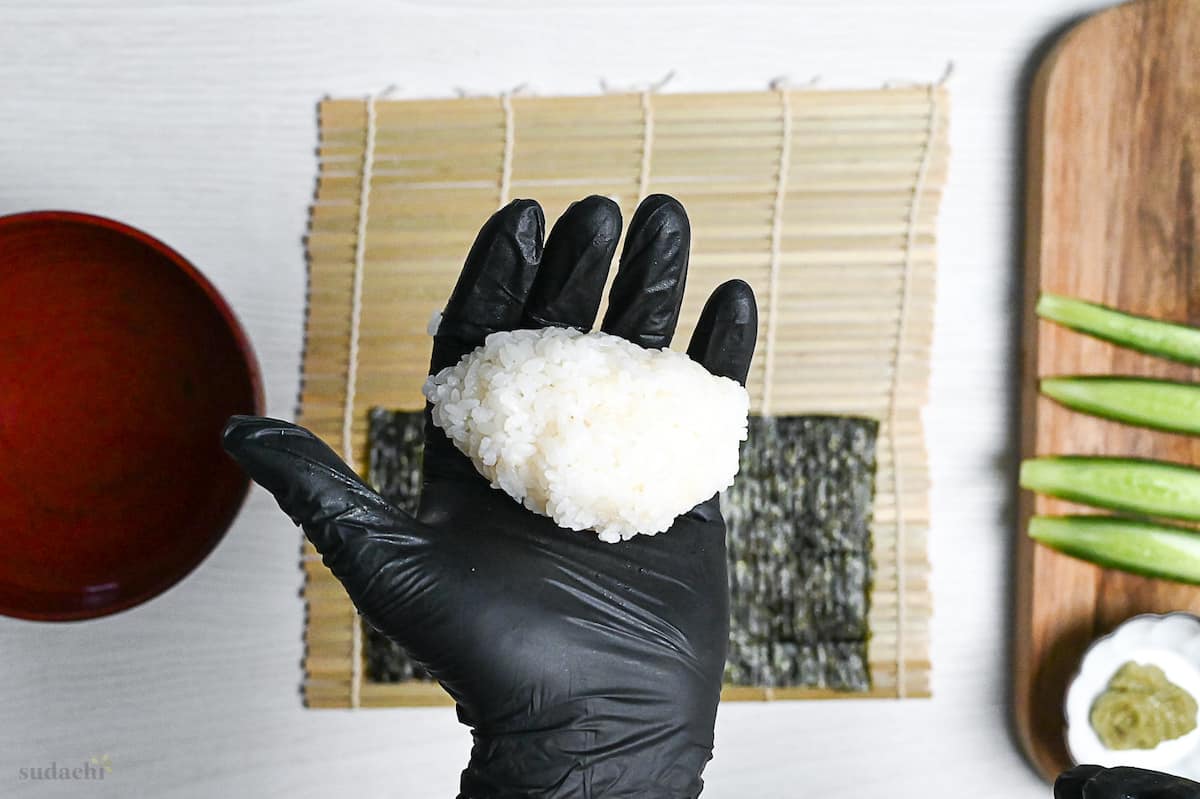
Take a handful of rice (about 80g) and roll it into a rough cylinder.
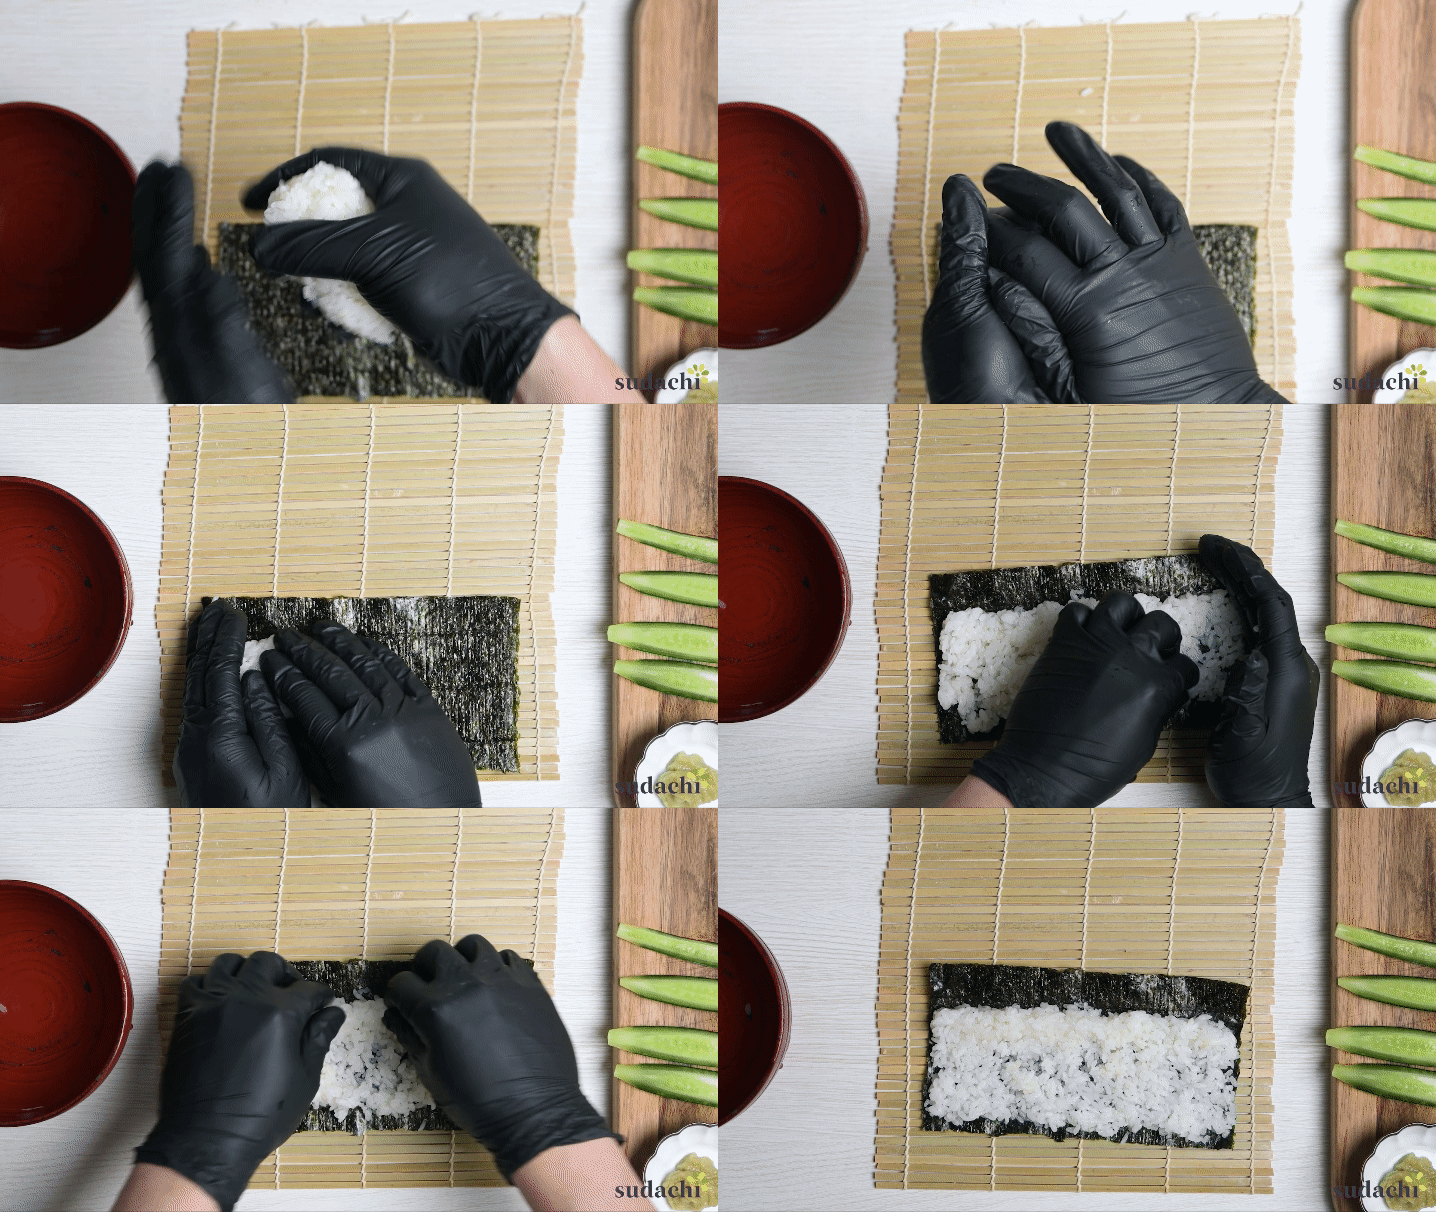
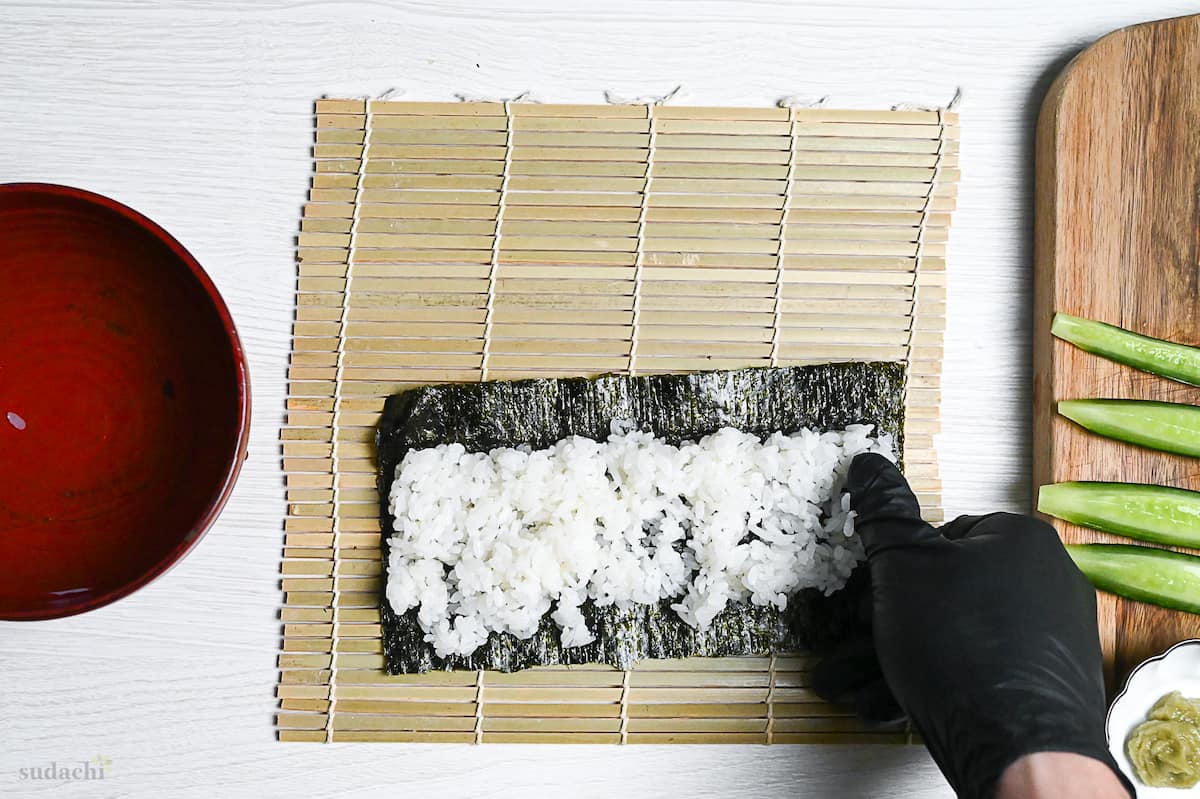
Place the rice on one side of the nori and spread it evenly to the edges, leaving a finger-width border at the top.
Pinch along the top border of the rice to make a ridge.
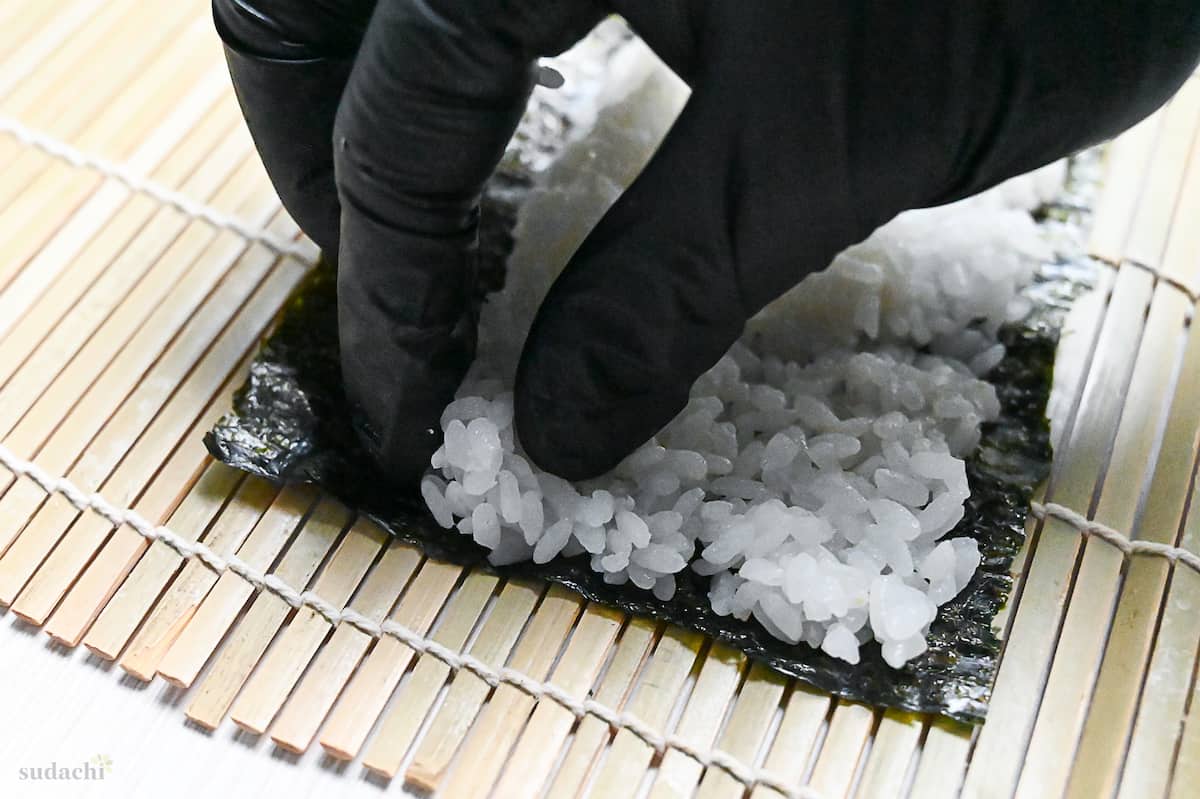
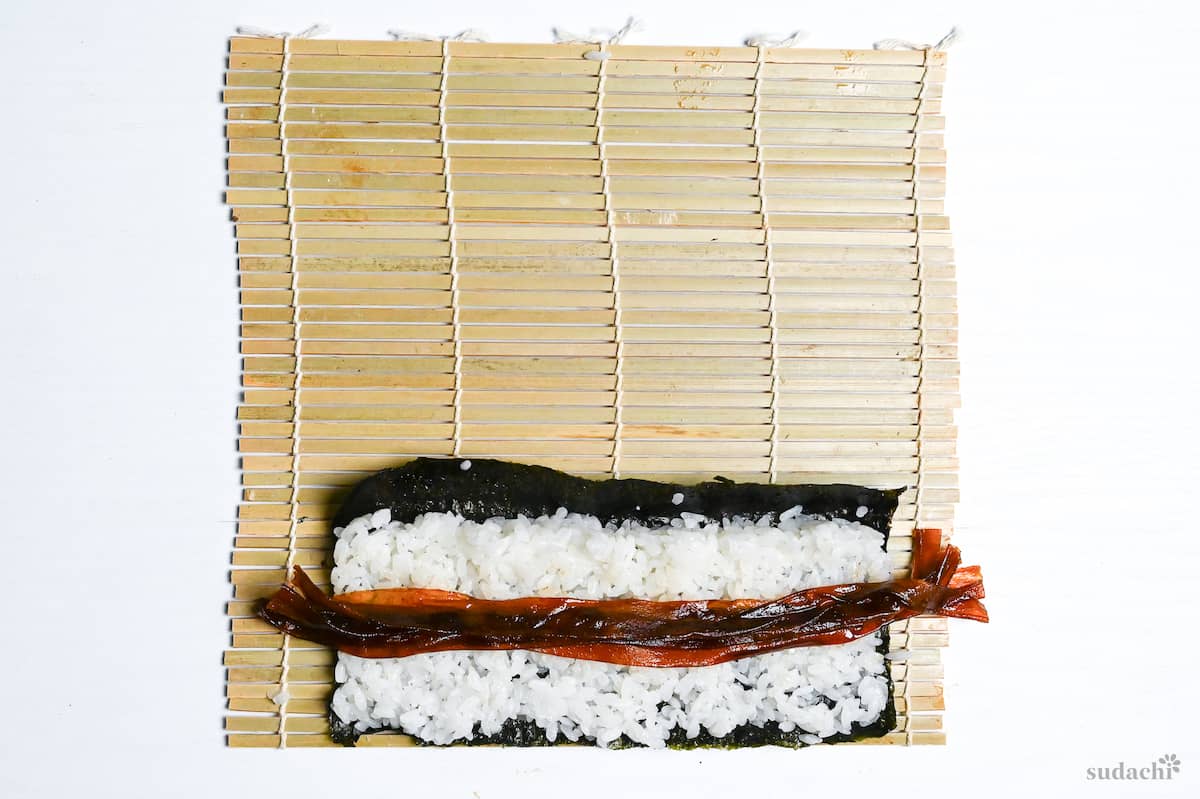
Finally, place 3-4 pieces of simmered kanpyo horizontally through the middle.
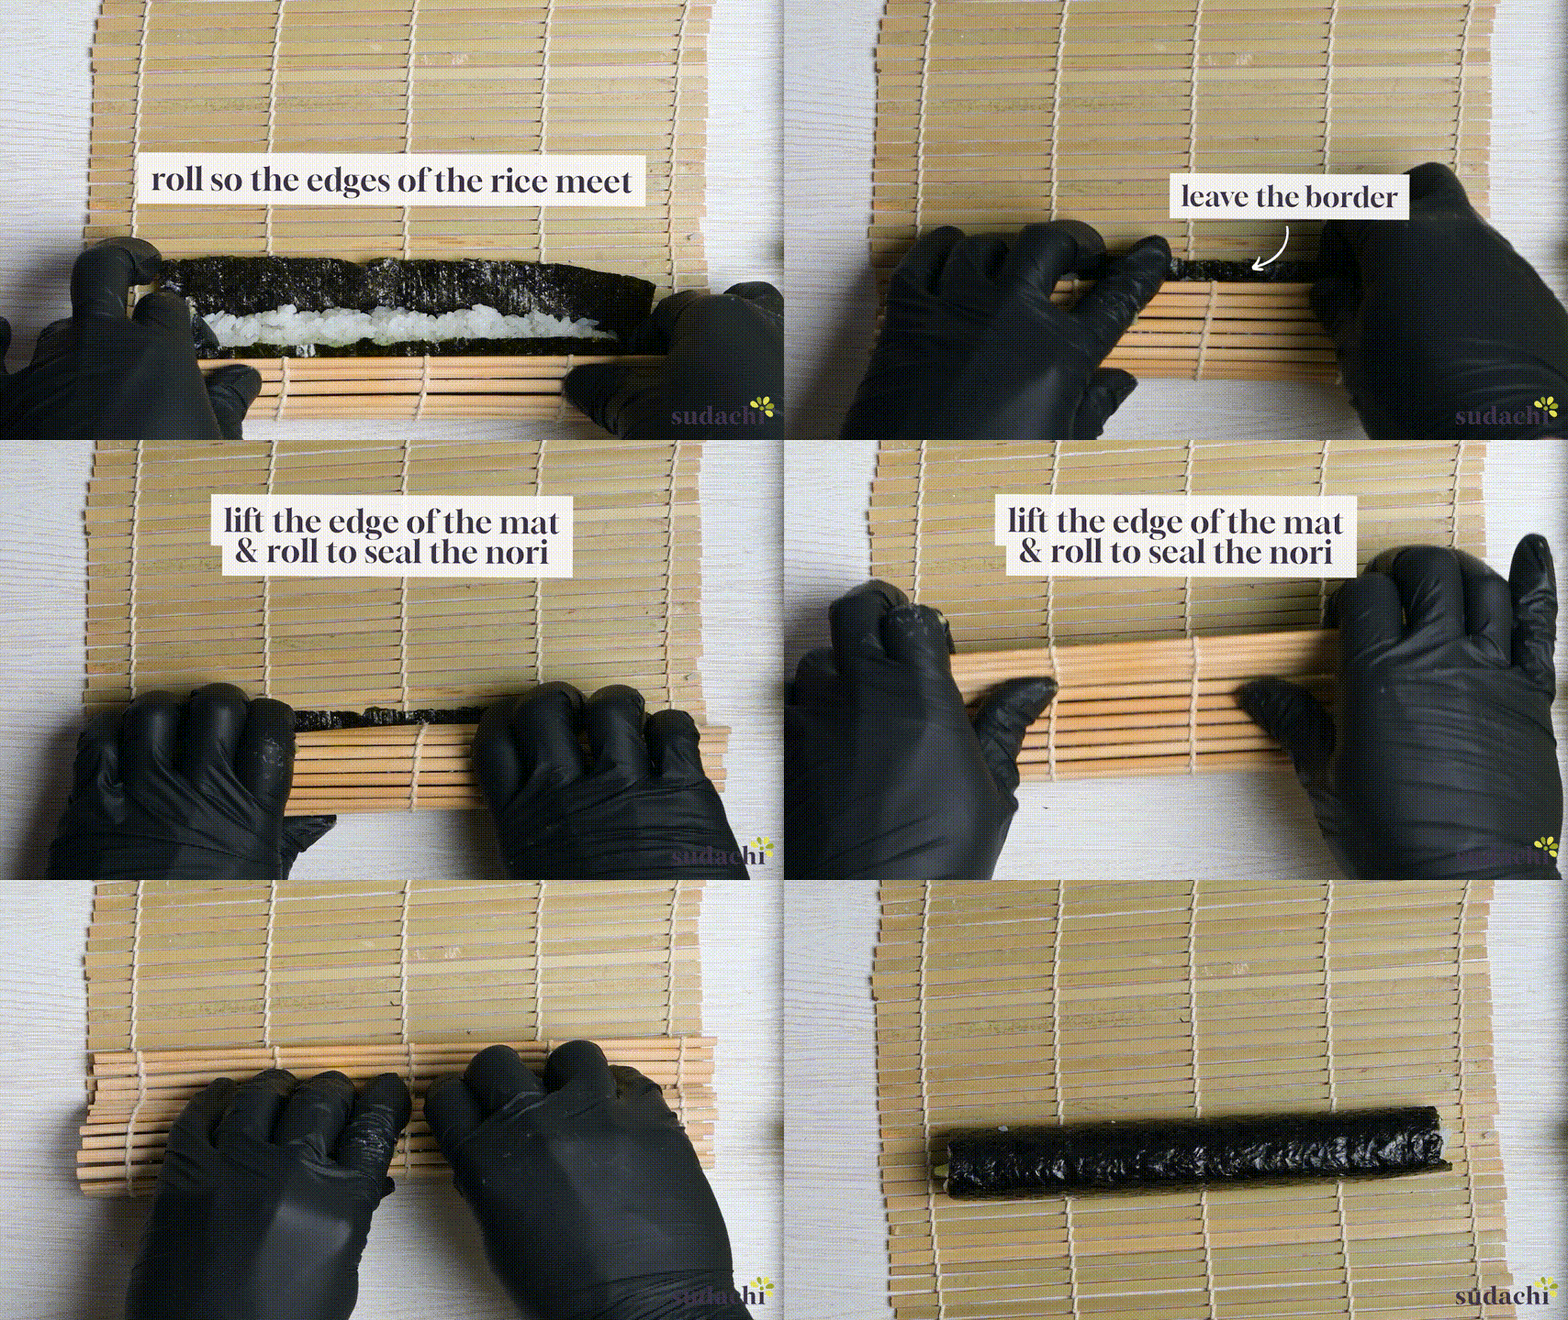
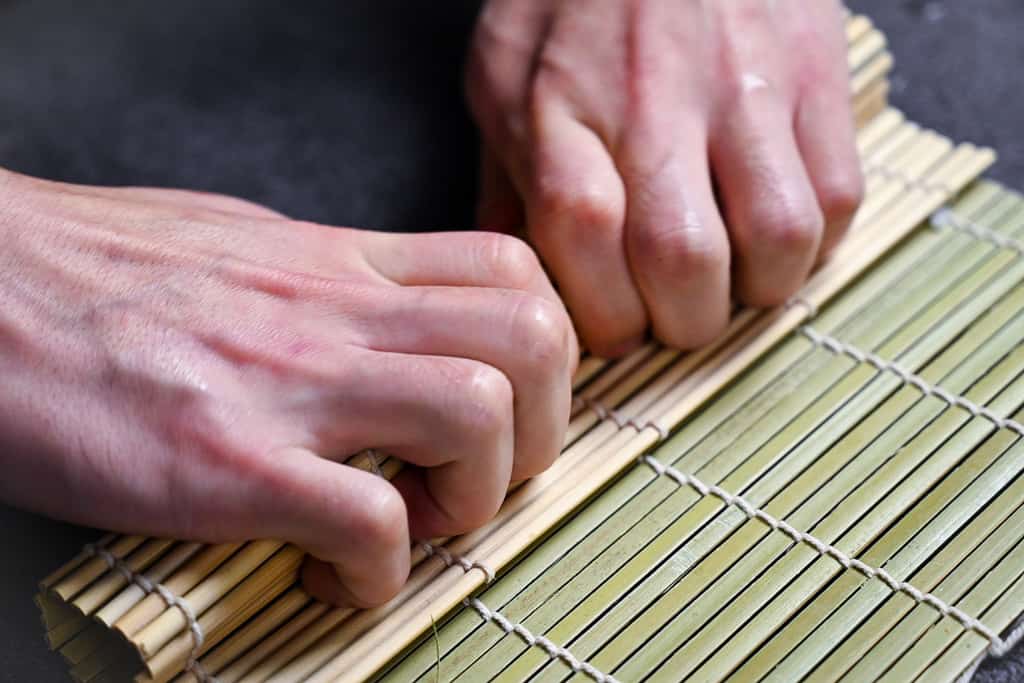
Lift the bottom of the sushi mat and pull it over so that the edges of the rice meet. Lift the mat slightly, then roll and use the empty border of the nori to seal the sushi roll. Press to secure.
Use a damp cloth to wipe your knife, and cut each sushi roll into quarters (half and half again). Use a short and sharp sawing motion to cut it cleanly, wiping the knife between each cut.
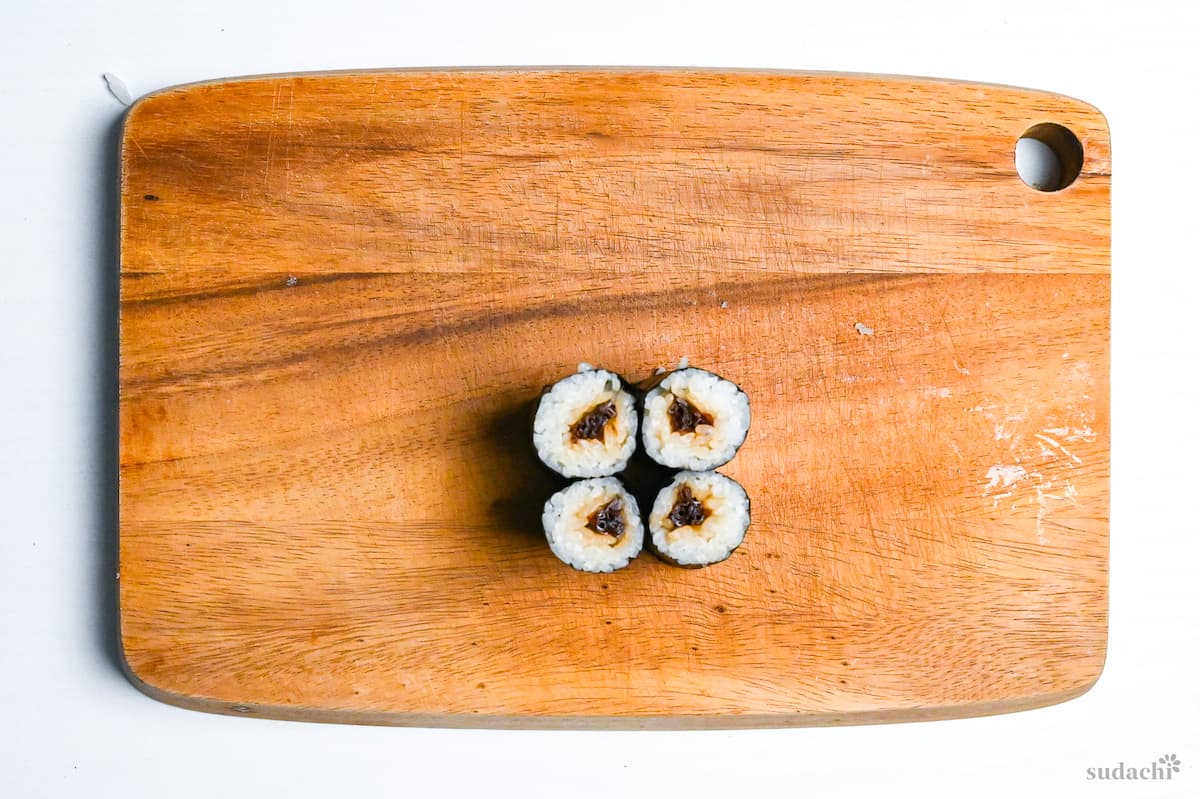
In Edo-mae (Tokyo-style) sushi, Kanpyo Maki is a type of sushi roll that is distinct from other hosomaki like Tekka Maki and Kappa Maki. While hosomaki are usually cut into six pieces, Kanpyo Maki is cut into four. The historical reason behind this is not entirely clear, but some believe that it’s because the taste of simmered kanpyo is very rich. So, by cutting it into four pieces, it can be eaten in two bites instead of one.
Another theory is that it’s simply more convenient to pack in a wooden box (oribako) when cut into four pieces. Traditionally, hosomaki are arranged vertically to show the cut surfaces for presentation. However, Kanpyo Maki could not be stood up when packed in a box because the juices from the simmered kanpyo can leak. As a result, it is cut long and packed horizontally.
Anyhow, many restaurants now serve Kanpyo Maki in six pieces, so you don’t have to worry too much about that at home!
Enjoy!
Jump to Full Recipe MeasurementsHow to Store
Sushi is always best served immediately and eaten as soon as possible. Refrigeration is not recommended as it will cause the rice to harden.
However, the simmered kanpyo can be wrapped in plastic wrap. If refrigerated, use as soon as possible (preferably within a few days). It can be divided into easy-to-use portions and frozen for up to 1 month. Thaw in the refrigerator for a few hours or microwave to defrost quickly.

I hope you enjoy this kanpyo maki recipe! If you try it out, I’d really appreciate it if you could spare a moment to let me know what you thought by giving a review and star rating in the comments below. It’s also helpful to share any adjustments you made to the recipe with our other readers. Thank you!
More Sushi Recipes
- Kappa Maki (Cucumber Sushi Rolls)
- Temakizushi (Hand Roll Sushi)
- Temarizushi (Decorative Sushi Balls)
- Chirashizushi (Scattered Sushi Bowl)

Kanpyo Maki (Simmered Gourd Sushi Rolls)
Equipment
Ingredients
Sushi Rice
- 1 ½ tbsp rice vinegar
- 2 tsp sugar
- 1 tsp salt
- 480 g cooked Japanese short-grain rice
Kampyo Maki
- 20 g dried gourd strips (kanpyo)
- 1 tsp salt
- 3 tbsp Japanese soy sauce (koikuchi shoyu)
- 3 tbsp light brown sugar
- 1 tbsp mirin
- 3 sheets roasted seaweed for sushi (nori)
My recommended brands of ingredients and seasonings can be found in my Japanese pantry guide.
Can’t find certain Japanese ingredients? See my substitution guide here.
Instructions
Simmered Kampyo
- Wash 20 g dried gourd strips (kanpyo) with cold water to remove any dust or debris.

- Place the kanpyo in a bowl and add 1 tsp salt. Gently massage the salt into the surface of the kampyo for 1-2 minutes, then rinse with water.

- Bring a pot of water to a rolling boil, then lower the heat to medium-low and add the kanpyo. Simmer for 15 minutes (I would usually start cooking my rice about now). When it's done, drain and transfer it to a bowl of cold water to cool it down.

- Squeeze the water out thoroughly and transfer the kanpyo to a frying pan. Add 3 tbsp Japanese soy sauce (koikuchi shoyu), 3 tbsp light brown sugar and 1 tbsp mirin and mix well. Heat on medium until it starts to bubble, then reduce the heat to low.

- Simmer until most of the liquid has soaked into the kanpyo, then remove the pan from the heat. Leave to cool and then cut into strips the same length as the nori.
How to Roll Kanpyo Maki
- Pour 1 ½ tbsp rice vinegar, 2 tsp sugar and 1 tsp salt into a small bowl and mix until dissolved.

- Mix the vinegar mixture into 480 g cooked Japanese short-grain rice while it's still warm. Gently fan while mixing to cool the rice and cover with a clean damp tea towel until you're ready to roll your sushi.

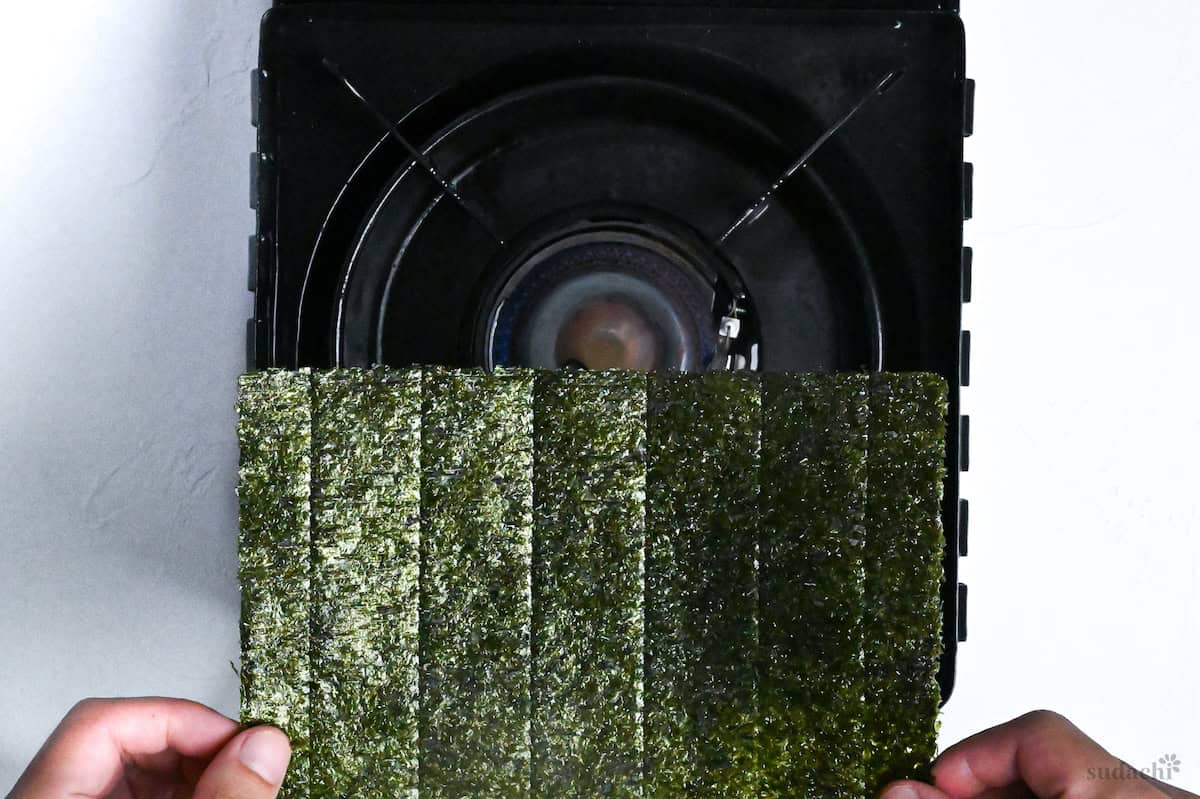
- Optional: Turn your gas burner on low and carefully fan 3 sheets roasted seaweed for sushi (nori) over the flame to improve the texture and aroma.

- Fold the nori in half and pinch along the crease so that you can neatly tear them in half. (Feel free to use scissors if you prefer a cleaner finish.)

- Place the rolling mat in front of you so that the bamboo is lying horizontally. Position the nori horizontally and line up the bottom edge with the bottom edge of the sushi mat, making sure the rough side is facing upwards.

- Wet your hands with cold water. Keep a bowl of cold water nearby to use when necessary. (This helps stop rice sticking to your hands.) Take a handful of sushi rice (approx 80g) and shape it into a rough cylinder.

- Leaving a finger-width border along the top of the nori, place the rice on one side and gently spread it to the other side. (If you don't want to handle the rice, you can use a rice paddle to spread it.)

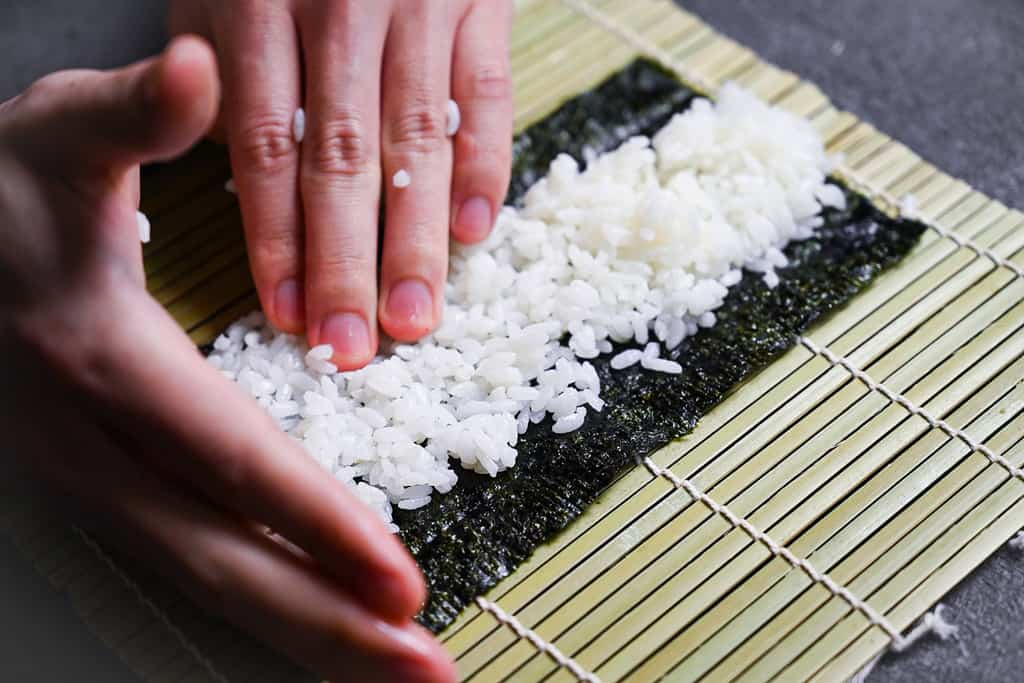
- Use your hand to make a wall and push the rice right up to the edges of the nori. Make sure to leave the border at the top clear.

- Make a ridge with the top edge of the rice (next to the border).

- Place 3-4 strips of the simmered kanpyo in the center of the rice.

- Lift the edge of the bamboo mat closest to you (the bottom edge) and carefully roll it over so that the two edges of the rice meet. (Make sure it's tight!) Lift the bamboo mat slightly and roll over the flap of nori to close the sushi. You don't need to wet it down, the moisture from the rice will help the nori stick together.

- Once rolled, use the bamboo mat to press secure the shape. Repeat these steps until you have 6 rolls.

- Wet a sharp knife with a damp cloth. Cut each sushi roll in half and then half again to make four tall rolls. Use a short, sharp sawing motion to cut, wiping your knife each time you make a new cut.

- Serve and enjoy!


Leave a rating and a comment