

What is Daigaku Imo?
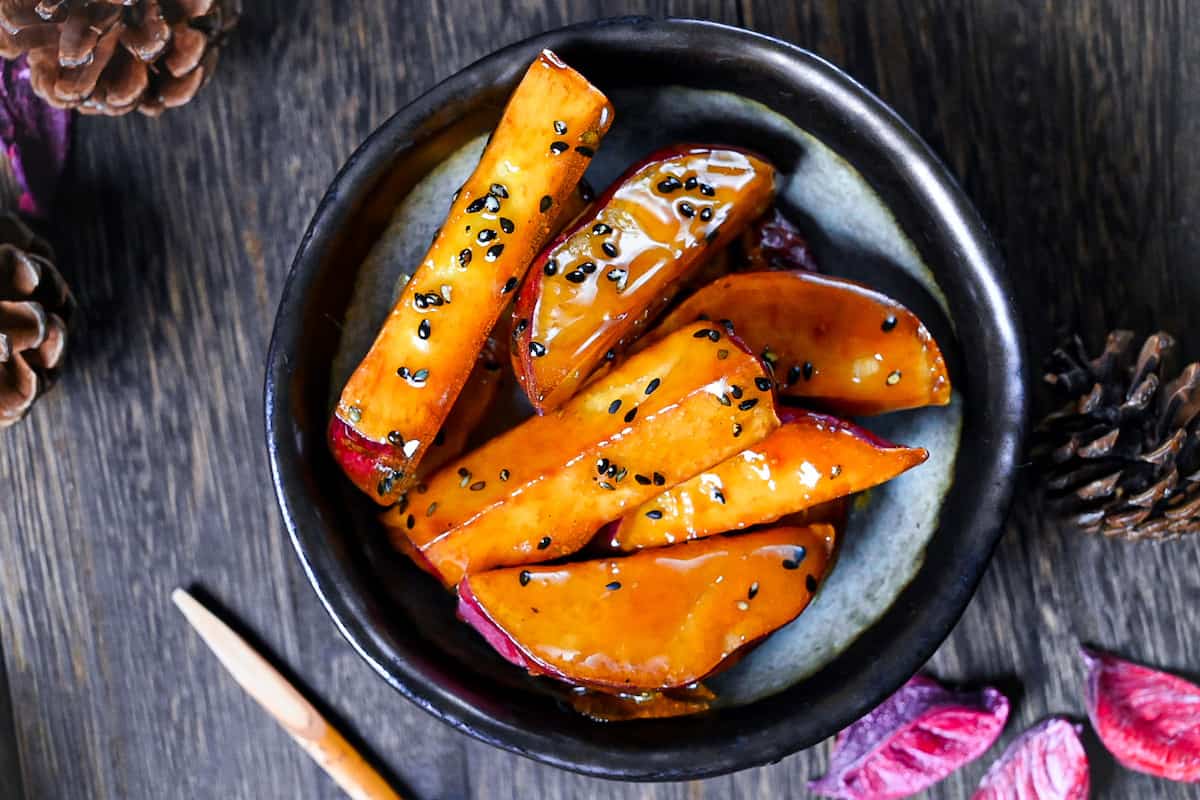
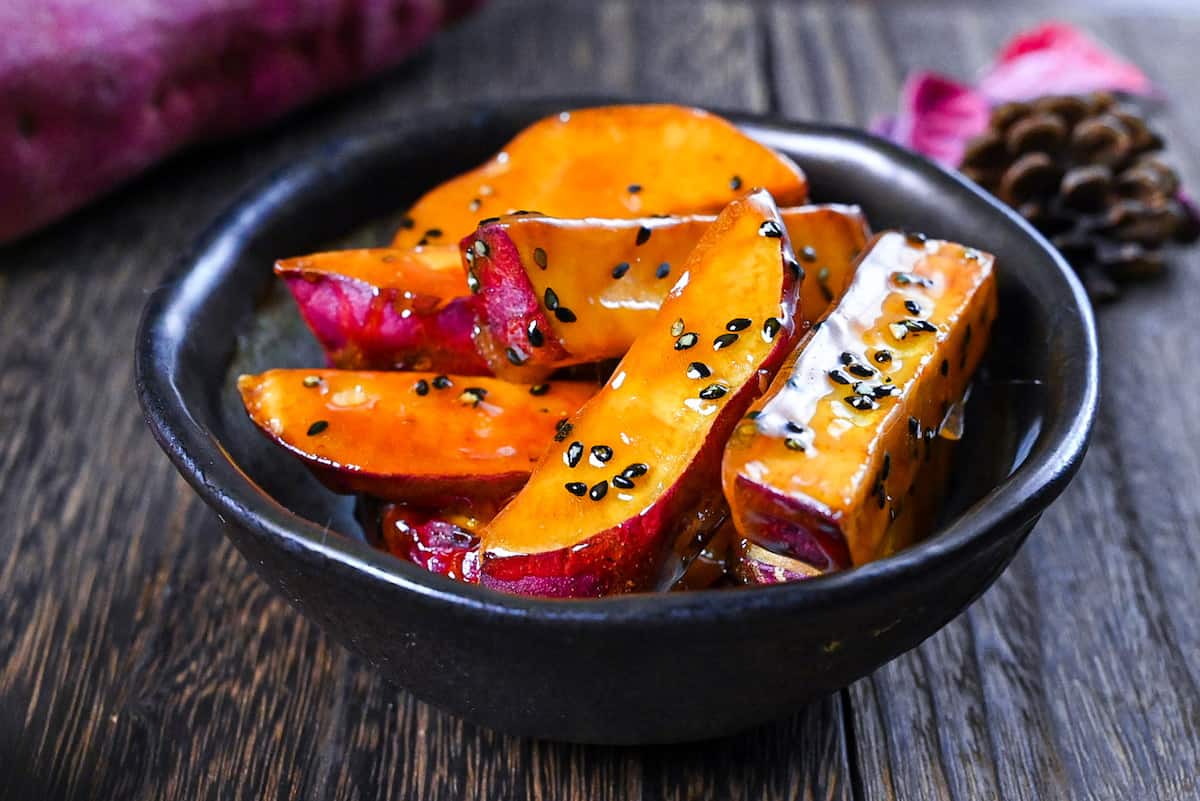
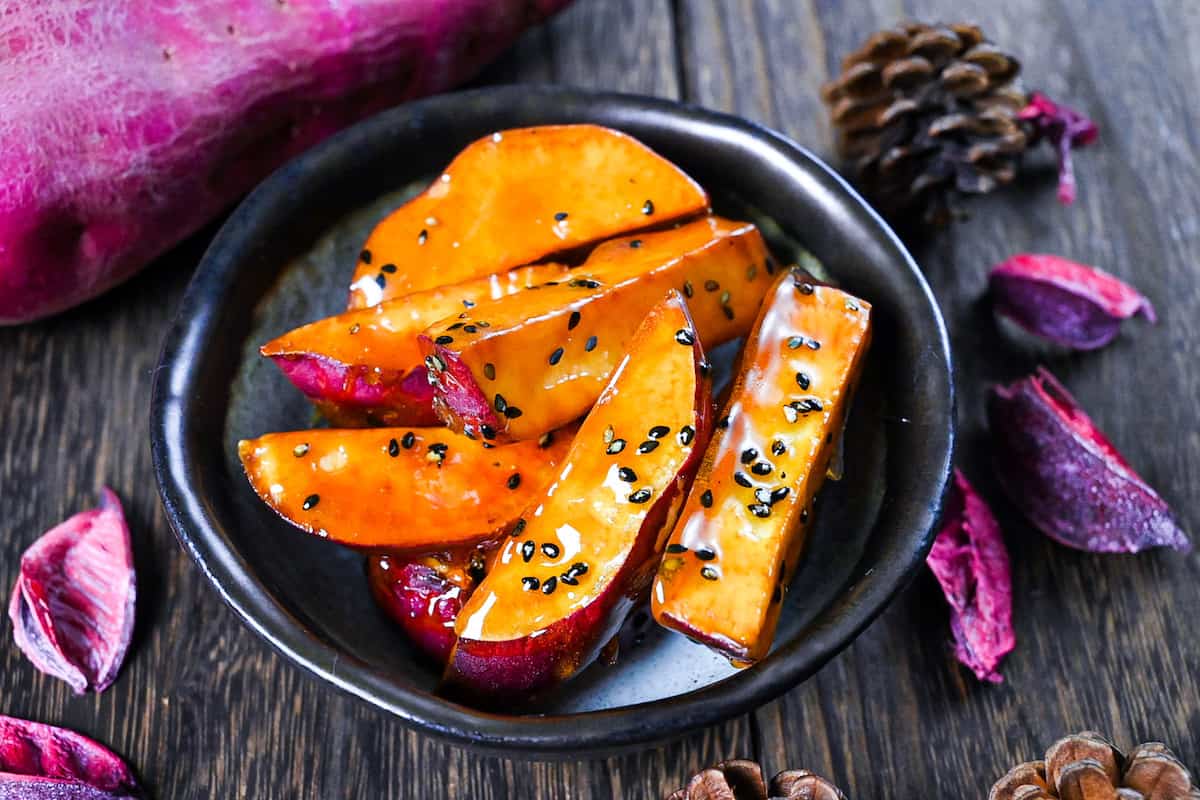
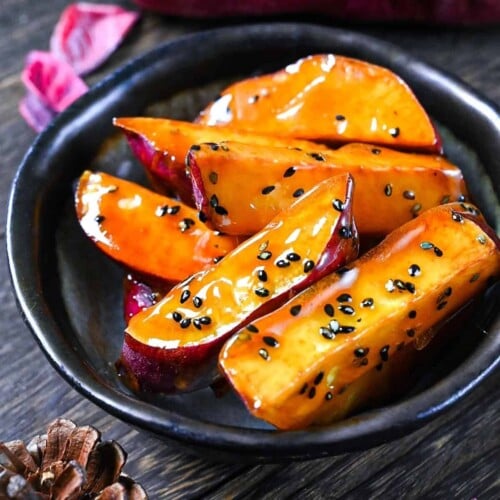
Daigaku Imo (大学芋) is a classic Japanese sweet snack made from purple Japanese sweet potatoes. They are usually cut into pieces, deep fried, coated in a sweet crunchy candy glaze, and sprinkled with black sesame seeds.
This snack is typically eaten in fall, a time when desserts that feature seasonal produce such as Japanese squash (kabocha), chestnuts (kuri) and sweet potatoes (satsumaimo) line the shelves of supermarkets, convenience stores, and bakeries across Japan.
By the way, if you love potato based snacks, be sure to check out my potato mochi recipe!
A Brief History of Daigaku Imo
It is believed that Daigaku Imo appeared in a sweet shop near Tokyo University around the beginning of the Showa period (1926-1989). The dish was supposedly inspired by the Chinese method “ba si” where ingredients such as apples, sweet potato and taro are fried and coated in a simple candy made with sugar and water. “Basi Digua” (拔丝地瓜) is the Chinese version of candied sweet potato and is known as “Chuuka Poteto” (中華ポテト) or “Chinese Potato” in Japanese.
You might wonder if there’s any difference between the Chinese and Japanese versions of this dish. After all, it’s just a candied sweet potato right? Well actually, there are a few characteristics that set daigaku imo apart from the original Chinese version.
Firstly, daigaku imo is always sprinkled with black sesame seeds, this is iconic for this dish and never left out. Secondly, the candy coating in the Japanese version is often flavored with a hint of soy sauce for added depth and color. A few other small differences include leaving the skin on (the Chinese version is usually completely peeled) and eating them warm/room temperature.
Why is it Called “Daigaku Imo”?
The name “Daigaku Imo” (大学芋) means “University Potato” in English and there are a few different theories about the unusual name and origins of this dish.
- Some say Daigaku Imo was sold in a sweet shop near Tokyo University and became a hit with the students in the area.
- Japanese sweet potatoes are cheap and filling, the perfect ingredient for students on a budget.
- It’s a potential money maker. Cheap to buy, easy to turn a profit – rumor has it that some students would make and sell candied sweet potatoes to help fund their college fees.
- They’re delicious – Daigaku Imo is simply loved by university students!
Whatever the origin, there’s no doubt that they’re a well-loved sweet amongst all Japanese people, not only students!

How I Developed This Recipe
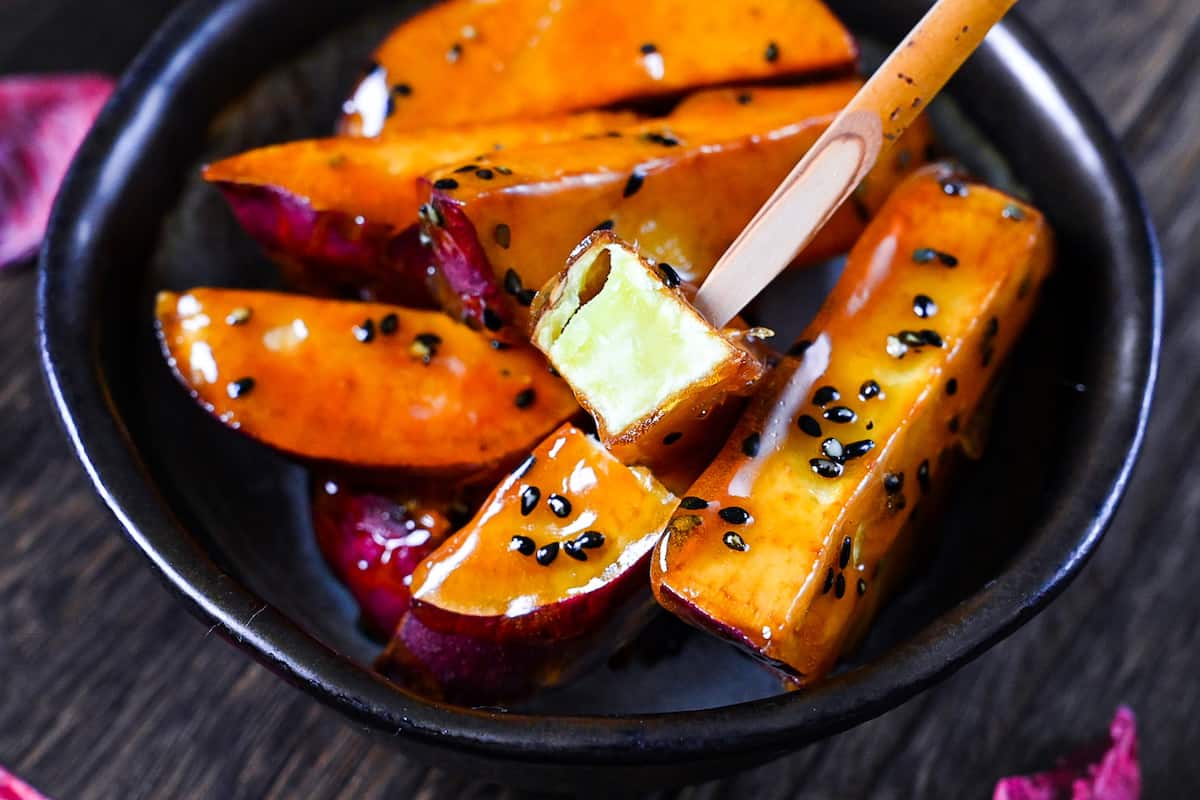
For me, the perfect Daigaku Imo needs to be fluffy in the middle and crispy on the outside. To achieve this, I needed to create a candy coating that wouldn’t compromise the crispy outside of the deep-fried sweet potato.
After many attempts and experiments with different techniques, I found that the secrets lie in the way its cut, the frying method and the type of coating. I opted for a hard candy rather than a sauce or glaze.
I believe I’ve created a deliciously crispy Daigaku Imo similar to my favorite store-bought version. I hope you try my recipe and love it as much as I do!
Ingredients & Substitution Ideas
For this recipe, you will need the following ingredients:
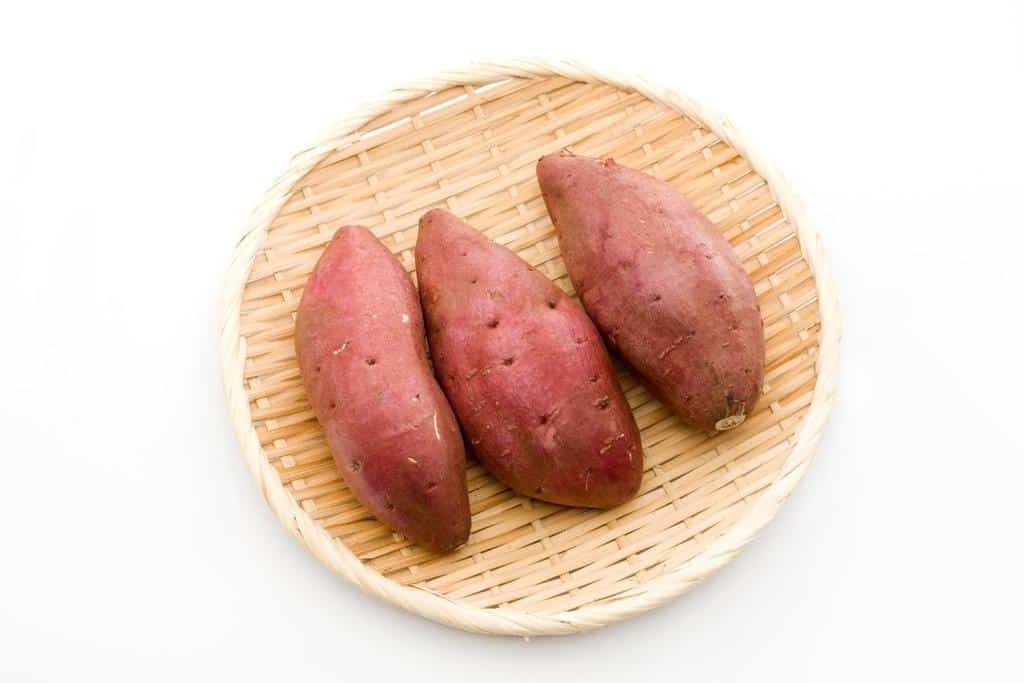
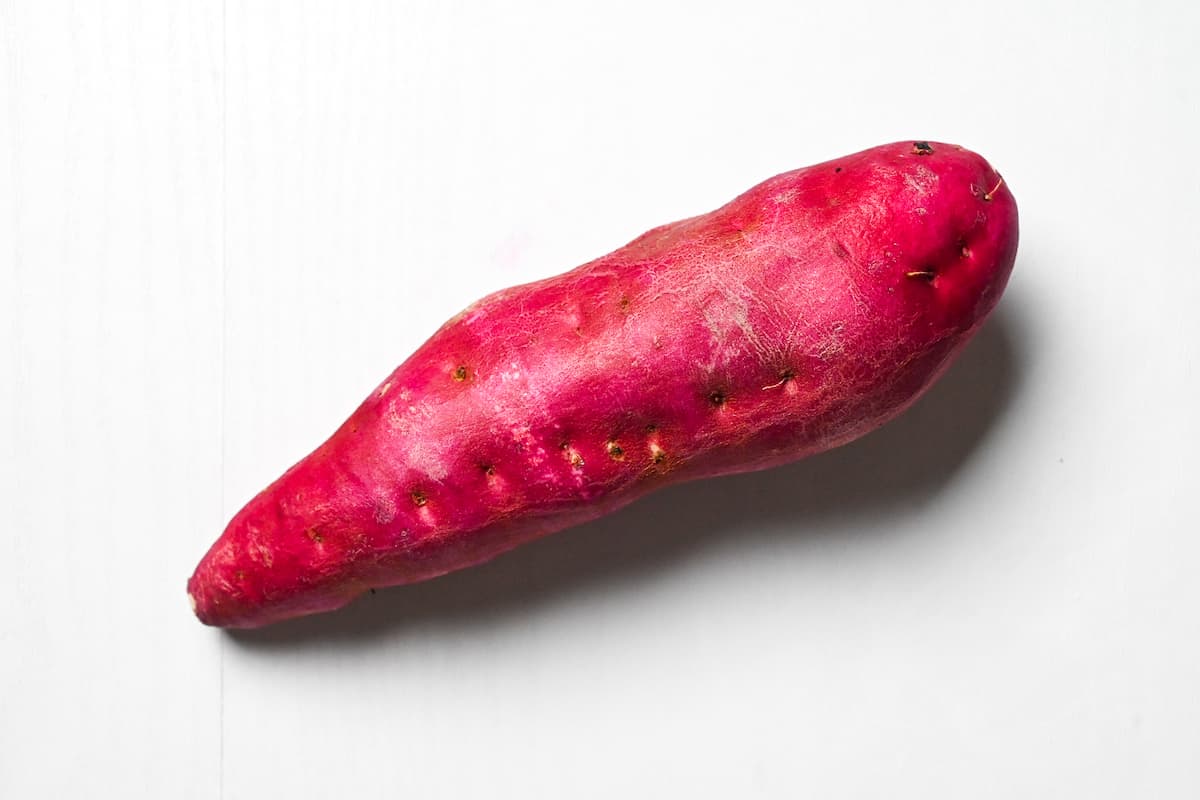
- Japanese Sweet Potato: Specifically “sastumaimo”, also known as the “murasaki potato” in English (not to be confused with the Okinawan sweet potato that is purple inside). Satsumaimo is especially sweet and dry compared to other kinds of sweet potato, I don’t recommend using other varieties. You should be able to find Japanese sweet potatoes in Asian supermarkets.
- Water: To soak the sweet potato and remove excess starch
- Salt: Helps draw out the starch and flavor the sweet potato. Use regular sea salt for this.
- Oil: For deep frying. Choose an oil with a mild flavor and high smoke point, such as vegetable oil or canola.
- White Caster or Granulated Sugar: Works best to make the crunchy caramel coating.
- Mirin: For added depth and sweetness.
- Water: To dissolve the sugar.
- Rice vinegar: A small amount helps prevent crystallization.
- Soy Sauce: Adds a hint of color and depth.
- Black sesame seeds: For added crunch and decoration.
3 Ways to Cut Sweet Potato for Daigaku Imo
There are several different ways to cut sweet potato for Daigaku Imo, so here I will cover 3 different ways to cut and include the pros and cons for each method.
Rangiri (diagonal bitesize chunks)
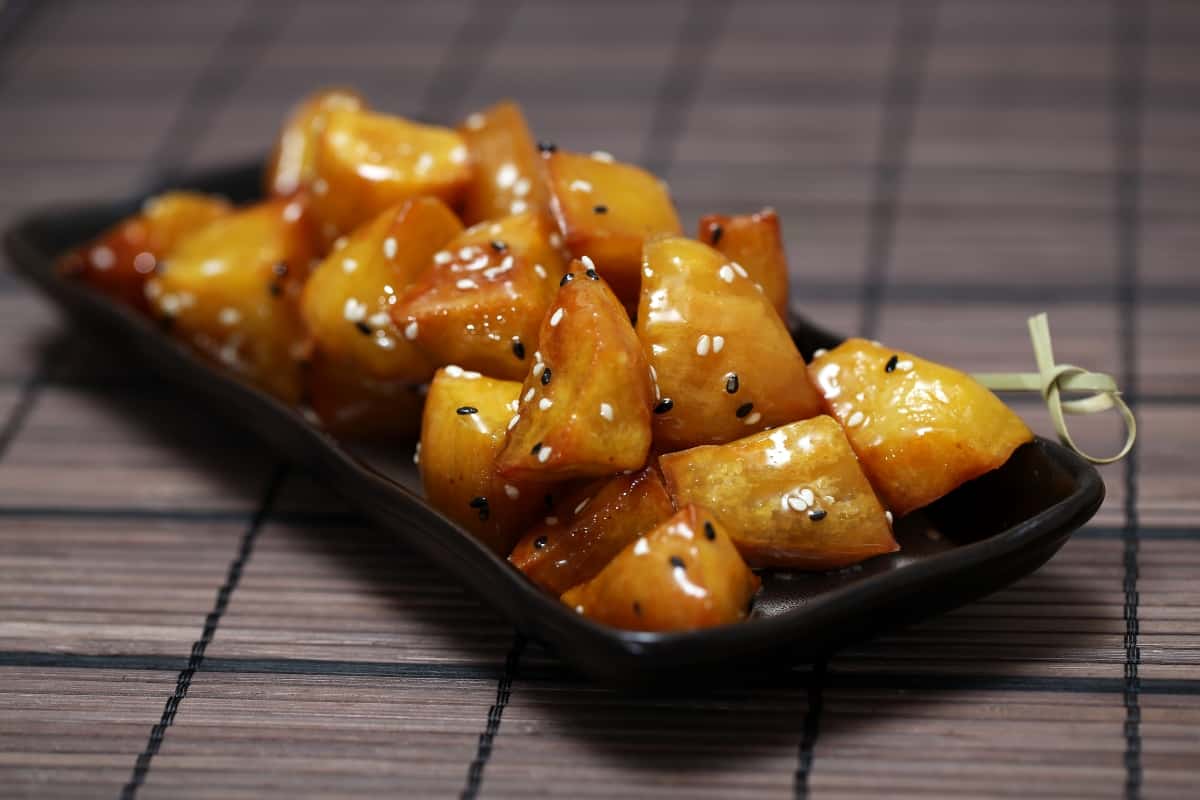
The most common way to cut sweet potato for daigaku imo is using a technique called “rangiri”(乱切り). This kind of cut is used for long, cylindrical vegetables like carrots or cucumbers.
To cut rangiri style, first cut off the ends and then make thick diagonal cuts, rotating the sweet potato one-quarter between each cut. Depending on the size of the potato, the middle pieces could end up being considerably bigger, in this case you can cut them in half. Try and cut the pieces to a similar size so that they finish cooking at the same time.
Rangiri style looks rustic and stylish in a homely way, it also ensures each piece has a good amount of skin. Some cons to rangiri cuts are that sometimes it can be difficult to keep the size of the pieces consistent (depending on the shape of the potato) and I personally find them a bit stodgy compared to the other styles.
Sticks (used in my recipe)
The second most common is the stick type, cut to a similar size as thick-cut fries. This type is my personal favorite, the size is the best for snacking and the potato-to-candy ratio is just perfect in my opinion!
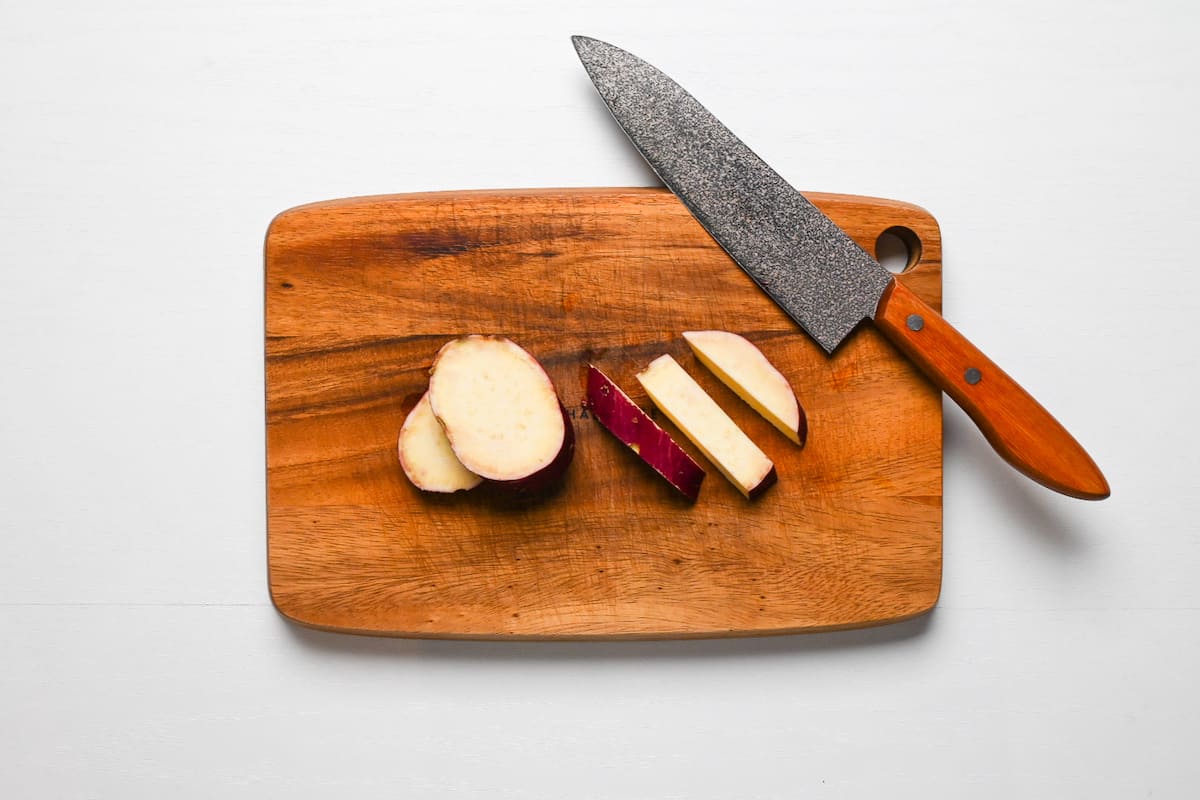
For the optimum size, I recommend slicing the sweet potato diagonally about 1.5cm thick (approx 1/2 inch) and then cutting each slice into 3 sticks.
Because the pieces are smaller, they take up less space in the pot and you can use less oil. Due to the shape, it is also easier to fully coat each one with the candy, however because of the size, it does take a little longer to coat them all individually.
Rounds (thick slices)
While not as stylish as the other two, simply cutting the sweet potato into 1.5cm thick slices is the best of both worlds! Thinner than rangiri means they cook a little faster in the middle, and cutting them is quick and straightforward. They also have a good amount of skin on each piece.
It might be a little more difficult to evenly coat the outside edge with caramel, but in terms of taste, texture, and simplicity, this one has it all!

Visual Walkthrough & Tips
Here are my step-by-step instructions for how to make Japanese Candied Sweet Potato at home. For ingredient quantities and simplified instructions, scroll down for the Printable Recipe Card below.
How to Fry Japanese Sweet Potato for Daigaku Imo
The skin of Japanese sweet potato is very thin, it also has a beautiful color and these are the two reasons why we generally eat them with the skin on. Of course, this means it needs to be washed well. Since the skin is quite delicate, I recommend washing it gently with warm water and a clean sponge or cloth, no need to scrub!
Rub the surface of the sweet potato gently with warm water and a clean cloth or sponge to prevent taking off any skin.
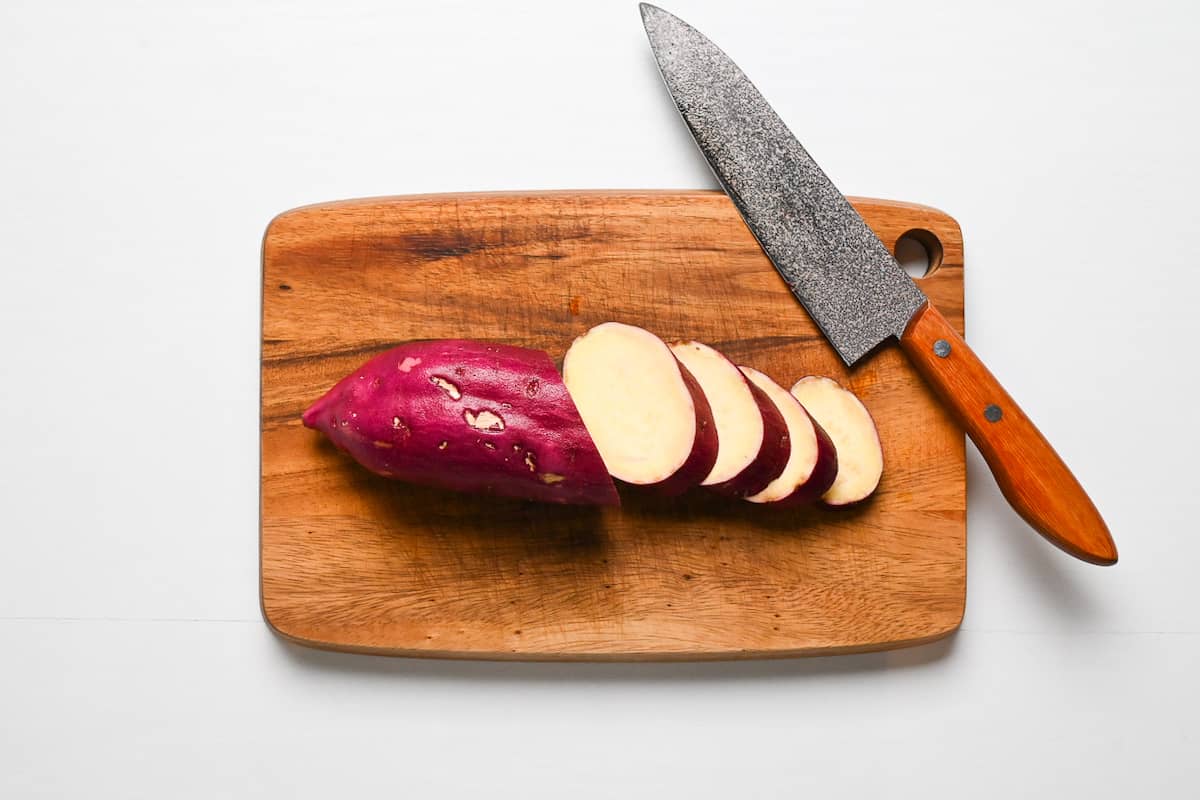
In my recipe, I cut my sweet potato into sticks. Cut off the ends, slice into 1.5cm (½ inch) rounds, and then cut each round into three sticks.
This is my favorite way to cut sweet potato for Daigaku Imo, but if you want to cut it a different way, see above for alternative ways to cut sweet potato.
Try to cut all the pieces to the same size and thickness so that they cook evenly.
After cutting the sweet potato, place it in a bowl of cold water with a pinch of salt and soak for 5 minutes. Not only does this help remove the excess starch, but it also prevents discoloration and protects the potato from absorbing too much oil when we fry it.
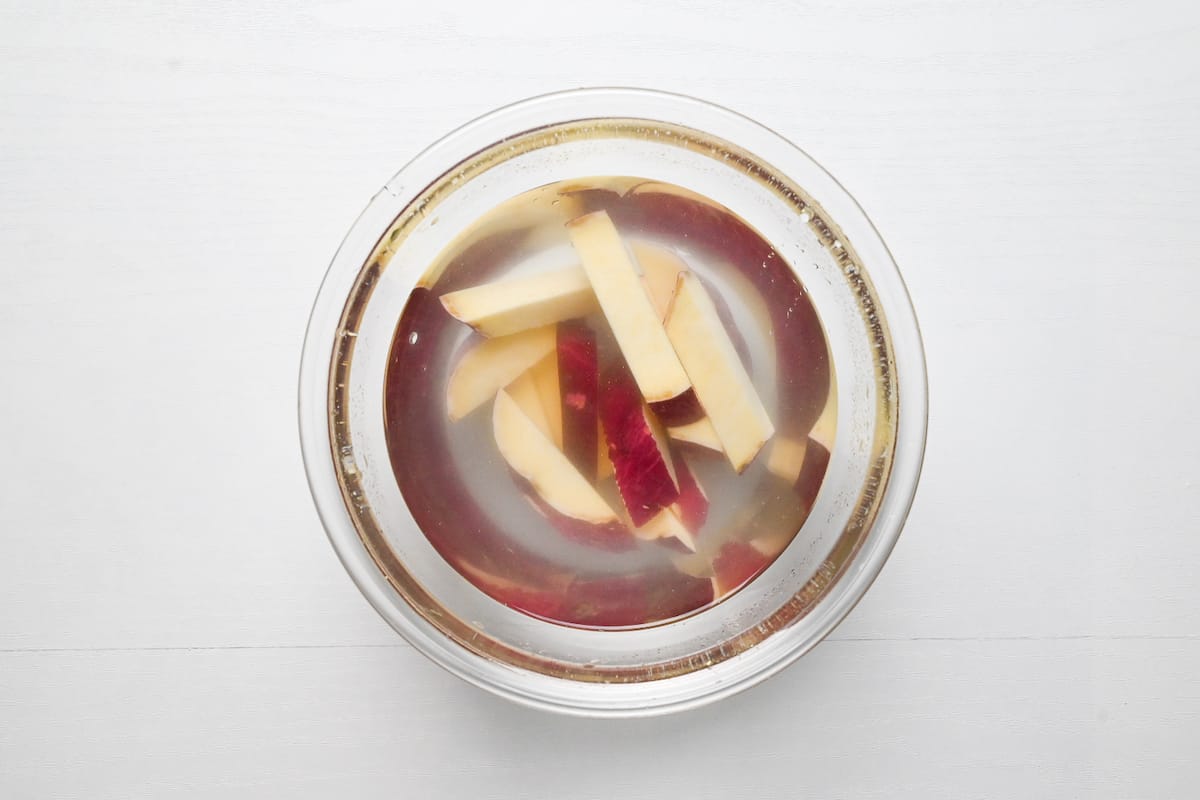
A short soak in warm water with a pinch of salt is all it needs to remove the starch. Any longer can result in a loss of flavor.
After soaking, discard the water and dry each piece thoroughly with kitchen paper.
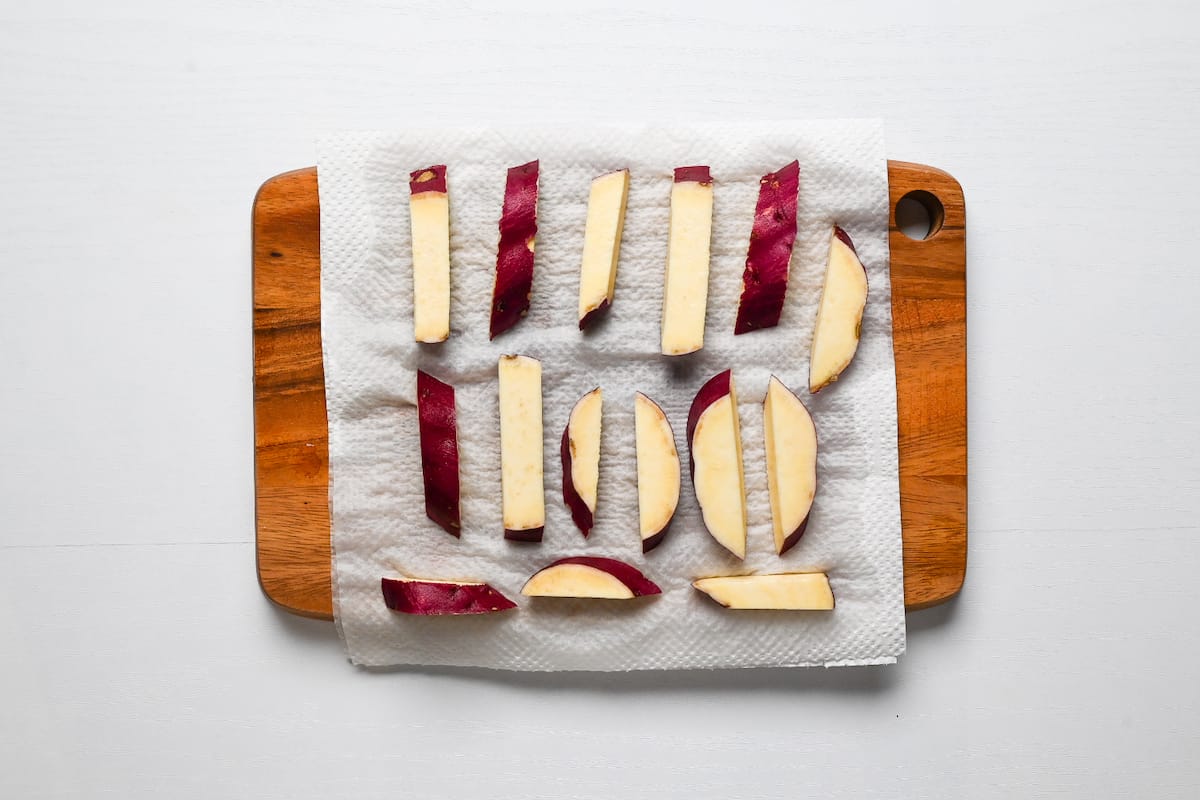
I don’t recommend air drying because they can become oxidized and discolored.
Next, transfer the sweet potato to a pot and pour in cold oil until all of the potato sticks are submerged. I use vegetable or canola oil, but you can use your preferred oil with a mild flavor and high smoke point.
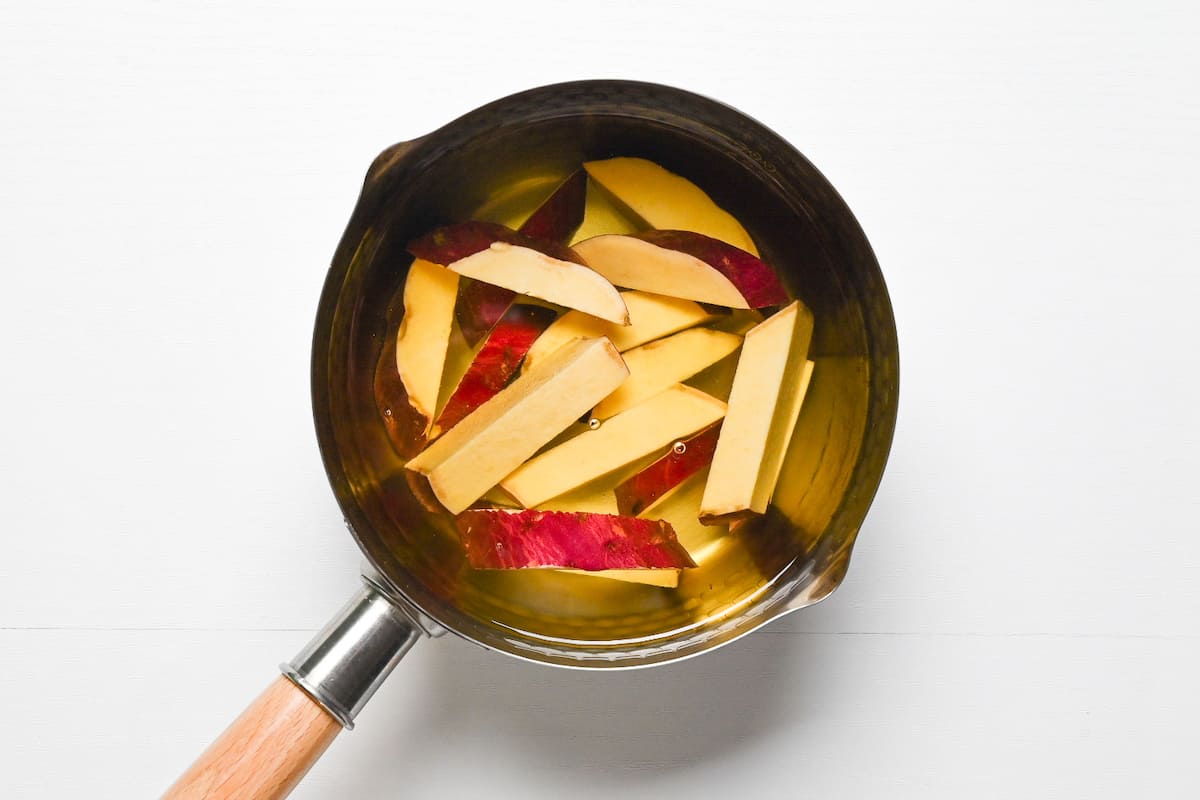
Place the pan on the stove and heat over a medium setting. Slowly bring the oil up to about 160-170°C (320-340°F). It helps to have a cooking thermometer for accuracy.
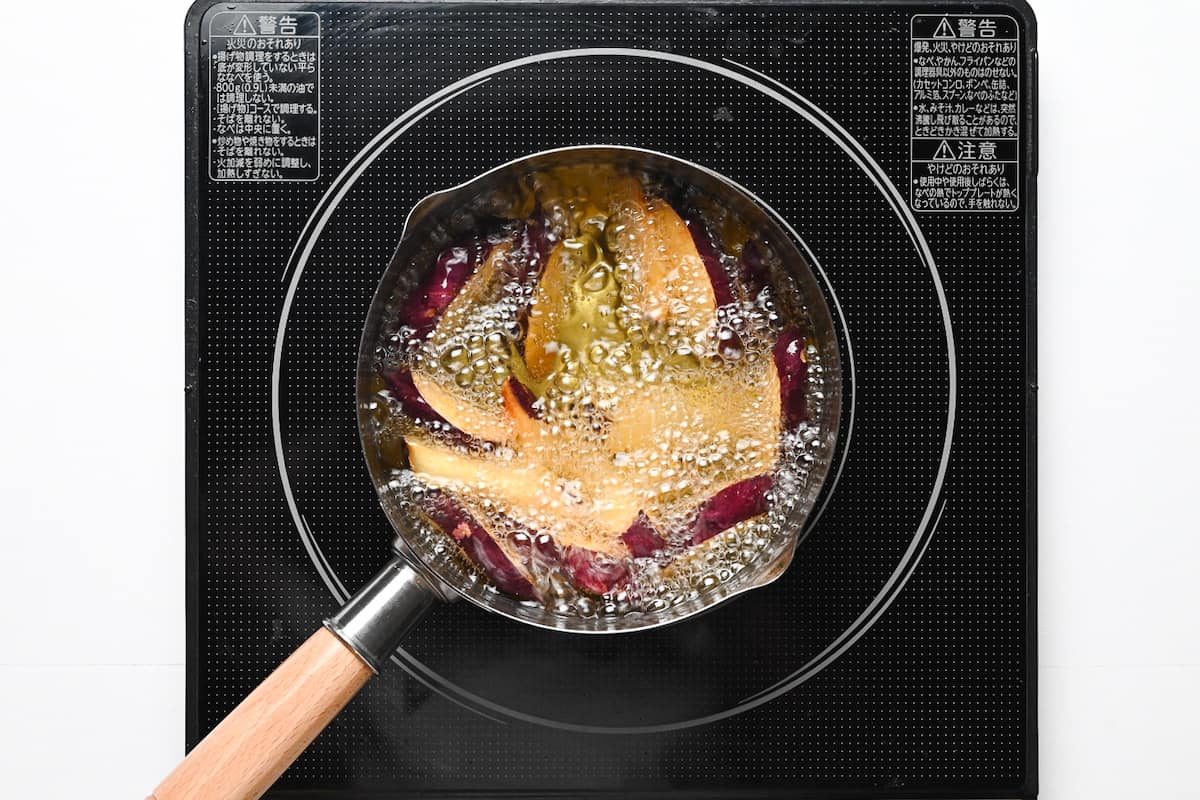
By allowing the potatoes to heat up slowly together with the oil, the middle cooks more evenly and ensures the potatoes are soft inside without burning the outside. Once the oil gets hot, the outside will crisp up quickly. This technique will make the inside fluffy without needing to steam or parboil.
Once the oil is hot and the sweet potato is bubbling away, just wait for them to turn golden. If you’re unsure whether they’re cooked through, take out the largest piece and pierce it with a skewer or fork to test it.
From beginning to end, this technique took 15 minutes. Rounds should take the same time, rangiri a minute or so longer.
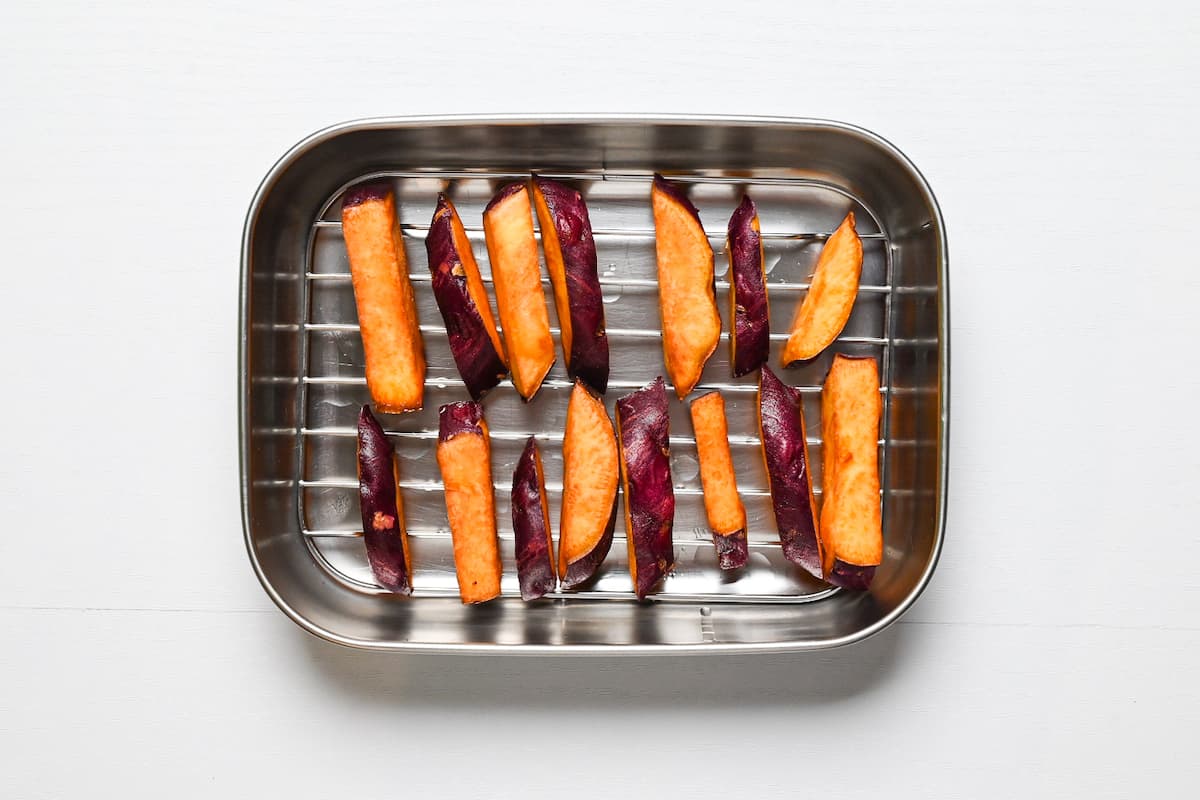
Once golden, transfer to a wire rack to allow any excess oil to drain off.
While they’re draining, we can move on to making the candy coating.
Making & Applying the Candy Coating
Add sugar, mirin, and water and mix to a pan while still cold (see tips & tricks for best pans to use for making caramel). I also add a small amount of rice vinegar to help prevent crystallization.
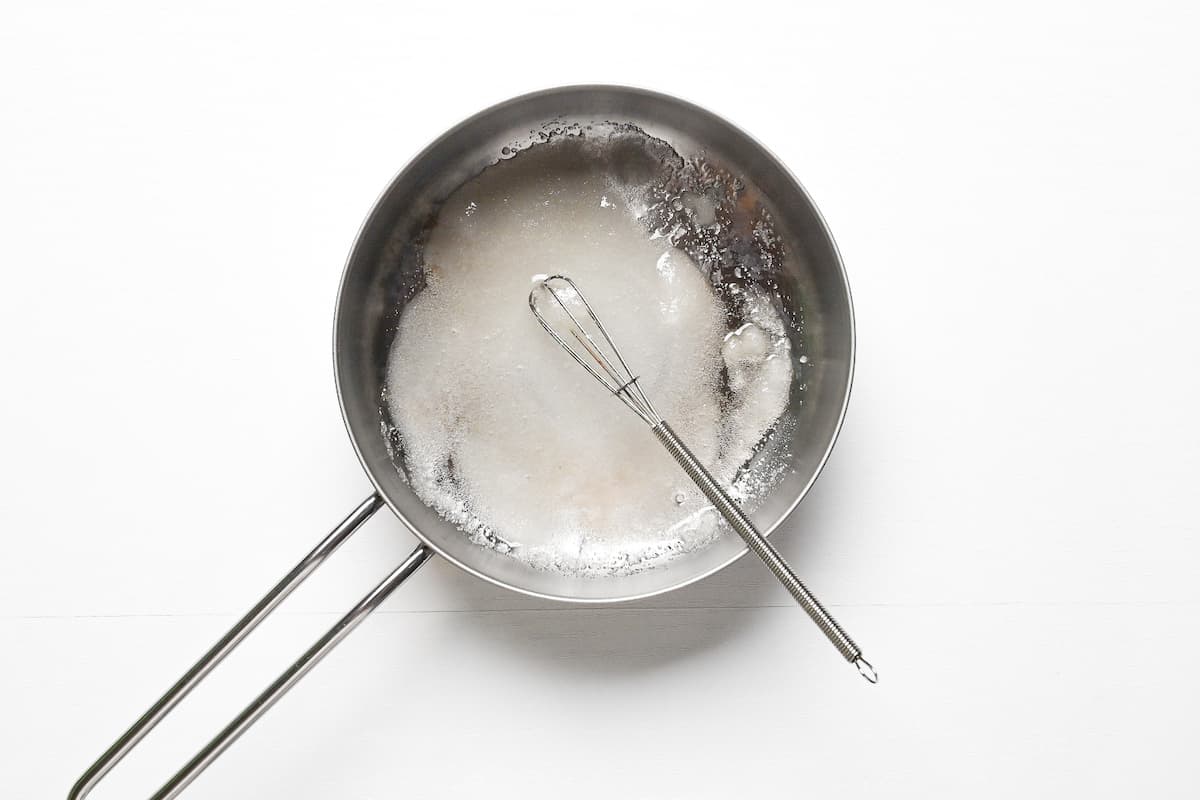
Place the pan on the stove over a low heat and stir until it starts to bubble. Once bubbling, stop stirring and leave it to turn golden. If it colors unevenly, tilt or rotate the pan, do not stir.
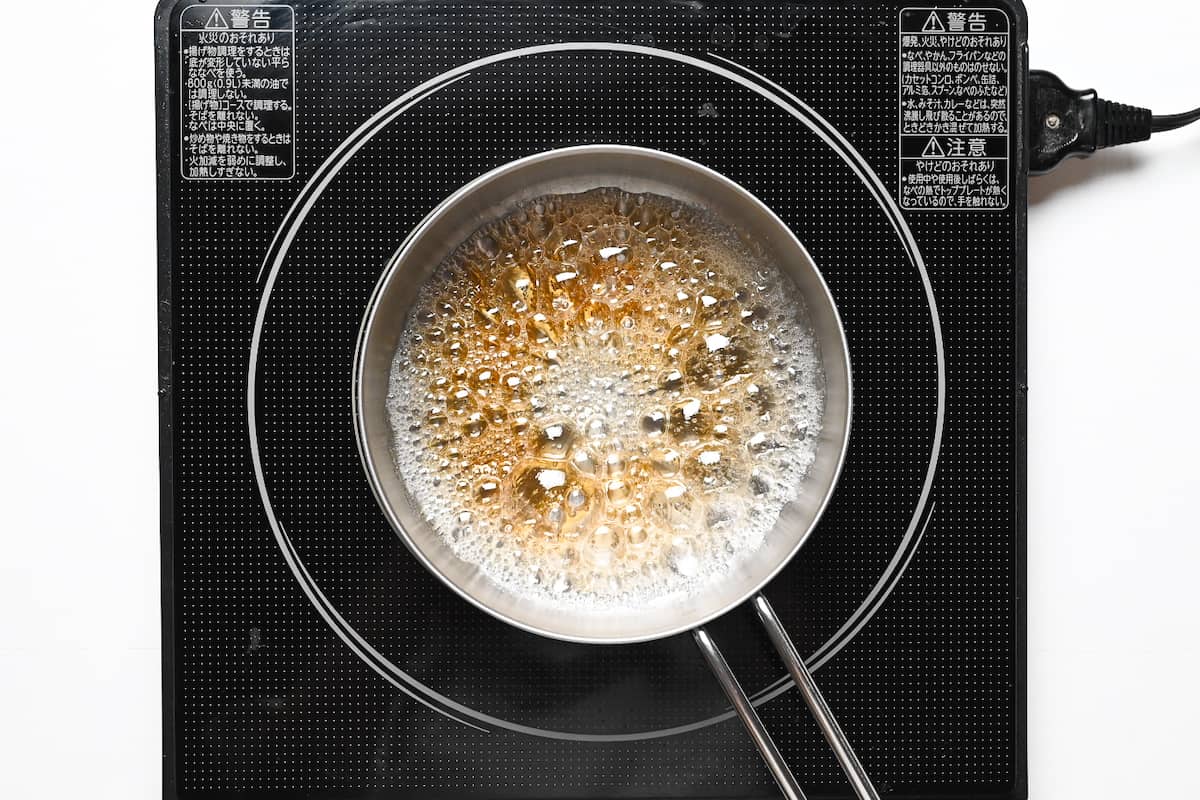
Once golden, dip a chopstick into the caramel and submerge it into cold water, if it turns hard then the caramel is ready.

Stirring the caramel can cause it to crystallize. If you notice some areas turning golden quicker than others, try rotating or tilting the pan gently instead of stirring.
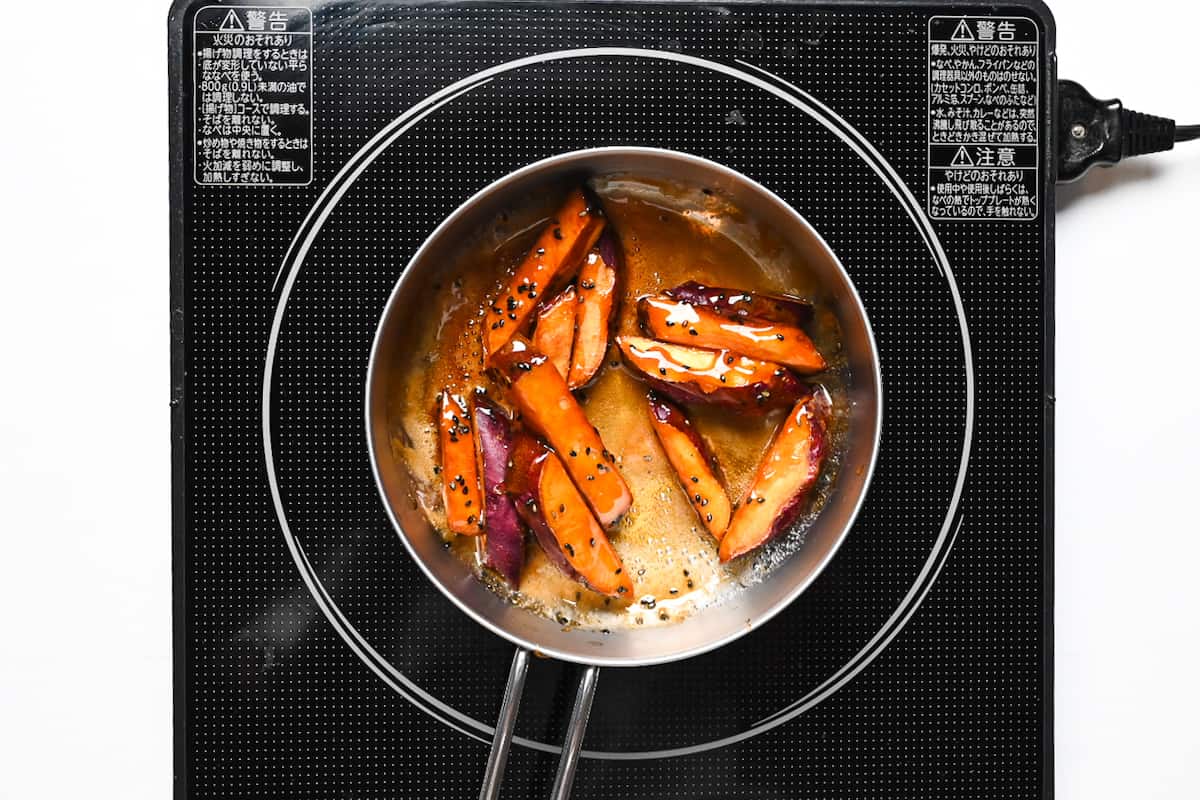
Add soy sauce and black sesame seeds, then mix before adding the fried sweet potato.
Turn off the heat and roll each piece around the pan to get an even coating of caramel. (If the caramel starts to harden before you’ve finished coating, turn the heat back on to the lowest setting and turn it off again once it becomes soft. You might have to do this a few times if you’re making a big batch.)
Once you’ve finished with the caramel, fill the pan with hot water and leave to soak. This will stop the candy from becoming hard and sticking to the bottom of the pan.
Transfer each piece straight to a non-stick surface with plenty of space between.
A heat-proof silicone baking mat (affiliate link) is ideal, but if you don’t have one, you can line a tray with baking parchment. (Keep in mind that some low quality baking parchments might still stick to the caramel, you can spray them with a very thin layer of oil to prevent any sticking.)
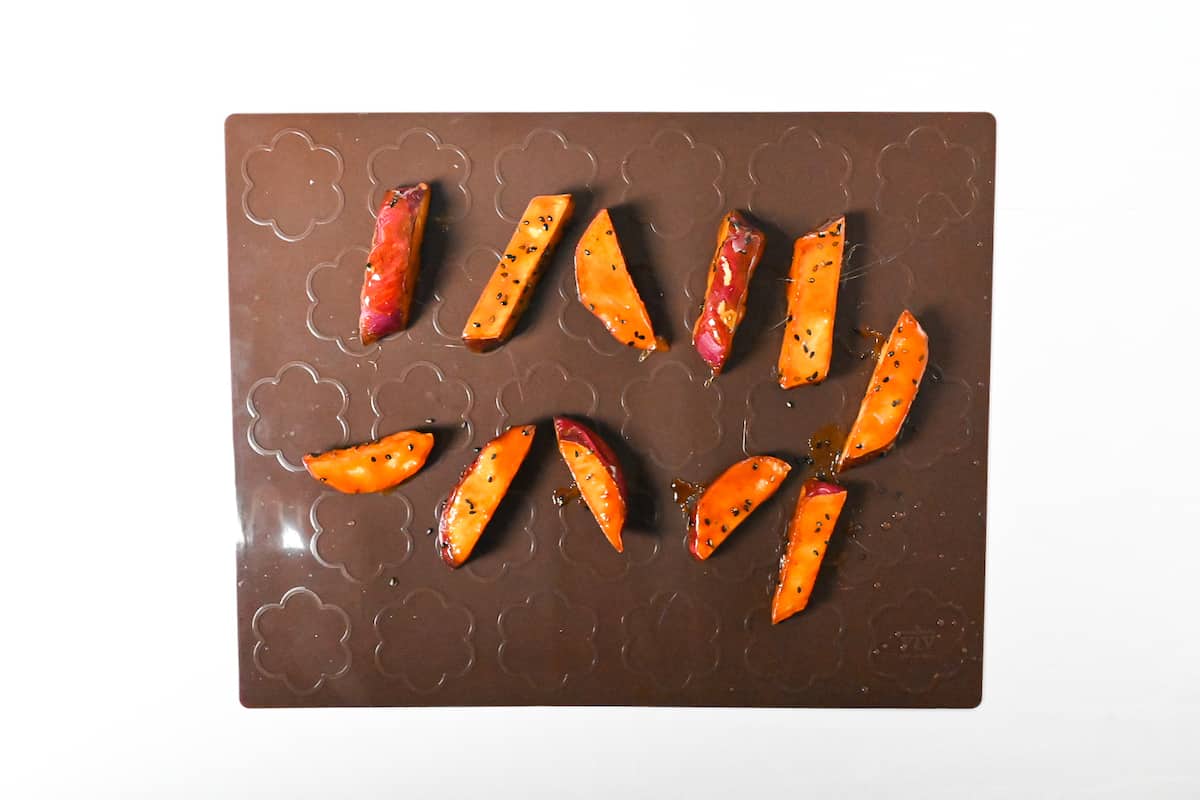
Cool for 5-10 minutes and enjoy!
Jump to Full Recipe MeasurementsTips & Tricks
Making candy is notoriously difficult. However, if you use these tips you shouldn’t have a problem, even without a candy thermometer.
- Use a pan with a thick base, they heat more evenly and are less likely to have heat spots.
- Use a silver or light coloured pan so you can see when the caramel changes colour.
- Use a wide pan so you have more space to coat the sweet potato and stop the pieces from sticking together.
- Avoid using a non-stick pan as the coating can be ruined by the high temperatures of caramel.
- Once it starts to bubble, do not stir or interfere with the candy coating. Doing so can cause it to crystallize. Try tilting the pan instead.
- Turn off the heat but leave the pan on the warm stove while you coat the sweet potato. If the caramel starts to harden before you’ve finished coating, heat on the lowest setting to melt it again.
- Once you’ve finished coating, fill the pan with hot water and leave to soak for easy clean up!
How to Store
Daigaku imo is best eaten on the day it’s made, preferably as soon as possible. This is because the candy coat tends to melt/deteriorate after a few hours, especially in humid or warm conditions.
Keep them in an airtight container in a cool place (but not in the refrigerator) if you plan to eat them later in the day.
Storage summary
Room temperature – A few hours (keep in a cool, dry environment).
Refrigerated – Not suitable.
Frozen – Not suitable.
I hope you enjoy this Daigaku Imo recipe! If you try it out, I’d really appreciate it if you could spare a moment to let me know what you thought by giving a review and star rating in the comments below. It’s also helpful to share any adjustments you made to the recipe with our other readers. Thank you!
More Sweet Potato Recipes
- Japanese Sweet Potato Dessert
- Sweet Potato Tempura
- Kuri Kinton (Sweet Potato Mash with Candied Chestnuts)
Want more inspiration? Explore my Japanese Dessert Roundup Post for a carefully selected collection of tasty recipe ideas to spark your next tea party!
Japanese Candied Sweet Potato (Daigaku Imo)

Ingredients
- 350 g Japanese sweet potato (satsumaimo) (satsumaimo)
- water for soaking
- 1 pinch salt
- cooking oil for deep frying
Caramel
- 60 g white caster sugar or granulated
- 1 ½ tbsp mirin
- ½ tbsp water
- ½ tsp unseasoned rice vinegar (komezu)
- ½ tsp Japanese soy sauce (koikuchi shoyu)
- ½ tsp black sesame seeds
My recommended brands of ingredients and seasonings can be found in my Japanese pantry guide.
Can’t find certain Japanese ingredients? See my substitution guide here.
Instructions
- Wash 350 g Japanese sweet potato (satsumaimo) and gently rub the skin to remove any dirt.

- Cut off the ends, cut into 1.5cm (1/2 inch) slices and then cut each round into 3 sticks.
- Place the sweet potato sticks in a bowl of cold water with 1 pinch salt and soak for 5 minutes.
- Drain the water and dry the surface of each piece thoroughly with kitchen paper.
- Place the sticks of sweet potato in a pot and add cold cooking oil until completely submerged.
- Move the pot to the stove and turn on the heat on a medium setting. Cook the sweet potato until golden. (For thick pieces, pierce with a skewer to check it’s soft inside.) From beginning to end, this usually takes about 15 minutes.
- Once golden, transfer to a wire rack and allow any excess oil to drain off.
- Take a thick base saucepan and add 60 g white caster sugar, 1 ½ tbsp mirin, ½ tbsp water and ½ tsp unseasoned rice vinegar (komezu). Mix the ingredients together and place on the stove, heat on low.
- Keep mixing until the sugar is dissolved, make sure to stop mixing as soon as it starts bubbling.
- When the caramel turns golden, dip a chopstick in it and submerge it into cold water, if the caramel goes hard then it's ready. (If it doesn't, heat for a little longer and keep testing every 30 seconds or so.)
- Add the ½ tsp Japanese soy sauce (koikuchi shoyu) and ½ tsp black sesame seeds, mix quickly and then add the sweet potato pieces. Turn off the heat.
- Coat each piece in caramel and then transfer them to a non-stick surface. (Lightly greased baking paper or a silicone baking mat.) If the caramel starts to harden in the pan, heat on low until it softens again and then turn off the heat again to prevent burning. Repeat as many times as necessary until all of your sweet potato sticks are coated, then leave to cool for 5-10 minutes to allow the candy to fully harden.
- Enjoy!
Leave a rating and a comment