

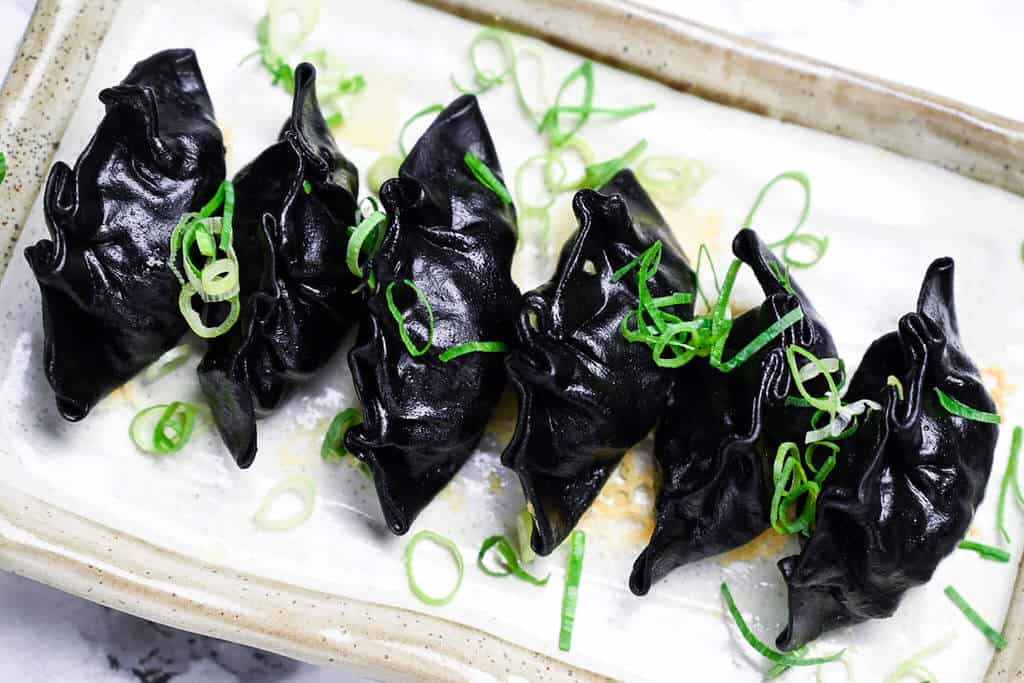
The best gyoza wrappers aren’t sold in stores. You make them at home. With flour, salt, and hot water, you get a chewy, tender dough that stretches, seals, and crisps in ways no commercial wrapper can.
I’ve tested flour ratios, water temperatures, and everything else to find what actually works best. This is everything I know about making perfect gyoza wrappers from scratch.
Homemade Gyoza Wrappers
Recipe Snapshot
- What is it? Thin circles of wheat dough used to wrap Japanese gyoza. Made with a blend of flour, hydrated with boiling water to trigger starch gelatinization.
- Flavor profile: Chewy on the steamed top, crispy on the pan-fried bottom. Clean wheat flavor with a subtle richness.
- Why you will love this recipe: The wrapper is half the gyoza, and this recipe treats it that way. Water temperature is the master variable that controls whether your dough turns out crispy, chewy, or both. Every step is explained with the science behind it, so you can adjust with confidence.
- Must-haves: A blend of bread flour and cake flour, a kitchen scale for precise measurement, and a rolling method (pasta machine for uniform thickness or a small rolling pin for hand-rolling).
- Skill level: Medium. The dough itself is forgiving. The challenge is rolling each piece into a uniformly thin circle, which improves quickly with practice.
Summarize & Save this content on:
What Are Gyoza Wrappers/Skins?
Gyoza wrappers/skins (餃子の皮) are thin, round sheets of unleavened wheat dough used to encase Japanese-style pan-fried dumplings. The dough is made by hydrating a blend of flour with hot water, which triggers starch gelatinization and suppresses excessive gluten formation. The result is a pliable skin that crisps on the bottom and stays chewy on top when pan-fried.
In Japan, store-bought wrappers have dominated home kitchens since the 1950s. But commercial skins contain preservatives, lack the natural wheat aroma of fresh dough, and produce a uniform texture that misses the mochi-mochi chew of handmade wrappers. Making them from scratch is positioned in Japan as a weekend project or a communal cooking event, not an everyday task.
Gyoza wrappers are actually distinct from other Asian doughs. Wonton wrappers contain kansui, an alkaline solution that gives them a slippery, springy texture and yellow tint. Spring roll wrappers are pre-cooked crepes with much higher hydration. Japanese gyoza wrappers sit in their own niche: no kansui, no egg, just flour, salt, and water, designed for the specific crispy-chewy contrast of yaki-gyoza.
Homemade Gyoza Wrapper Ingredients

- Cake flour: This is your tenderness engine. With only 6.5-9% protein, cake flour forms weak gluten networks that keep the wrapper soft and give you that clean snap when pan-fried. It makes up half the blend in this recipe, and increasing its proportion will push the texture toward crispier and more delicate. If you only have all-purpose flour, that works on its own as a balanced middle ground.
- Bread flour: The other half of the blend. At 10.5-13% protein, bread flour builds the elastic gluten structure that gives the dough its stretch and chew. Without it, the dough tears too easily when you roll thin. Together with cake flour, the 1:1 ratio hits the sweet spot between pliability and strength. You can shift this ratio depending on your goal: more bread flour for chewy boiled gyoza, more cake flour for crispy pan-fried ones.
- Mochi flour: This is the optional secret ingredient. Mochiko is 100% amylopectin with zero amylose, which means it gelatinizes at a lower temperature than wheat flour and adds a distinctive sticky, mochi-mochi chew to the finished wrapper. It also improves moisture retention, making the dough less prone to cracking. A small amount goes a long way.
Why Water Temperature Changes Everything
Choosing water temperature for gyoza wrappers is not about preference. It is a chemical design decision that determines which of two competing reactions dominates your dough.
Wheat flour is roughly 70-78% starch. In its raw state, starch has a crystalline structure that repels water. But when you add water and heat, the granules start swelling around 55°C (131°F), viscosity surges between 60-70°C (140-158°F), and full gelatinization occurs above 85°C (185°F). Gelatinized starch, particularly the branched amylopectin chains, produces the soft, sticky, mochi-mochi texture that defines a good pan-fried wrapper.
At the same time, wheat proteins (gliadin and glutenin) form gluten when hydrated. But above 60°C (140°F), these proteins denature before they can build strong elastic networks. This is the trade-off: the hotter the water, the more starch gelatinization you get and the less gluten you form.
This recipe uses boiling water (90-100°C / 194-212°F) because the goal is a pan-fried wrapper with maximum chew and a crispy bottom. The principle is identical to yudane, a bread-making technique that pre-gelatinizes wheat starch to boost moisture retention and softness.
| Water Temperature | Range | Dough Character | Best For |
|---|---|---|---|
| Cold water | 5-20°C (41-68°F) | Strong elasticity, springy | Boiled gyoza |
| Warm water | 30-50°C (86-122°F) | Versatile, easy to handle | All-purpose |
| Boiling water | 80-100°C (176-212°F) | Mochi-mochi + crispy when fried | Pan-fried gyoza |
If you want wrappers that work for both pan-frying and boiling, warm water around 50°C (122°F) offers a middle path. You get moderate gluten for structure and partial gelatinization for chew.
Hydration Ratio
The flour-to-water ratio is the most critical measurement after temperature. Too little water makes the dough stiff and crumbly. Too much makes it impossibly sticky. A 50% hydration rate (equal parts flour and water by weight) is the standard starting point.
Higher-protein flour absorbs more water, so adjust accordingly. Humidity matters too. On a humid summer day, the flour has already absorbed moisture from the air, so reduce water slightly. In dry winter conditions, add a touch more. The dough’s feel should always take priority over the exact number.
Substitutions, Variations, and Customization
Substitutions:
- Cake flour + bread flour → All-purpose flour works as a single-flour option. All-purpose sits between the two in protein content, so you get a balanced dough without needing to buy separate bags. Use the same total weight of flour and adjust water as needed.
- Mochi flour → Potato starch or tapioca starch can add similar chewiness. The texture will not be identical since mochi flour’s 100% amylopectin structure is unique, but either starch will improve moisture retention and pliability. You can also skip it entirely, but make up the loss with flour.
- Boiling water → Warm water (around 50°C/122°F) if you want wrappers for both pan-frying and boiling. You lose some of the starch gelatinization that gives pan-fried wrappers their signature chew, but you gain a more versatile dough with better gluten structure. For dedicated boiled gyoza, use room-temperature water.
- Lard (optional additive) → Any neutral oil. Lard adds a subtle savory fragrance to the pan-fried surface, but oil does the same job of suppressing gluten and improving extensibility.
- Potato starch (dusting) → Cornstarch works equally well. Both prevent sticking without absorbing into the dough the way wheat flour does. Avoid using the same flour you made the dough with for dusting. It will absorb into the wrappers and make them heavy.
- Pasta machine → A rolling pin and some patience. The dough rolls out fine by hand. You lose the perfectly uniform thickness, but the wrappers still cook beautifully. Roll from center outward, rotating the disc after each stroke to keep the shape round.
- Circle cutter → The rim of a large glass or a small bowl. Any round edge works for cutting. Choose something in the 8-9 cm range. Larger circles are easier to fill and fold, especially with handmade dough that is more fragile than commercial wrappers.
Have trouble finding Japanese ingredients? Check out my ultimate guide to Japanese ingredient substitutes!
Variations:
- Gluten-free wrappers: Combine rice flour and potato starch in roughly 50/30 ratio, then hydrate with boiling water. The dough behaves differently since there is no gluten to provide stretch, so keep it under plastic wrap at all times. These wrappers dry out and crack faster than wheat-based ones.
- Boiled gyoza (水餎子) version: Shift the flour ratio to 75% bread flour and 25% cake flour, and use room-temperature water instead of boiling. The extra gluten gives the wrappers enough resilience to survive boiling without tearing.
How to Customize:
- Flavored wrappers: Blend vegetable puree (spinach, beet, kabocha) or squid ink into the water before adding it to the flour. The color is vibrant and the flavor is subtle. Reduce plain water slightly to account for the moisture in the puree.
- Extra crispy pan-fried: Increase the cake flour ratio to 60:40 (cake to bread). The lower protein means less gluten and a wrapper that crisps faster and more dramatically on the pan-fried side.
- Thicker wrappers for soup dumplings: If you want a sturdier wrapper for brothy fillings, roll to 2mm instead of 1mm and use a smaller circle cutter (7-8 cm). The thicker skin holds up to the liquid without splitting.
How to Make Homemade Gyoza Skins
If you prefer to watch the process in action, check out my video of this homemade gyoza wrappers recipe!
Before you start (Mise en place):
- Gather your flours, salt, sugar, and a kettle of water ready to boil.
- Have potato starch on hand for dusting, plastic wrap for covering, and your rolling method (pasta machine or rolling pin) within reach.
- A circle cutter or glass in the 8-9 cm range will shape the final wrappers.
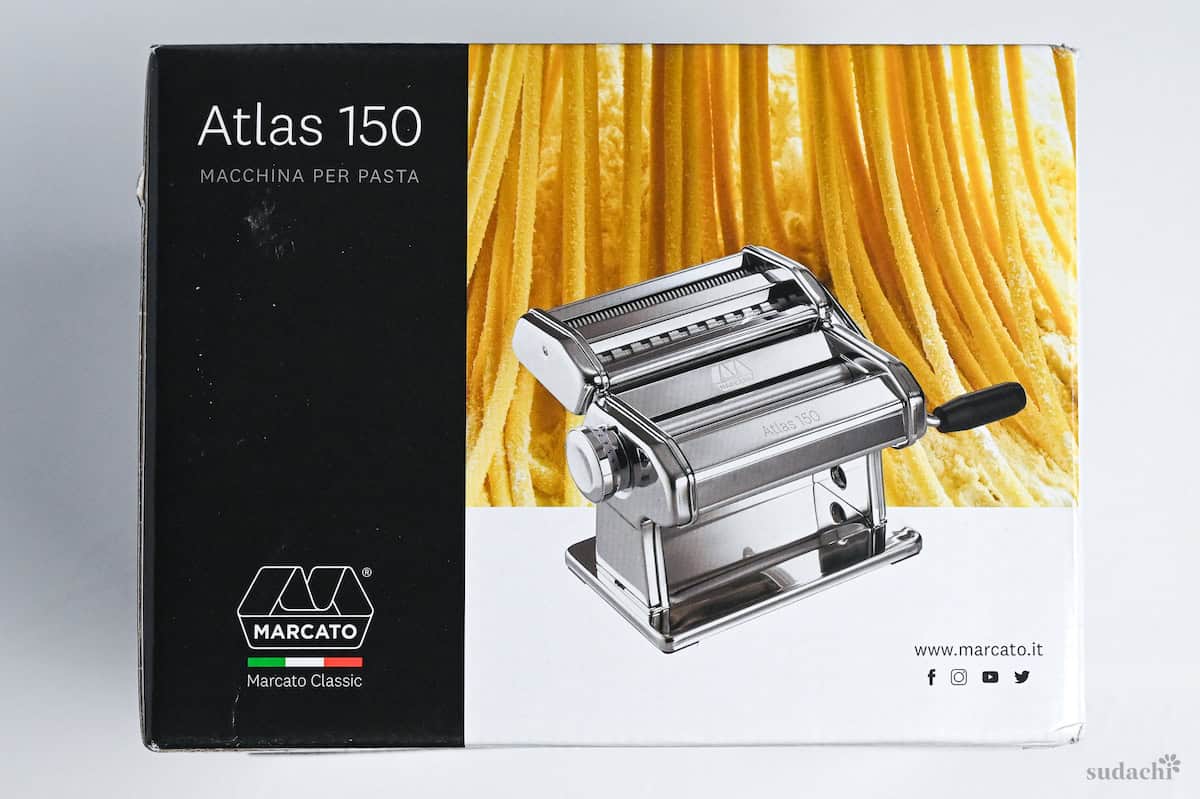
To develop this homemade gyoza wrappers recipe, I used Marcato’s Atlas 150 pasta machine.
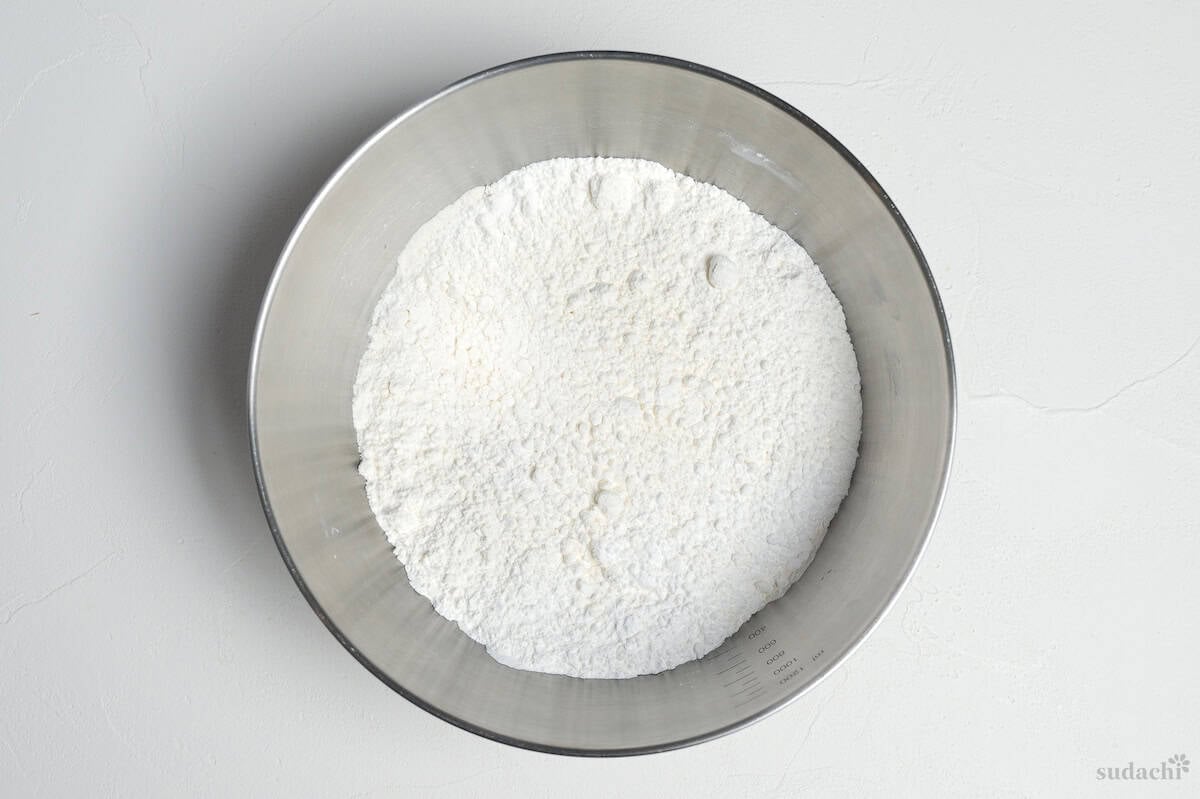
i. Combine cake flour, bread flour, and mochi flour in a large heat-proof bowl. Stir briefly with chopsticks to distribute everything evenly.
Increasing the cake flour proportion (for example, 60:40 cake to bread) suppresses gluten formation and pushes the wrapper toward a crispier, more delicate snap when pan-fried. More bread flour does the opposite, adding chew and elasticity for boiled gyoza. If you only have all-purpose flour, use it on its own. It lands right in the middle.
ii. (Optional) Add a small amount of lard to the dry flour and rub it in with your fingertips before adding any liquid.
Fat physically coats flour particles, blocking protein-water contact the same way butter does in pie crust. Adding it before the water maximizes this barrier effect. The result is a dough that stretches thinner without tearing, resists excessive gluten buildup, and develops a subtle savory fragrance on the pan-fried surface.
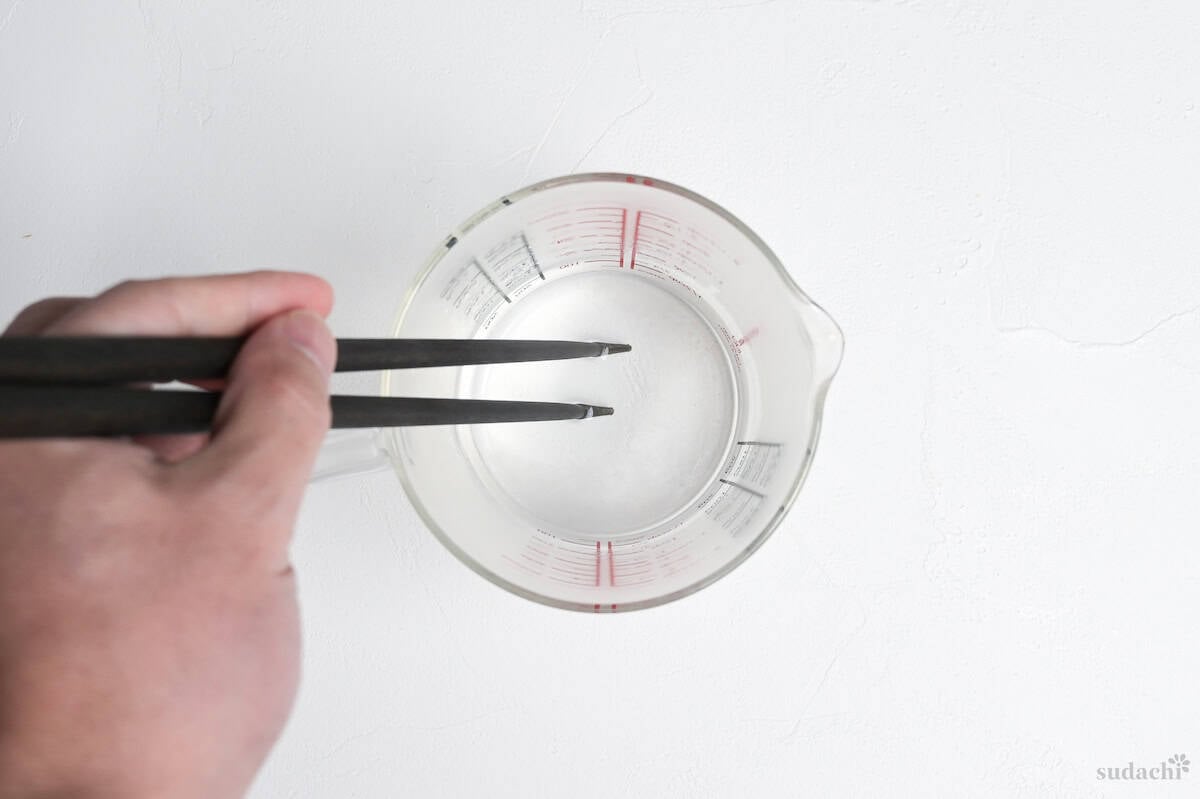
i. Dissolve salt and sugar in boiling water (90-100°C / 194-212°F).
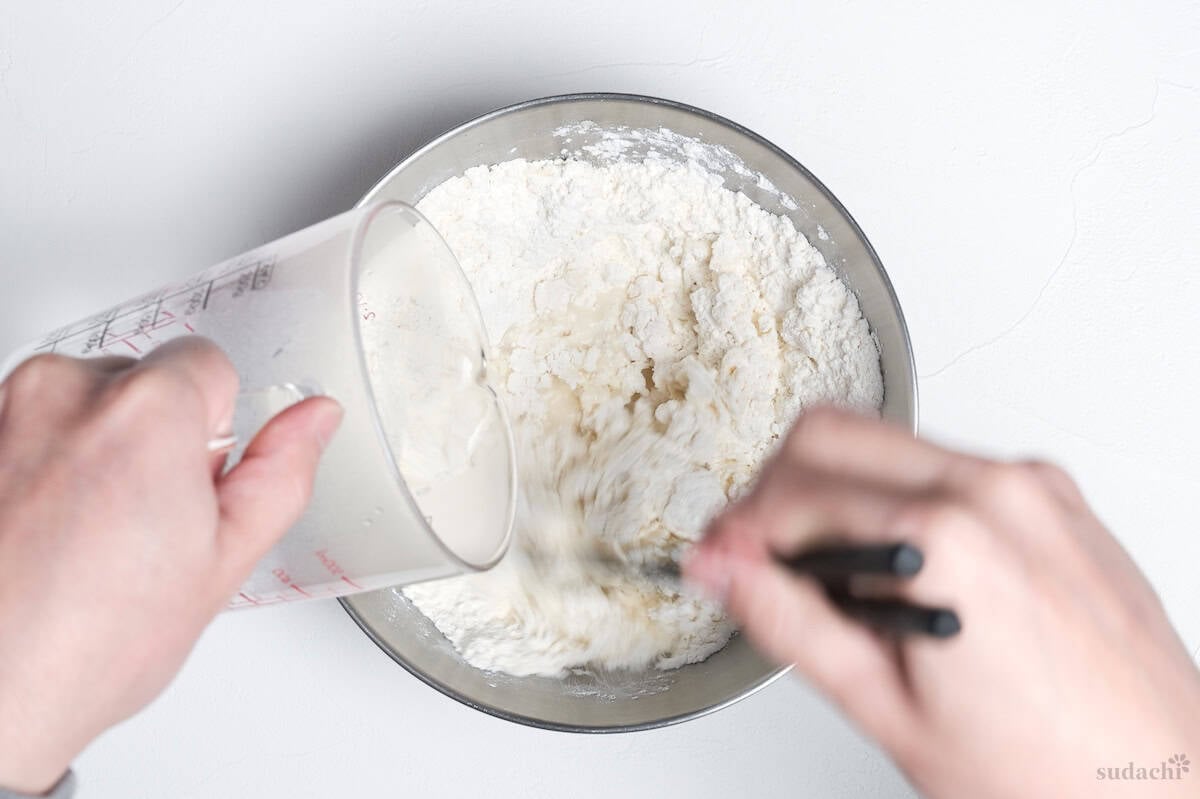
ii. Pour the hot liquid into the flour in a steady stream while stirring vigorously with chopsticks.
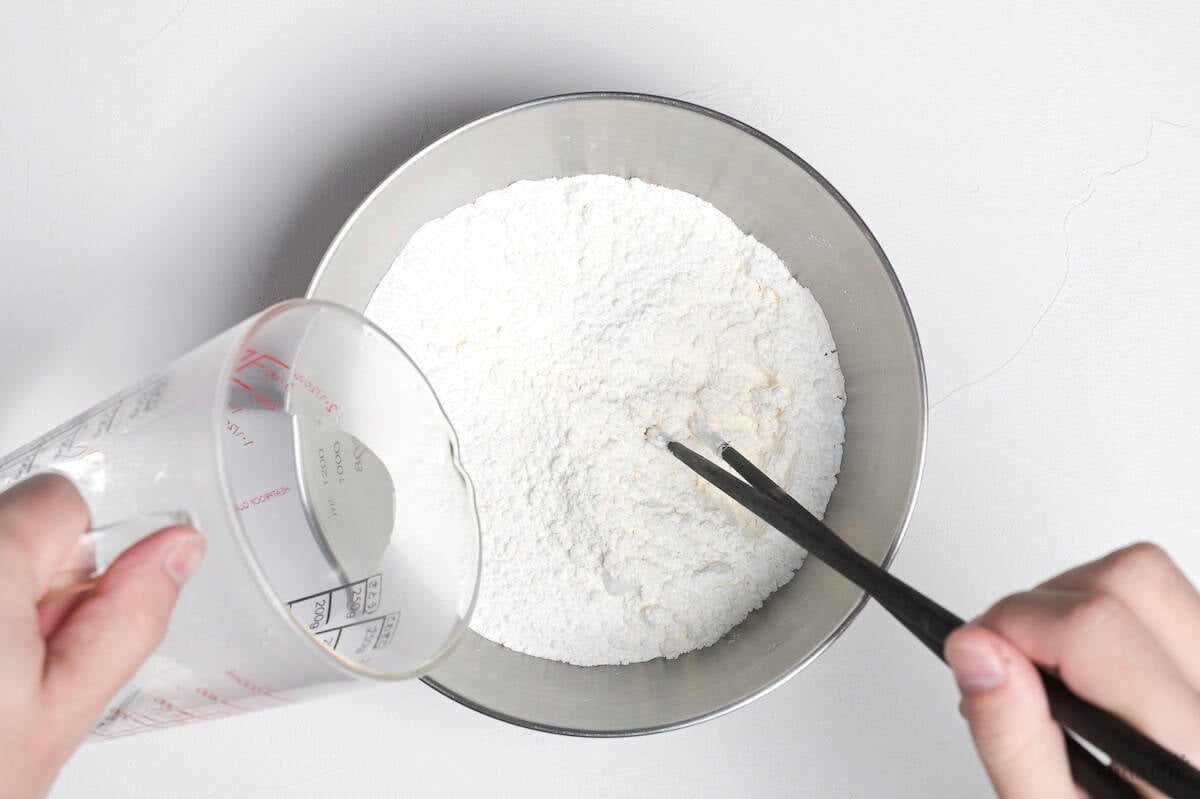
Two reasons. First, the mixture is dangerously hot. Second, chopsticks distribute water more evenly across the flour. Using your hands at this stage causes the liquid to pool in one spot, creating lumps that never fully hydrate.
iii. Keep stirring until the flour forms shaggy, crumbly clumps.
iv. It will look rough and uneven. That is exactly right.
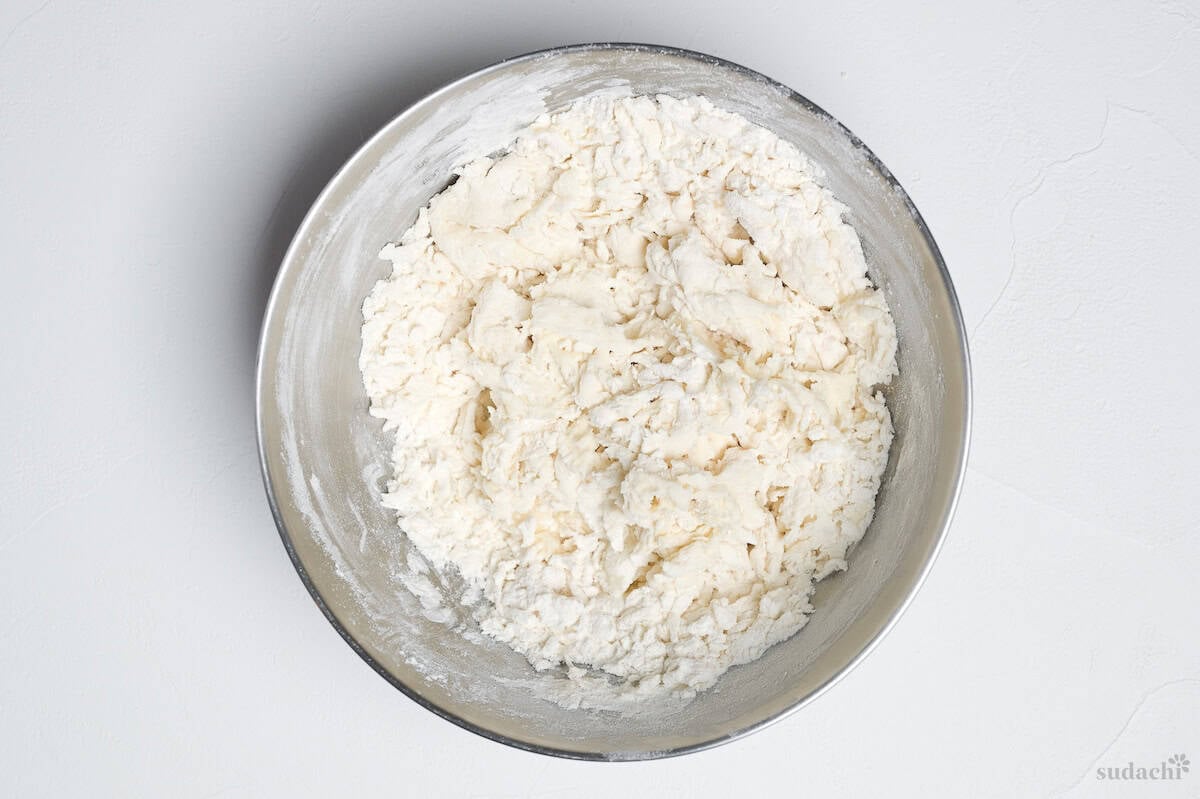
At 90°C+, starch granules absorb water and gelatinize within seconds. This is an irreversible transformation that creates the soft, pliable quality unique to hot-water dough. At the same time, the heat denatures gluten proteins before they can form strong elastic networks. This is why the finished dough rolls thin so easily.
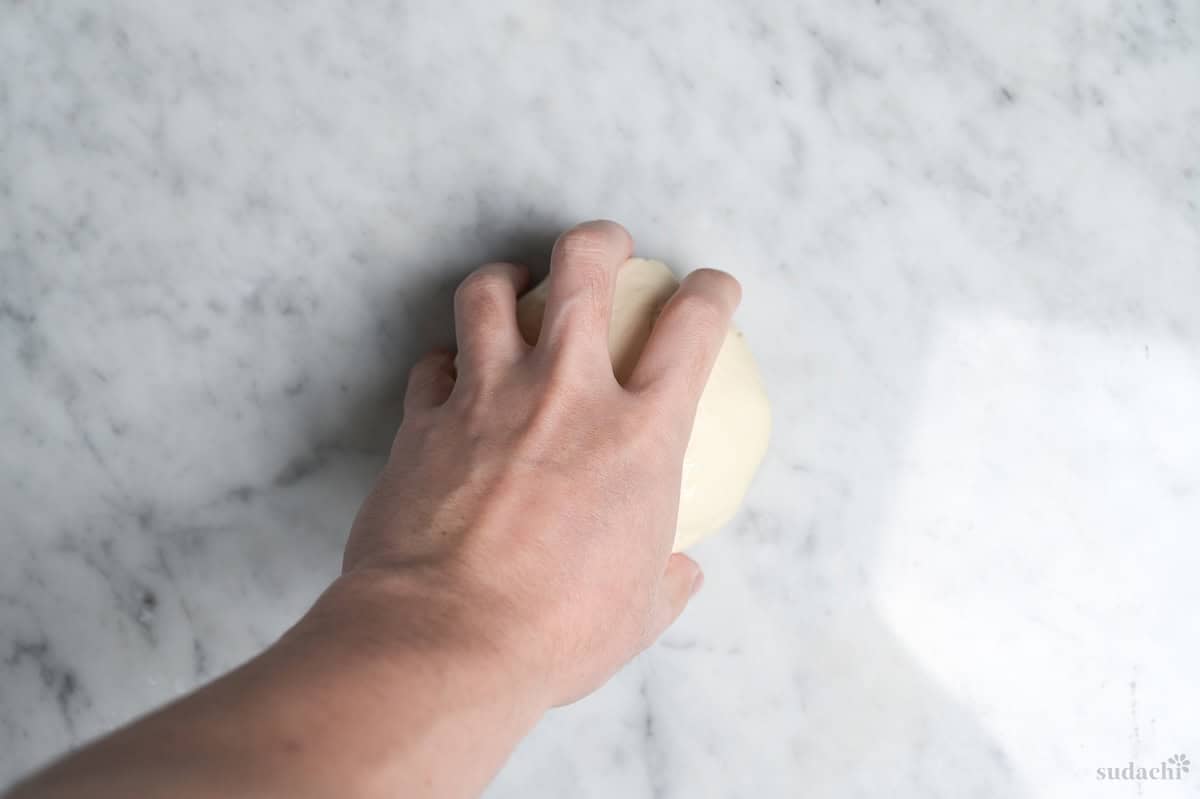
i. Once the mixture is cool enough to handle, tip it onto a clean surface and bring it together with your hands. Press the dough away from you using the heel of your palm with your body weight behind it, then fold it back in half. Rotate 90 degrees and repeat.
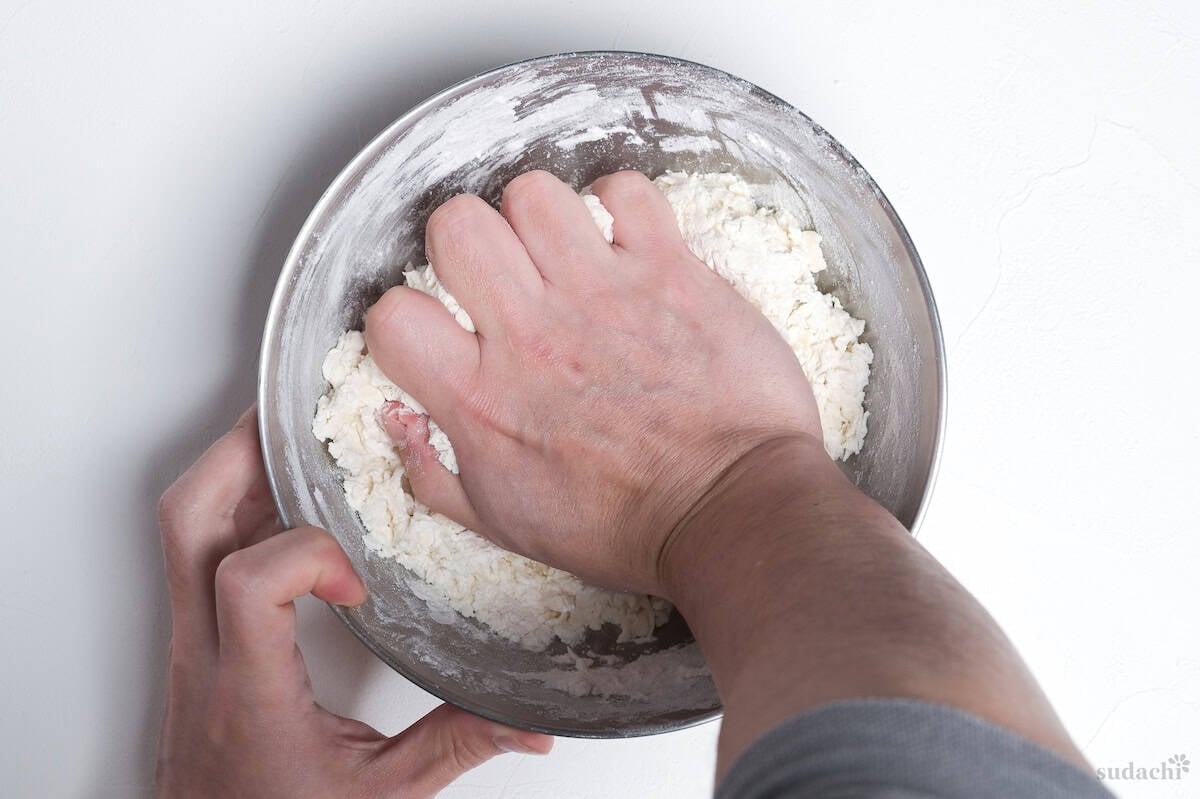
ii. Continue kneading for 5 to 10 minutes. Push, fold, and rotate in every direction. Simply mixing in one plane only stretches gluten fibers in a single direction, which does not build sufficient elasticity. Working the dough from multiple angles constructs the three-dimensional network structure you need.
The surface should be smooth and slightly glossy. Press with a finger. If the indent slowly springs back, the dough is ready. In Japan, the classic benchmark is “the softness of an earlobe.” With hand kneading, over-working the dough is nearly impossible, so the risk of going too far is low.
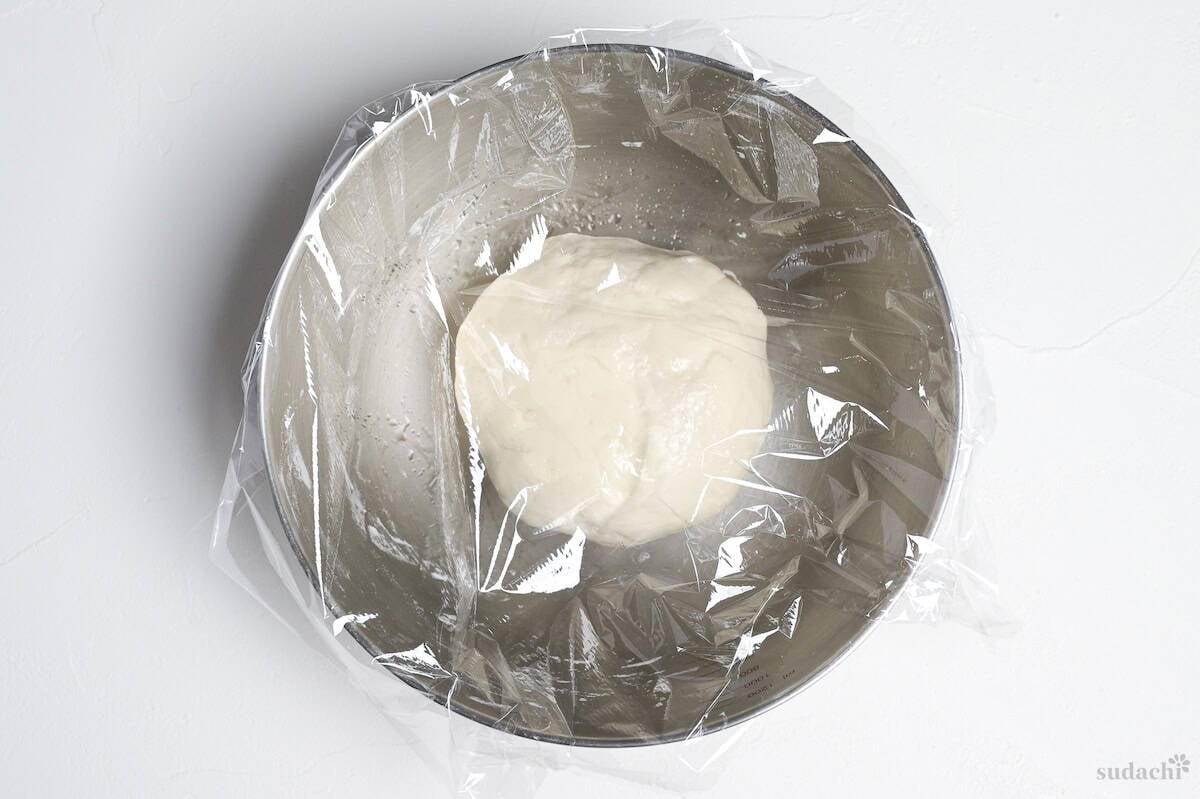
i. Rub a thin film of oil over the dough ball.
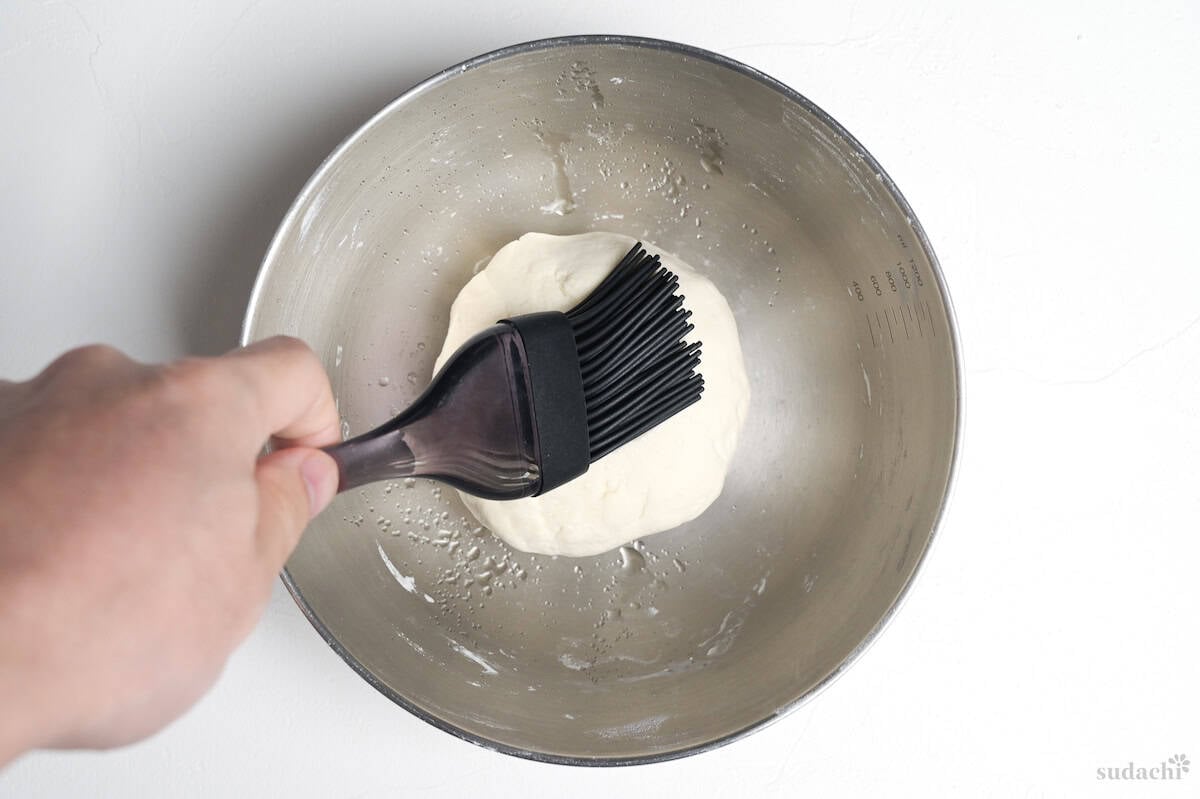
ii. Wrap tightly in plastic wrap, and let it rest at room temperature for at least 20 minutes. In summer, 15-20 minutes is enough. In winter, extend to 30-45 minutes.
Several things happen simultaneously. Gluten relaxes from its tense, kneaded state, so the dough stops springing back when you try to roll it. Moisture migrates to drier pockets, creating uniform hydration throughout. Natural enzymes in the flour (proteases) gently soften the protein structure, making it more pliable. And the gluten network continues to develop passively, stabilizing the dough without any additional work from you. Skipping this step is the second most common reason homemade wrappers fail.
Use this time wisely. Prepare your gyoza filling while the dough rests. This is the most efficient parallel workflow.
i. Unwrap the rested dough and knead briefly (about 30 seconds) to redistribute.
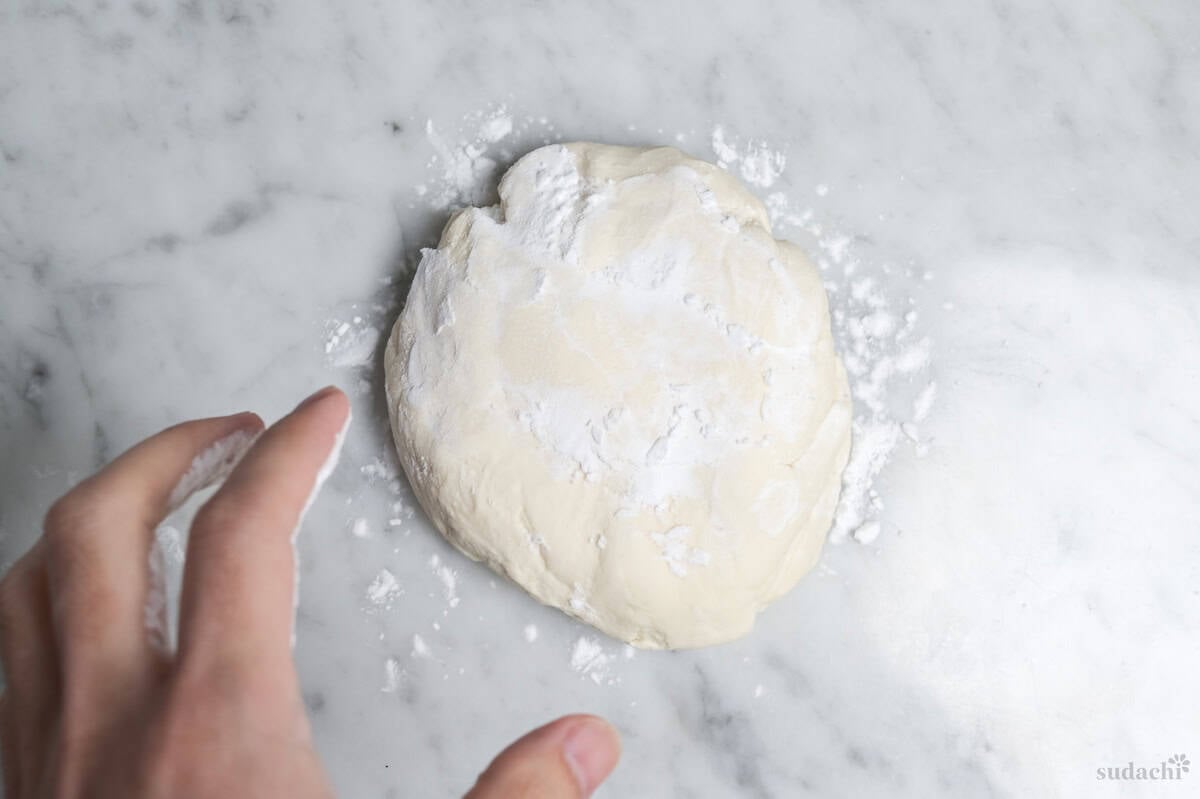
ii. Dust your work surface generously with potato starch.
Pasta machine & circle cutter “easy & neat” method:
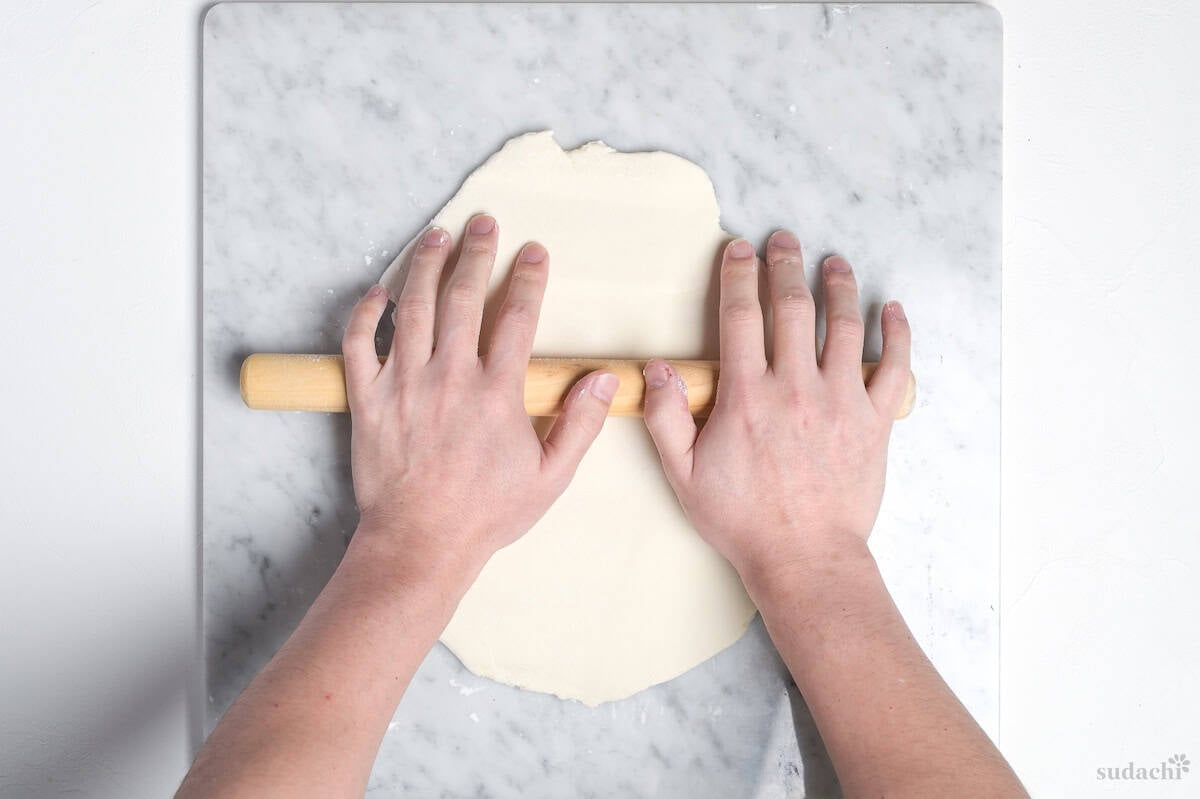
iii. Flatten the dough into a rough rectangle with your hands. Roll it out with a rolling pin until about 1 cm thick, then cut into pieces small enough to fit your pasta machine.
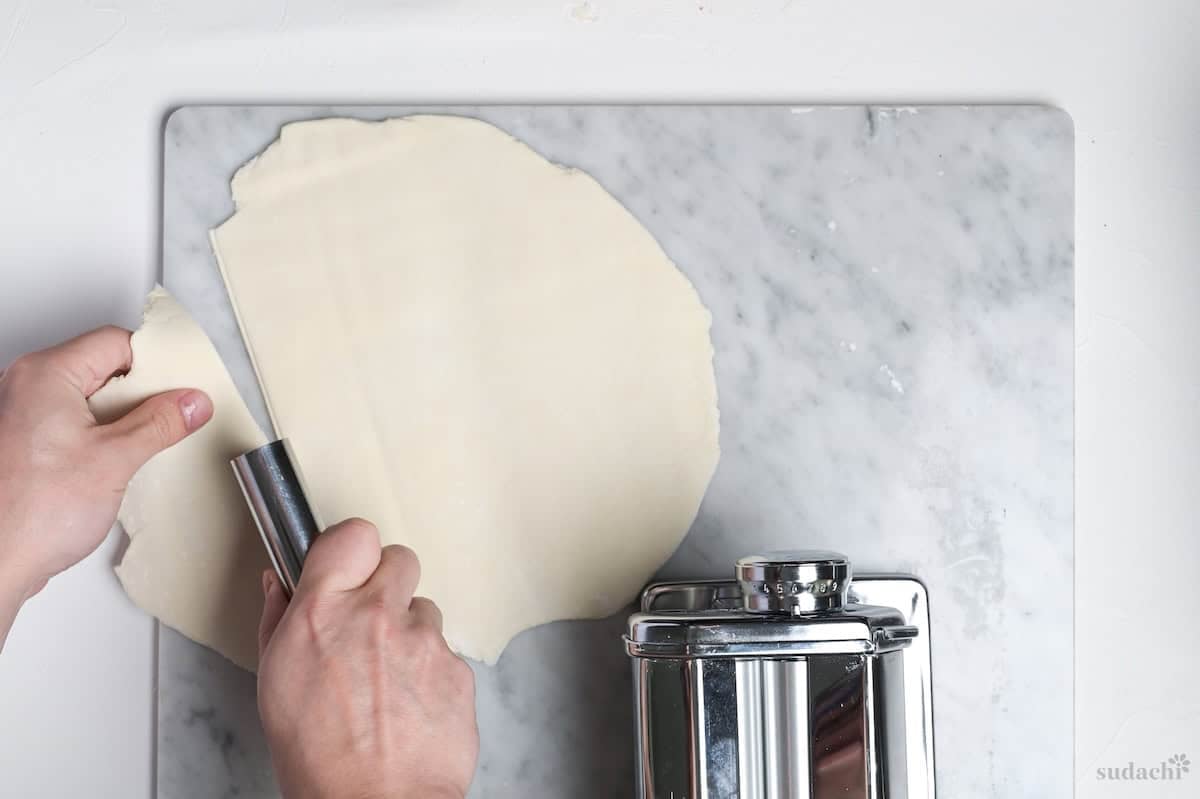
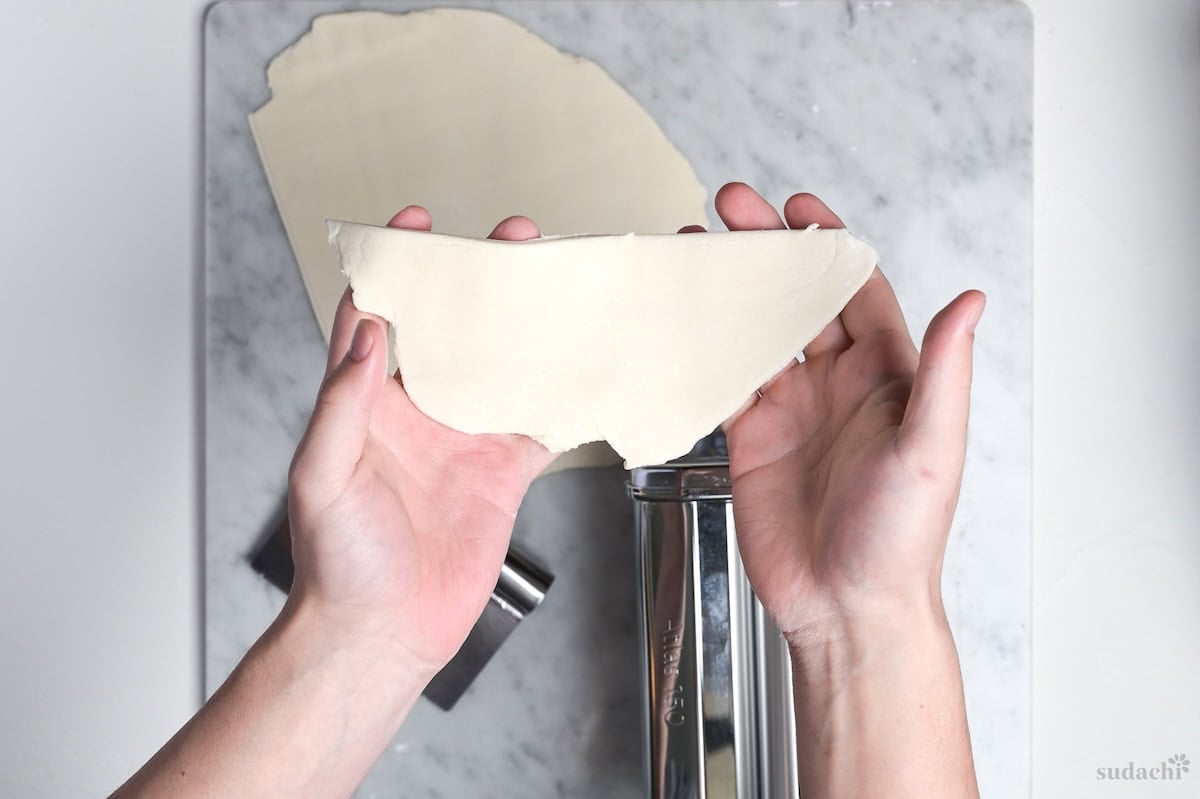
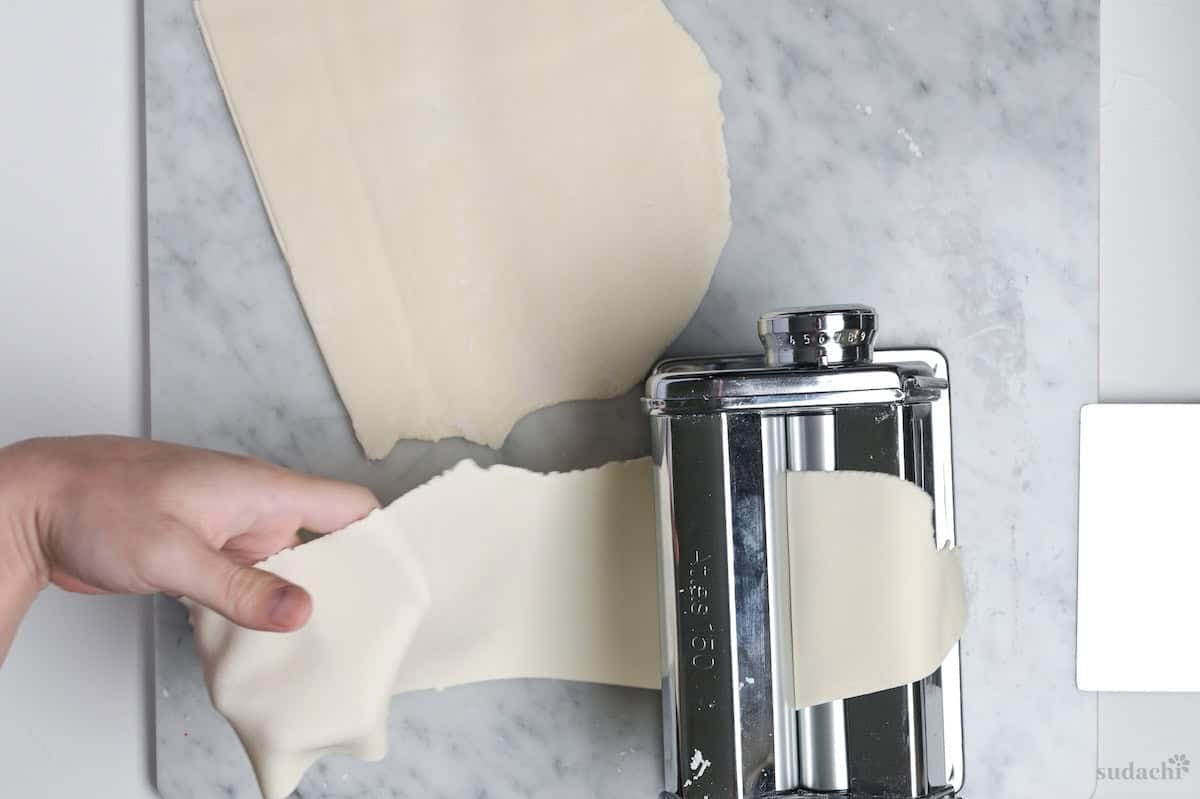
iv. Feed it through the pasta machine on the widest setting, then gradually reduce the thickness one notch at a time until you reach the target.
On my Atlas pasta machine, I found that setting 6 (about 1mm thick) gives the best results. Commercial wrappers are often thinner, but homemade dough has more elasticity than factory-produced sheets. Below 1mm, the wrappers deform and tear during handling. This was my conclusion after testing every setting on the machine.
Not confident folding yet? Roll a little thicker!
1mm is my recommendation, but treat it as a target, not a rule. If you are new to pleating gyoza, or the dough feels hard to handle, go one notch thicker on purpose. A thicker skin is more forgiving and still tastes great, with a bit more wheaty chew. One firm line, though. Never go below 1mm, even once you are confident.
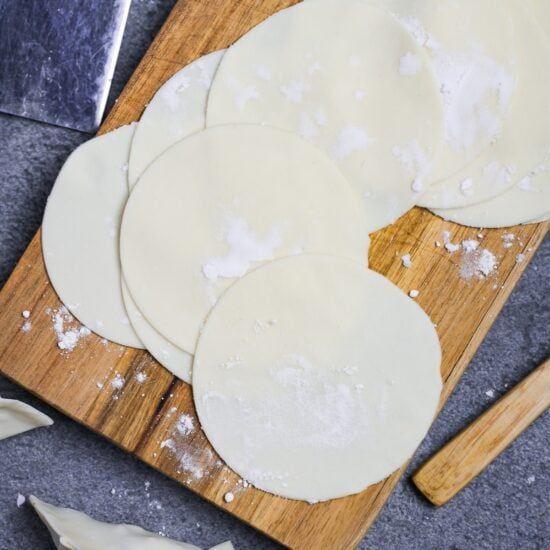
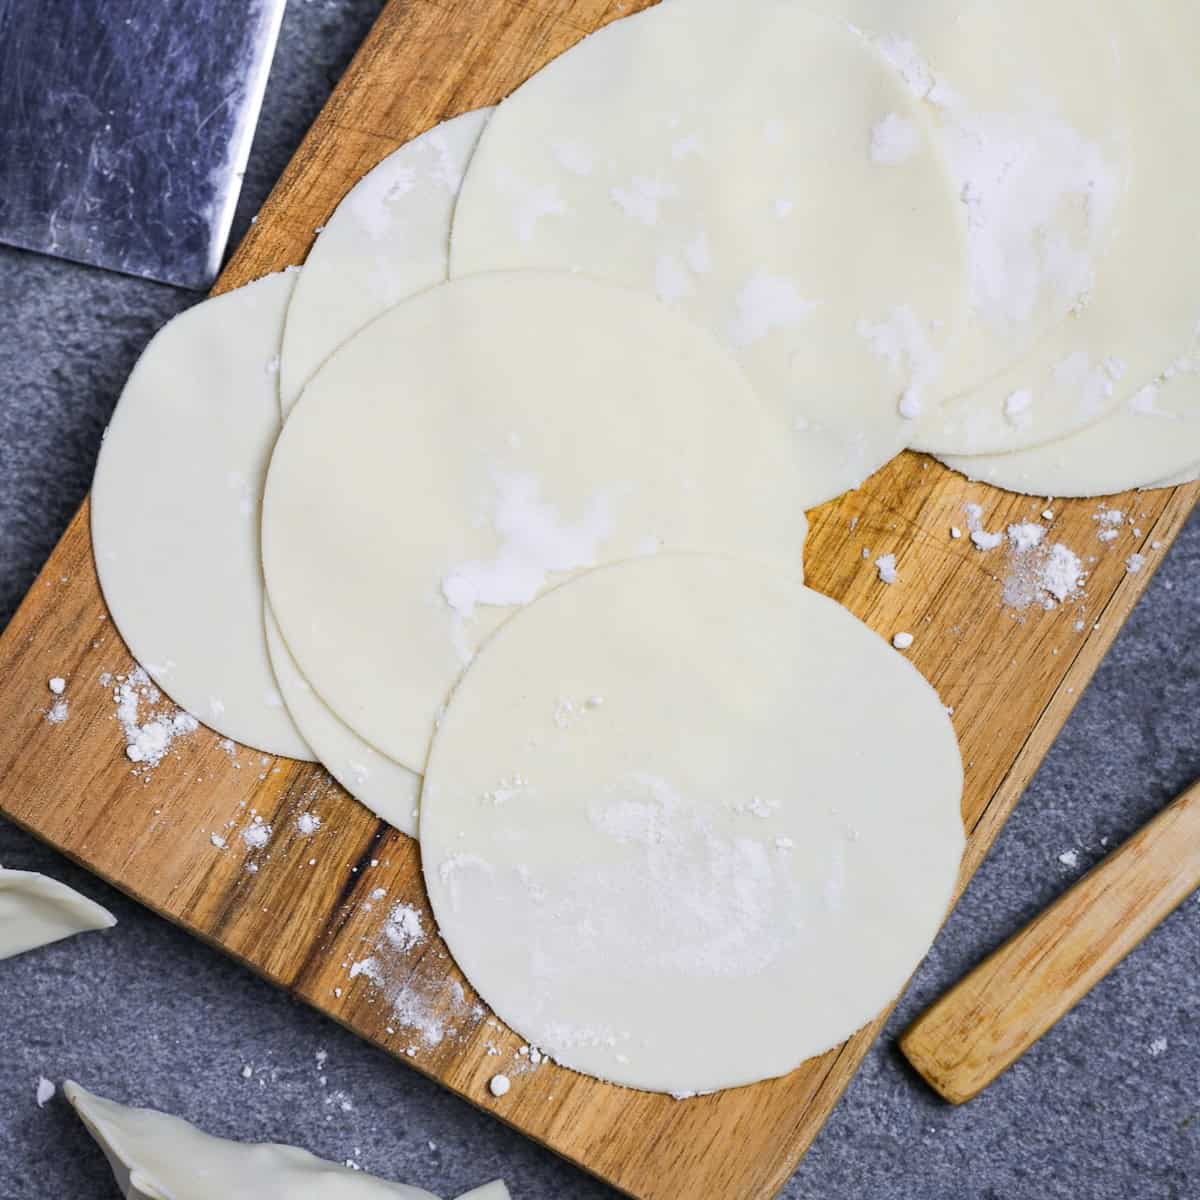
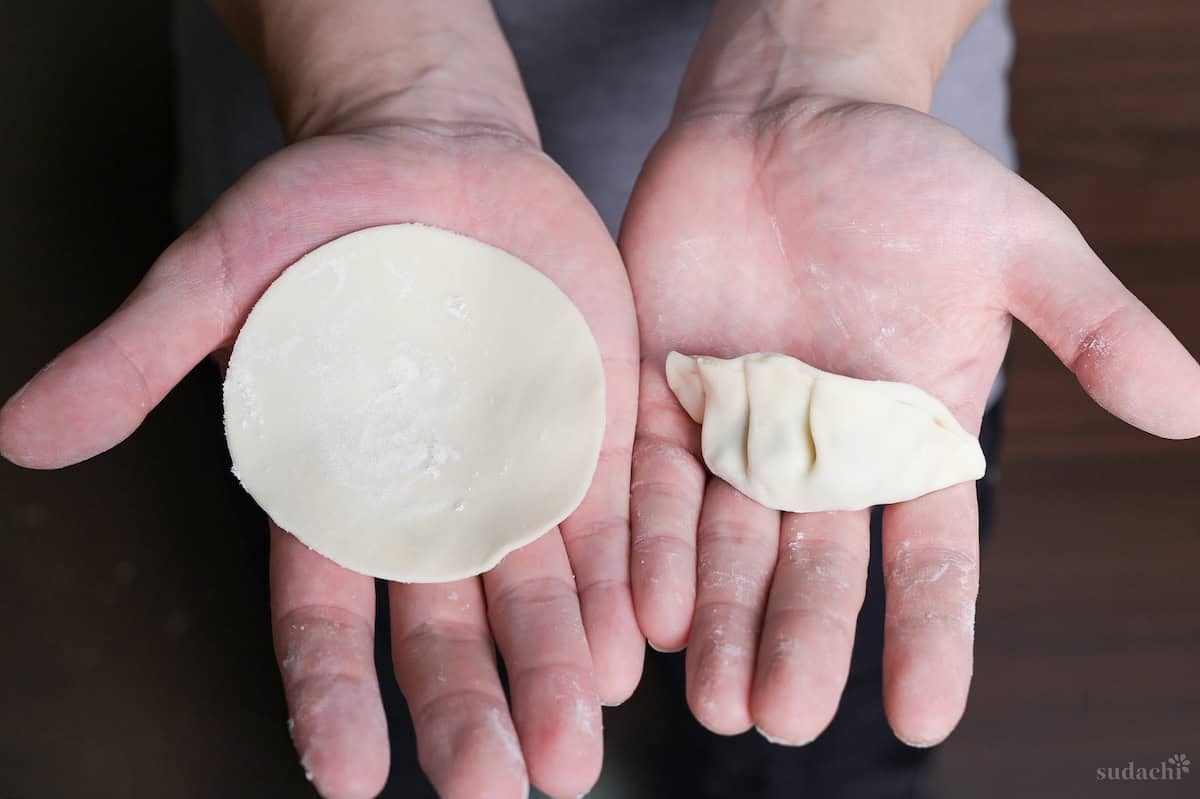
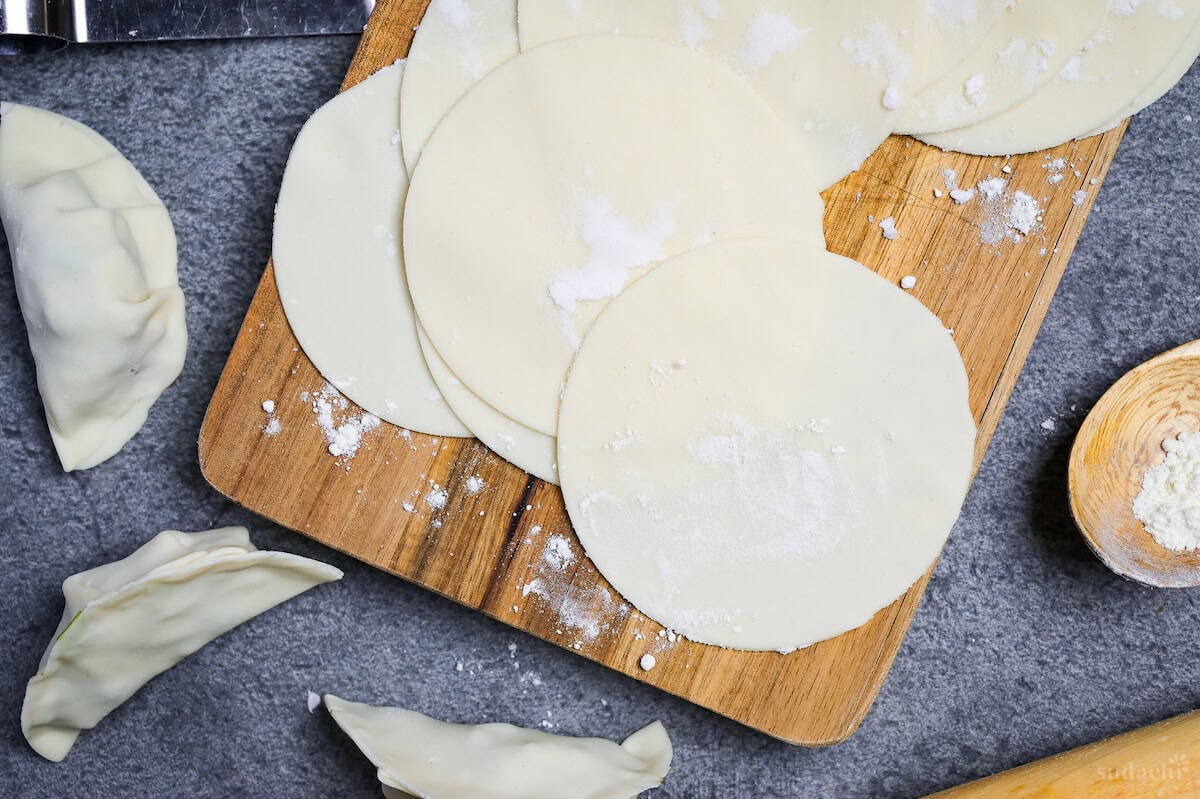
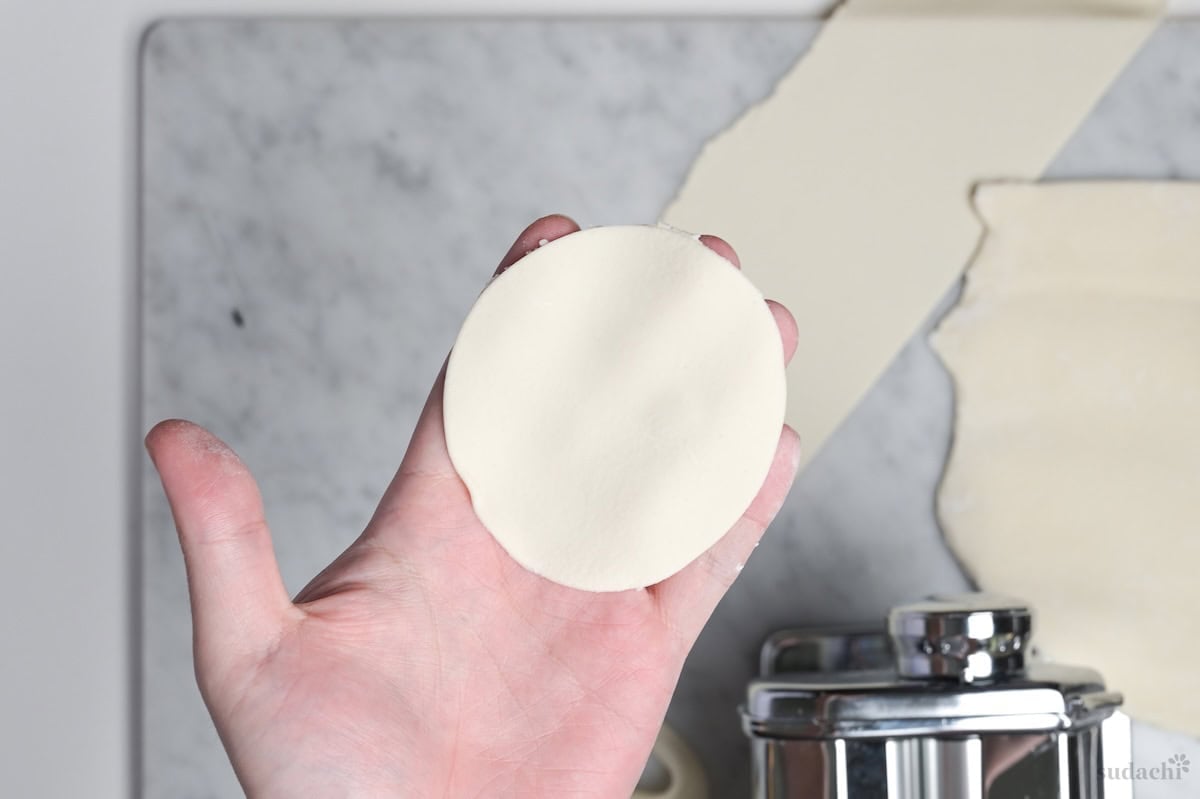
v. Lay the rolled sheet on the dusted surface and cut circles using a circle cutter (8-9 cm). I use an 8.5 cm cutter. Larger diameter makes wrapping easier, especially with homemade dough that is more fragile than store-bought.
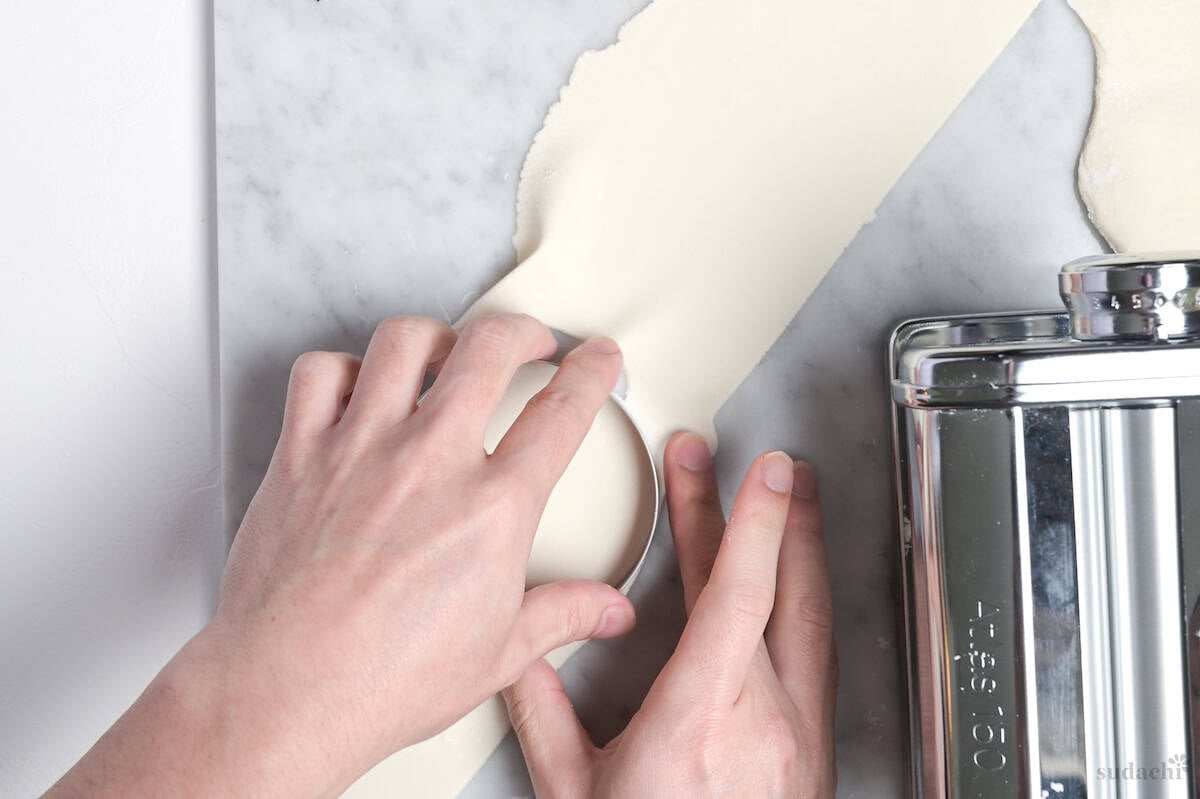
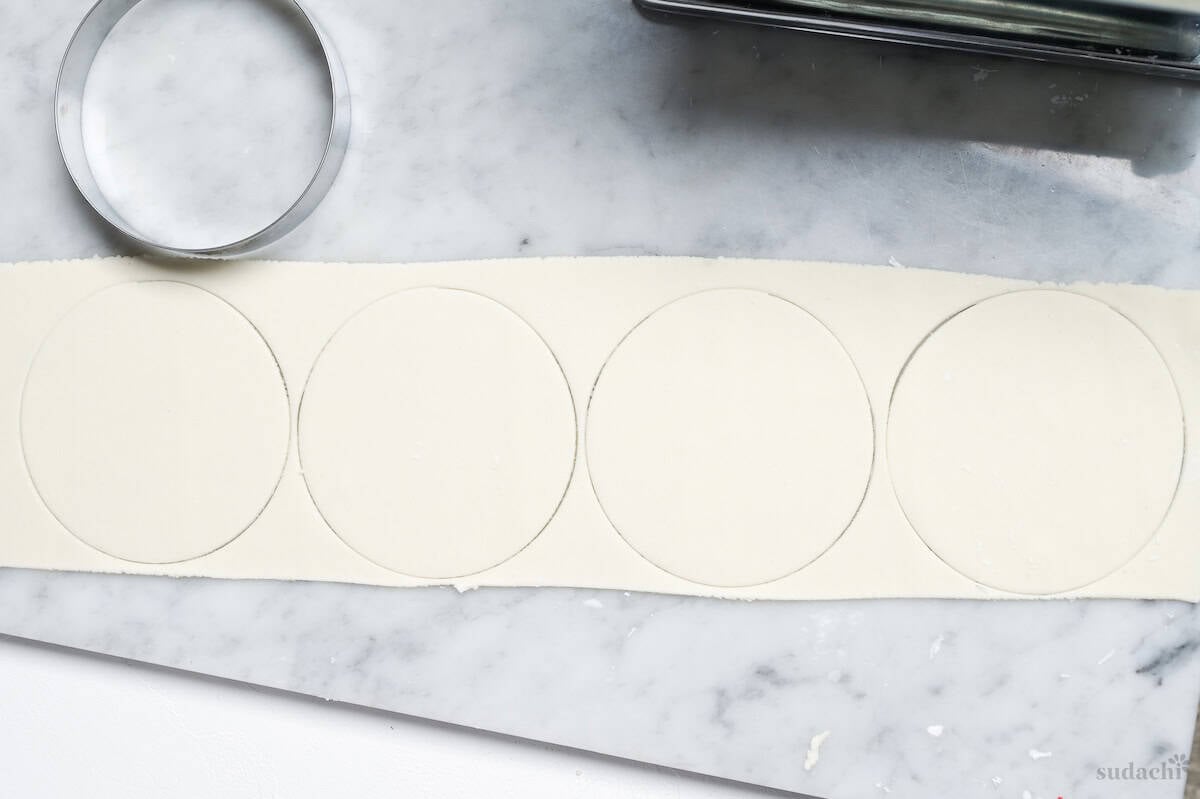
vi. Gather the scraps, press them together, and re-roll once through the machine. Cut until you run out of the dough.
Hand-rolling method (no machine):
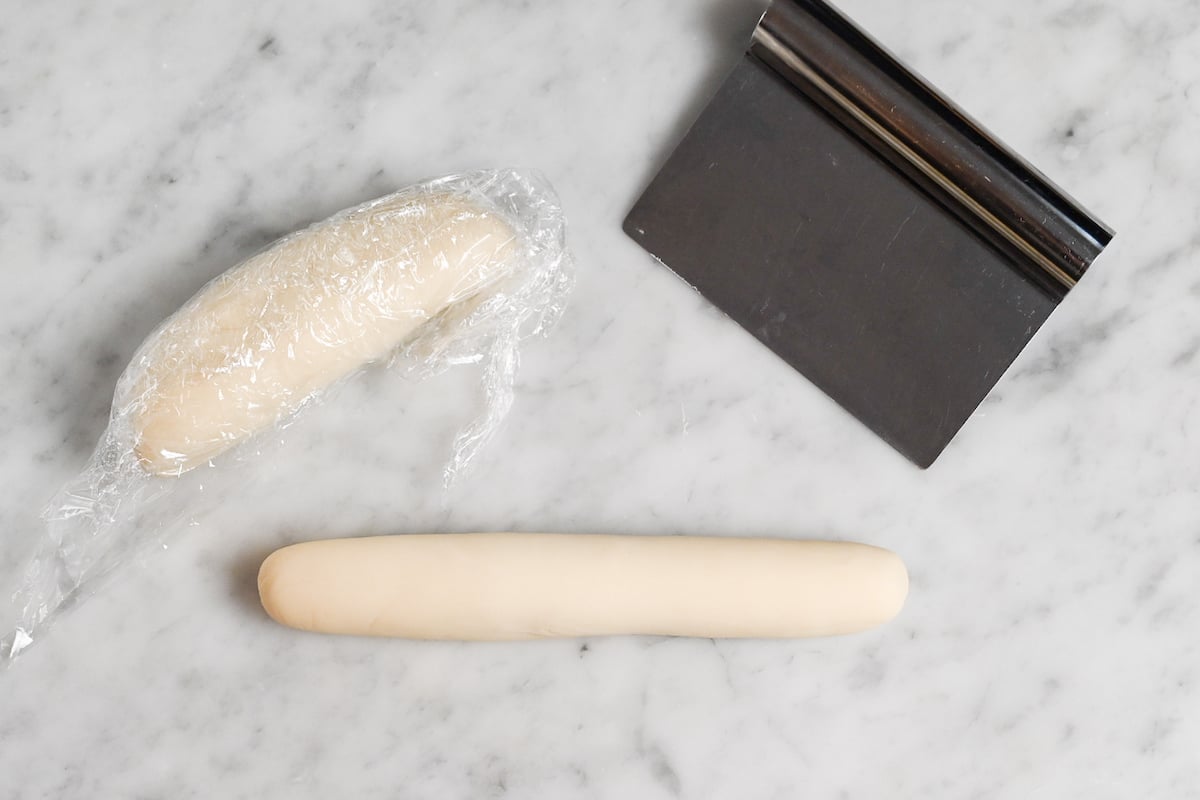
iii. Divide the dough in half. Keep one piece wrapped while you work the other. Roll it into a rope about 2 cm in diameter, then cut it into about 16 equal pieces (16 per roll).
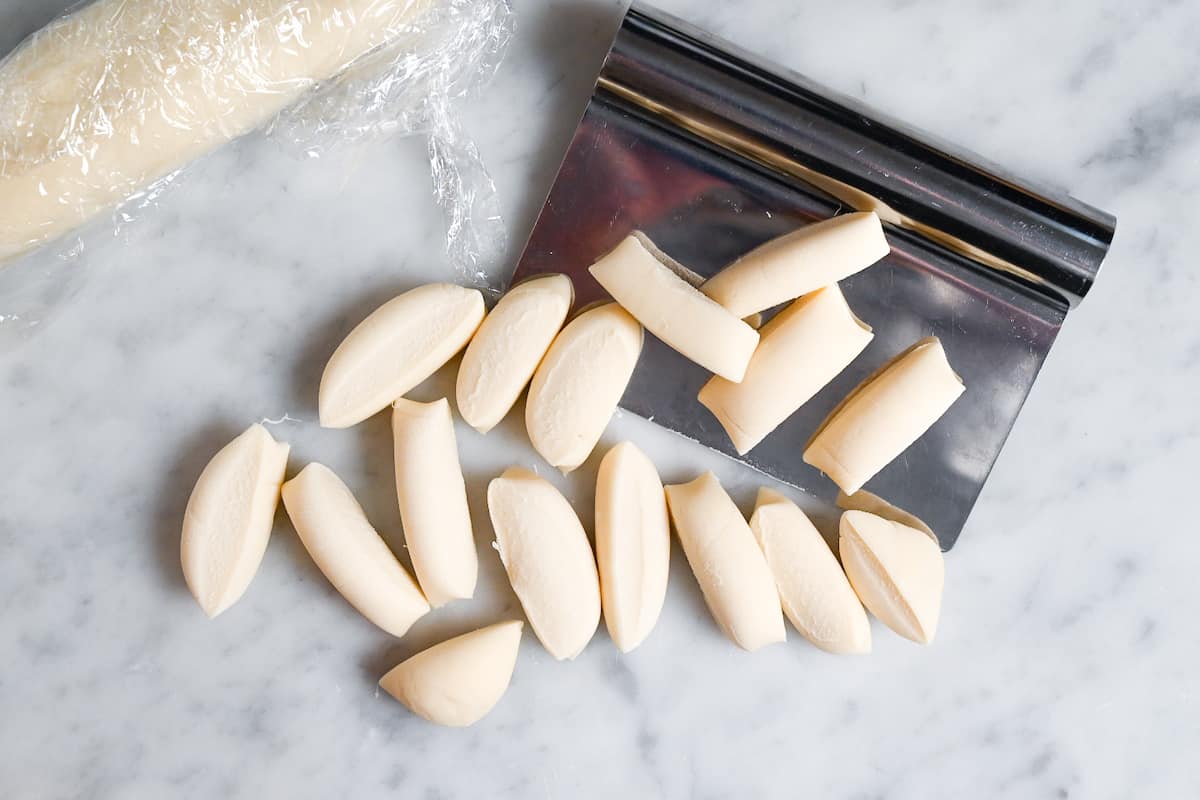
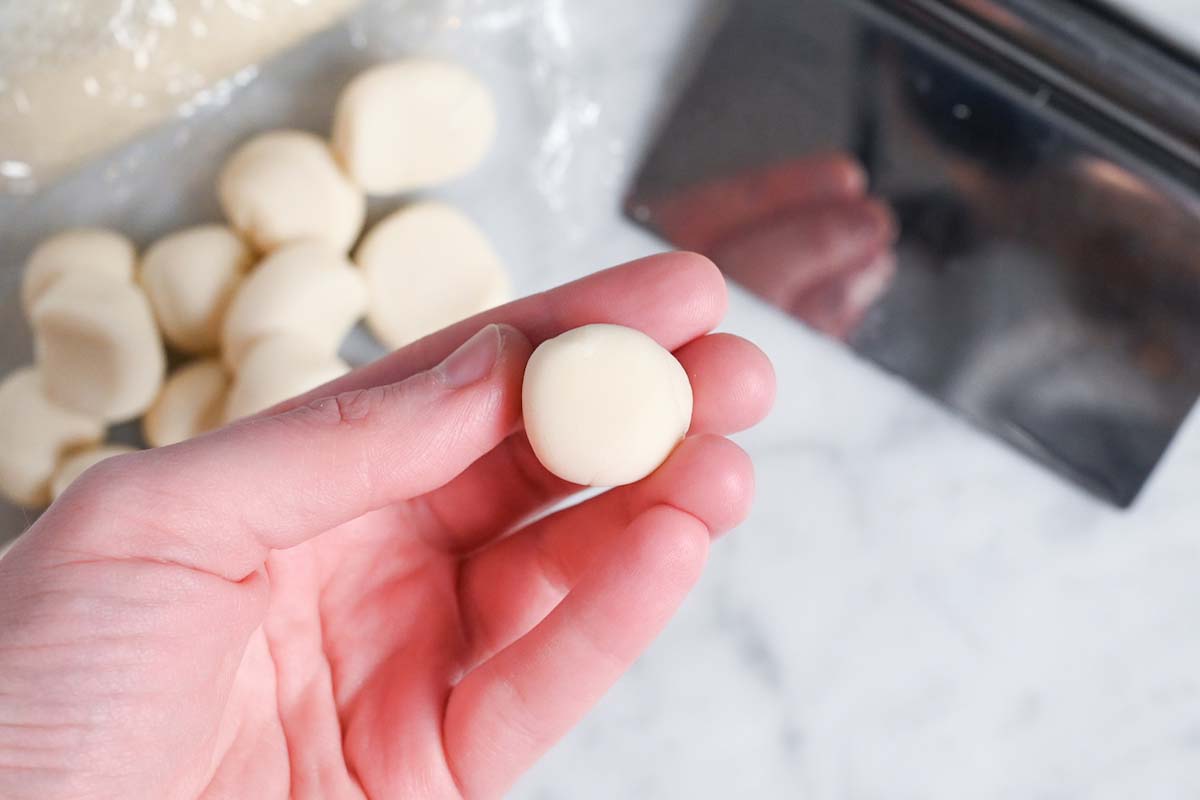
iv. Roll each piece into a ball, then press it flat between your fingers to form a small disc.
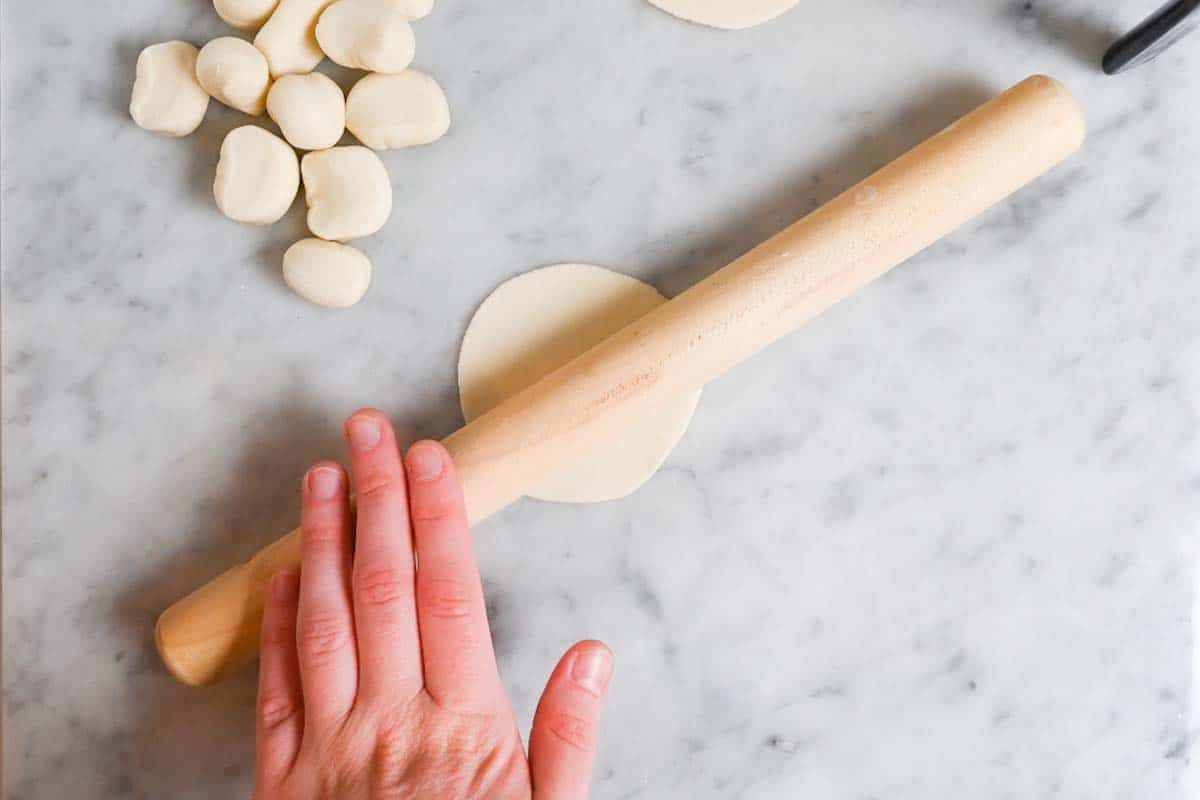
v. Using a rolling pin, roll from the center outward with firm pressure on the push stroke and light pressure on the return. Rotate the disc about 15 degrees after each stroke. Repeat around the full circumference until the wrapper reaches your target thickness.
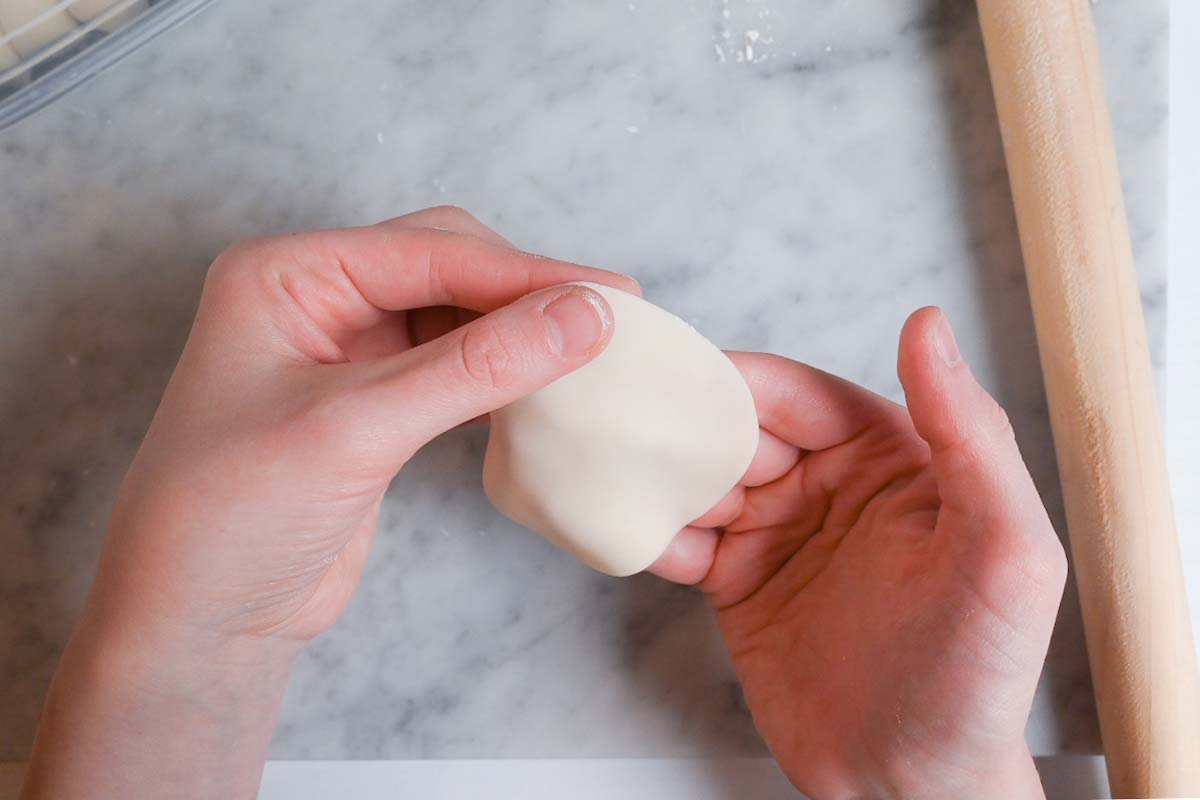
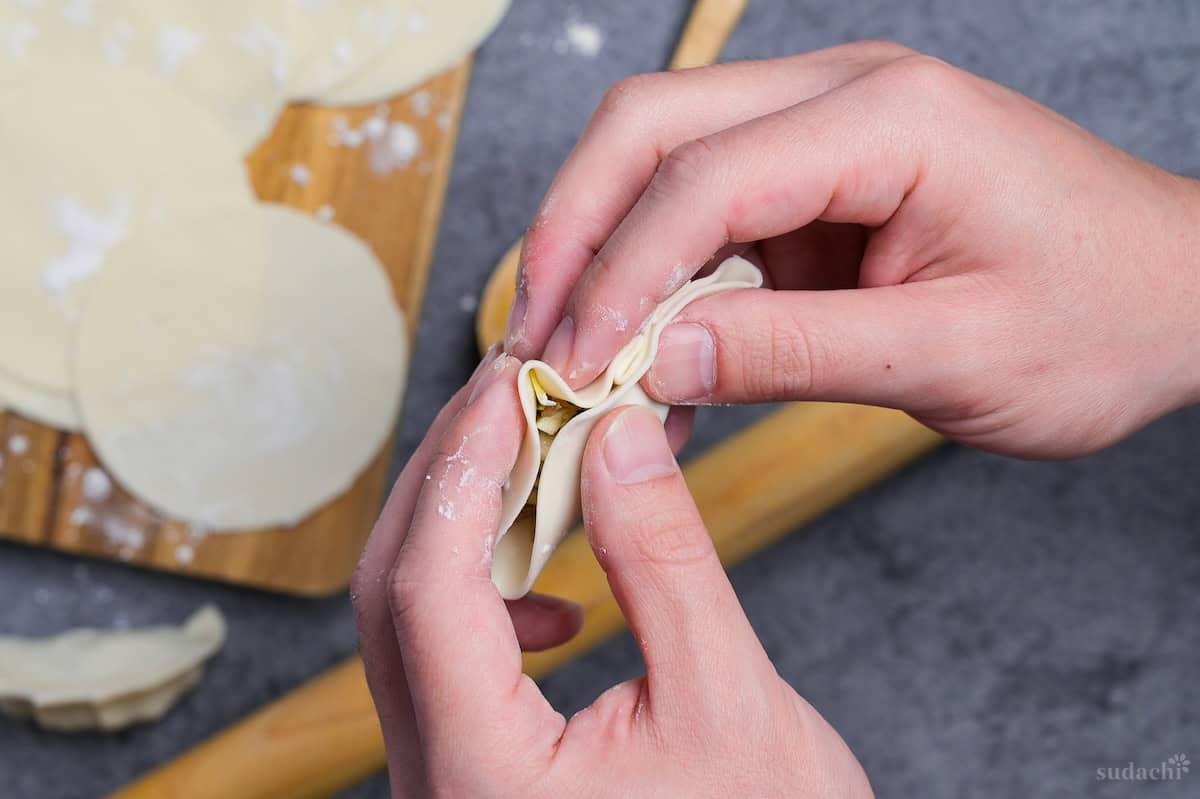
iv. Pinch the edges with your thumb and forefinger to thin them slightly. This prevents the top from becoming too thick and doughy when the gyoza is pleated and sealed.
If you follow the default recipe, it will yield approximately 30-32 wrappers using an 8.5 cm circle cutter, depending on thickness and how many times you re-roll the scraps. That batch size is not an accident. It is matched to my gyoza filling recipes, so one batch of wrappers and one batch of filling finish together with nothing left over.

Essential Tips & Tricks
- Measure flour and water by weight, not volume. This is the single most important rule. A kitchen scale removes the guesswork that causes most failures. Even small errors in hydration change whether the dough can be rolled at all.
- Use starch for dusting, not wheat flour. Wheat flour absorbs into the dough and makes the finished wrappers heavy and tough. Starch sits on the surface and prevents sticking without changing the texture.
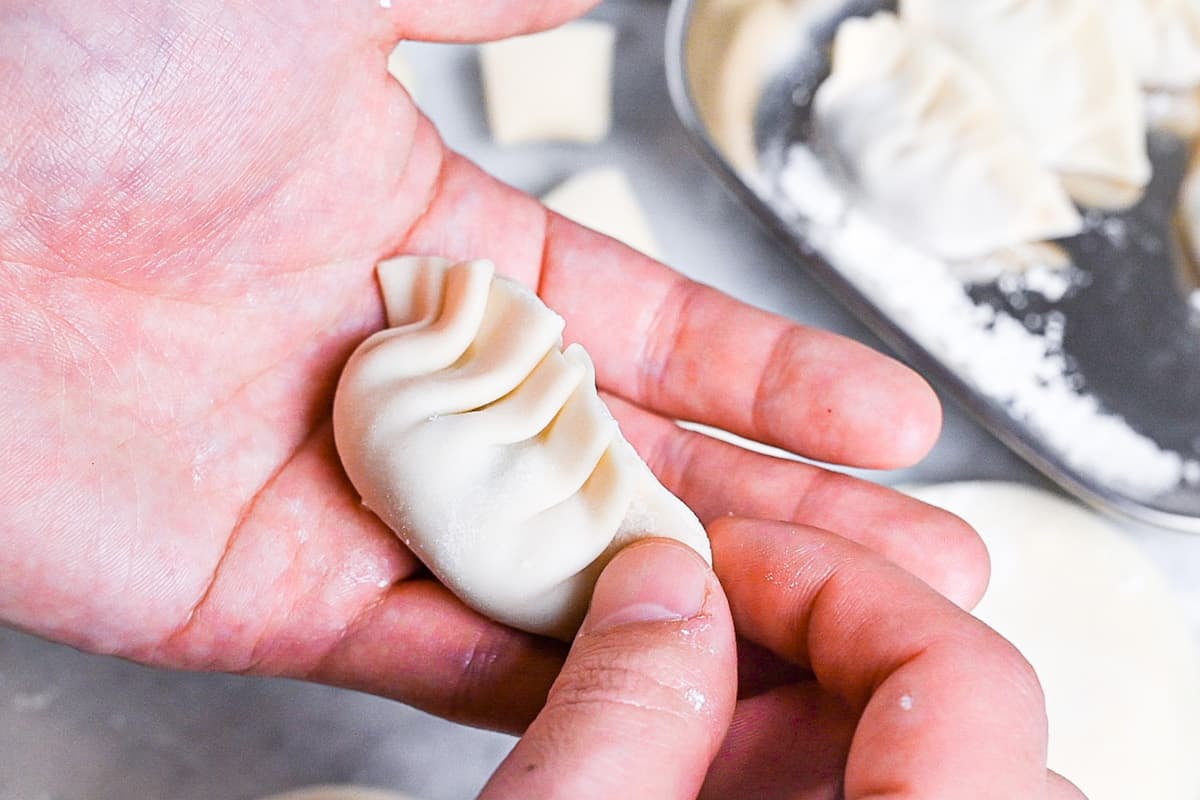
- Expect homemade wrappers to handle differently from store-bought. The stretchy, soft texture that makes them special is also what makes them a little trickier to fold. That softness is the trade-off and the reward at once. Keep everything well dusted, and do not be discouraged if your first few pleats feel clumsy. You will find the rhythm within a wrapper or two.
- Dust often, not just once. If the cut circles stick to each other, it is not the end of the world, but you have to gather them back into one dough, roll it thin all over again, and re-cut every circle. The moment a surface looks like it might tack, add more starch. Frequent dusting saves the whole batch.
- Adjust water for the weather. On a humid summer day, your flour has already absorbed moisture from the air. Reduce water by a small amount. In dry winter conditions, increase it slightly. The dough’s feel should always override the recipe’s exact water measurement.
With these simple tips in mind, you’re set for success every time you make homemade gyoza wrappers.
Storage & Meal Prep
Fridge: For raw dough, wrap the dough ball tightly in plastic wrap and refrigerate for up to 2 days. The dough will continue to hydrate and soften slightly. Knead briefly before rolling. Not recommended for rolled wrappers.
Freezer: Not recommended.
Meal Prep:
- Make the dough ahead: Mix, knead, and rest the dough the day before, then refrigerate overnight.
- Prepare filling in parallel: While the dough rests, prepare your gyoza filling.
- Assembly line for groups: Assign roles. One person rolls dough into ropes and cuts, one rolls individual wrappers, one fills, one folds. This keeps the process moving and prevents any wrapper from sitting exposed long enough to dry out.
- Freezing assembled gyoza: Line a tray with plastic wrap, dust with potato starch, and place assembled gyoza without touching each other. Freeze until solid, then transfer to a zip-lock bag. Cook directly from frozen, never thaw first. Do not freeze in dough/wrapper form.
What to Make With These Wrappers
Now that you have a batch of fresh homemade wrappers, the next step is a great filling. Here are my favorite gyoza recipes that pair perfectly with handmade skins.
Want more ideas? Explore my gyoza recipe collection to find your next favorite fillings!
Homemade Gyoza Dough FAQ
About 1mm for pan-fried gyoza, slightly thicker (2mm) for boiled. Commercial wrappers are often thinner, but homemade dough has more elasticity than factory sheets. Going below 1mm causes tearing and deformation during handling.
Gyoza wrappers are made with flour, salt, and water only. Wonton wrappers contain kansui, an alkaline solution that gives them a slippery, springy texture and yellow color. The same agent is used in ramen noodles. They are not interchangeable if you want authentic gyoza texture.
For pan-fried gyoza, yes. Boiling water triggers starch gelatinization, which is what gives the wrappers their signature mochi-mochi chew and crispy bottom. For boiled gyoza (sui-gyoza), use room-temperature water instead to maximize gluten development for a springy, resilient wrapper.
More Homemade Ingredients
Did You Try This Recipe?
I would love to hear your thoughts!
💬 Leave a review and ⭐️ rating in the comments below. 📷 I also love to see your photos – submit them here!

Easy Homemade Gyoza Wrappers

Equipment
- pasta machine or rolling pin
- circle cutter 8-9 cm, or rim of a glass
Ingredients
Gyoza Wrapper Dough
- 100 g unbleached cake flour or all-purpose flour for both
- 100 g bread flour or all-purpose flour for both
- 30 g glutinous rice flour (mochi flour) or an equal amount of cake/bread/all purpose flour
- 1 tsp lard for improved extensibility and flavor, or cooking oil
- 115 g freshly boiled water 90-100°C/194-212°F
- ½ tsp salt fine easy-to-dissolve sea salt recommended
- ½ tsp sugar
- cooking oil for coating the dough
- potato starch (katakuriko) or cornstarch
The ingredient brands and tools I trust are in my Japanese pantry guide and my cooking tools guide.
Can’t find certain Japanese ingredients? See my substitution guide here.
Instructions
- Measure out 100 g unbleached cake flour, 100 g bread flour, and 30 g glutinous rice flour into a large mixing bowl. Mix with chopsticks until well distributed.

- Pour 115 g freshly boiled water into a heatproof jug and add ½ tsp salt and ½ tsp sugar. Mix until fully dissolved.
- Drizzle the hot water into the bowl of flours while stirring with chopsticks until it forms a shaggy dough. Then let it cool enough to handle.
- Transfer the cooled dough to a clean dry surface, then knead by pressing, folding and turning it. Repeat and knead for 5-10 minutes or until smooth with the softness of an earlobe.
- Brush the dough with a thin film of cooking oil and cover the bowl with plastic wrap. Rest at room temperature for 15-20 minutes in a warm environment, or 30-45 minutes in a cold environment.
Pasta Machine Method
- After a rest, knead the dough for 30 seconds. Dust your work surface generously with potato starch (katakuriko), then place the dough on top and sprinkle with extra potato starch to prevent sticking.
- Flatten the dough by hand, then roll with a rolling pin until no more than 1cm thick. Cut into strips wide enough to fit a pasta machine.
- Feed the strips through the pasta machine one at a time on the widest setting, then reduce the thickness by one notch and repeat. Continue feeding each strip through until it reaches 1mm thick. (This is setting 6 on my atlas 150 pasta machine).
- Lay out the rolled sheet and use a circular cutter (8-9cm) to cut your wrappers. Sprinkle with extra starch to prevent sticking, and store them in an airtight container to protect them from drying out.
- Press the leftover scraps together, then roll and feed it through the pasta machine again. Repeat until you've run out of dough.
Hand Rolled Method
- Cut the dough in half and roll into two equal sized cylinders, about 2cm in diameter. Wrap one cylinder with plastic wrap (or store in an airtight container) while you work the other.

- Cut the cylinder in half, each half in half again, and repeat until you have 16 equal pieces from one roll.
- Roll each piece into a ball, then press to make a small disc.
- Use a rolling pin to roll it flat, starting from the center and working outwards, then rotate the dough about 15 degrees and repeat. This will help keep it round. Continue to roll until about 1mm thick.
- Pinch all around the edges with your fingers so that the edge is slightly thinner (this makes better pleats).
- Fill with your favorite gyoza fillings, and enjoy!
One of the cons printed is that of making them all uniform. I use my pasta machine to roll out the dough. Same thickness every time. cut the sheet of dough with whatever to your desired size. ( a glass, cooky cutter). Knead leftover pieces roughly then put back through the machine. Continue till all dough is used. Cut baking paper into small pieces that would cover a wrap. Separate each unused wrap with a piece of baking paper. Cover the pile with freezer prove wrap and freeze. Easy to separate wraps.
Don’t have cake flour. Have lots of all purpose and strong flour. Will try with all purpose. We are trying the Gyoza tomorrow night. Looking forward to more of your recipes.
Hi Vic,
Thank you so much for sharing your detailed tips!
Using a pasta machine is definitely a great solution – I really need to update this post to include this method. When I originally developed this recipe back in 2020, I didn’t have a pasta machine, but I recently got one for making noodles. Your suggestion is a perfect reminder to revisit this recipe with the pasta machine technique.
I hope you enjoy making your gyoza! 🙂
Yuto
East to follow recipes with detailed photos. thank you.
Thank you so much, Lyn! 🙂
Arigato Omura Sensei
Thank you, Dorothea! 🙂
Hi Yotu, I am just starting, next Monday, to get into making sushi etc. Have been buying locally, I know sad eh!
Am finding your recipes very clear and simple. Cant wait.
I make my own bread and pizza bases and use a lot of 00 pizza flour. Is there any reason not to use instead of bread flour, or do you think there is not enough gluten in 00?
Hi Victor,
Thanks so much for the kind words! On the 00 flour question, gluten content itself isn’t really the issue (I’m assuming 00 flour for pizza or bread, not pasta here). The thing with 00 is the gluten tends to stretch beautifully but doesn’t snap back as much, which is brilliant for pizza bases but means you might lose a bit of that chewy bounce you want in gyoza wrappers. Since this recipe uses boiling water though, the heat denatures the gluten anyway, so the difference becomes pretty minor. I’d just dial back the water a touch, start with 100g instead of 115g and add more as you go based on feel and look. I hope you’re going to have fun making the wrappers! 🙂
Yuto
Thanks Yotu for your prompt reply.
two last questions, I hope.
1. I just tried the sushi rice but only did 150g in case I stuffed up. It turned out well but seem to be quite dry at the end of the process. Would this have been because I halved your recipe, and really would be better to do the full 300g rice with the 200g water?
2. You mention in tour sushi recipe that any extra sushi rice, if freezing, should be packed hot and then frozen. What is the reason for this, as it is not recommended to put hot things in a freezer?
Thank. Victor
Hi Victor,
Thank you for trying the recipe and taking the time to ask these questions.
Before I answer, could I just double-check which recipe you were following? I have two related ones, and the details are a little different:
– Sushi rice (vinegared rice): https://sudachirecipes.com/perfect-sushi-rice-recipe/ uses 300g rice to 350ml water.
– Plain Japanese rice: https://sudachirecipes.com/perfect-japanese-rice/ uses 300g rice to 400ml water.
In either case, the water amount is higher than the rice weight, so the 200g of water you mentioned doesn’t quite match either recipe. If you halved the sushi rice recipe, the correct amount would be 150g rice + 175ml water, and for plain rice it would be 150g rice + 200ml water. I’m wondering if there may have been a small mix-up with the measurement, or if perhaps you were looking at a different recipe. That would also explain why the rice came out drier than expected at the end.
In general, halving the recipe itself shouldn’t cause dryness as long as the rice-to-water ratio and the cooking steps (especially the 10-minute steam off the heat with the lid on) are followed. A smaller batch can occasionally lose a bit more moisture during the cooling and fanning stage, but it shouldn’t be dramatic if the ratio is right.
As for the freezing question, I had a look back through both recipes and I couldn’t actually find any instruction to pack the rice hot before freezing. Could you let me know which page or section you saw that on? I’d love to check, as it’s possible I’m missing something or it may have come from a different source.
For reference, the method I do recommend is to spread the rice out, cover it with plastic wrap, let it cool to room temperature, and then freeze it.
Hope this helps clear things up, and please let me know which recipe you were following so I can give you more specific advice!
Yuto