

What is Ichigo Sando?
Ichigo sando is a variation of the Japanese “fruit sando”, a type of sandwich made with soft milk bread called “shokupan” filled with fresh cream and fruits. The word “ichigo” means “strawberry” and “sando” is an abbreviation of “sandoichi”, the Japanese word for sandwich.
While fruit sando are made with a variety of fruits such as strawberries, kiwi, and tangerines (mikan), ichigo sando is made with strawberries alone. The simplicity of the filling really highlights the delicious flavour of the strawberries and can be cut in a variety of beautiful ways.
A Brief History of Fruit Sando
Despite the popularity of sandwiches all over the world, the fruit sando is a sandwich unique to Japan and there are several theories about its origin.
Japan is well known for its expensive fruits and for a long time, fruit was not eaten regularly by common people. Between the Taisho period (1912-26) to the early Showa era (1926-89), fruits became more accessible, but still were considered a luxury item and were often bought as gifts or souvenirs.
Specialty fruit retailers began to pop up around train stations across Japan, making it easy and convenient for people to purchase high-quality fruits on the way home from their travels. These fruit shops also began to open “fruit parlors” close by serving their produce on parfaits, cakes, and even in sandwiches. This meant that their fruits could be enjoyed in a single sitting at a more affordable price.
It is widely believed that the fruit sando originated either from Tokyo or Kyoto. Since these cities were central in Japanese business and administration, many people would be passing through their major stations, making them ideal locations to set up luxury fruit stores.
One of the most famous high-end fruit retailers is “Sembikiya” which was founded in Nihonbashi, Tokyo in 1834. The company later coined the term “fruit parlor”, opening the first of its kind in 1913. It is not clear when fruit sando first appeared on the menu, but Sembikiya is still famous for their fruit sando to this day.
On the other hand, it is believed that the fruit sando was already a regular and well-loved item in Kyoto’s cafes and coffee shops before “fruit parlors” even became popular. Not to mention, Kyoto is home to one of the oldest fruit shops in Japan “Yaoiso” which has been around since 1869. Yaoiso established its own fruit parlor in 1972.
In recent years, there has been a fruit sando boom in Japan thanks to the social media term “danmen moe” (断面萌え) or “moedan” (萌え断) for short. Danmen moe refers to thick sandwiches, rolled sushi, and onigirazu that have been stuffed with ingredients arranged decoratively, and then cut to reveal a beautiful cross-section. They are often extremely thick and focus on the aesthetic rather than how practical they are to eat, but they sure are beautiful to look at!
Ingredients & Substitution Ideas

One of the beauties of the ichigo sando, is it only requires a handful of ingredients! For my recipe, you will need the following:
- Shokupan (Japanese milk bread): Shokupan is made from a high hydration dough enriched with butter and milk. It’s characterised by it’s extremely light and fluffy texture with a sweet and luxurious taste. If you can’t buy shokupan, use your favorite brand of white, fluffy sandwich bread. Alternatively, try making your own shokupan with this handmade recipe!
- Fresh Strawberries: Use fresh ripe strawberries that are uniform in size for the best taste and presentation.
- Heavy Cream: For a rich and decadent taste.
- Light Brown Sugar: For subtle sweetness with depth. Feel free to use white sugar instead, you can also adjust the amount to suit your taste.
- Mascarpone Cheese: A bonus ingredient mixed in with the cream to create a little more depth and a thick, cheesecake-like texture.
- Vanilla Essence or Extract: A hint of vanilla in the cream goes perfectly with the strawberries!
Visual Walkthrough & Tips
Here are my step-by-step instructions for how to make Ichigo Sando at home. For ingredient quantities and simplified instructions, scroll down for the Printable Recipe Card below.
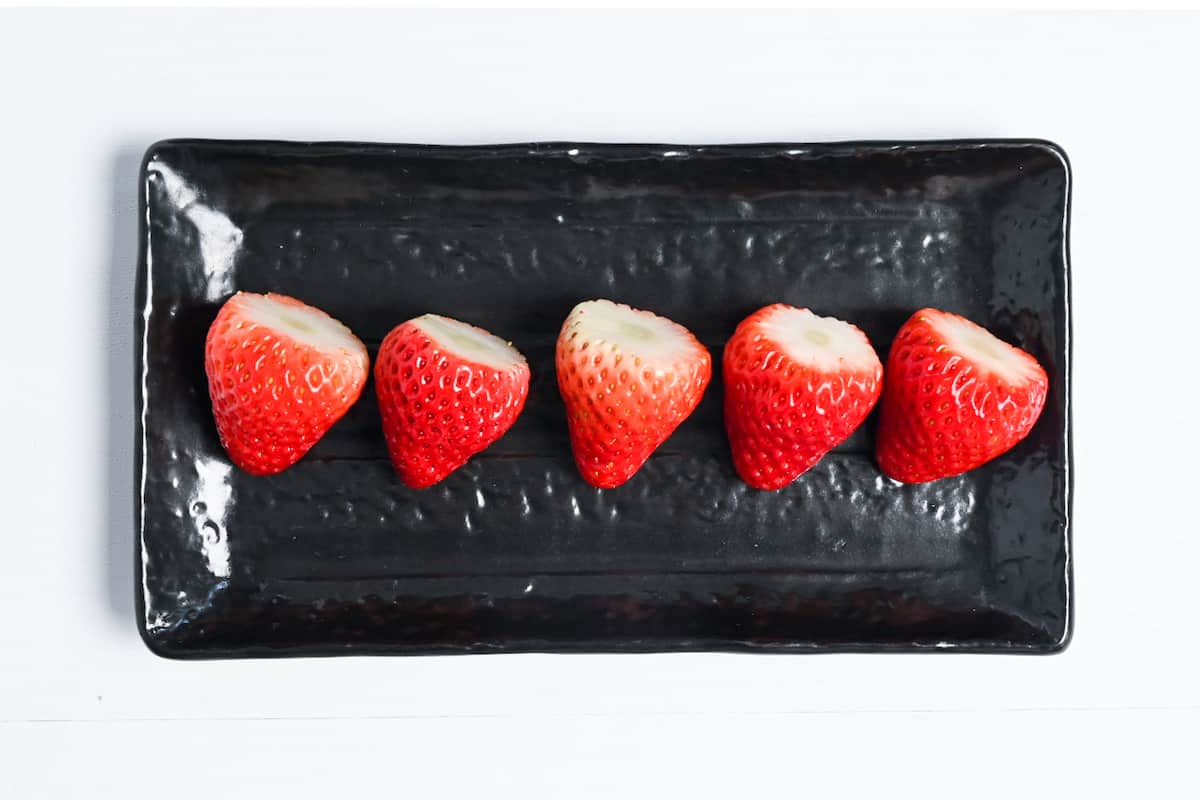
Start by washing the strawberries, drying them thoroughly, and cutting off the stems at the top. Each sandwich will have 5 strawberries, so try to pick 5 with a similar shape and size for the best presentation.

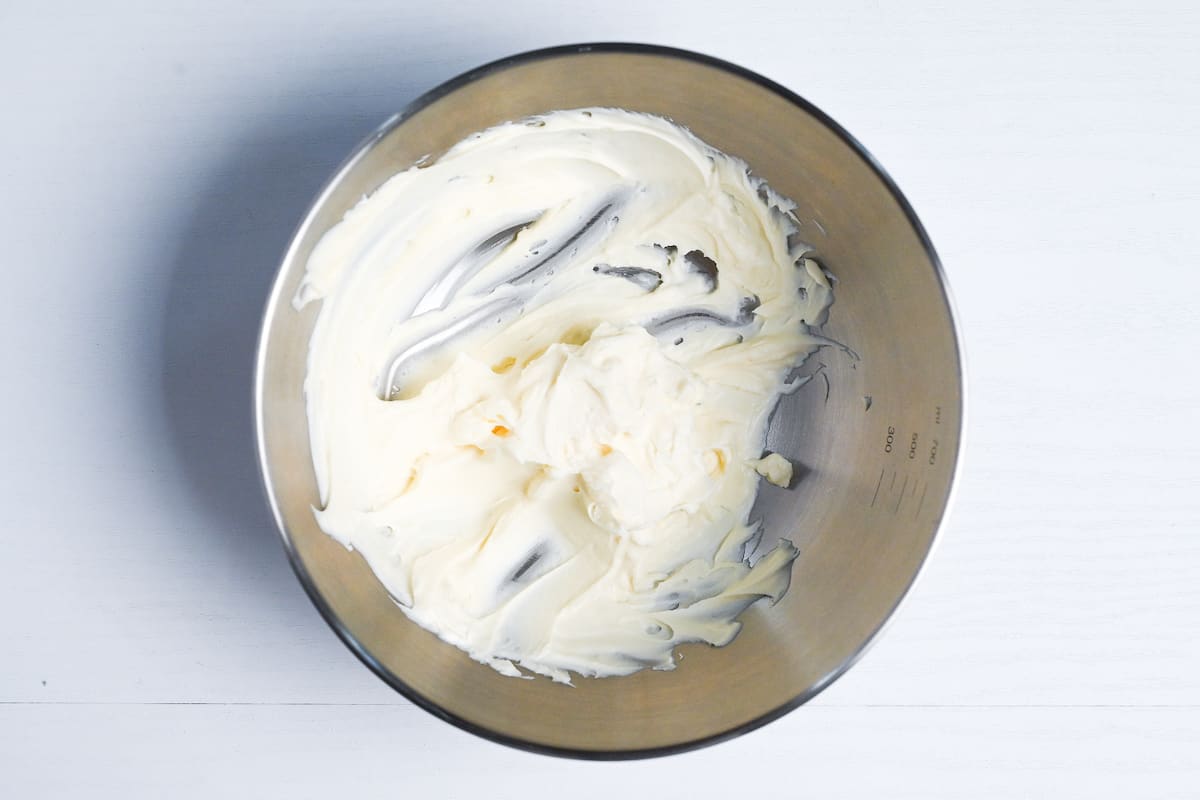
Measure the mascarpone cheese into a mixing bowl and add a few drops of vanilla essence. Whisk until smooth. This will be easier to do if you take the mascarpone out of the fridge in advance (I recommend about 20 minutes) to let it soften to room temperature.

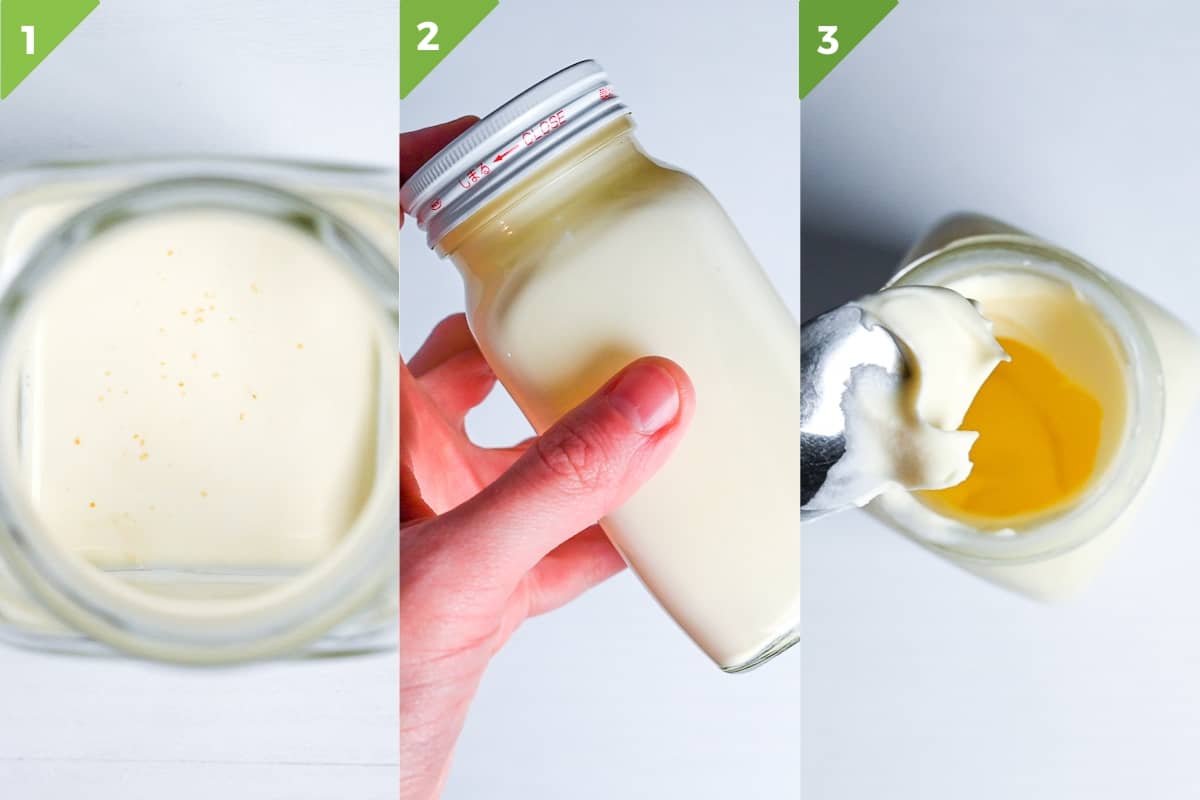
On the other hand, the heavy cream should be kept chilled and used straight from the fridge for successful whipping.
Pour the cream into a bowl and whip it with the light brown sugar until stiff peaks form. Be careful to check the thickness regularly to avoid over whipping, over-whipped cream will become grainy and start to separate.
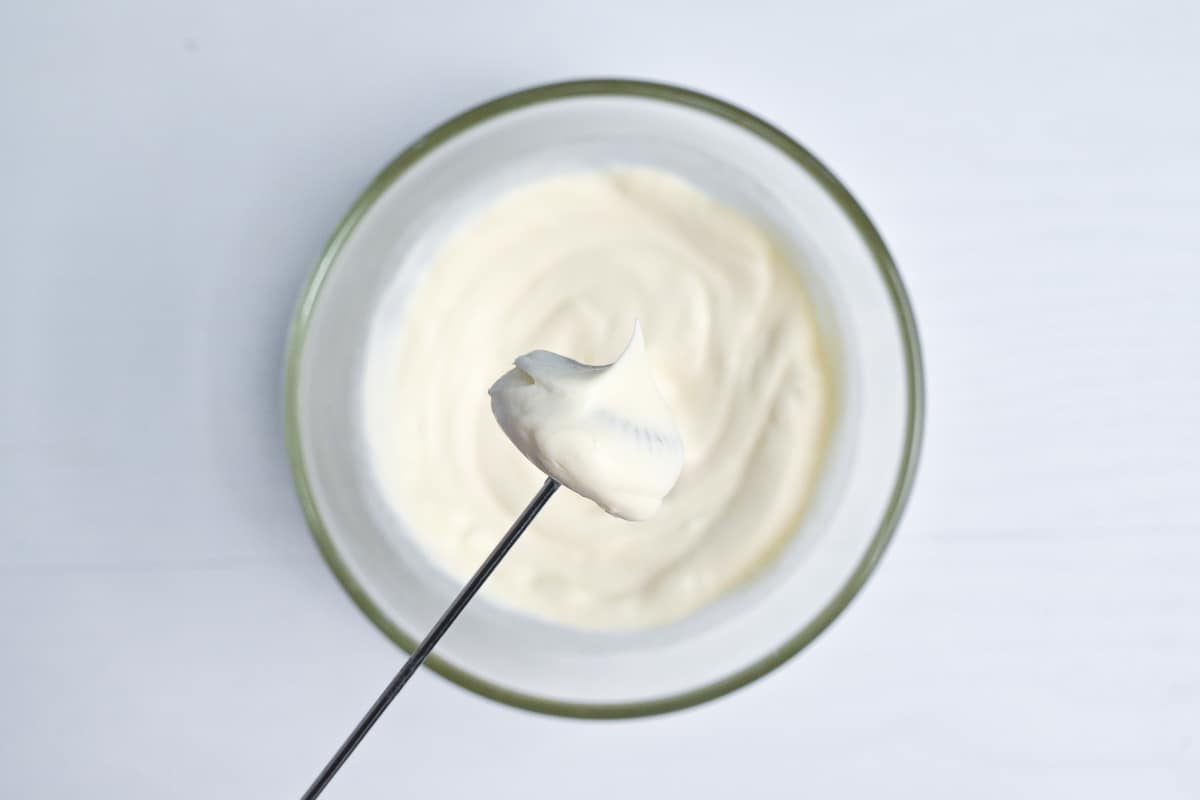
Stiff peaks will point upwards without drooping over.
If you don’t have an electric whisk, you can pour the cream and sugar into a chilled mason jar and shake it until it becomes thick. For one sandwich, it took me about 3 minutes!
Transfer the whipped cream to the bowl of mascarpone and mix gently with a spatula to combine.
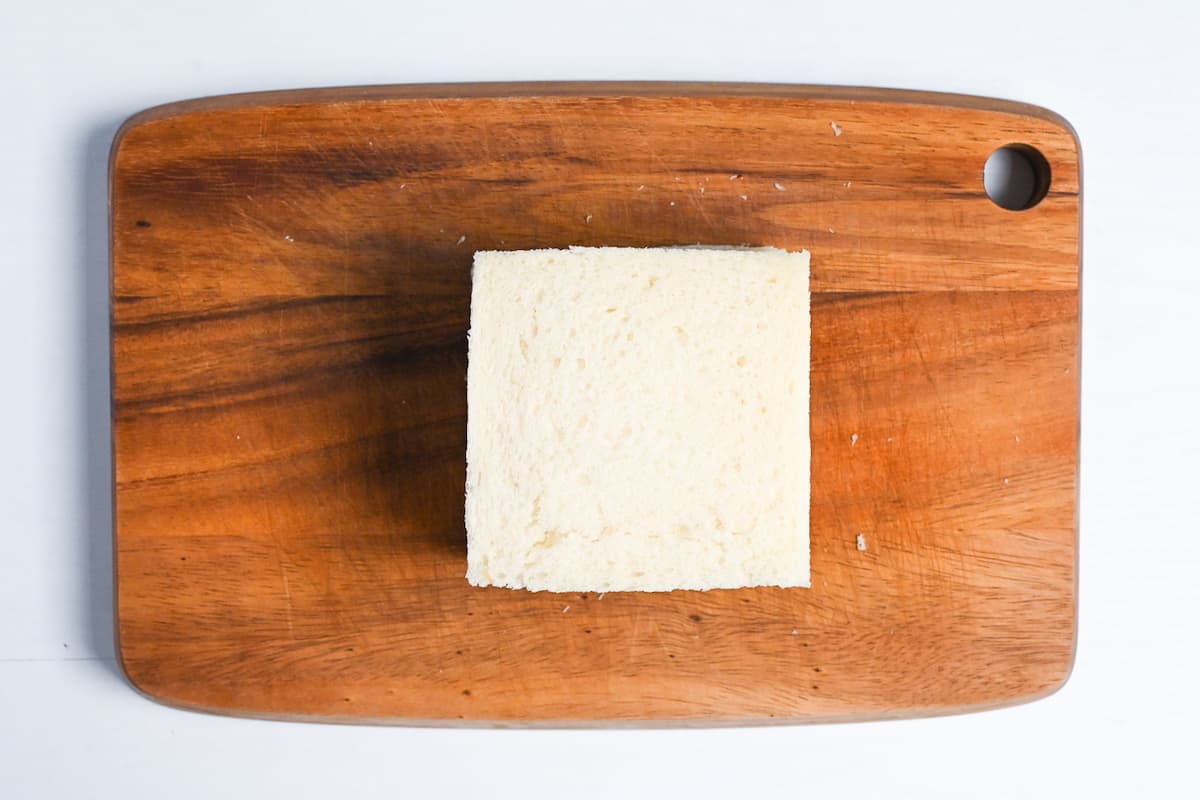
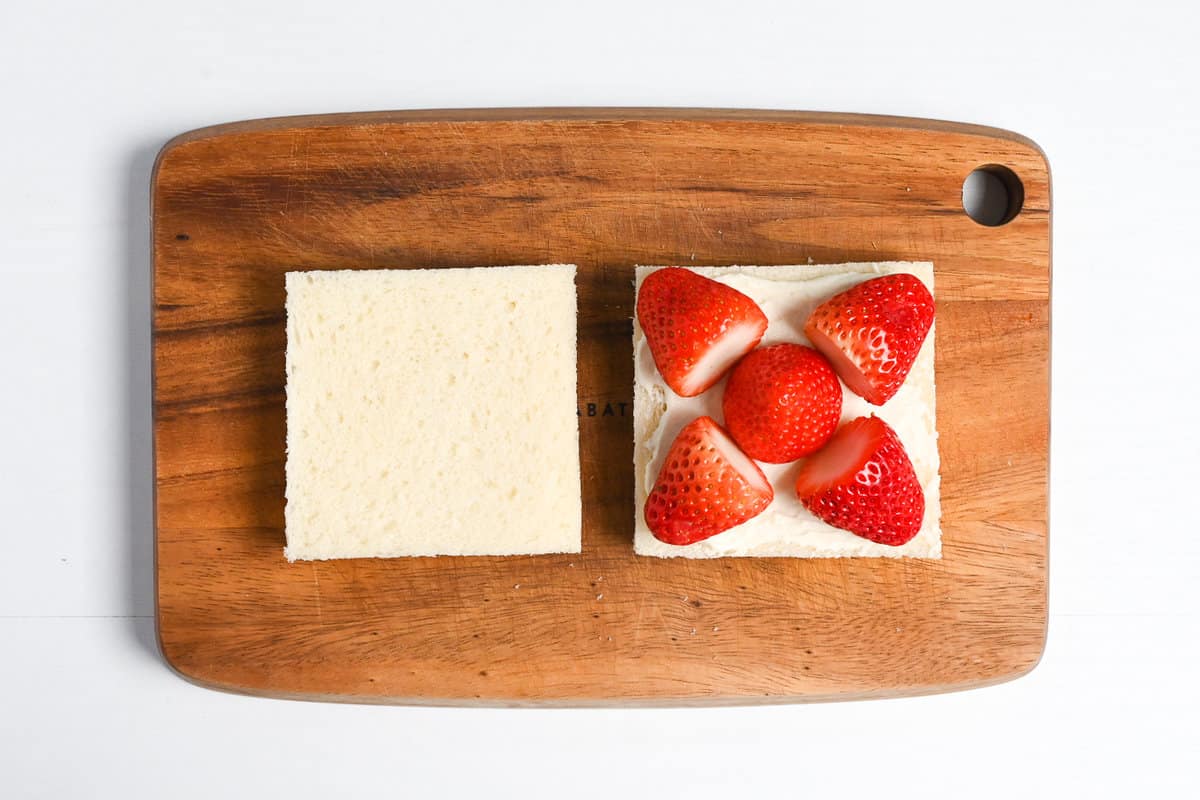
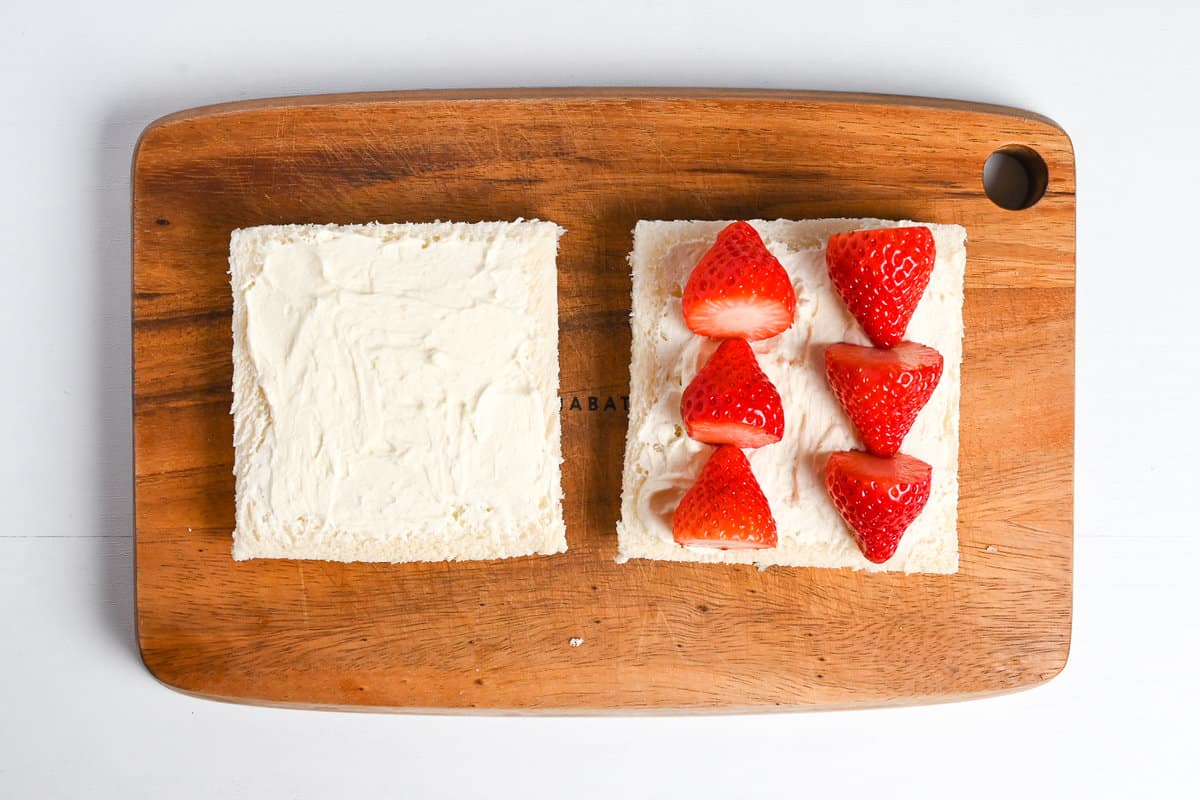
Take your bread slices and remove the crusts.

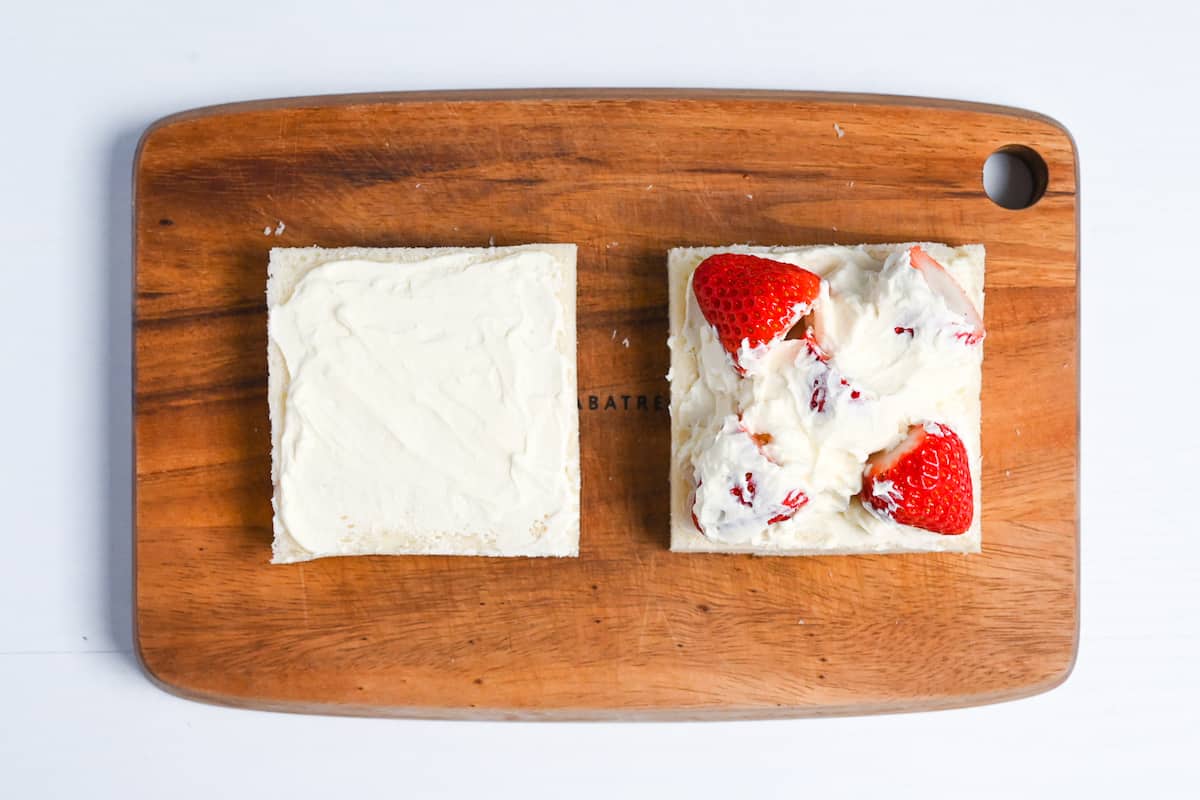
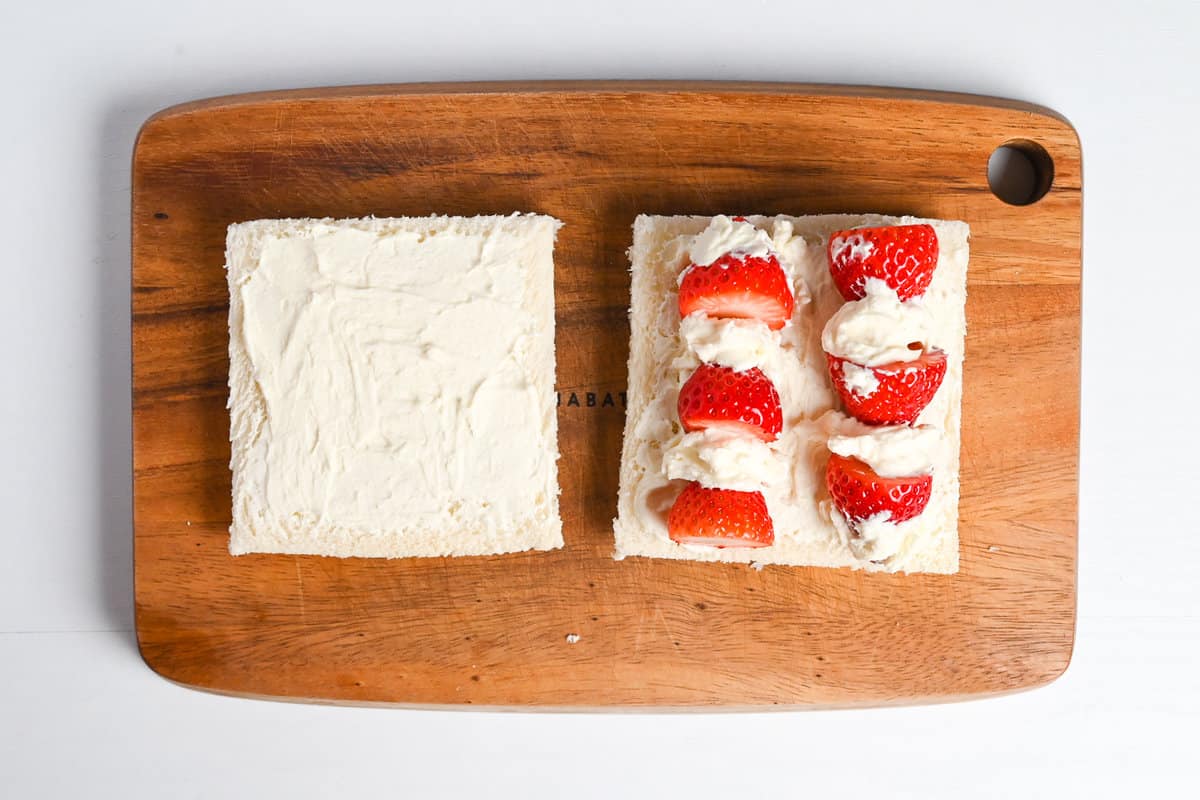
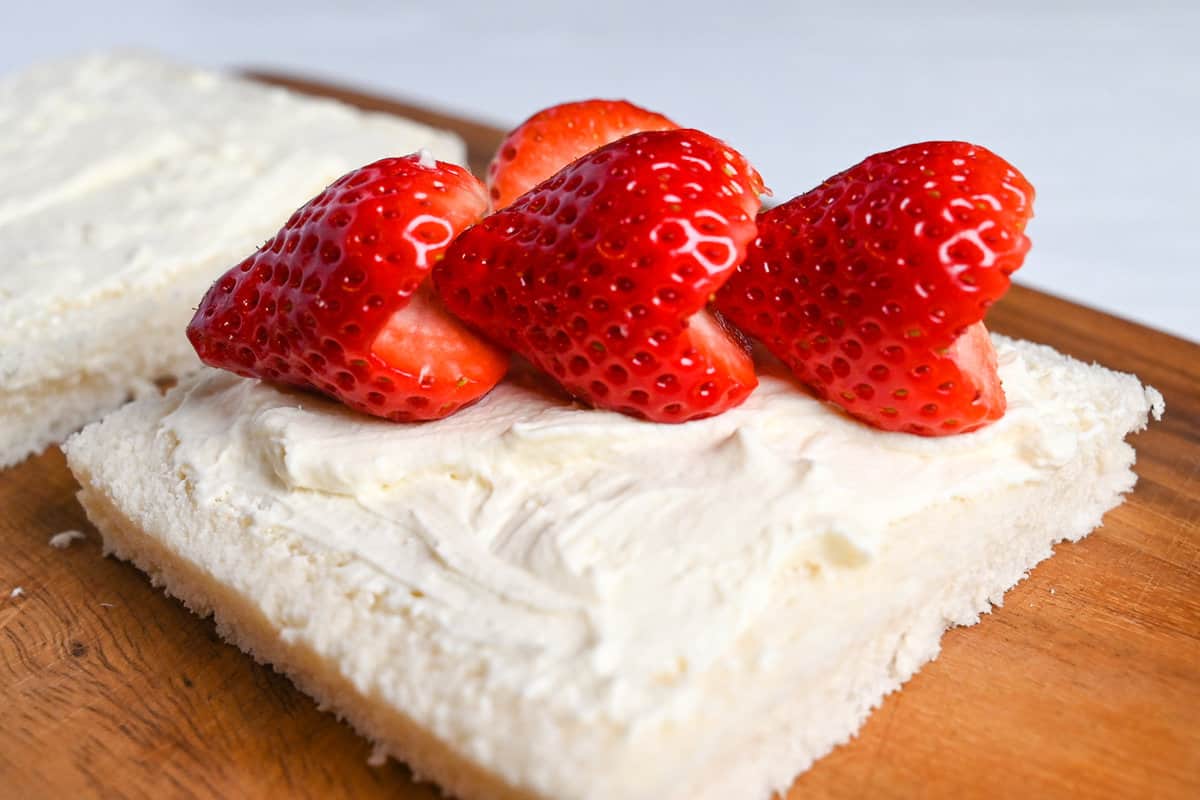
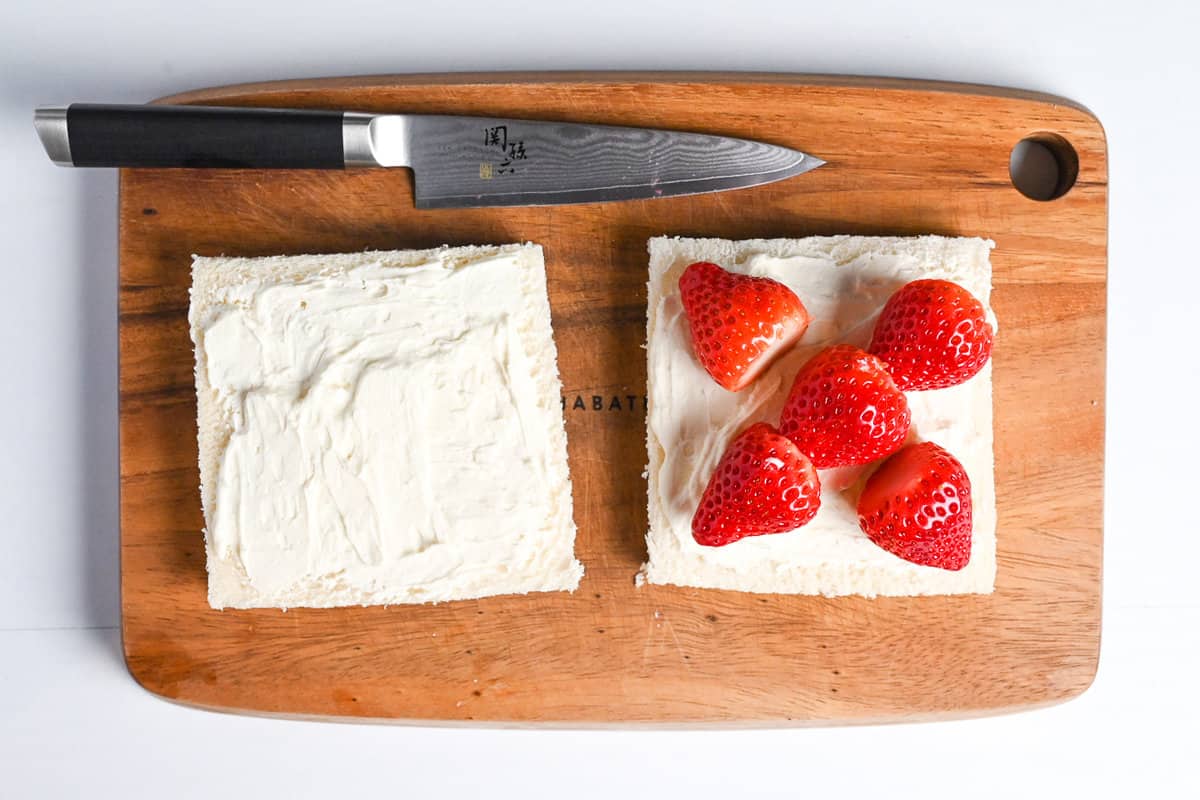
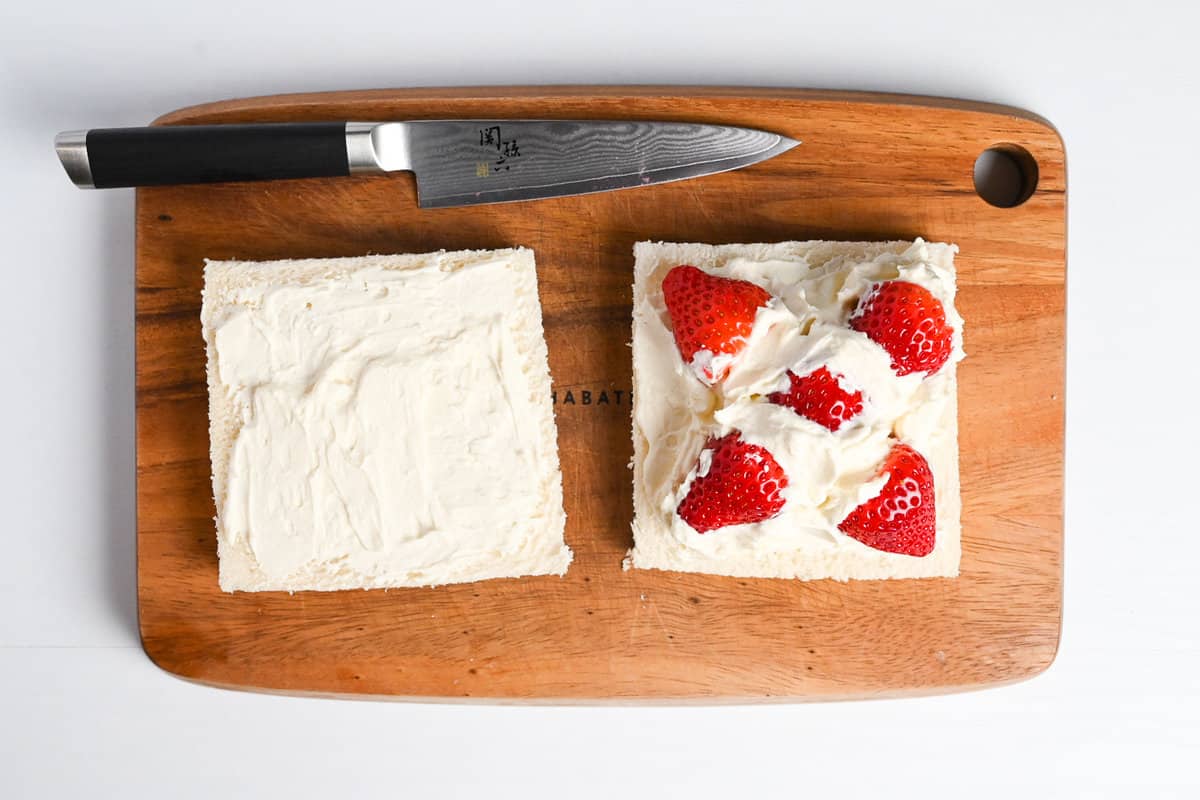
Coat one piece of the bread with a generous layer of cream and lay the strawberries on top.
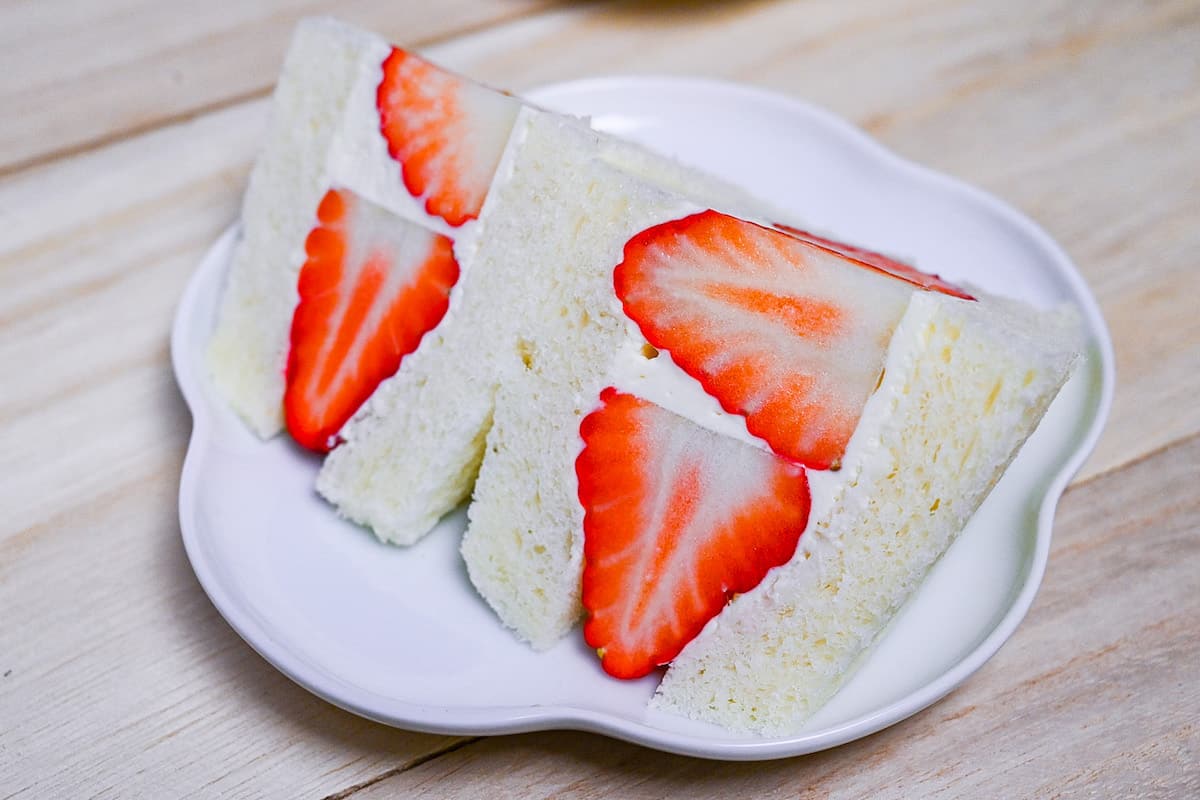
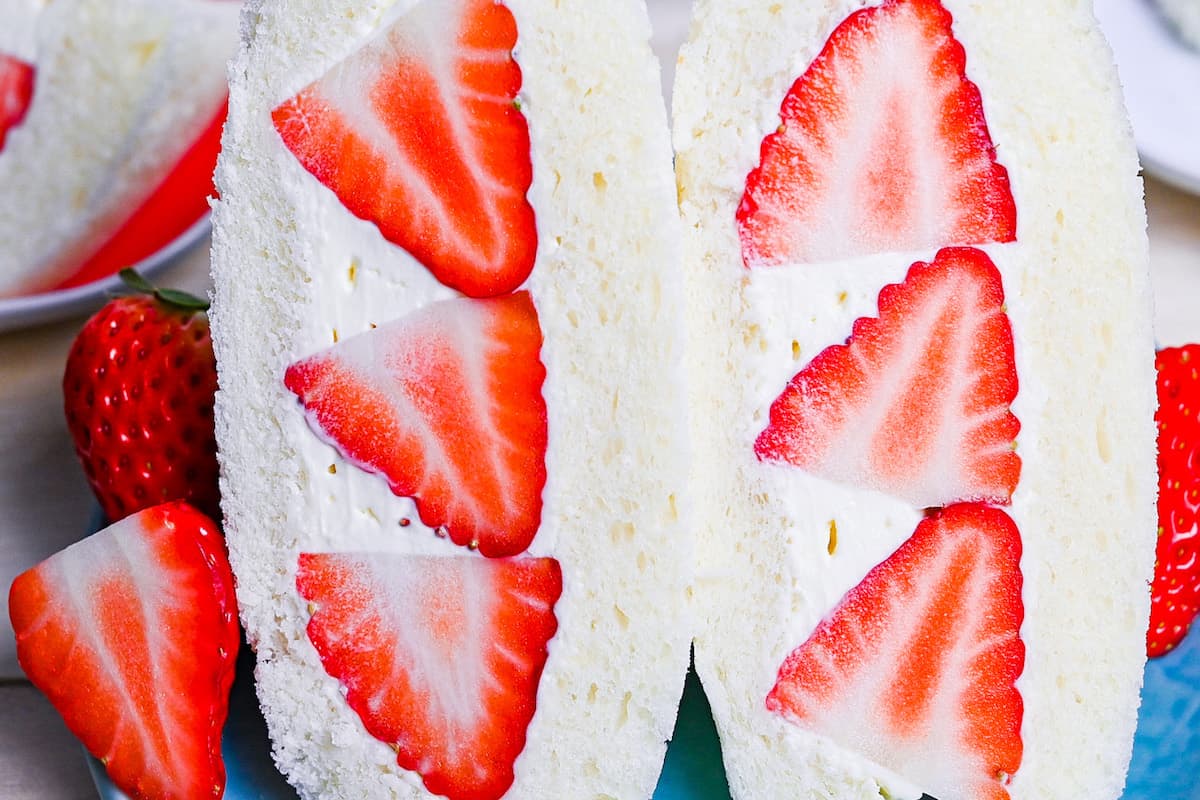
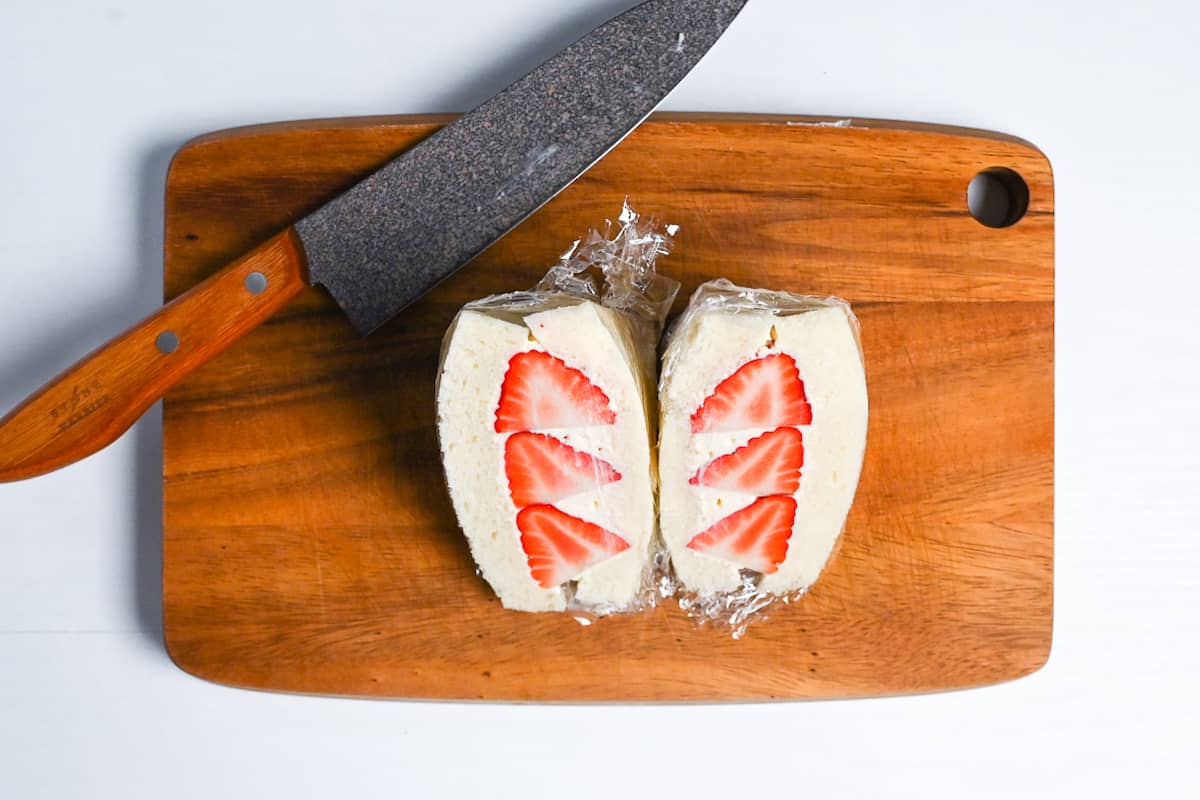
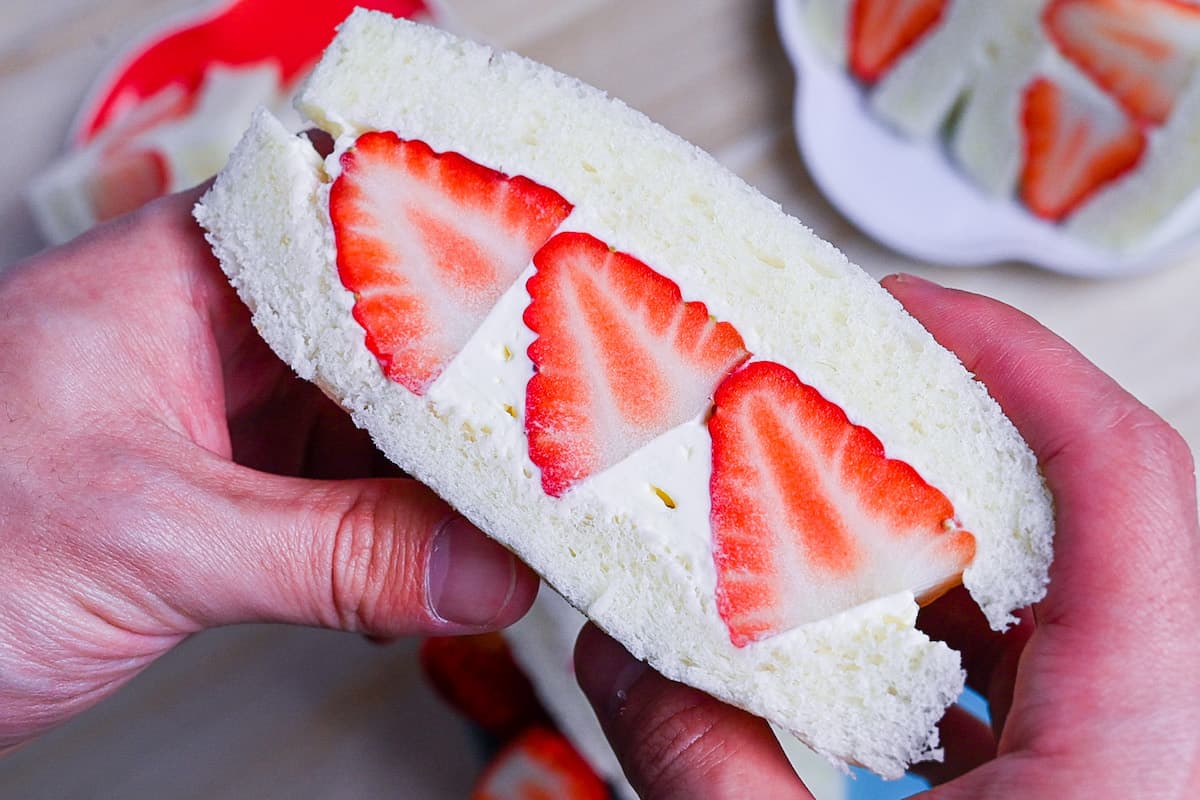
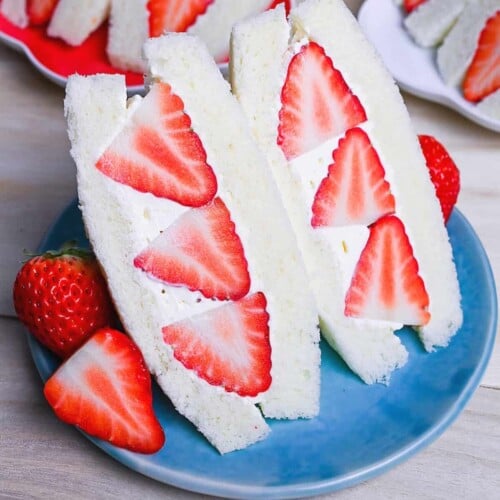
The most common presentation for ichigo sando is diagonally halved to create triangular sandwiches with the strawberries pointing in the same direction. Place 3 strawberries diagonally across the bread, then fill the empty corners with the 2 leftover strawberries.

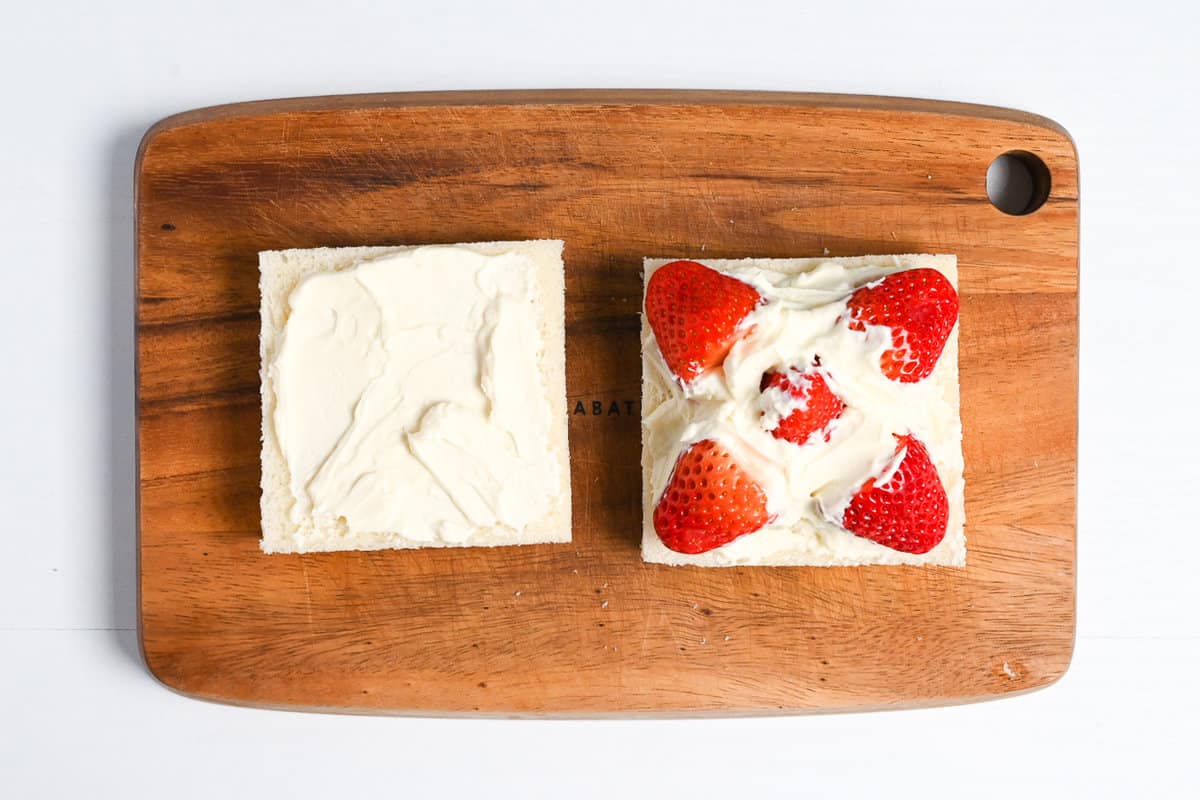
Spread a layer of cream on the other slice while making sure to leave some leftover cream to fill in the gaps between the strawberries.
Place the other piece of bread on top and gently press the edges to seal it. (Be careful not to press the centre and damage the strawberries.)
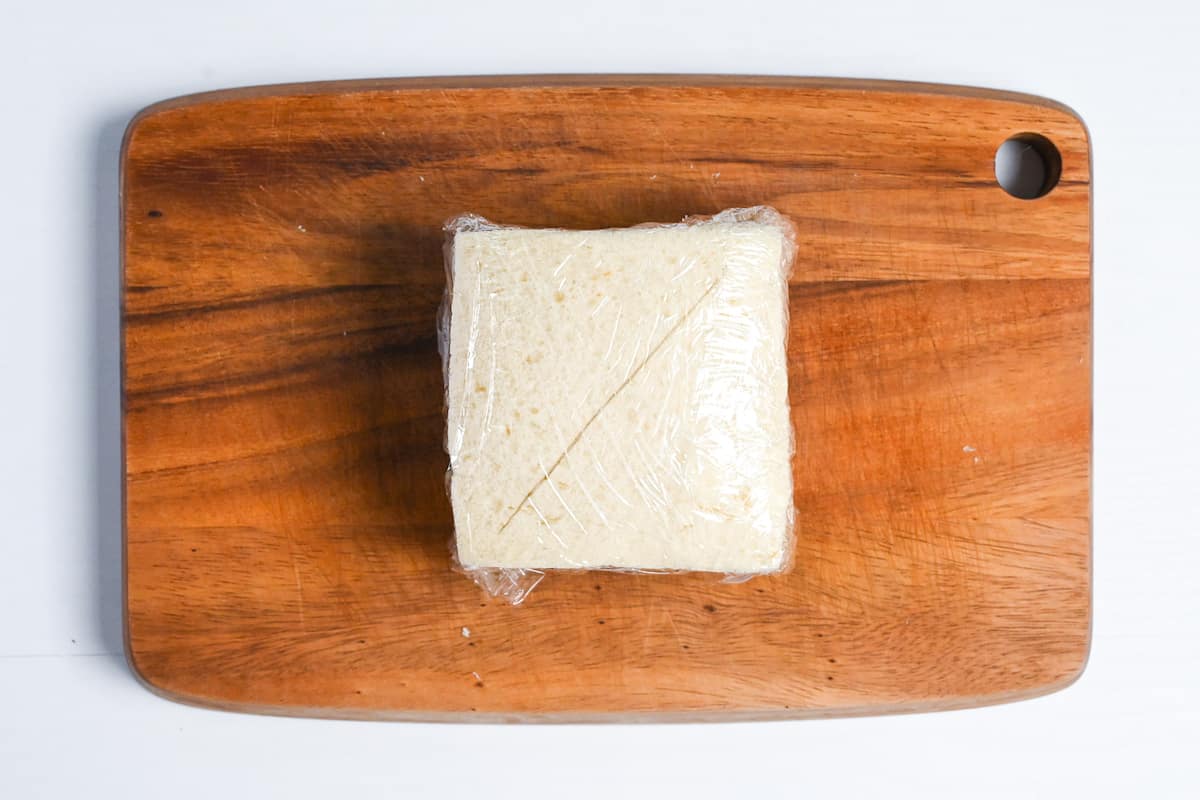
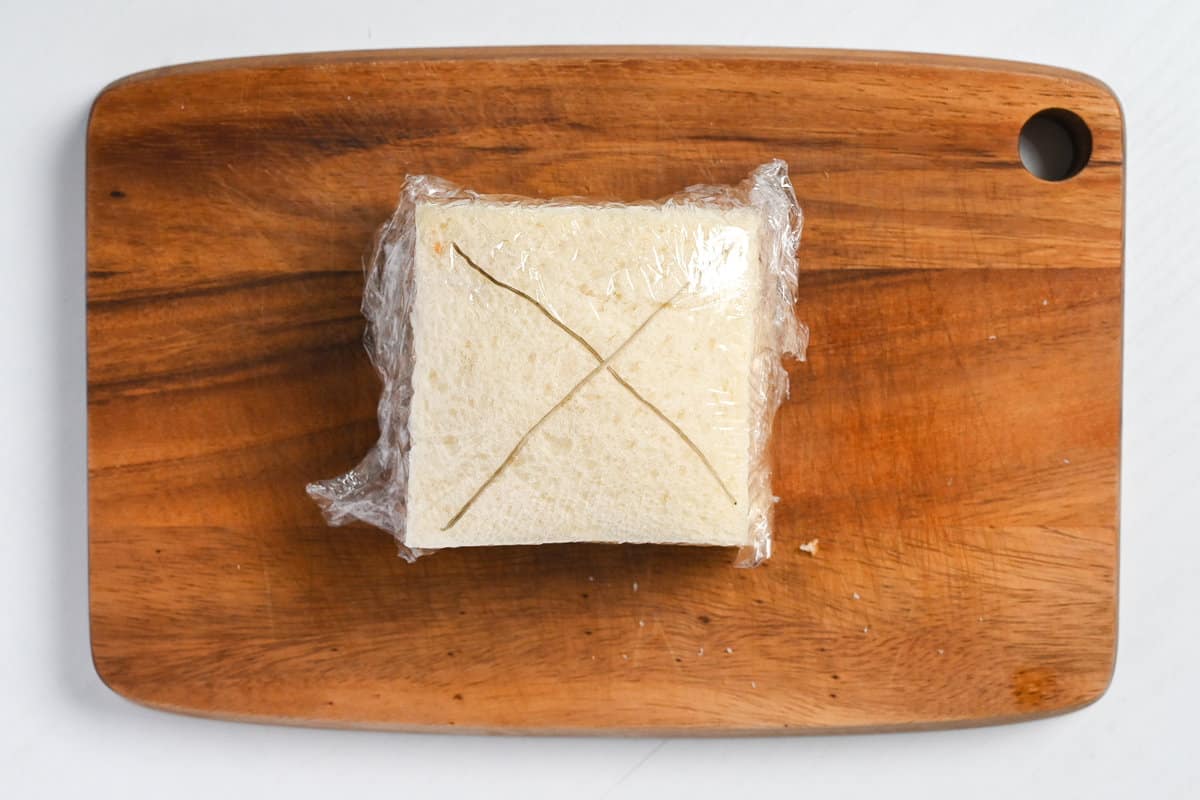
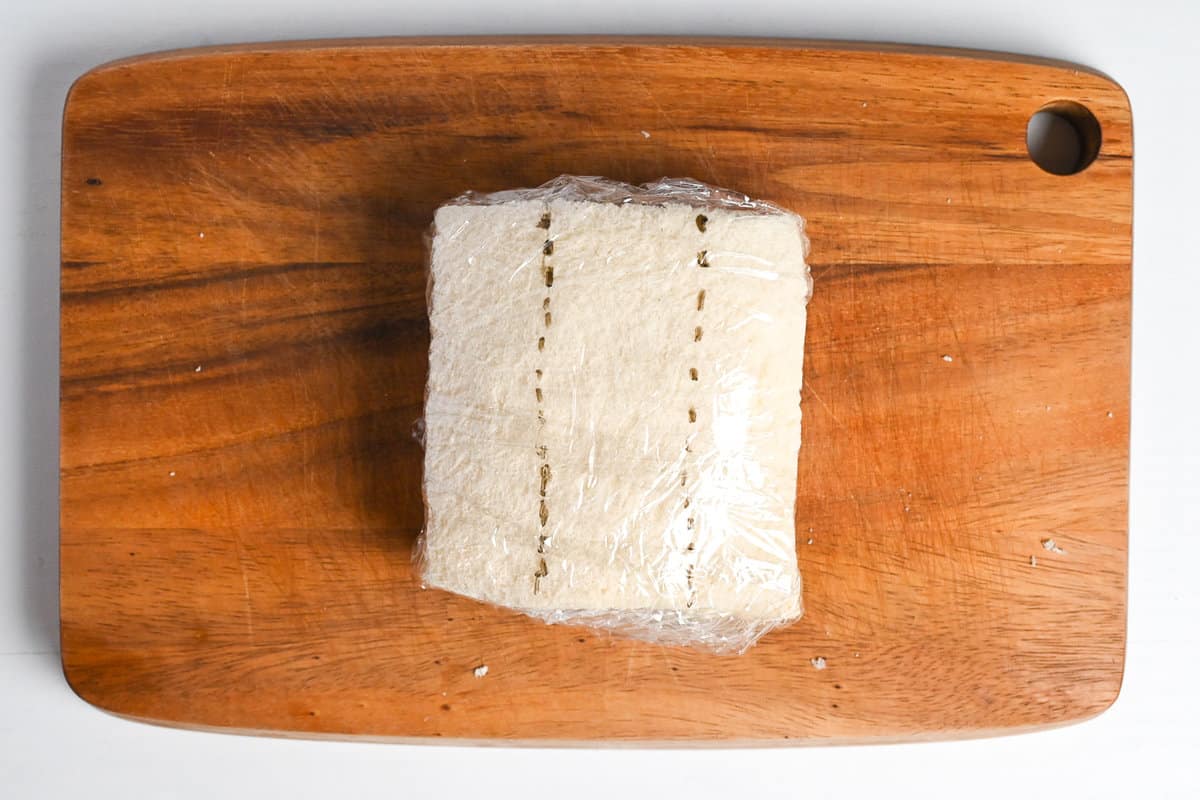
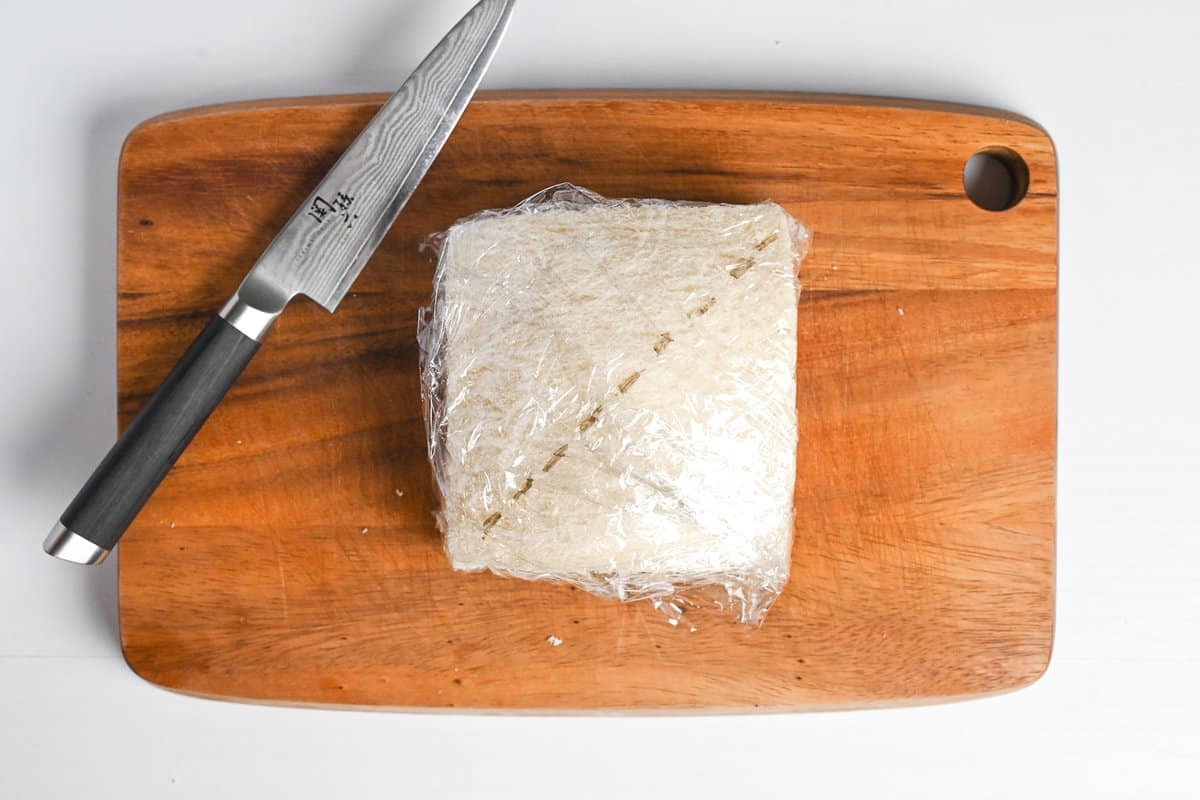
Wrap the sandwich with plastic wrap and use a marker pen to draw a guideline following the row of strawberries. You can follow the guideline when you cut the sandwich later.
For best results, store in the fridge for 3-4 hours before eating.
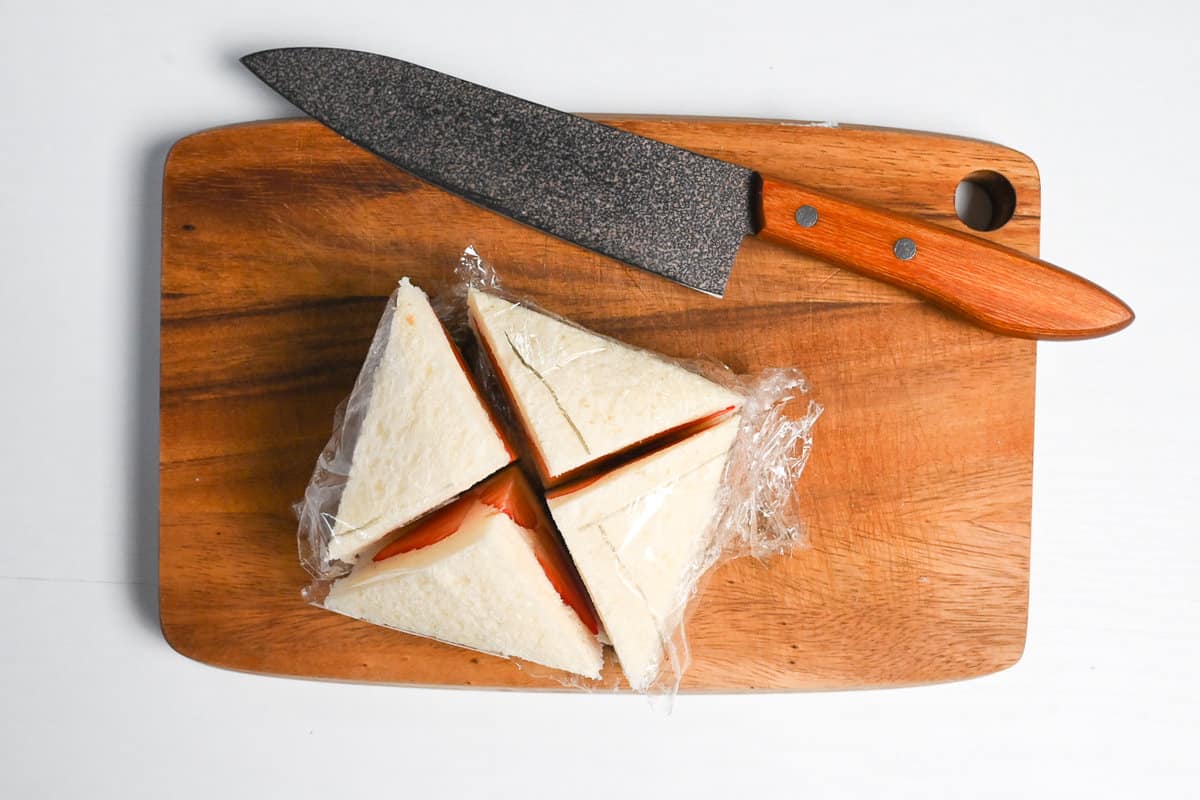
Finally, cut the sandwich by following the line you drew earlier. Make sure to use a sharp knife and cut through while it’s still wrapped in the plastic wrap. This will stop the bread from sliding around, resulting in a perfect cut!
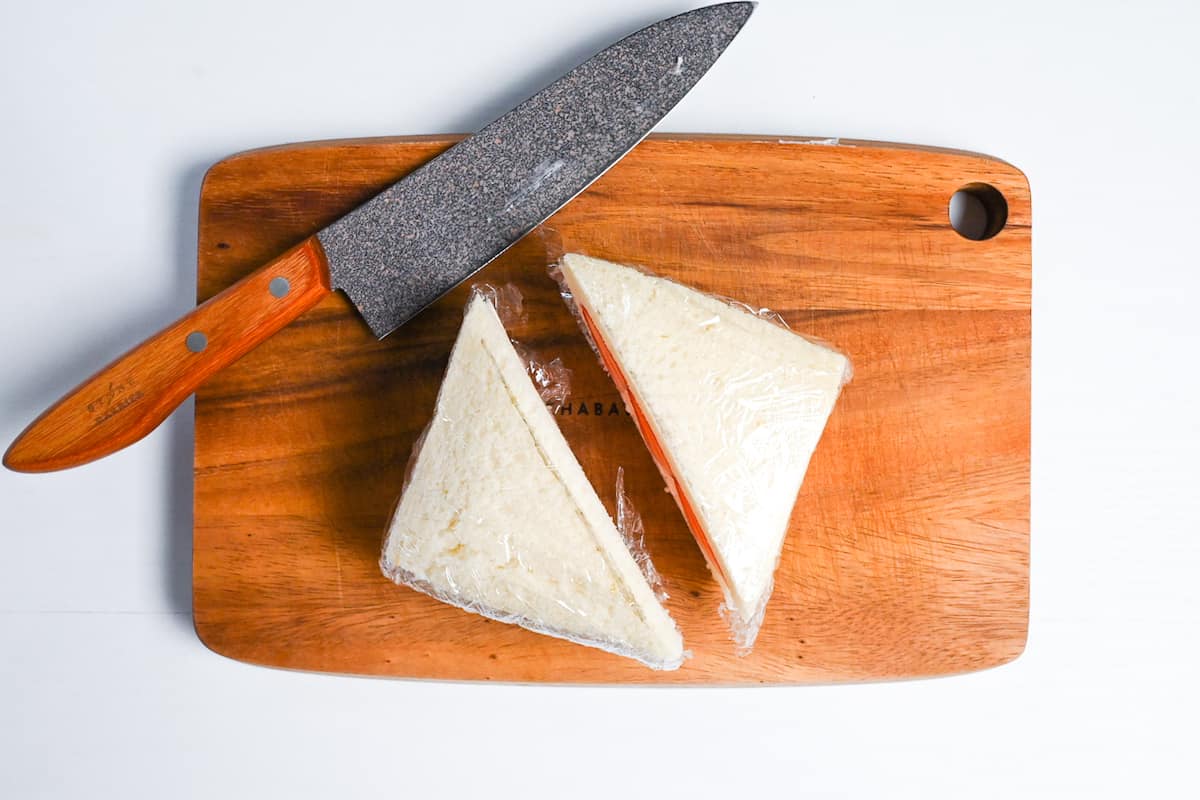
If you’re making multiple sandwiches or cuts, make sure to wipe the knife clean between each cut.
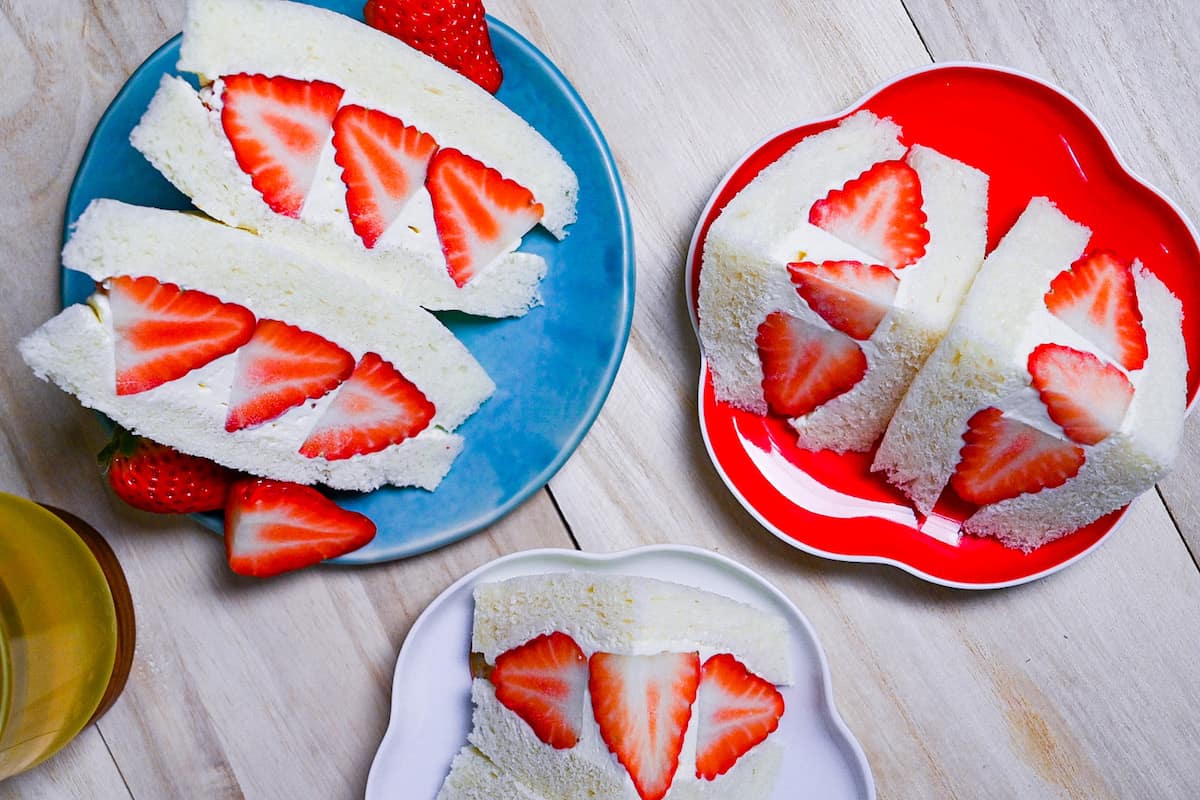
Ichigo Sando Aesthetic
Ichigo sando and fruit sando have become popular “instagramable” items that you can customize to your heart’s content! Here are three simple ways to arrange the strawberries and cut the sandwiches for a different look.
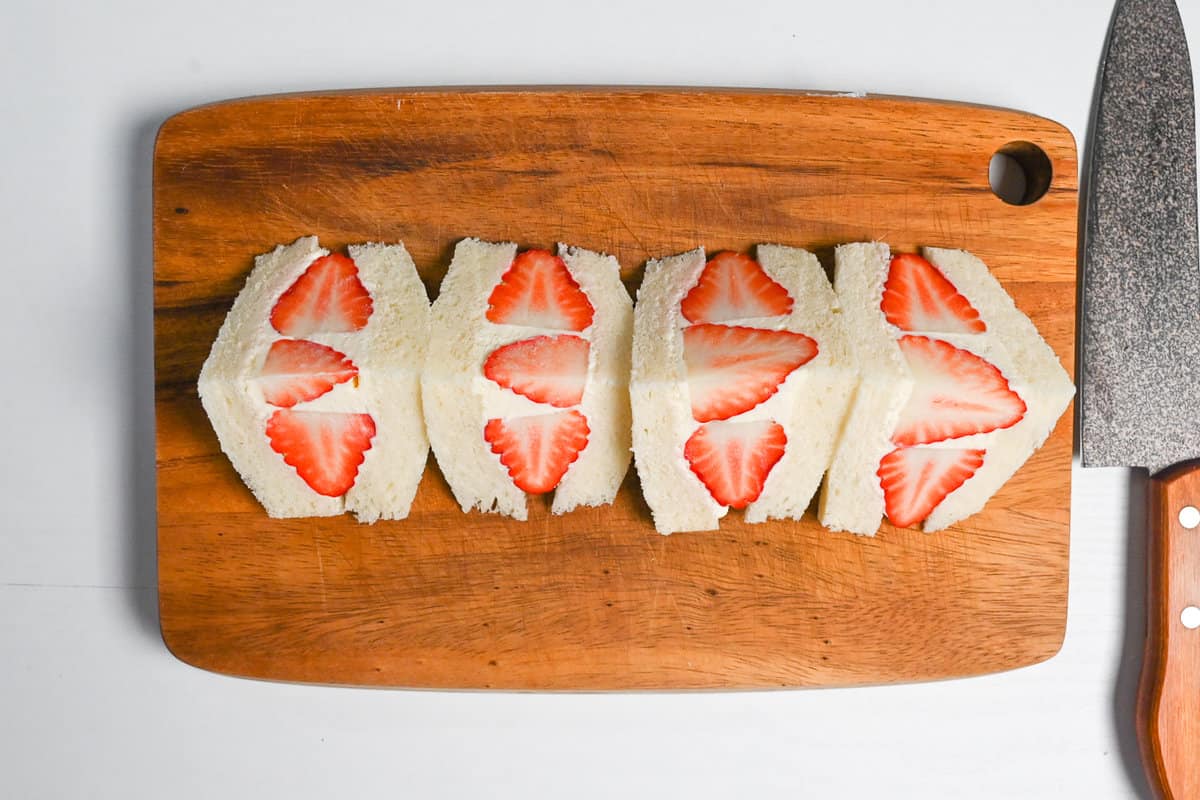
Triangular Quarters
For beautiful mini triangle sandwiches, place one strawberry in the center with the point facing up and then arrange the other 4 strawberries so that the points are directed towards each corner of the bread.
Spread a layer of cream on the other slice and fill in all the gaps with the leftover cream as you would normally.
Place the other slice of bread on top and gently press the edges down to seal the sandwich. Don’t press the middle, the centre should be the tallest point, almost like a mountain.
Wrap with plastic and mark with a cross, then store in the refrigerator for 3-4 hours.
Cut along the mark so that you have 4 equal triangle sandwiches.
This type of cut is perfect for making smaller portions if you find halves too big, it’s also great for sharing and parties!
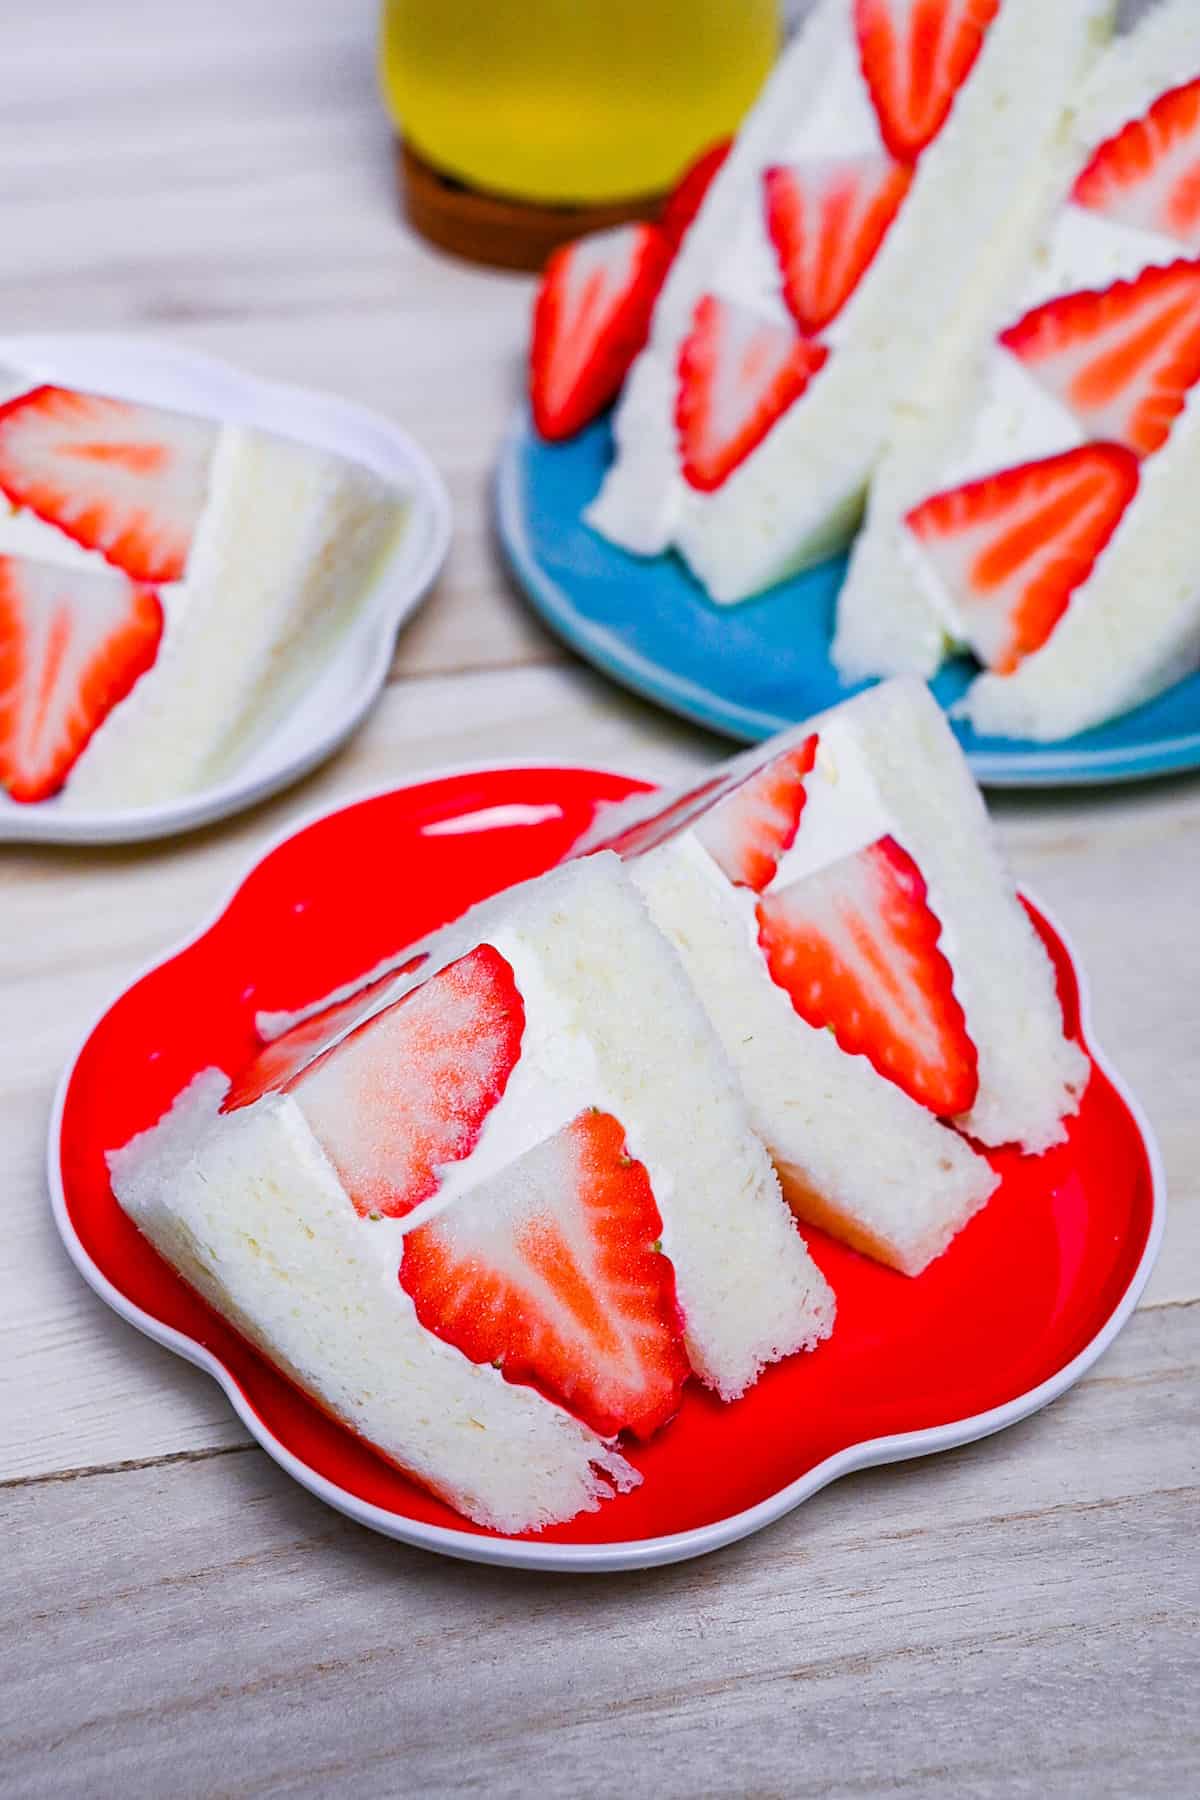
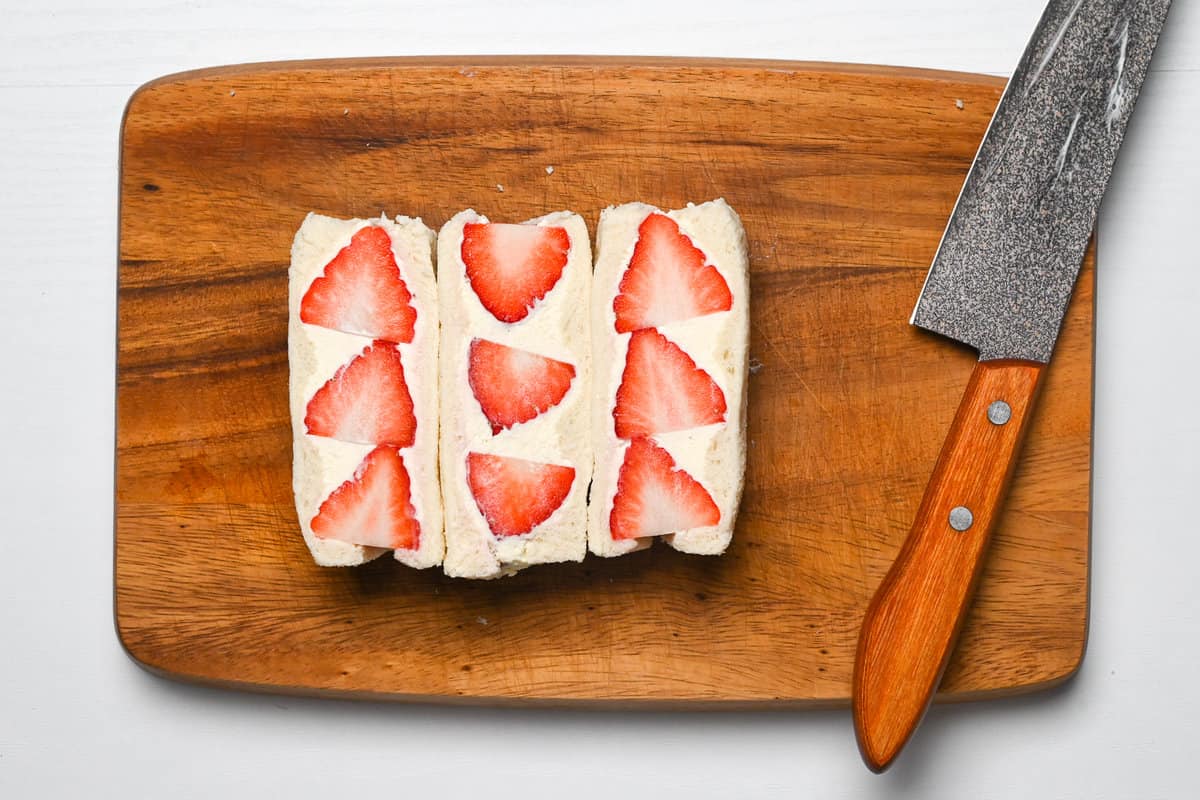
Finger sandwiches (thirds)
This cut is inspired by the rectangular “finger sandwiches” that you might see with an English afternoon tea. The uniform shape makes a simple yet great presentation!
For this one, I used an extra strawberry and made two rows of 3 going in opposite directions. Each row should be placed a third of the width away from the edge.
Fill in the gaps between the strawberries with cream as you usually would.
Wrap with plastic wrap and draw lines to mark where each row of strawberries is. Store in the fridge for 3-4 hours.
Use the lines marked on the plastic wrap as a guide for cutting.
Serve and enjoy!
Hearts
Making ichigo sando for a loved one? Or perhaps for Valentine’s day or a birthday? Then this heart shaped design is perfect!
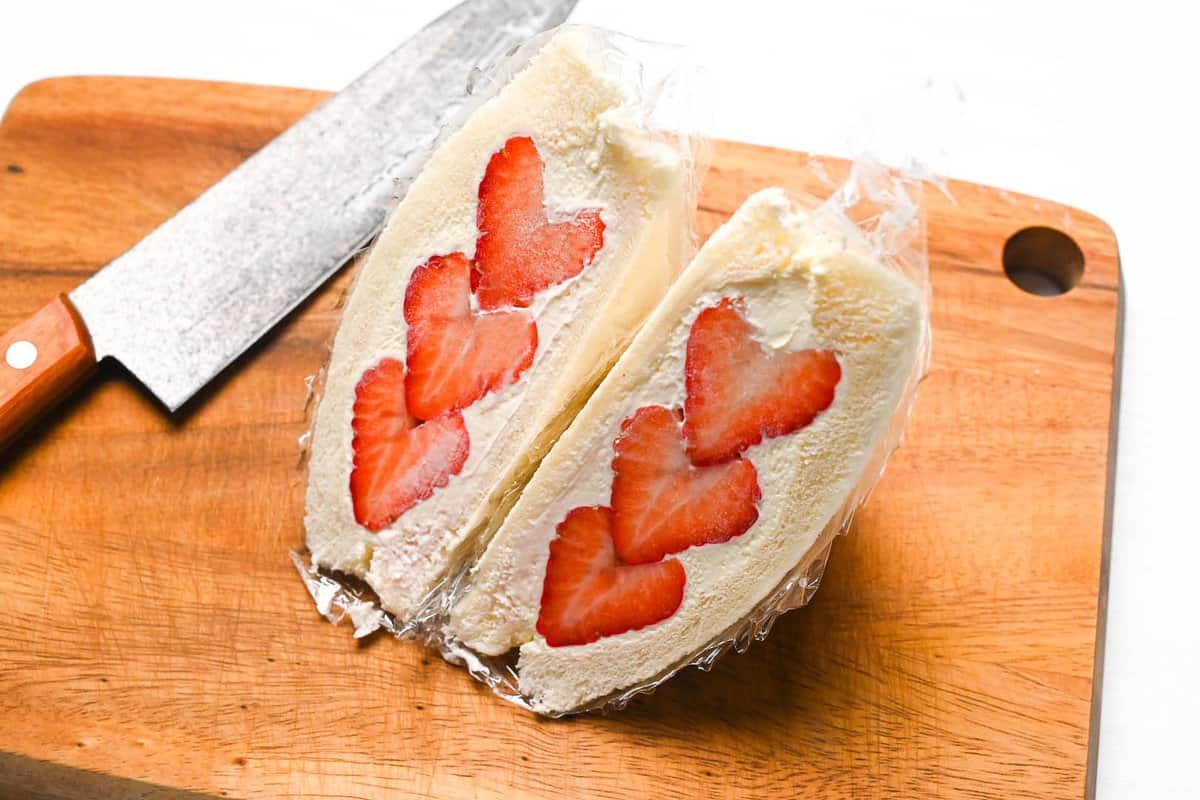
Trim the stems and cut triangles at the top center of 3 of the strawberries.

Lay the heart-shaped strawberries on their sides diagonally across the cream-coated bread. (If you want to make a clearer division between each heart, place some cream in the triangle cut.)
Fill the empty spaces with one strawberry on each side. The tips of each strawberry should be pointing toward the corners of the bread.
Spread a generous layer of cream over the other slice and then fill in the gaps between the strawberries with the leftovers.
Complete the sandwich by placing one slice of bread over the other and gently press the edges to seal. Wrap it in plastic wrap and draw a guide line in the direction of the heart-shaped strawberries using a marker pen. Store in the fridge for 3-4 hours.
Once it’s time to serve, use a sharp knife to cut along the guideline with the plastic wrap still on.
Enjoy!
How to Store
I recommend storing ichigo sando in the fridge for 3-4 hours before cutting to allow the cream to stabilize properly, this will help it cut more beautifully without becoming squashed.
After the minimum storing time, you can keep ichigo sando for 1-2 days. Try to eat them sooner rather than later as the bread will start to become soggy as time goes on.
Ichigo sando is not suitable for freezing.
Storage Summary
Room temperature – Not recommended.
Refrigerated – 1-2 days.
Frozen – Not suitable.
FAQ
Ichigo sando is usually made from a Japanese milk bread called “shokupan”. Shokupan is made from a high-hydration dough enriched with butter and milk. It’s characterized by its extremely light and fluffy texture with a sweet and luxurious taste. Alternatively, a light, fluffy, and slightly sweet sandwich bread is a good alternative.
“Sando” is the shortened form of “sandoichi” (サンドイッチ), the Japanese word for sandwich.
For ichigo sando, only strawberries are used. However, fruit sando can contain any kind of fruit. Popular options include kiwi, mikan (mandarin), grapes, and blueberries. I’ve also seen pineapple and mango used too which is a great option for those who love tropical fruits!
I hope you enjoy this Ichigo Sando recipe! If you try it out, I’d really appreciate it if you could spare a moment to let me know what you thought by giving a review and star rating in the comments below. It’s also helpful to share any adjustments you made to the recipe with our other readers. Thank you!
More Strawberry Recipes
- Japanese Strawberry Milk (Ichigo Milk)
- Strawberry Mochi (Ichigo Daifuku)
- Japanese Strawberry Shortcake
- Matcha Roll Cake with Strawberries and Cream Filling
Want more inspiration? Explore my Japanese Dessert Roundup Post for a carefully selected collection of tasty recipe ideas to spark your next tea party!
Japanese Strawberry Sandwich (Ichigo Sando)

Ingredients
- 5 strawberries
- 35 g mascarpone cheese softened to room temperature
- 1-2 drops vanilla essence
- 35 ml heavy cream at least 36% milk fat, chilled
- 2 tsp light brown sugar
- 2 slices white bread preferably Japanese shokupan or sweet bread
My recommended brands of ingredients and seasonings can be found in my Japanese pantry guide.
Can’t find certain Japanese ingredients? See my substitution guide here.
Instructions
- Wash 5 strawberries, dry them with kitchen paper and remove the stems.

- Whip 35 g mascarpone cheese with 1-2 drops vanilla essence until soft and smooth.
- Take 35 ml heavy cream from the fridge, add it to a separate bowl with 2 tsp light brown sugar and whip until stiff peaks form.
- Add the whipped cream to the mascarpone and mix together until well combined. (Be careful not to over mix.)
- Trim the crusts off 2 slices white bread.
- Spread one slice of bread with 1/3 of the mascarpone cream and then place 3 strawberries on top going diagonally through the middle. Place the other two strawberries in the empty corners with the points facing outwards.
- Spread 1/3 of the cream over the other slice of bread and use the leftovers to fill in the gaps between the strawberries.
- Place the other slice on top to complete the sandwich and gently press the edges to seal.
- Wrap the sandwich with plastic wrap and draw a line in the direction of the strawberries so you know where to cut later. Chill in the fridge for 3-4 hours.
- Take the sandwich from the fridge and use a clean sharp knife to cut along the guideline while it’s still wrapped.
- Enjoy!
Notes
- Keep refrigerated and consume within 1-2 days.
- See in post for different arrangement and cutting styles.
Leave a rating and a comment