


Featured Comment
Beautiful recipe! The step-by-step guide makes it so approachable, and I appreciate the note about using stem hojicha for deeper flavor!
★★★★★
– Leah
When it comes to Japanese tea-flavored desserts, matcha always takes the spotlight. But hojicha is the underdog that deserves more attention. If you’ve already tried making matcha ice cream at home, this is the natural next step, and the flavor goes in a completely different direction.
Hojicha is a roasted green tea that brings smoky depth with hints of caramel. In a creamy ice cream base, that flavor deepens into something genuinely hard to find anywhere else, and you only need six ingredients and a whisk to get there.
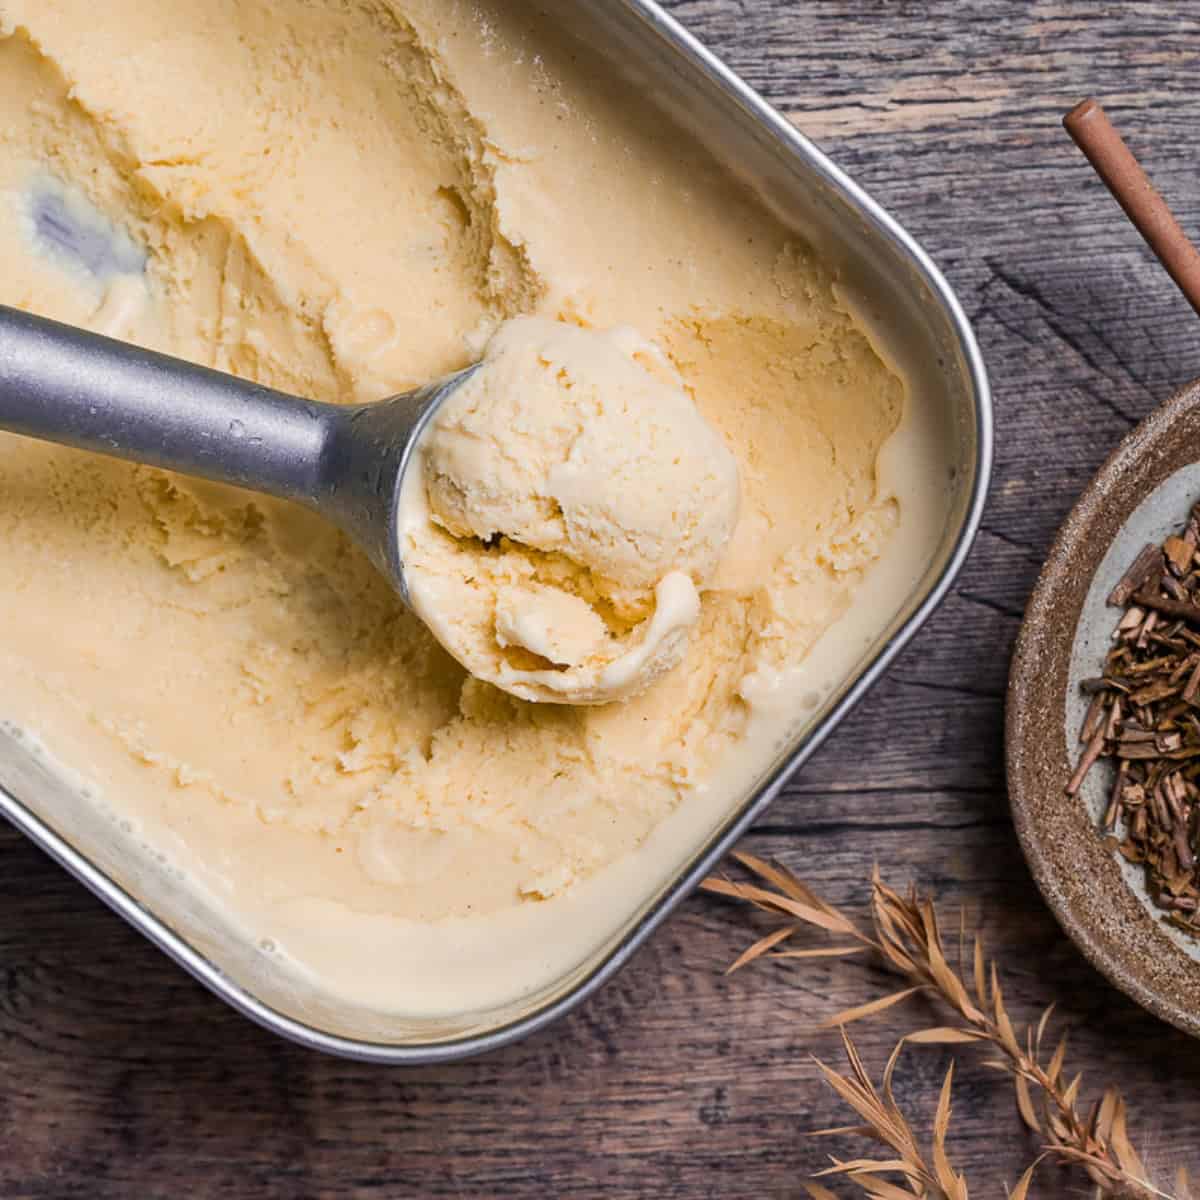
HOJICHA ICE CREAM
Recipe Snapshot
- What is it? A custard-based hojicha ice cream made by hand, no ice cream machine needed. The roasted Japanese green tea gives a flavor depth you won’t find in other tea flavored ice creams.
- Flavor profile: Smoky, nutty, caramel-like.
- Why you’ll love this recipe: This small batch recipe comes together with 6 simple ingredients and no special equipment. Hojicha has a naturally complex flavor that does all the heavy lifting, and it’s low in caffeine making it perfect as an anytime treat.
- Must-haves: Hojicha tea (stem if you can find it, but teabags or powder also work fine), a freezer.
- Skill Level: Easy.
Summarize & Save this content on:
Disclaimer: This post may contain Amazon affiliate links. Sudachi earns a small percentage from qualifying purchases at no extra cost to you. See disclaimer for more info.
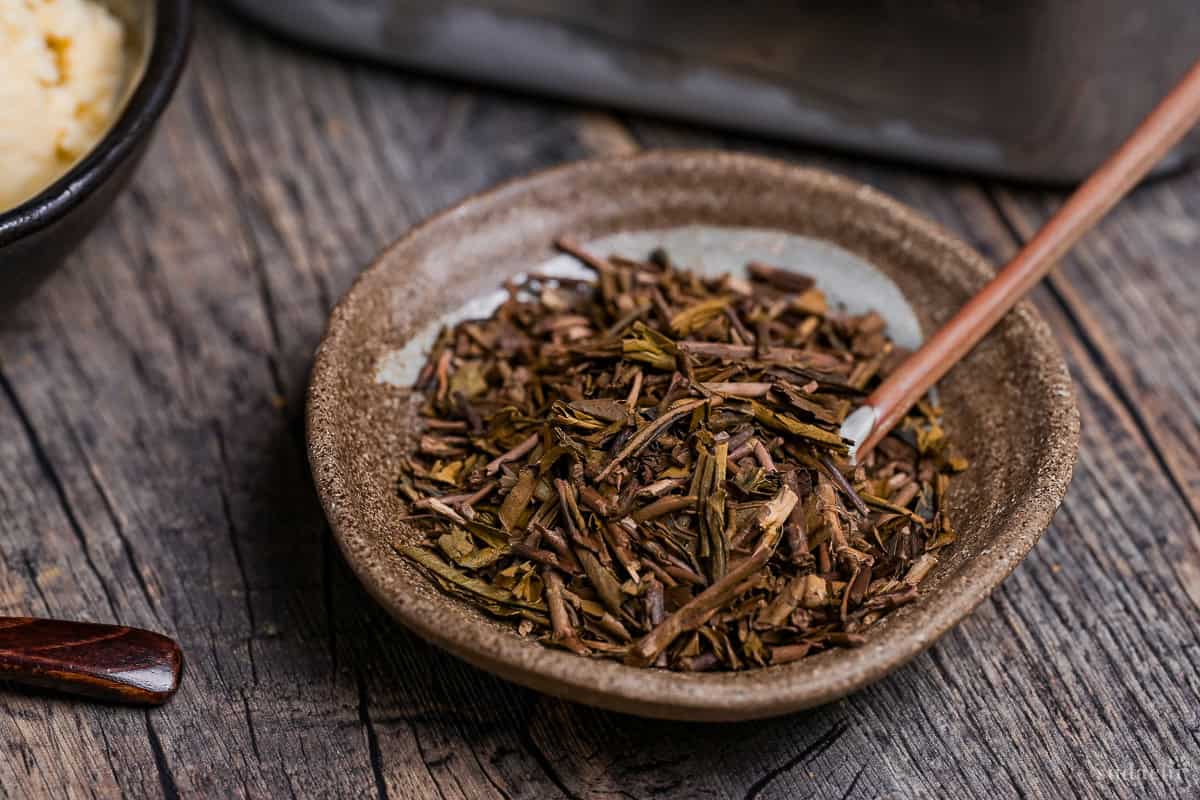
What is Hojicha?
Hojicha (ほうじ茶) is a type of Japanese green tea roasted at a high heat that gives it a reddish brown color and a toasty, almost nutty flavor with subtle notes of caramel.
It is most commonly made with bancha (番茶), an everyday green tea produced from the larger, more mature leaves of the later harvests. These leaves tend to be robust and slightly bitter, but roasting them softens that bitterness and transforms them into something smoky with a hint of natural sweetness. The process also burns off much of the caffeine, making hojicha one of the few teas you can comfortably drink in the evening.
Hojicha doesn’t get nearly enough credit as a dessert flavor, and that’s something I genuinely want to change. The roasted, smoky depth holds up beautifully in a rich ice cream base in a way that lighter teas simply don’t (in my opinion). If you’ve never tried hojicha in a dessert before, then this recipe is the perfect place to start!
Hojicha Ice Cream Ingredients
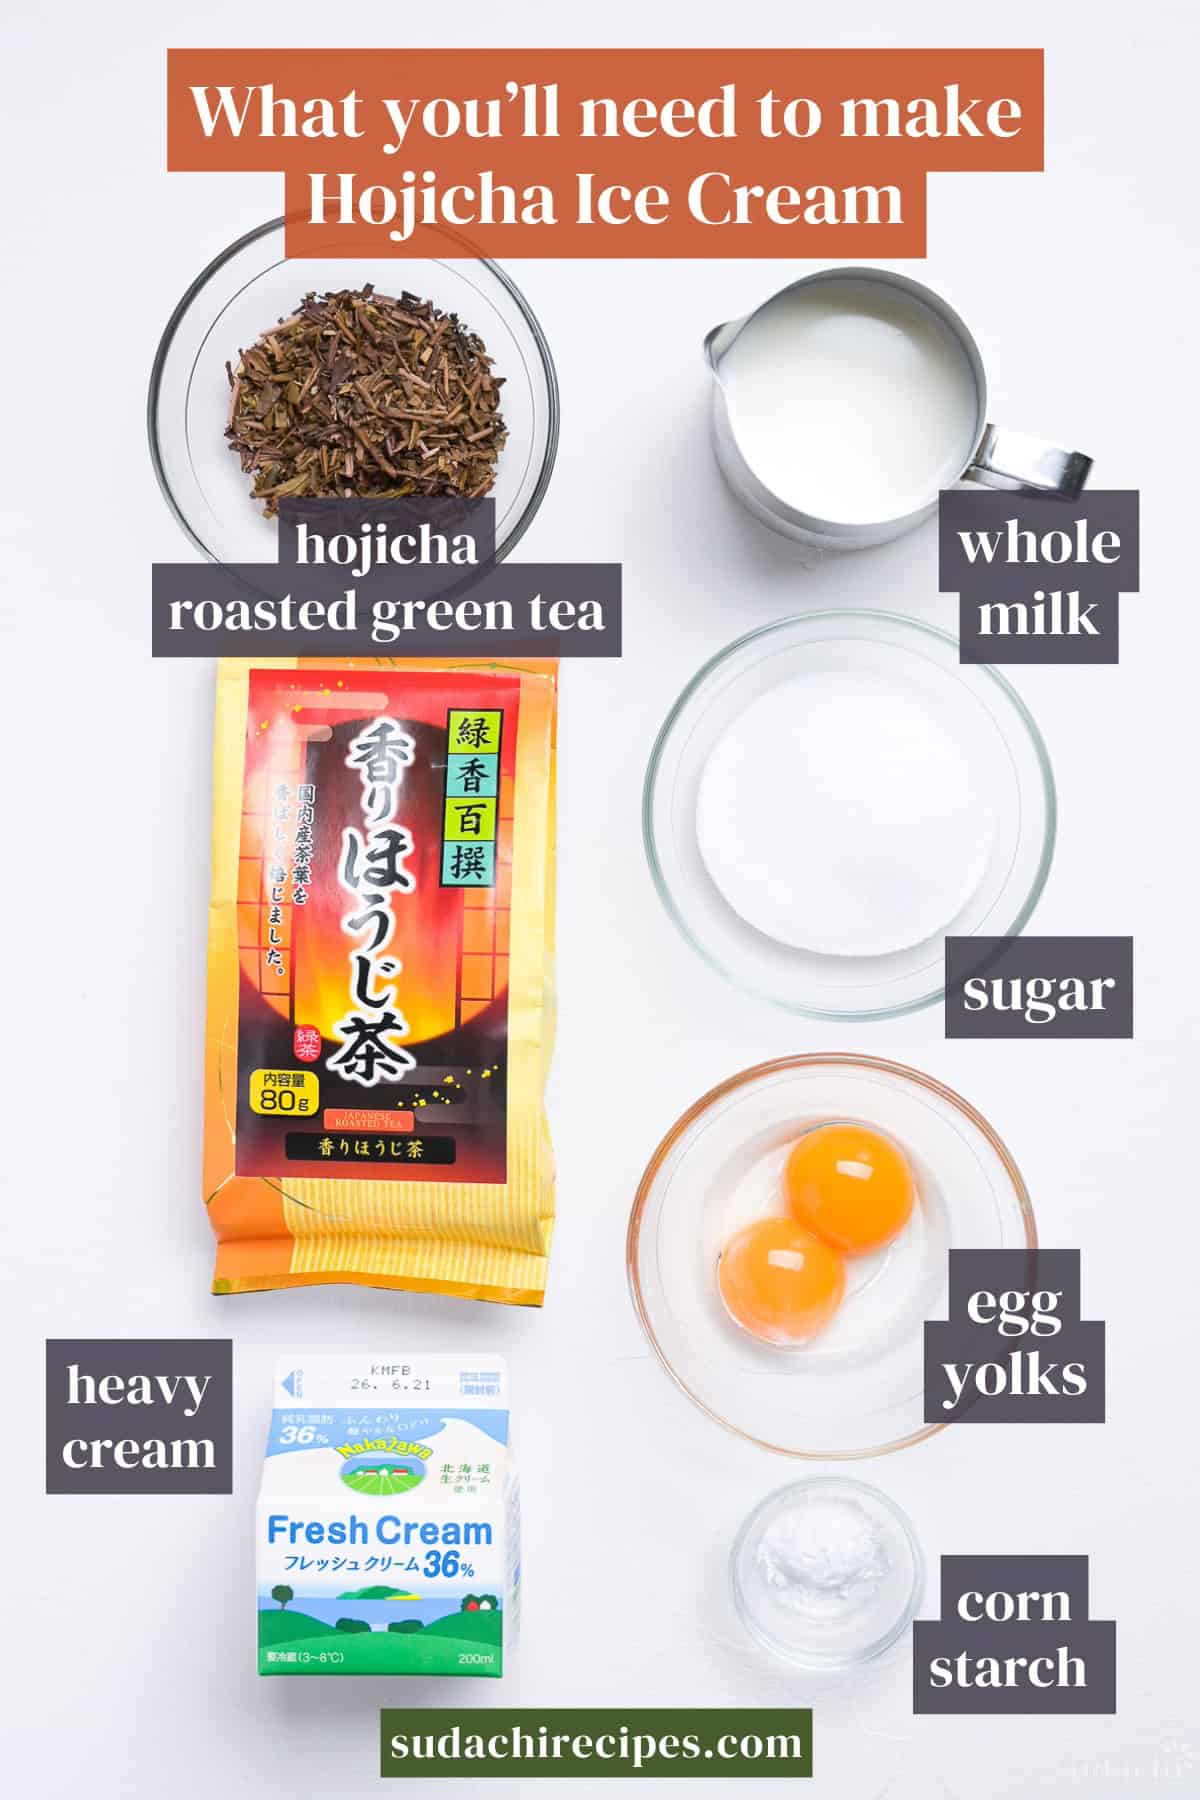
- Hojicha: This recipe can be made with any kind of hojicha. For a deep hojicha flavor, opt for loose tea with stems. Tea bags are great for convenience since they are easy to remove (no straining), and Hojicha powder can be mixed in and also sprinkled at the end for an extra pop of flavor. The powder is concentrated and fine, so use half the amount stated in the recipe (4.5g/1½ tbsp powder instead of 9g tea leaves).
- Egg yolks: Give a richer and creamier flavor and texture to the custard base. I recommend using pasteurized eggs since we won’t be cooking them thoroughly.
- Sugar: Regular white caster sugar is used not only to add sweetness, but also to lower the freezing point of the liquids in the ice cream. Adjusting the sugar can result in an ice cream that is either too hard or too soft so keep this in mind if you decide to adjust the sugar quantity.
- Whole Milk & Heavy Cream: Combining these two results in a rich and creamy texture. For best results, use heavy cream with at leave 35% milk fat. I don’t recommend using skimmed or low fat milk in this recipe since it’s more likely to create ice crystals, but half and half is a good substitute. I haven’t tried plant-based options yet, but I will update the post when I do.
- Corn Starch: Thickens the base mixture for the ice cream, which will help prevent ice crystals from forming. Tapioca starch and potato starch are good substitutes.
Other Teas to Try
This recipe is built around one thing, the tea. This makes it the perfect base for any other tea flavored ice creams you would like to try. Here are a few ideas:
- Assam (royal milk tea inspired)
- Earl Grey
- English Breakfast
- Chai
- Oolong
- Jasmine
How to Make My Hojicha Ice Cream
This recipe is designed to be a small batch made by hand (hand churning). The mixture can also be tripled/quadrupled and used in an ice cream machine if you have one.
If you prefer to watch the process in action, check out my YouTube video of this recipe of this hojicha ice cream recipe.

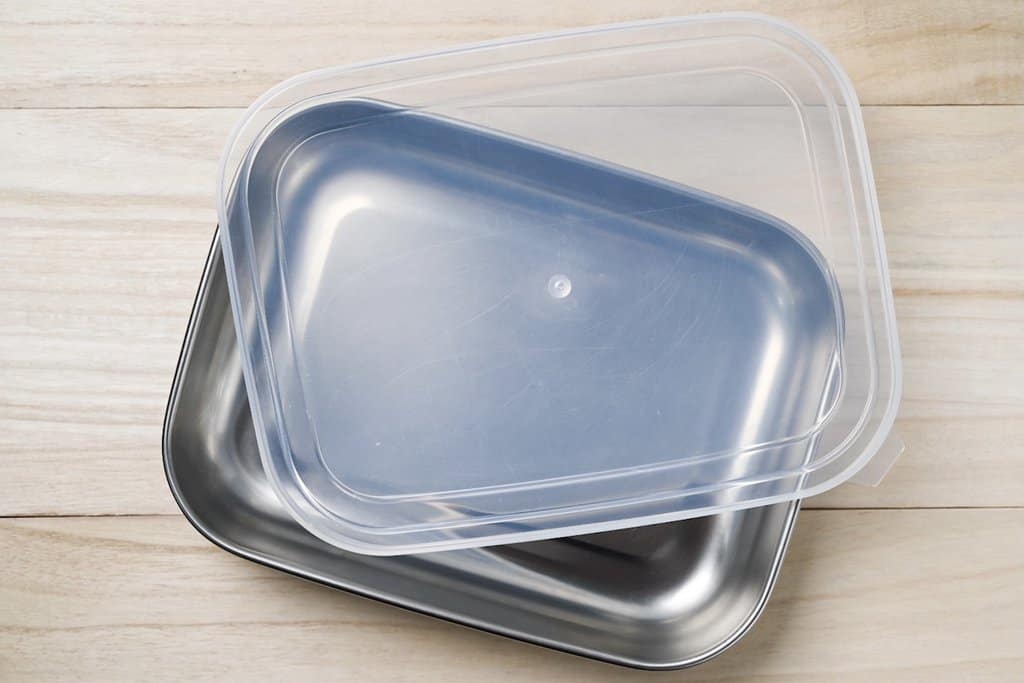
Place your storage container in the freezer before you begin the recipe. Starting with a cold container will help the ice cream freeze faster. I recommend a wide container over a tall one, a wider means a larger surface area which helps it freeze fast.
I love these steel prep containers with silicone lids. The steel conducts heat well, so the edges and base freeze really quickly.
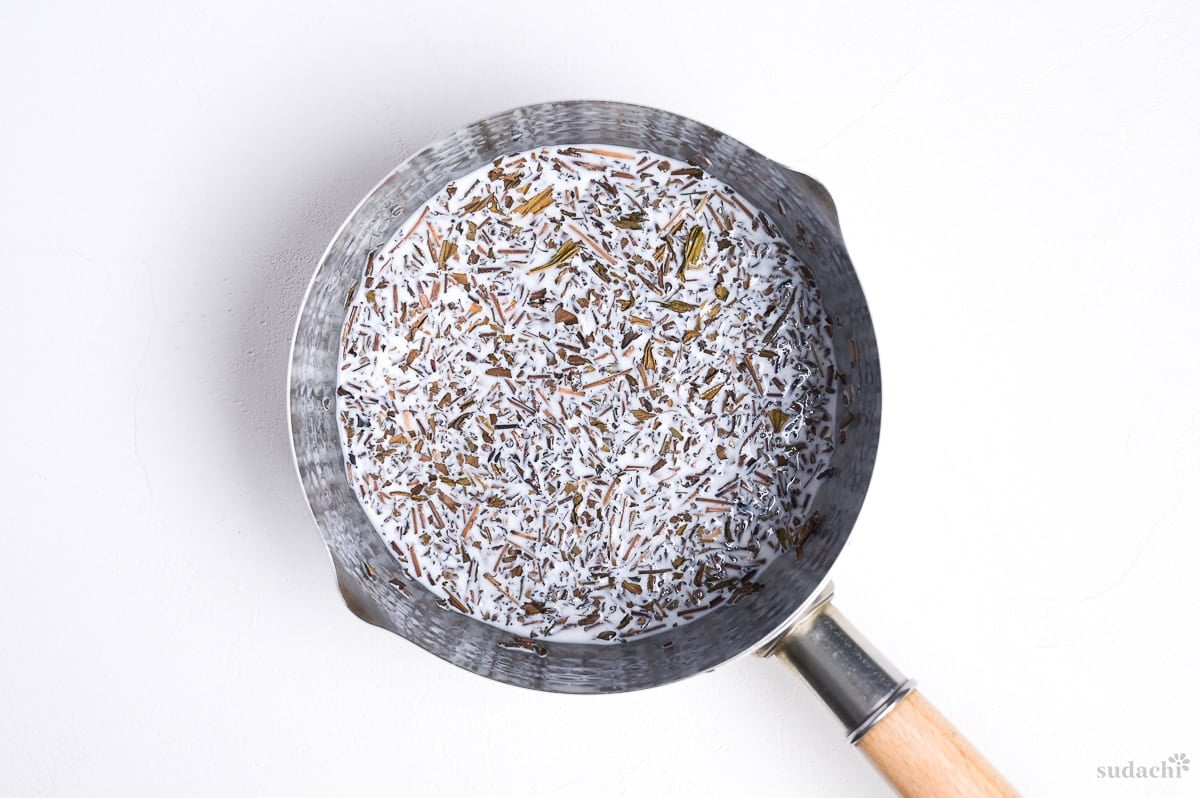
First, pour the cold milk into a cold saucepan and add the tea. Mix it and set it aside while you prepare your other ingredients. This is bonus soaking time that would be a waste to miss.
If you’re using hojicha powder, you can mix them now or later, your call.
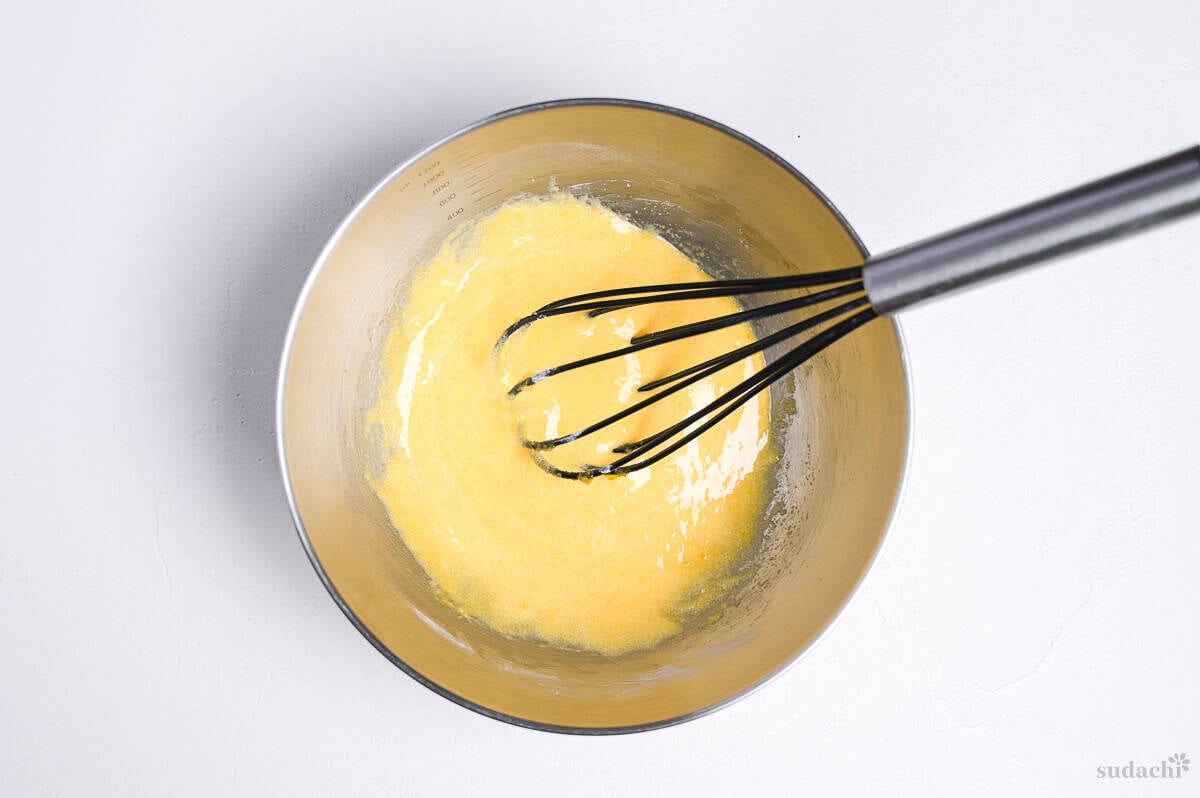
Whisk the egg yolks, sugar and corn starch together in a large heatproof bowl until pale and creamy. This thorough whisking begins to denature the egg proteins slightly, helping them bind more evenly with the fat from the cream and milk. The result is a more stable emulsion and creamier ice cream with less risk of ice crystals.
i. Heat up the pan of milk and stir the tea around to help release the flavor. Be careful not to let it boil.
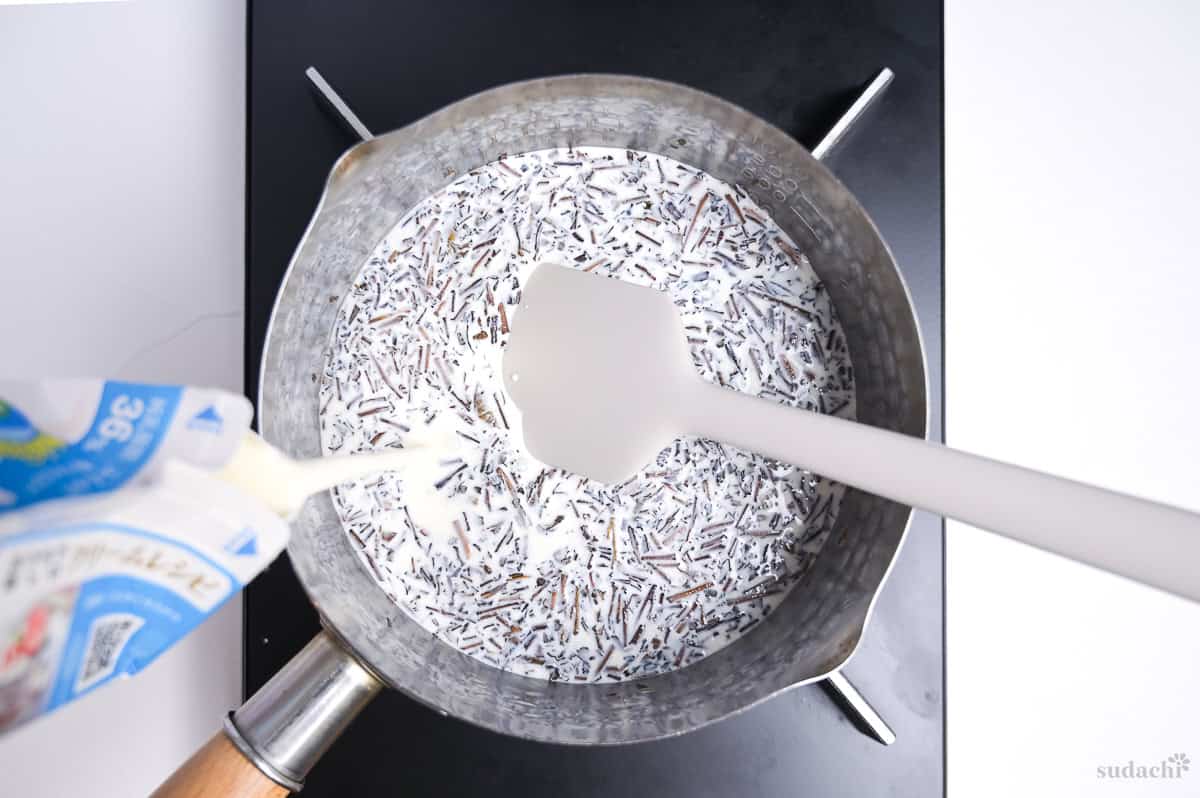
ii. When you start to see tiny bubbles around the edges, pour in the heavy cream and stir. This will lower the temperature back down, giving the hojicha time to release more flavor.
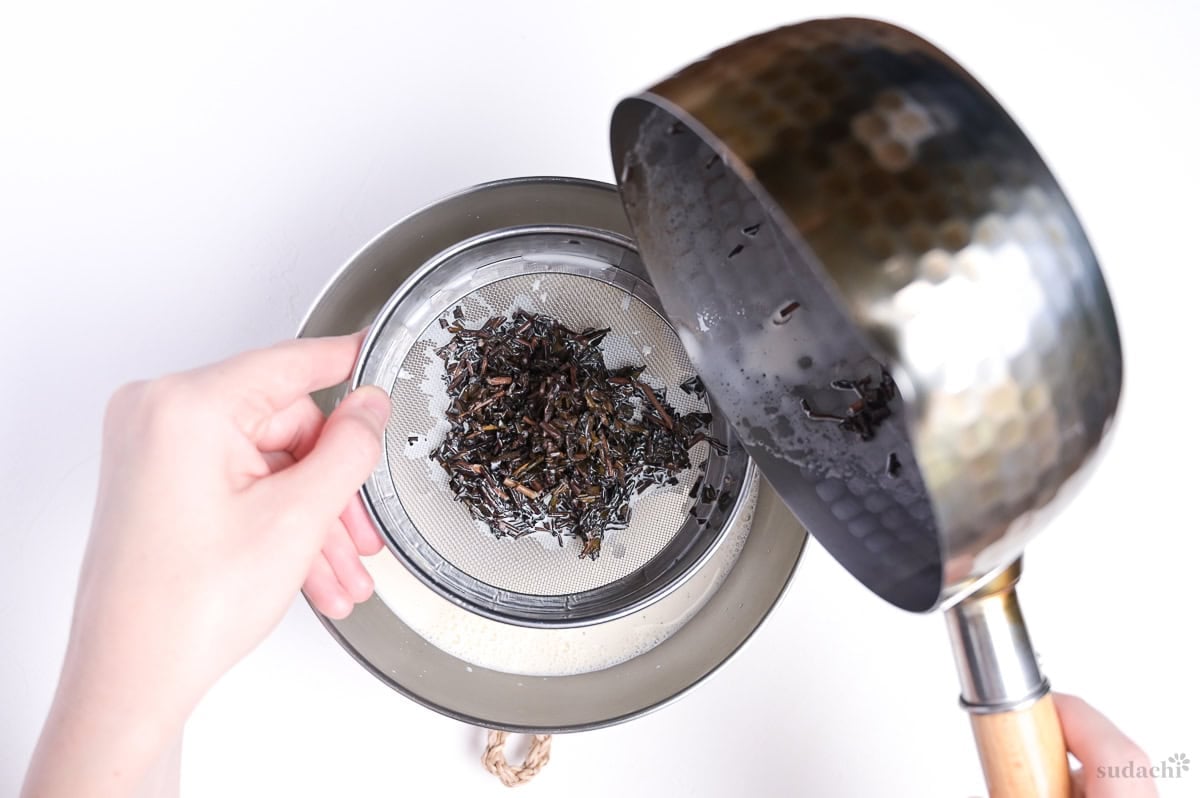
iii. Continue to heat until small bubbles start appearing around the edge once more, then turn off the heat. If you’re using loose tea, strain the mixture and wipe out the pan to use again. If you’re using tea bags, lift them out and squeeze them thoroughly with tongs to get out as much flavor as possible.
If you used hojicha powder, you don’t need to do anything. Just take the pan off the heat and move onto the next step.
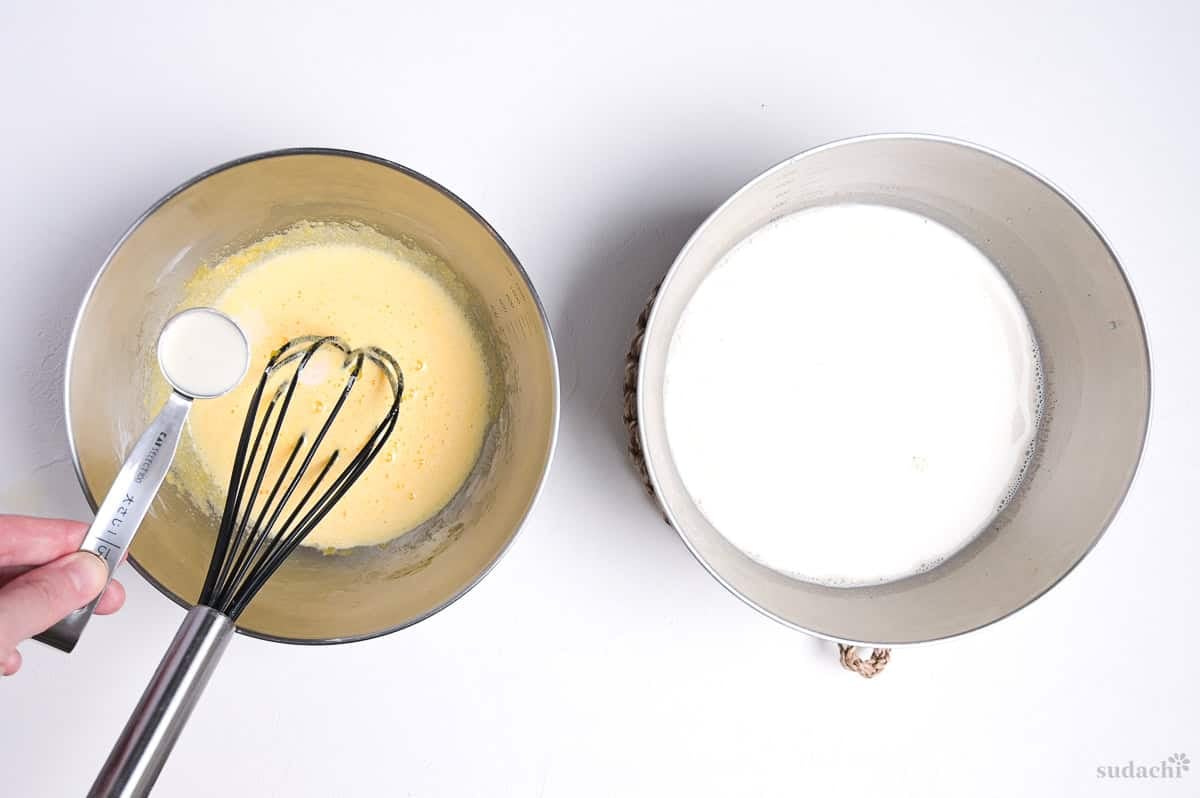
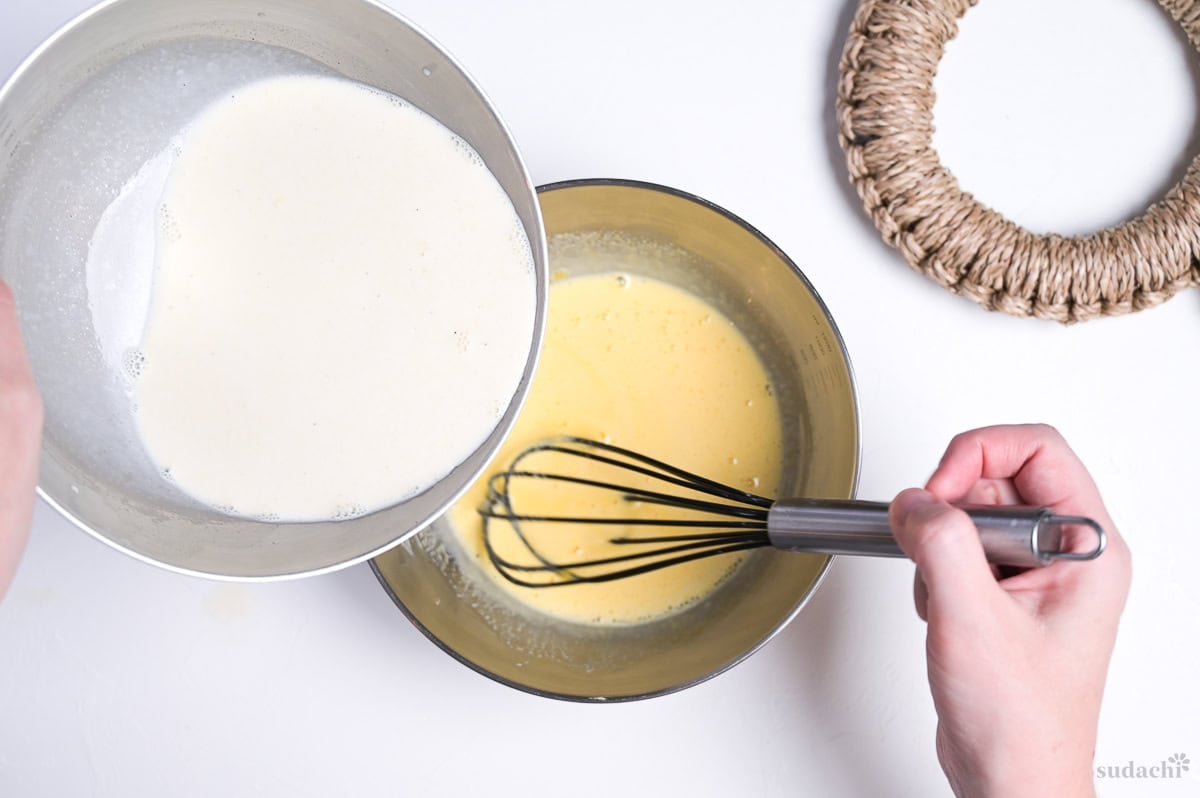
i. Add a few tablespoons of the hot milk mixture to the egg yolk base while whisking thoroughly. This is called tempering and prevents the egg from seizing, cooking or scrambling.
ii. Gradually pour the rest of the milk and cream into the bowl while whisking, then pour it back into the saucepan.
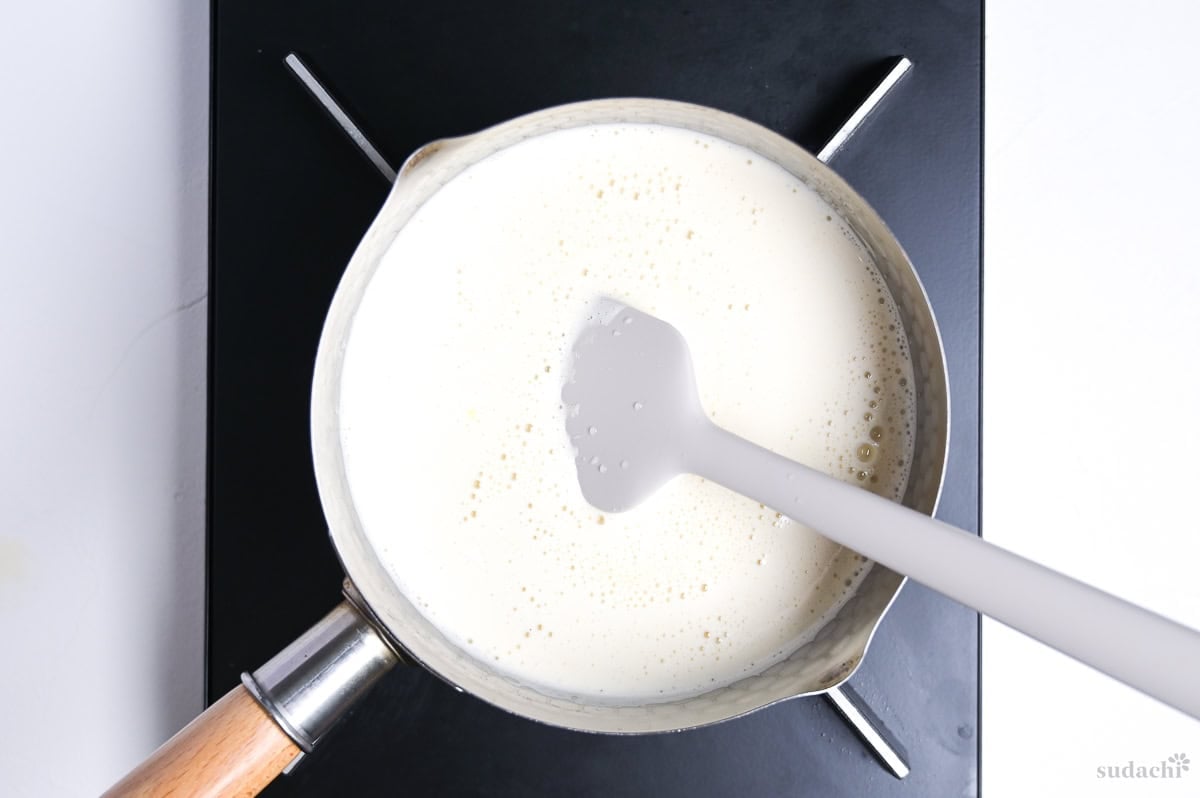
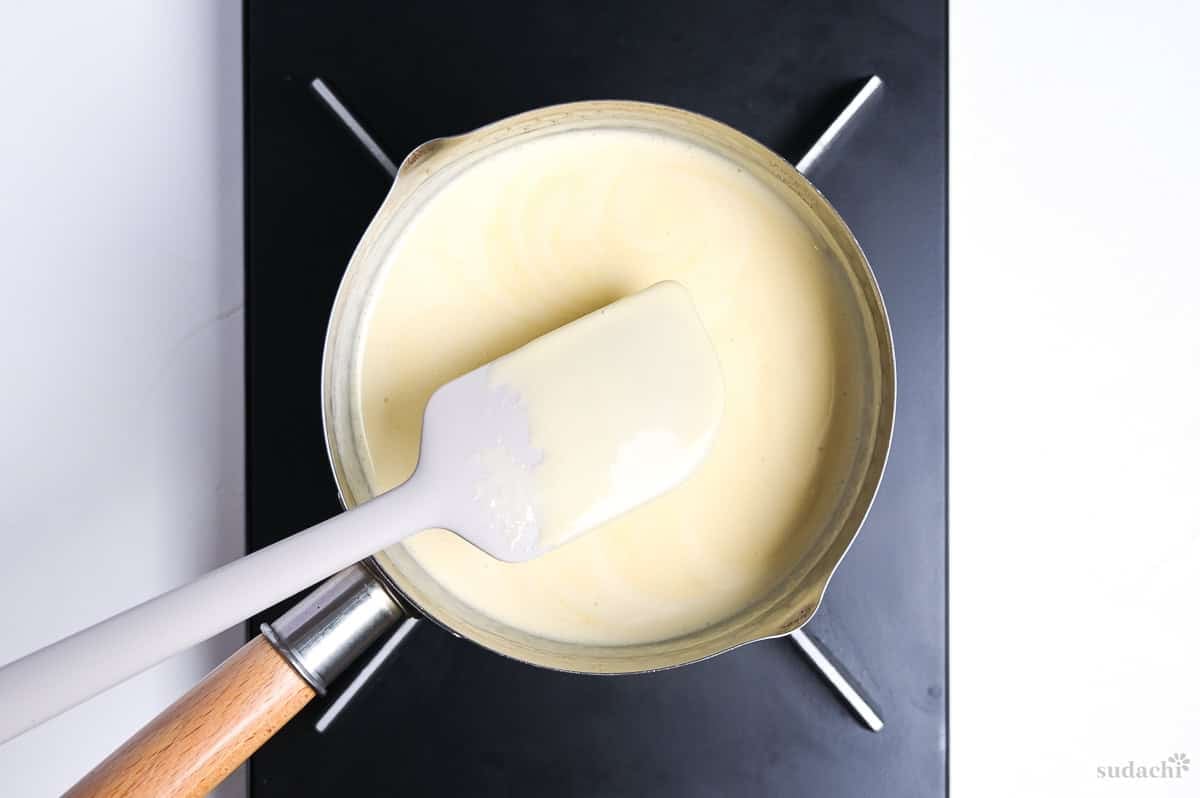
iii. Heat on low heat while stirring continuously until it thickens into a thin custard consistency. It should be thick enough to coat the back of a spoon.
Use a silicone or wooden spatula with a flat edge to scrape the bottom of the pan as you stir, this will prevent it catching on the bottom.
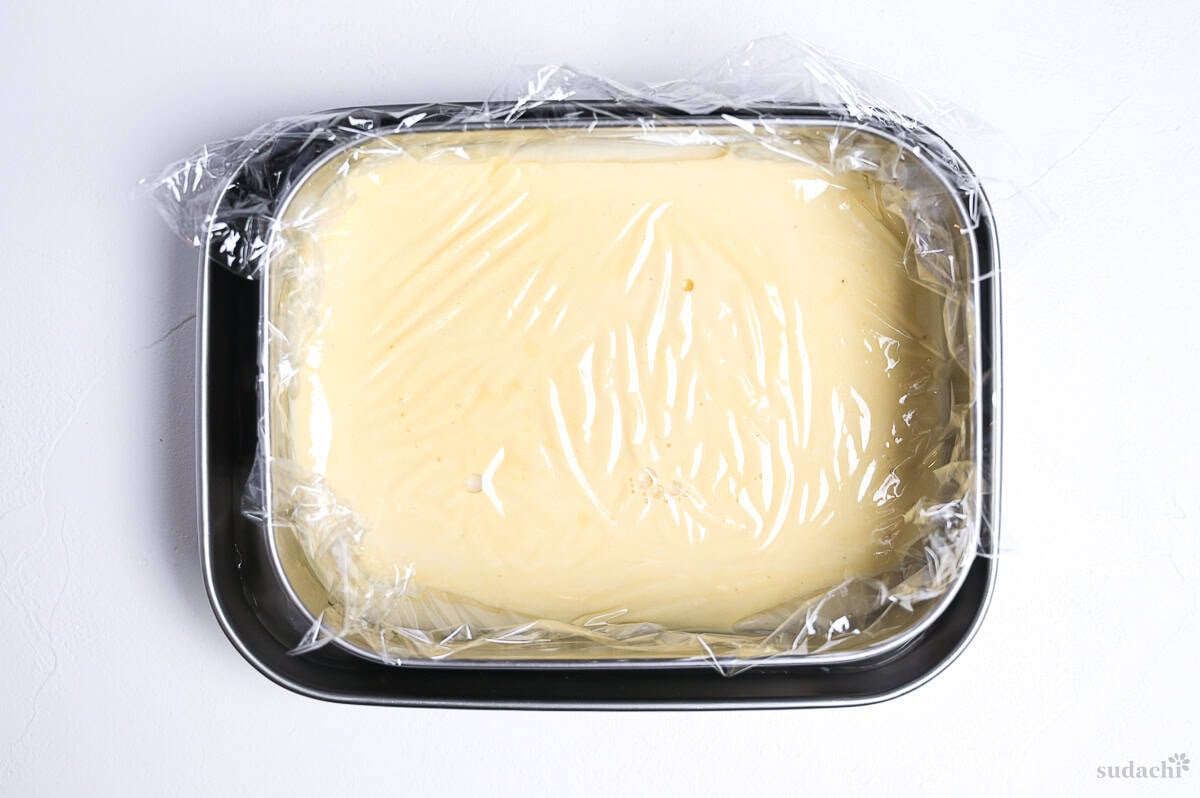
Transfer the mixture to a heatproof container. Note: this is a different container than the one I will use to freeze it, which is chilling in the freezer.
Place plastic wrap directly on the surface of the ice cream to prevent a skin from forming on top and leave the mixture to cool to room temperature. I like to speed up the process by placing the container inside a larger container filled with ice.
i. Once it’s cool, transfer the mixture into the prepared frozen container. You can discard the plastic wrap at this point.
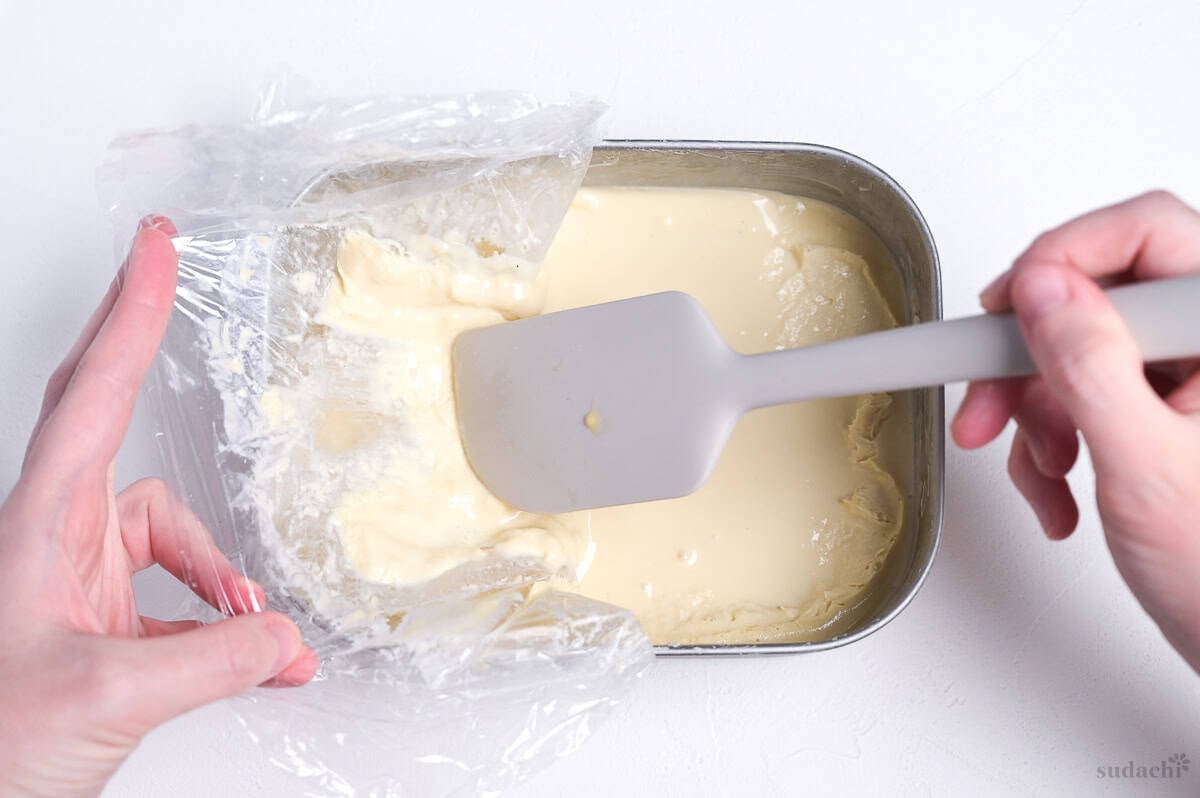
ii. Seal with a lid and place it in the freezer. Churn every 30 minutes for 3 hours, six times in total. Use a whisk for the first hour, then switch to a spatula when it becomes too stiff to whisk.
Note: The mixture around the edges and base freezes faster than the center, so scrape it up and fold it into the softer middle each time you churn. This ensures everything freezes evenly.
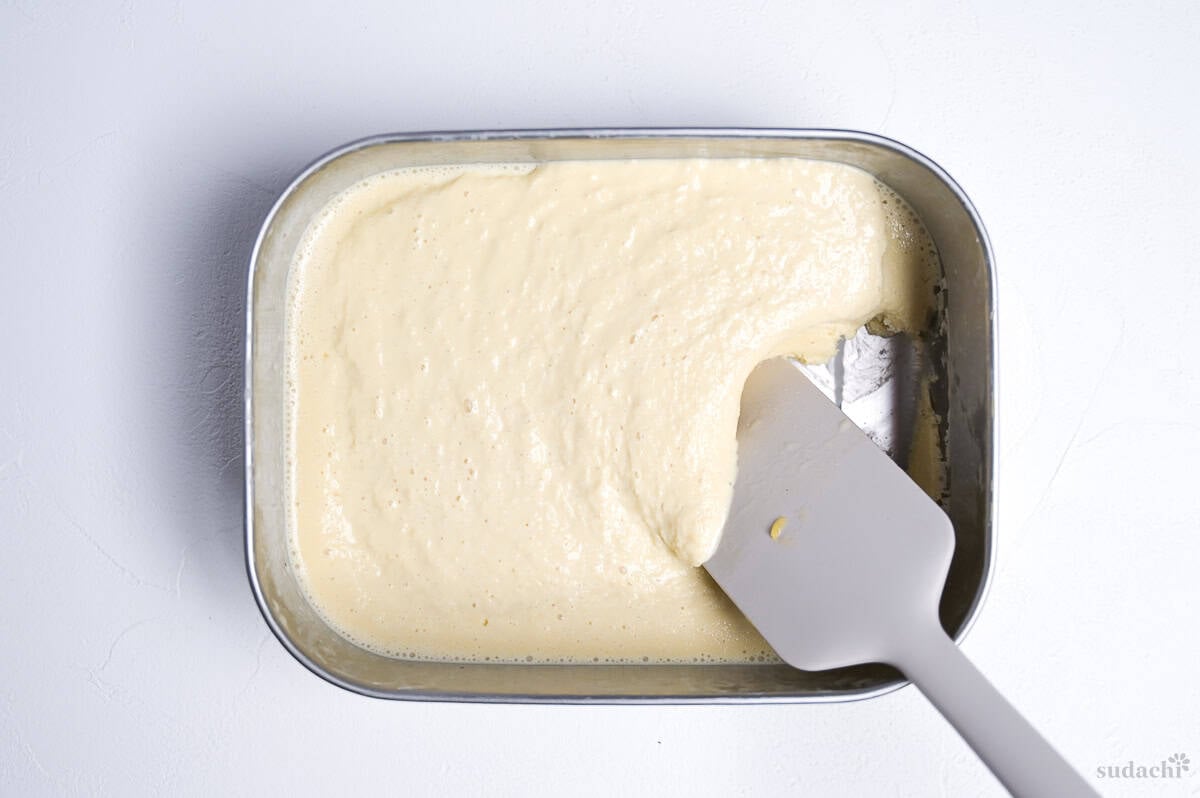
iii. After the final churn, freeze for 3-4 hours or until firm enough to scoop.
If you make a larger batch, it will take closer to 6 hours.
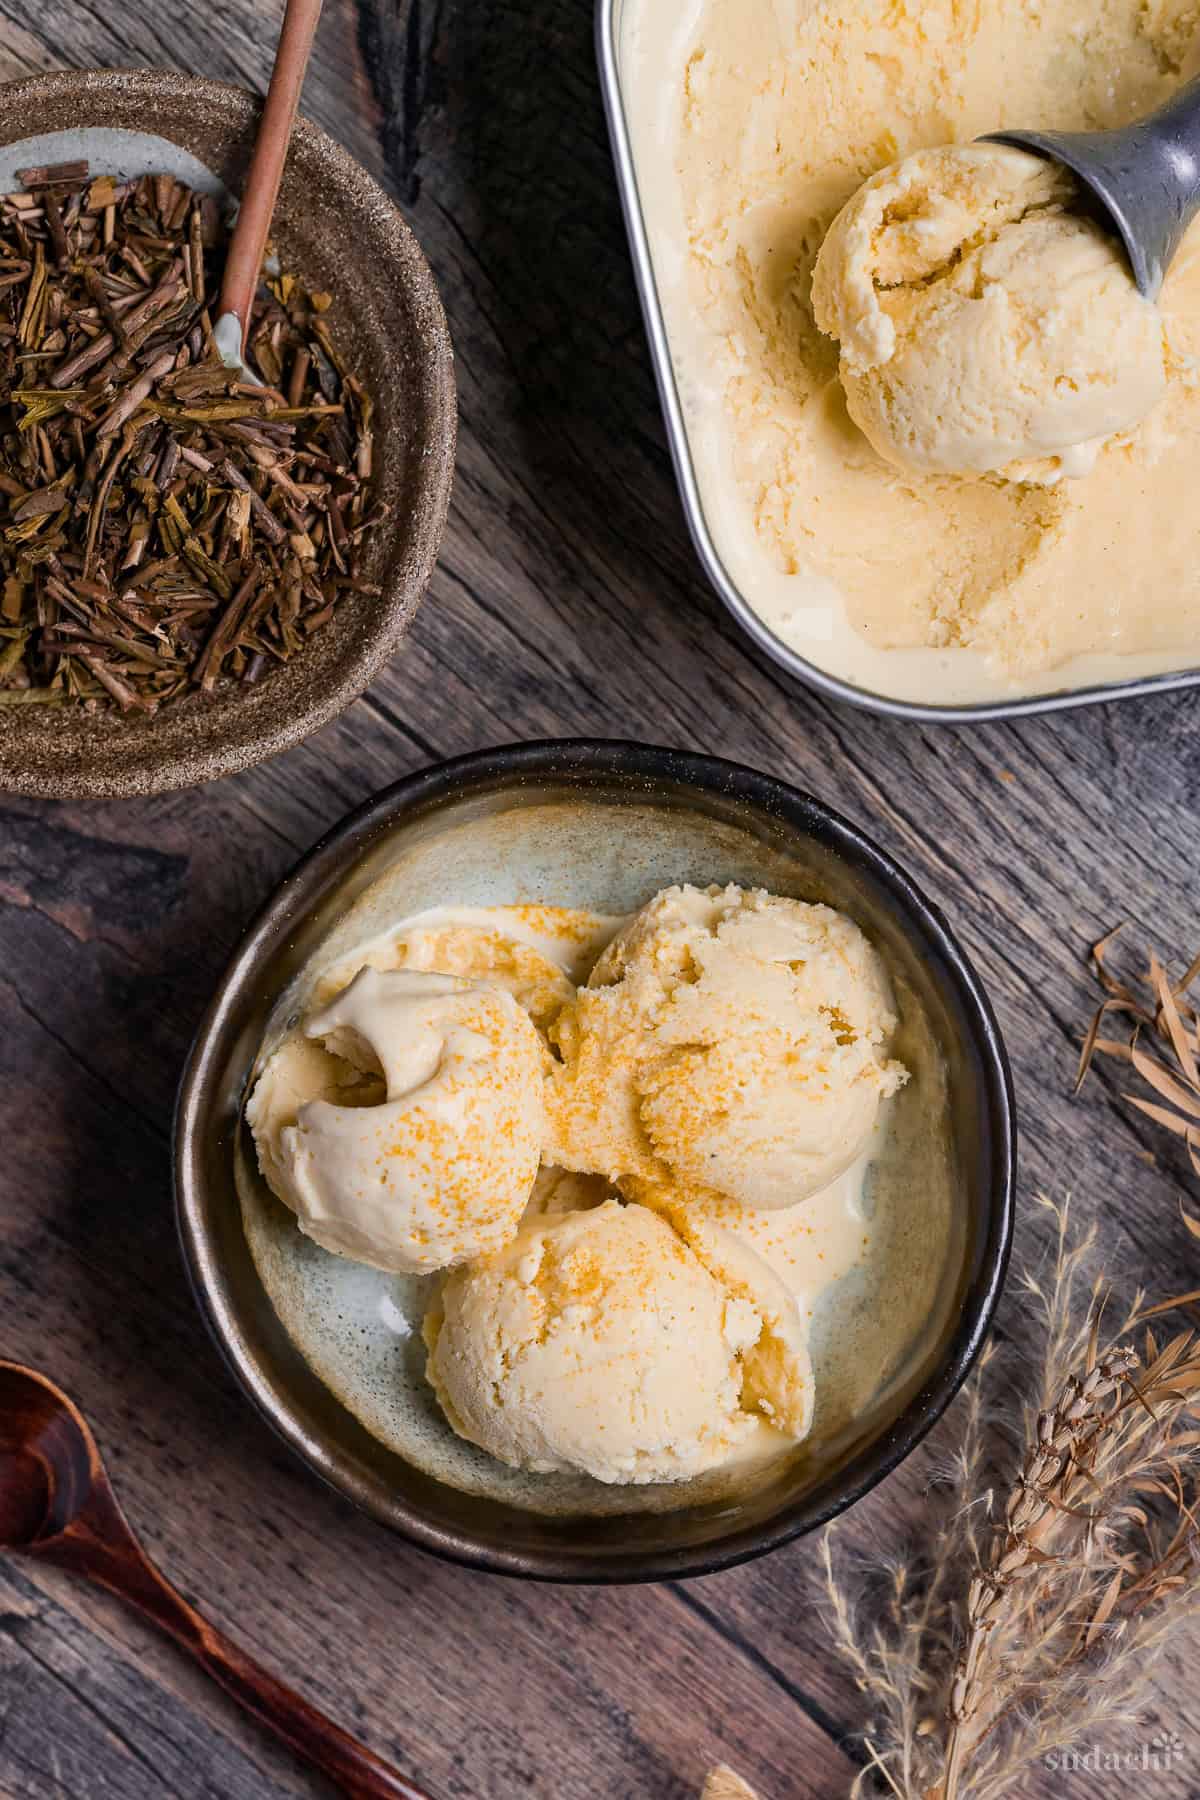
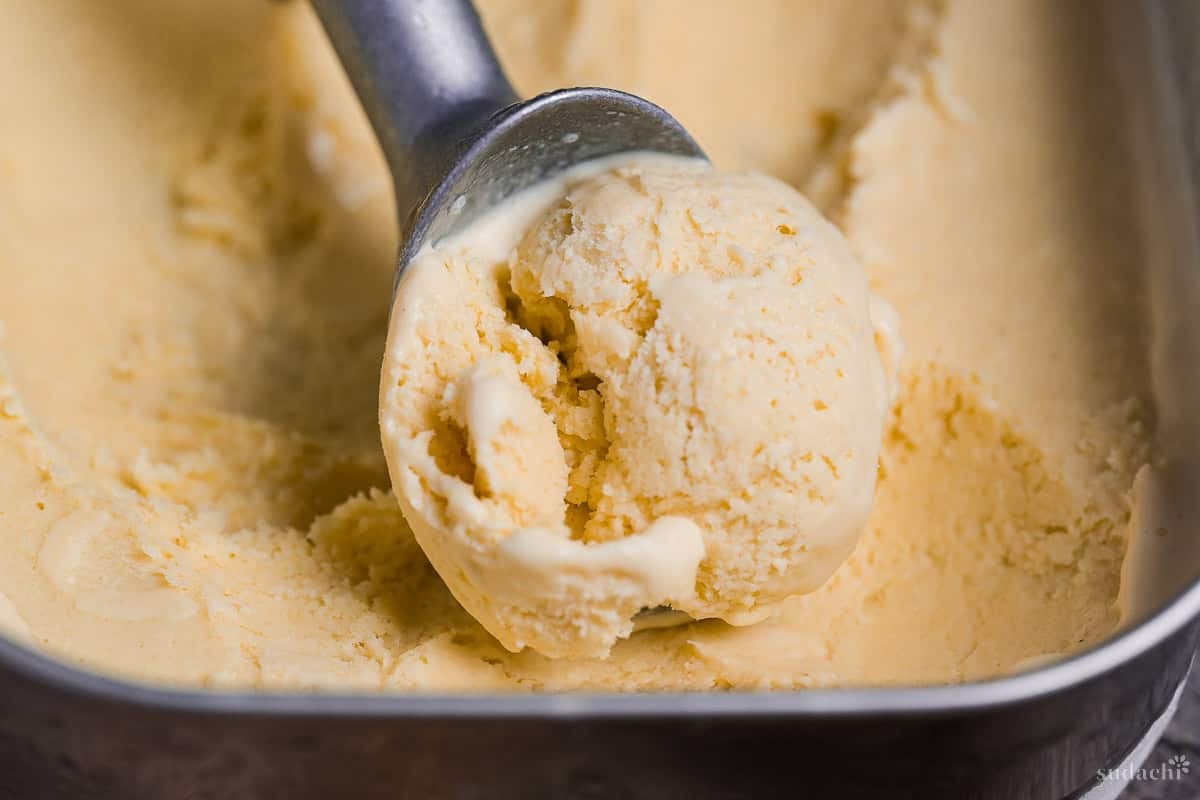
Leave the ice cream on the counter for 5-10 minutes before scooping to soften slightly.
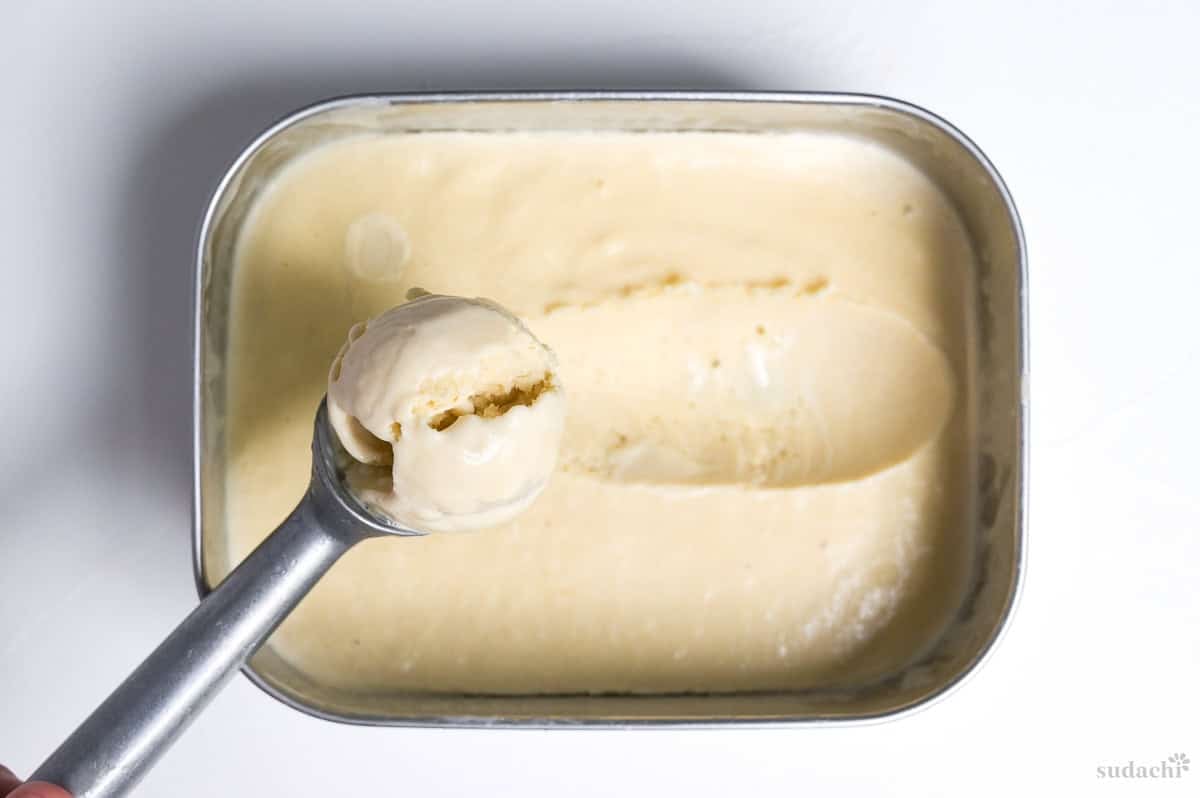
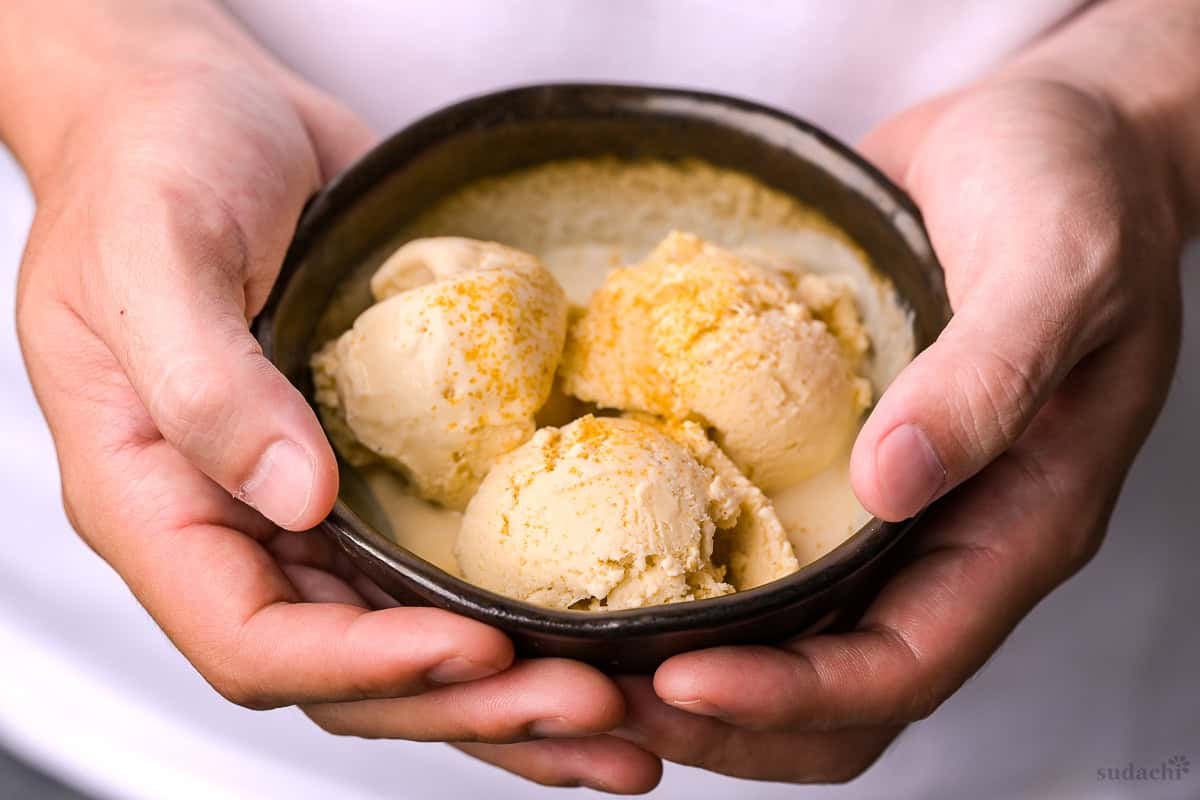
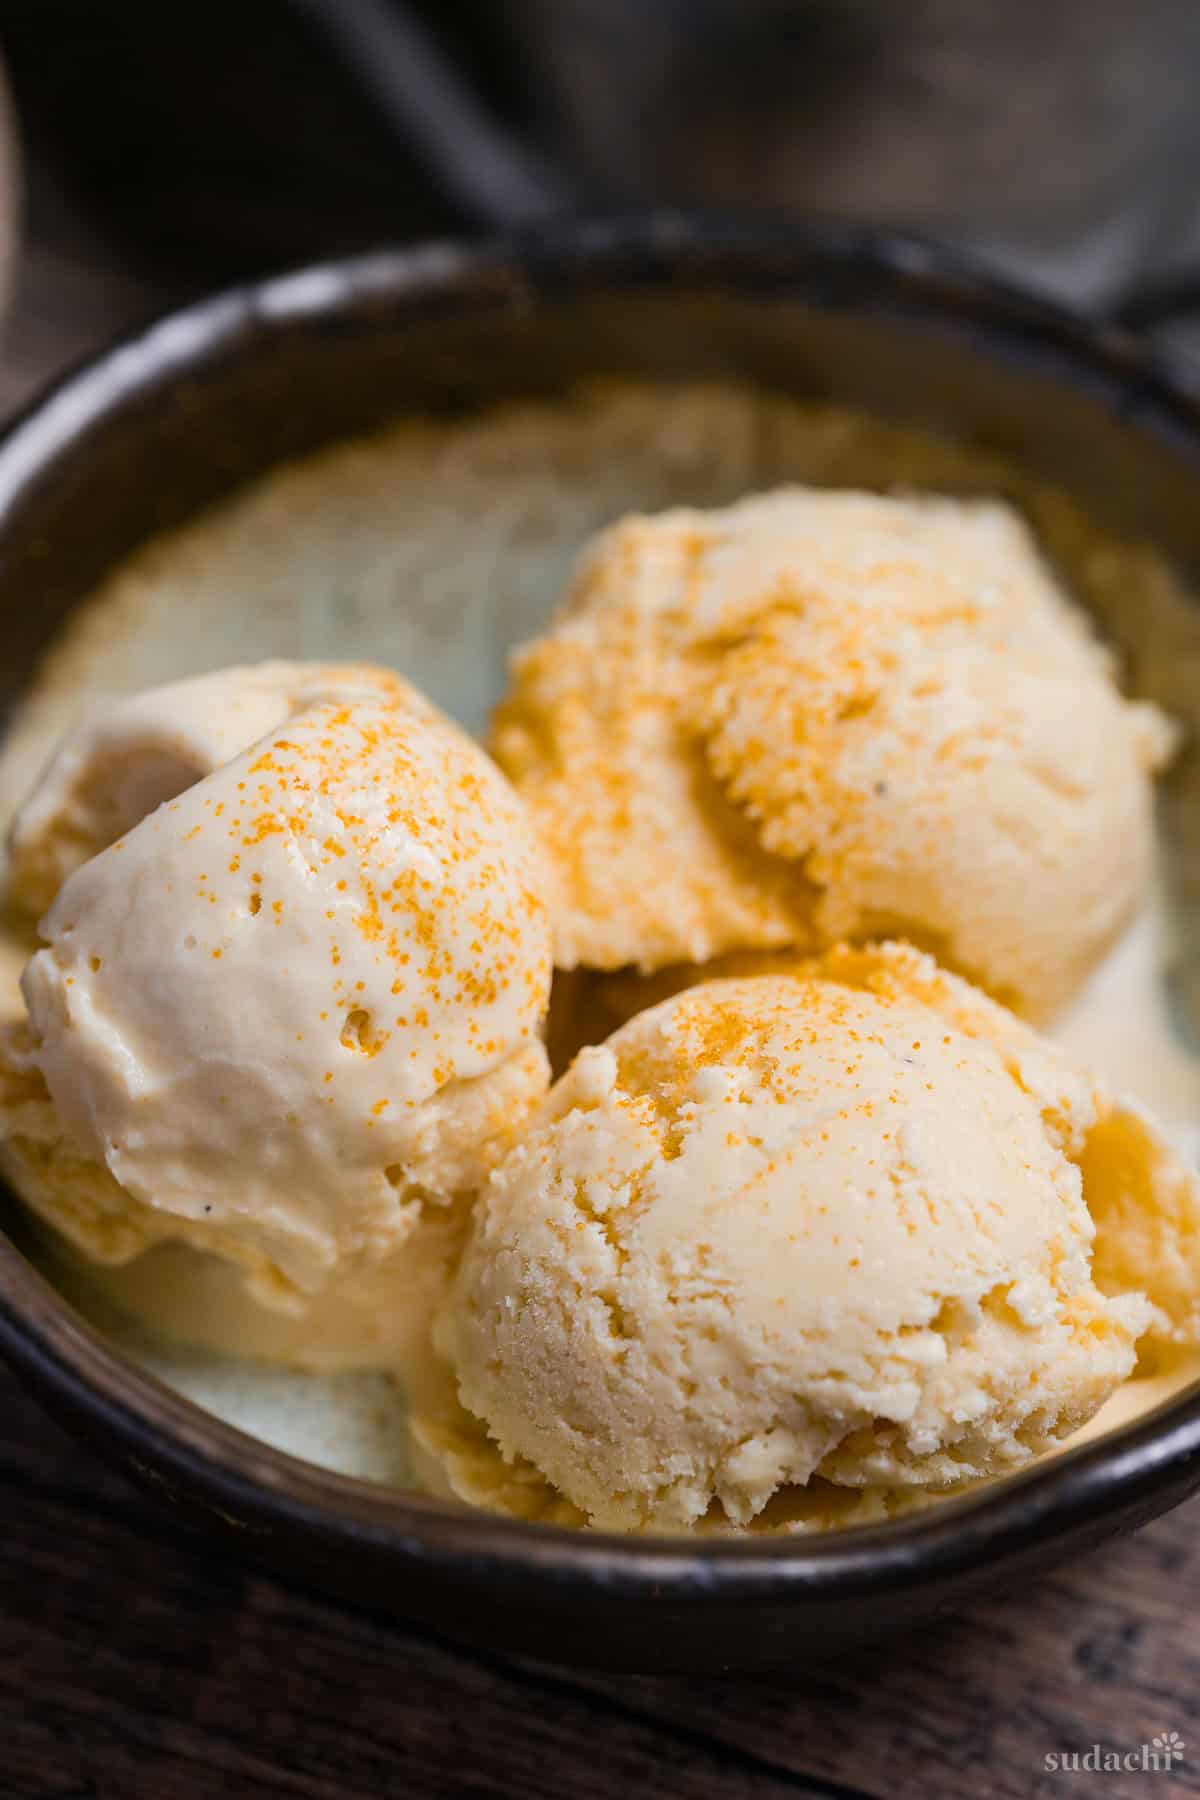
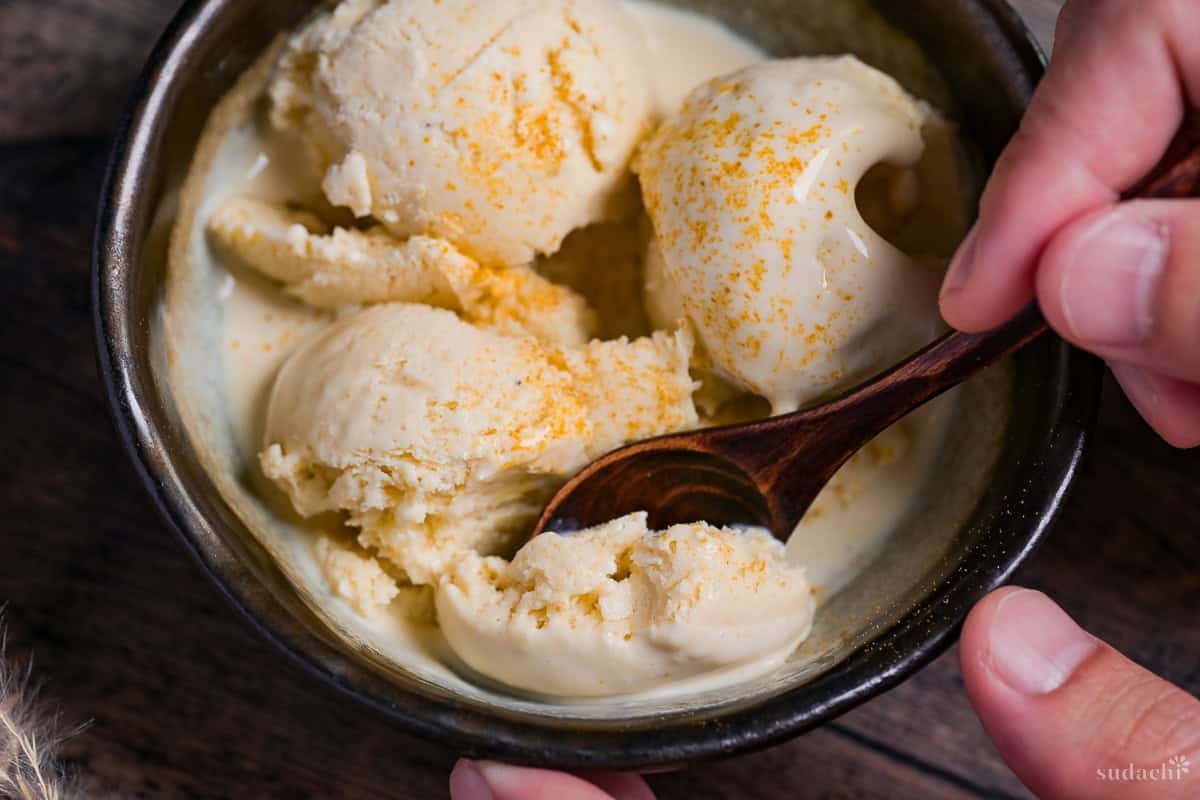
Scoop, serve and enjoy!
If you have hojicha powder, you can sprinkle some on top for an extra burst of flavor.
How to Store
Keep this hojicha ice cream stored in a sealed container in the freezer. It’s best eaten within 1-2 weeks.
Since homemade ice cream doesn’t contain stabilizers like store-bought versions, the texture deteriorates and becomes icy over time. It is still safe to eat for up to 2-3 months, but it the taste and texture is best in the first two weeks.

Essential Tips & Tricks
- Don’t let the milk or cream boil. Boiling it can cause it to split or make it taste scalded so keep the heat low, and take your time.
- Churn more for a smoother ice cream. I churn 6 times as a minimum in this recipe, but you can churn more than that. The more you churn, the smoother the ice cream will be.
- Use wide containers rather than tall ones. The high surface area helps it freeze faster.
- Use a steel container for churning your ice cream. They conduct heat better and freeze the ice cream faster. Store it in the freezer before you start the recipe for maximum effectiveness.
- Use two containers if possible. One for cooling, one for churning/freezing. This speeds things up too.
- This is a small batch recipe designed for easy hand churning. If you want to use an ice cream machine, triple or quadruple the recipe.
- If you double or triple the recipe: it will take longer to freeze (more like 6 hours). If you’re in a rush, divide the mixture into smaller containers.
- Store in a sealed container to prevent freezer burn.
With these simple tips in mind, you’re set for success every time you make homemade hojicha ice cream.
Hojicha Ice Cream FAQ
I designed this recipe so that it can be made both ways, either by hand churning or in a machine. It’s a small batch so you will need to triple or quadruple the recipe to fit your ice cream machine.
Honestly, they’re all good. Flavor-wise, I like loose stem hojicha best, but tea bags are more convenient to remove, and powder is the easiest to use while producing a better color. They all have pros and cons, so use whichever is more accessible to you.
Ice crystals form when the water in the mixture is not properly bound to the fat and sugar. This can be caused by insufficient churning or too much water in the mixture (for example, if you use skimmed milk instead of whole milk). Try churning more.
Some hardness after a full freeze is totally normal for homemade ice cream and not a sign that anything is wrong. Leave it on the counter for 5-10 minutes before scooping. Keep in mind, that reducing the sugar in the recipe can make it harder.
More Tea Related Recipes
Want more inspiration? Explore my Japanese Dessert Roundup Post for a carefully selected collection of tasty recipe ideas to spark your next tea party!
Did You Try This Recipe?
I would love to hear your thoughts!
💬 Leave a review and ⭐️ rating in the comments below. 📷 I also love to see your photos – submit them here!

Creamy Hojicha Ice Cream (Japanese Roasted Green Tea)

Ingredients
- 200 ml whole milk
- 9 g roasted green tea (hojicha) 1 tea bag per 3g, or half the amount of powder
- 2 pasteurized egg yolks
- 75 g sugar
- 1 tsp cornstarch
- 200 ml heavy cream
My recommended brands of ingredients and seasonings can be found in my Japanese pantry guide.
Can’t find certain Japanese ingredients? See my substitution guide here.
Instructions
- Before you start, place your container in the freezer. Add 200 ml whole milk and 9 g roasted green tea (hojicha) to a saucepan and mix well. Leave them to steep while you prepare your other ingredients.

- Whisk 2 pasteurized egg yolks, 75 g sugar and 1 tsp cornstarch together in a heatproof bowl until pale and creamy.
- Place the saucepan on the stove and heat on low/medium-low. Stir occasionally, and when you start to see tiny bubbles appear around the edge, pour in 200 ml heavy cream. Be careful not to let the mixture boil.
- Continue to heat until the little bubbles start appearing around the edge once more, then take the pan off the heat. If you used loose tea, strain the mixture into a heatproof bowl and wipe out the saucepan to use again later.
- Temper the eggs and sugar mixture by adding a few tablespoons of the hot milk/cream to the bowl while whisking.
- Gradually pour the rest of the hot milk mixture into the bowl while whisking continuously.
- Pour the mixture through a sieve and back into the sauce pan. Heat on low and stir continuously, scraping the bottom of the pan as you go to prevent it catching.
- Stir continuously on a low heat until it thickens into a custard consistency and coats the back of a spoon.
- Pour it into metal container and place plastic wrap directly on the surface to prevent a skin from forming. Leave to cool to room temperature.
- Once it's cool, take your frozen container from the freezer and pour the mixture inside. Place it in the coldest part of your freezer and churn every 30 minutes for 3 hours, 6 times minimum.
- After the final churn, freeze for 3-4 hours (6 hours for larger batches).
- Rest on the counter for 5-10 minutes before scooping. If you have hojicha powder, sprinkle a pinch on top for an extra burst of flavor. Serve and enjoy!
Video
Notes
- This is a small batch for hand churning. Triple or quadruple the recipe to use in an ice cream machine.
- If using hojicha powder, use half the weight. 1 tsp is about 1g, so the base recipe would use 1½ tbsp (4.5g).
- Store in a sealed container in the freezer to prevent freezer burn, and consume in 1-2 weeks for best flavor and texture.
- Don’t let the milk or cream boil as this can make it split or taste scalded.
- If you double or triple the recipe: it will take longer to freeze (more like 6 hours). If you’re in a rush, divide the mixture into smaller containers.
- Use two containers for maximum efficiency. One for cooling, one for churning/freezing.
- Use a steel container for churning. Steel conducts heat better and freezes the ice cream faster.
- Use wide containers with a high surface area to help it freeze faster.
- Churn more for a smoother ice cream. 6 times is the minimum. The more you churn, the smoother the ice cream will be.
Beautiful recipe! The step-by-step guide makes it so approachable, and I appreciate the note about using stem hojicha for deeper flavor!
Thank you so much, Leah!